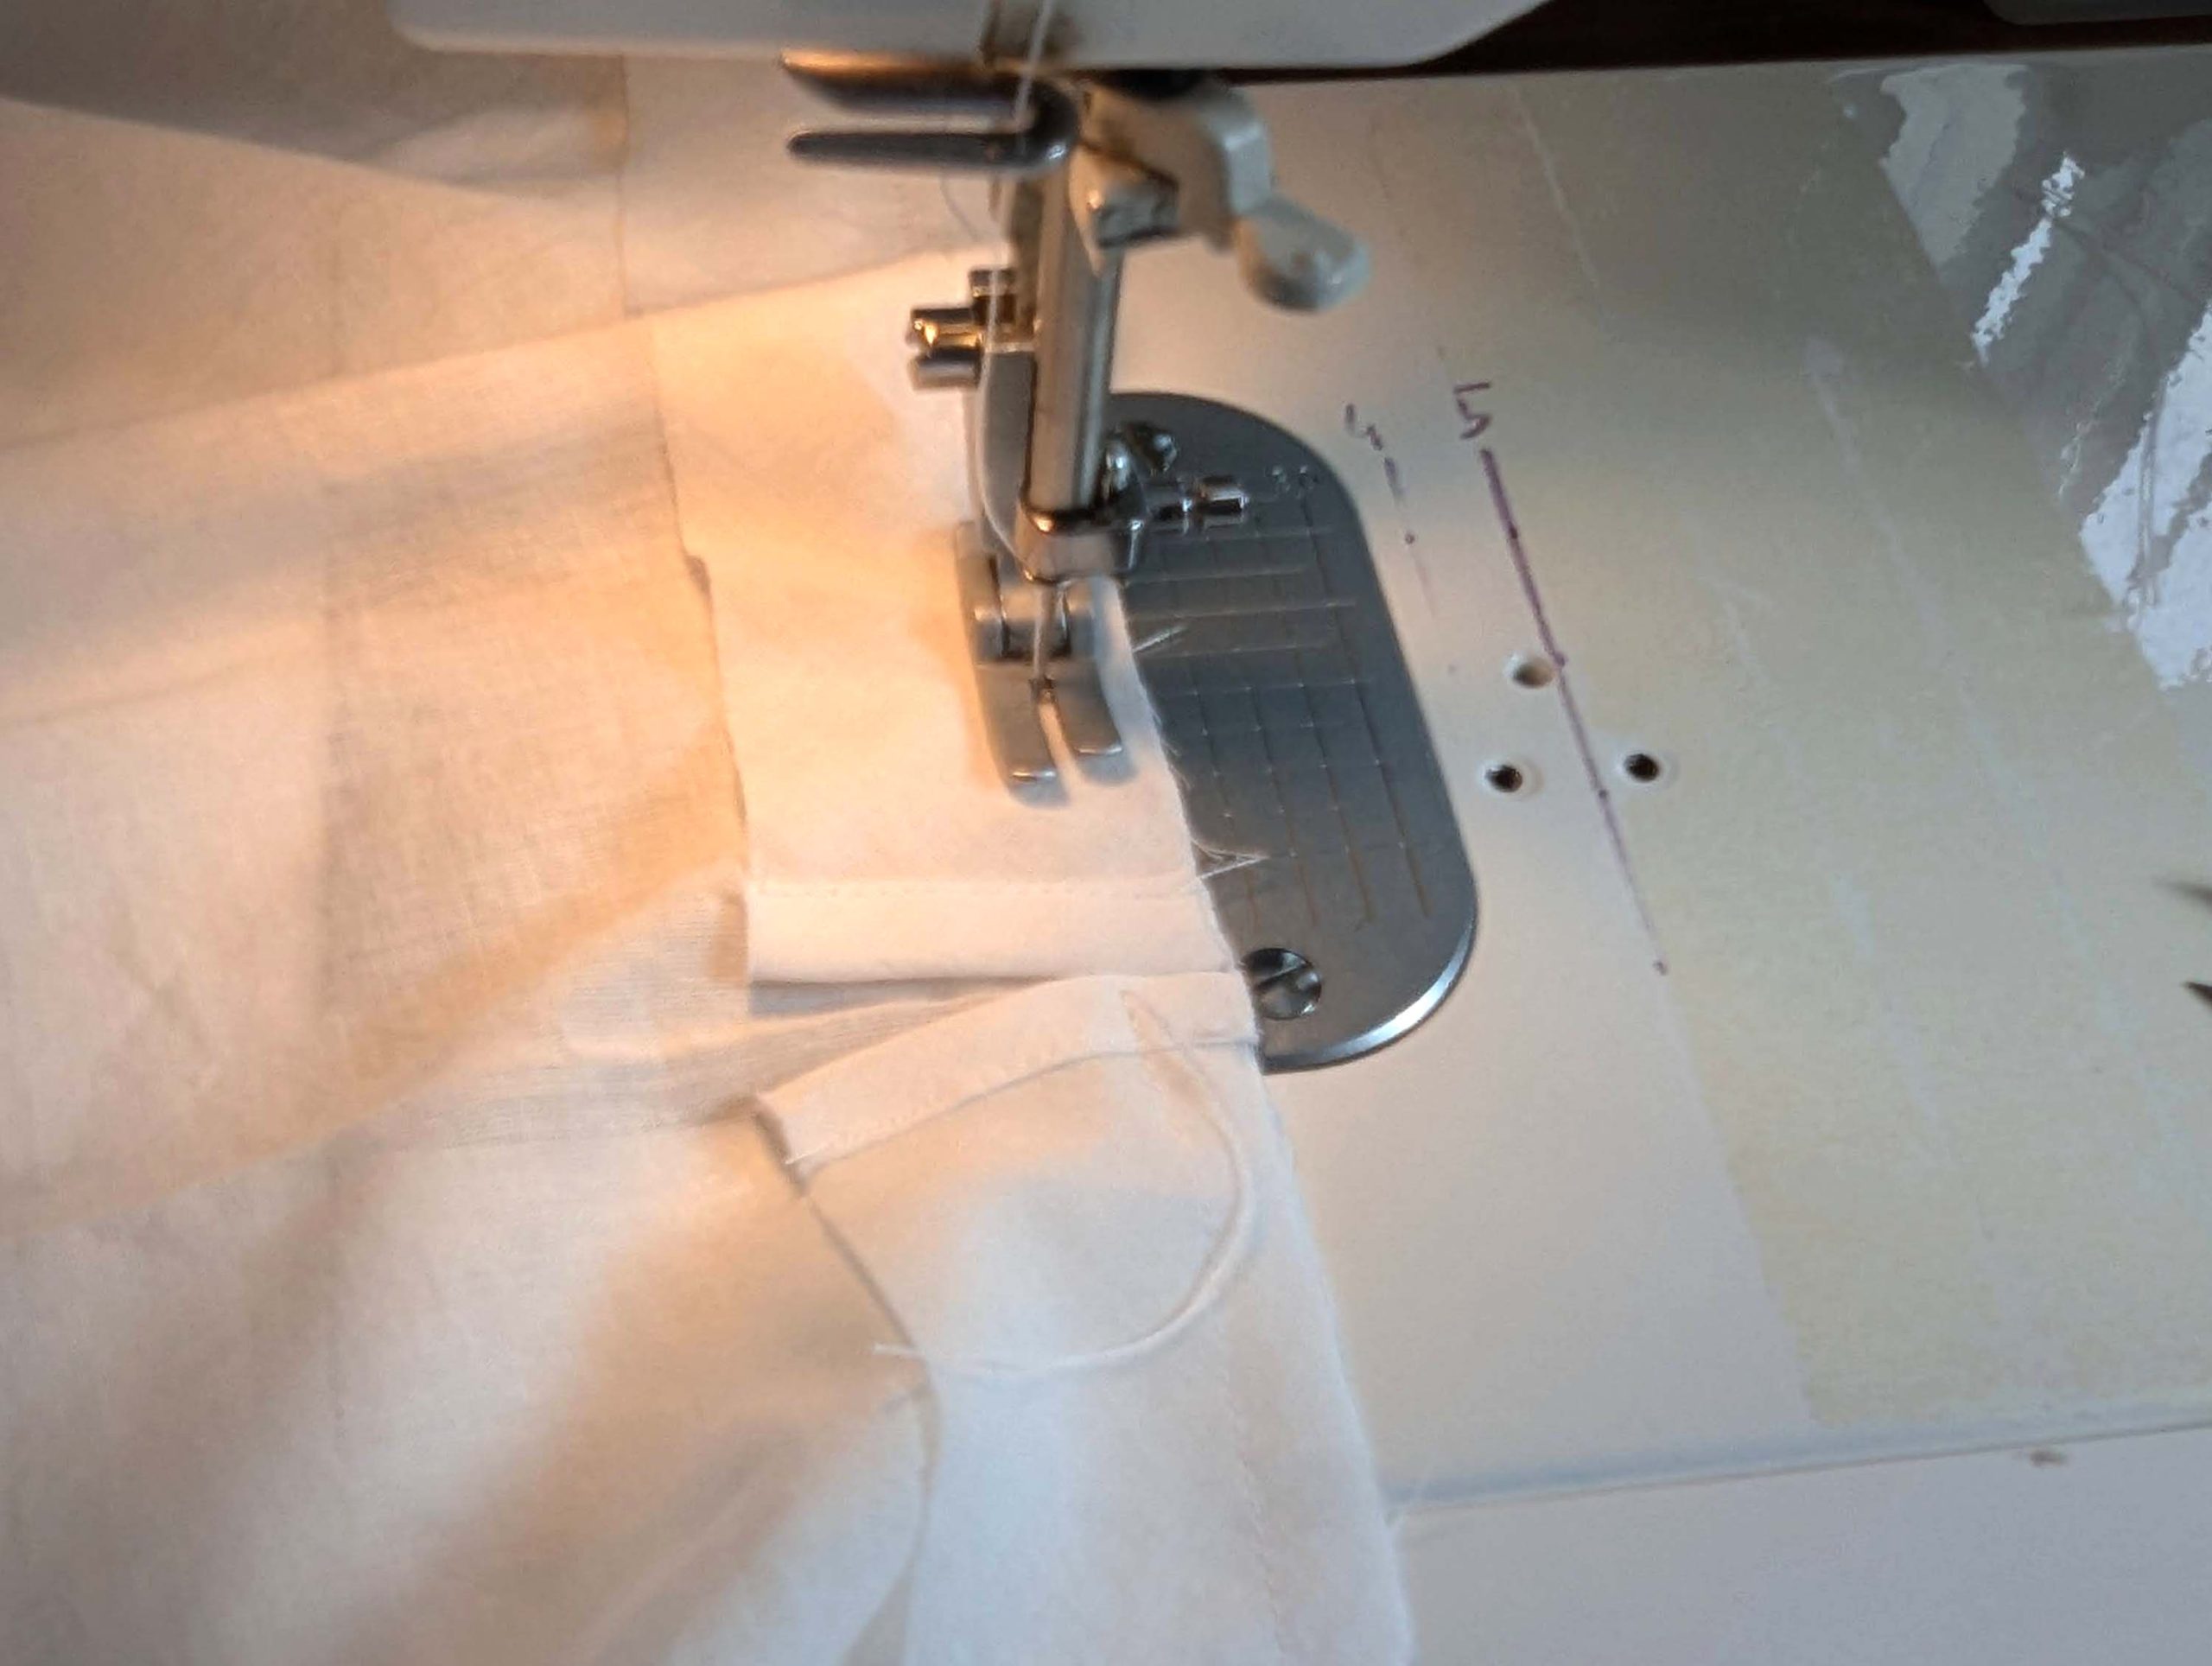
(4) Take the top collar and flatline with lightweight cotton, alternatively use fusible. Turn in the seam allowance along the neckline. Press and edgestitch from the right side. Trim back and notch the seam allowances. Line up the top collar with the under collar, right sides together. Shift the edges of the top collar about 1/8” (2mm) behind the edge of the under collar to allow for the turn of cloth. Stitch along the outer edges, reducing the stitch length at the corners. Trim back the seam allowances and turn the right way out, press.
Line up the under collar with the neckline, right sides together and sew, taking care to match the collar points exactly. Trim back and notch the seam allowances, press towards the collar.
Now that we’ve completed the jumpsuit, let’s move on to the next pieces of our bathing suit.
Let’s start with the skirt, which is designed to be worn over the jumpsuit.
(8)Cut all pieces from the fabric, leaving the selvages at the center back. Transfer all notches and marks carefully and sew the darts. Sew the backs to the front, right sides together, and finish with a flat felled seam.
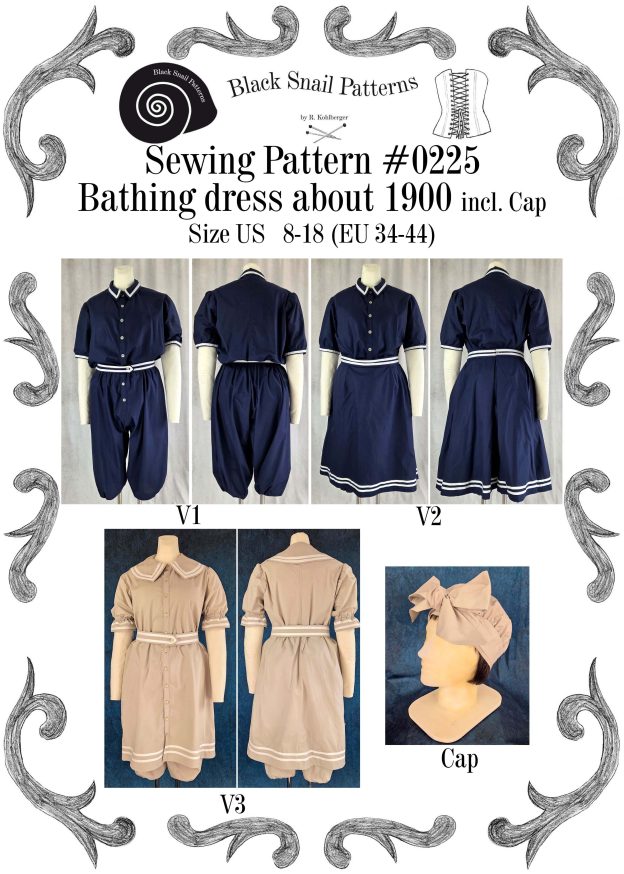
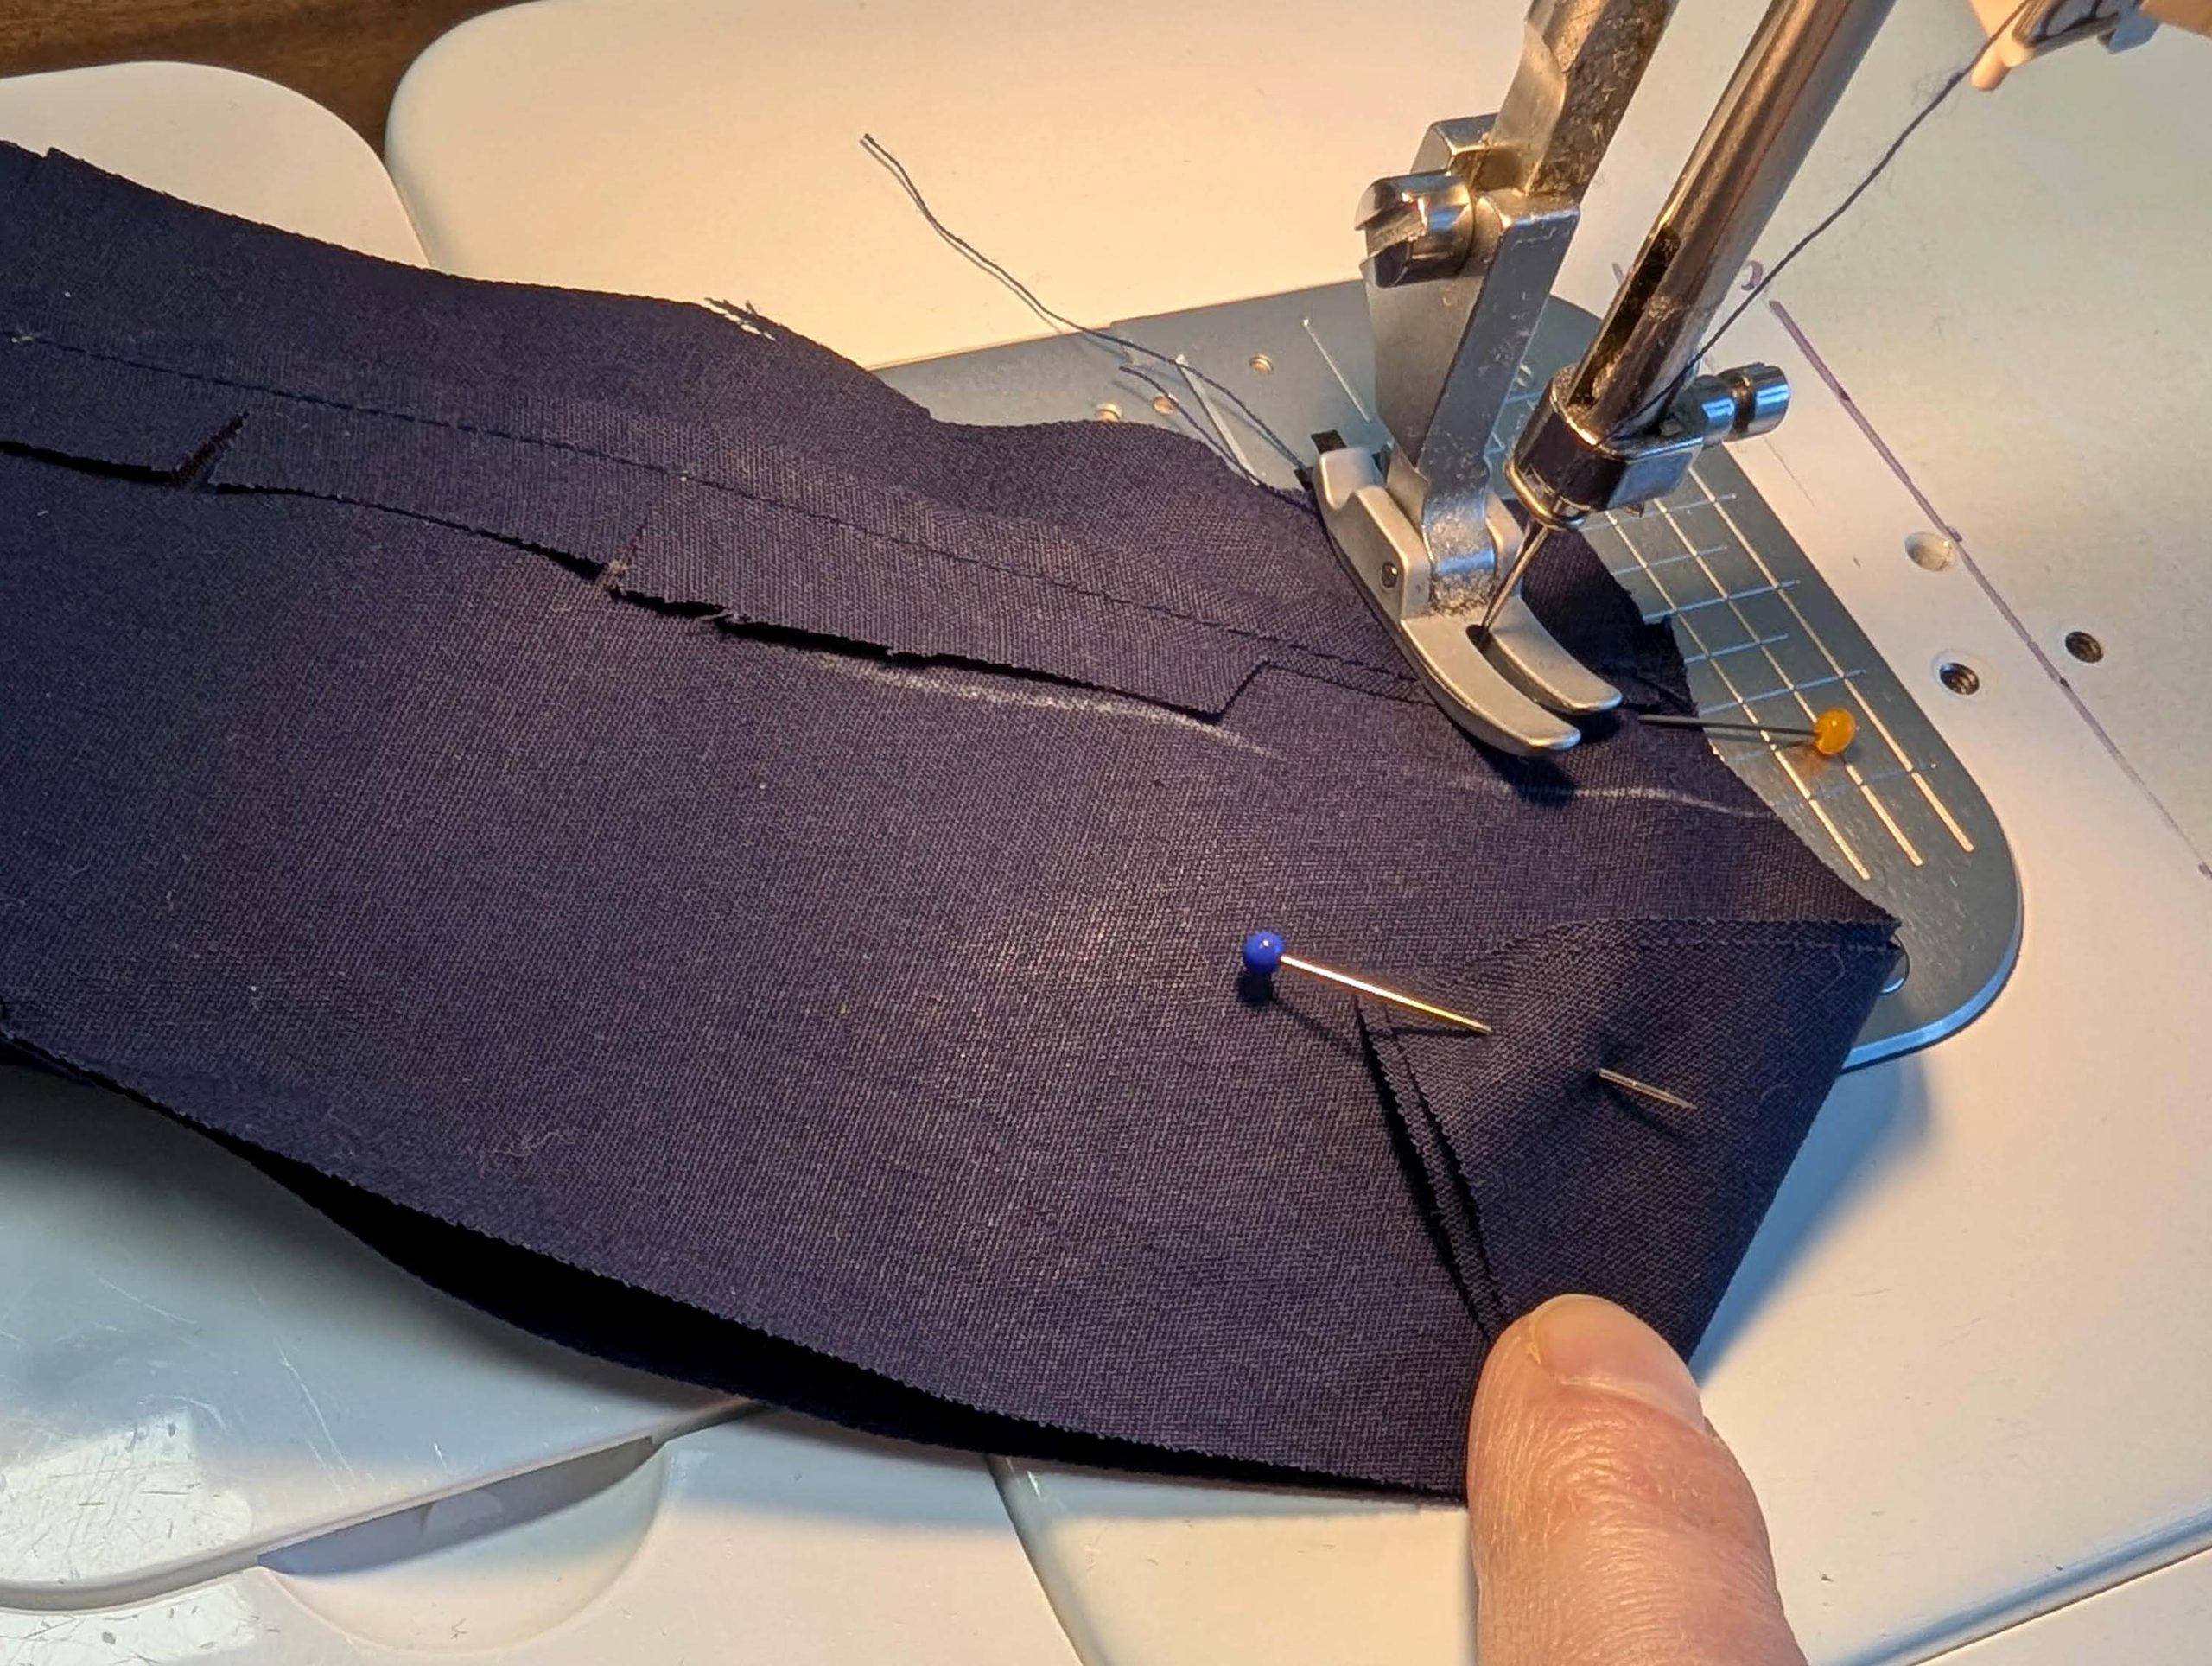
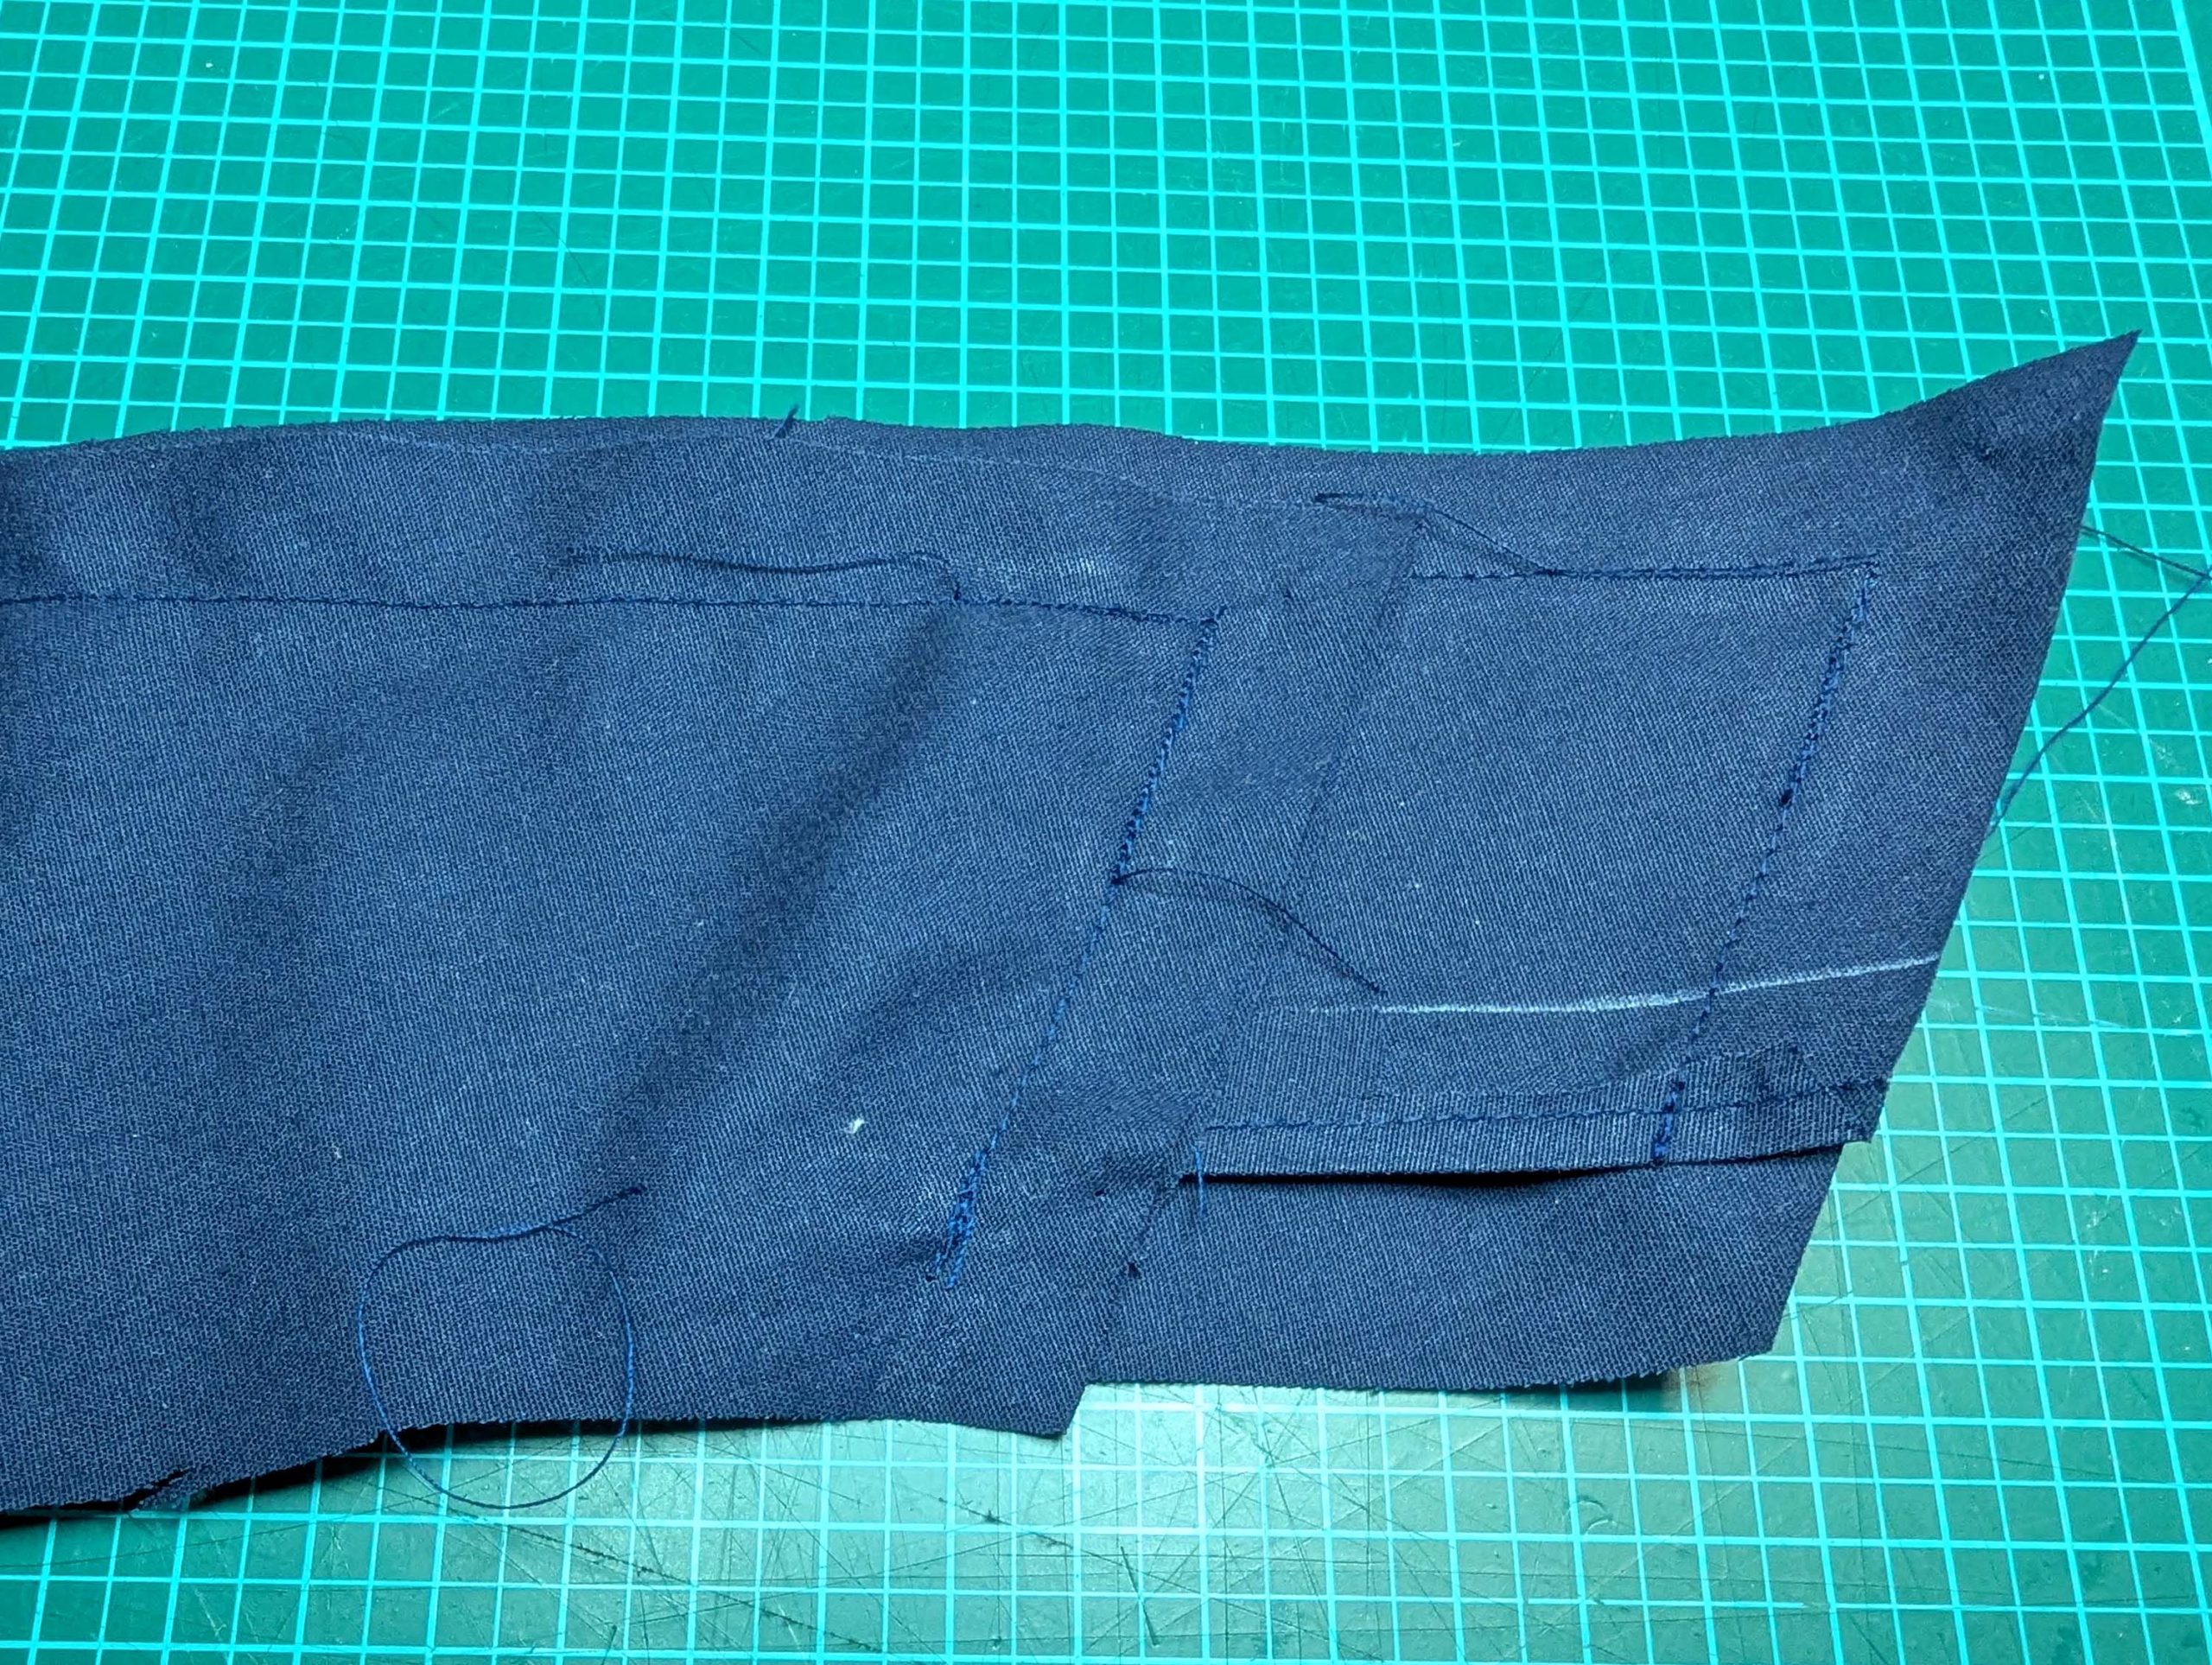
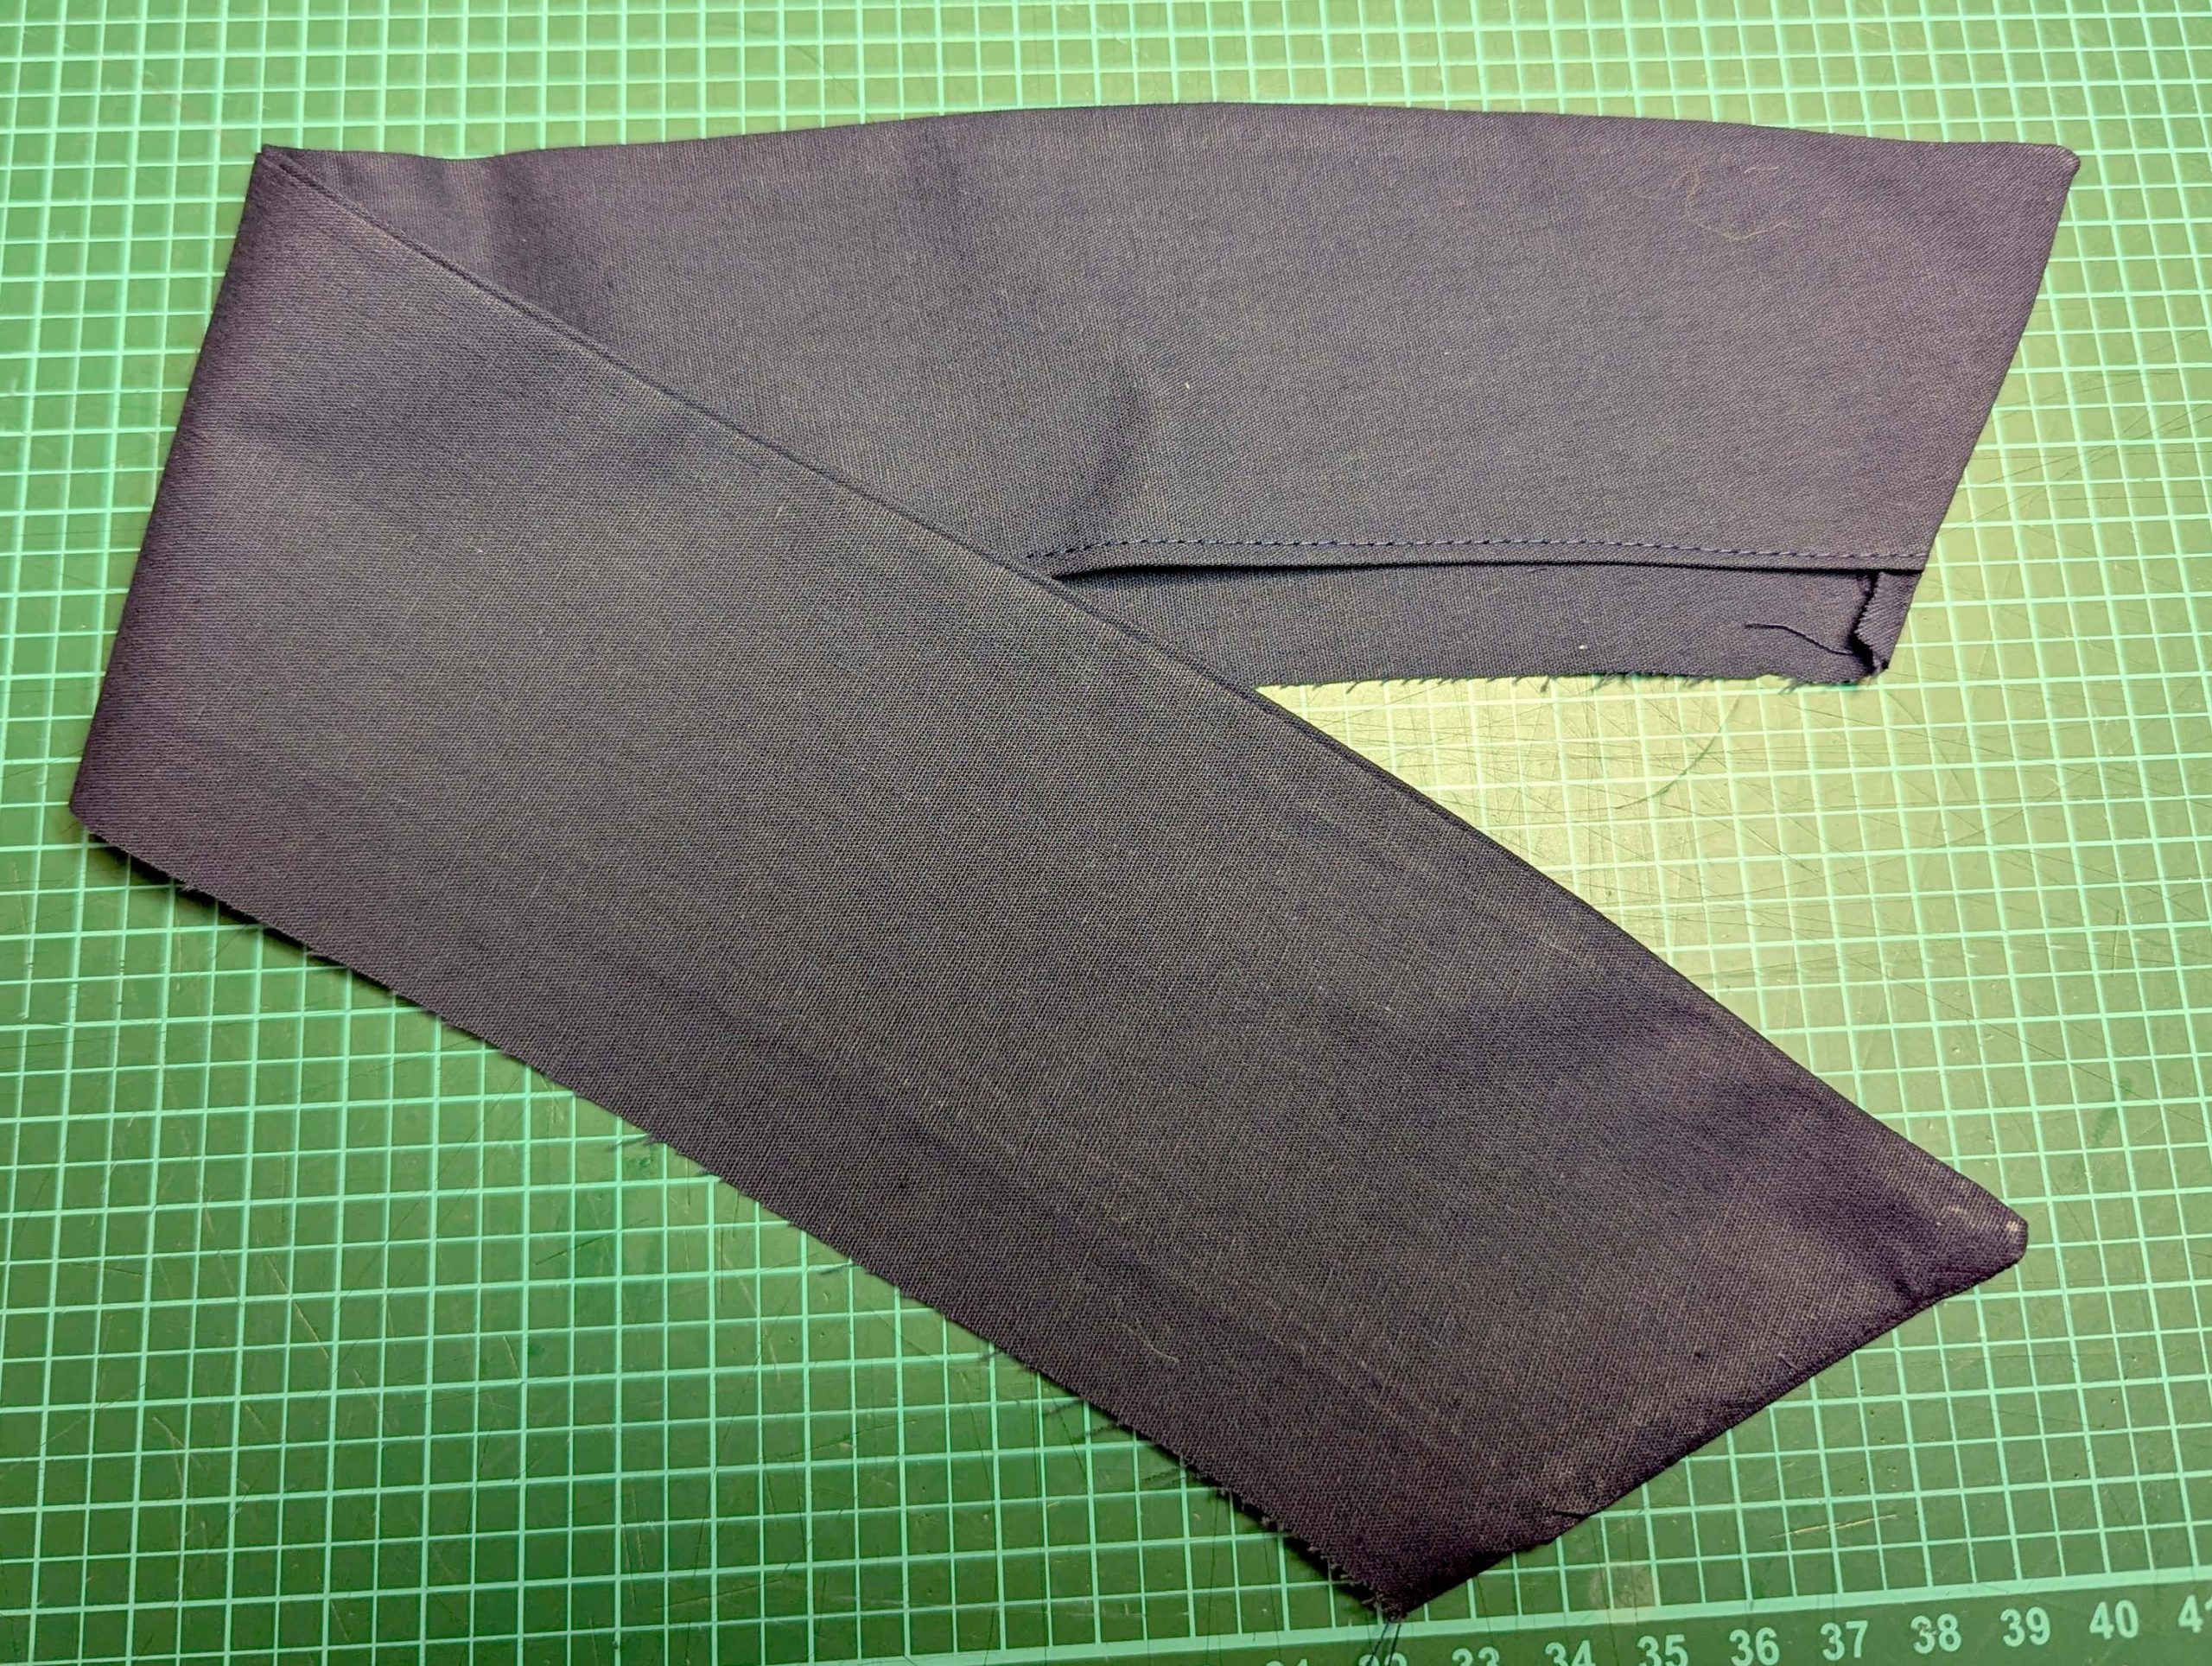
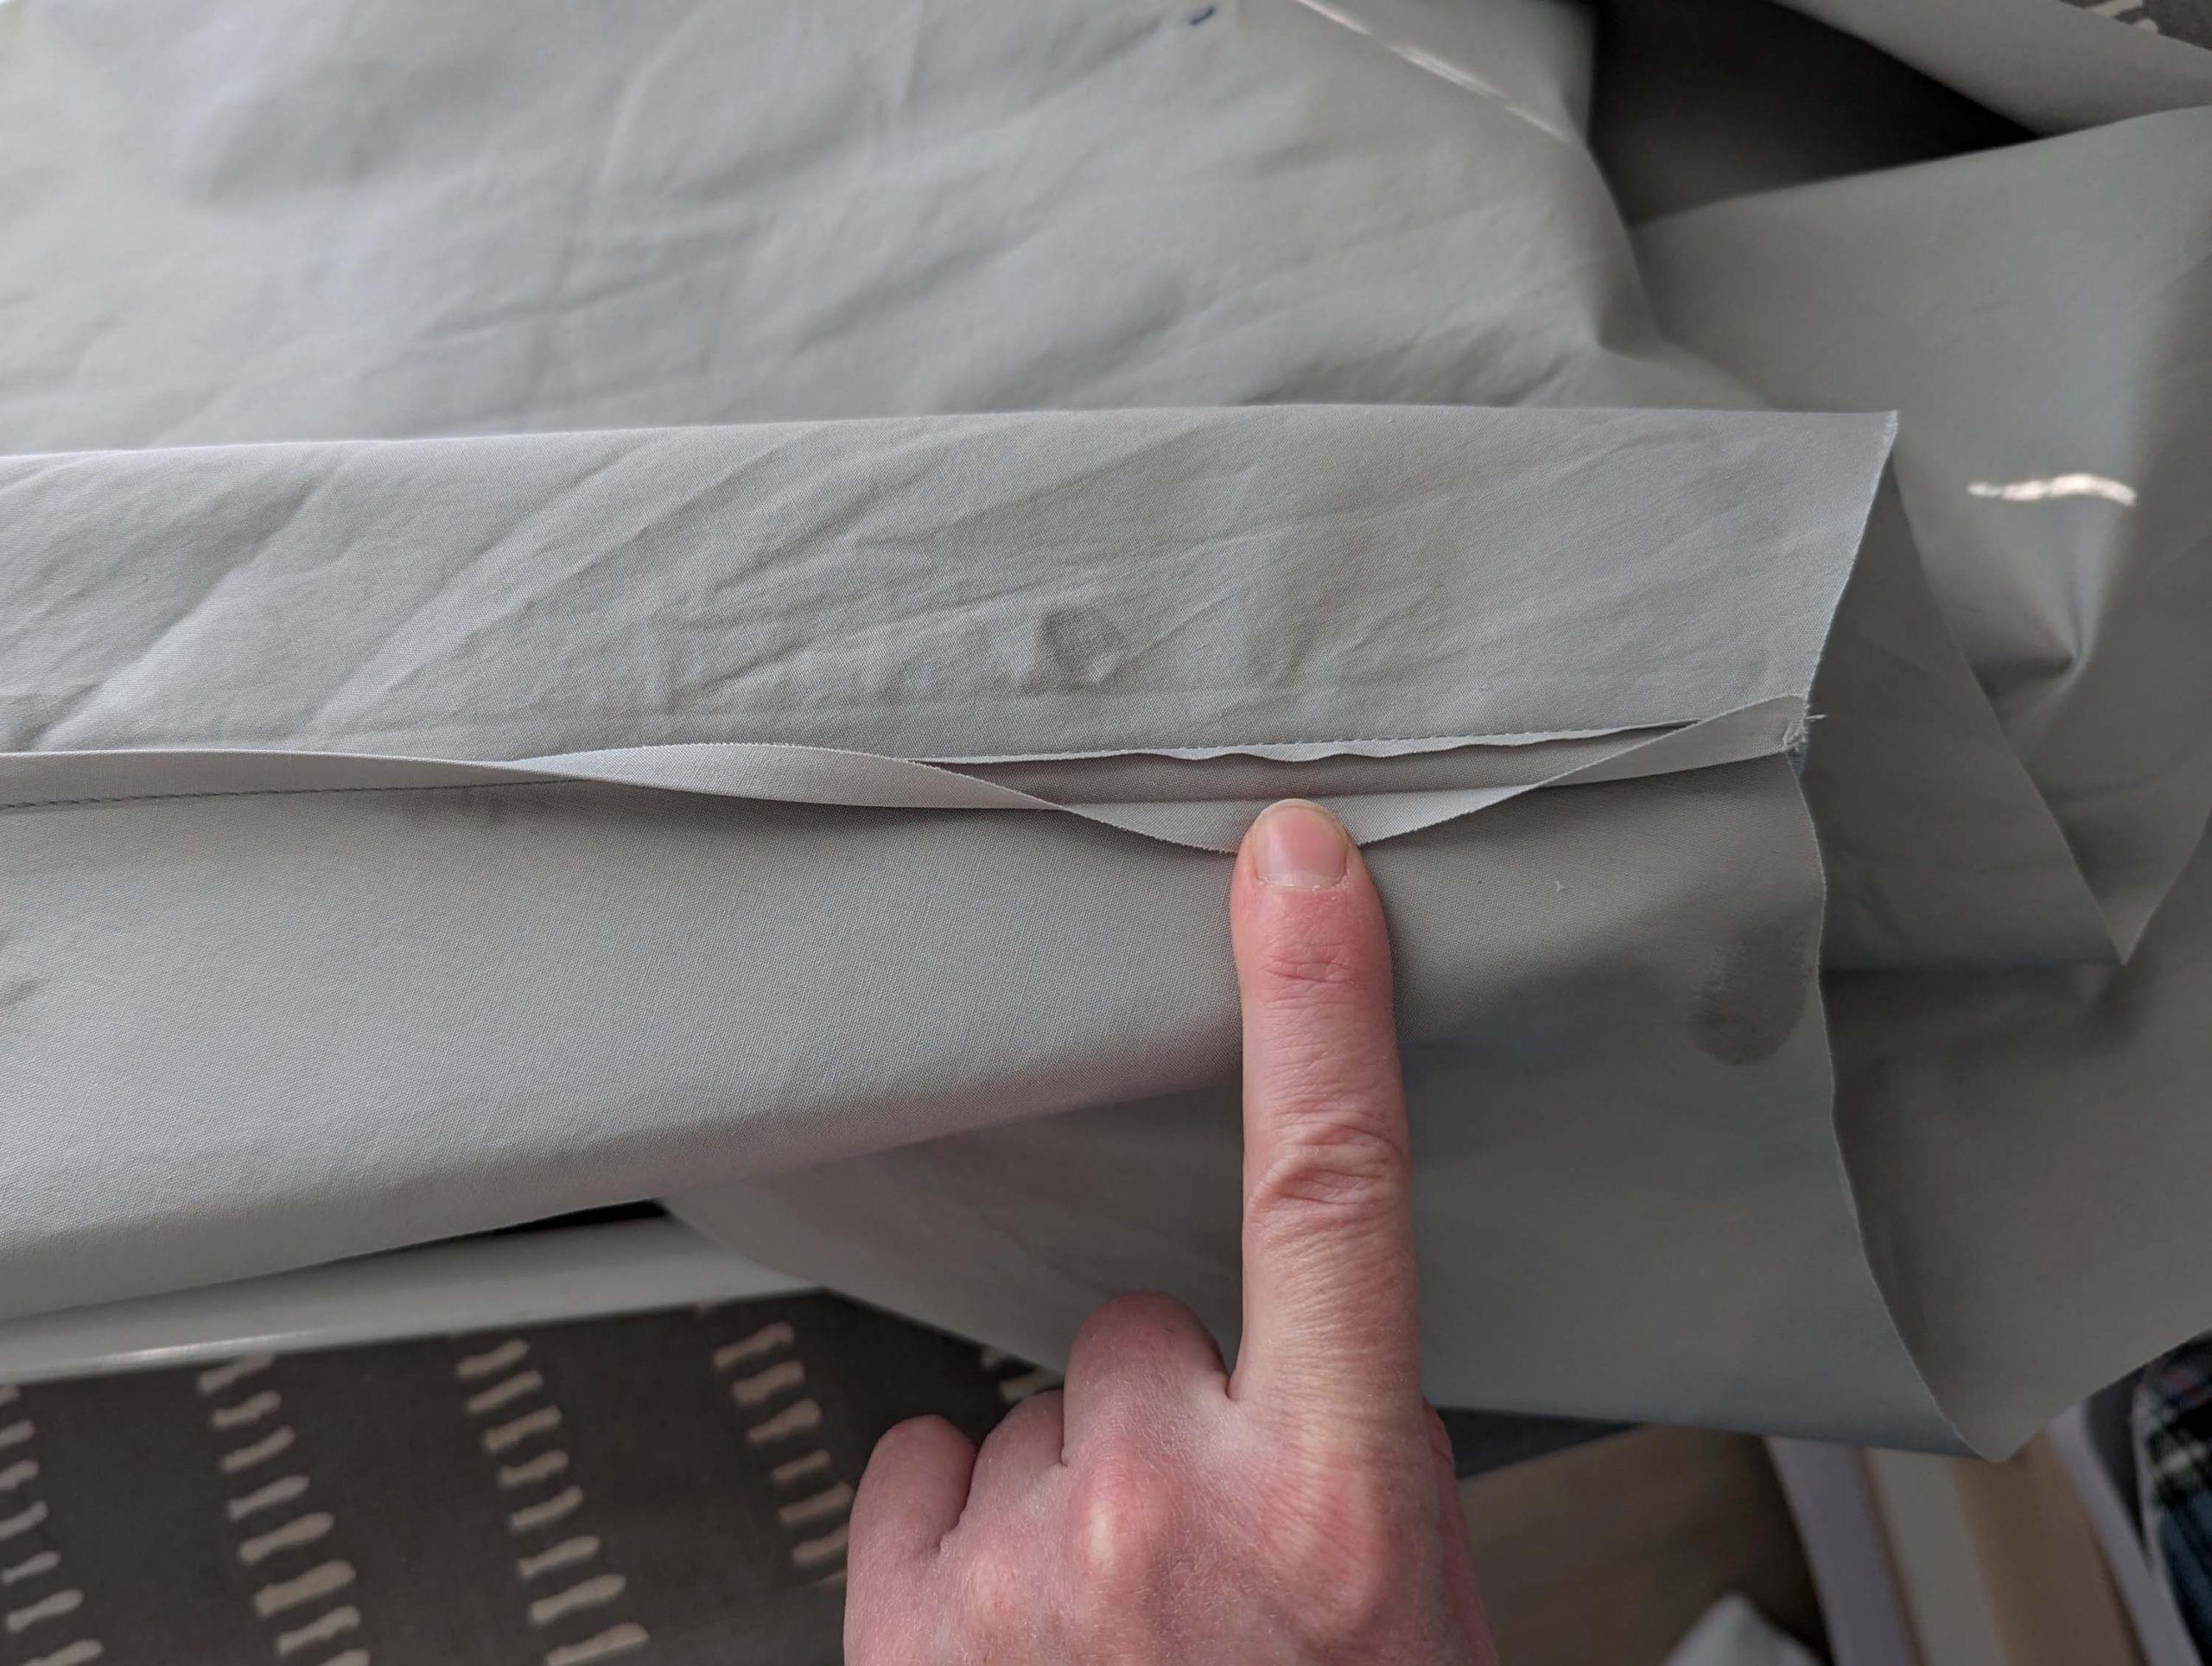
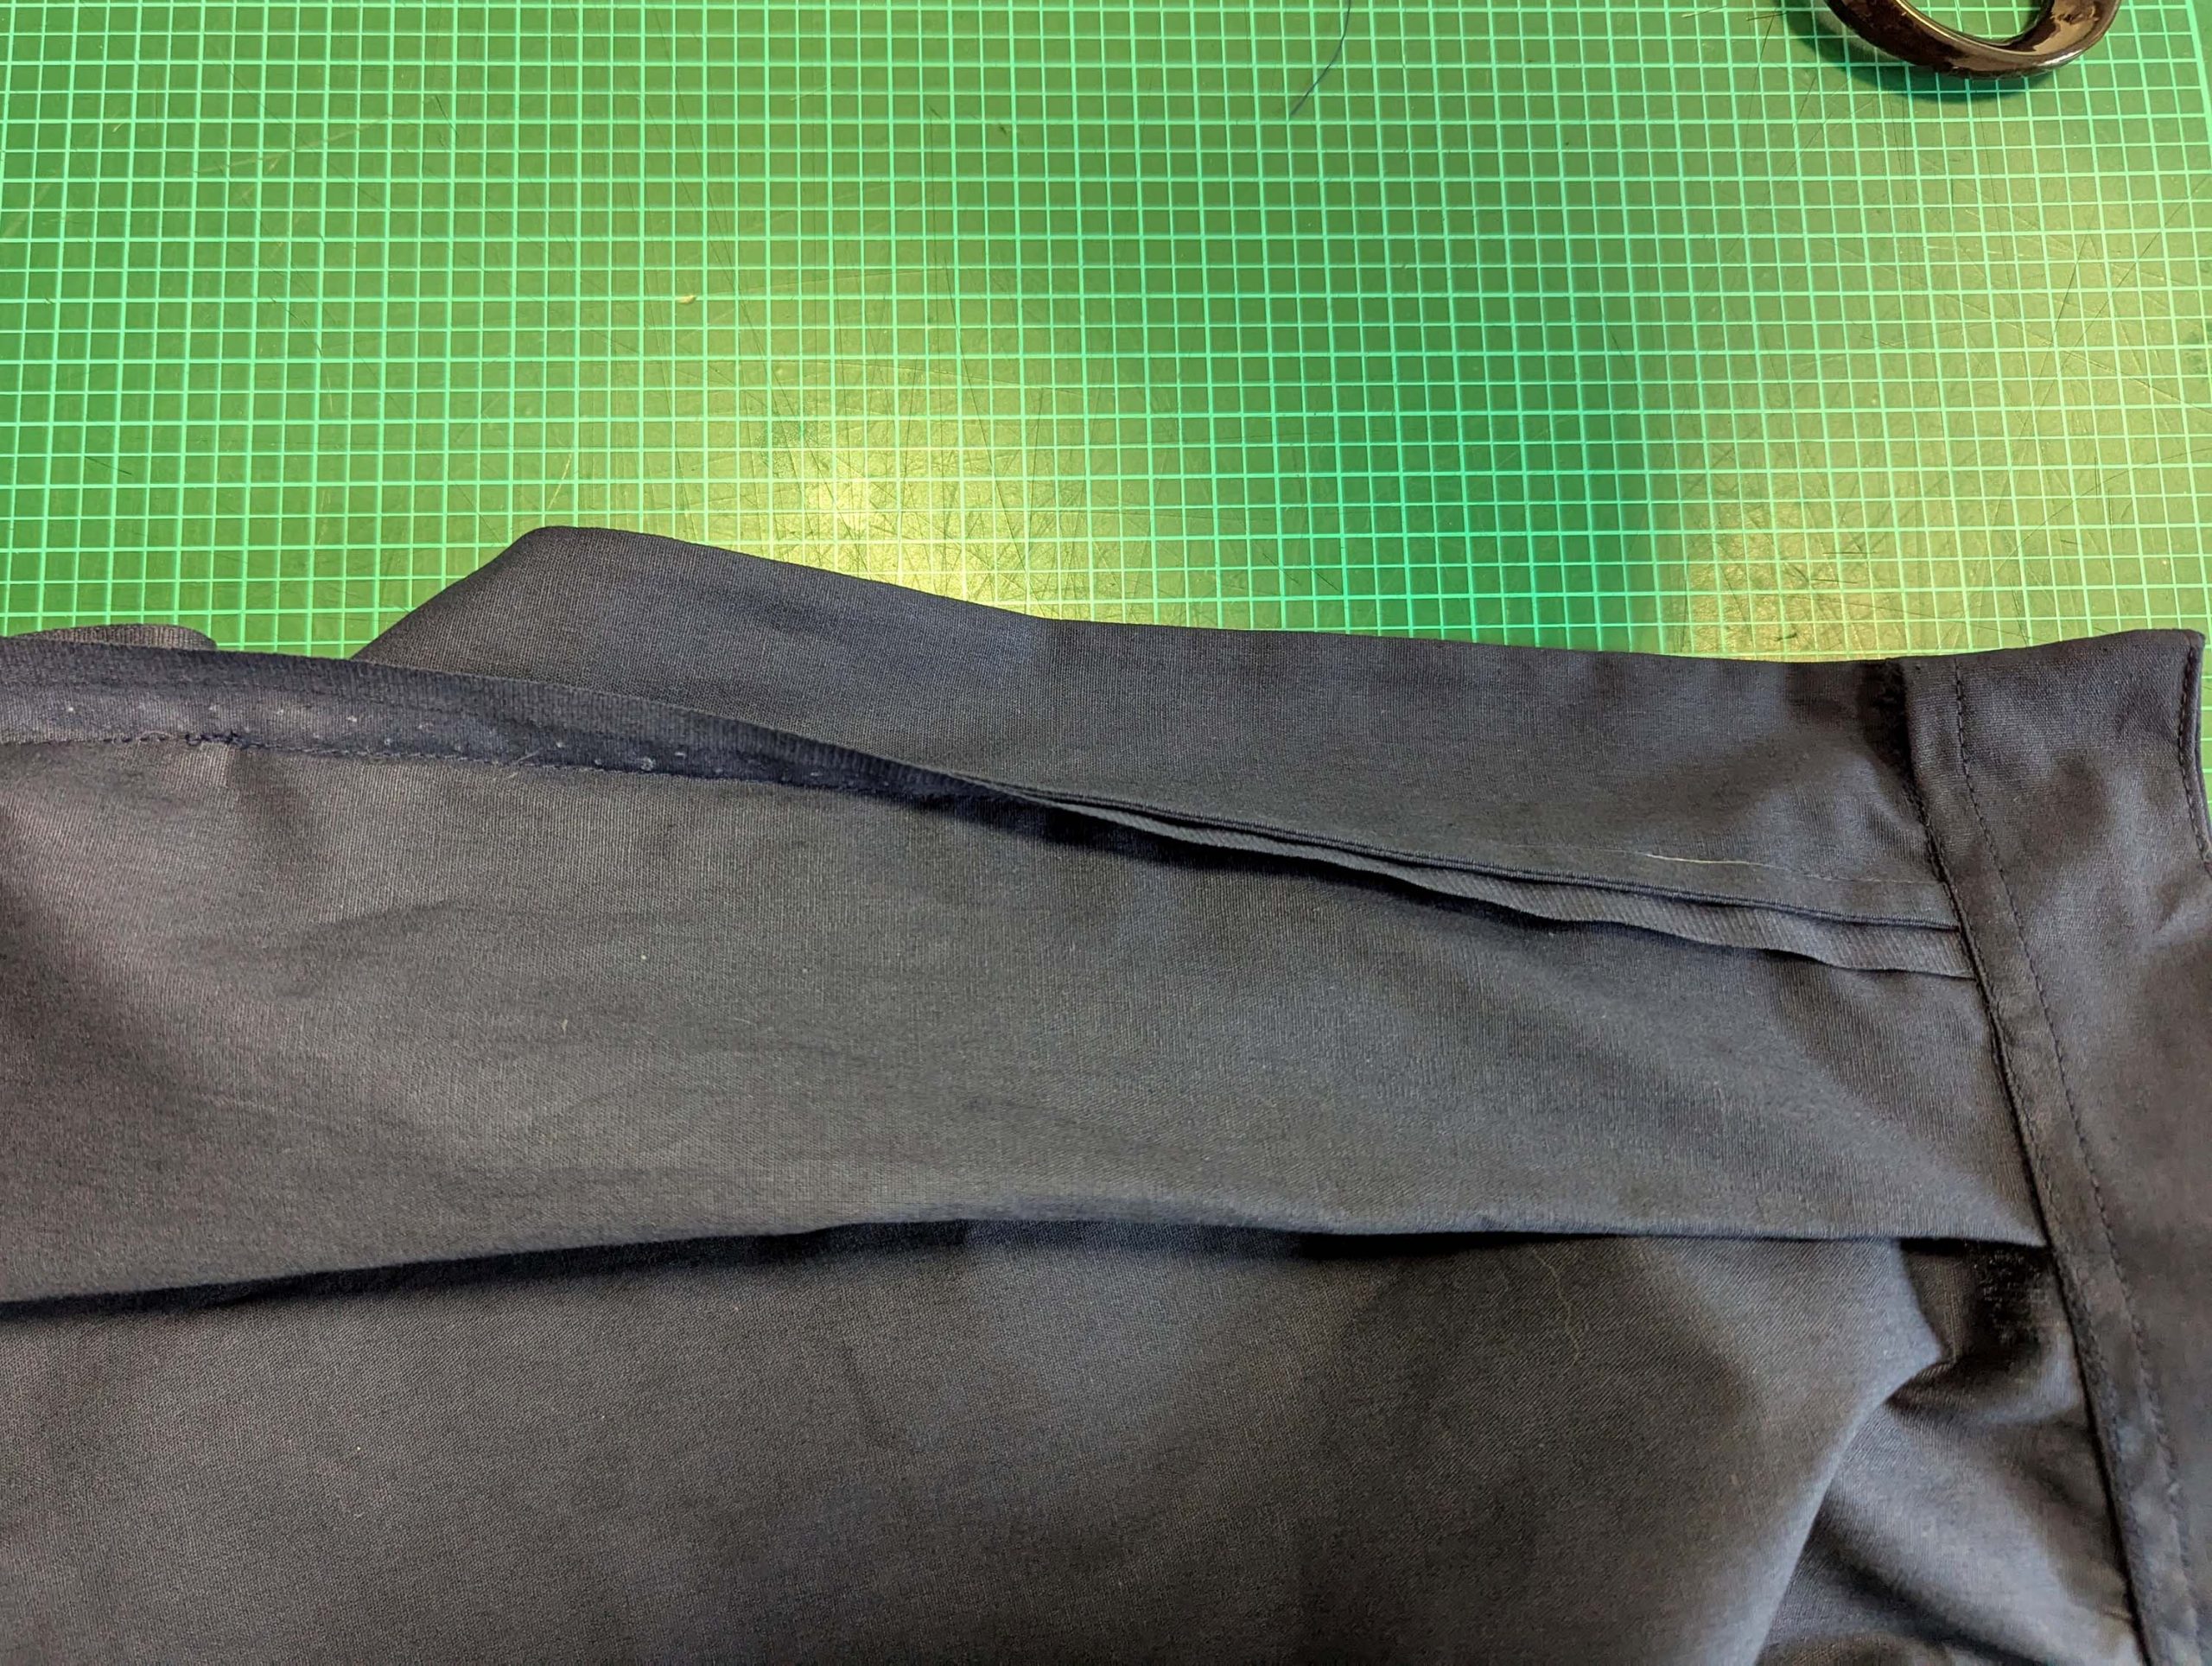
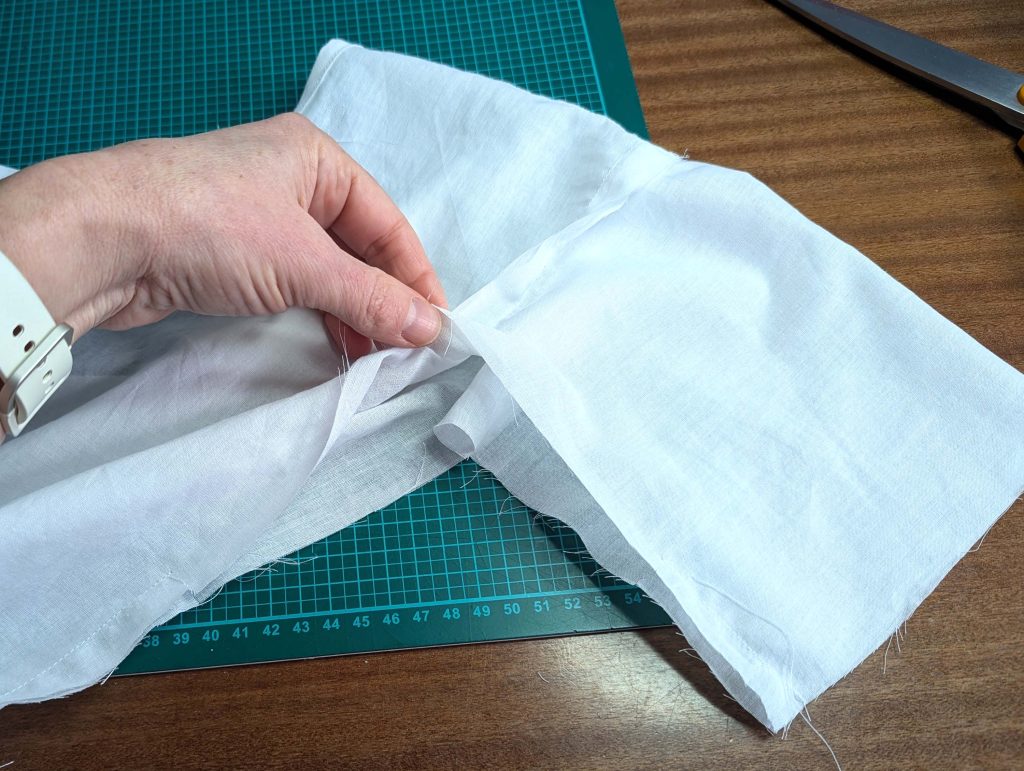
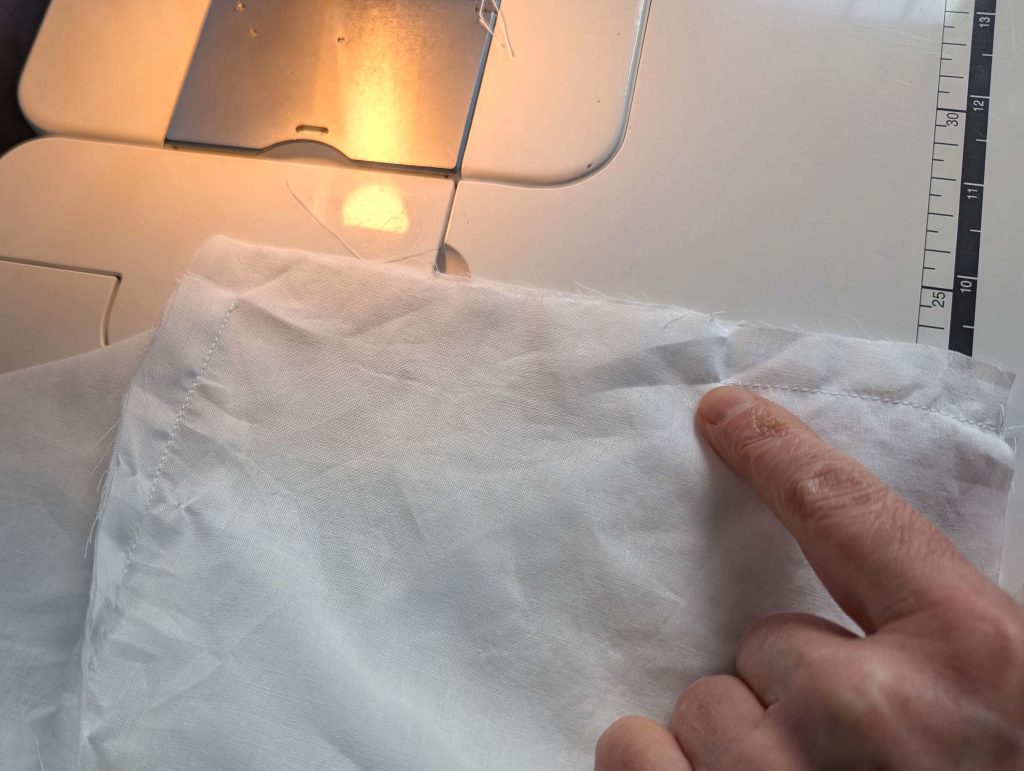
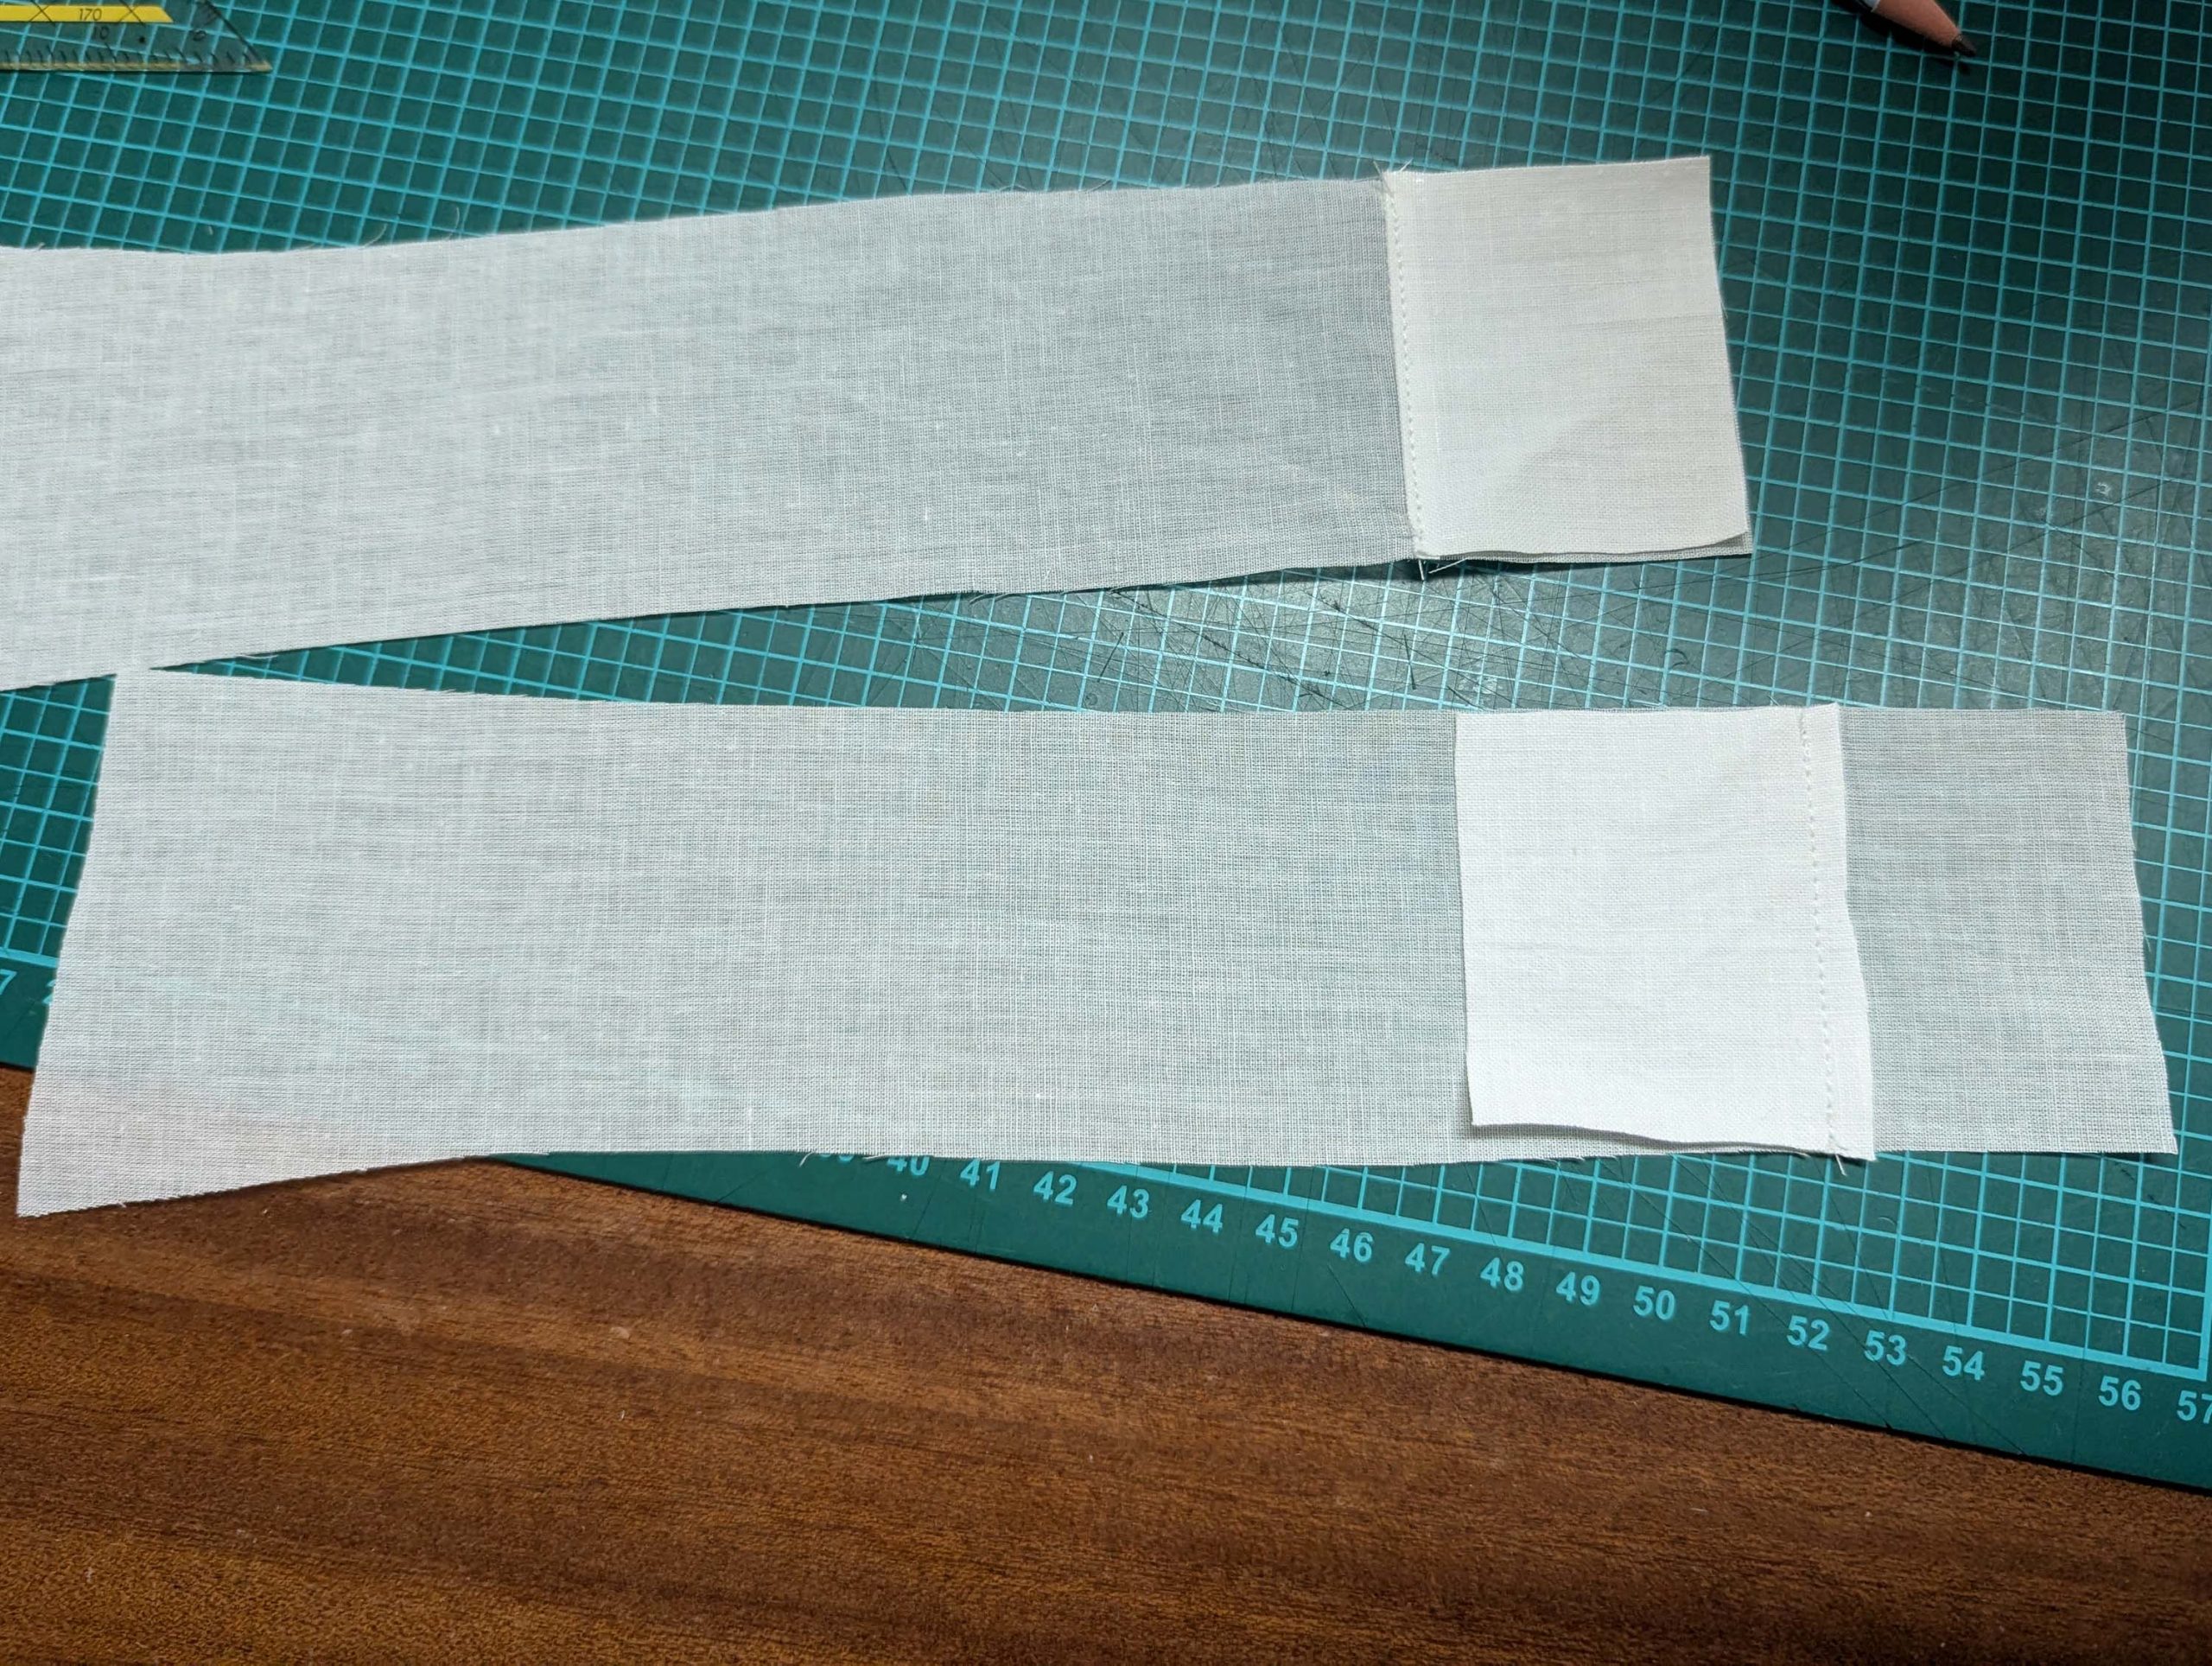
(9) Take the placket and fold along the dotted line, right sides together. Sew along the bottom and side edges and trim back the seam allowances. Turn the right way out and press. Line up with the left back edge, right sides together. Sew with a 5/8” (1,5cm) seam allowance, starting at the top and stopping at mark (1). The width of the finished placket is 1 5/8” (4cm). Sew the center back seam, right sides together, stopping exactly at mark (1). Fold the excess fabric at the center back into a box pleat, regarding the marks.
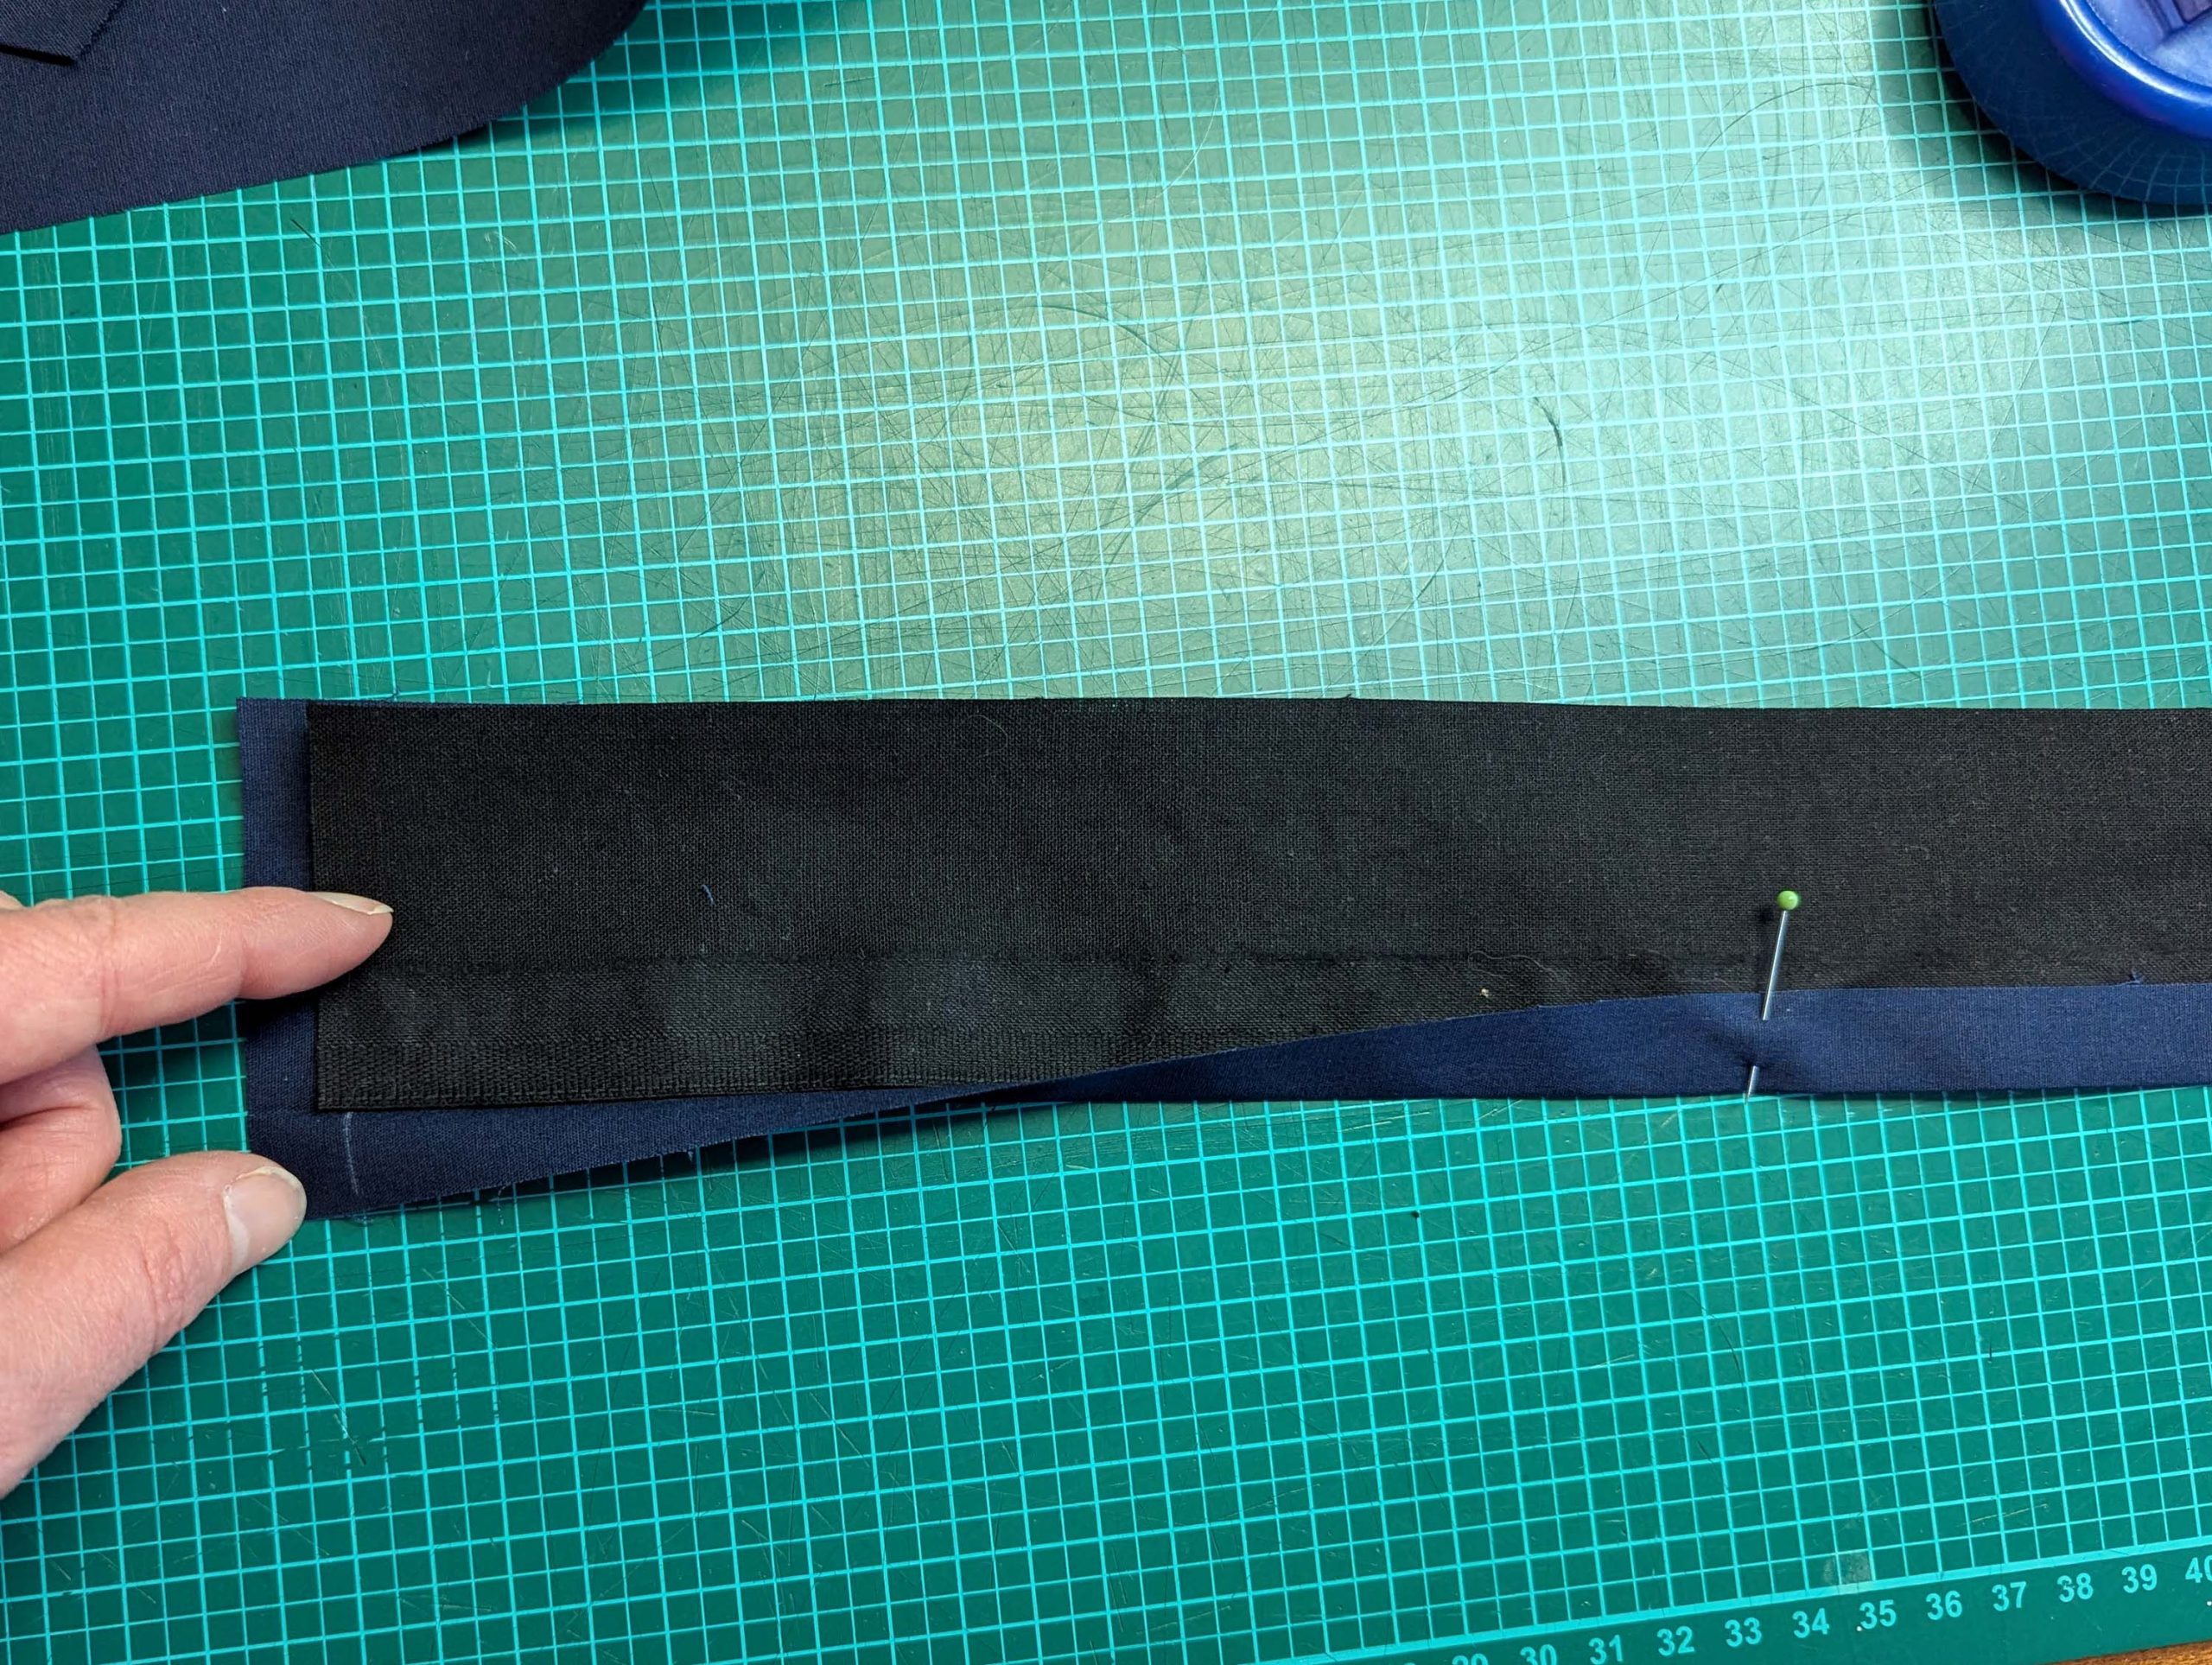
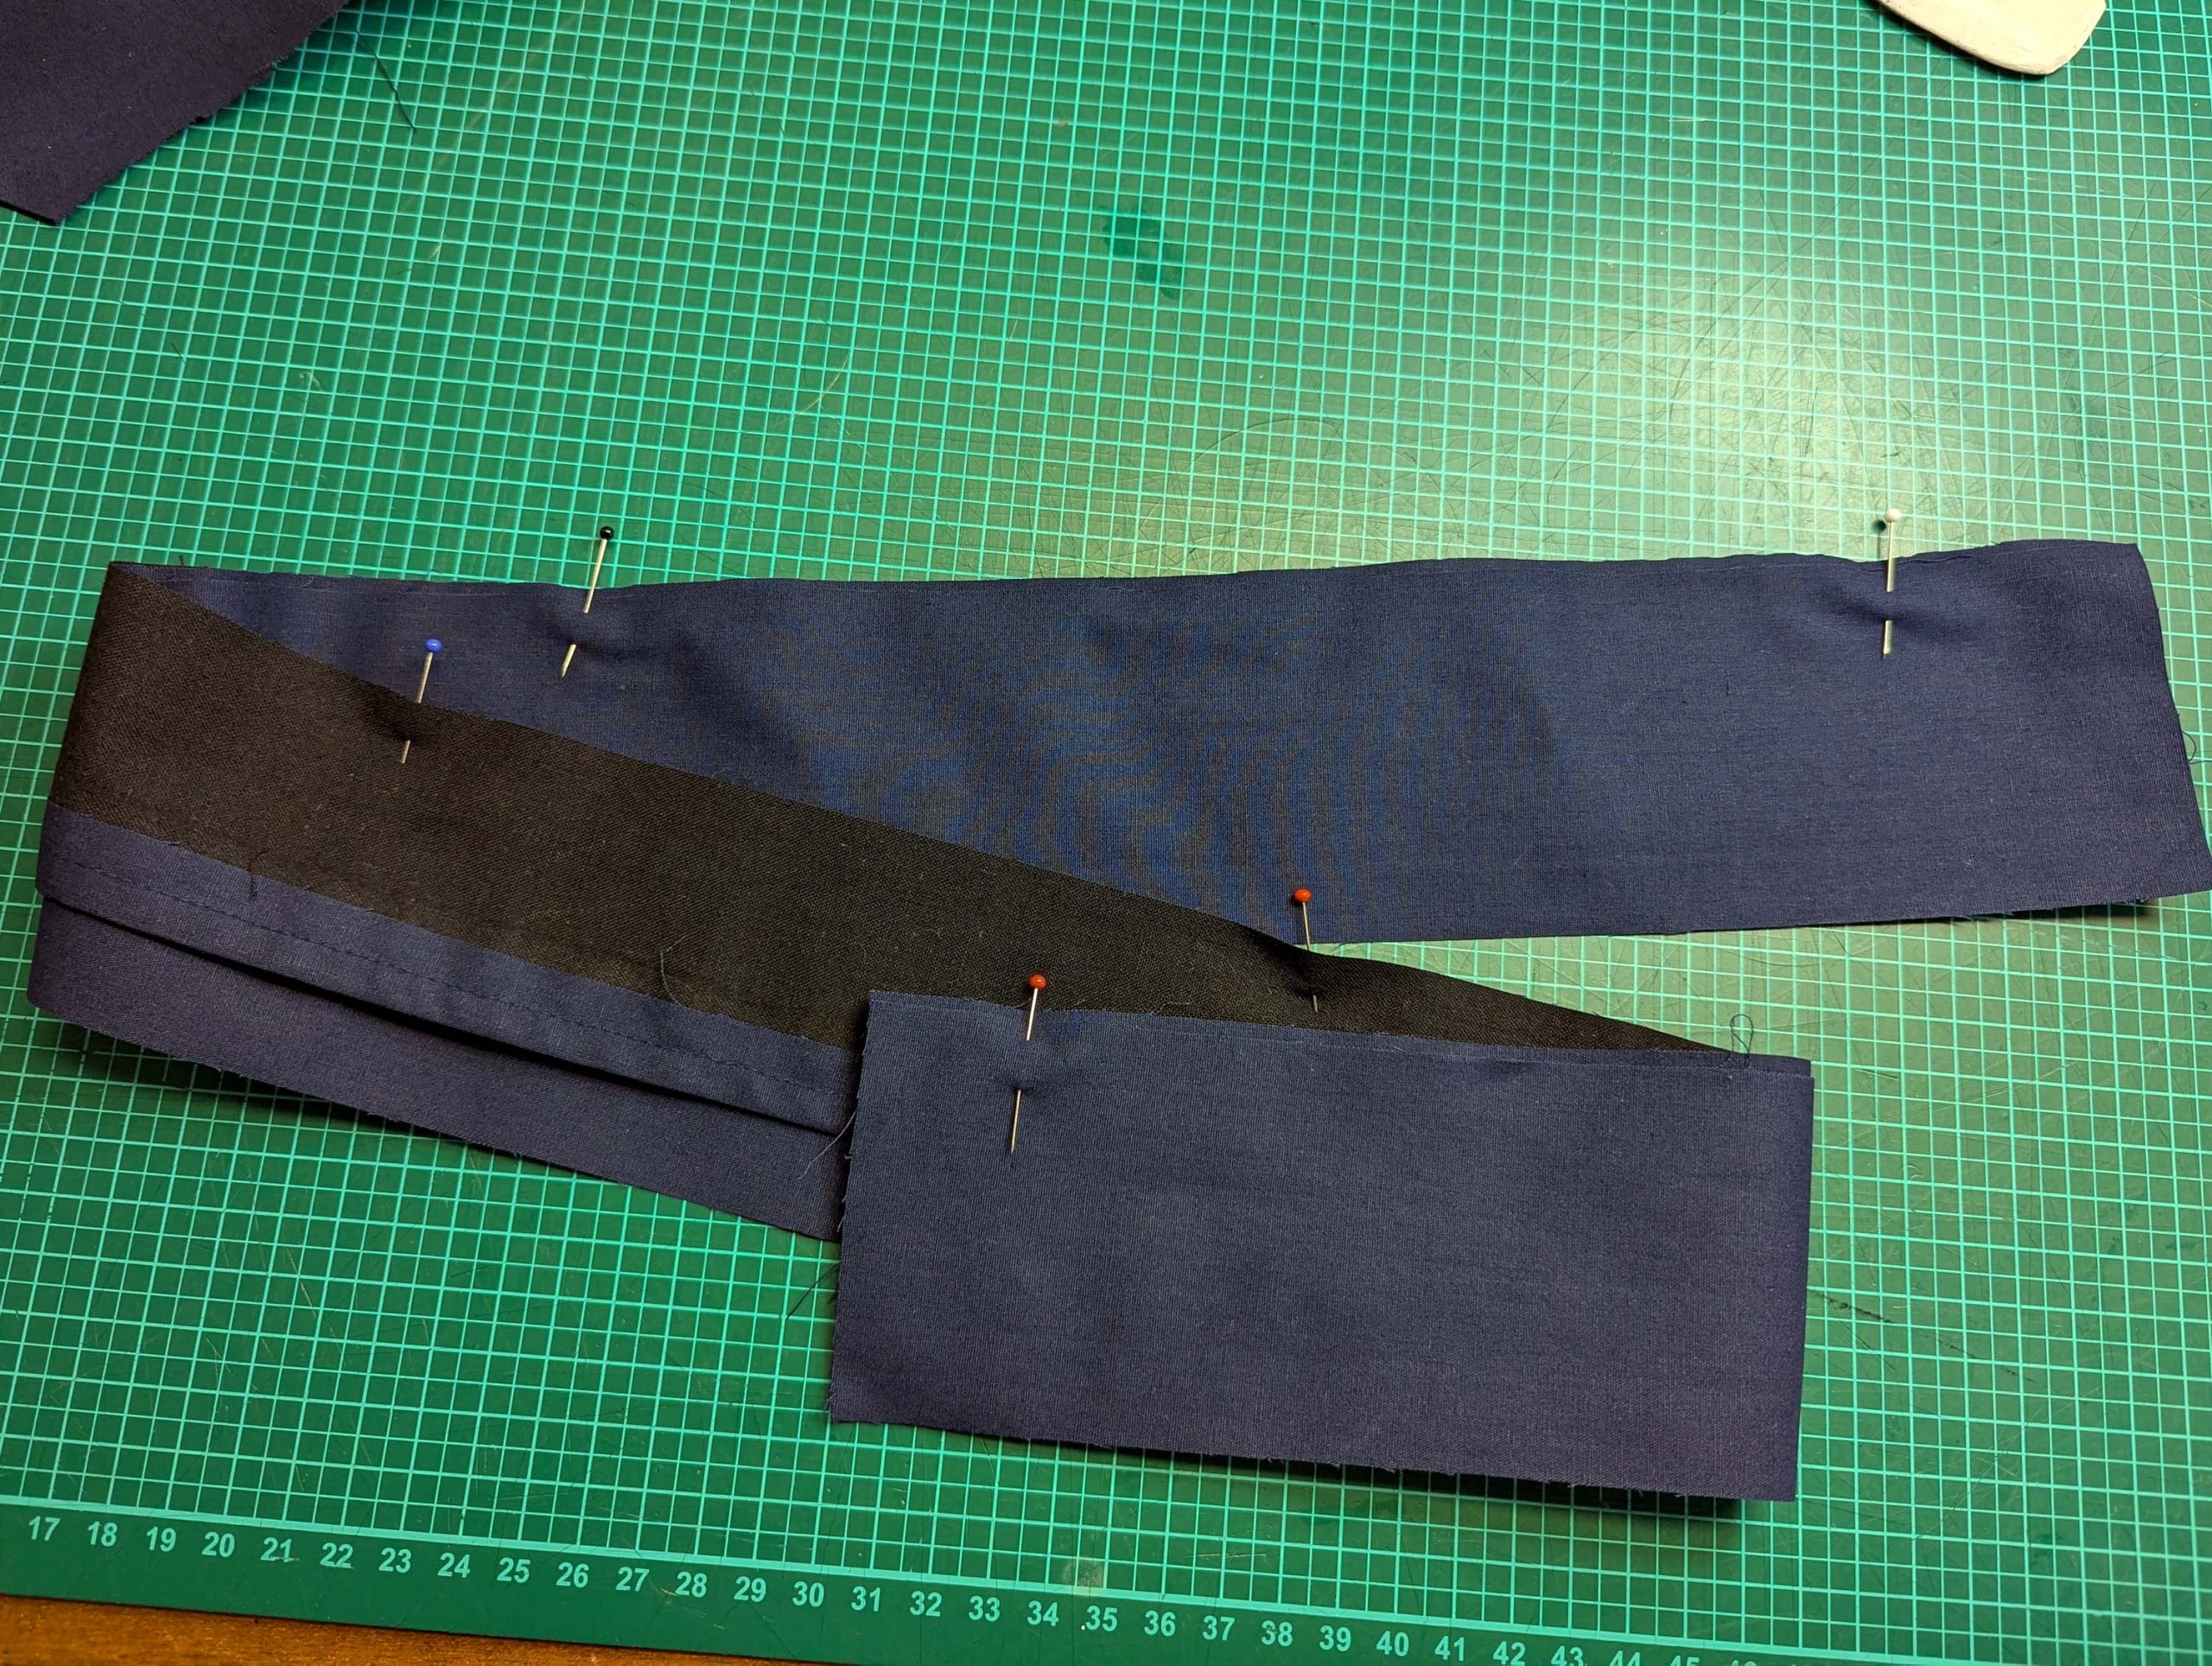
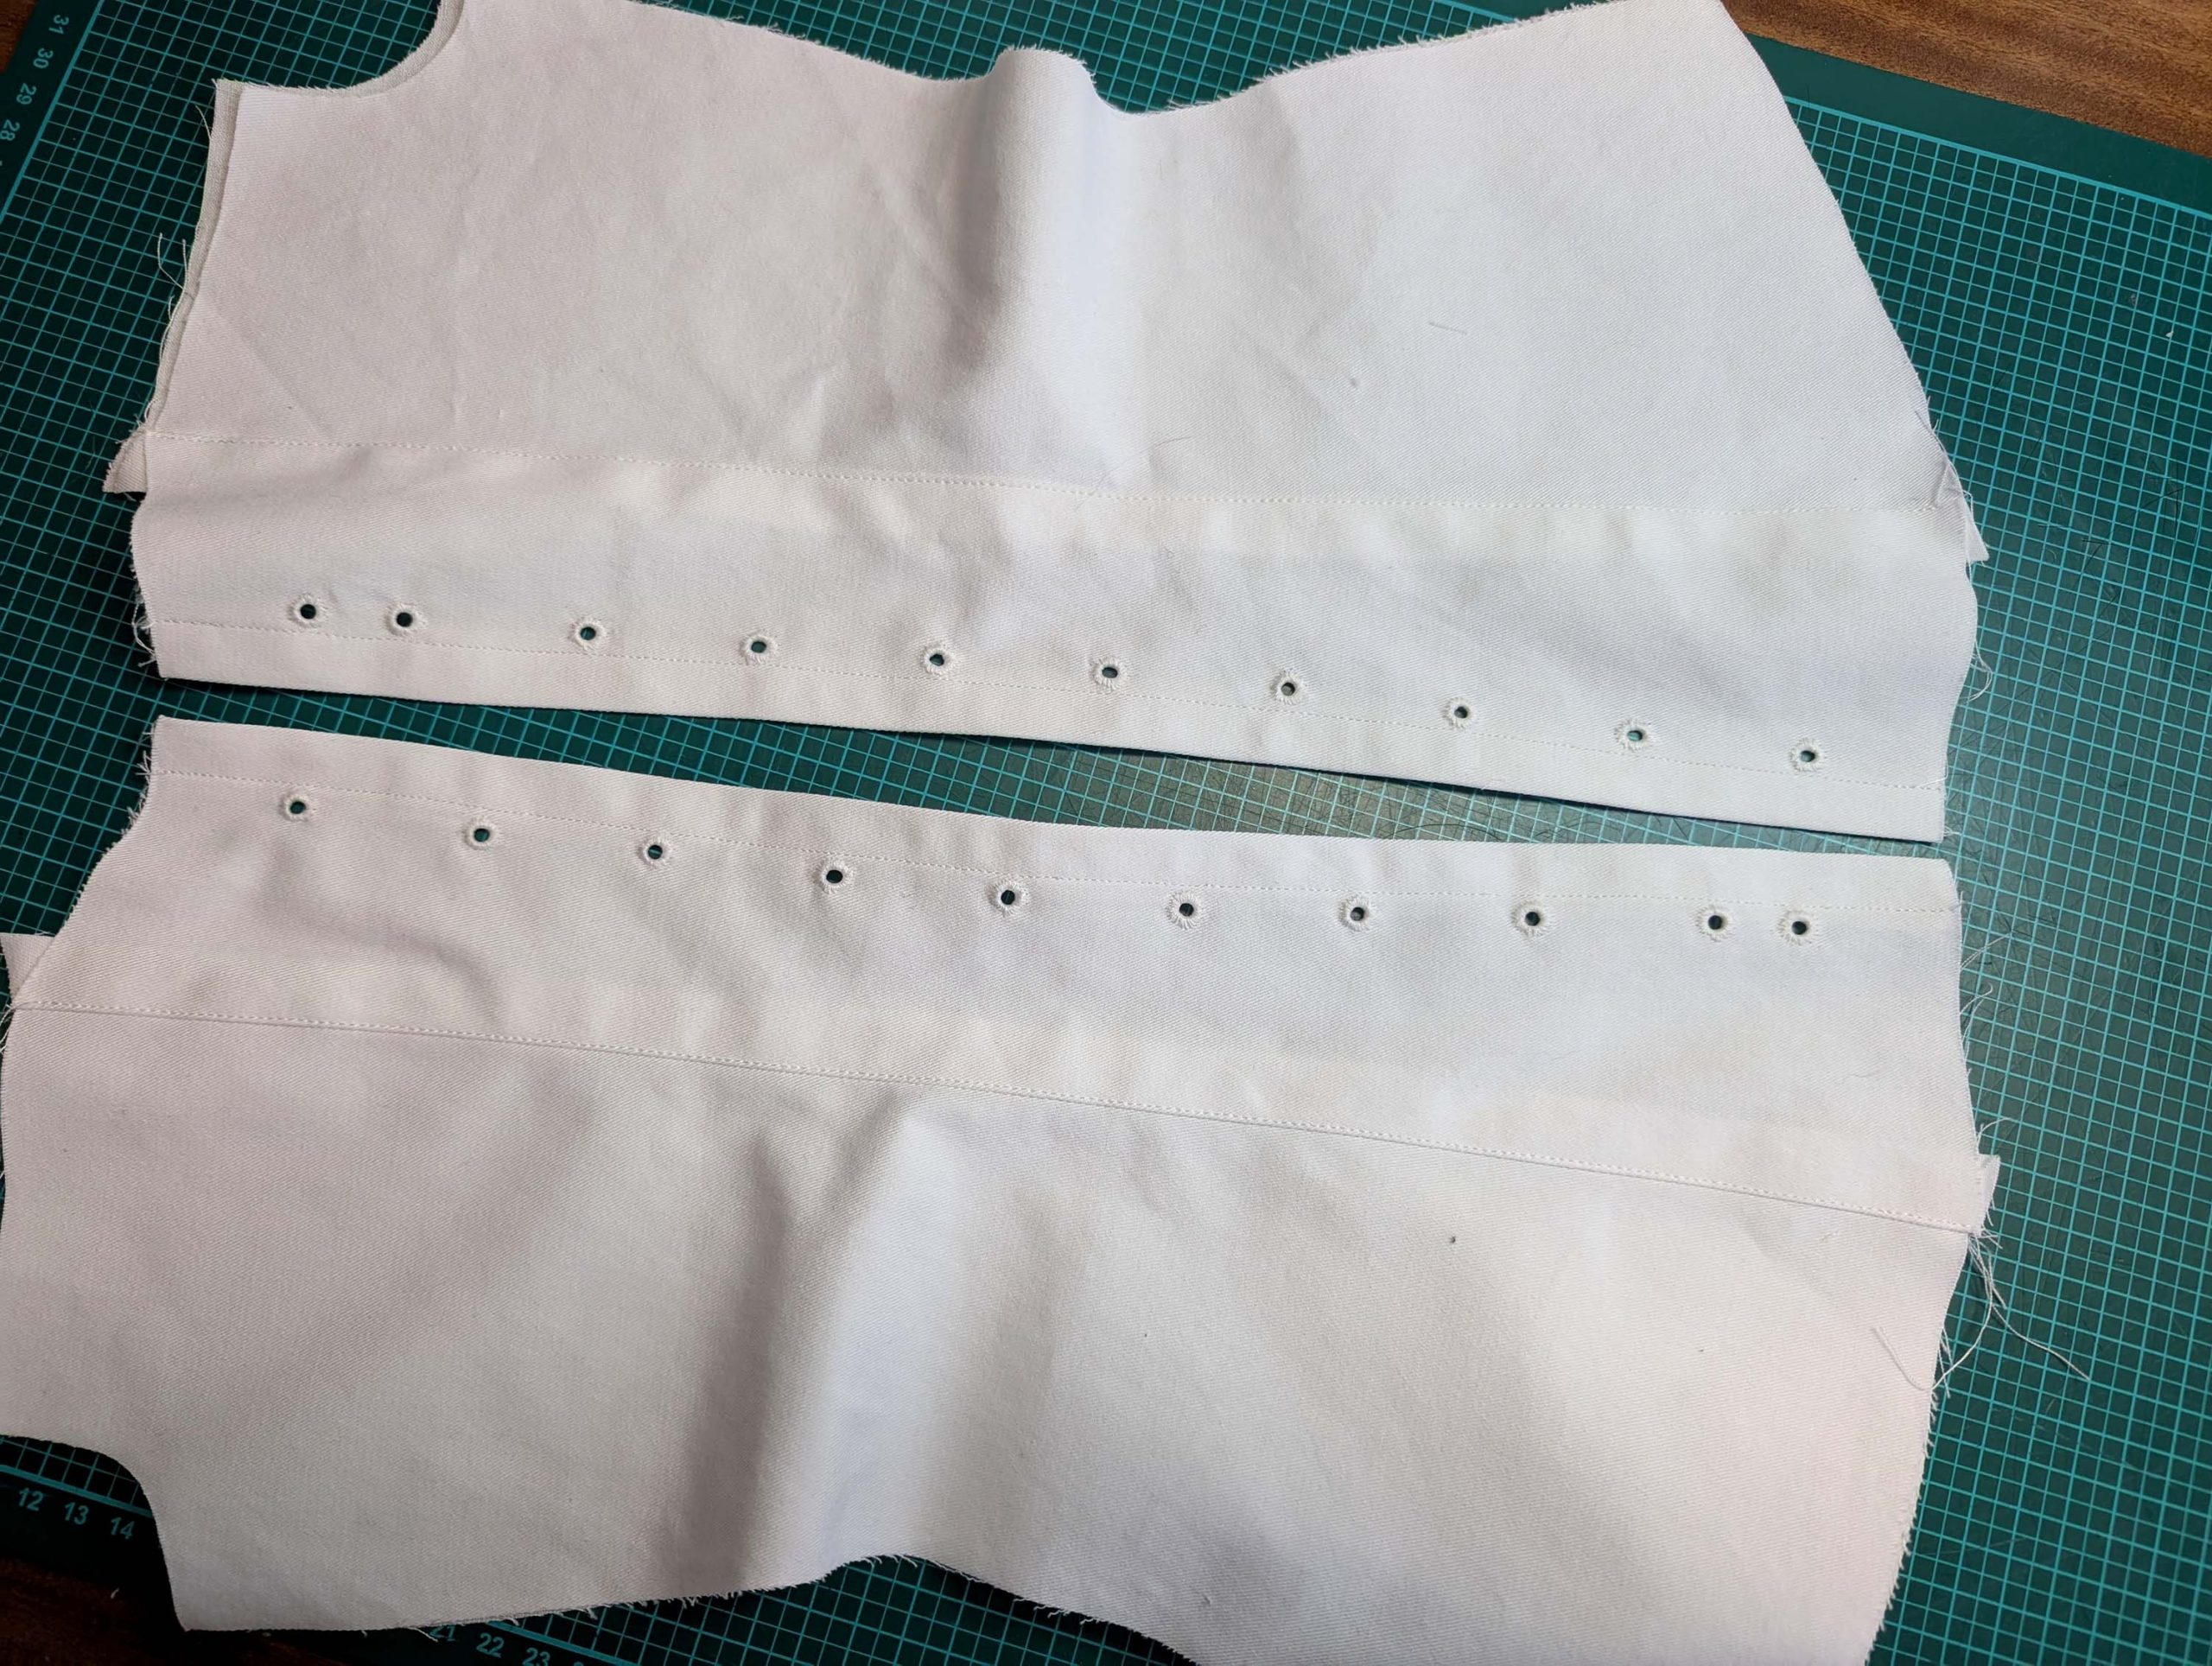
(10) Take the waistbandlining and flatline with a layer of midweight cotton fabric. Turn in the seam allowance along the bottom edge and stitch in place. Trim back the excess fabric. Line up with the waistband, right sides together, along the top edge, setting back the edge of the waistband about 1/8” (2mm) behind the edge of the waistband lining to allow for the turn of cloth. Sew along the top edge, trim back and press the seam allowance towards the lining. Understitch from the right side. For a neat and even finish, decorate the waistband with two parallel rows of white (contrasting) cotton tape now.
The period between 1795 and 1820, known as the Empire or Regency era, marked a fascinating transition in fashion history. Gone were the rigid, heavily boned stays of the 18th century, replaced by a softer, more natural silhouette inspired by Greek and Roman statuary.
During this period, the transformation from stays to corsets reflected changing attitudes toward fashion and comfort. The term “corset” itself emerged from the Old French word “cors” (body), signaling a shift toward lighter, less restrictive garments. These new corsets were advertised in ladies’ journals as a healthier alternative to their predecessors, while still providing the desired silhouette of high, separated breasts and a smooth line from bust to hip.
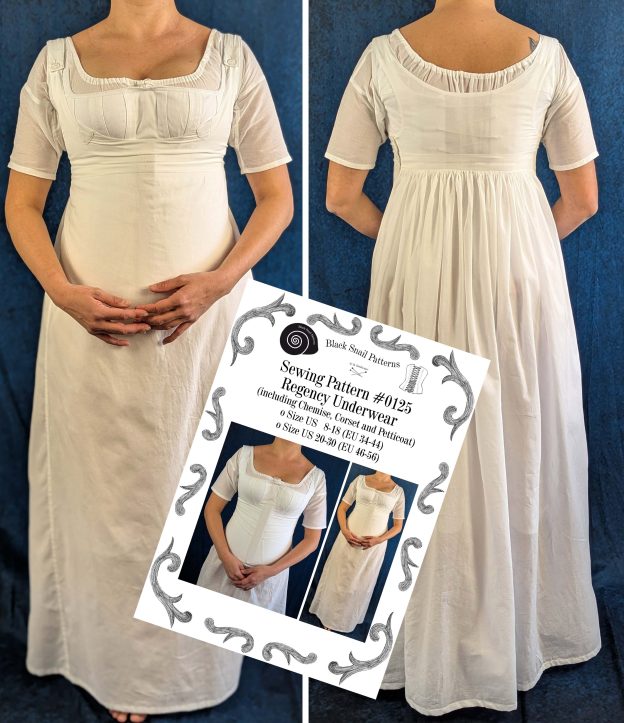
The complete Regency undergarment ensemble typically consisted of three pieces:
A simple chemise of cotton or linen as the first layer against the skin
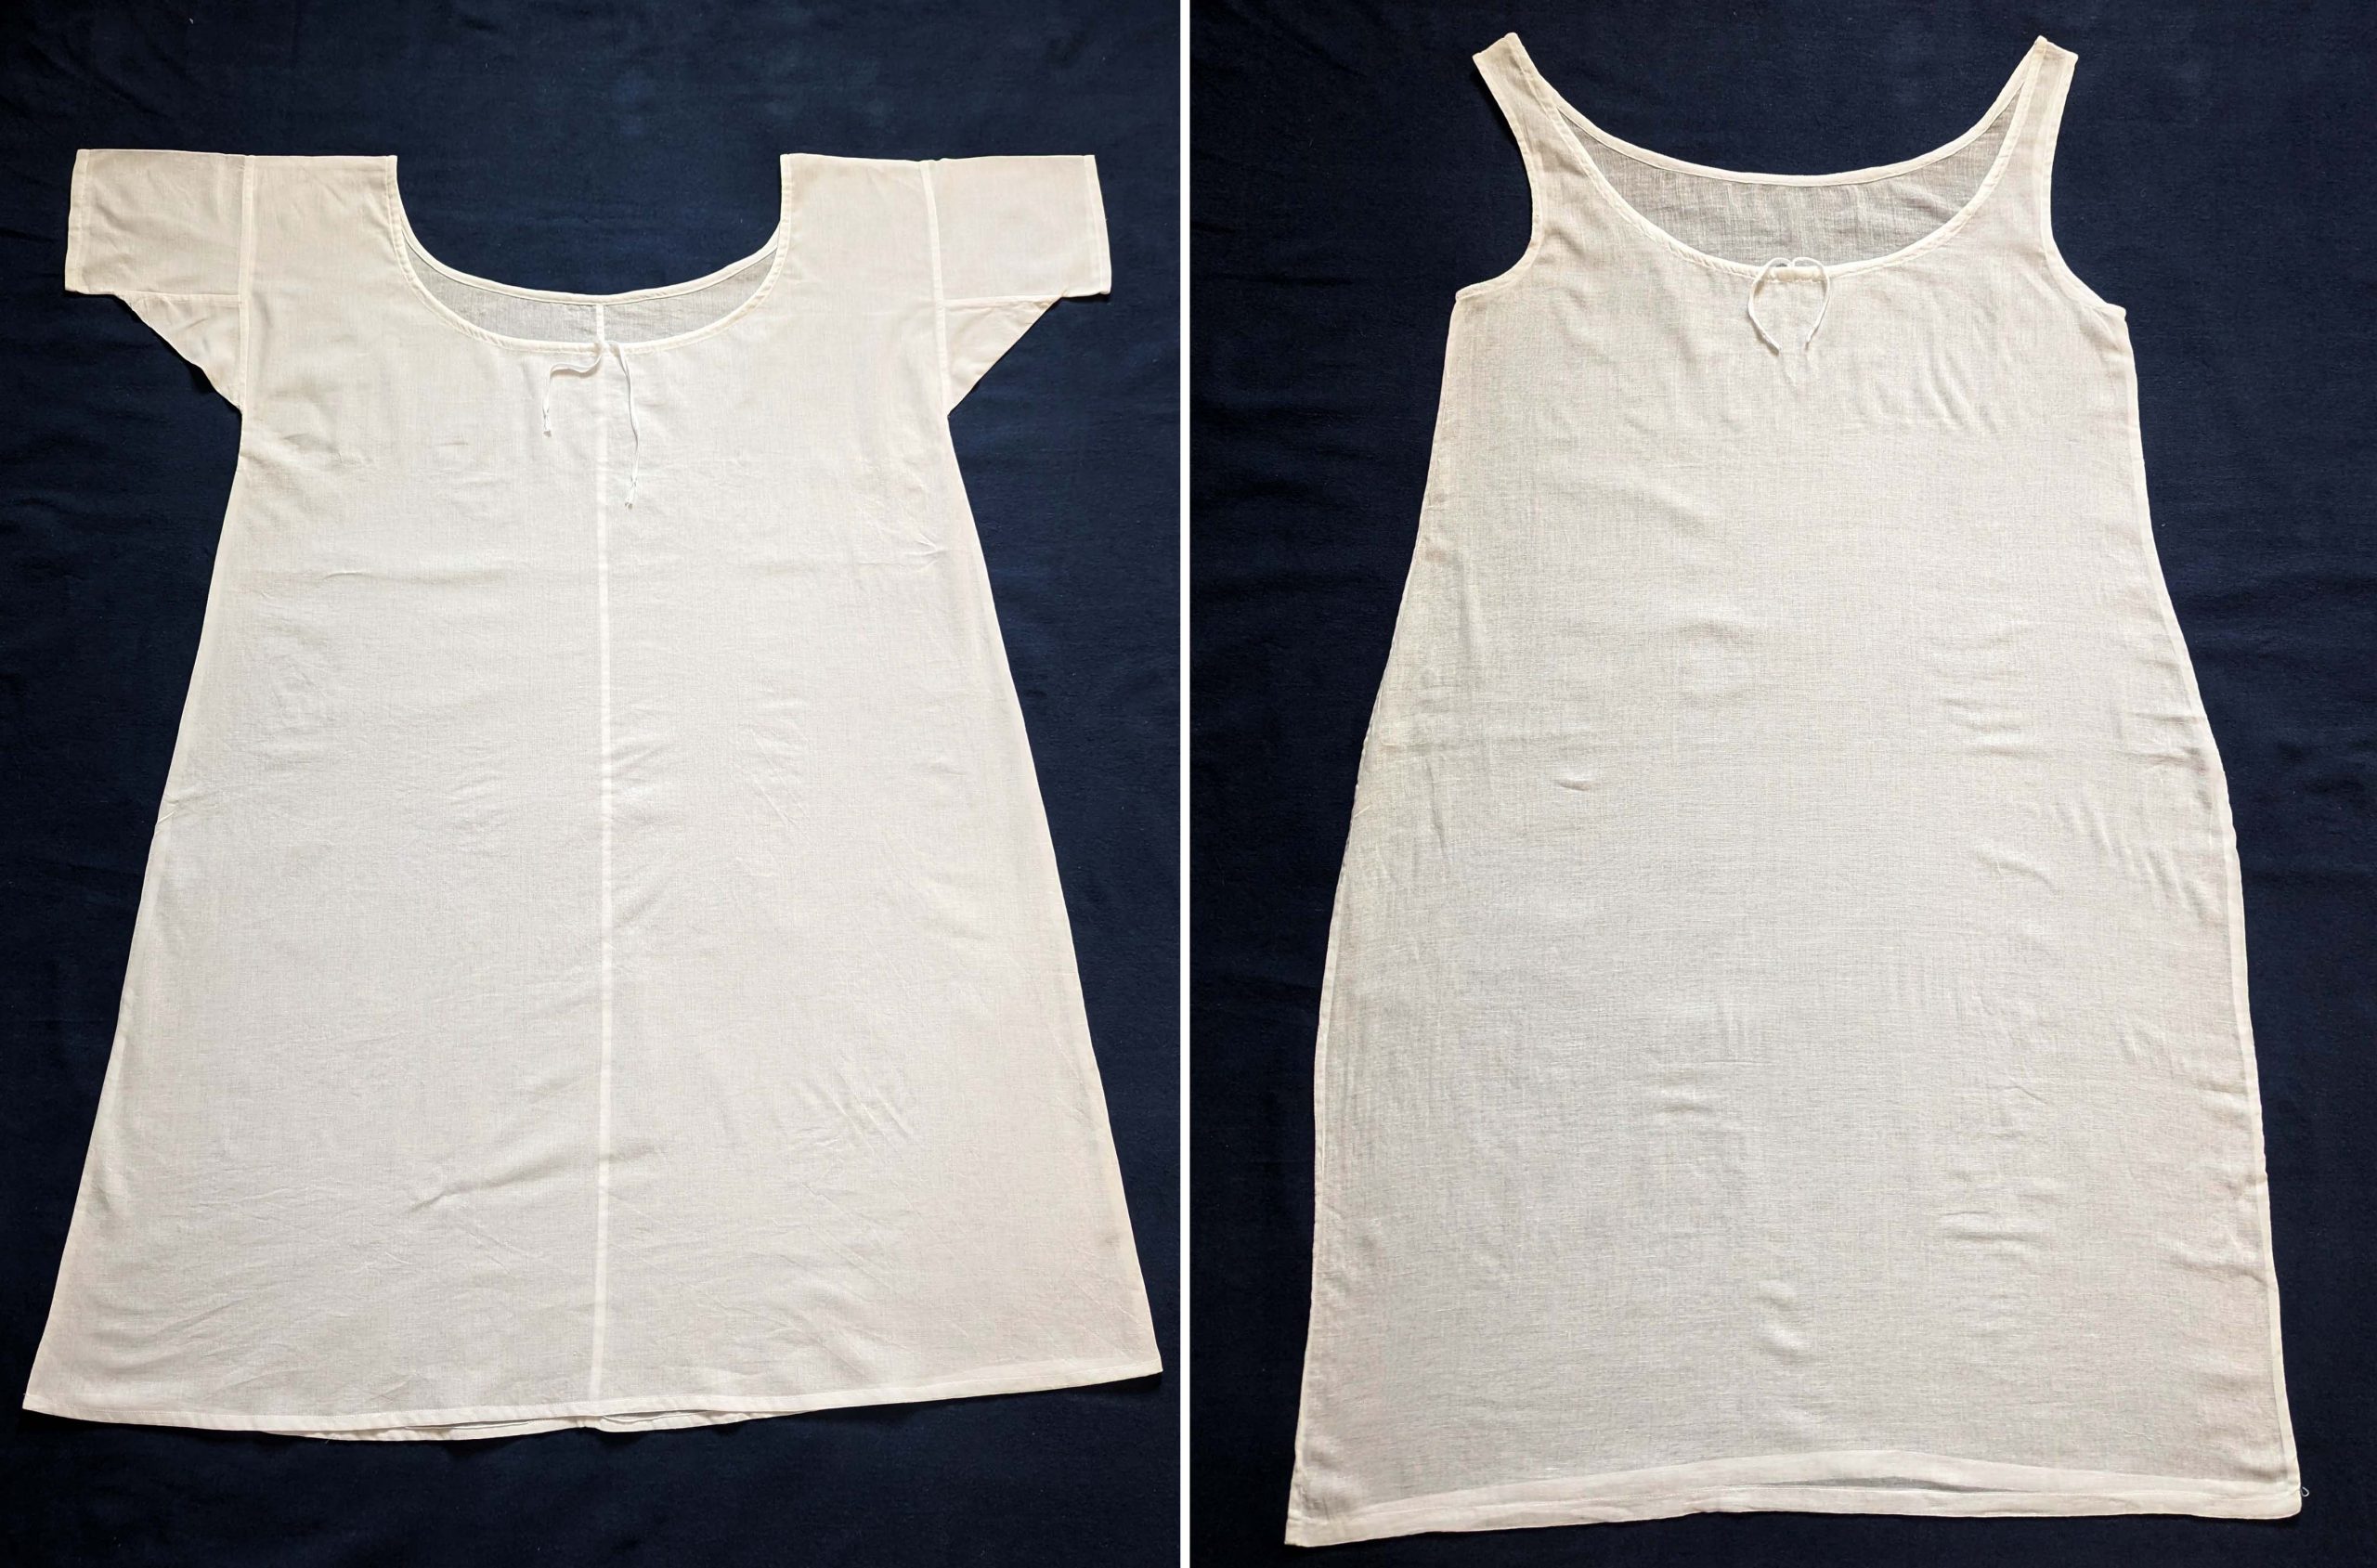
Every great women’s costume starts with a solid foundation: the chemise. Today, we’ll create this essential first layer that graced the wardrobes of Jane Austen’s contemporaries. Made from soft cotton or fine linen, this knee-length garment protected the corset and the outer garments from sweat and body oils.
You can purchase the pattern, including chemise, petticoat, and corset here in my webshop:
COMING SOON
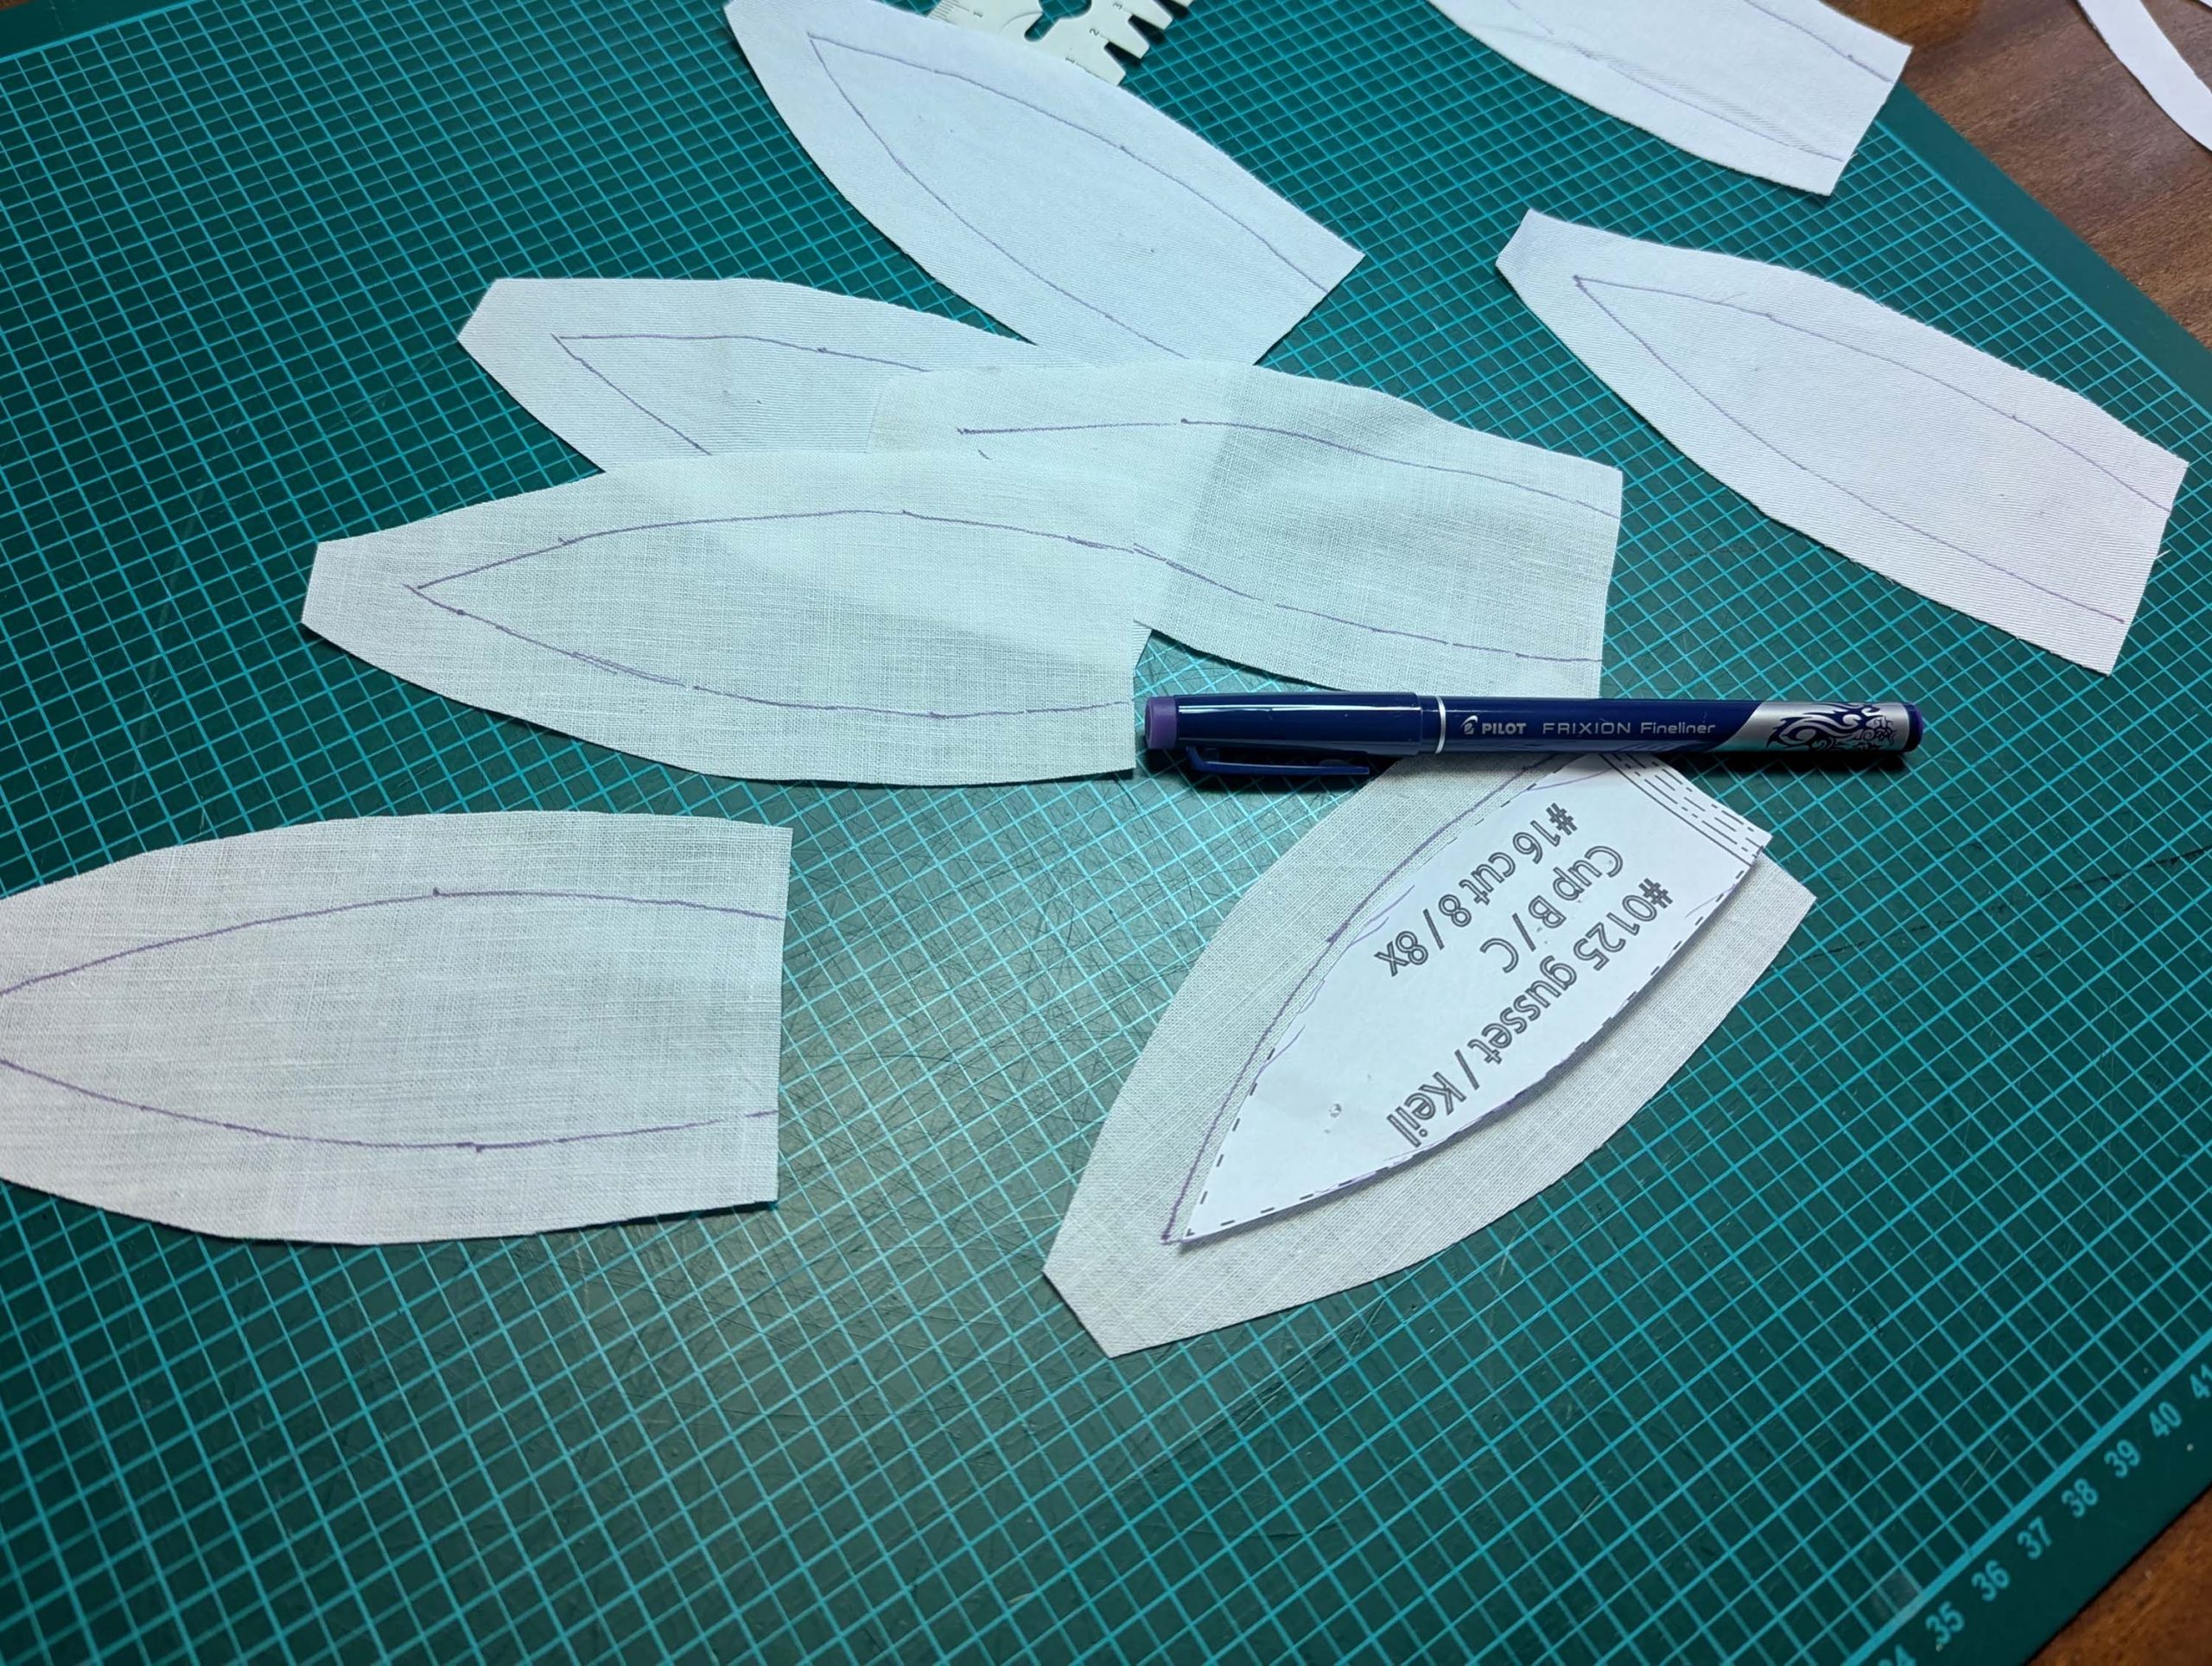
The chemise is a simple garment cut in rectangular and triangular pieces to save fabric. The main difficulty is to insert the underarm gusset properly. For an easier sewing process, as we are using modern fabrics, with modern widths, we just cut the triangle shape of front and back, without inserting some additional gussets, as it would be historically accurate. By the way, this sewing guide will not show a historically accurate hand-sewing process, but machine sewing.
(1)Cut out all pieces, and transfer the notches carefully, especially at the underarm gusset. Sew the center back seam when needed and sew the shoulder seams, right sides together, creating flat felled seams.
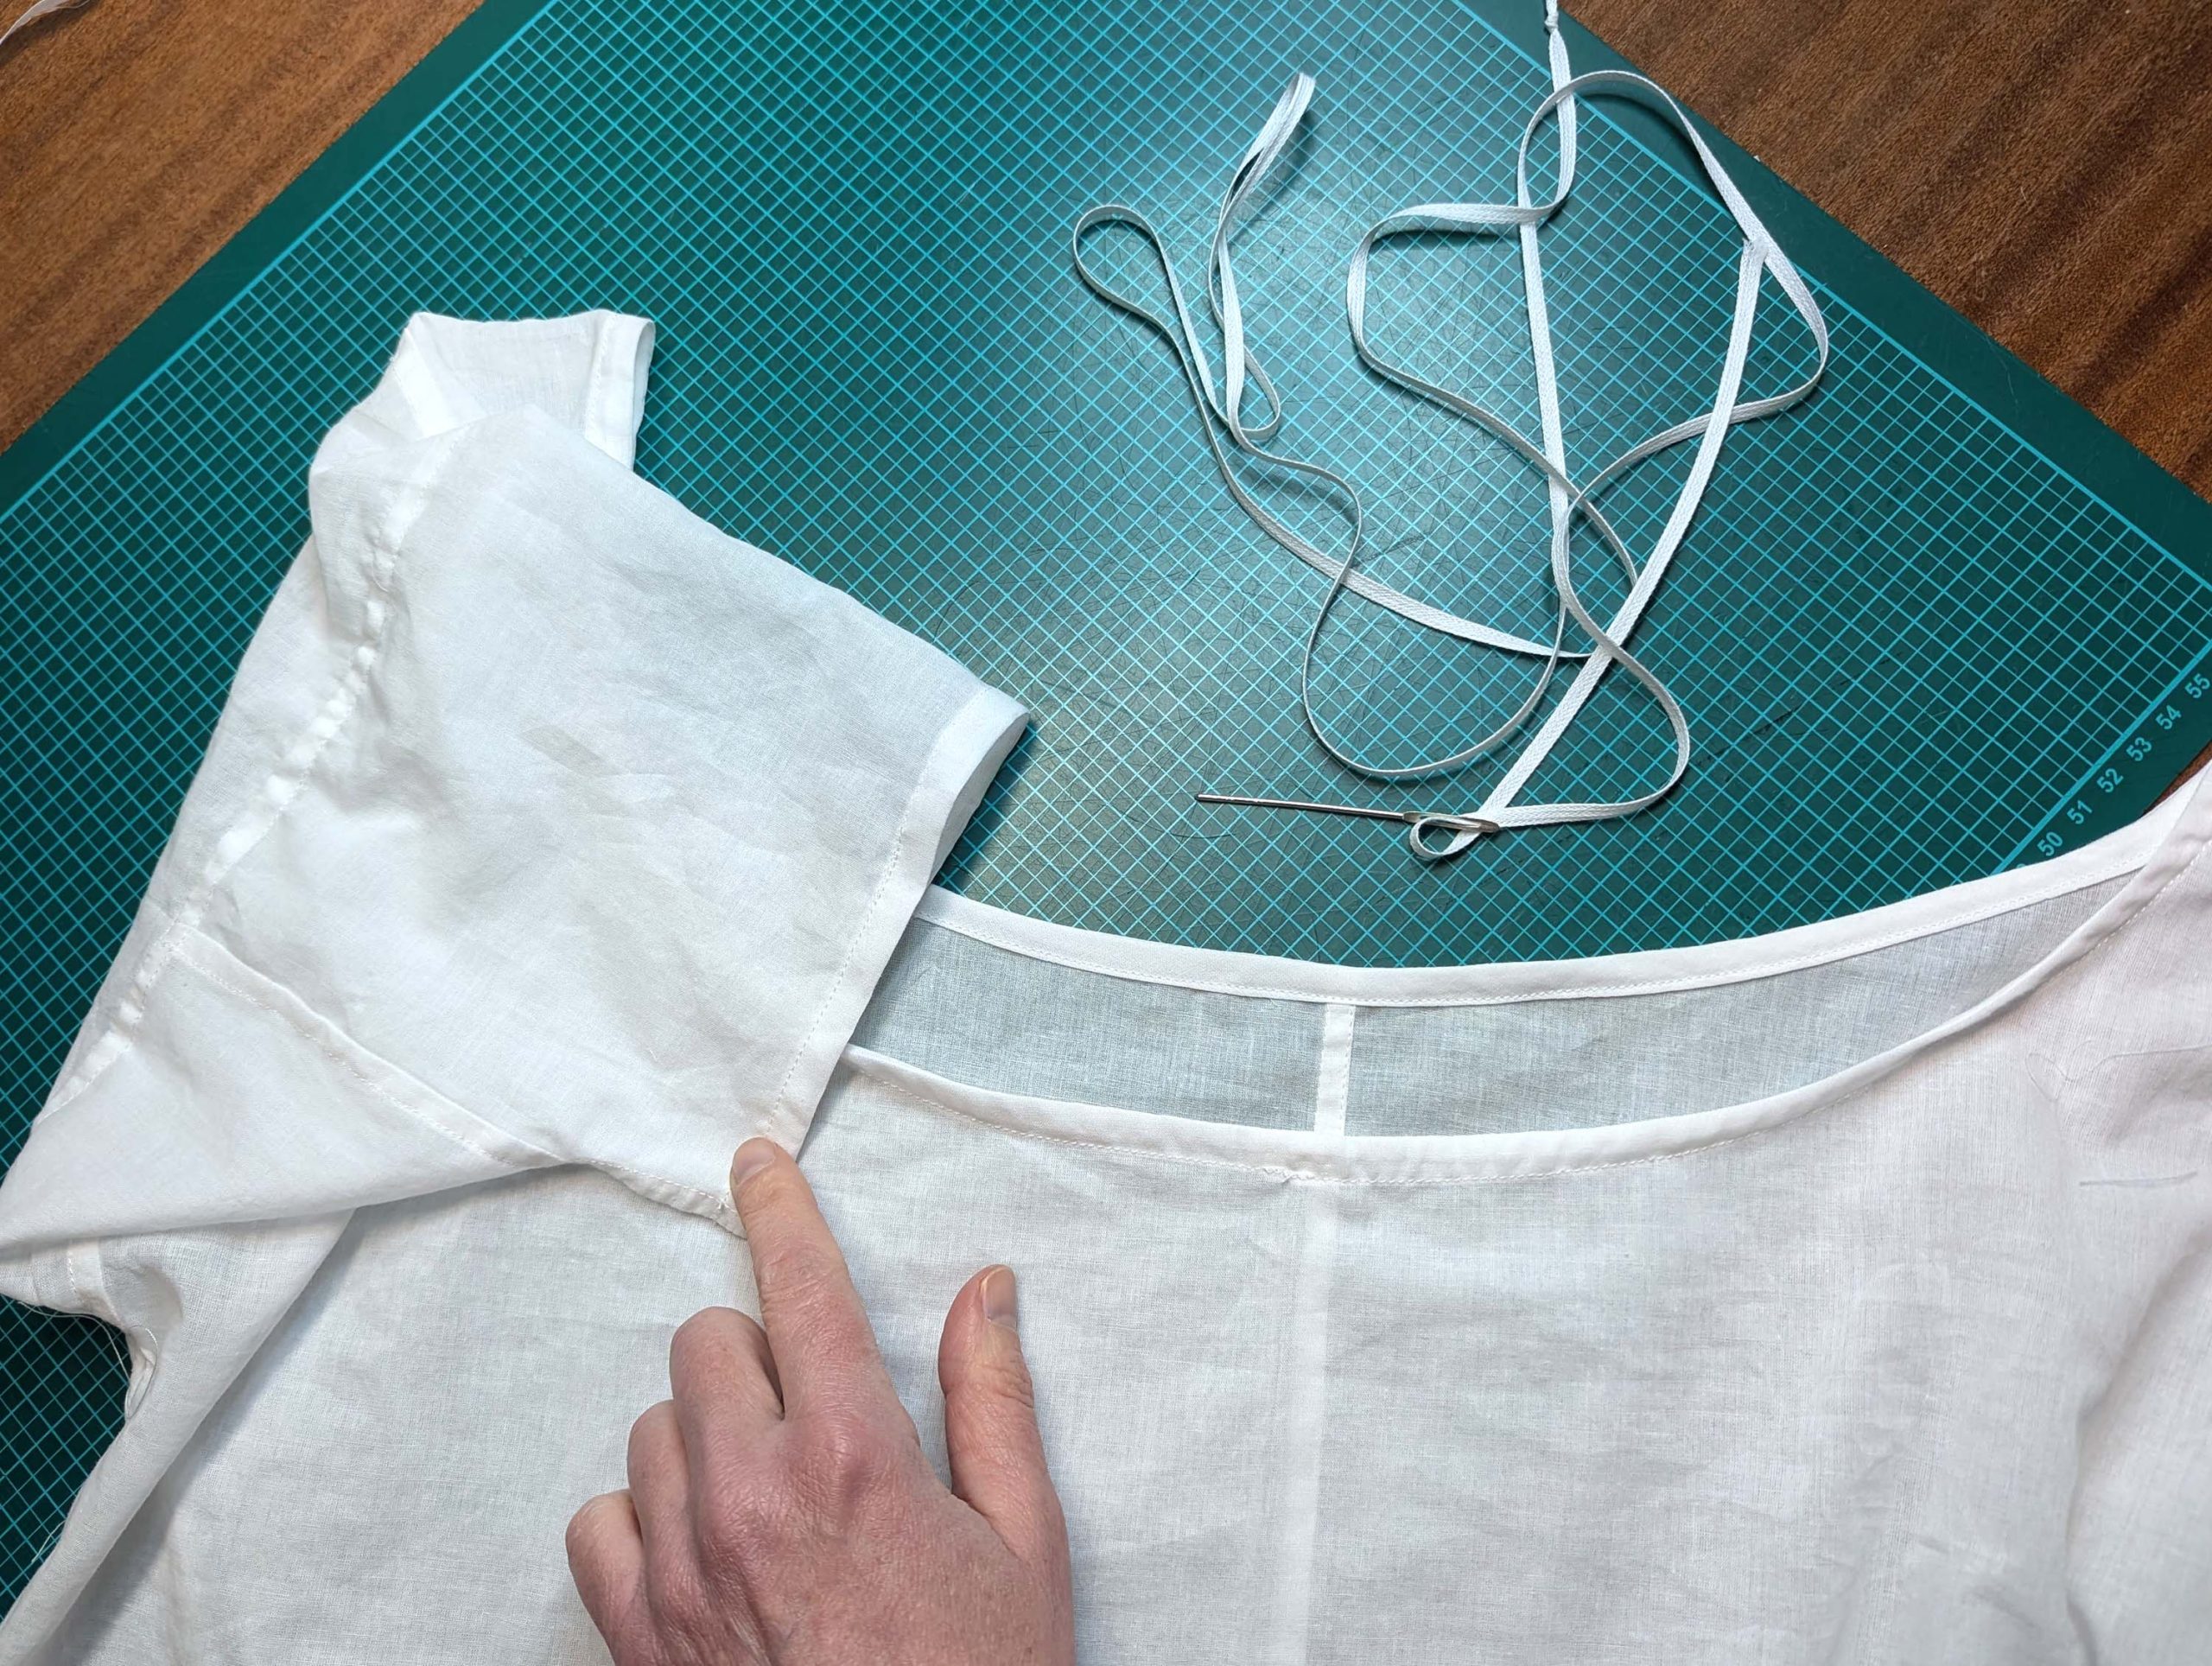
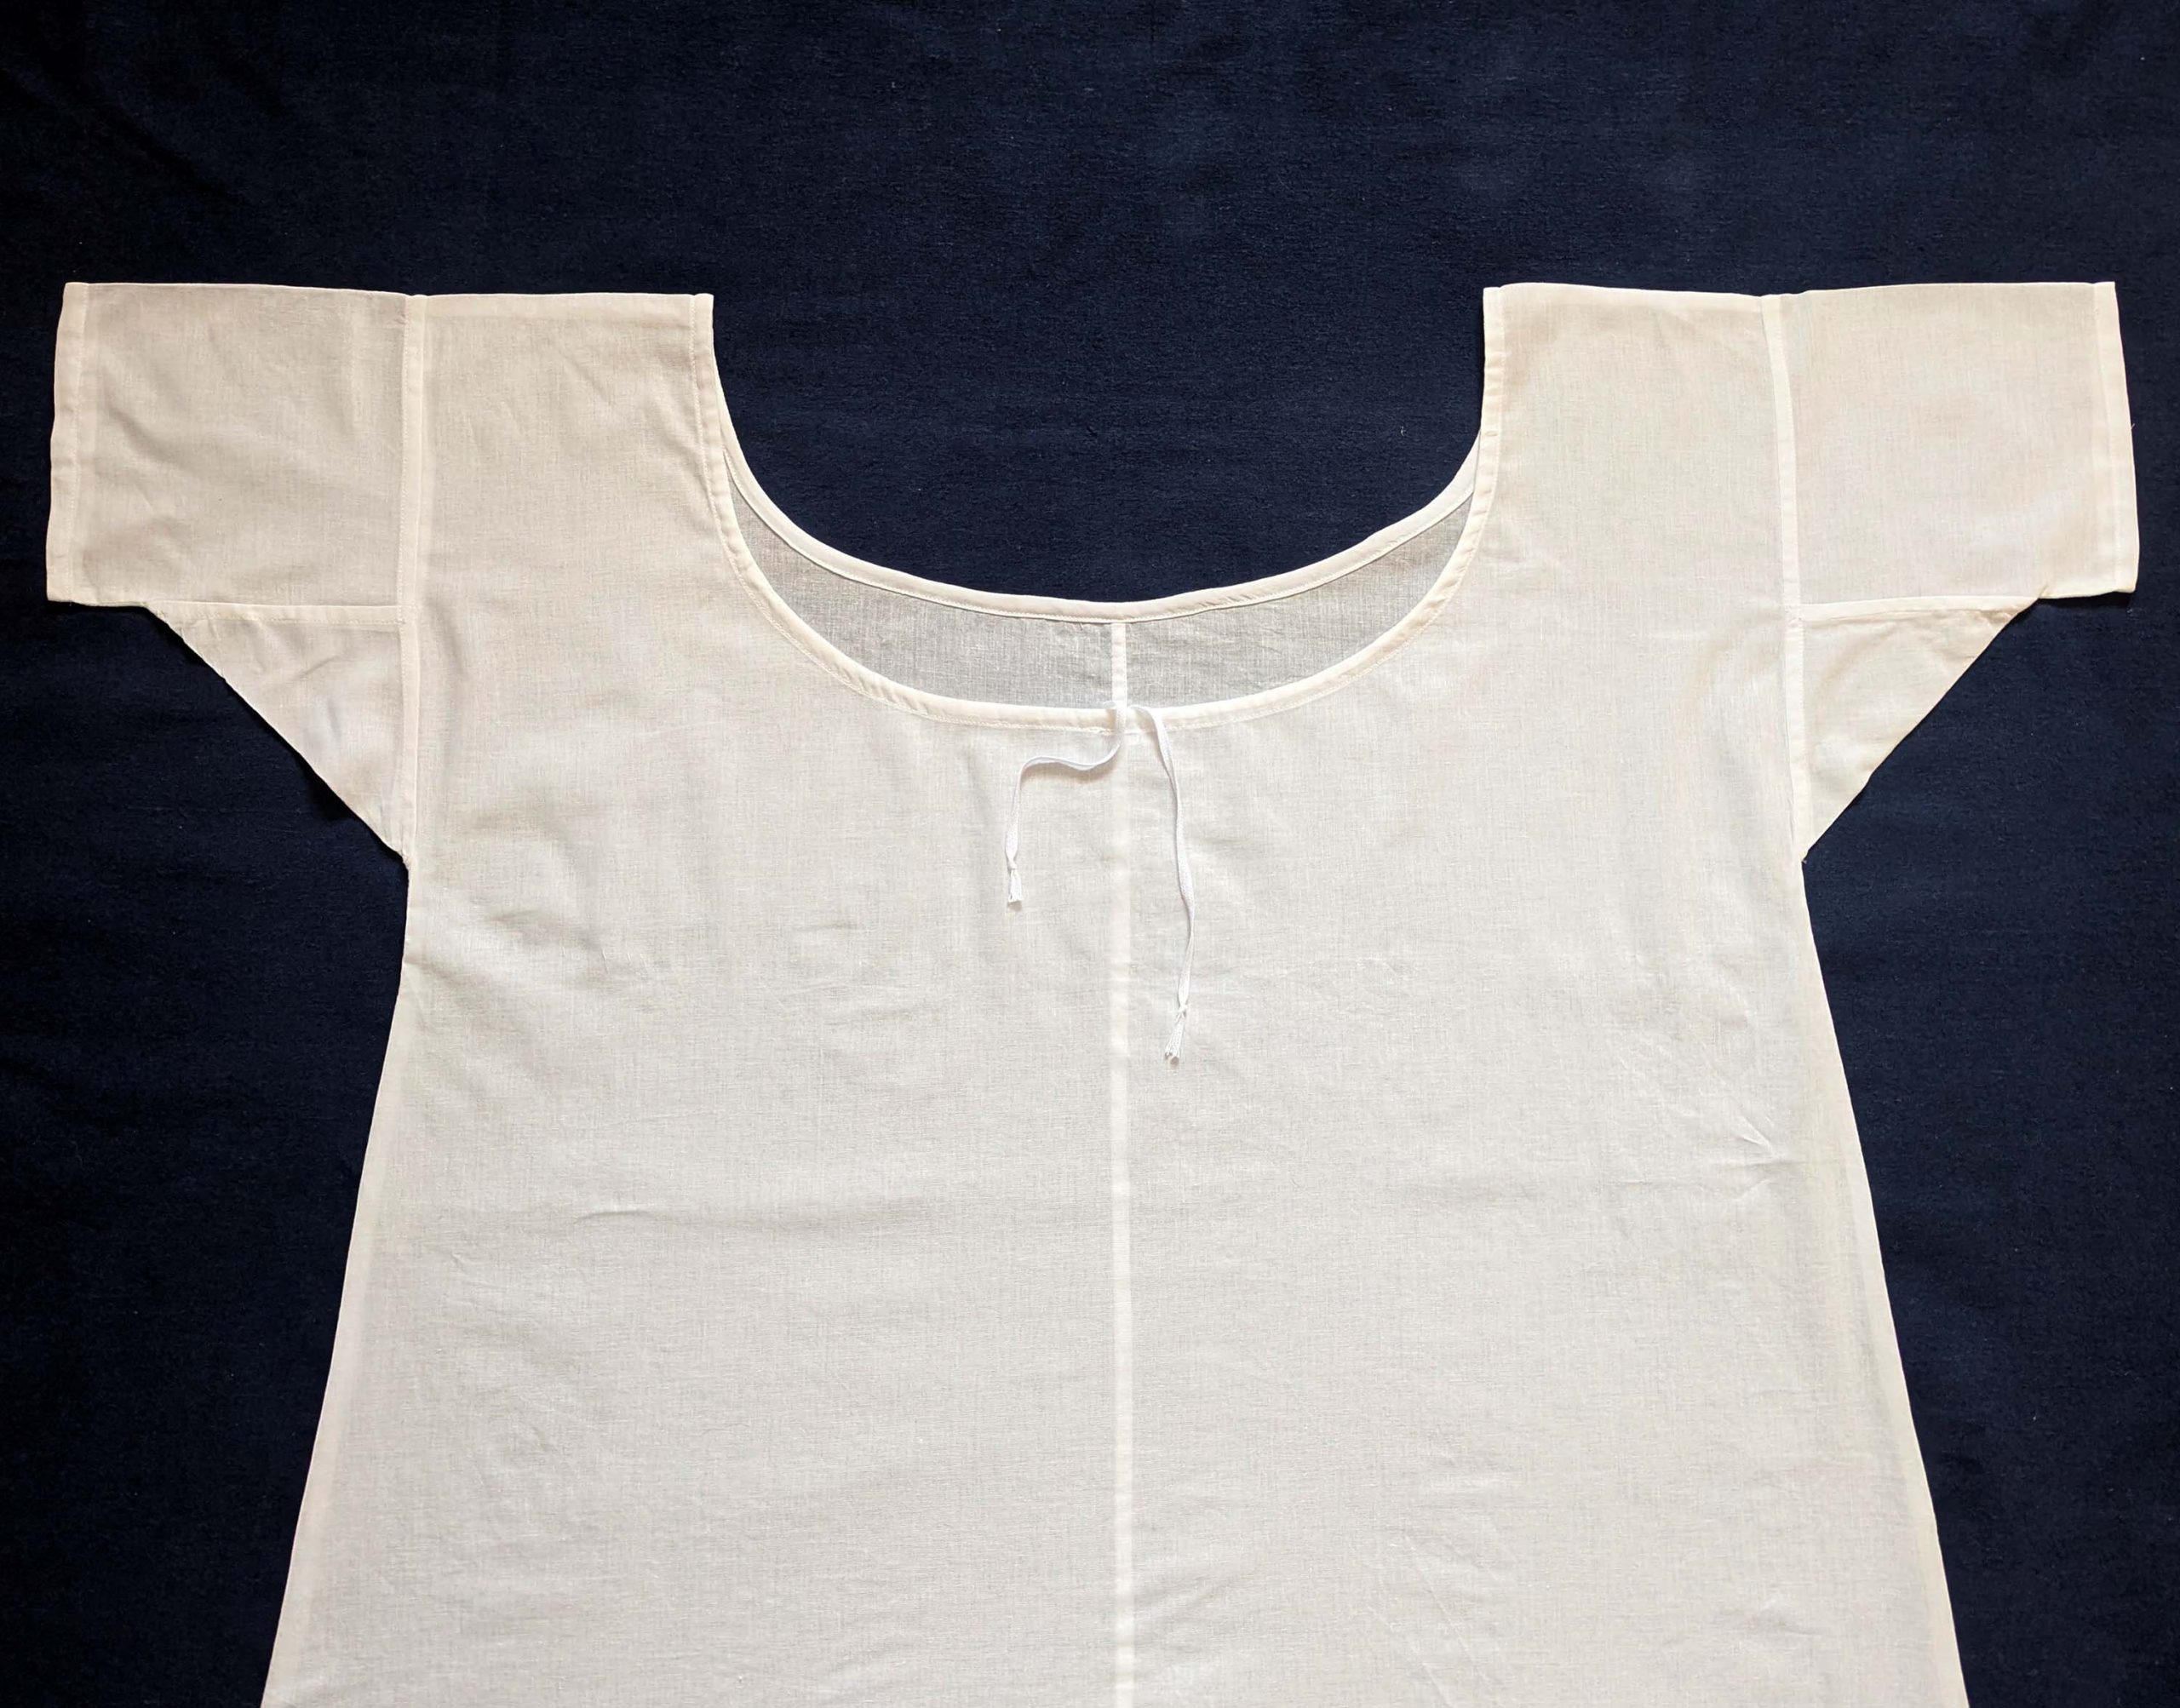
(2) Take the bias tape and line up with the neckline, right sides together. Start and stop at the center front, turning in a narrow seam allowance, and leaving an opening for the drawstrings there.Sew, trim back the seam allowance, and clip at the curves, optionally understitch. Fold the bias tape with the wrong sides matching against the chemise, rolling the seamline slightly out of sight.Turn in the loose edge of the bias tape, creating a narrow tunnel. Fell or edge stitch in place. Finish the armholes with bias tape as well, when sewing the chemise without sleeves.
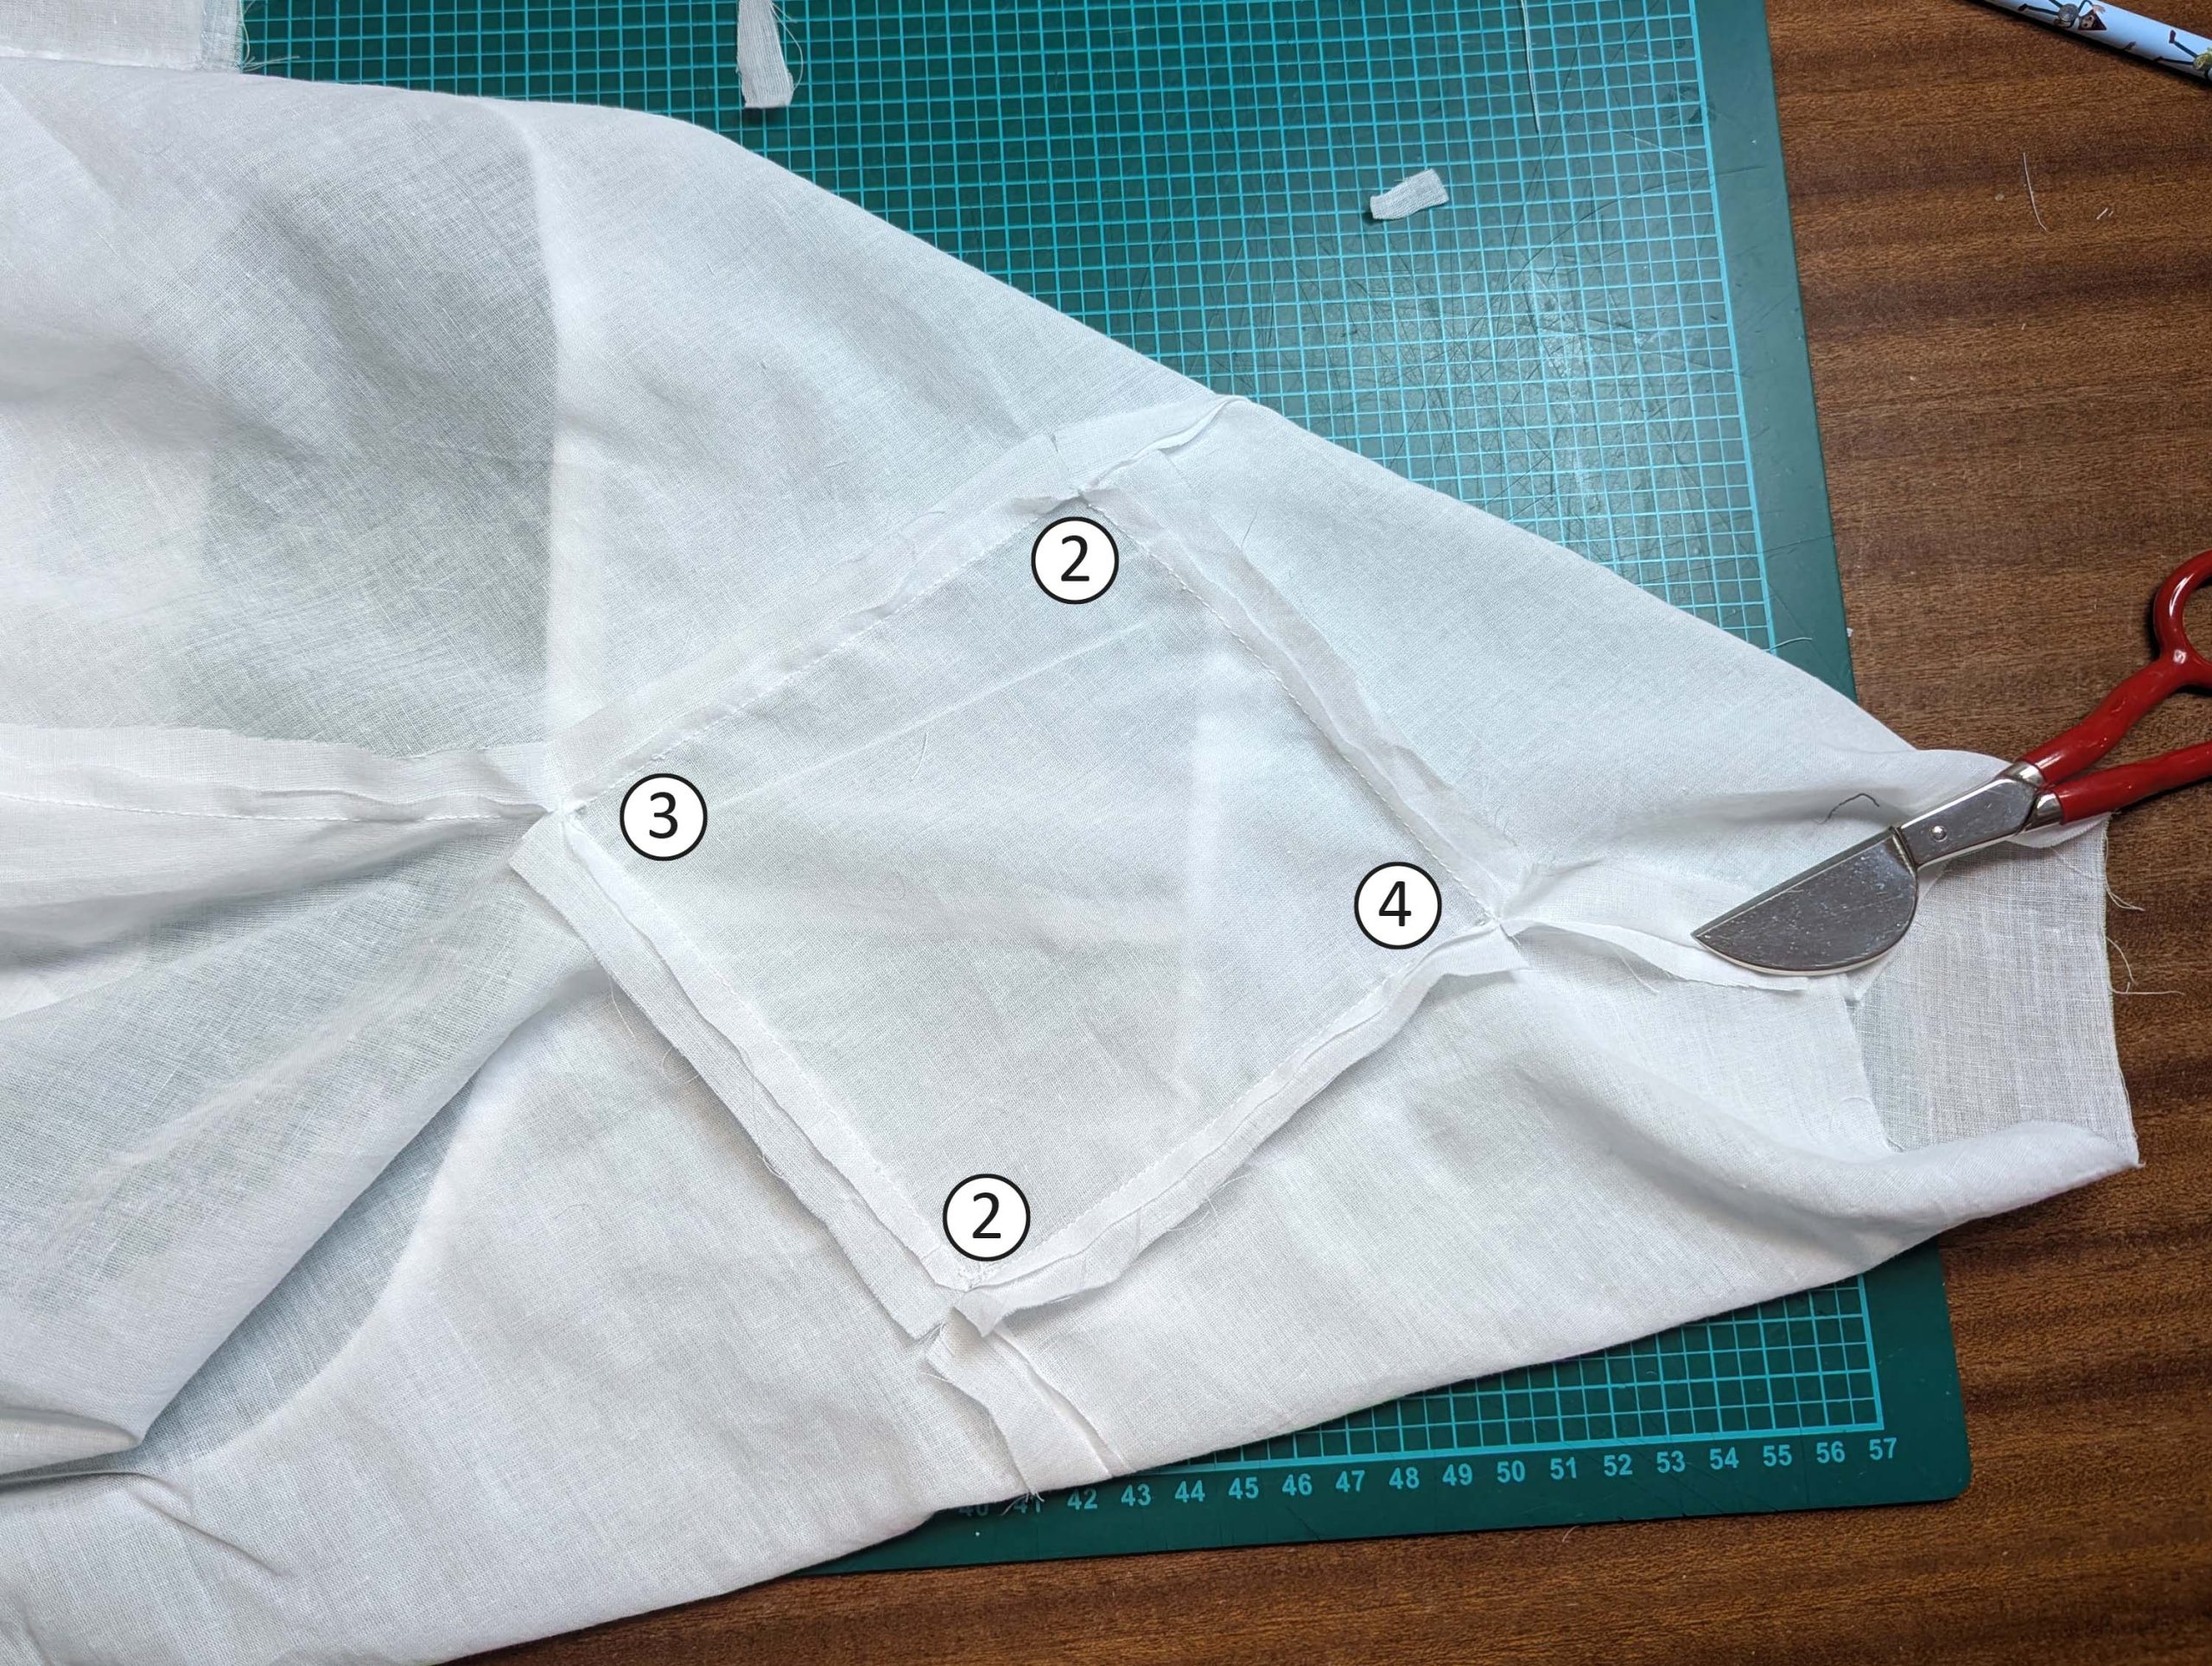
(3) Sew the sleeves to the bodice, right sides together, start and stop exactly at the marks. Sew the sleeve and side seams, right sides together, stopping exactly at the marks, leaving an opening for the gussets.
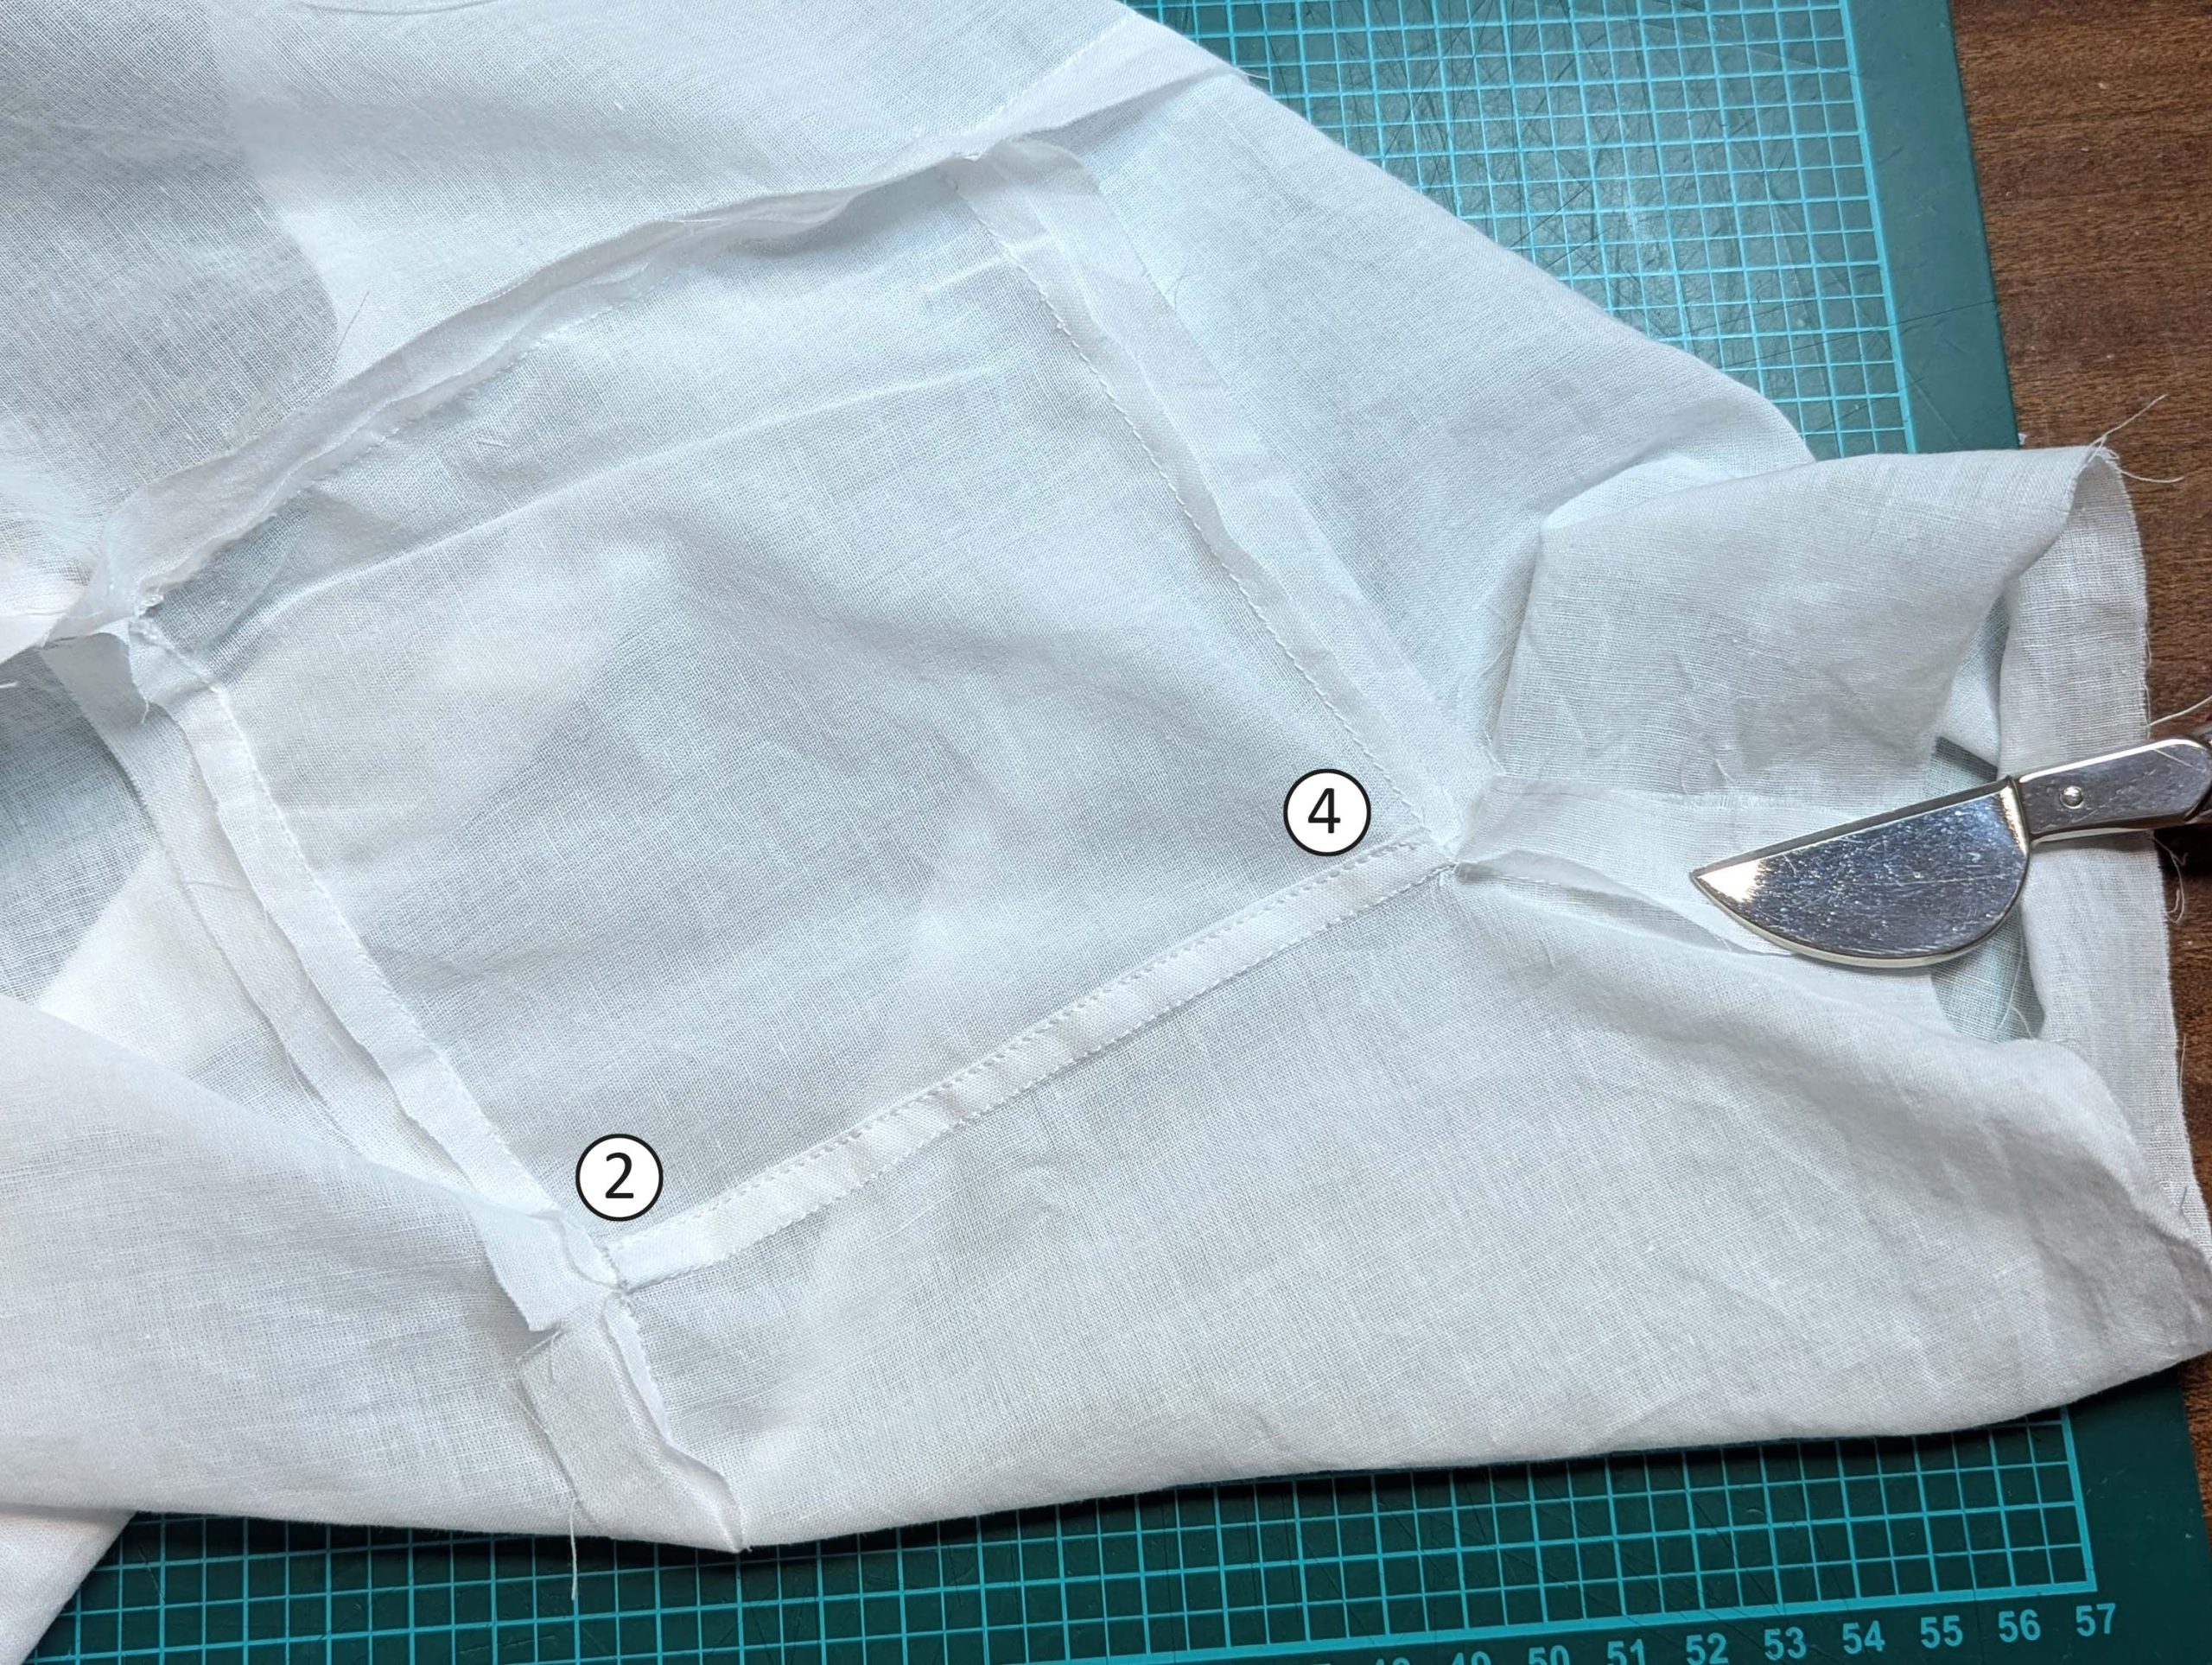
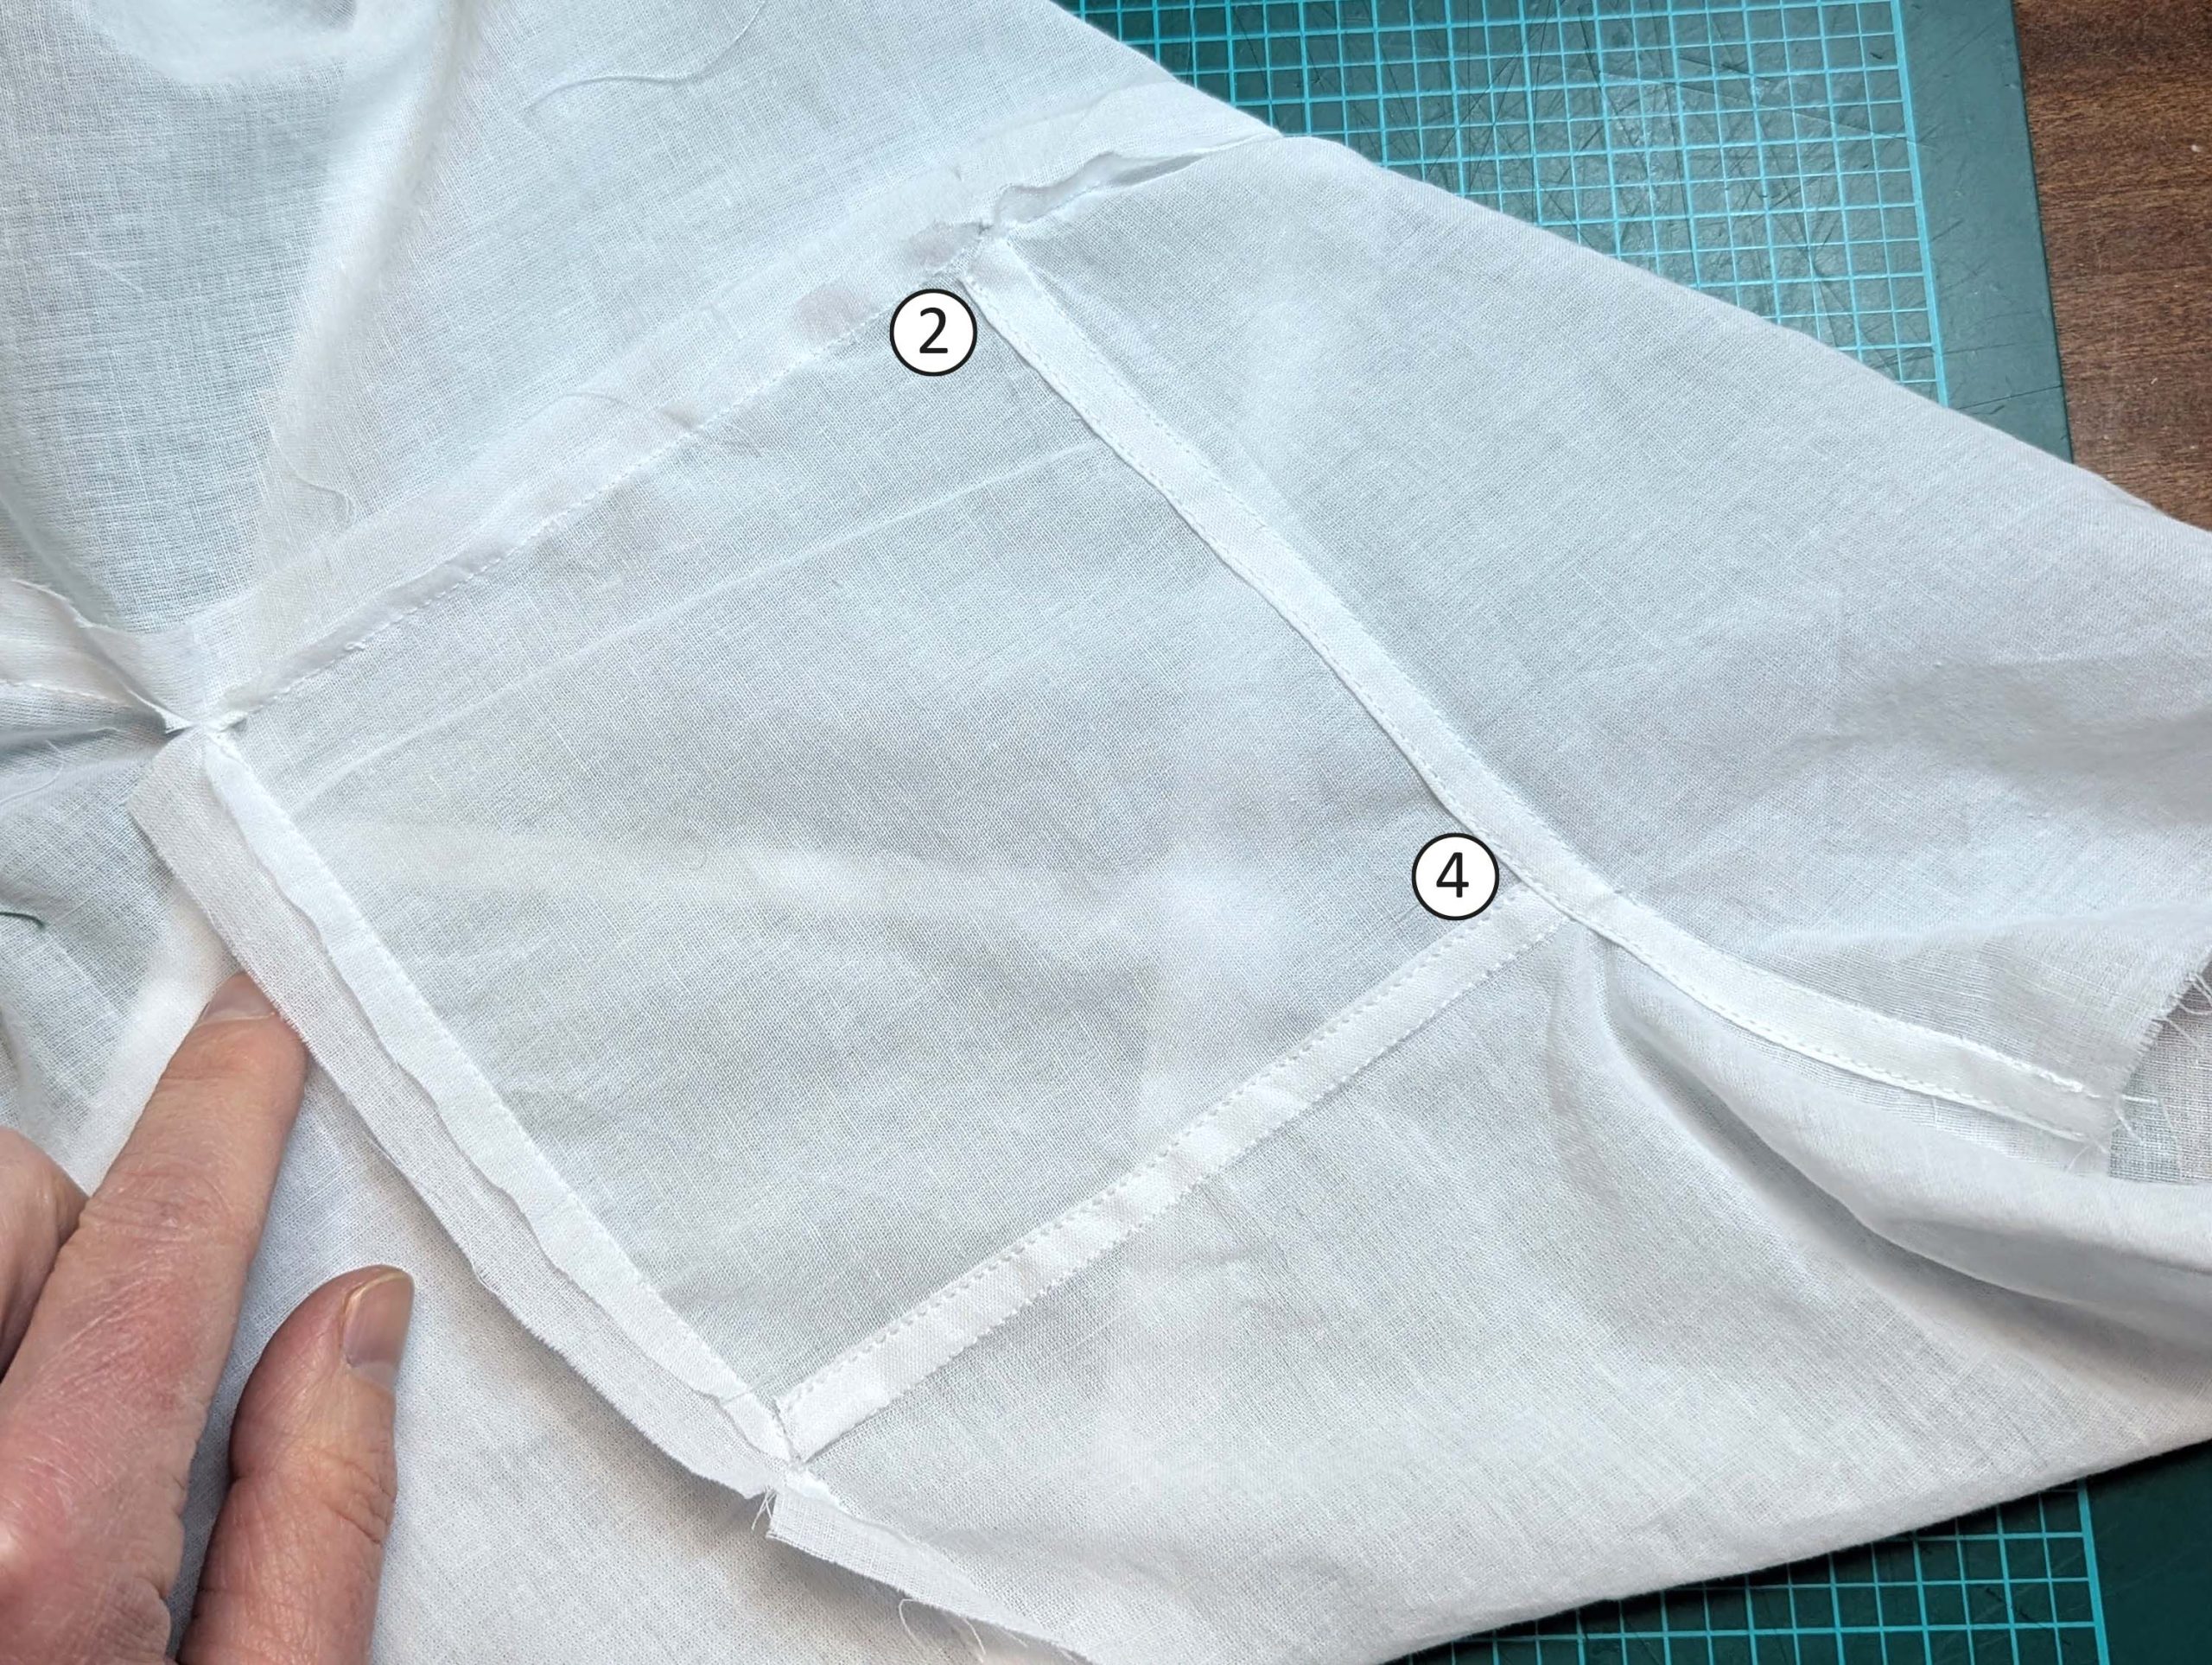
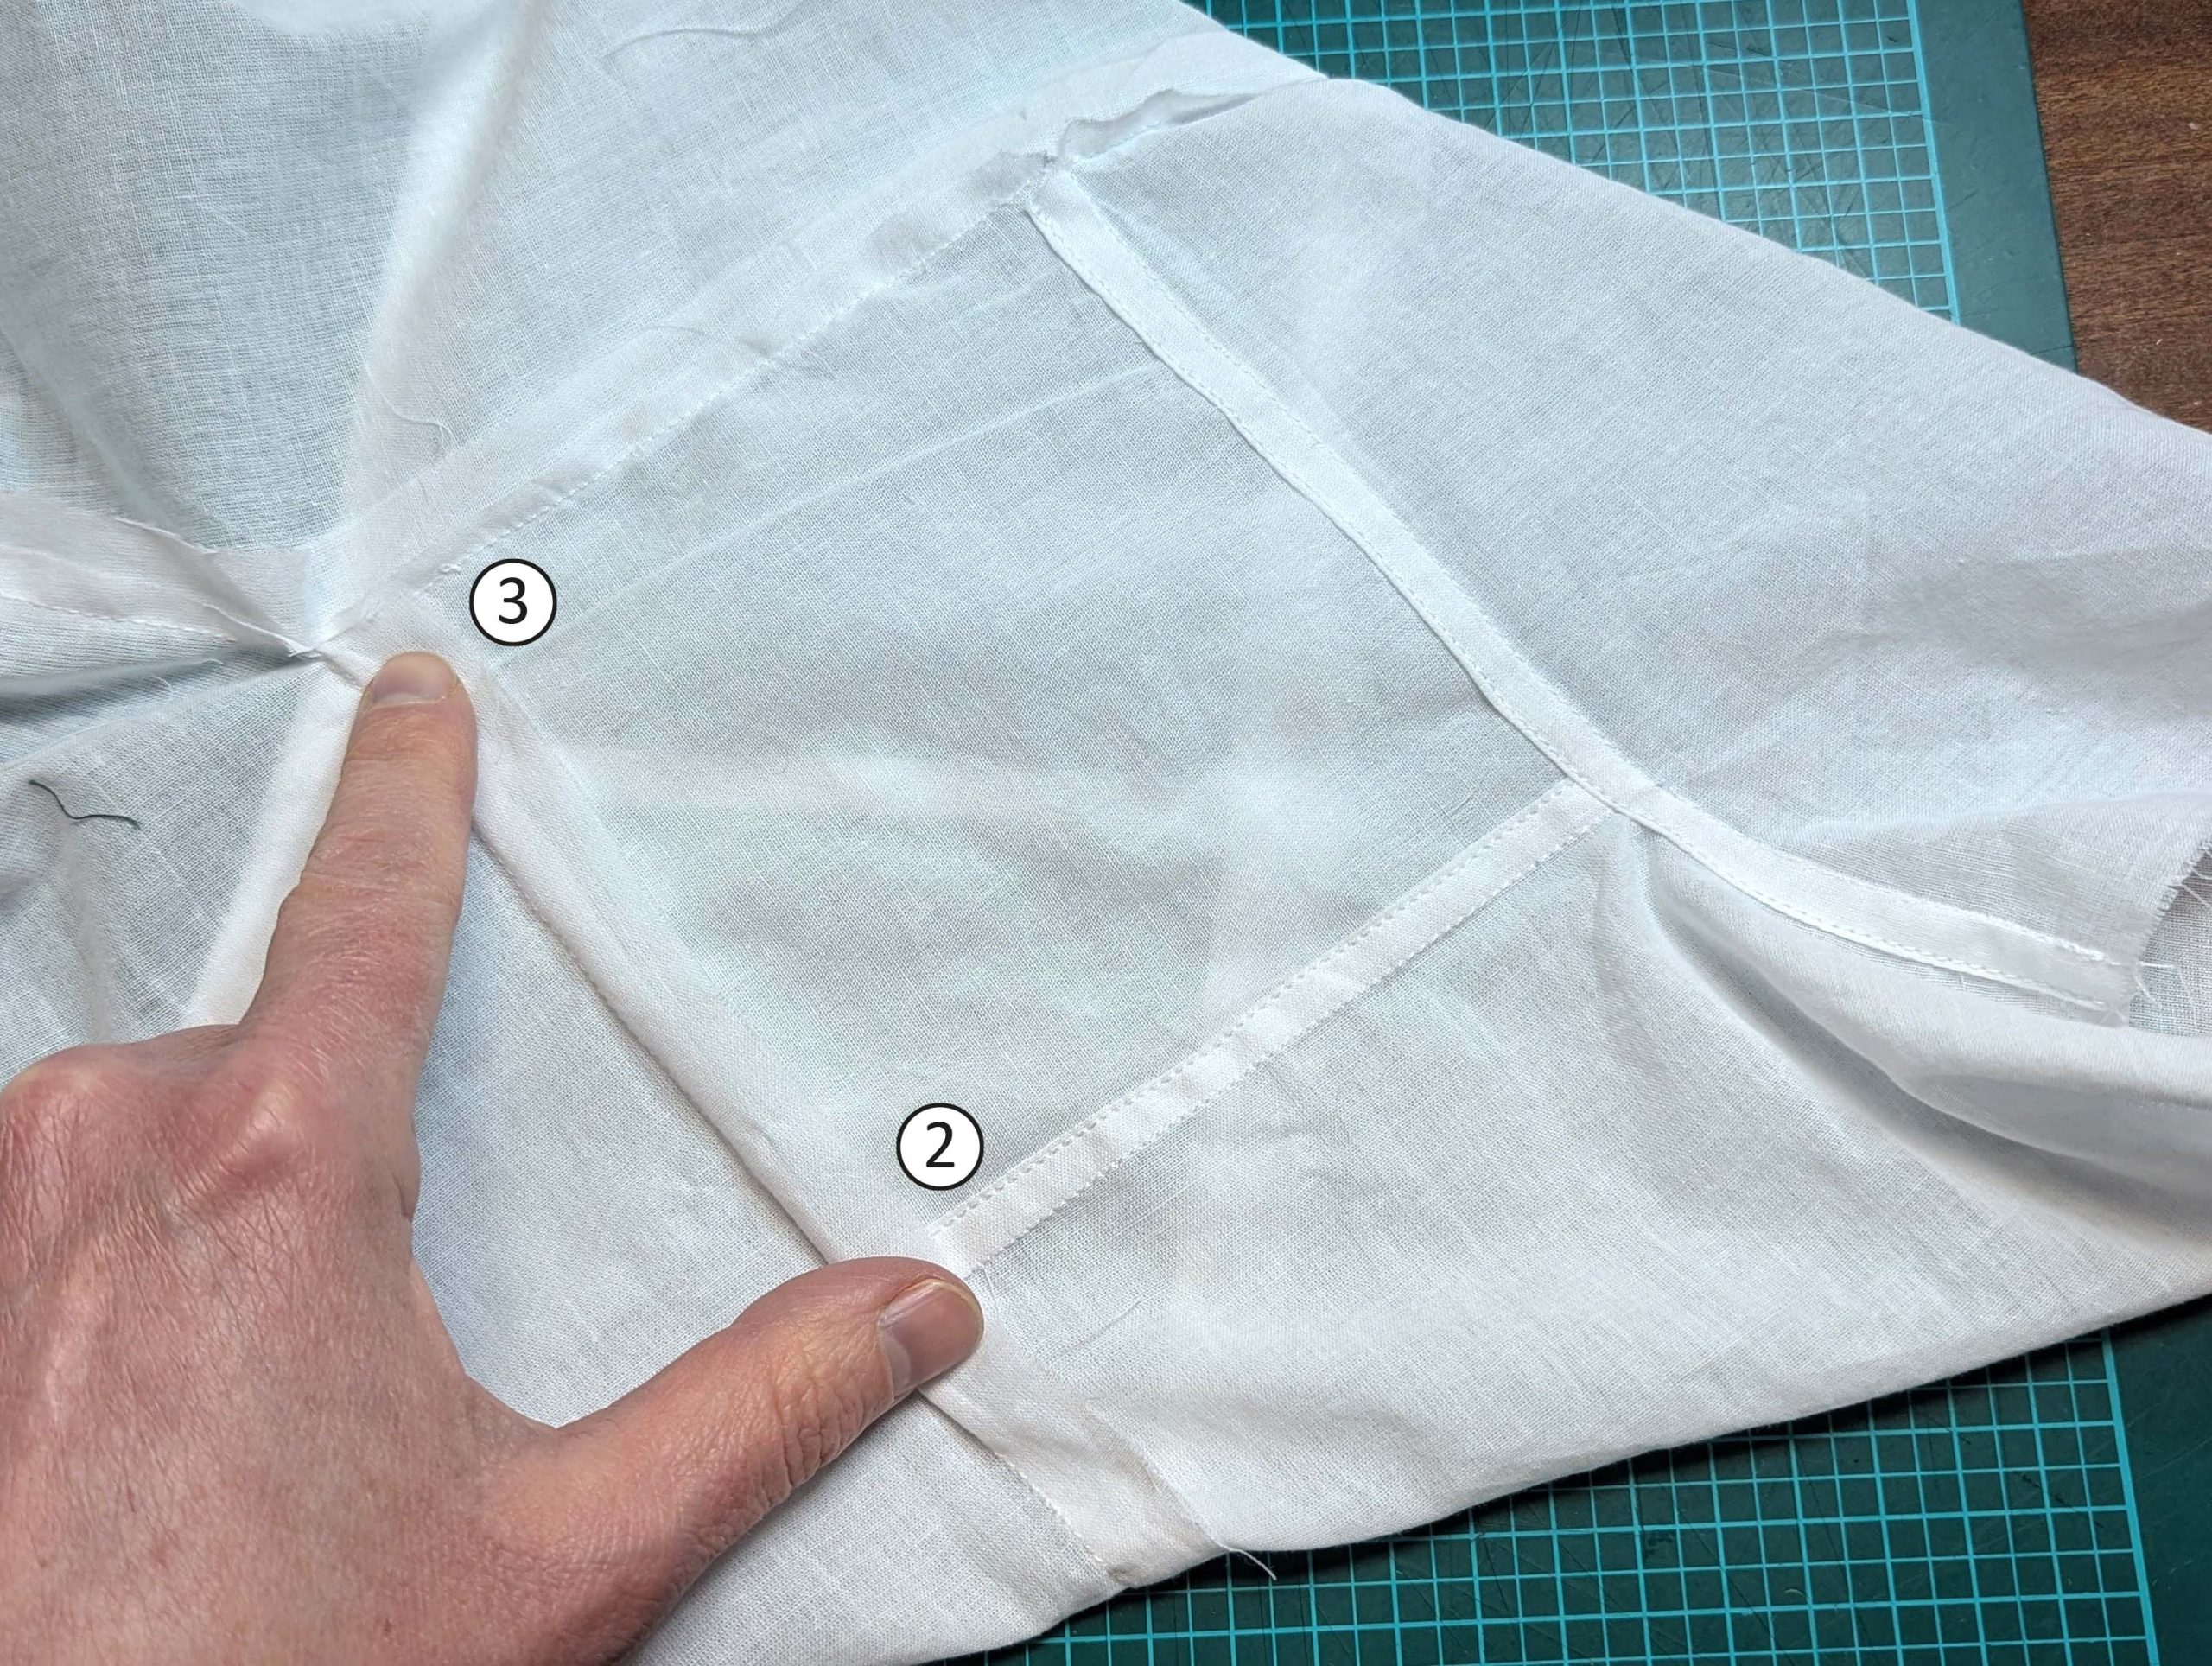
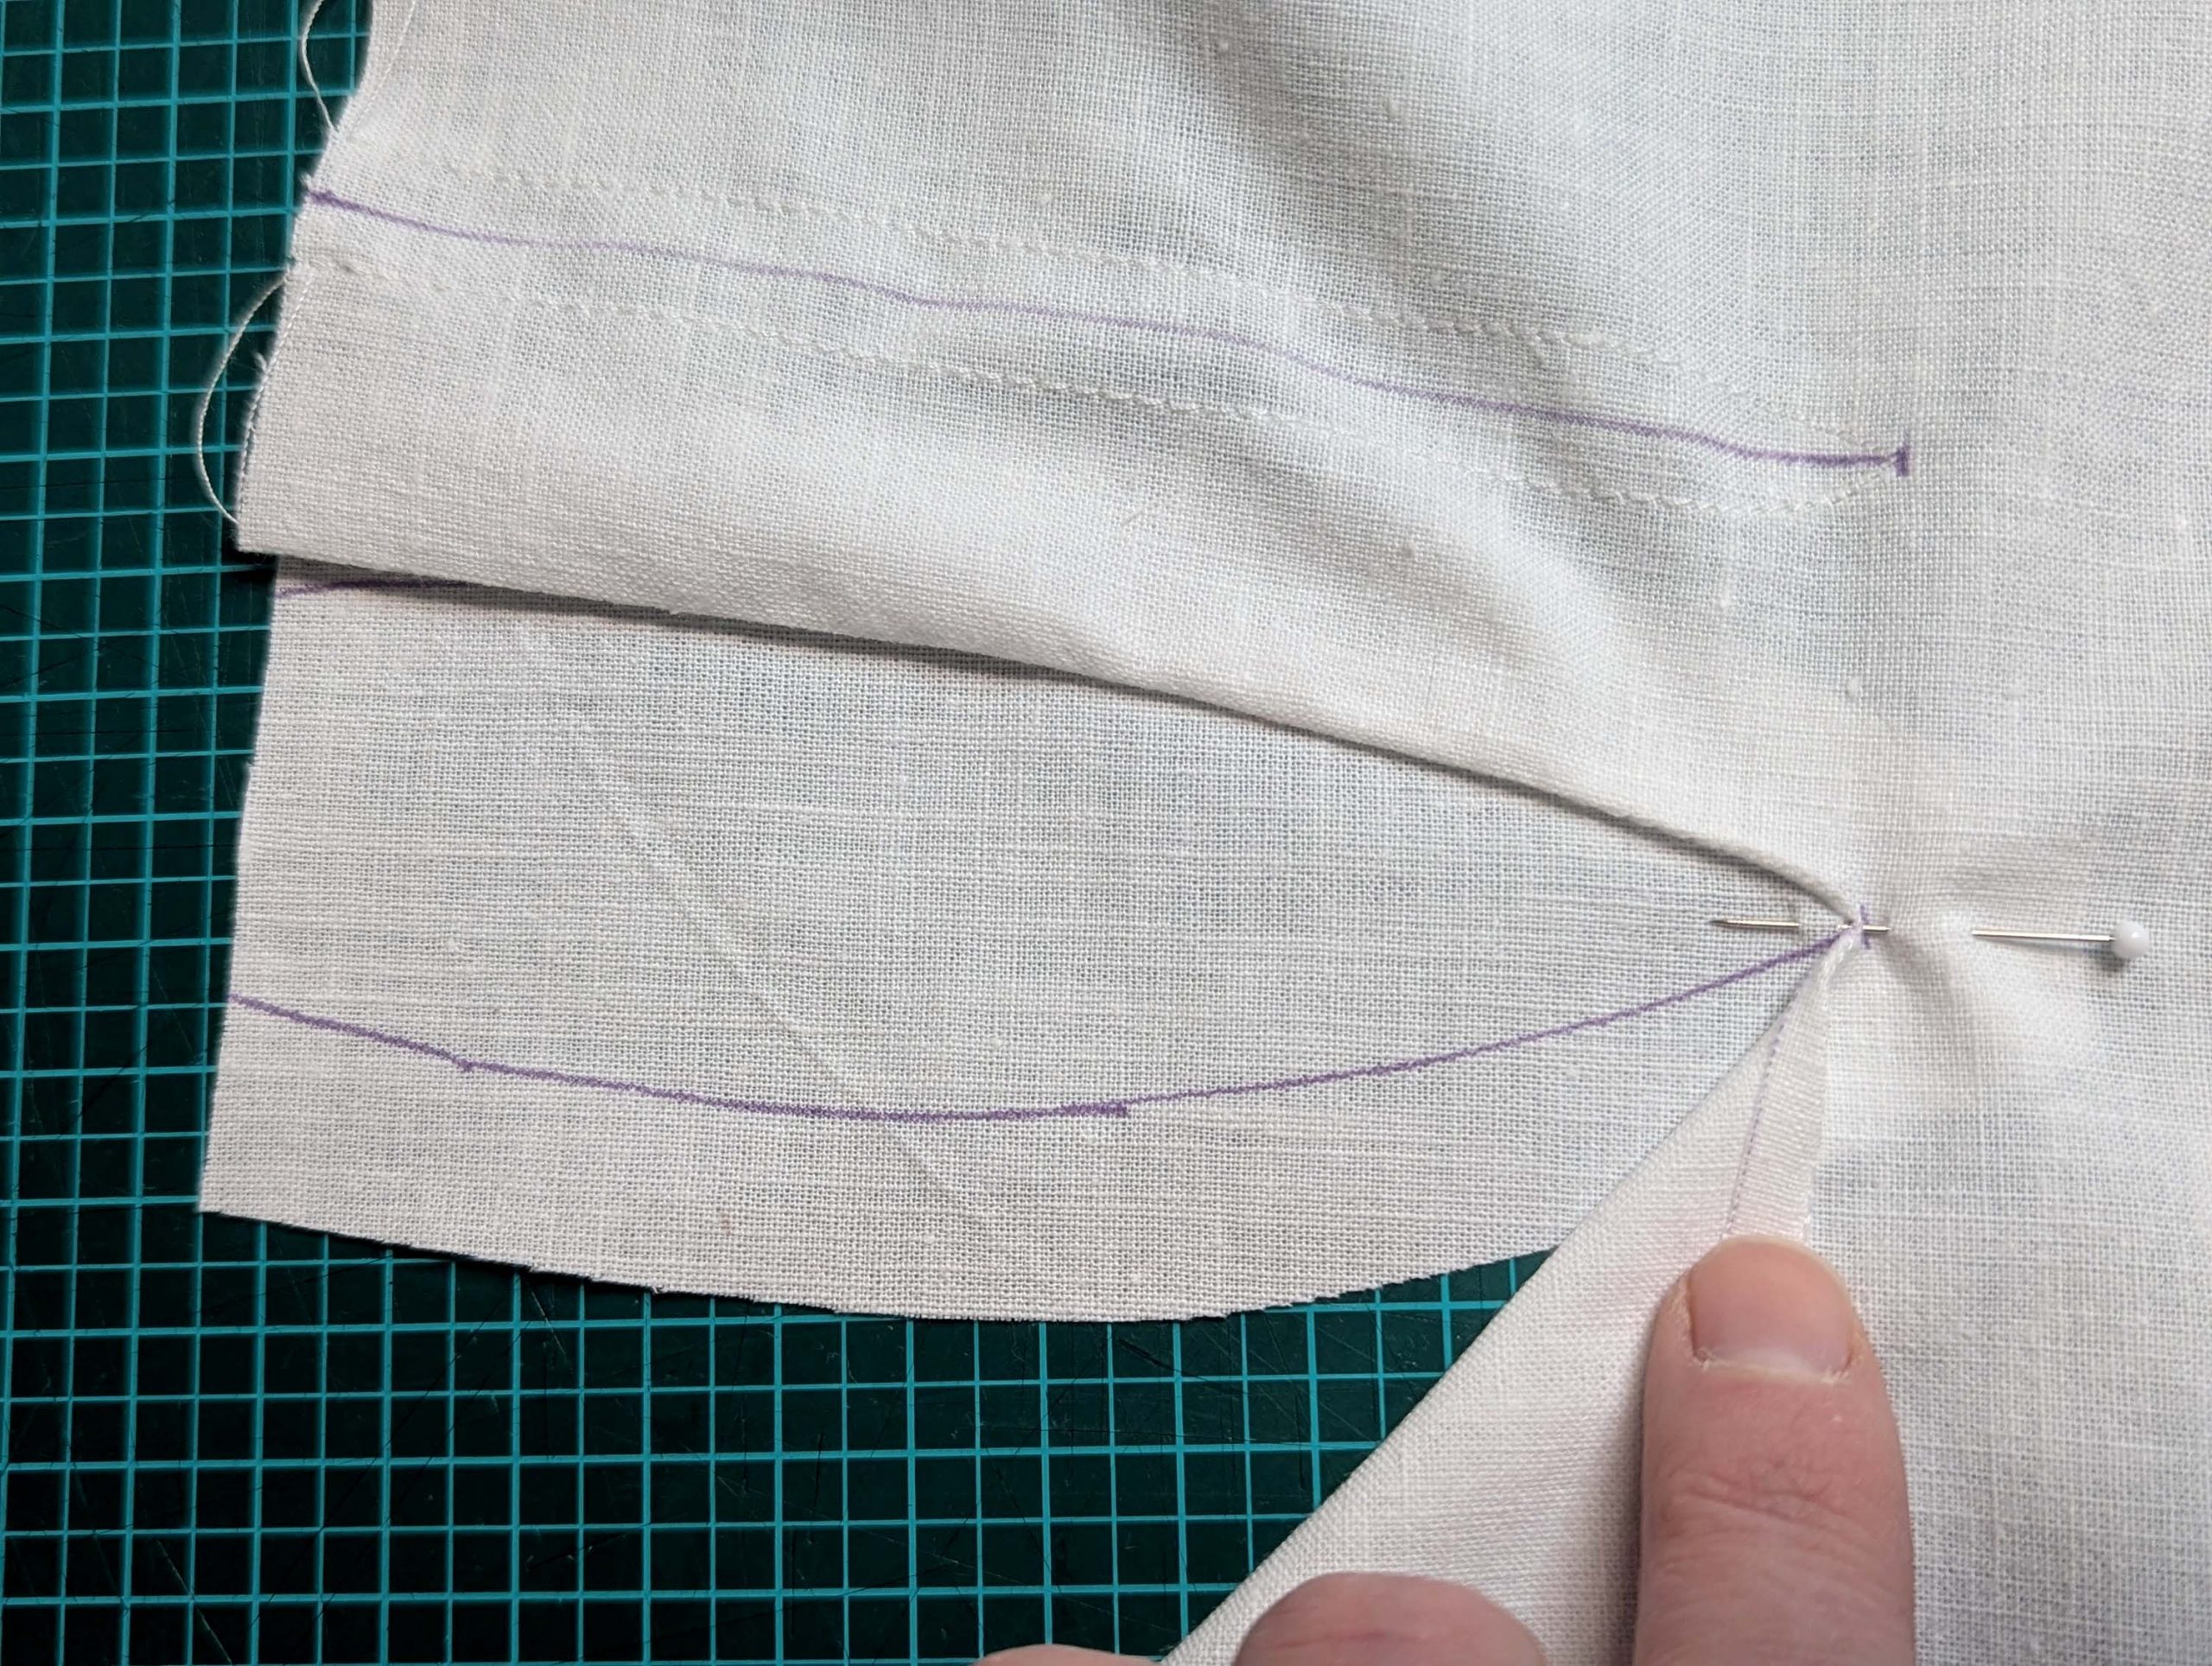
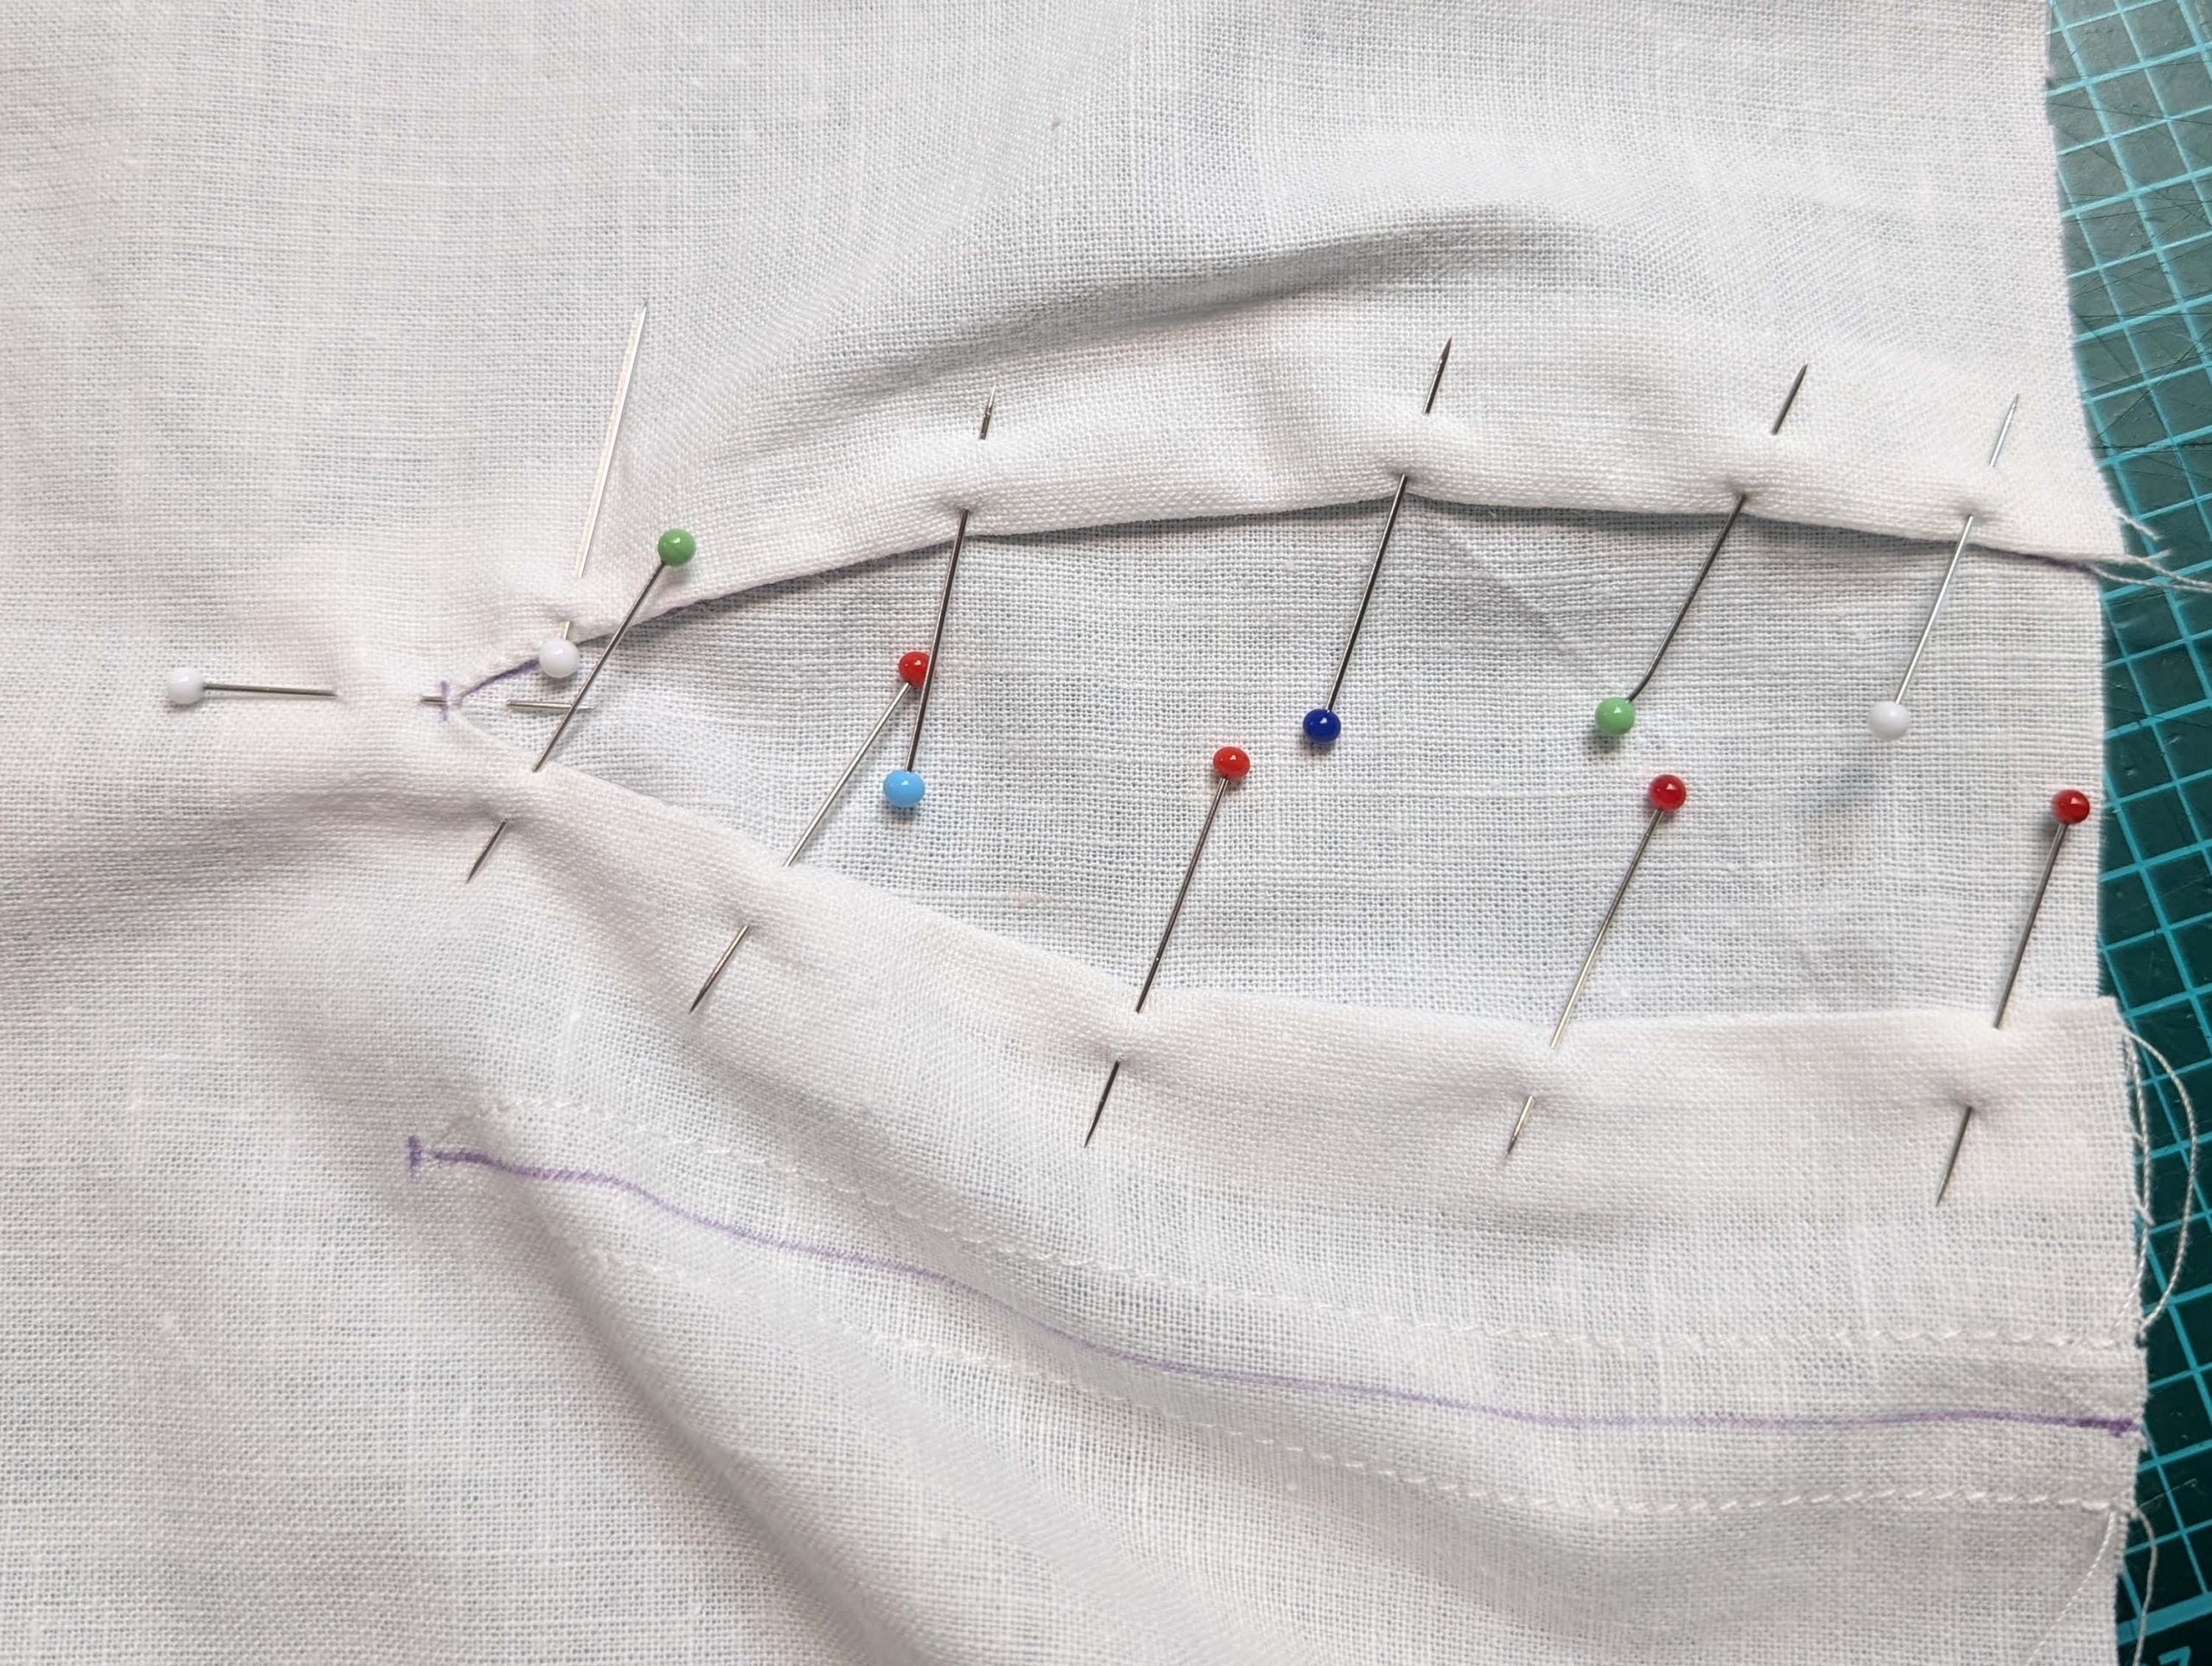
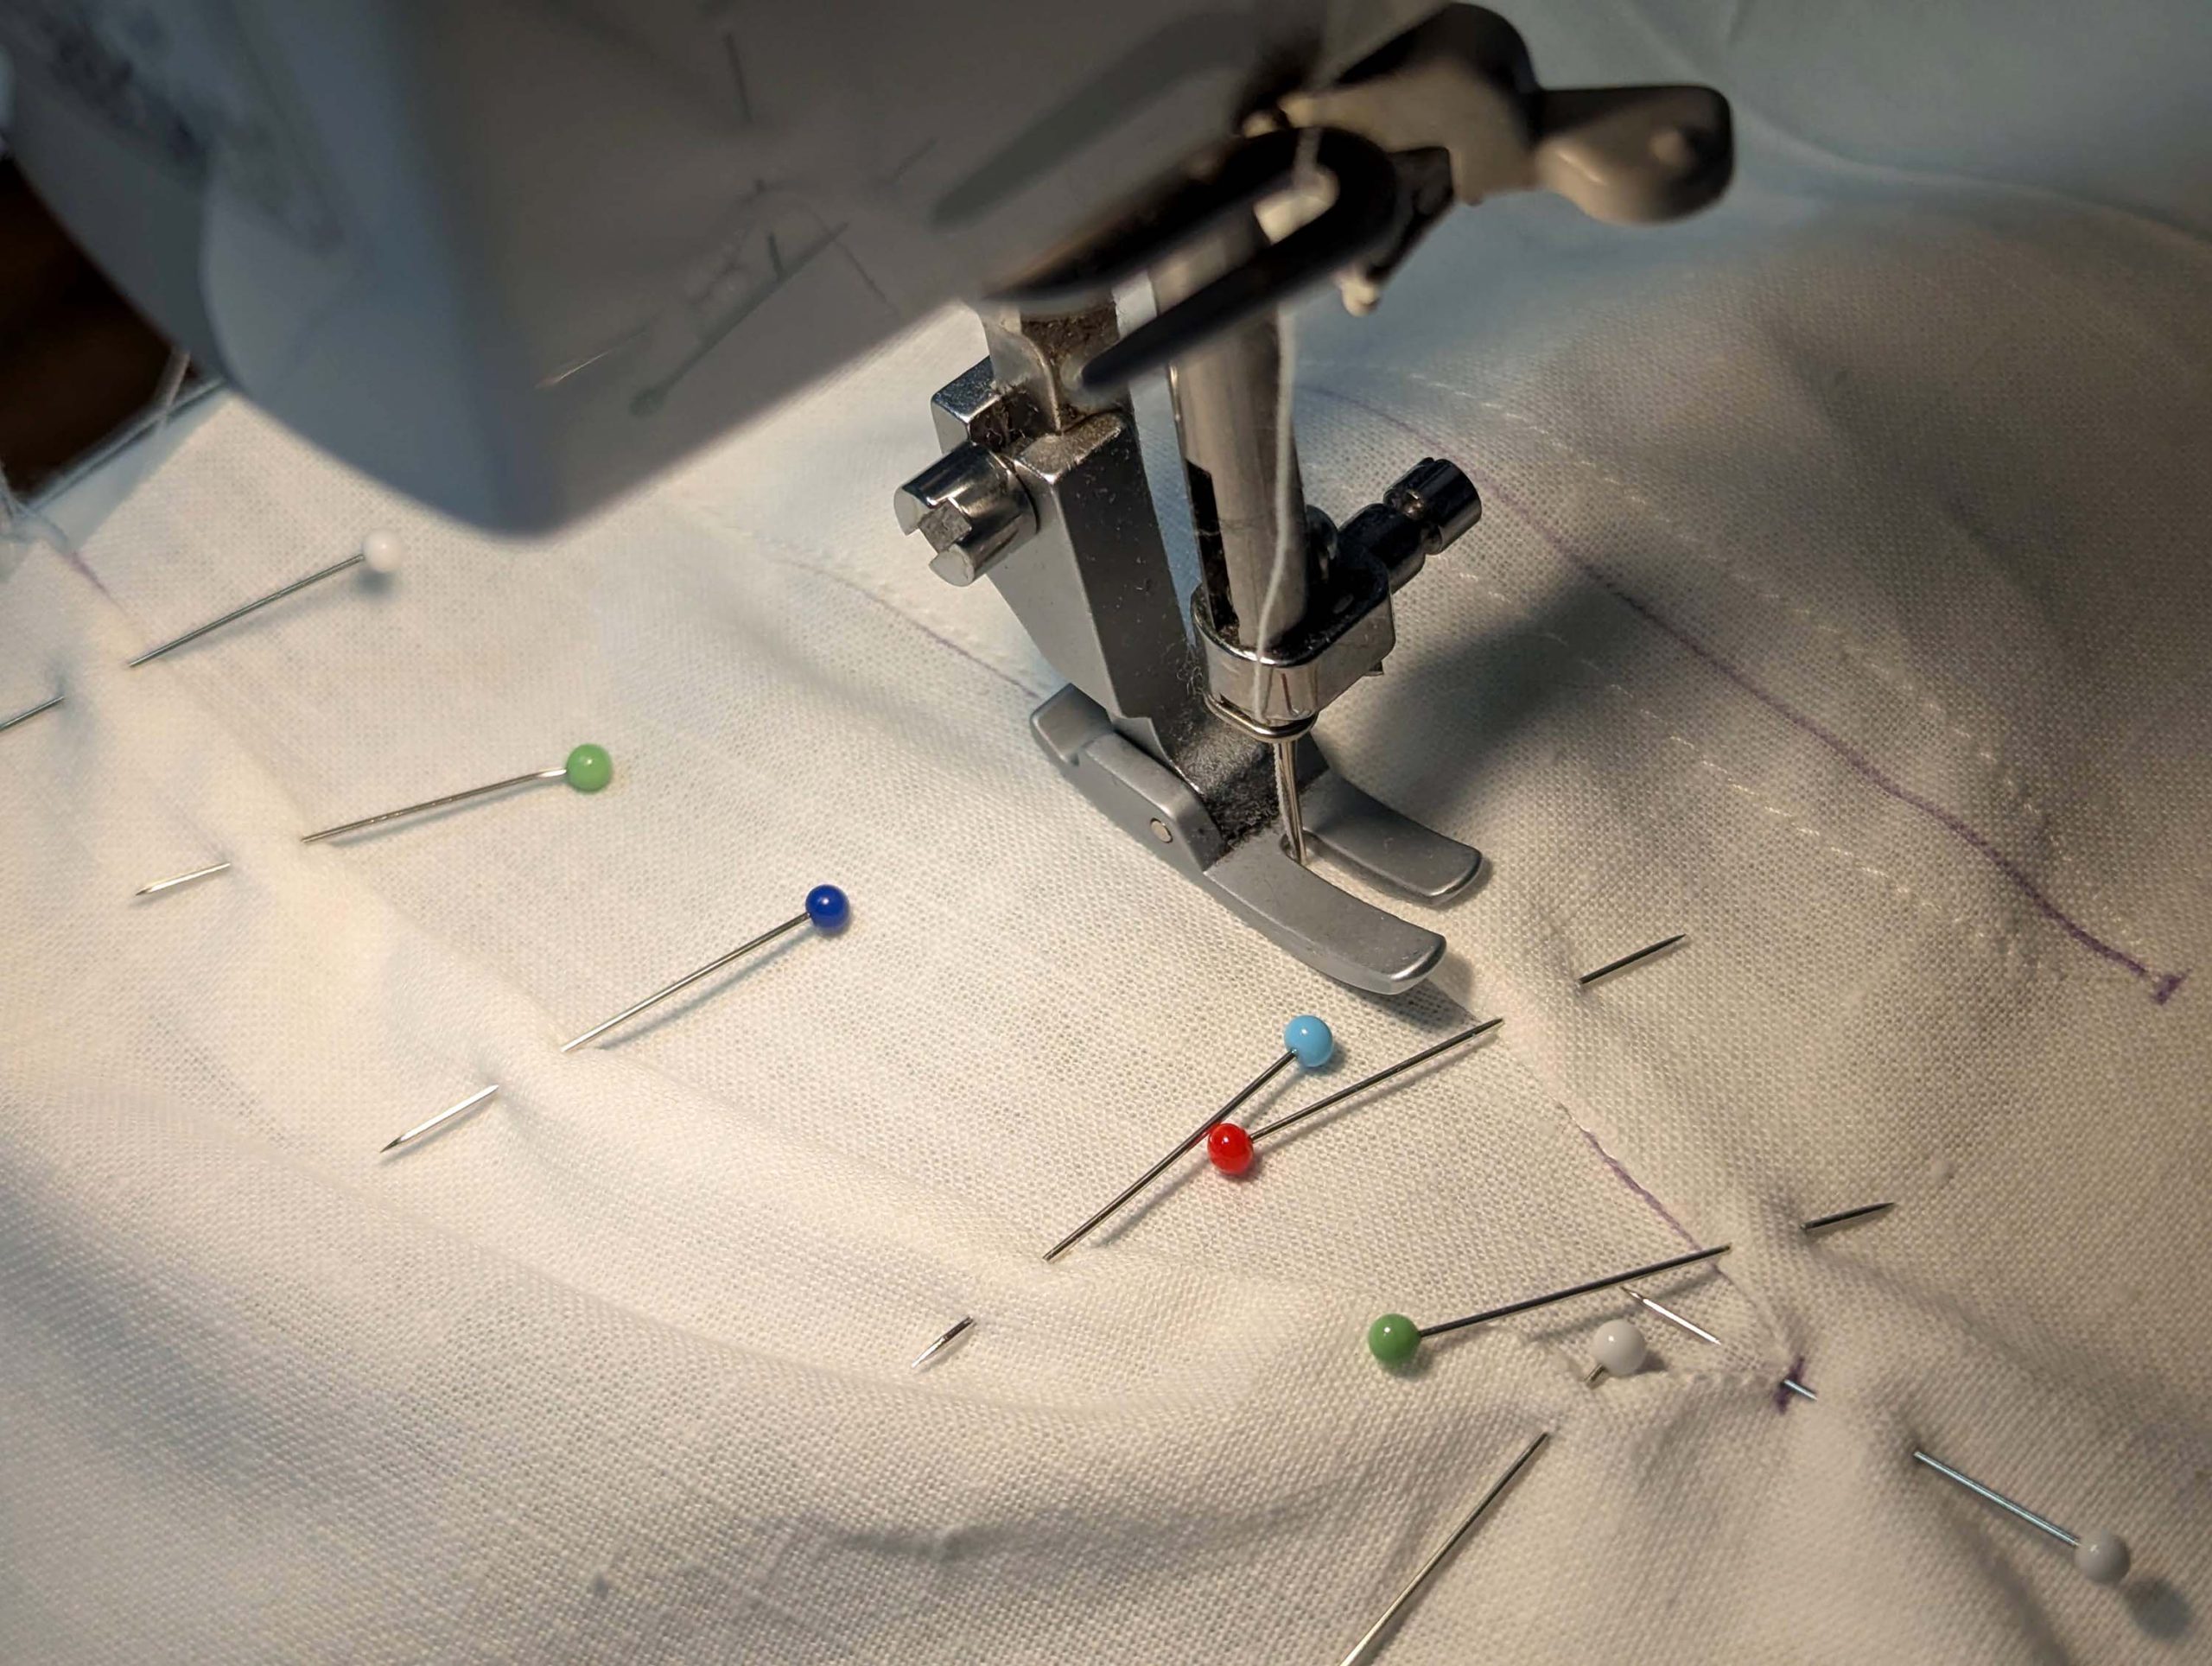
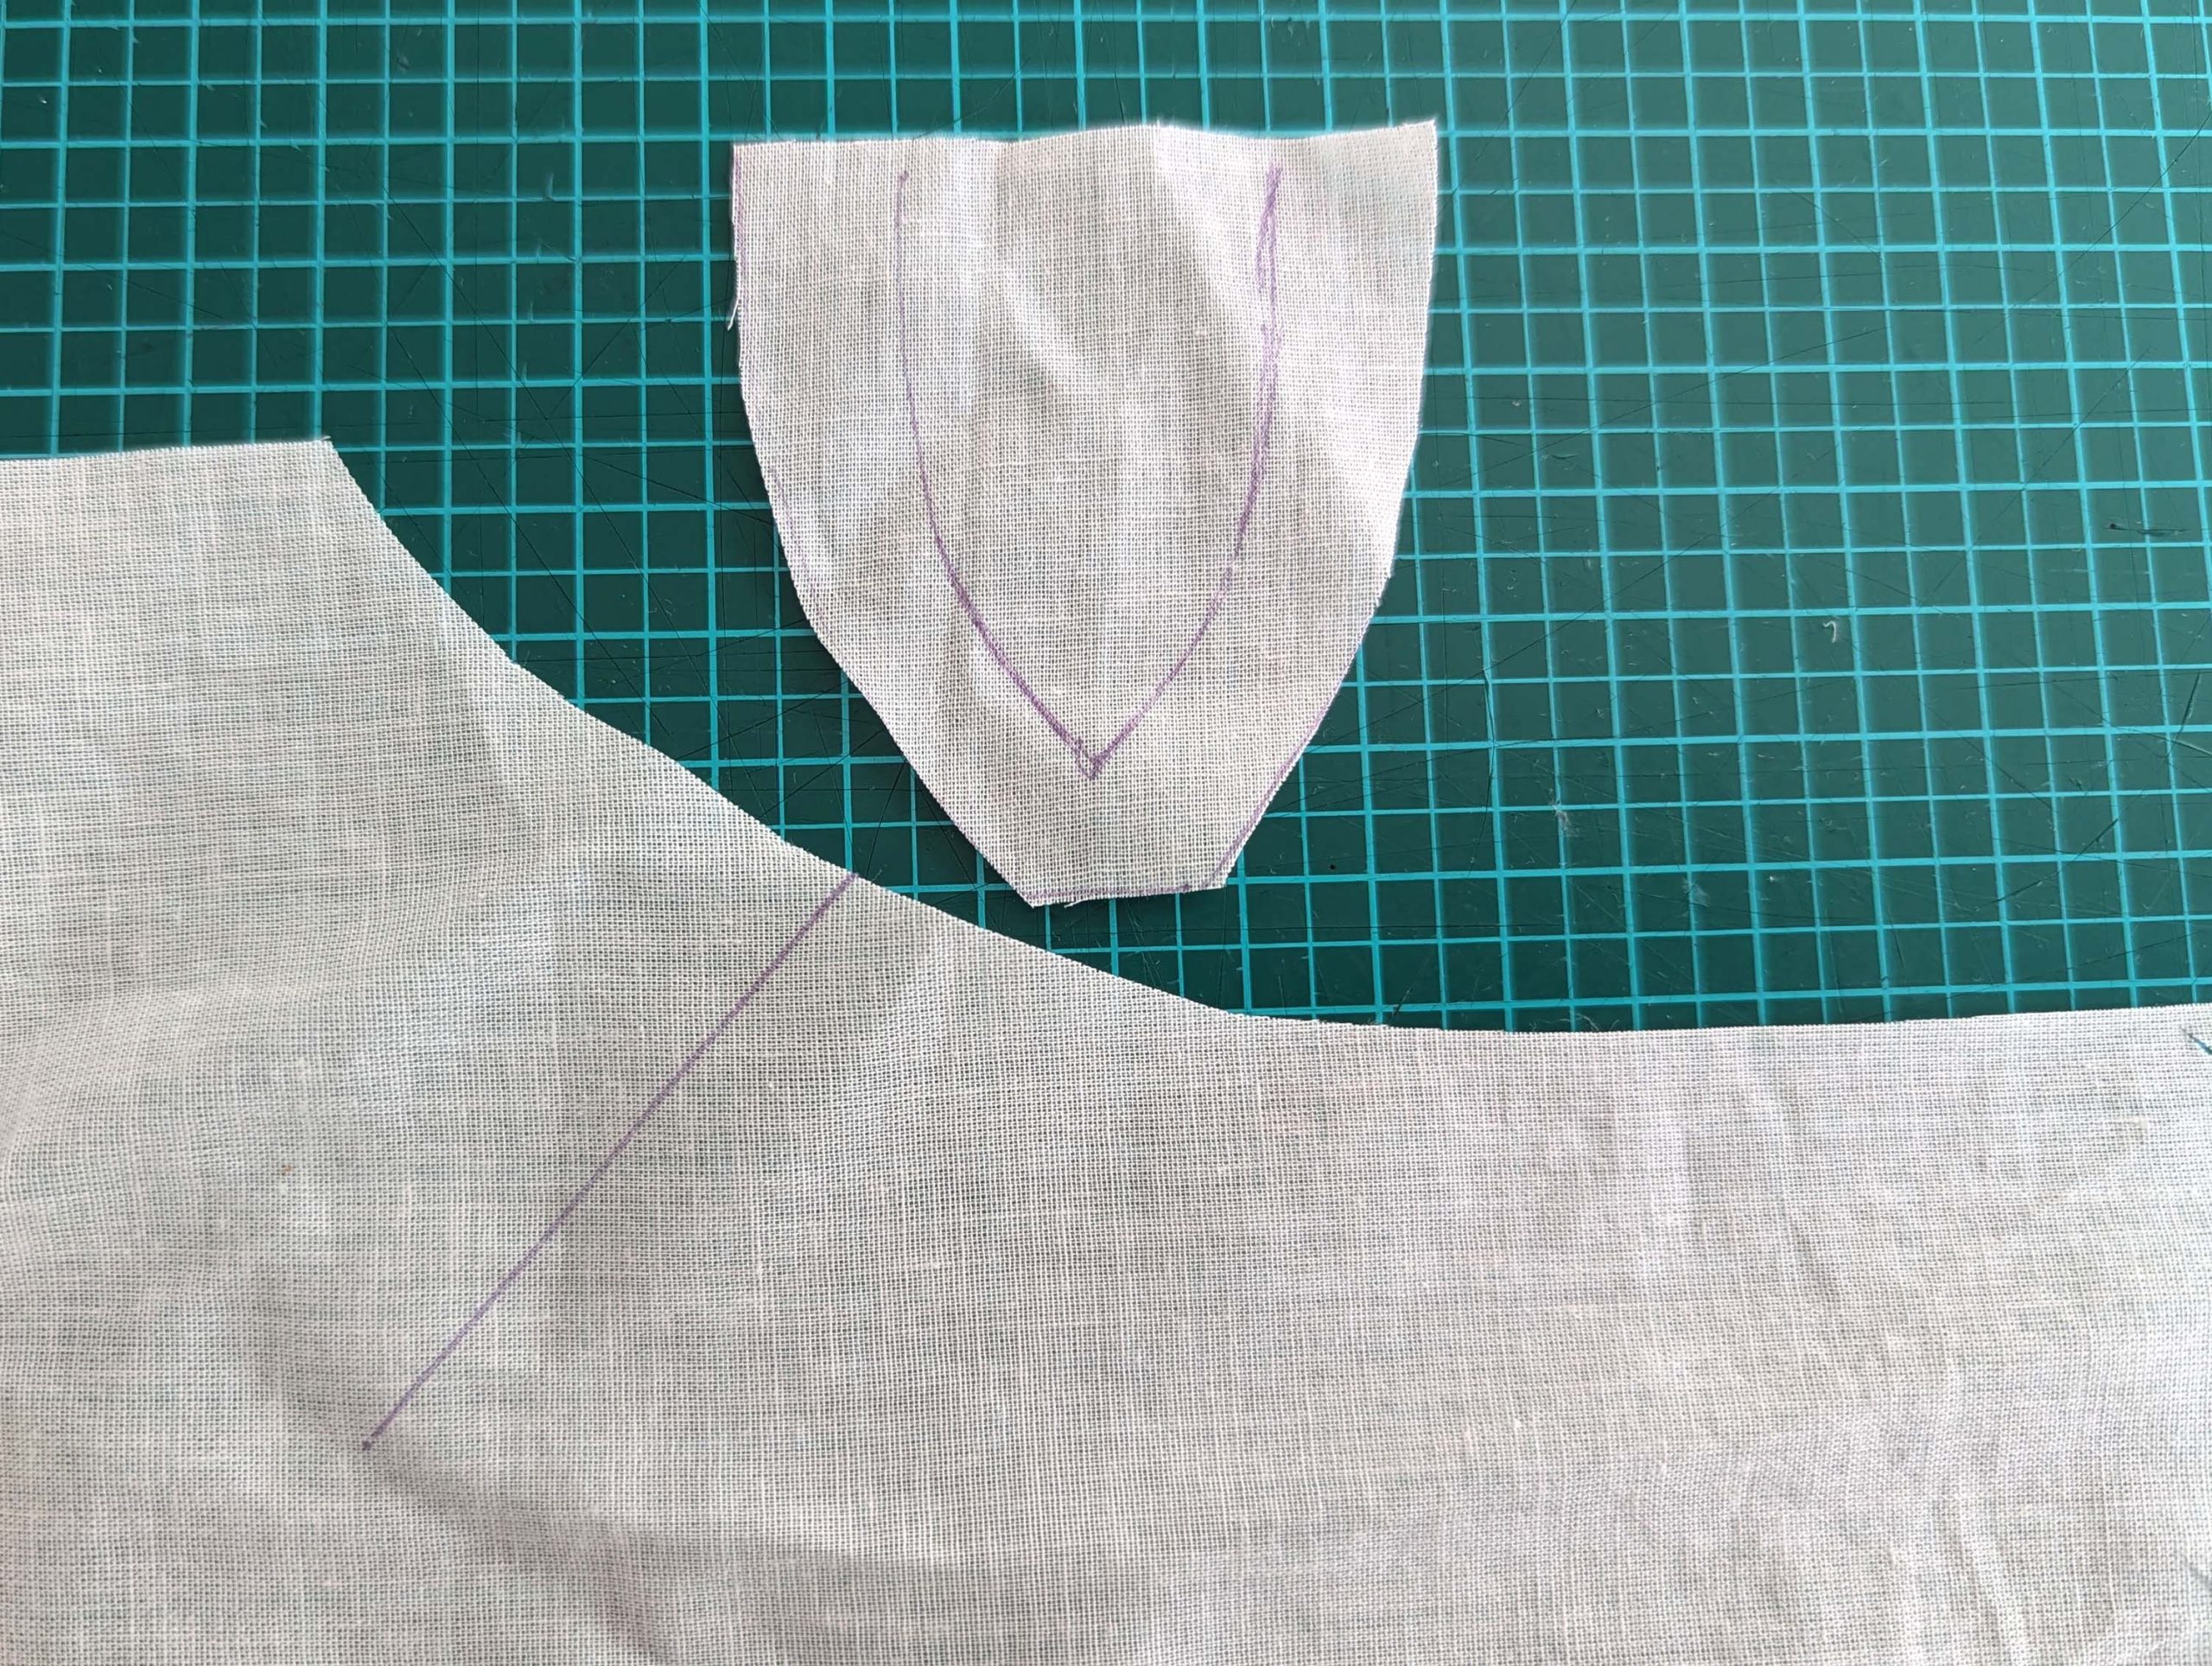
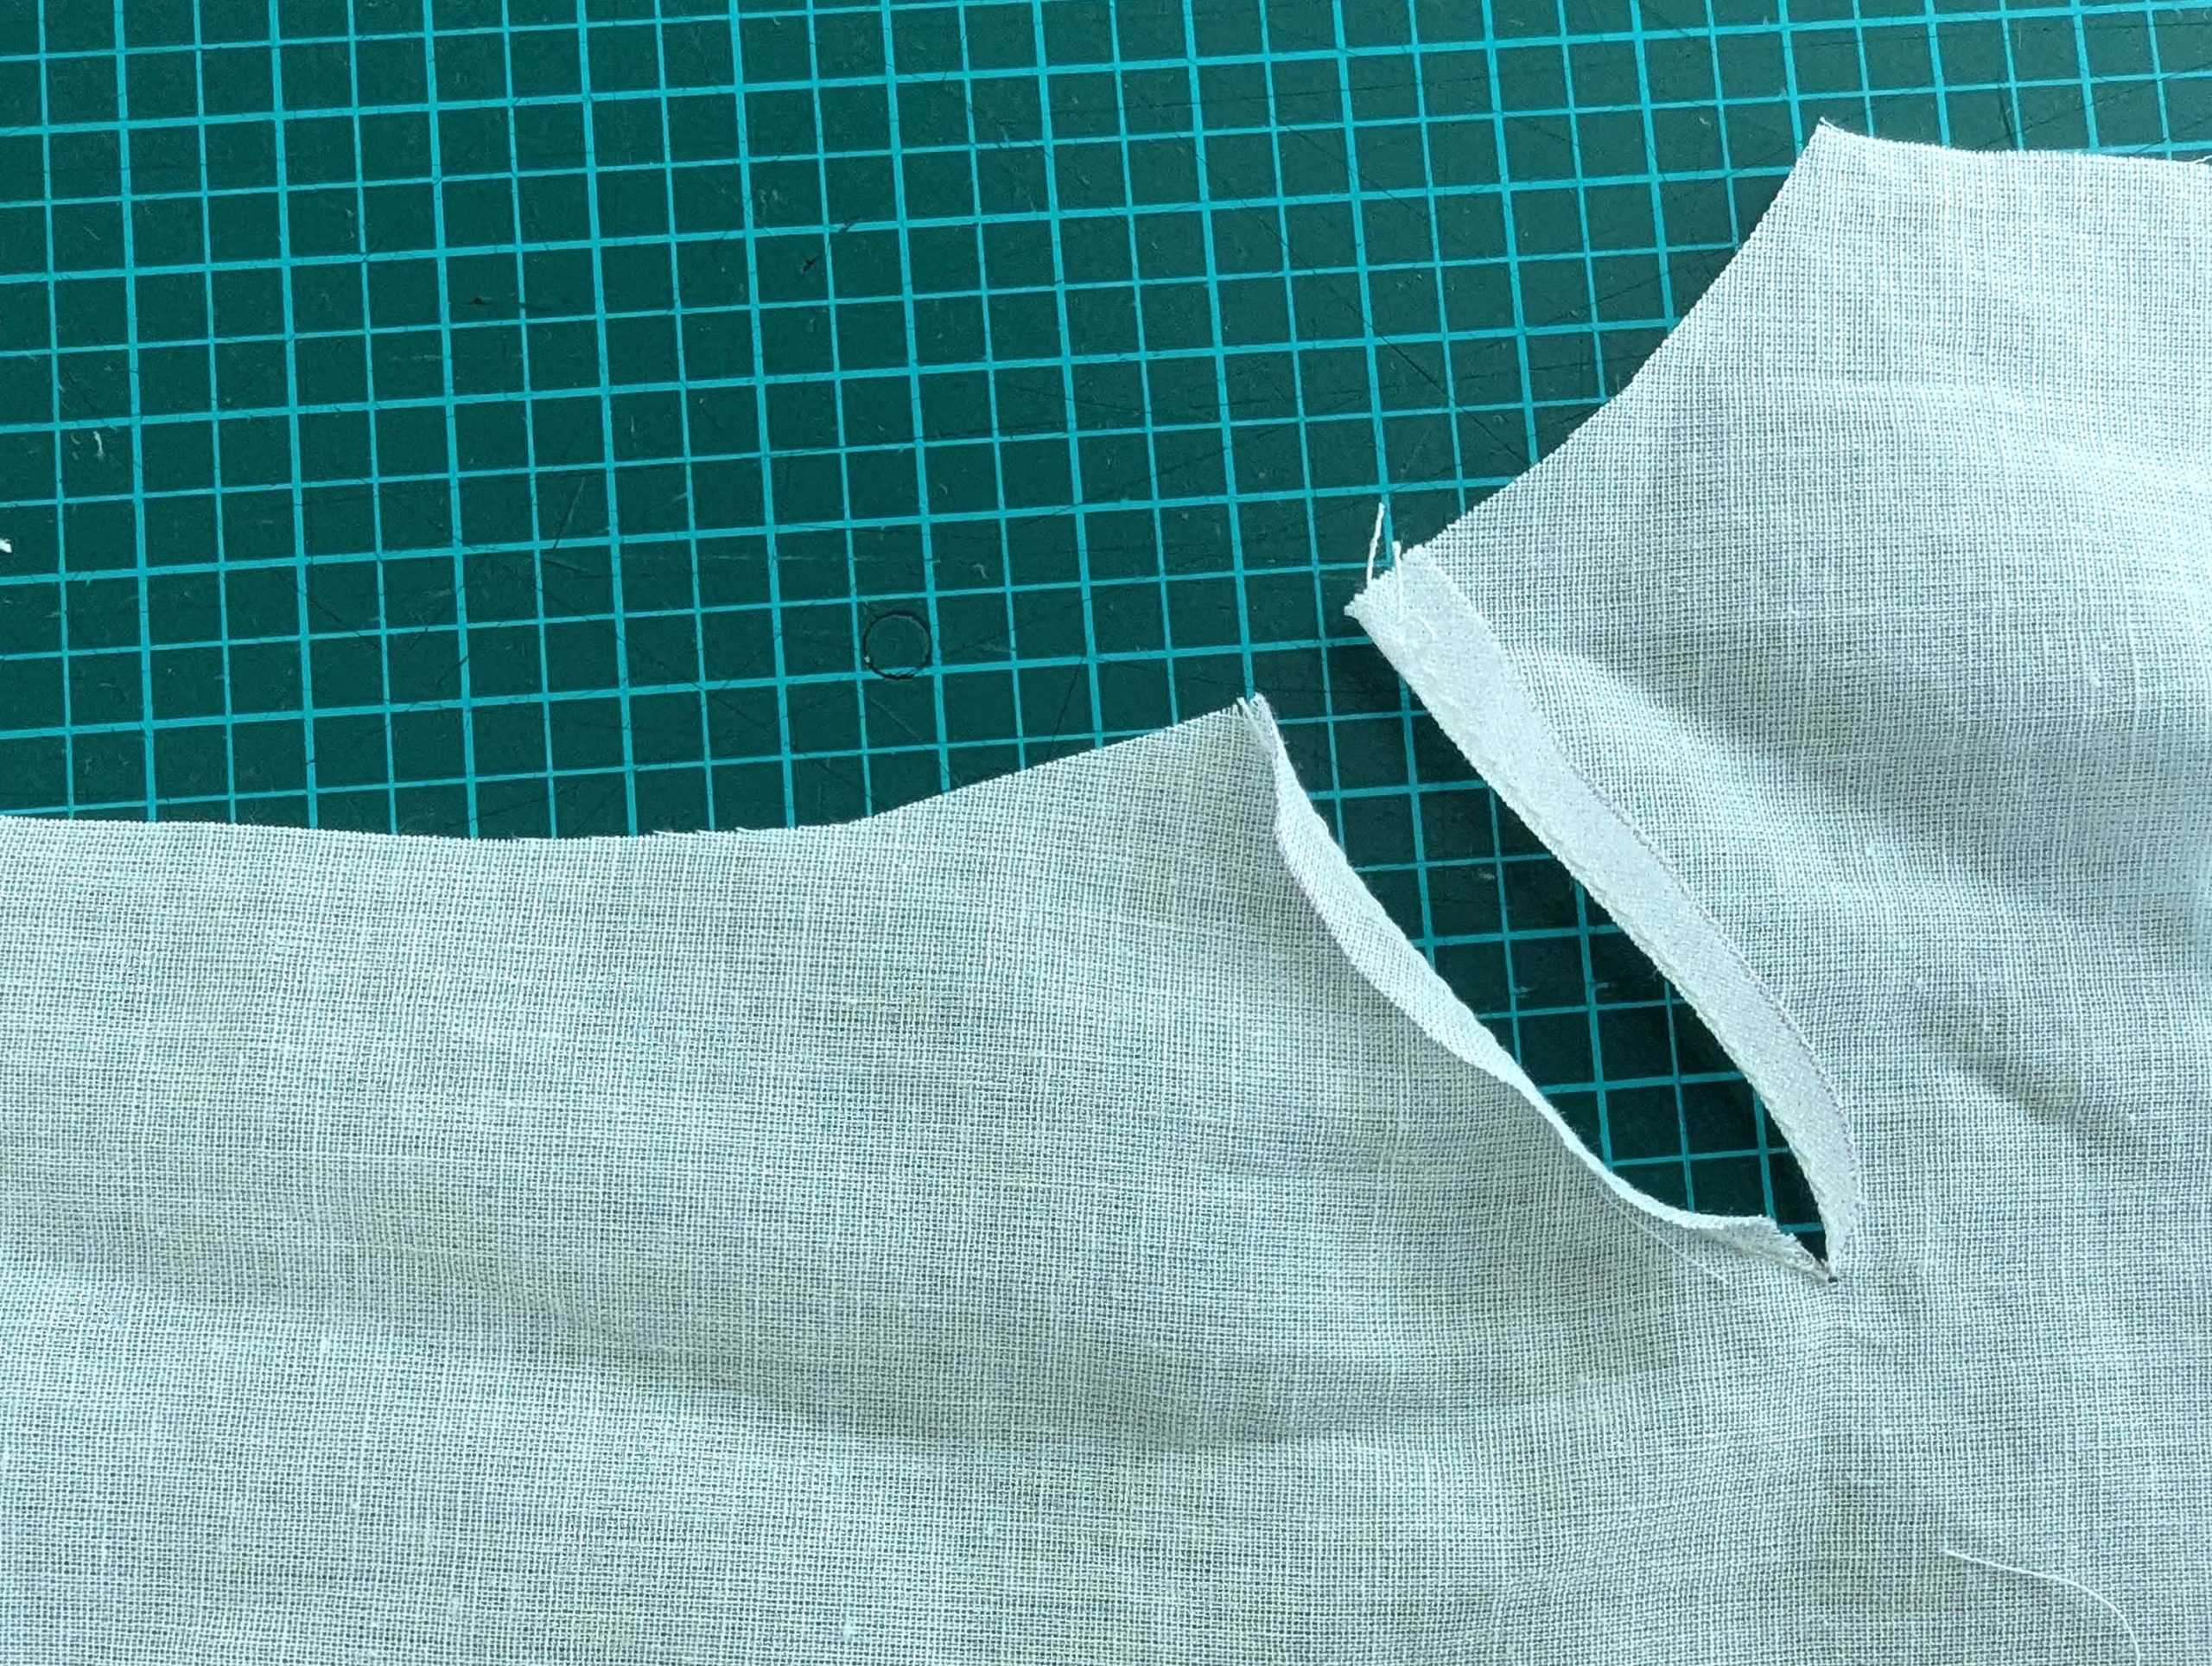
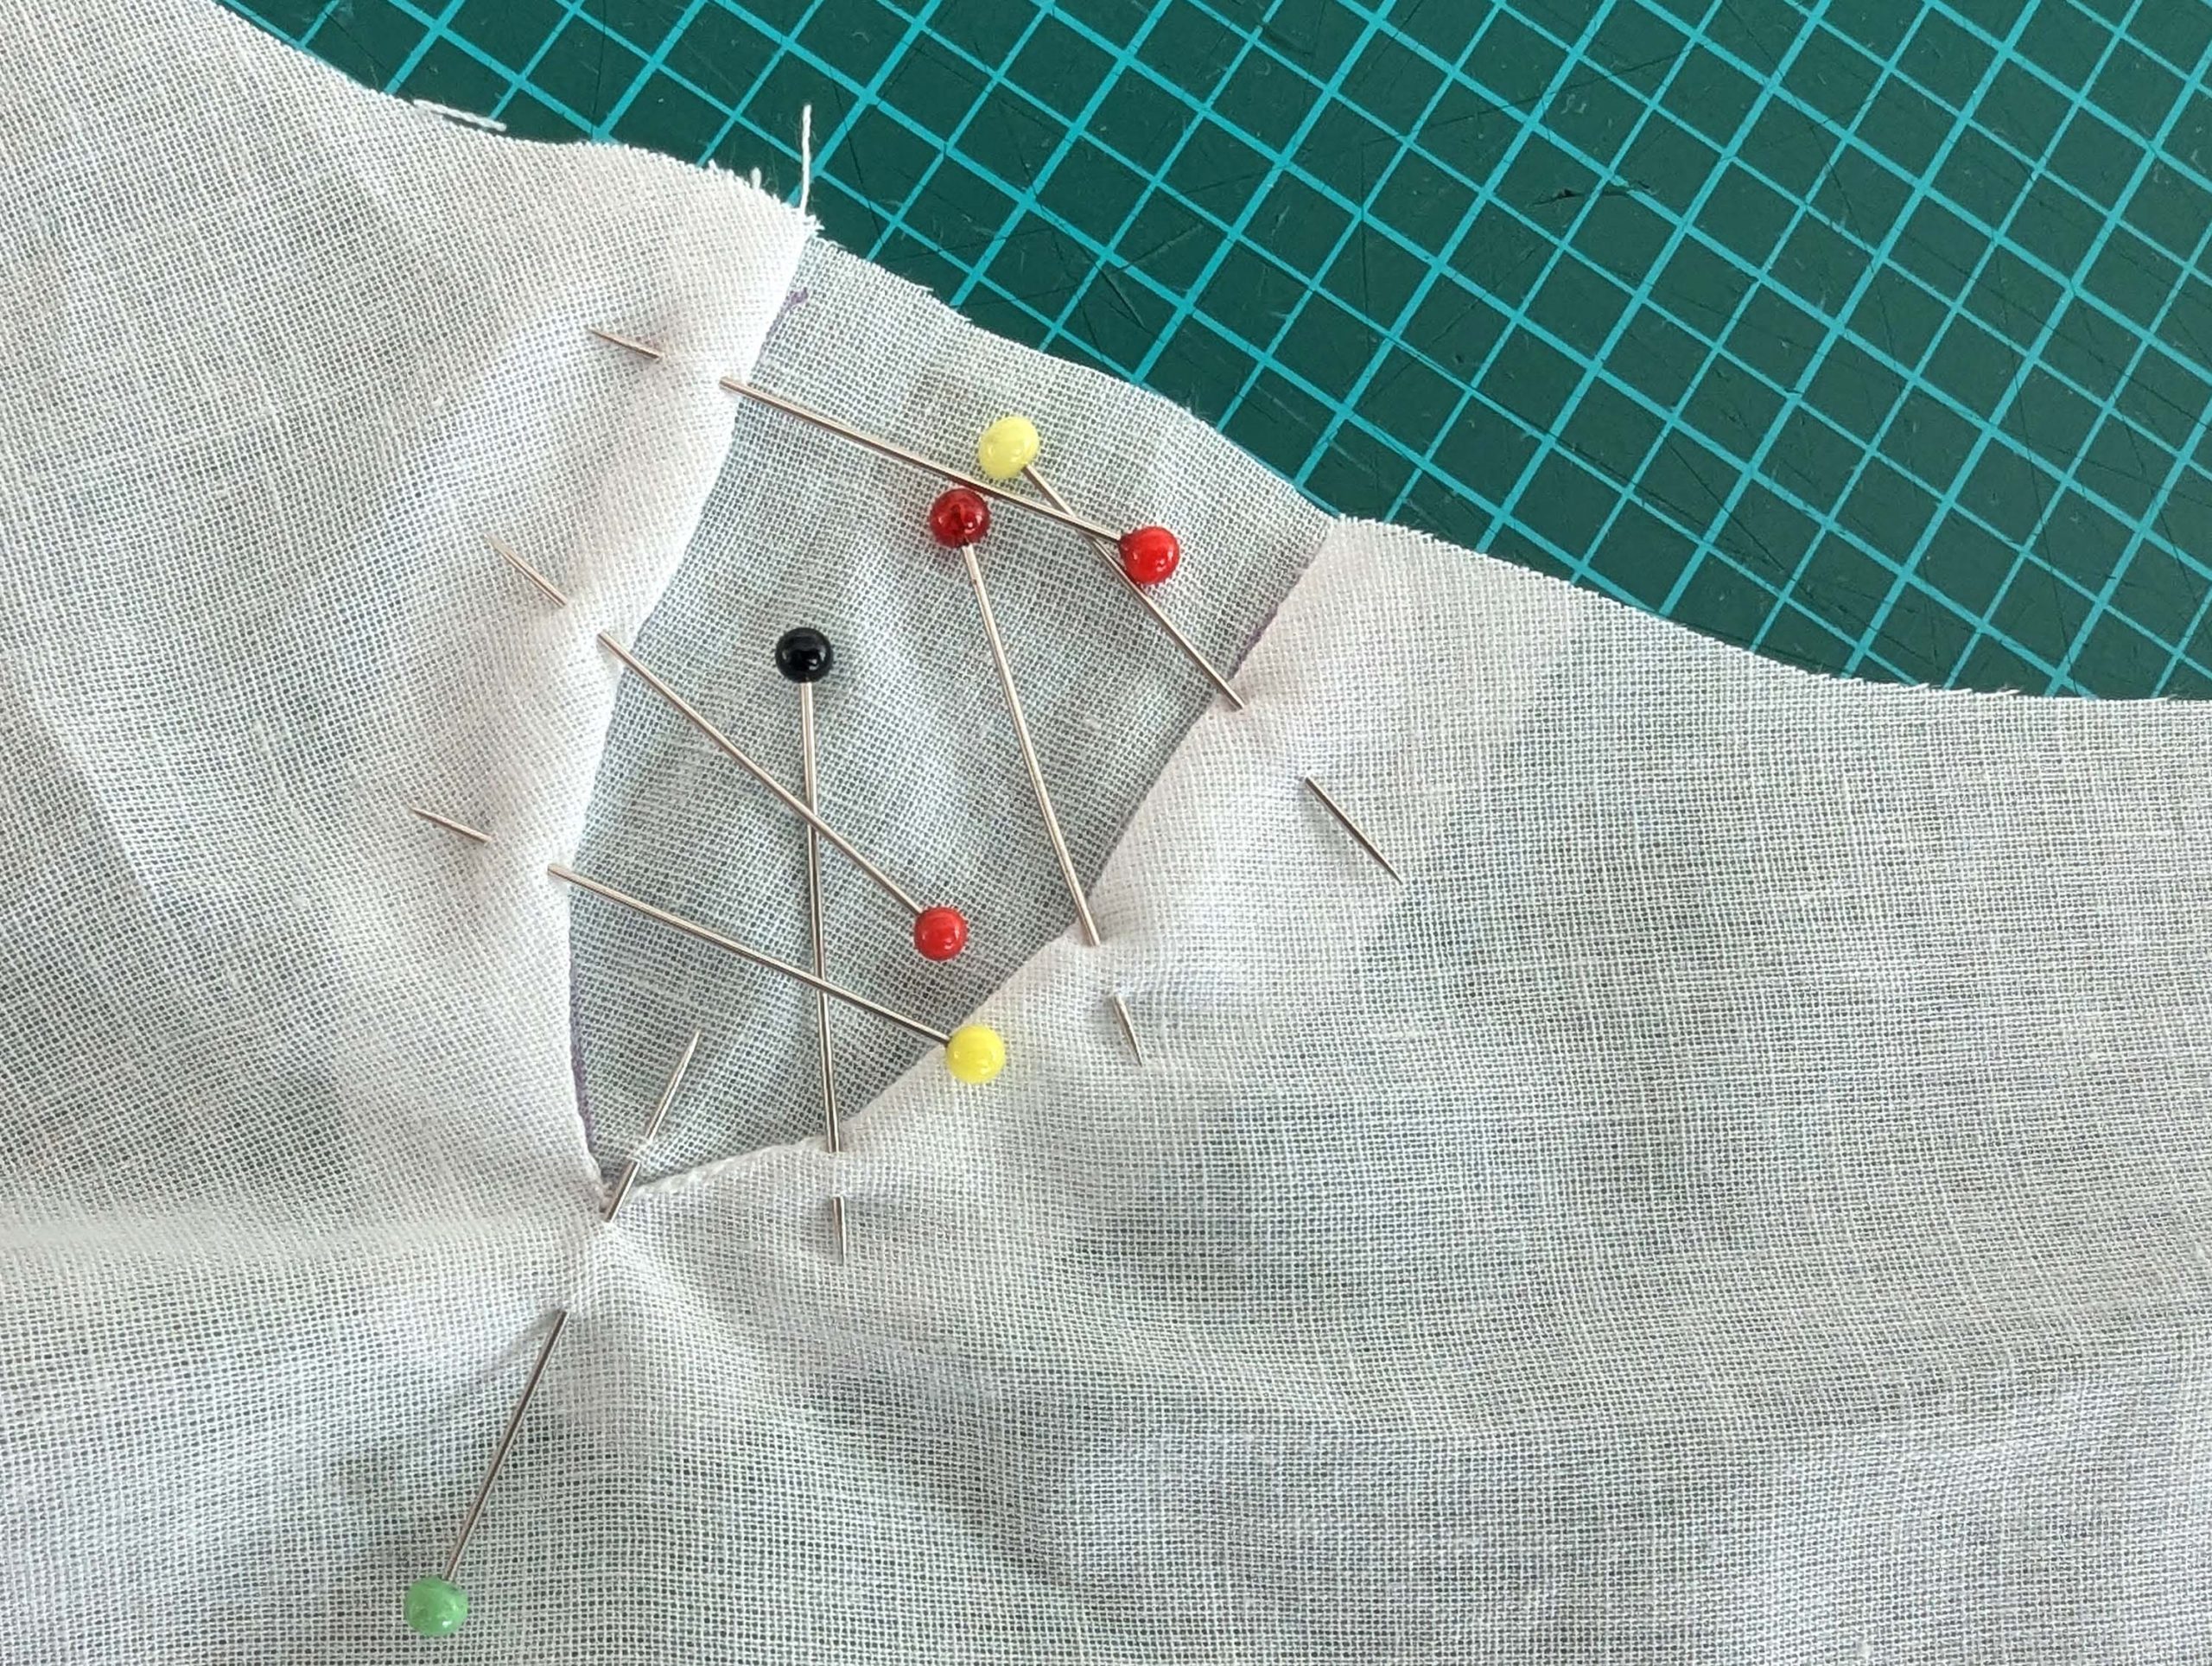
(4) Pin the gusset into the opening, right sides together, matching all marks. Sew, start, and stop exactly at the marks or pre-existing seams. Don’t catch any seam allowance while sewing. Now it´s getting a little bit complicated, making all the seams a flat felled seam.Trim back the seam allowances of the gusset all around to about ¼”, and trim back the corners at an angle of 45°.
Notch and trim back the seam allowance of the sleeve and back as shown in the illustration in the sewing instruction and start between (2) and (4) at the back portion of the sleeve, folding the wider seam allowance over the trimmed back and press, edge, or fell stitch in place, creating a flat felled seam. Continue from (2) to (4) – front portion of the sleeve, followed by (3) to (2) on the back, until reaching (2) on the front, proceeding to (3), and then going all the way down until reaching the bottom edge.
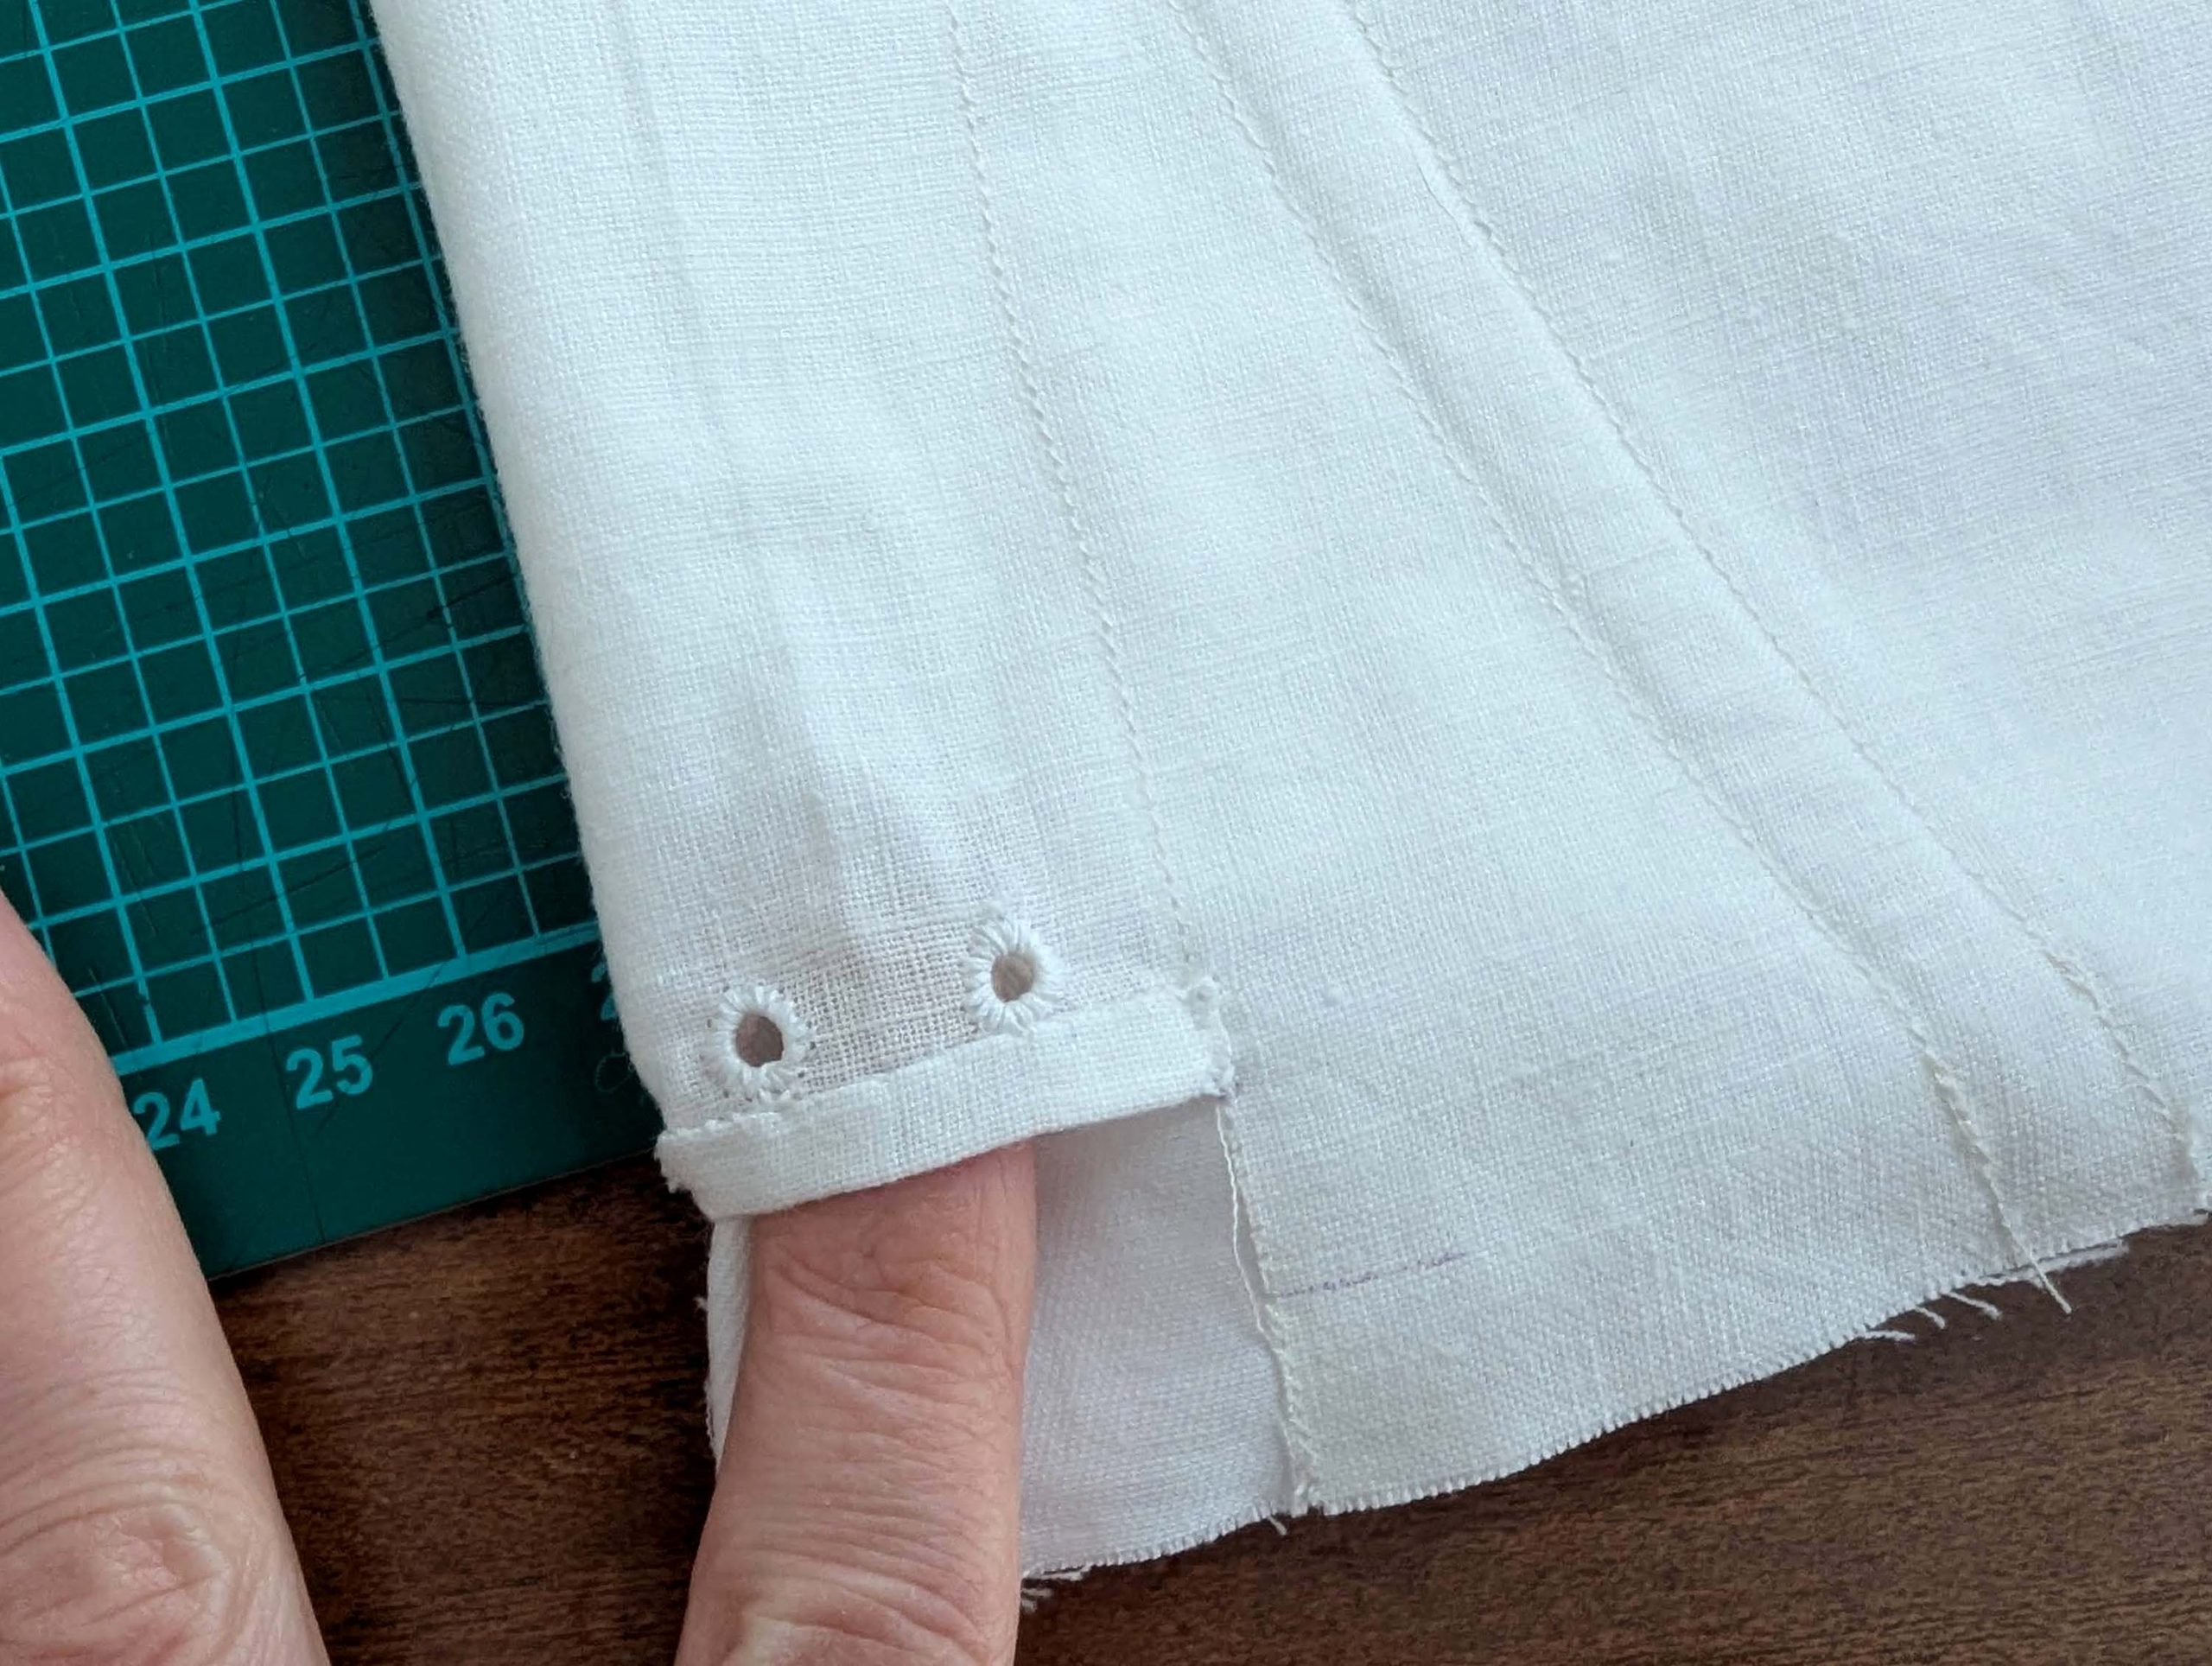
(5) Double turn in the sleeve hem and stitch in place, double turn in the hem and stitch in place in the same way. Thread the tunnel at the neckline with a narrow cotton tape.
This blog post is now about the corset construction, again all machine sewing.
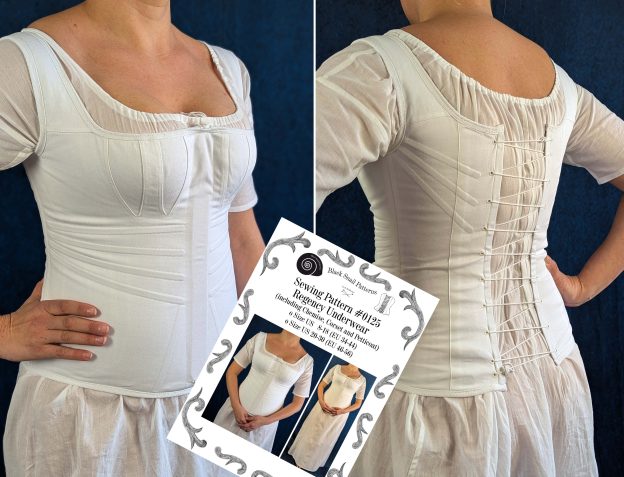
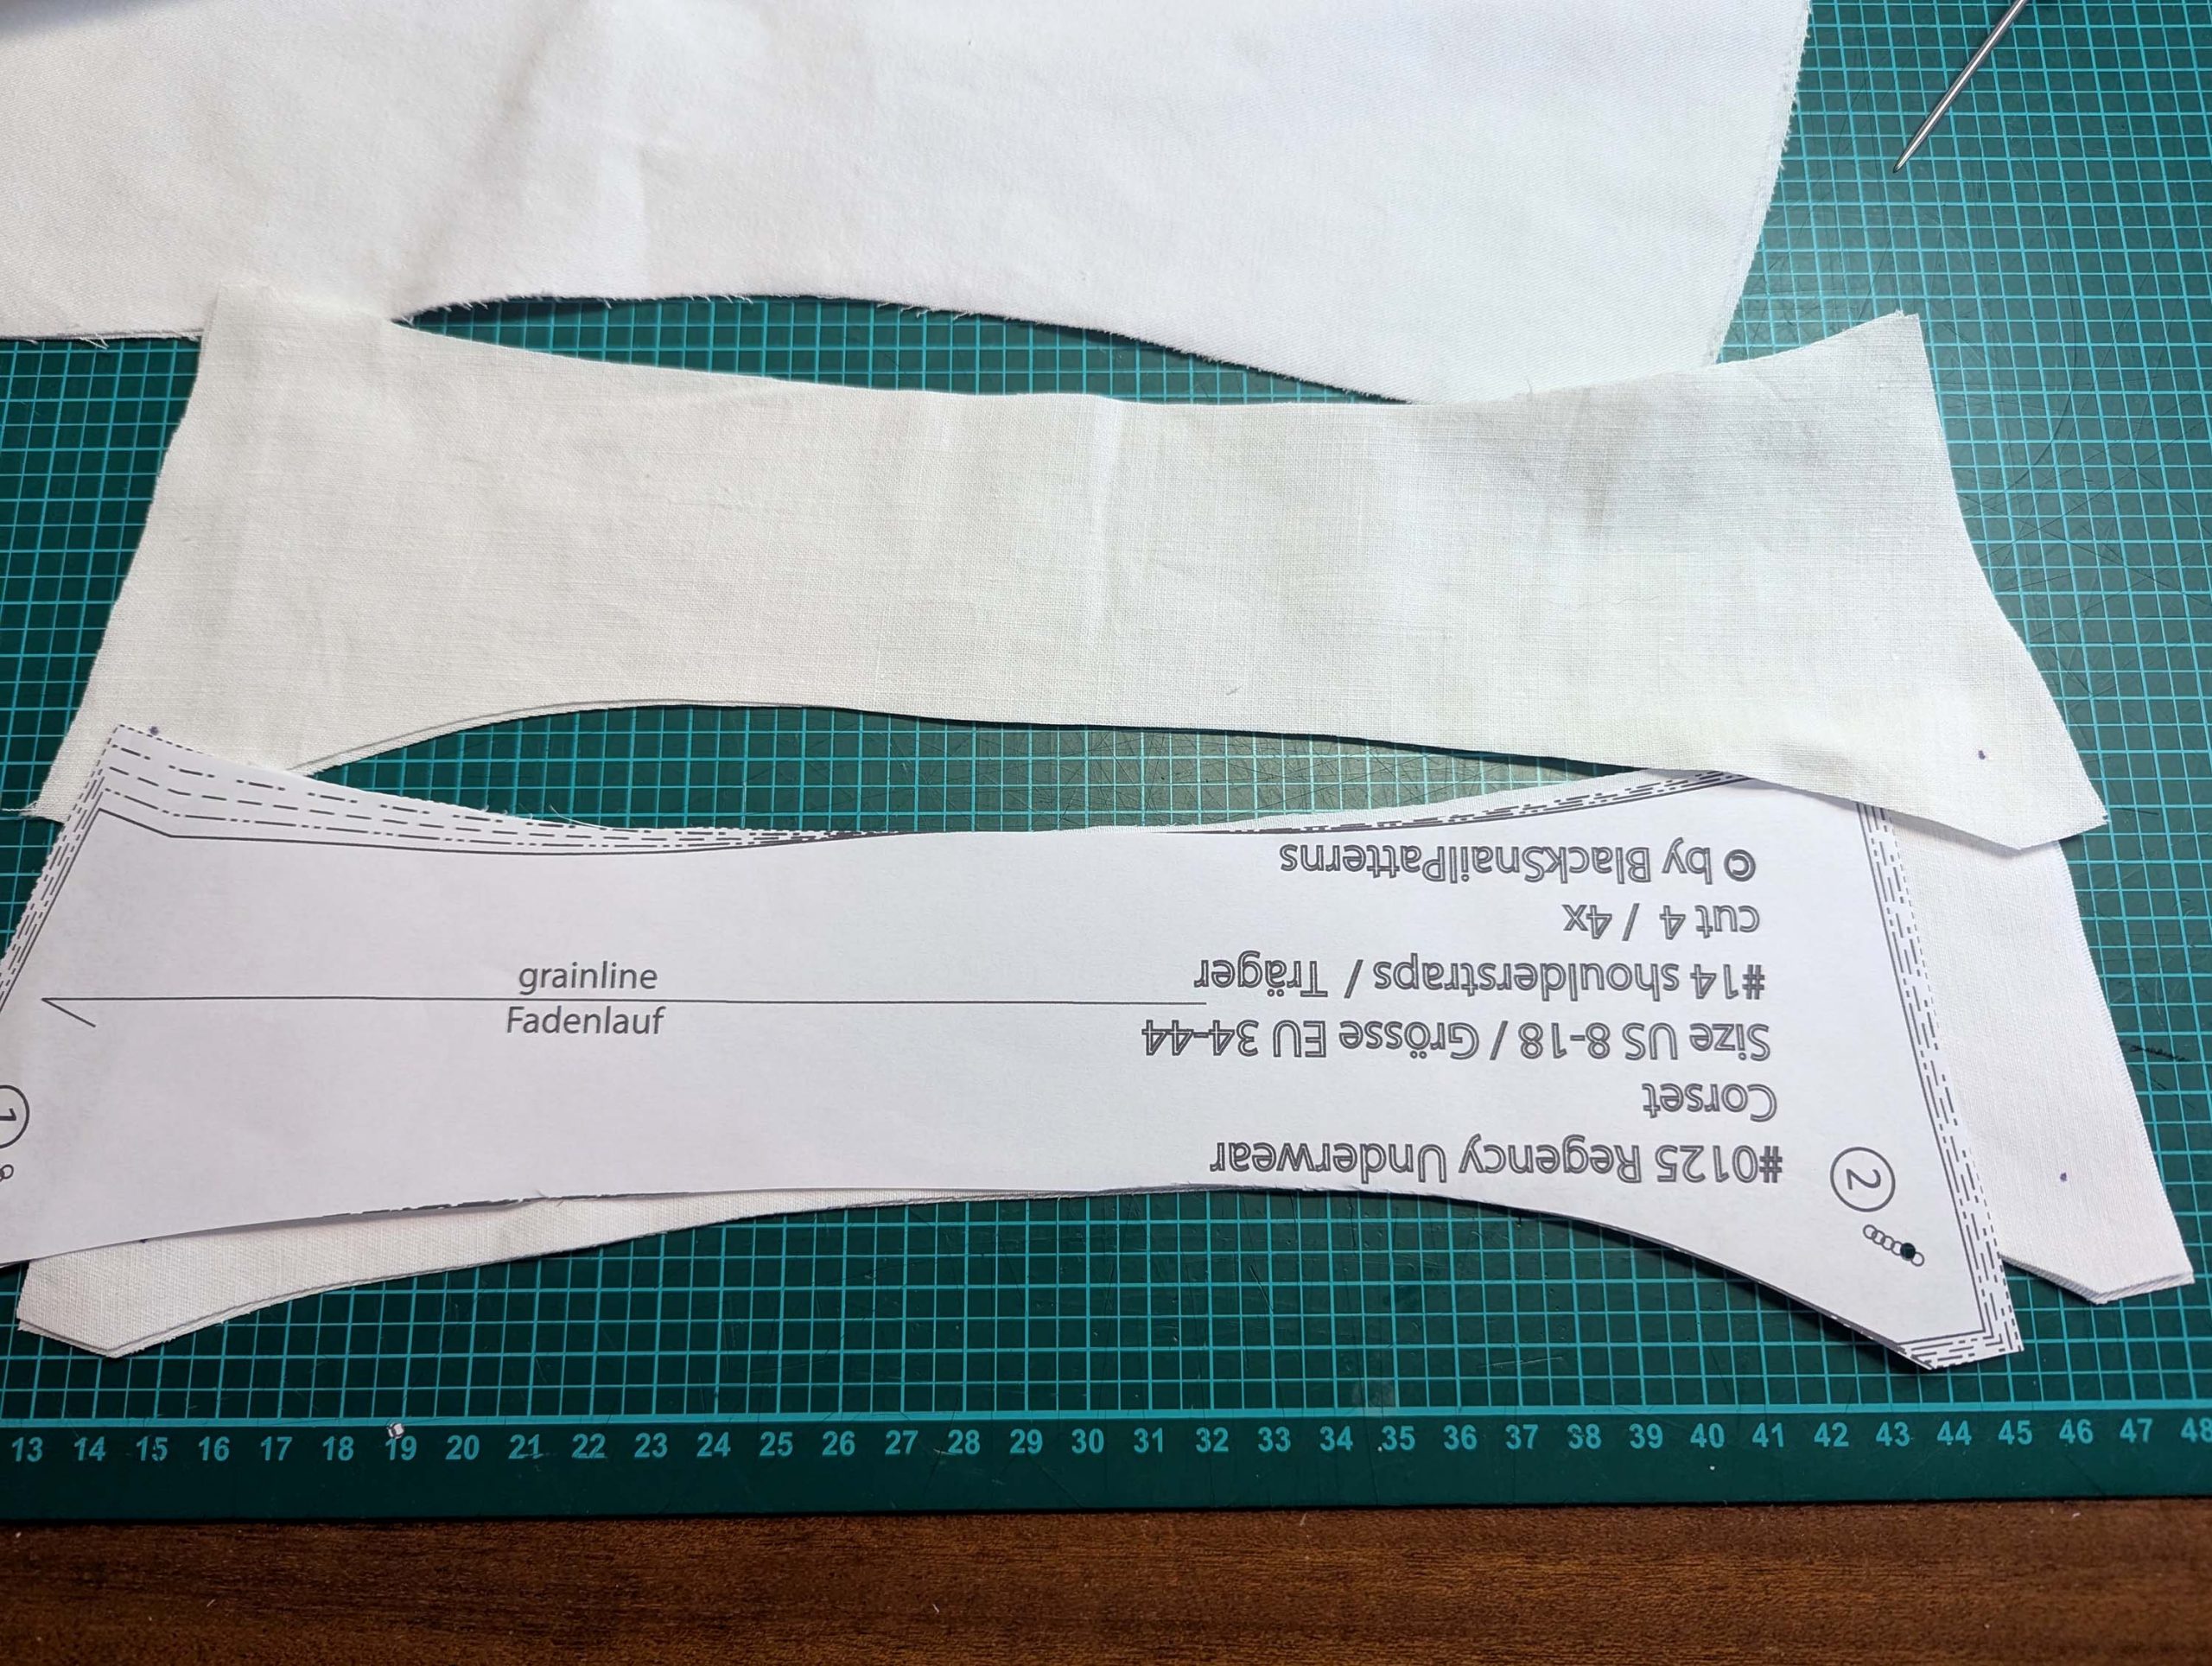
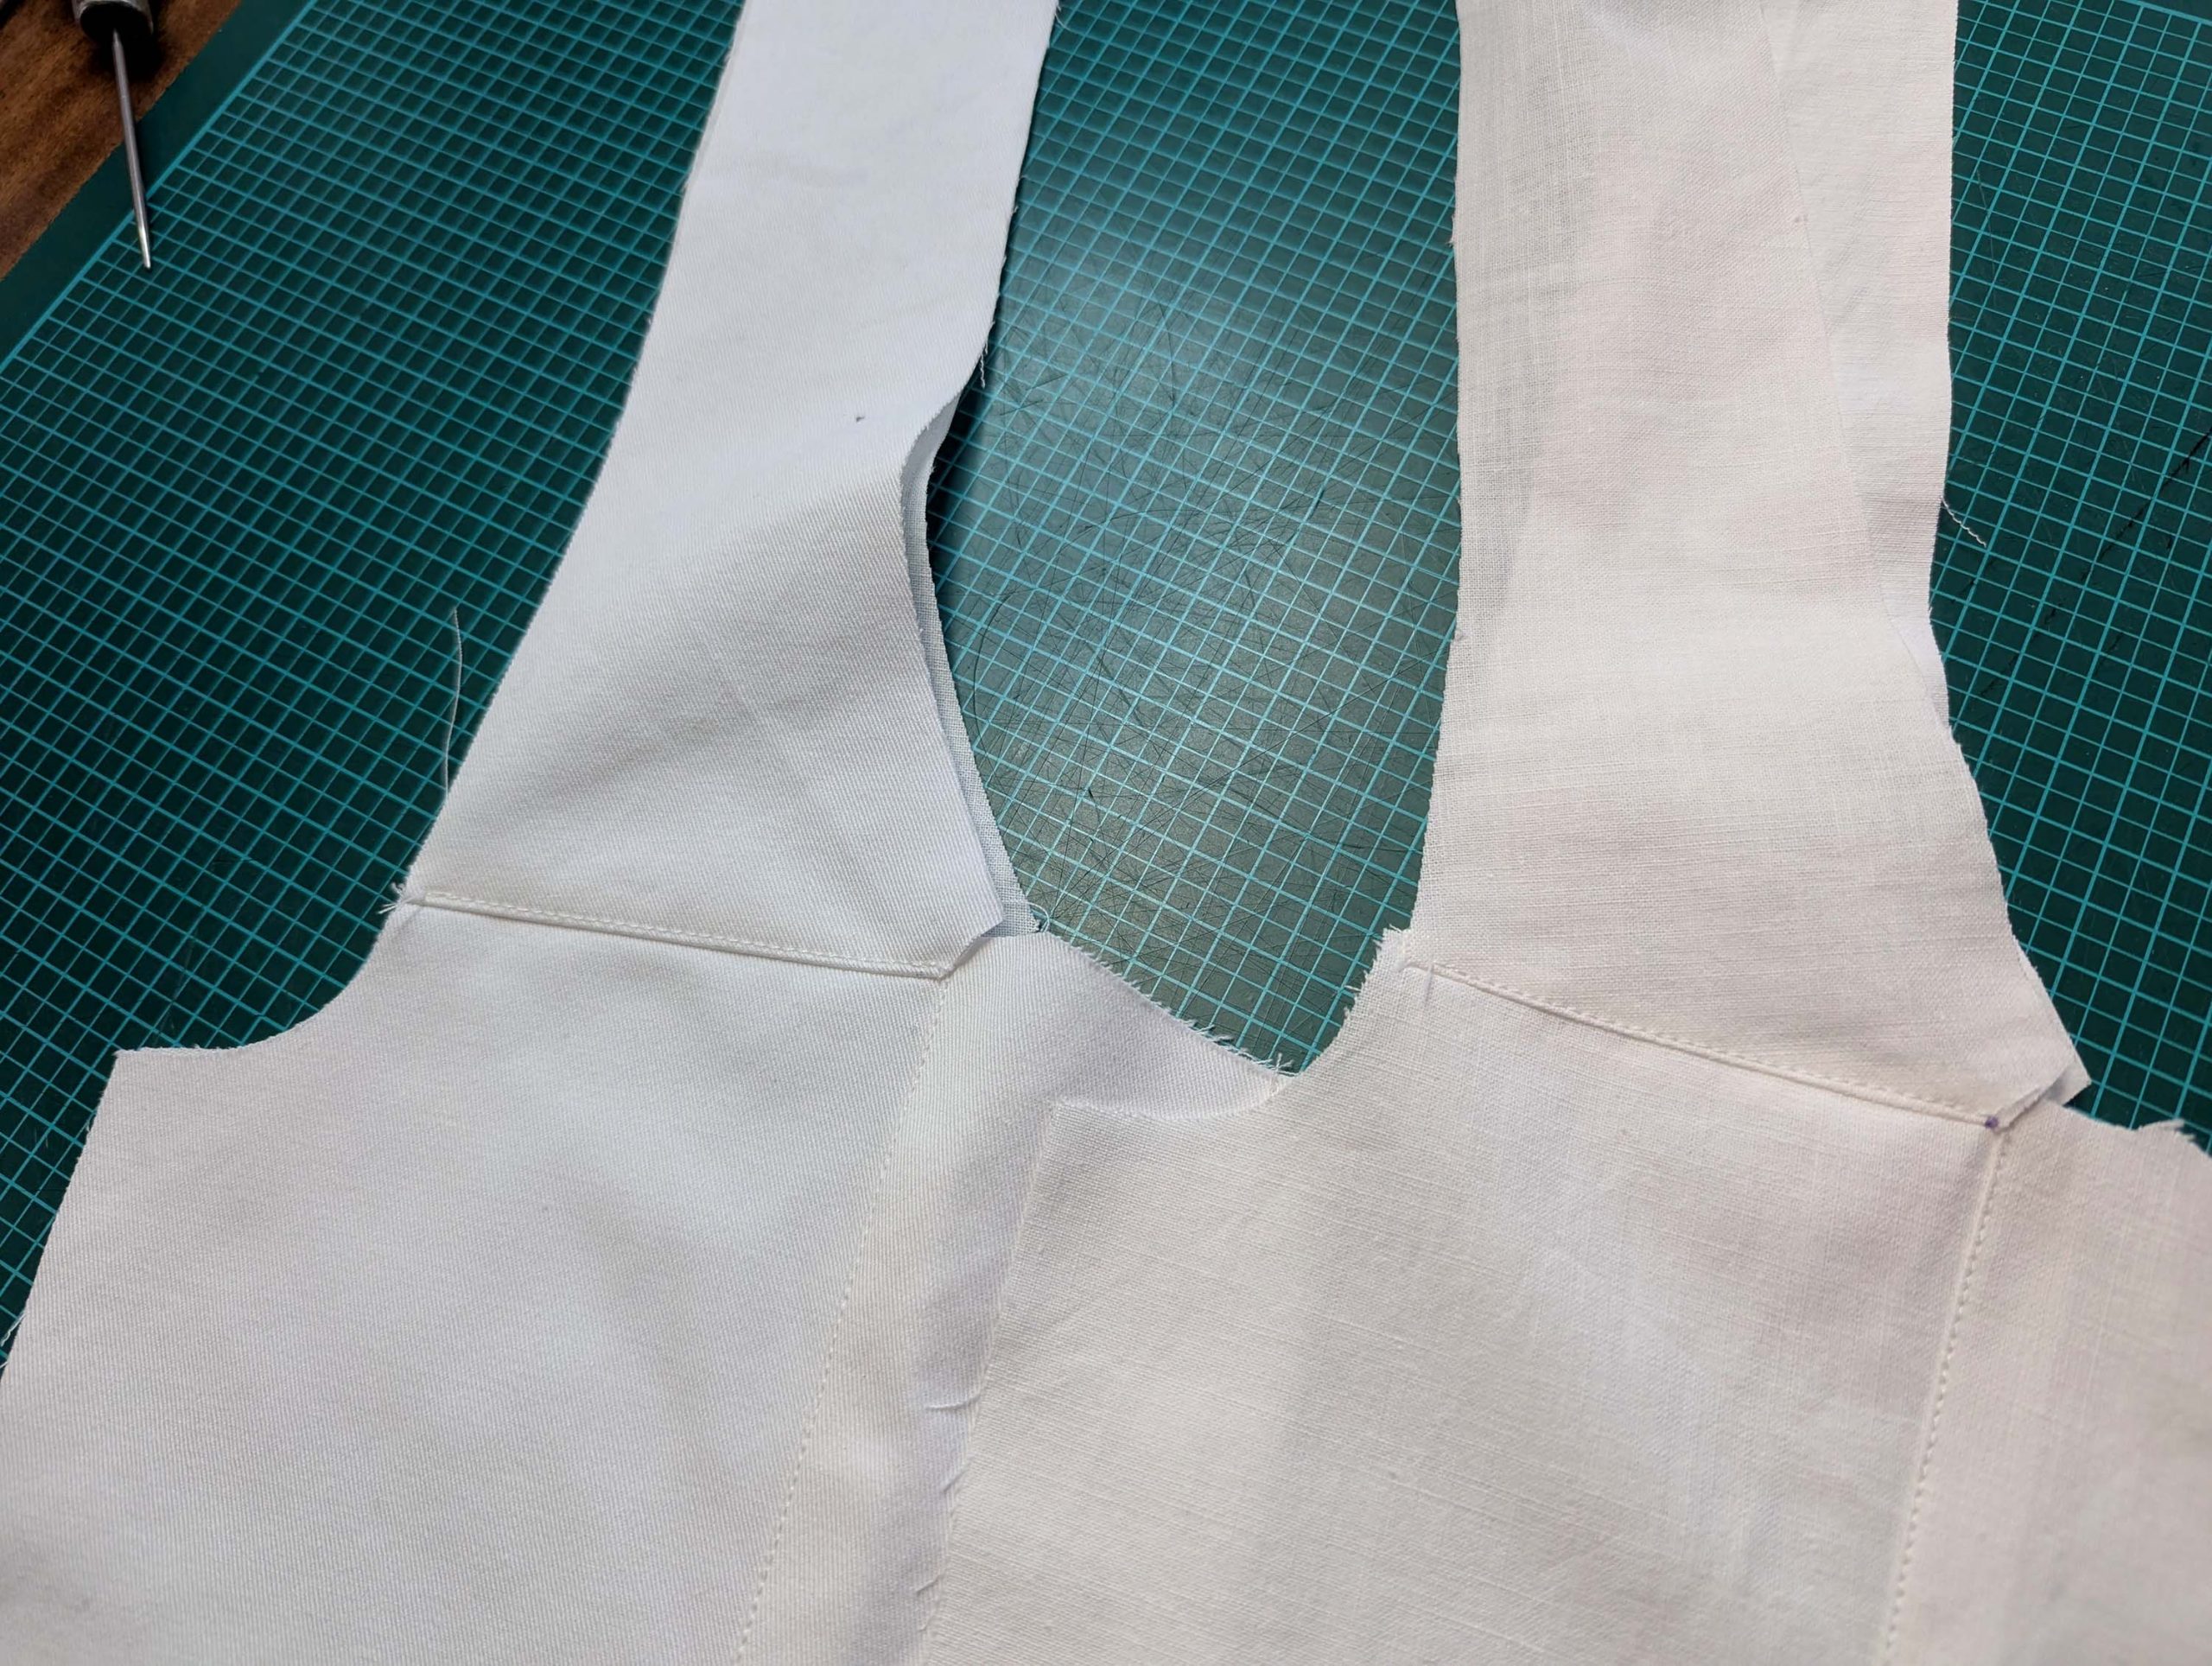
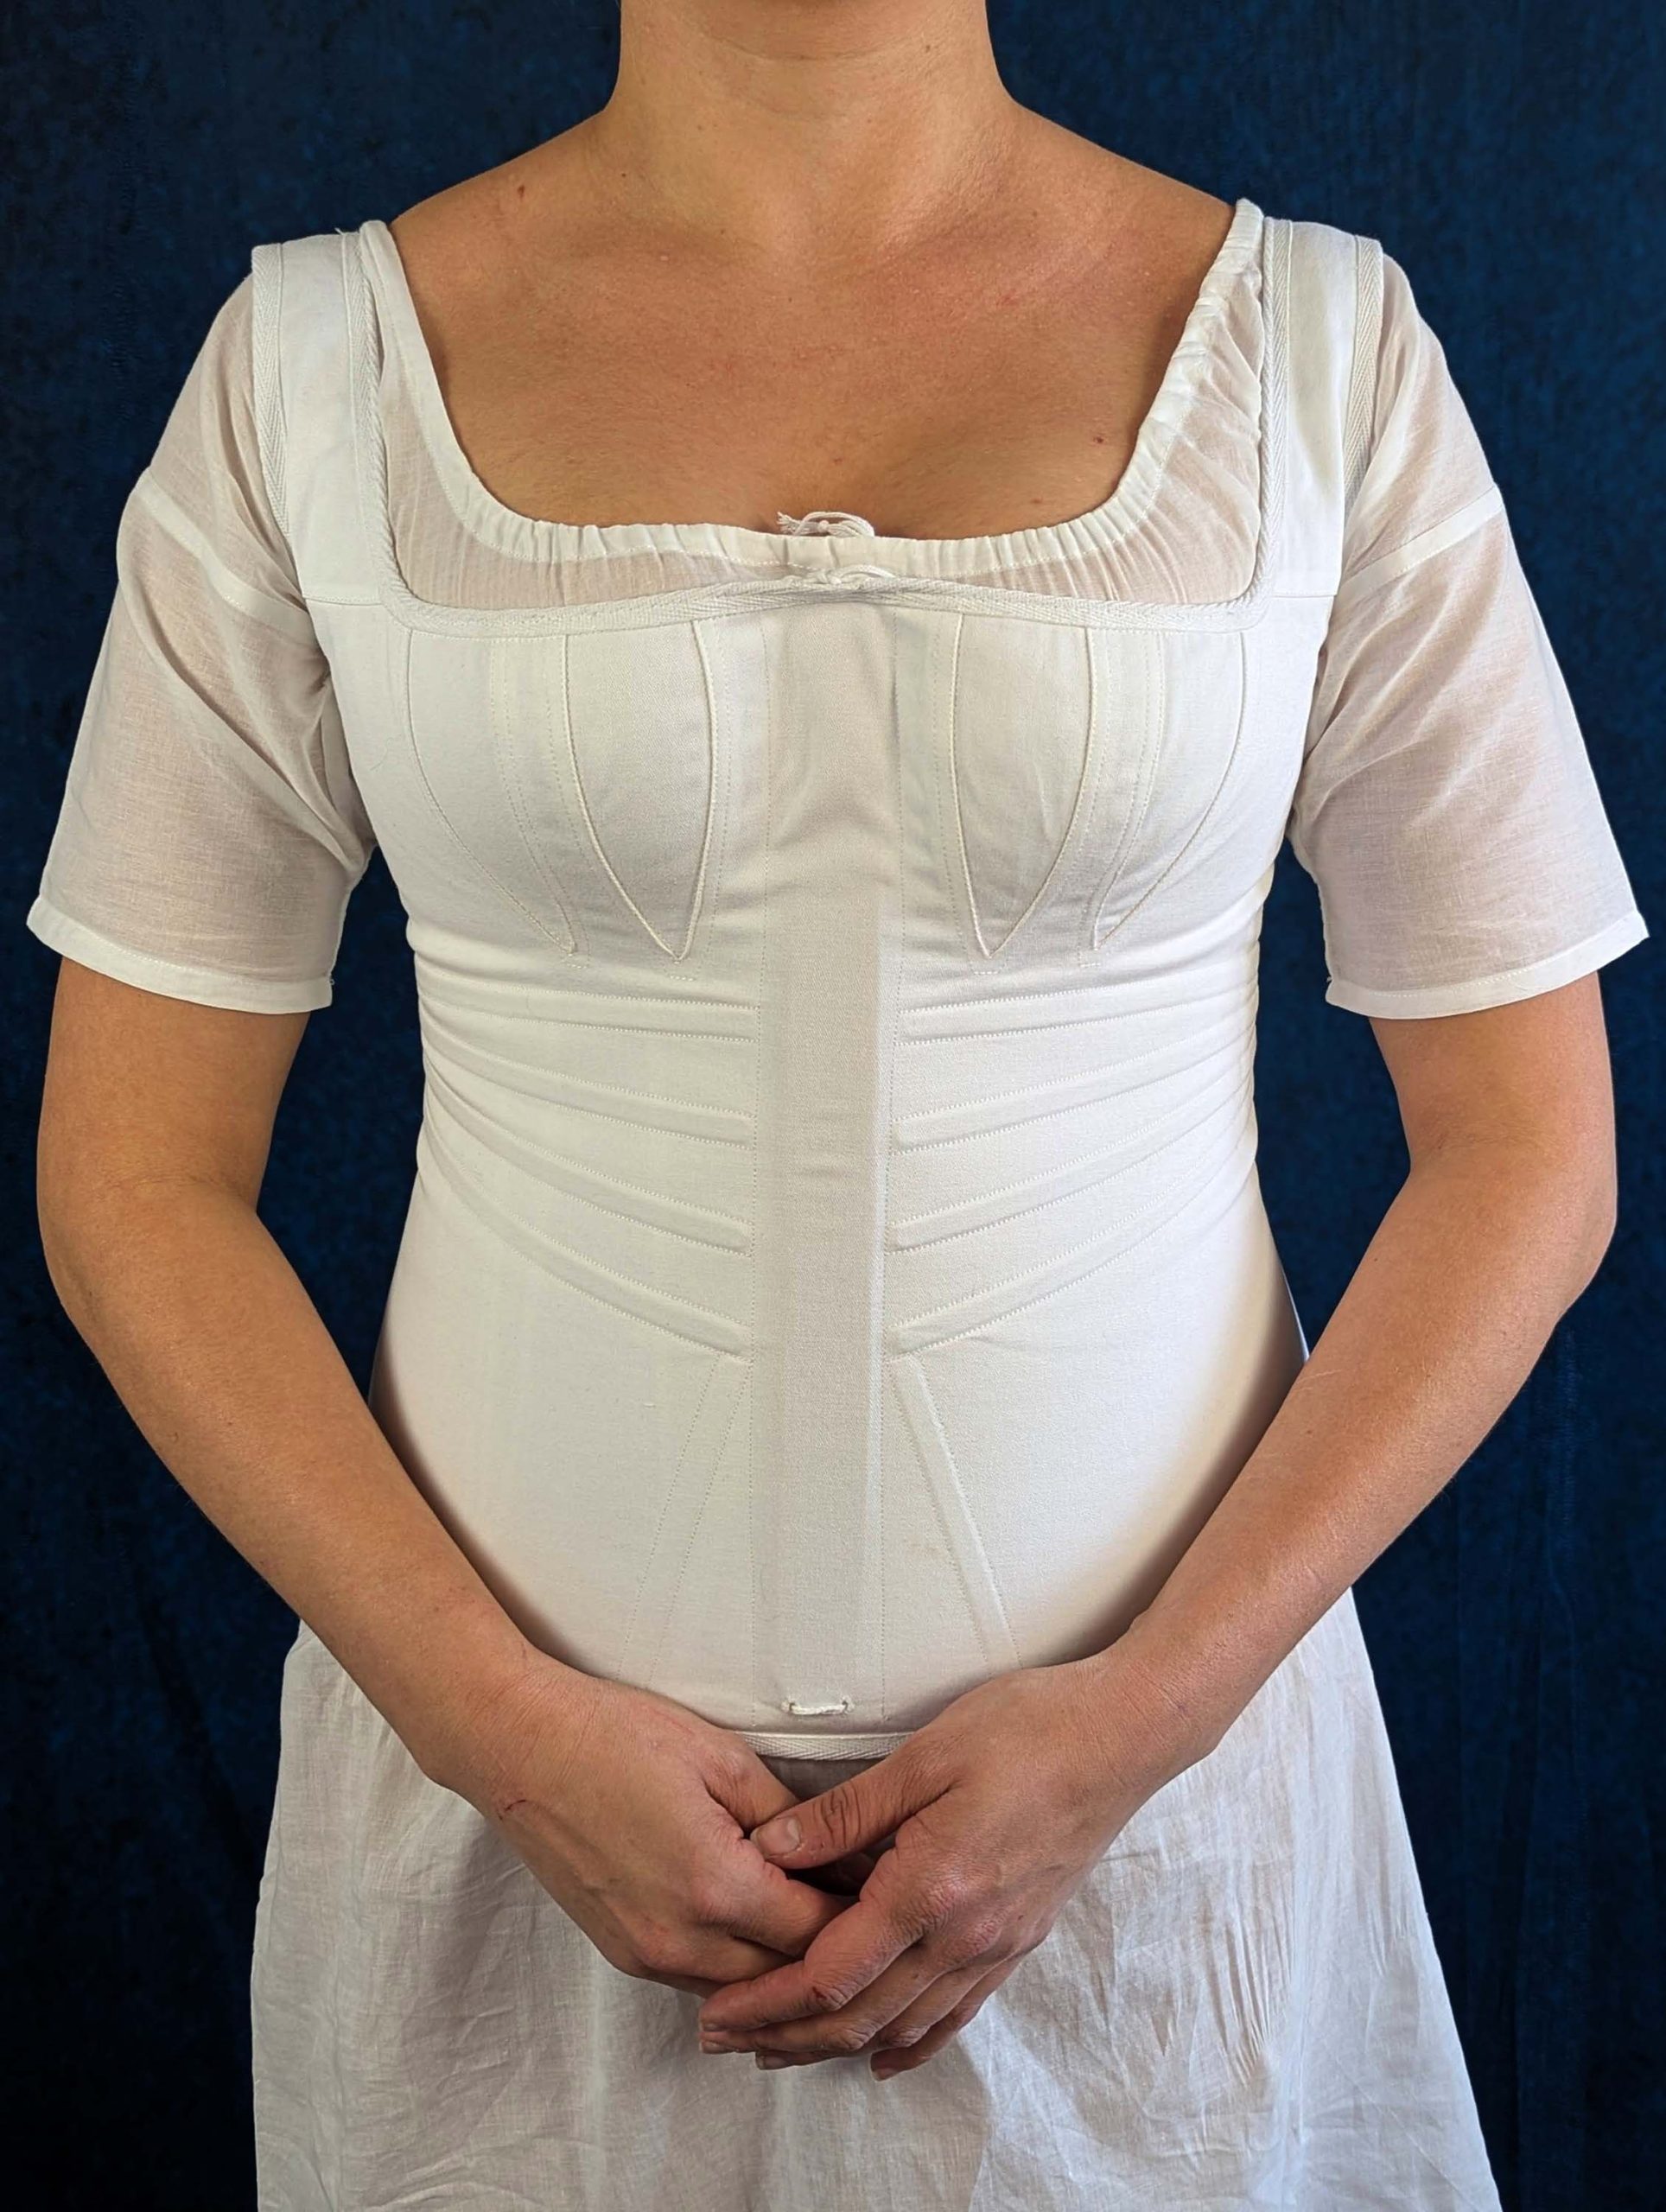
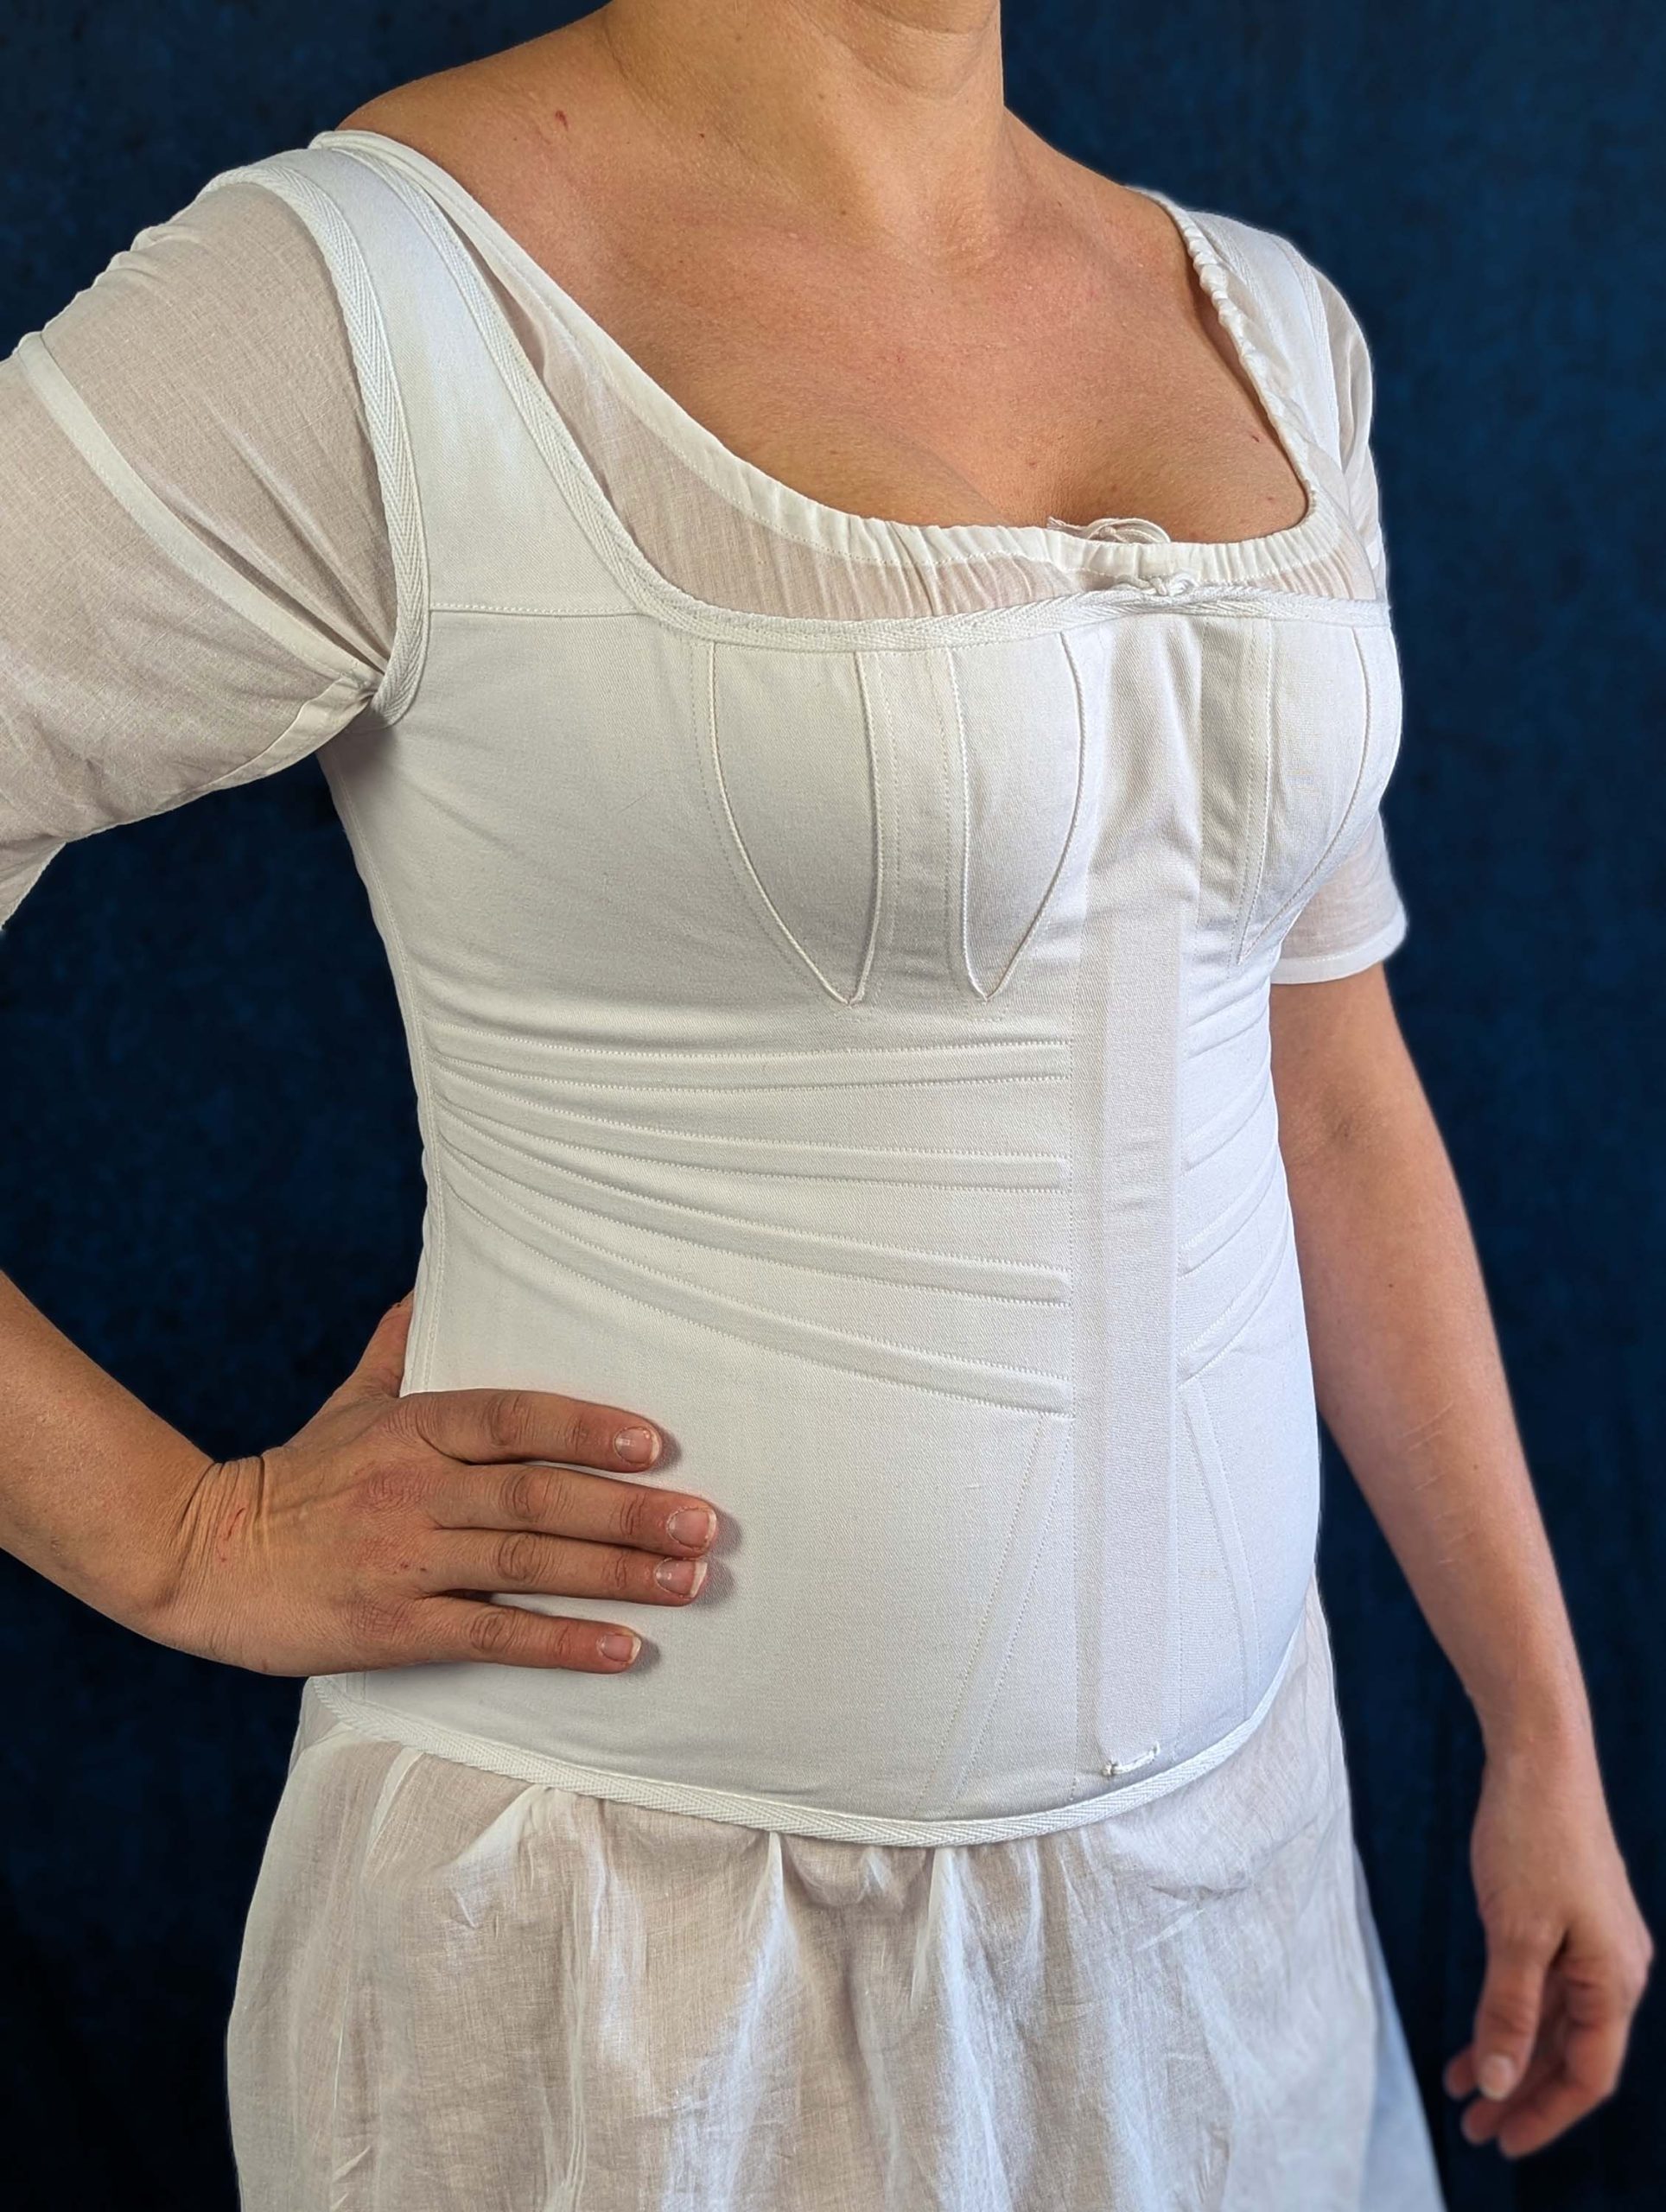
The corset in this sewing pattern serves for representations from 1800 to 1820. It is made from two layers of fabric, for the outer layer I recommend a strong cotton fabric like coutil or twill, and the lining can be made from midweight cotton or twill (same as for the top layer). The front (wooden) busk and the boning are introduced between the two layers. The cups will be created by inserting gussets. The lacing at the back still features spiral lacing, with asymmetrically placed grommets.
For an easier and quicker sewing process, the quilting, often seen on extant corsets from that era, will be omitted and the cording will be replaced and imitated by plastic whalebone, inserted in fan-shaped tunnels at the front and back, giving extra support at the underbust and upper back.
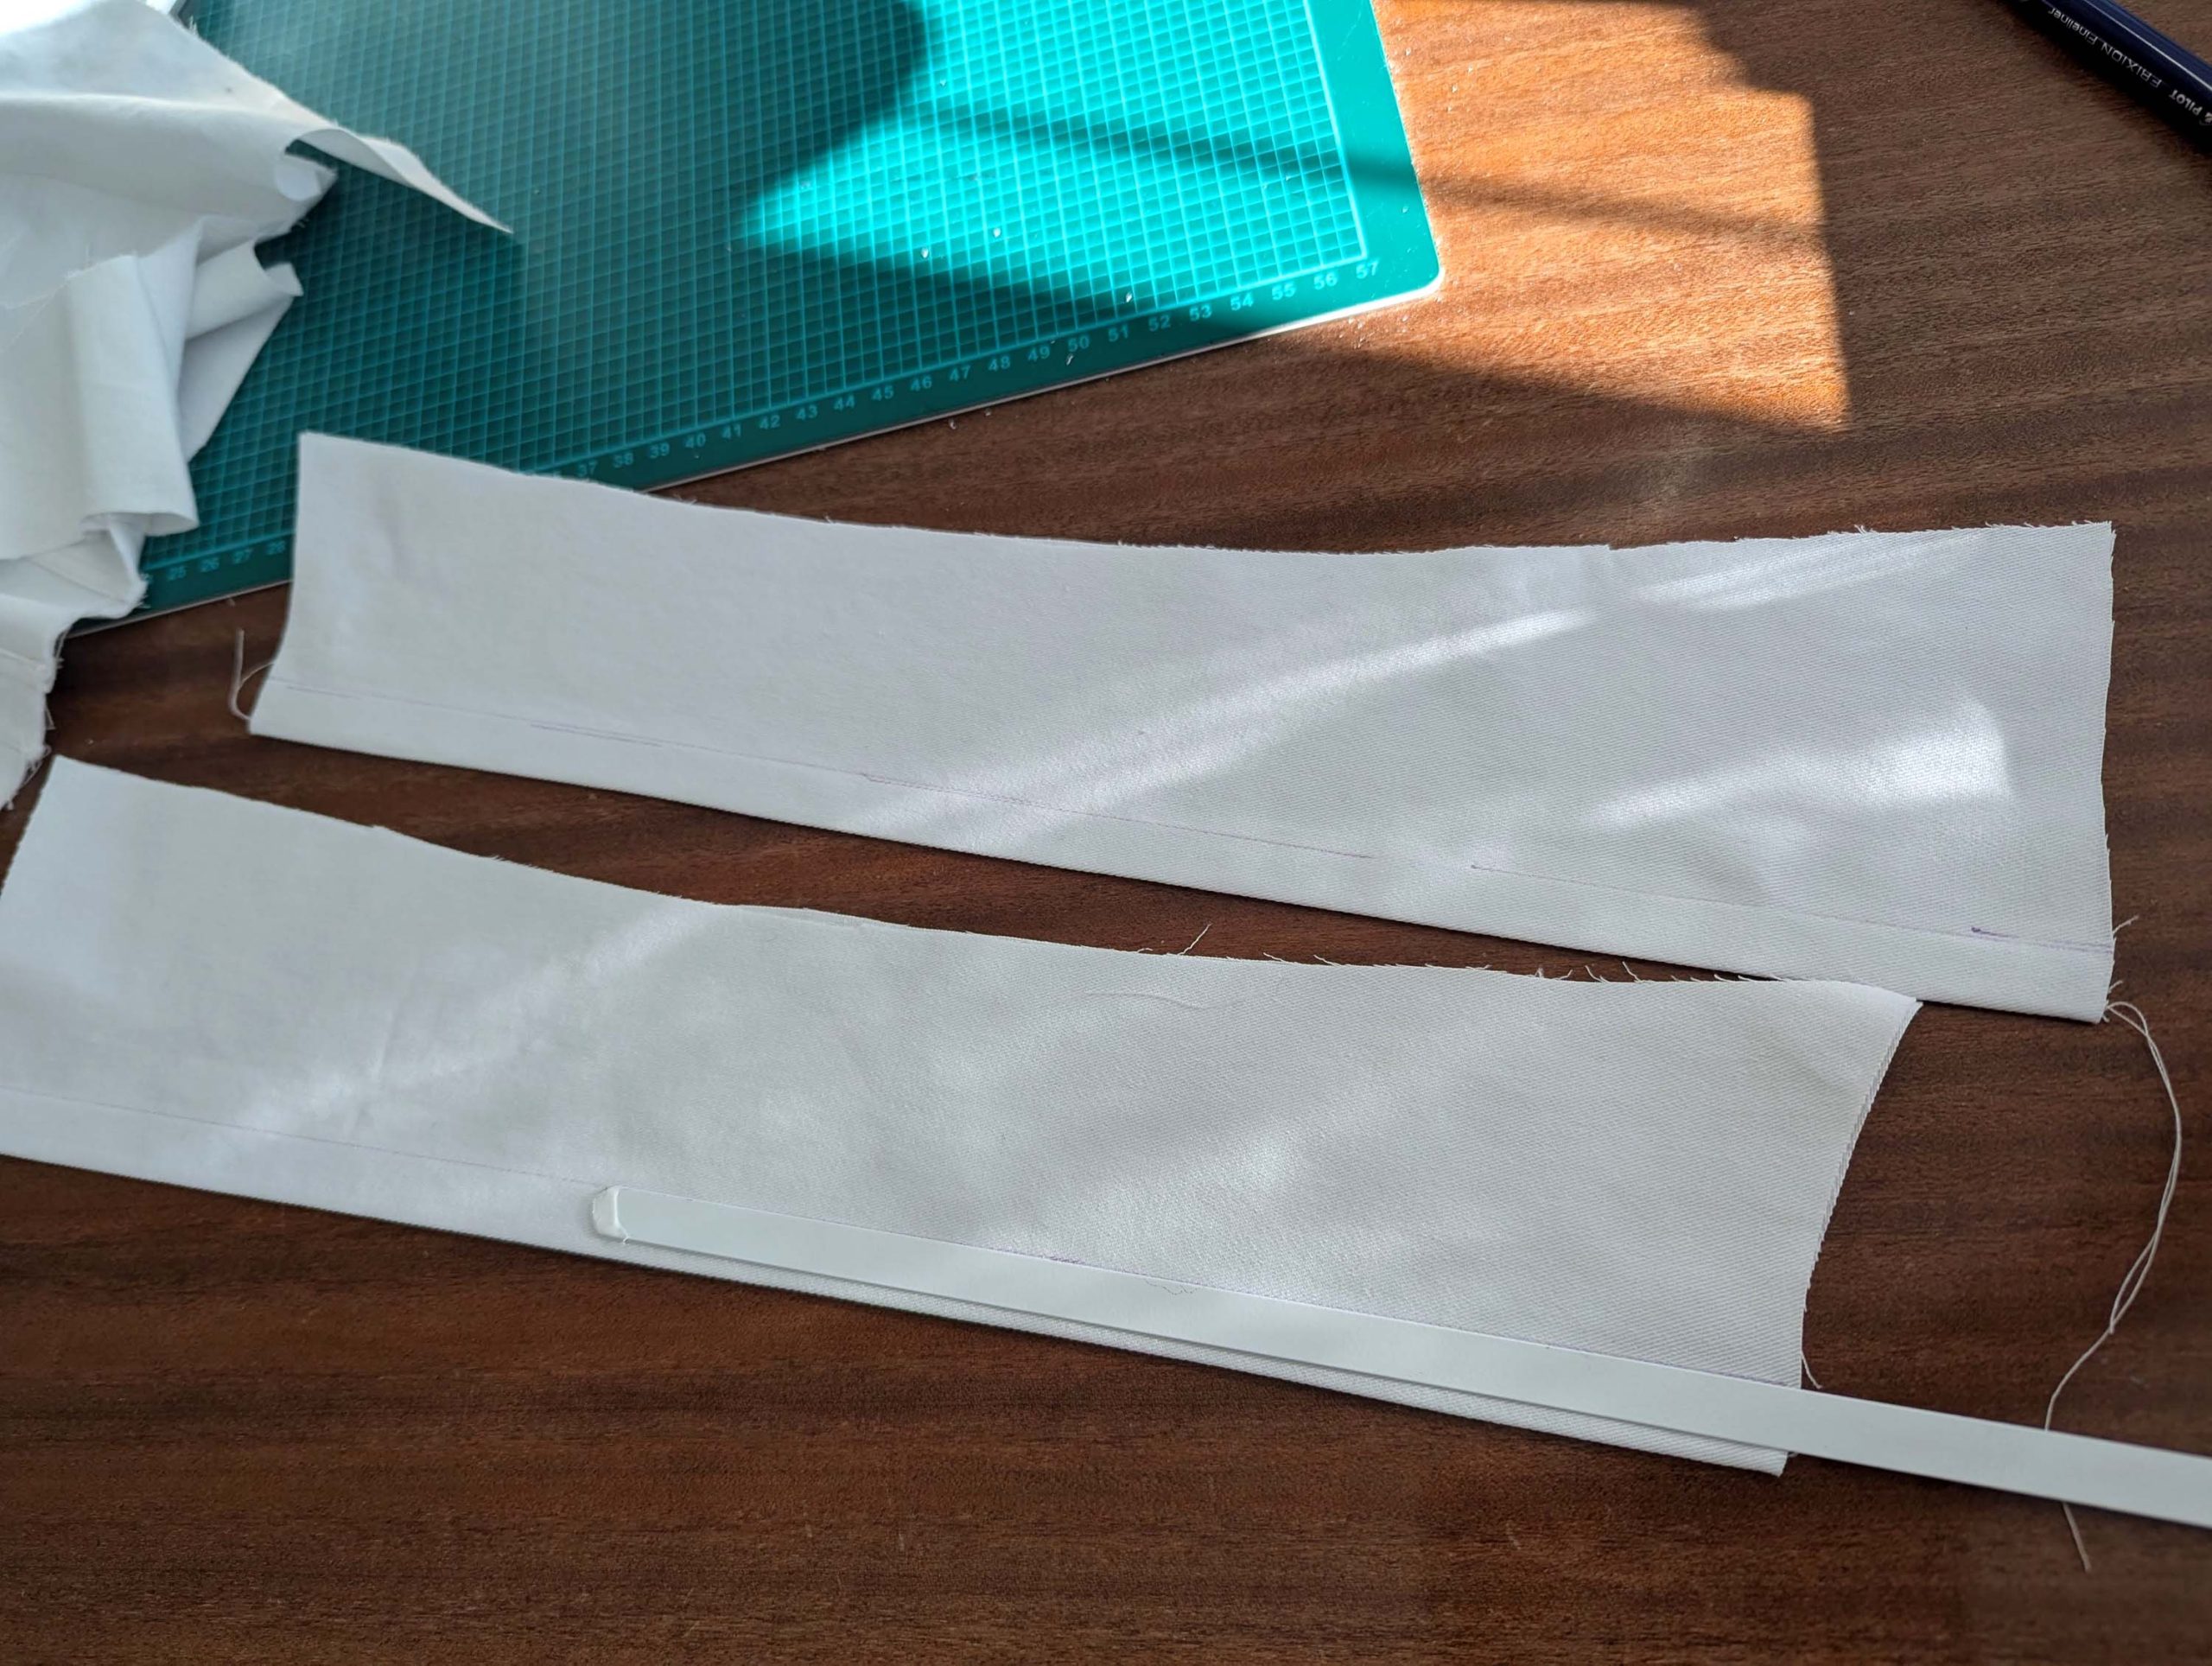
The busk has a length of about 13” (33cm) for the smaller sizes and 14” (35,5cm) for the larger sizes. I recommend purchasing a 14” busk and cut to the length needed at home.
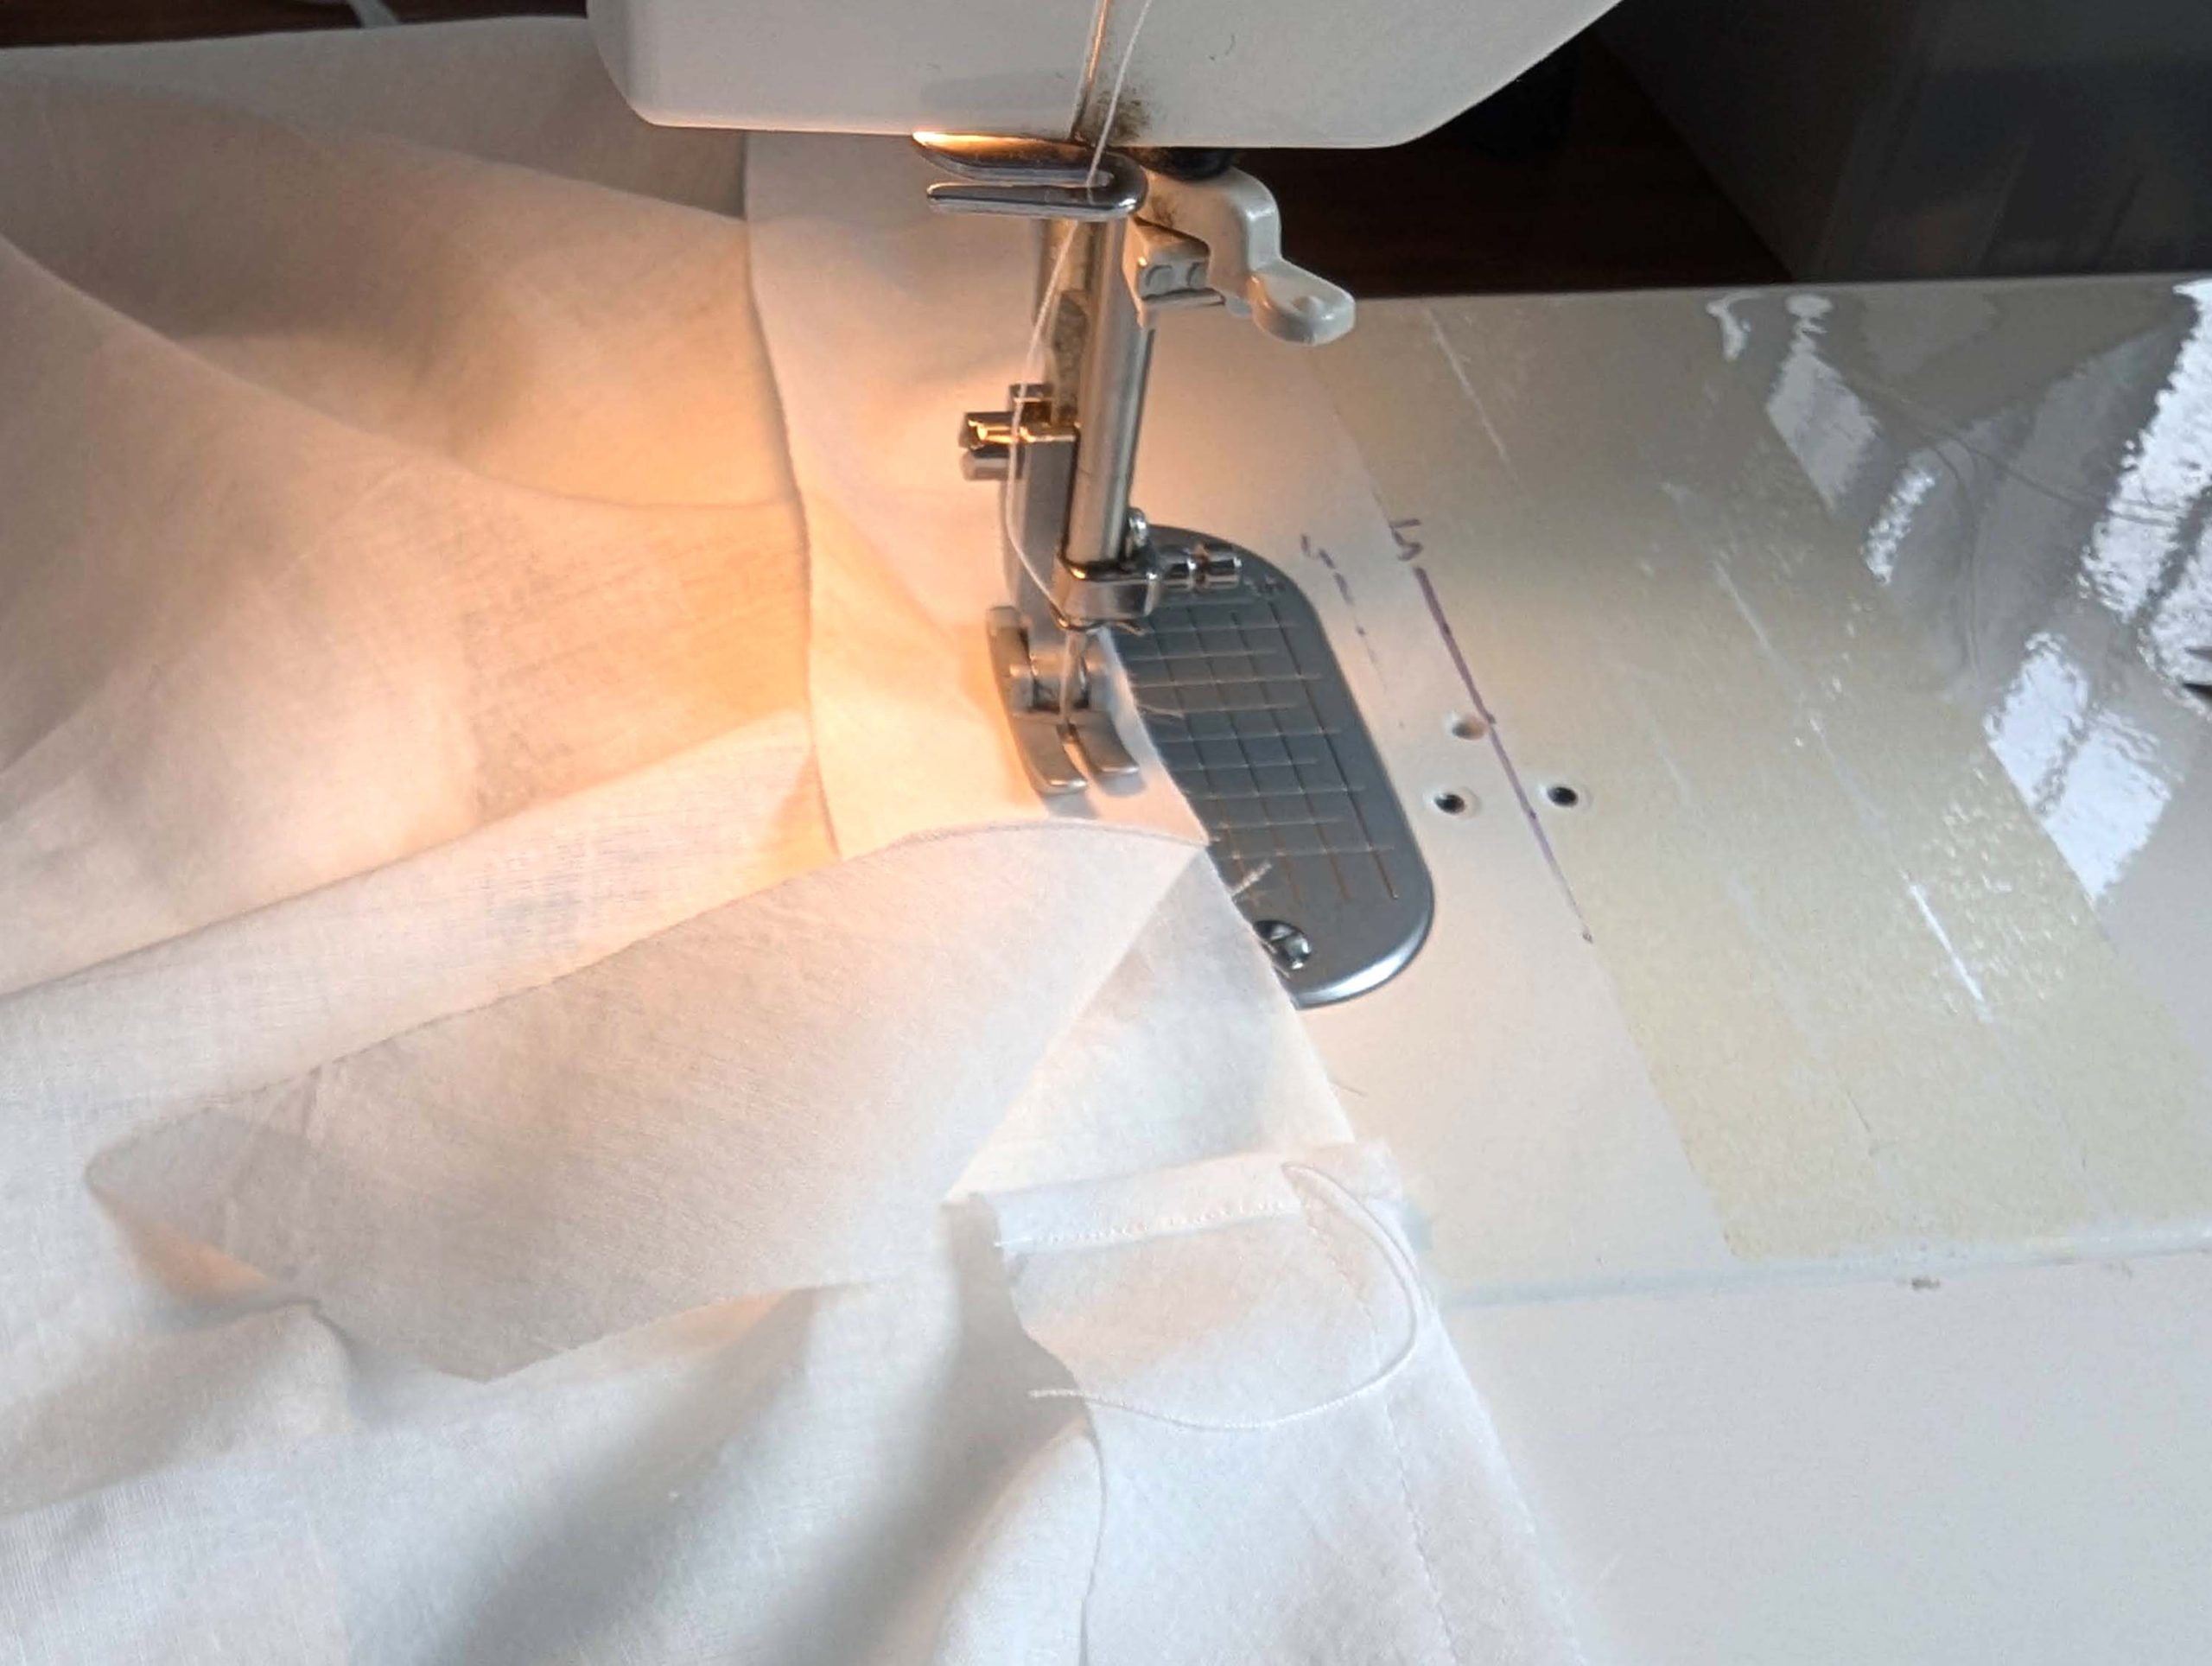
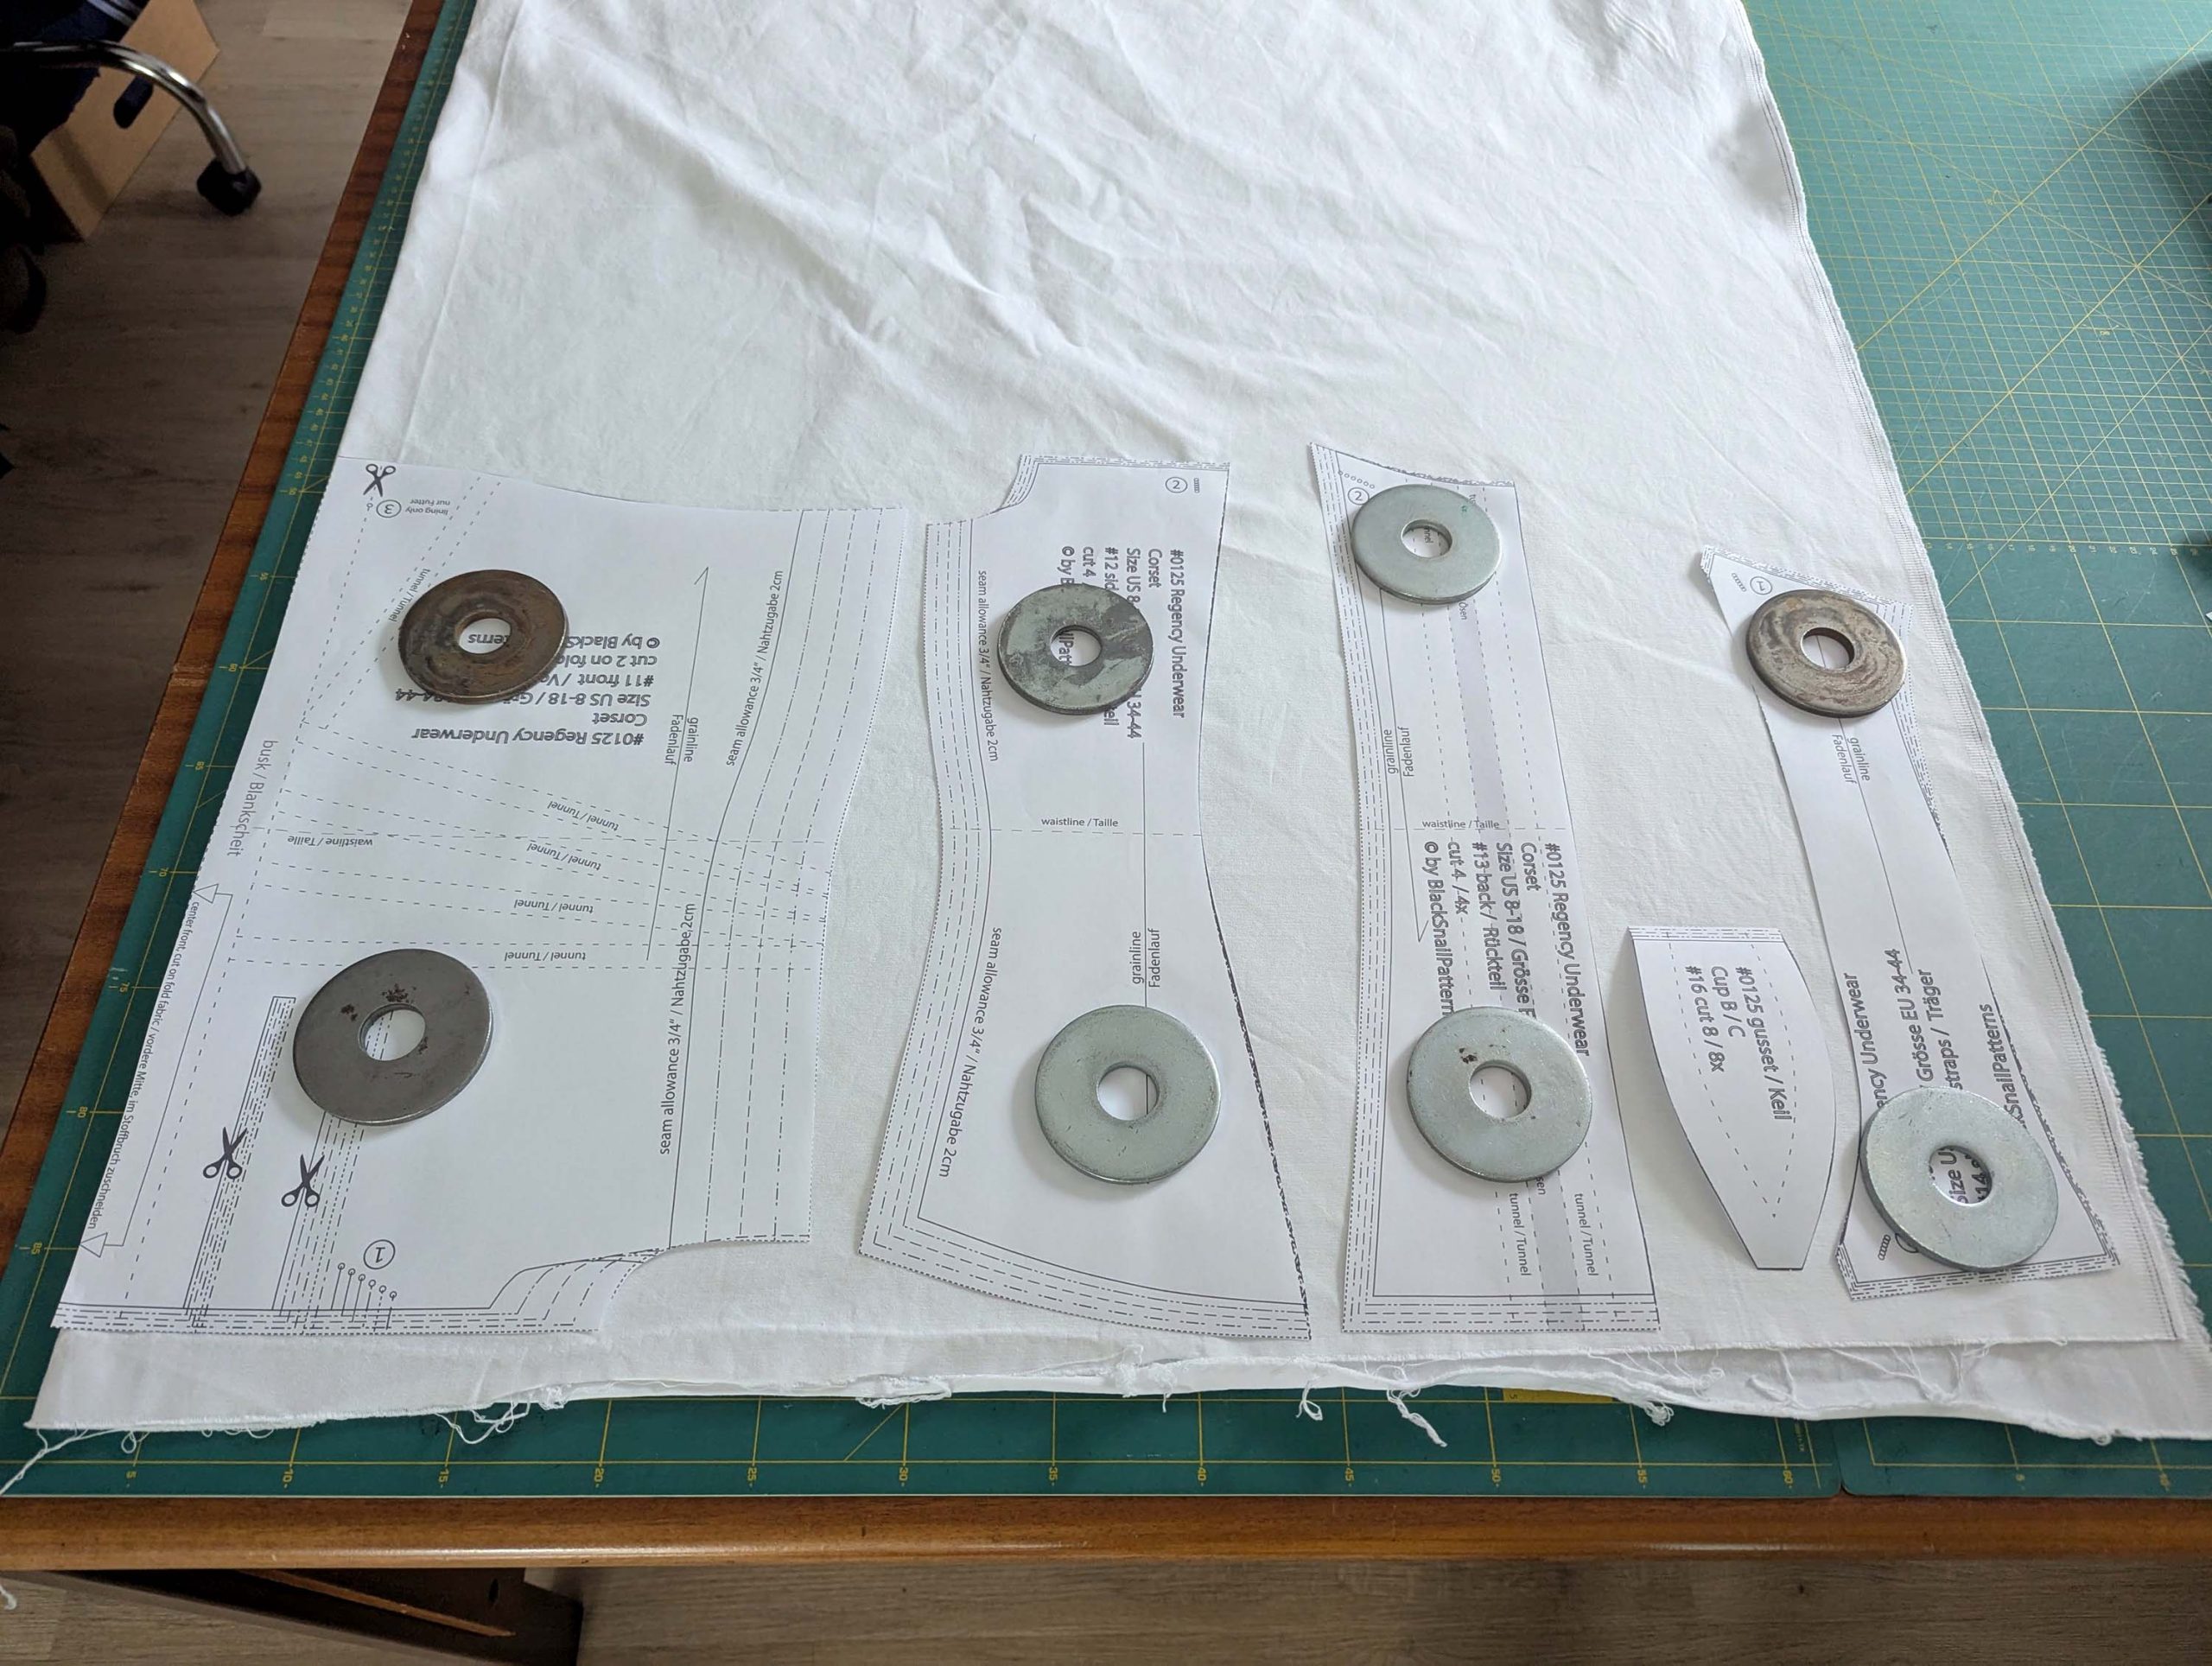
(1)Cut out all pieces from the fabric and lining. Transfer all marks carefully. In this case, I prefer the Pilot Frixion pens for exact lines.
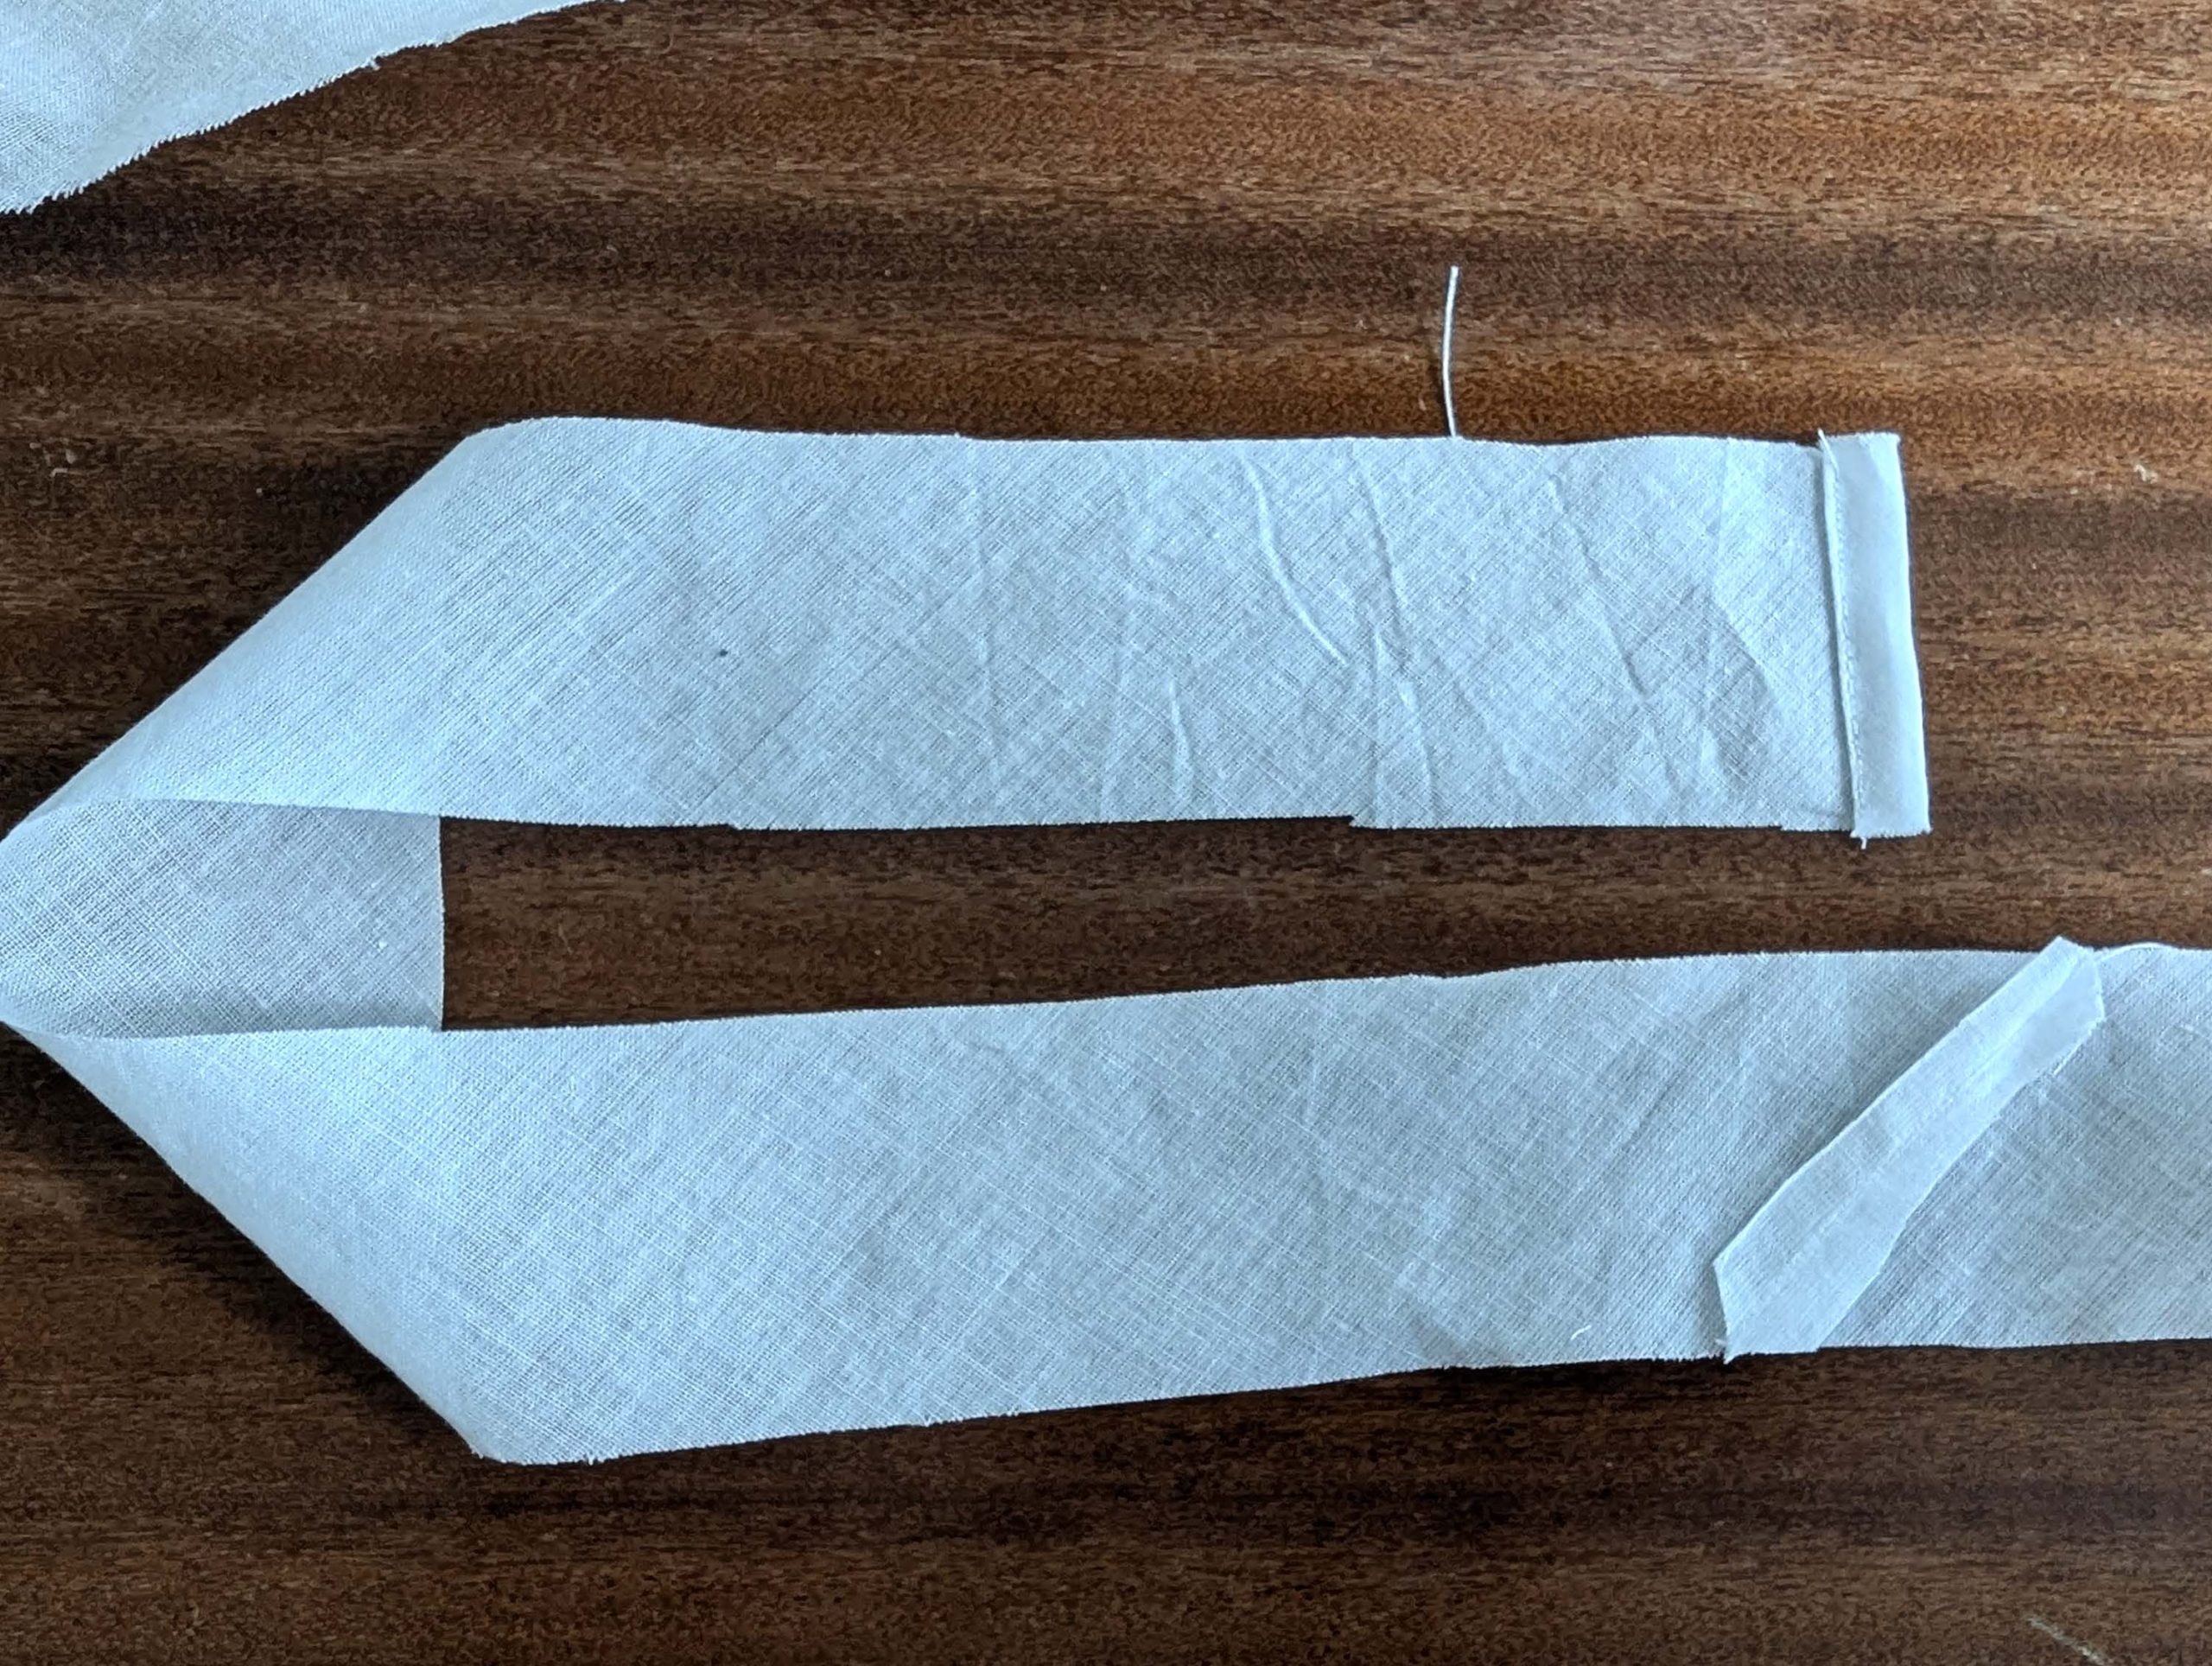
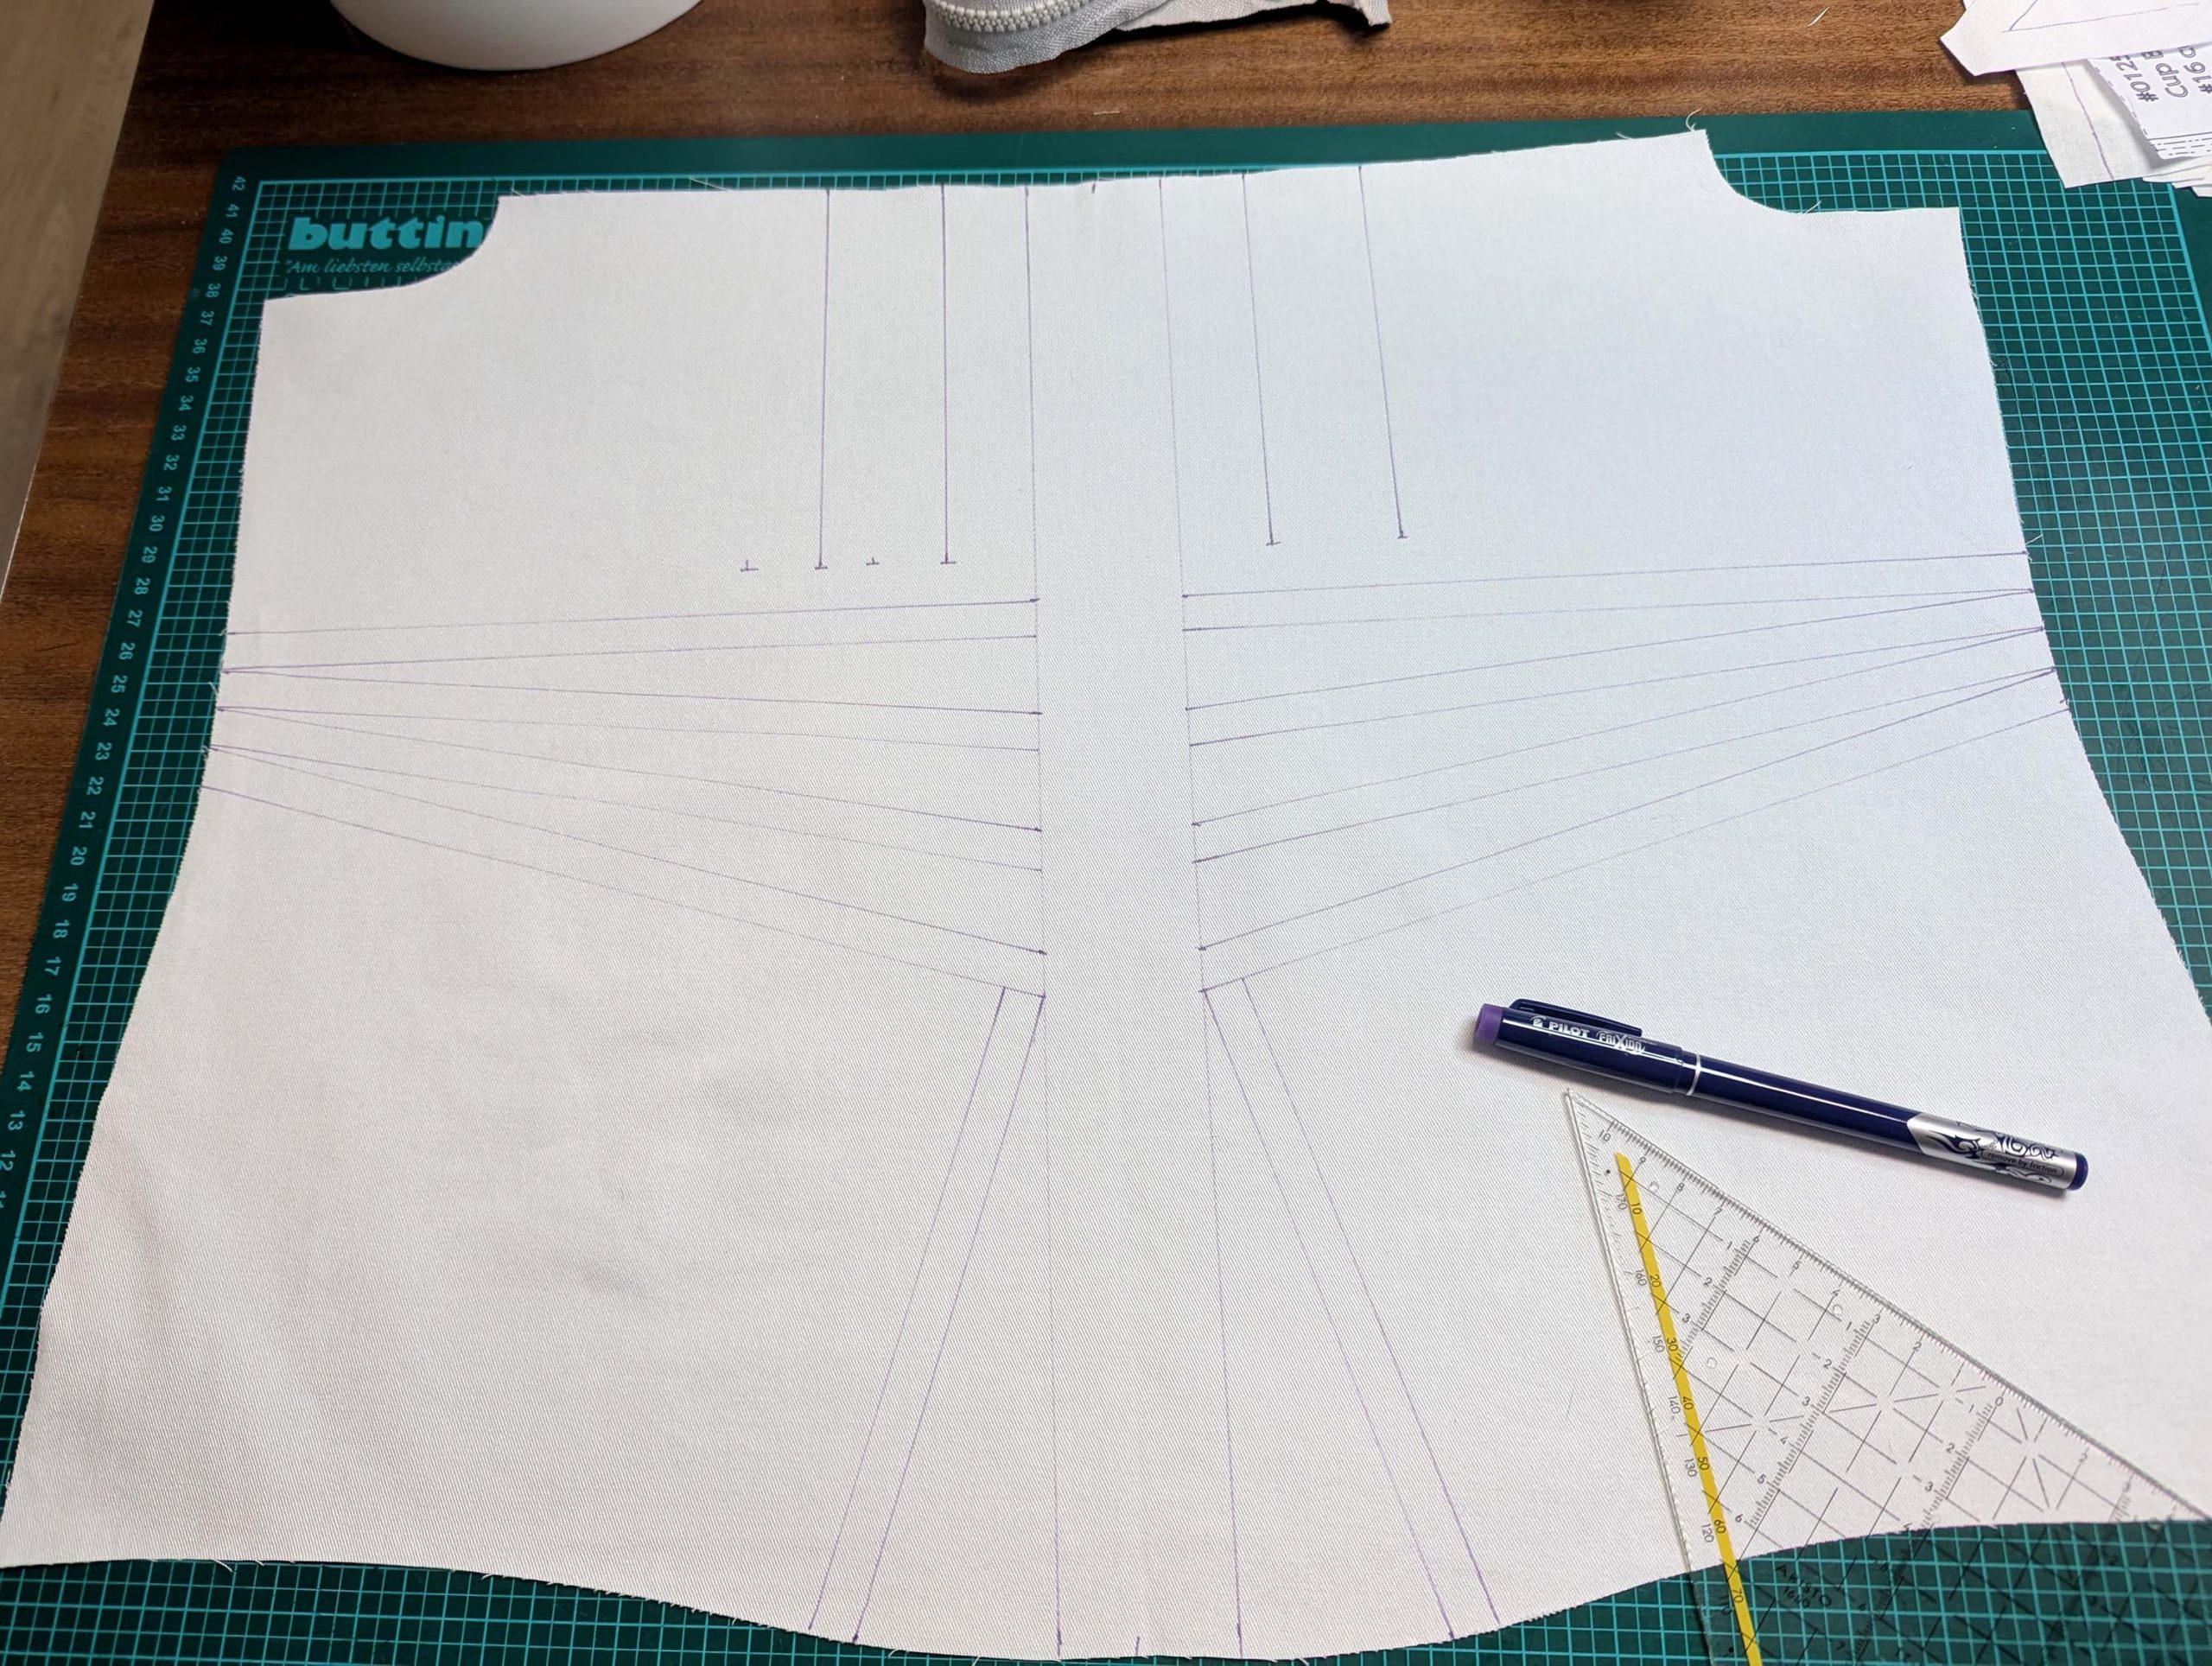
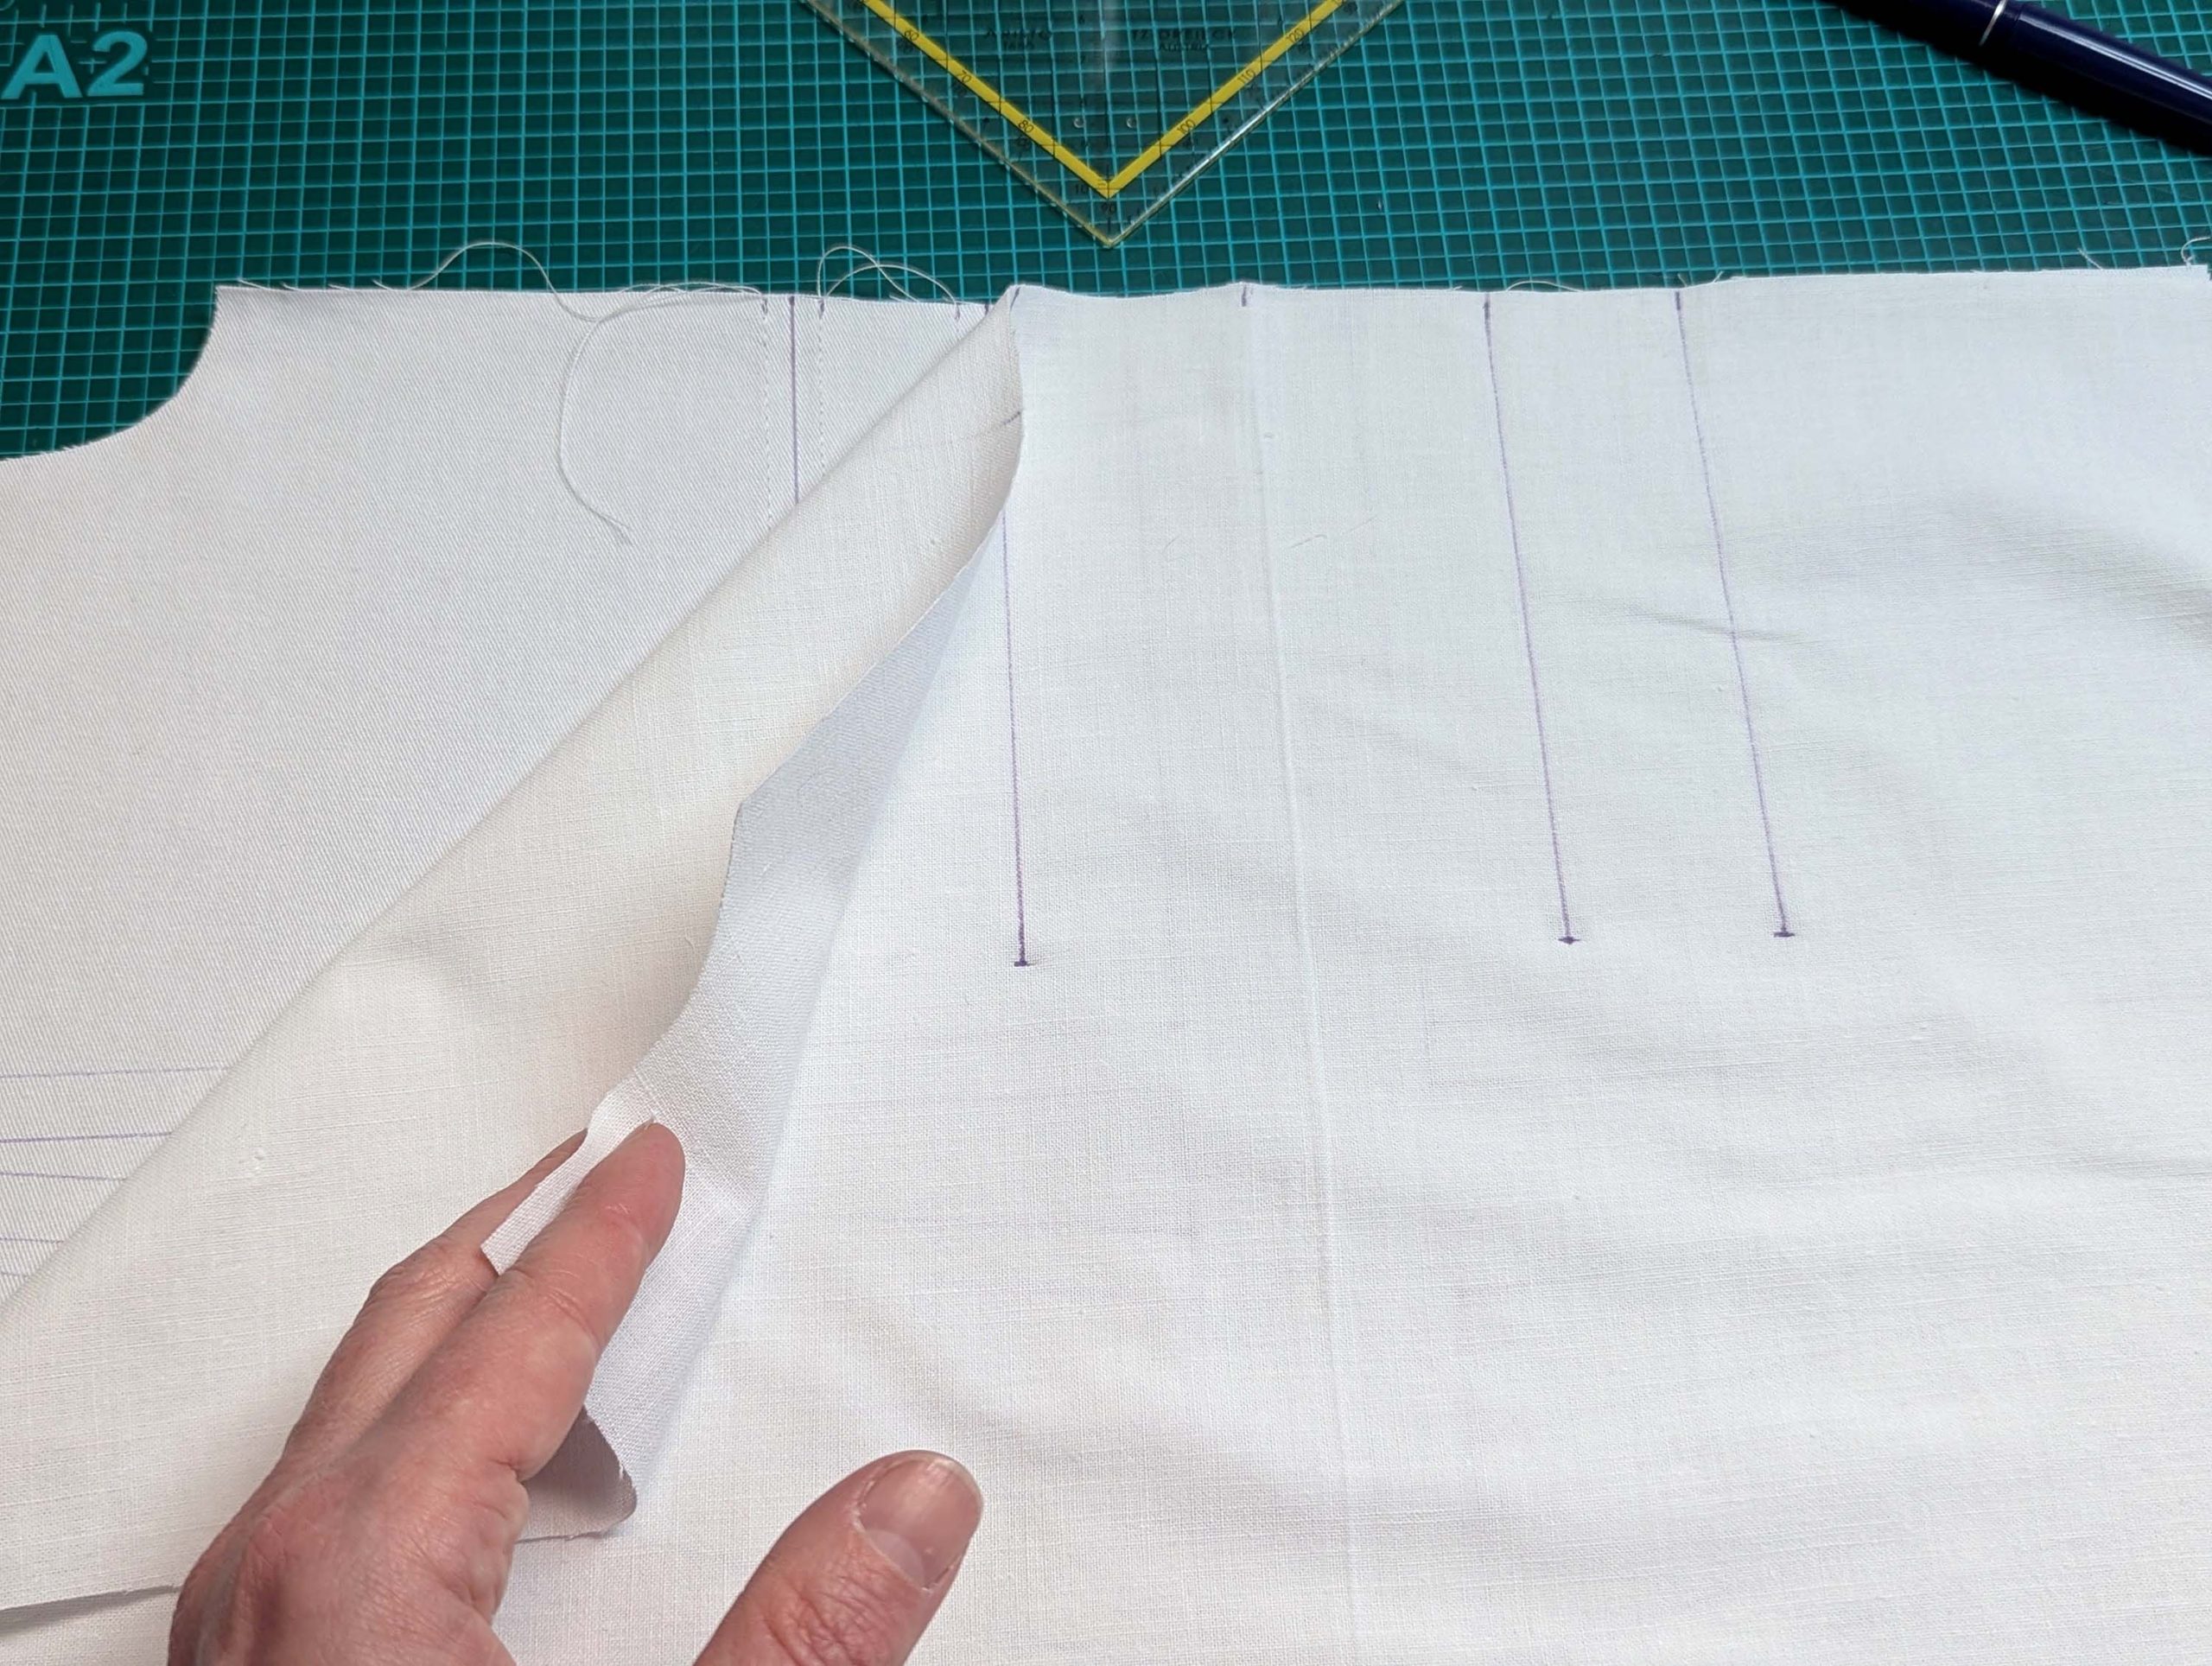
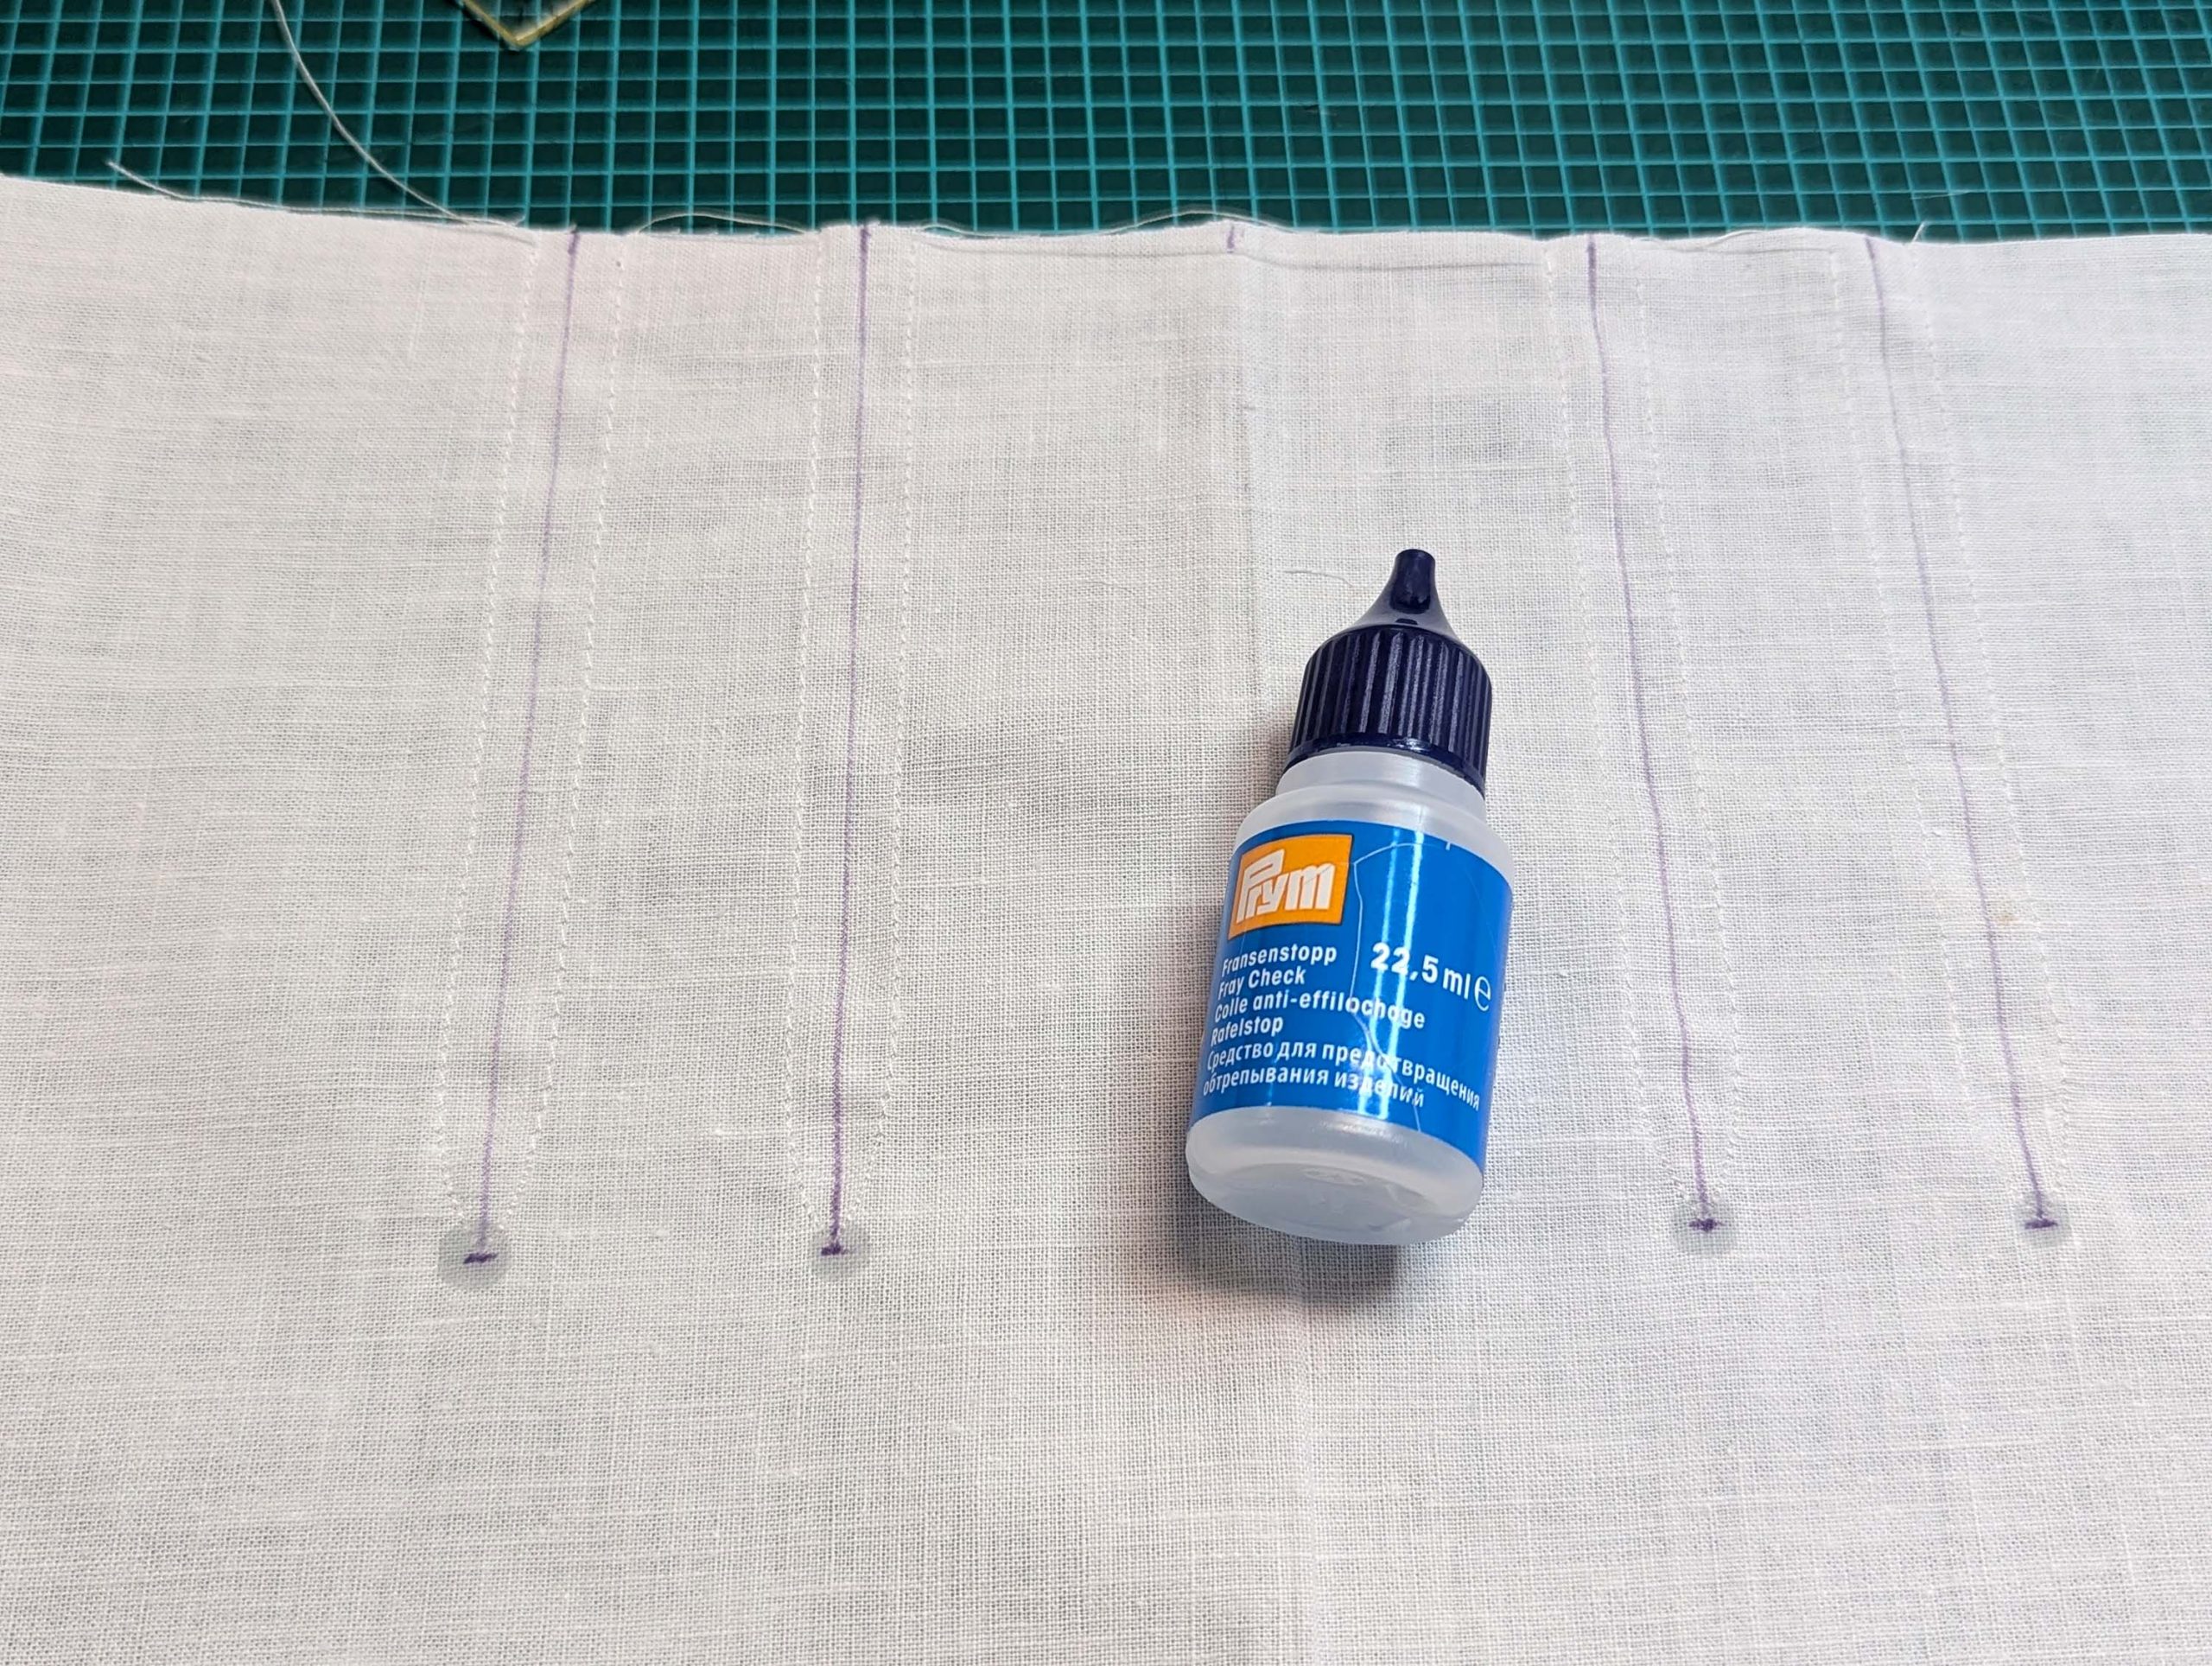
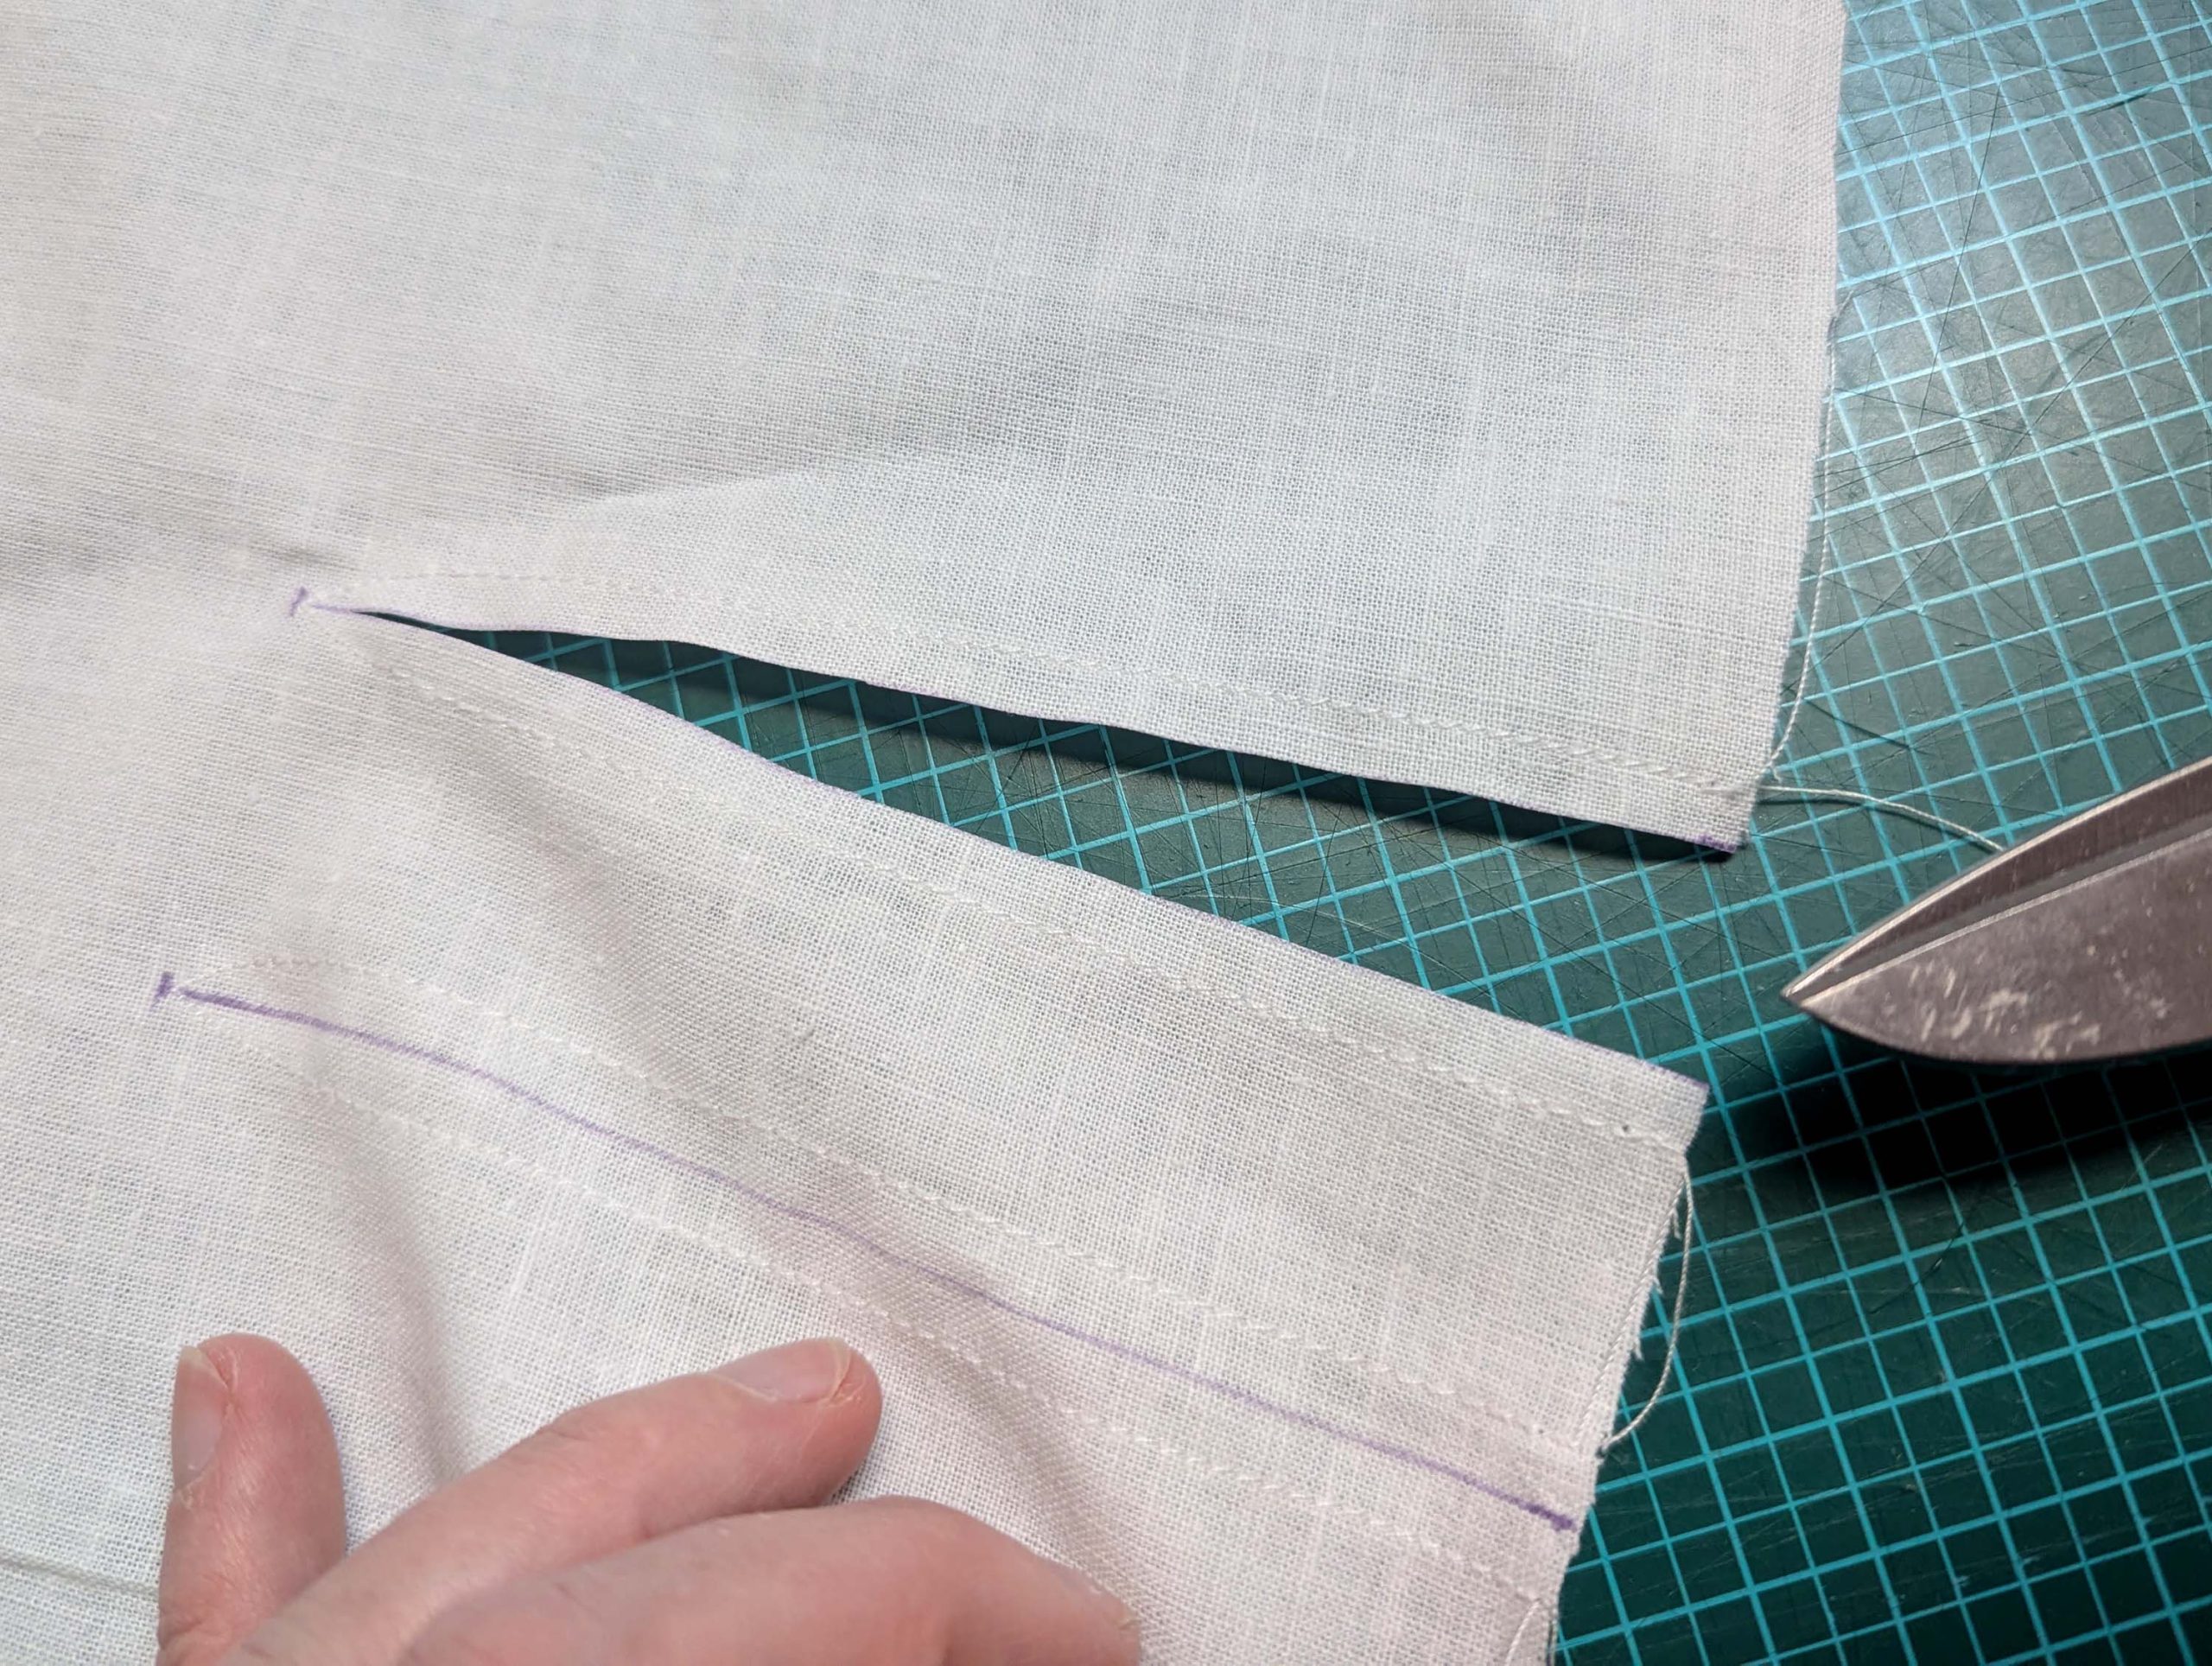
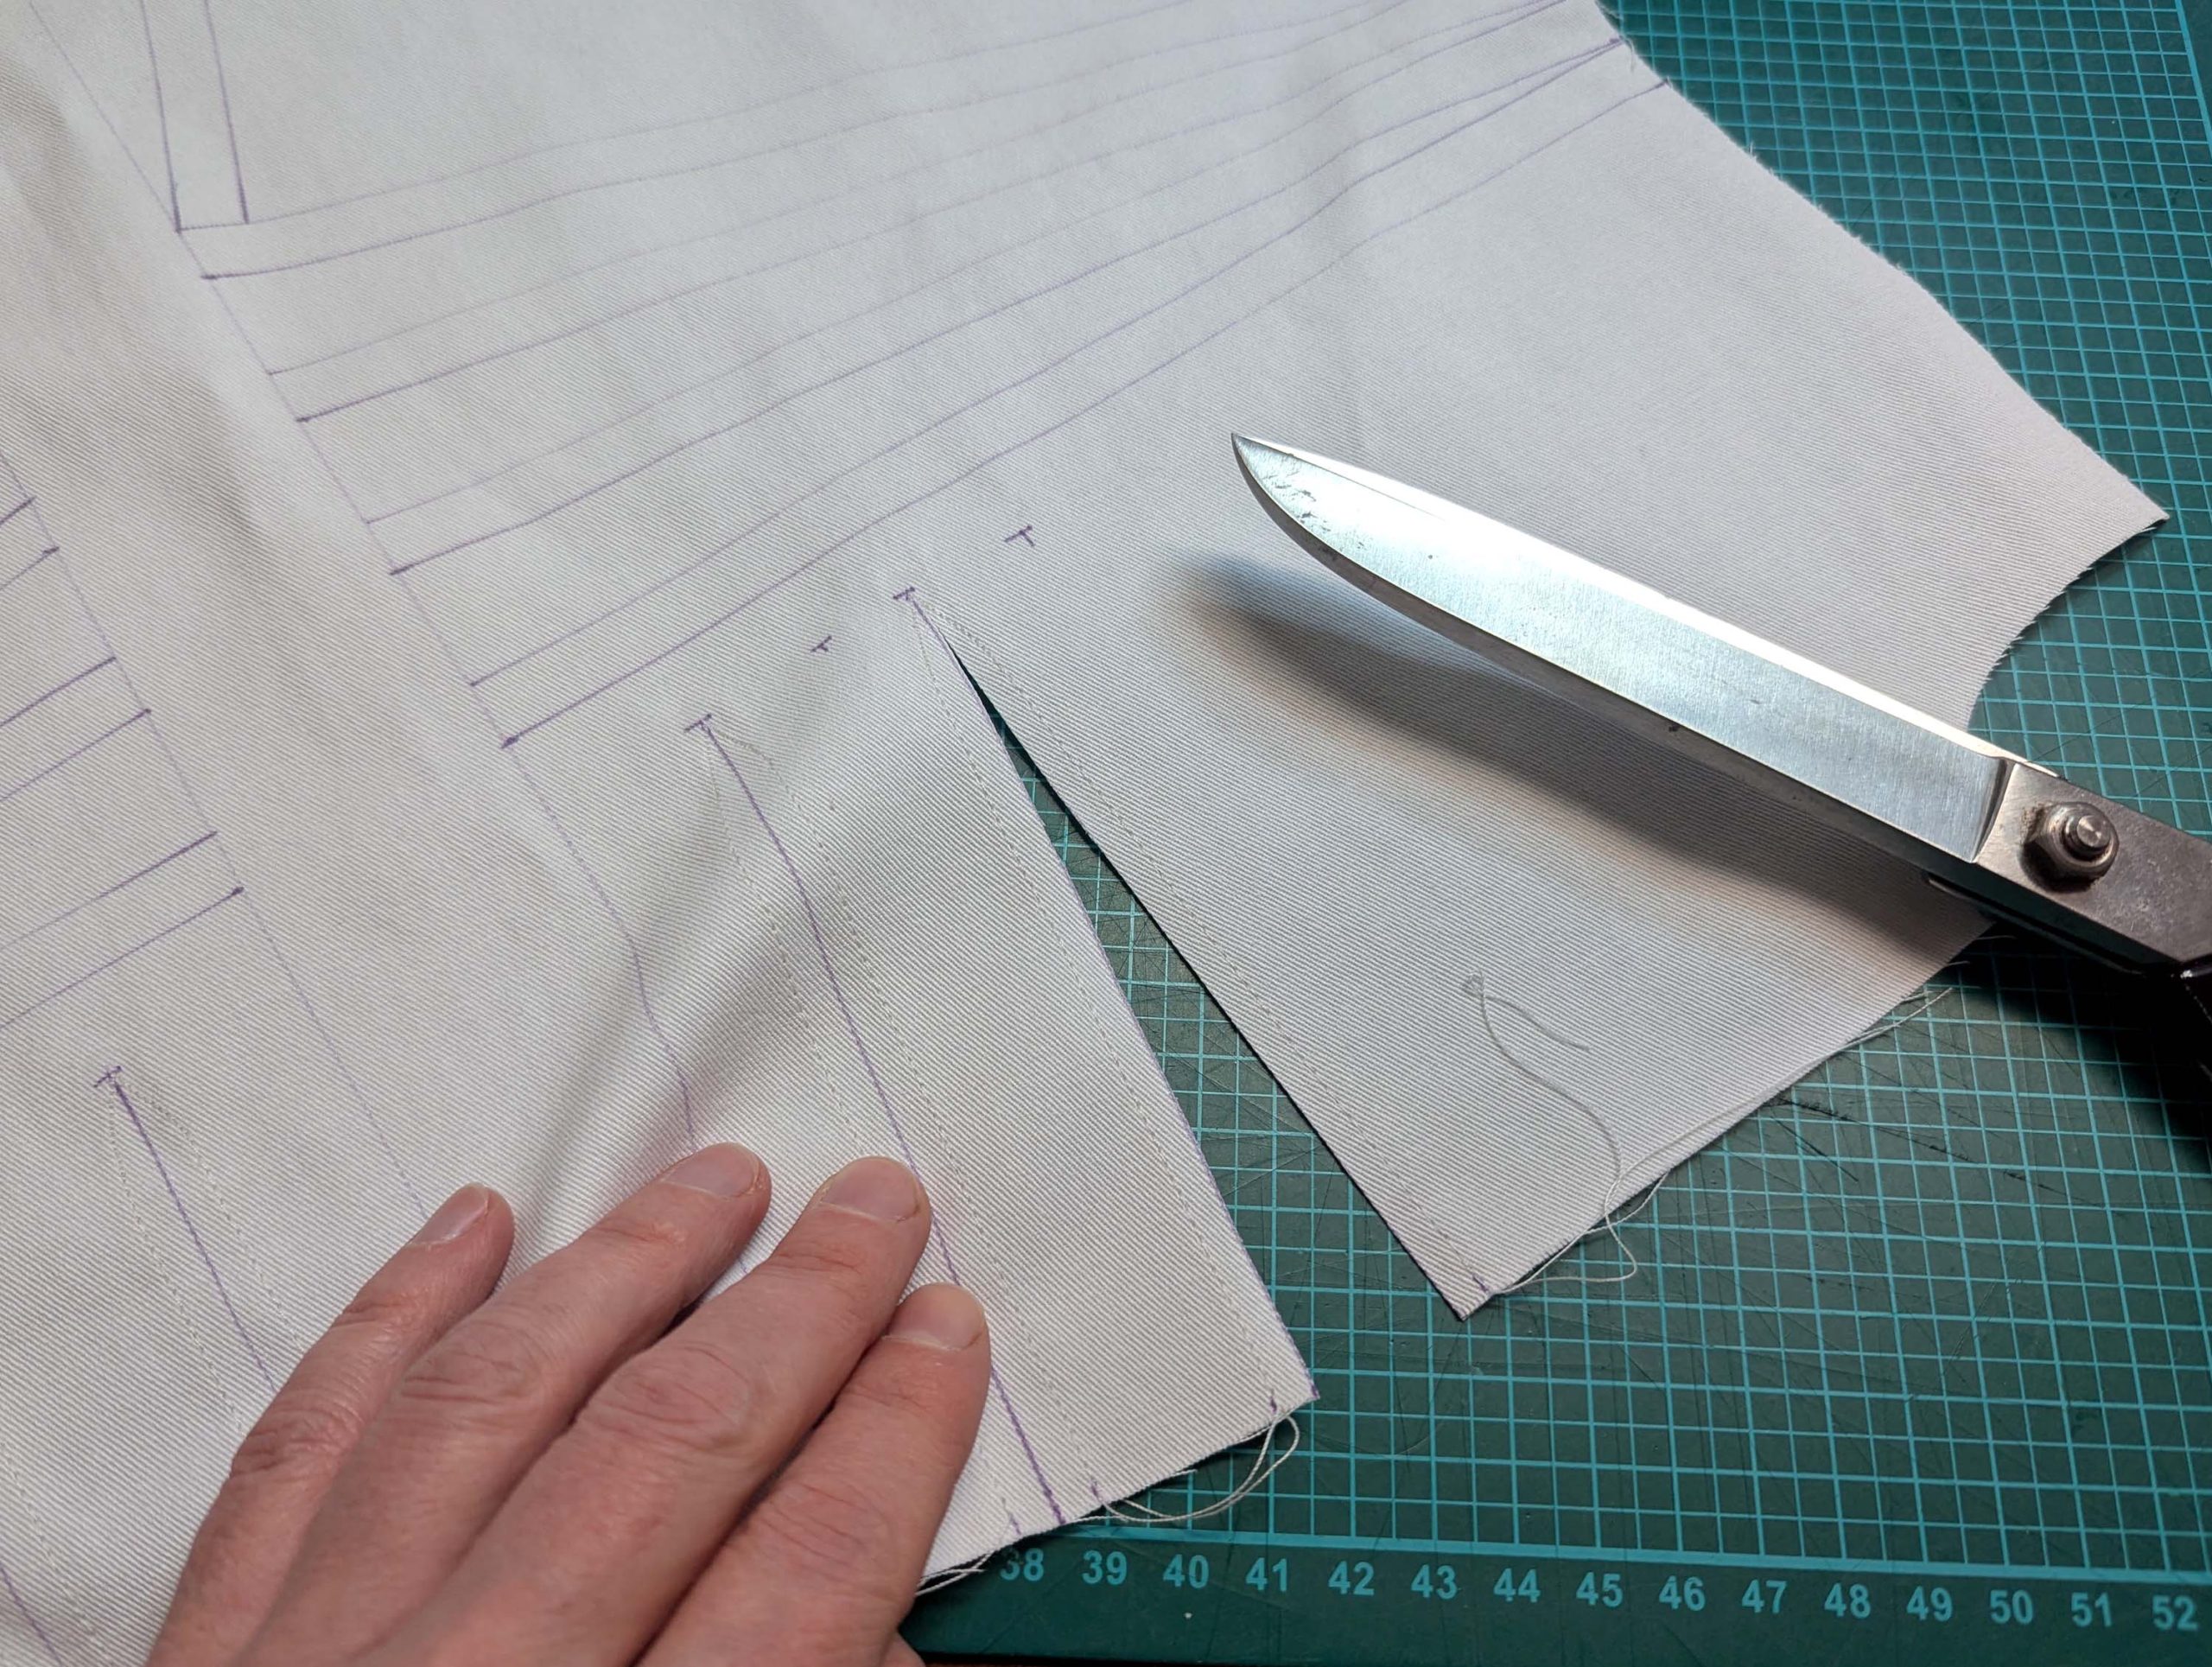
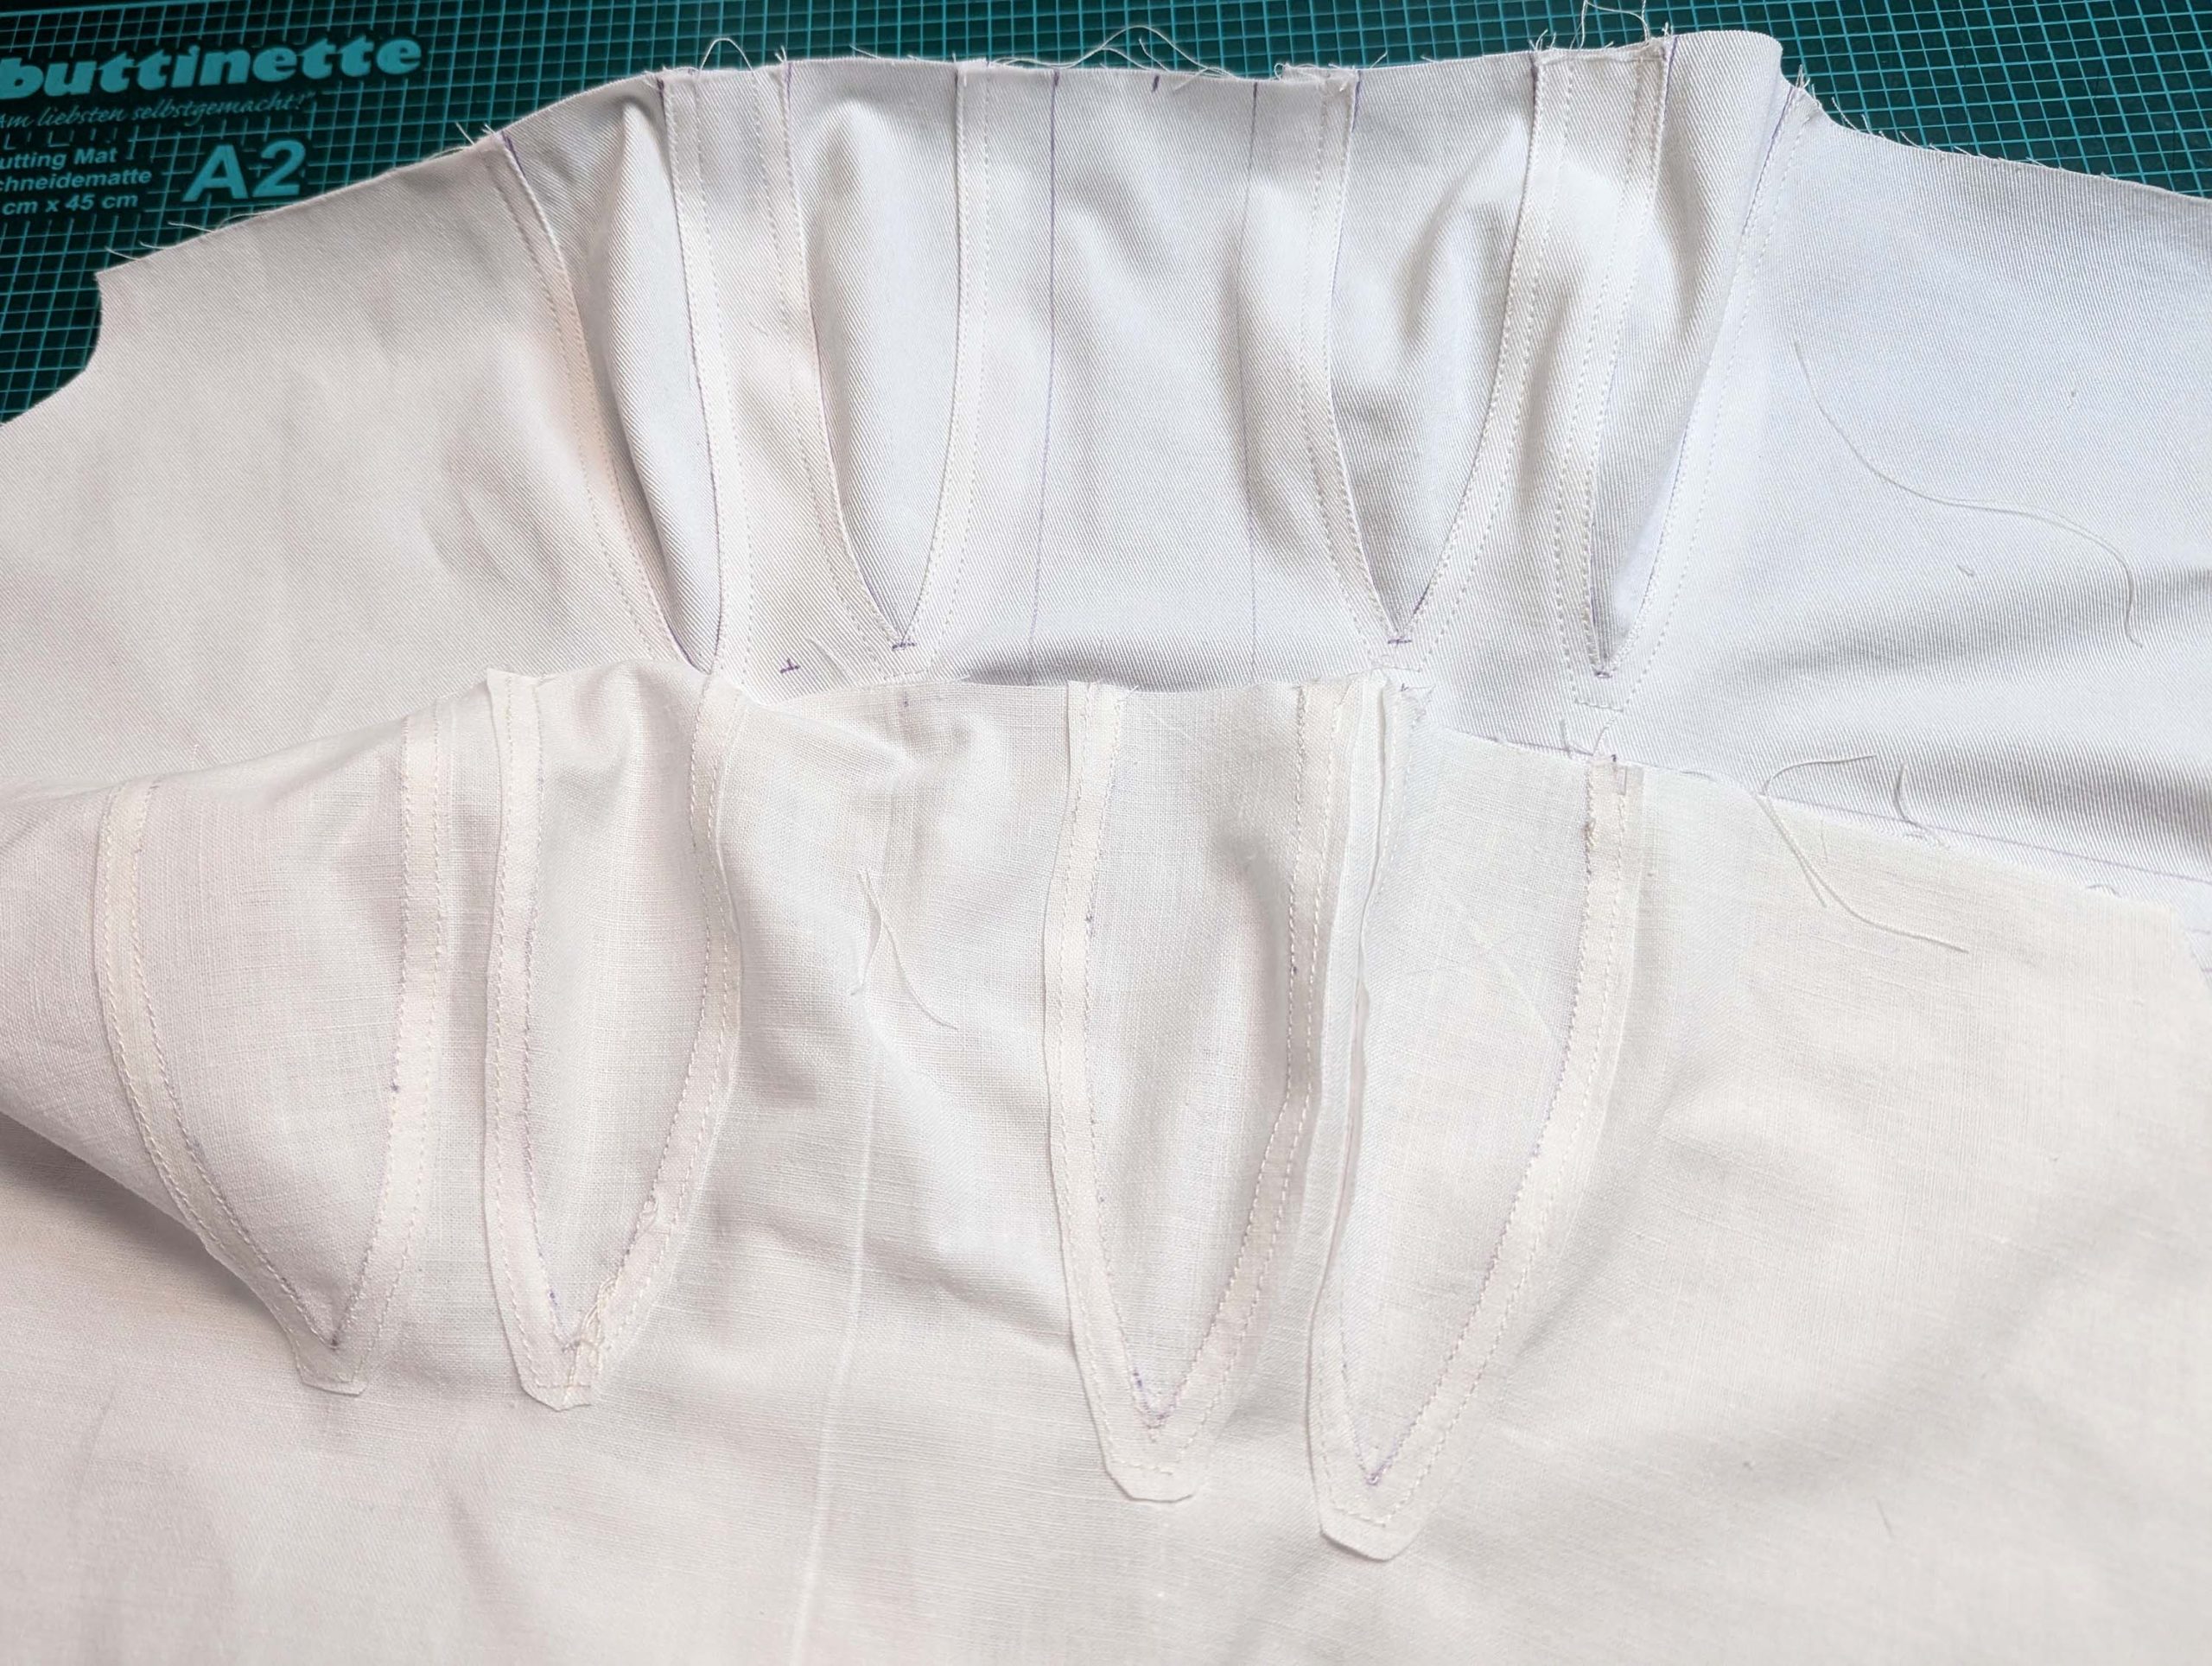
(2) Take the fronts from the fabric and lining and insert the gussets. Numerous techniques exist for inserting a gusset into a corset, and I’d like to share my preferred method. Begin by marking the slash lines on the front corset pieces. Starting on the left side of your marking, position your stitching line approximately ¼ inch (0.5 cm) away from the mark, and stitch downward, maintaining this parallel distance. As you approach the end of the slash, about 5/8 inch (1.5 cm) from the bottom, reduce your stitch length and gracefully curve your stitching toward the slash endpoint.
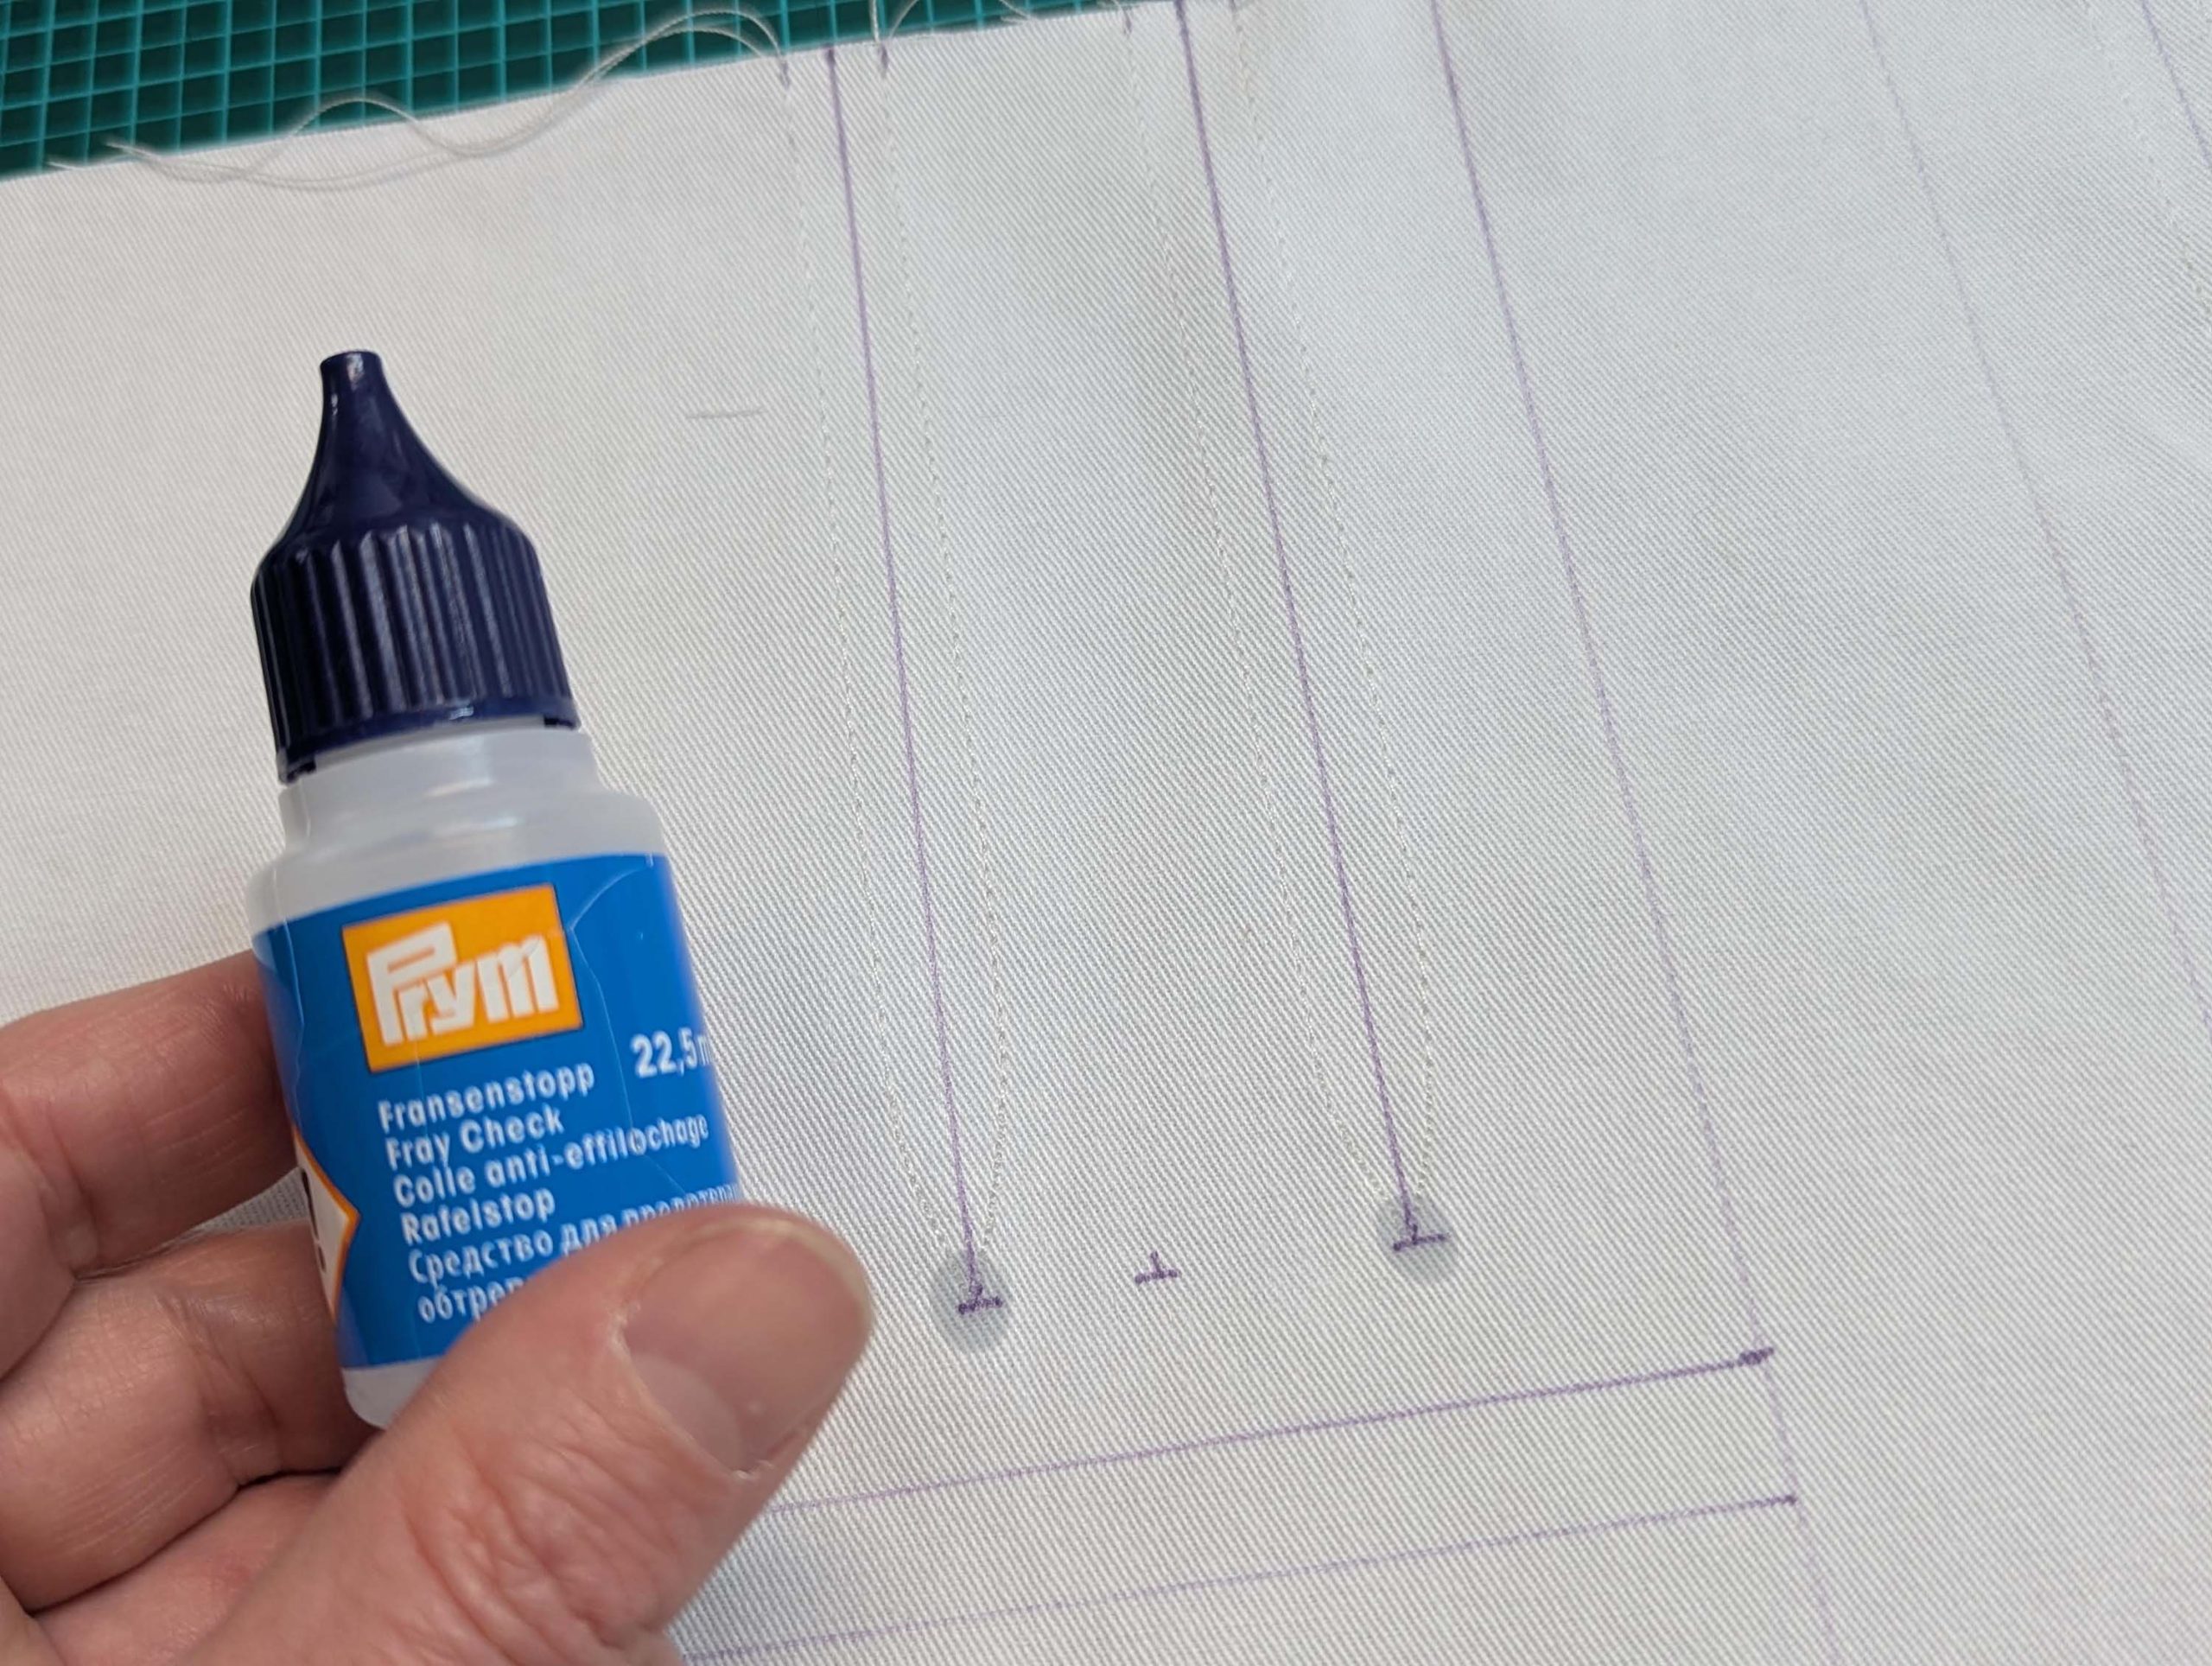
Once you reach the end, pivot your work and mirror these same steps on the opposite side, stitching upward until you reach the fabric’s edge. Apply a drop of Fray-Check at the end of the slash and cut along the line after drying. Fold the seam allowances towards the wrong side along the stitching lines. Sew the fashion fabric and lining separately.
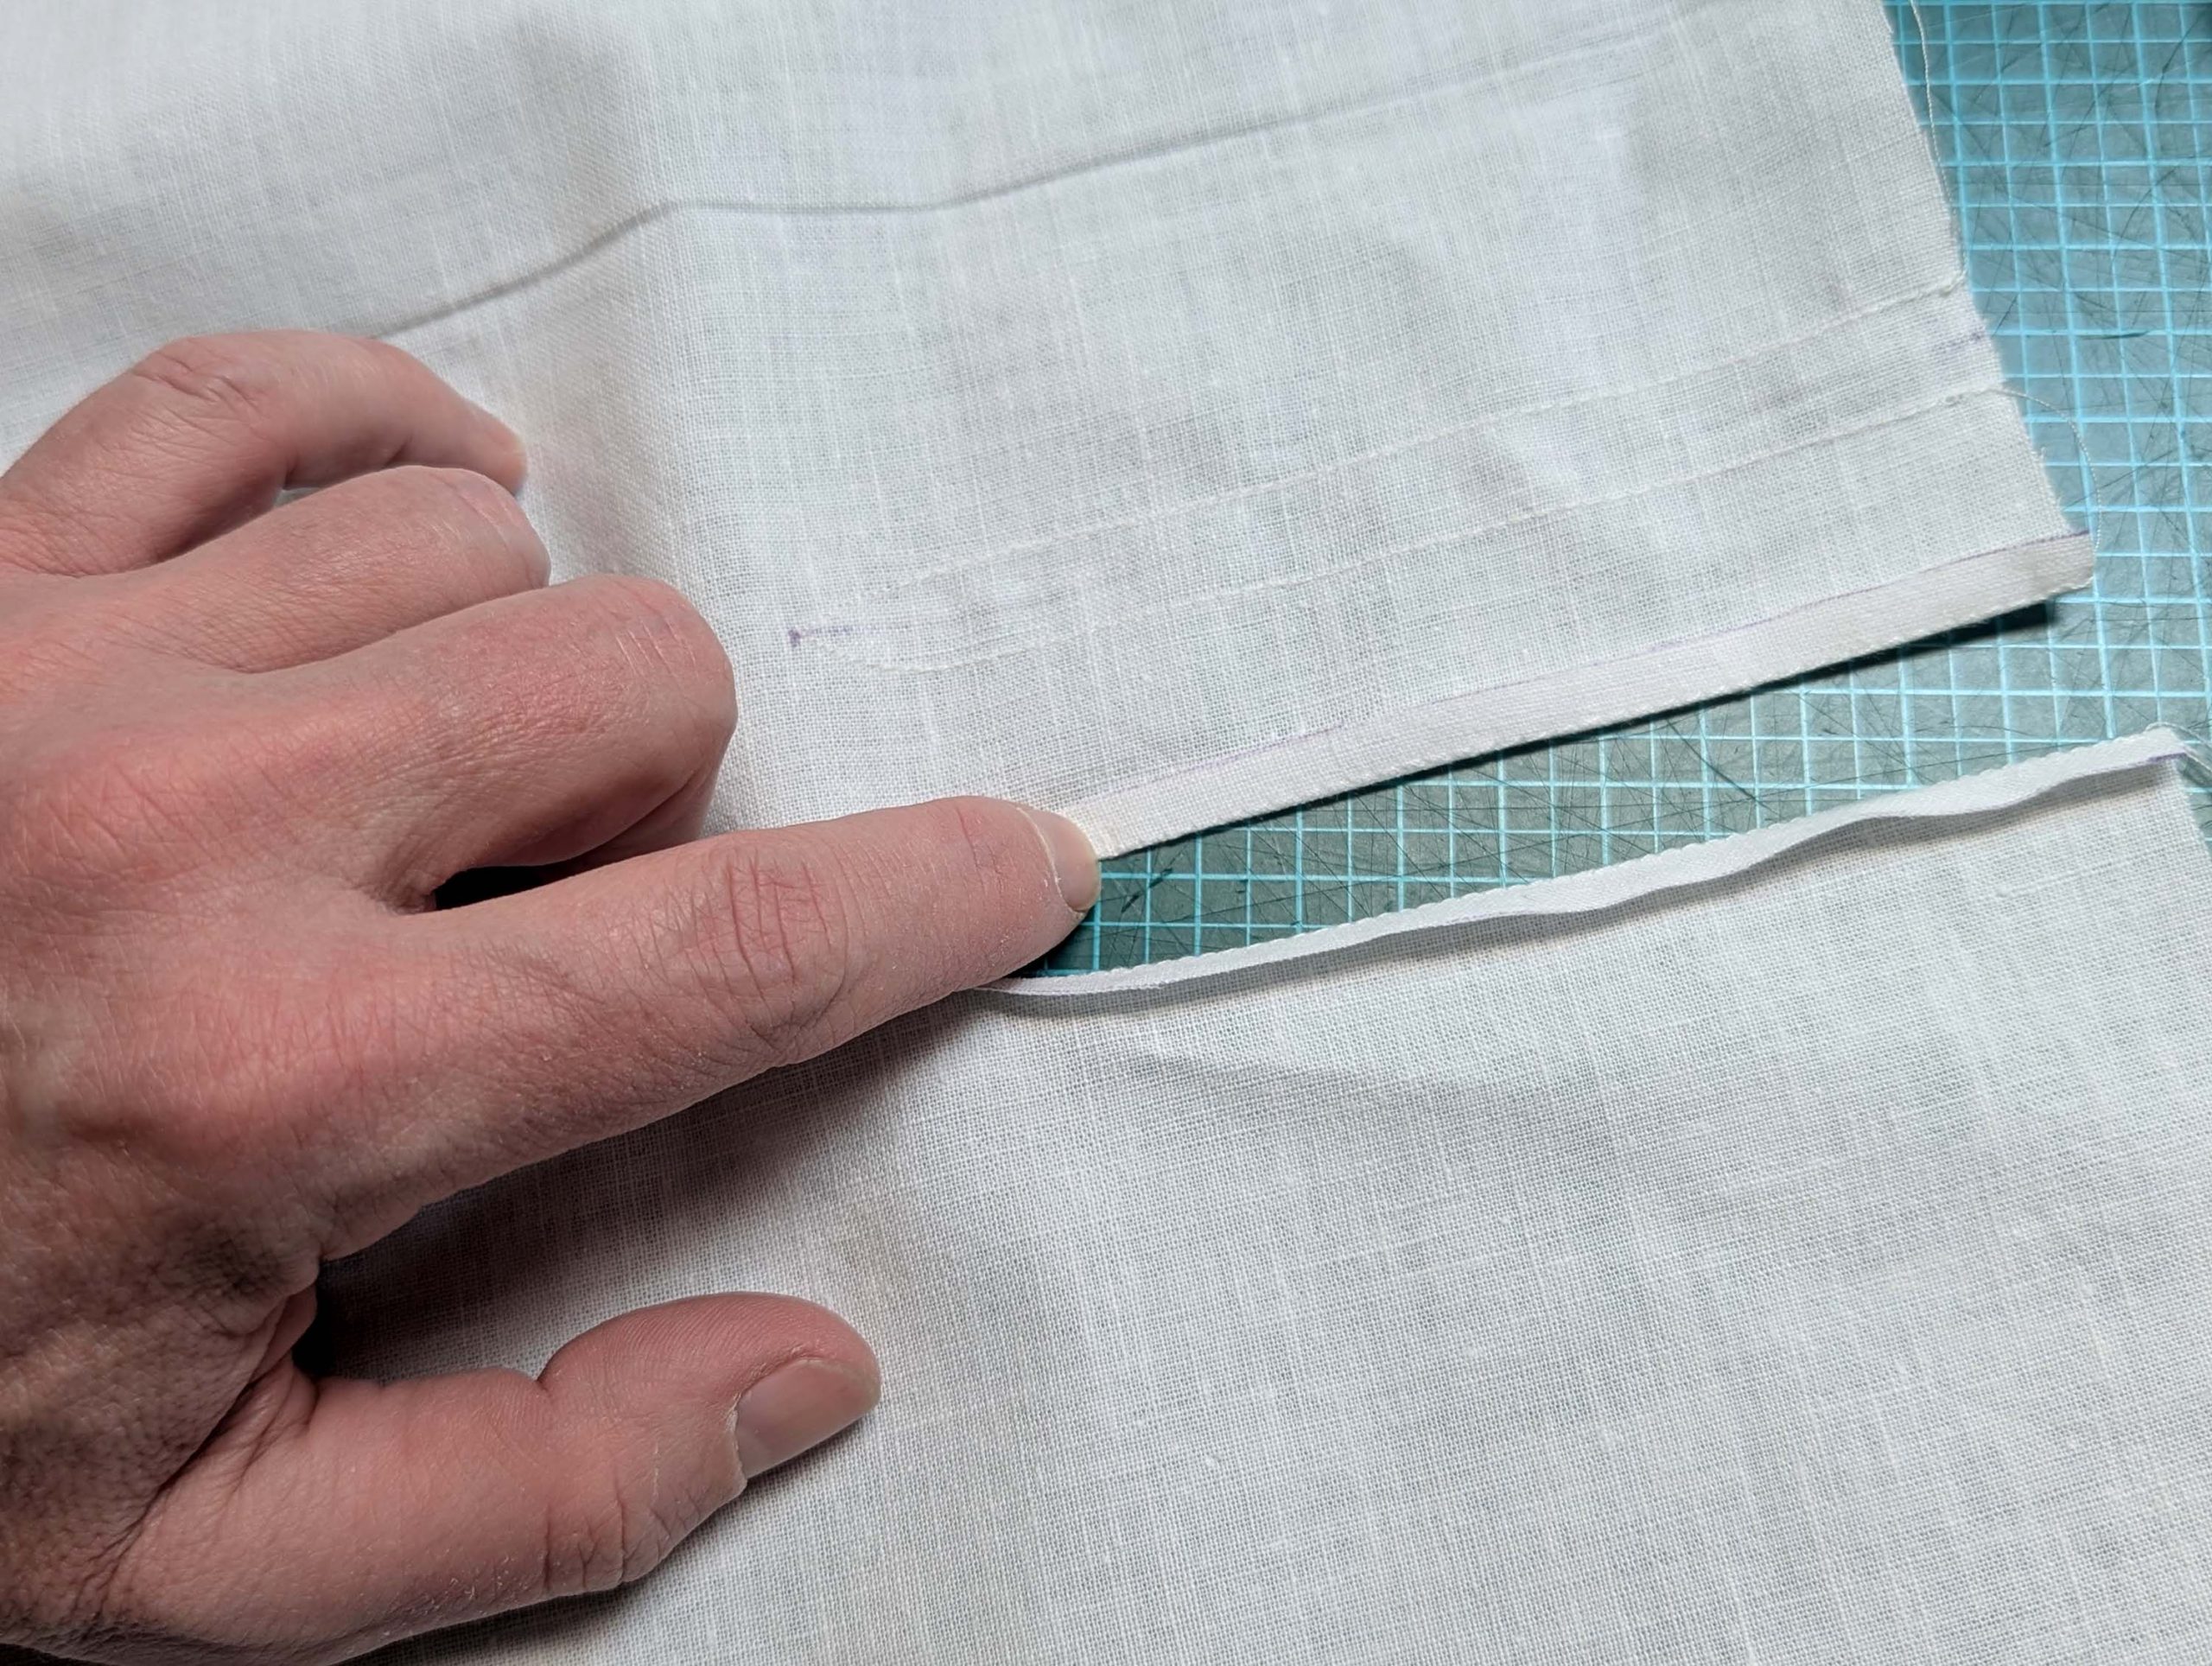
Mark the stitching line on the gusset and align the slash edges with the stitching lines. Stitch in place right beside the edge, pivoting at the end. If wanted, make a second stitching row parallel to the first. Repeat all steps on the lining separately. Optionally, bar tack the end of the gussets on the finished corset.
Line up the fronts from the fashion fabric and lining, wrong sides together, matching the gussets. Line up the gussets exactly, first baste, then stitch together the layers in the ditch of the gusset from the right side. OK, you know me, I like to omit the basting and sew just with the layers pinned together.
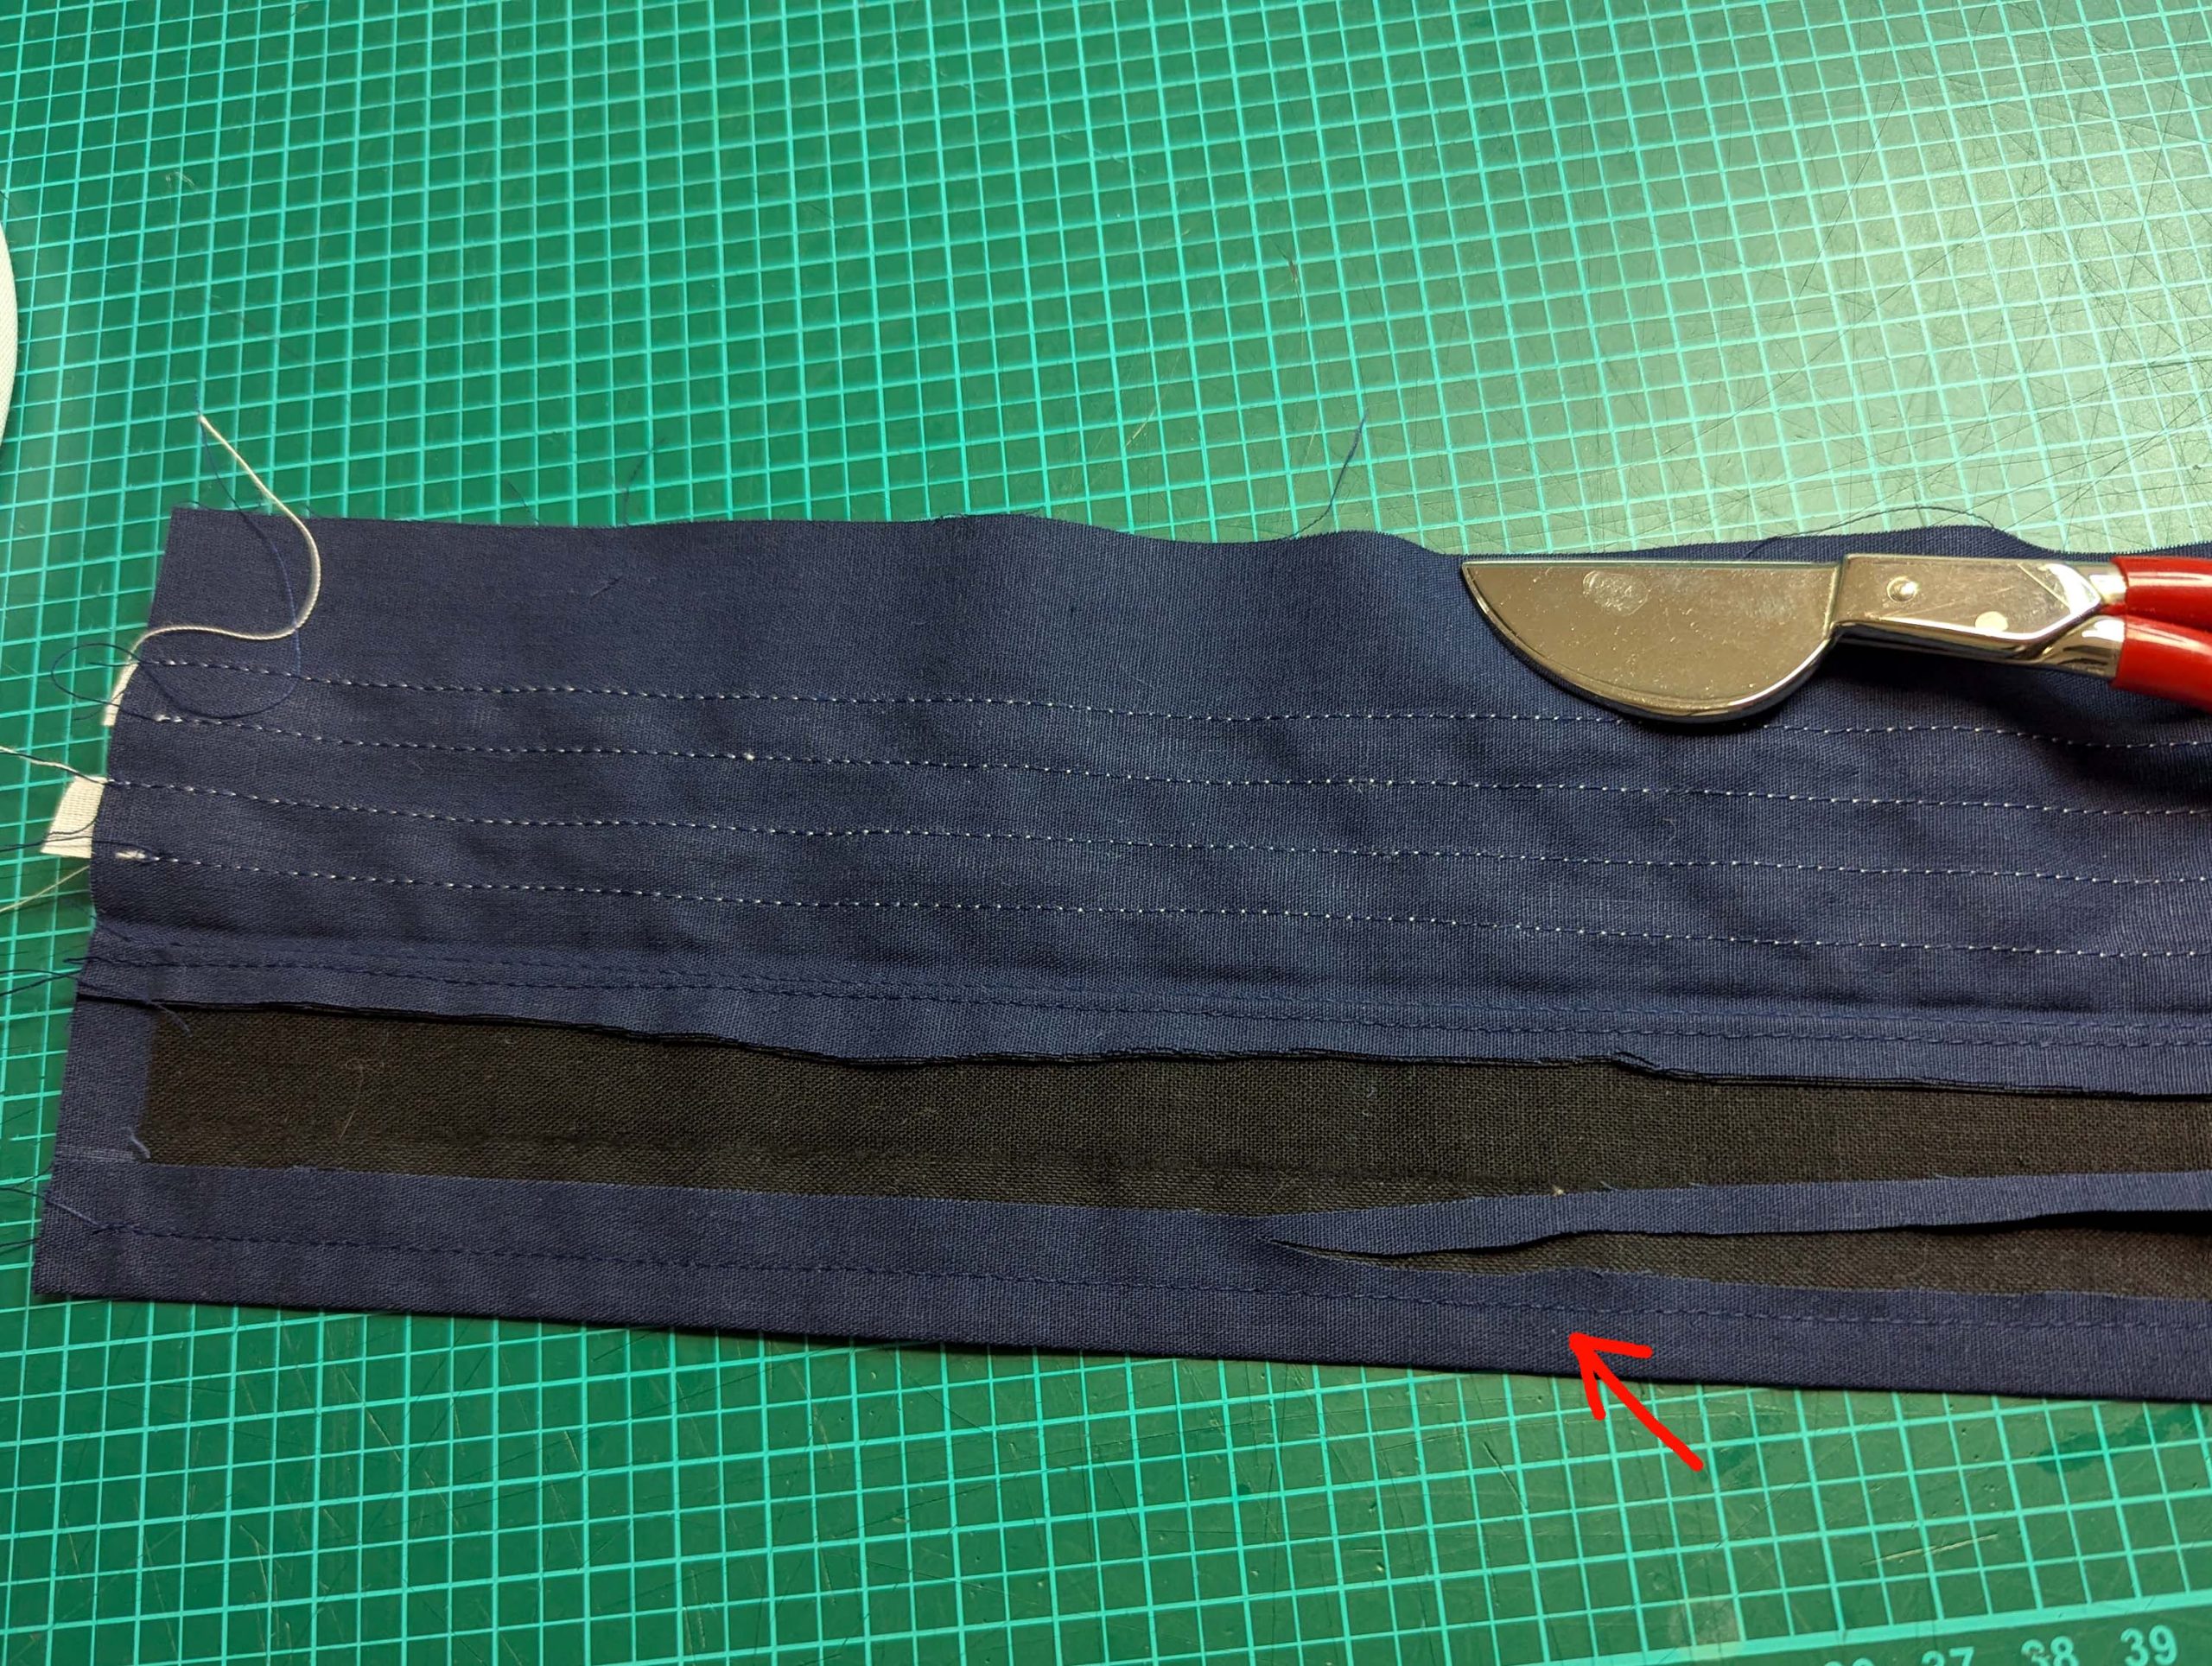
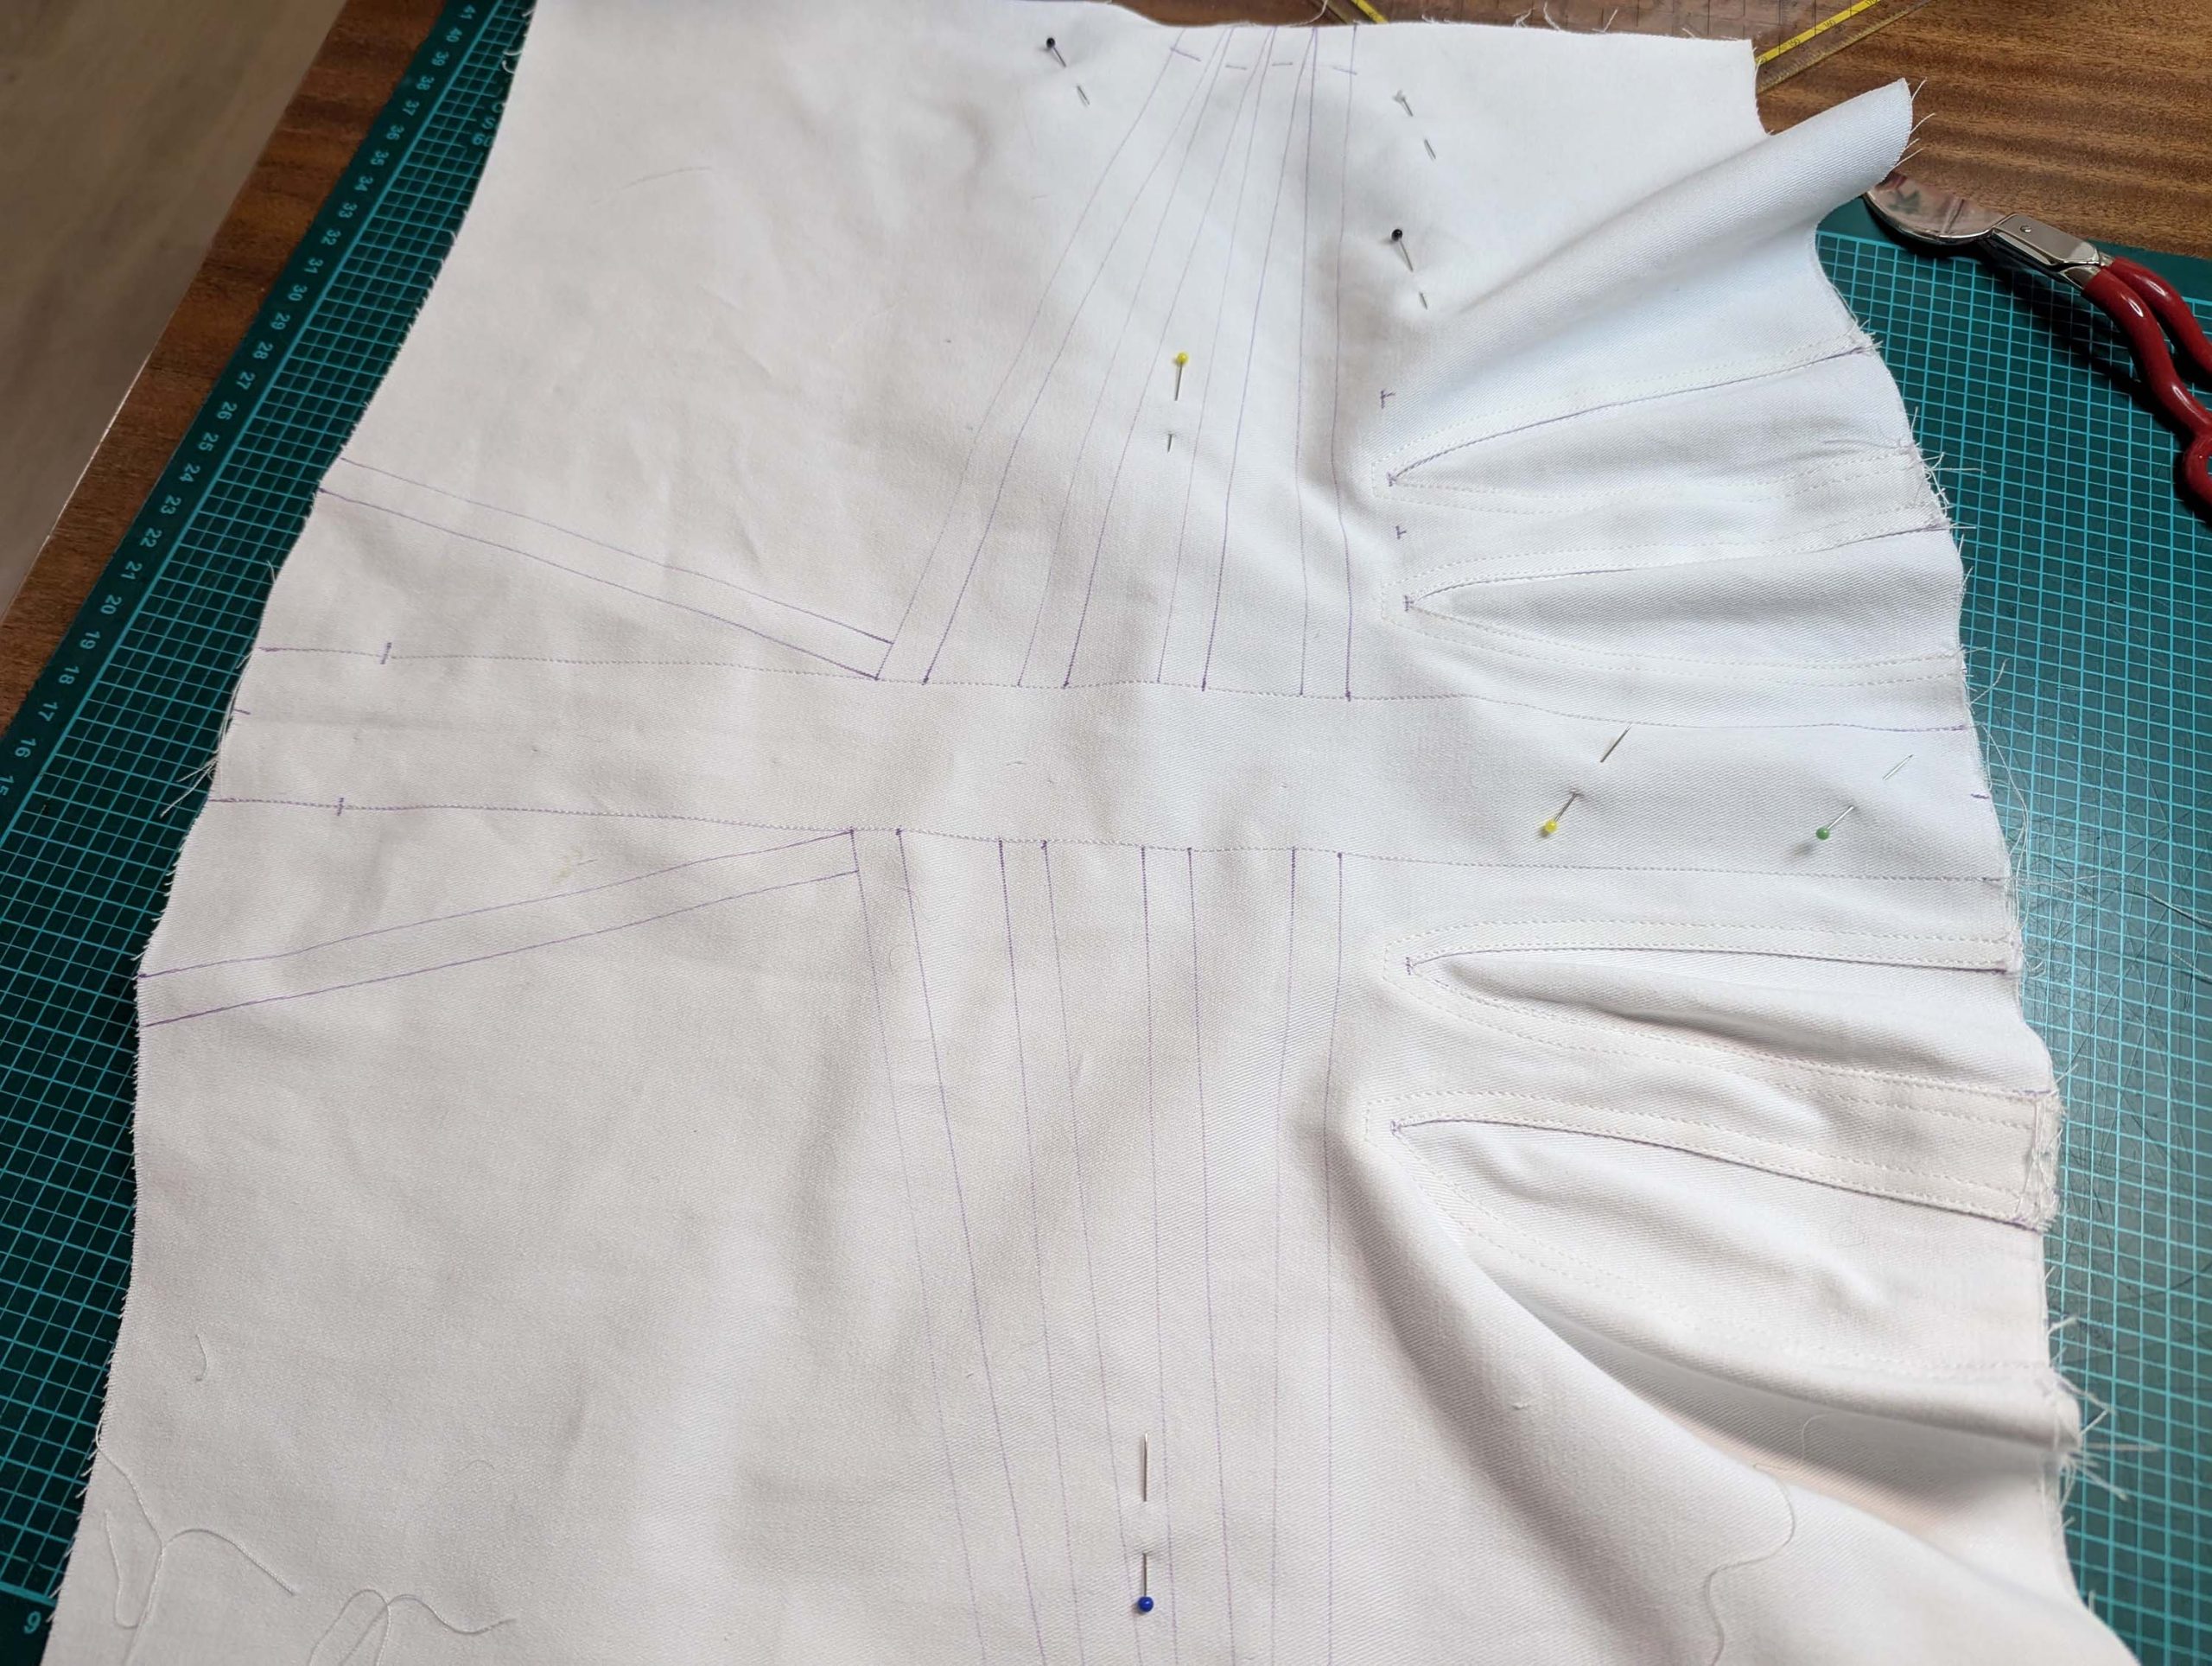
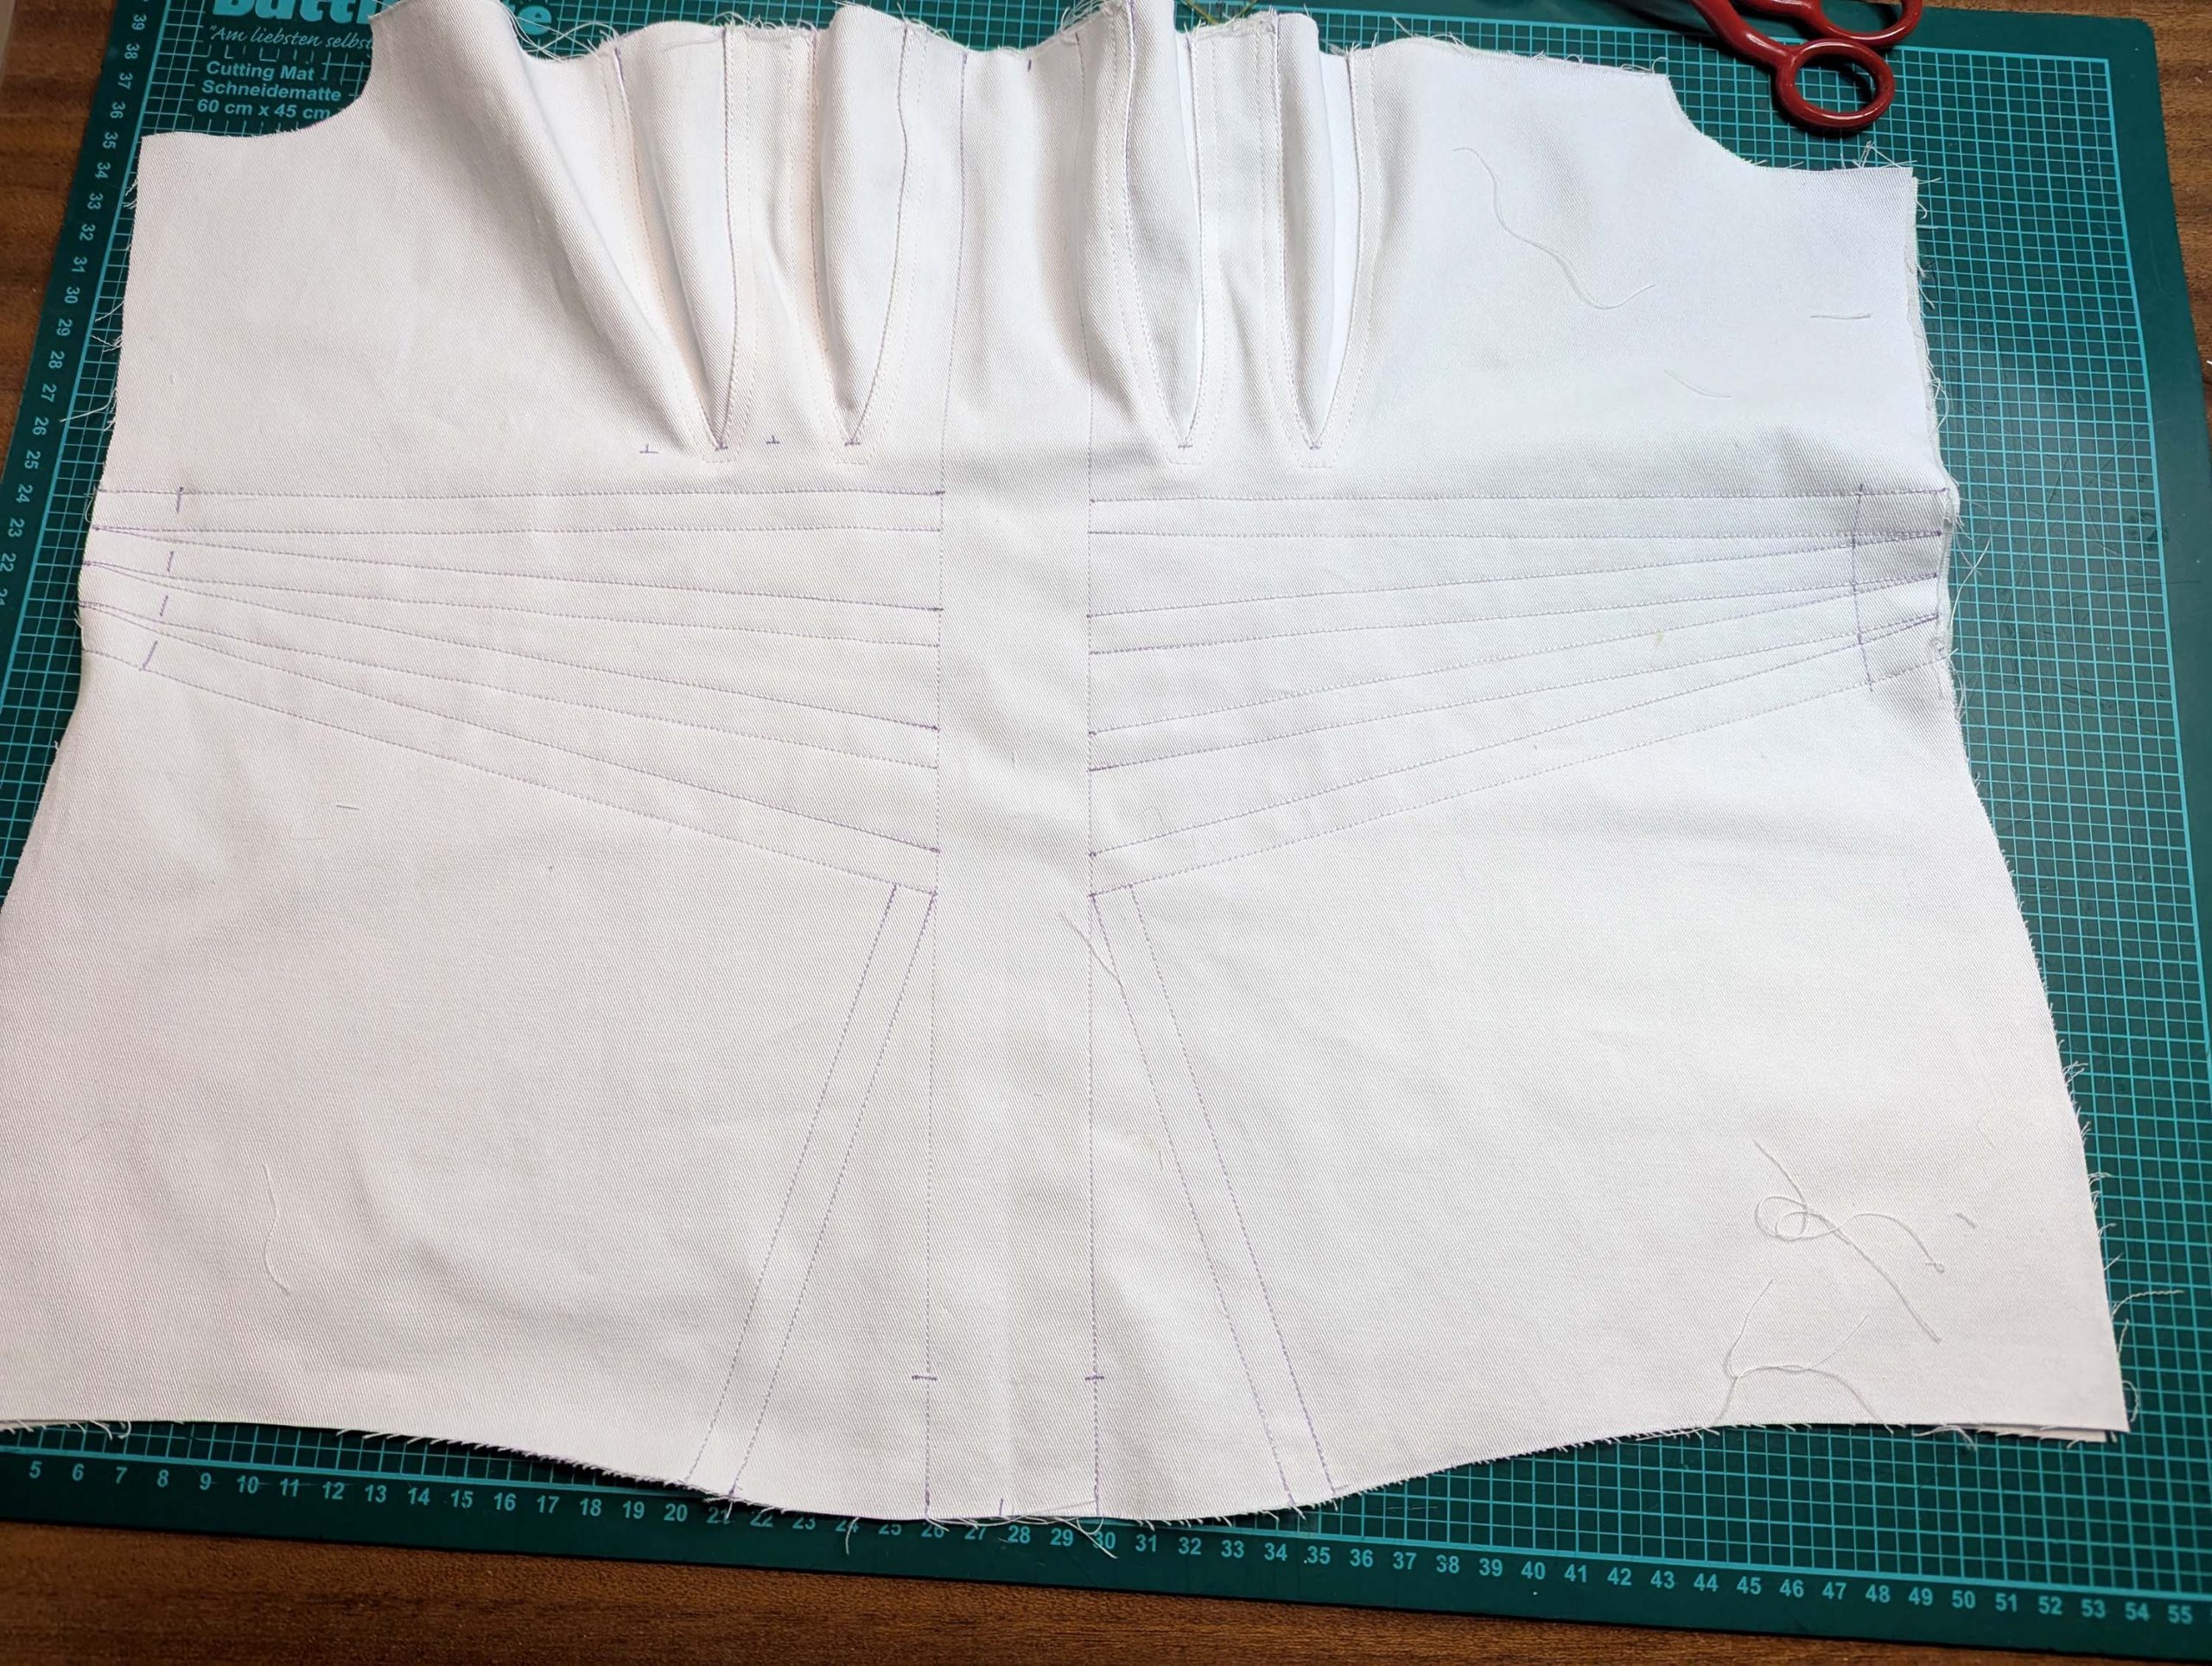
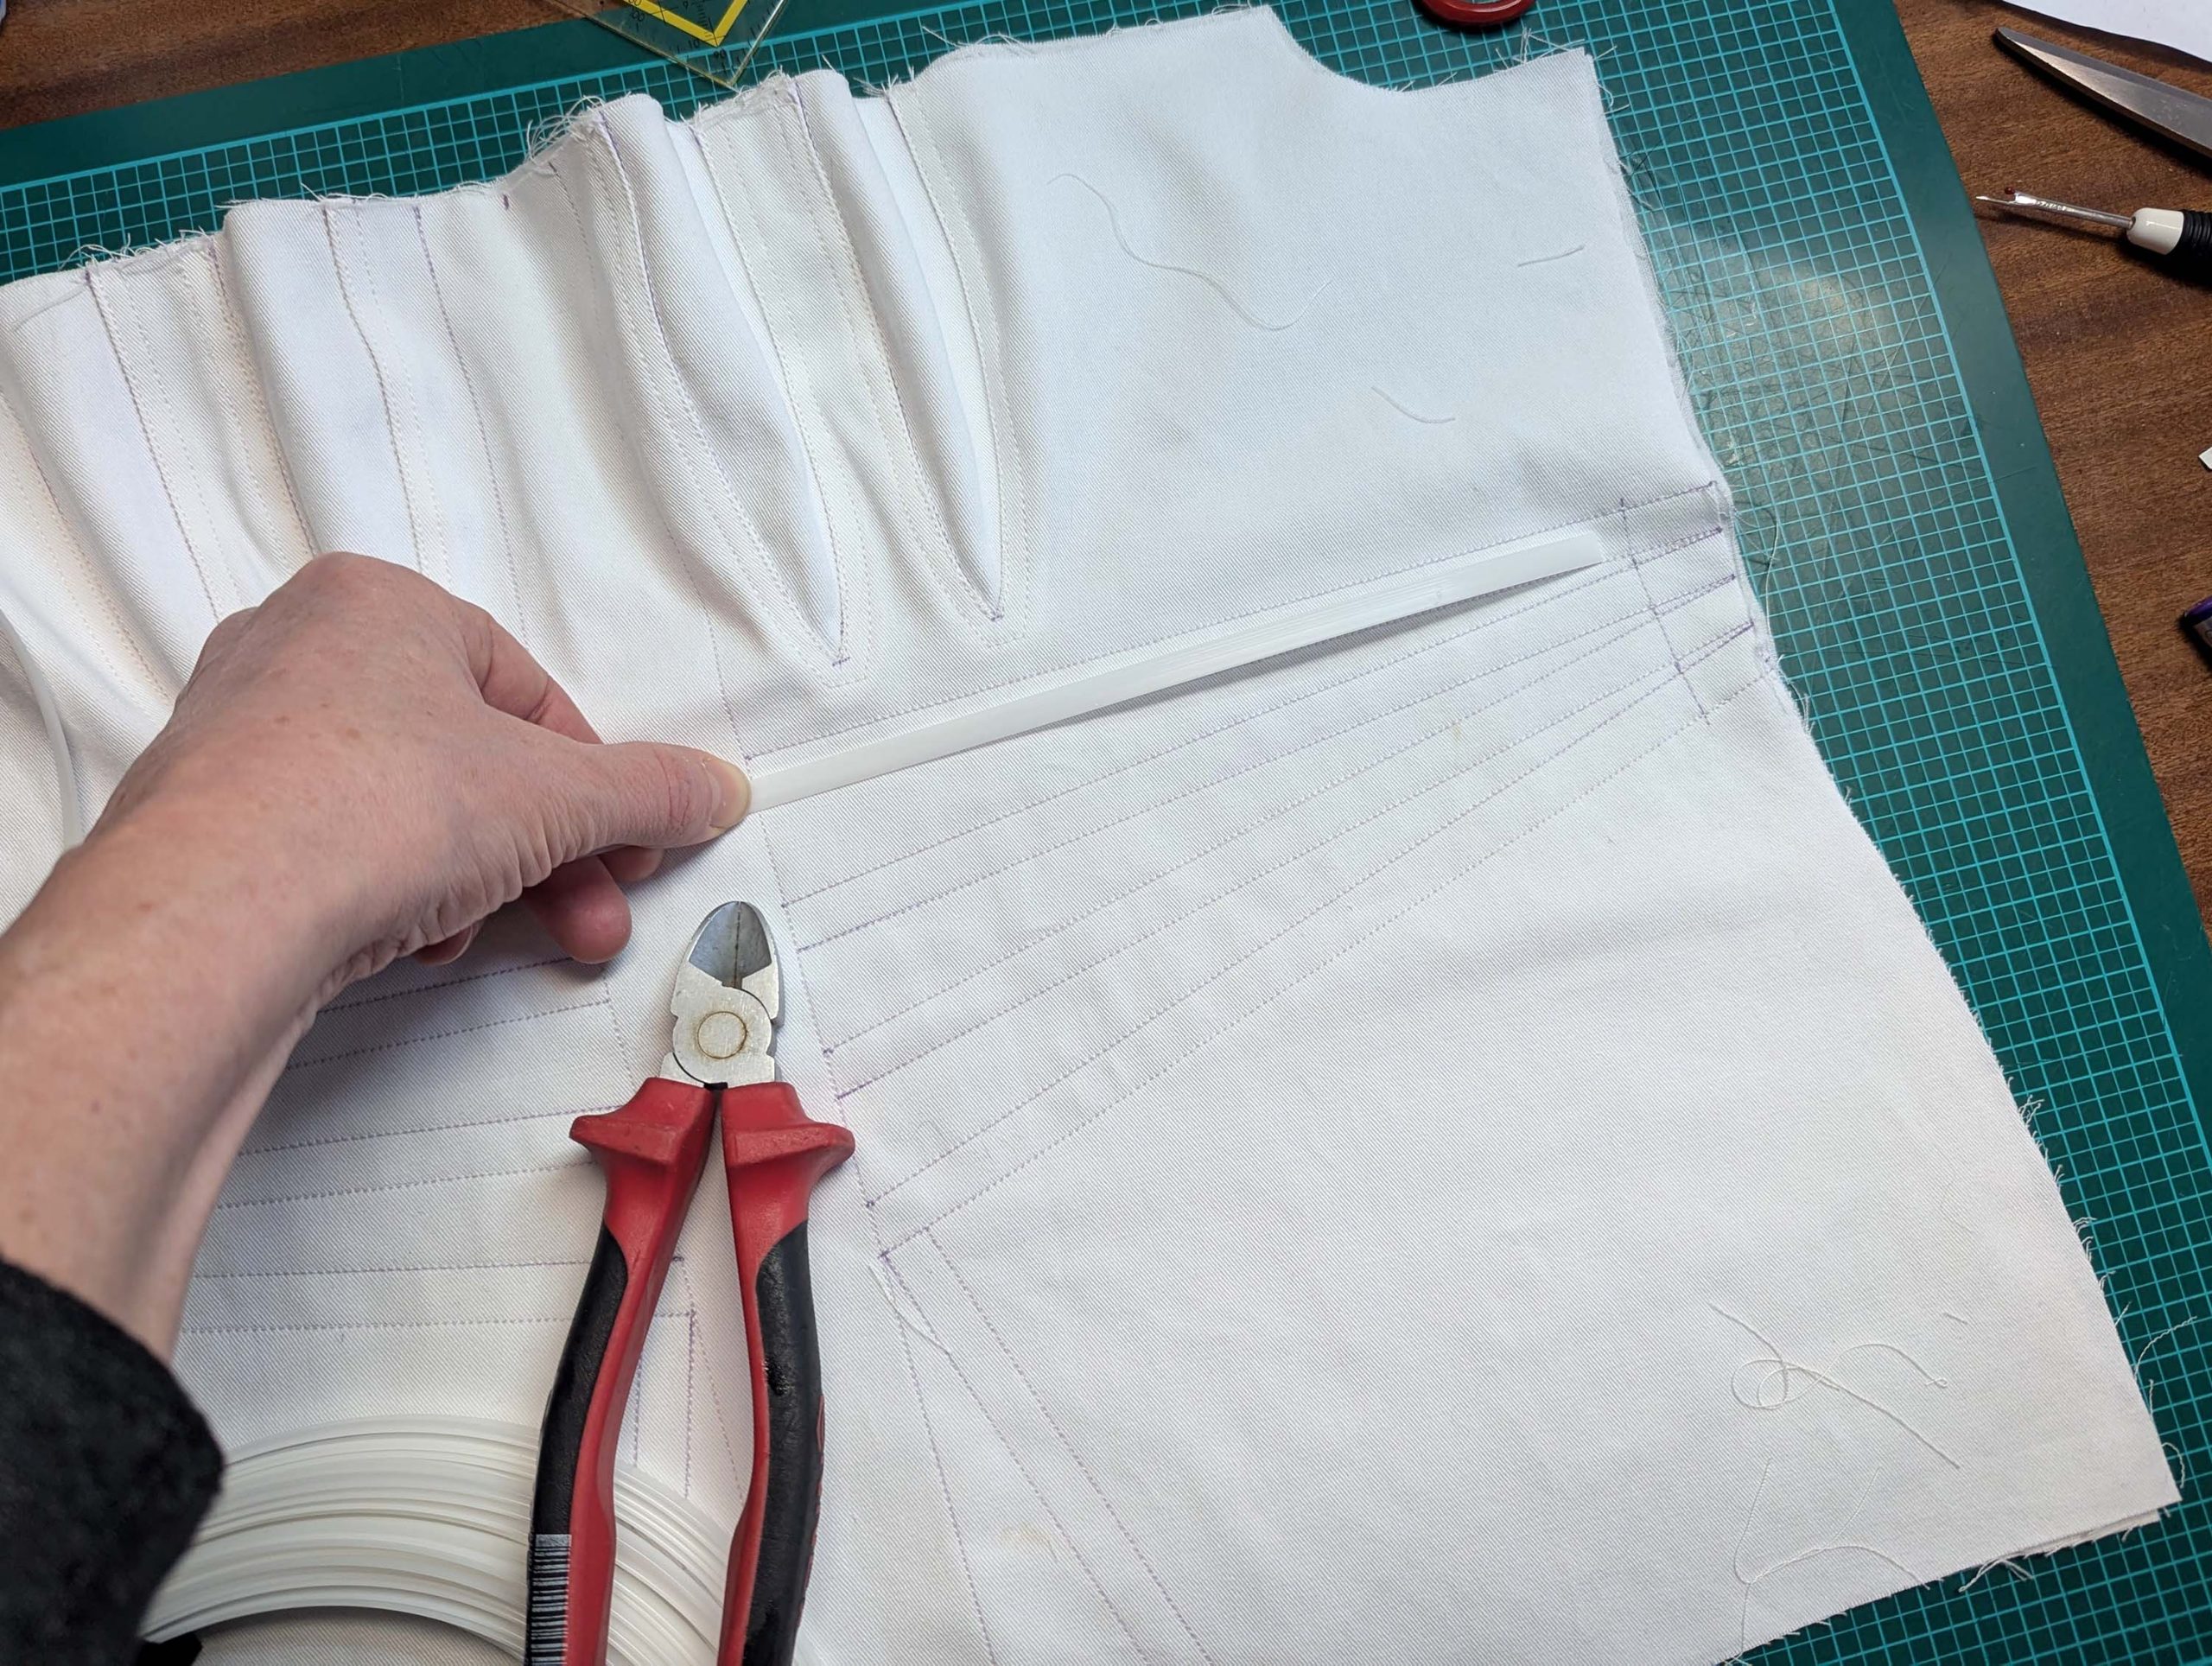
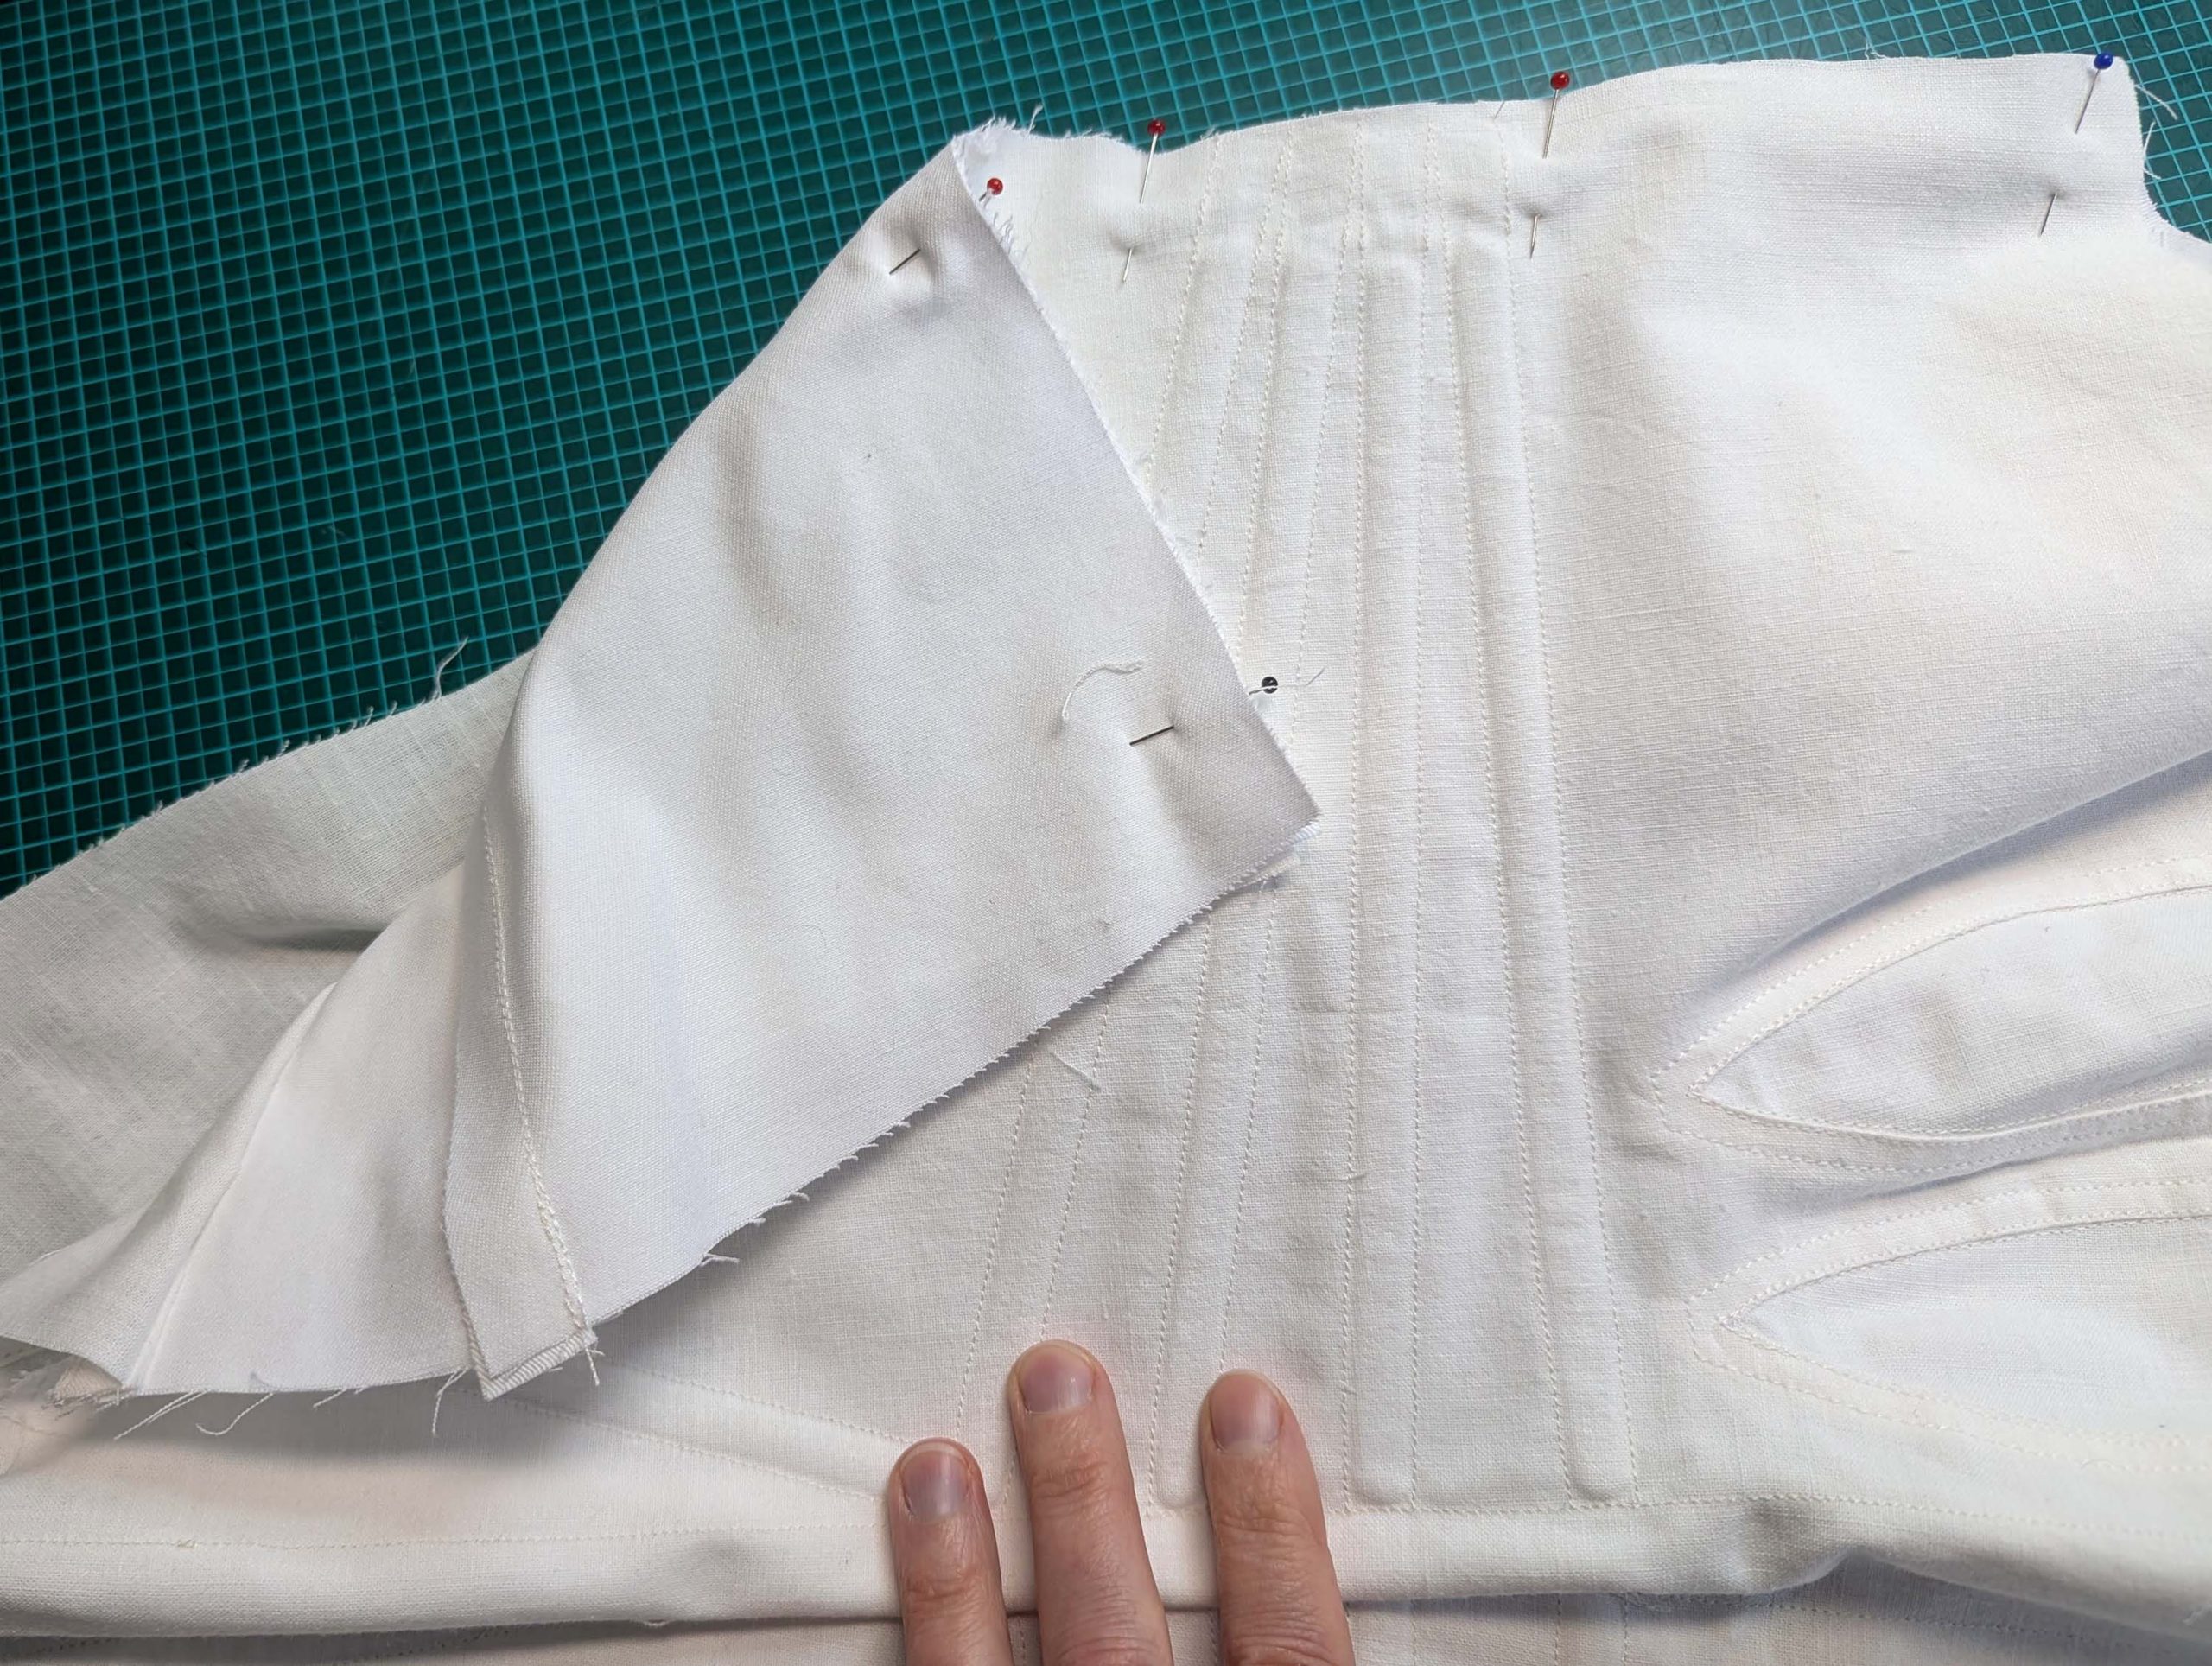
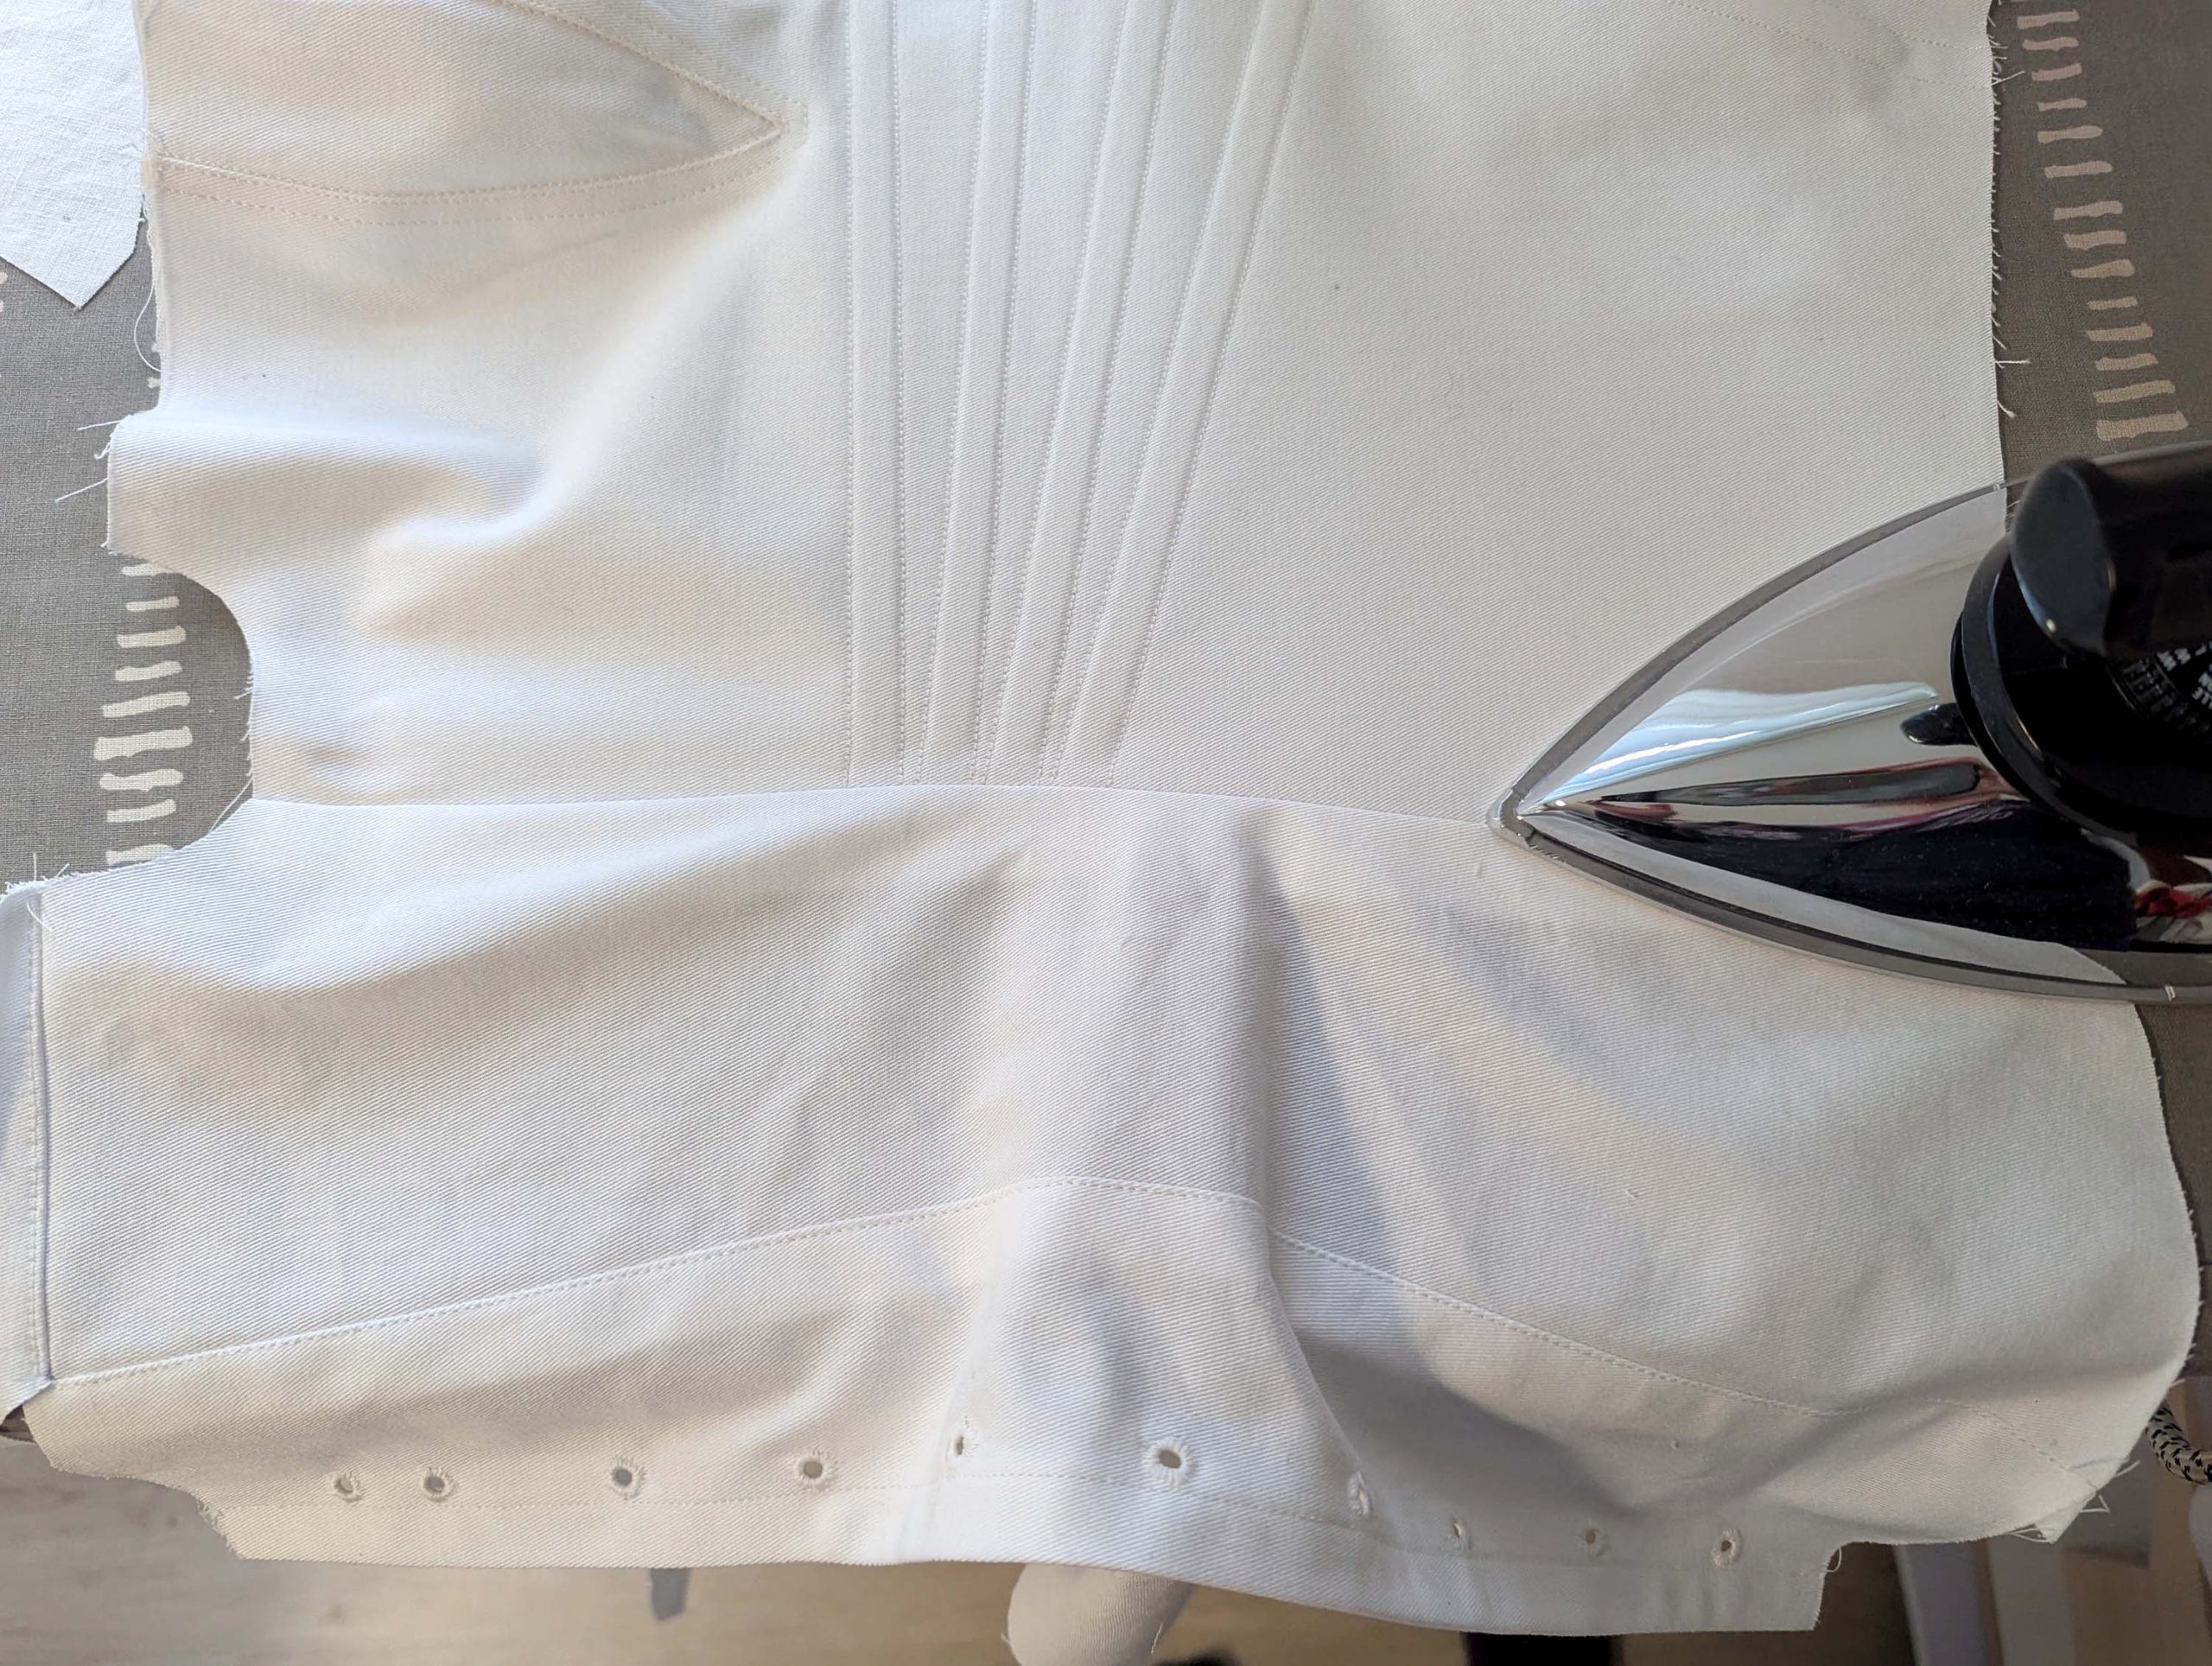
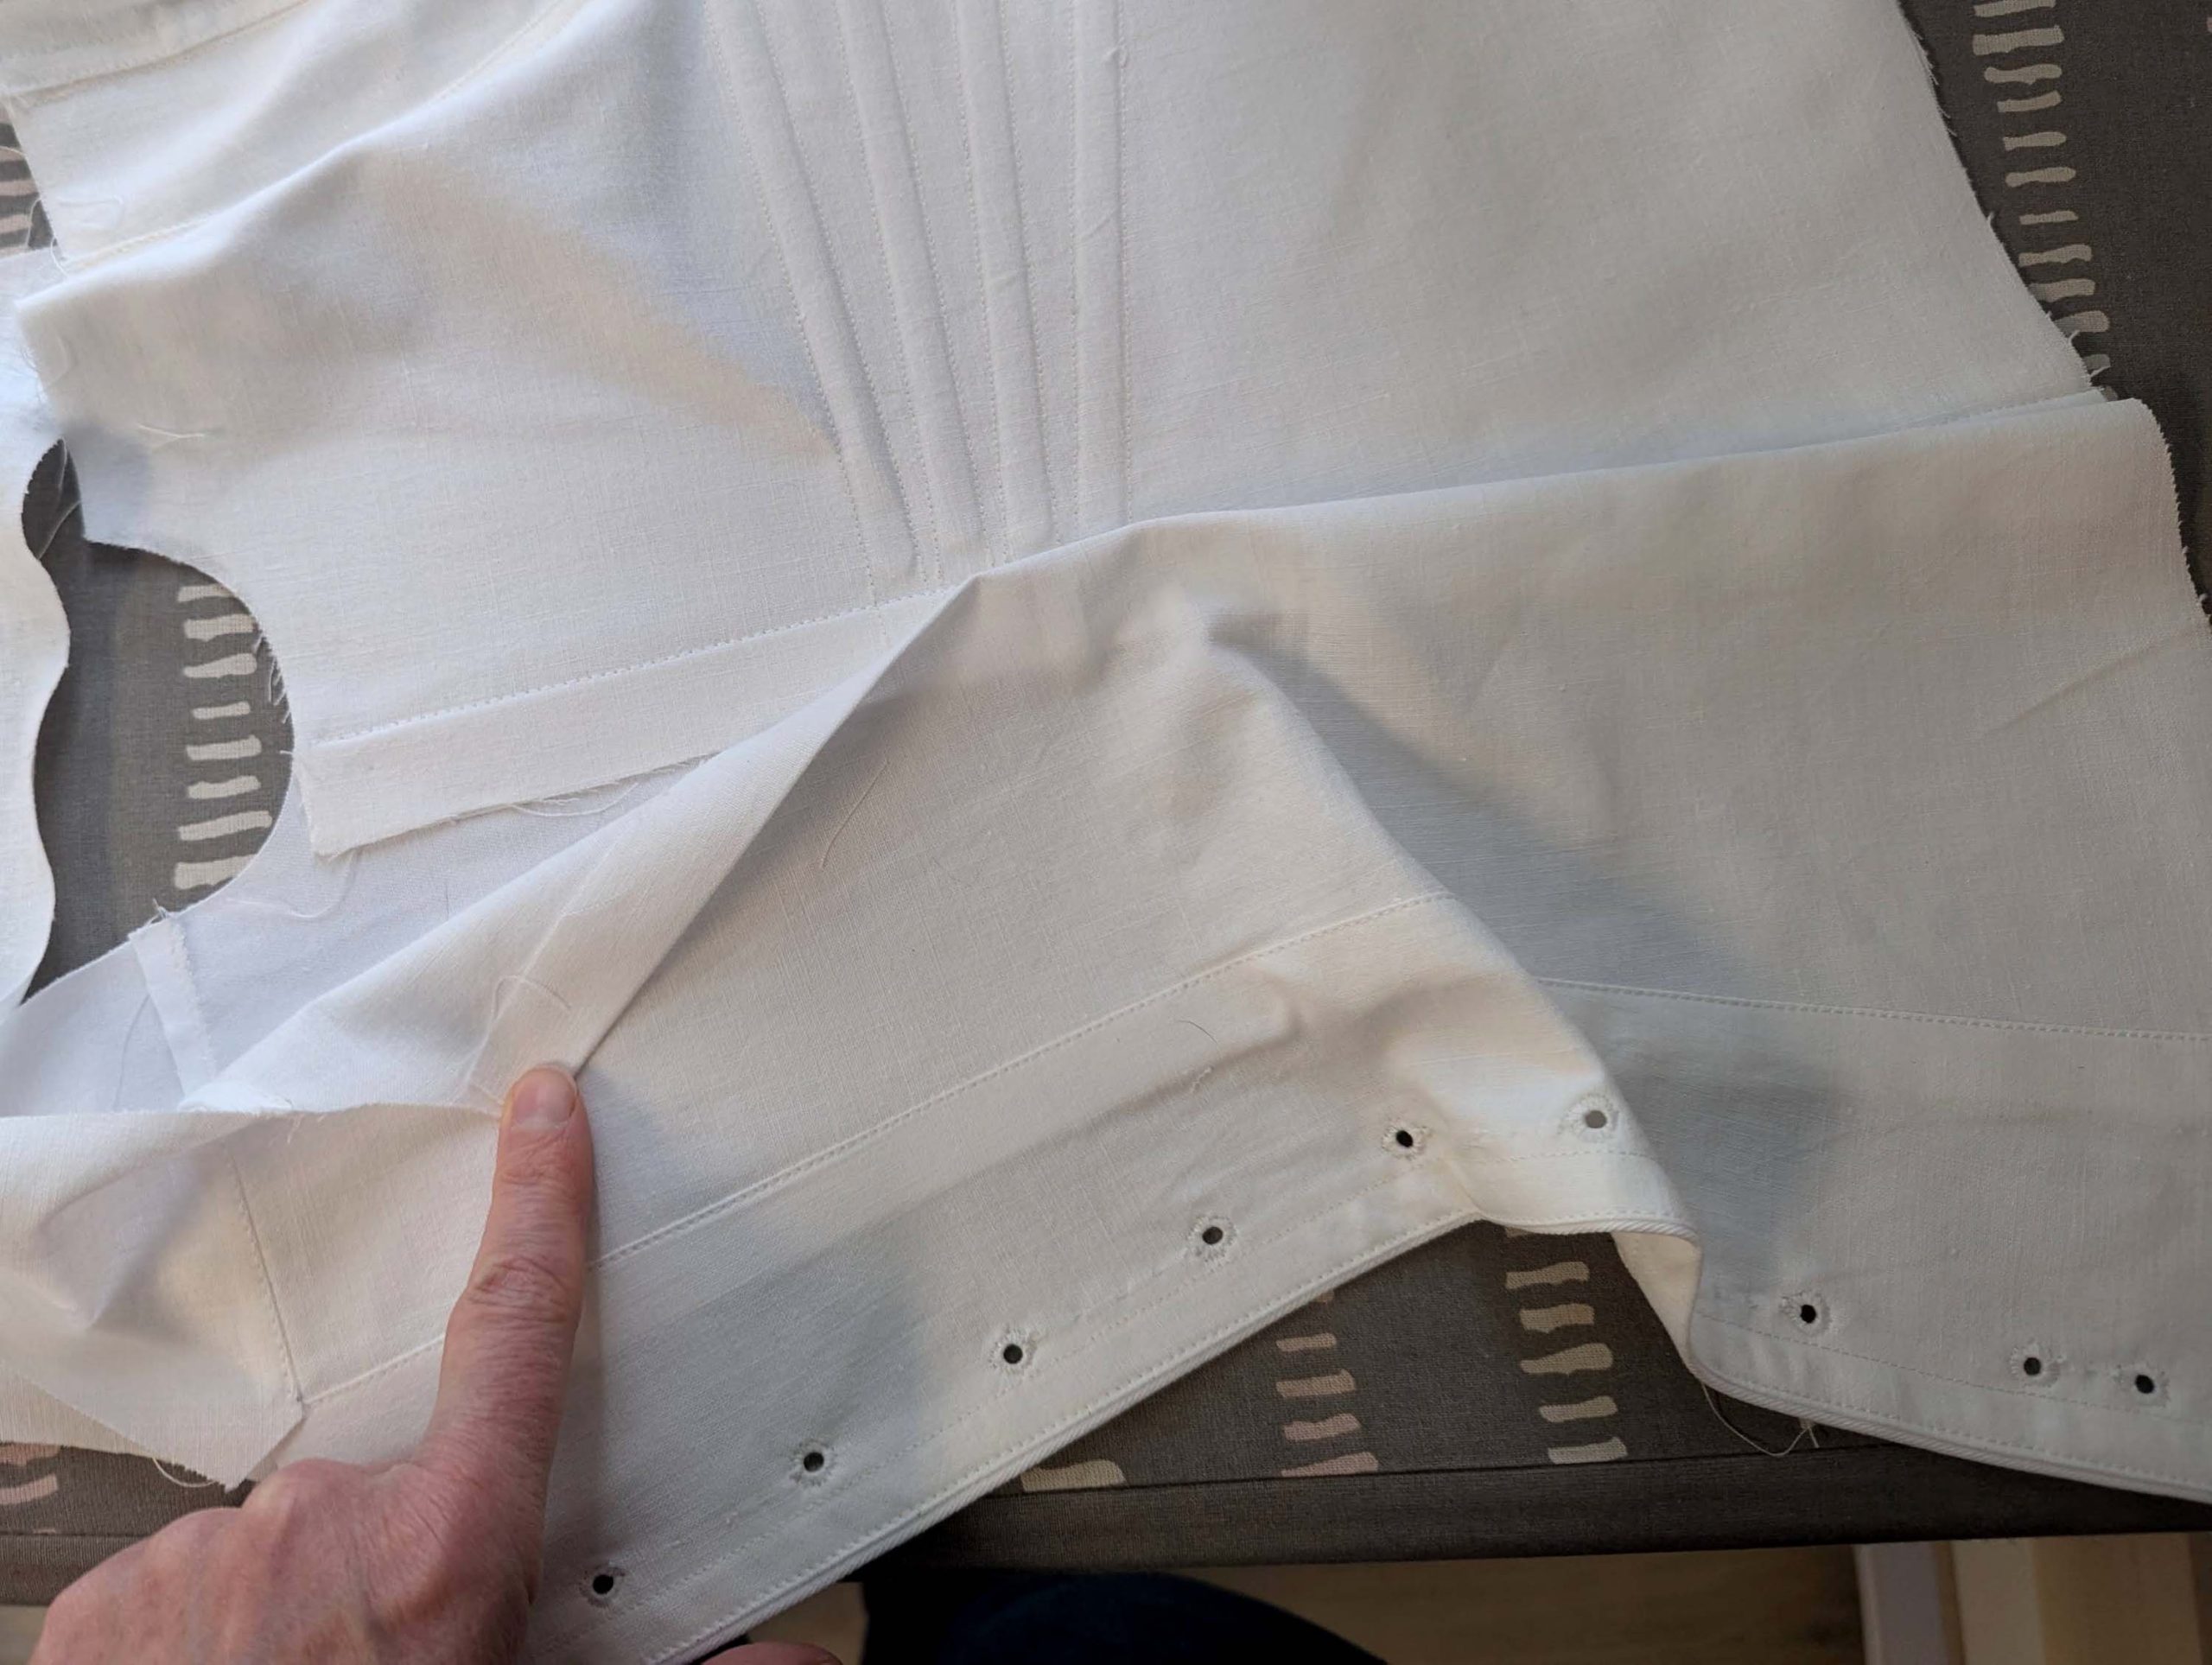
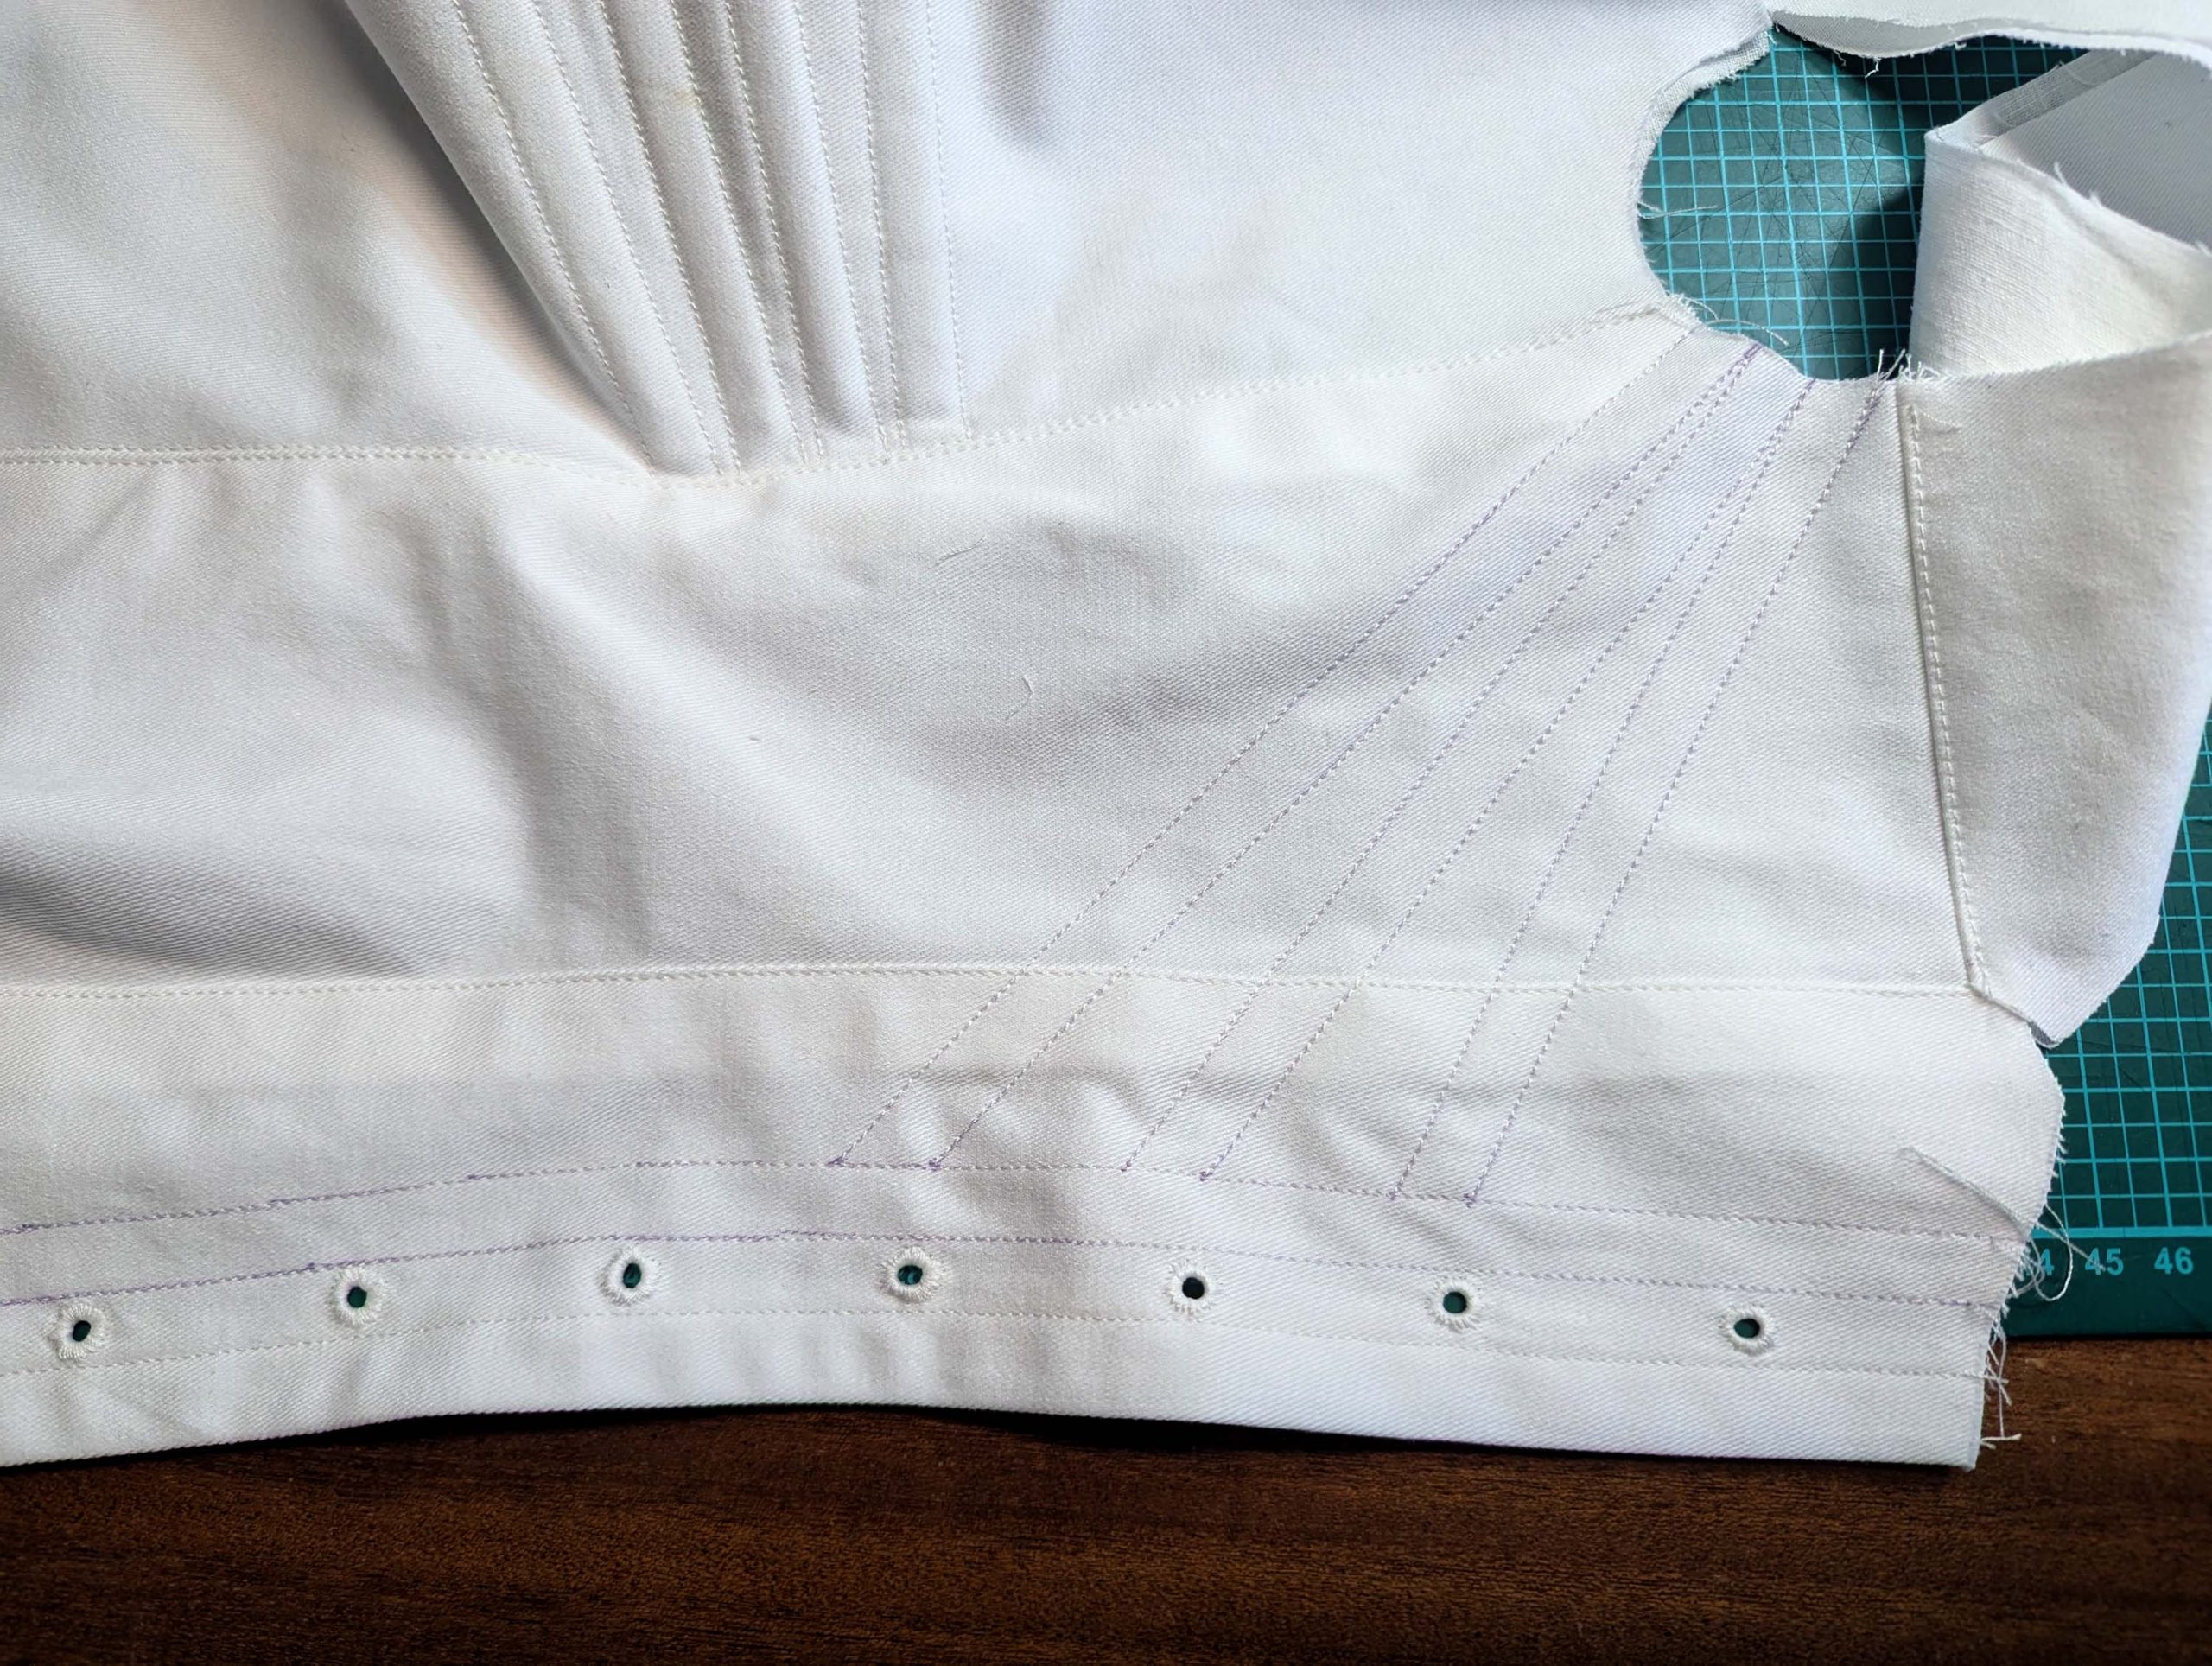
Stitch the tunnels, first the tunnel for the busk, followed by the tunnels for the plastic whalebone, try to stitch the underbust tunnels in one go. Cut the whalebone to the length needed and insert it into the tunnels, take care to leave enough space at the side seam, seam allowance is ¾” (2cm) here.
Time to press the garment, this will remove any of my pen markings and also help to shape the plastic boning straight again.
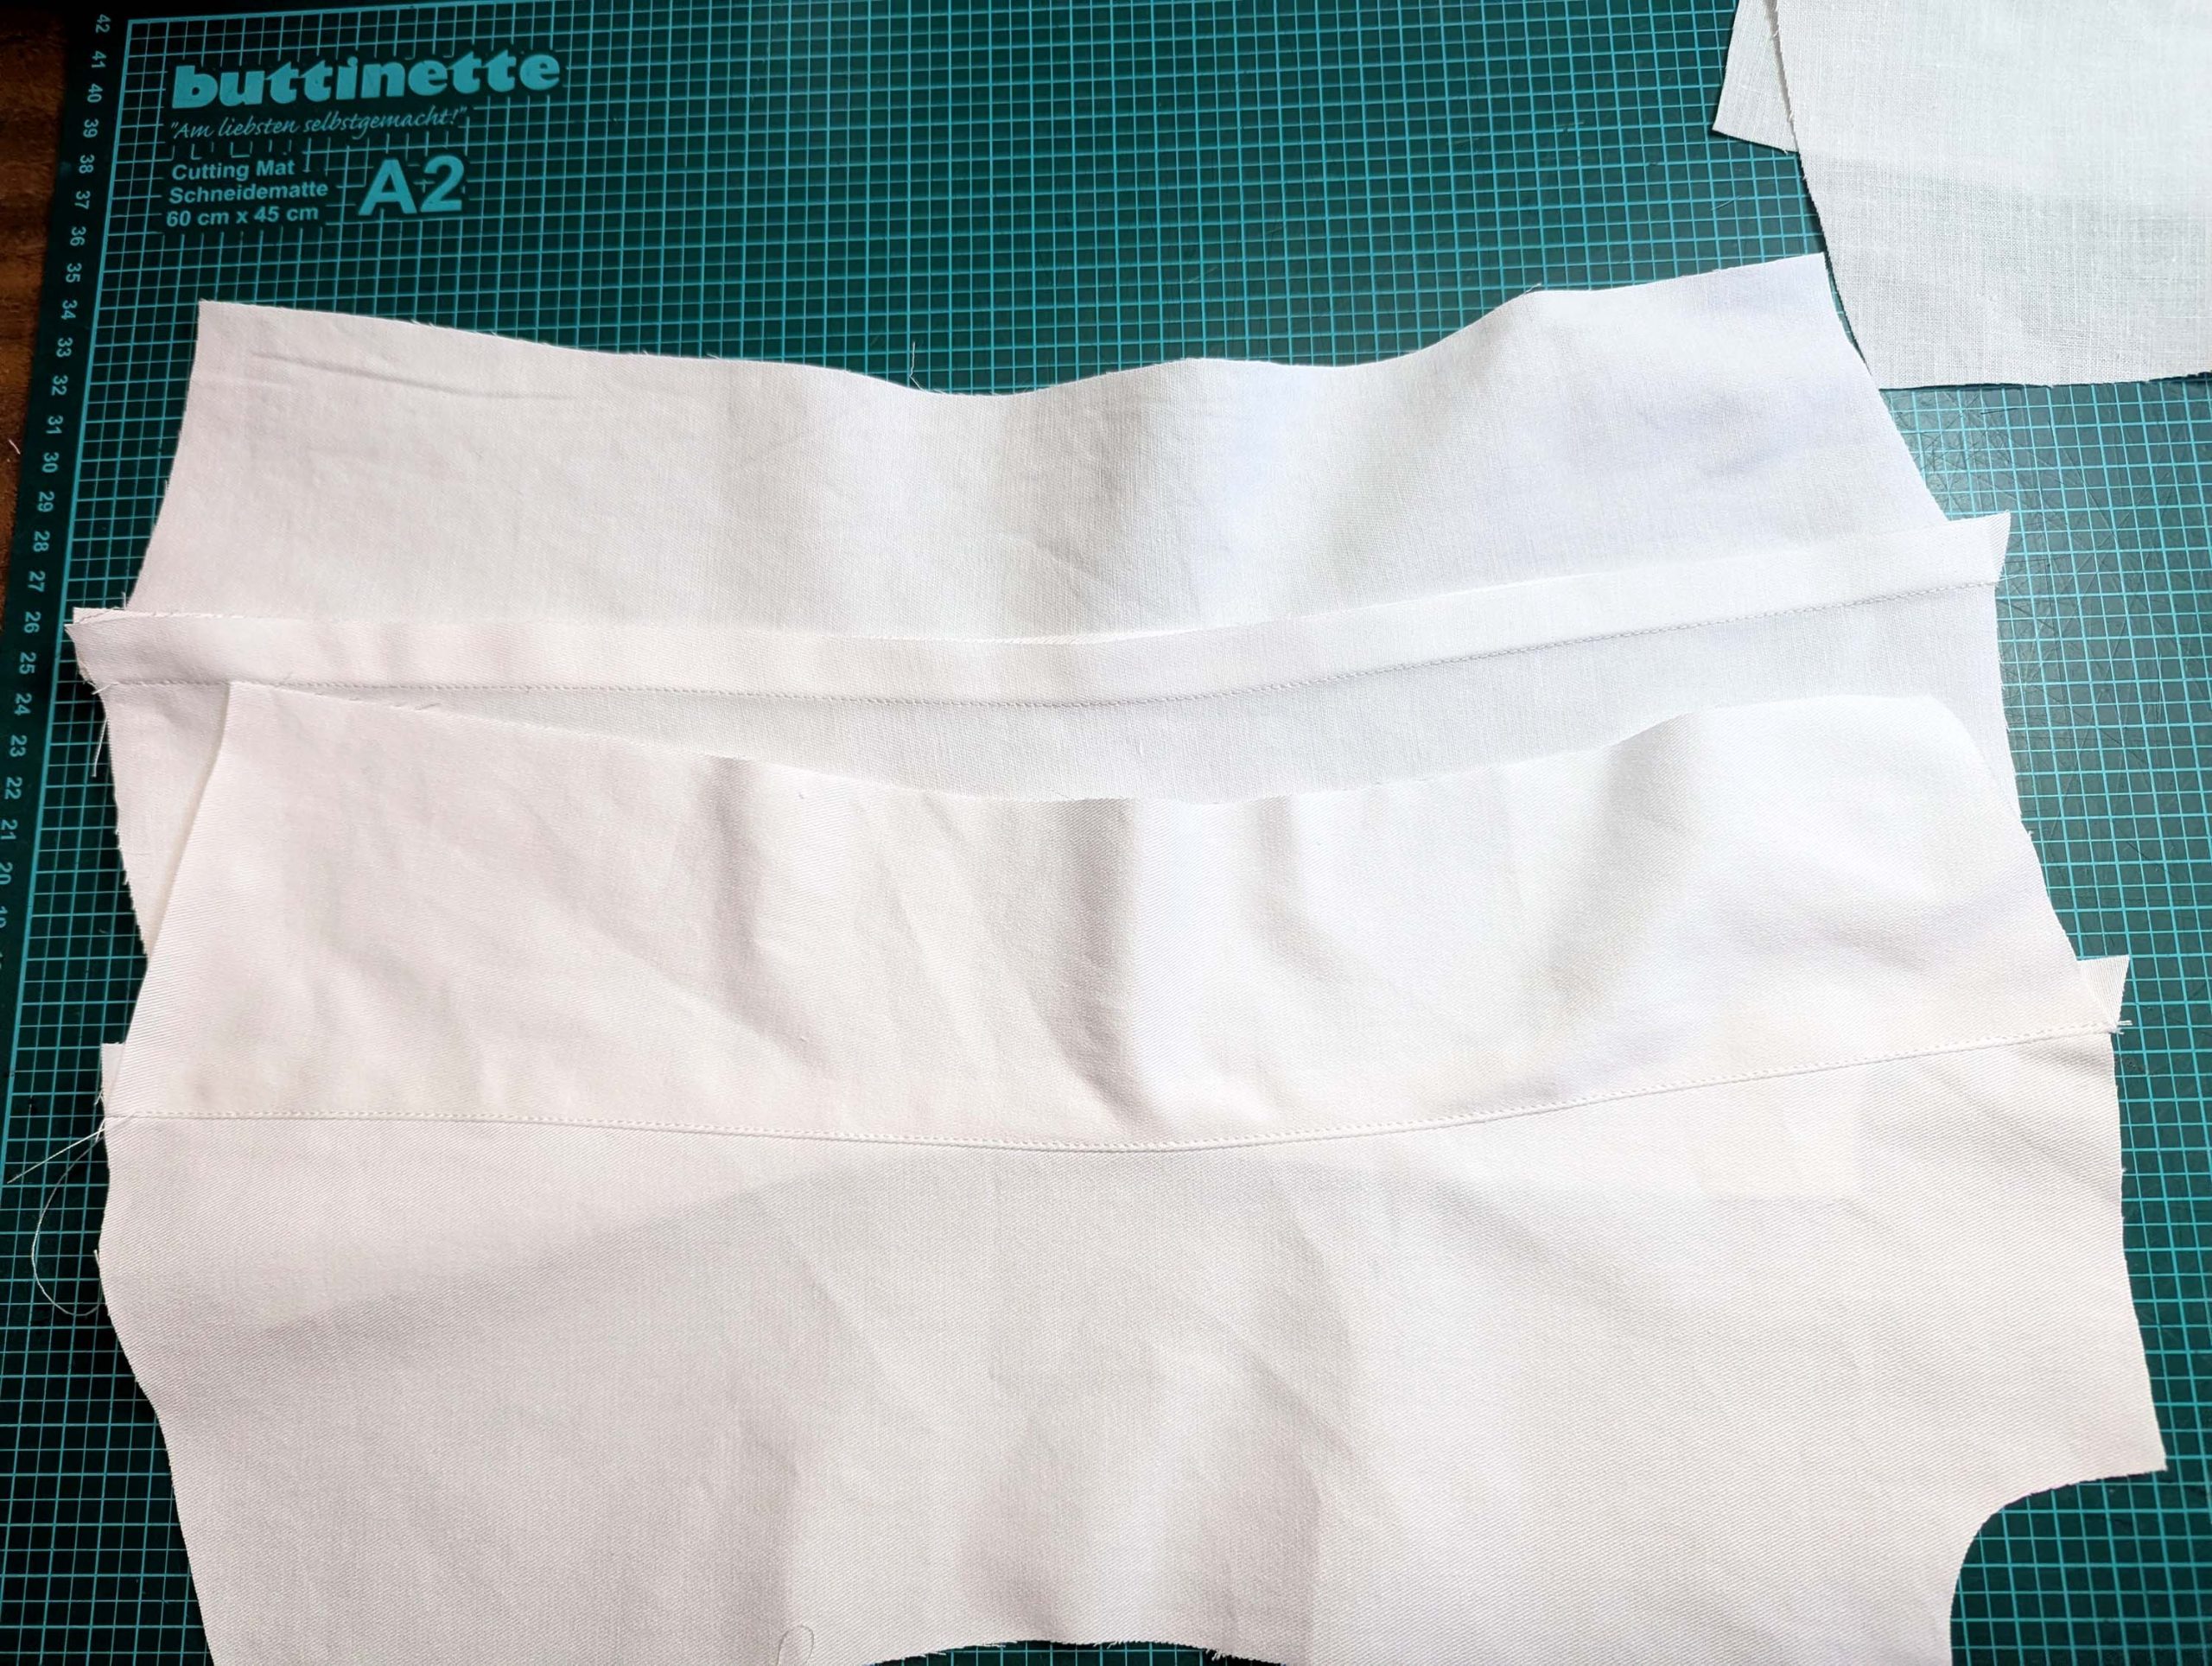
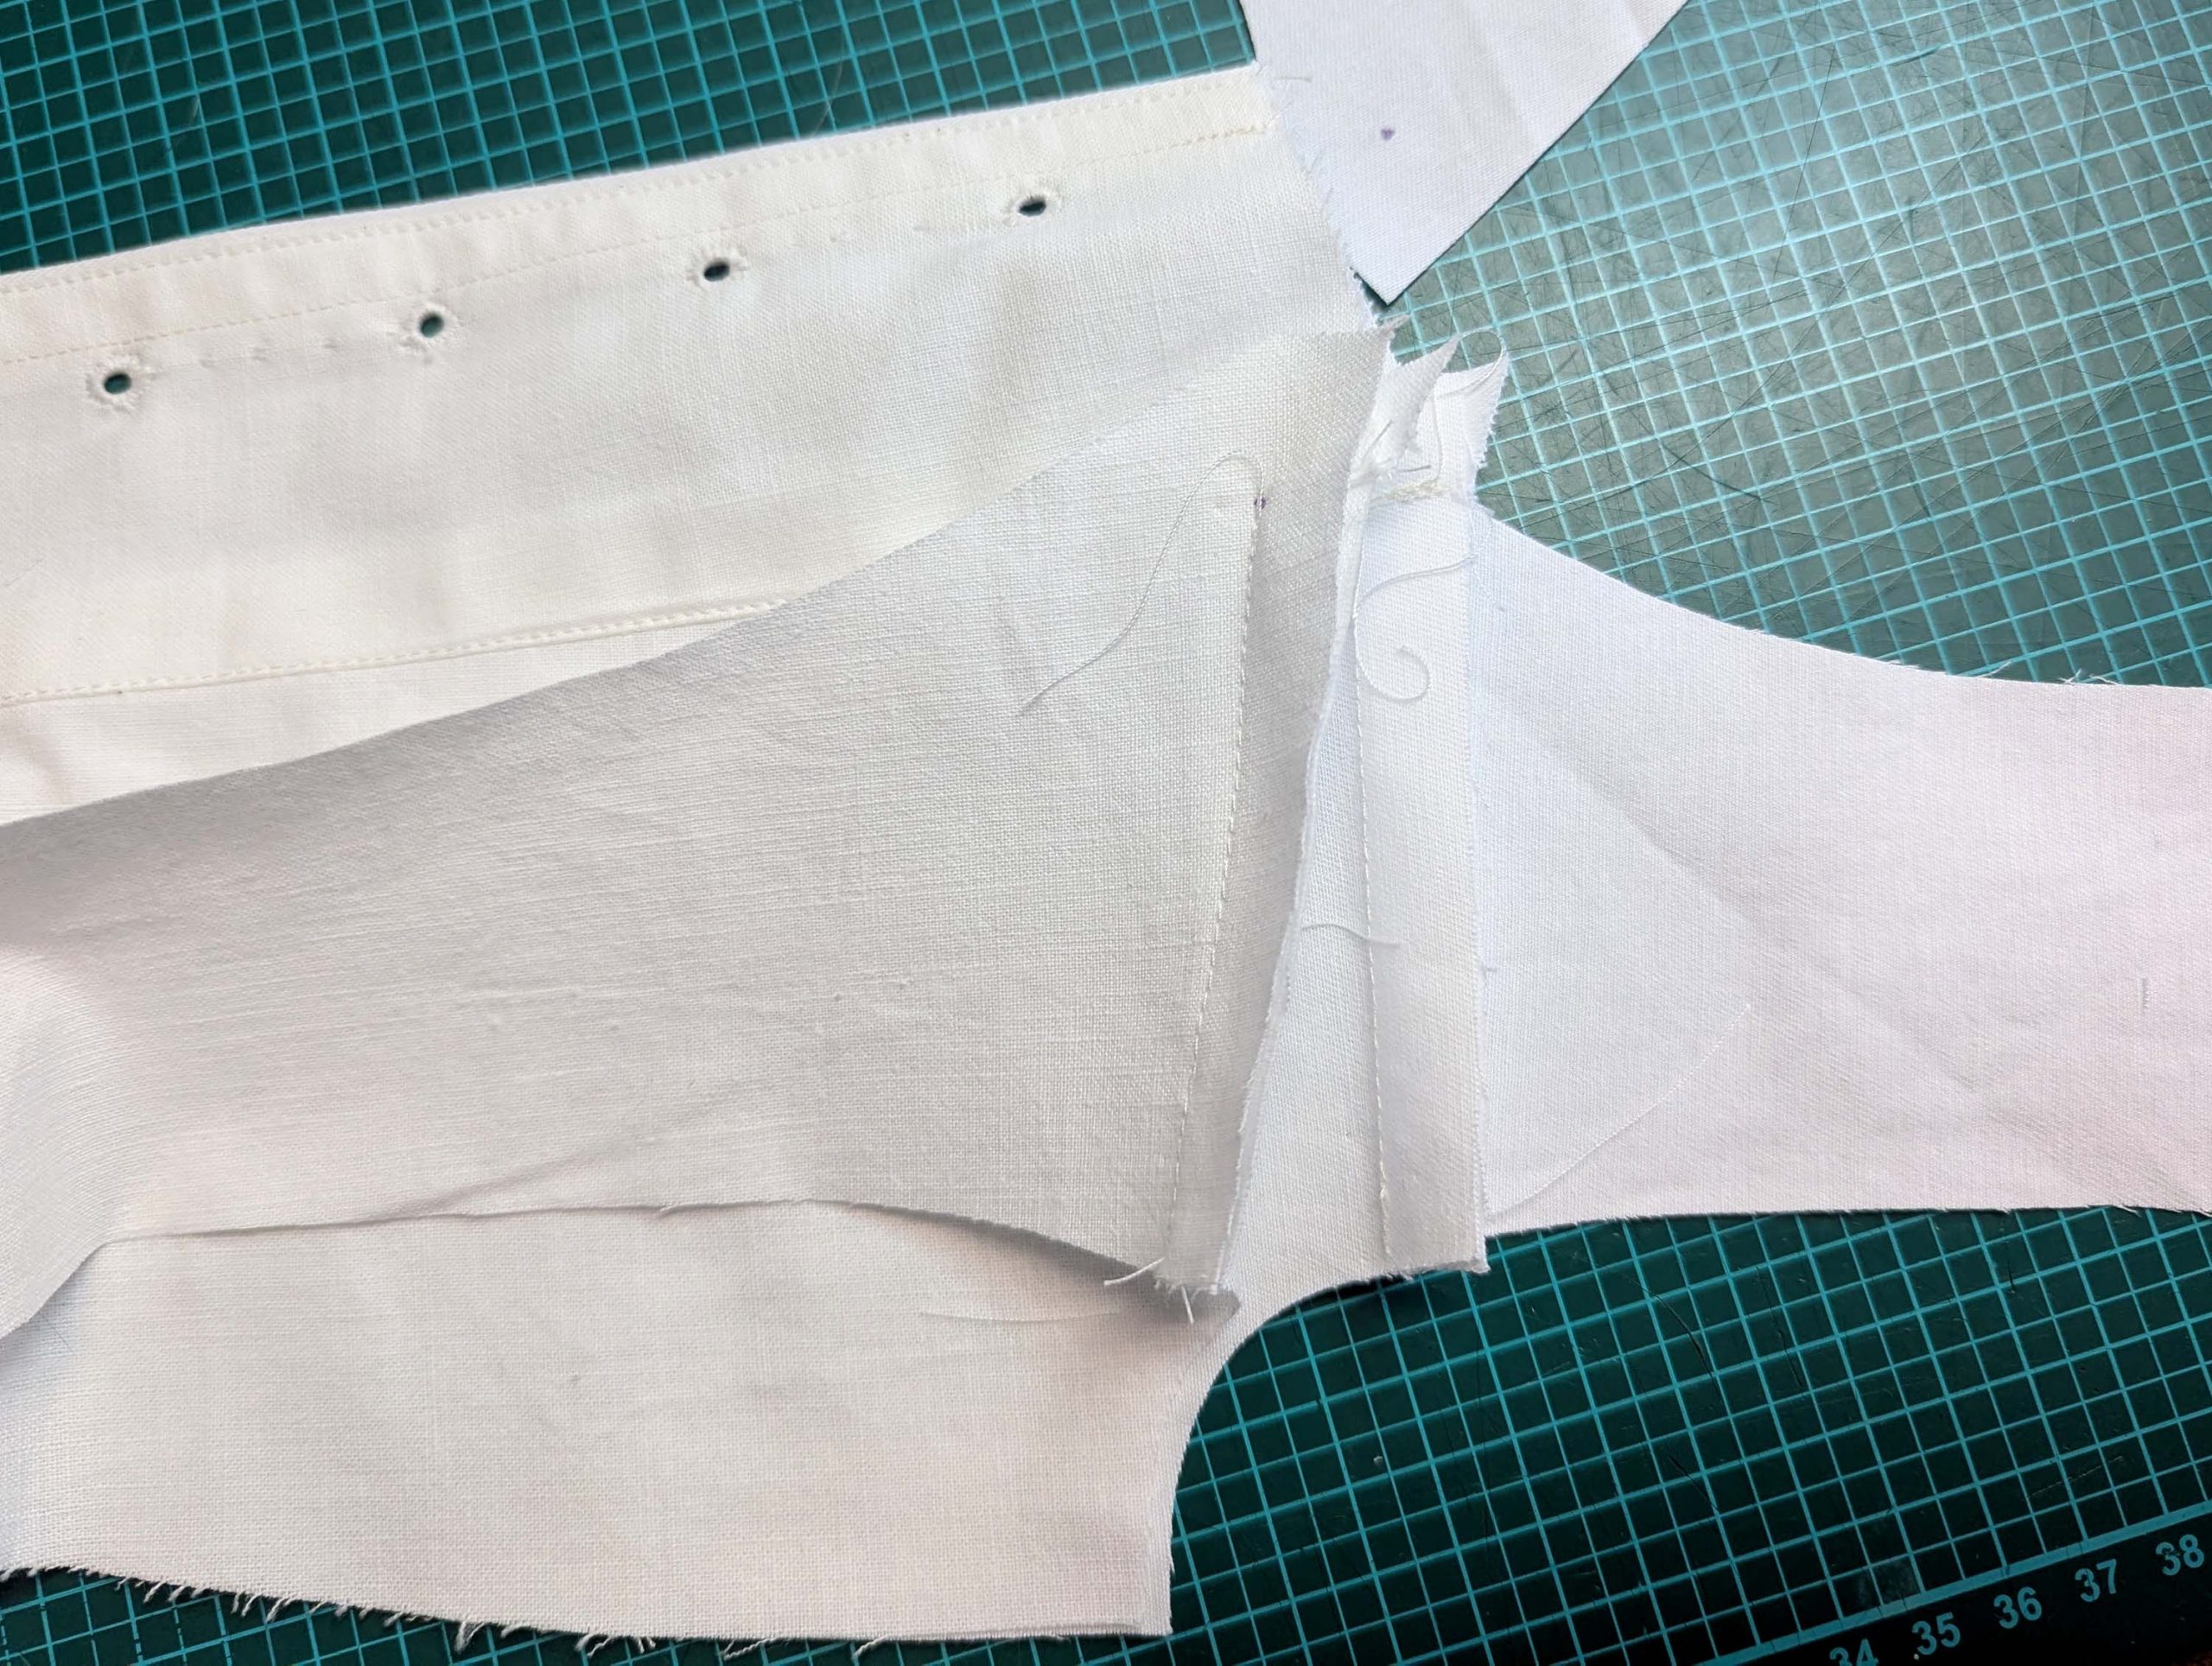
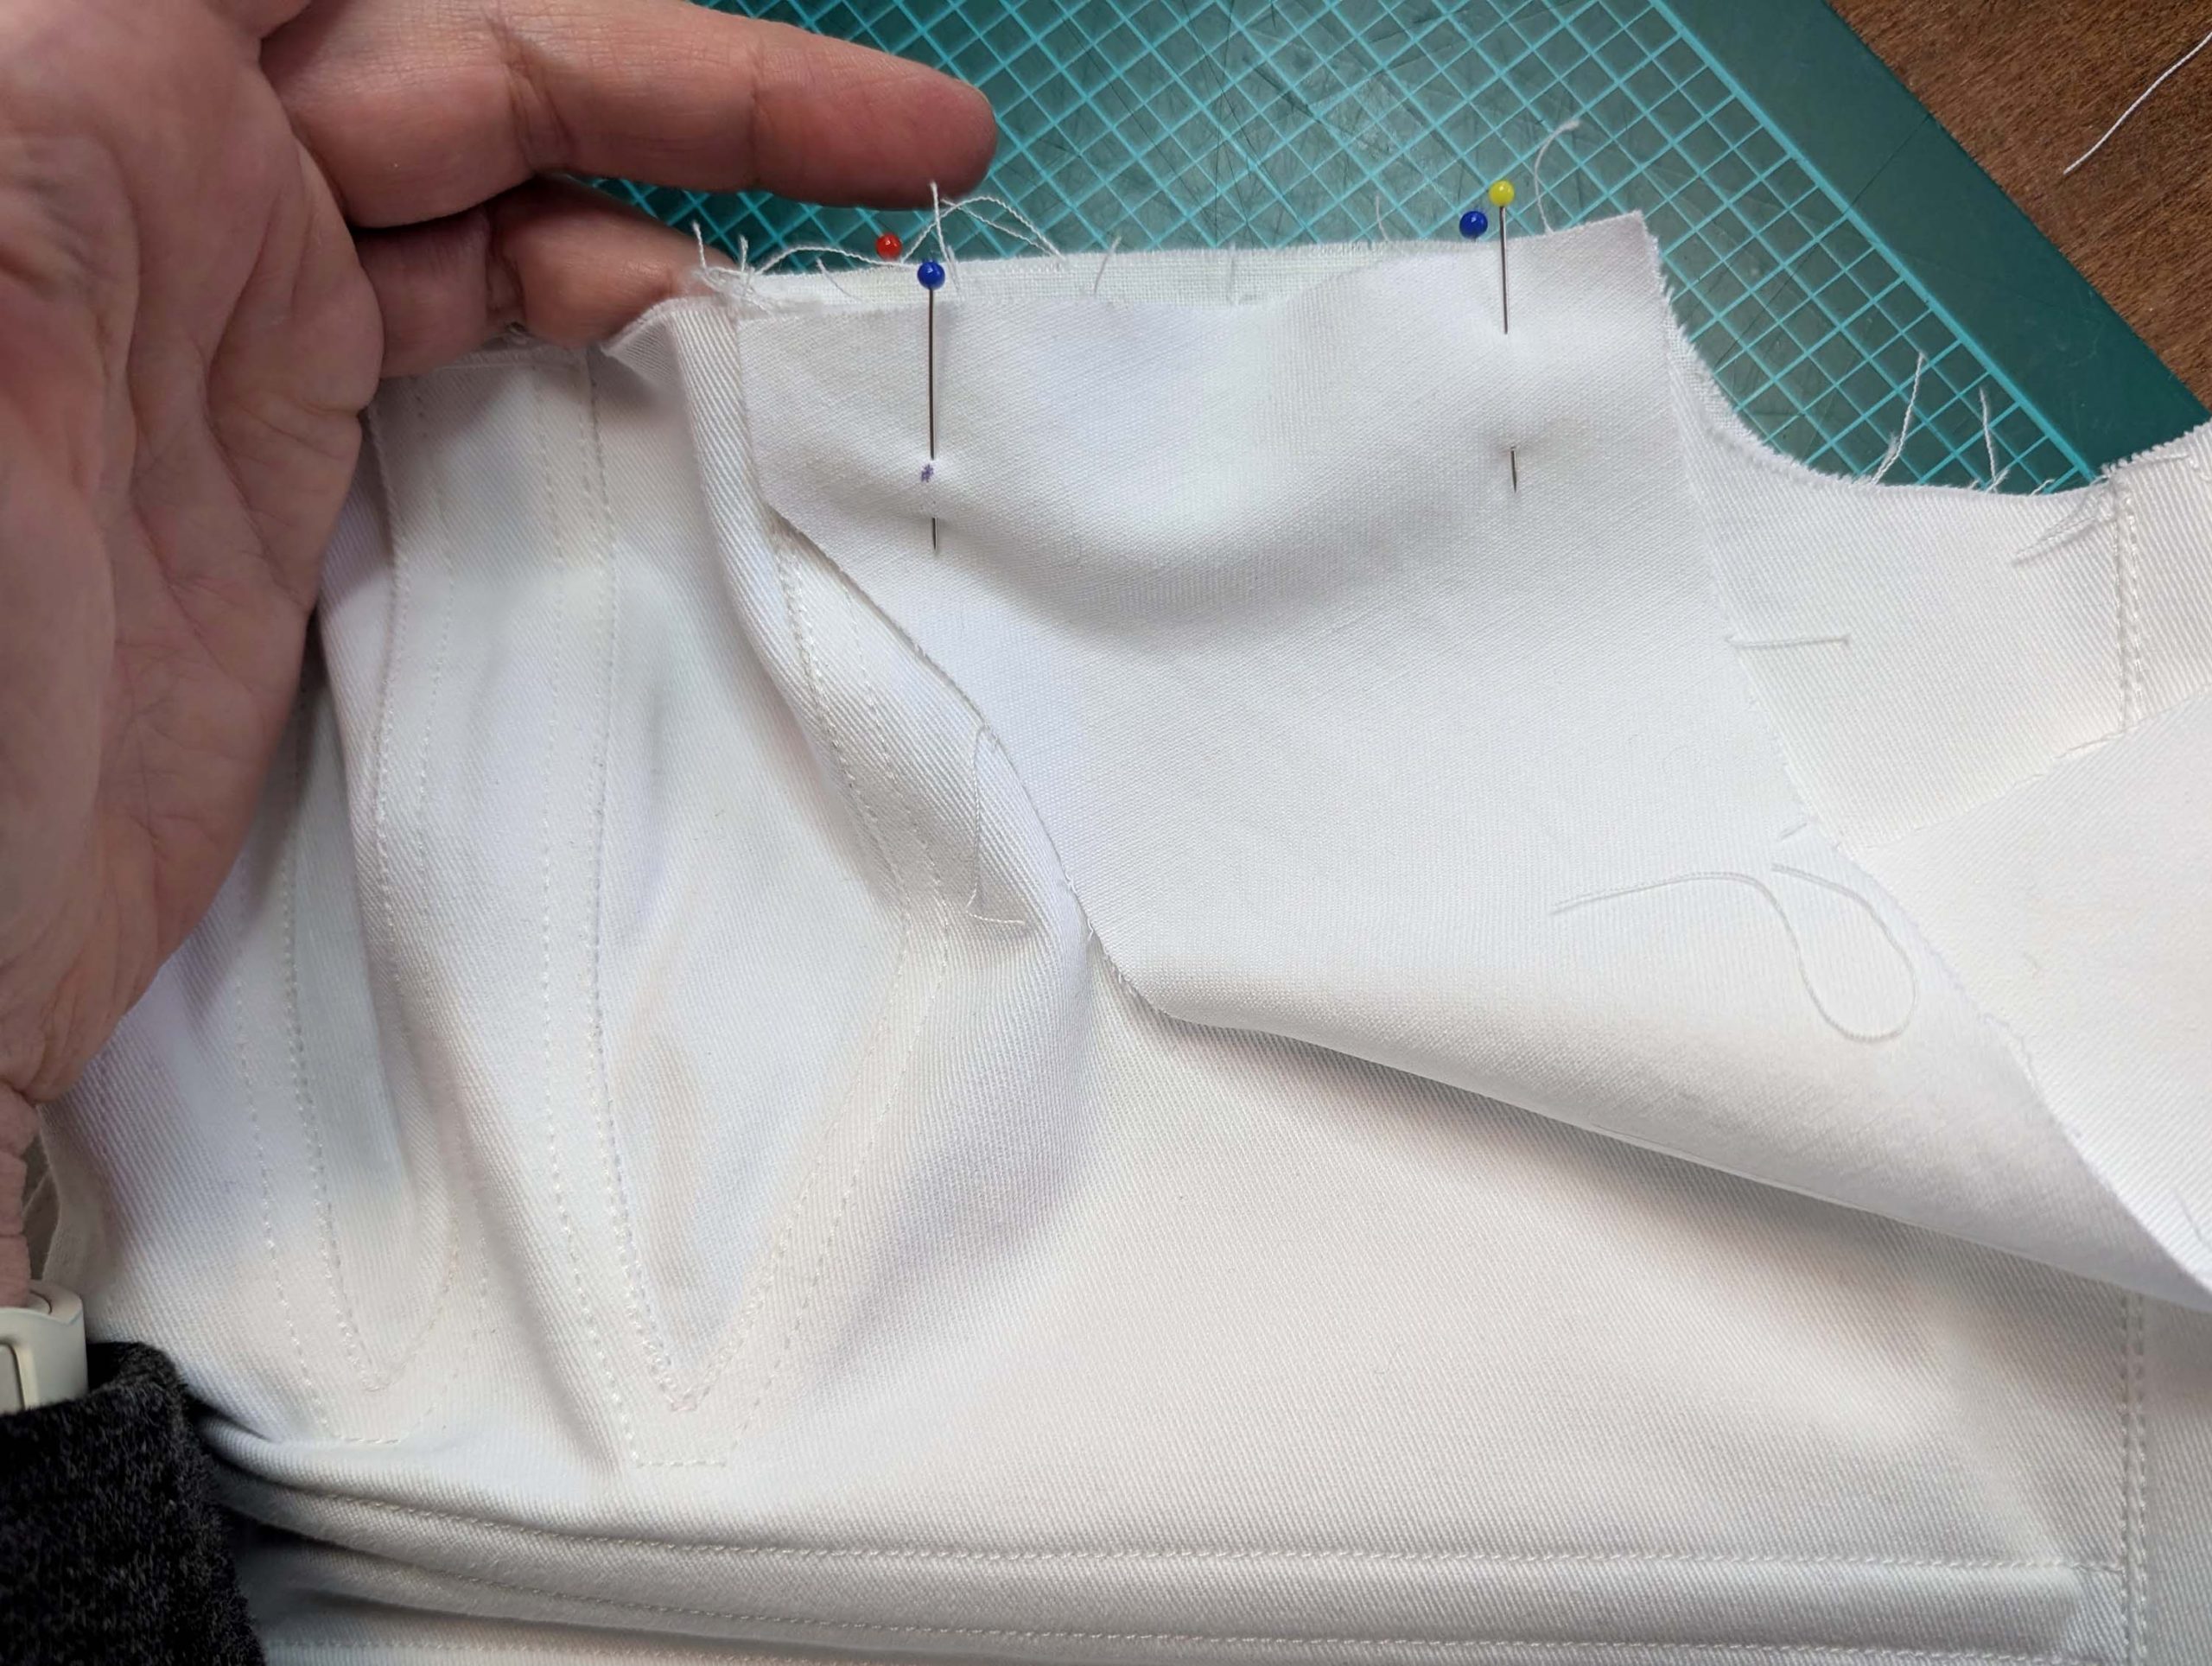
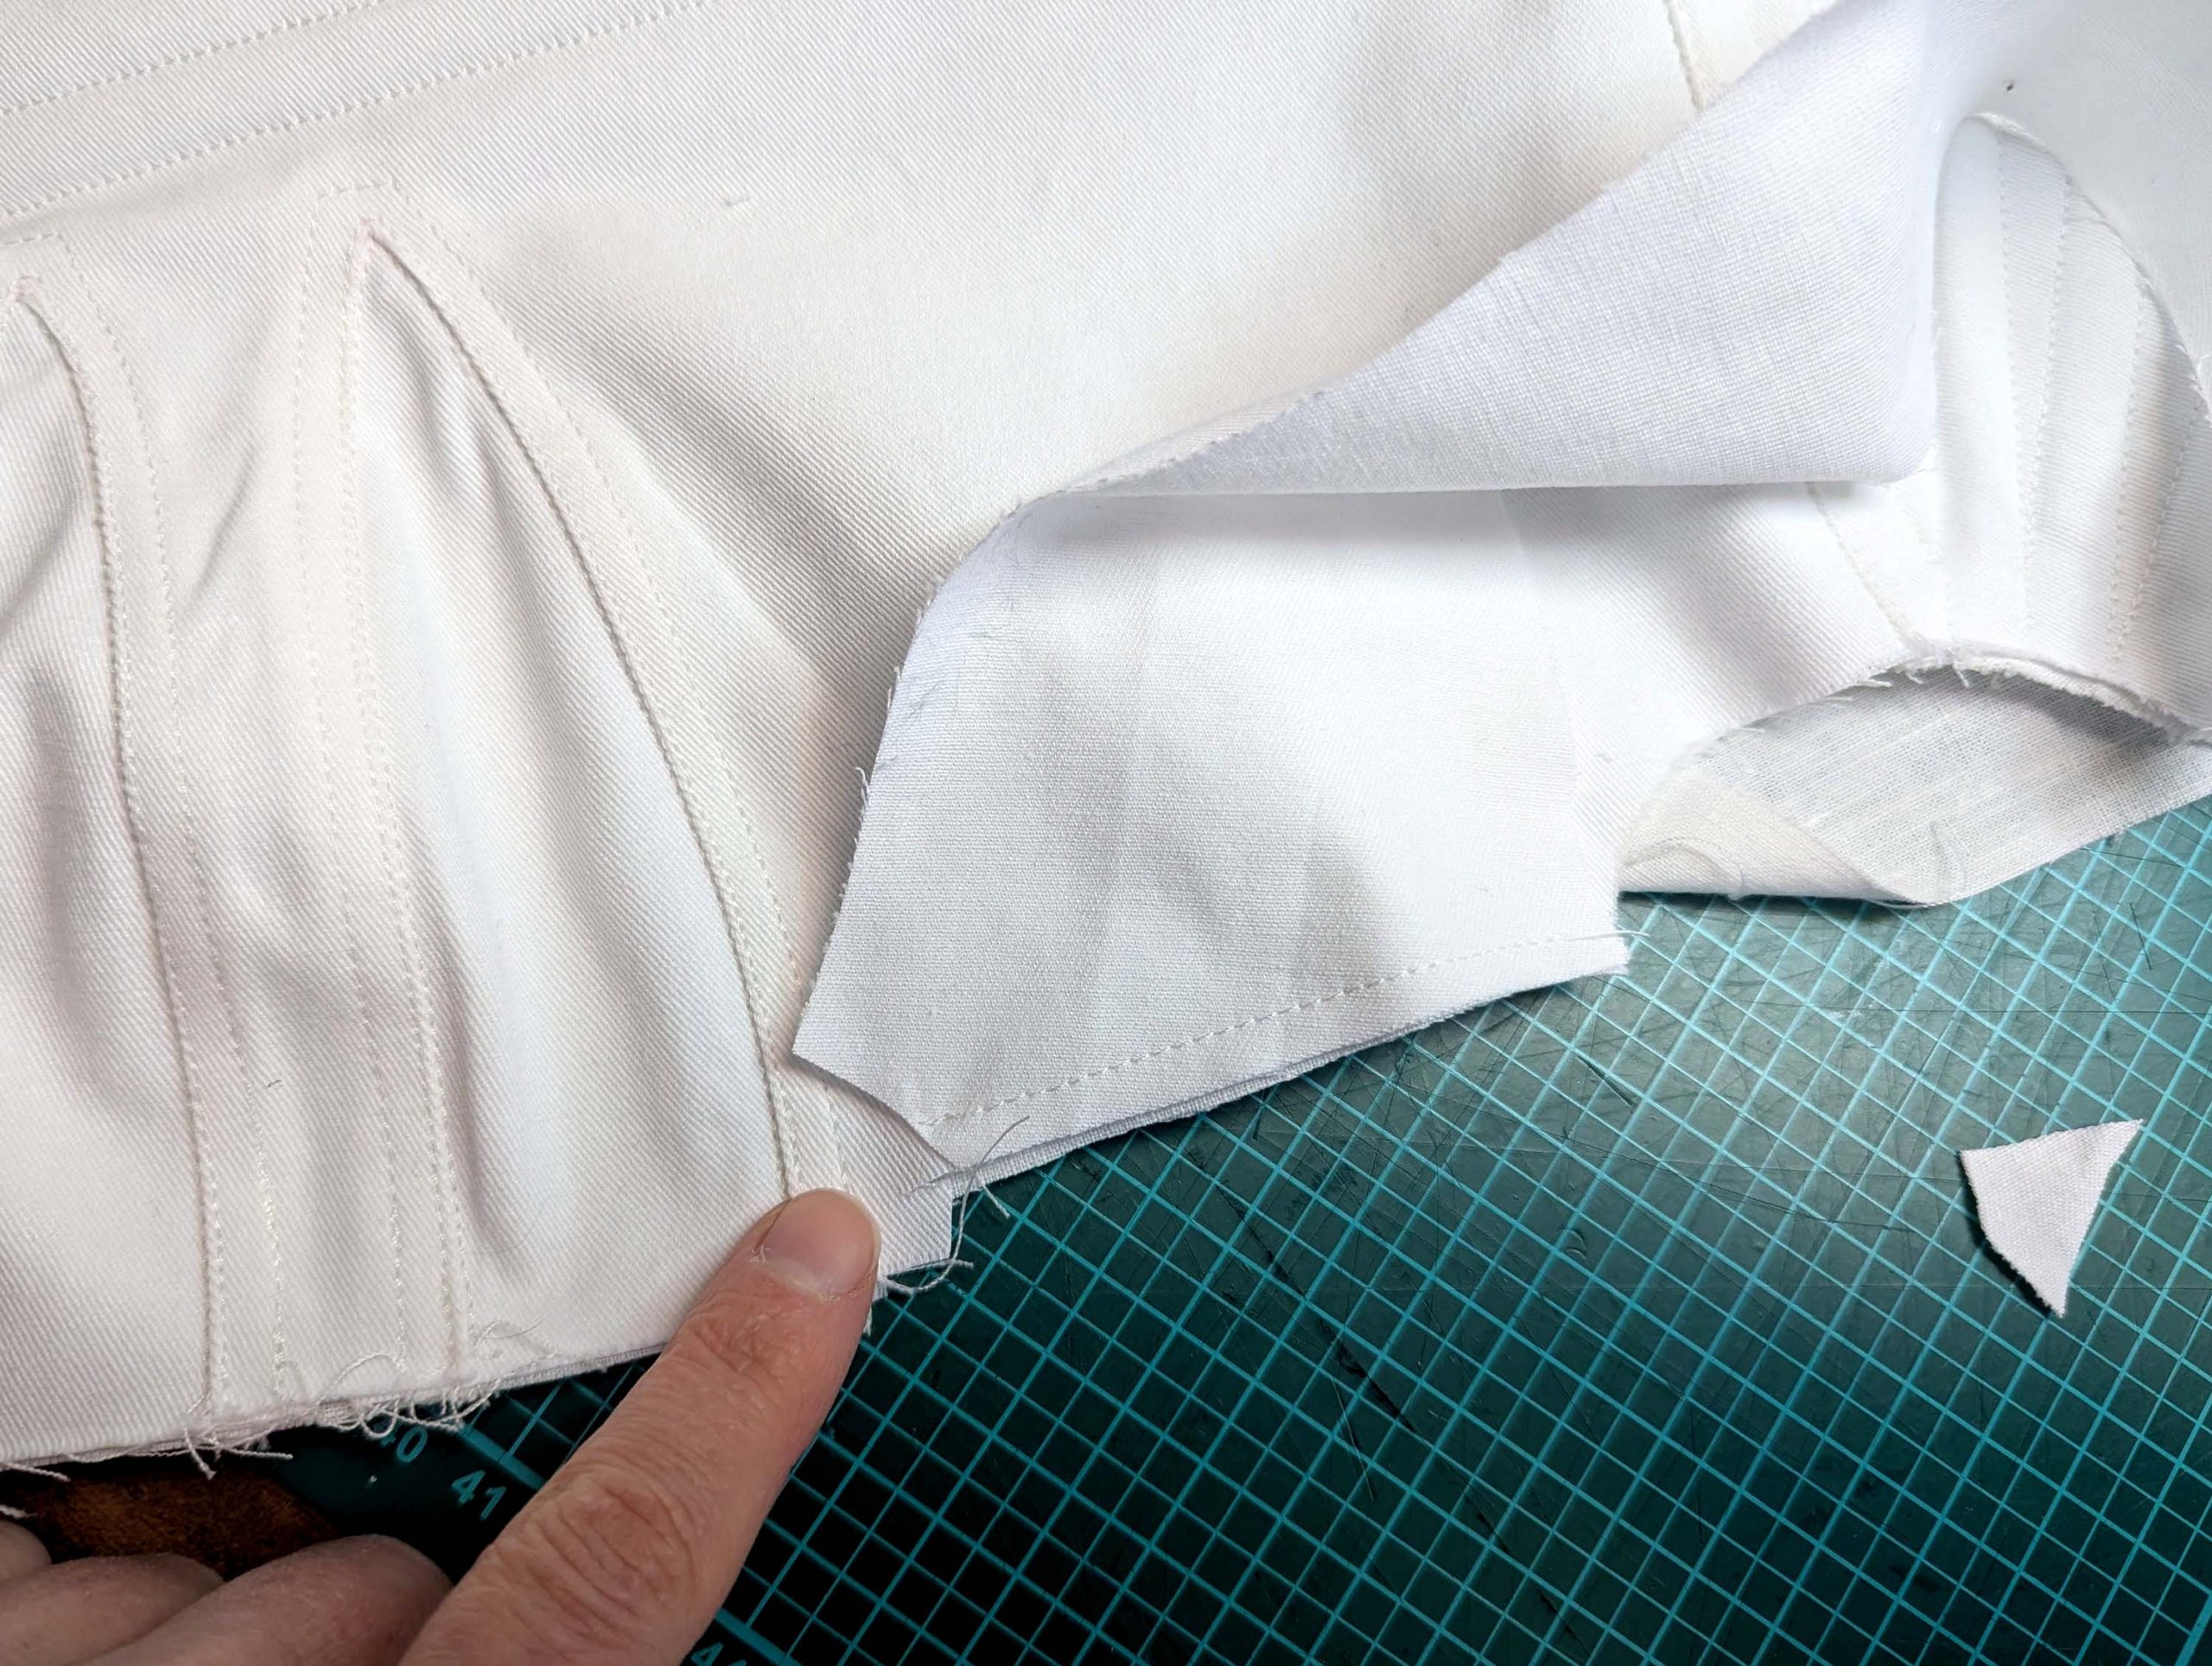
(3) Sew the back to the side back, right sides together, press the seam allowance towards the back, and topstitch from the right side. Repeat with the lining. Line up the top layer with the lining, right sides together, and sew along the back edge, with the lining protruding the fashion fabric for about 1/8″ (2-3mm) for the turn of cloth. Fold the seam allowance towards the lining and understitch. Fold the layer’s wrong sides together and press the edge, rolling the stitching slightly out of sight towards the garment’s wrong side.
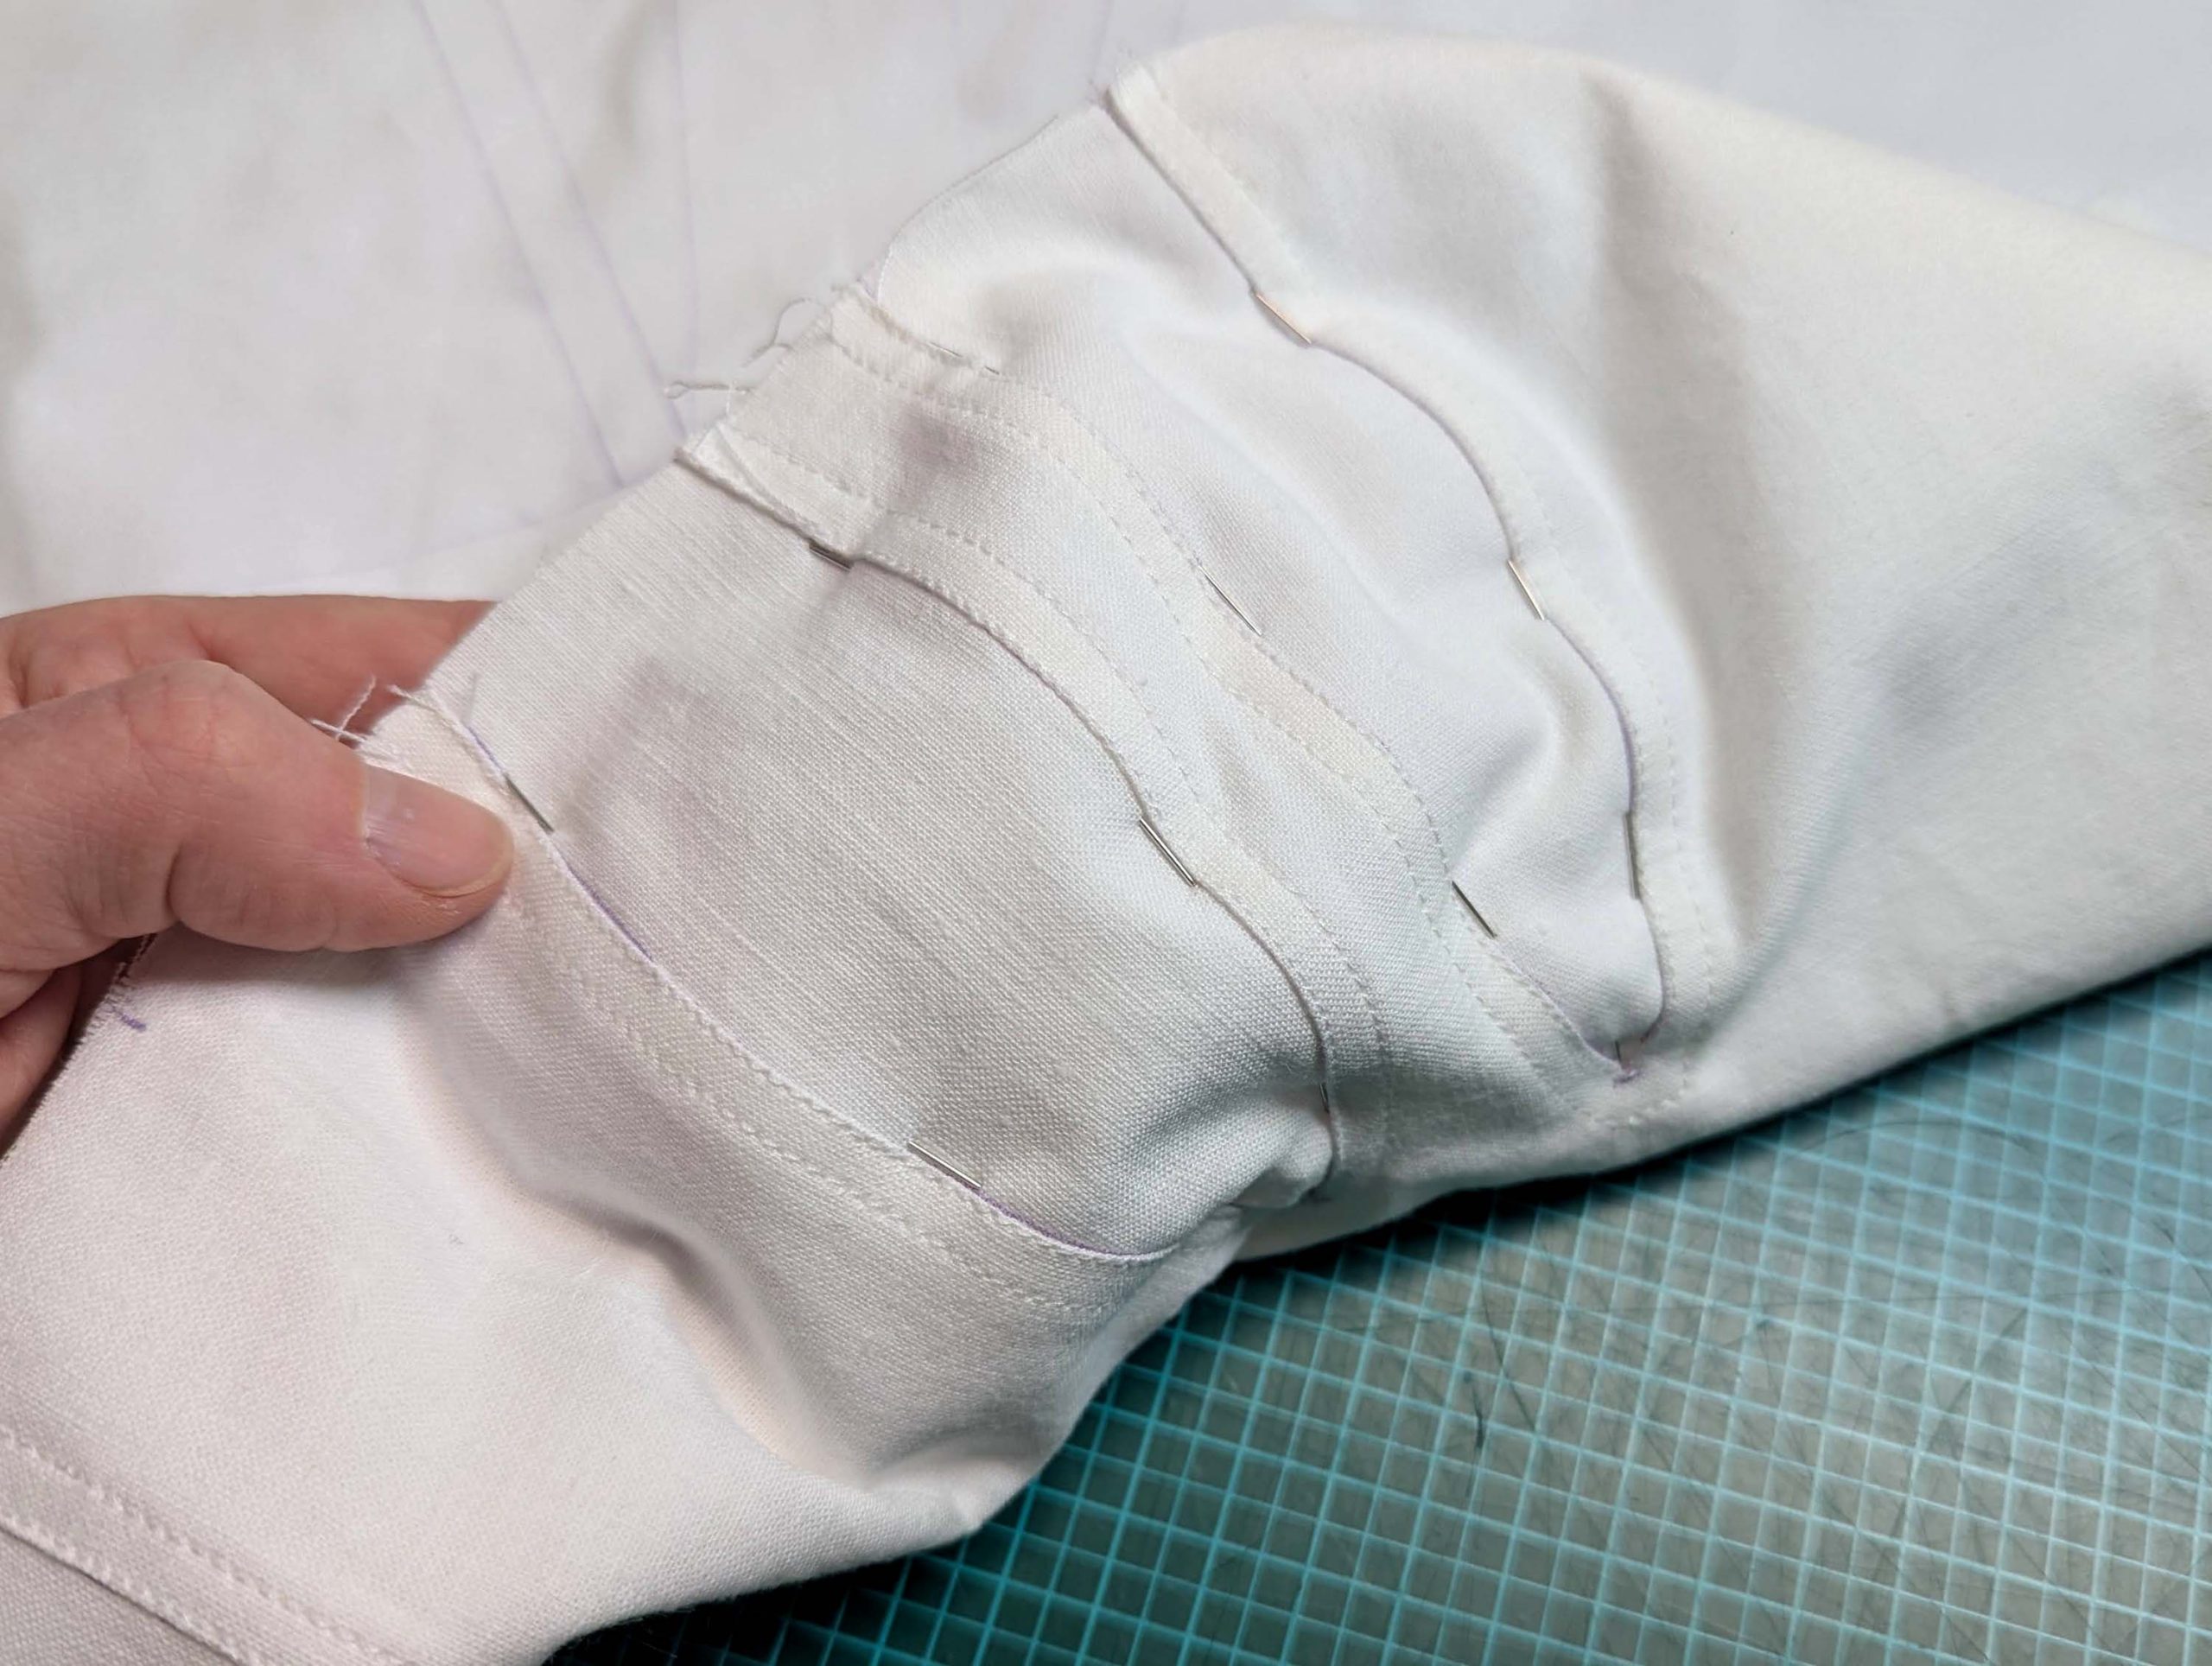
Sew the strap to the side back, right sides together, and stop at the mark (2). Trim back the seam allowance, and angle at the mark. Press the seam allowance towards the straps and topstitch. Sew the fashion fabric and lining separately.
(4) Sew the side back to the front – ¾” (2cm) seam allowance, right sides together. Fold the lining of the side back to the side, but catch the front lining together with the fashion fabric. Press the seam allowance towards the back. Smooth out the back lining, turn in the seam allowance along the side seam, cover the raw edges, and protrude the stitching line about 1/8” (3mm). Baste in place, and topstitch from the right side, catching the lining on the back.
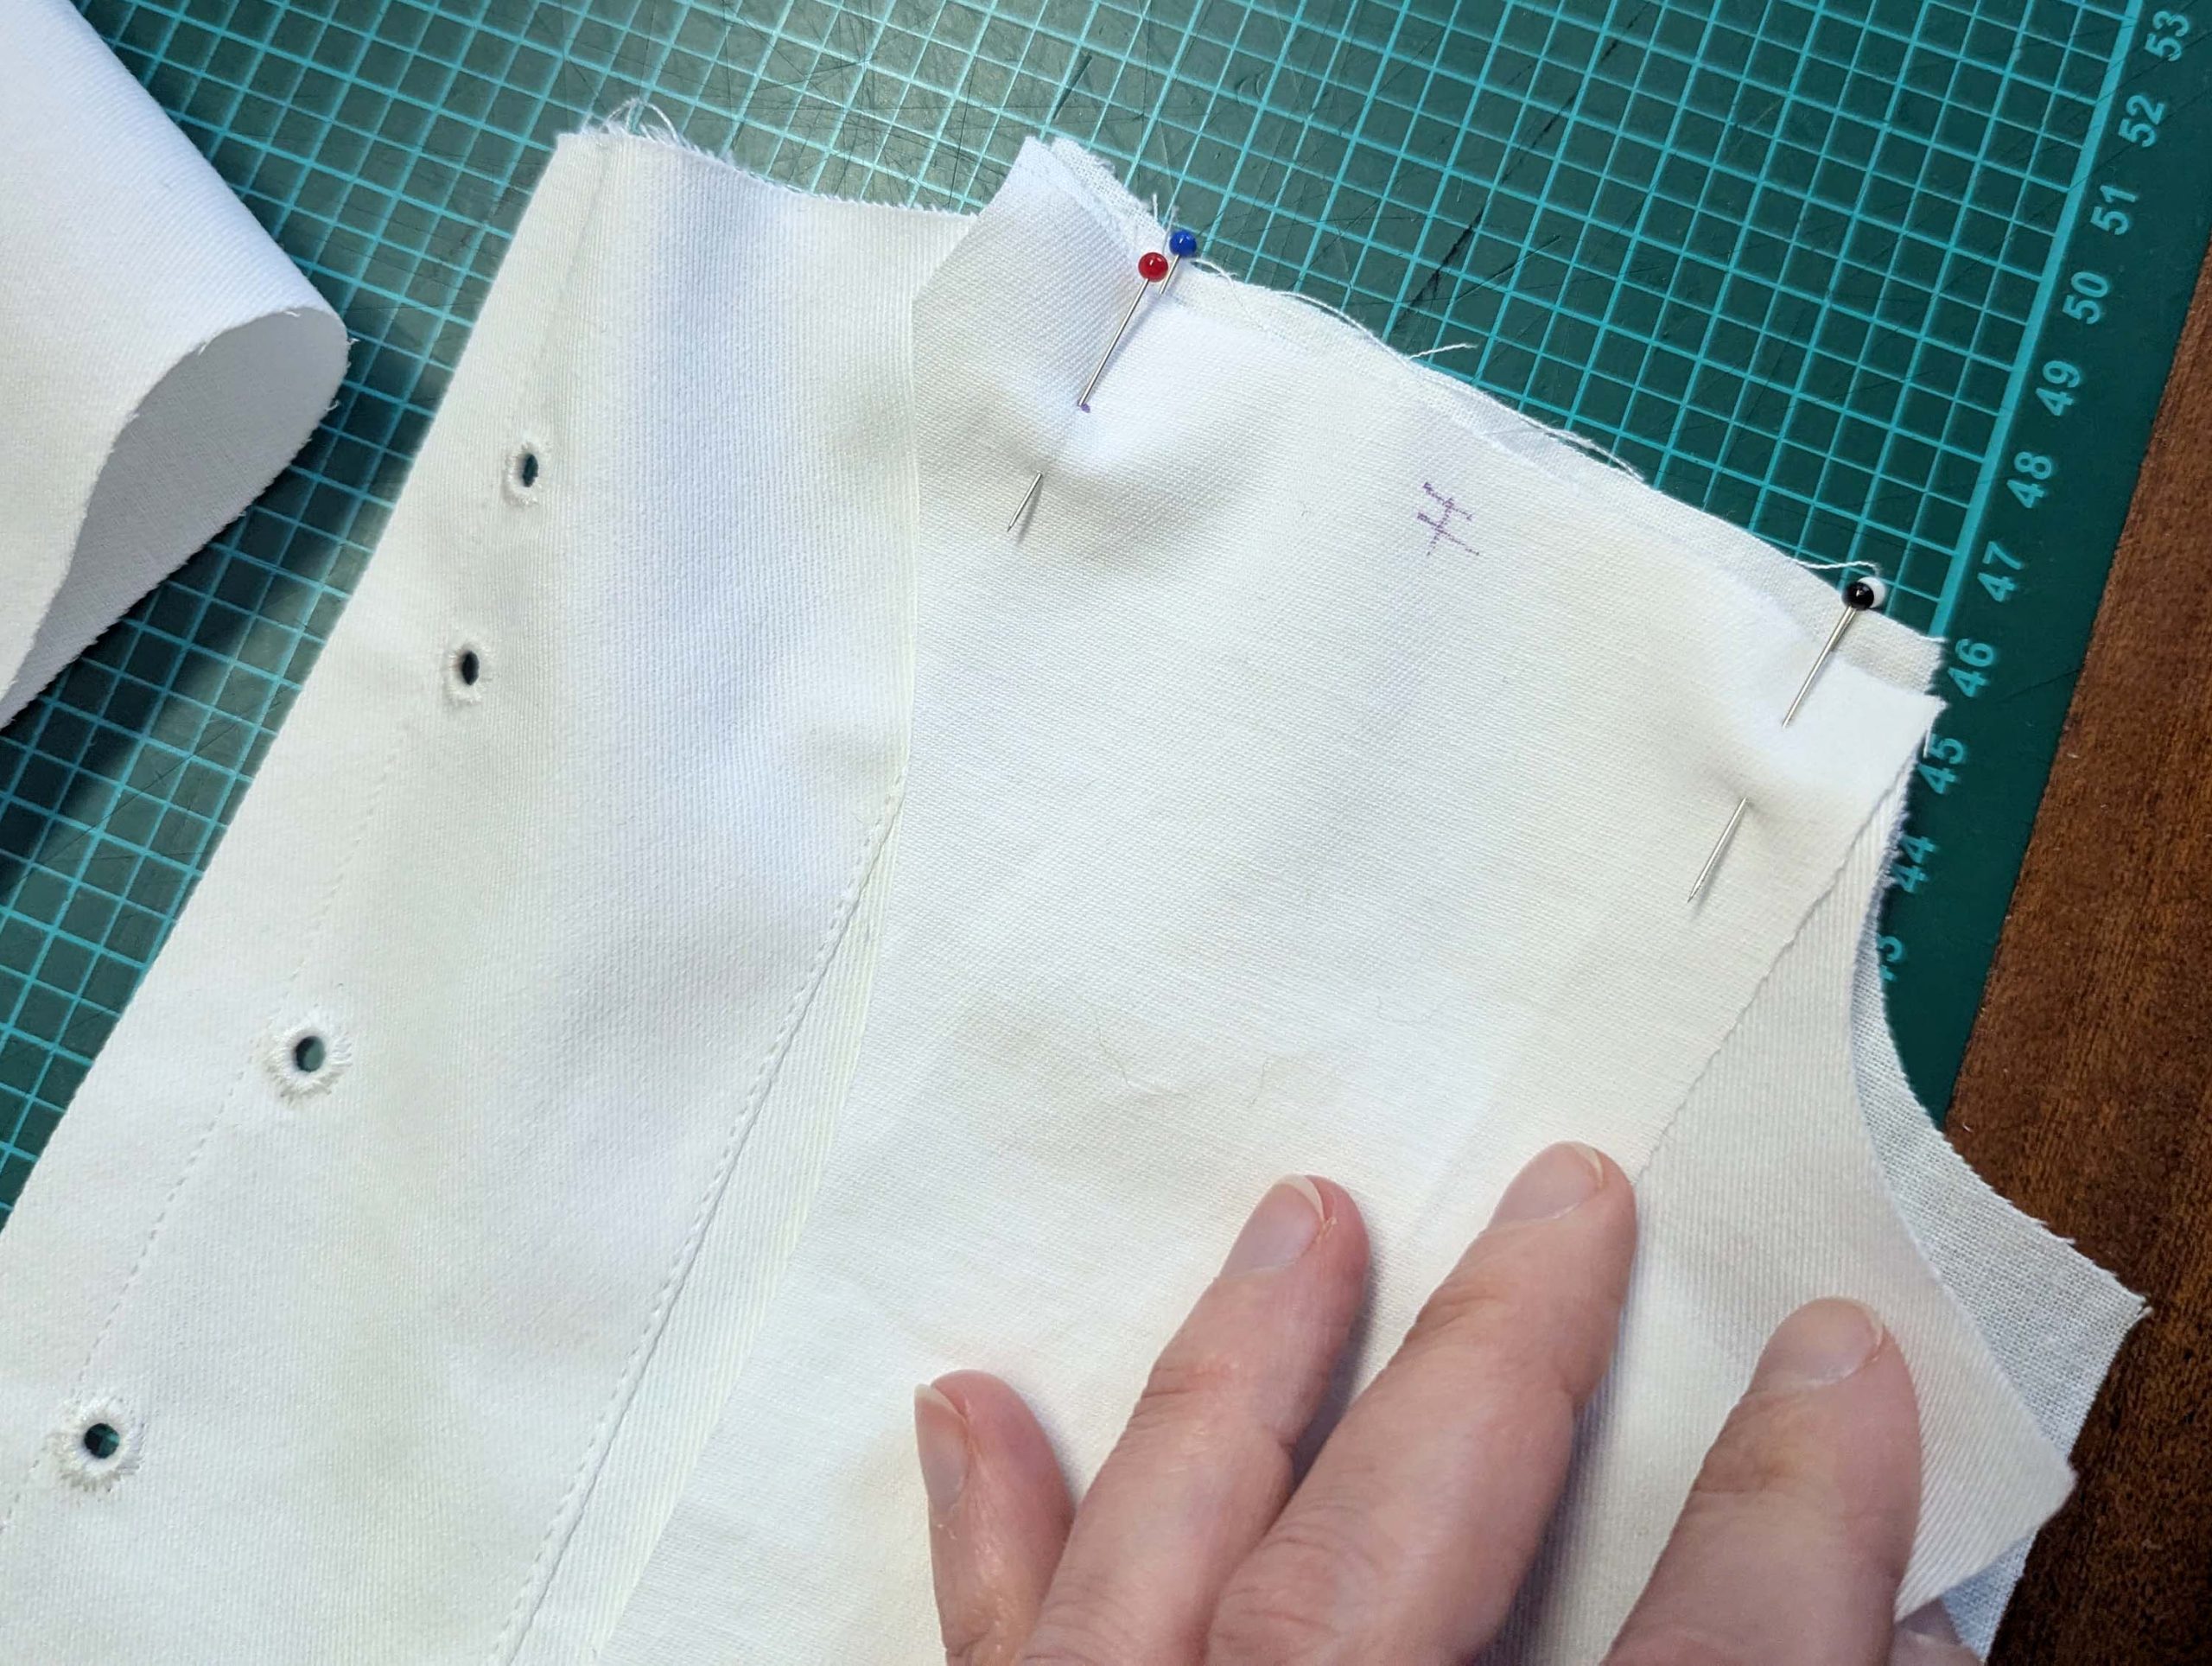
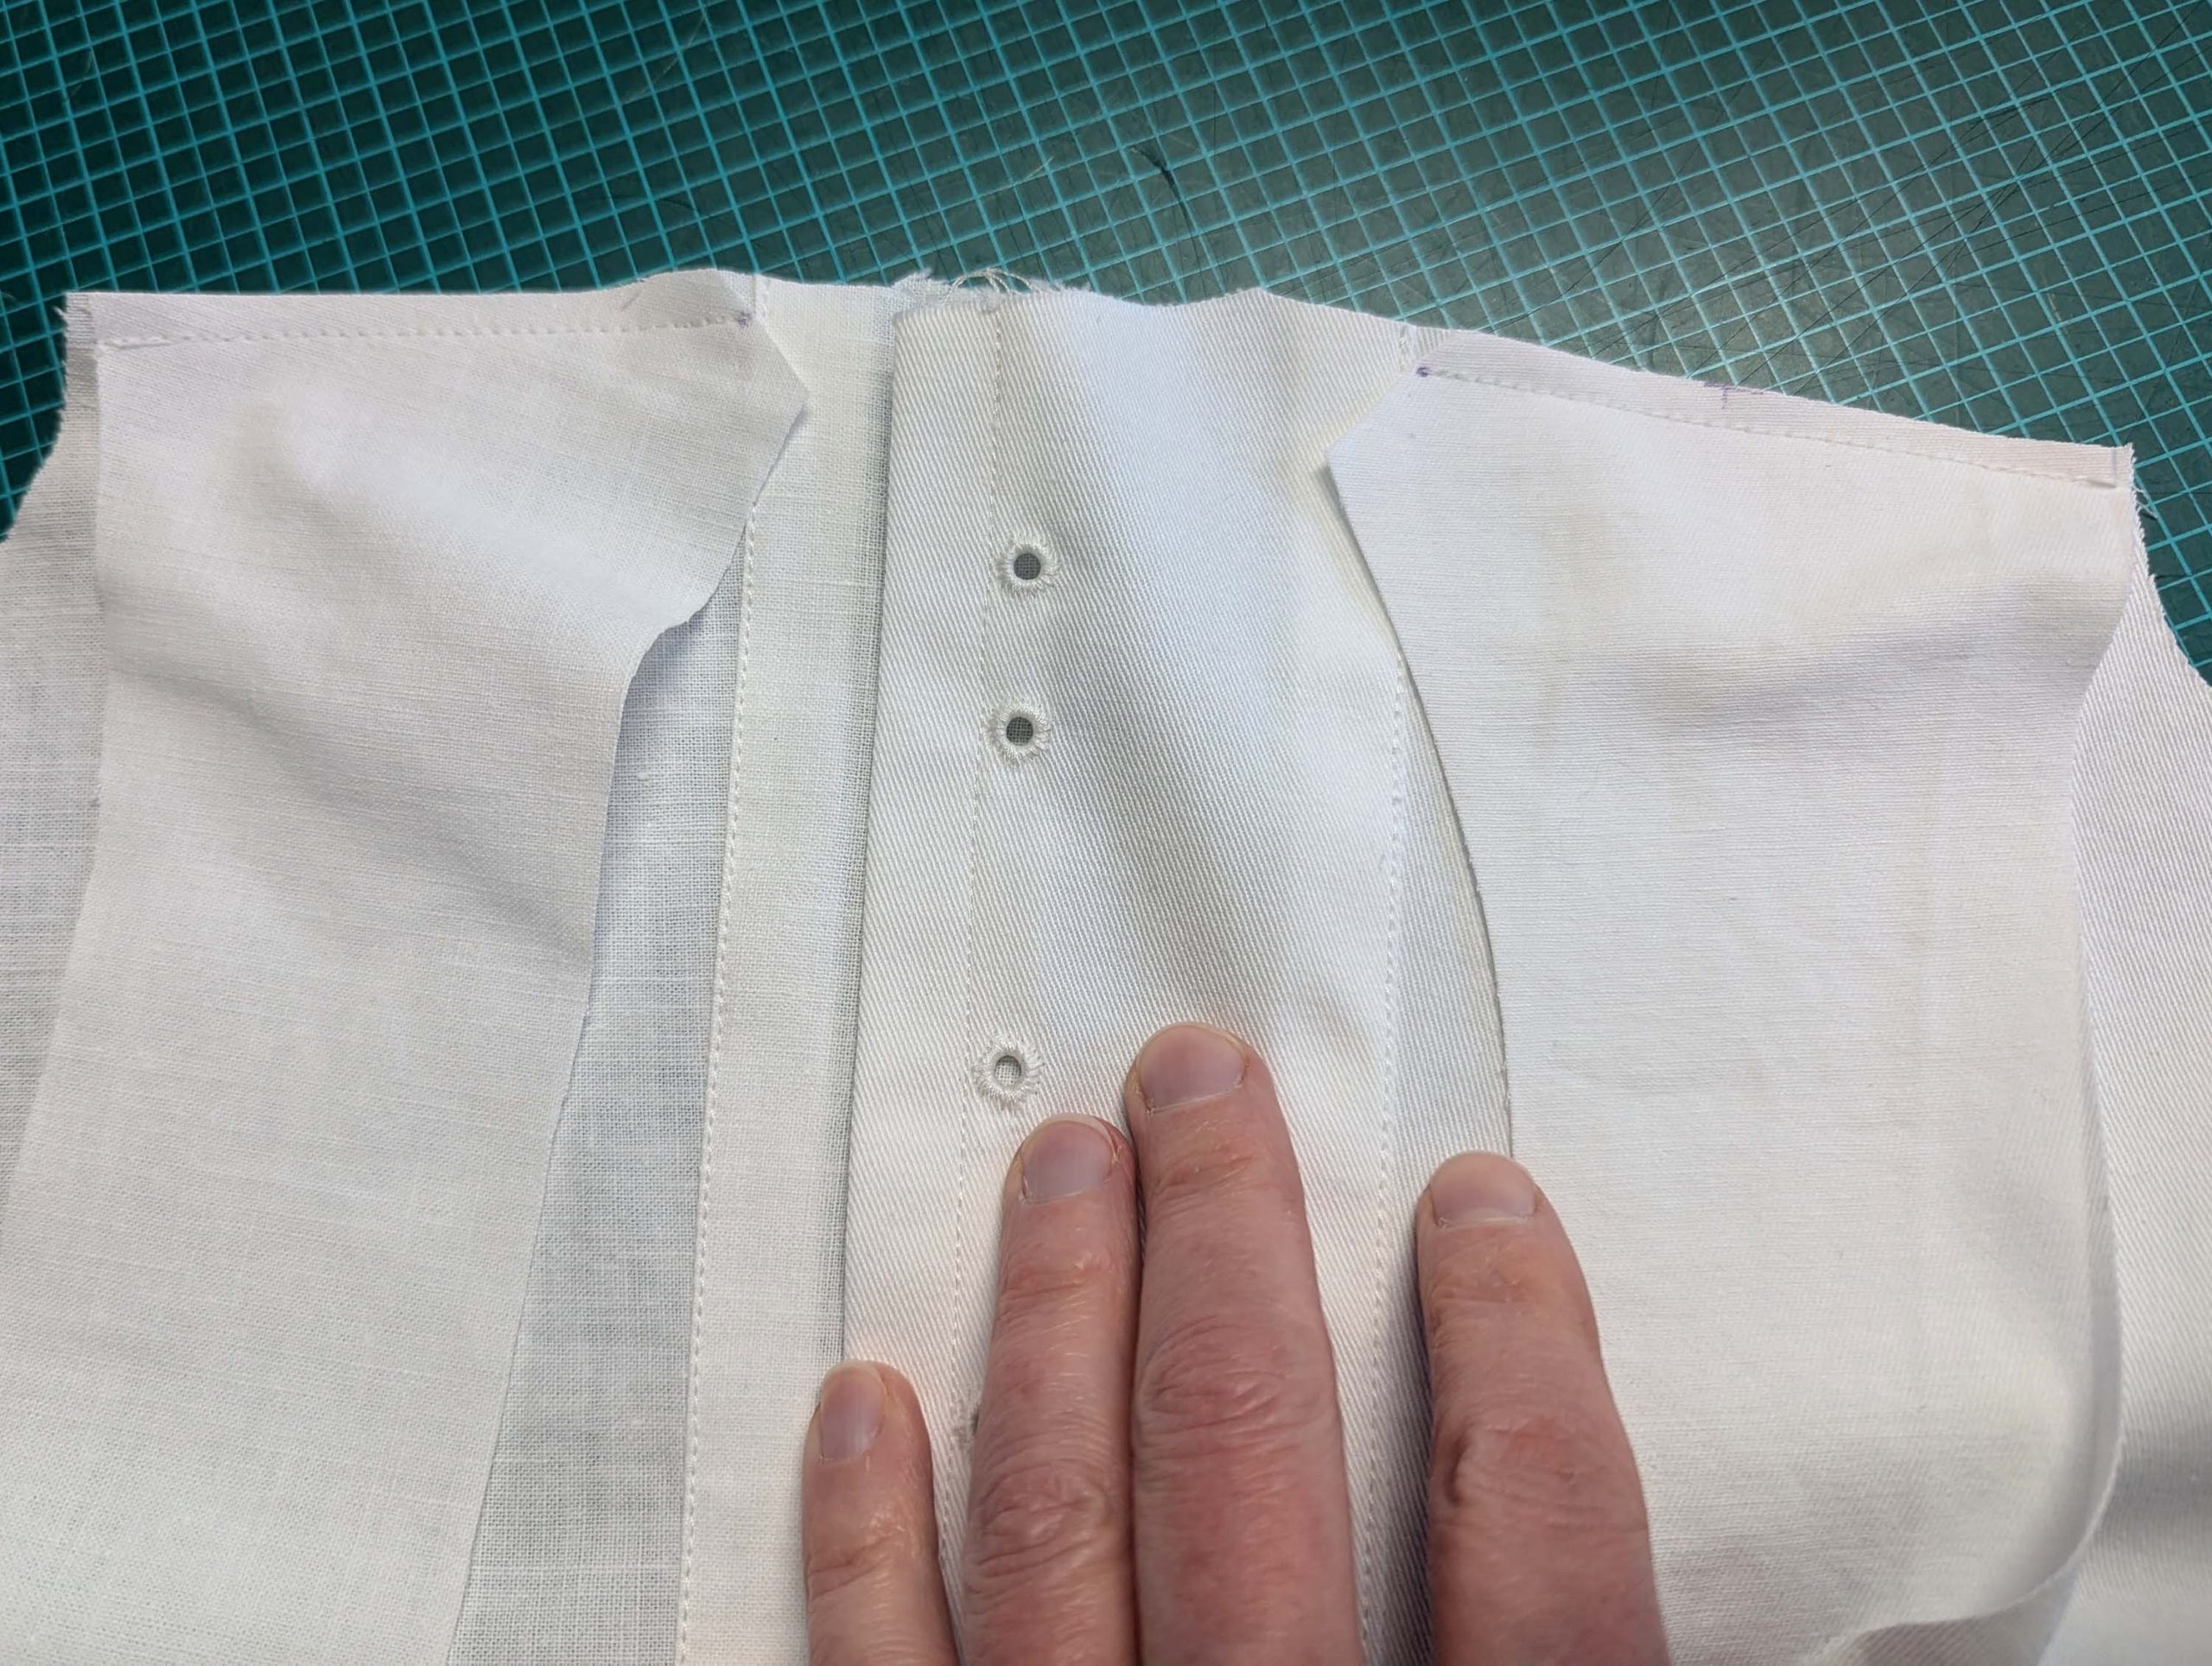
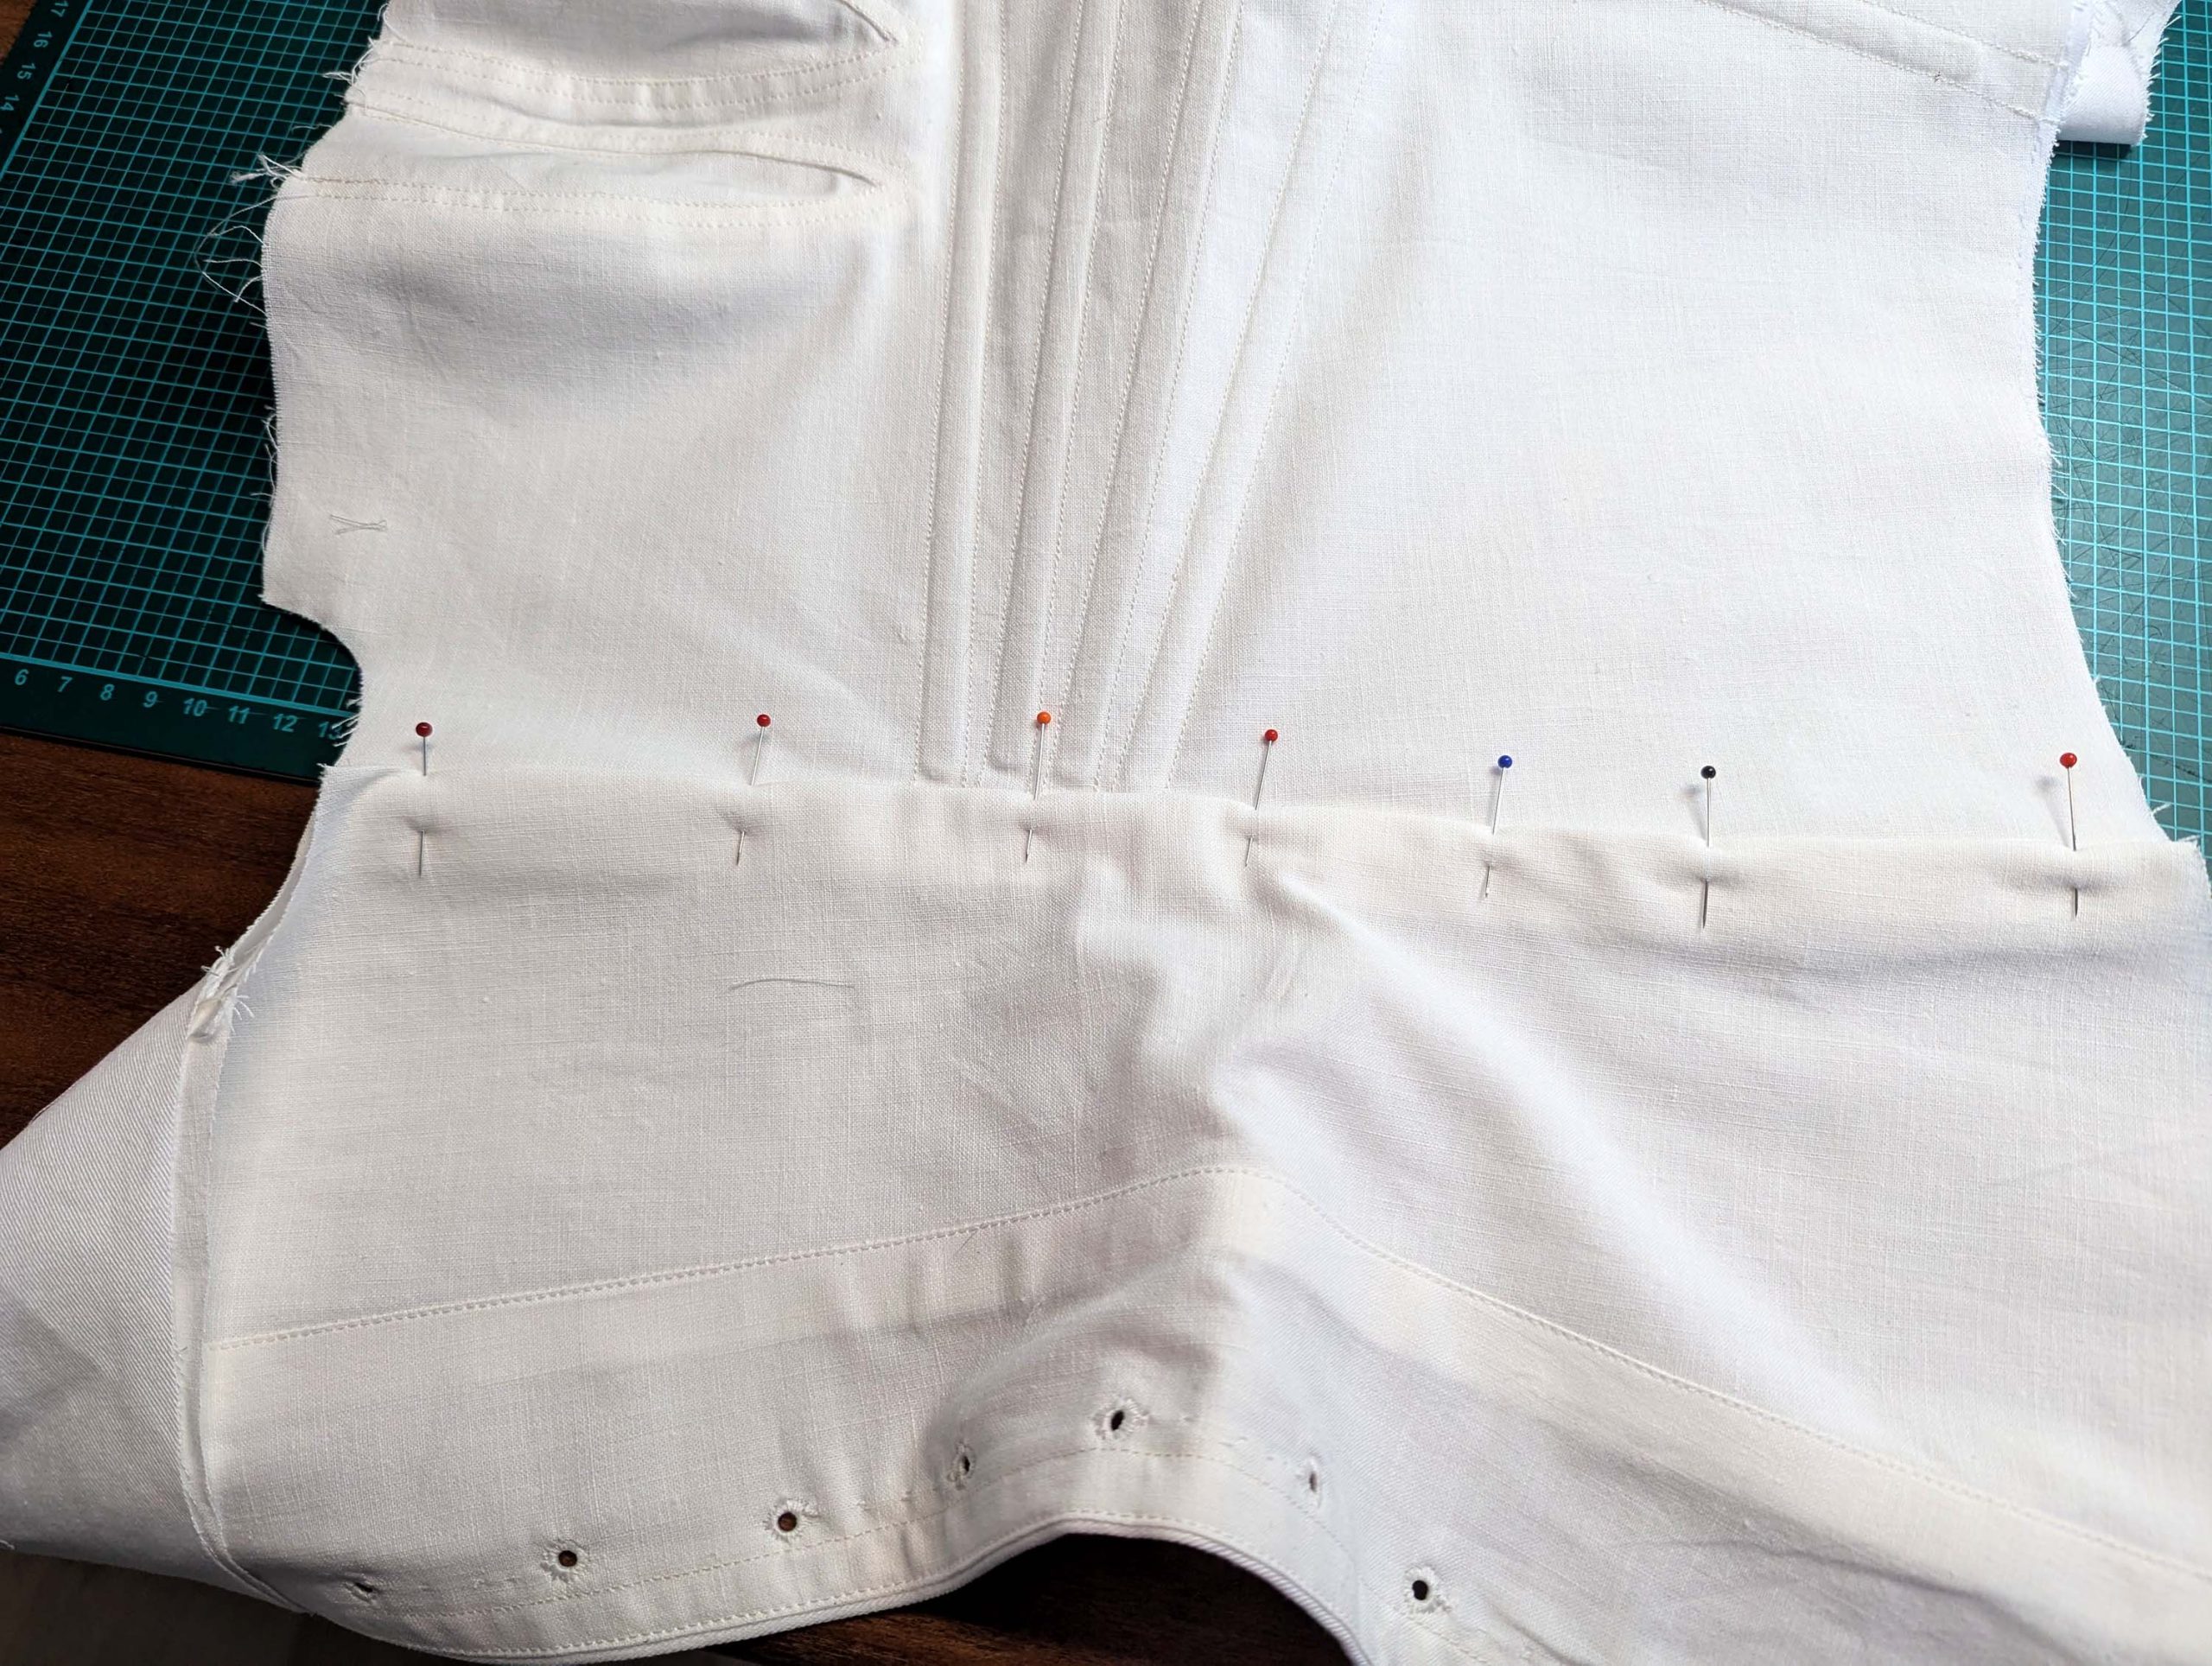
(5) Sew tunnels for the boning along the back edge, and along the side seam, the width depends on the width of your boning. For the larger sizes, I recommend a second row of boning along the back, right beside the grommets.
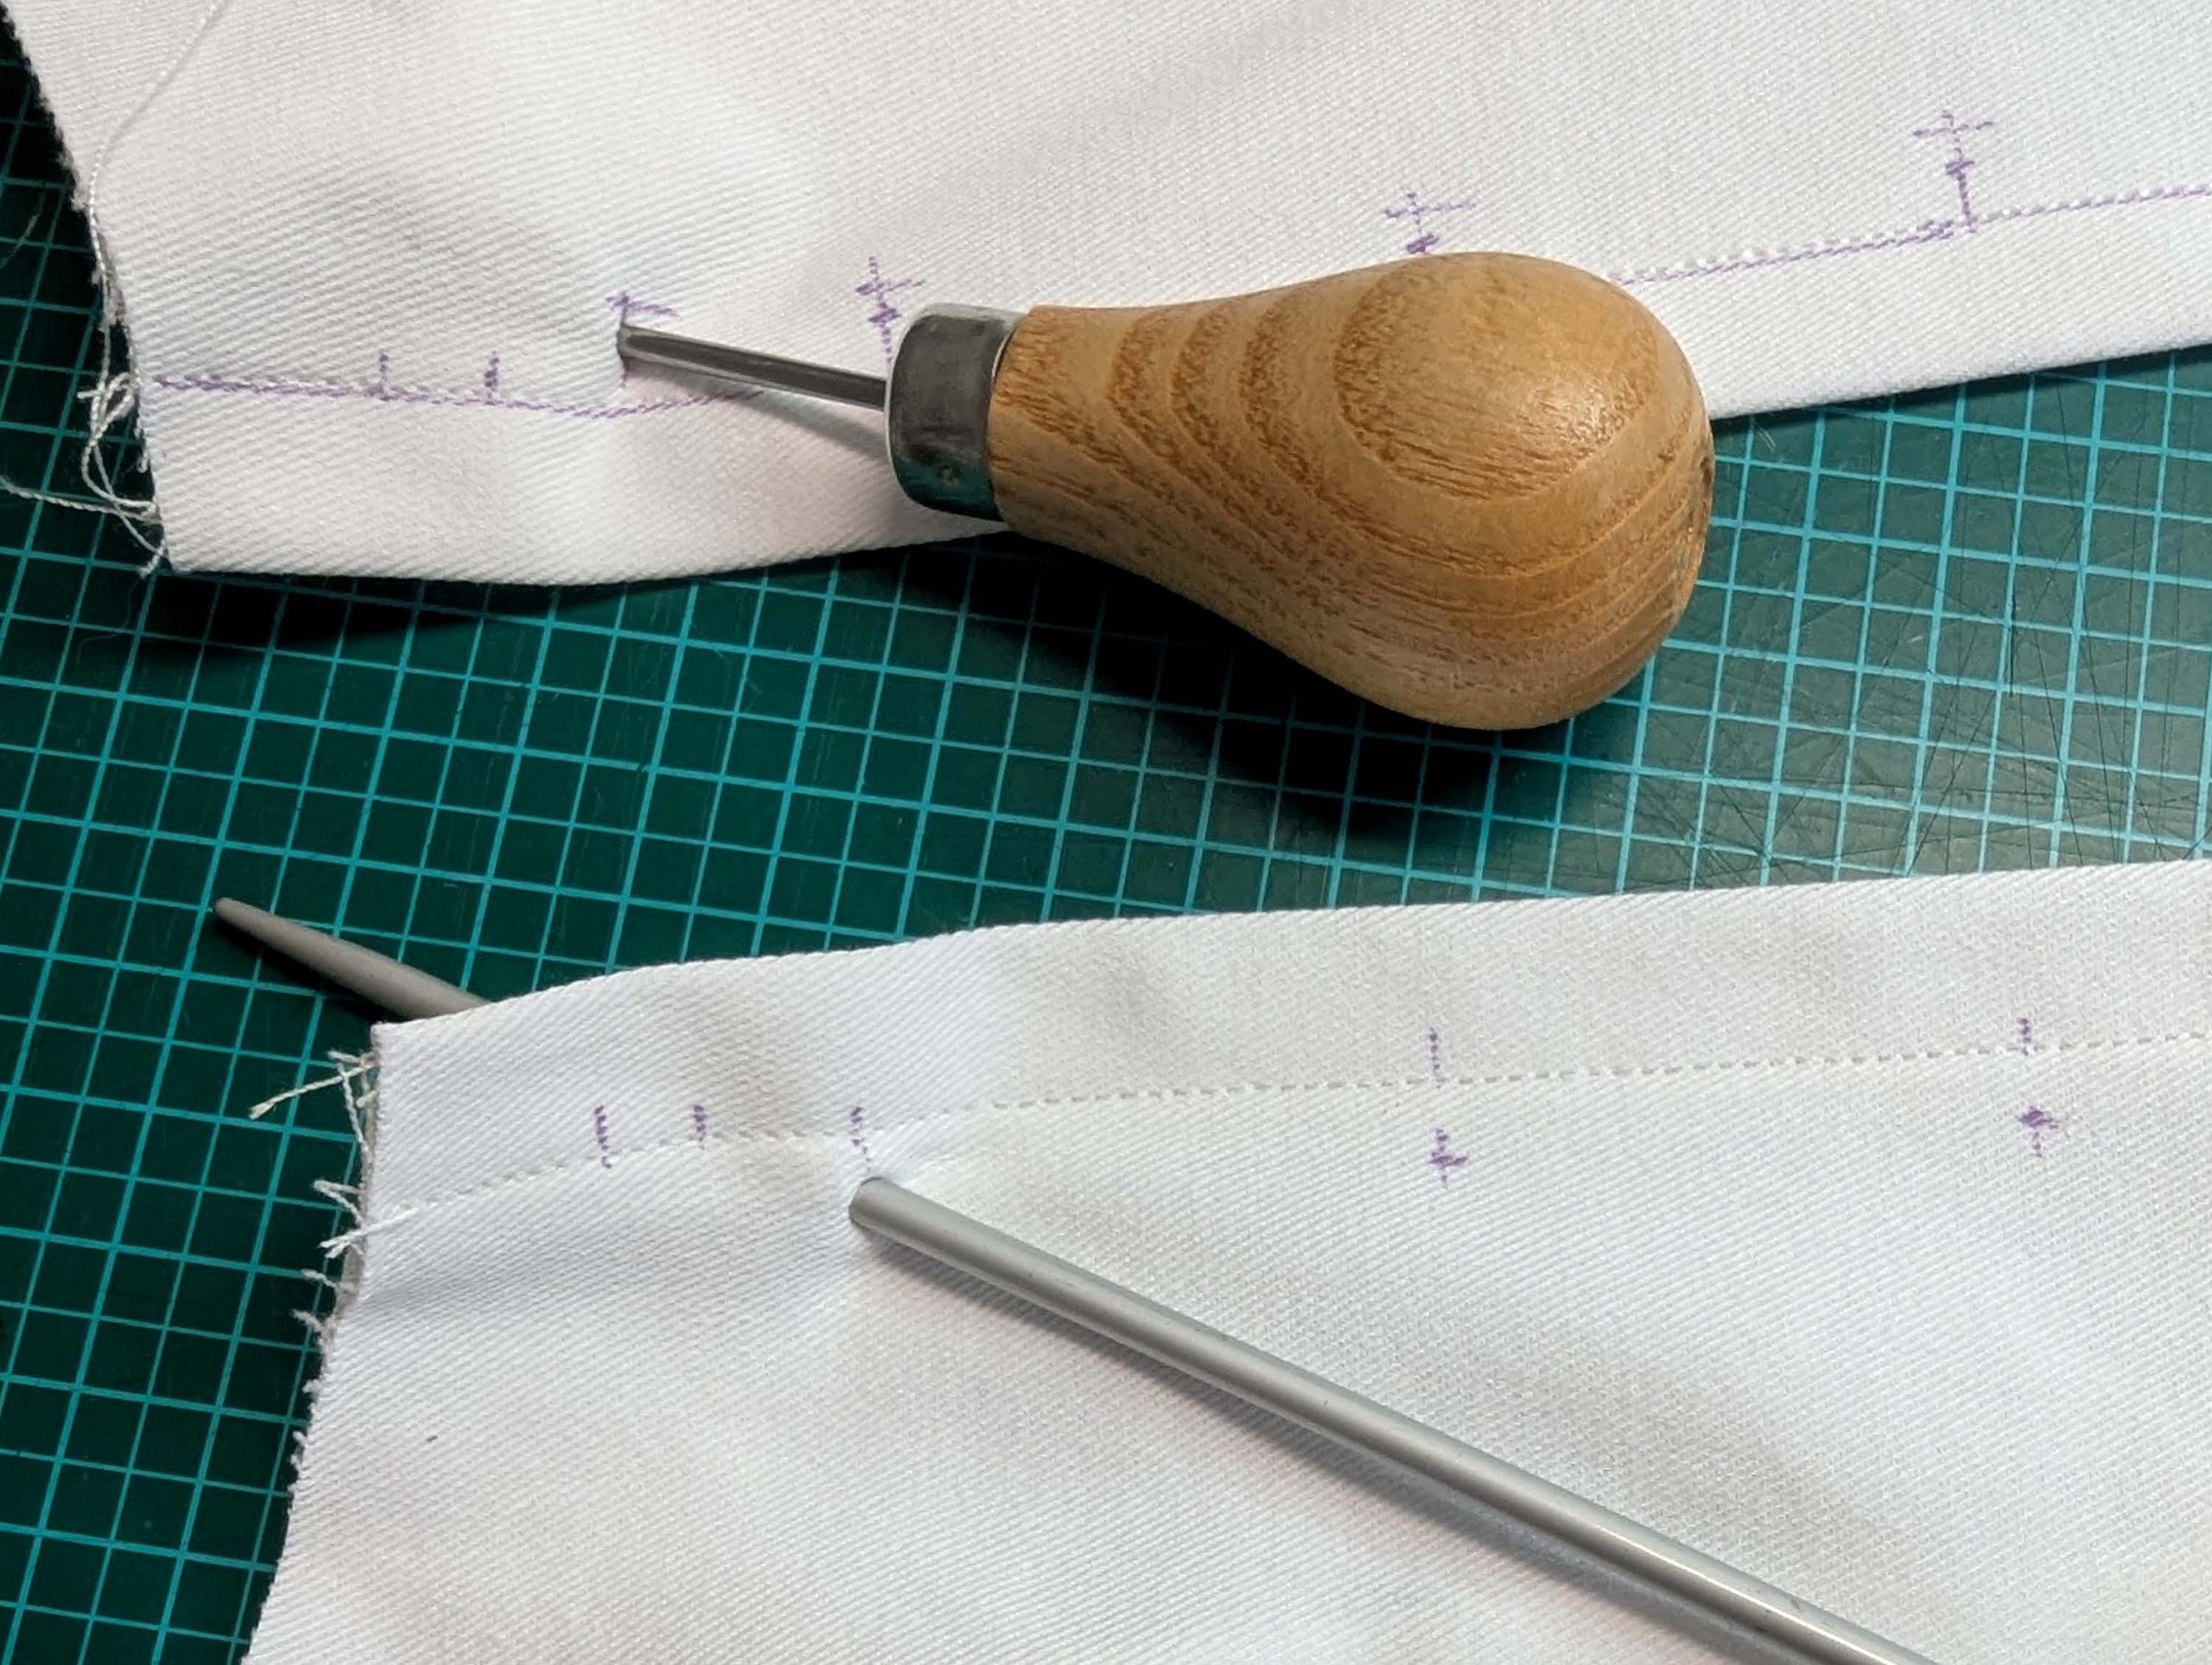
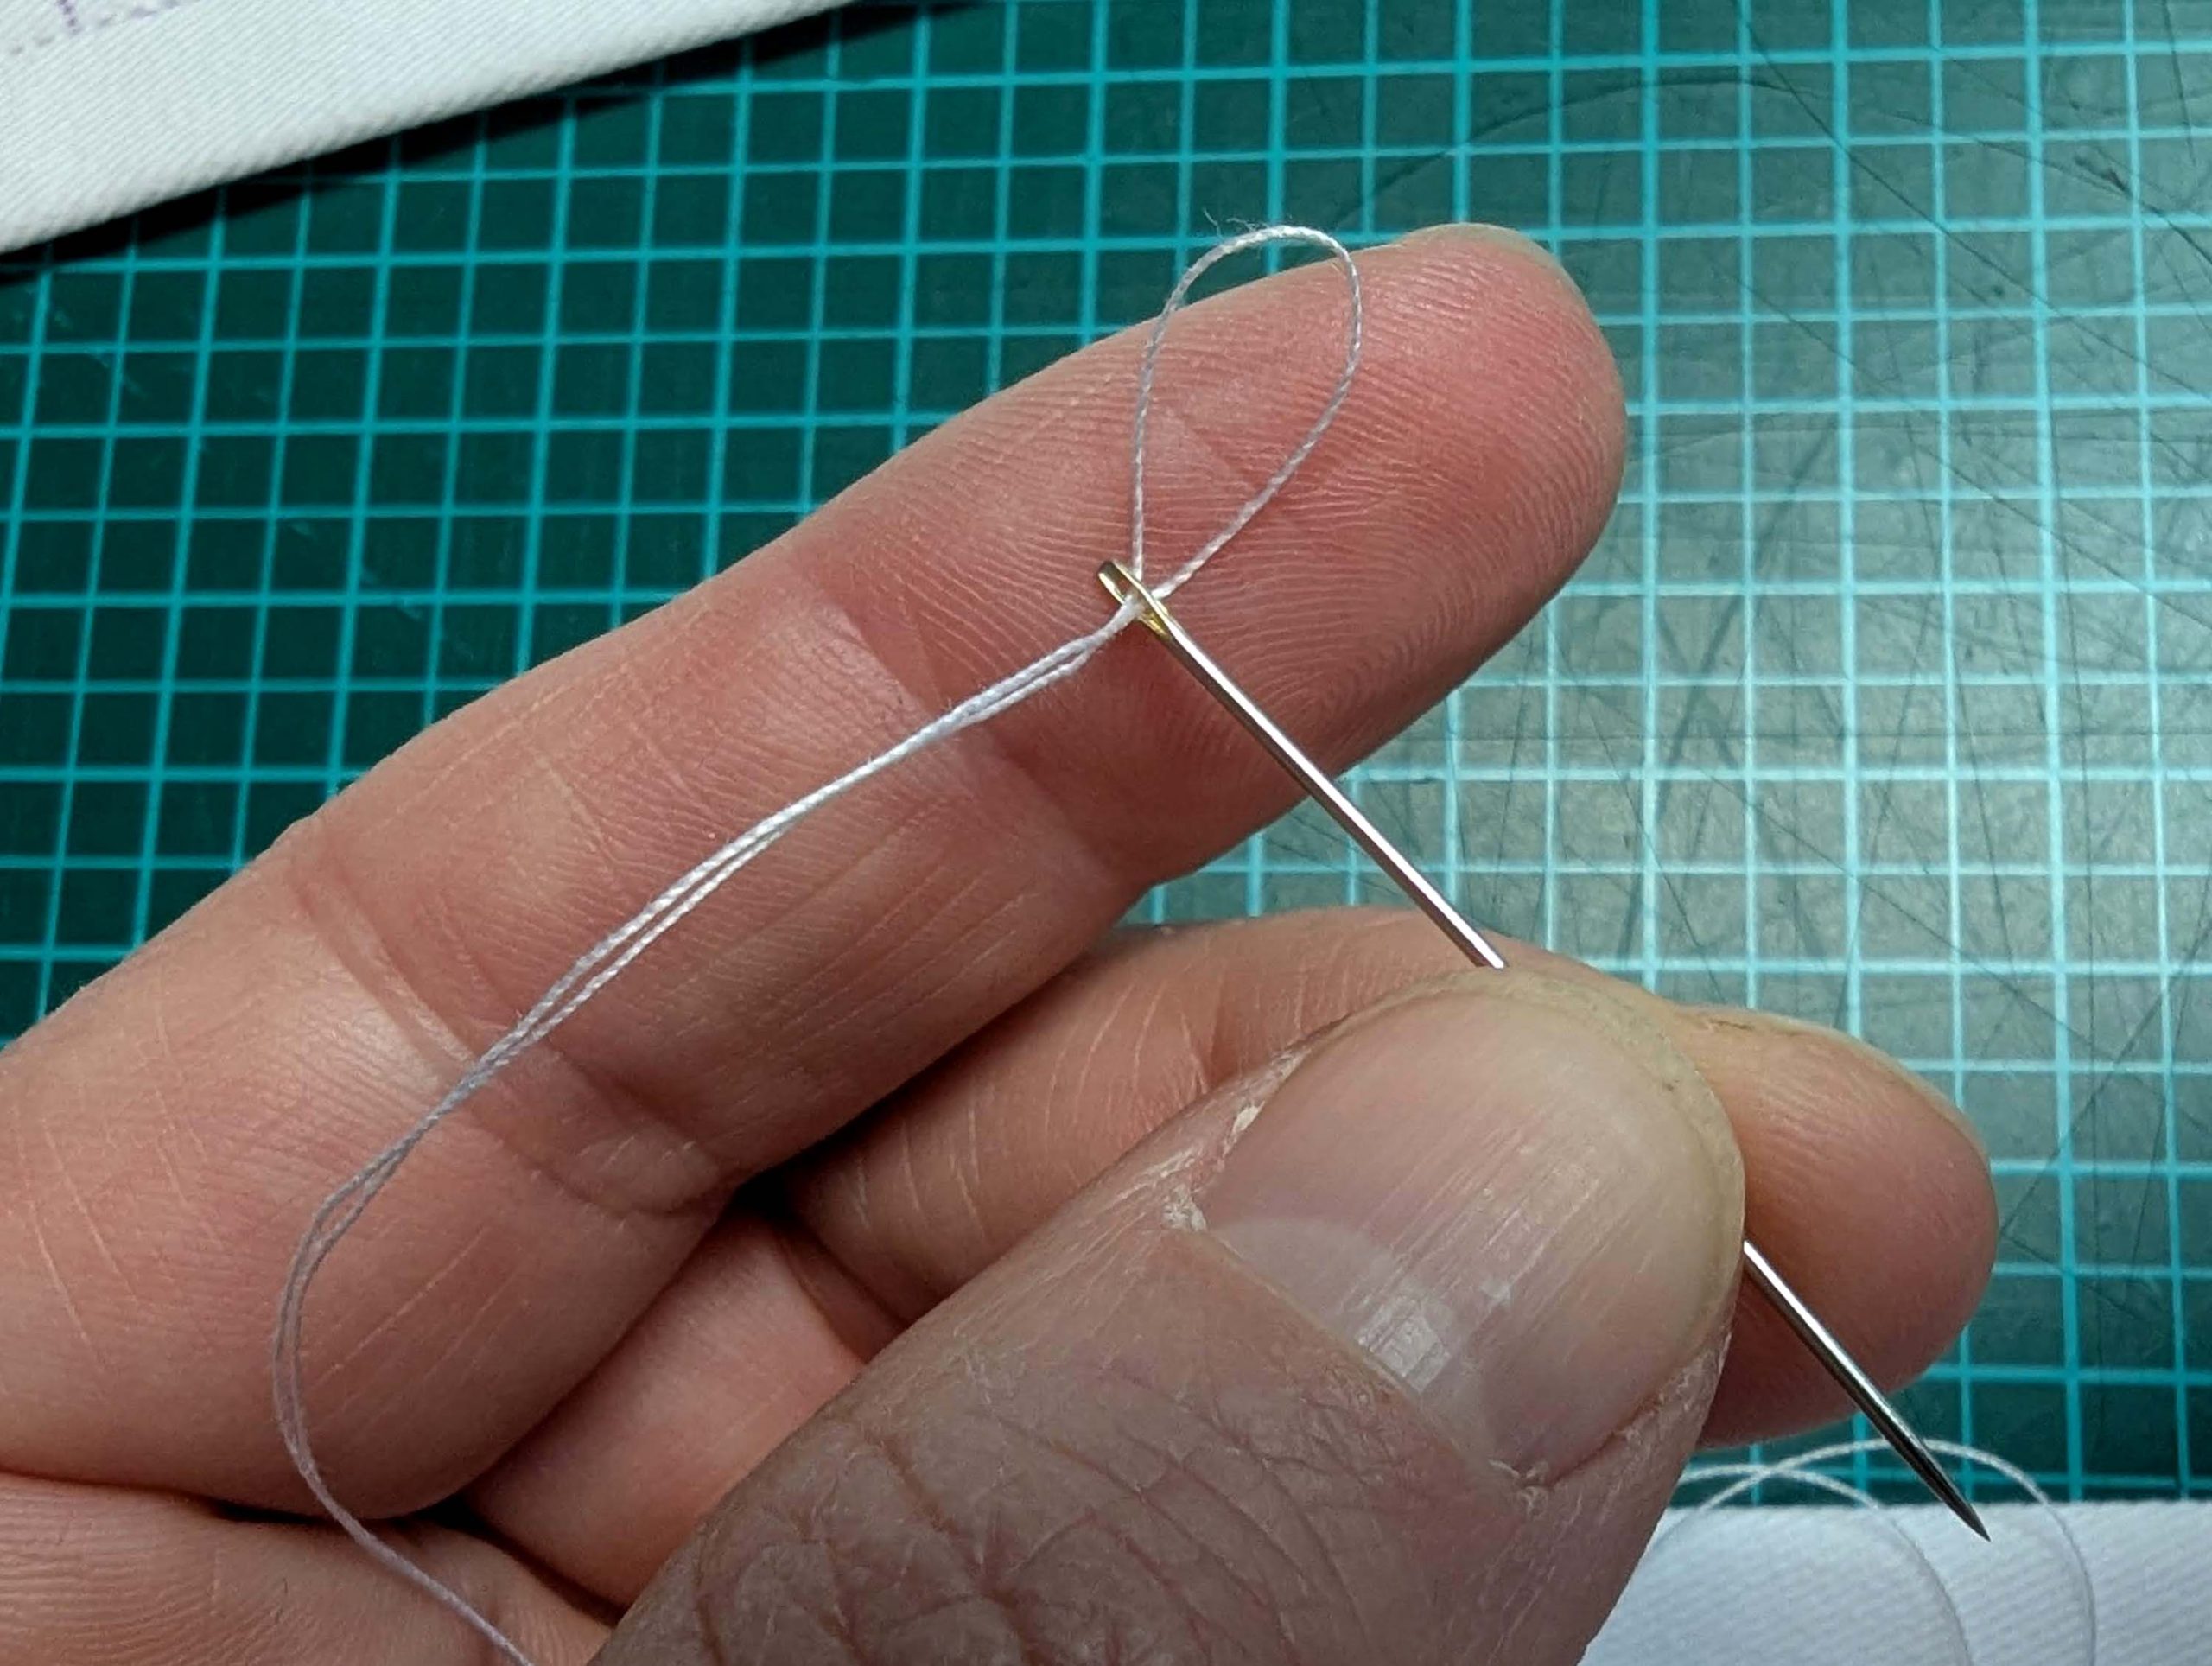
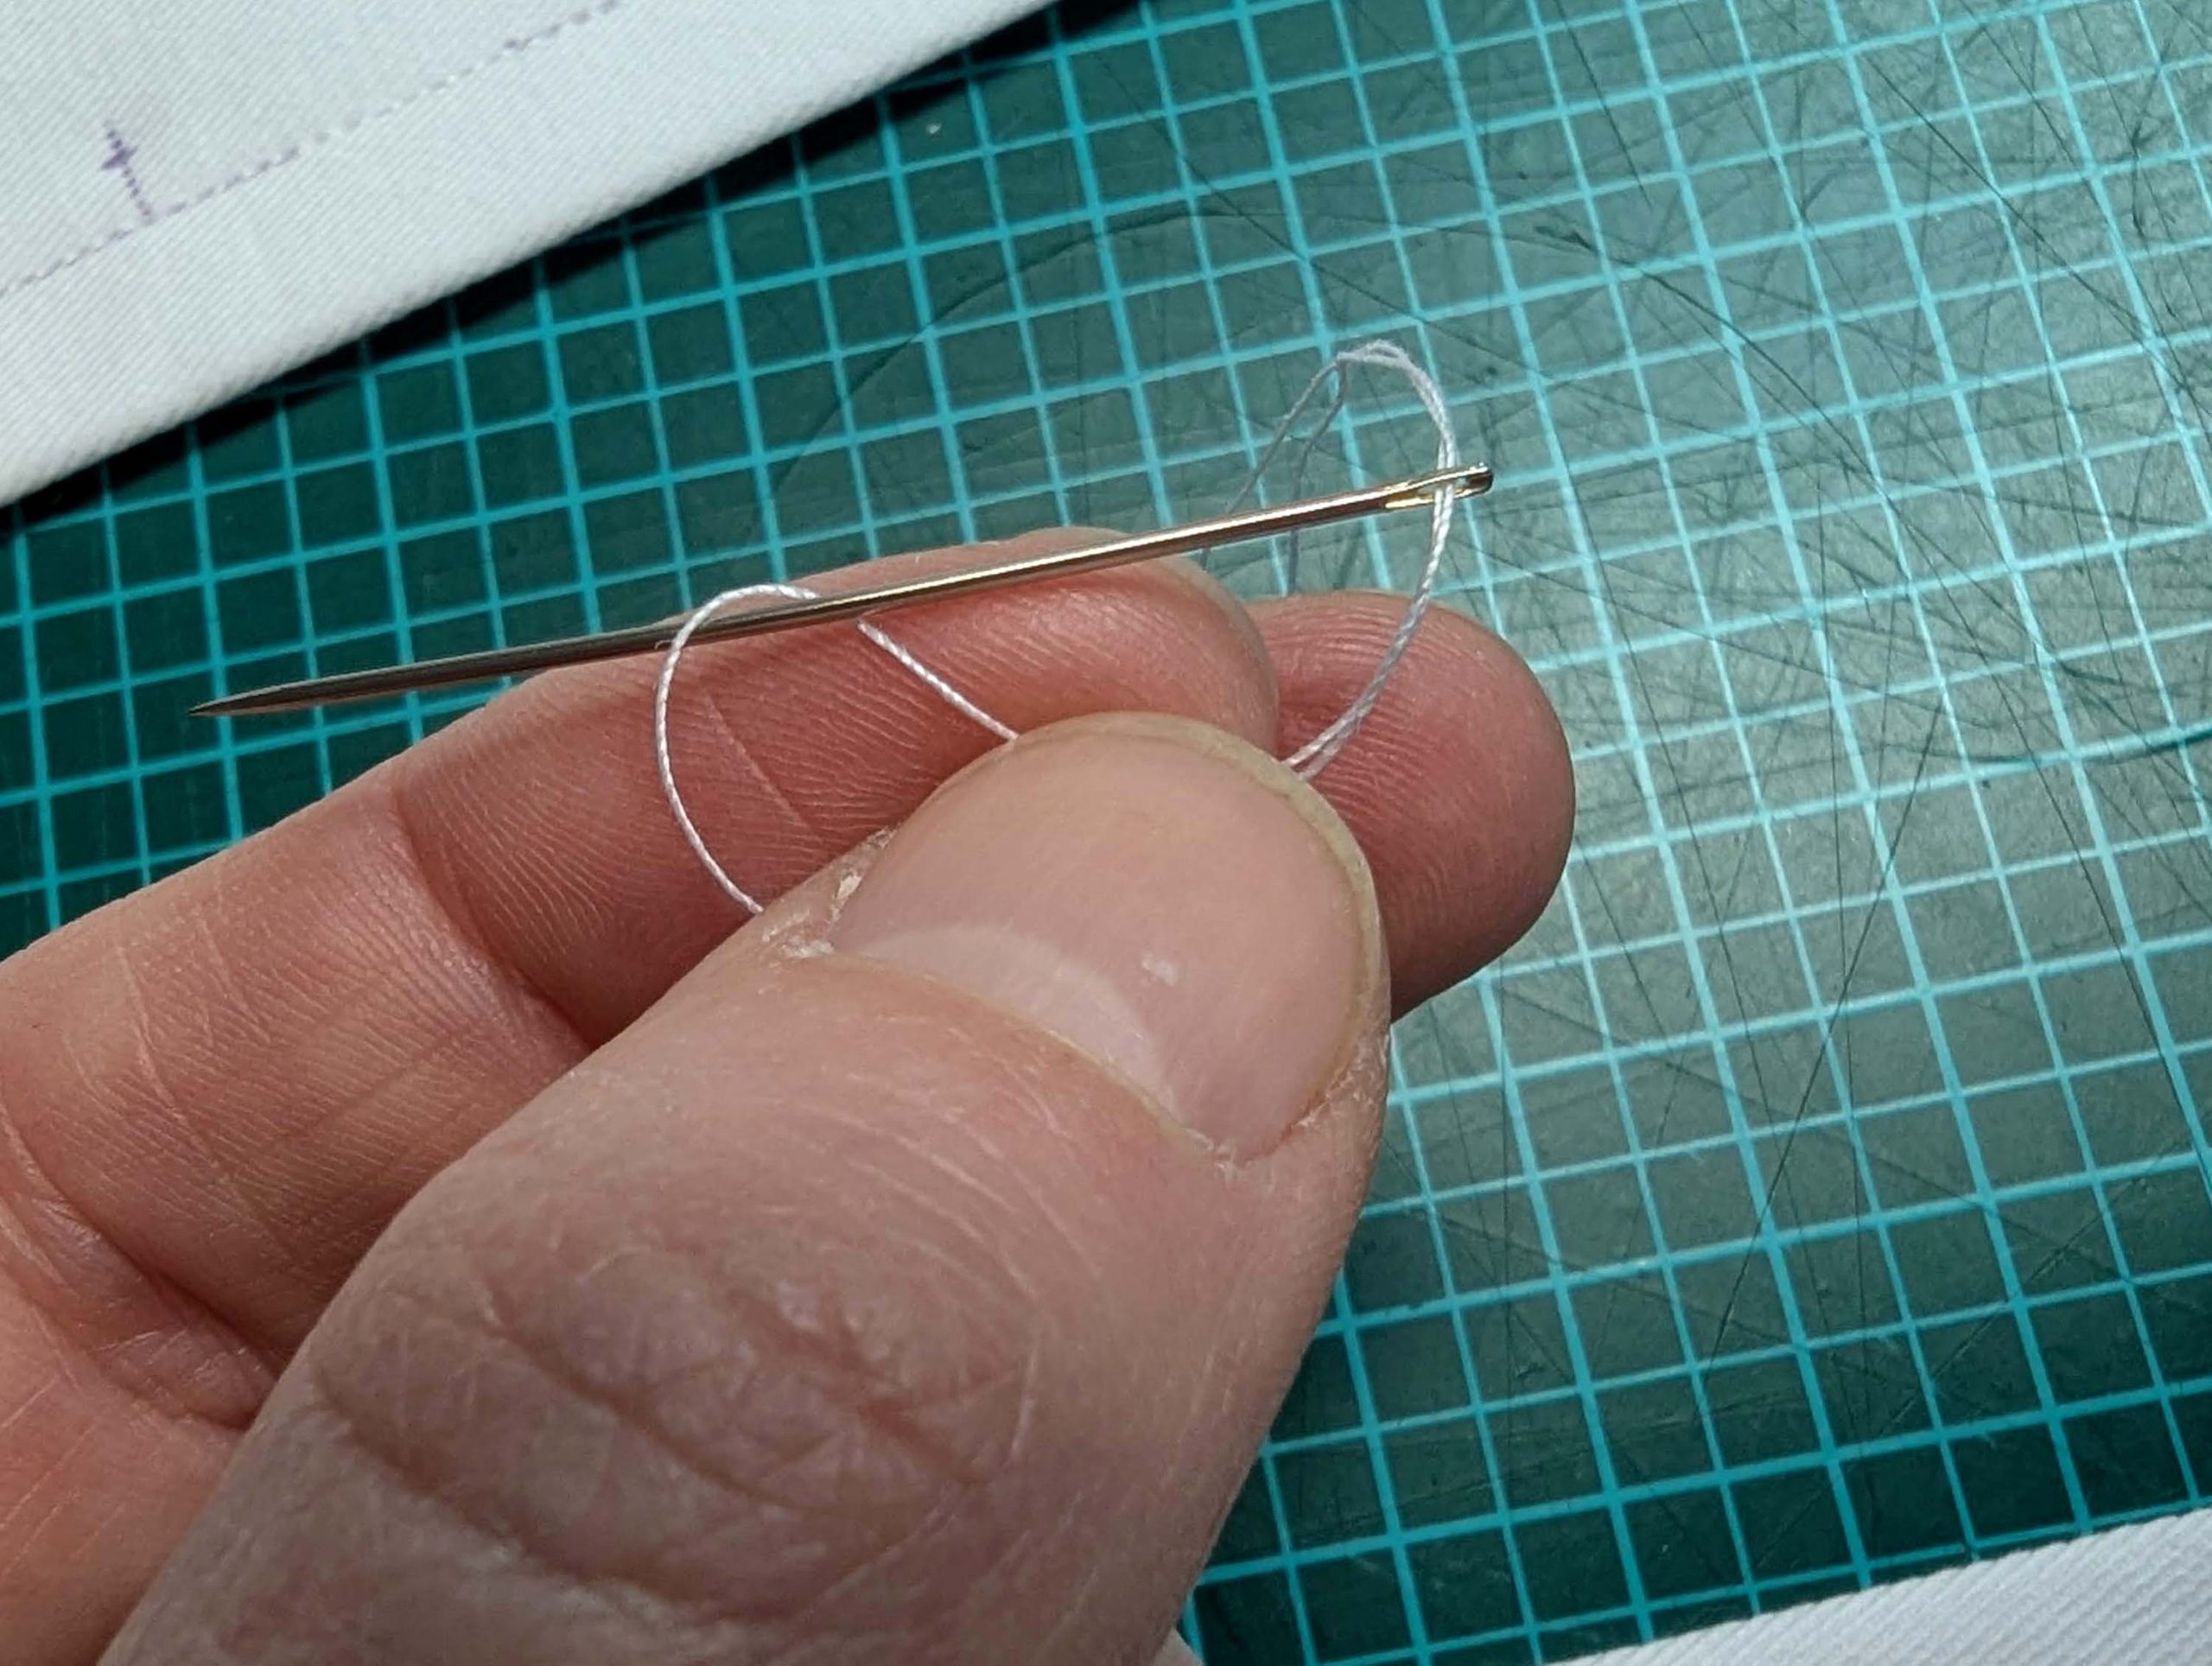
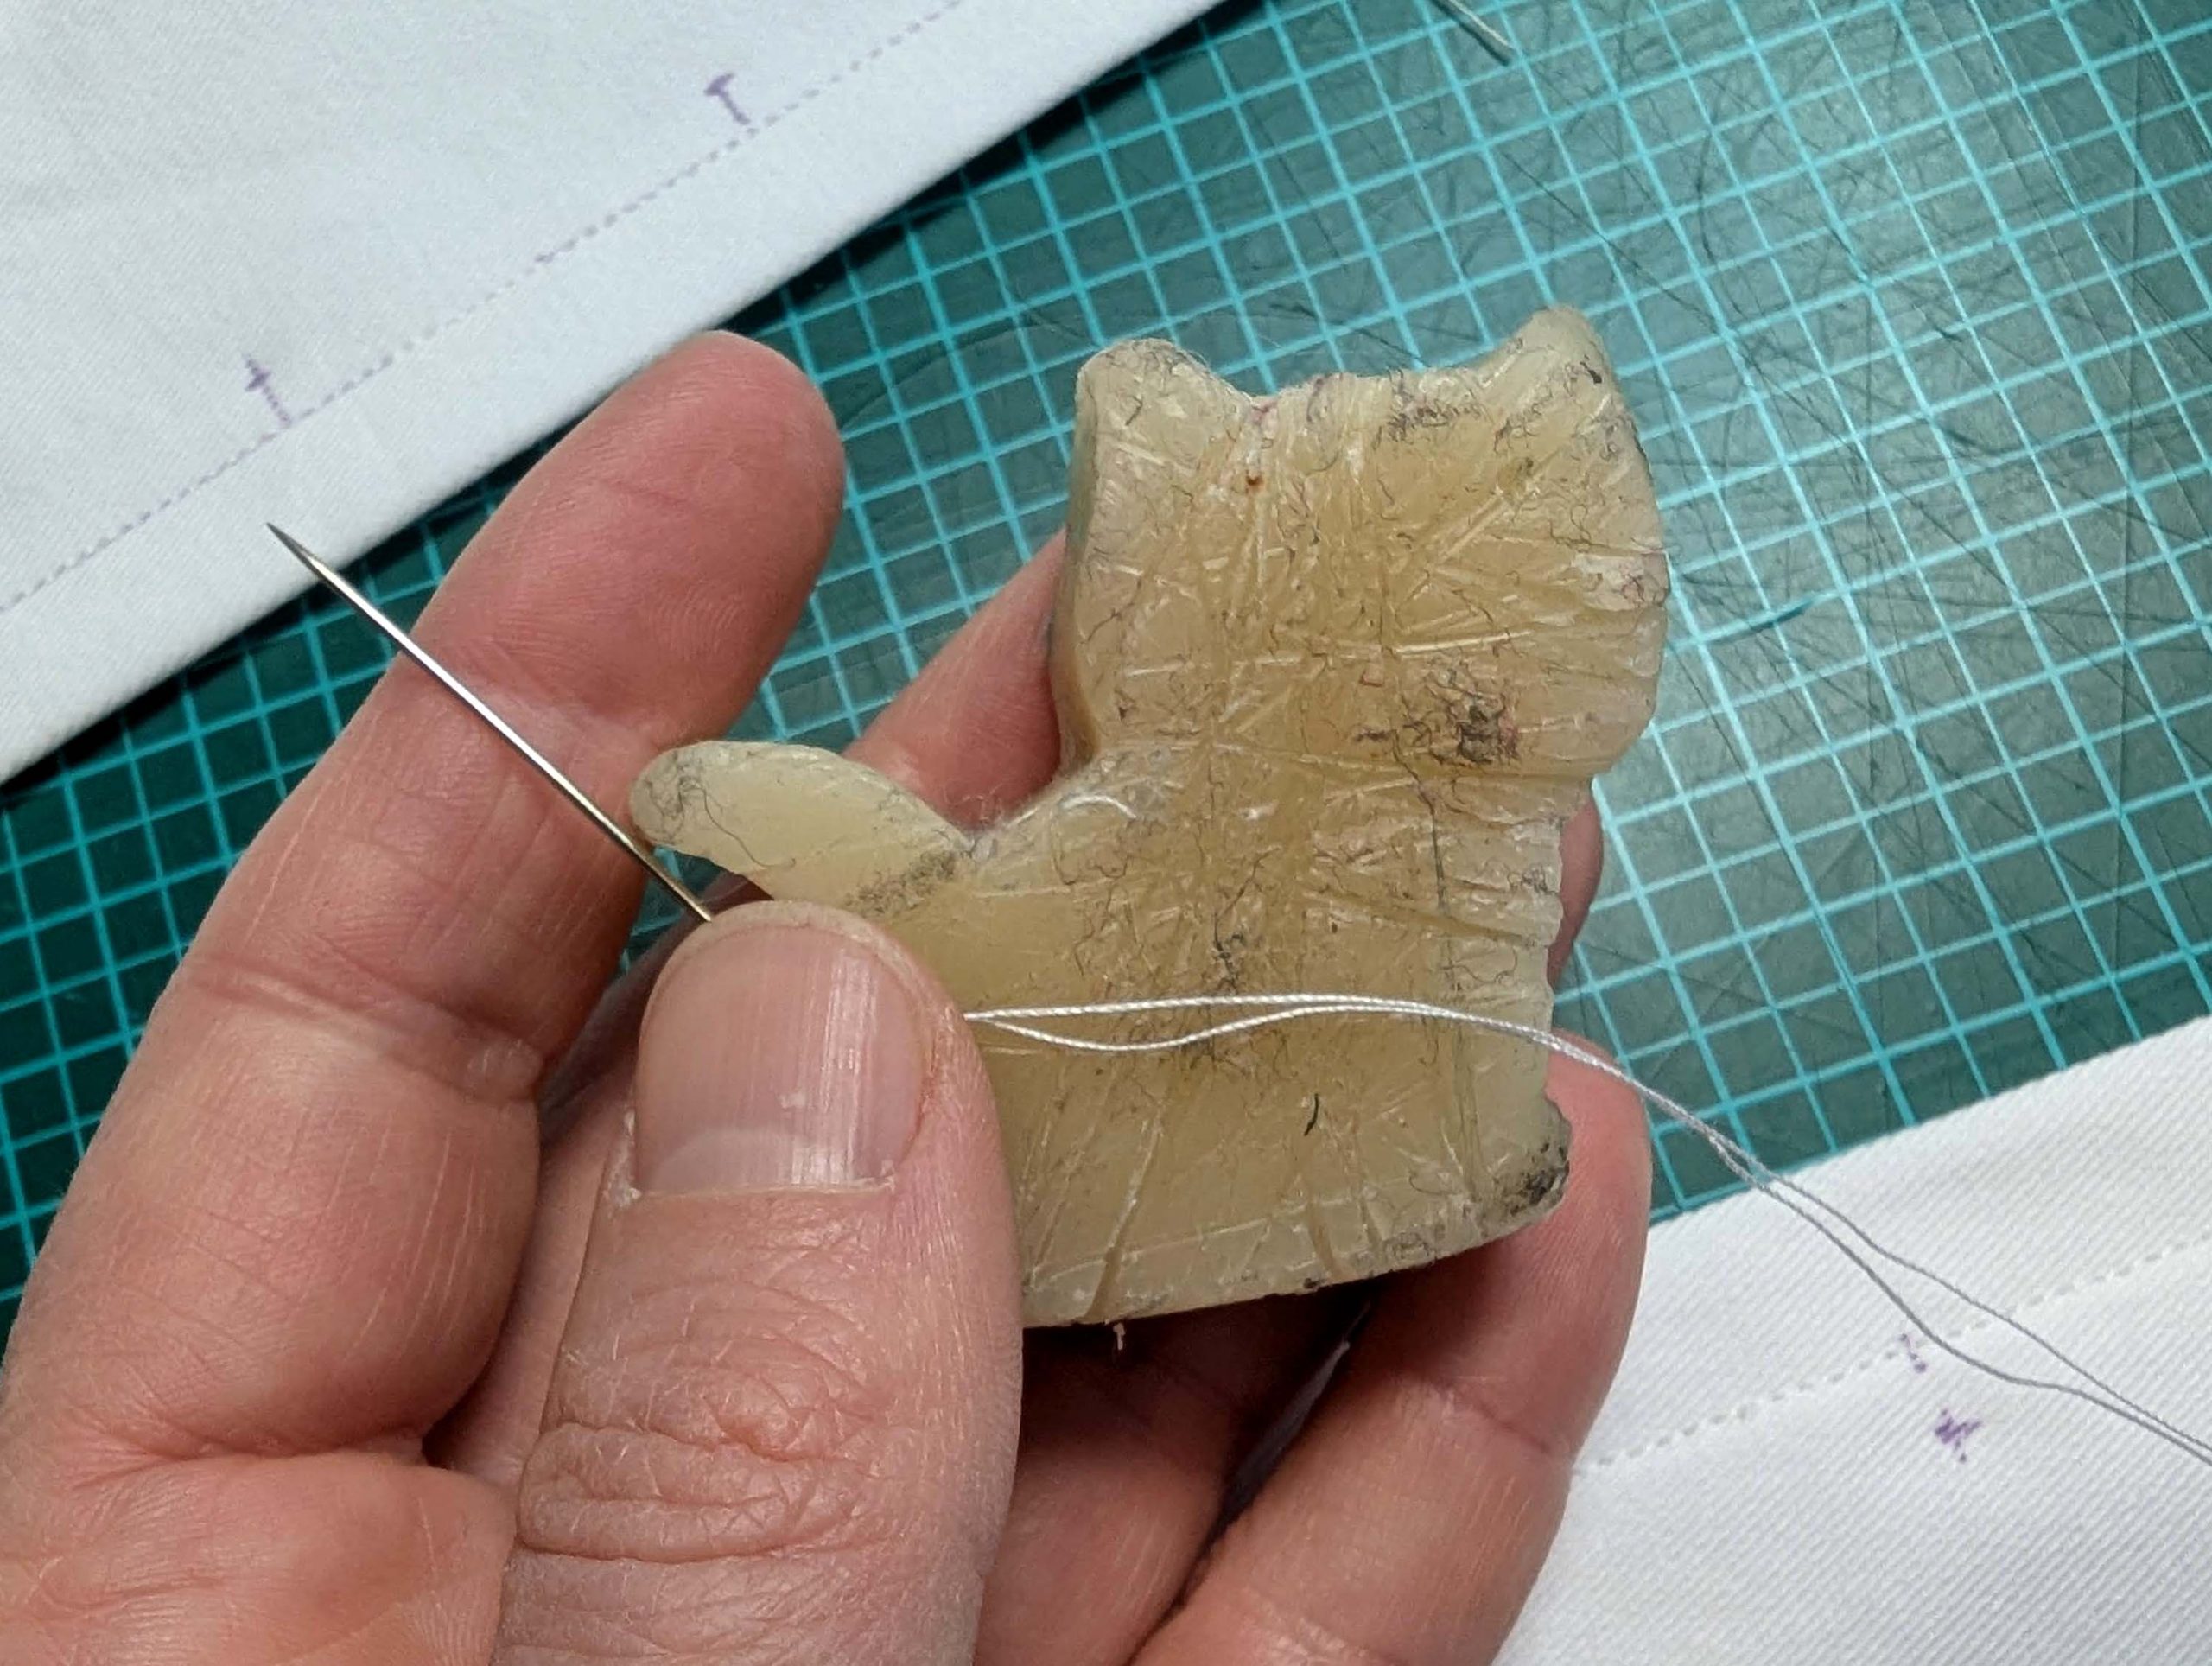
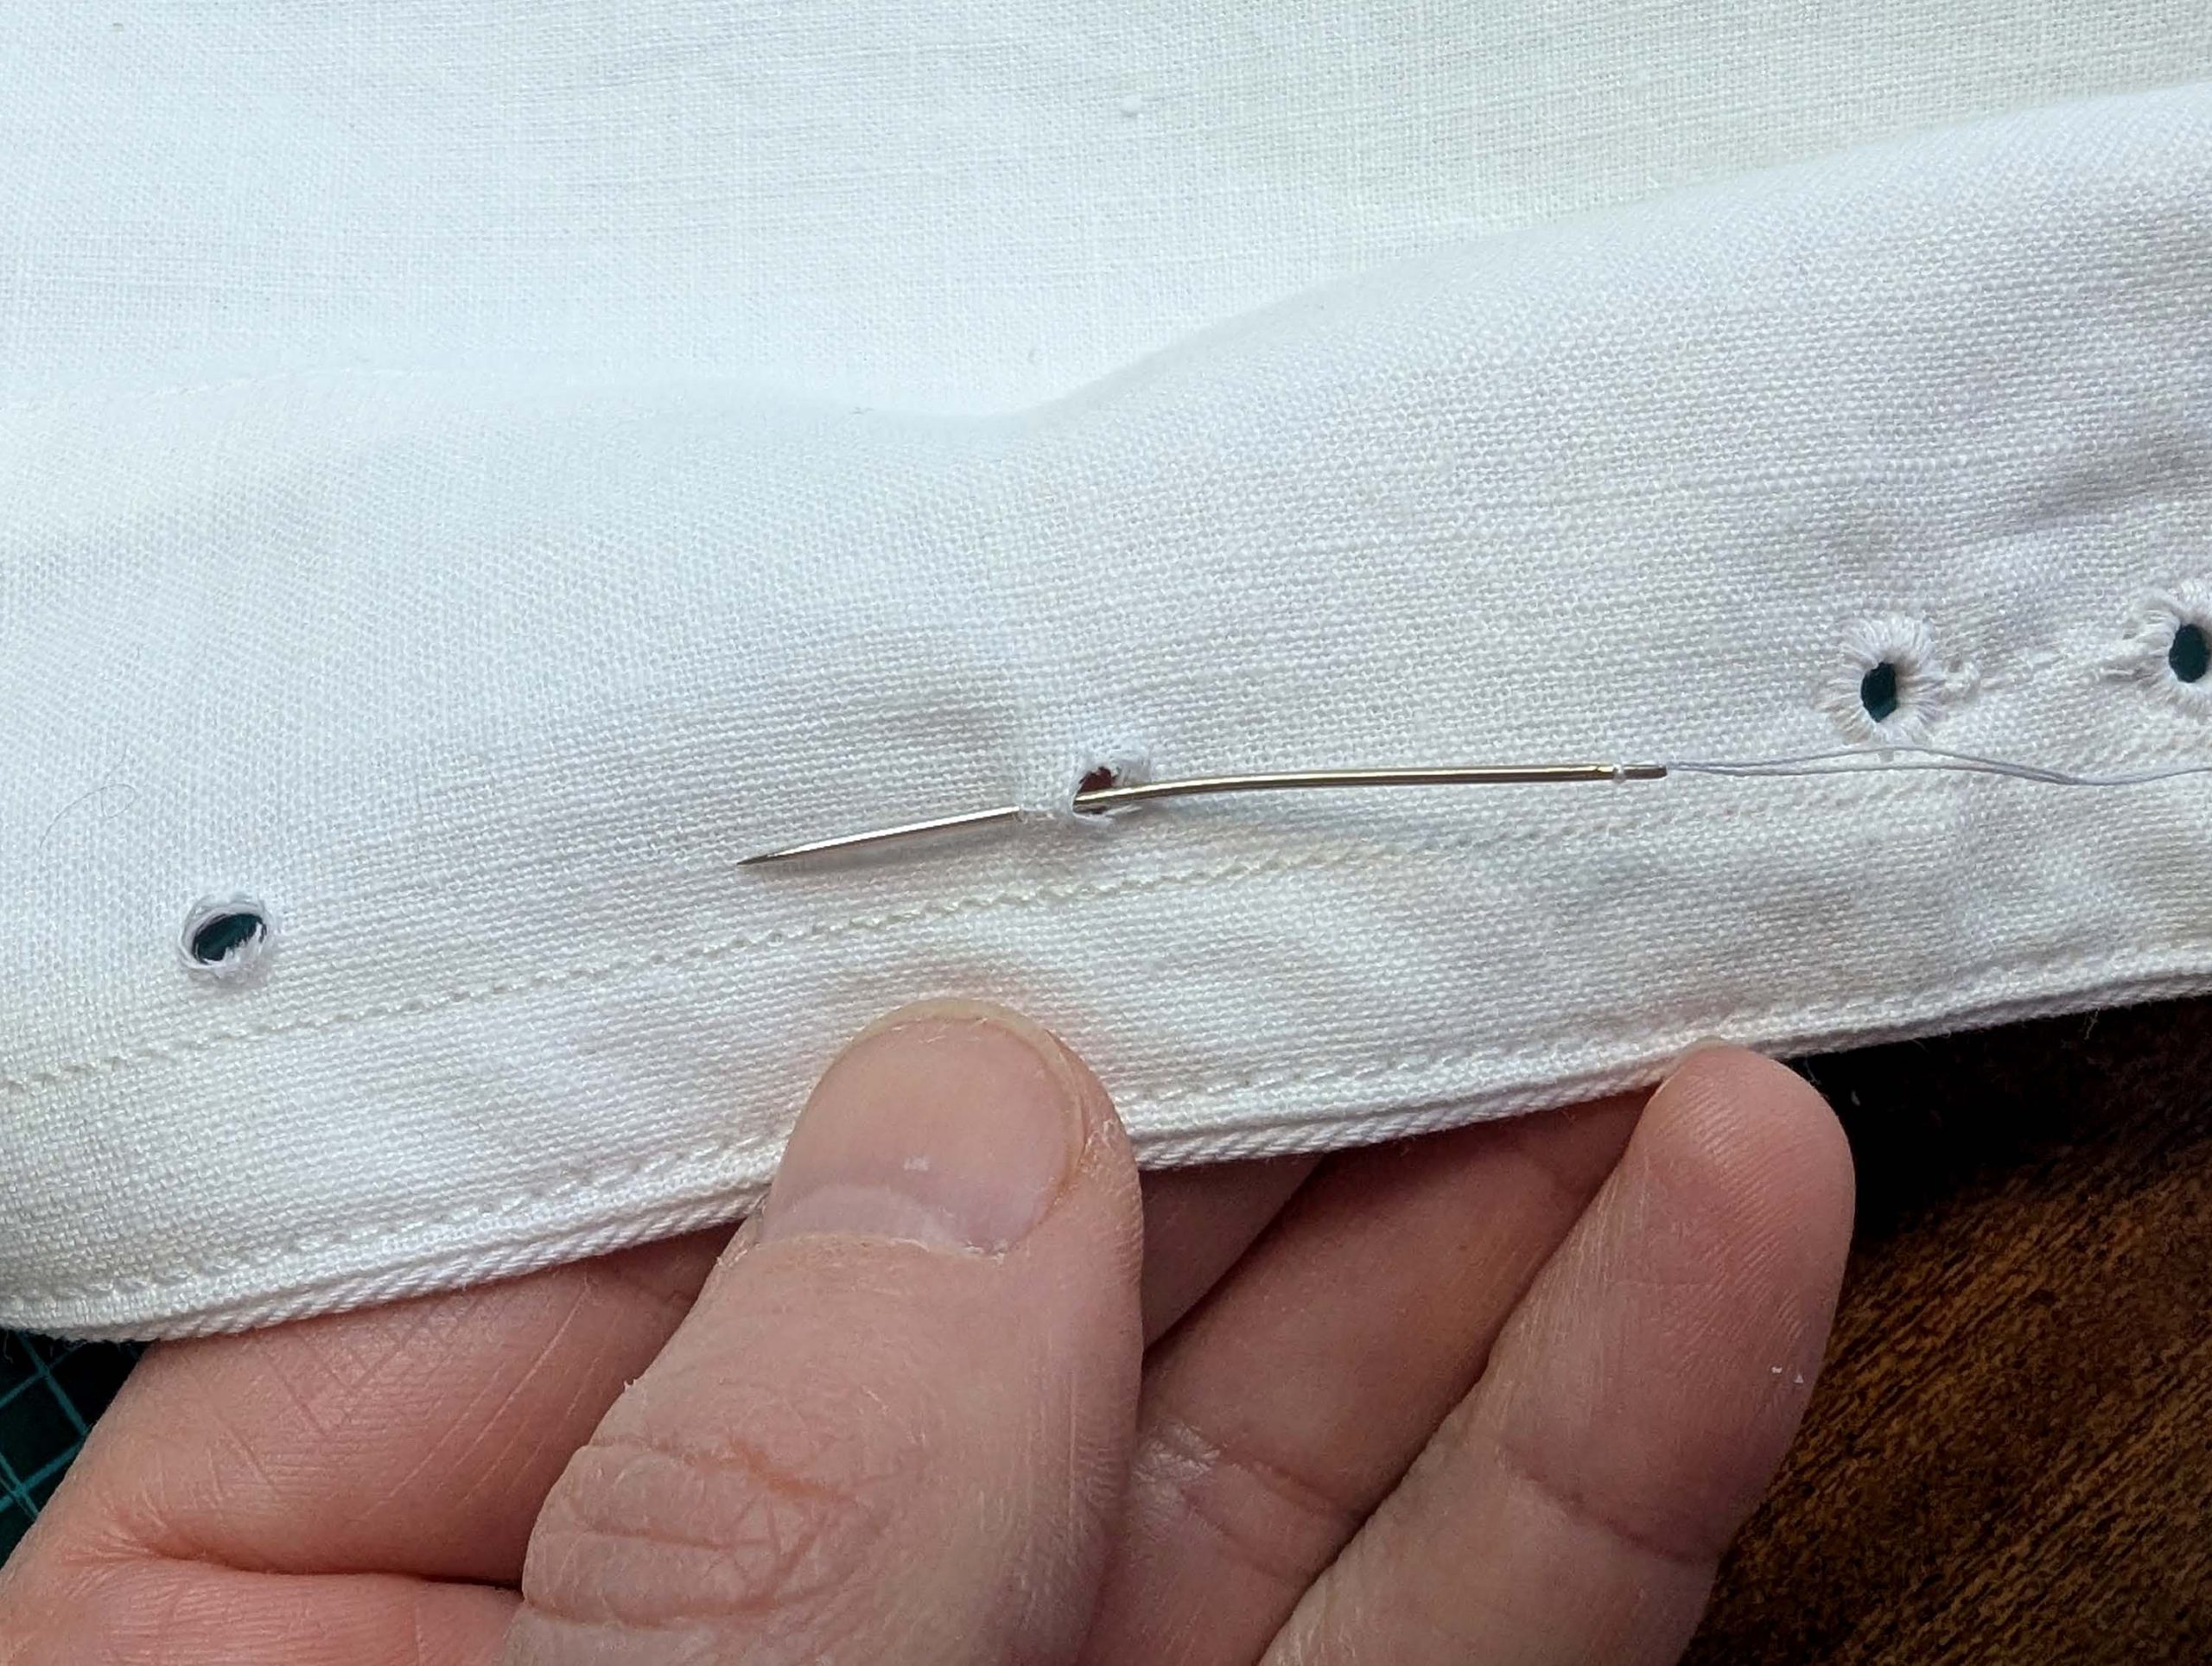
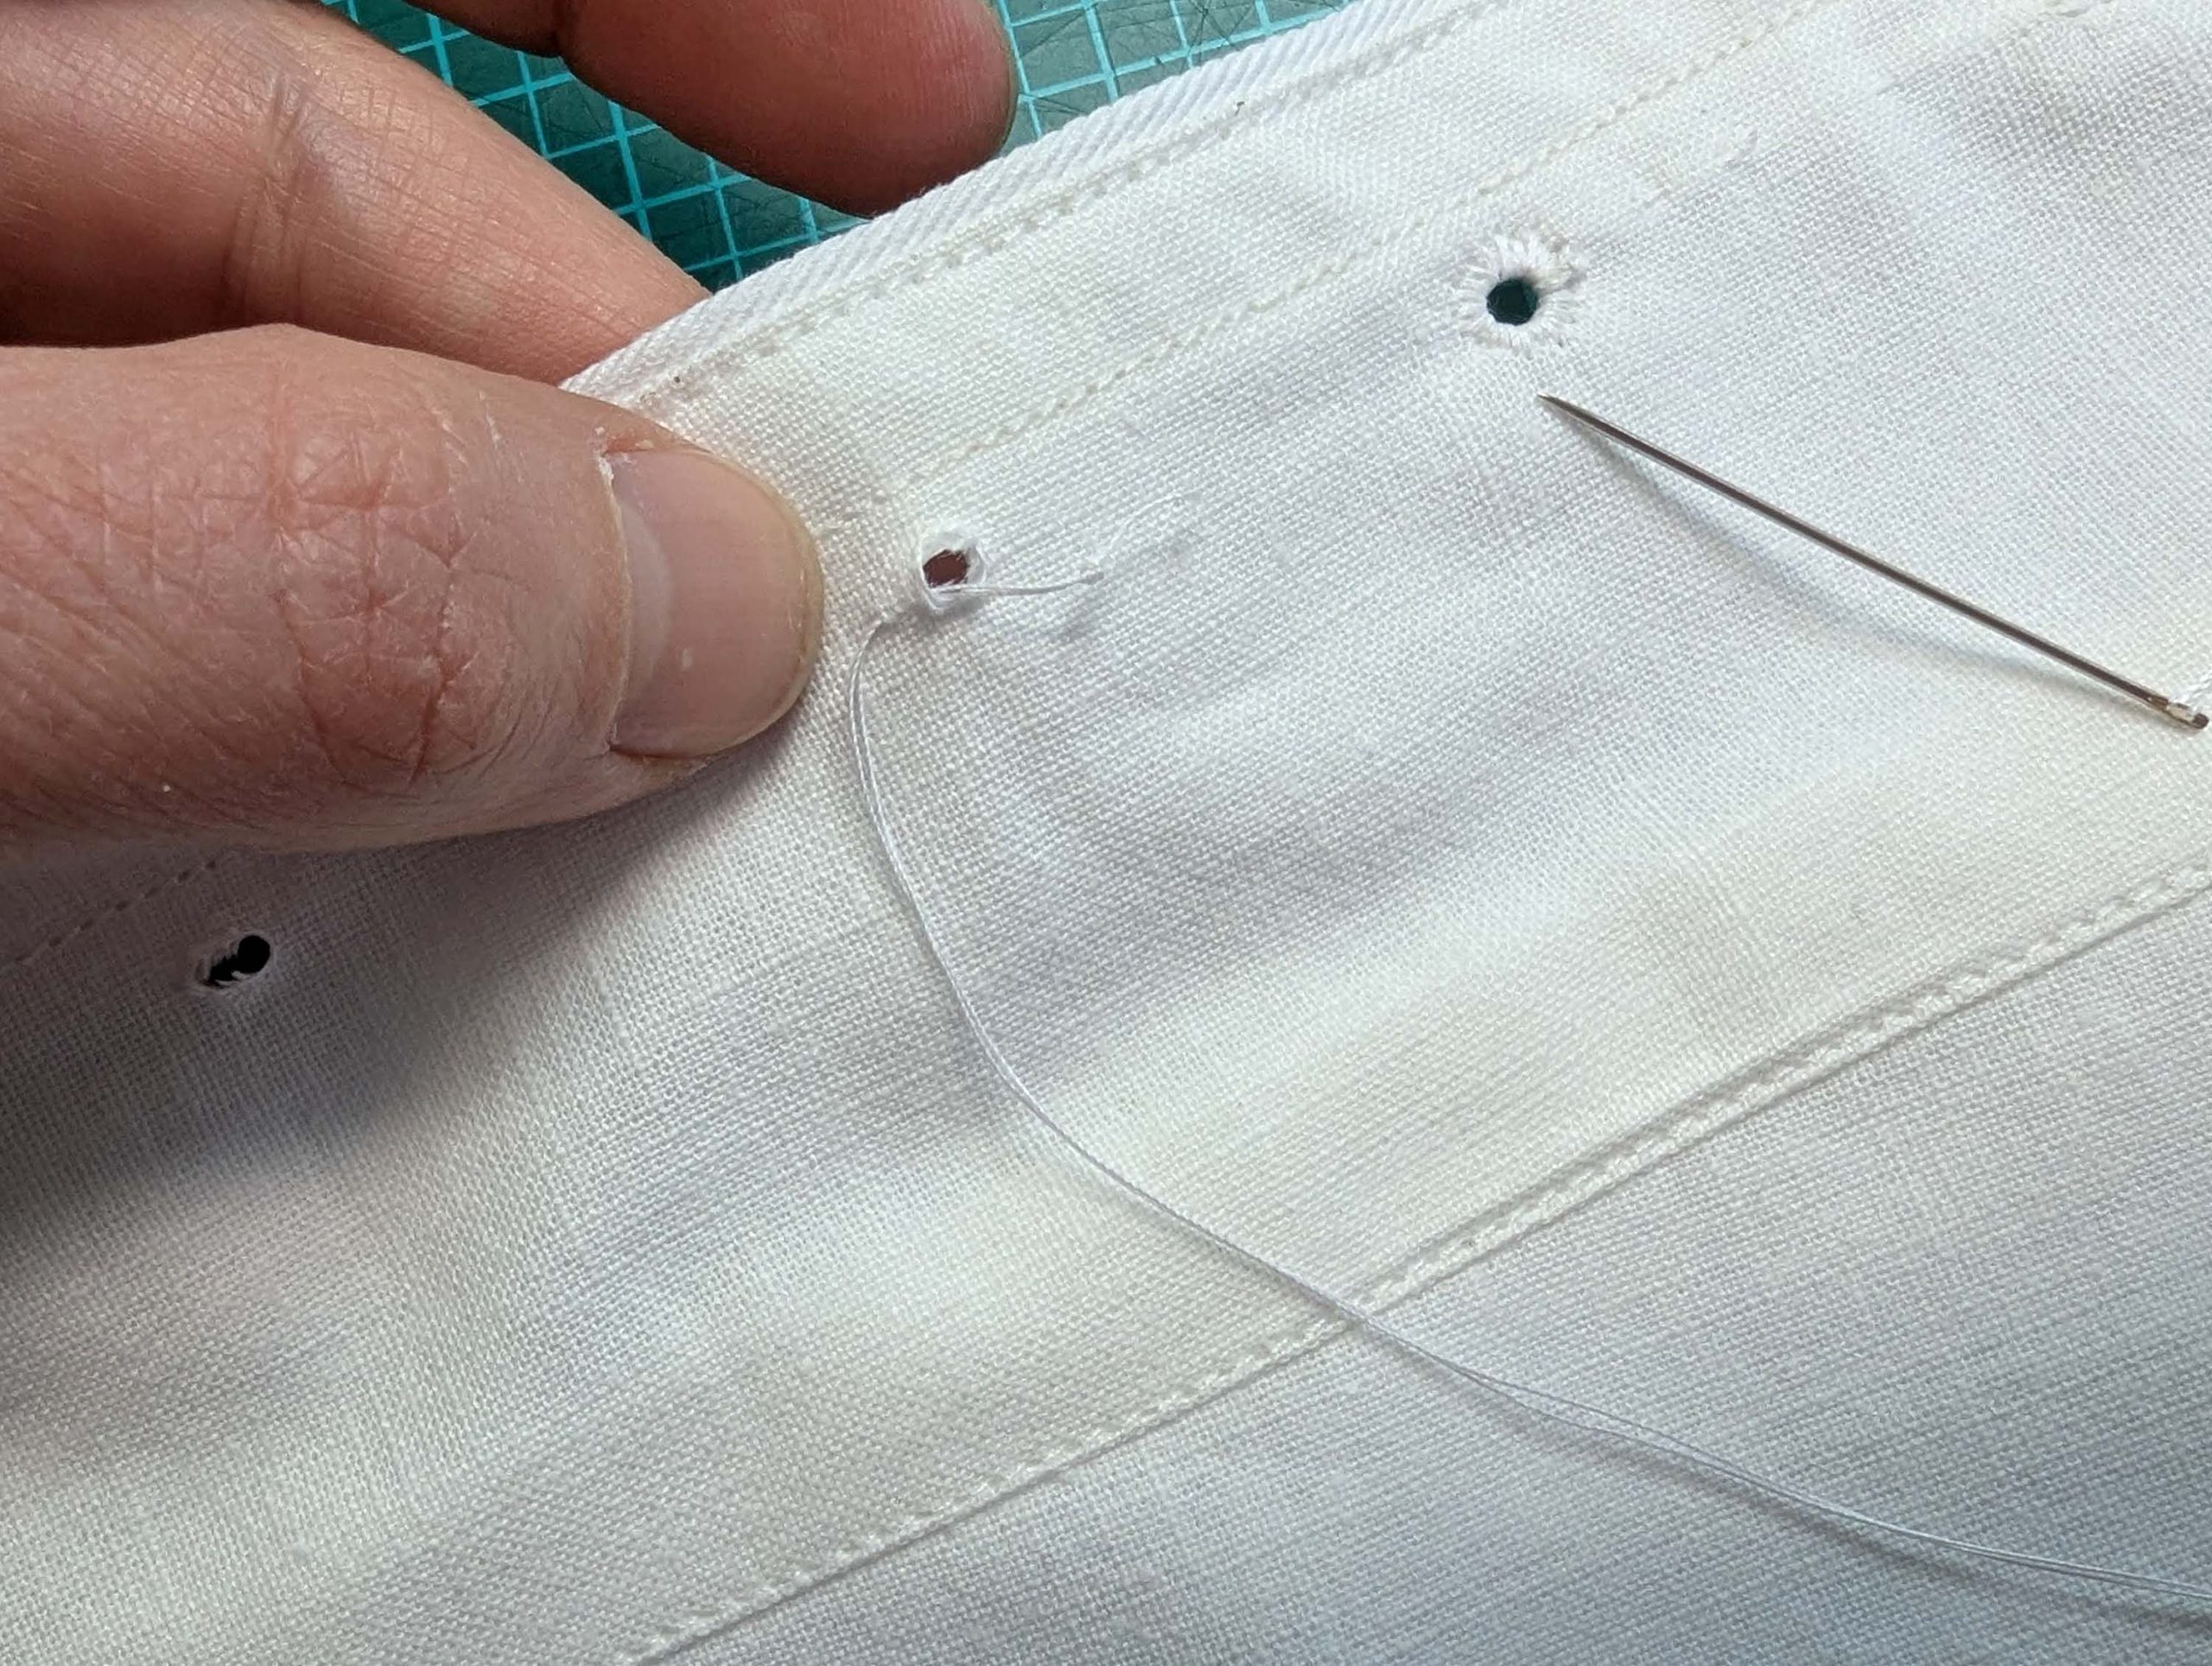
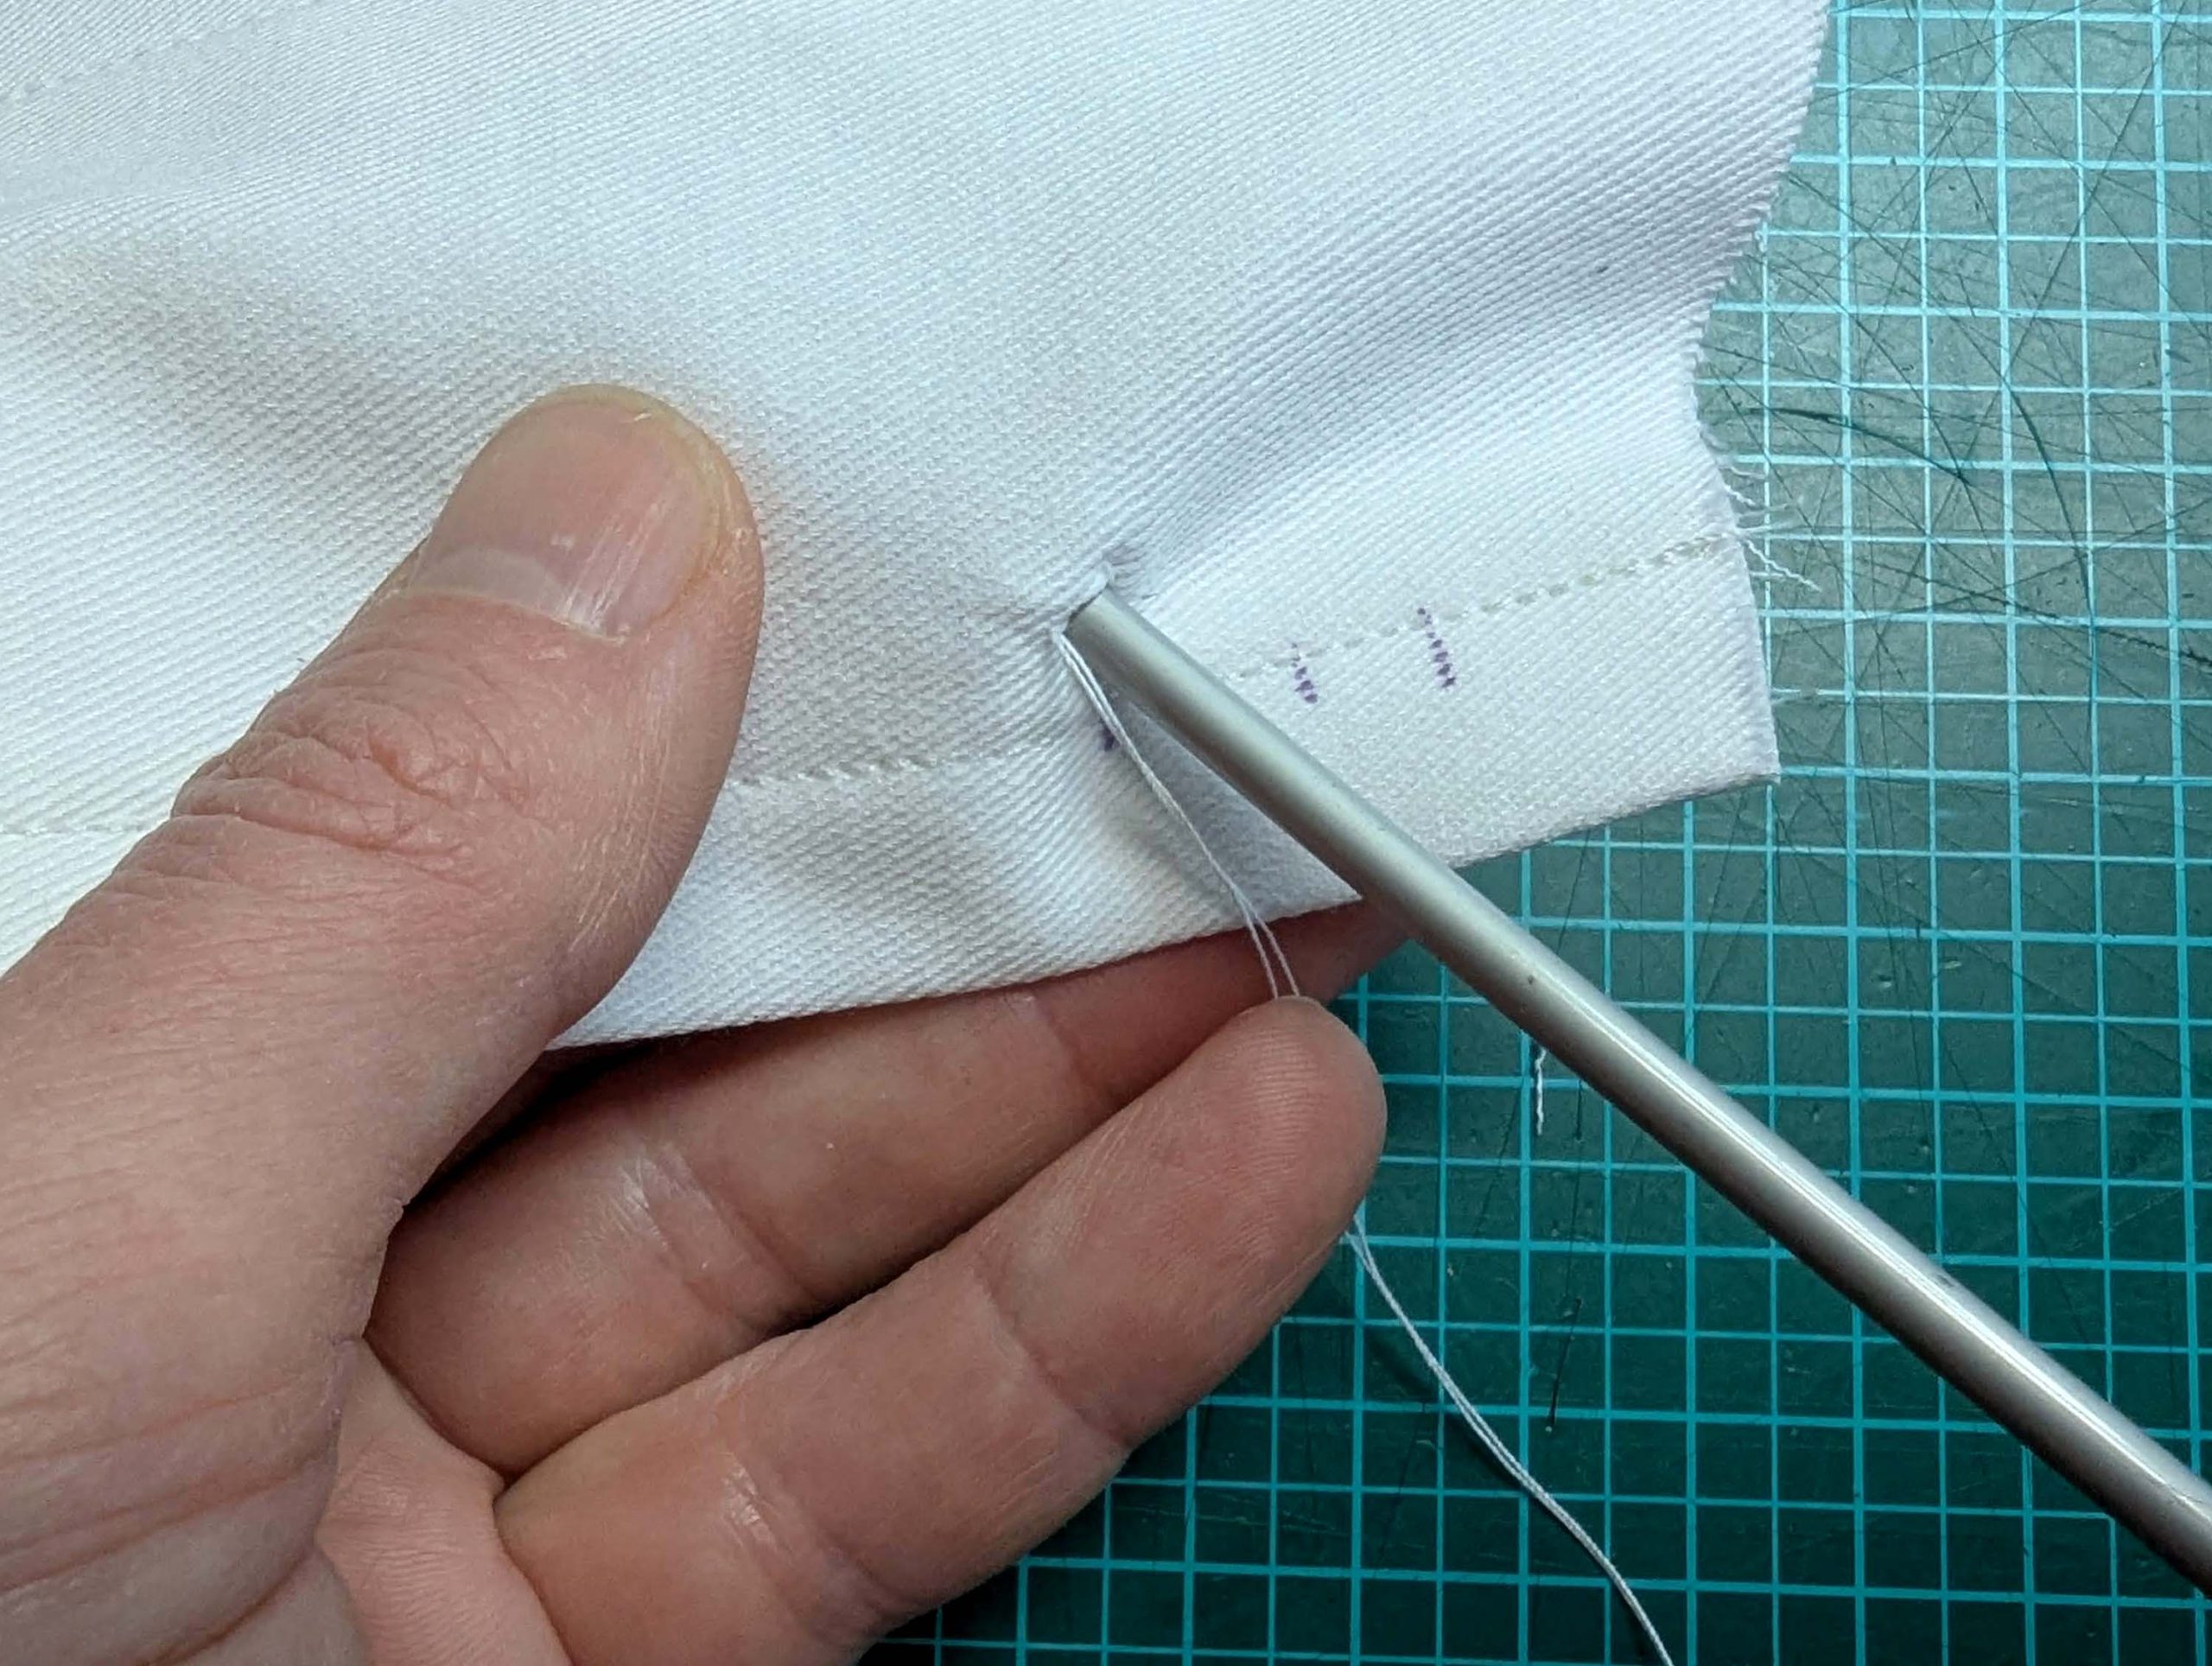
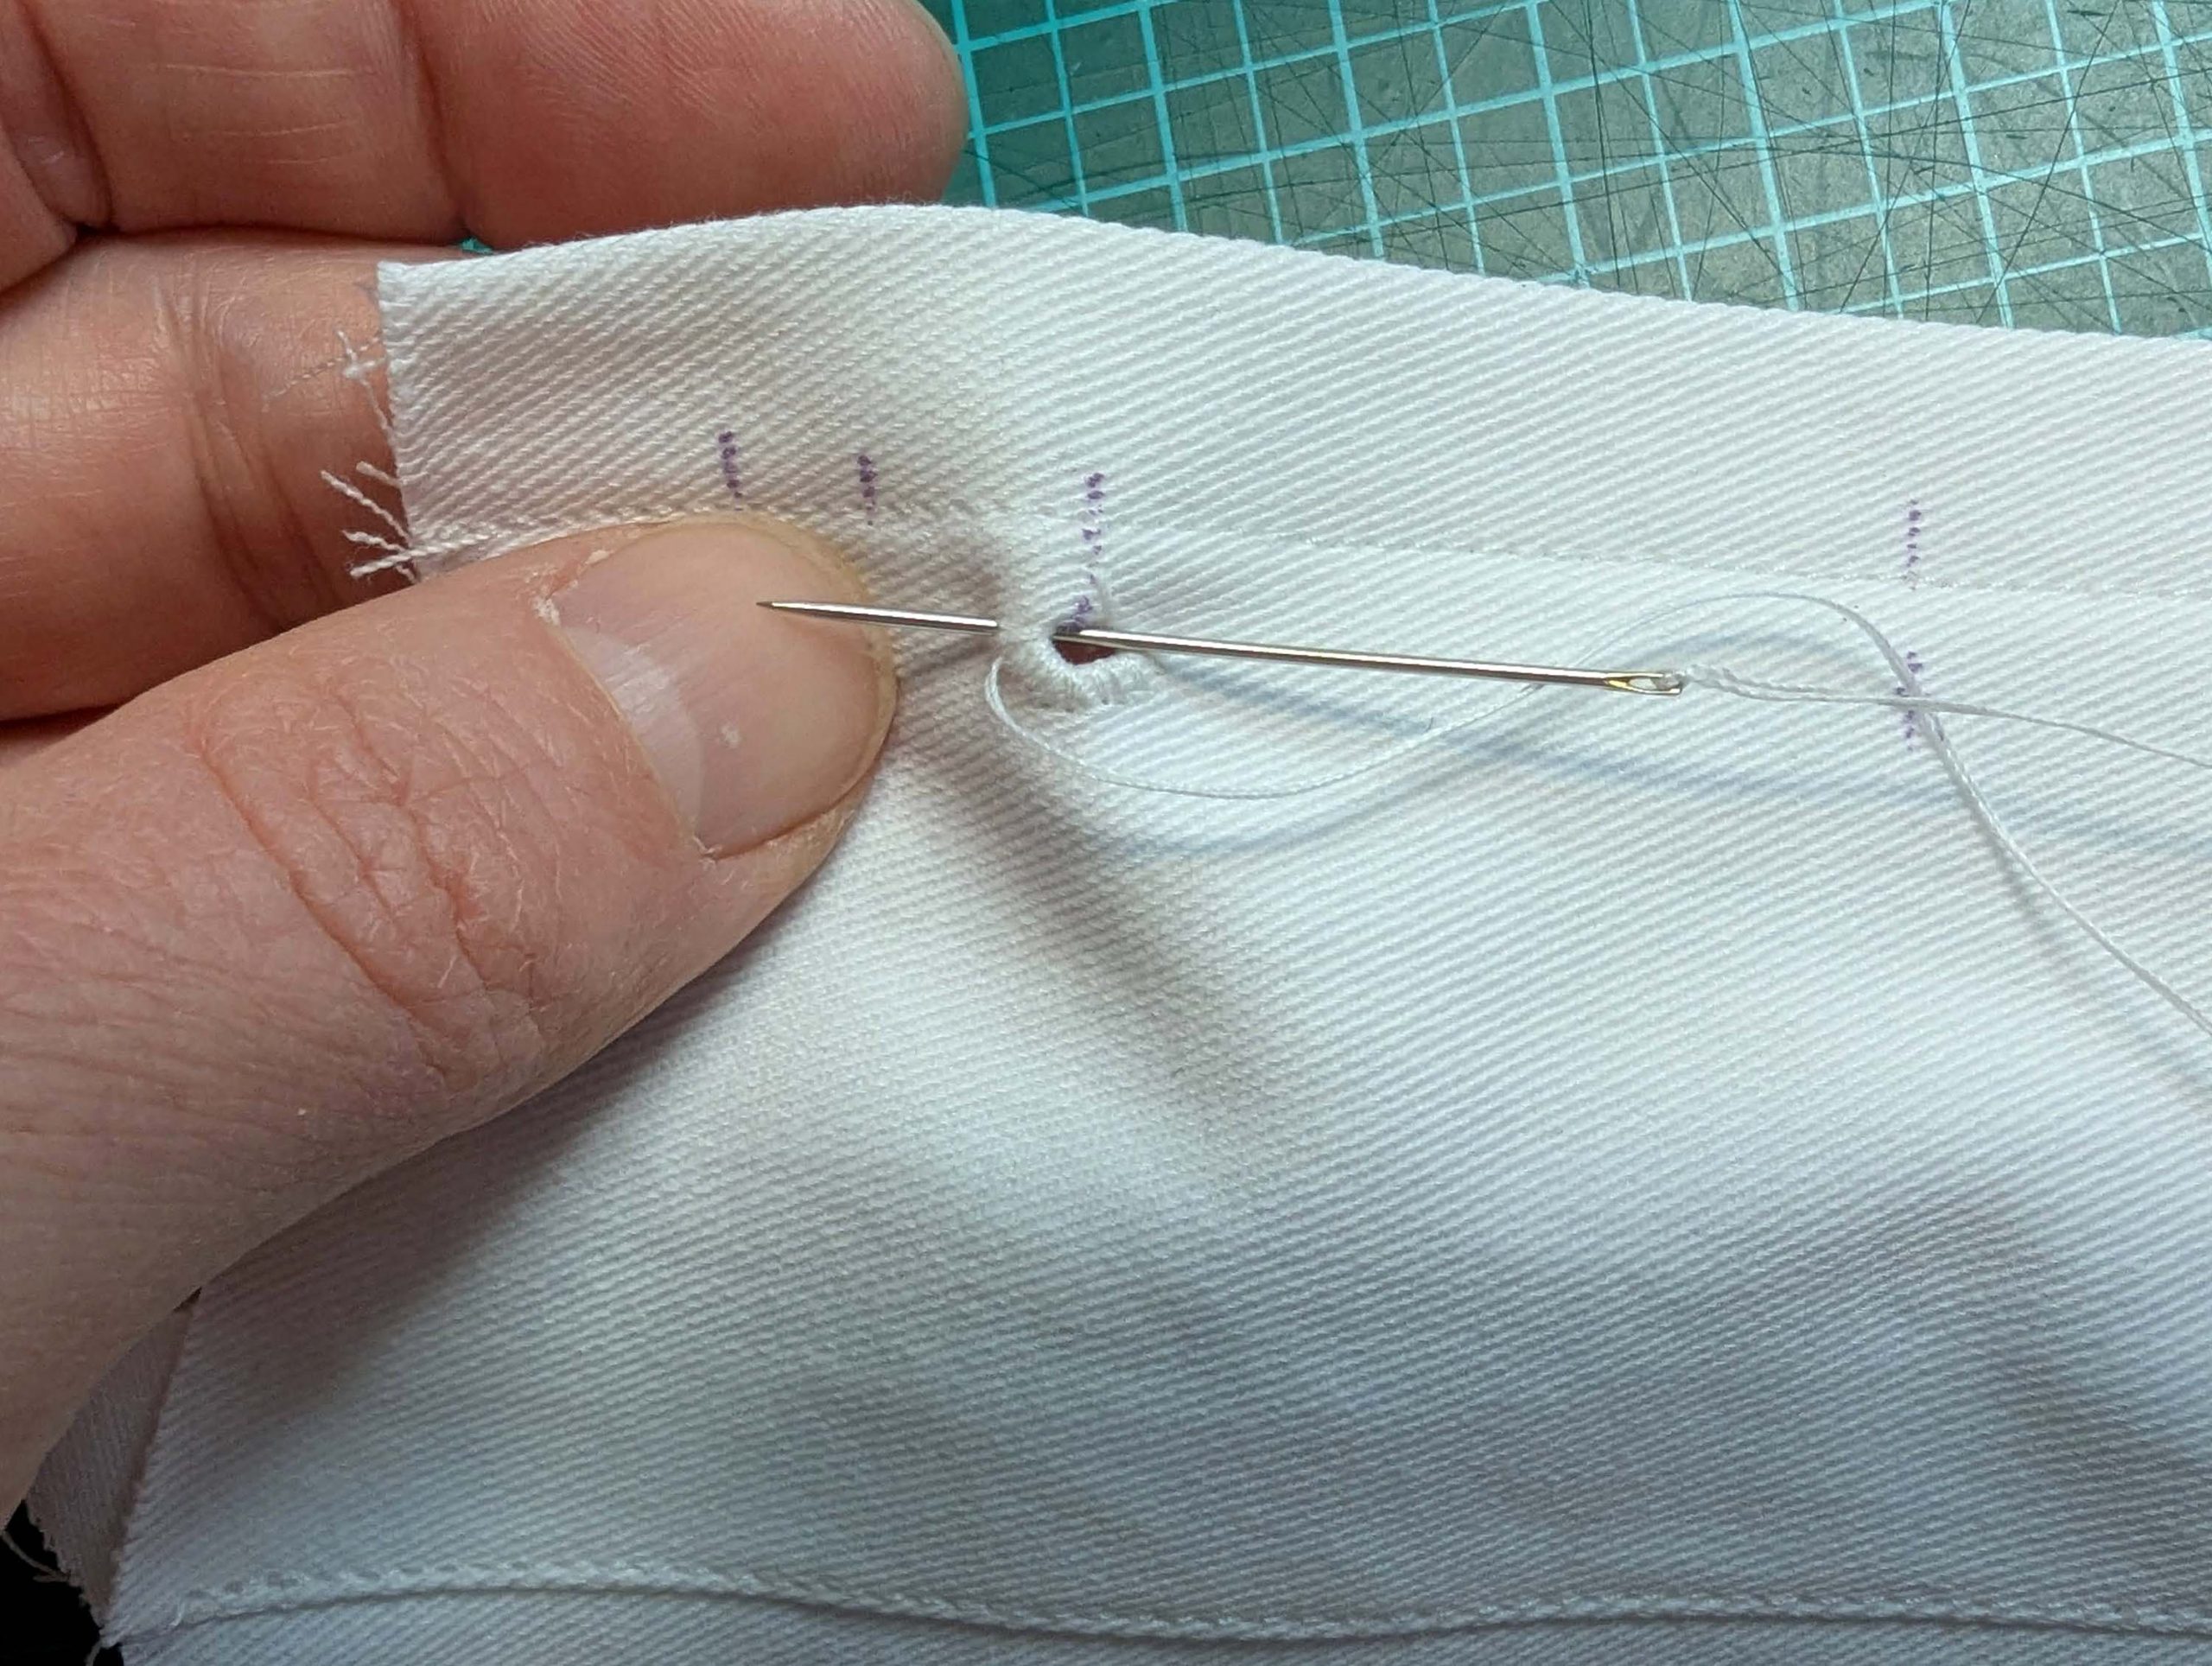
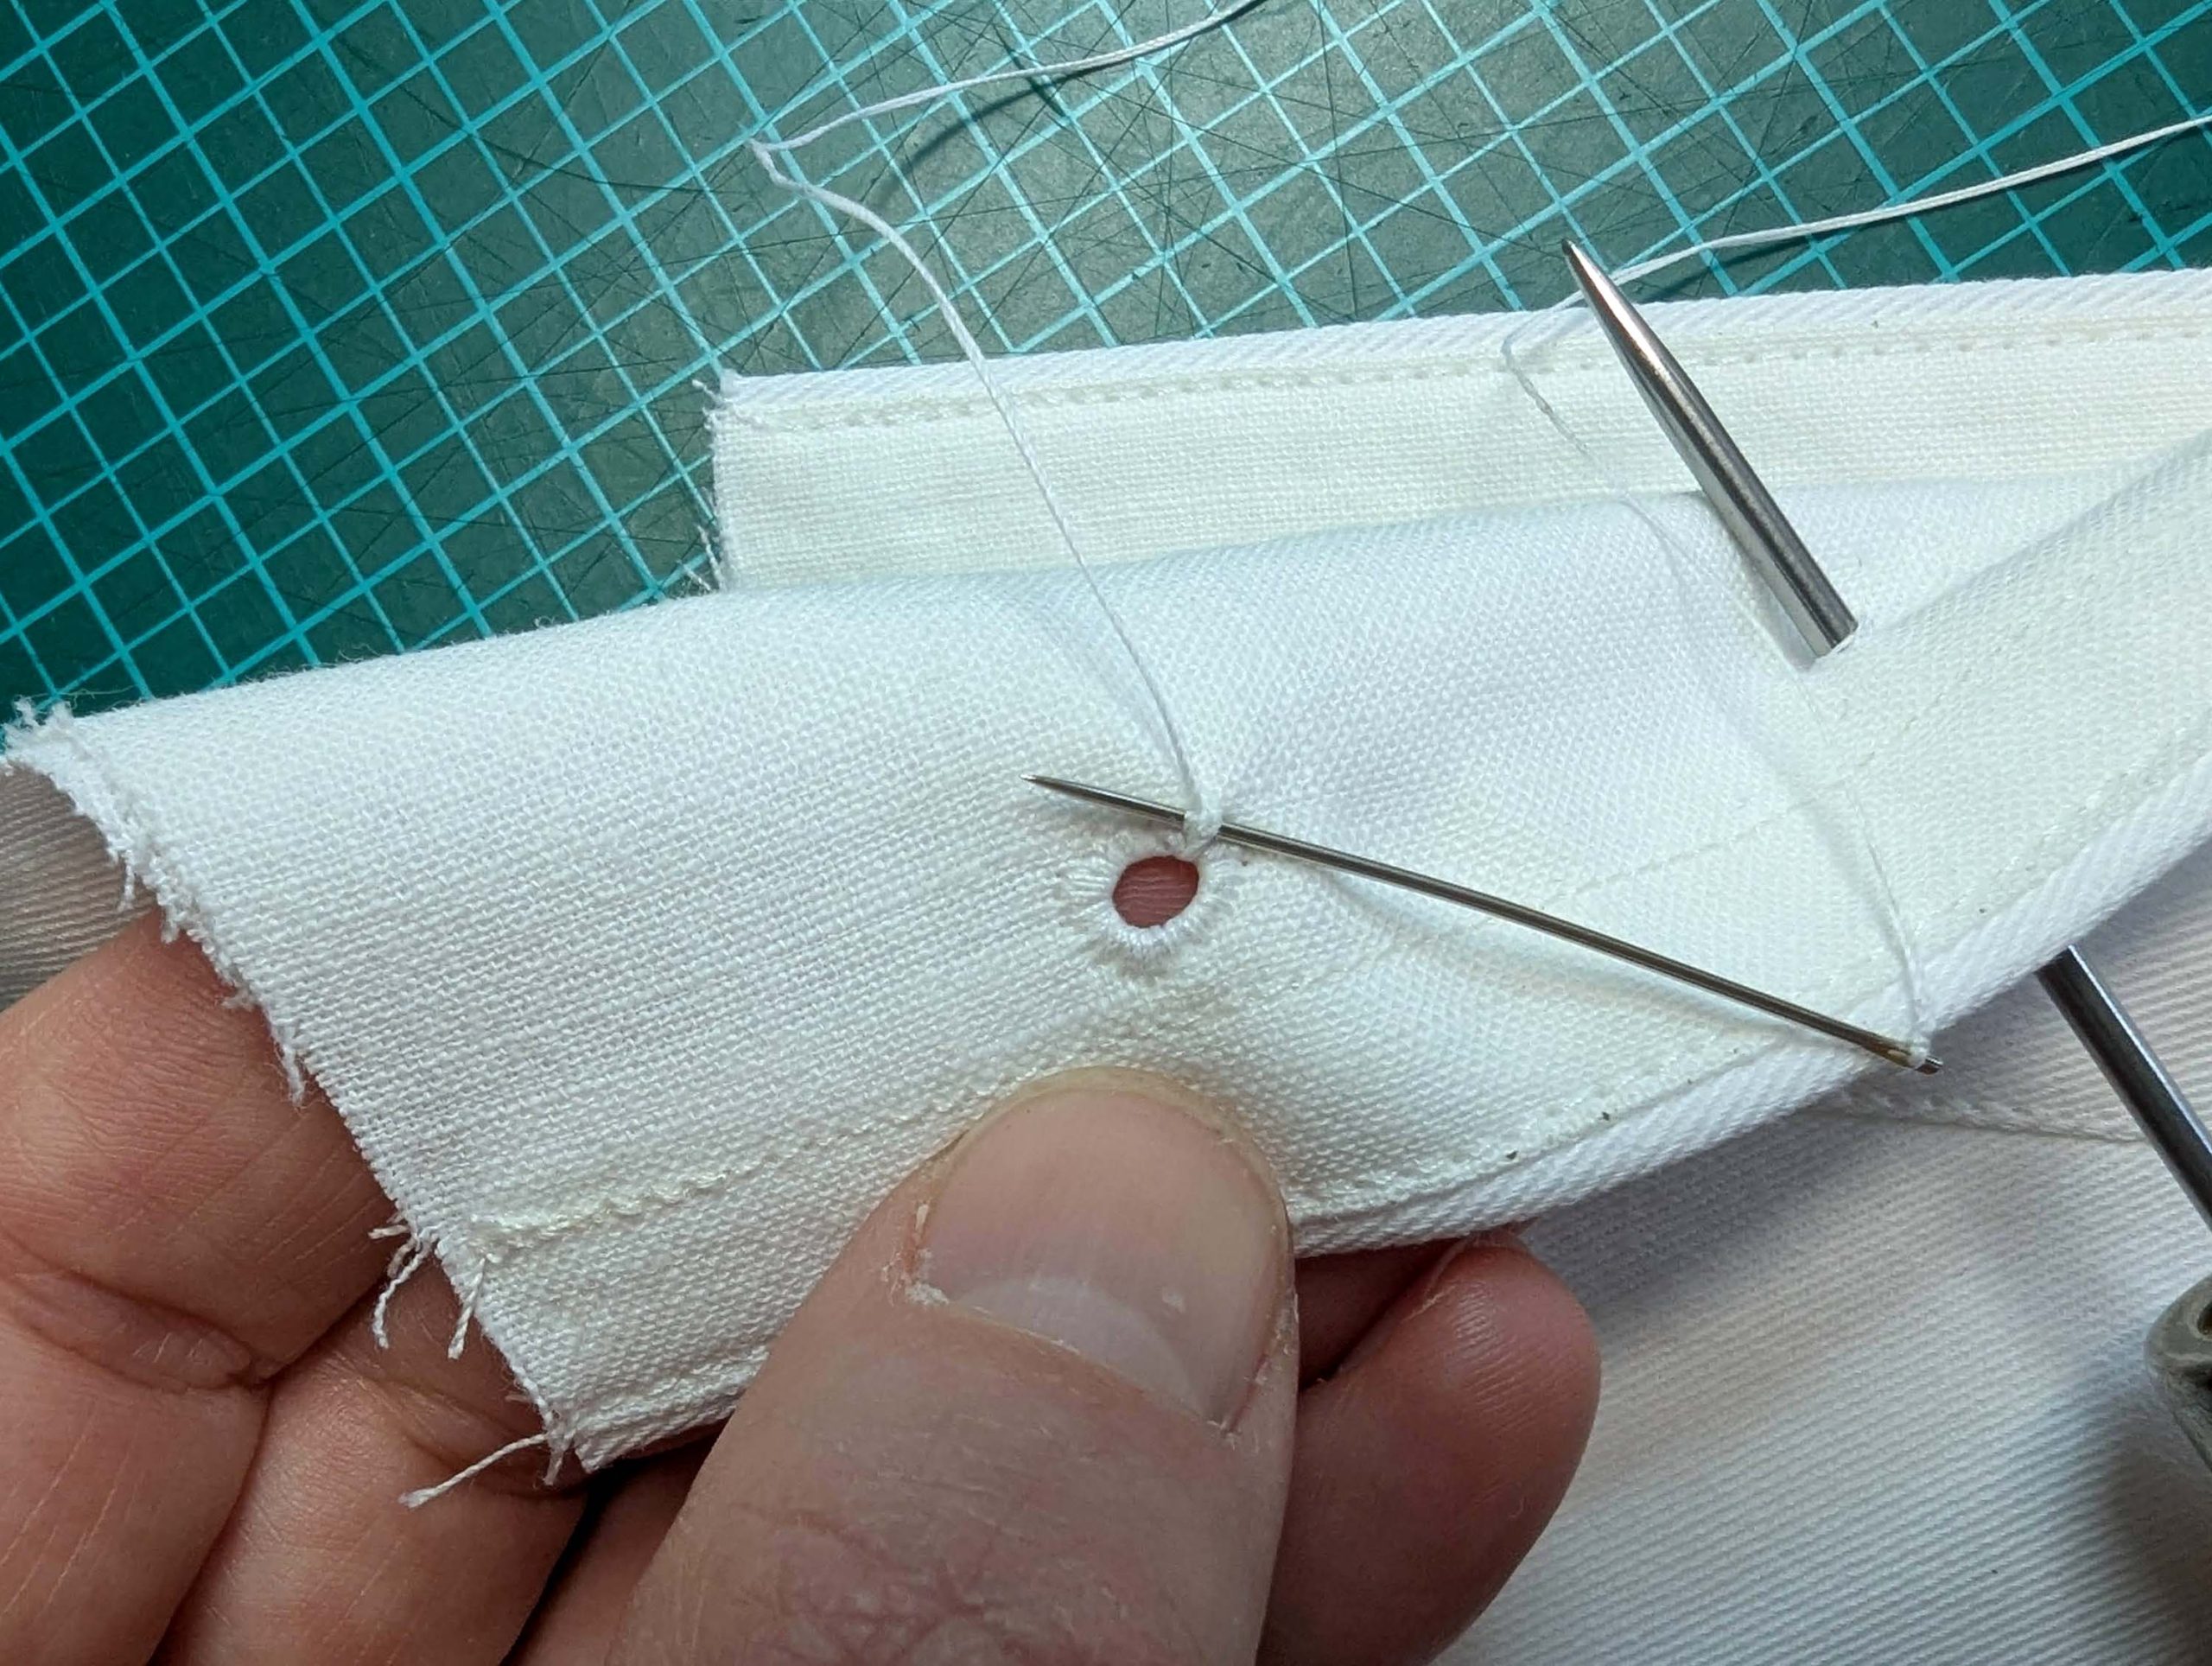
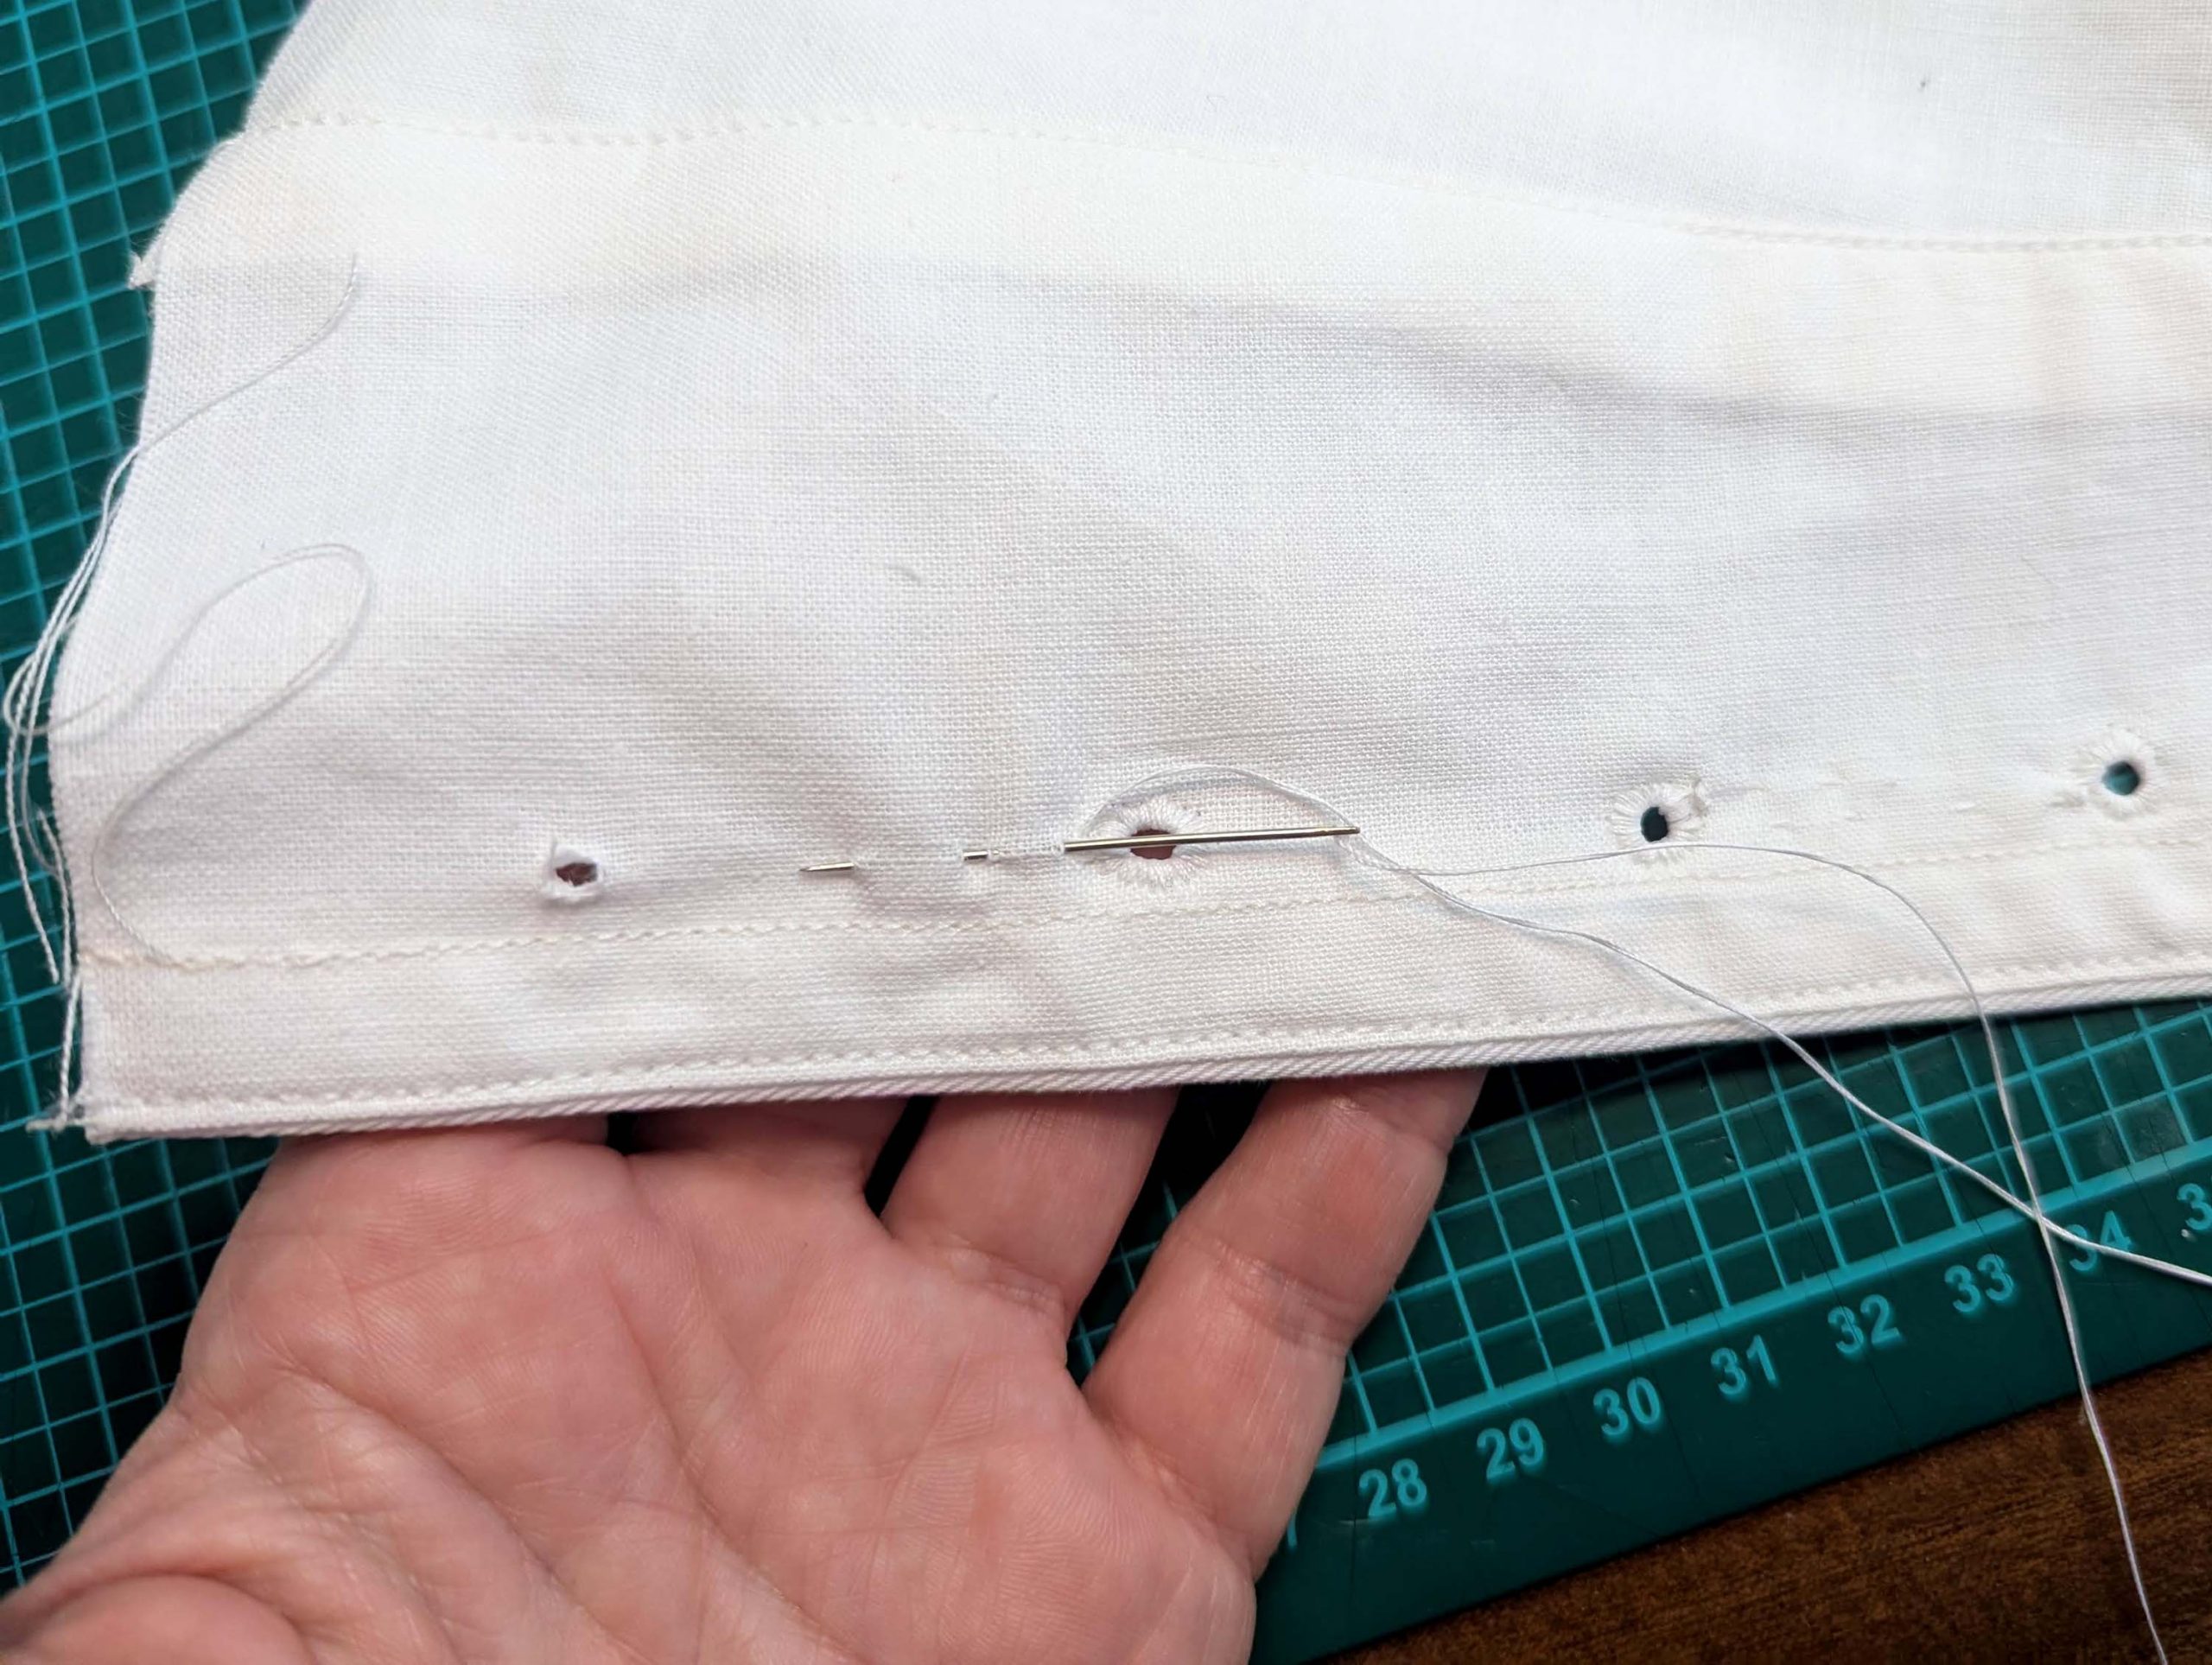
Sew eyelets or insert metal grommets, taking care of the asymmetrical positioning for the spiral lacing. For the eyelets, mark the position and punch a hole with an awl. Widen the hole with a larger knitting needle, without damaging any threads. Take your double-threaded needle and knot the end of the thread. I prefer the way to double thread the needed as shown, and to wax my thread for eyelet stitching for a smoother finish.
Make the first stitch near the hole on the wrong fabric side, secure with 2-3 stitches, and bring the needle through the fabric to the right fabric side. Start with four stitches at an angle of 90°, pulling the thread quite tight to hold open the hole. Before starting with the whip stitches, going all around, widen the eyelet again with the knitting needle. Secure the thread on the wrong side. “Walk” to the next eyelet when your thread is still long enough.
Optionally, sew tunnels for an additional light boning at the back, radiating regularly from the armhole, and ew the straps to the front, right sides together, trim back the seam allowance as described at the back, and topstitch.
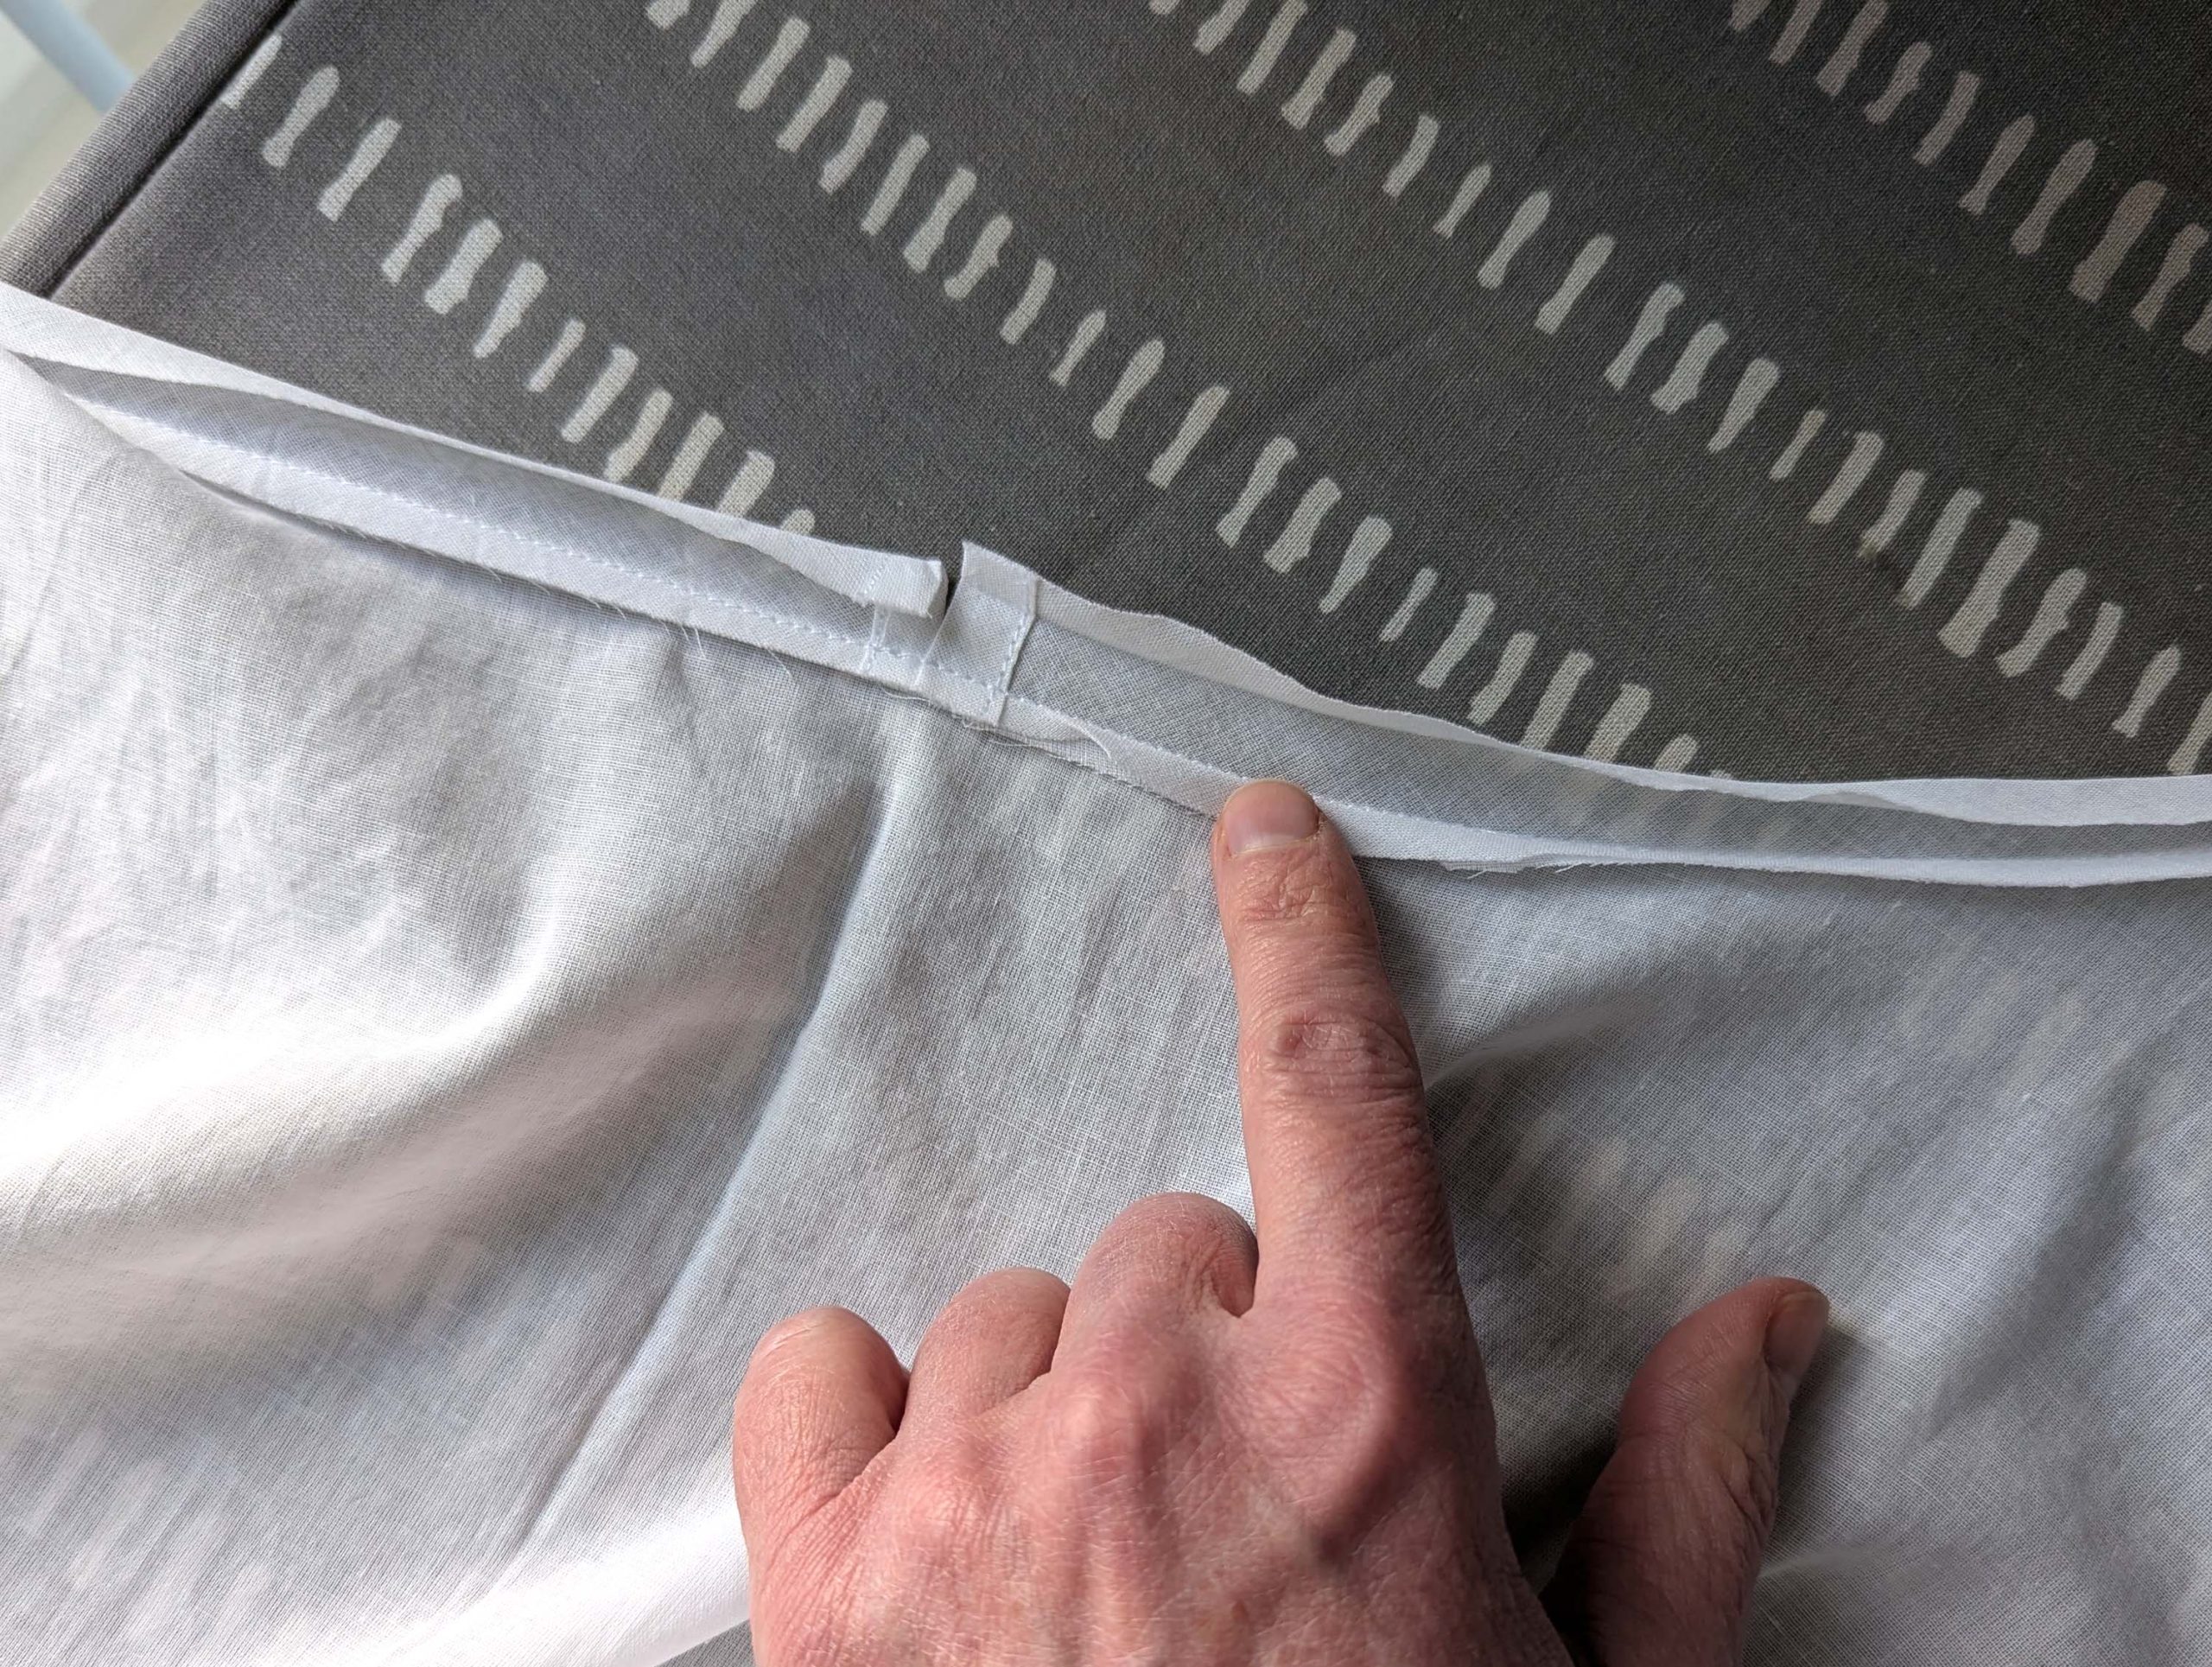
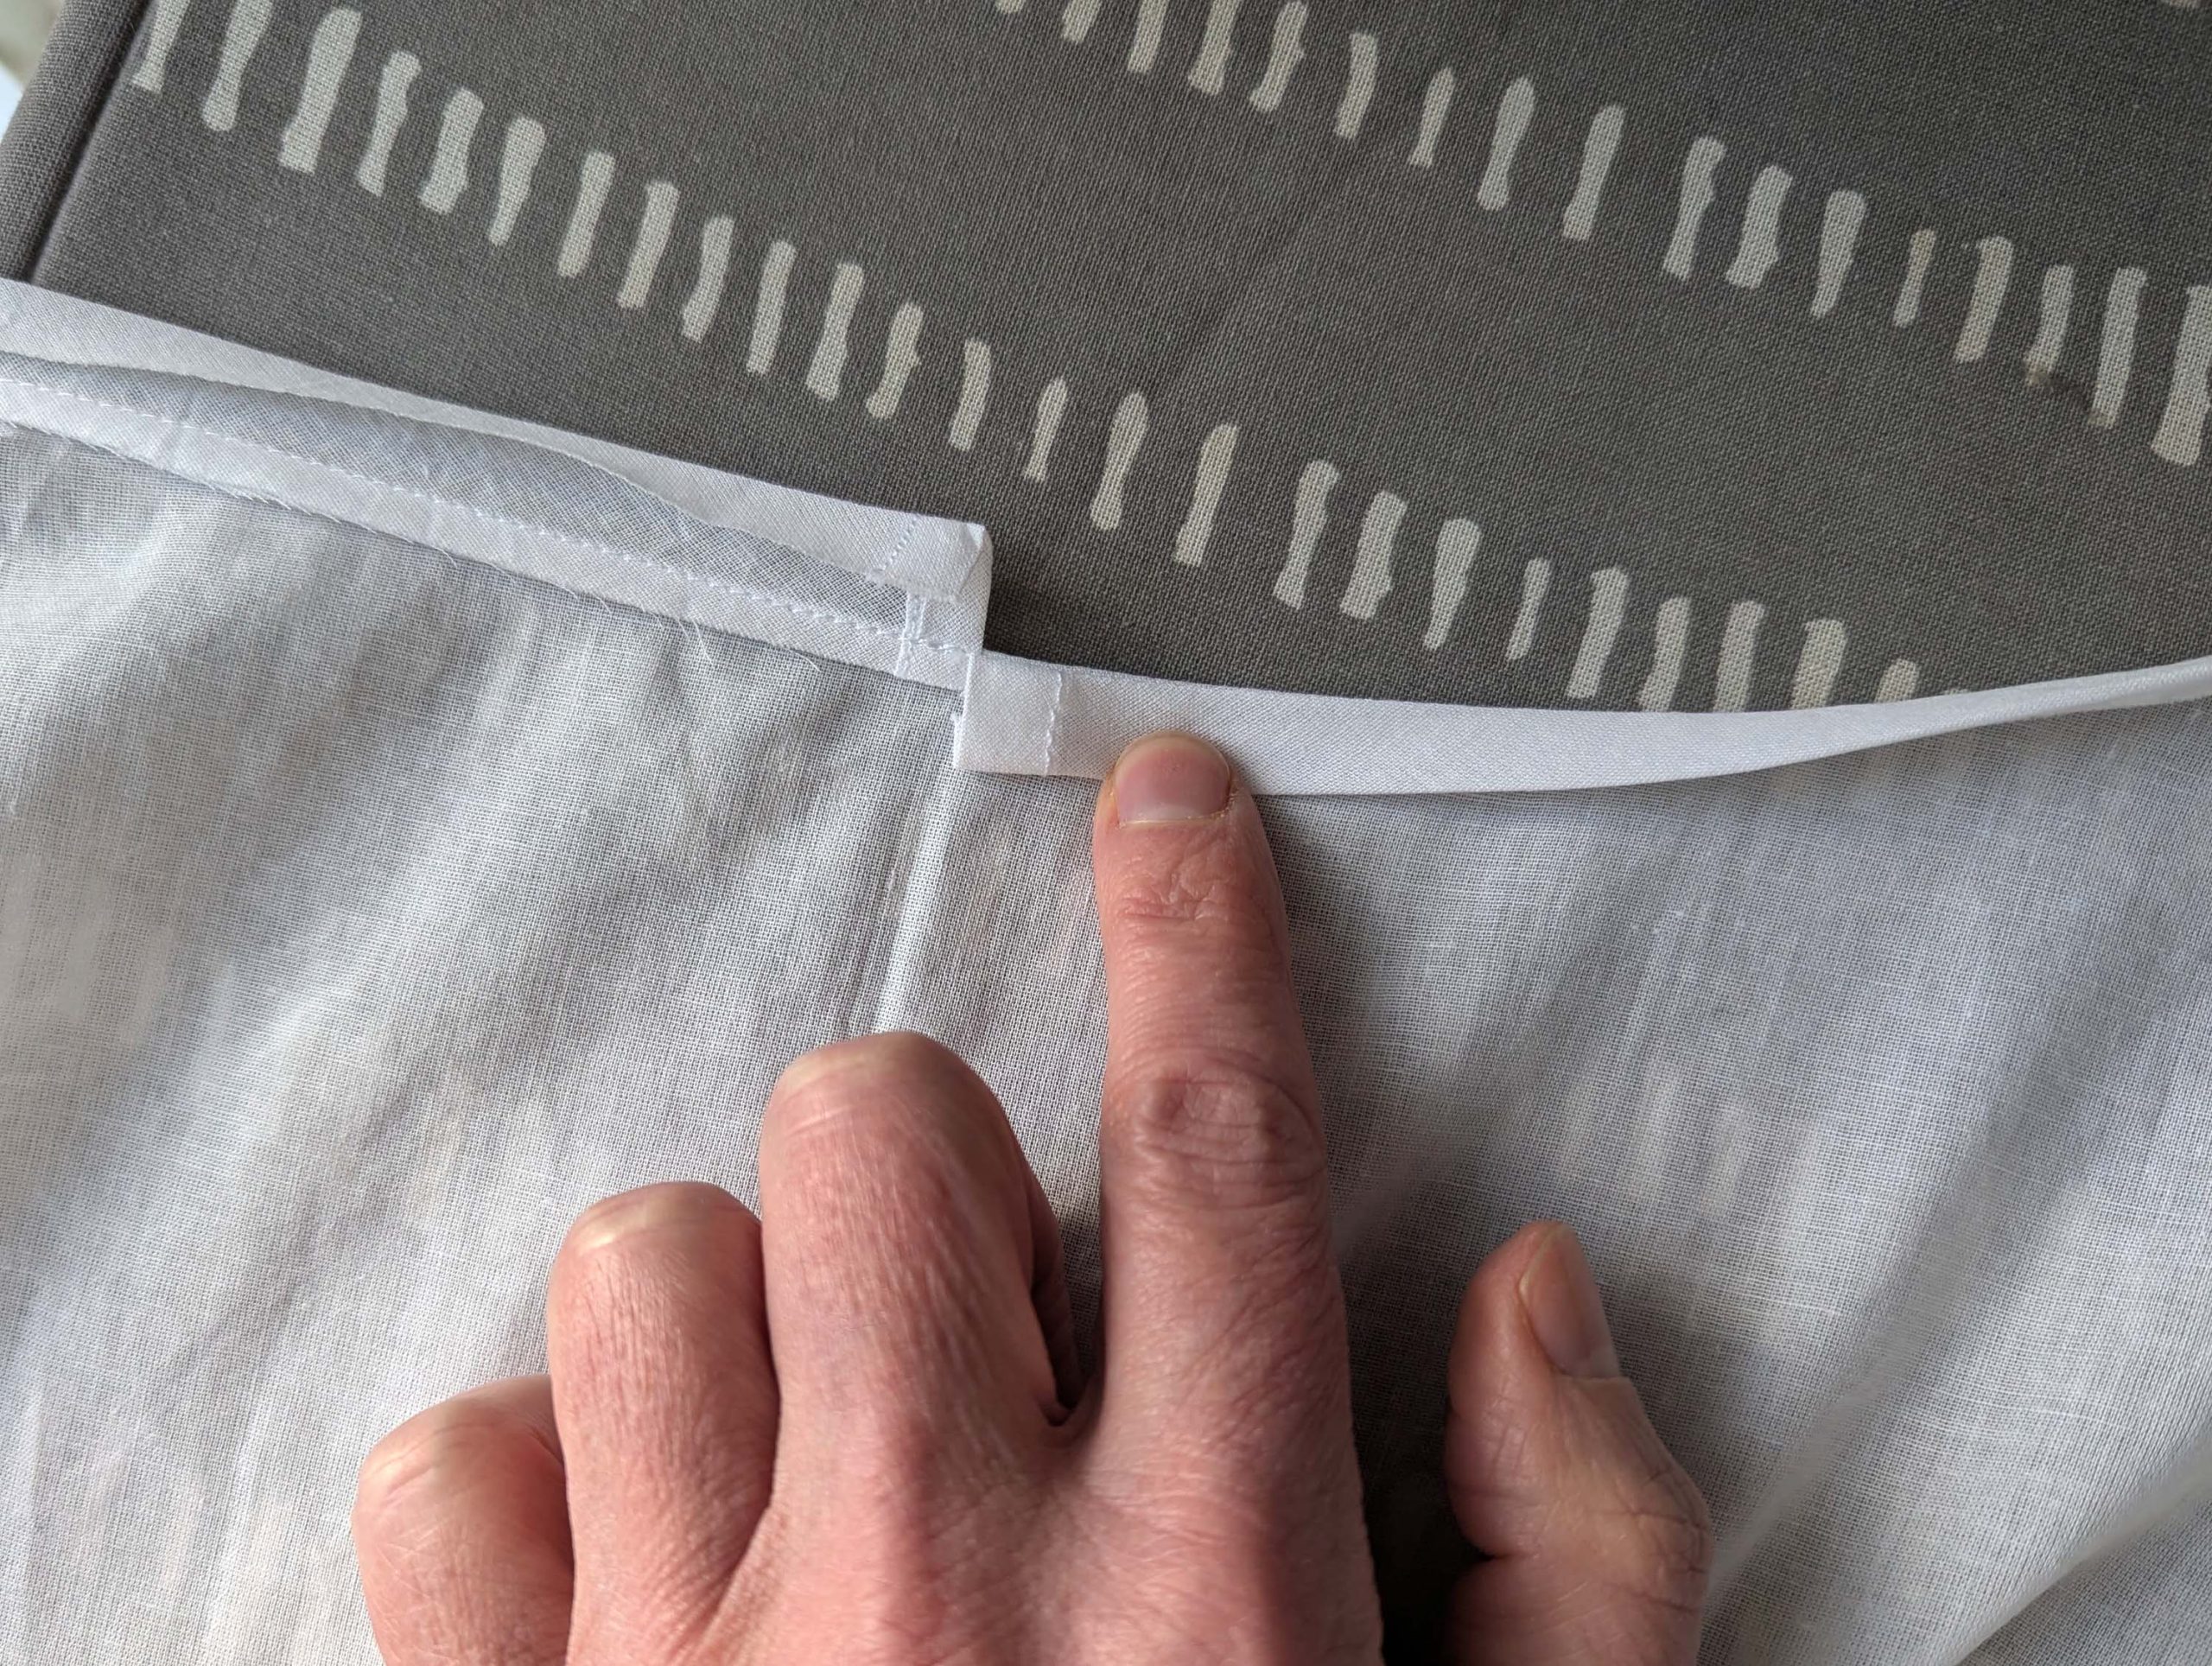
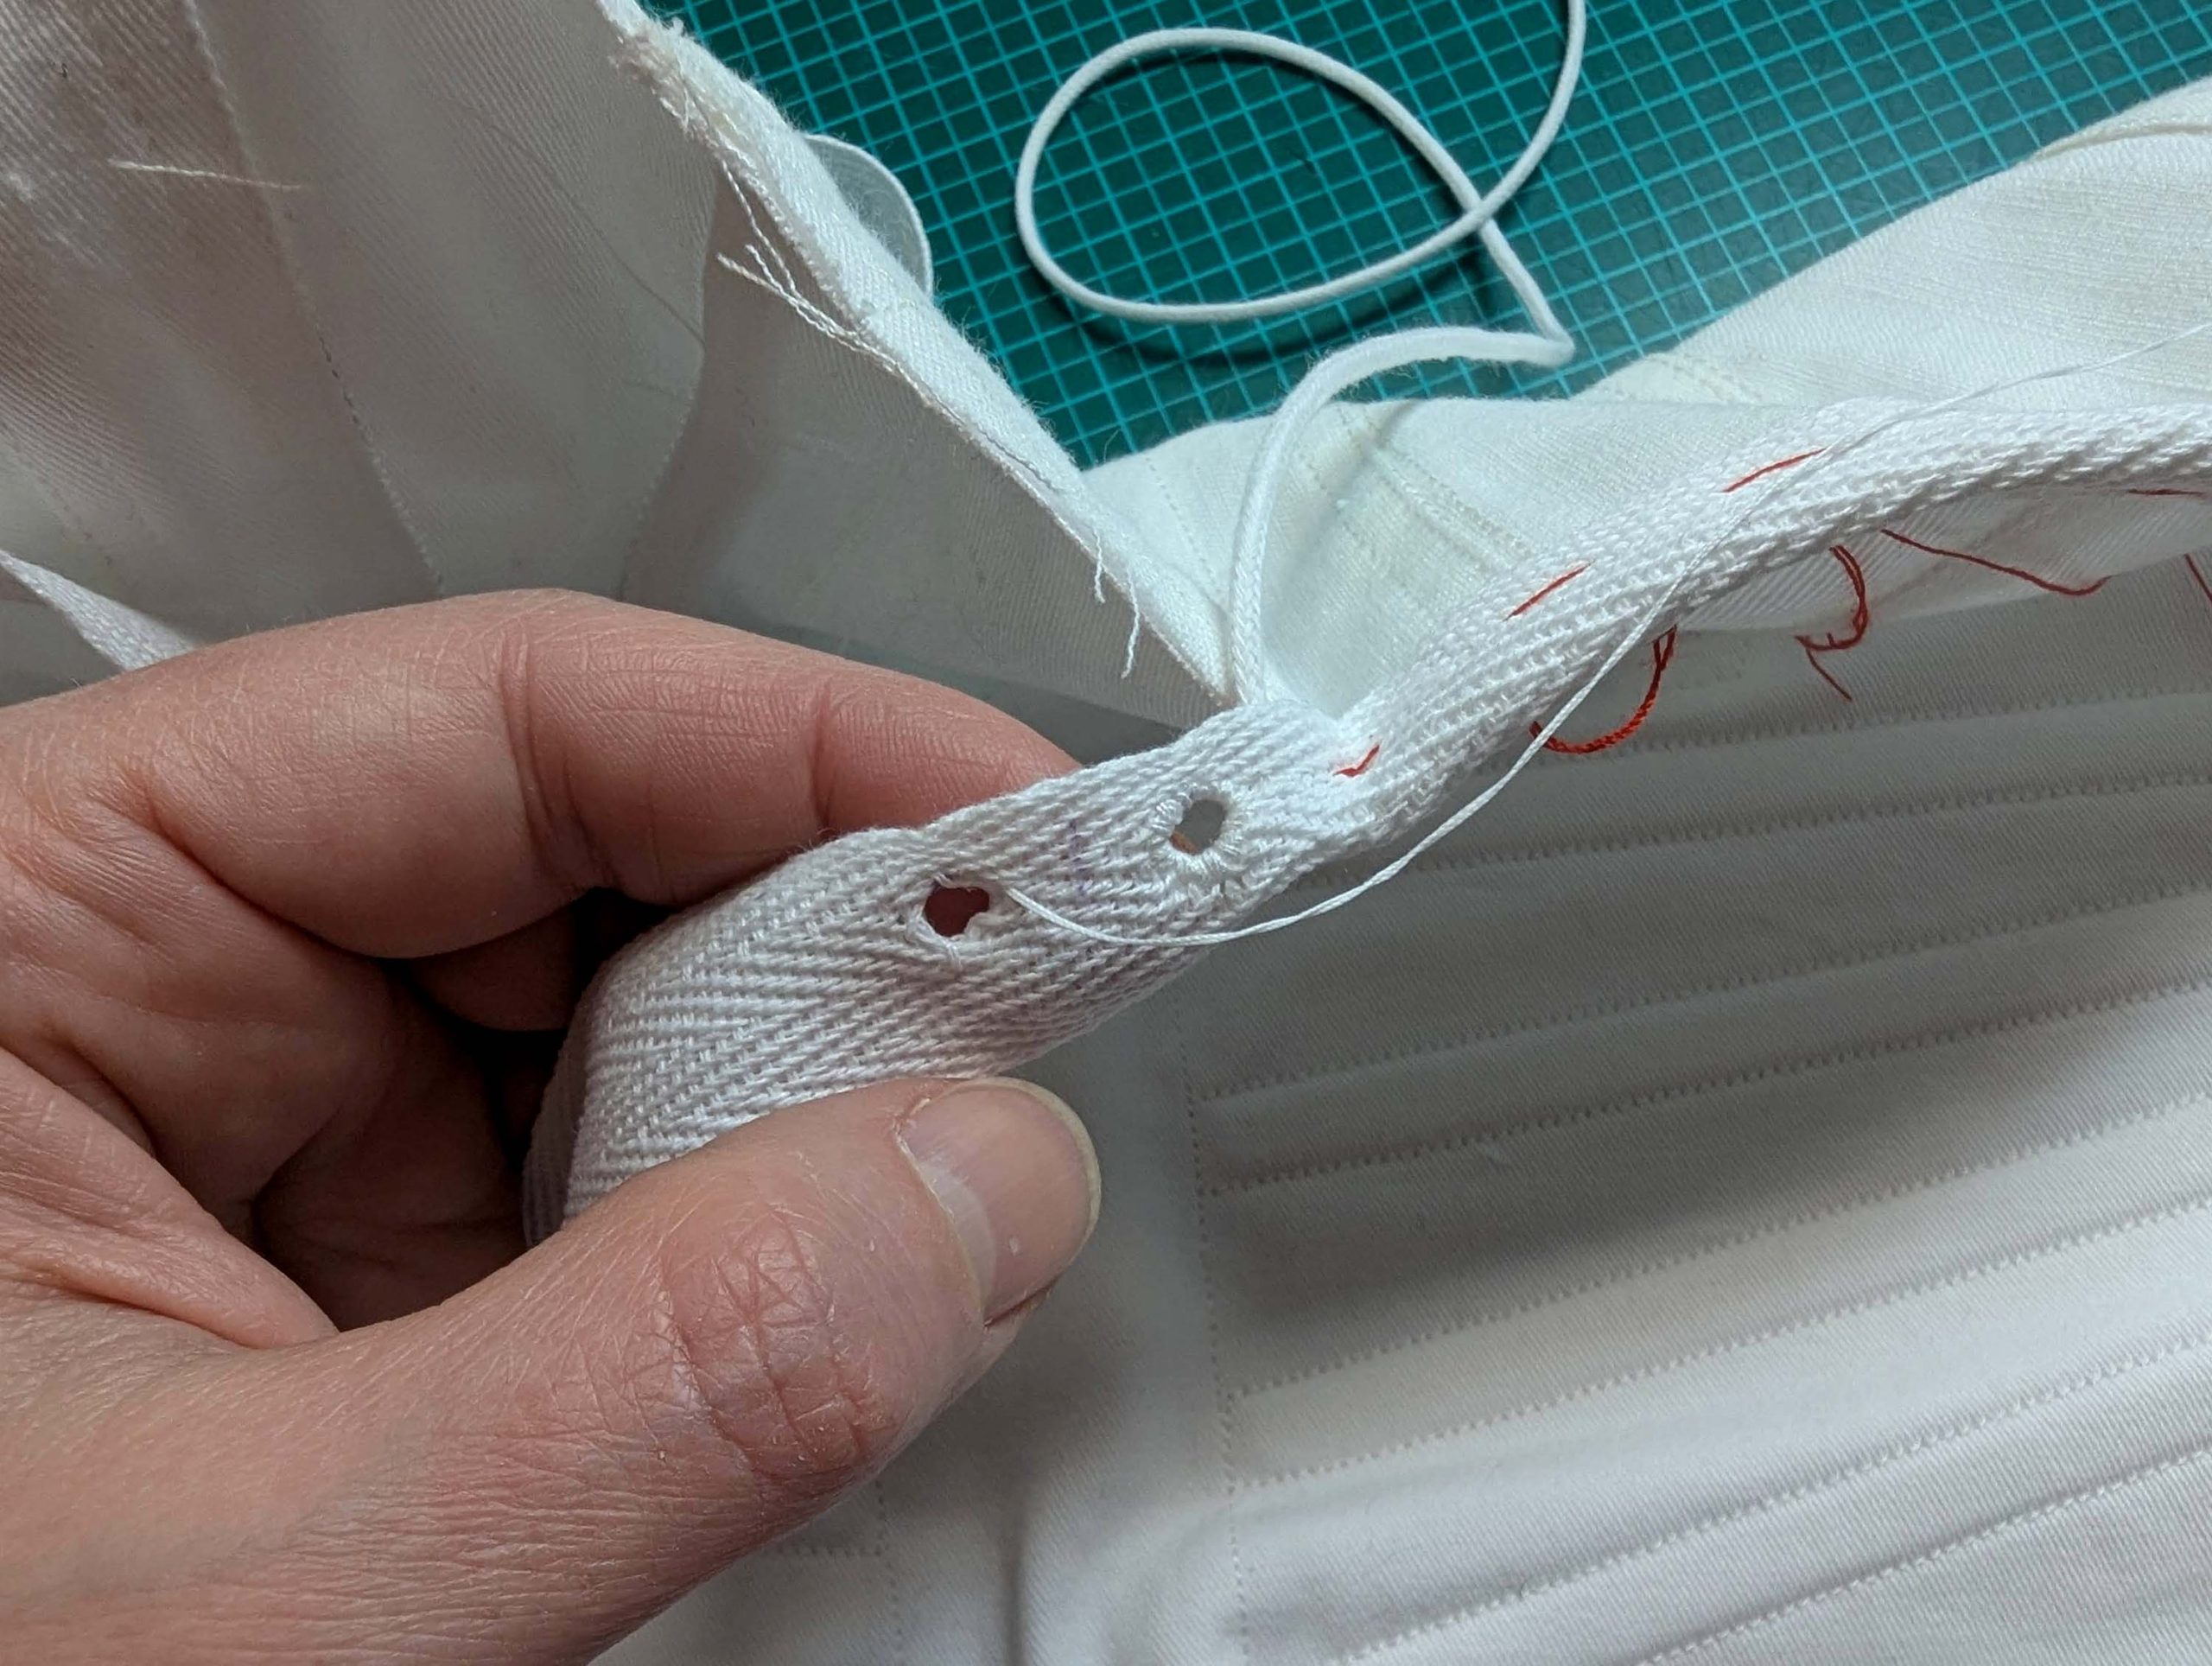
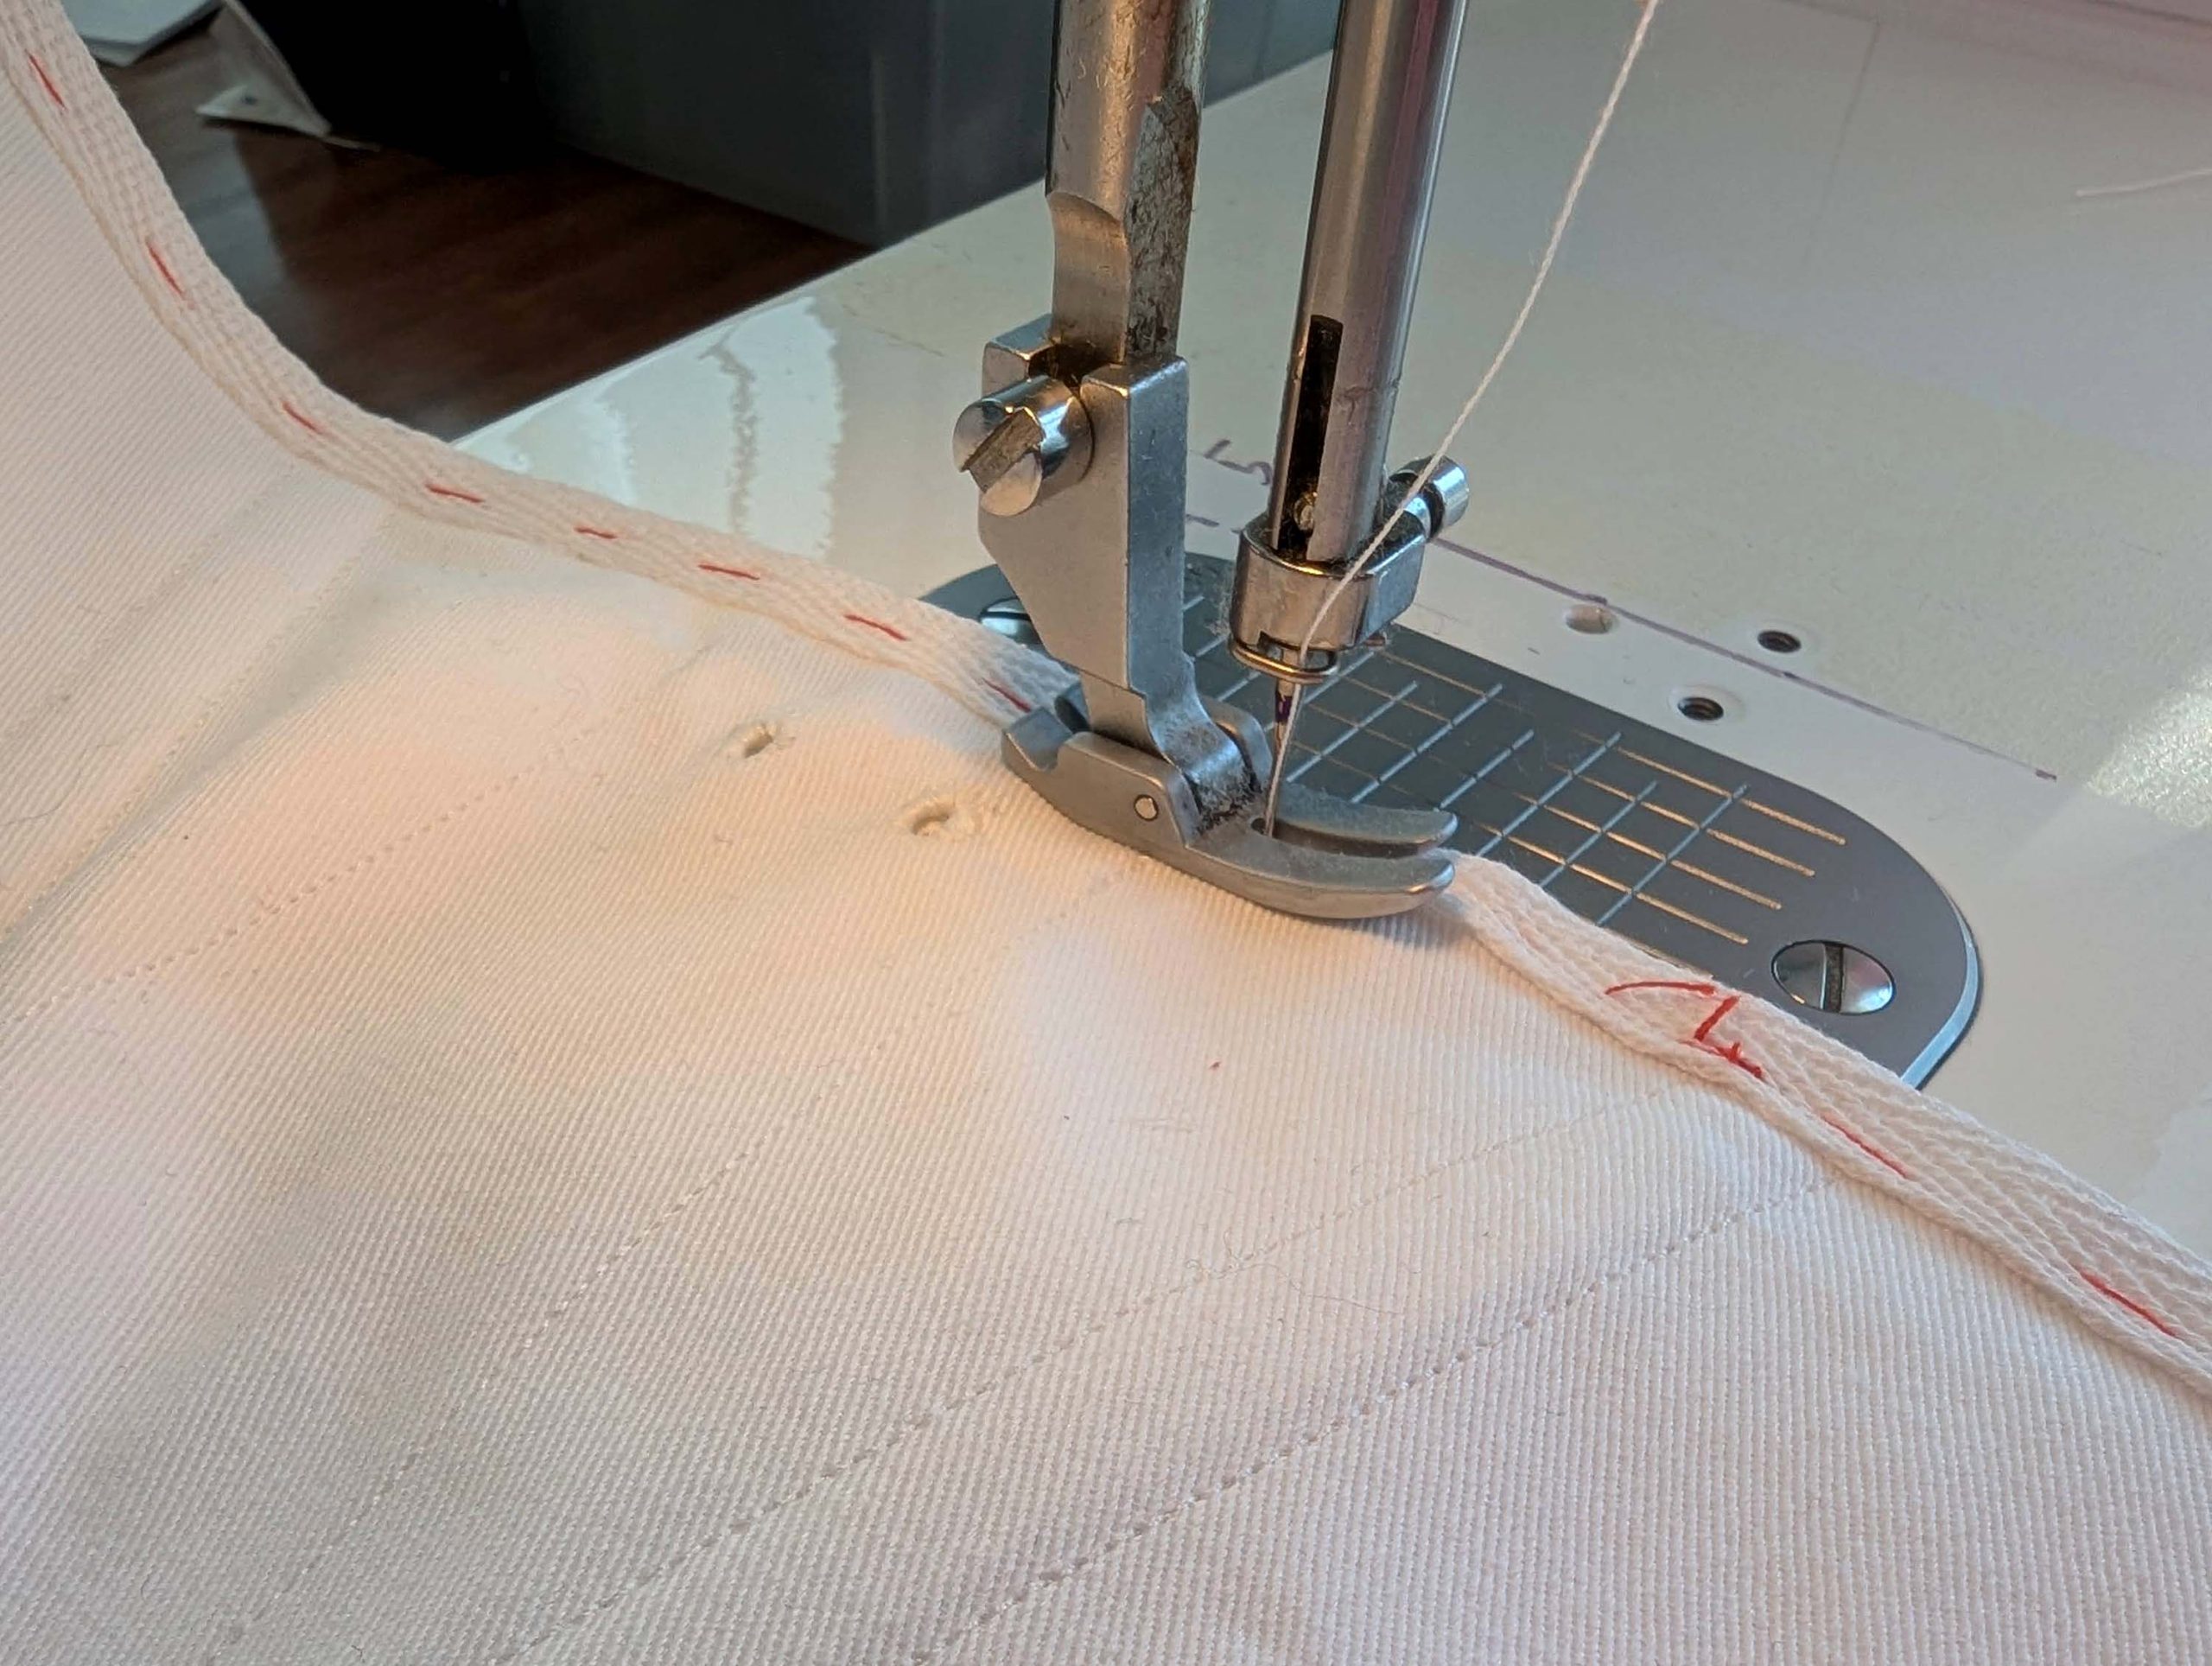
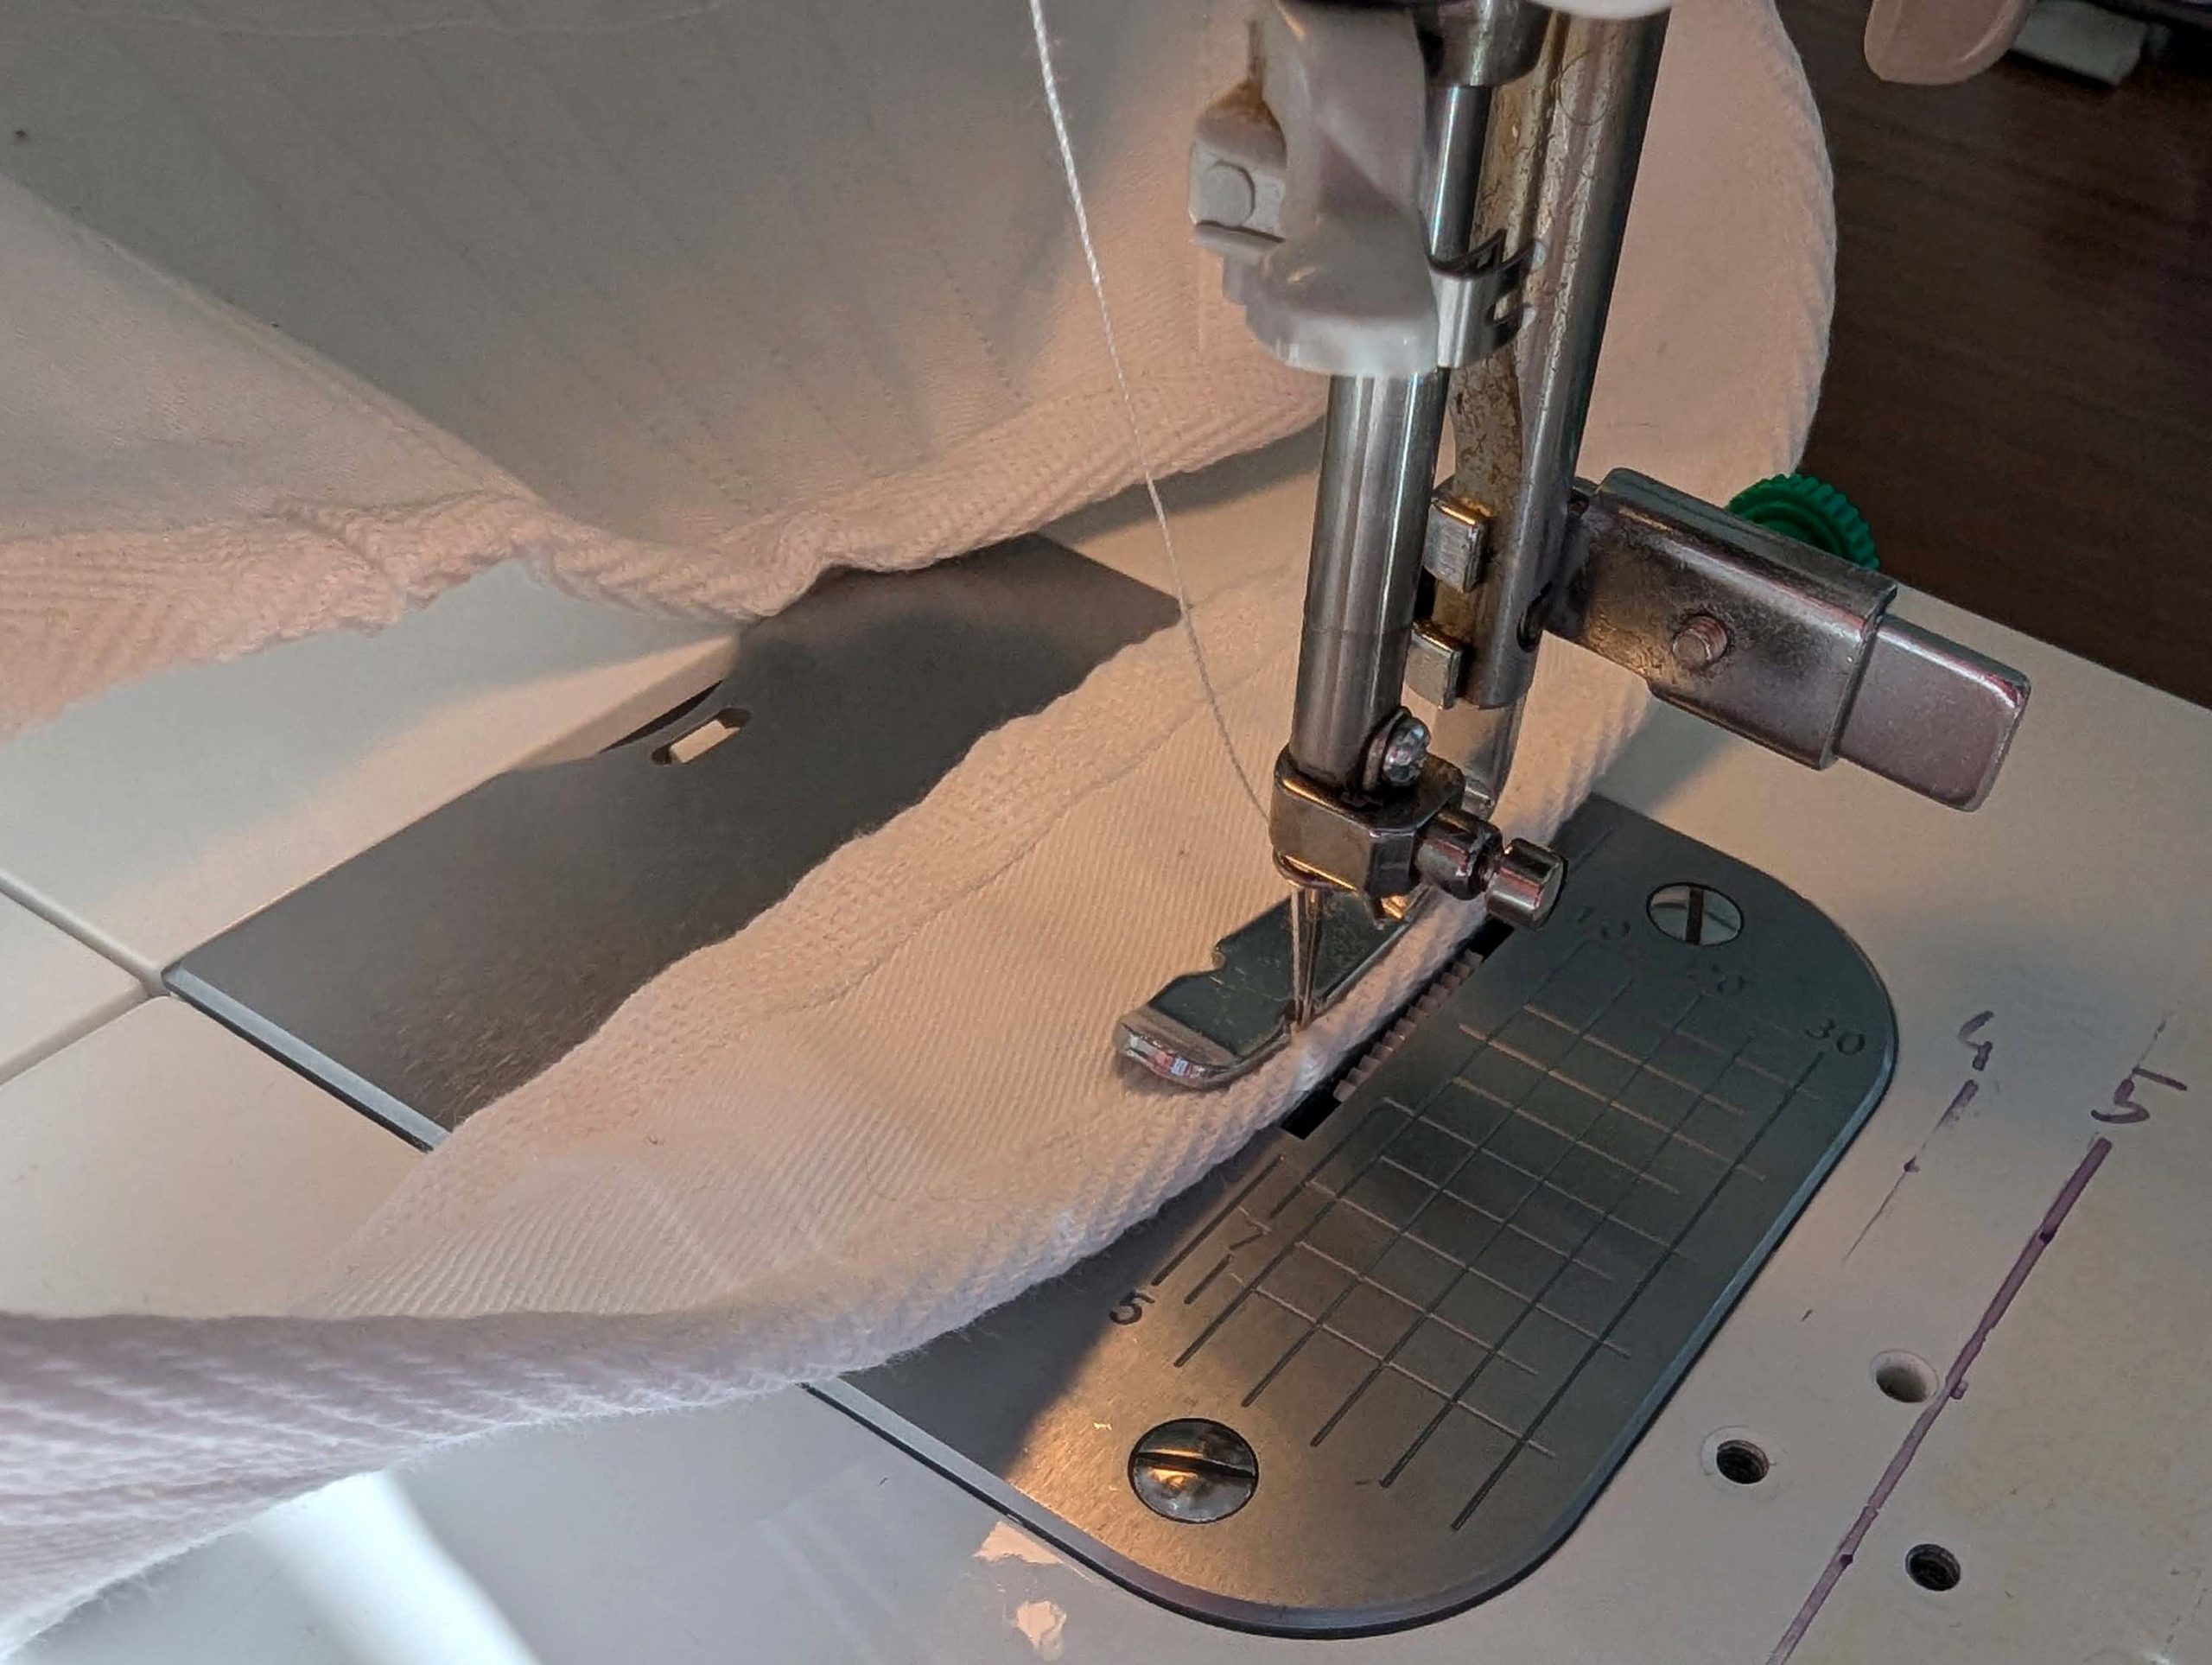
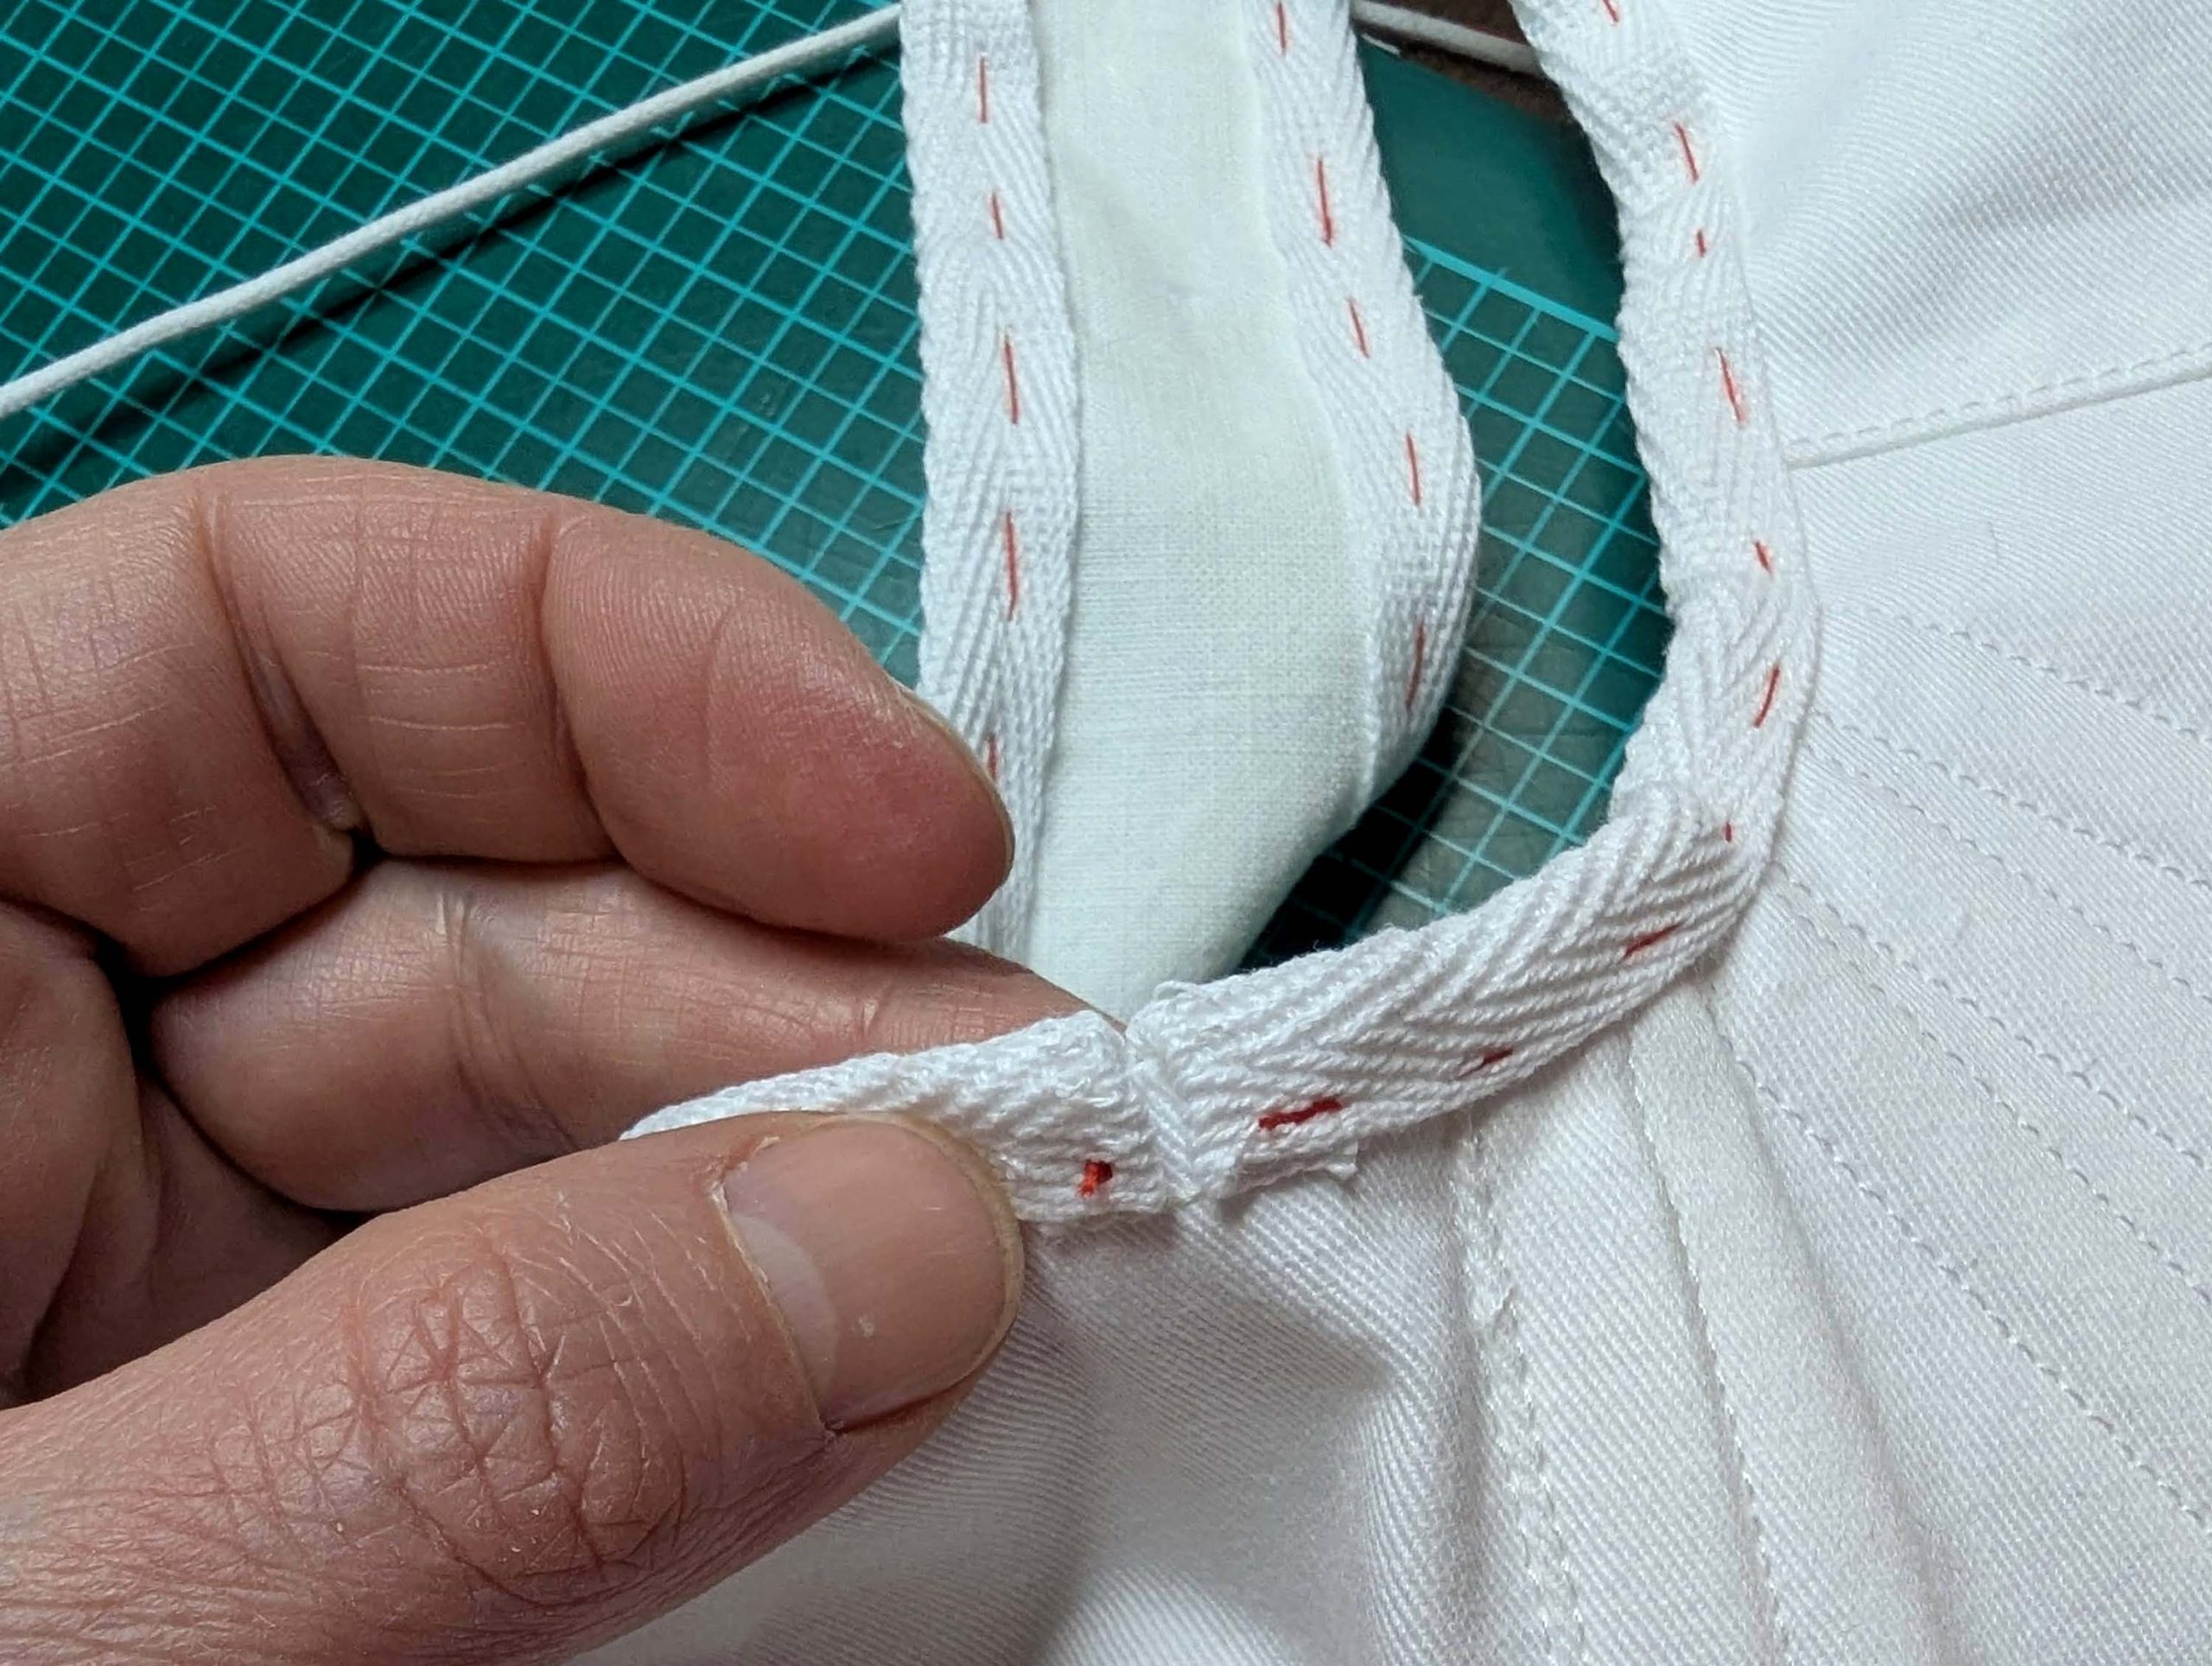
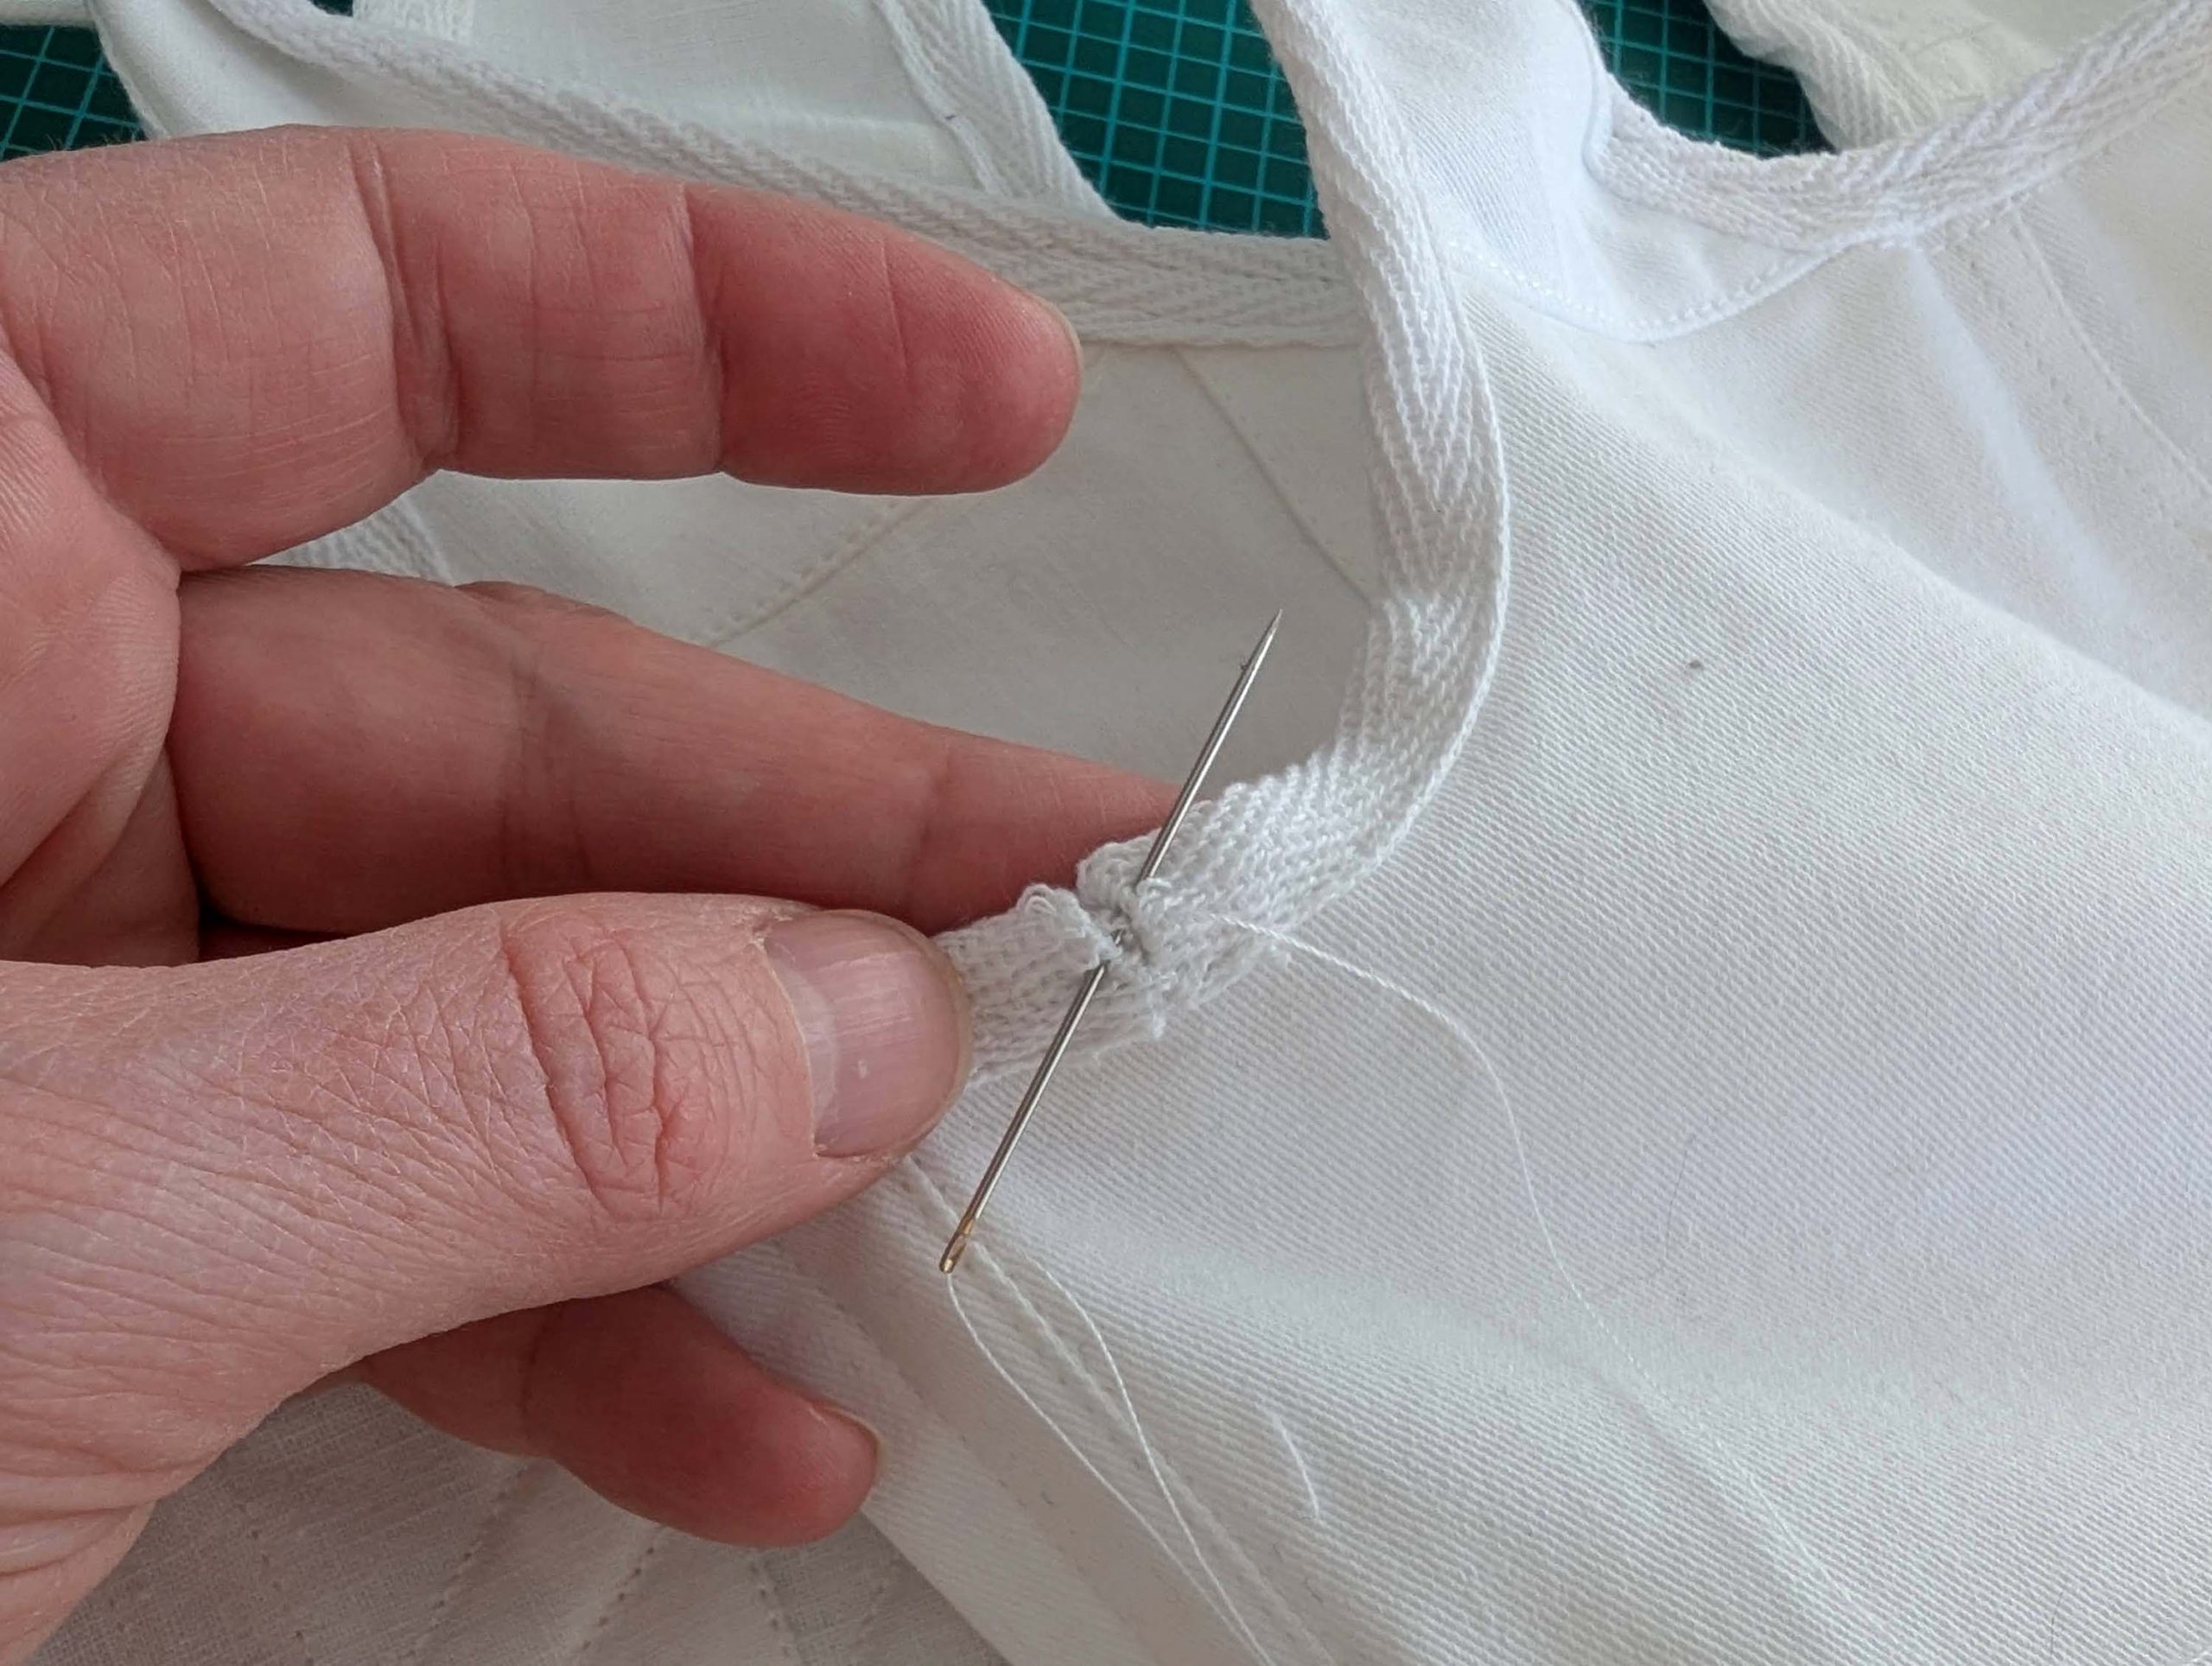
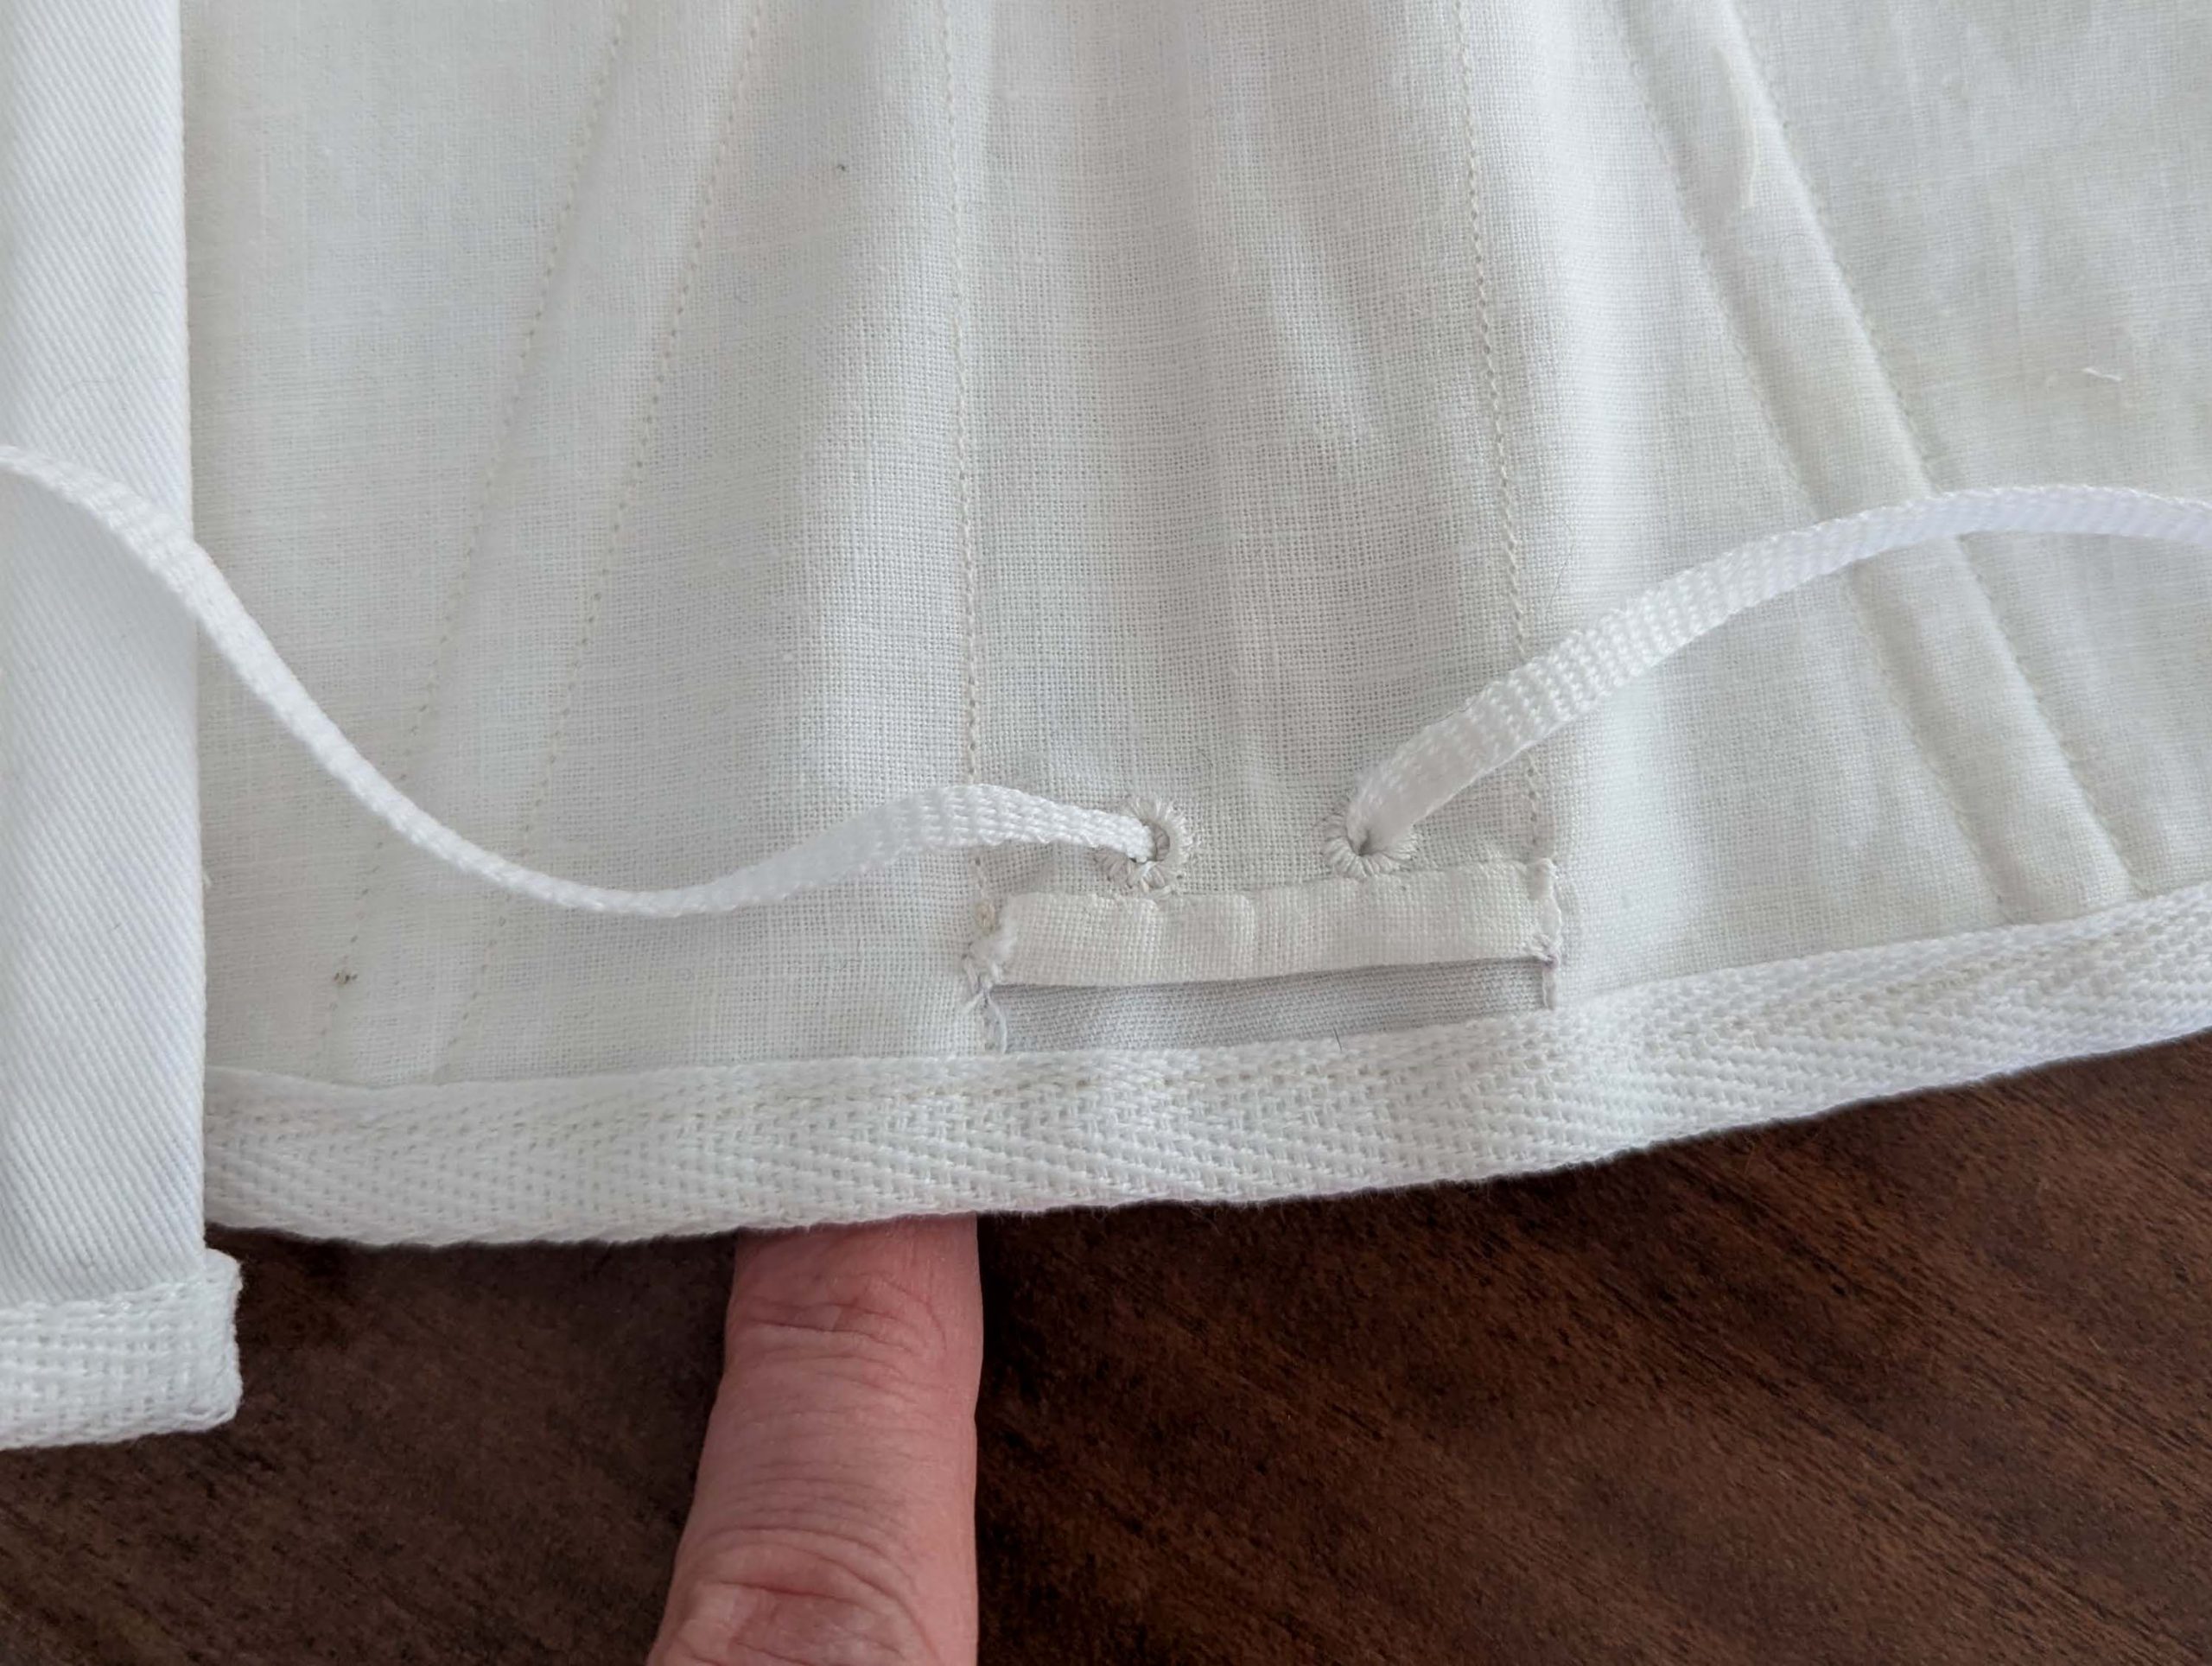
(6) Plan a fitting to adjust both straps and armholes. Check the neckline and length, and trim back when needed. For fuller figures, pay special attention to keeping the armholes narrow. Stitch along the neckline and armhole, about ¾” (2cm) parallel to the edge. Trim back the seam allowance of 5/8” (1,5cm). Take the twill tape (width 5/8“ (1,5cm) and fold it in half. Cover the raw edges of the neckline with that tape and baste in place through all layers, turning in a narrow seam allowance at the center back. I use a water-soluble glue stick to fix the ends before basting in place. Thread the tape with a drawstring, reaching from the center back to the center front on each side.
Sew eyelets to lead out the drawstring at the center front. At the center back, bar-tack the drawstring to the corset. Stitch the twill tape in place through all layers. Optionally, make a second row of stitching, creating piping when using a cord.
At the armhole, just finish the edges with twill or bias tape, without a drawstring. I made the ends edge to edge and not overlapping to avoid bulk.
(7) To insert and remove the placket easily, clip the only lining towards mark (3), at the bottom. Trim back the seam allowance to about 3/8” (1cm) double turn in a narrow seam allowance and stitch in place. Trim back the remaining seam allowances along the bottom edge and finish with a twill or bias tape. Don´t forget to insert all boning first. Create four eyelets at the bottom edge of the busk pocket: two in the lining and two directly opposite in the fashion fabric. Thread a narrow ribbon through them and insert the busk. Secure the ribbon with a knot to prevent the busk from slipping out.
(8) Take the remaining piping cord and reinforce the ends with Fray-Check or heat shrink tubing, wax if wanted. Lace the corset, I prefer the method of putting on the corset with the back to the front and laced up with a shorter cord, then spinning around and tightening the lacing in the back, as shown in this video from Burnley and Trowbridge: https://www.youtube.com/watch?v=q8Isg0sBCpo
Got caught by the corset-making bug? Let’s try a dress to wear over your new creation!
A supporting petticoat that helped maintain the dress’s elegant drape while providing modesty
This blog post is now about the petticoat construction, again all machine sewing.
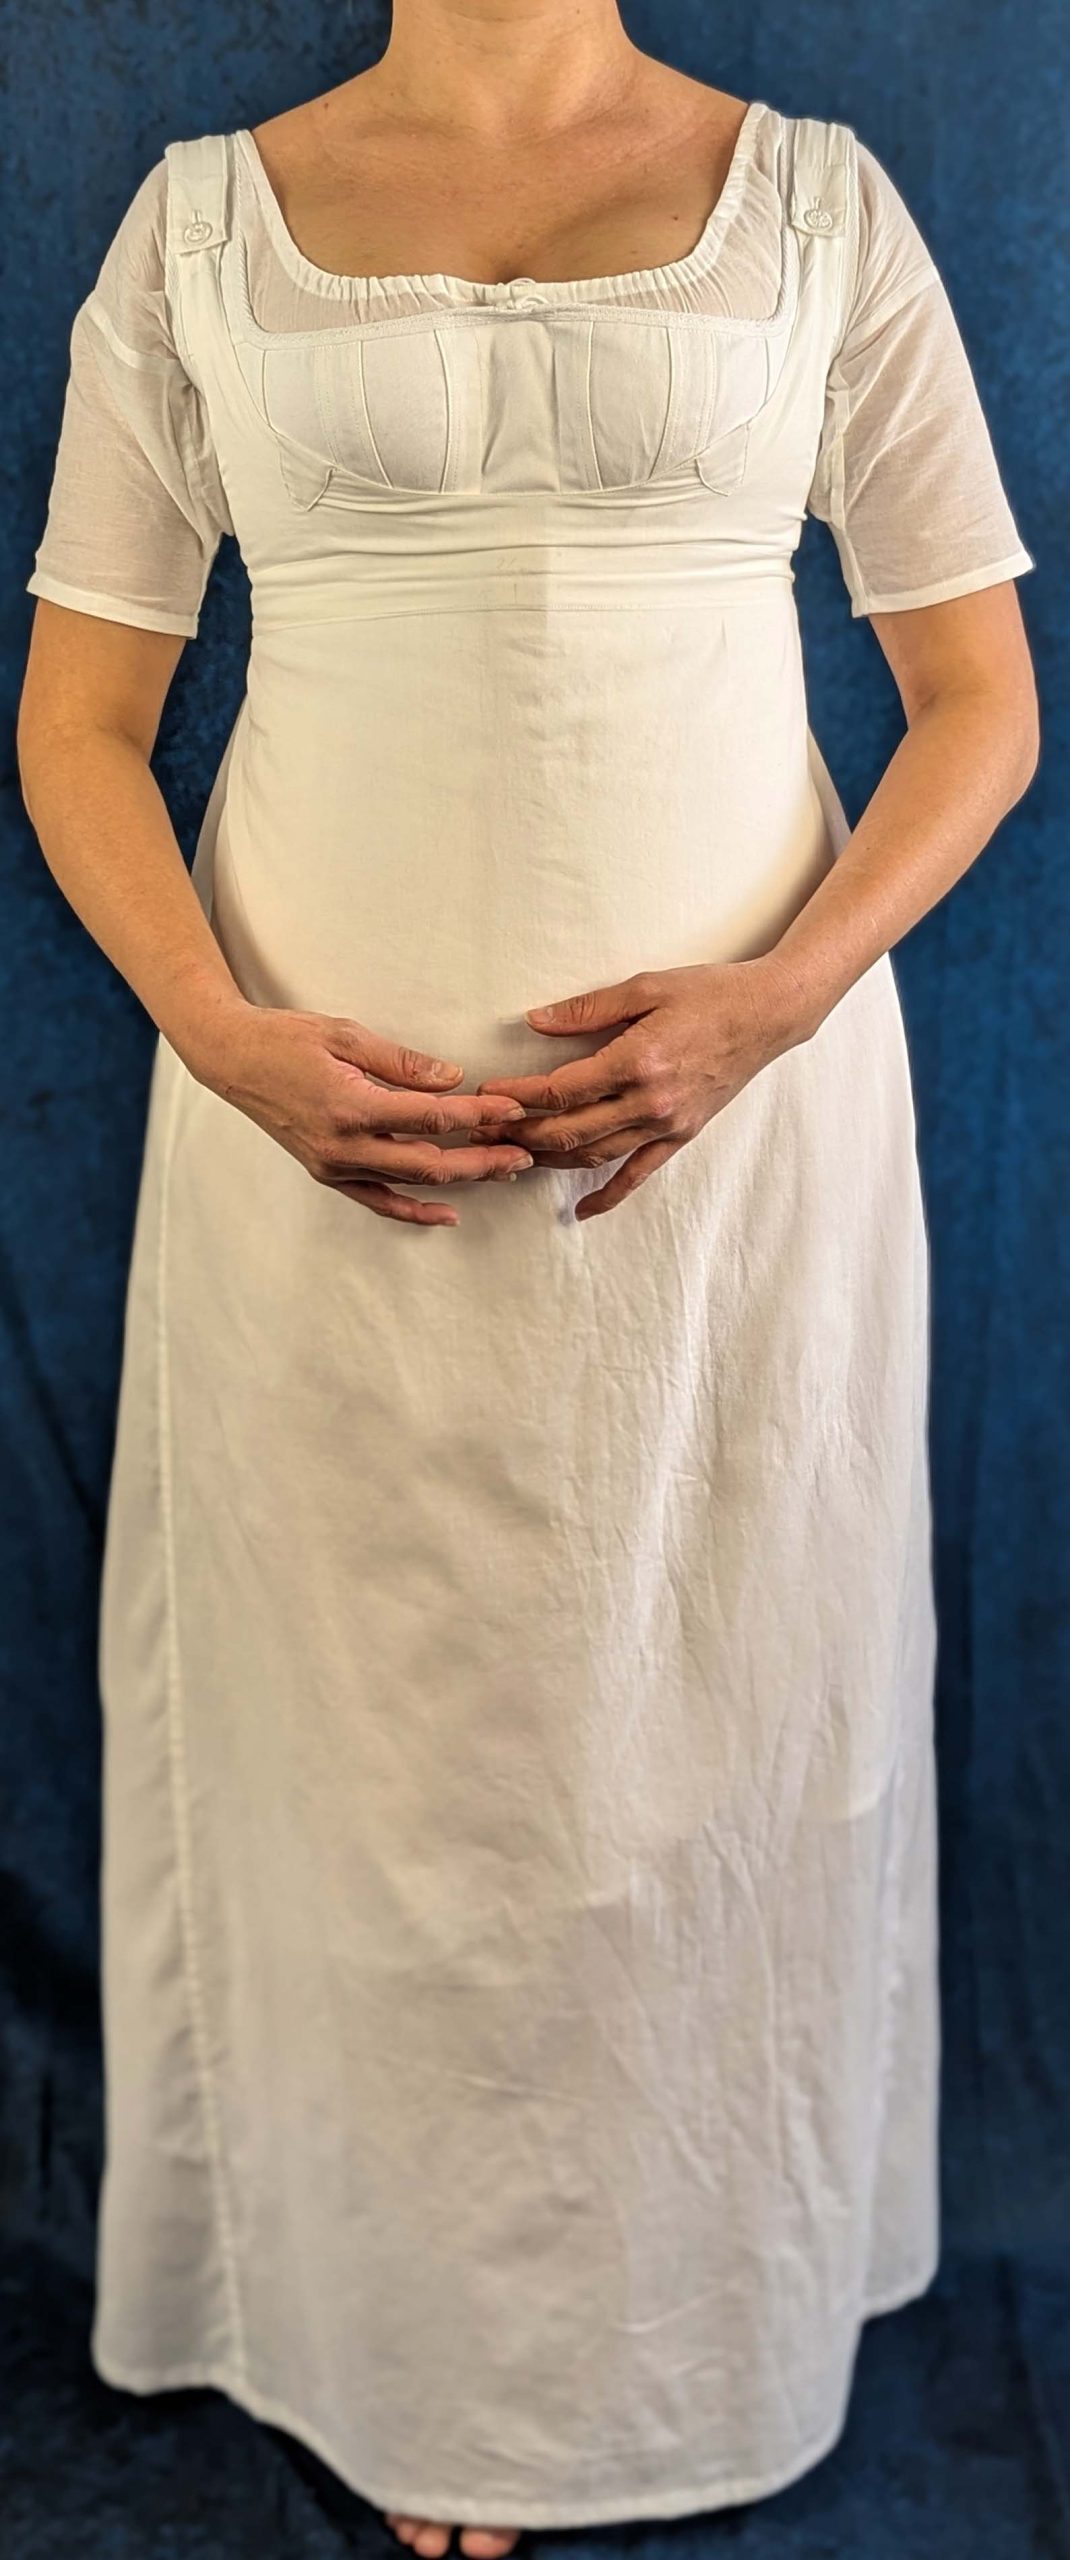
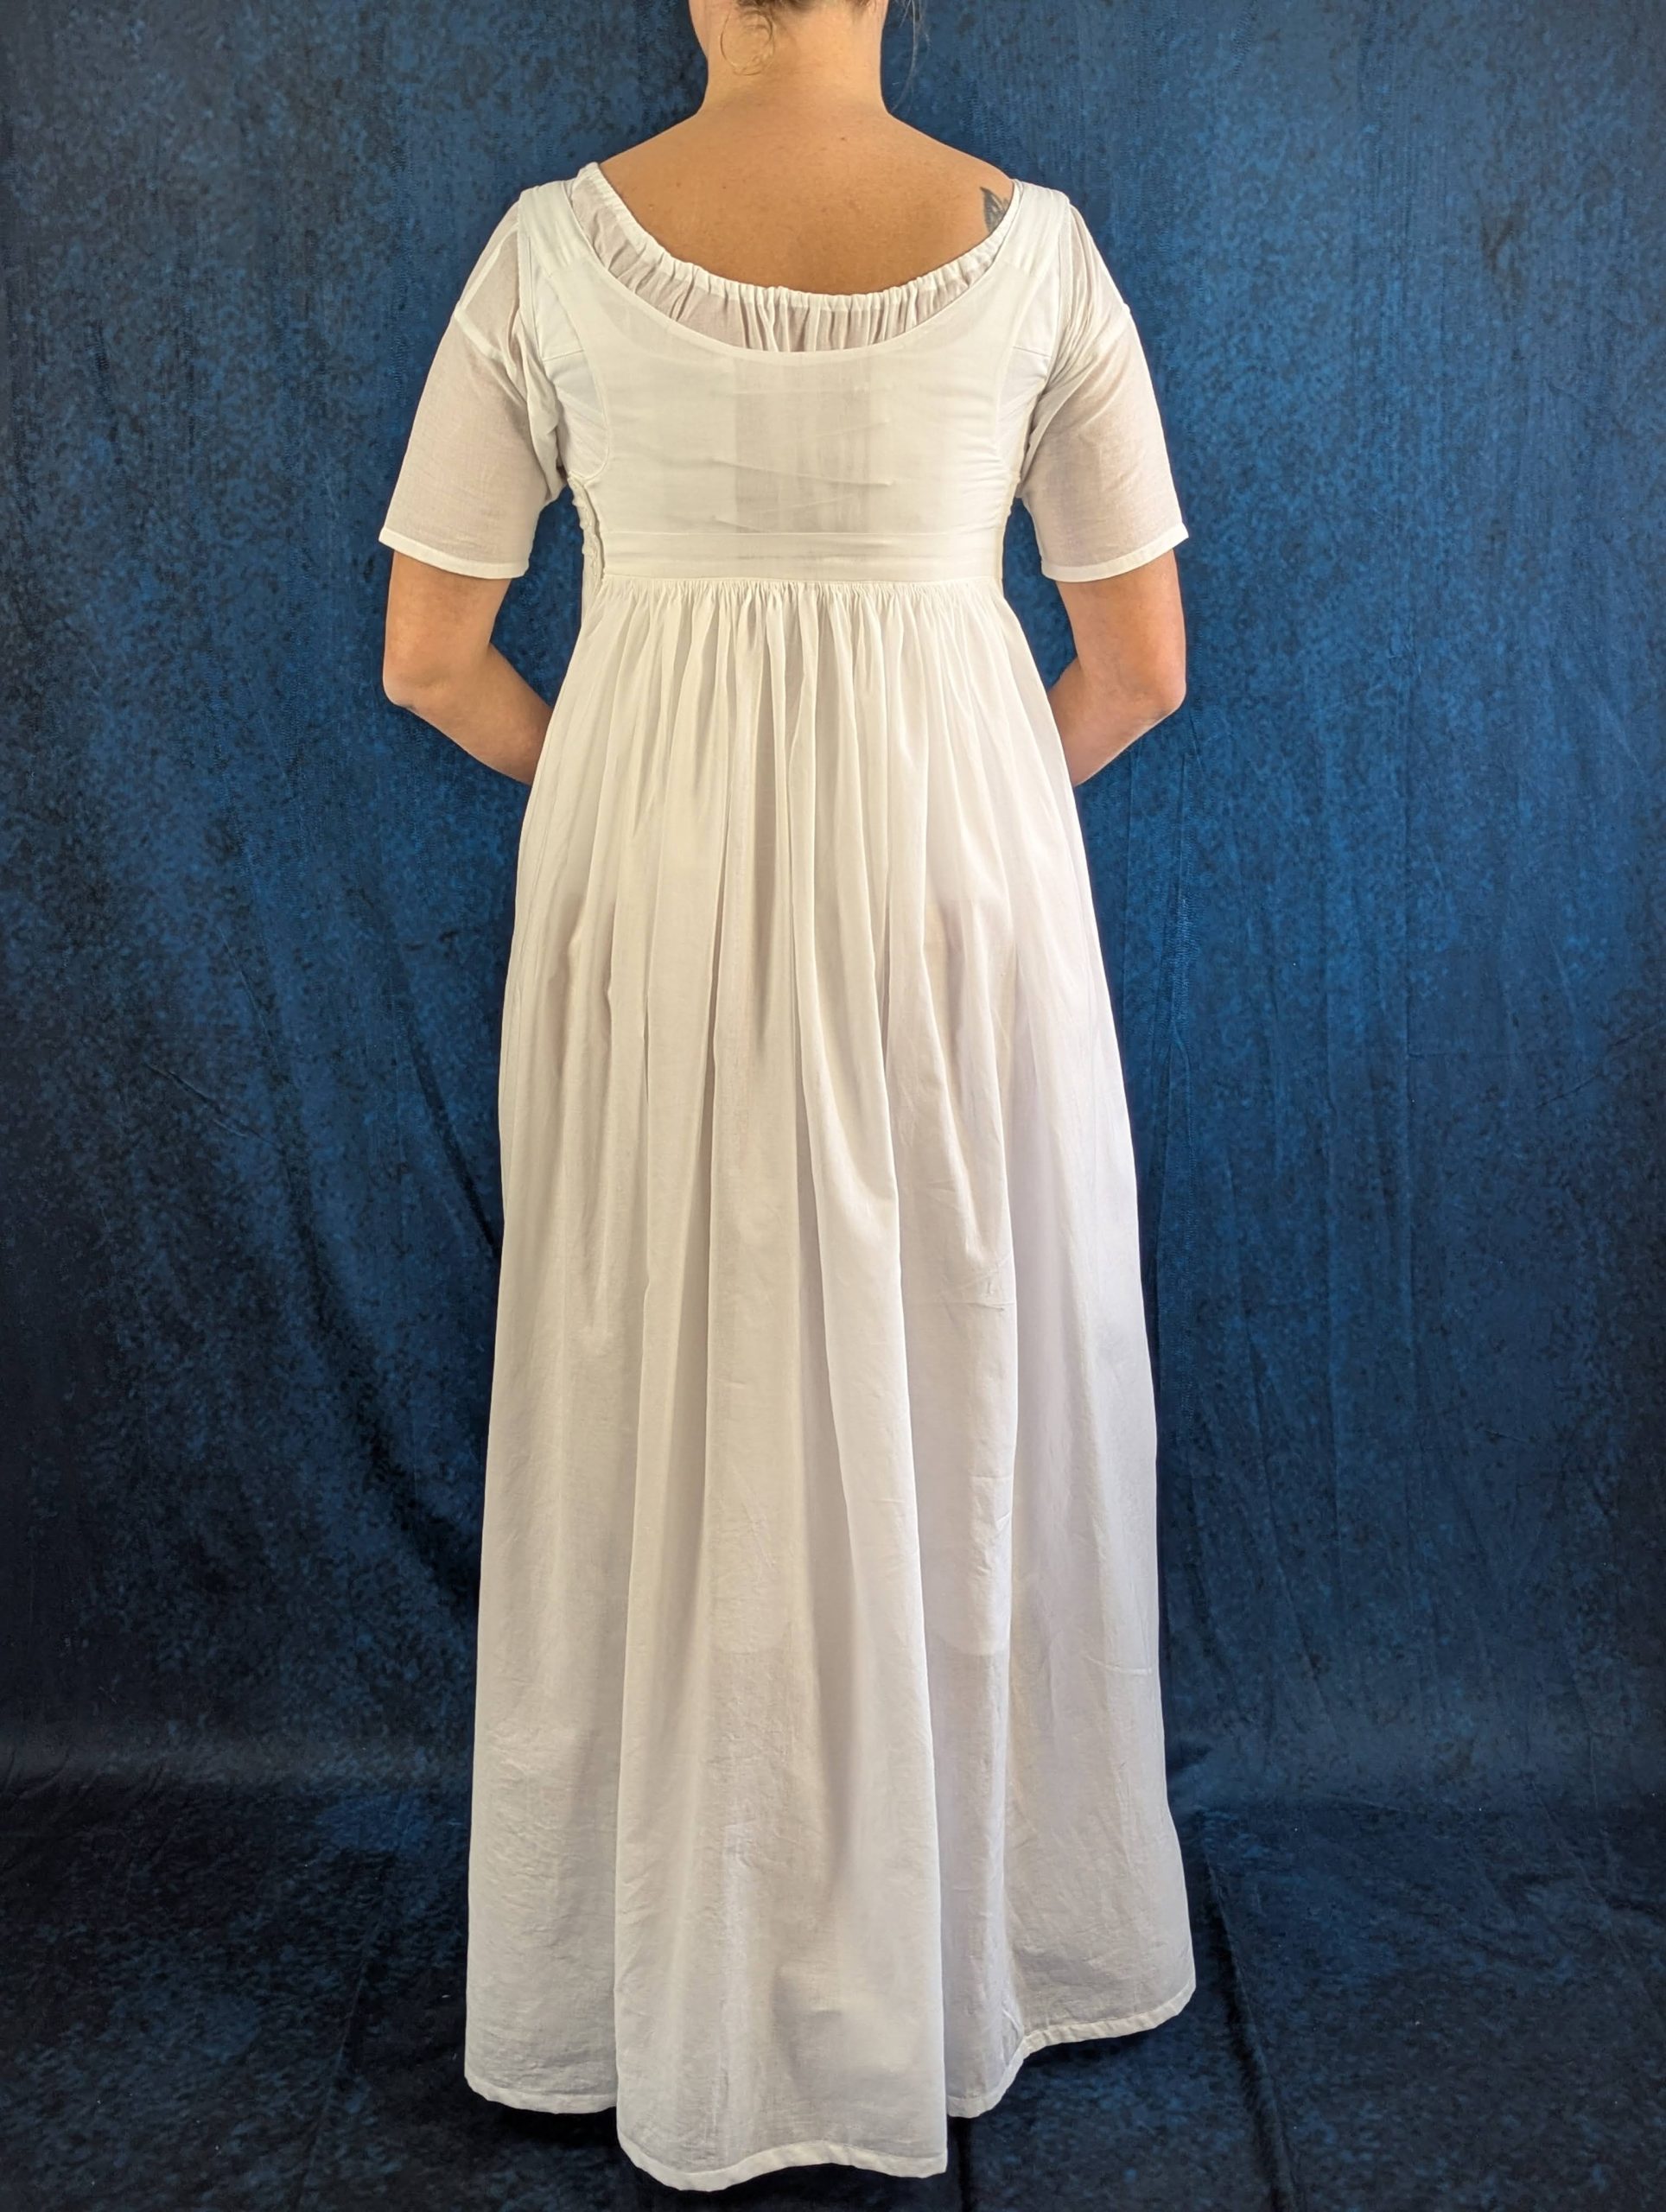
The Regency petticoat is a skirt with a fitted waistband that sits just under the bust. The fullness is concentrated at the back through careful gathering, while the front remains relatively smooth. The petticoat is held in place by a small bodice or just straps.
(1)Cut out all pieces from the fabric. For the skirt, cut several panels from the fabric as indicated in the cutting diagram, depending on your size. Omit the bodice pieces and step when you prefer just straps instead.
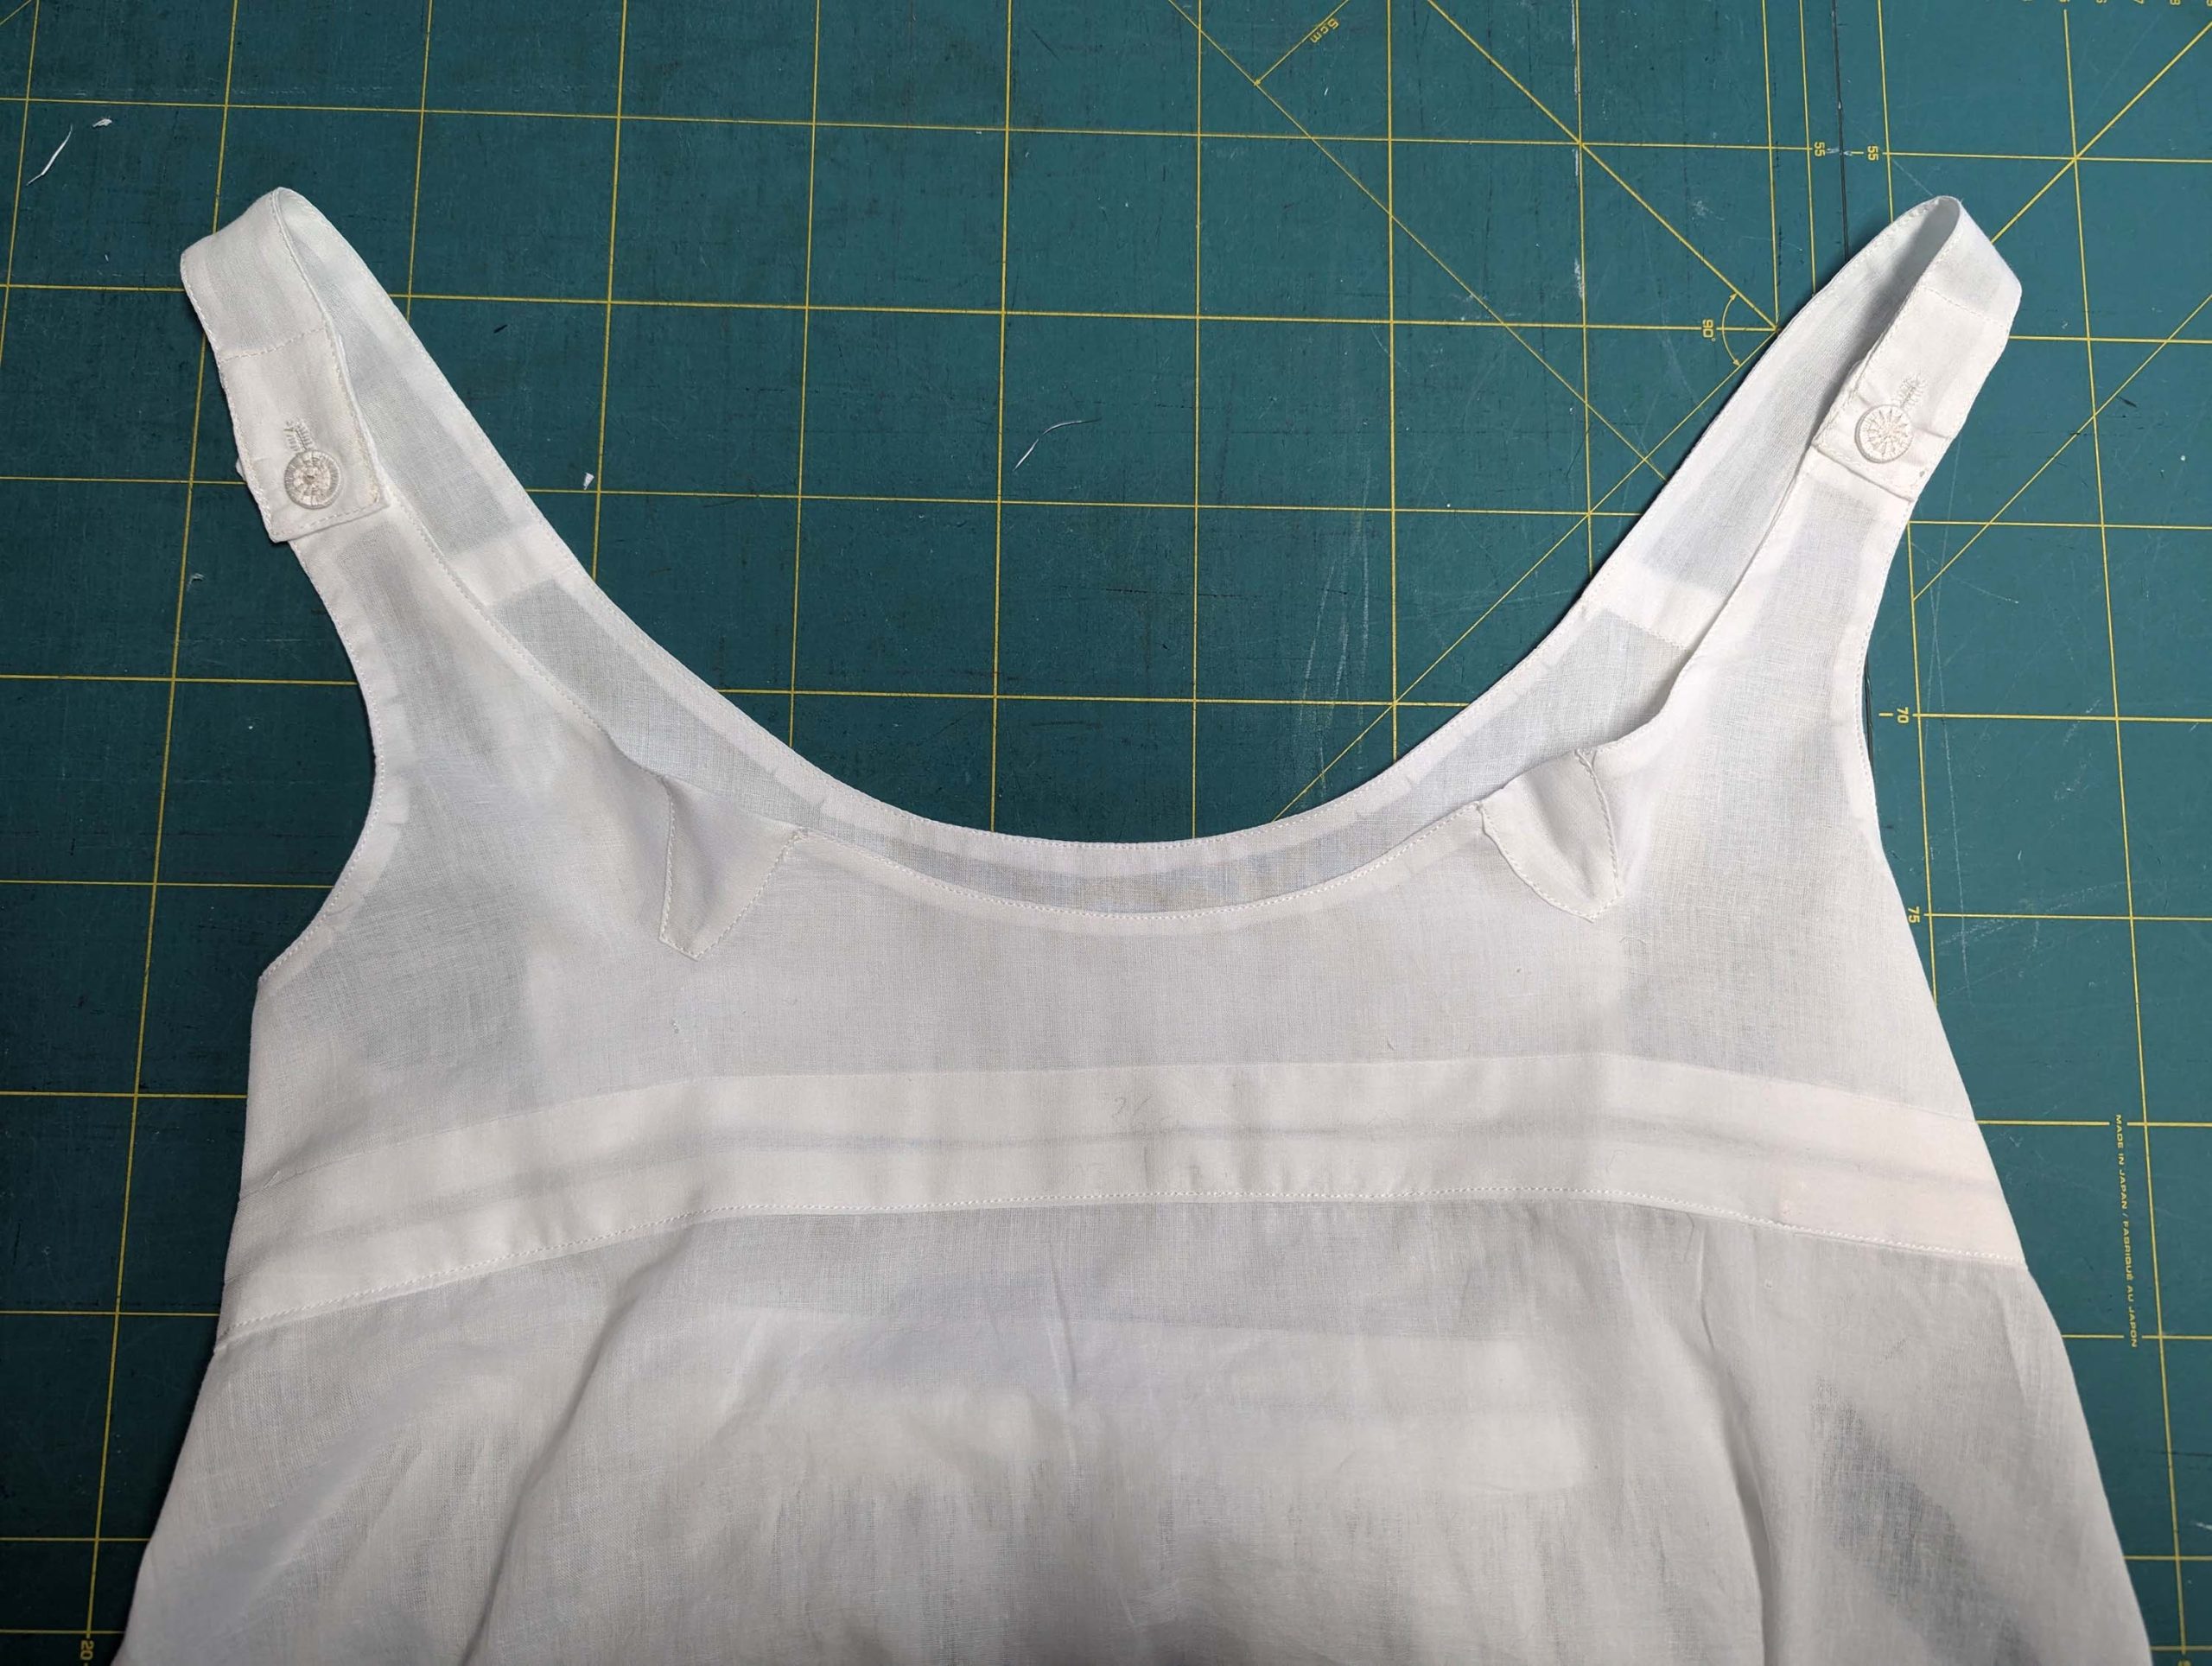
(2) To ensure durability in the bodice, reinforce all lining areas that will bear mechanical stress with a midweight cotton fabric. Key areas requiring reinforcement include the button and buttonhole placements, the terminal points of the straps, and the placket positioned at the left side seam. To do so, take the small pieces, and turn in the seam allowance along the edge, indicated on the pattern, and line up with the straps/placket, wrong sides together. Edgestitch along the edge with the turned-in seam allowance.
Sew the straps to the back bodice, right sides together, and press the seam allowance towards the straps and topstitch. Sew the right side seam, right sides together, press the seam allowance towards the back, and topstitch. Insert the gussets and repeat all steps with the top layer, except the reinforcing.
Line up the top and lining layer, right sides together, and stitch along the left side, armholes, neckline, and straps, reducing the stitch length at corners and curves. Trim back the seam allowance, notch at the curves, and turn the right way out. Press and topstitch along the edges.
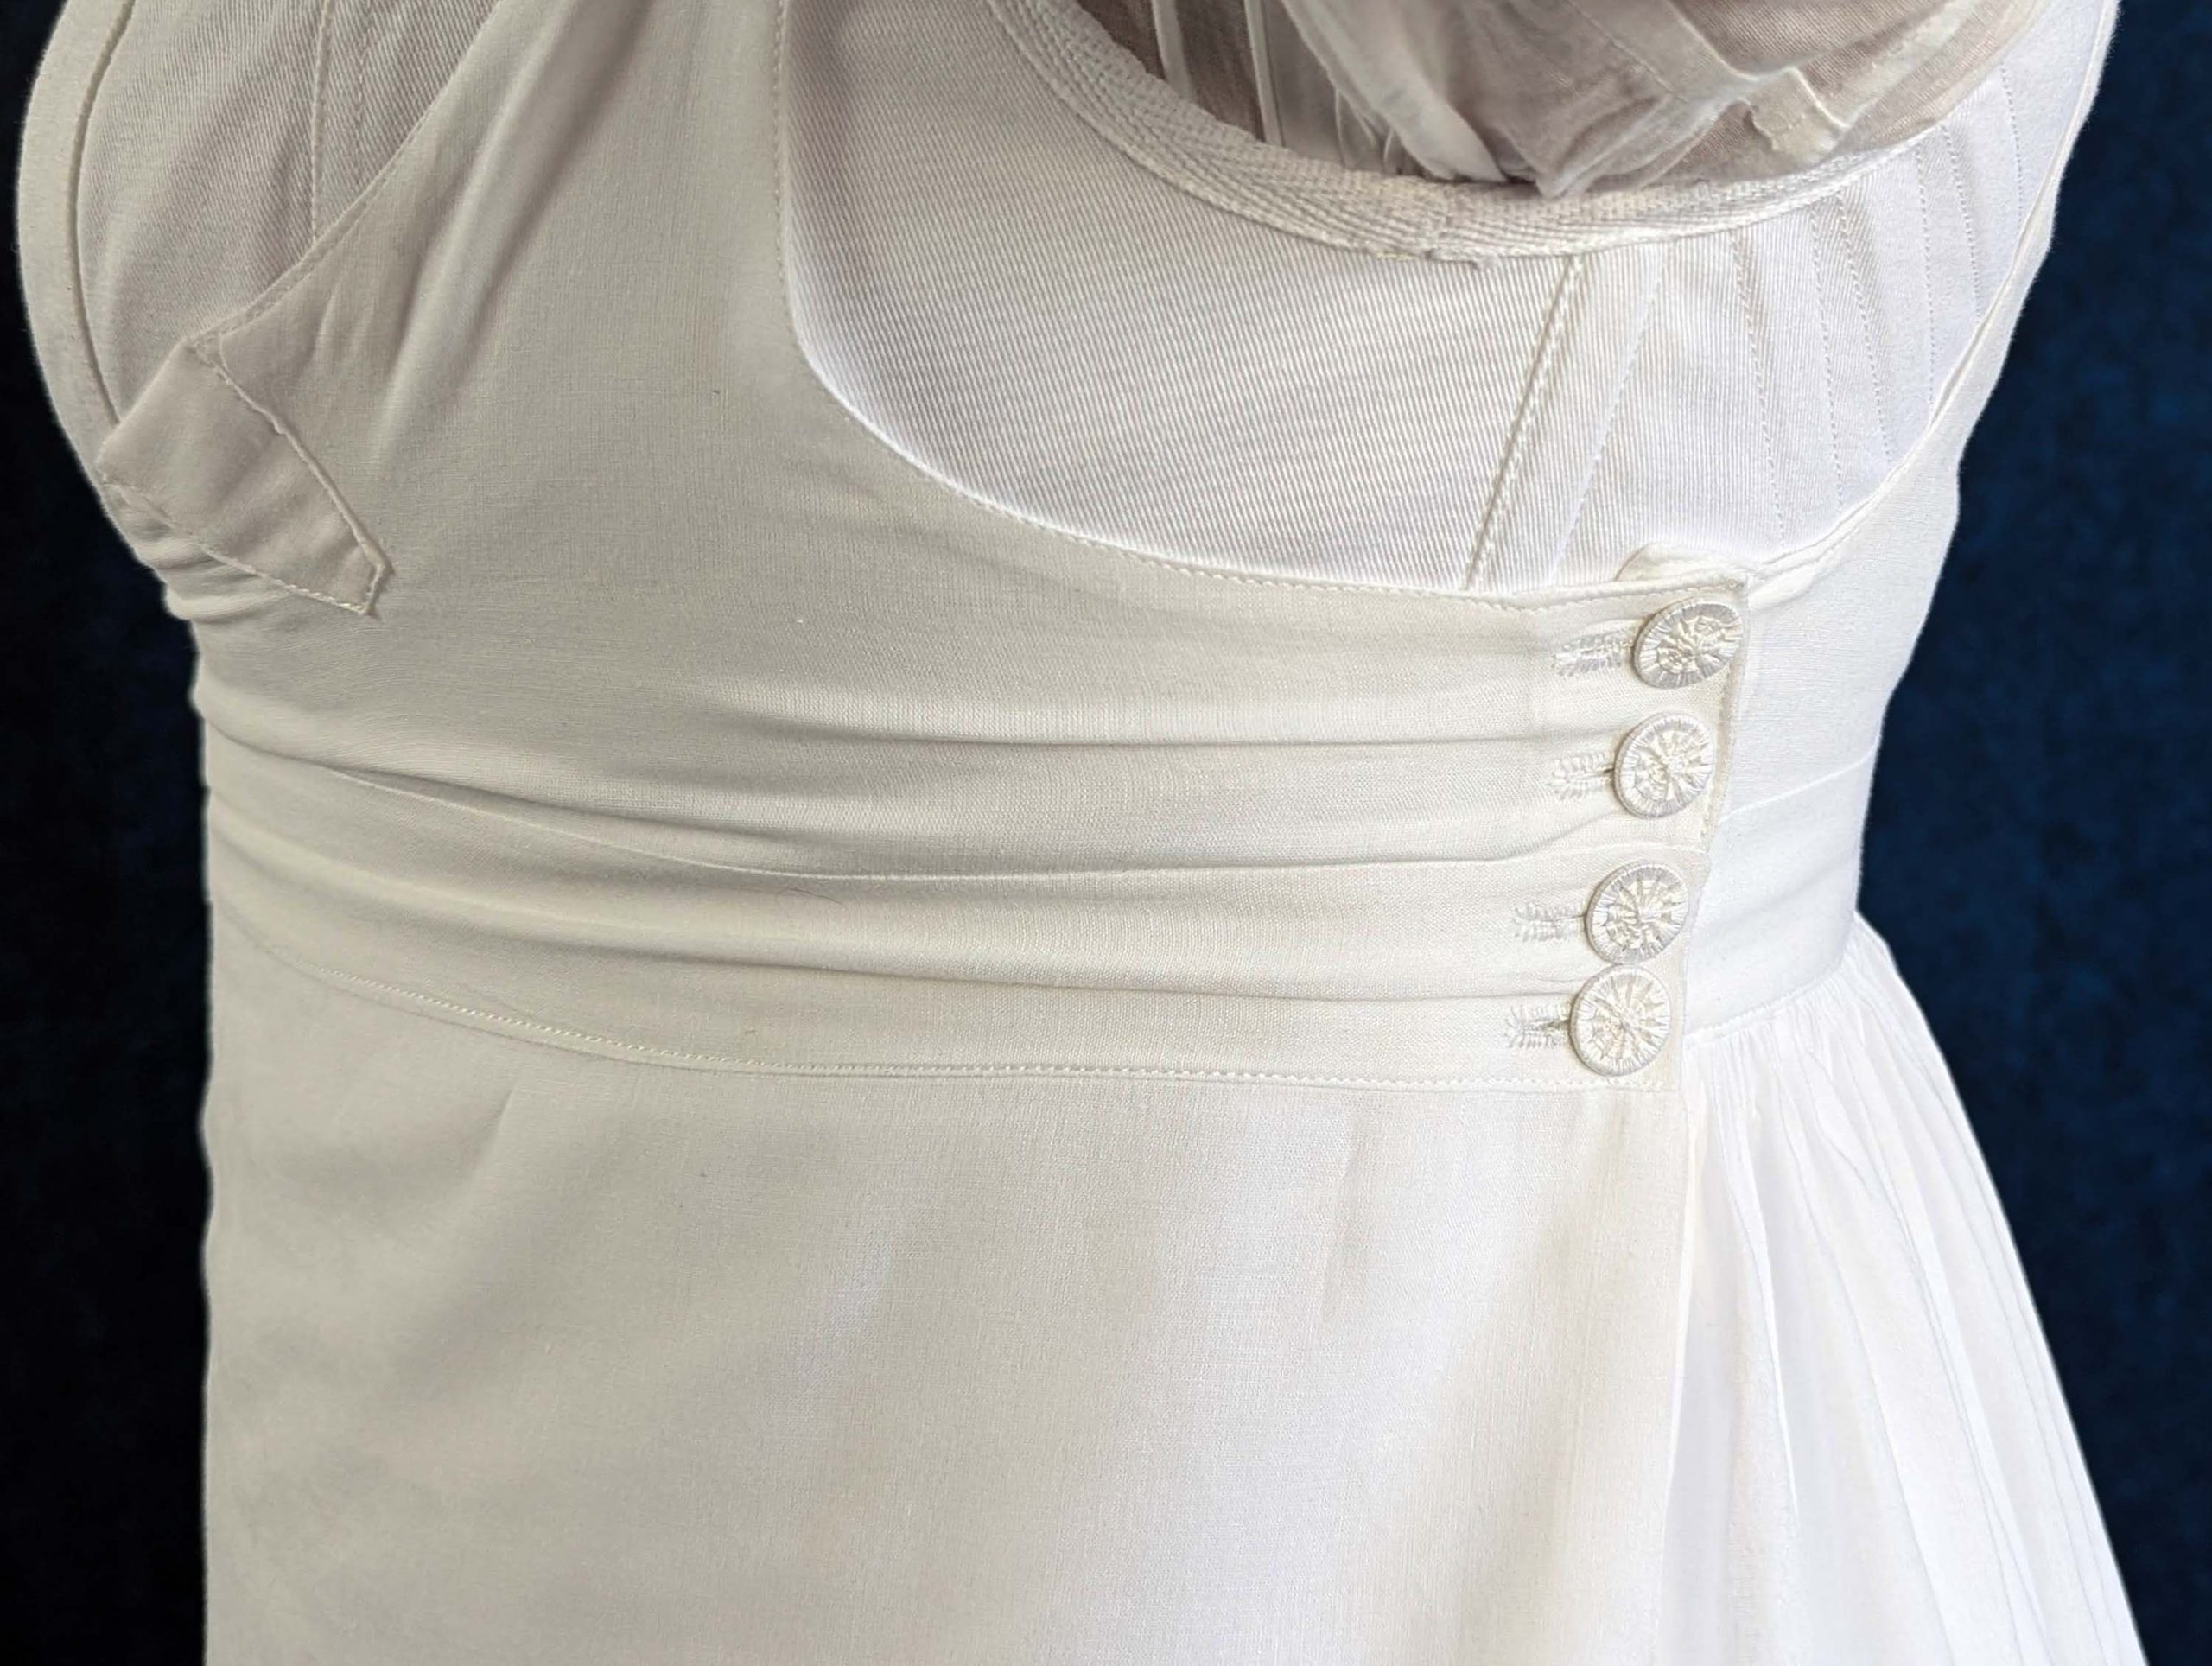
(3) Reinforce the ends of the waistband lining in the same way as described before. Without bodice: Line up the waistband and waistband lining, right sides together, and stitch along the top edge, understitch if wanted. With bodice: sandwich the bodice between the two layers, respecting all marks.
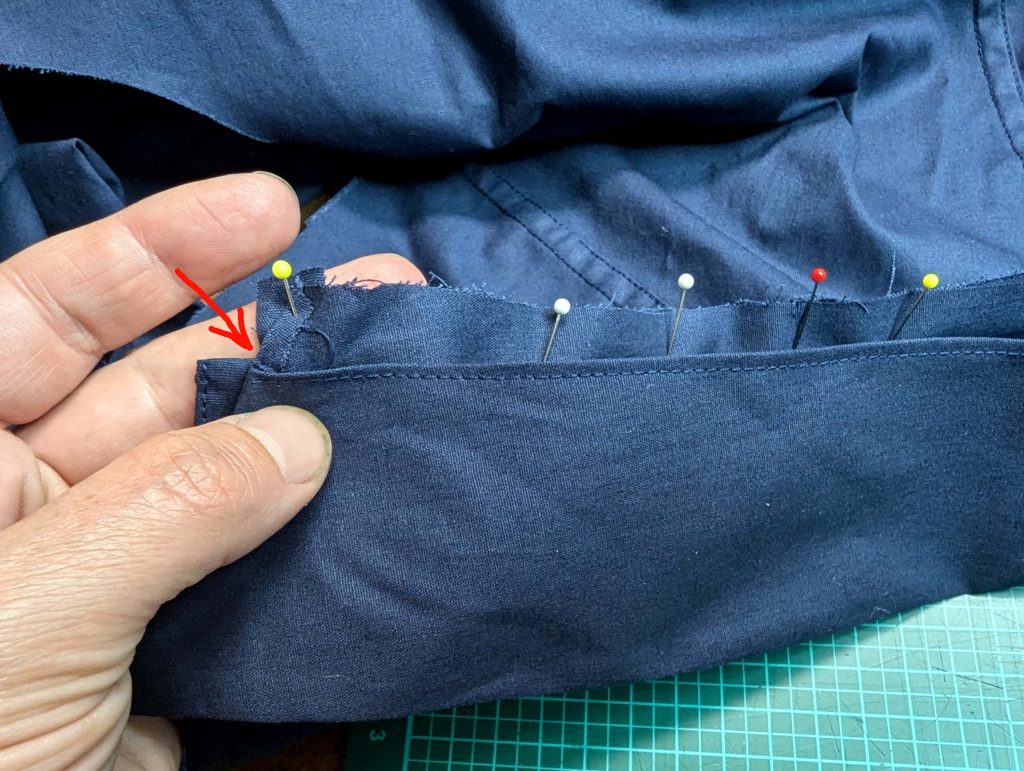
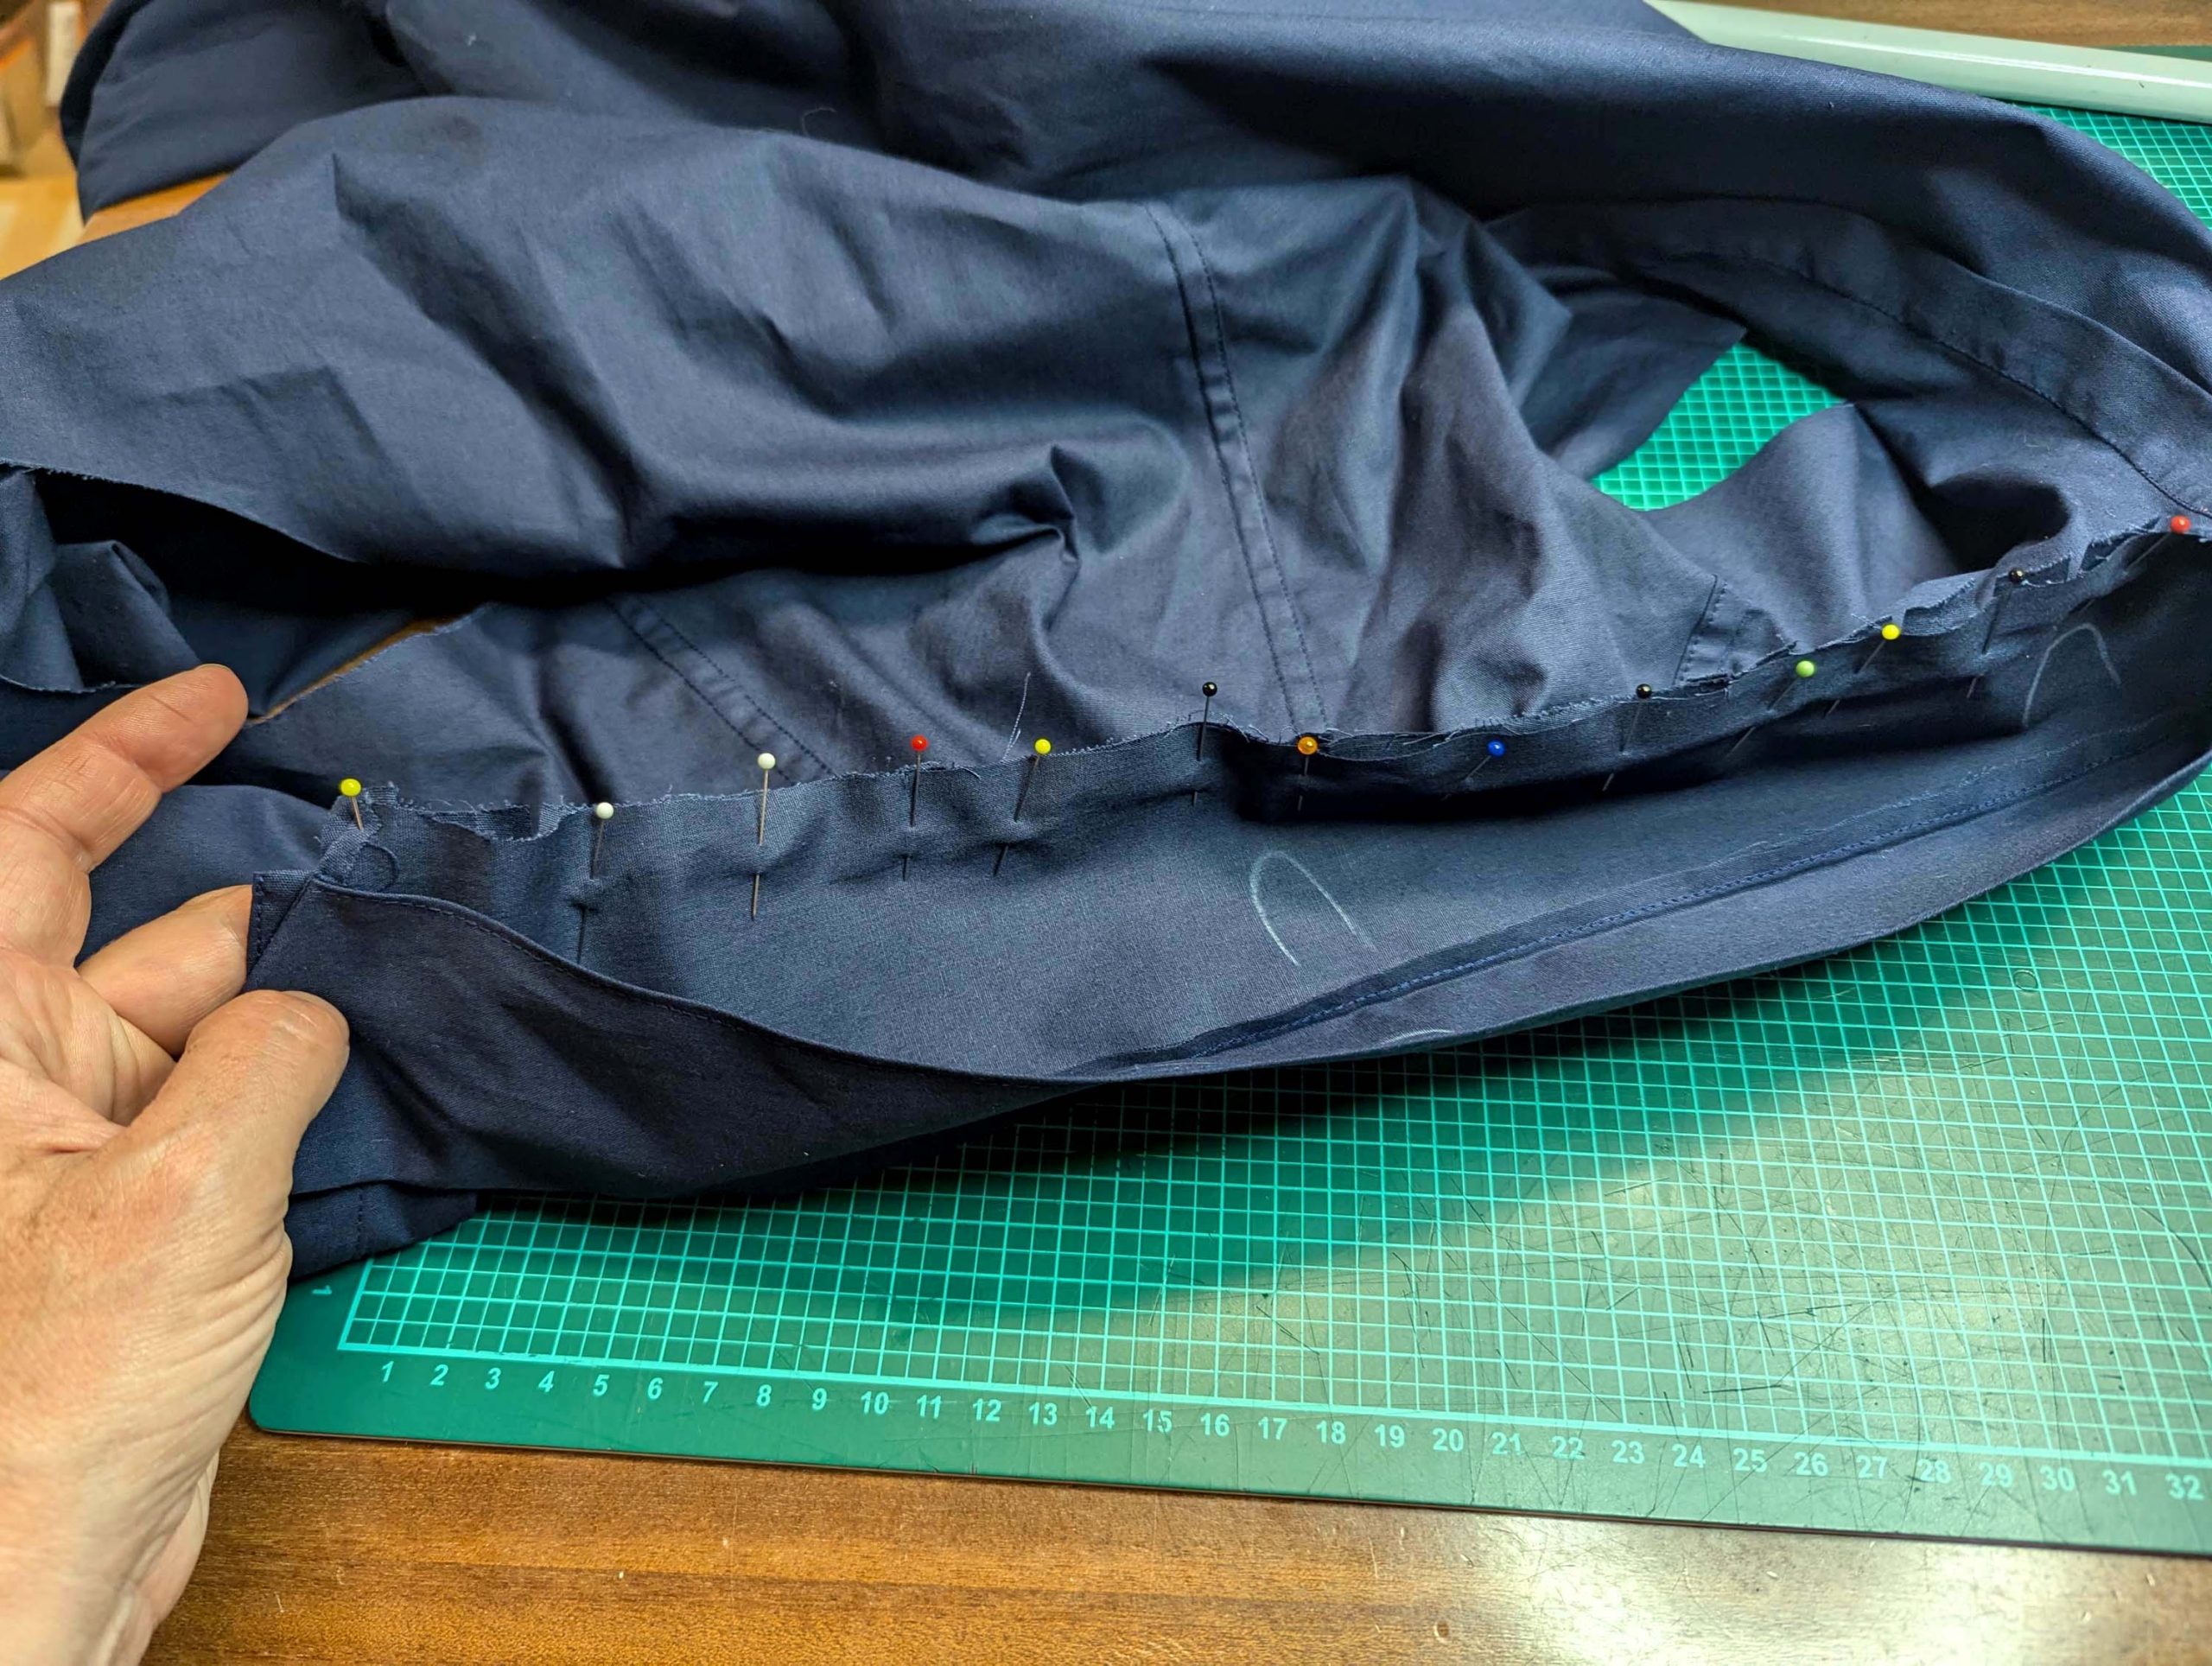
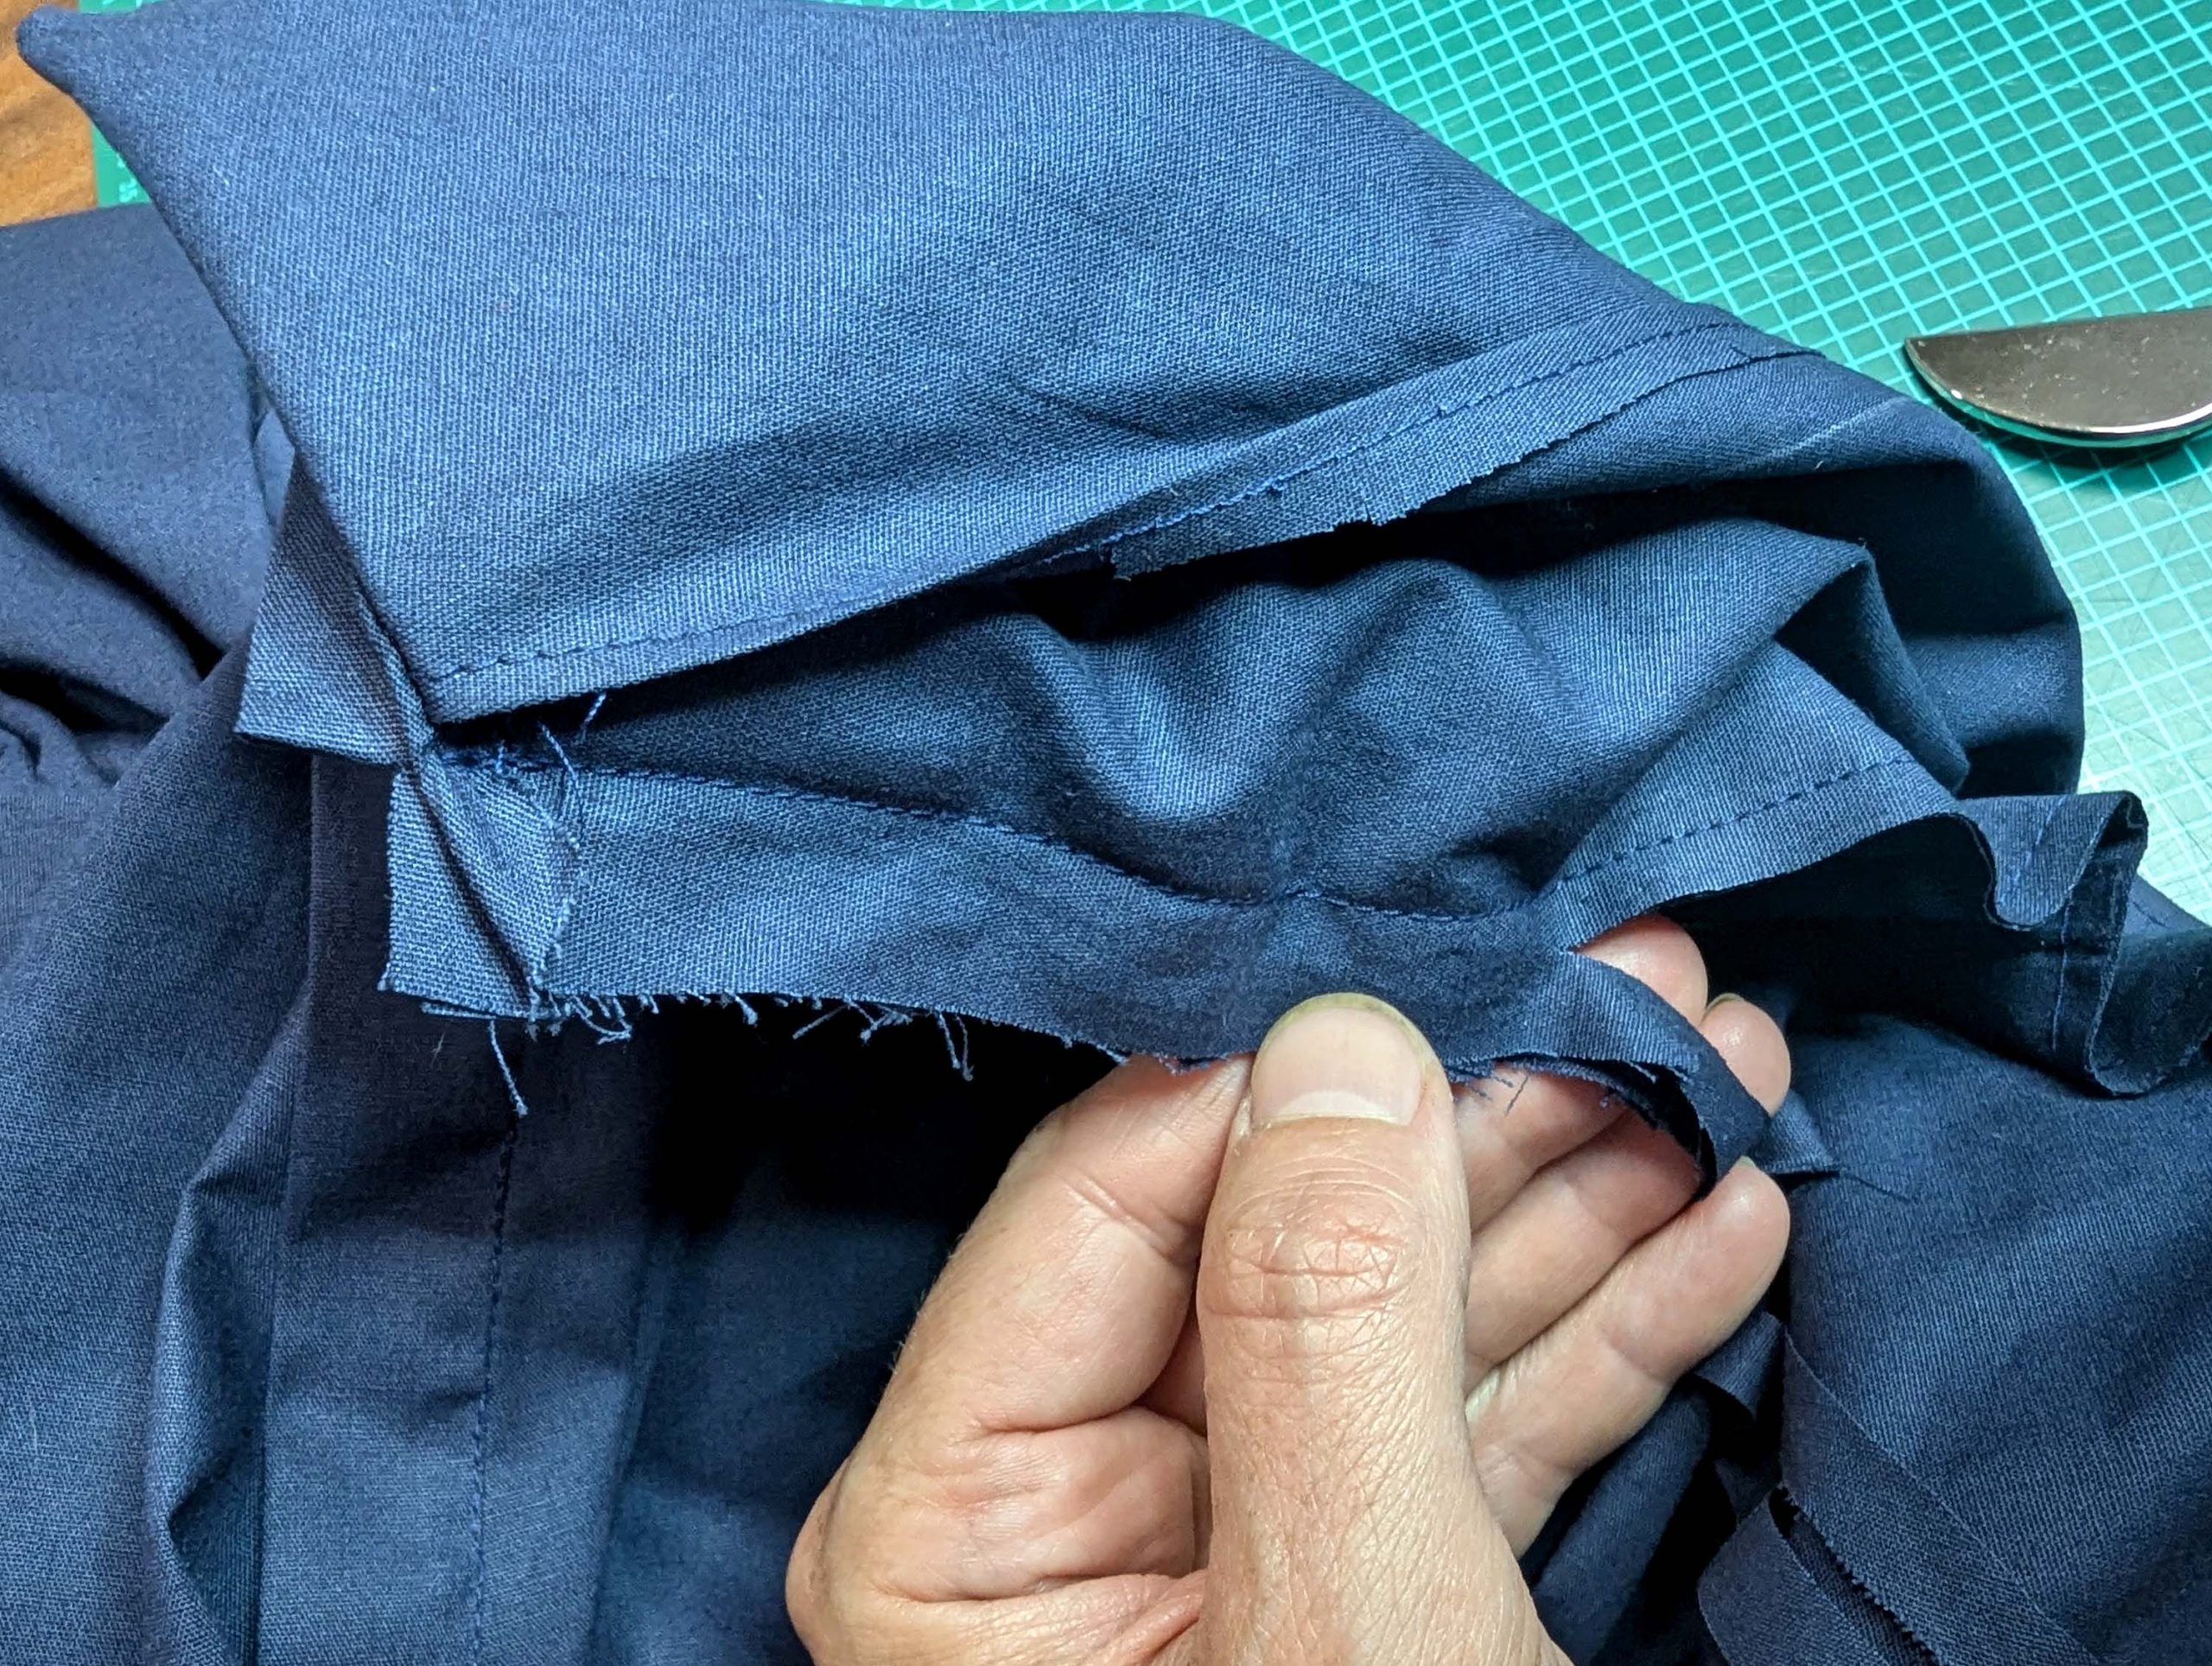
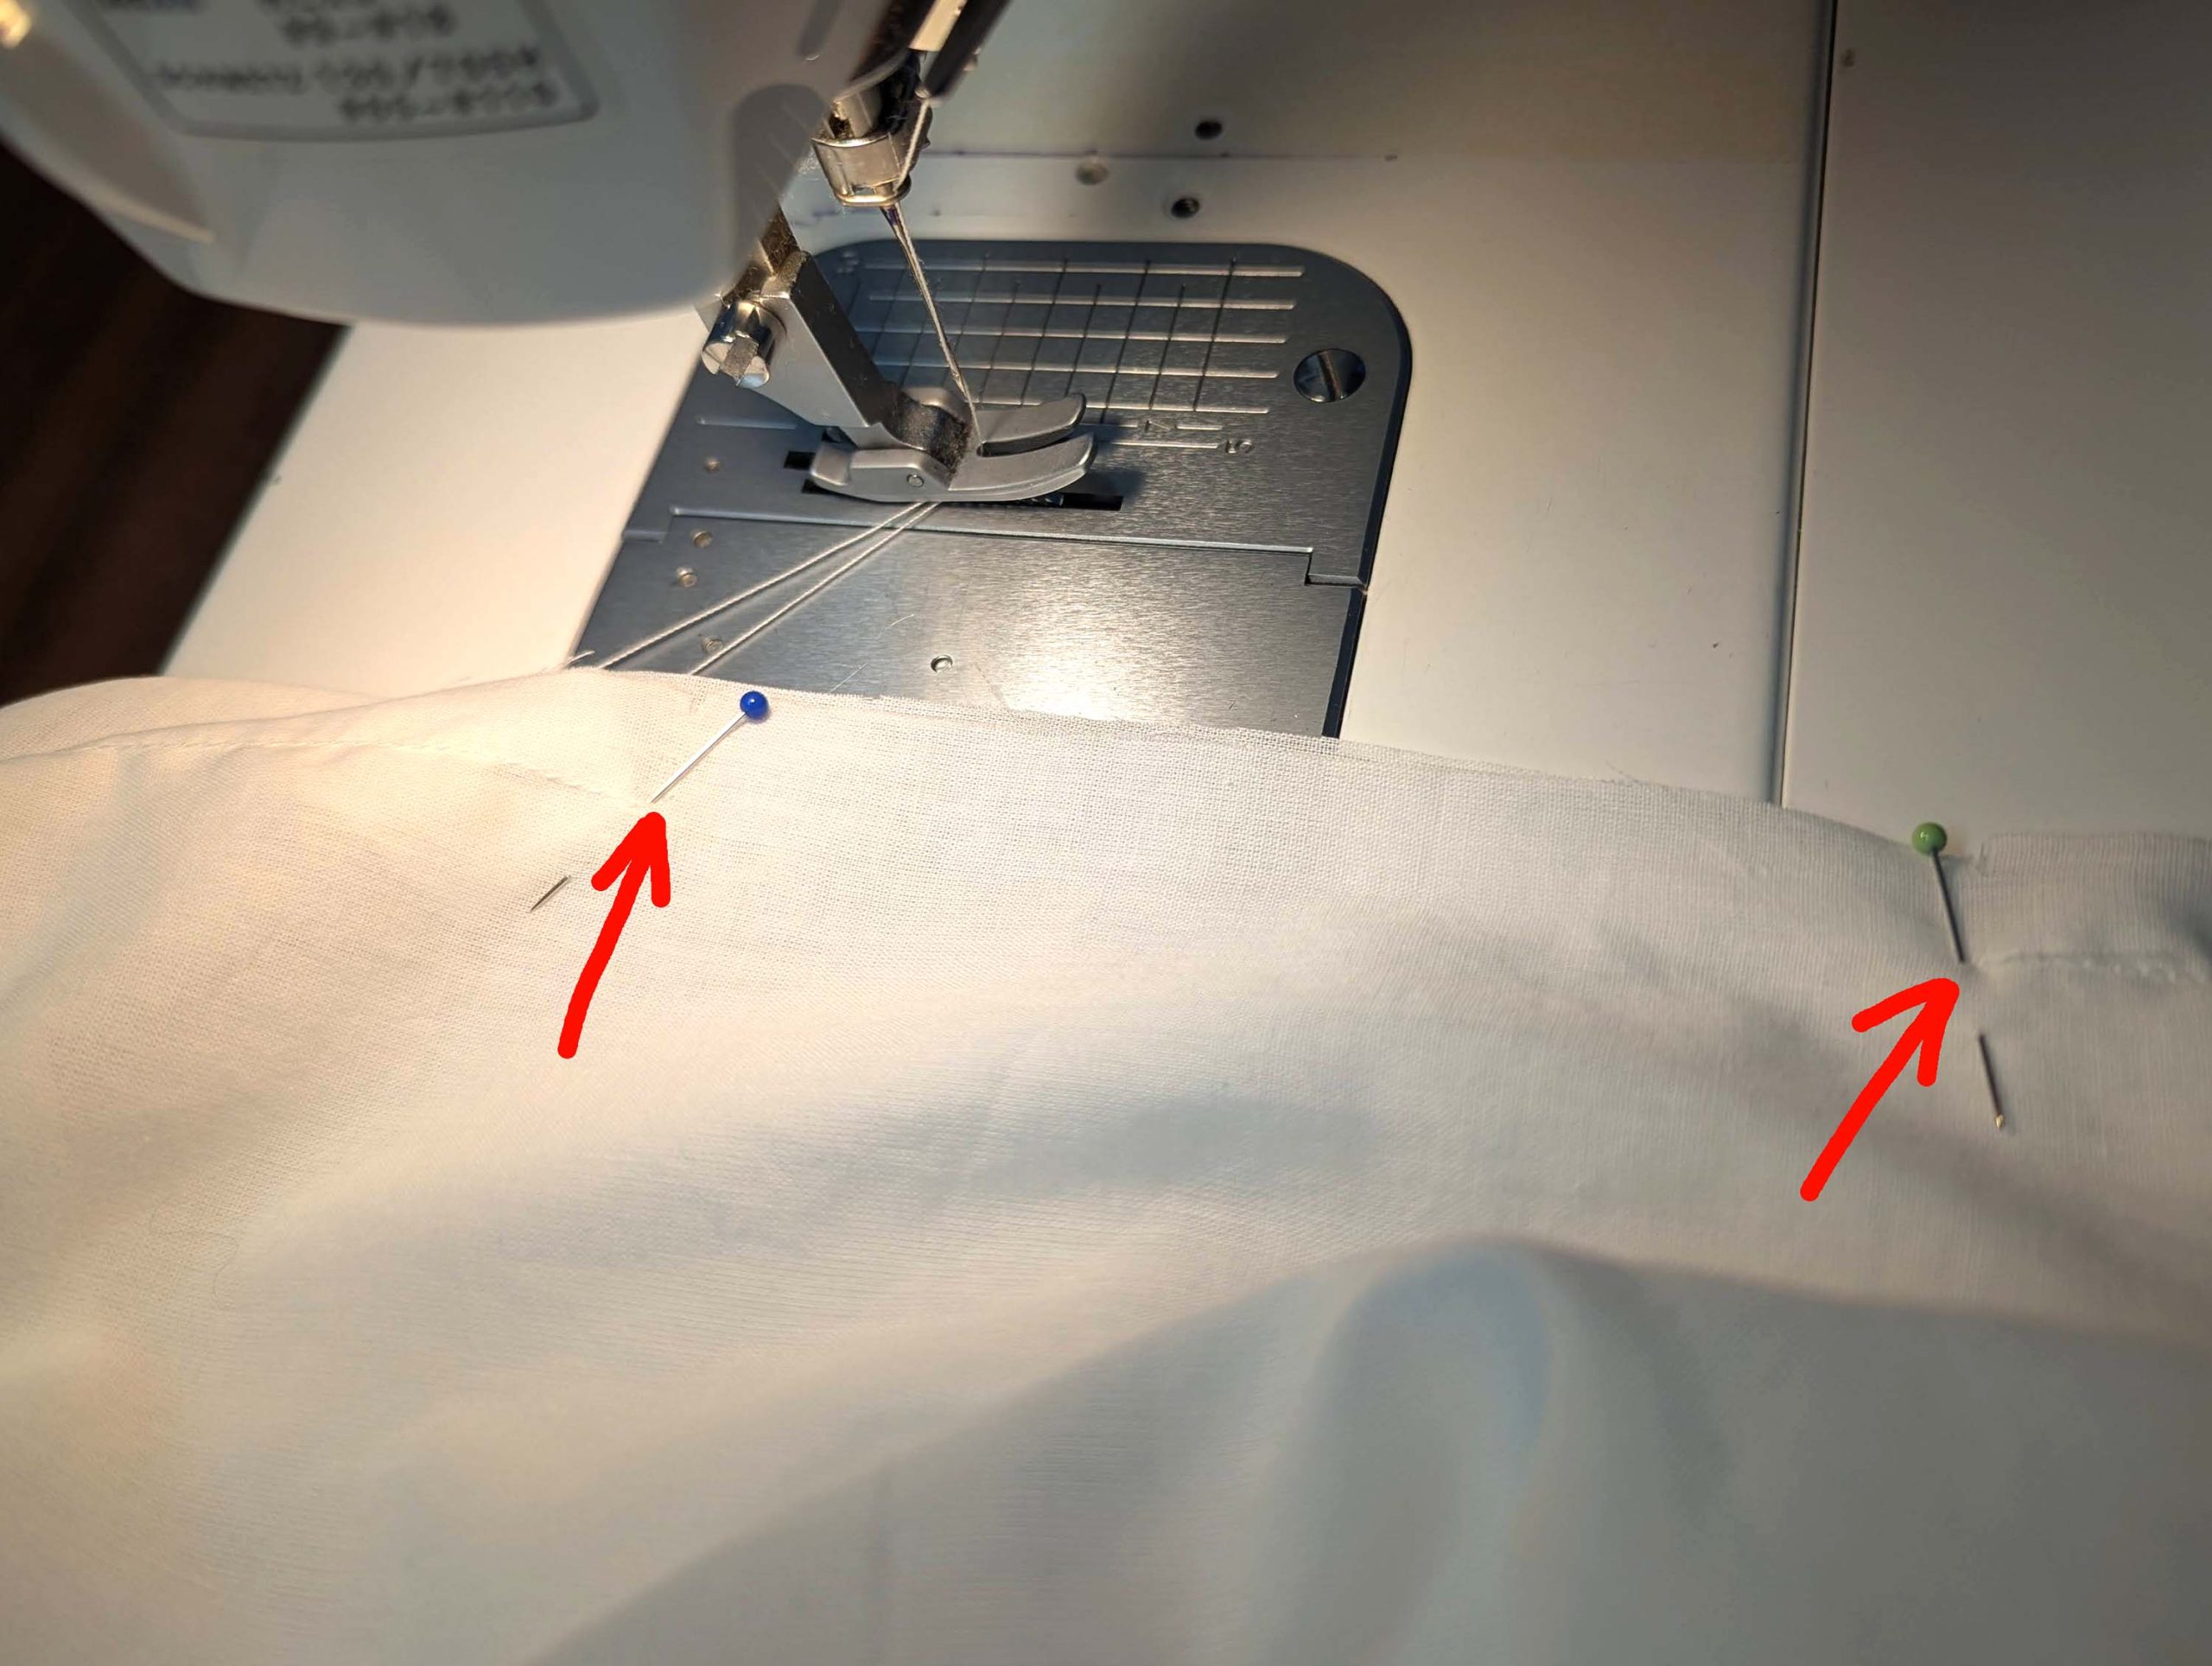
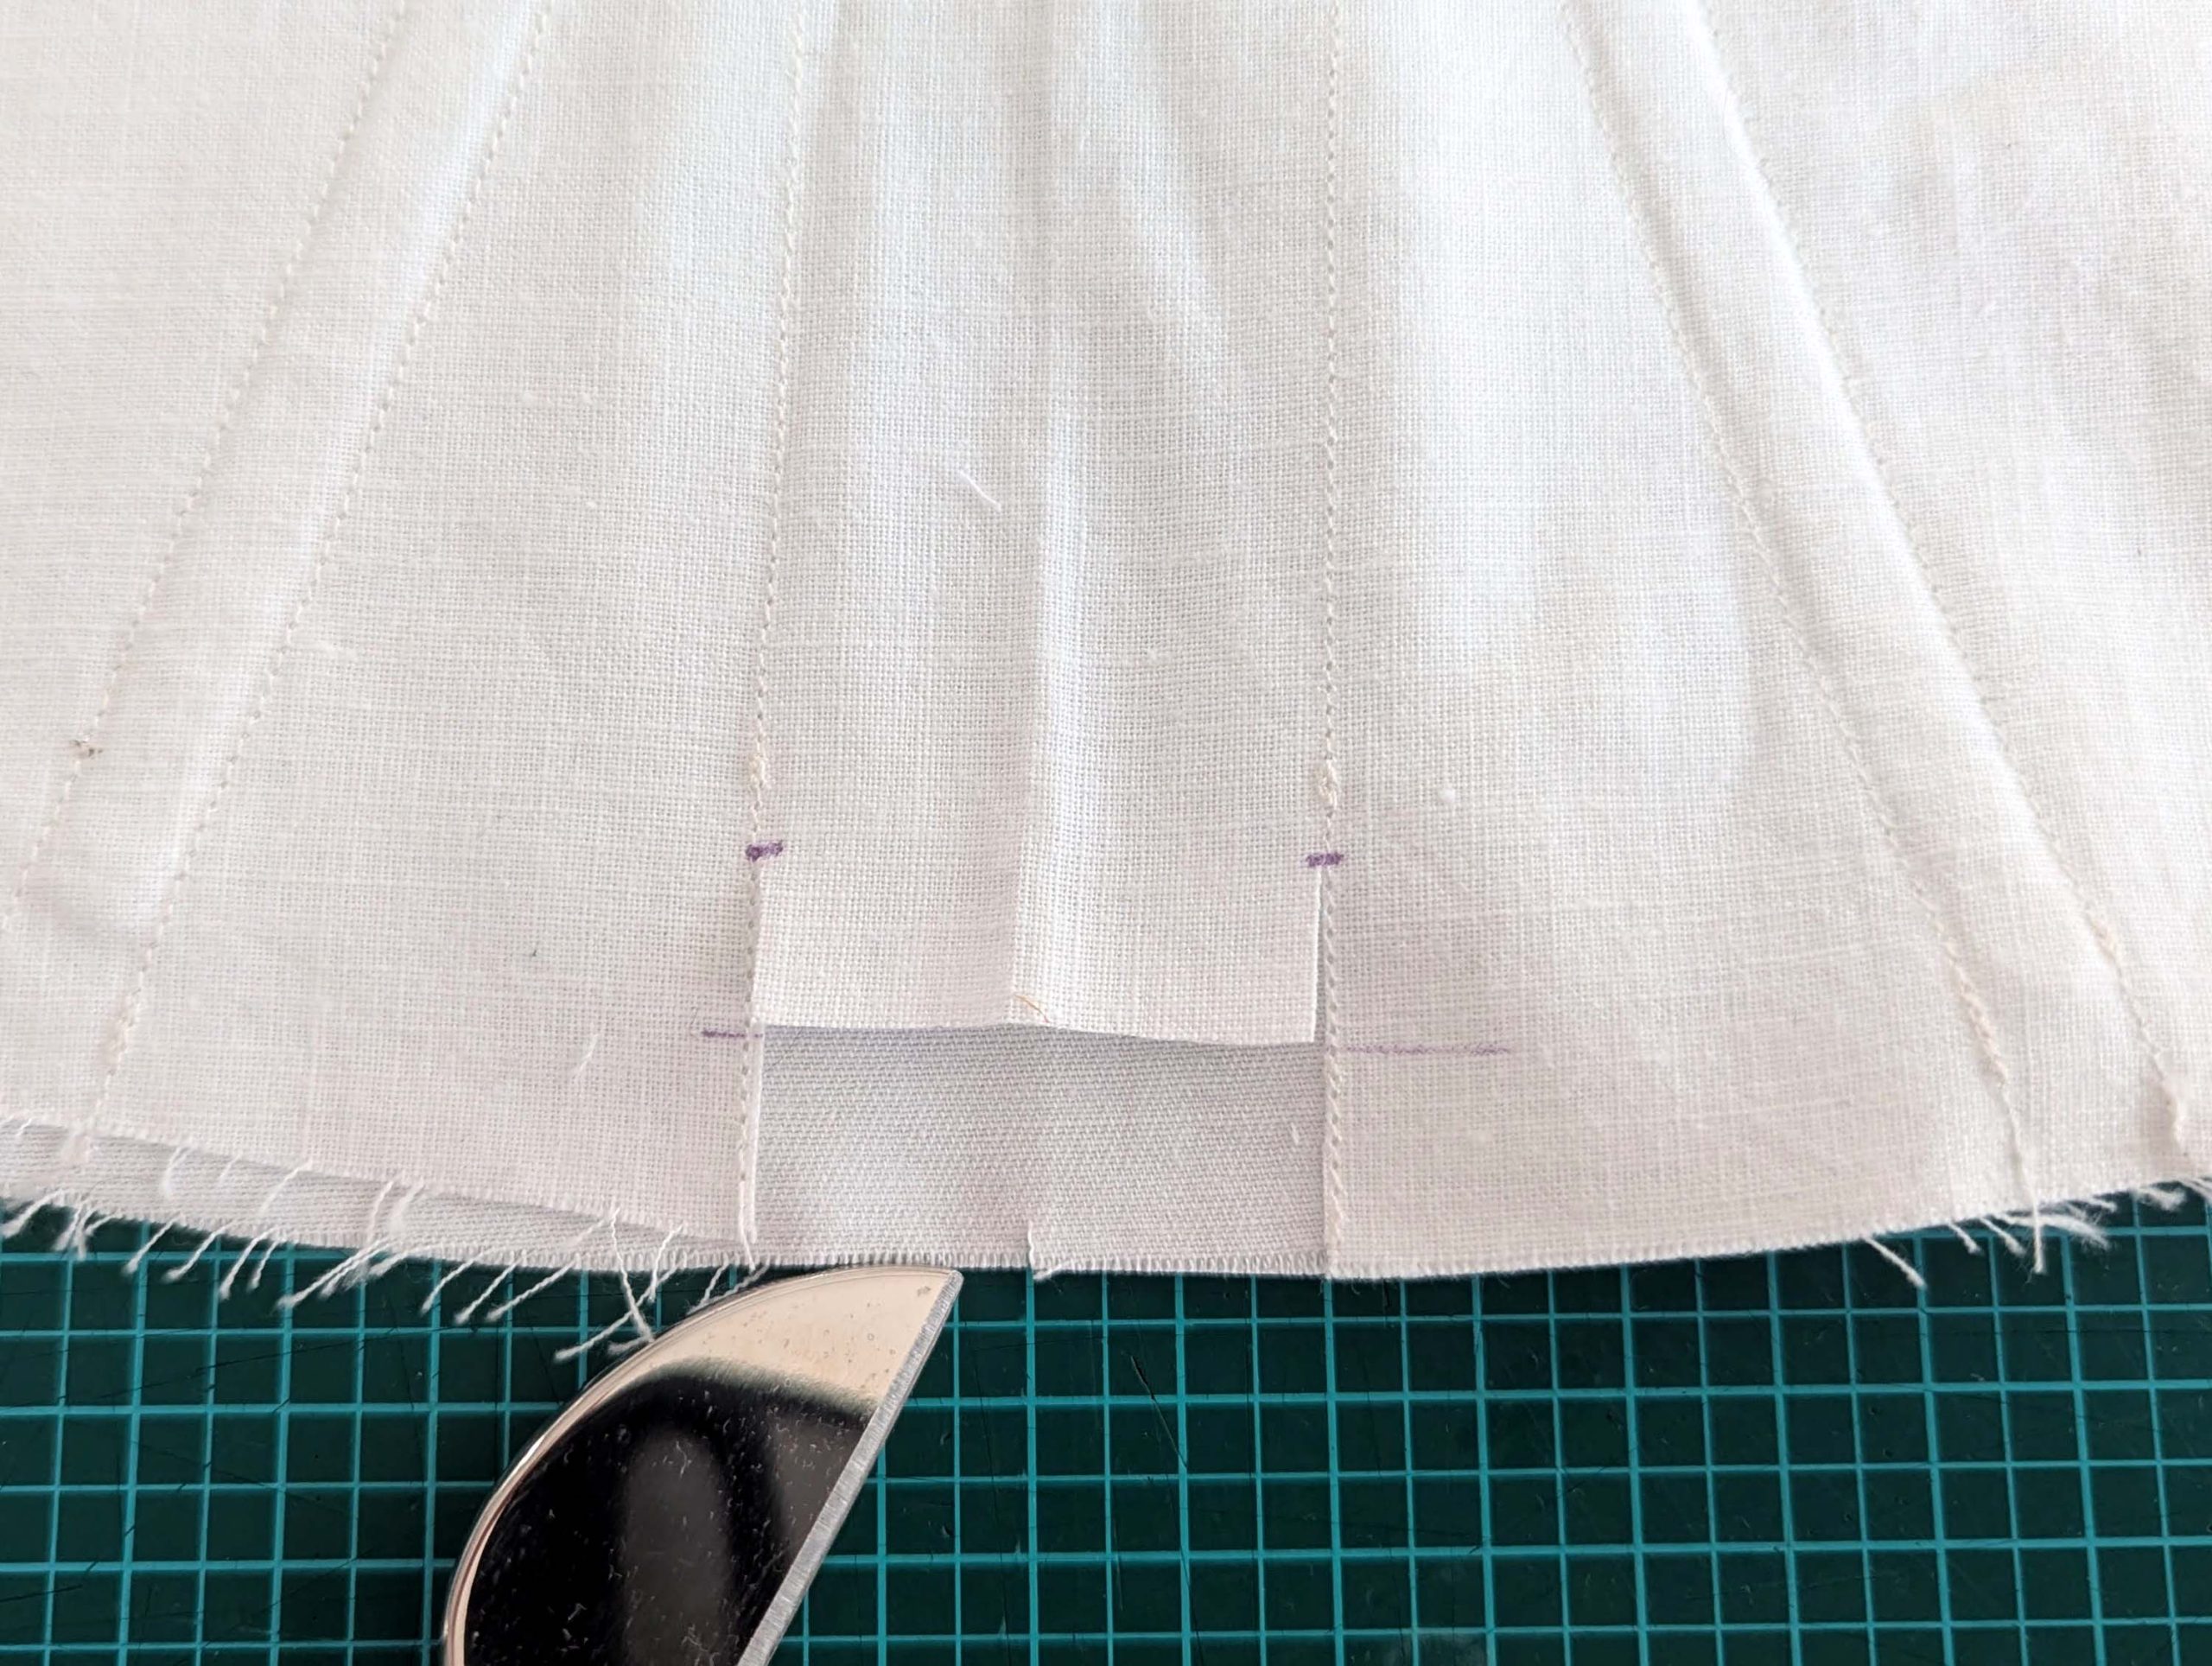
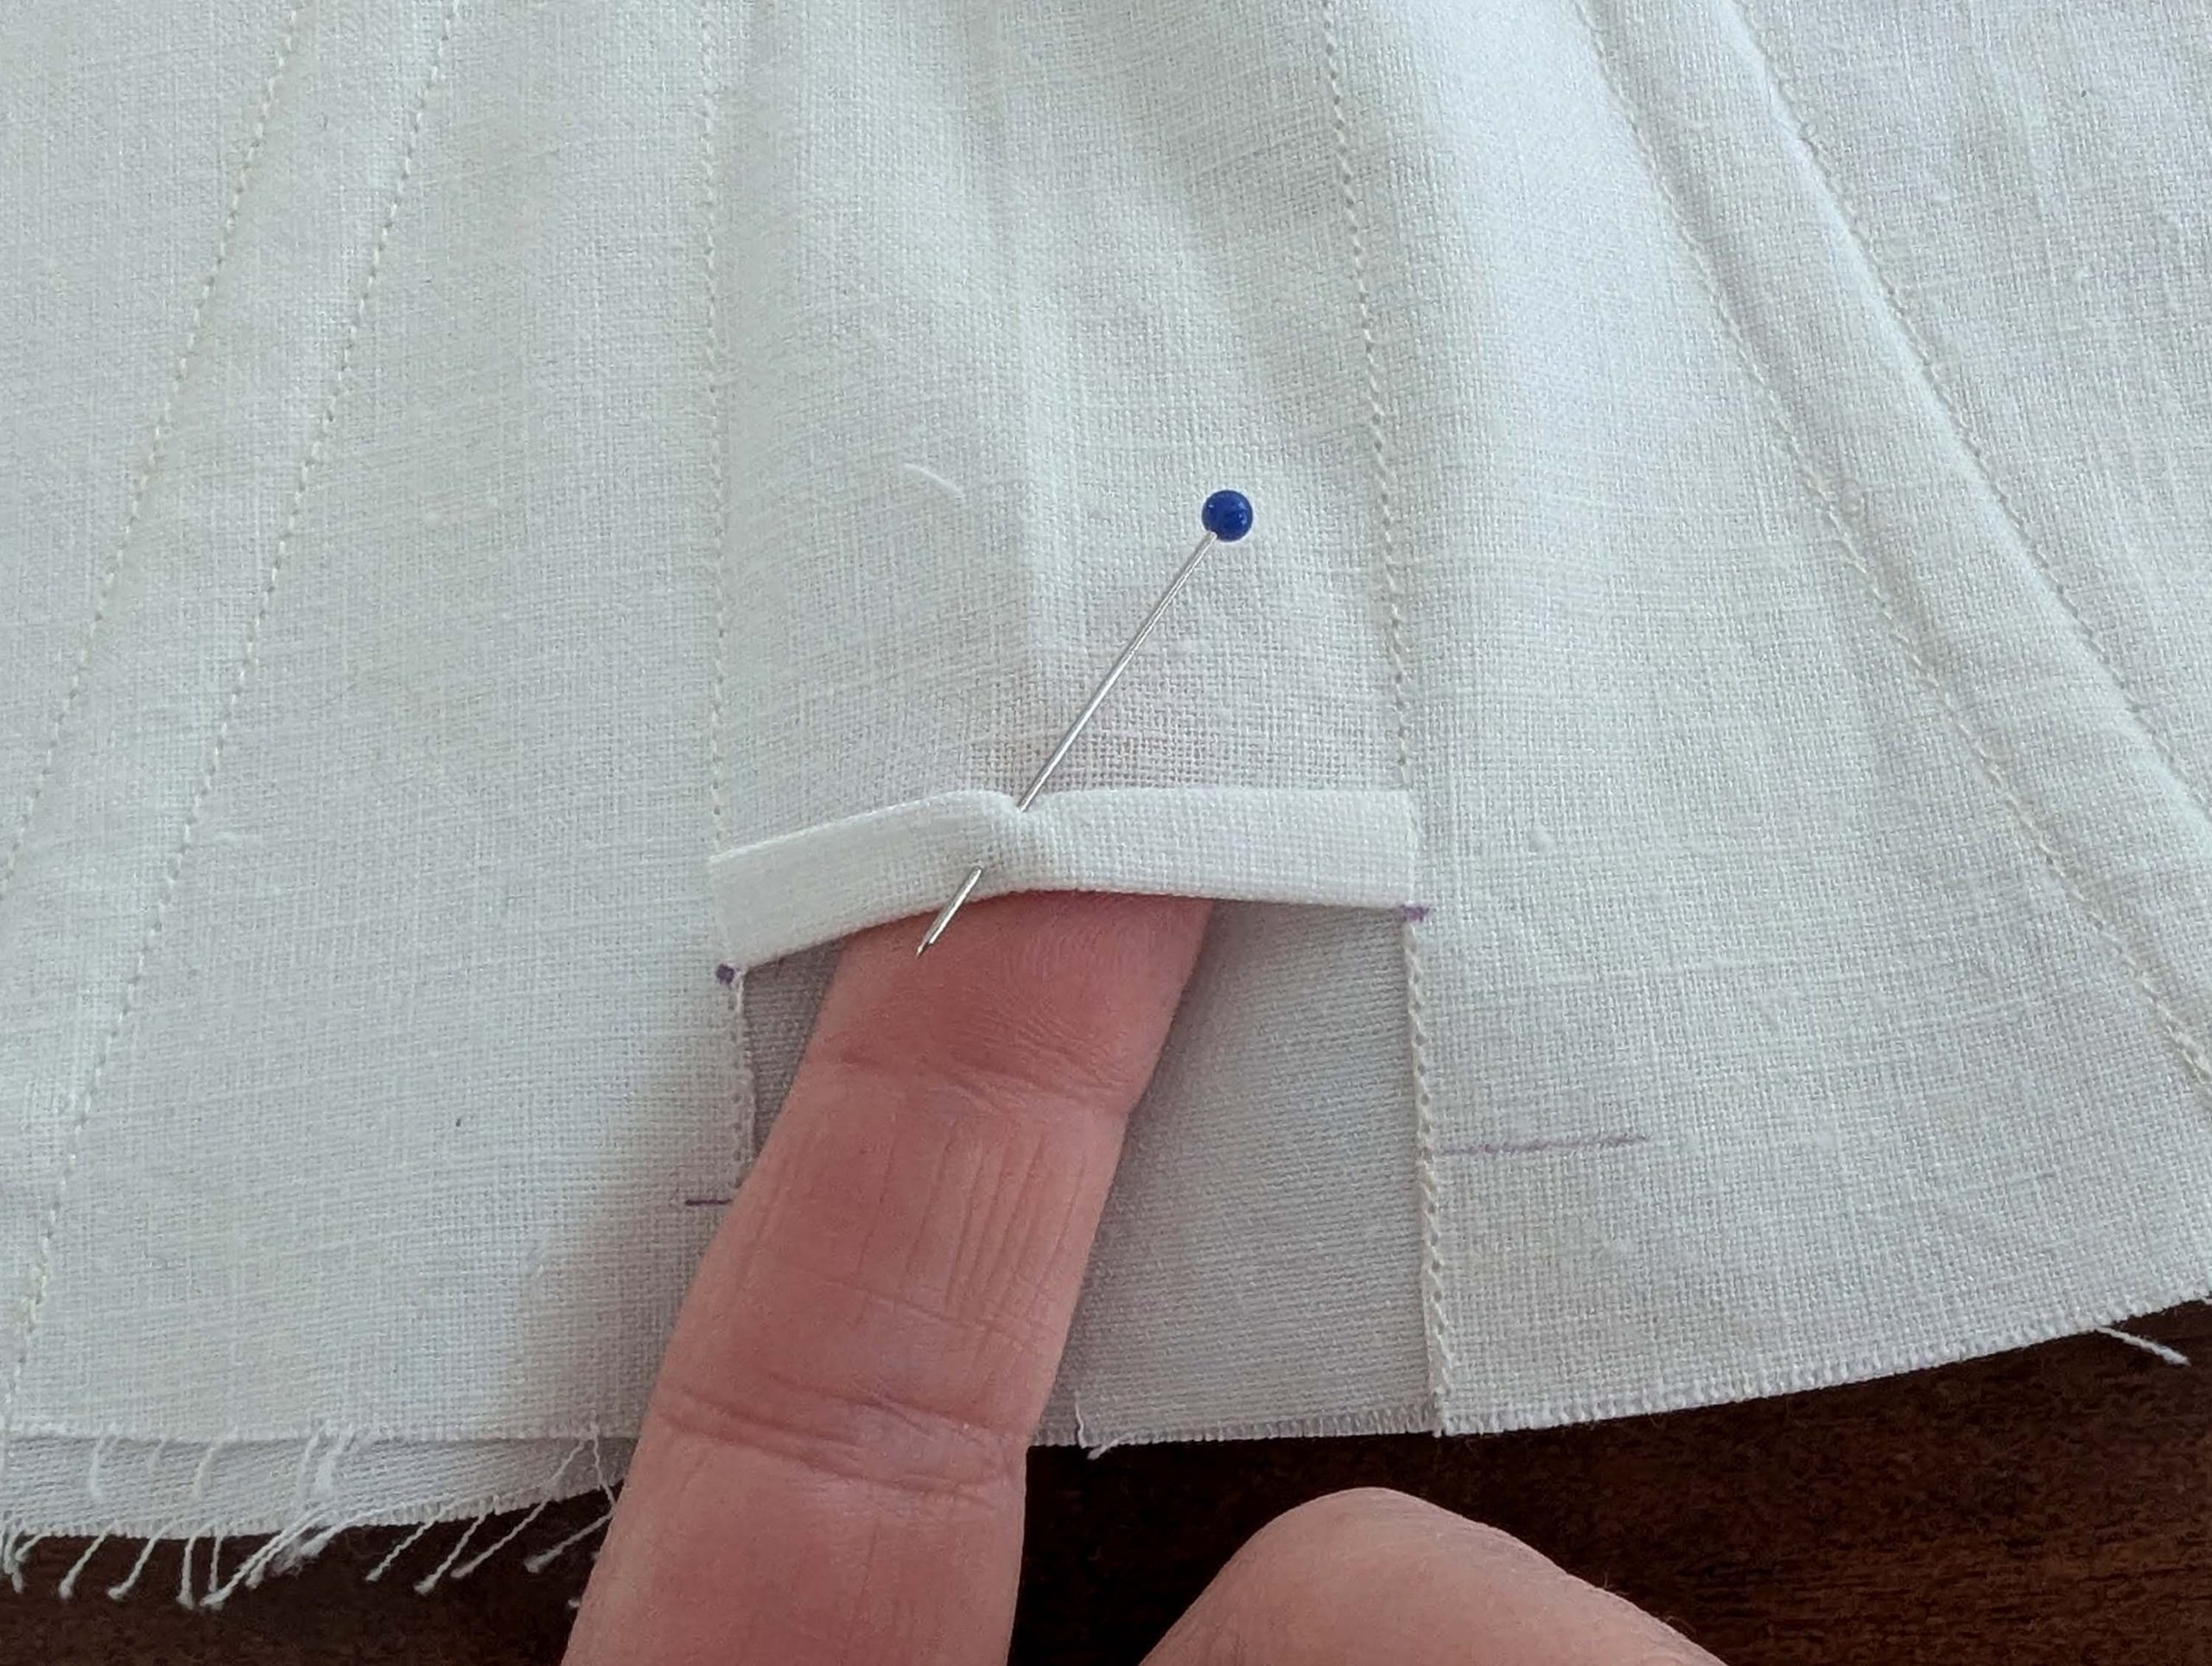
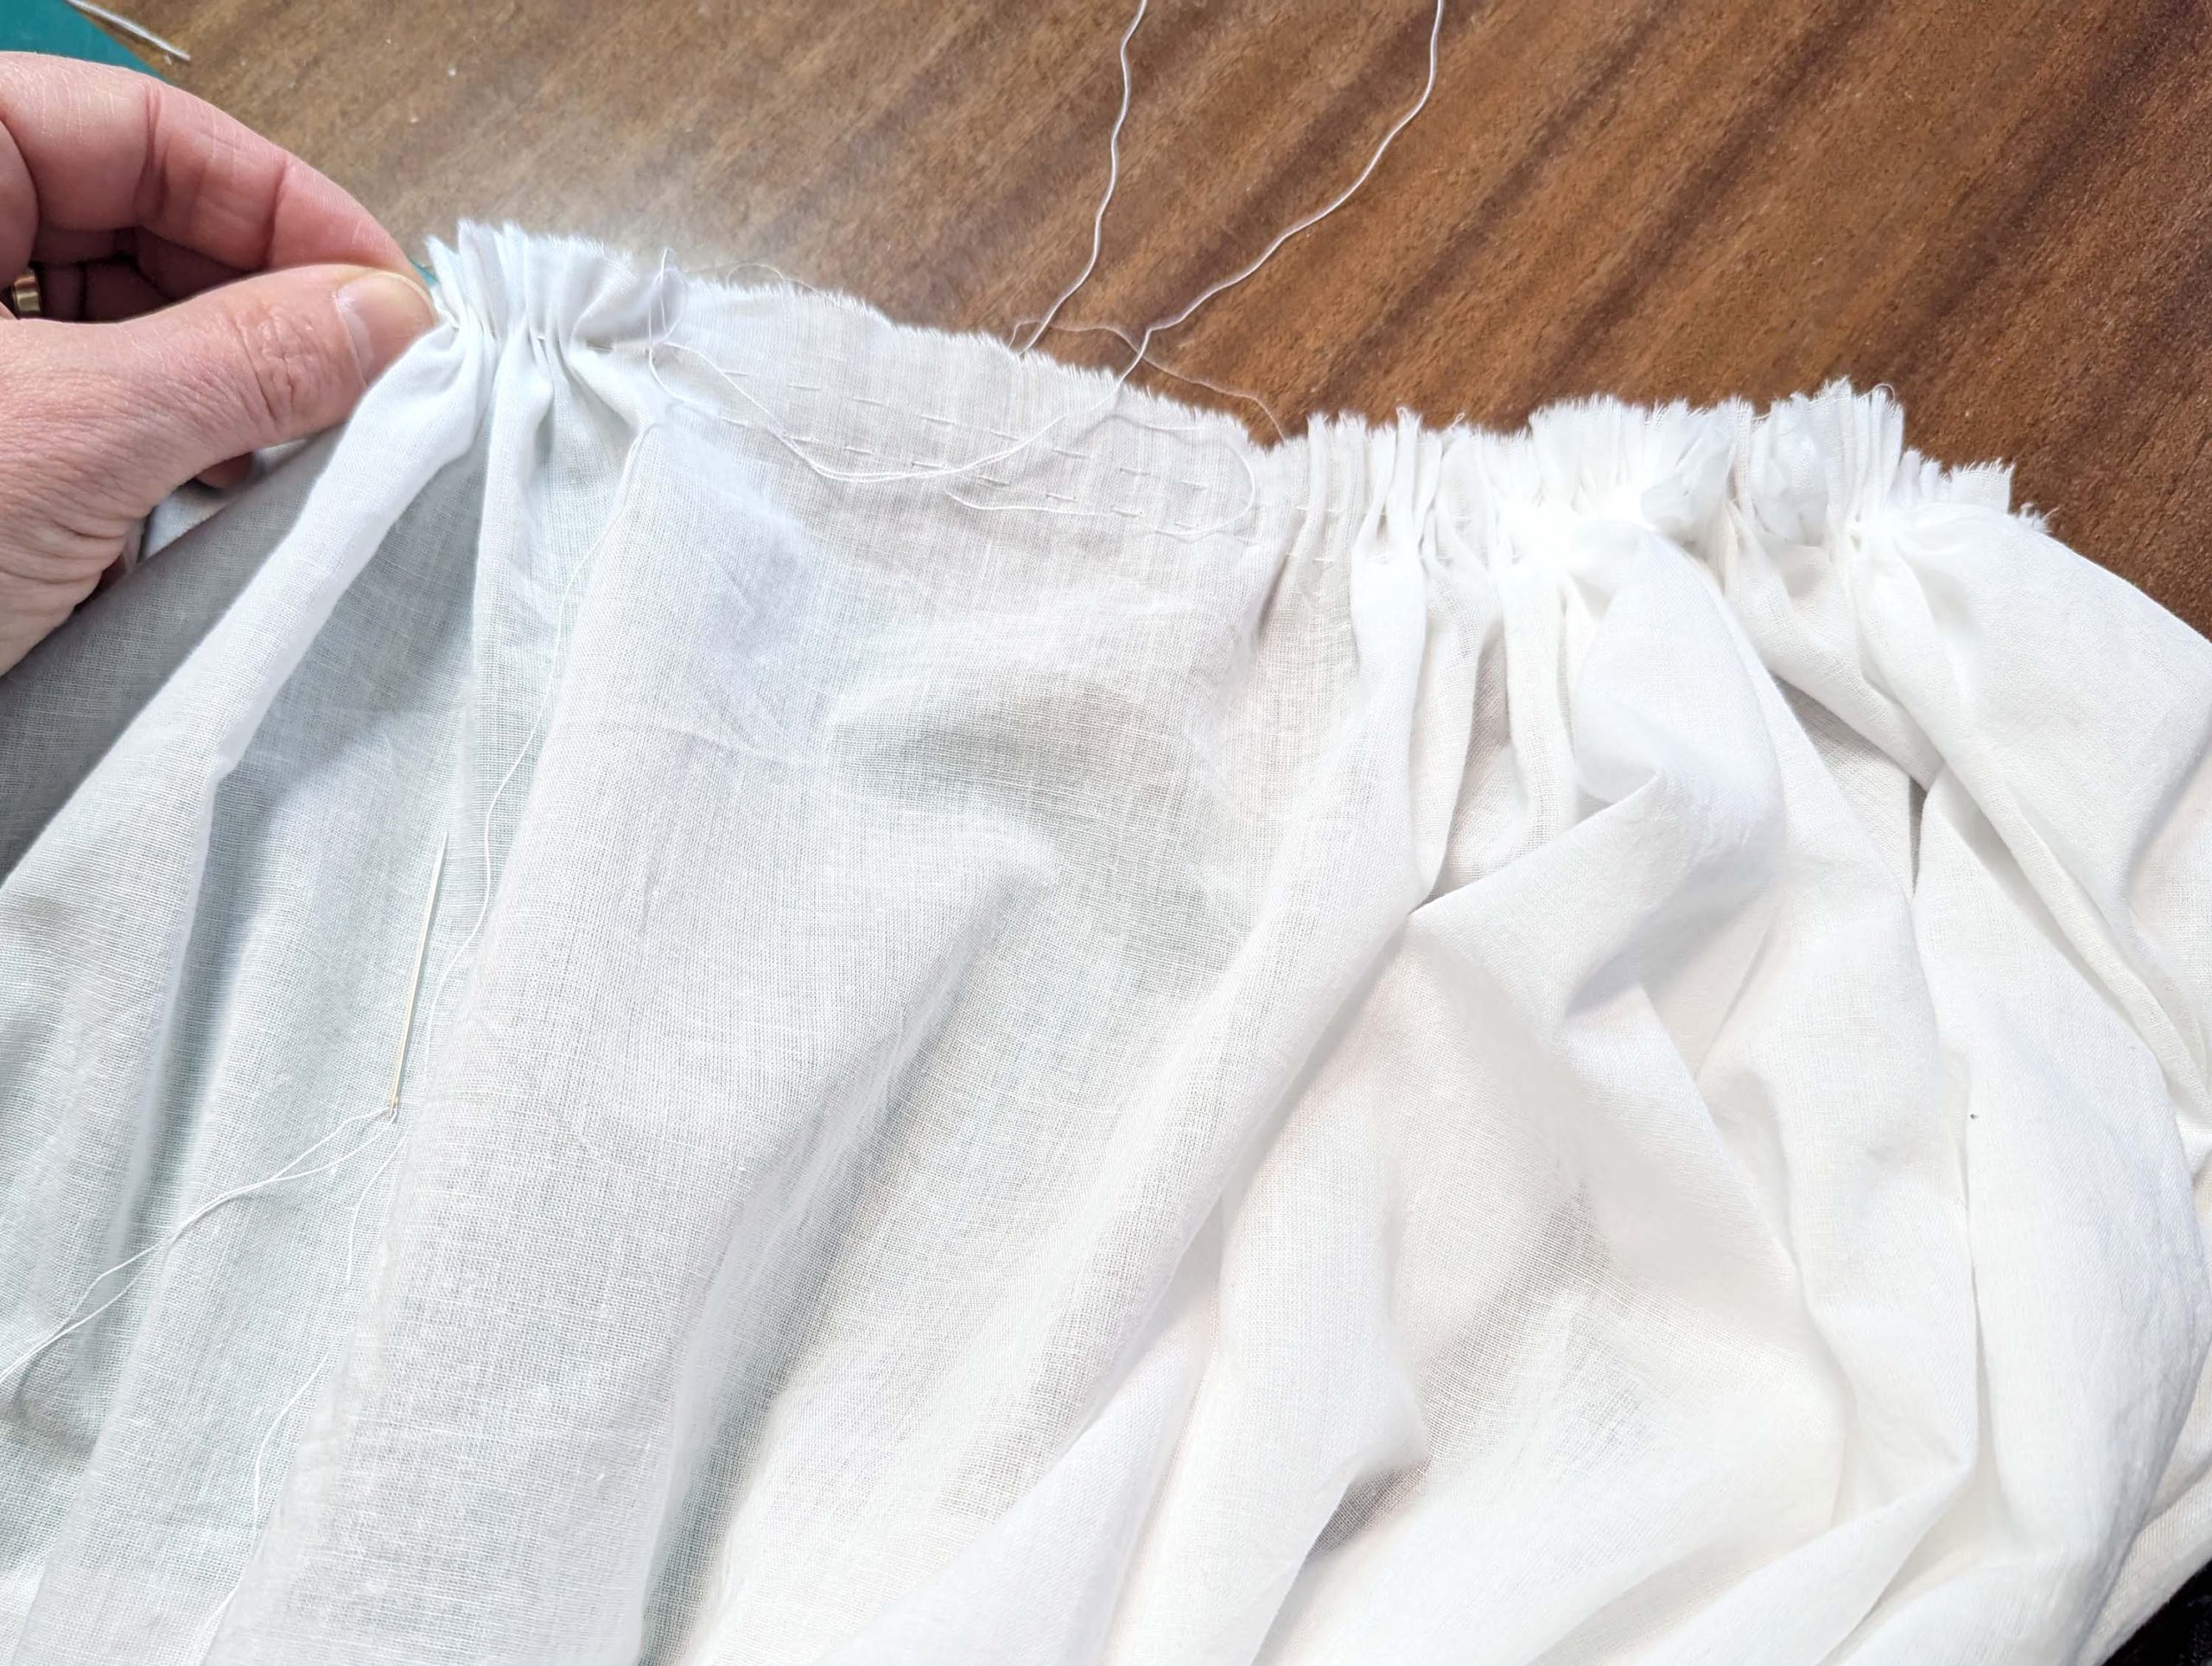
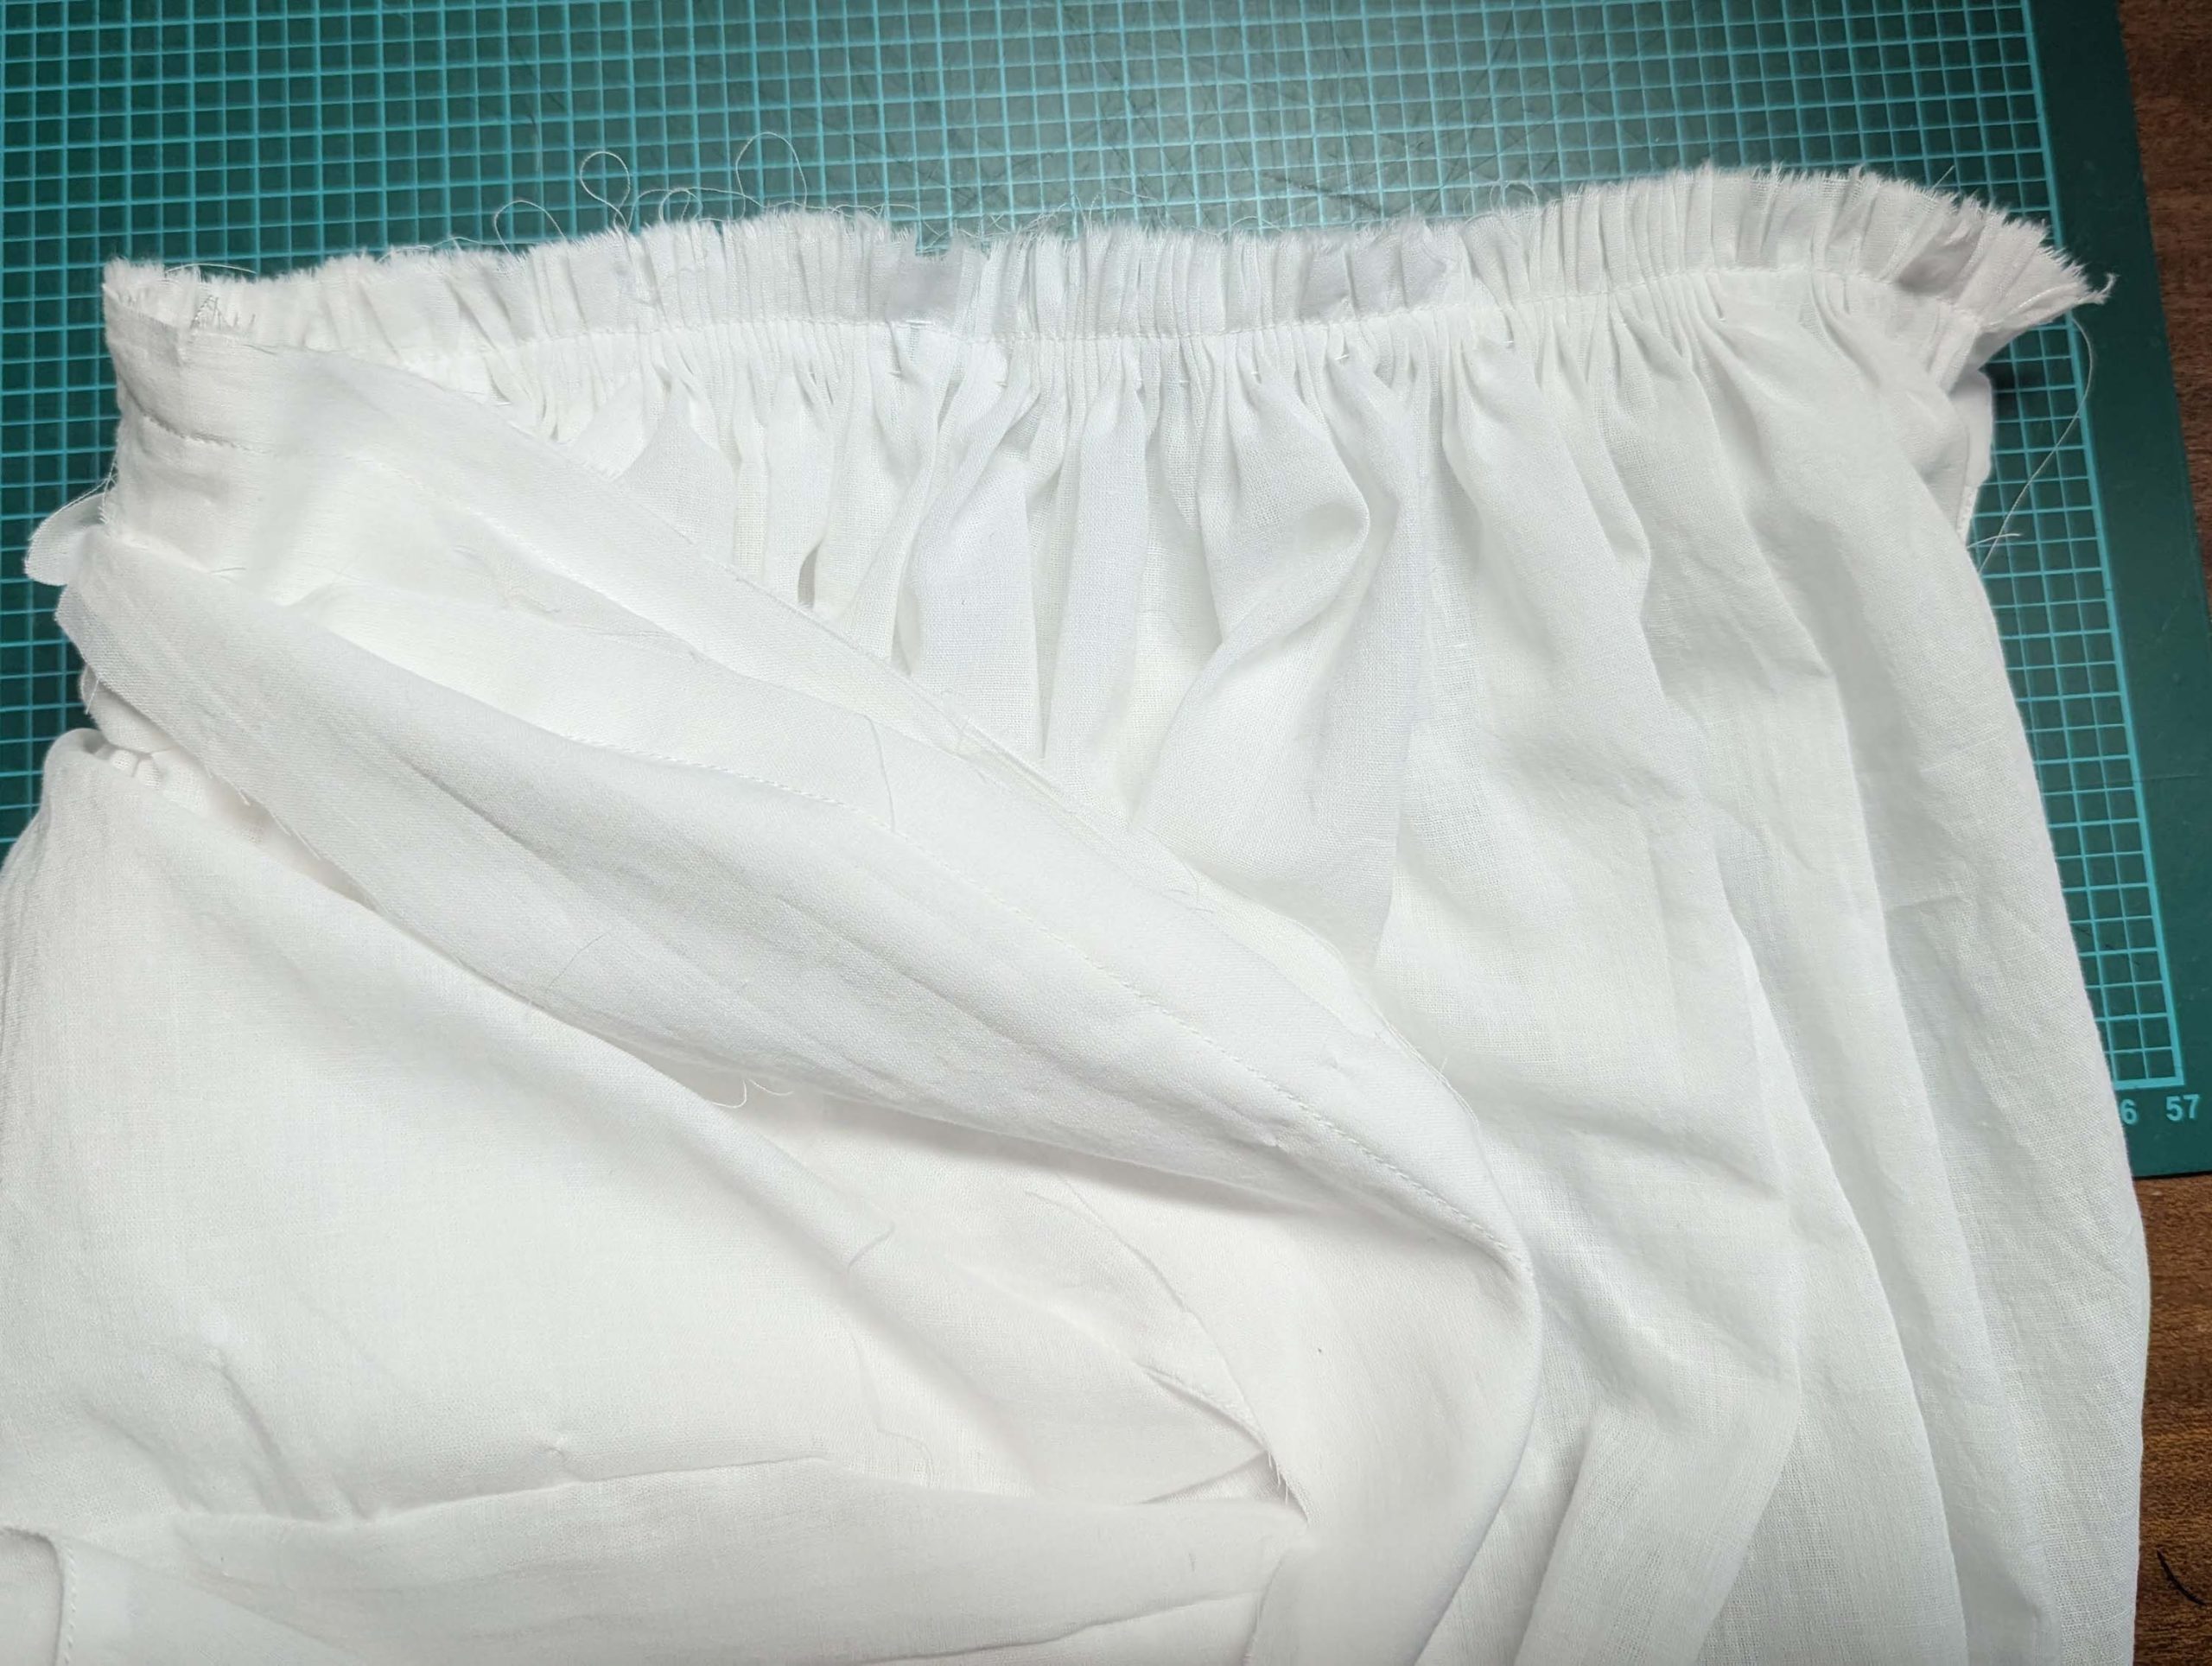
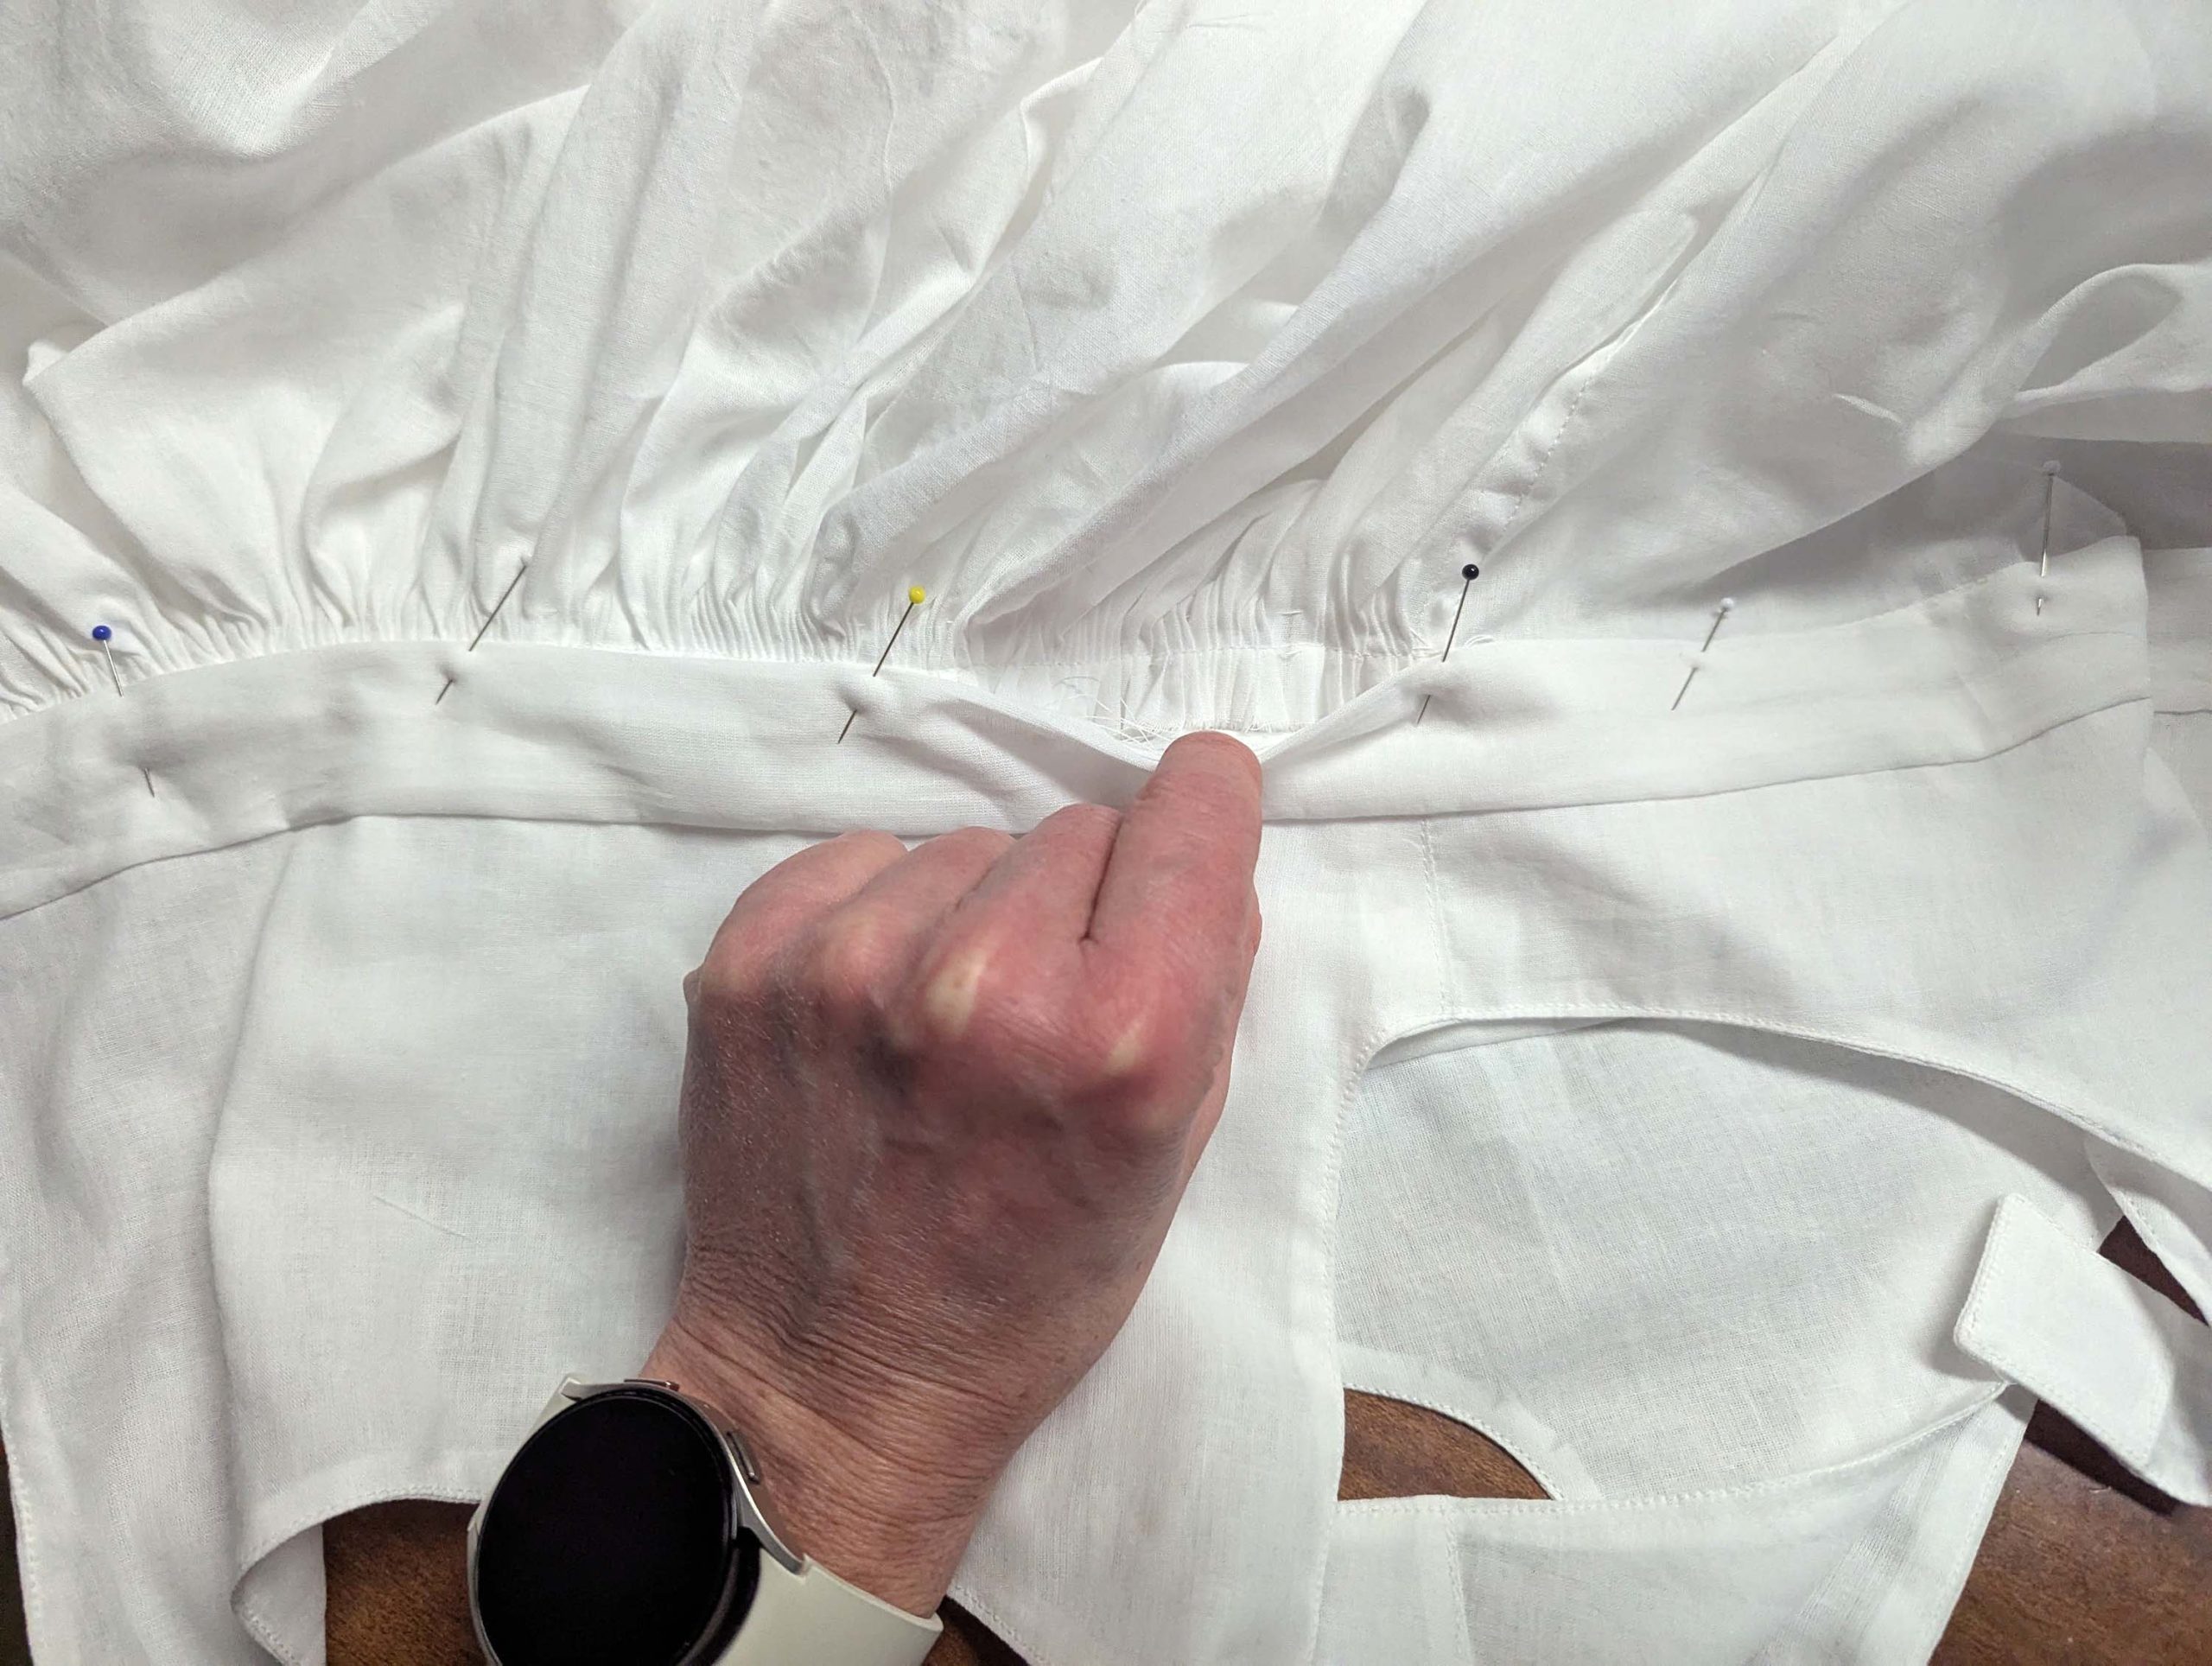
(4) Take the skirt panels and sew the right side seam, right sides together, finishing with a flat felled seam. Sew the left side seam, leaving a 12” (30cm) deep vent. Gather the top edge of the back. Sew the skirt to the waistband, right sides together, respecting all marks. At the back, pull the threads to match the waistband, and spread the pleats evenly, leaving the placket area plain. Fold the seam allowances towards the waistband after sewing. Sew the short ends right sides together. On the inside, line up the bottom edge of the waistband lining with the stitching line of the skirt and fell stitch in place.
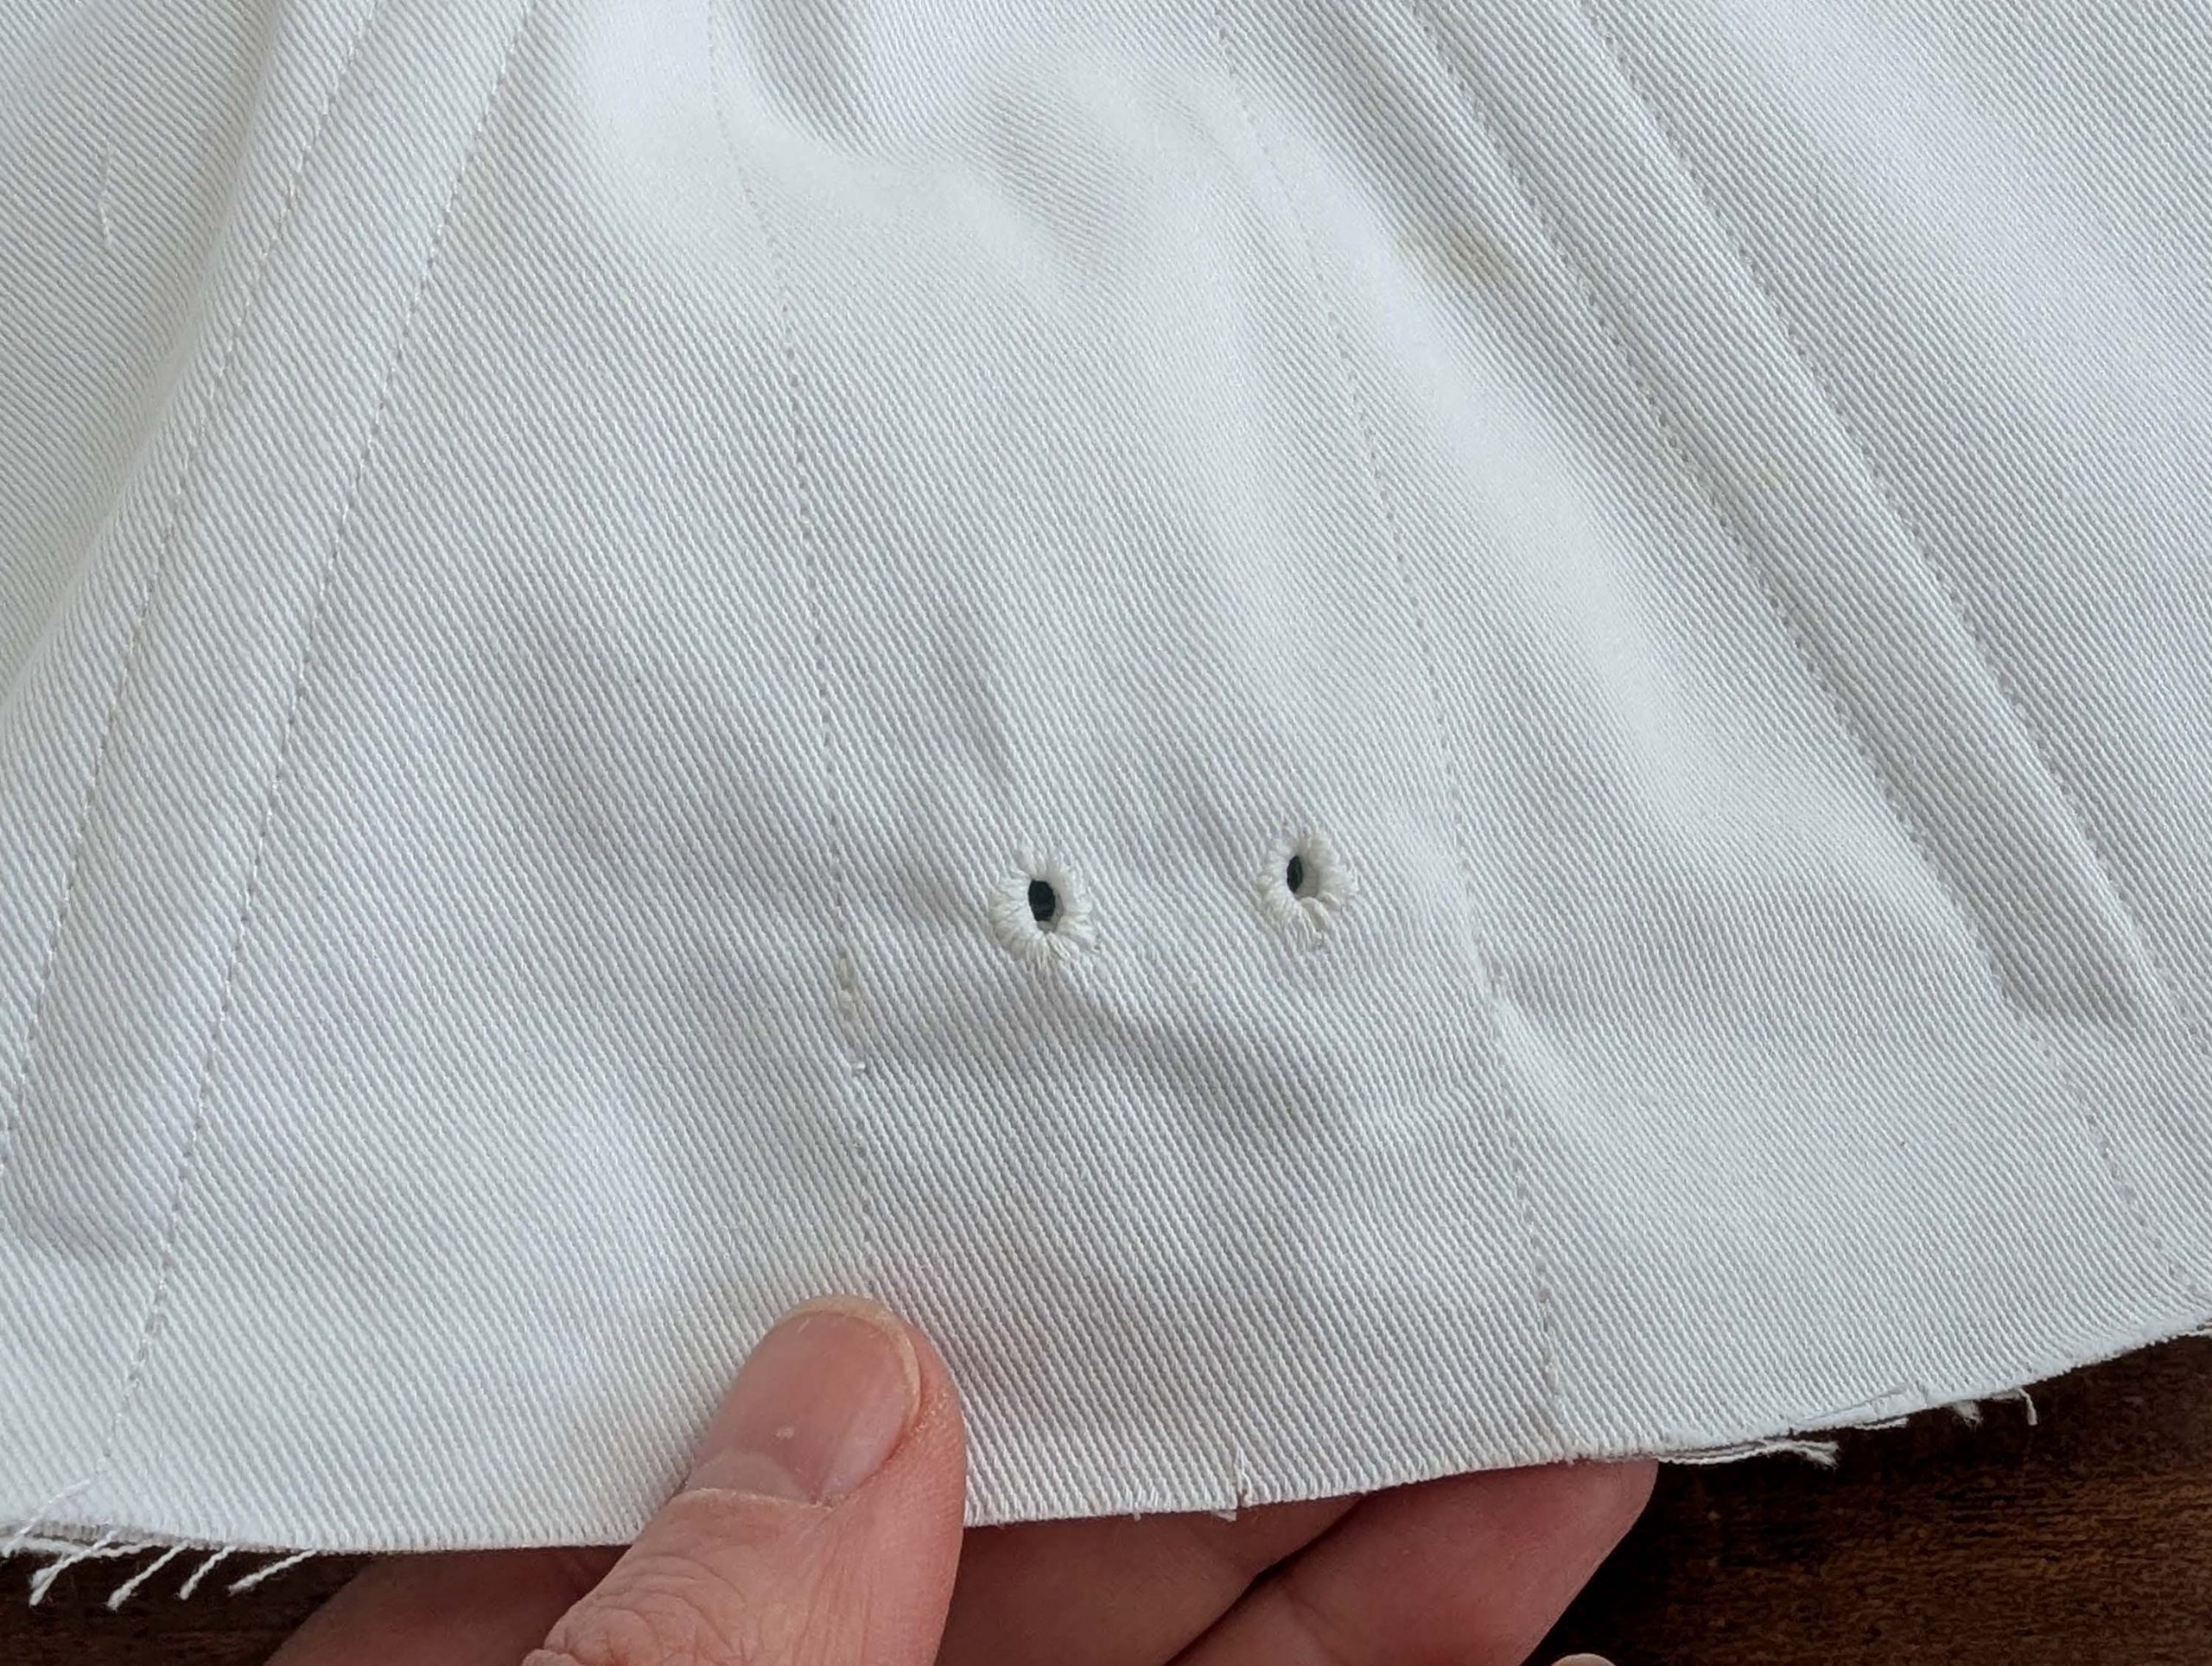
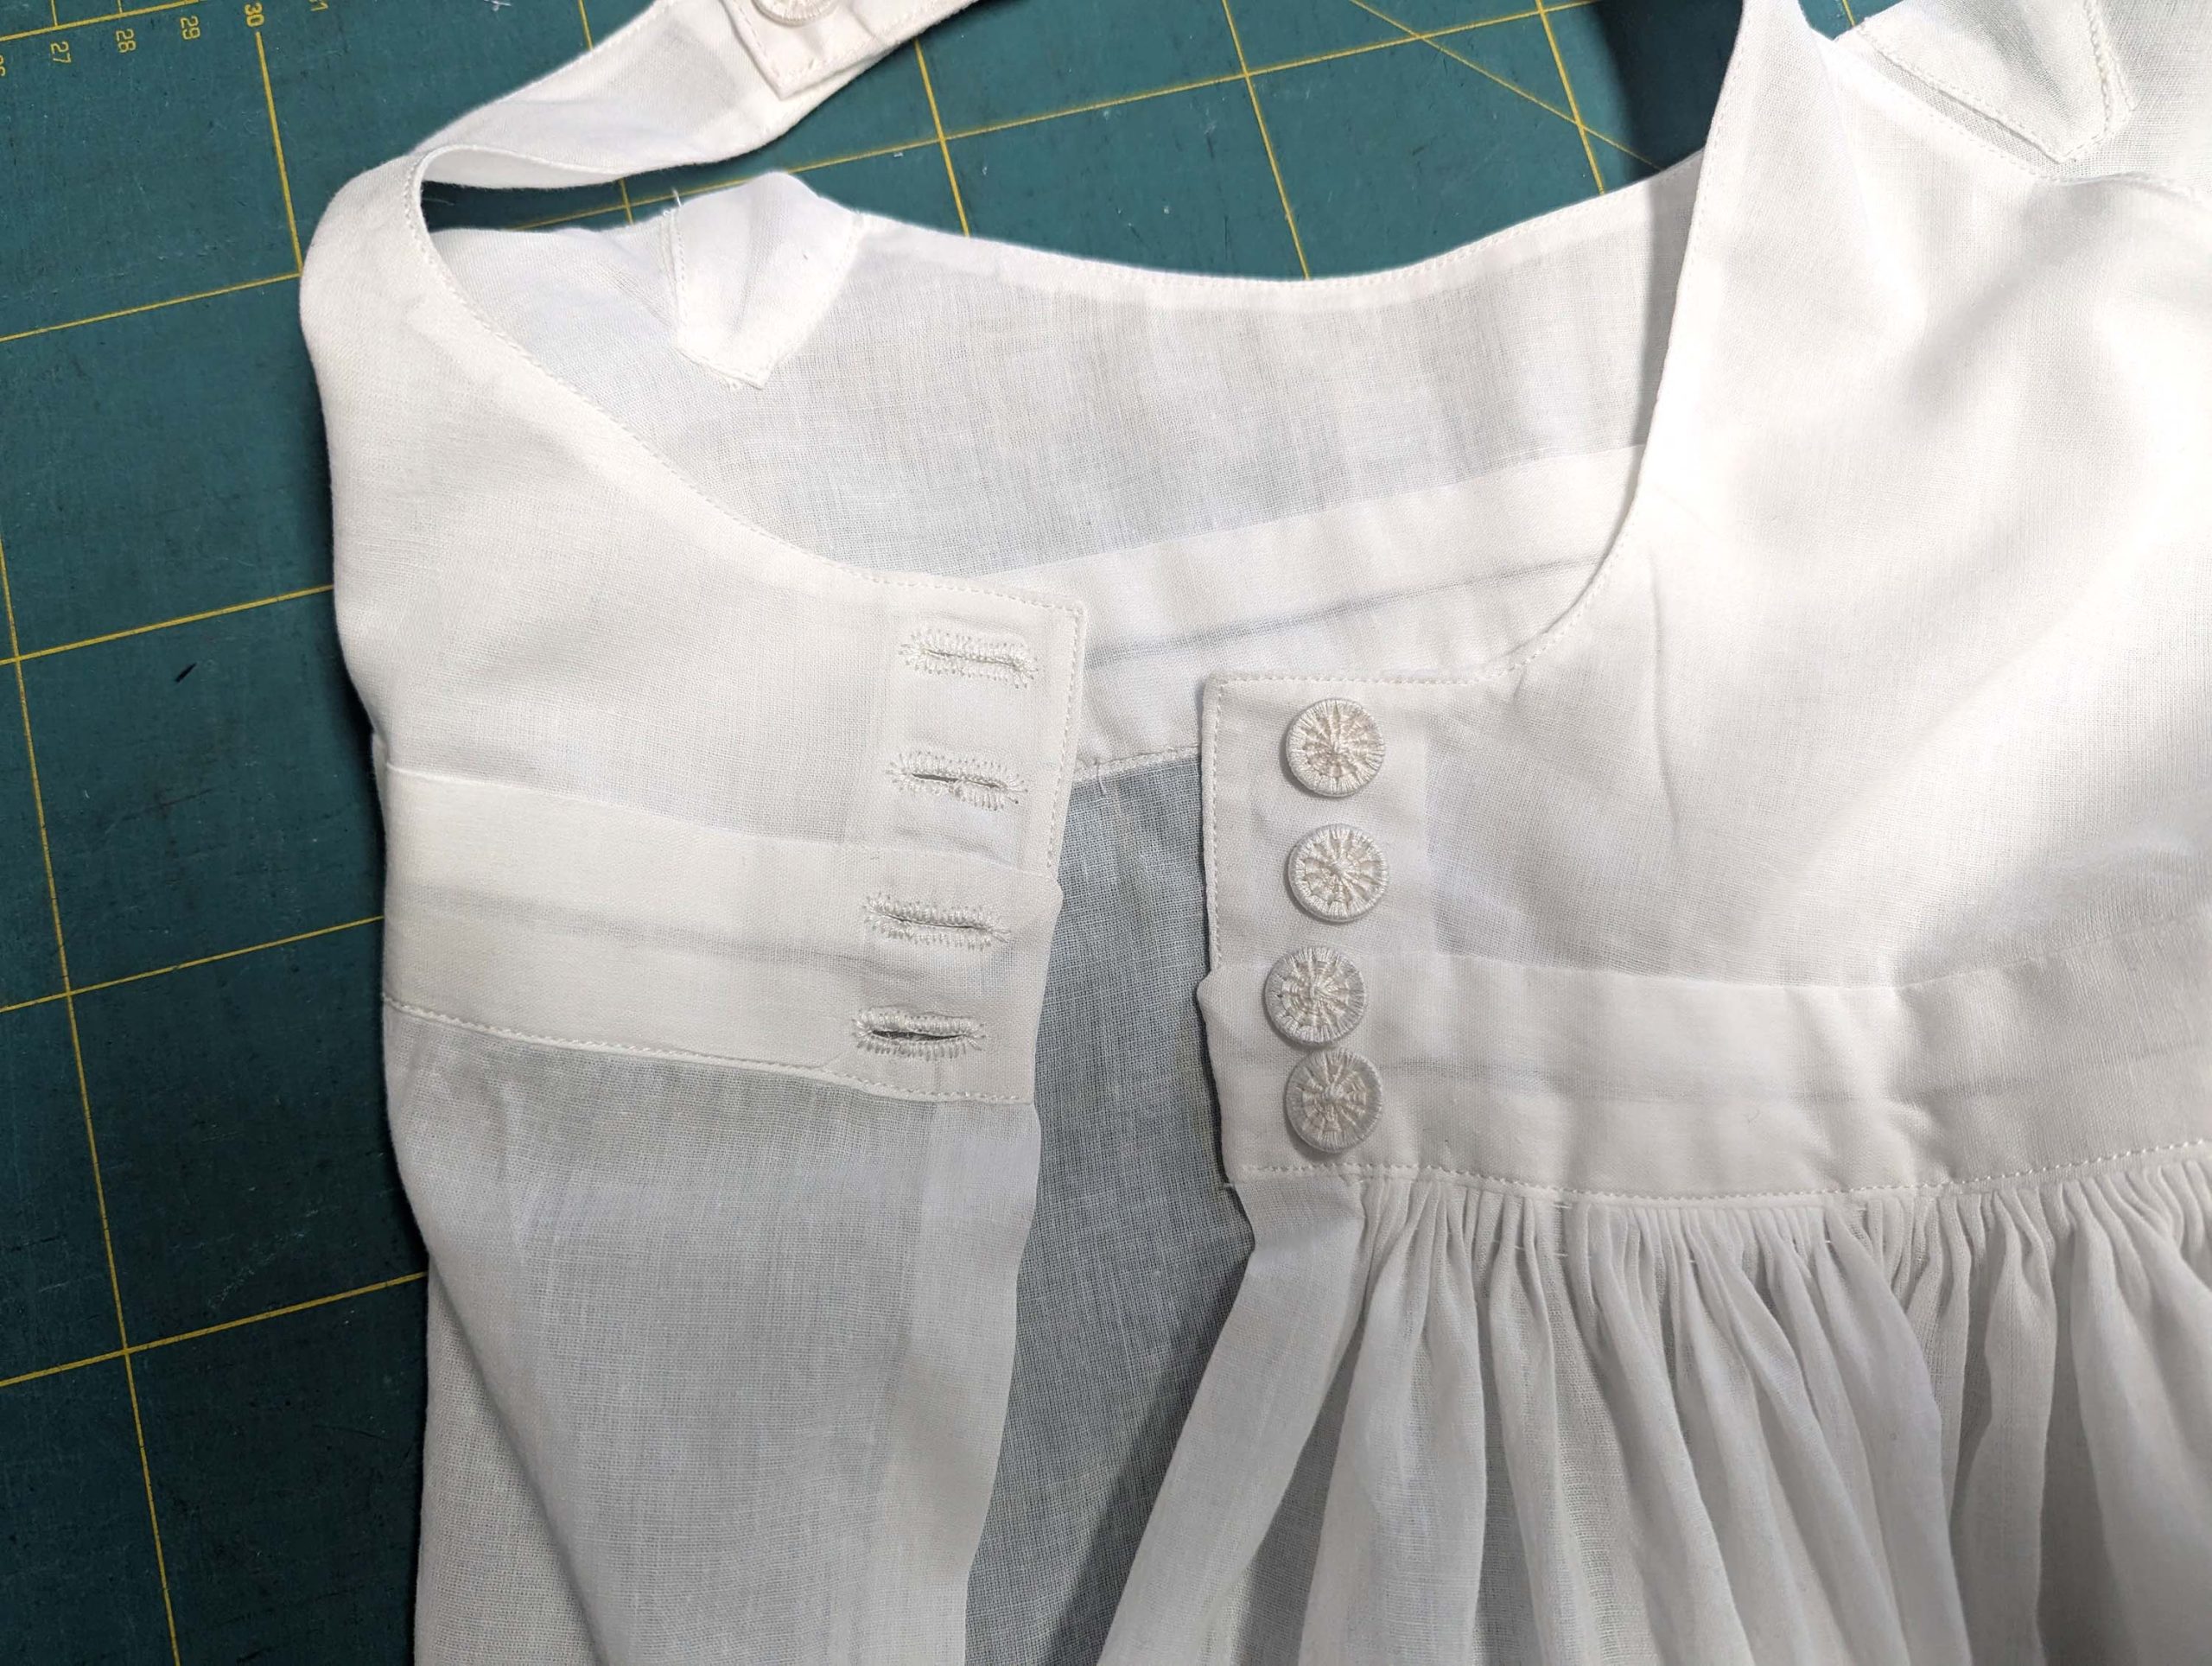
Work a buttonhole at the front end of the waistband and sew on a matching button at the back end. Work two buttonholes at the left side of the front and a buttonhole on each strap. Sew-on the buttons correspondingly.
(5) Without bodice: For the straps, cut a twill tape about 1” (2.5 cm) wide to the needed length and sew it to the back of the waistband where indicated on the pattern. At the front, sew to the waistband as indicated on the pattern; alternatively, work buttonholes to make the straps adjustable.
(6) The last step is to check the length and trim back the hem when needed. Double-turn in the hem and stitch in place.