 All tunnels stiched? Now it is time to add the cording. The technique is called Trapunto, that means you add the cords after stitching the tunnels. This is a time-consuming and exhausting work, nobody told it would be easy. You can avoid this step with adding each piece of cord after you stitched one side of the tunnel, then make the second seam beside the cord. The result will be smoother with the Trapunto technique.
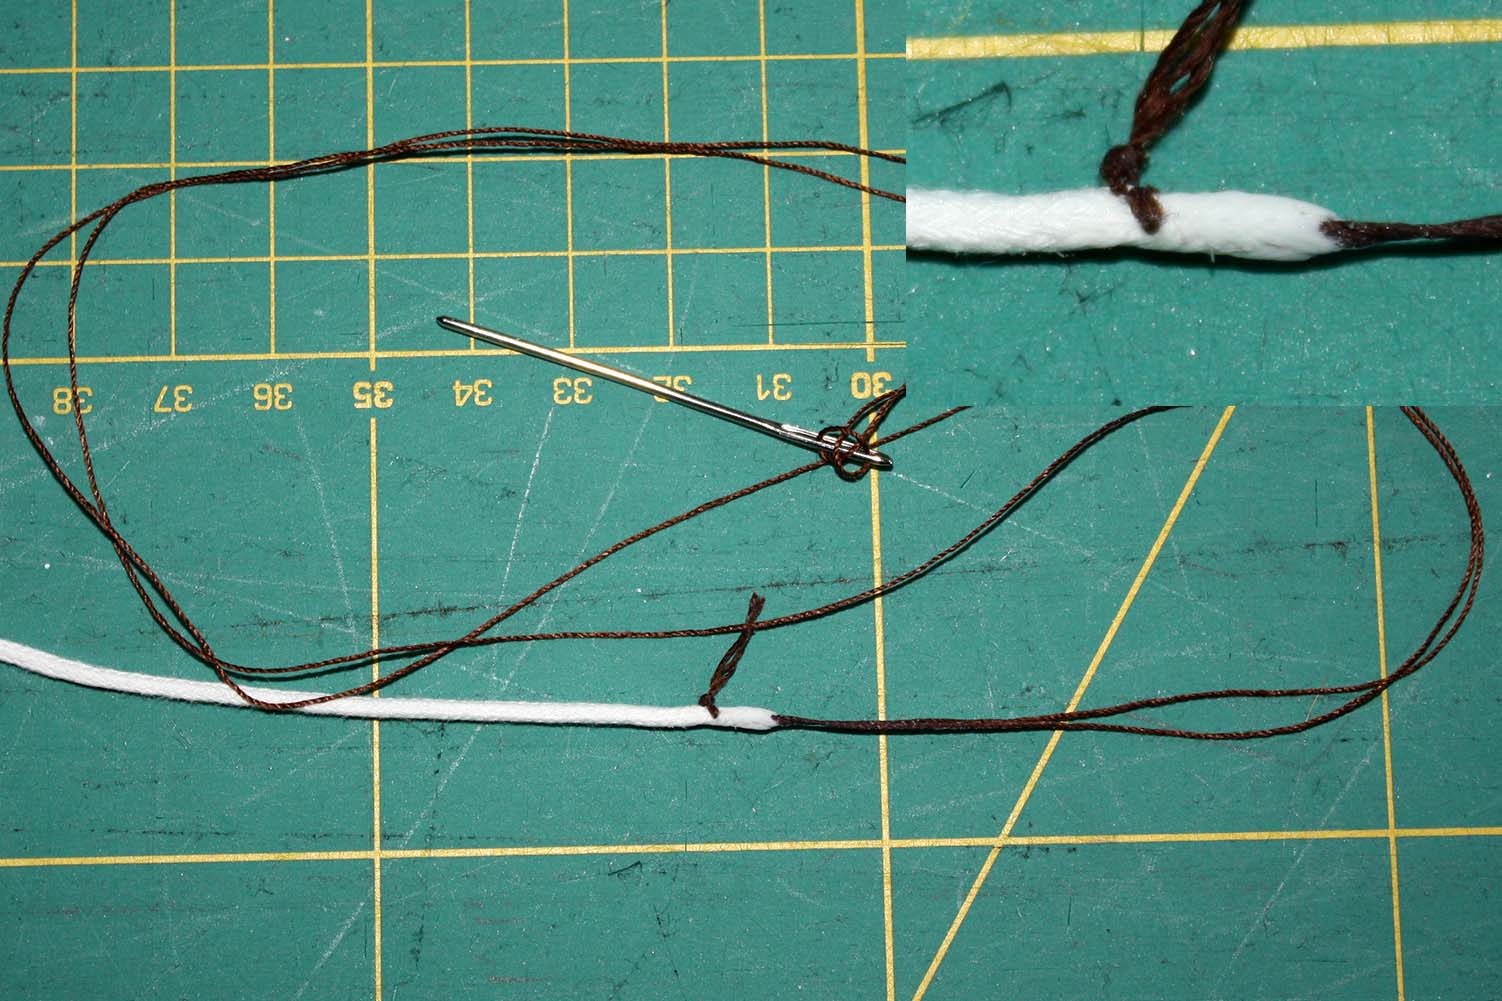
For adding the cord, I threaded a blunt point needle with a strong buttonhole thread, make a couple of stitches through the end of the cord. To harden the cord´s end I used glue and let it dry for some hours.
Widen the holes with an awl. If you have problems pulling through the cord you can widen the tunnel with the awl first.
Pull the cord through the tunnel, the end should just slip into. Cut off the cord close to the fabric and shove the end back into the tunnel with your awl.