Monthly Archives: June 2023

1116 Edwardian Belt

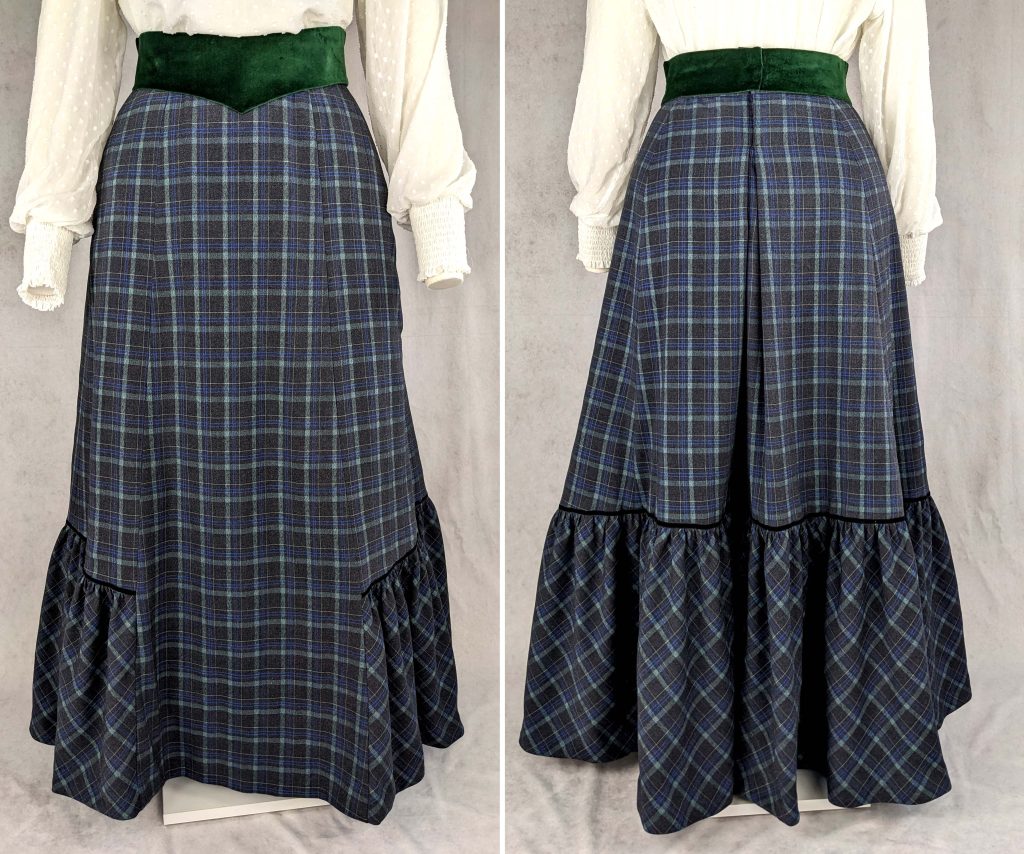
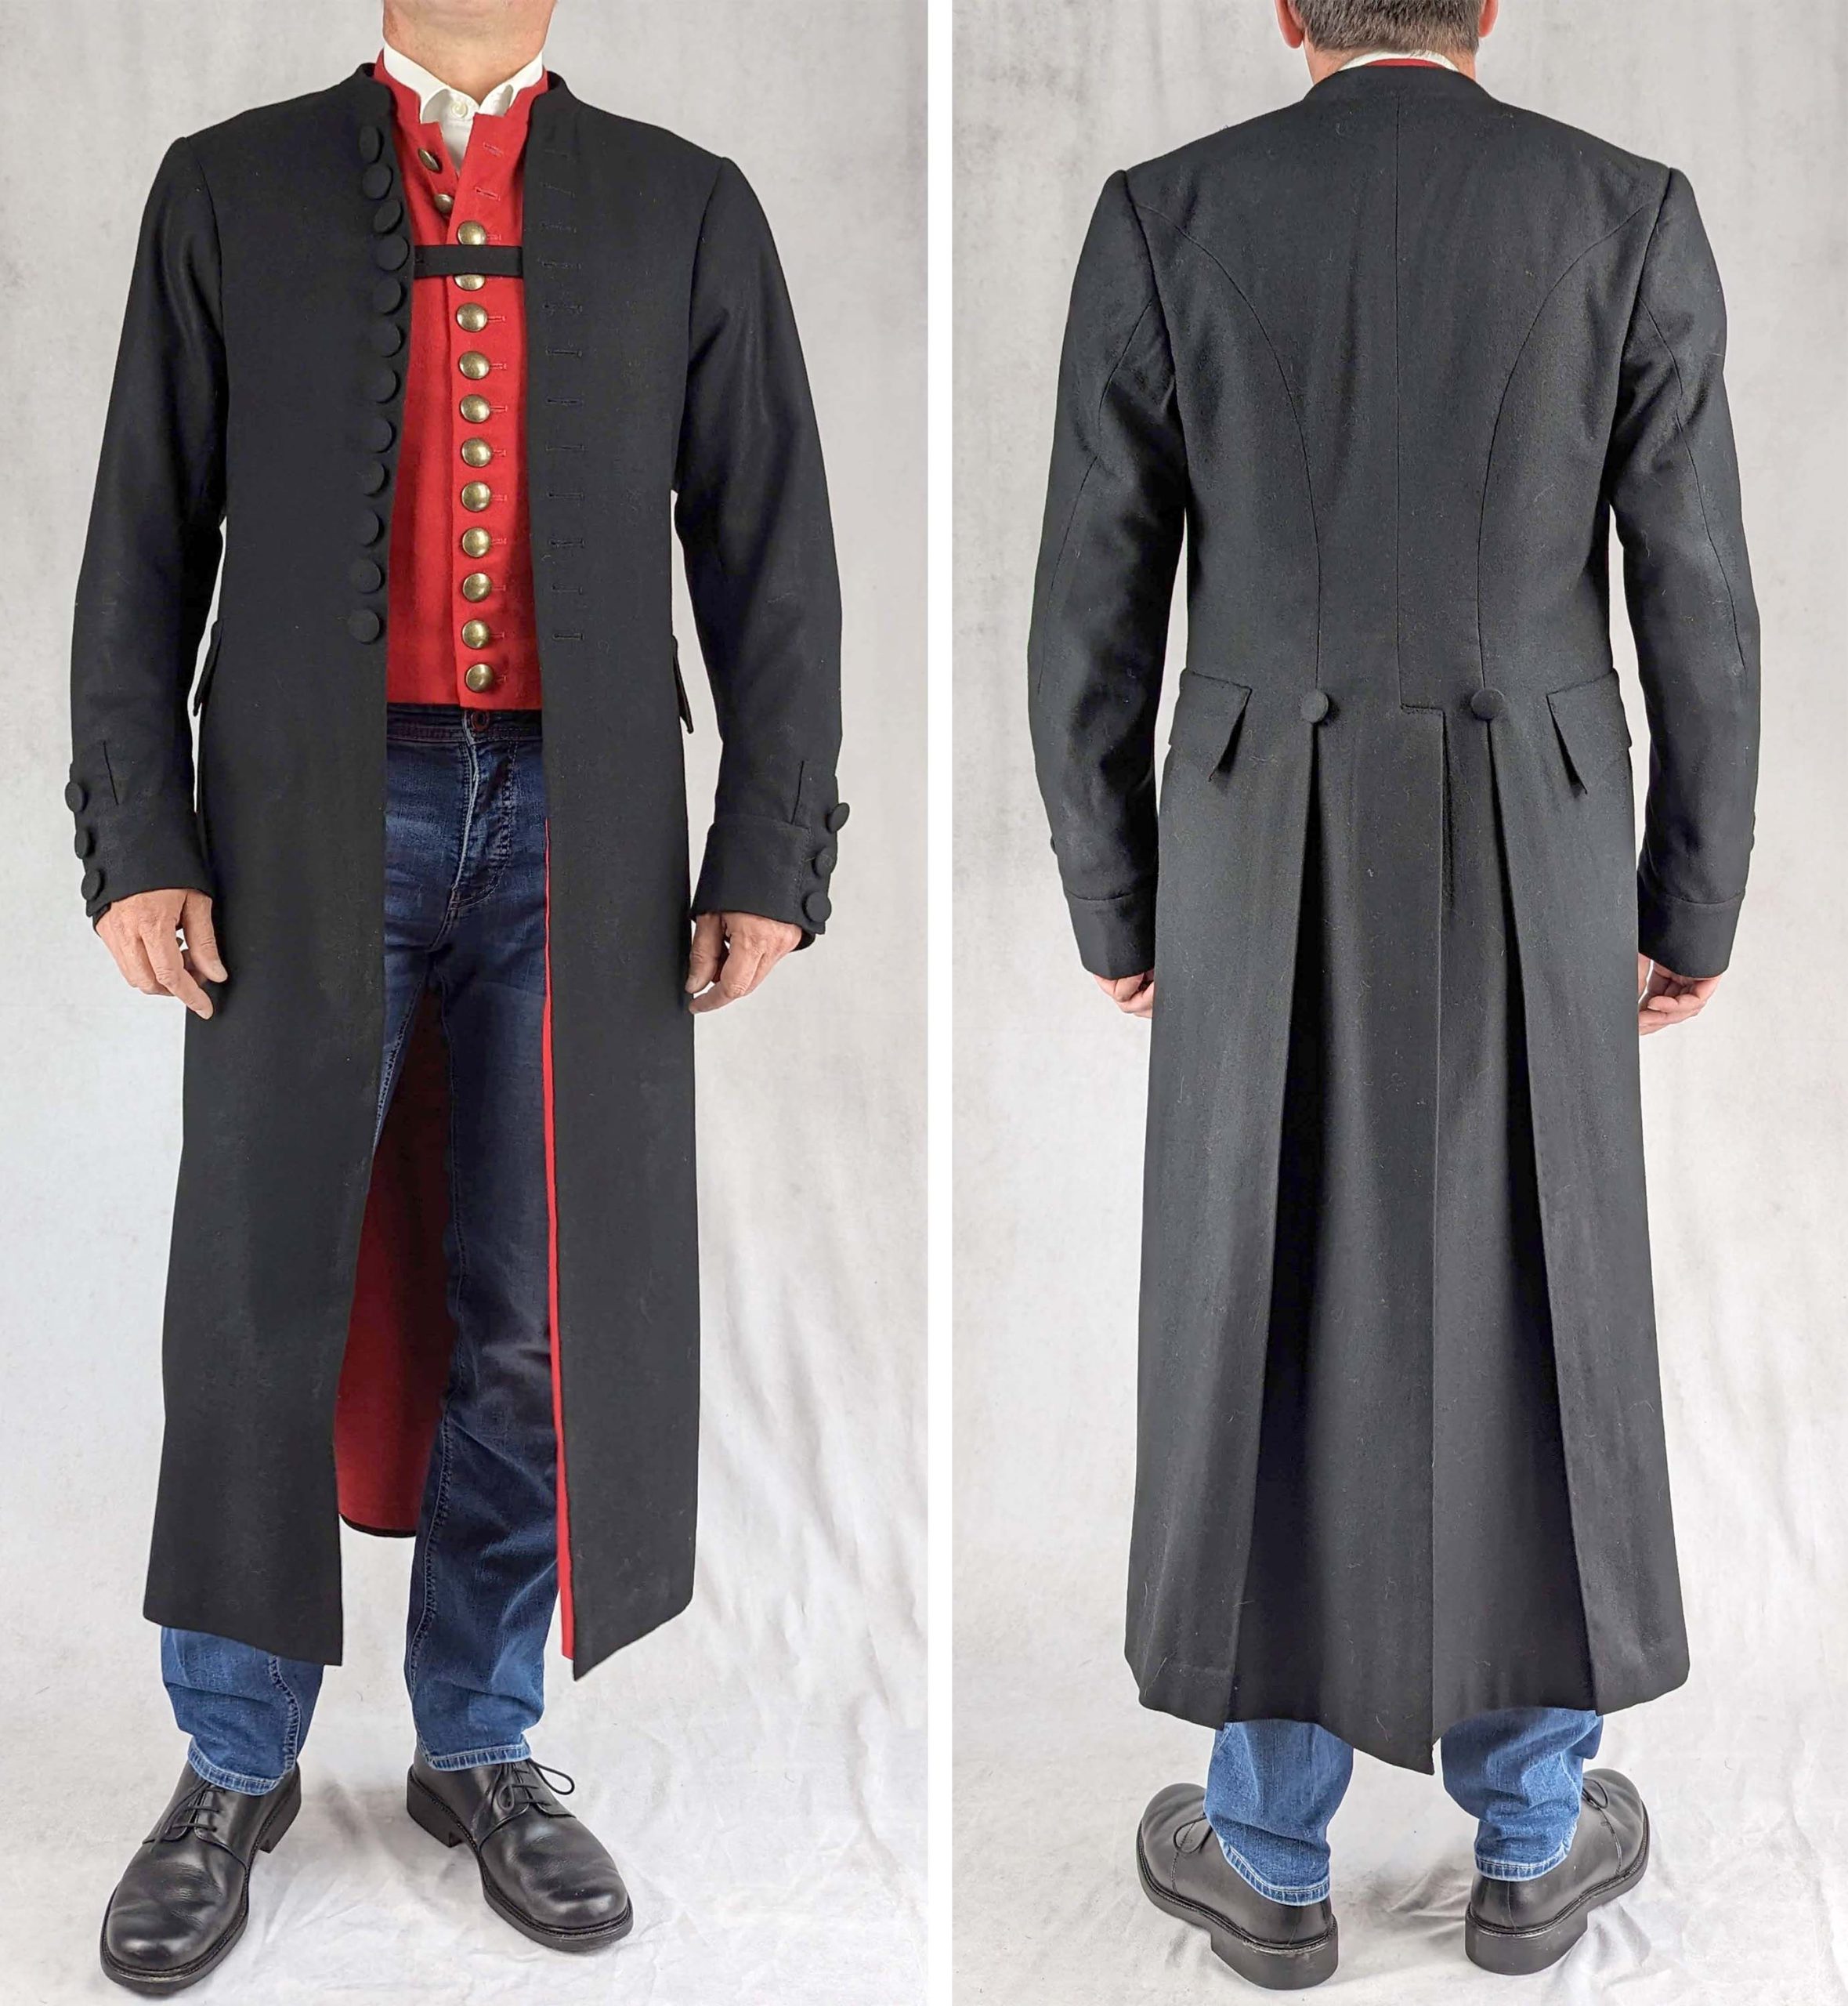
Around 1901, fashions changed with the invention of the straight-front corset, thus a new silhouette developed. They pushed the body into a hollow back or S-bend accentuating the bust and hips. The illustrations of the artist Charles Dana Gibson immortalized the ideal look and can still be seen today.

The S-bend shape often was emphasized with wide belts. The belt pattern comes with the new pattern #0916 or can be downloaded here:

This is another illustrated instruction to supplement my sewing pattern. The belt pattern is available for free on my webshop: klick

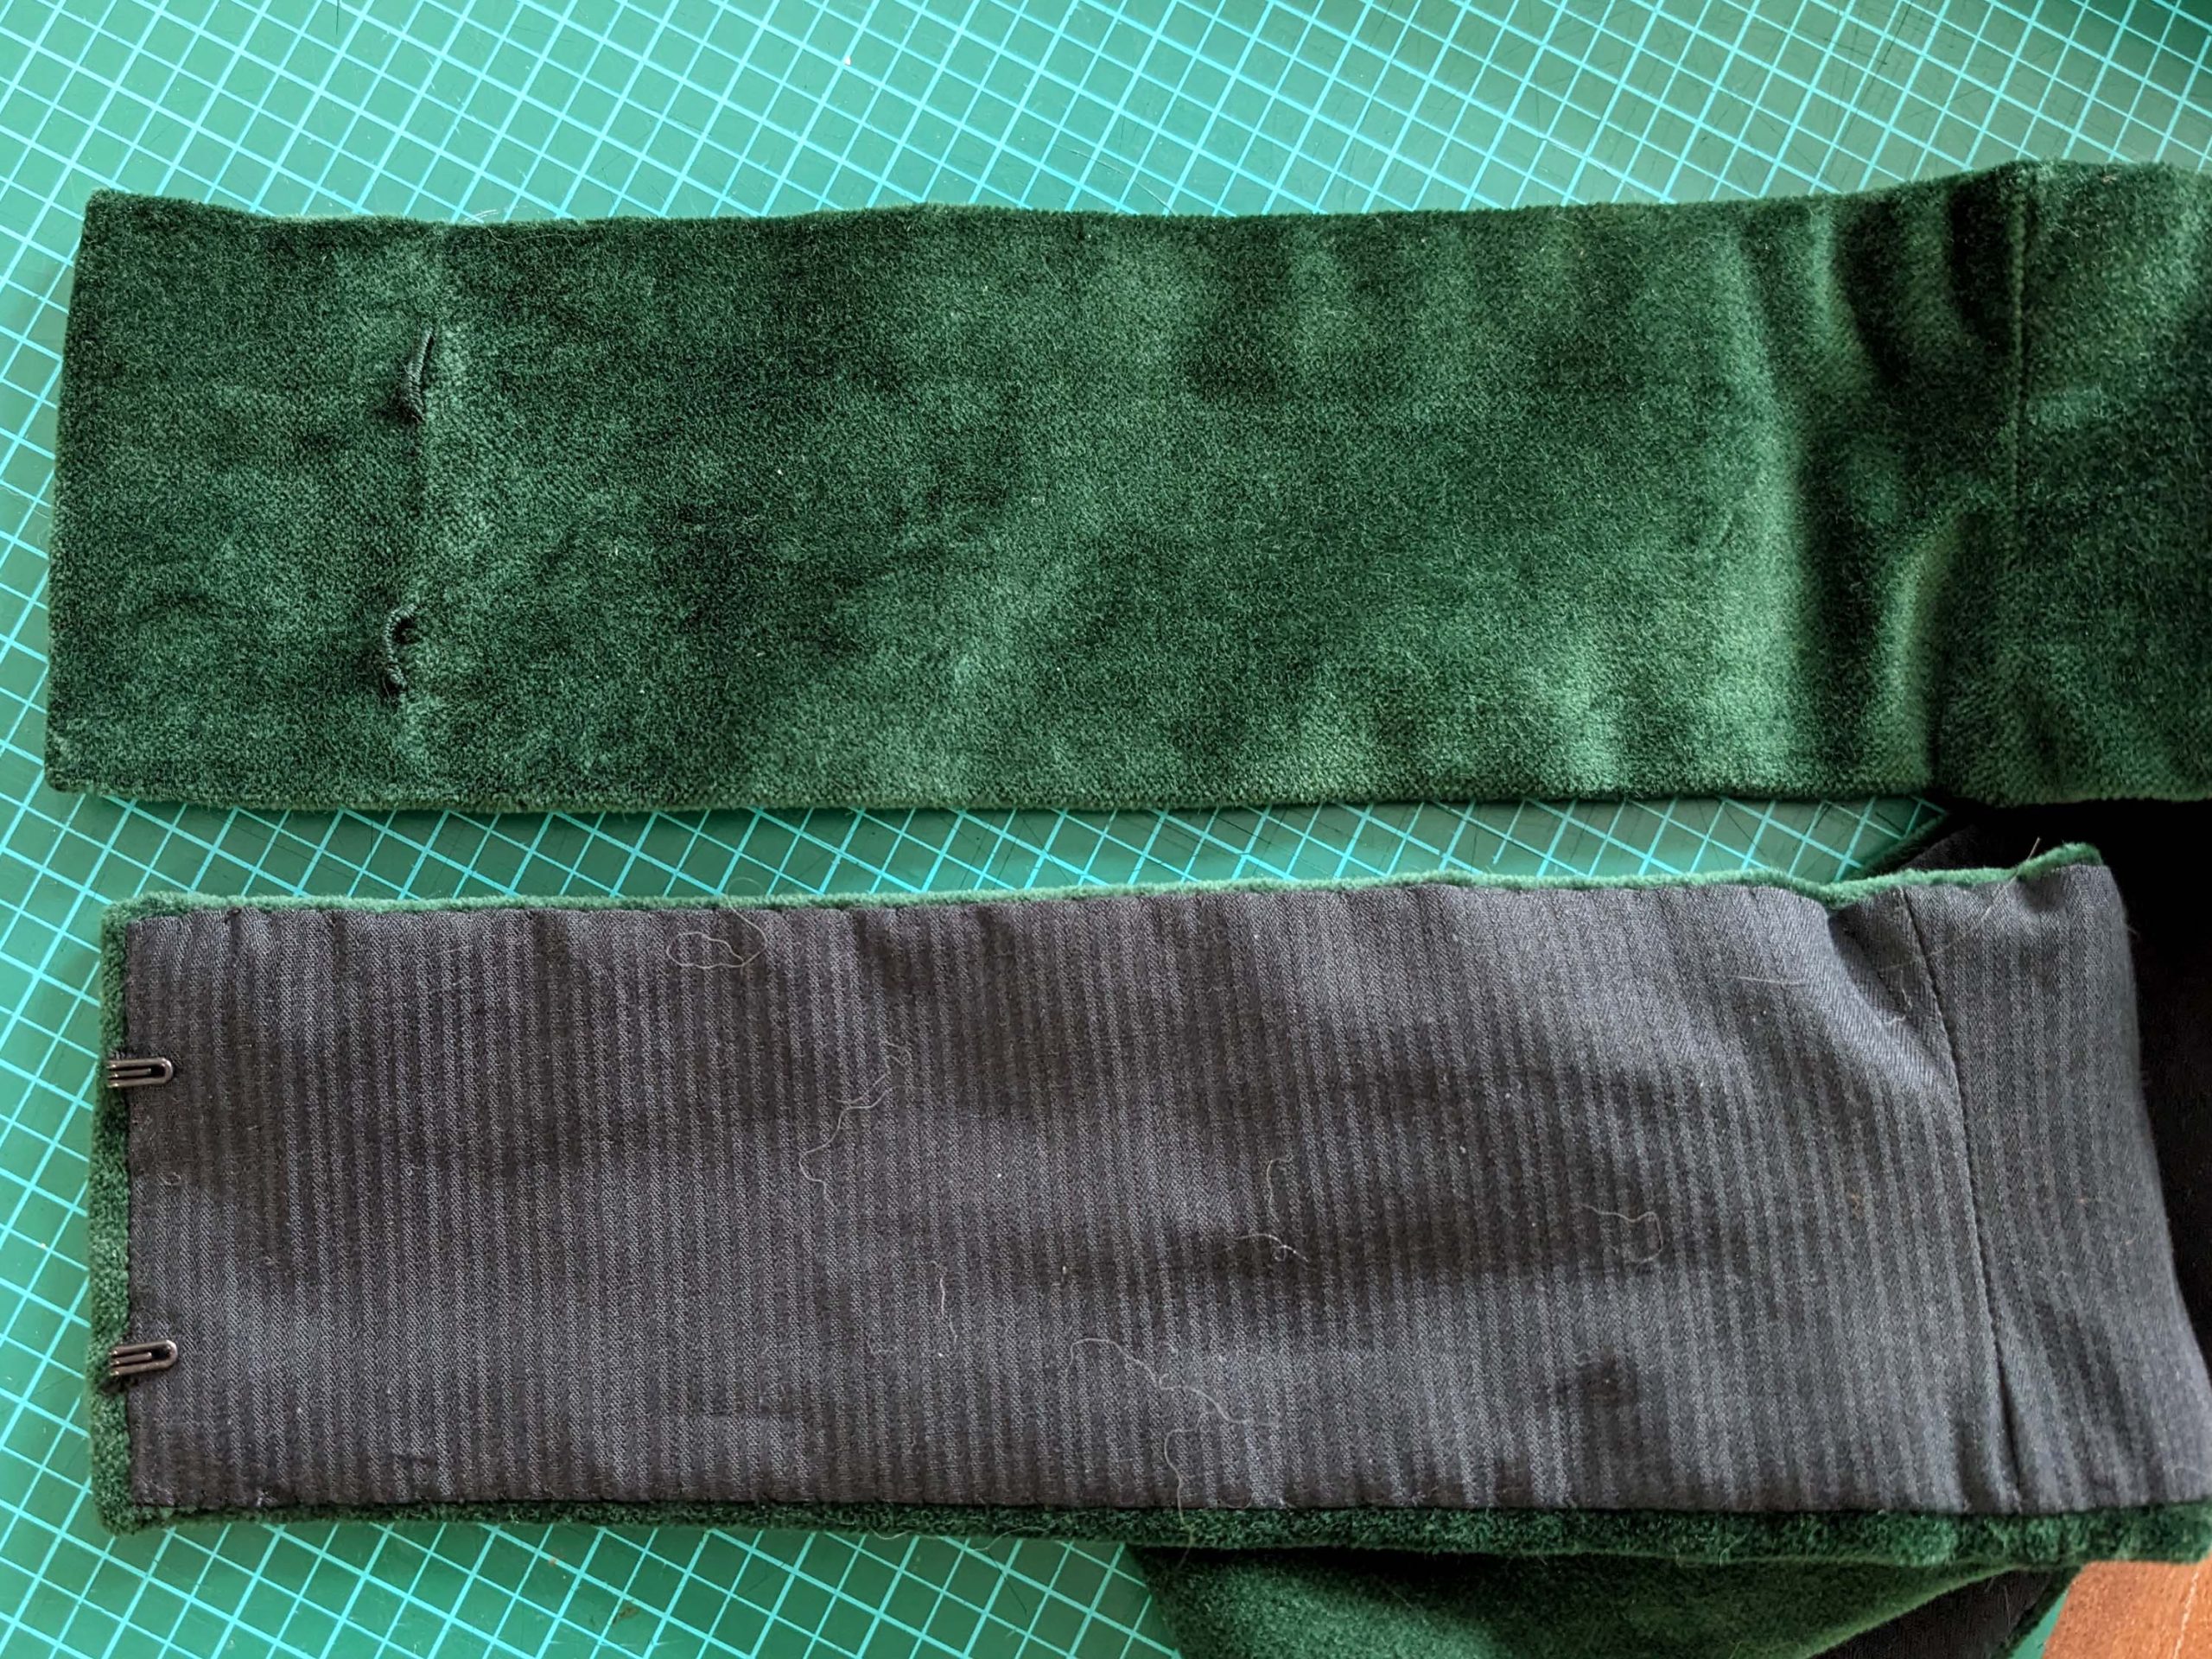
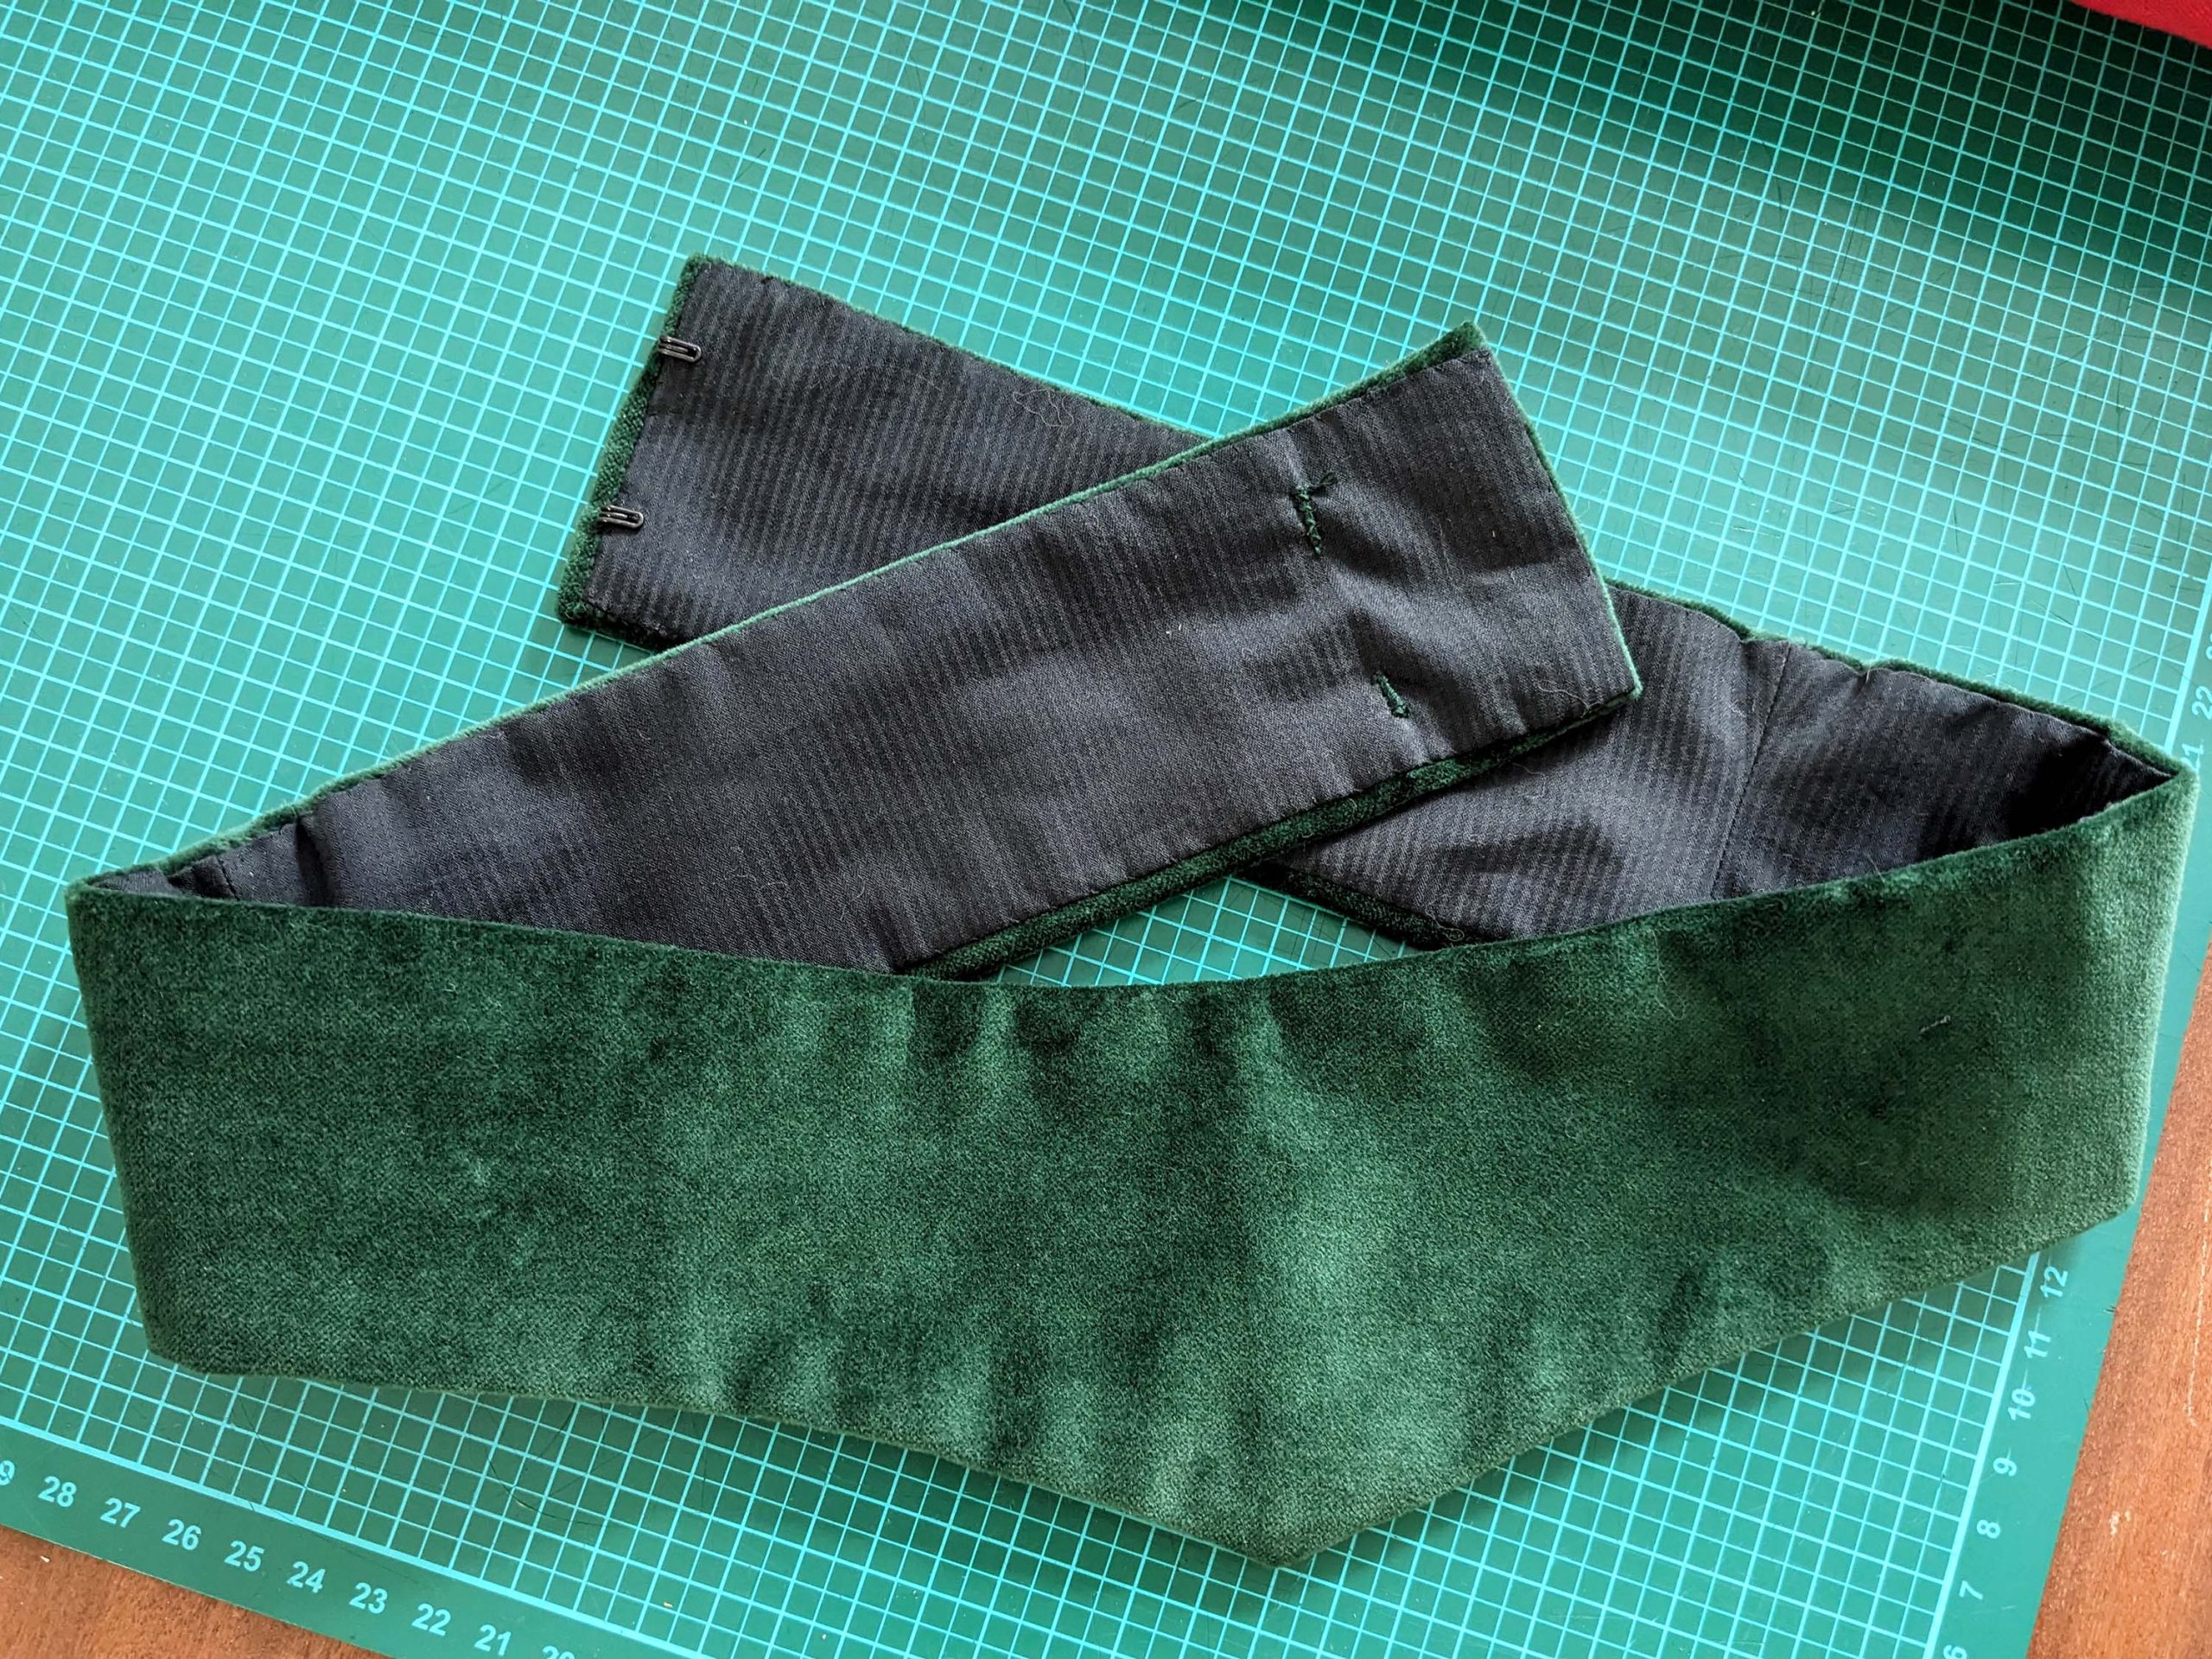
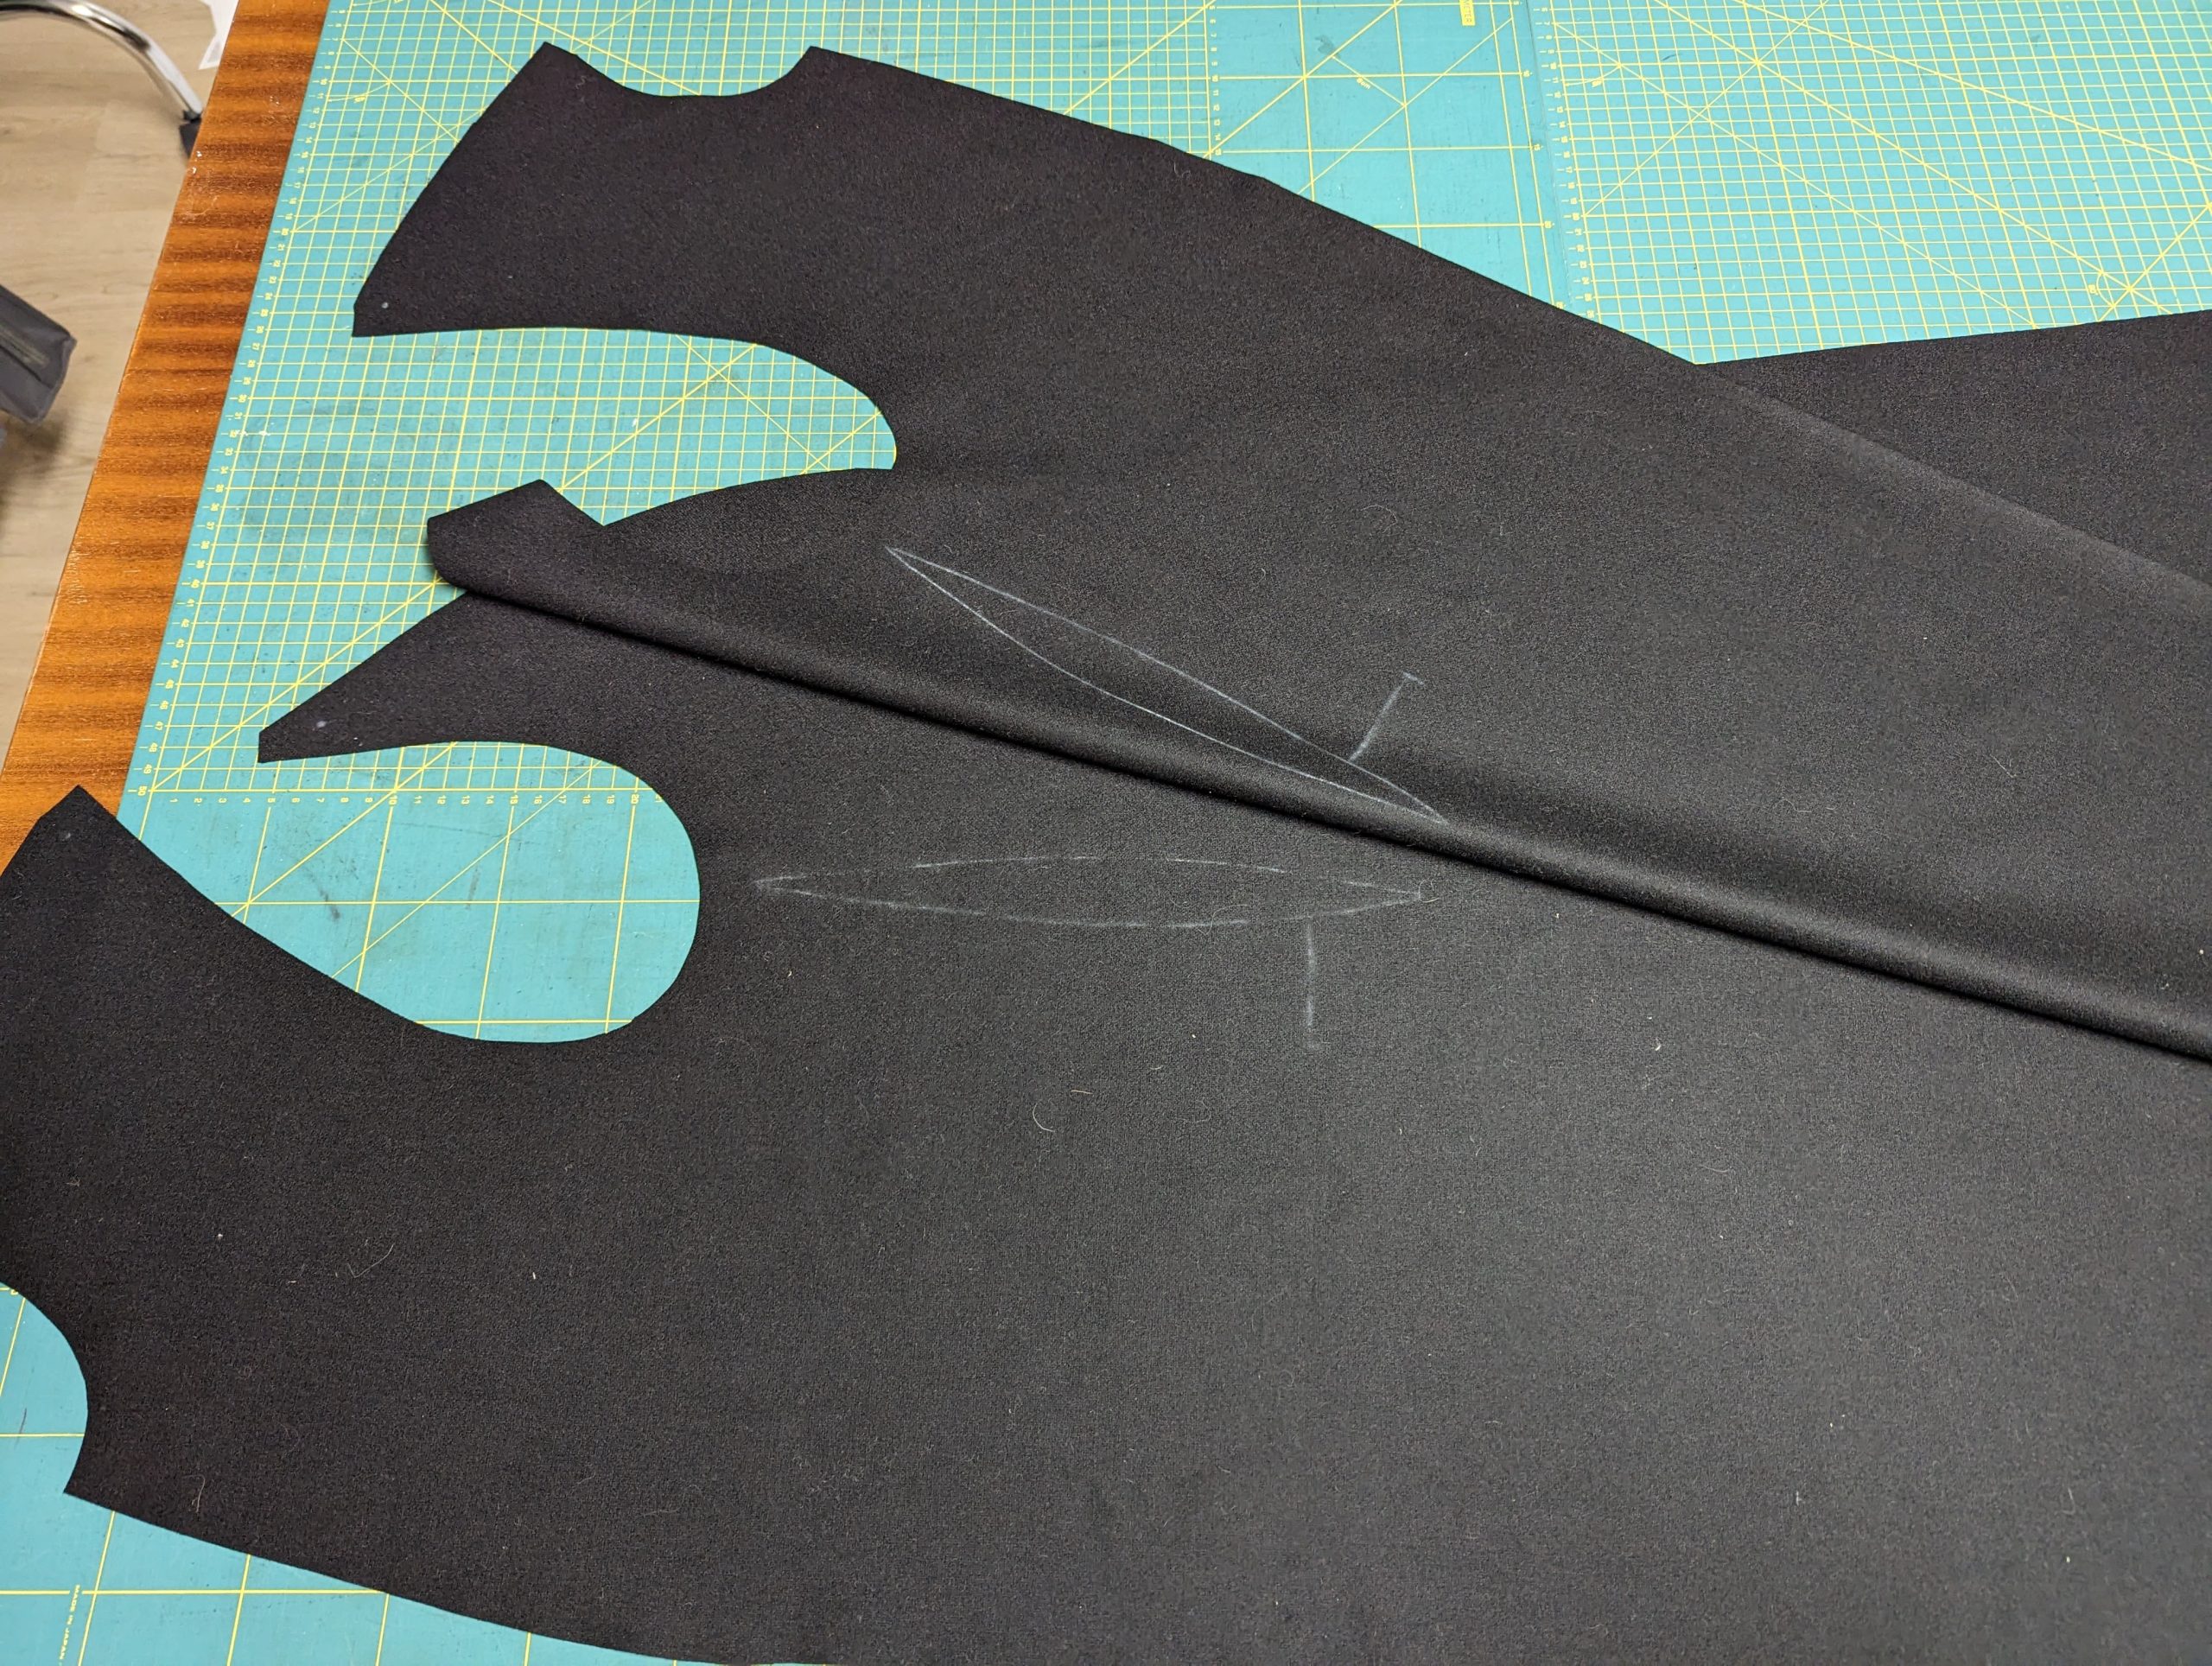
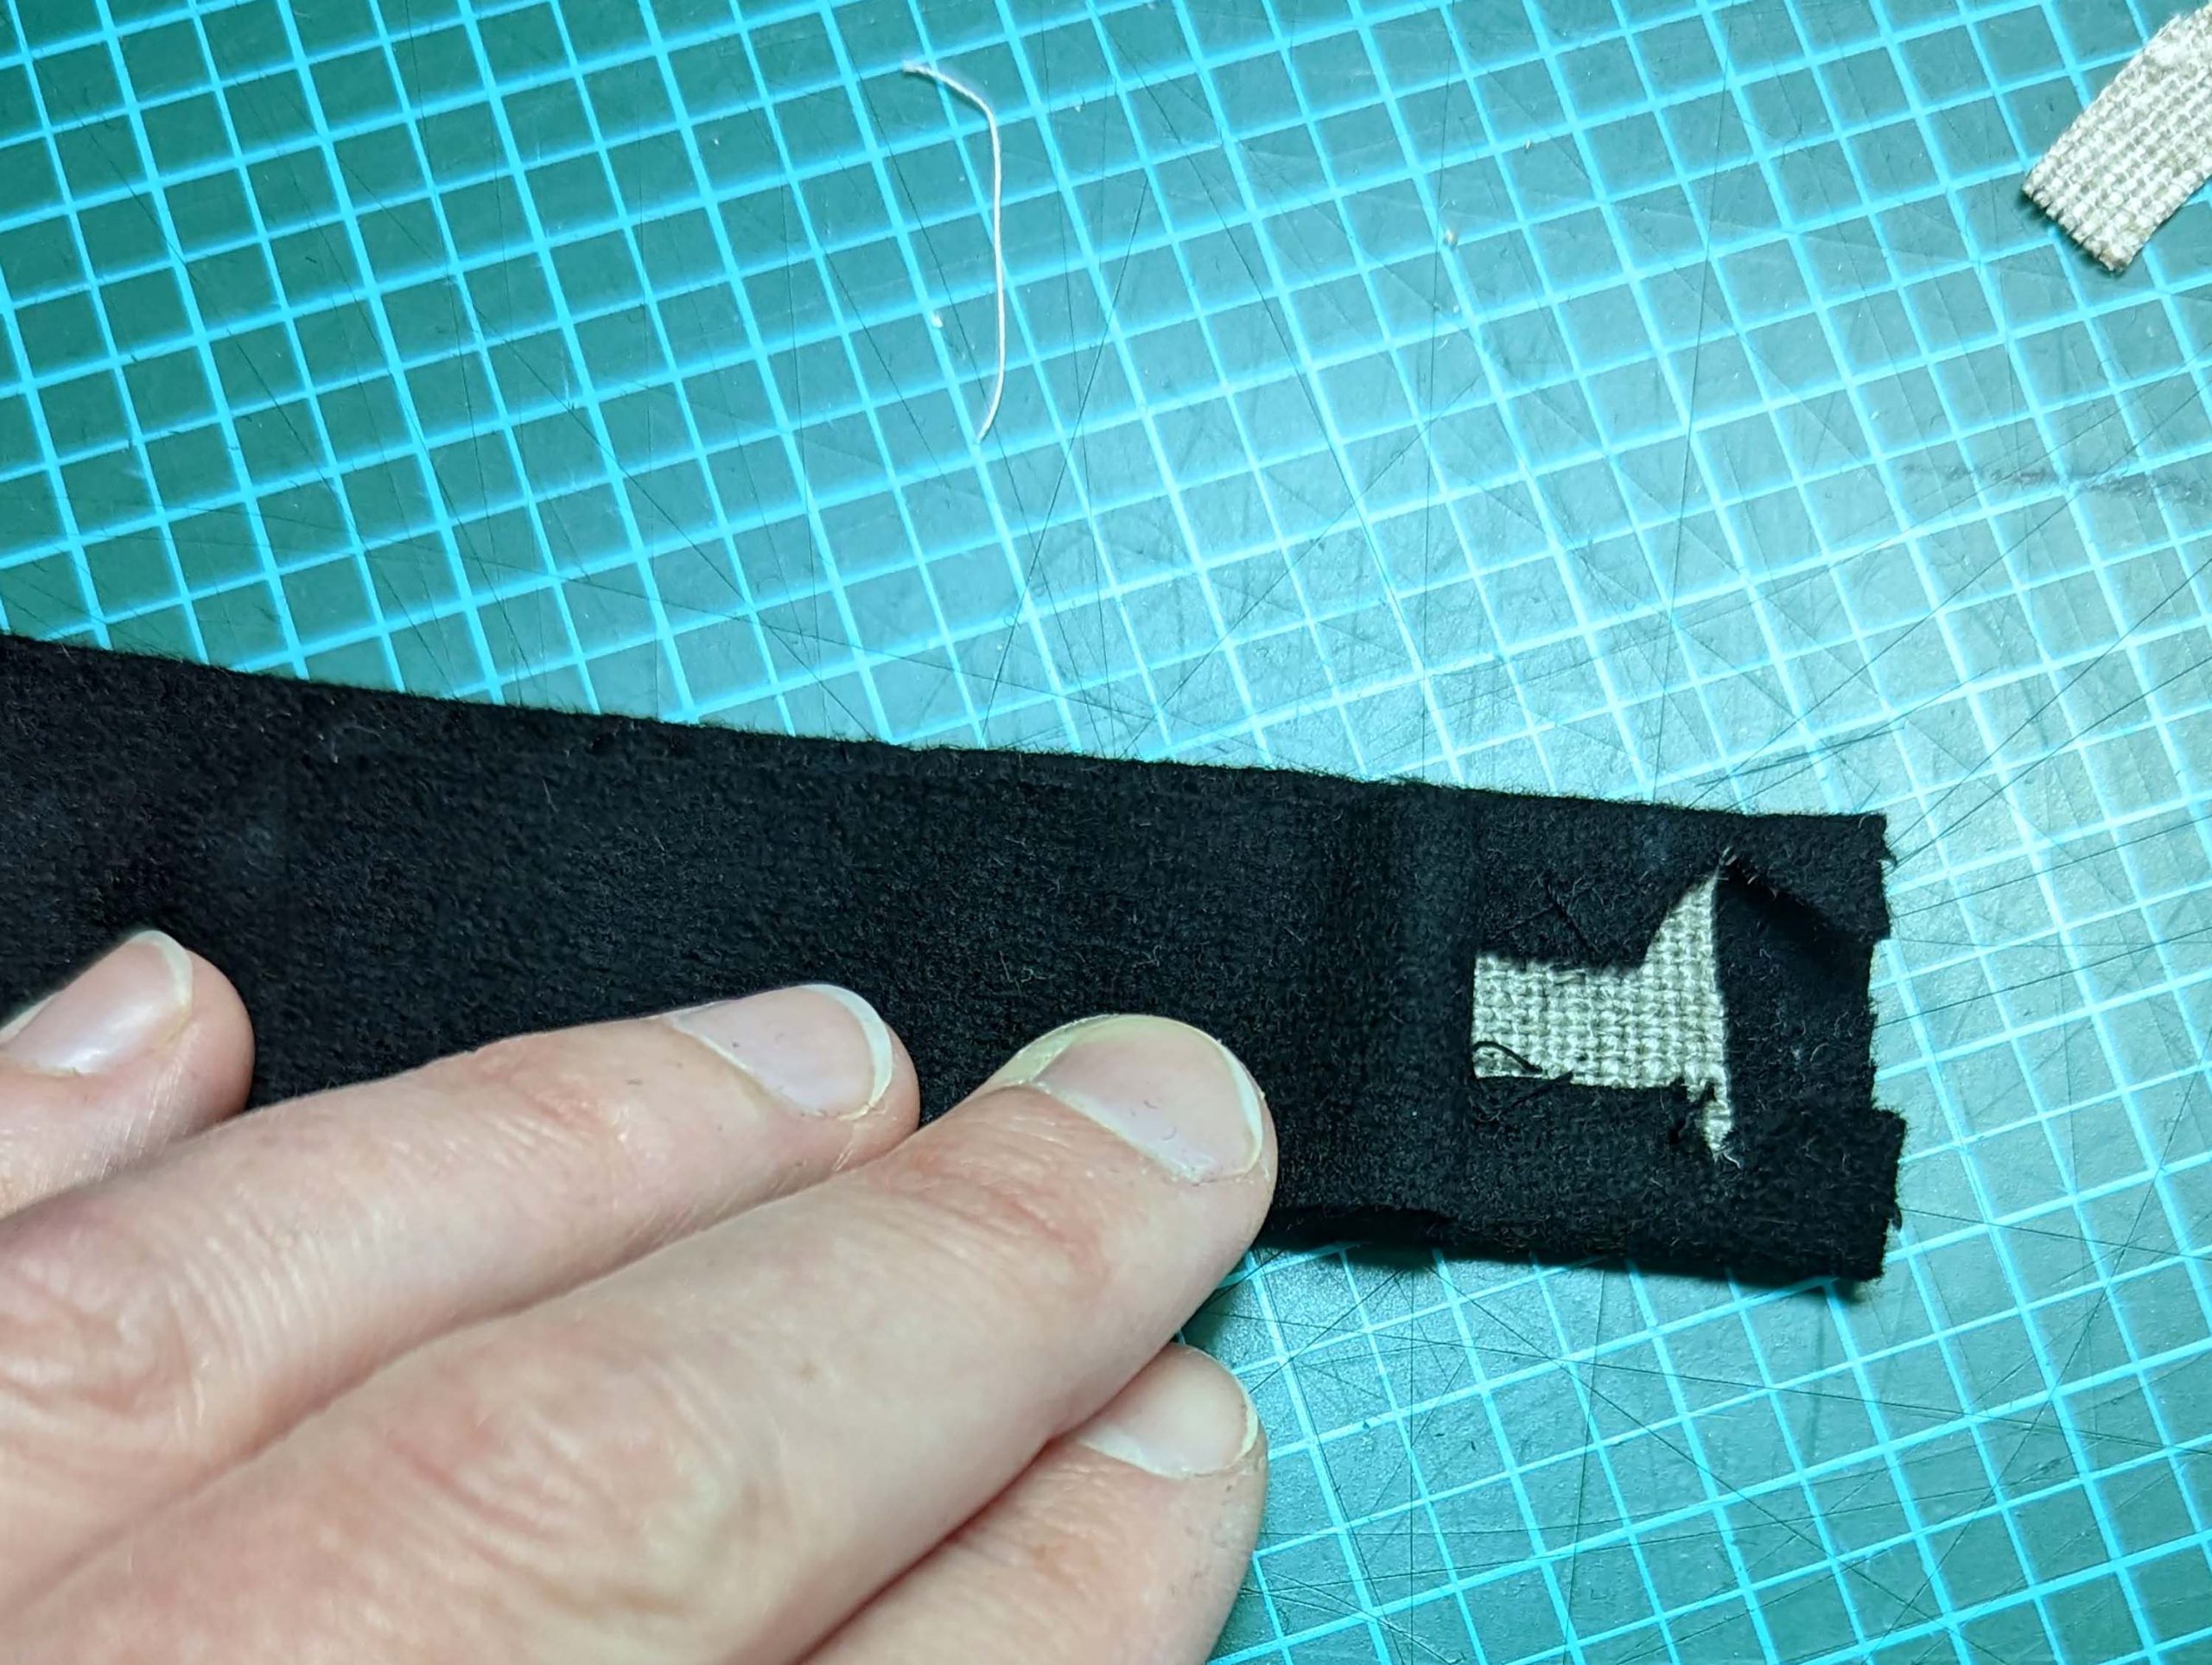
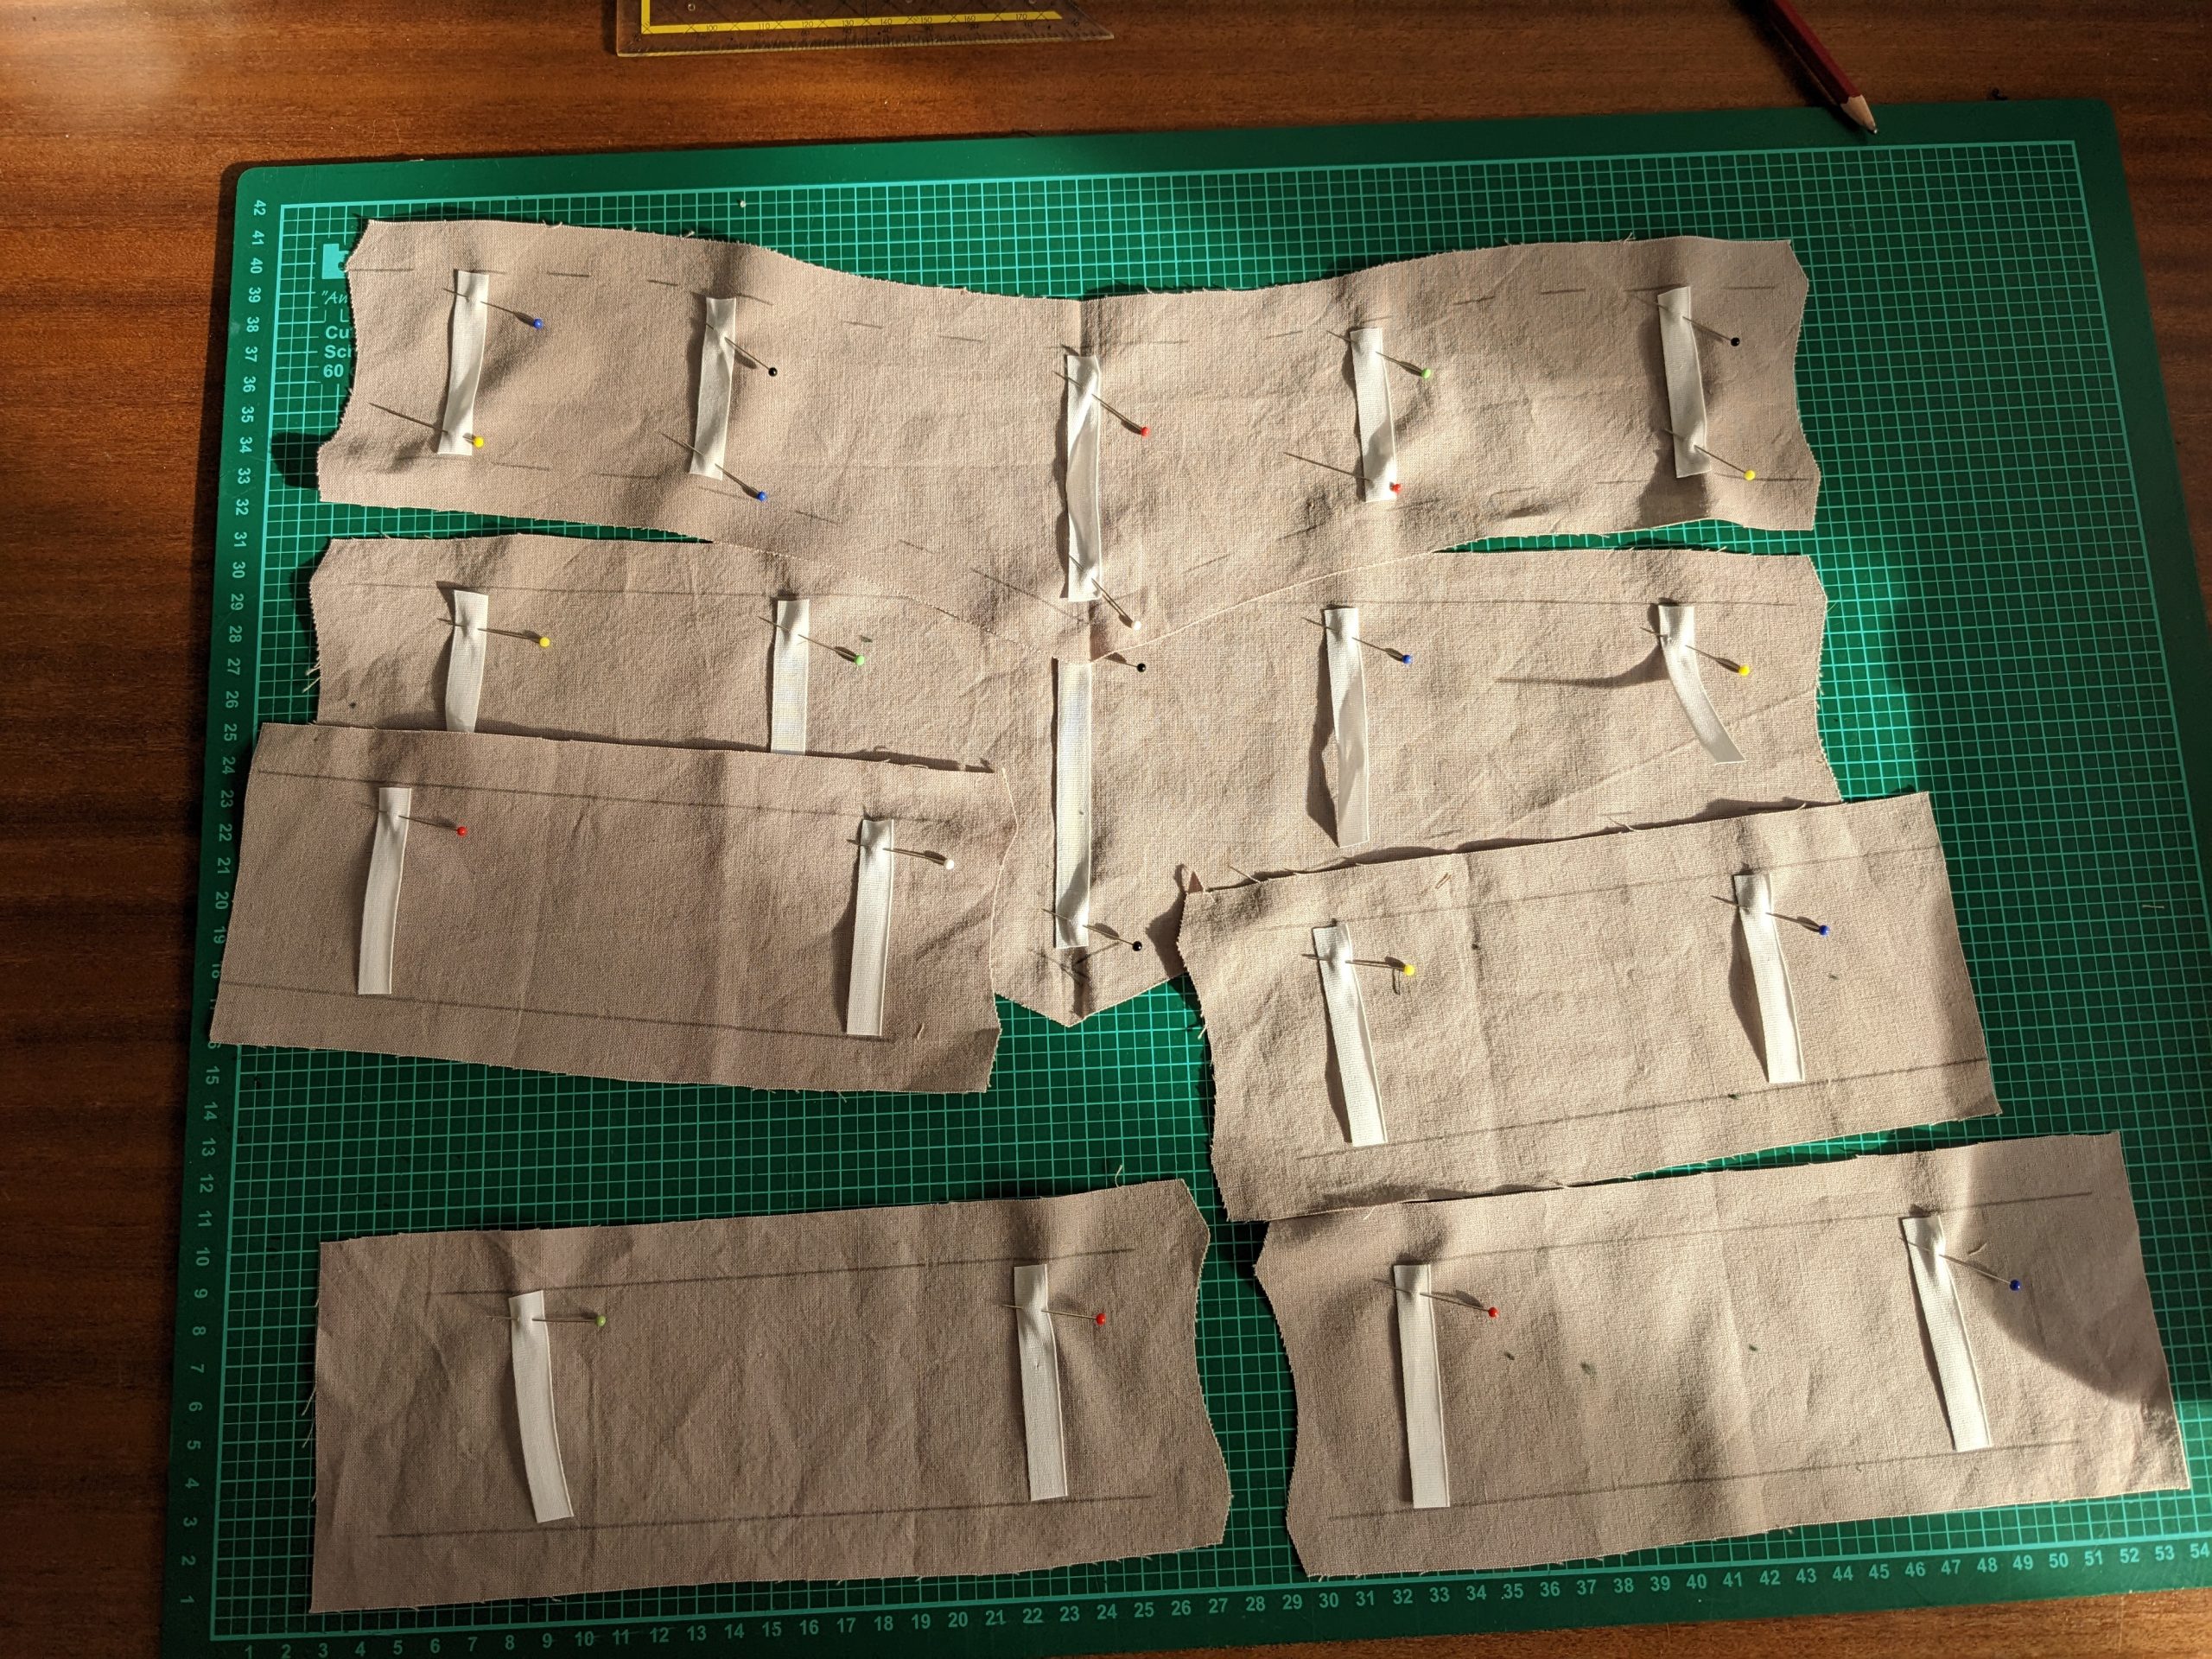
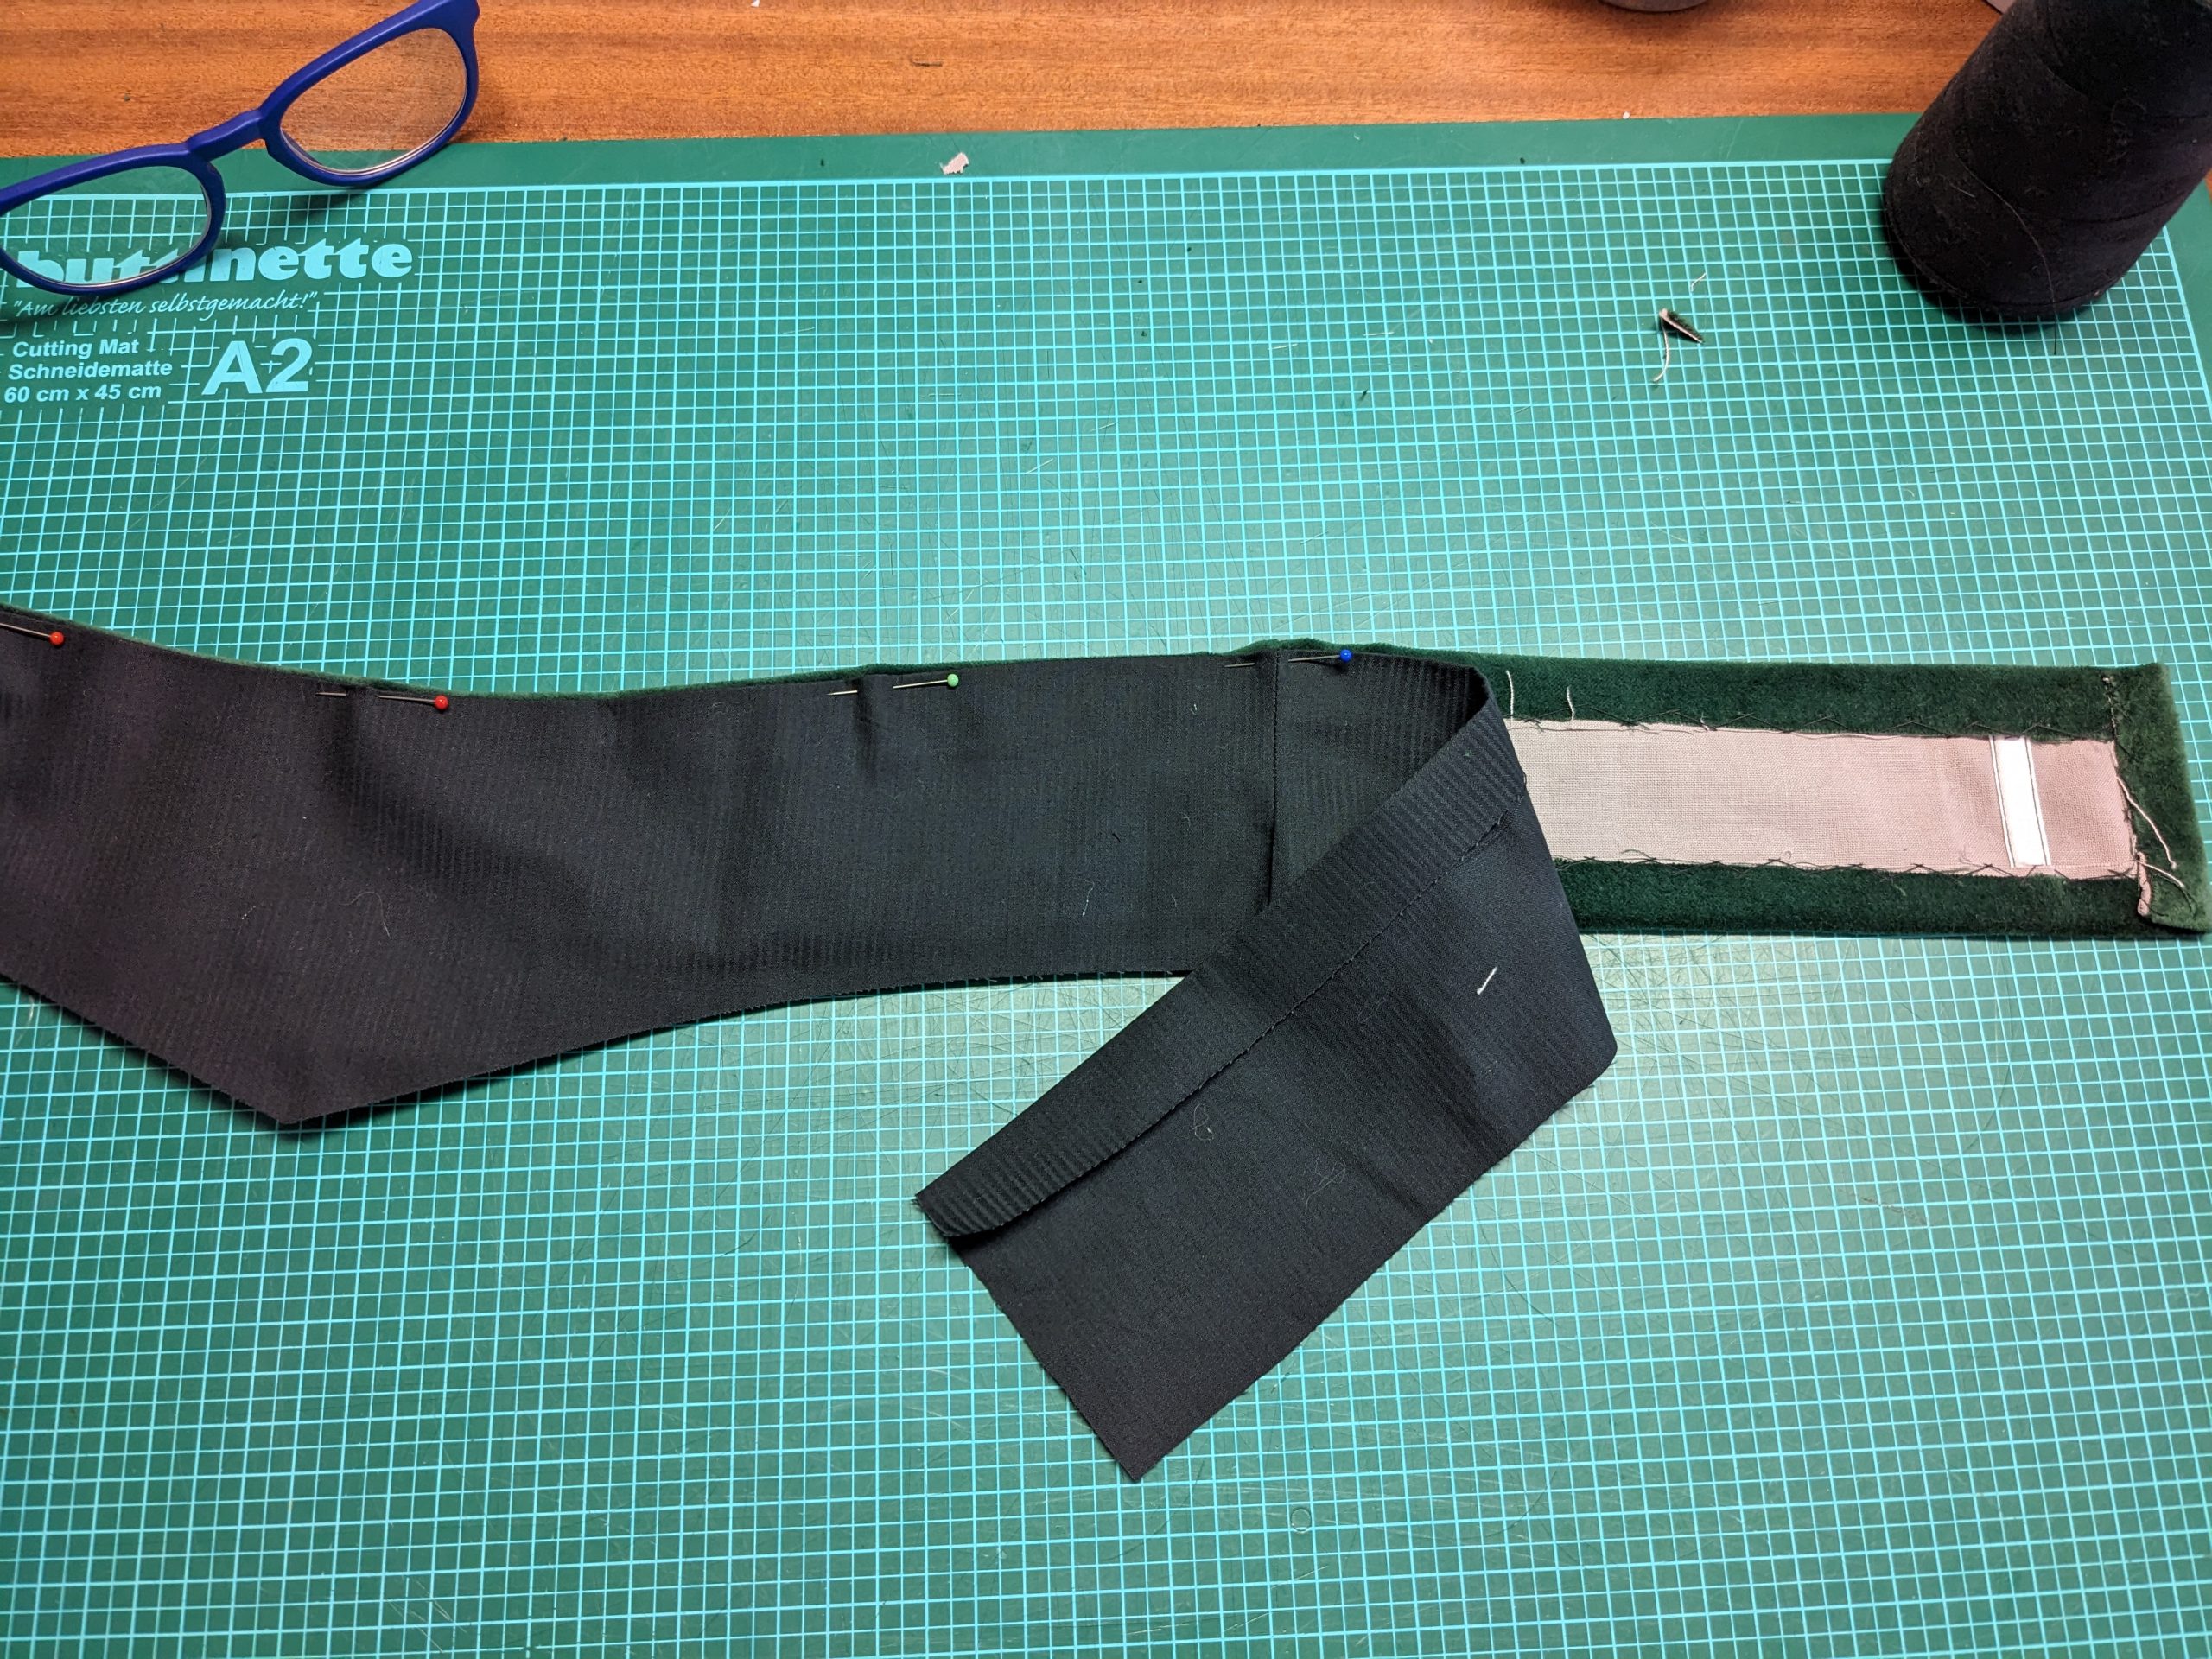
(1) Take the belt pieces from the fashion fabric, interlining and lining (same fabric), and cut off the placket of ¾” (2cm) on the left back side only.

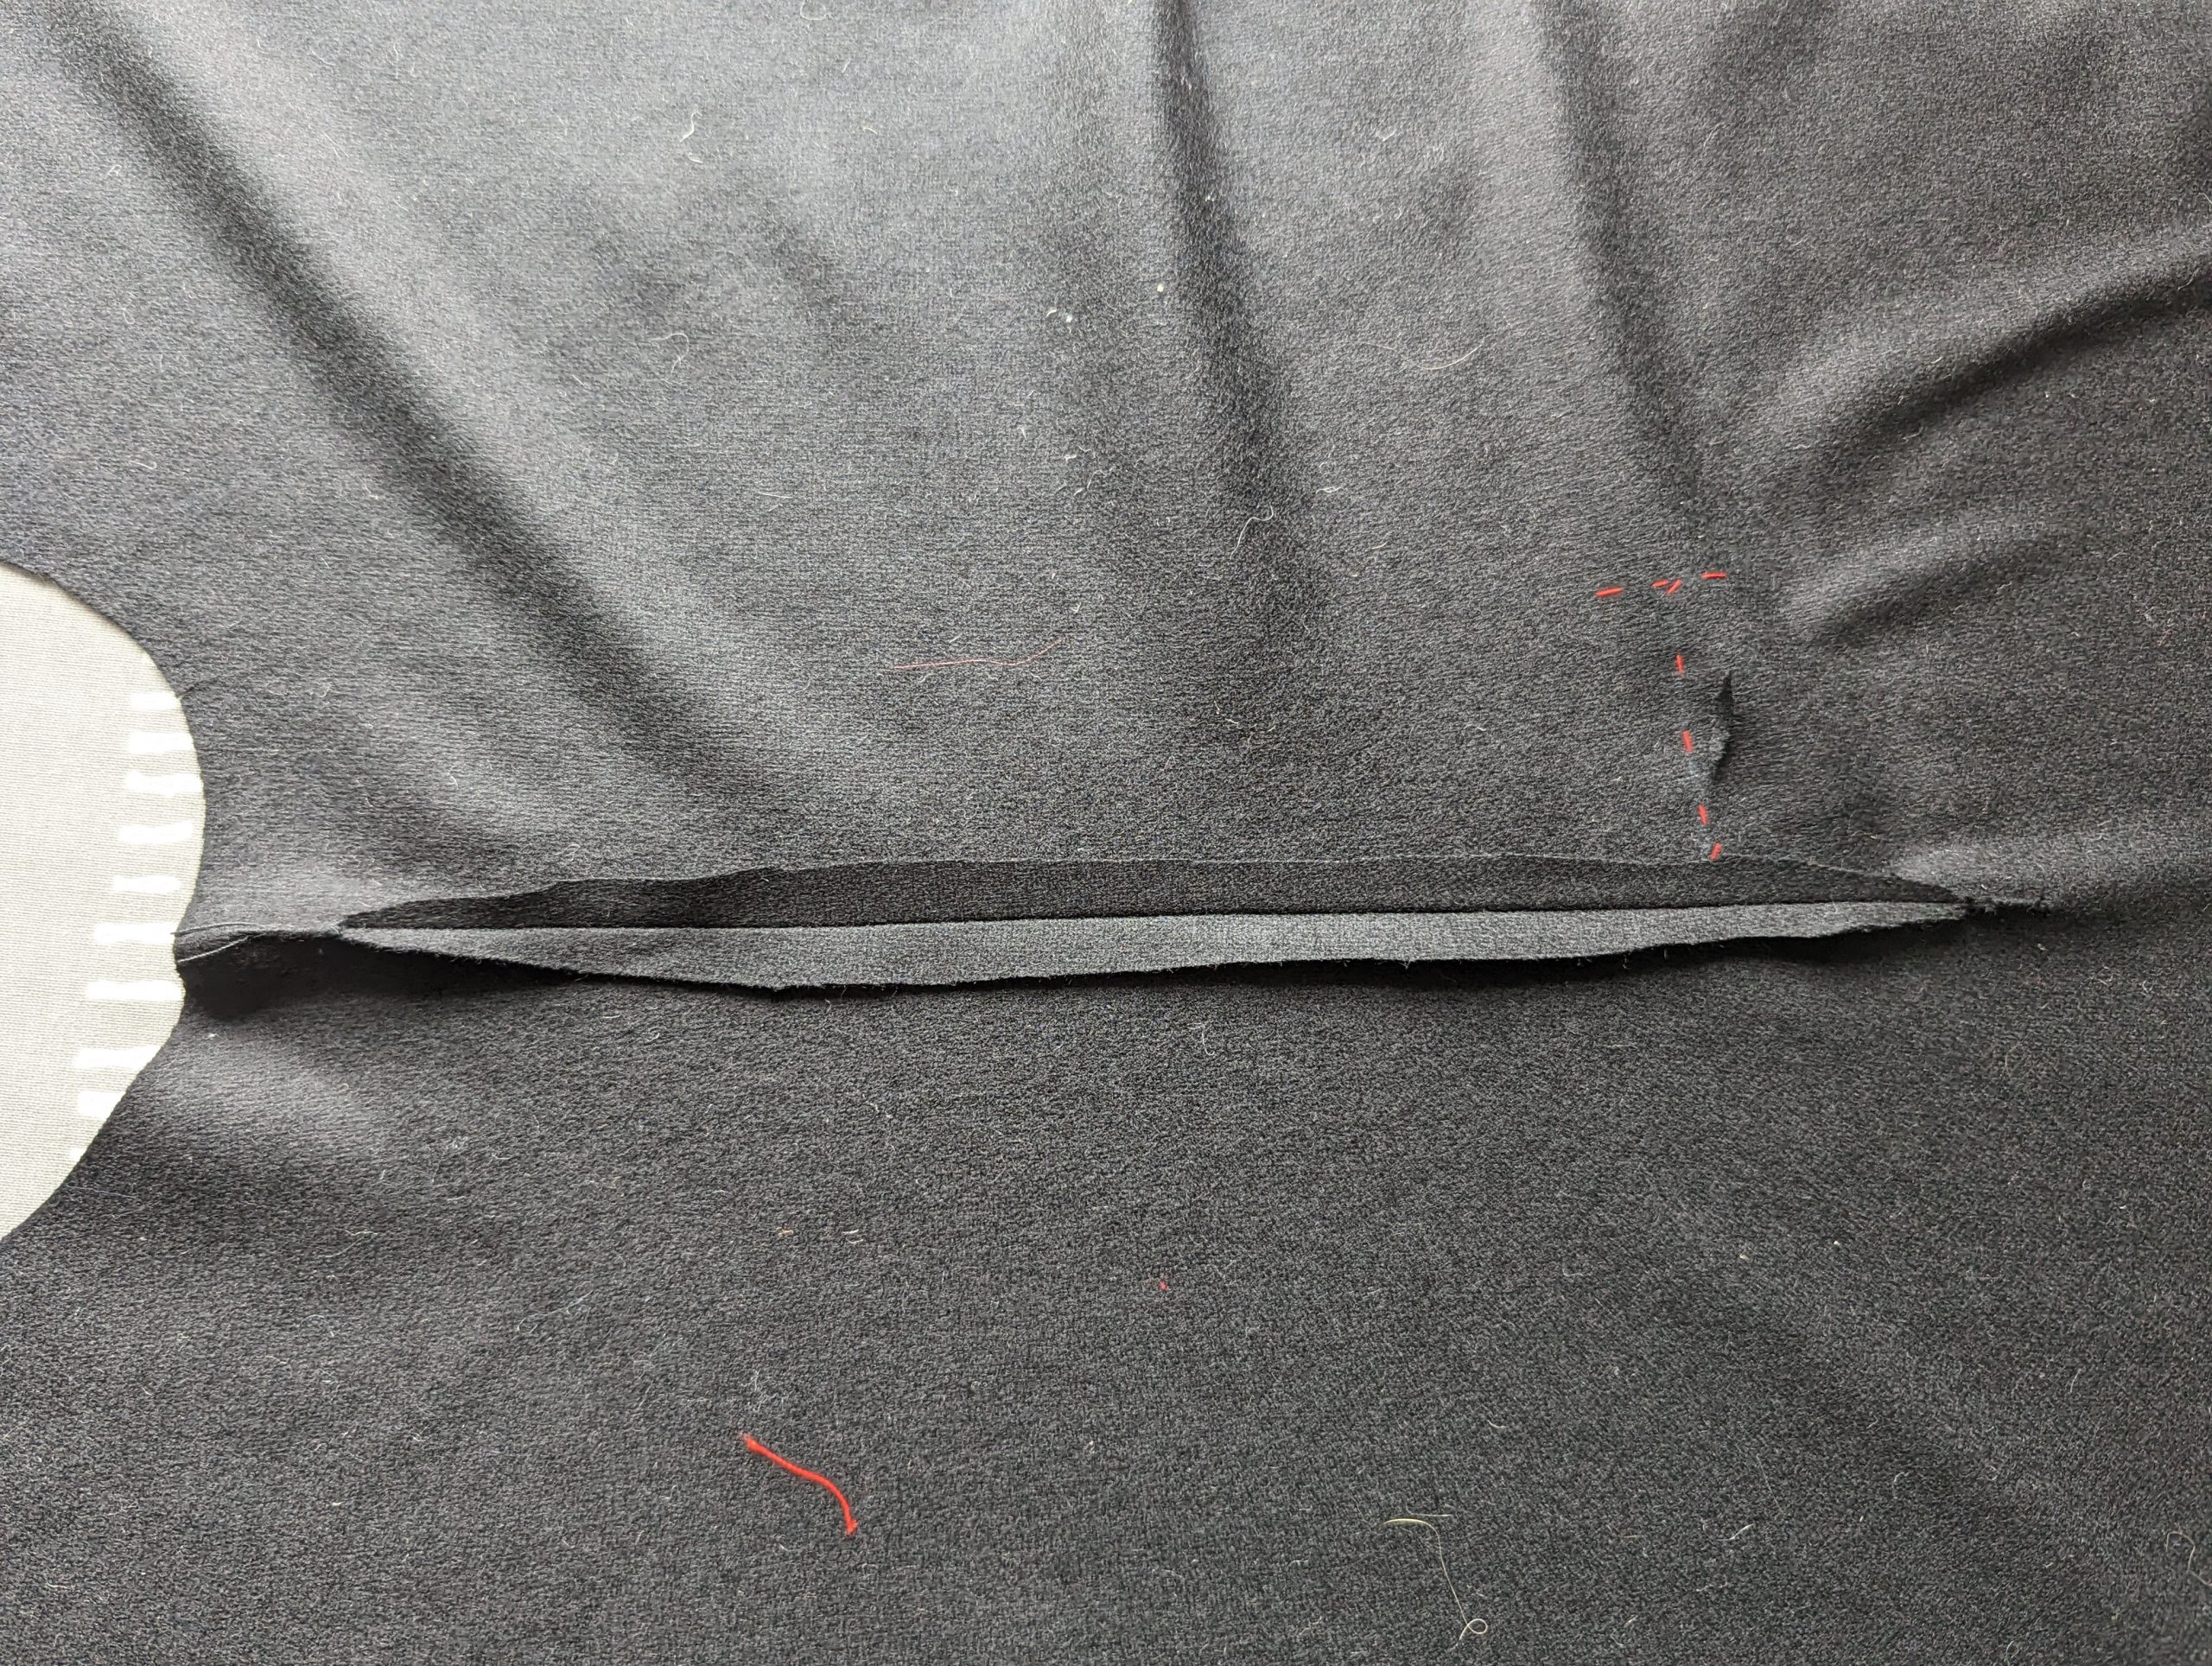
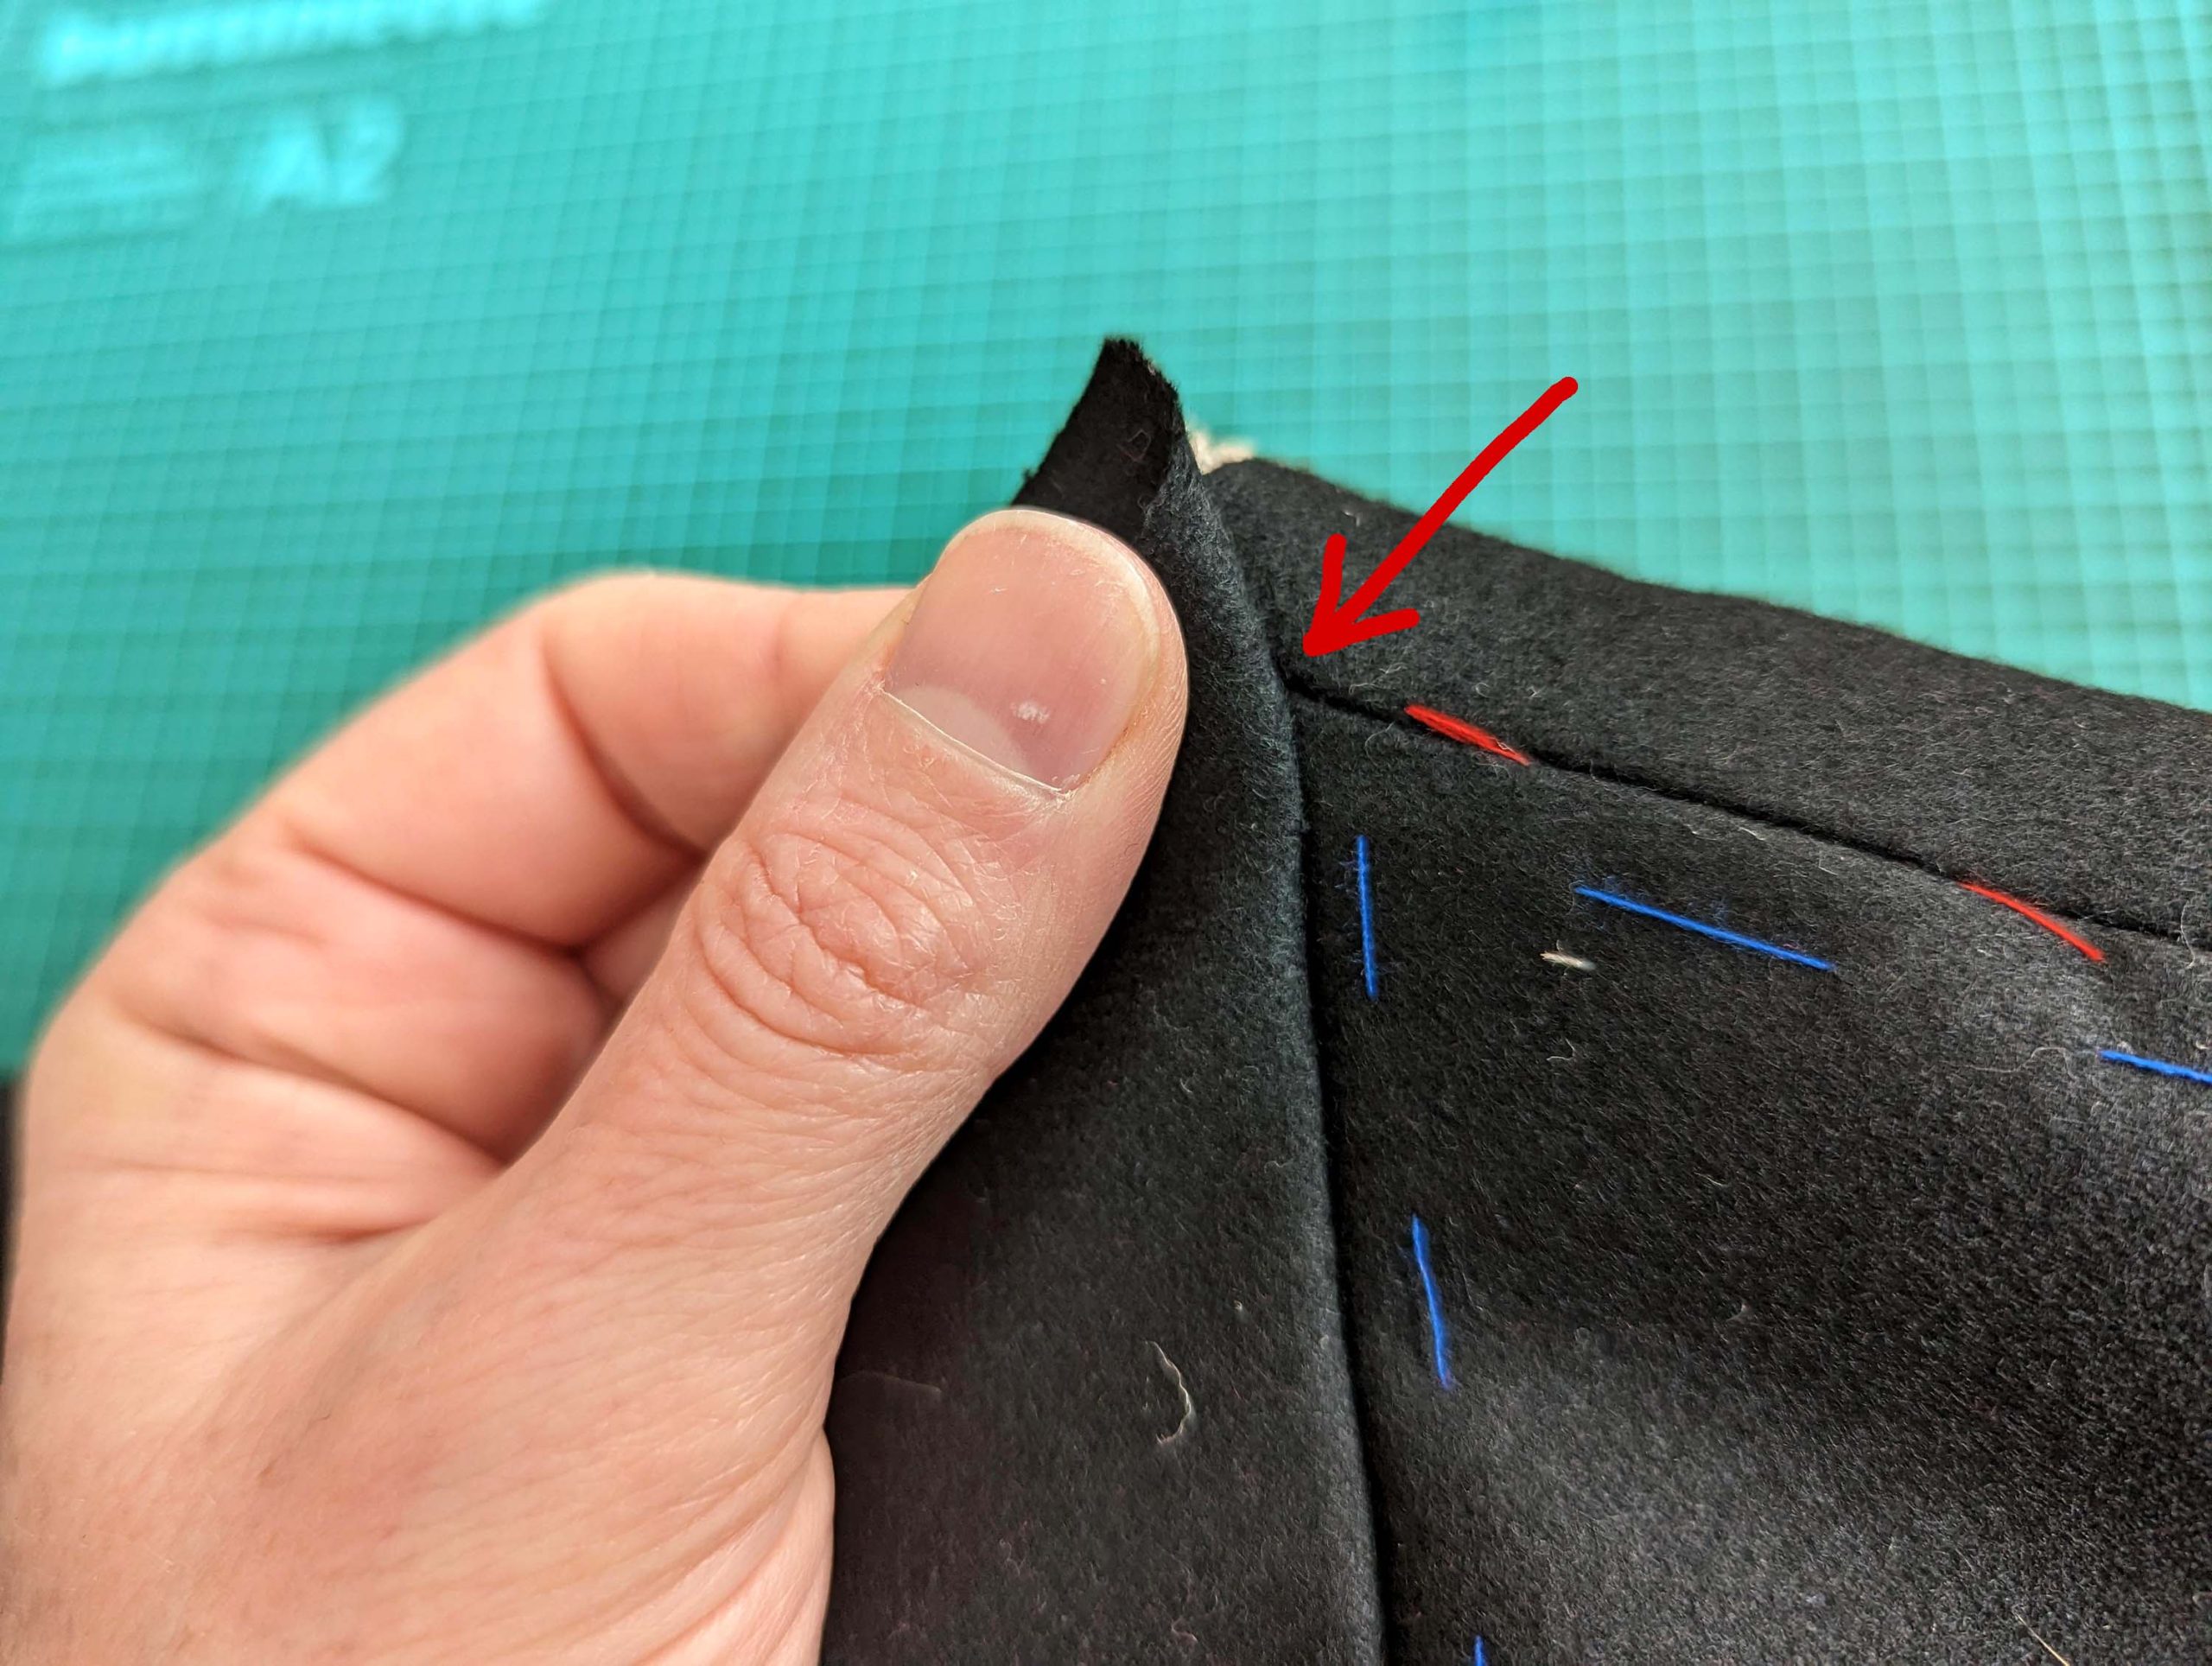
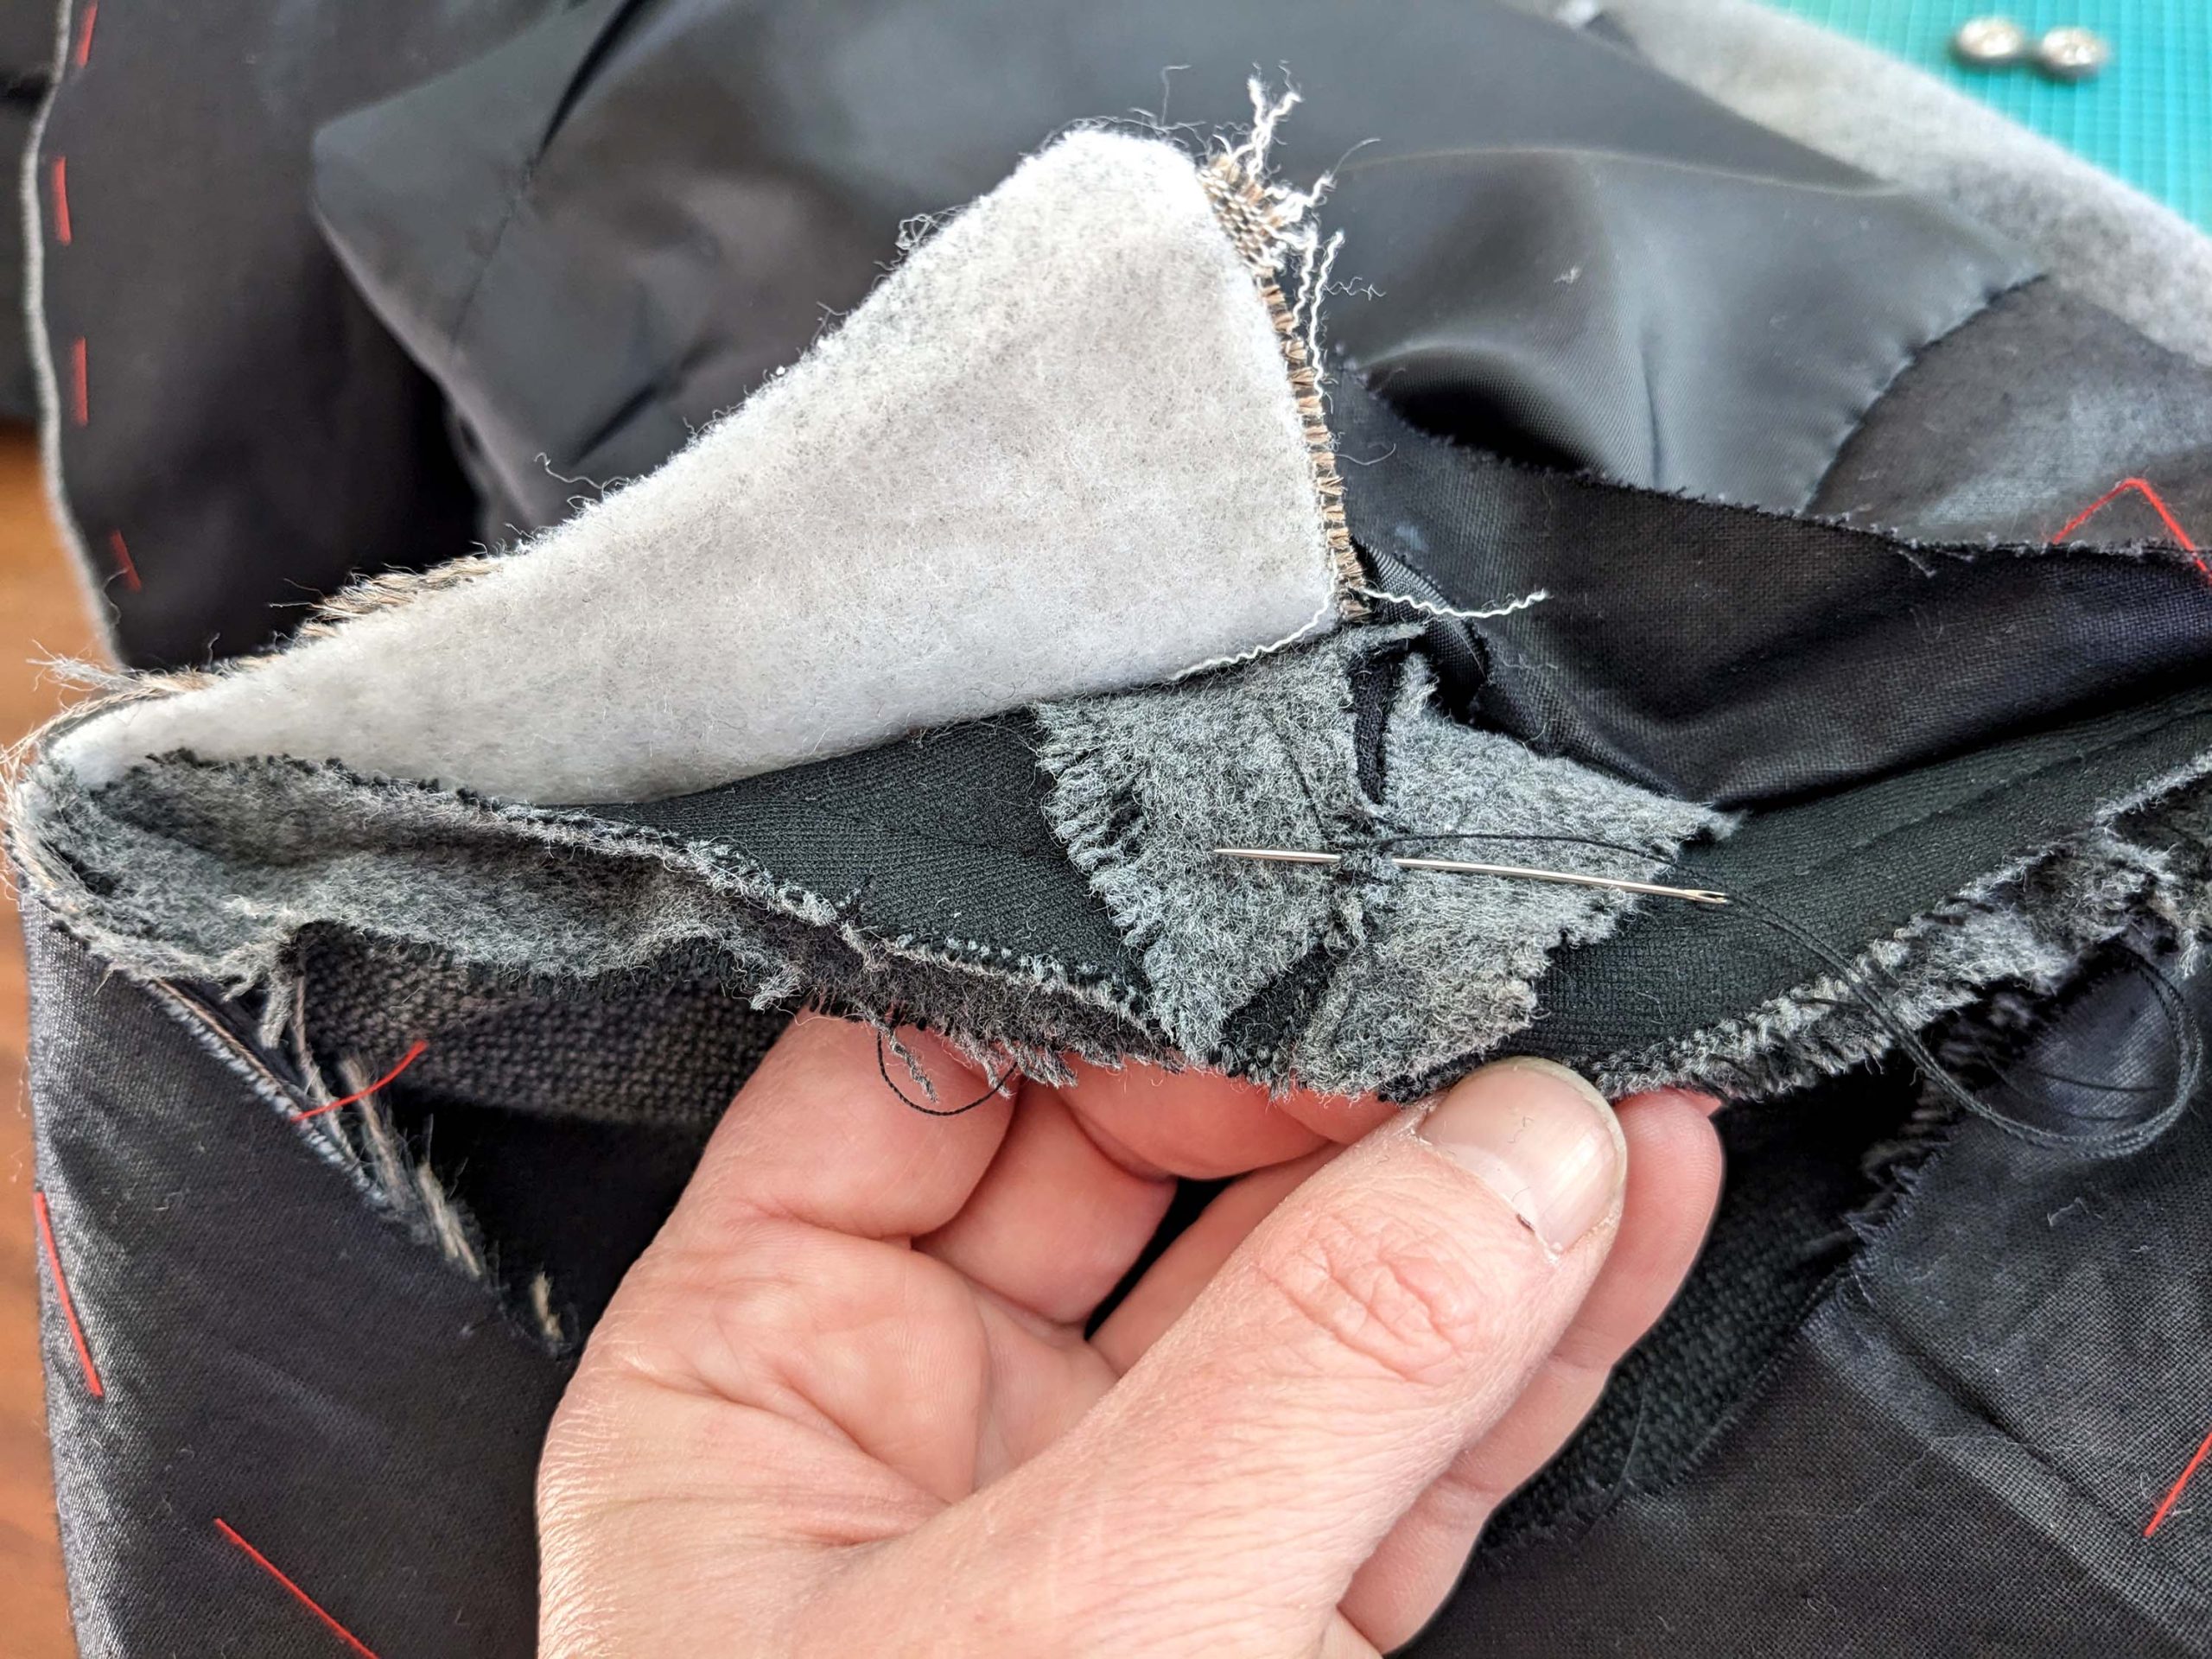
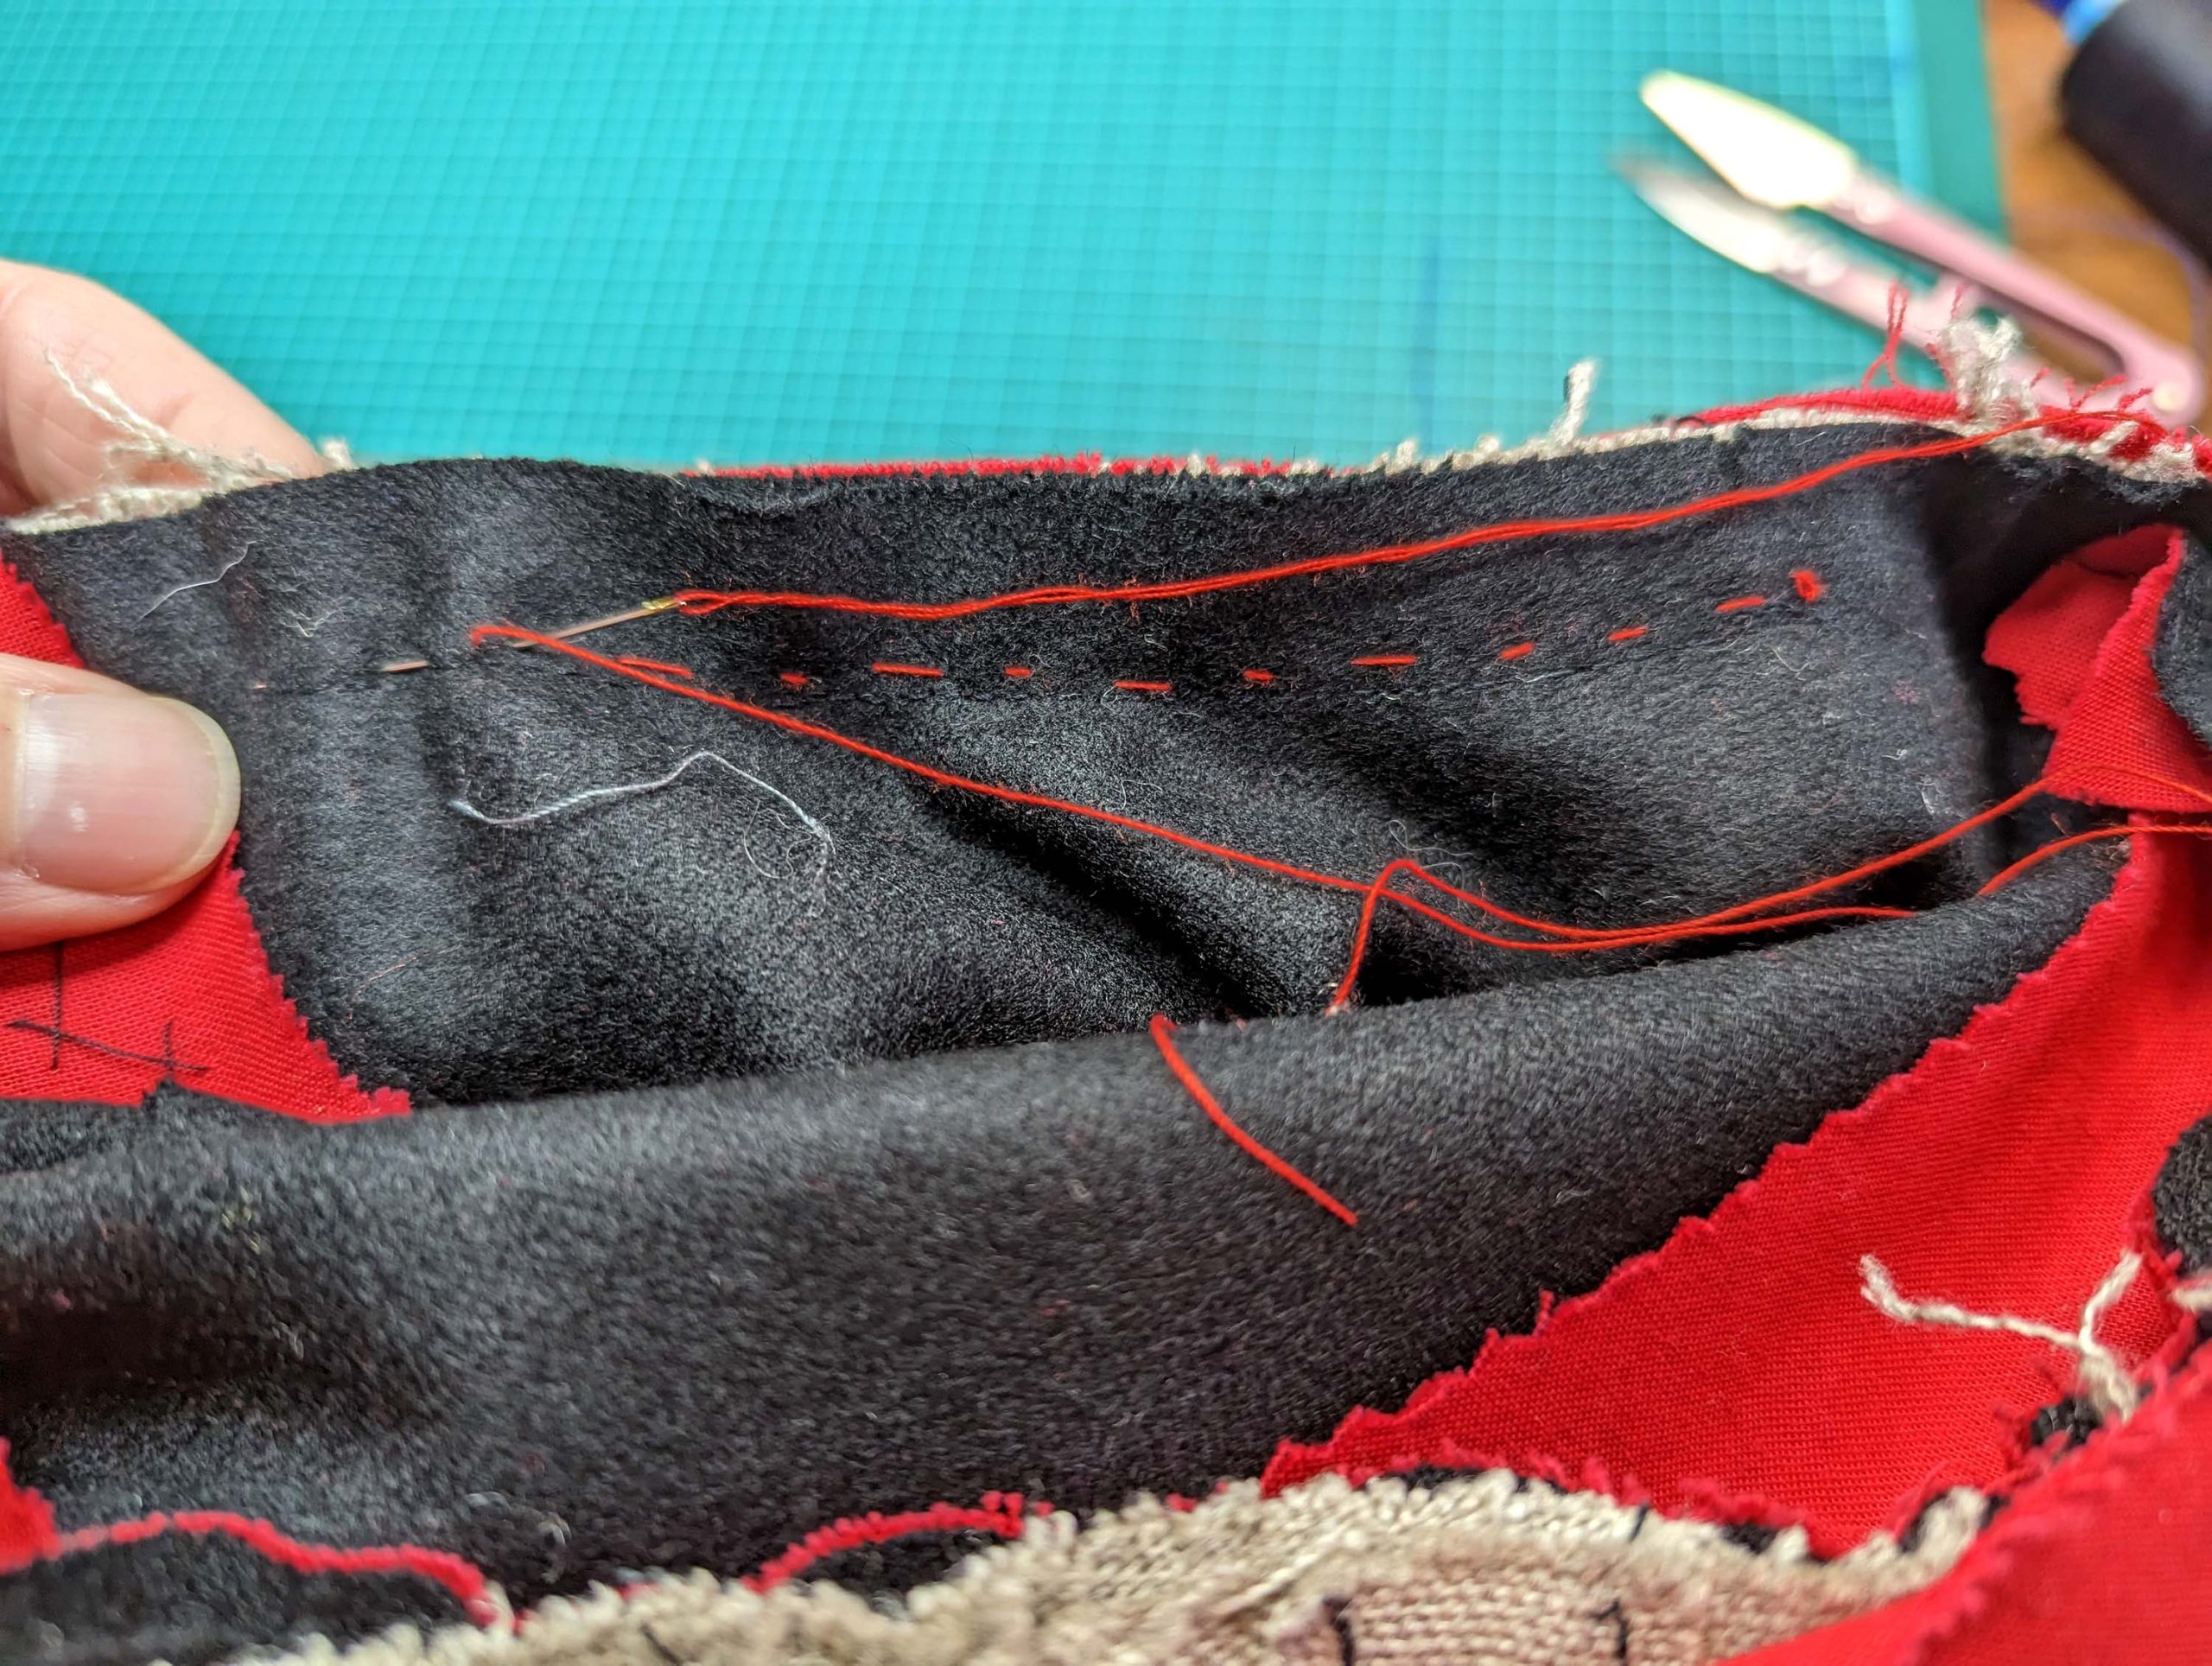
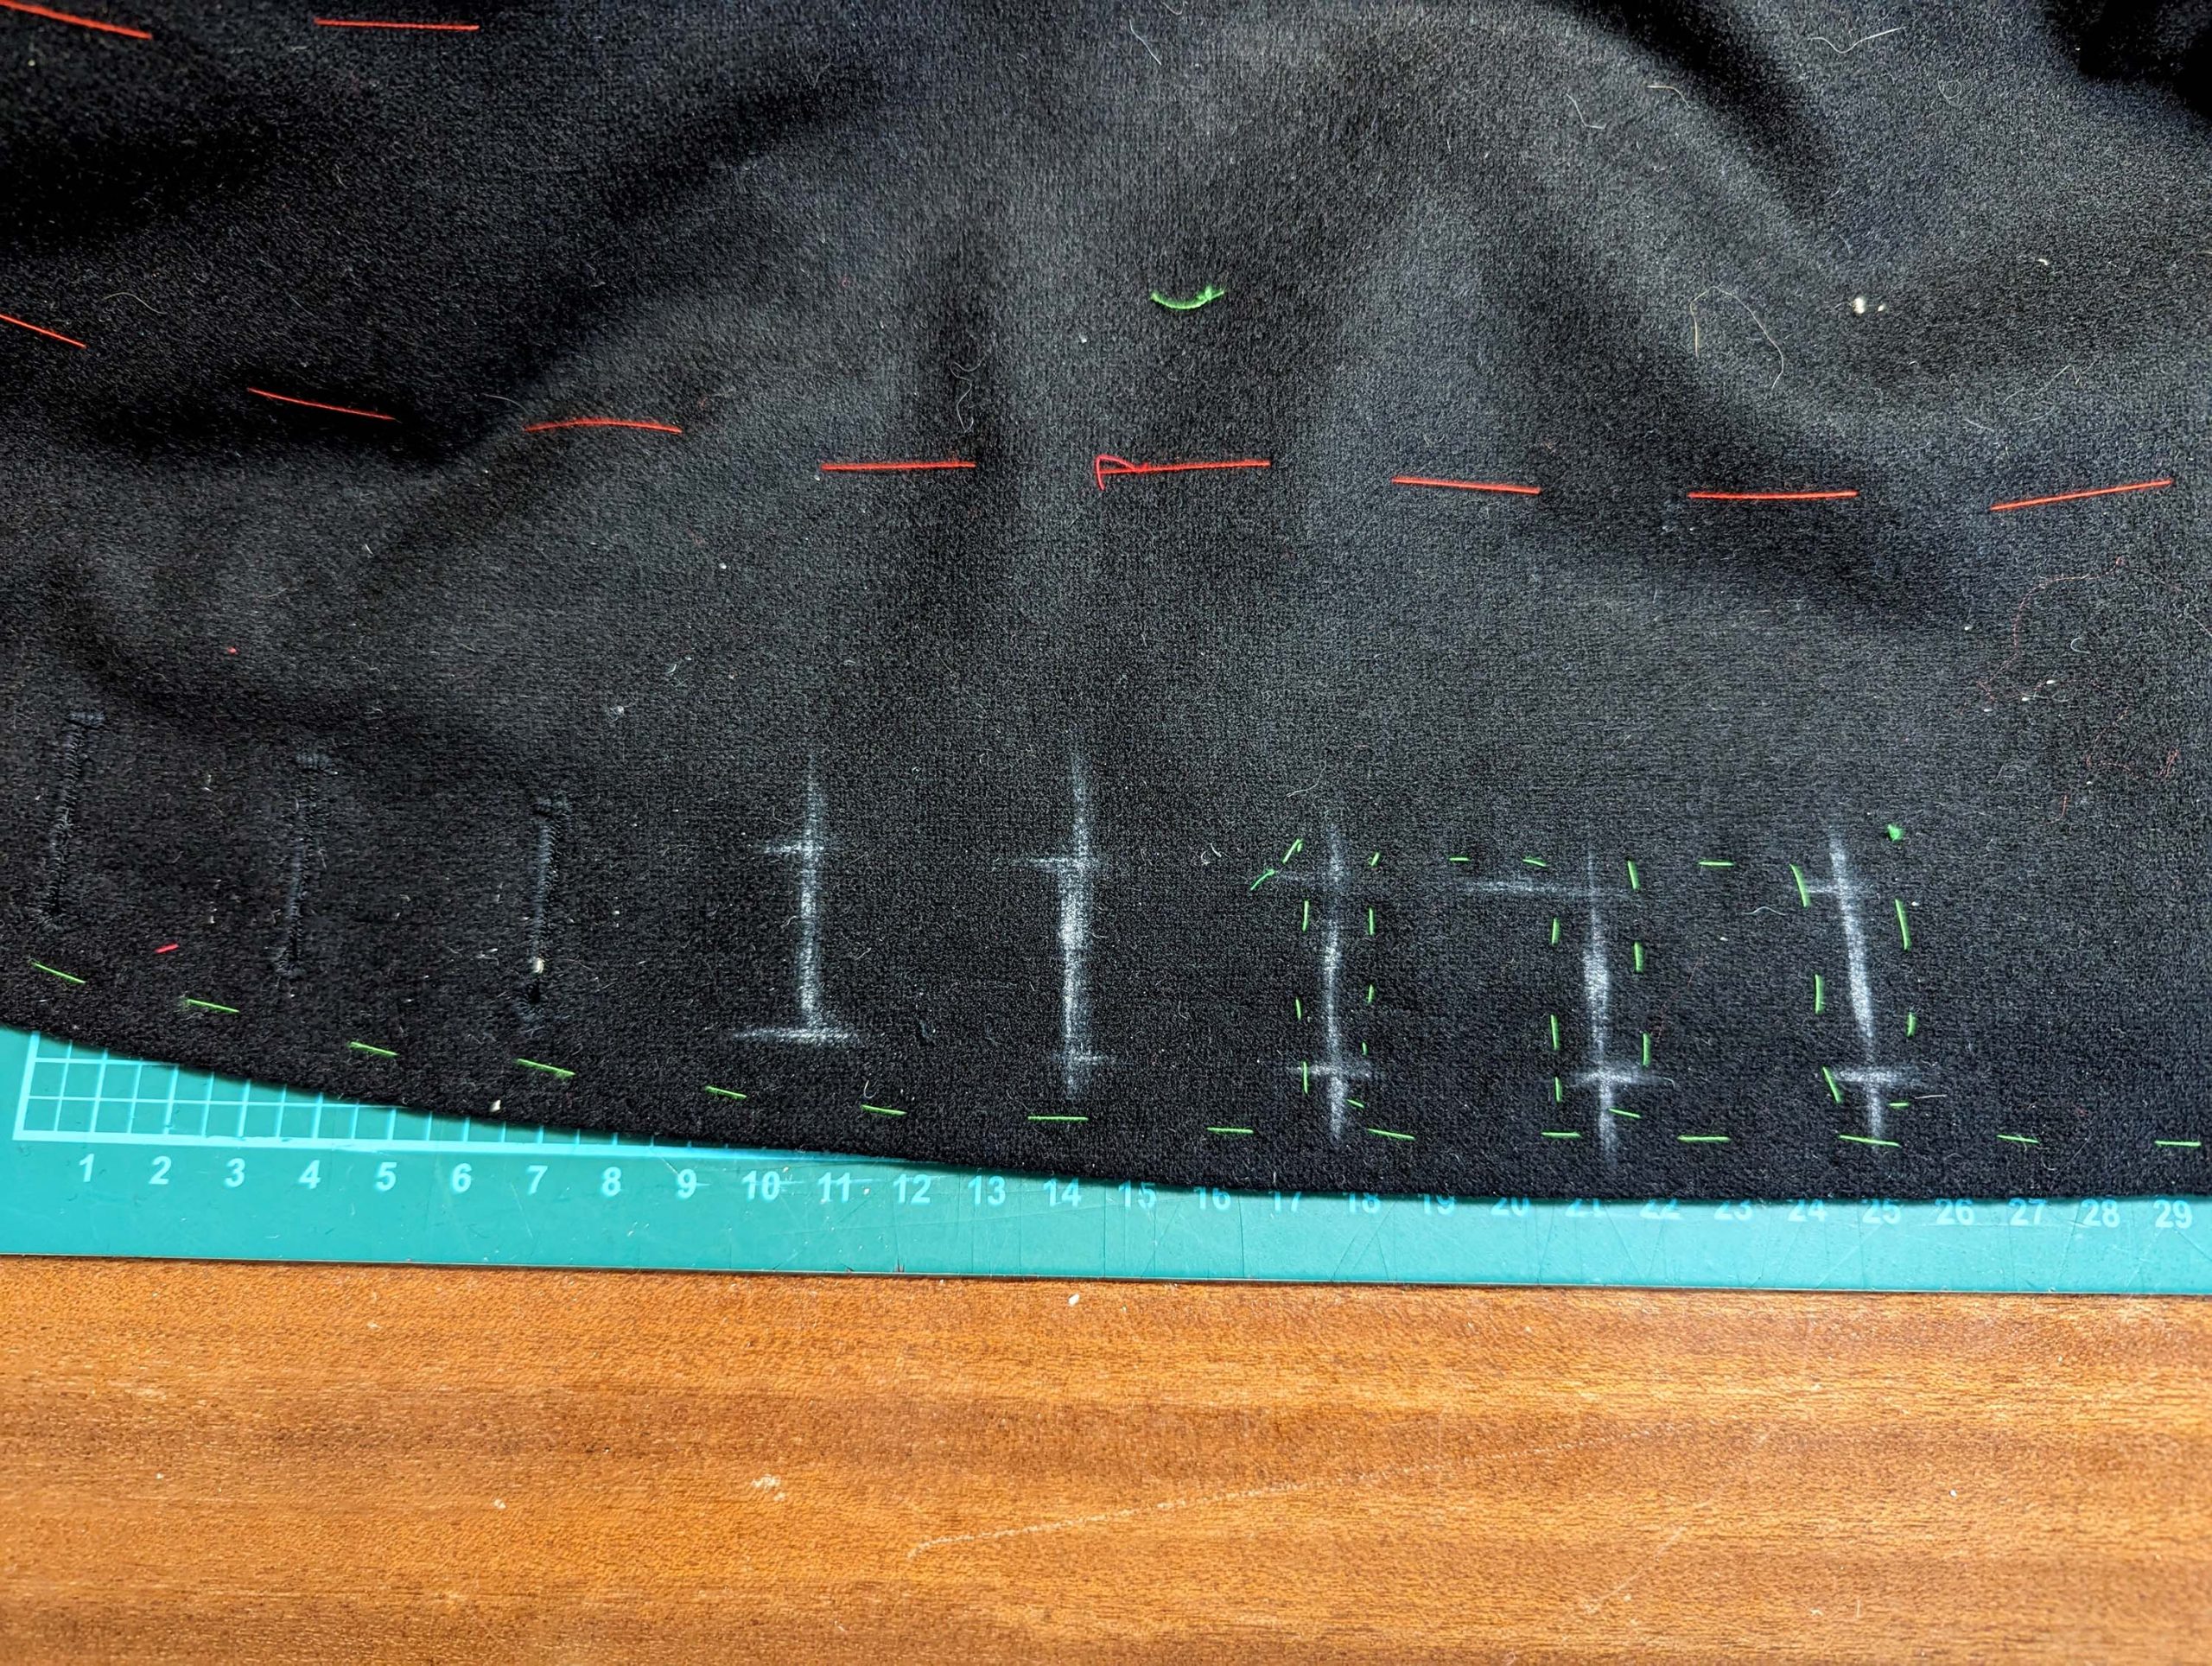
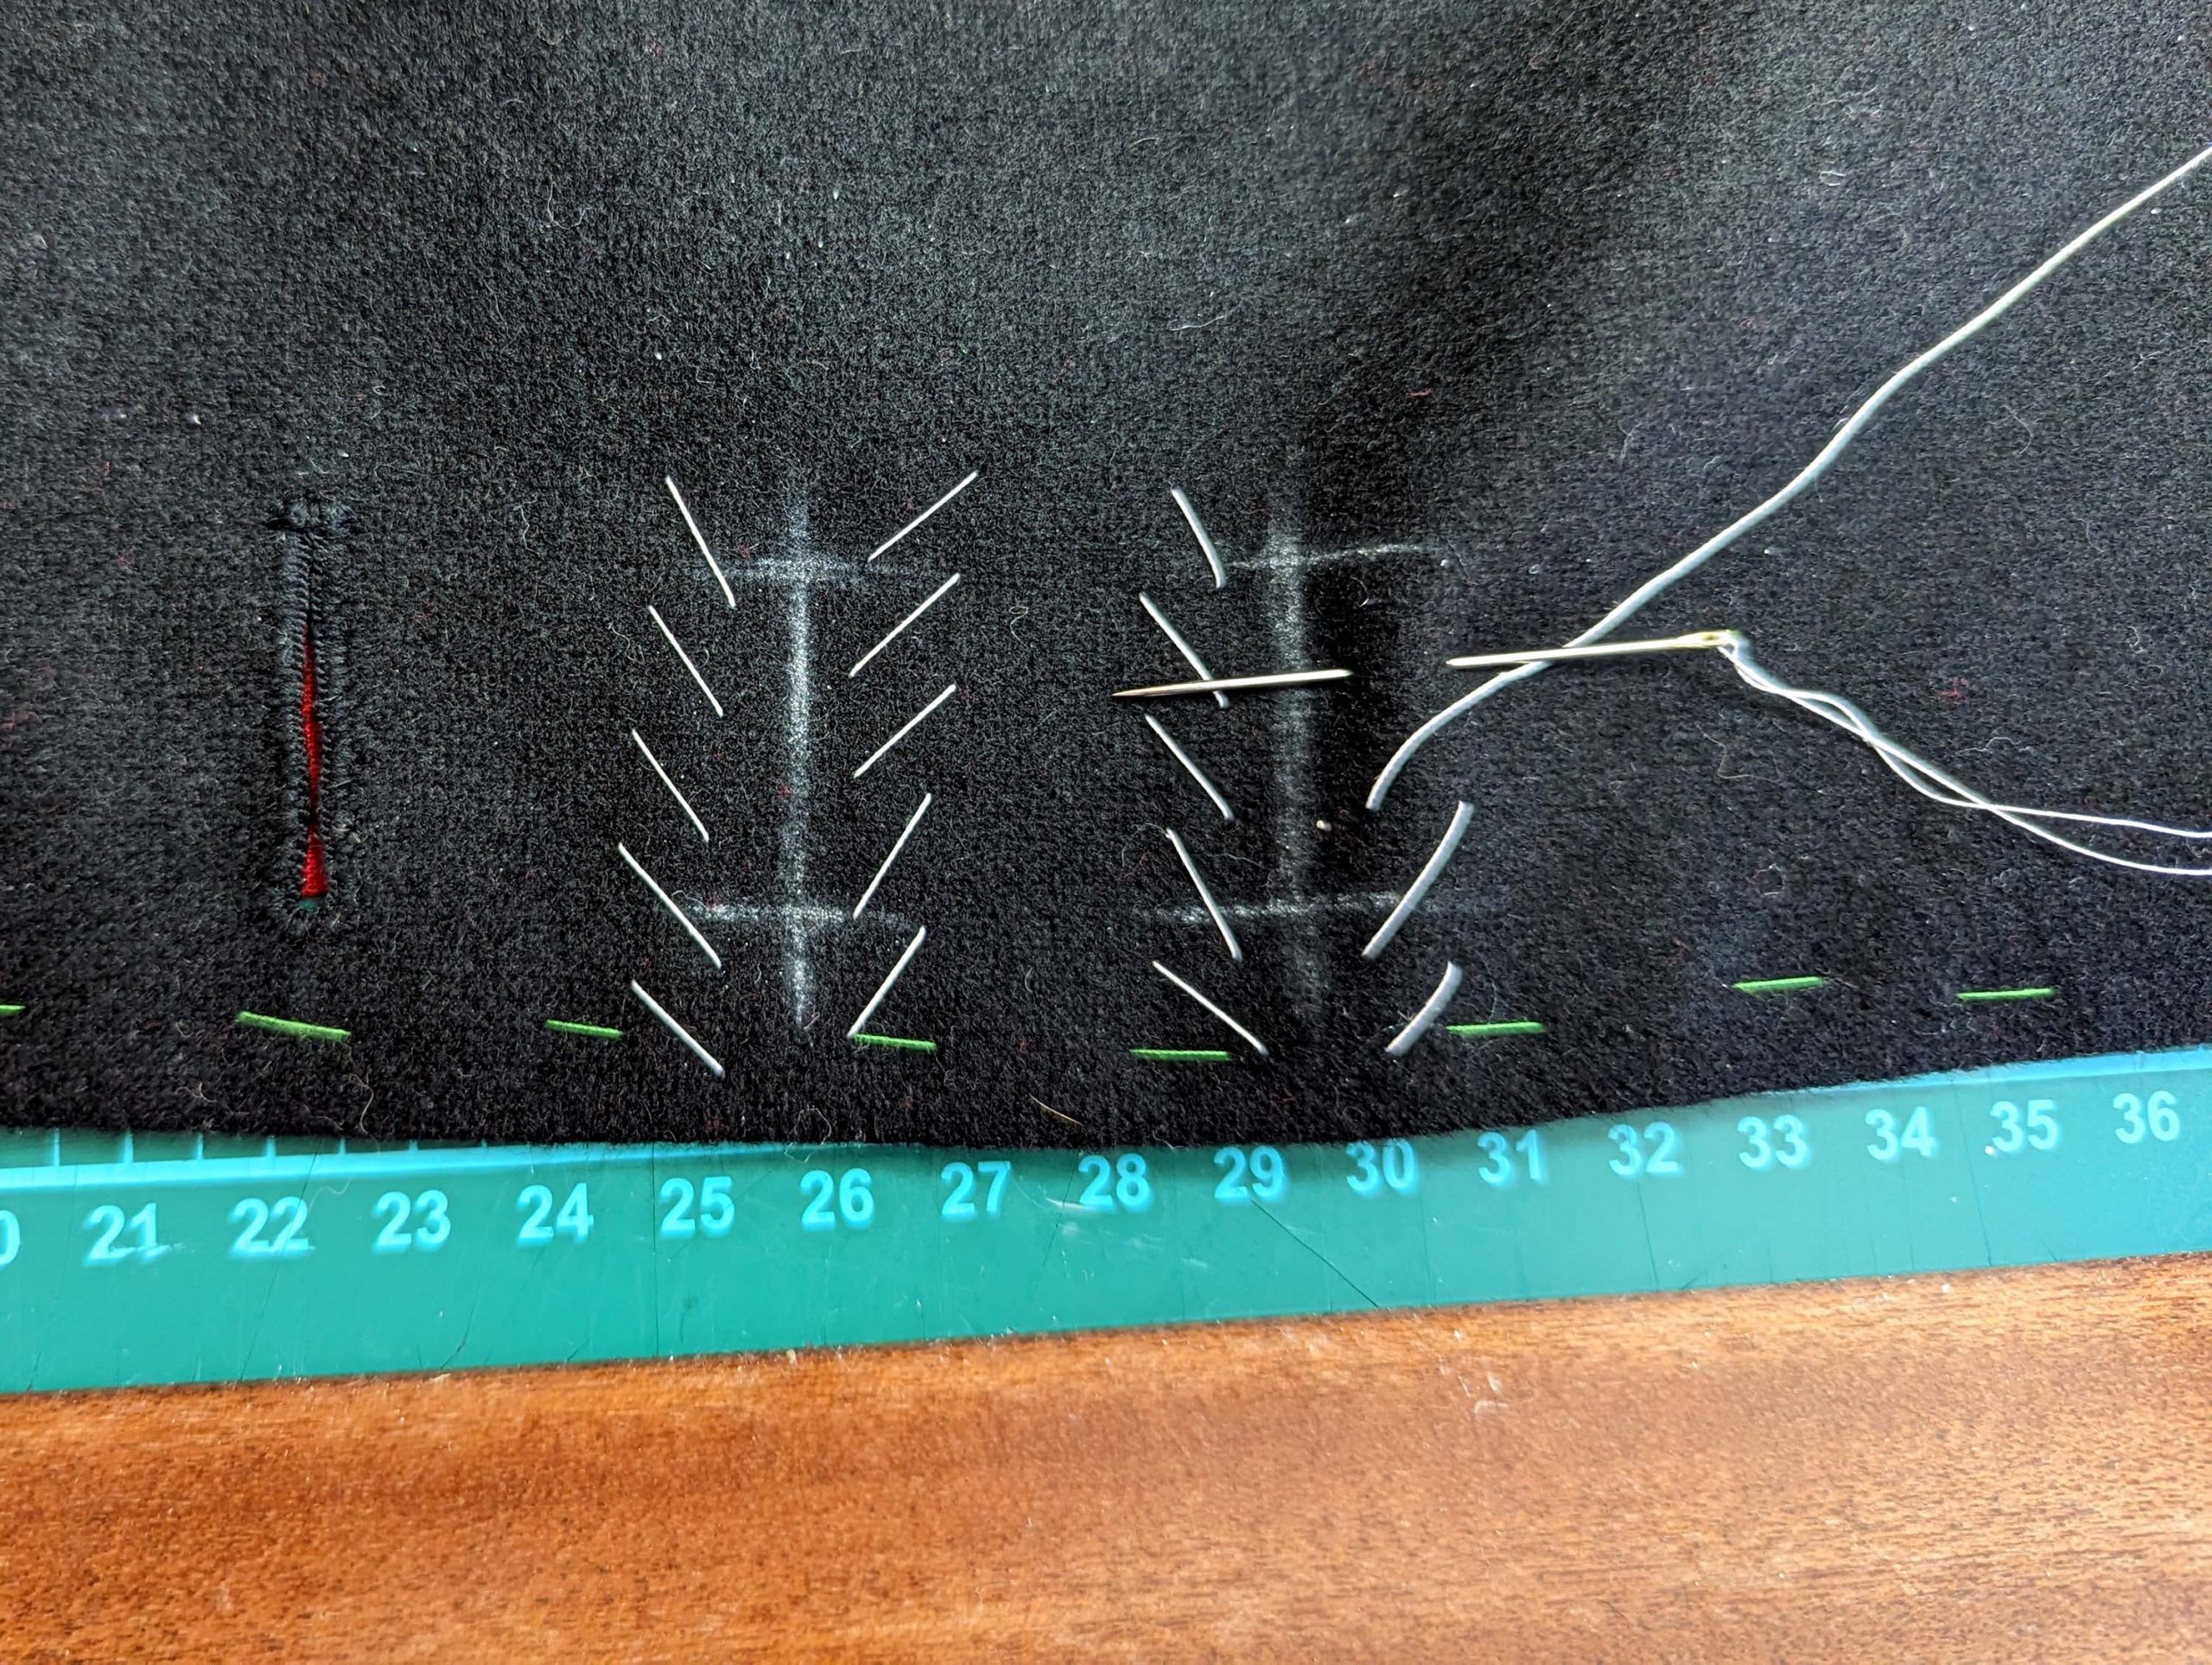
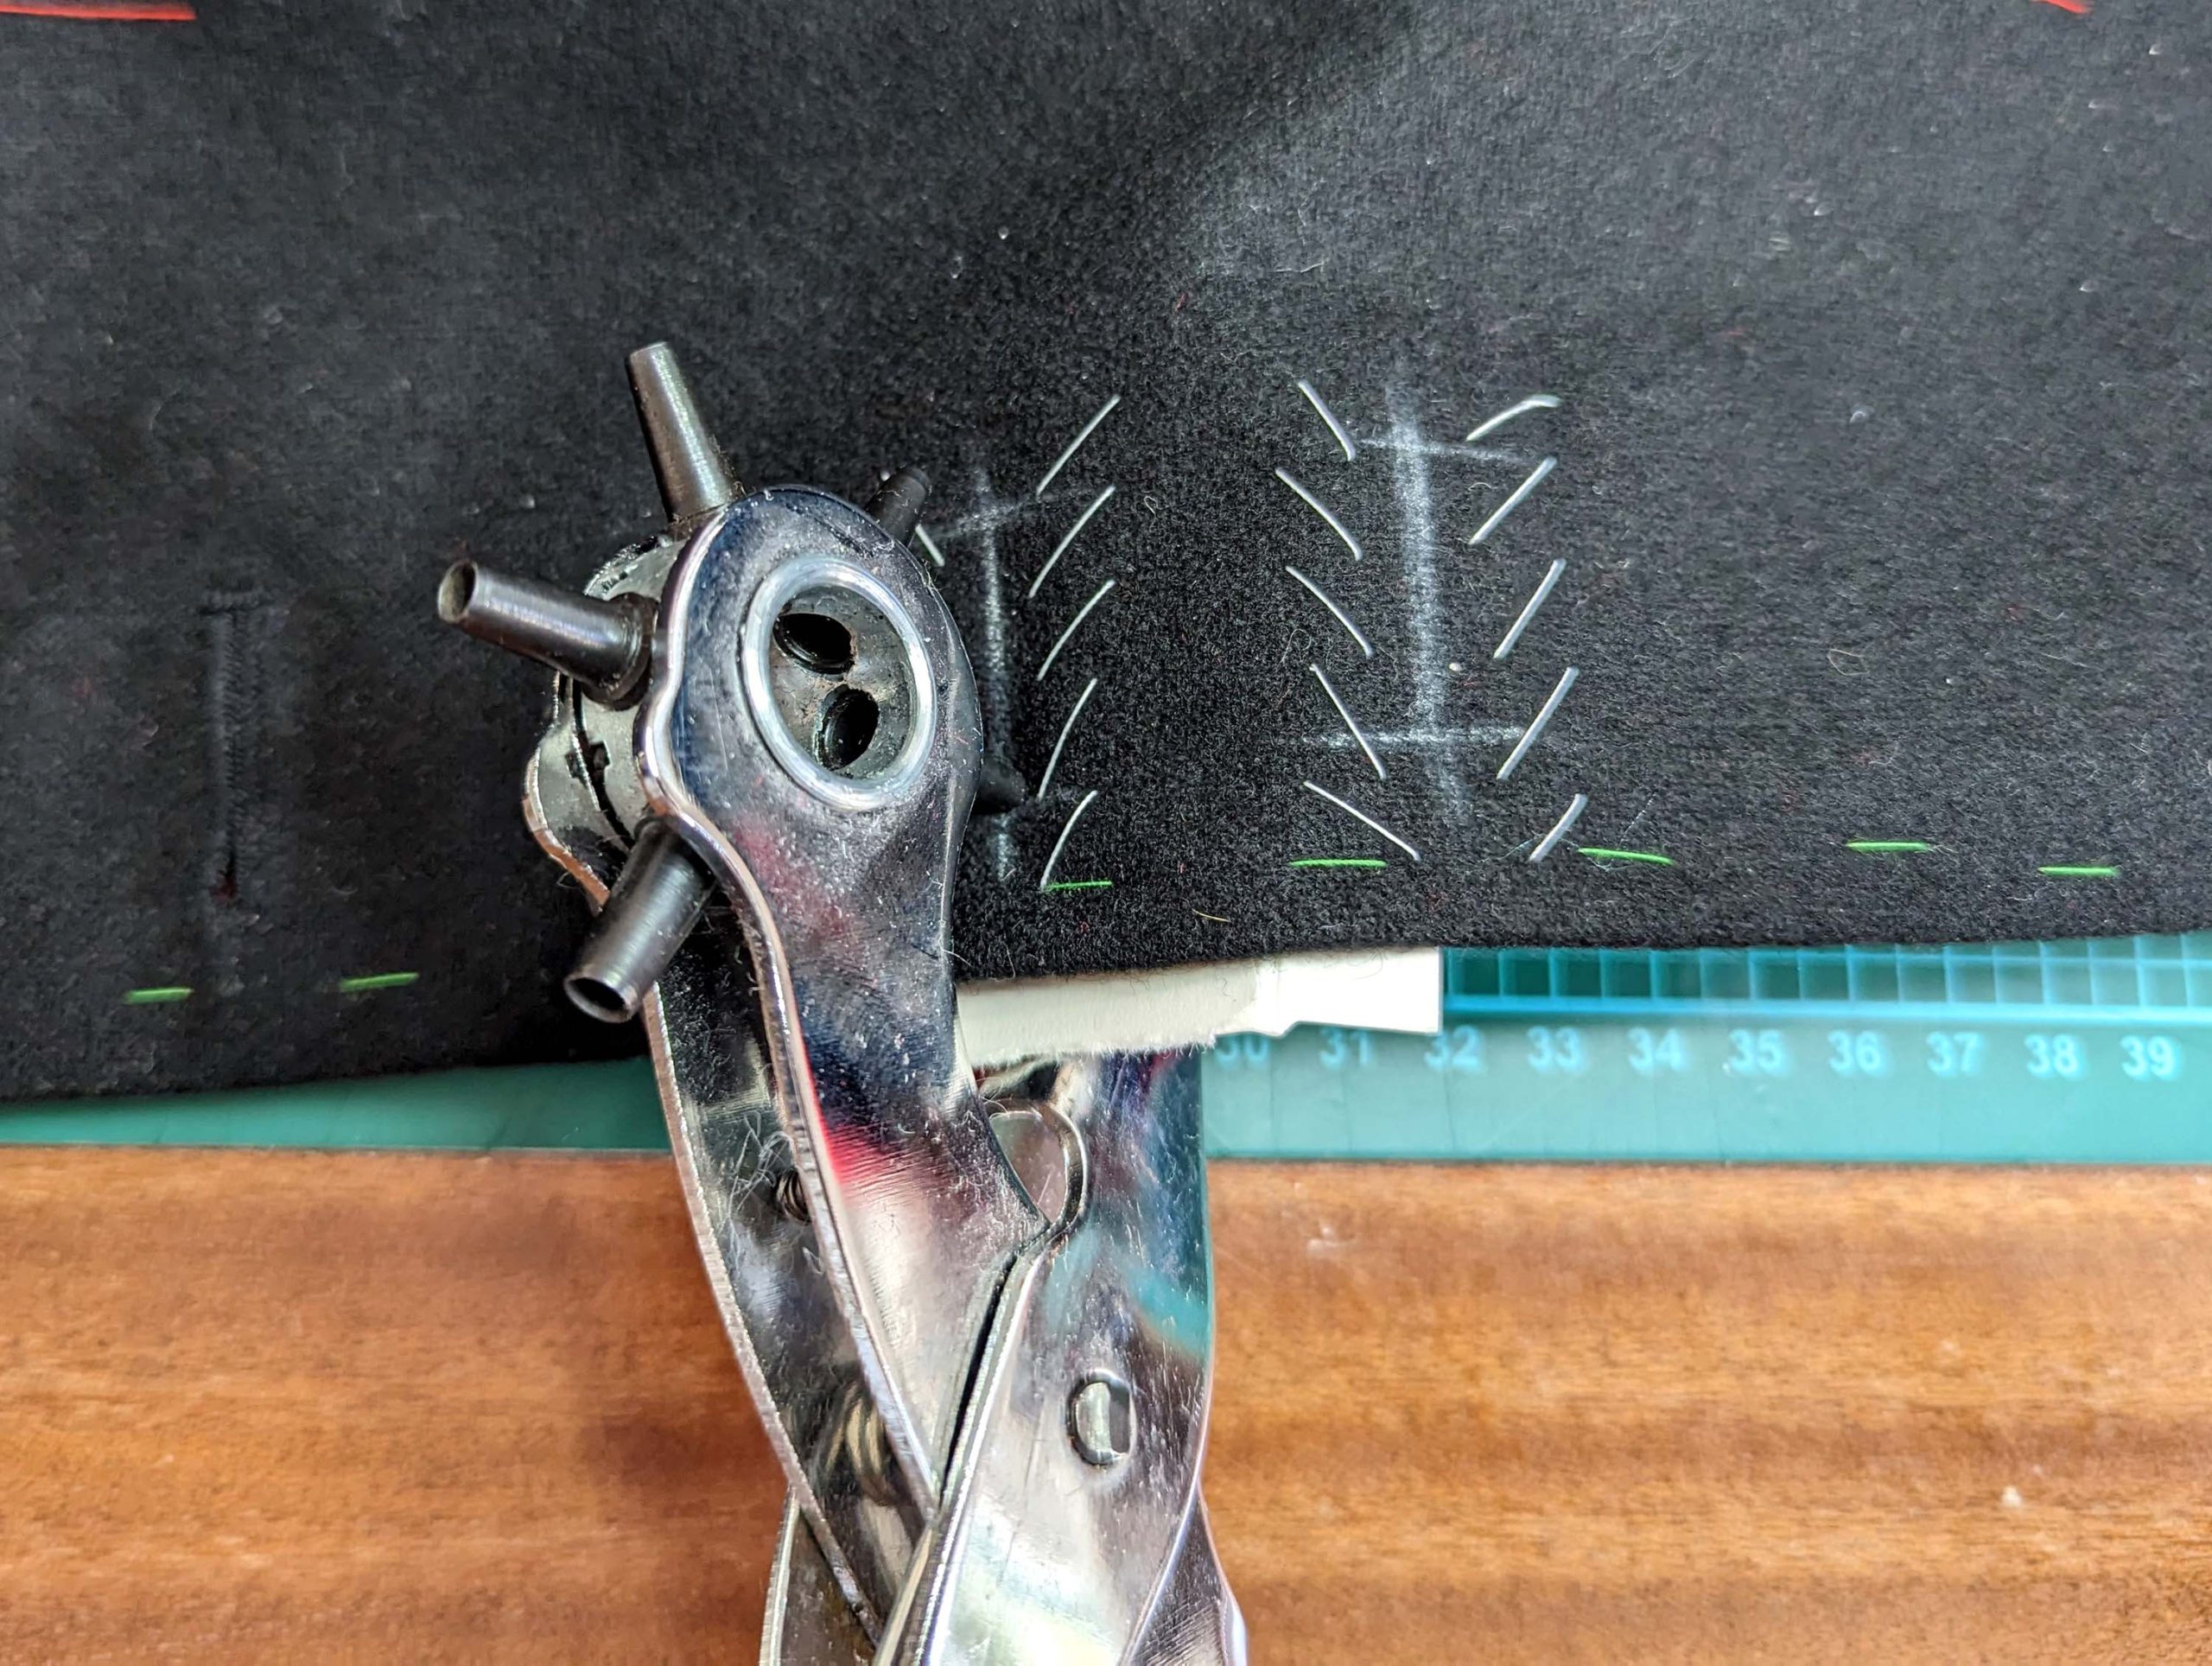
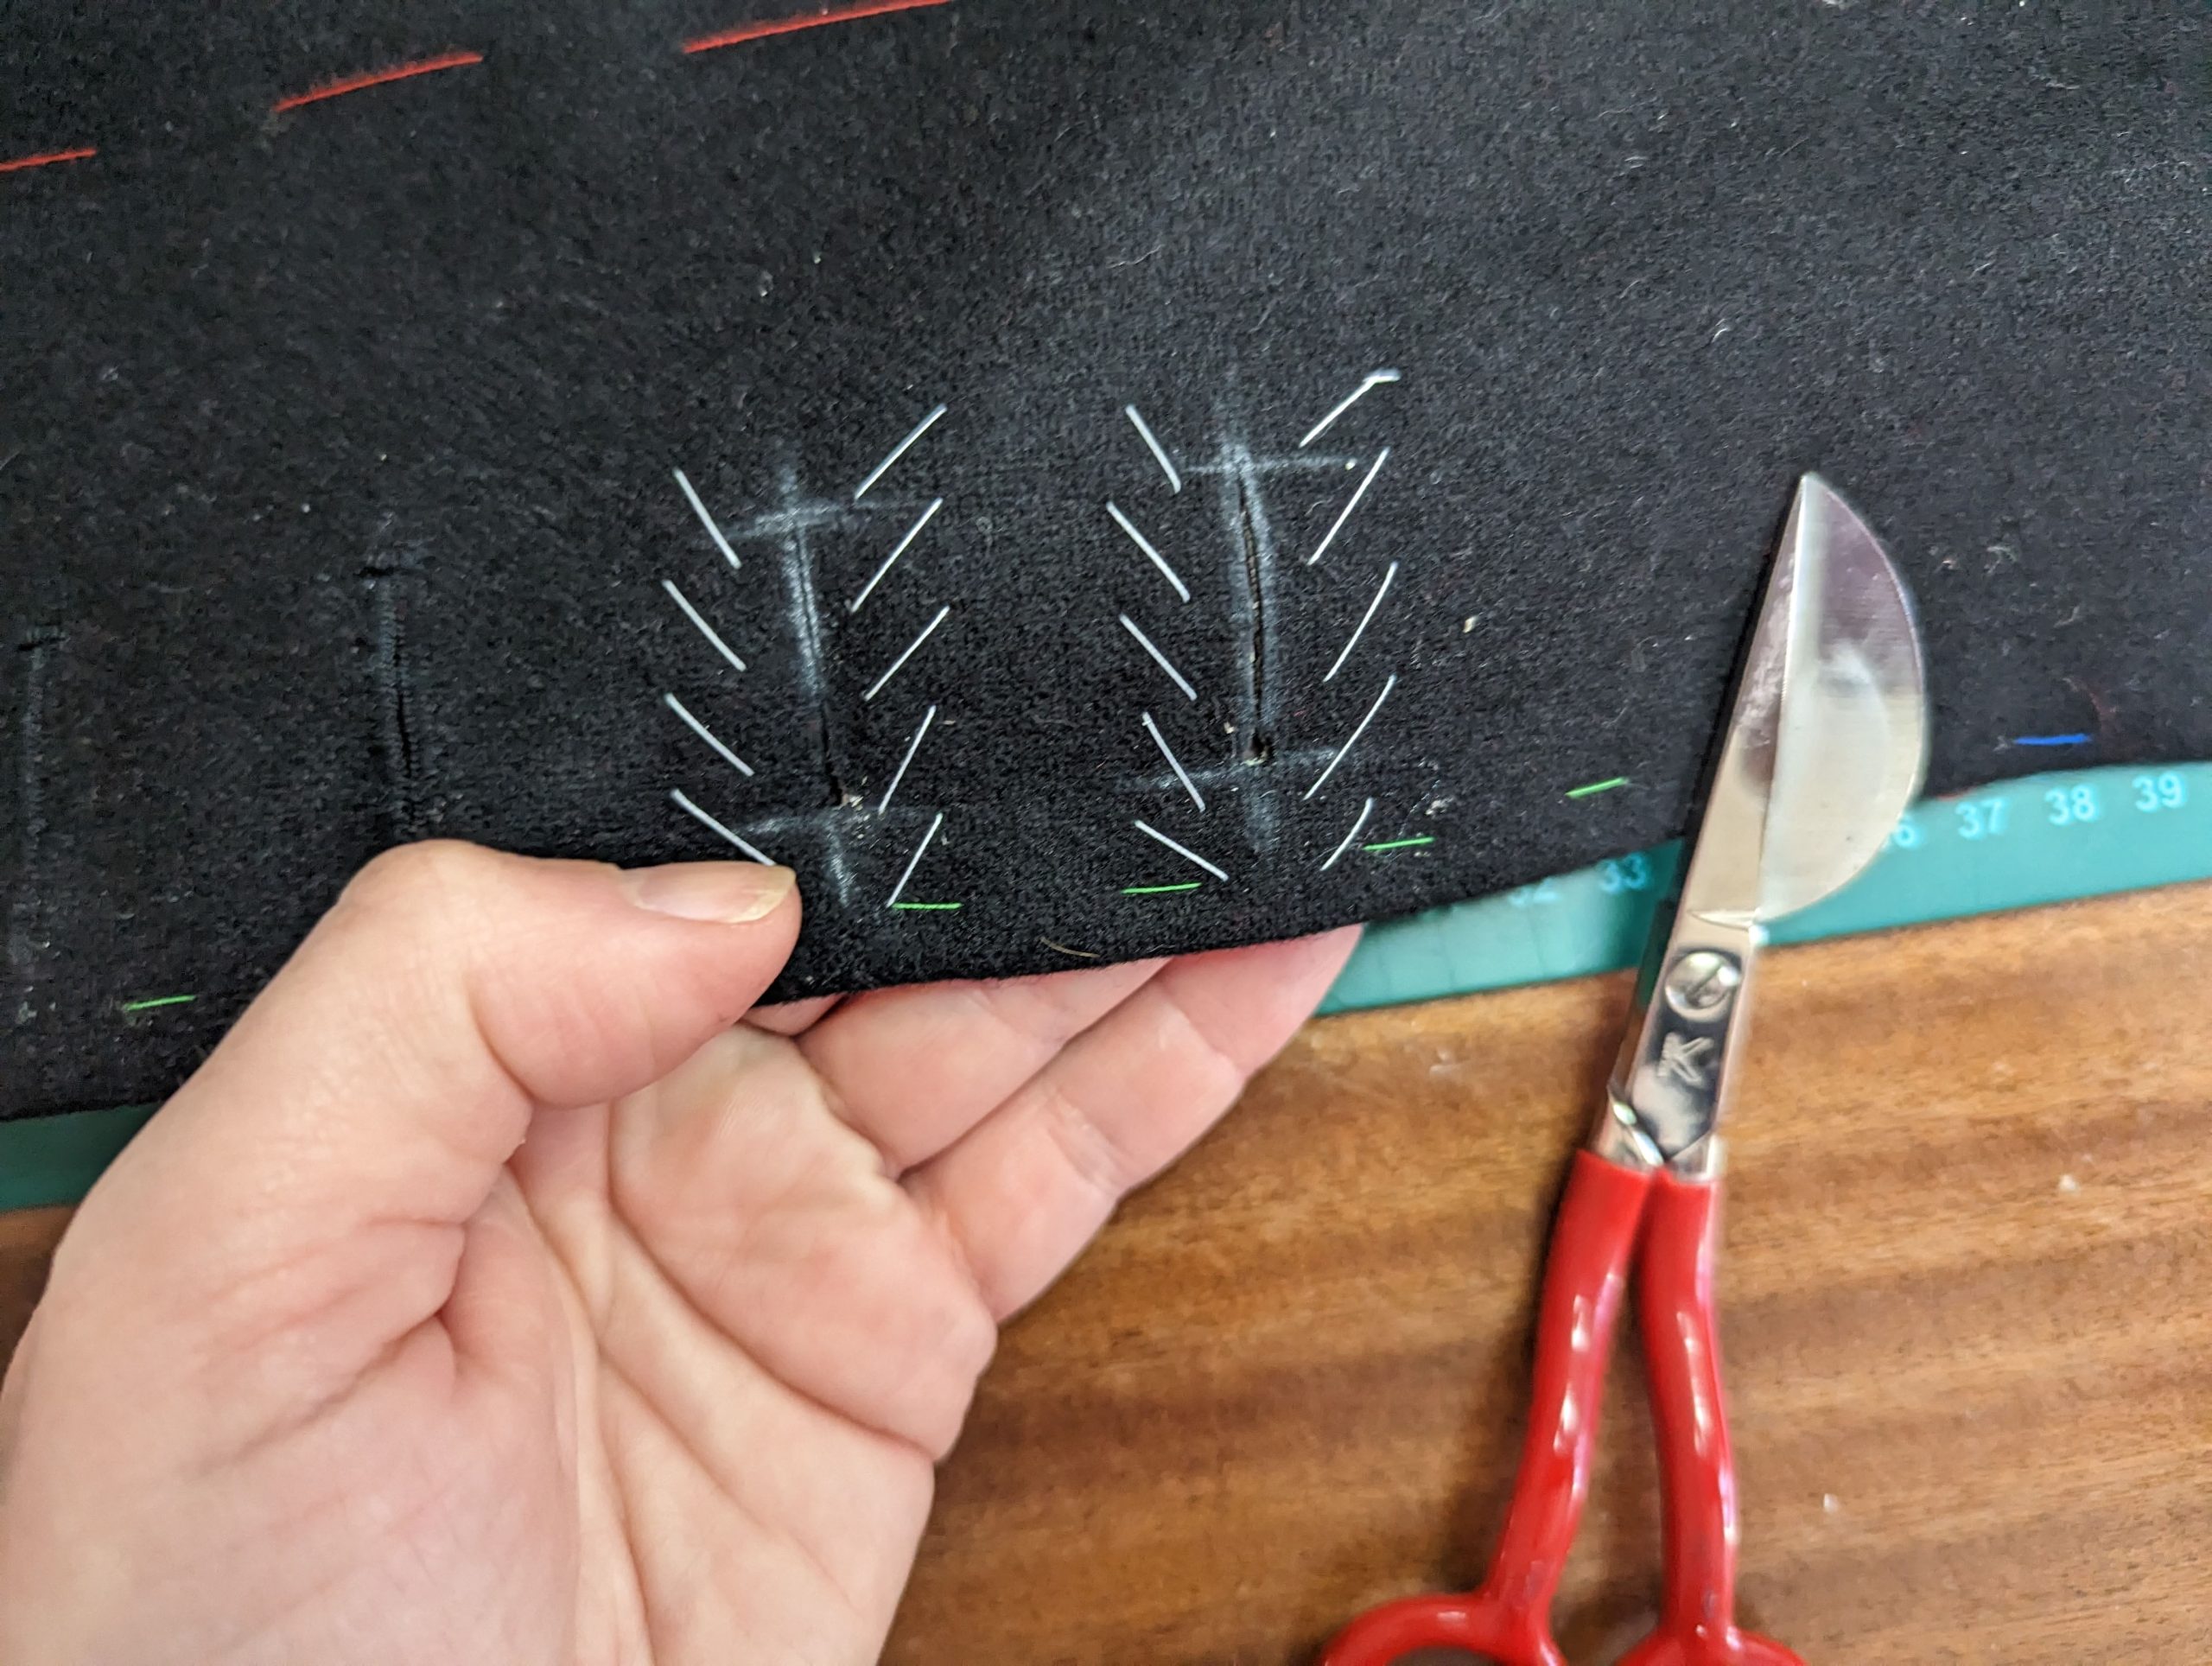
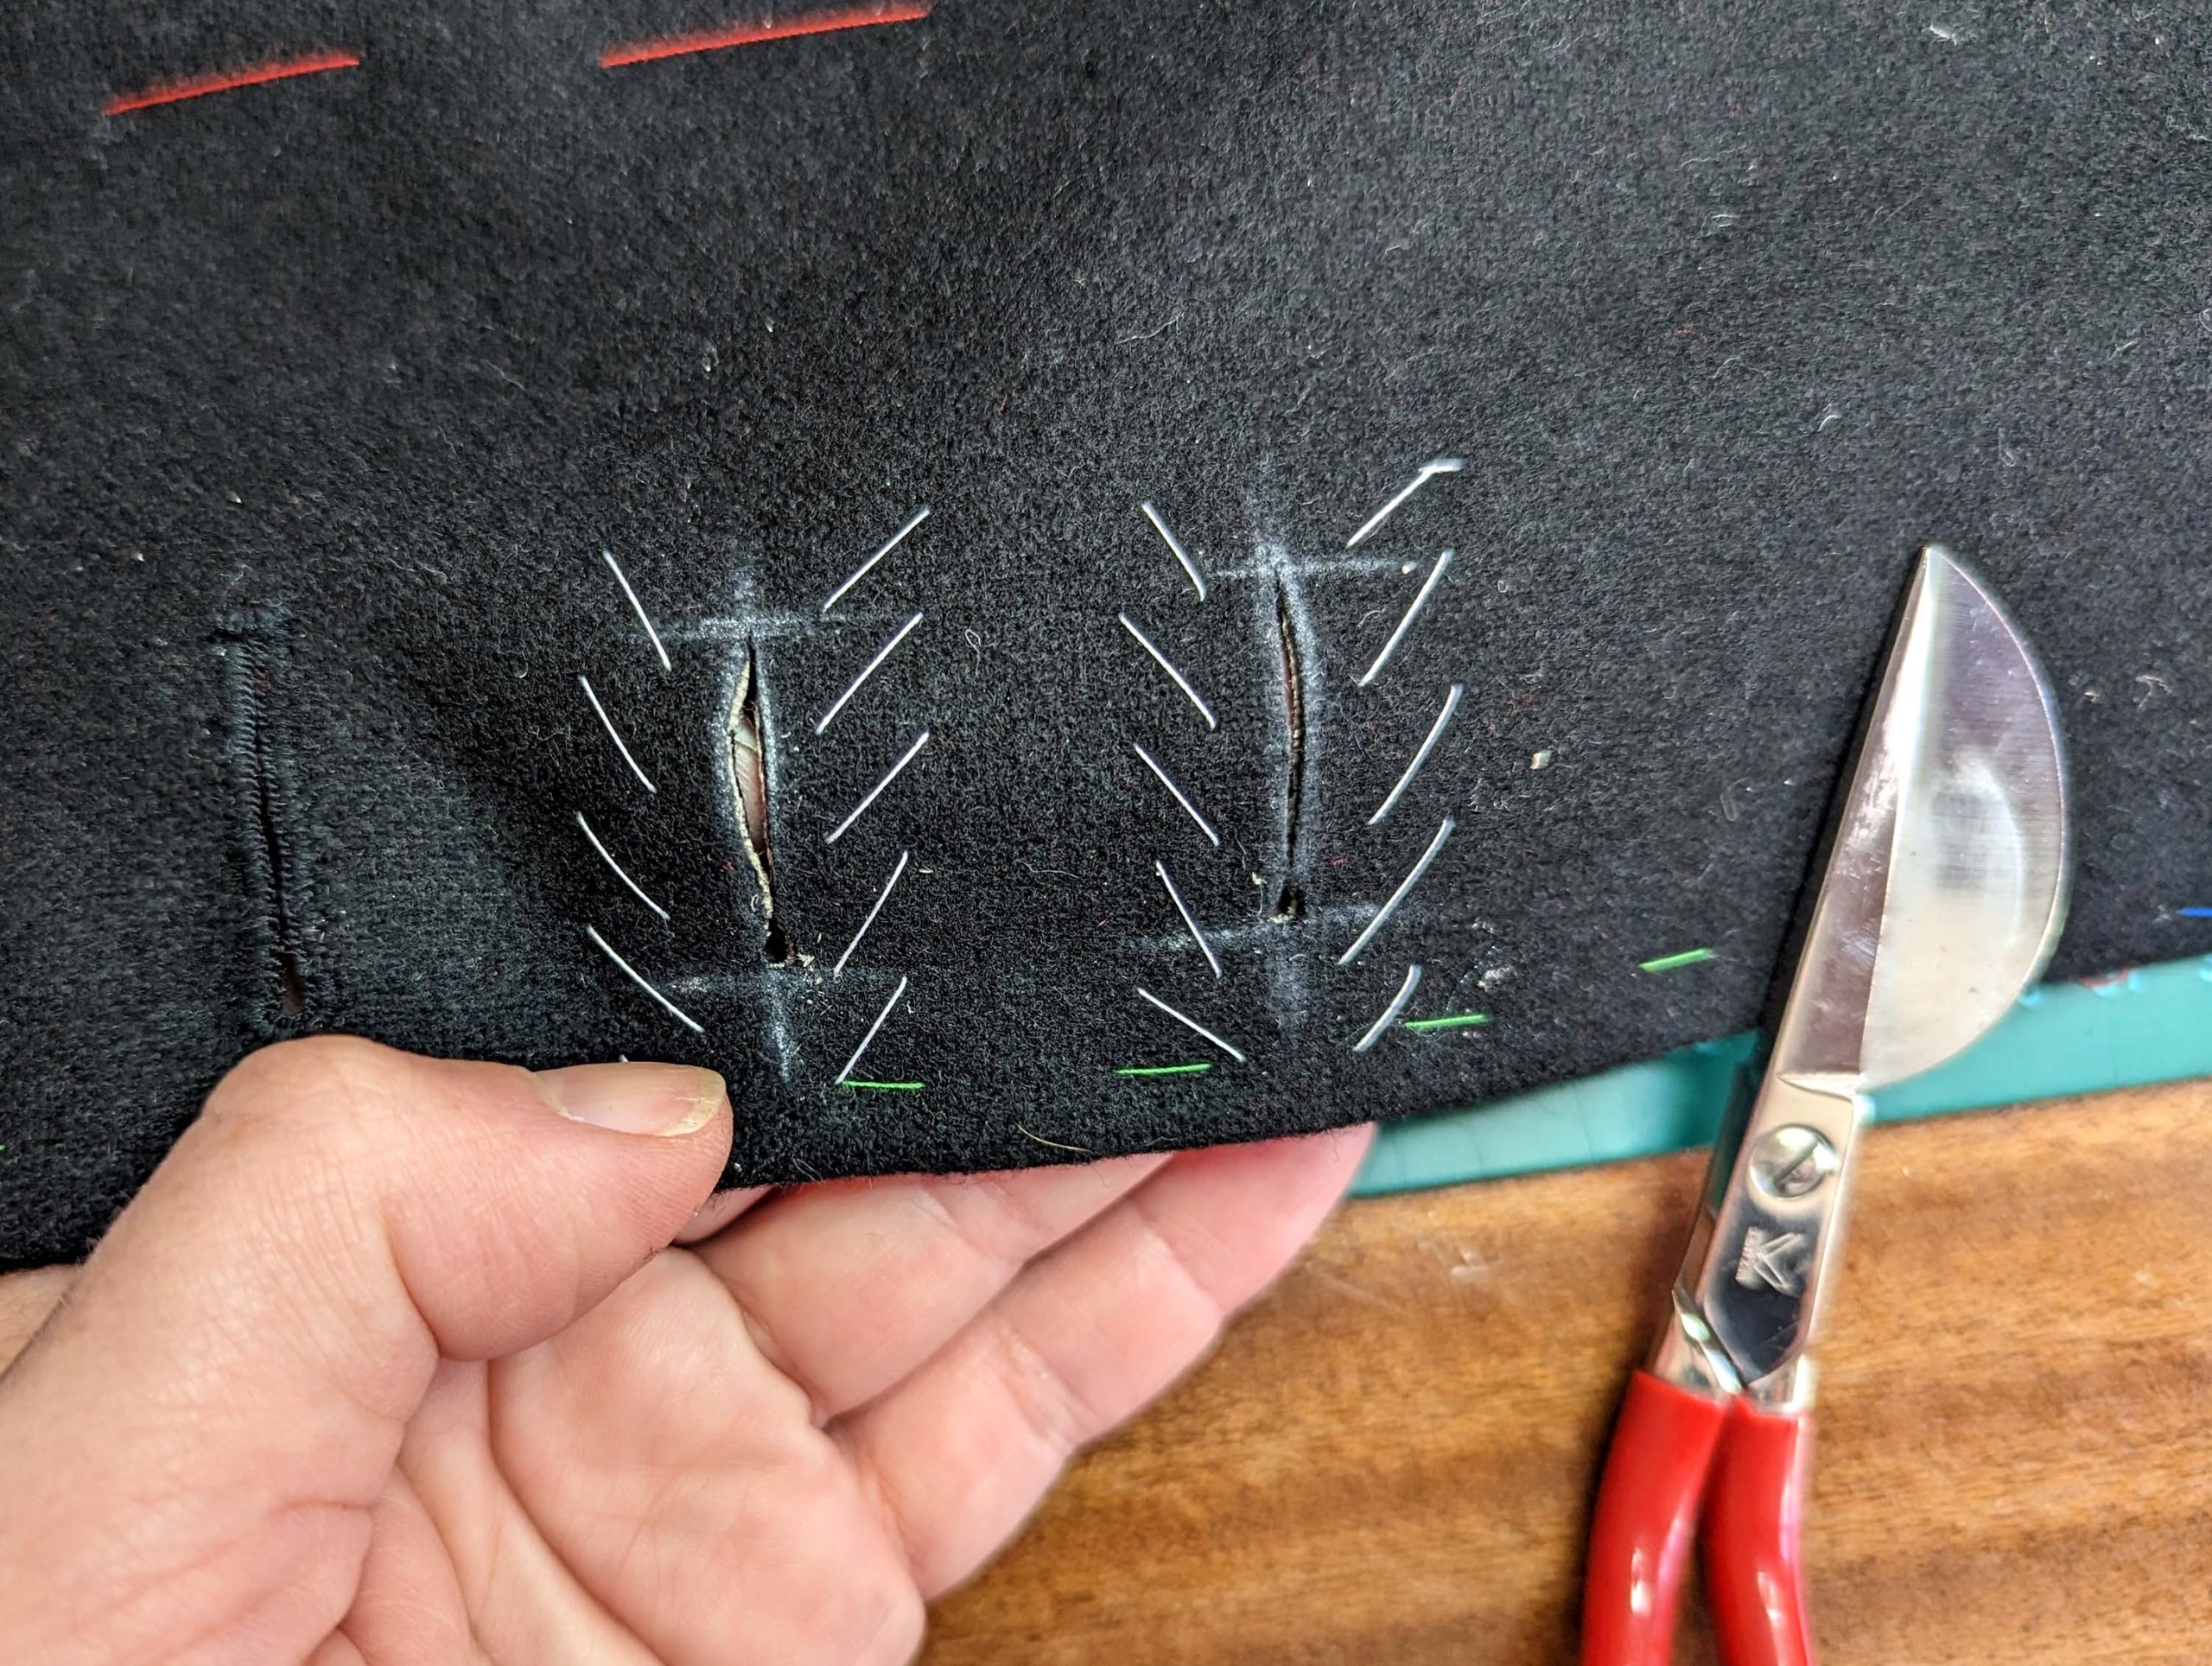
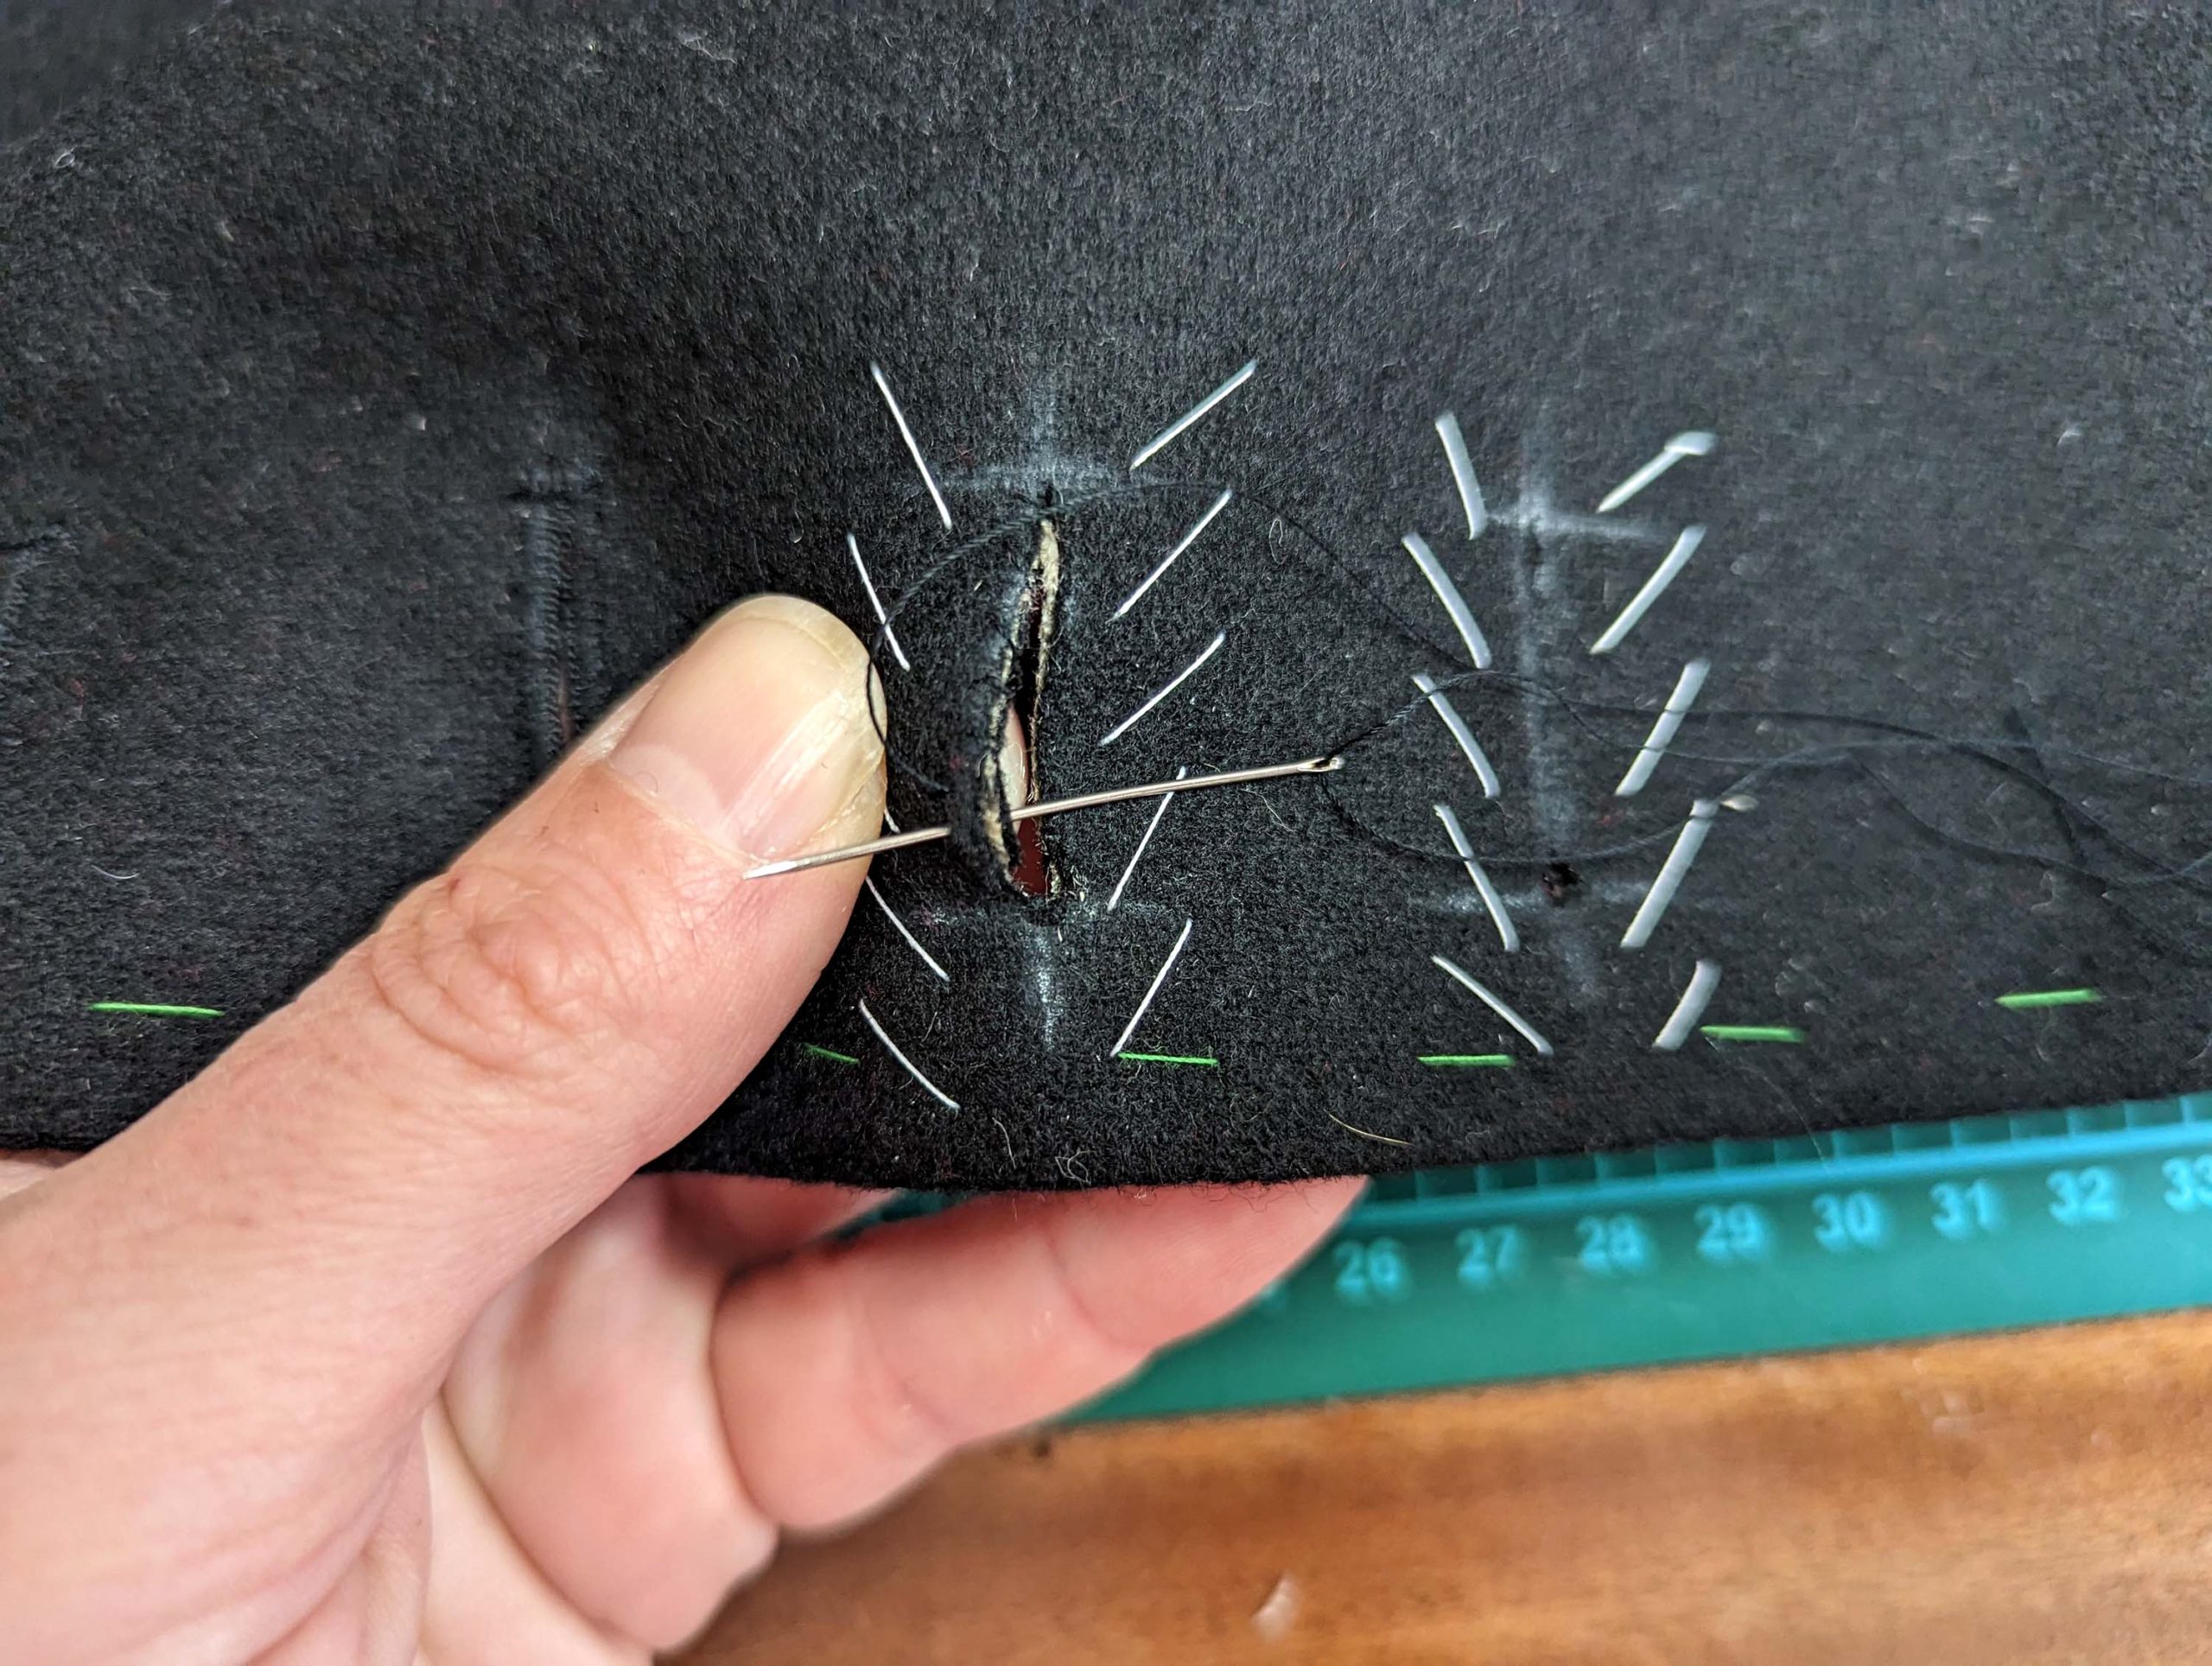
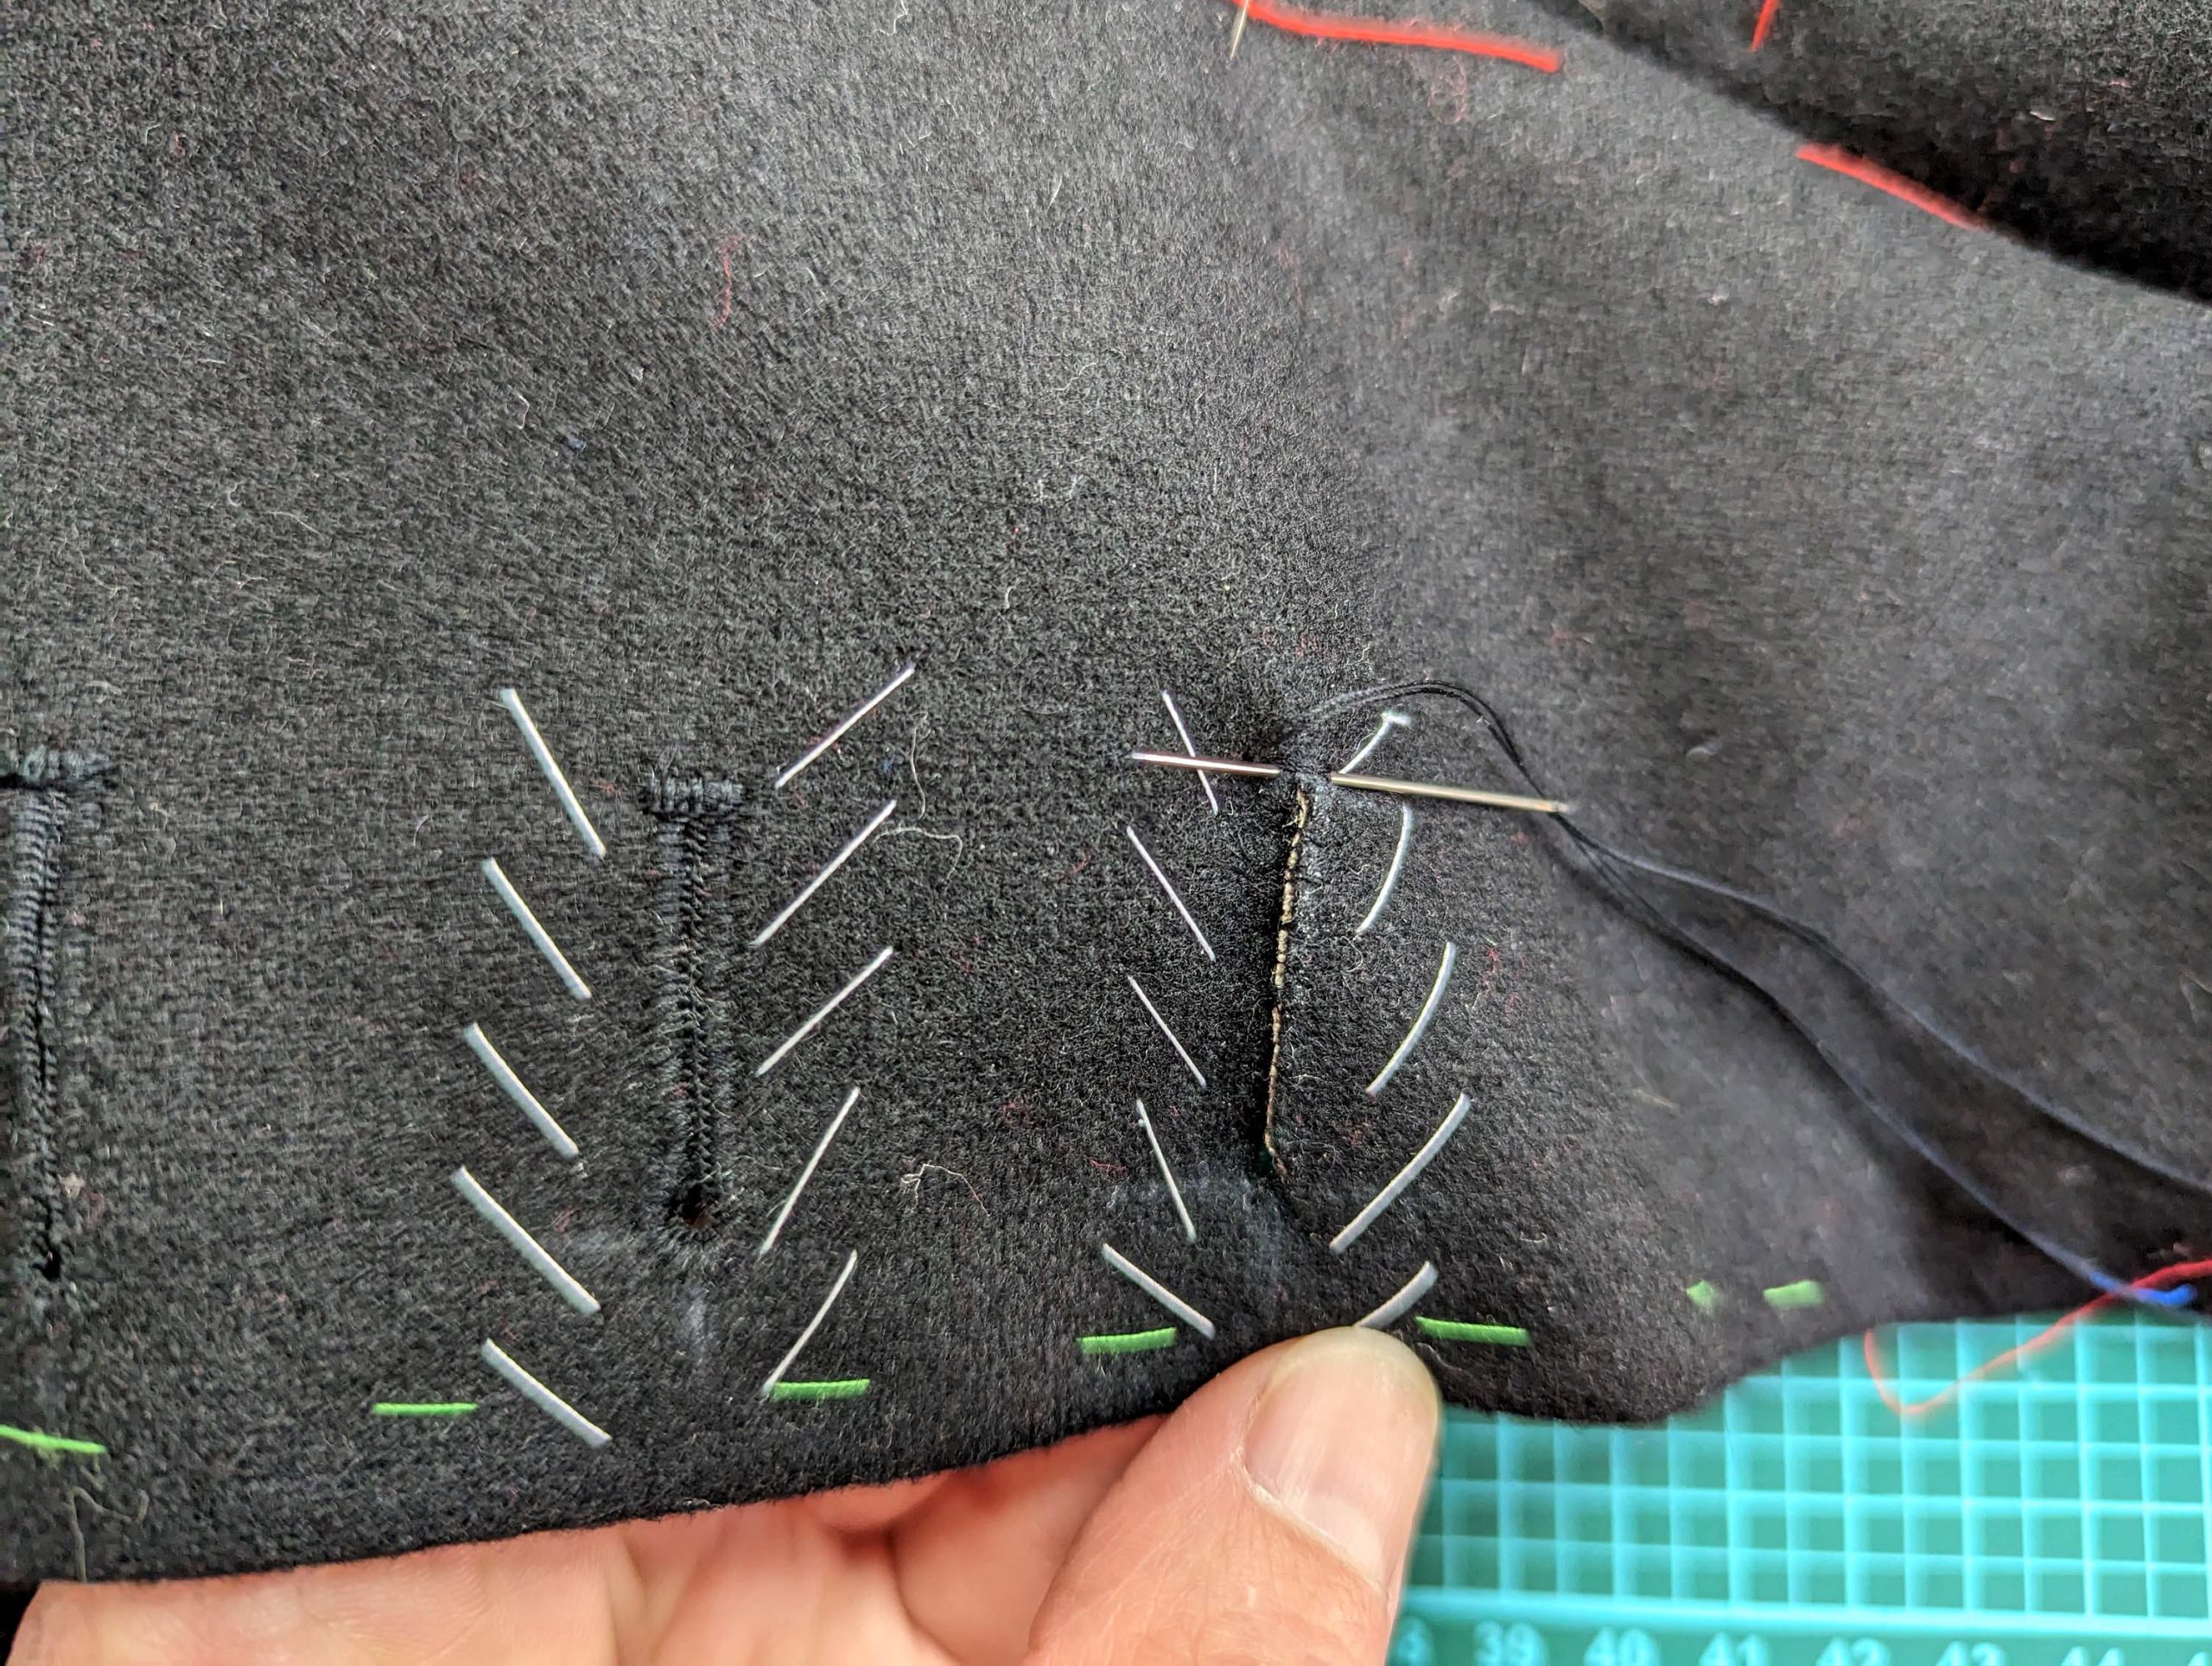
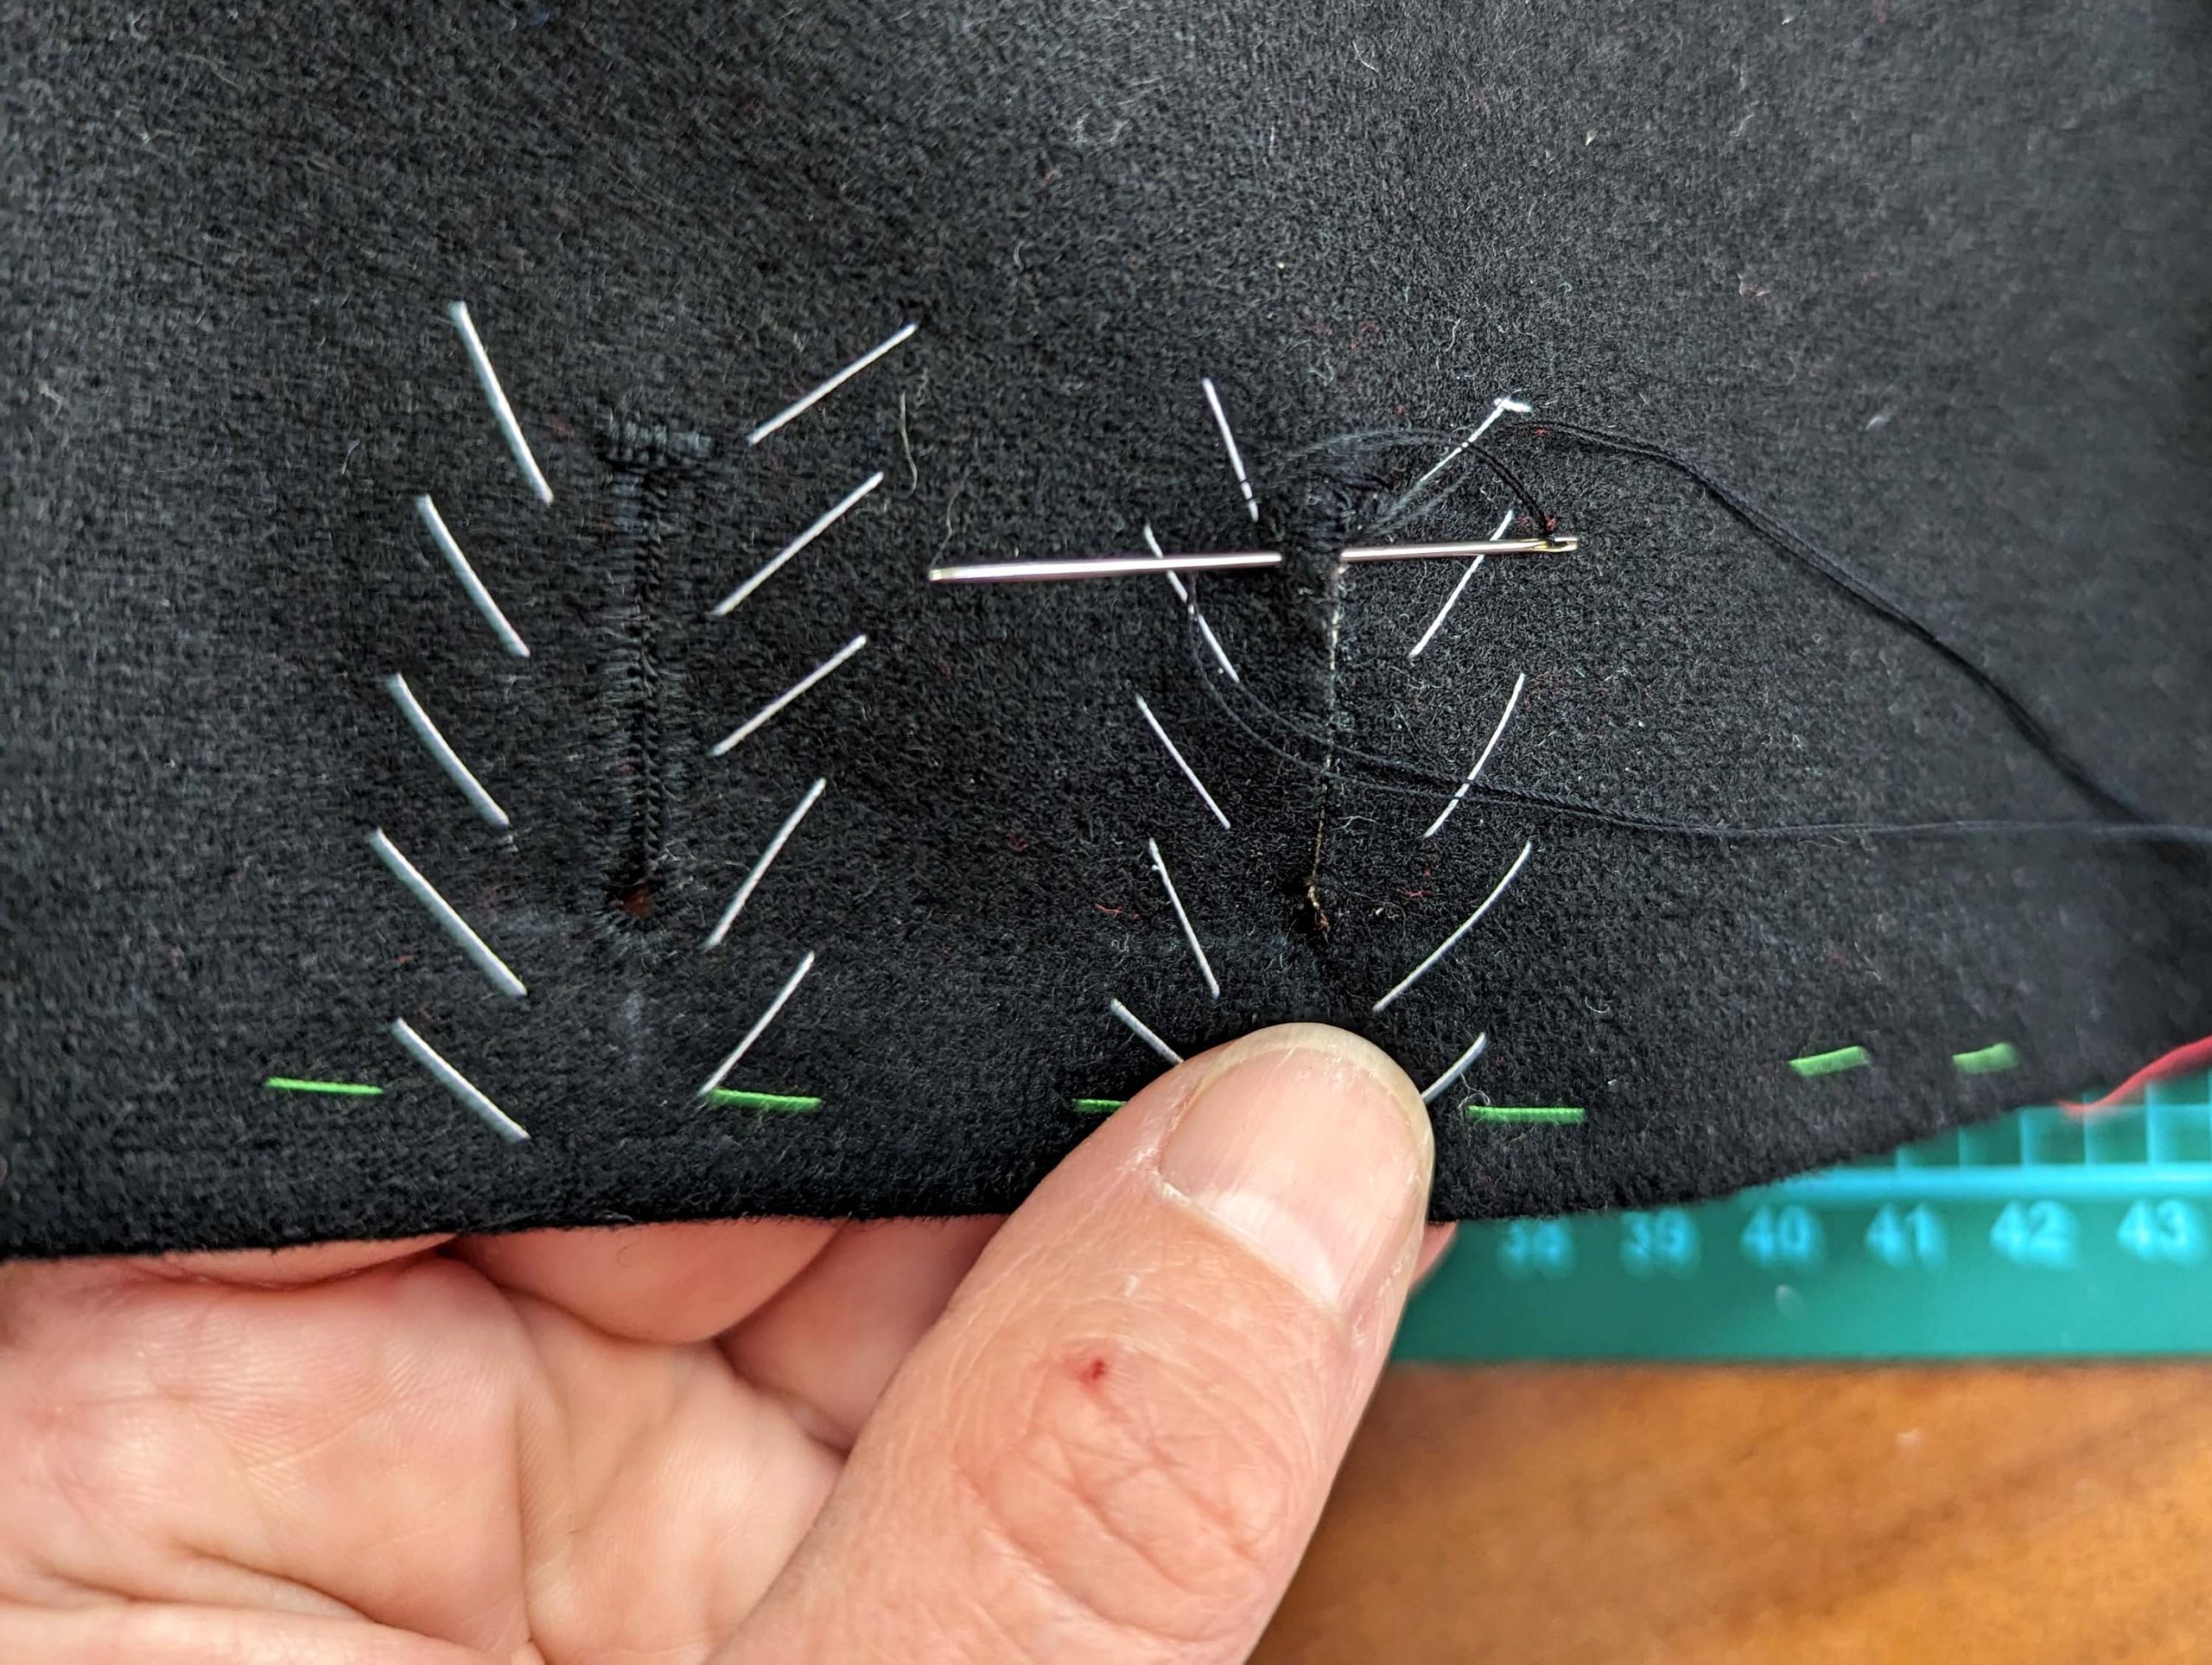
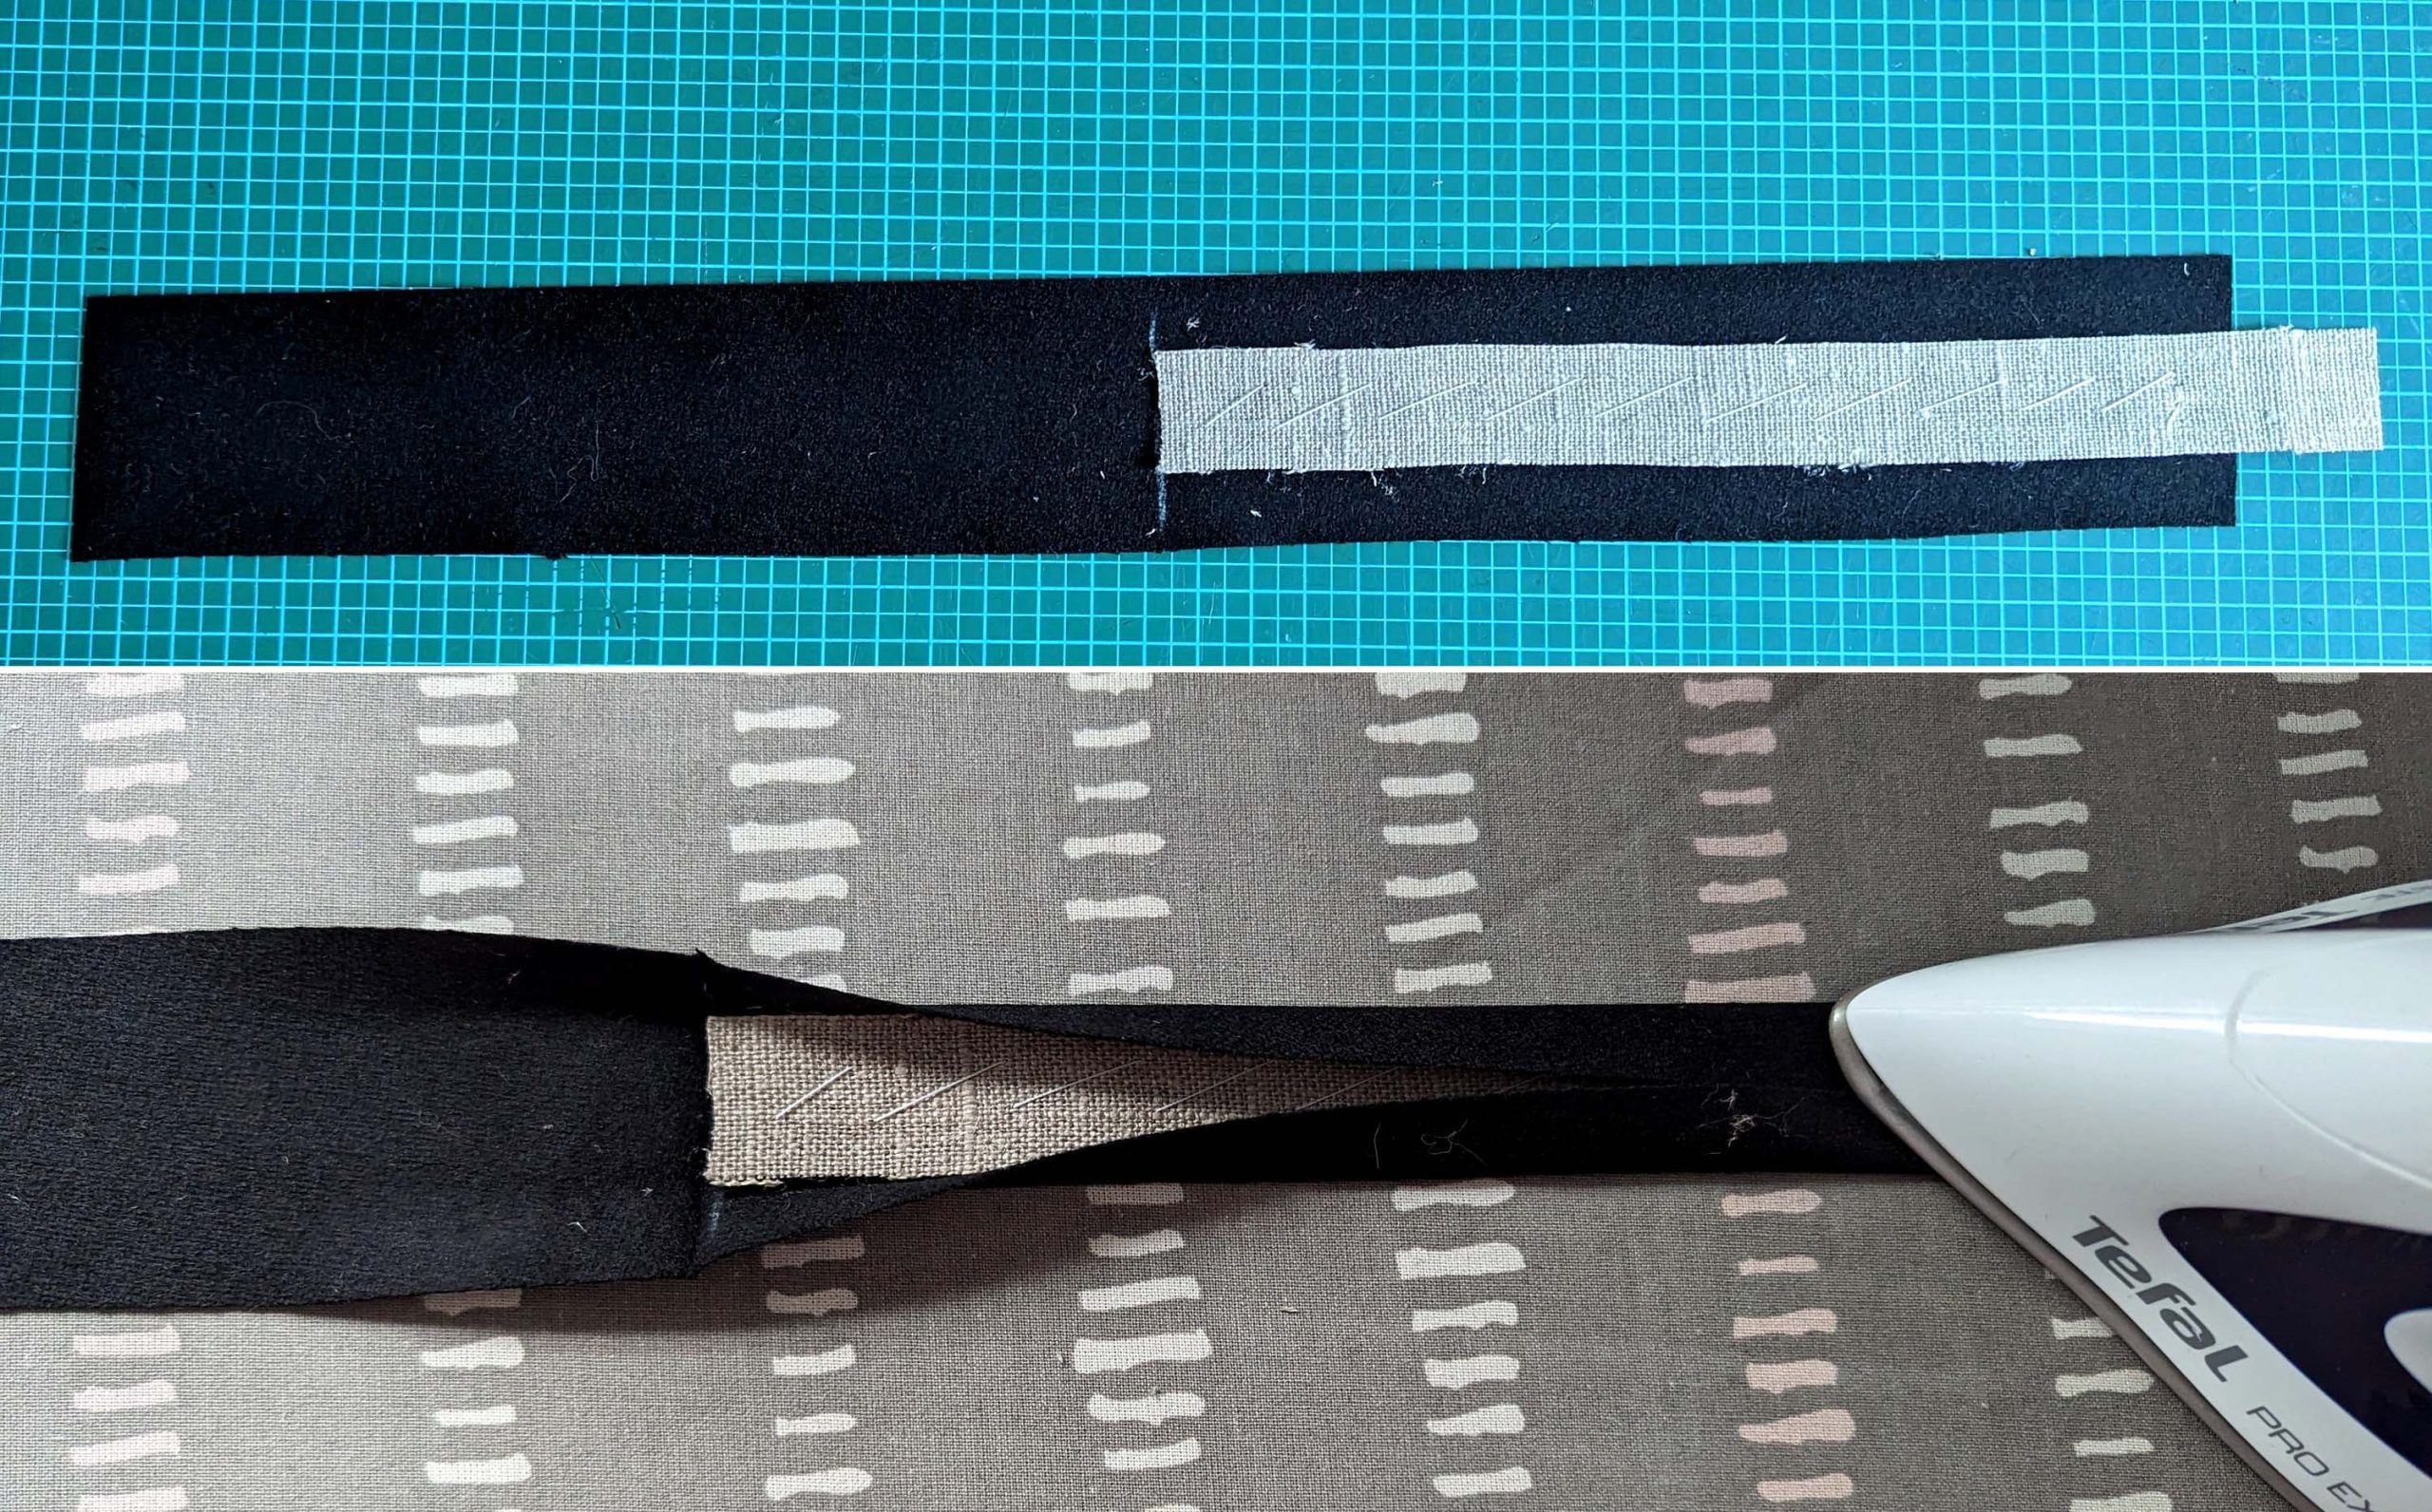
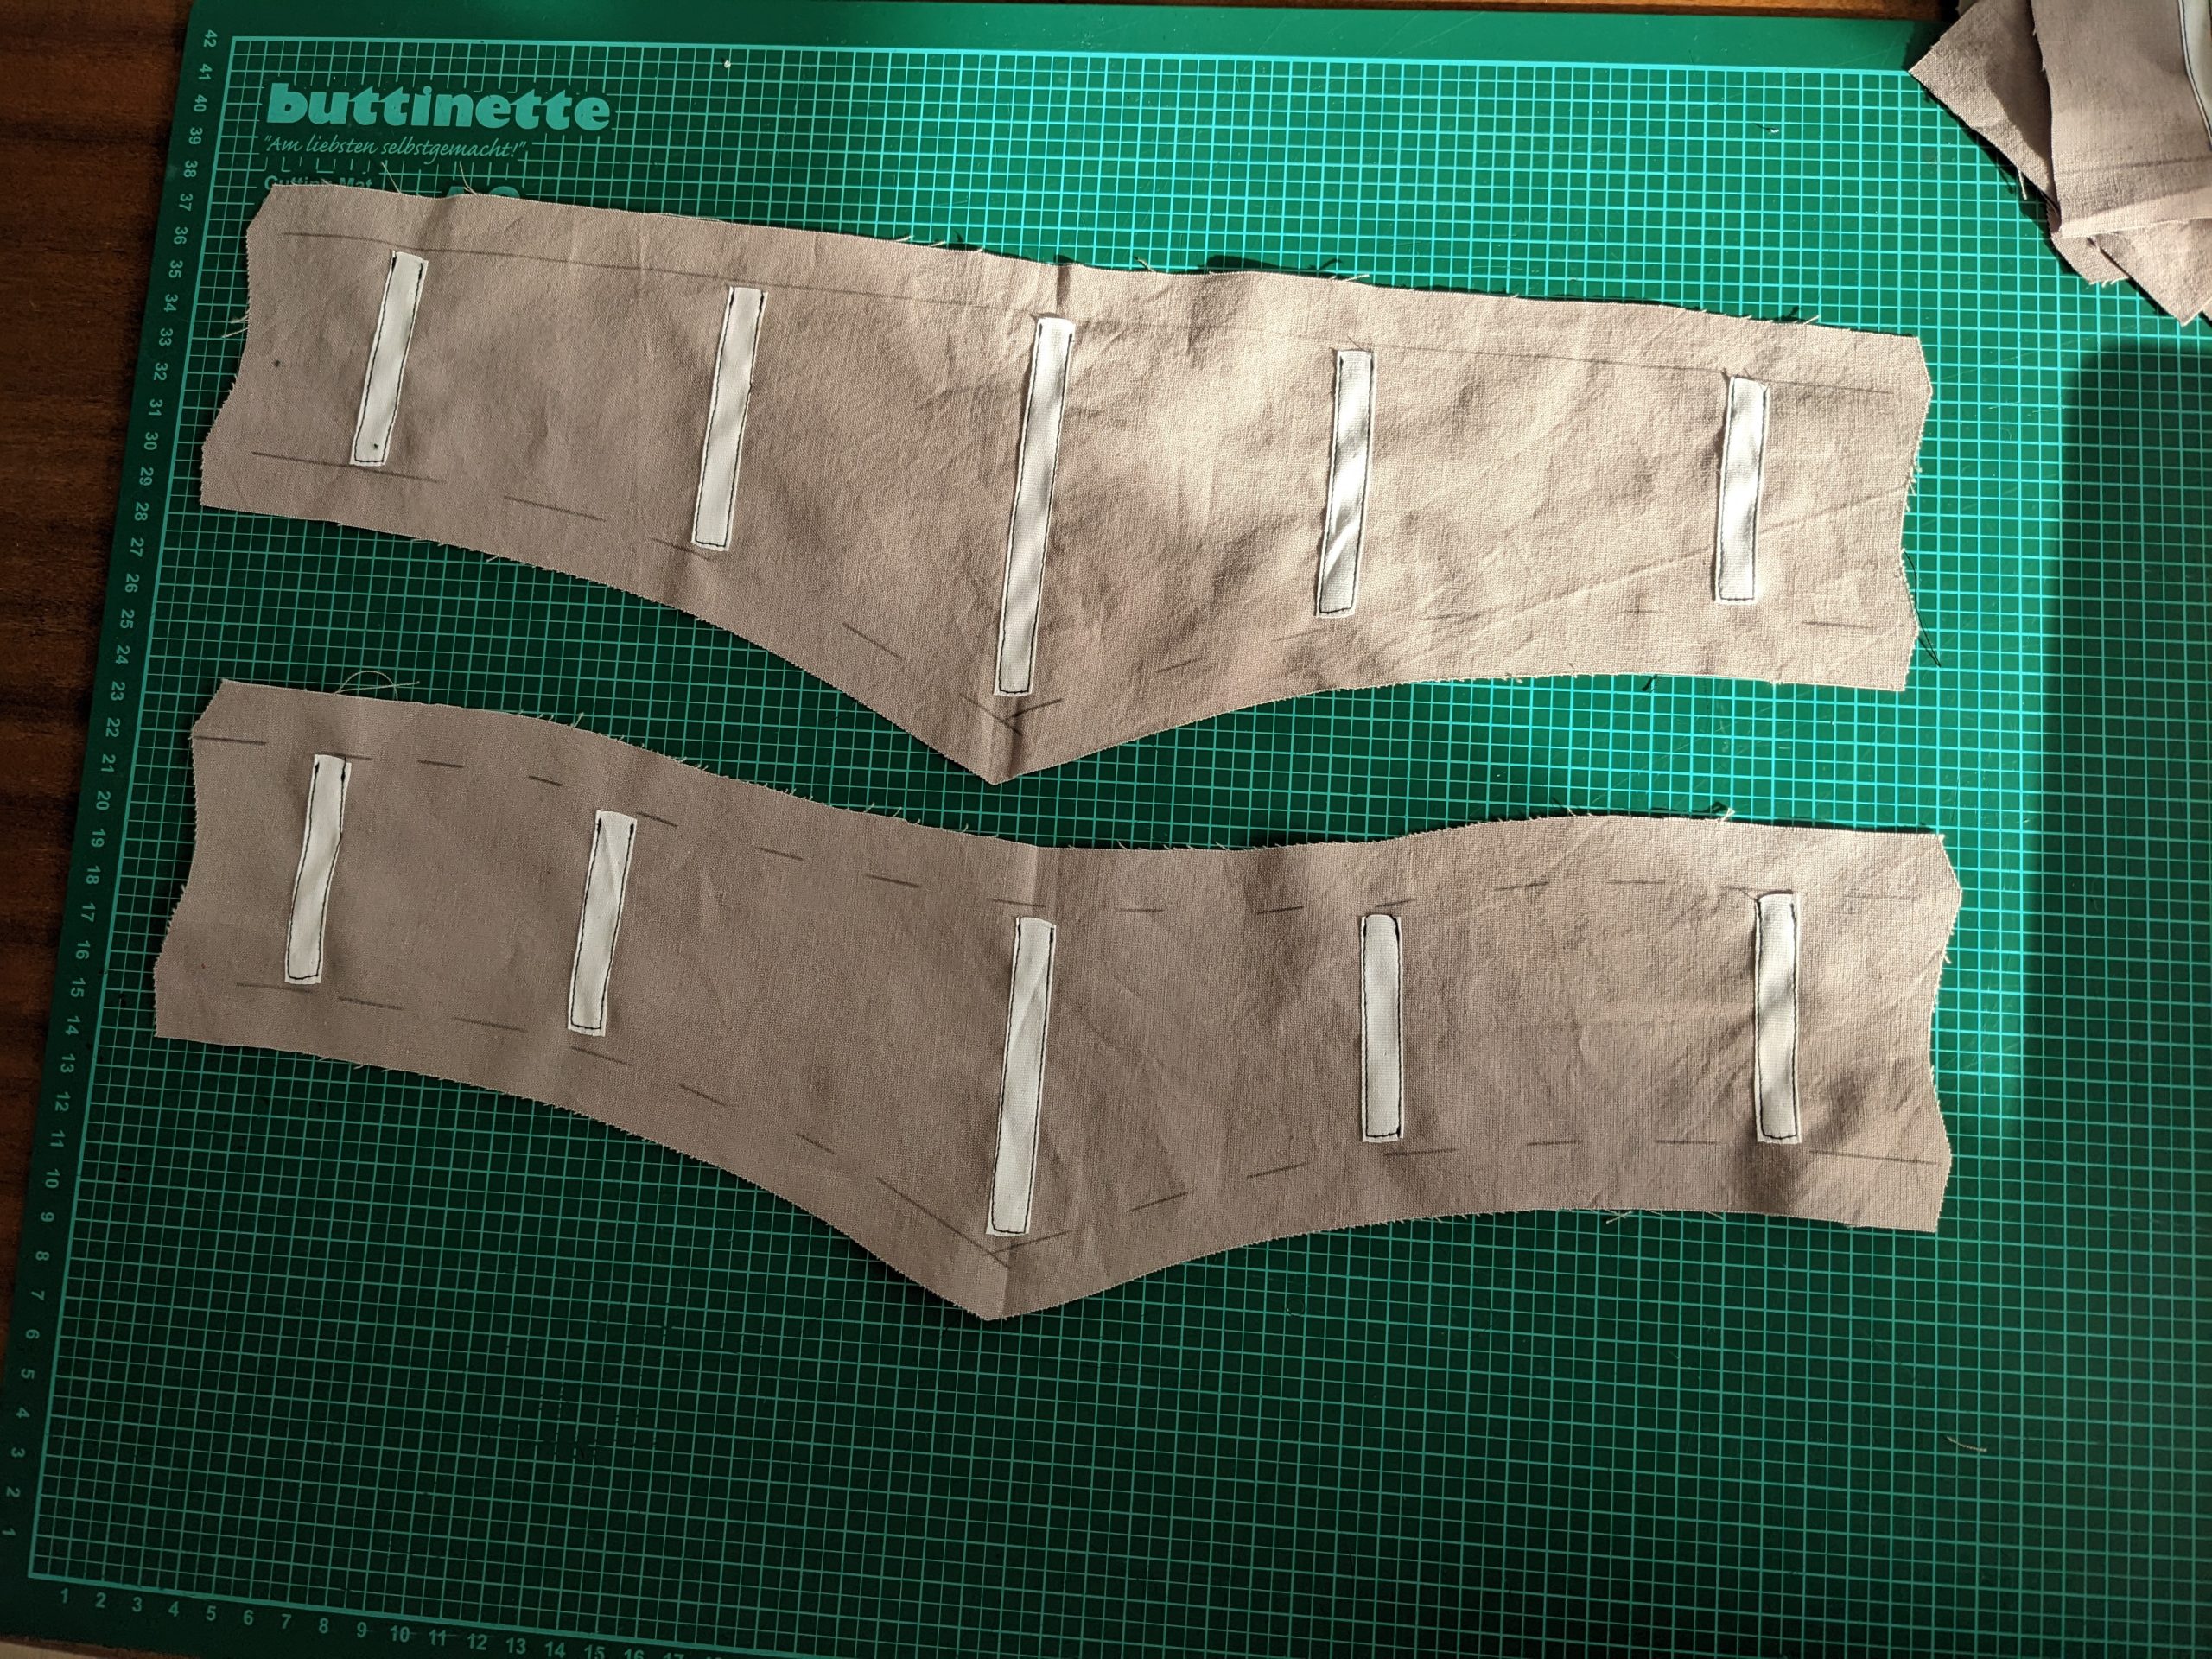
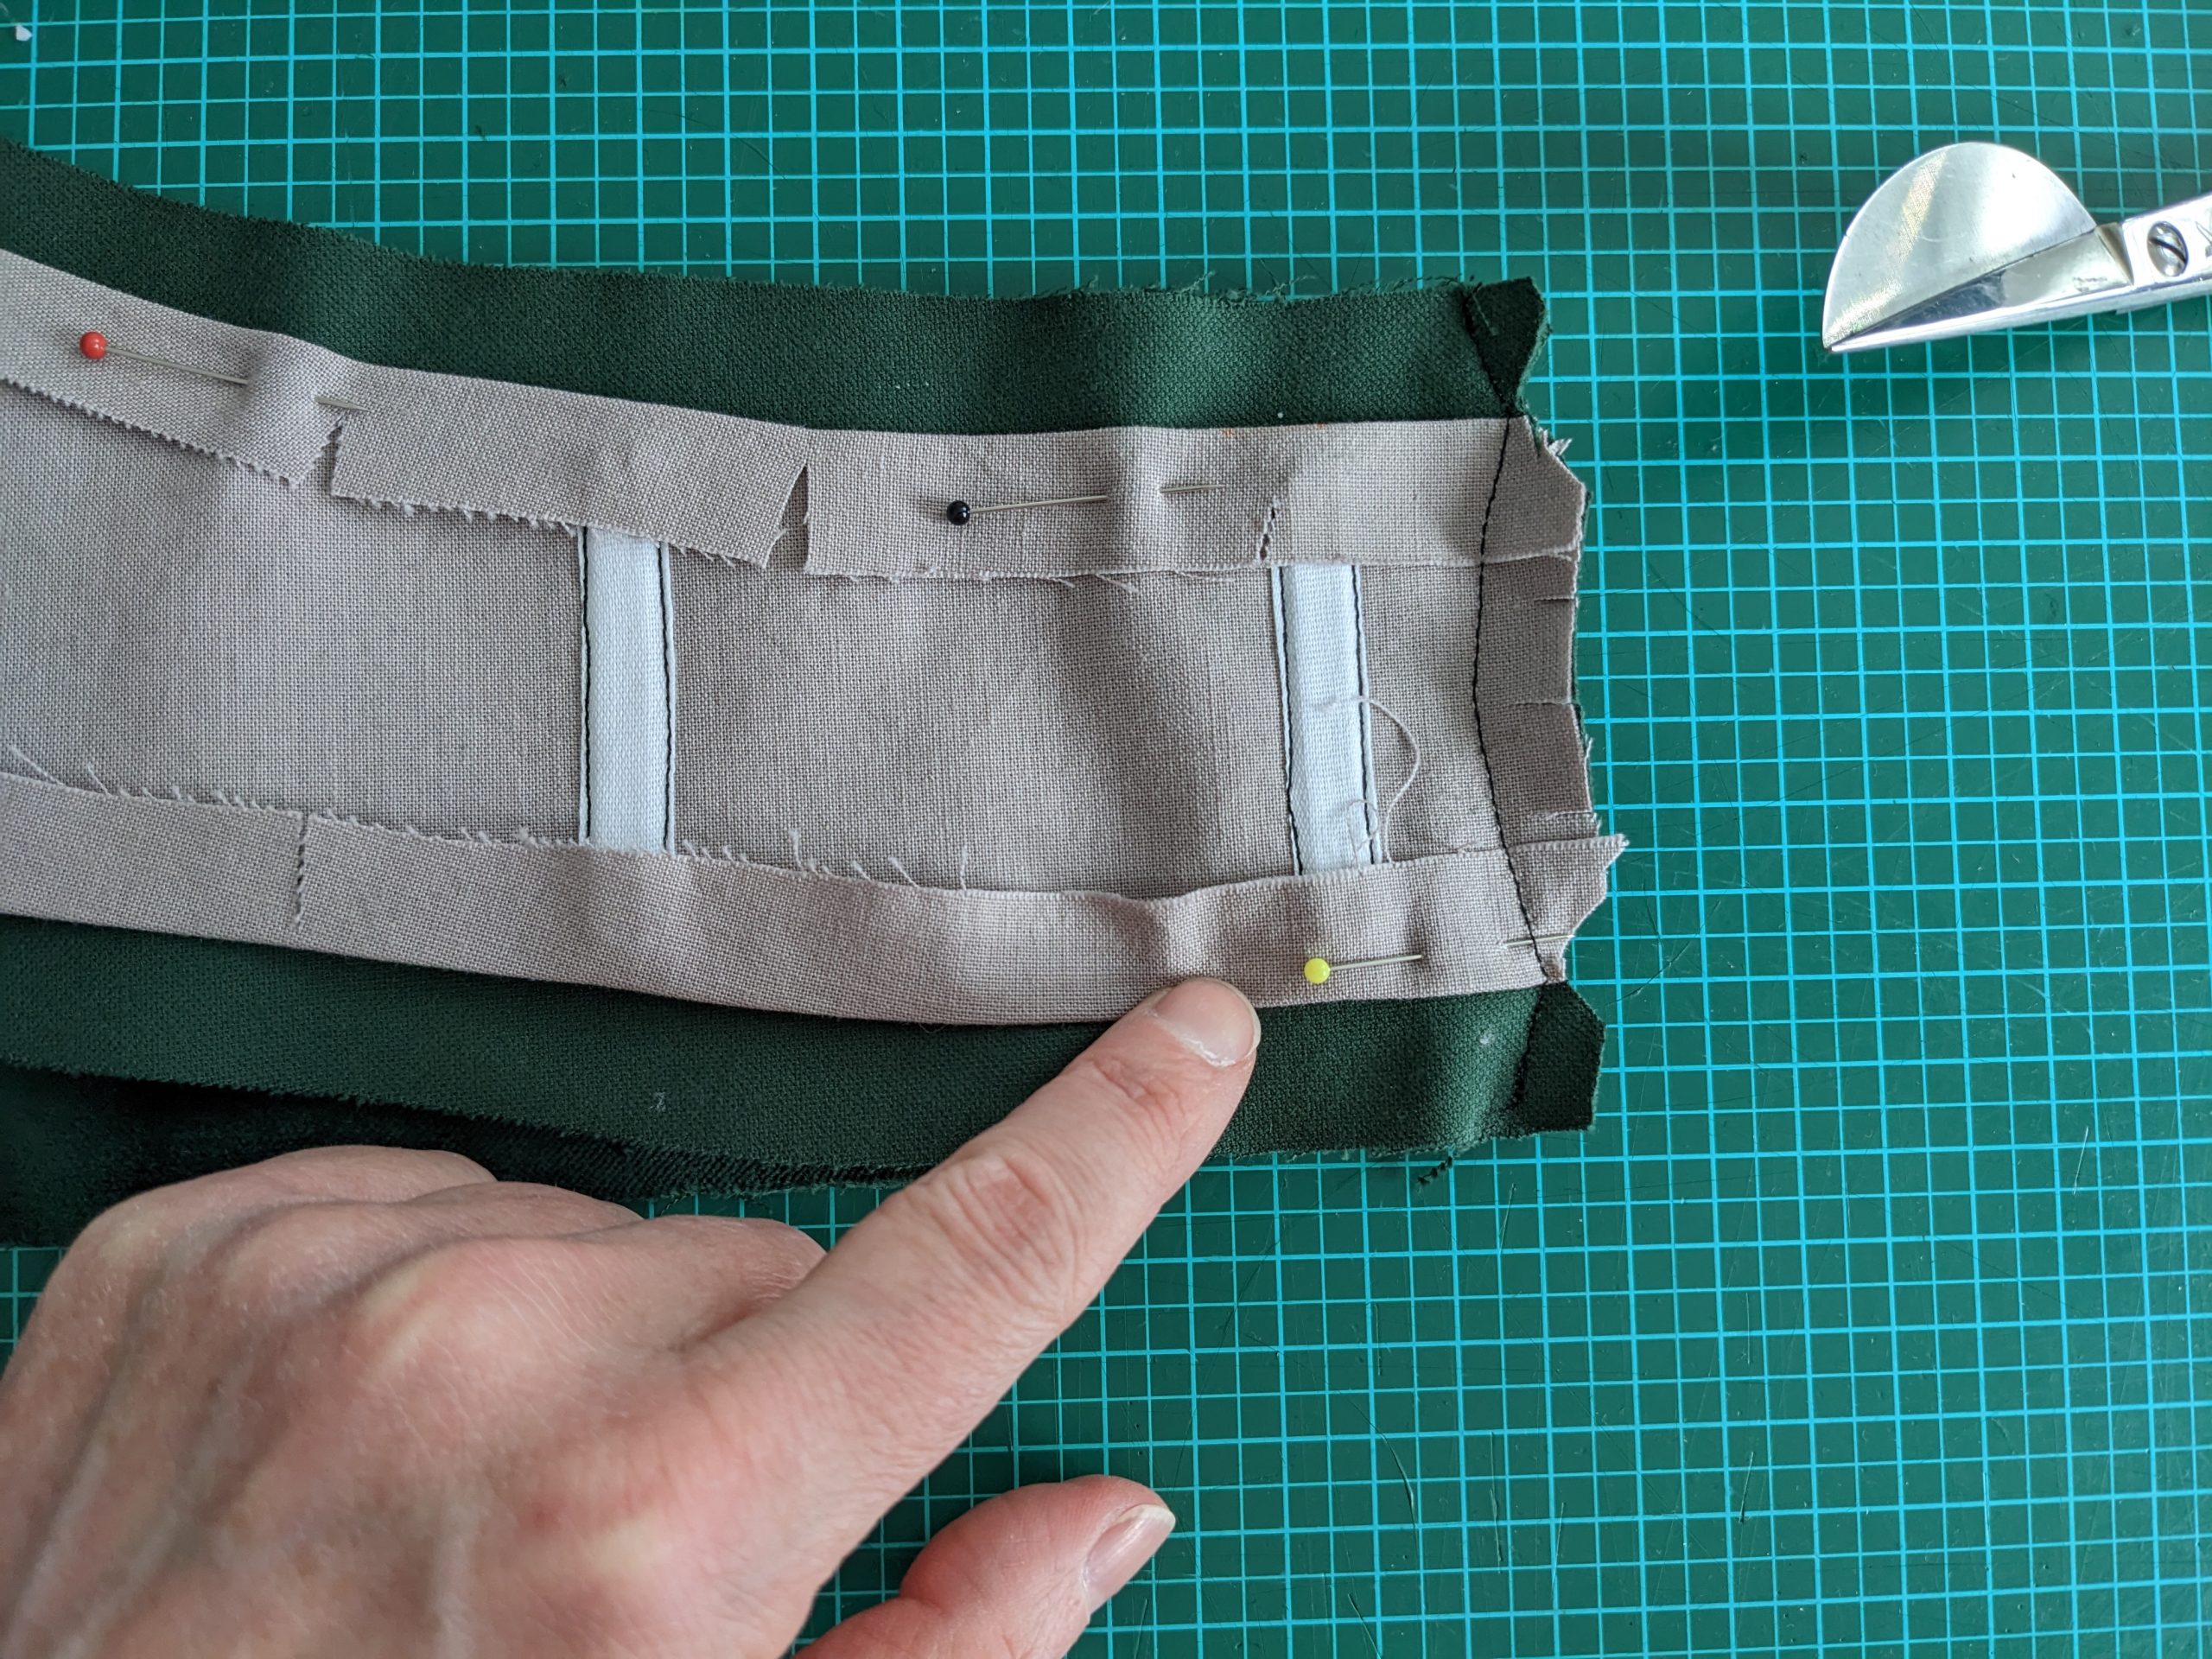
(2) Take the pieces for the interlining and mark the stitching line. Cut strips from fabric, twice as wide as the boning plus ¼” (5mm) ease for the bone casings. Turn in the edges the same way you´d prepare bias binding. Alternatively, use any narrow tape from your stock. Sew the casings to the right side of the interlining, where indicated on the pattern. The width of the casing should be as narrow that the boning can´t twist inside the tunnel. Insert the bones and close the casings carefully. Turn the seam allowances of the interlining towards the right side and press. Clip at the curves to lay flat. I decided to make the two belts, straight and the dip waist style.

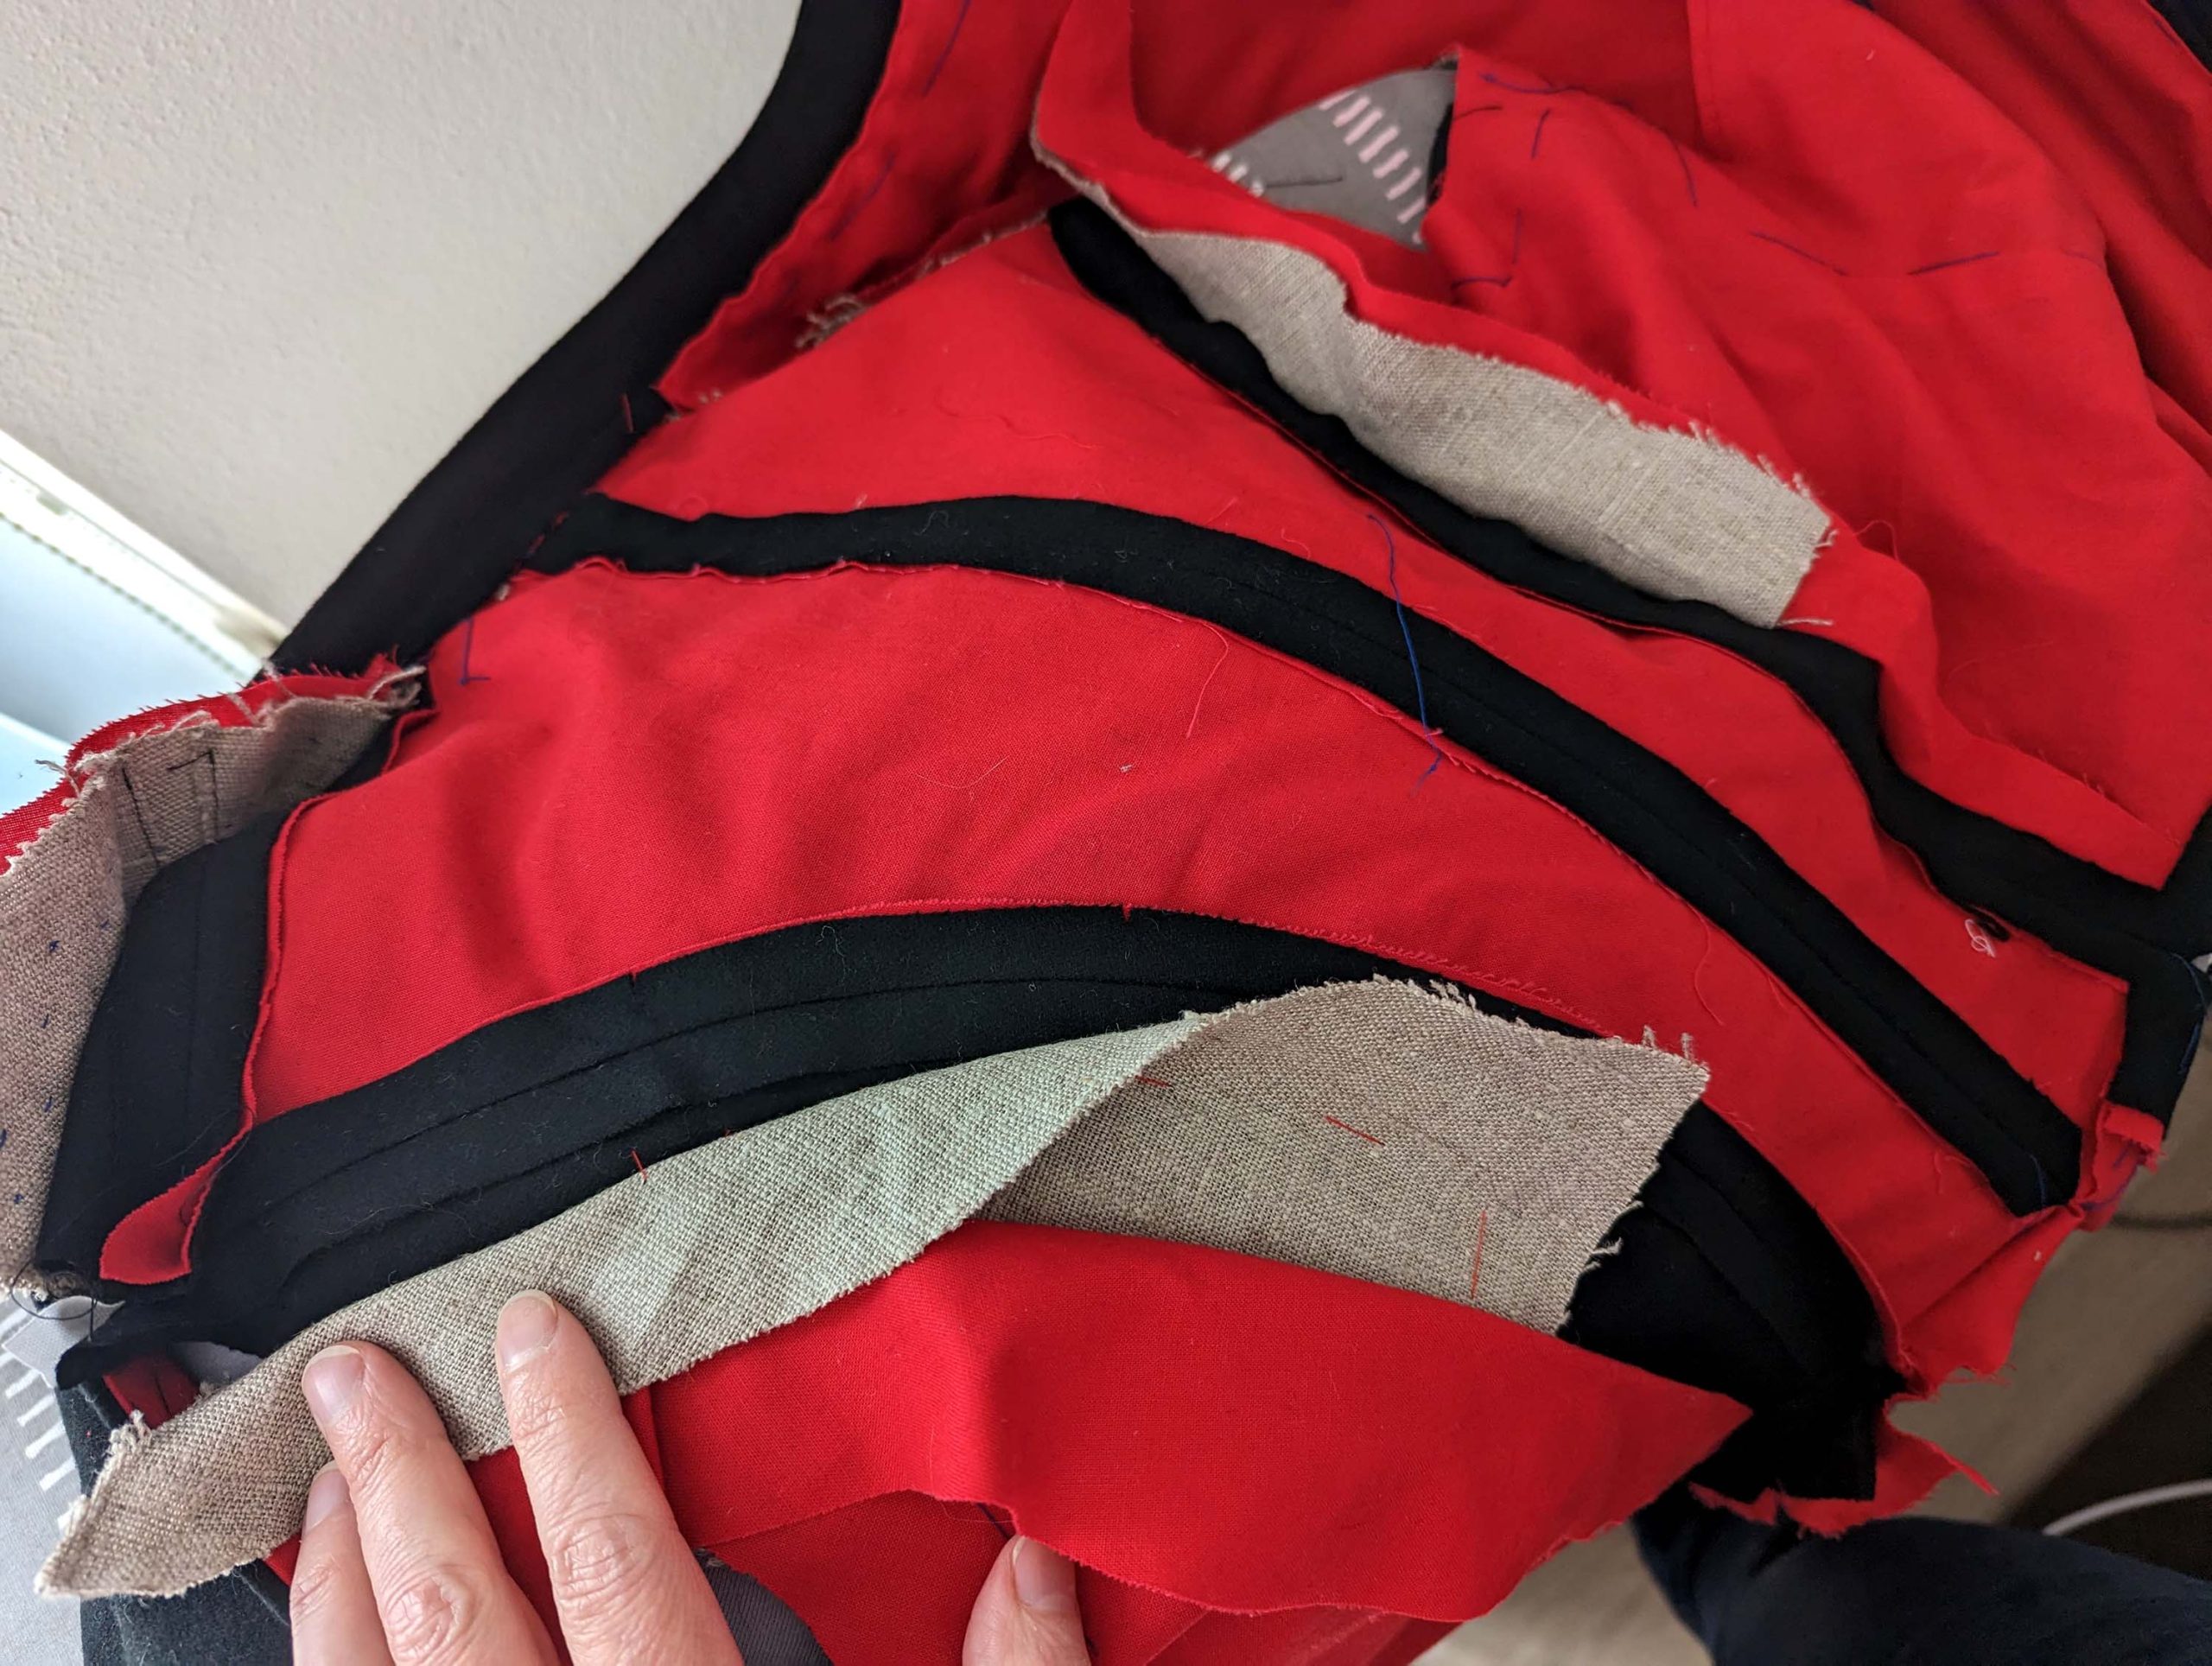
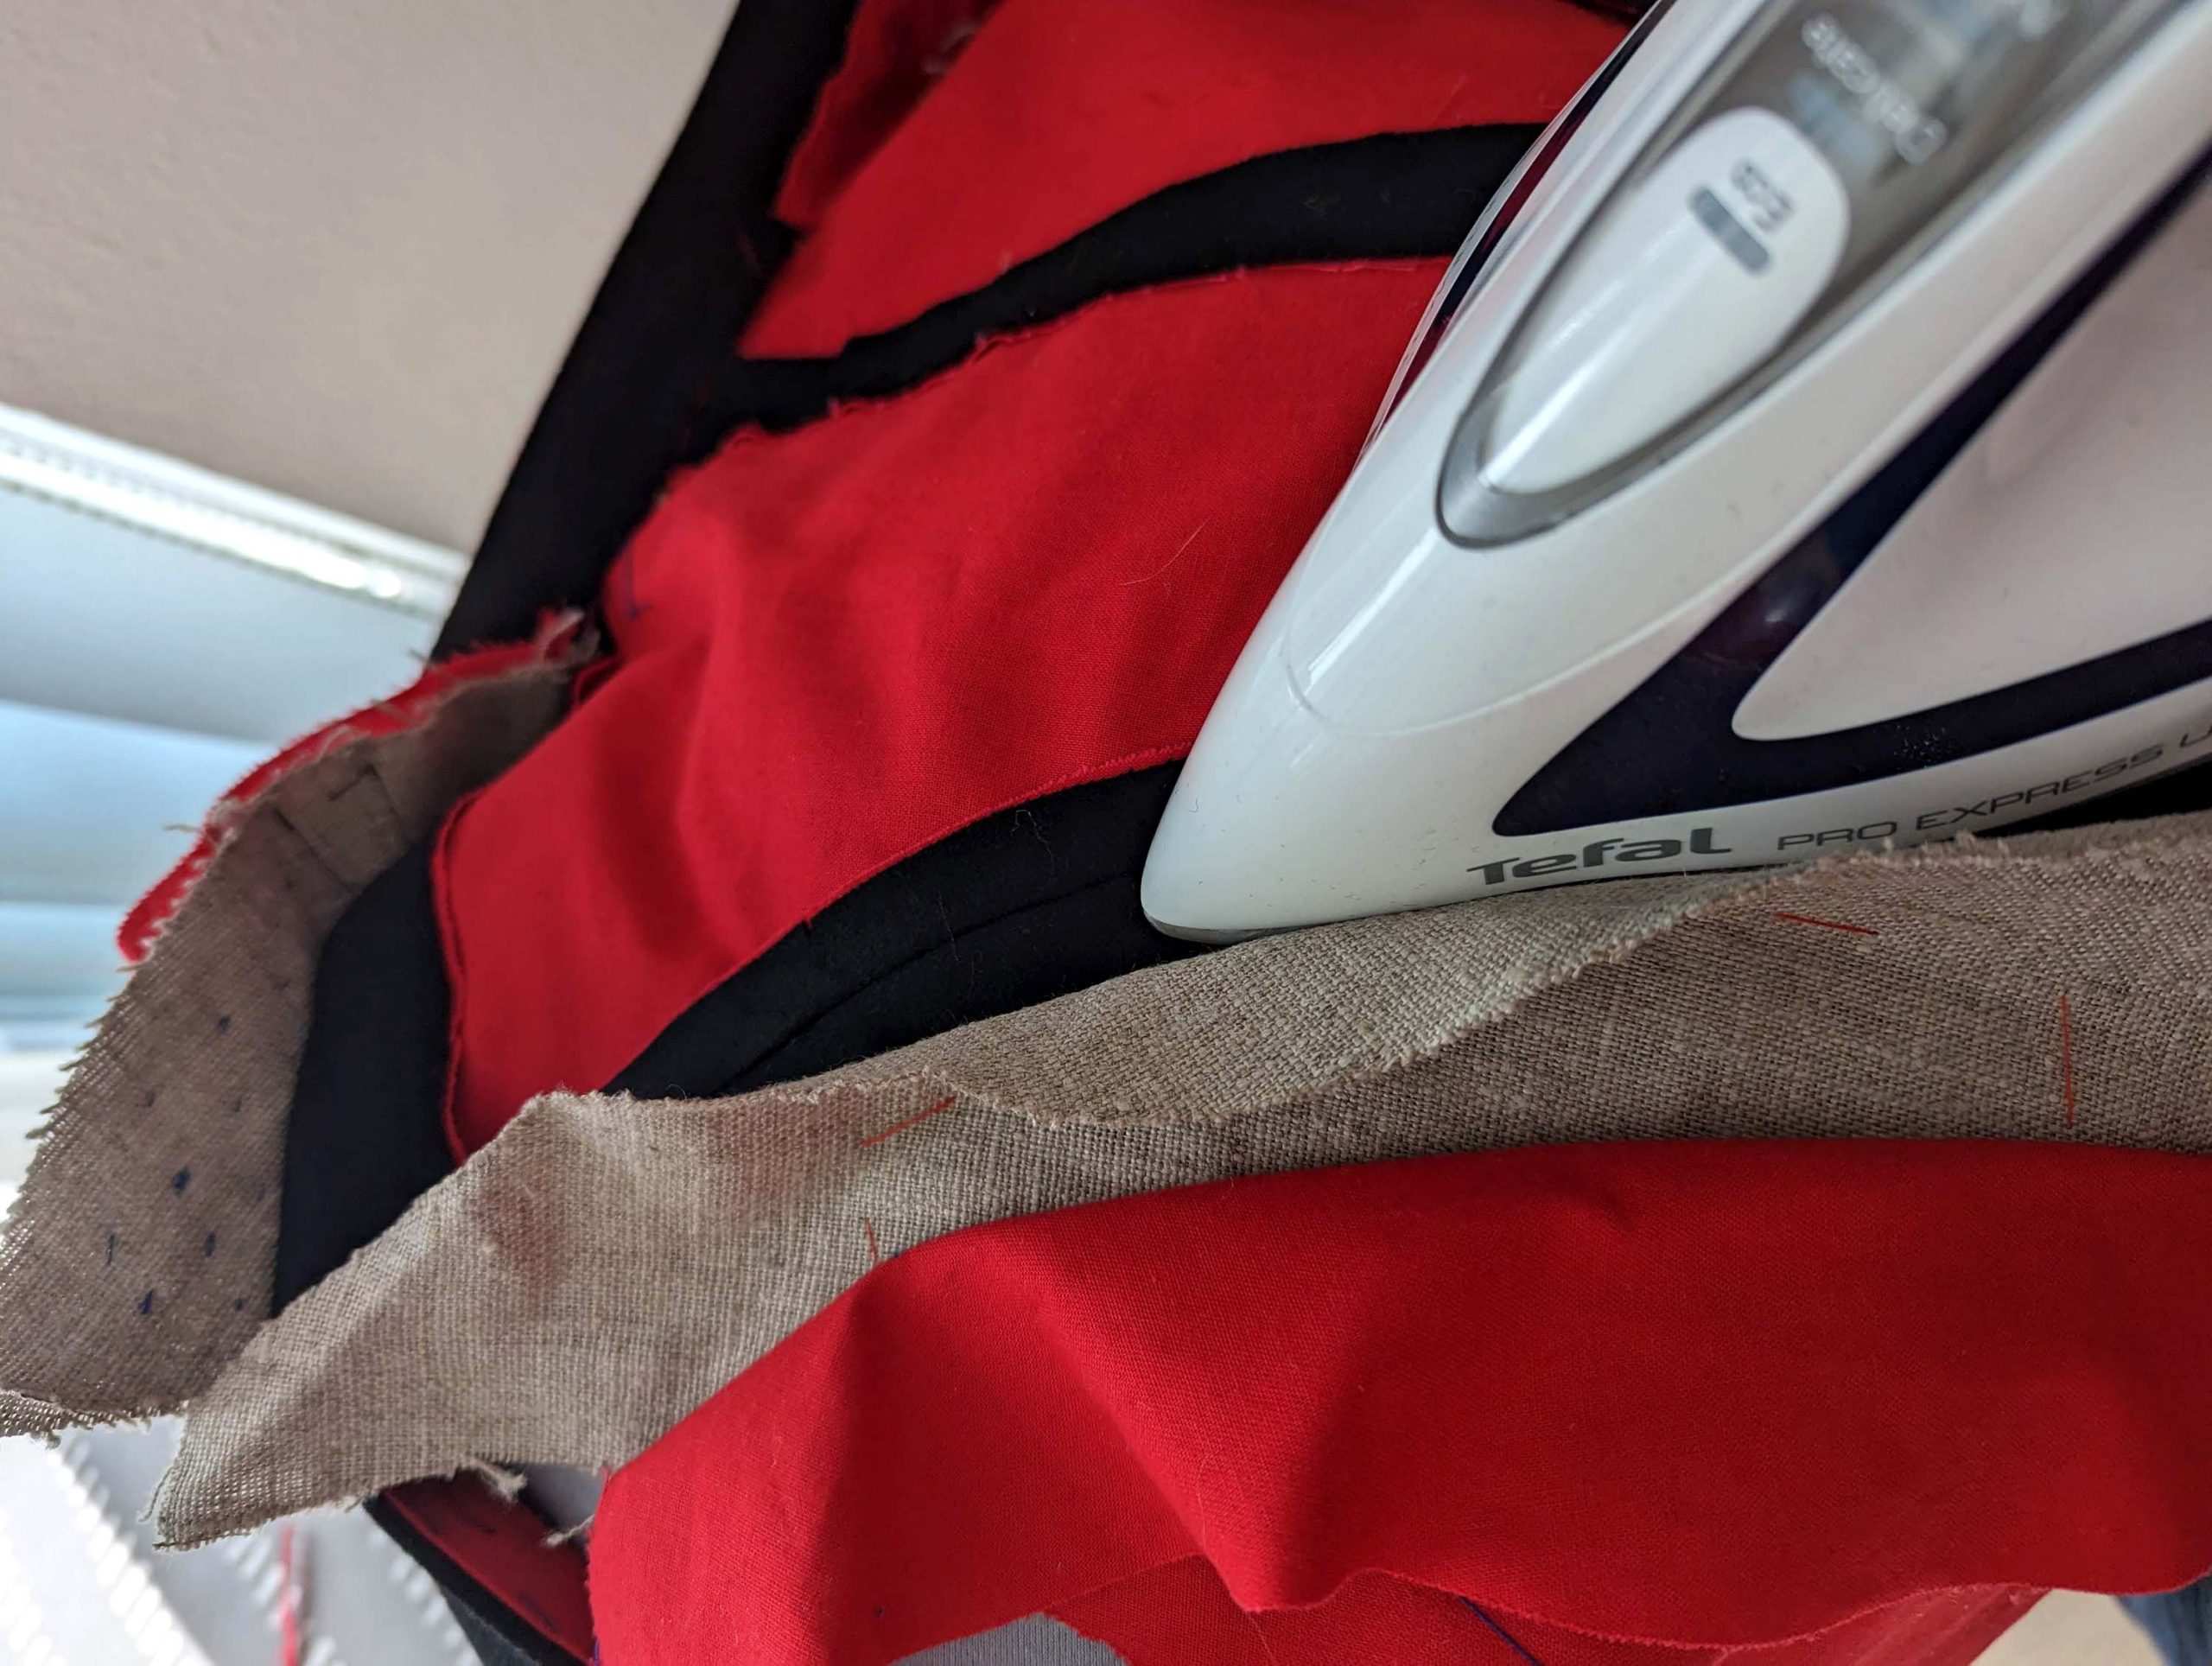
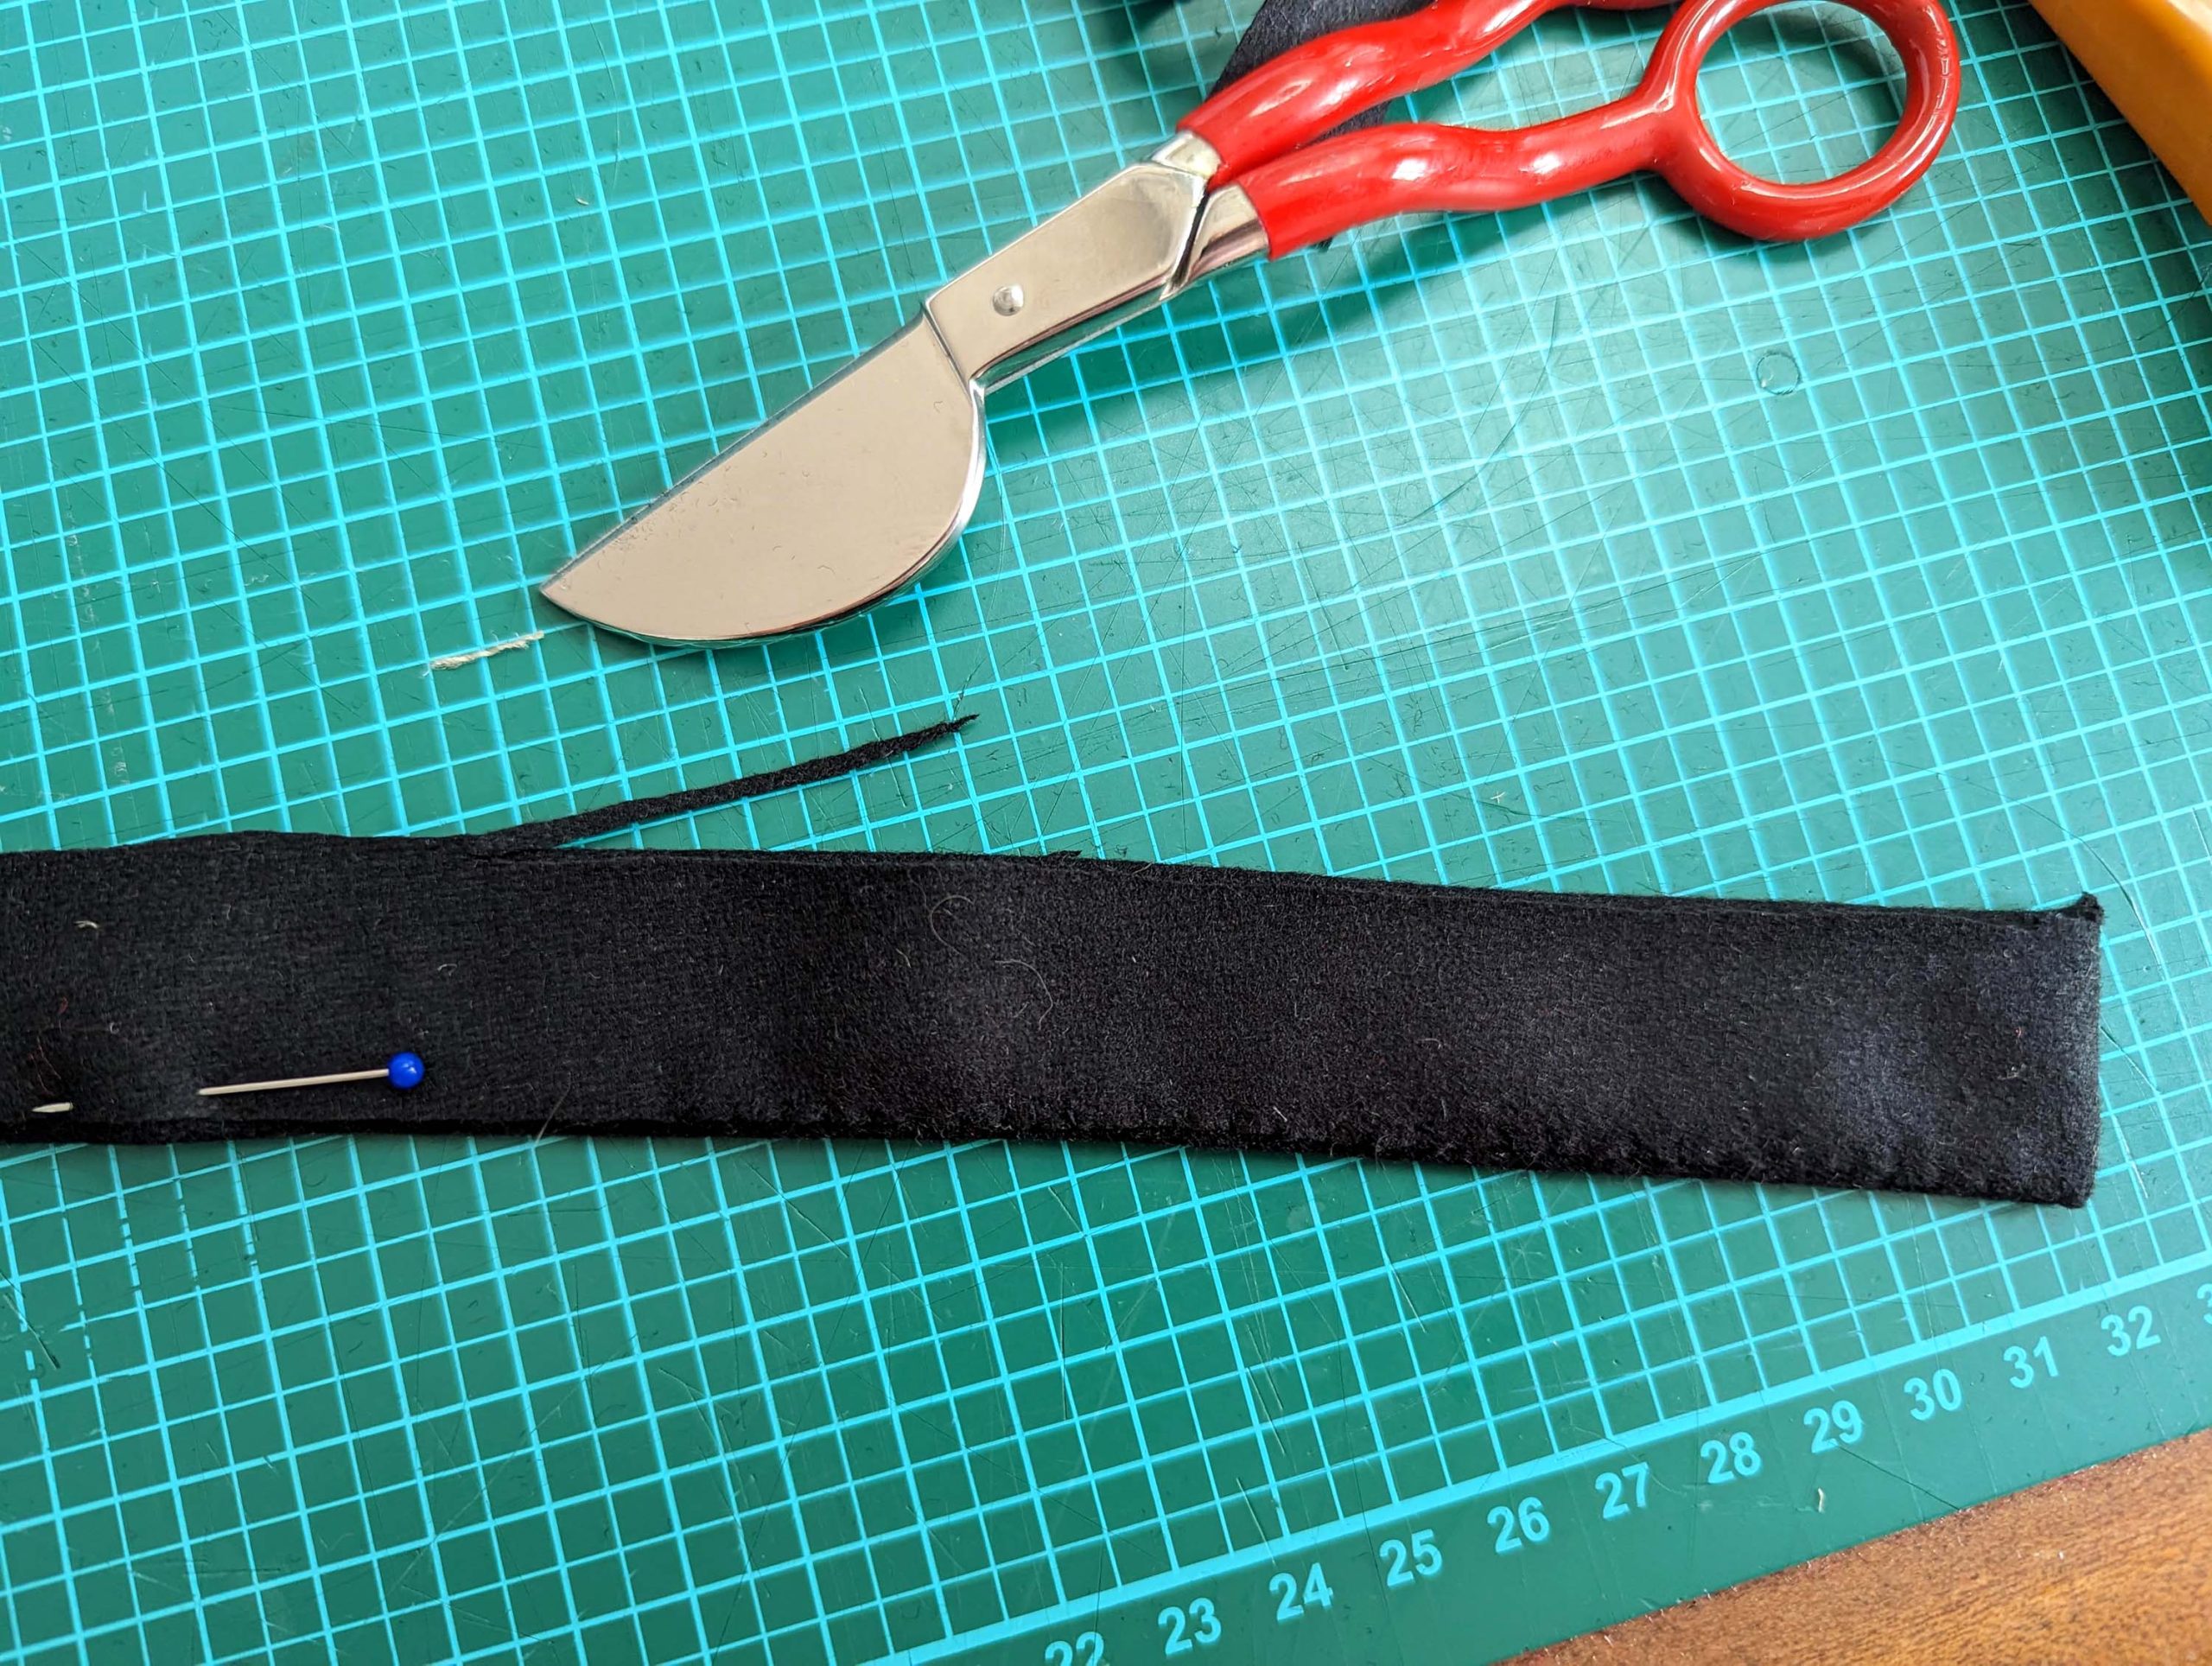
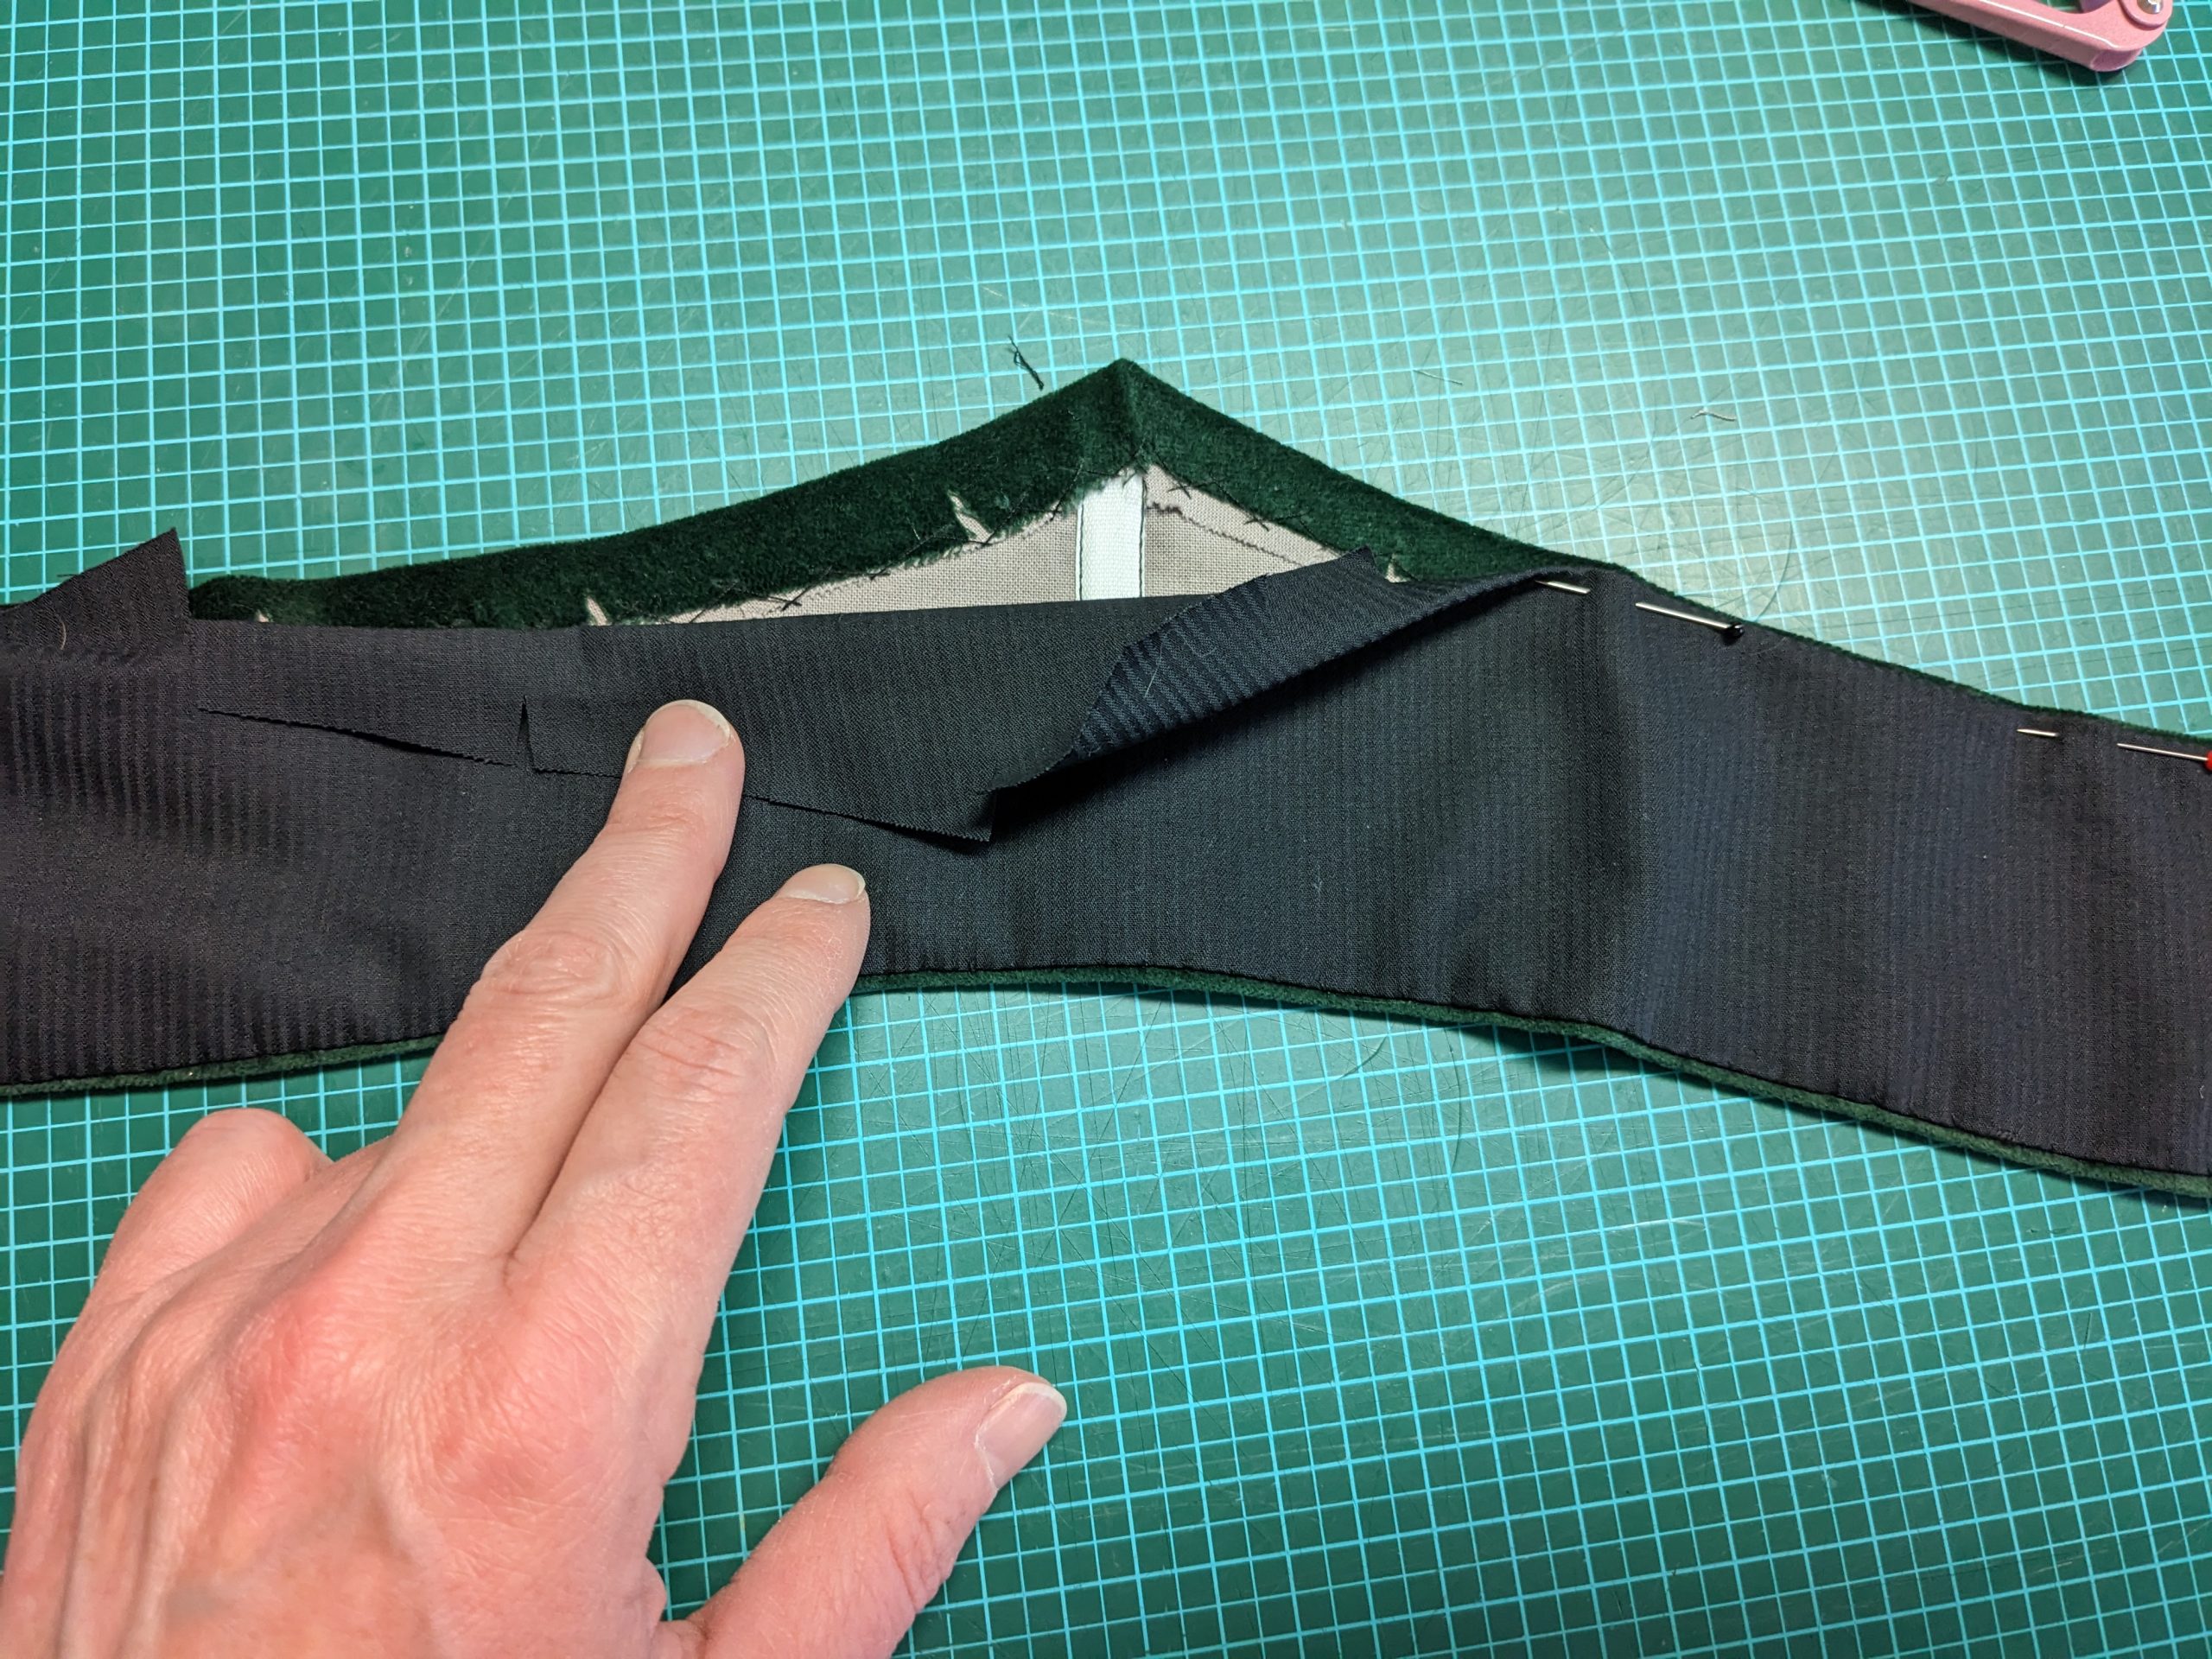
(3) Line up the interlining with the belt pieces from the fashion fabric, wrong sides together, and baste in place. Sew the side seams, right sides together. Trim back, notch the seam allowances as shown, and press open.

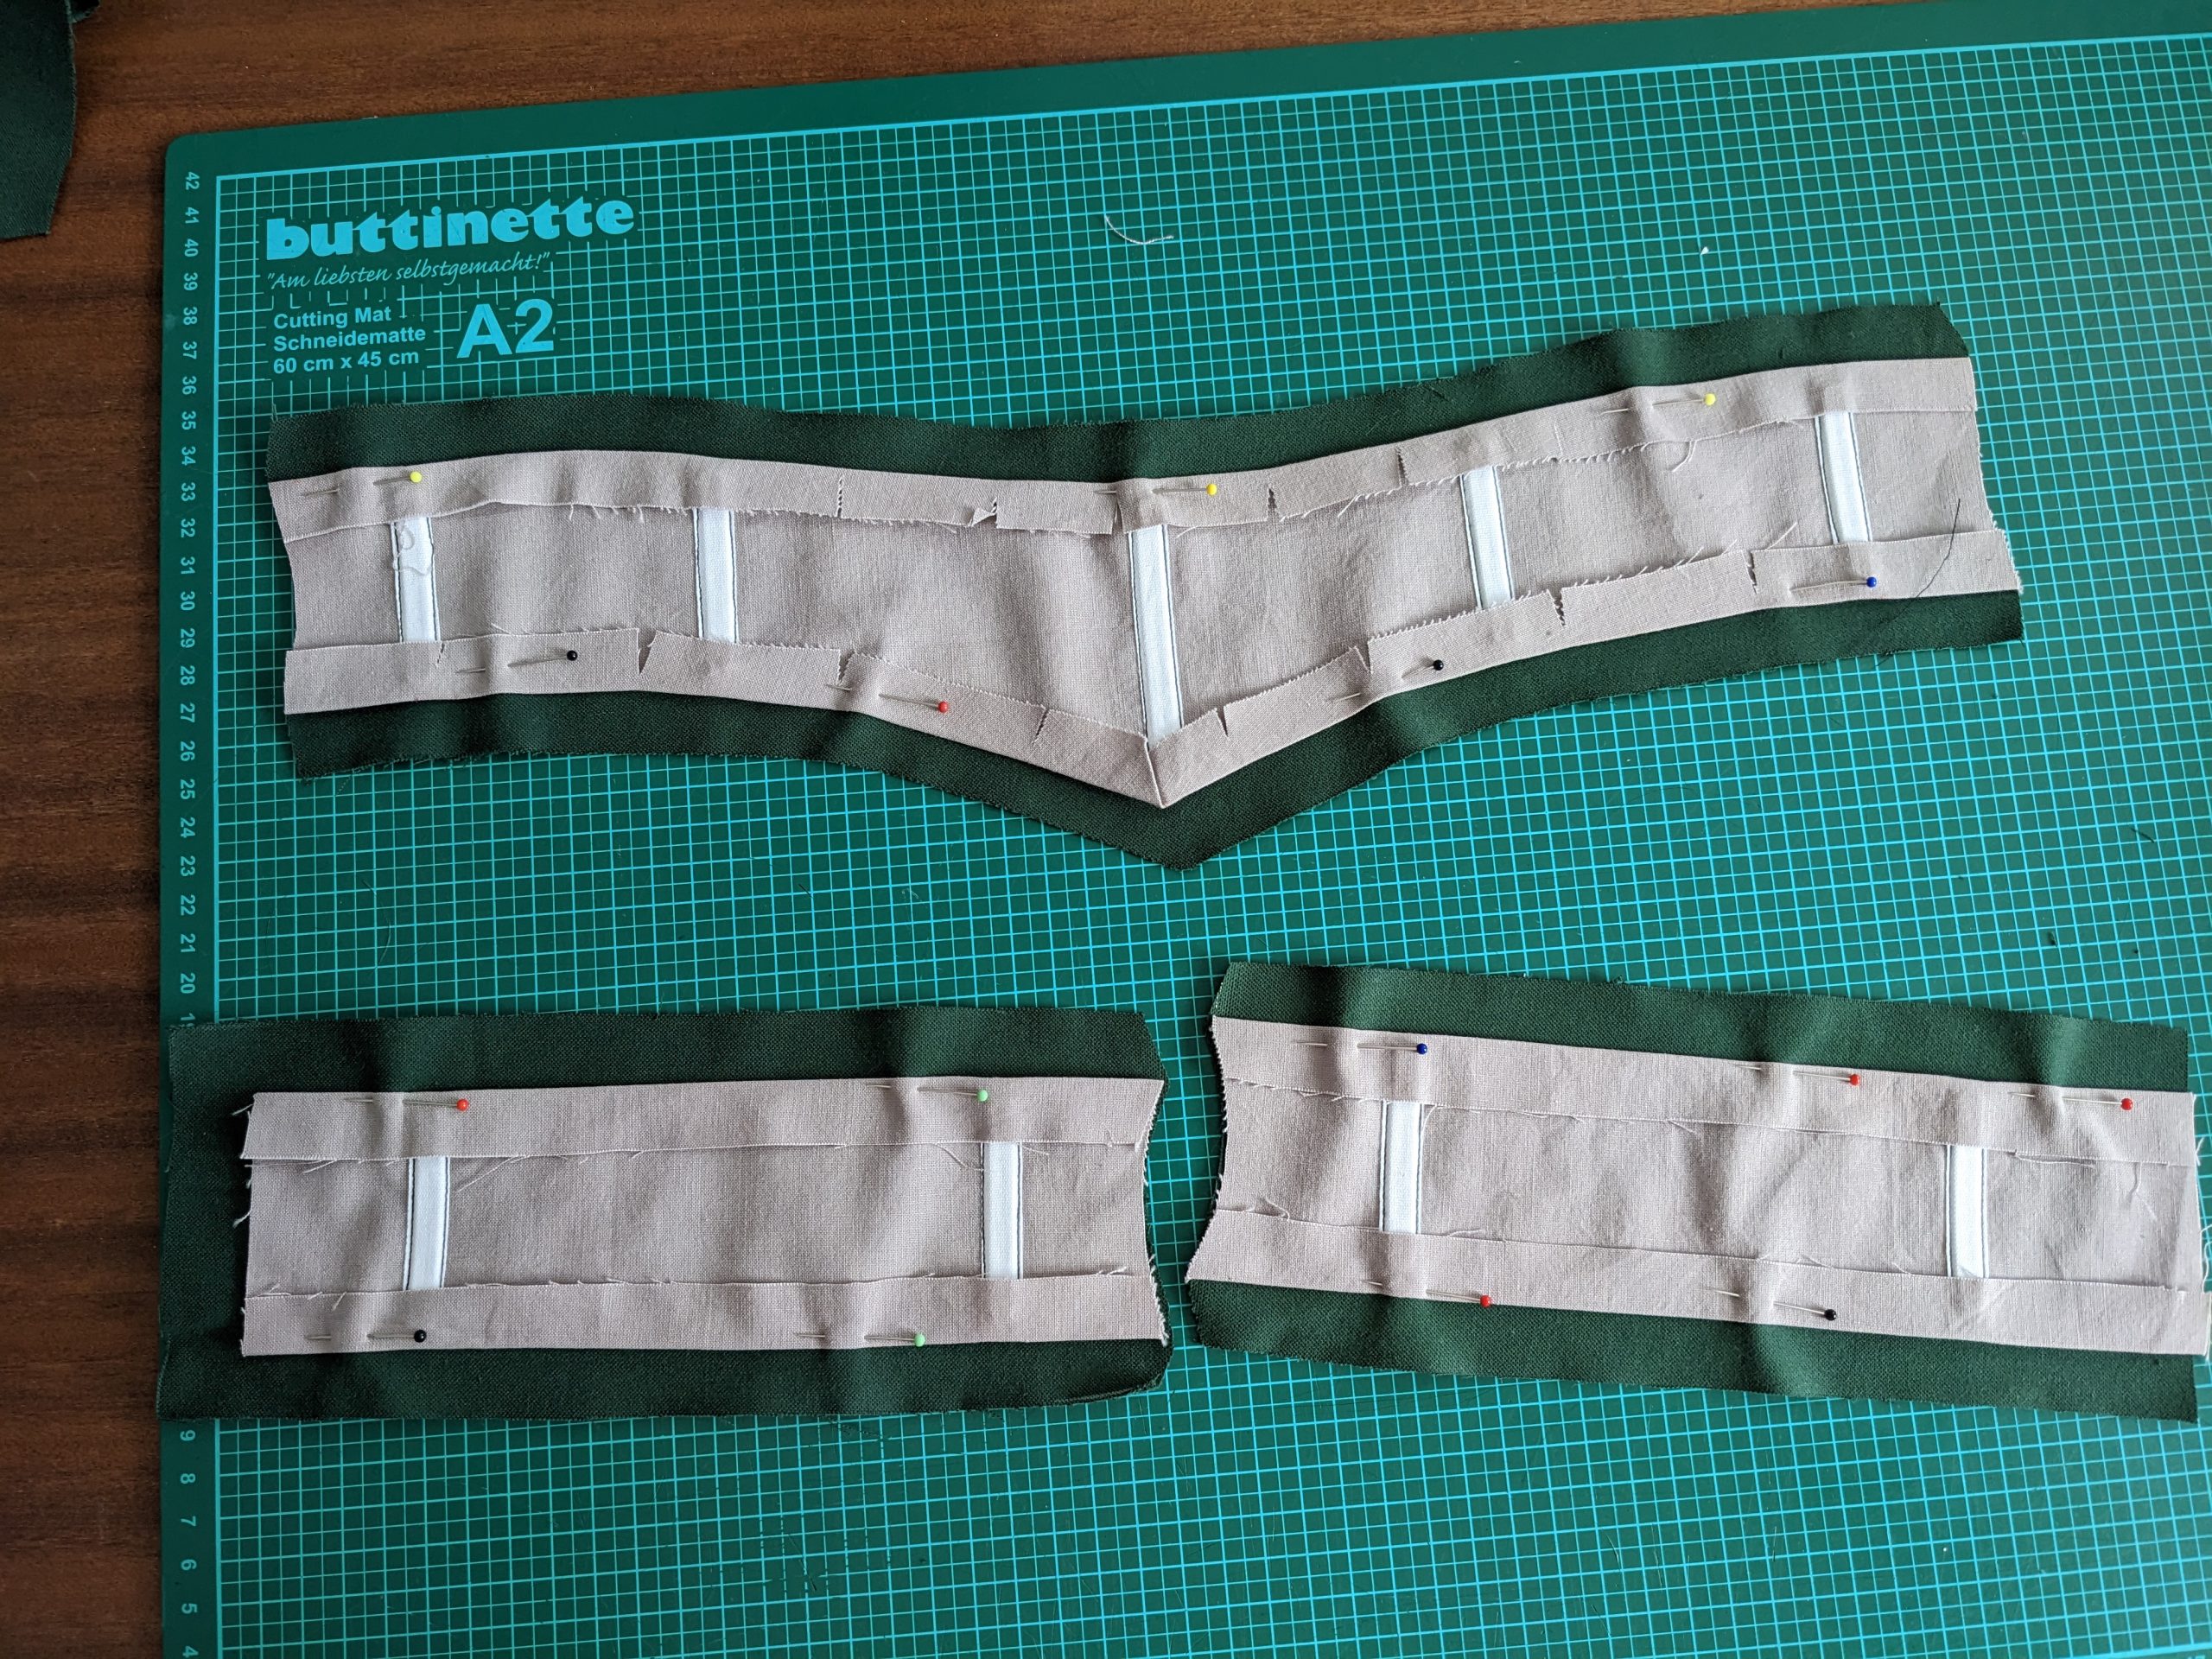
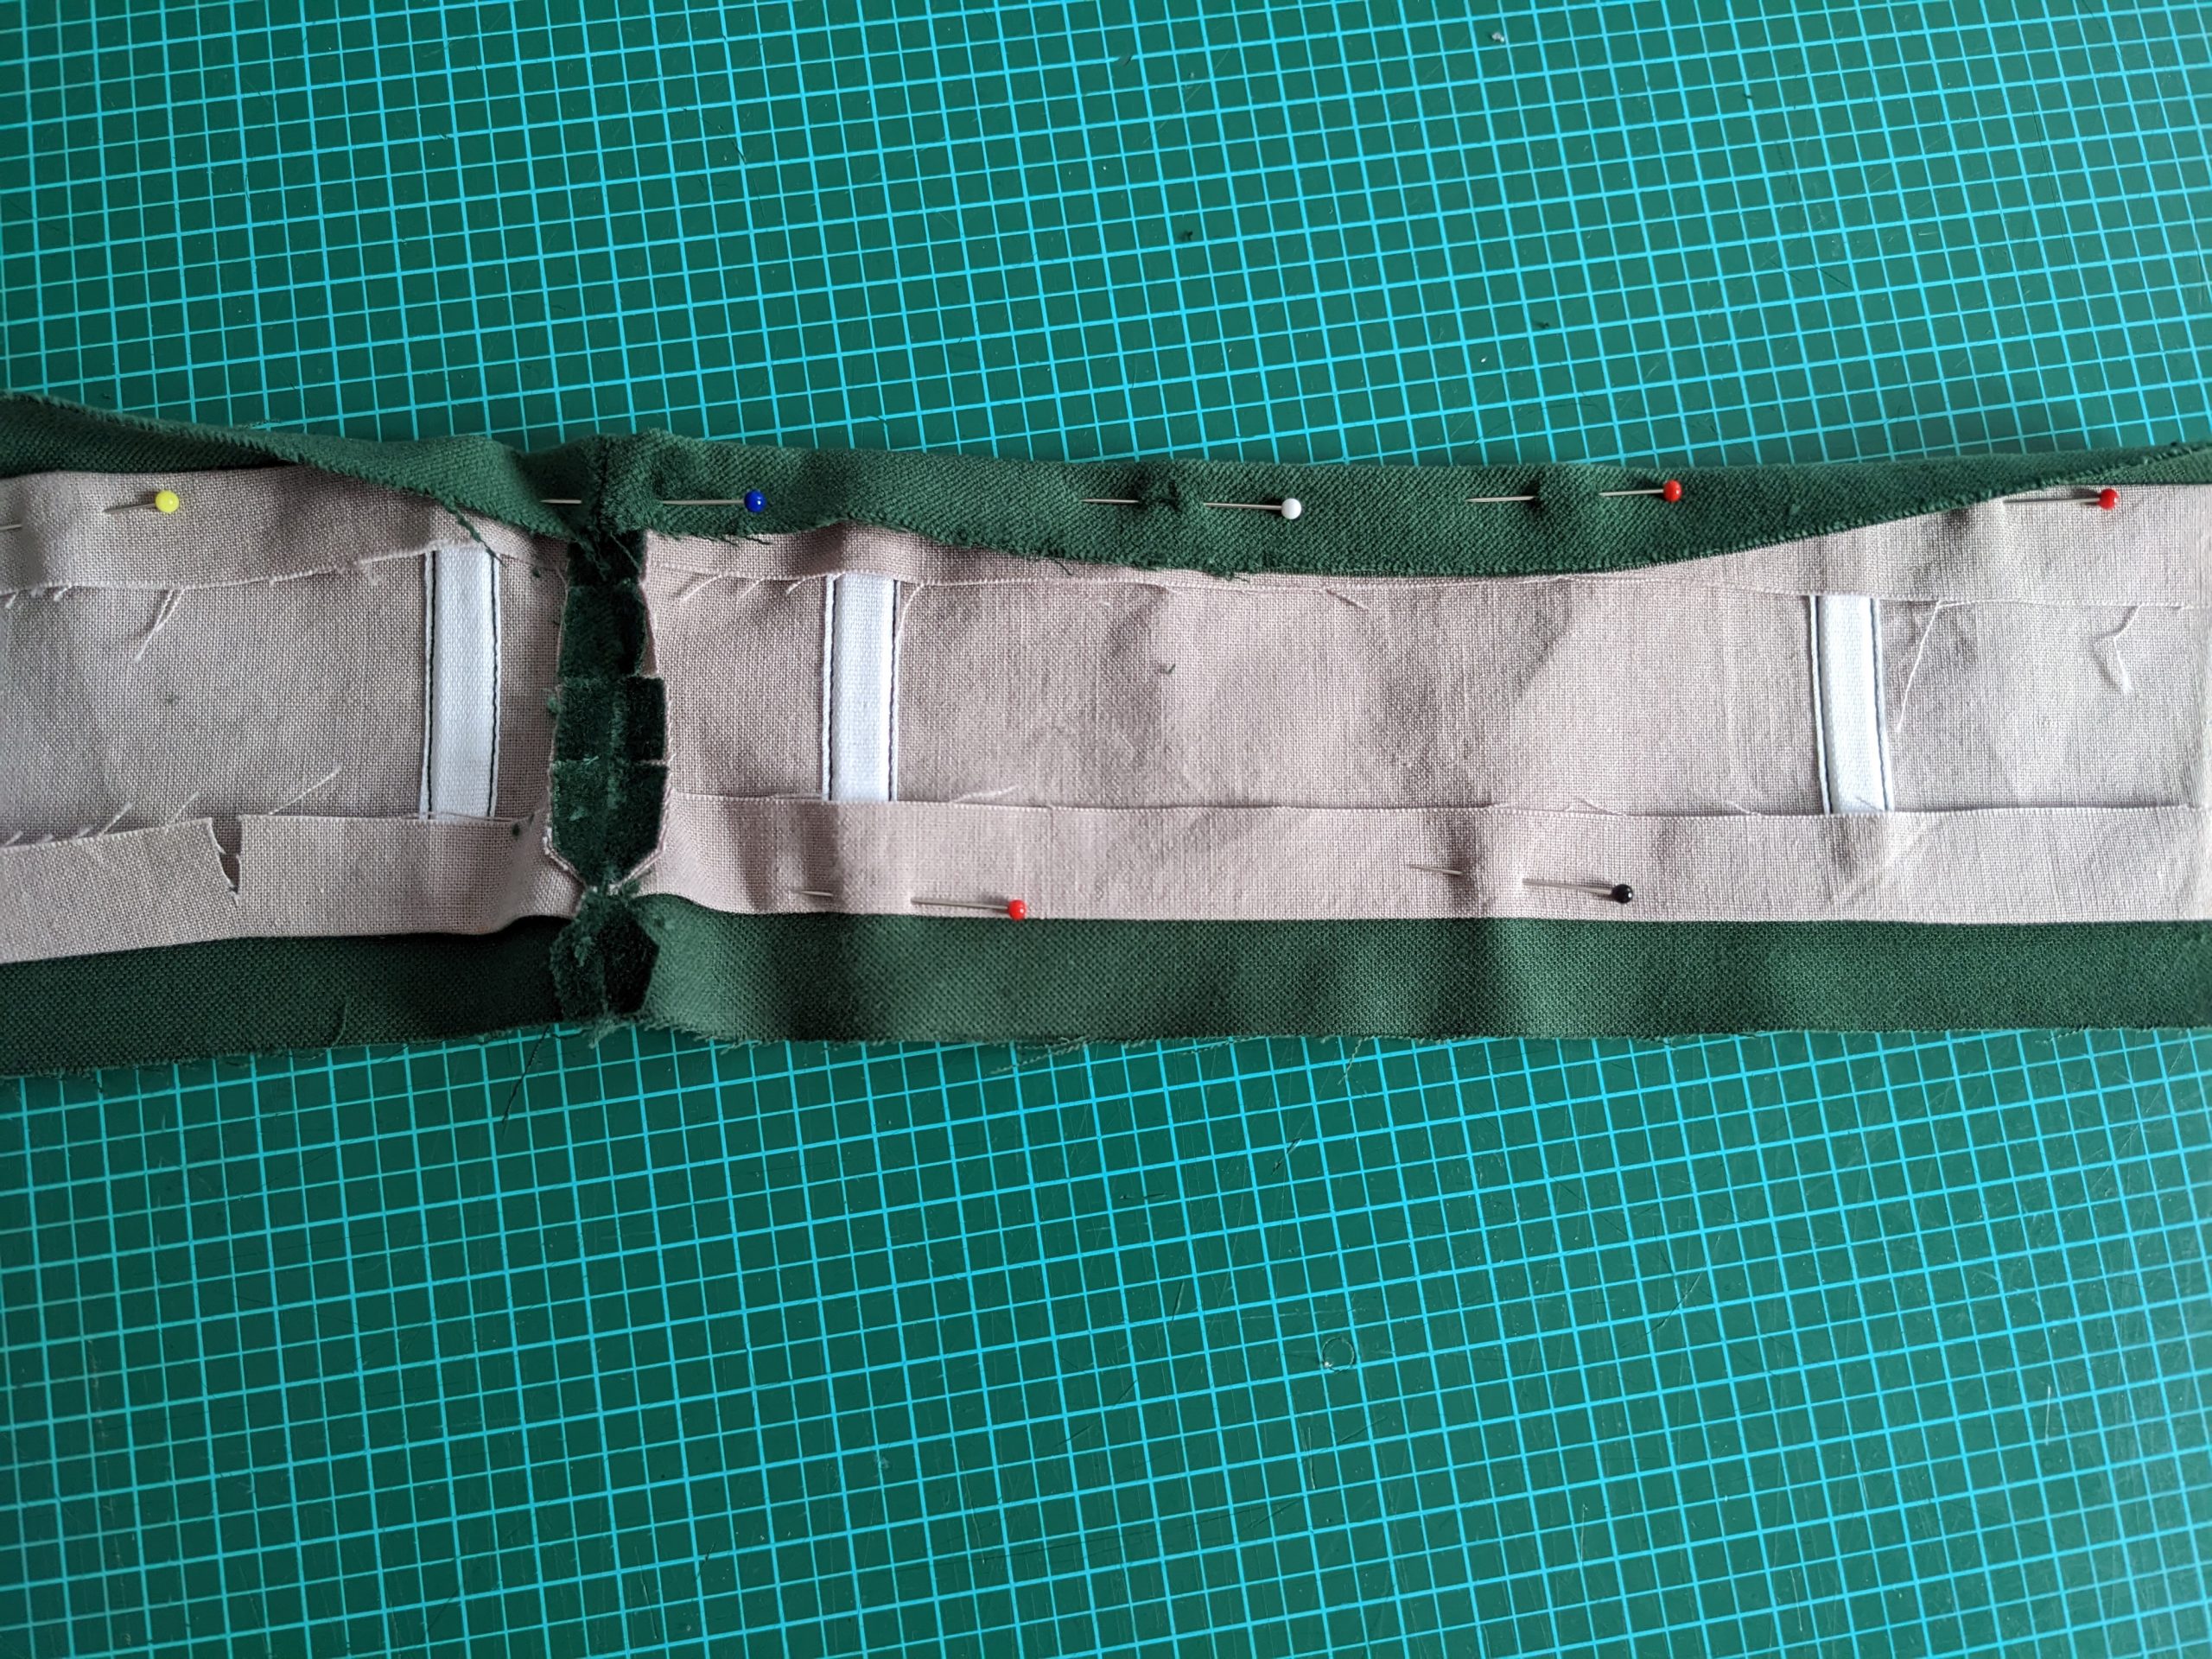
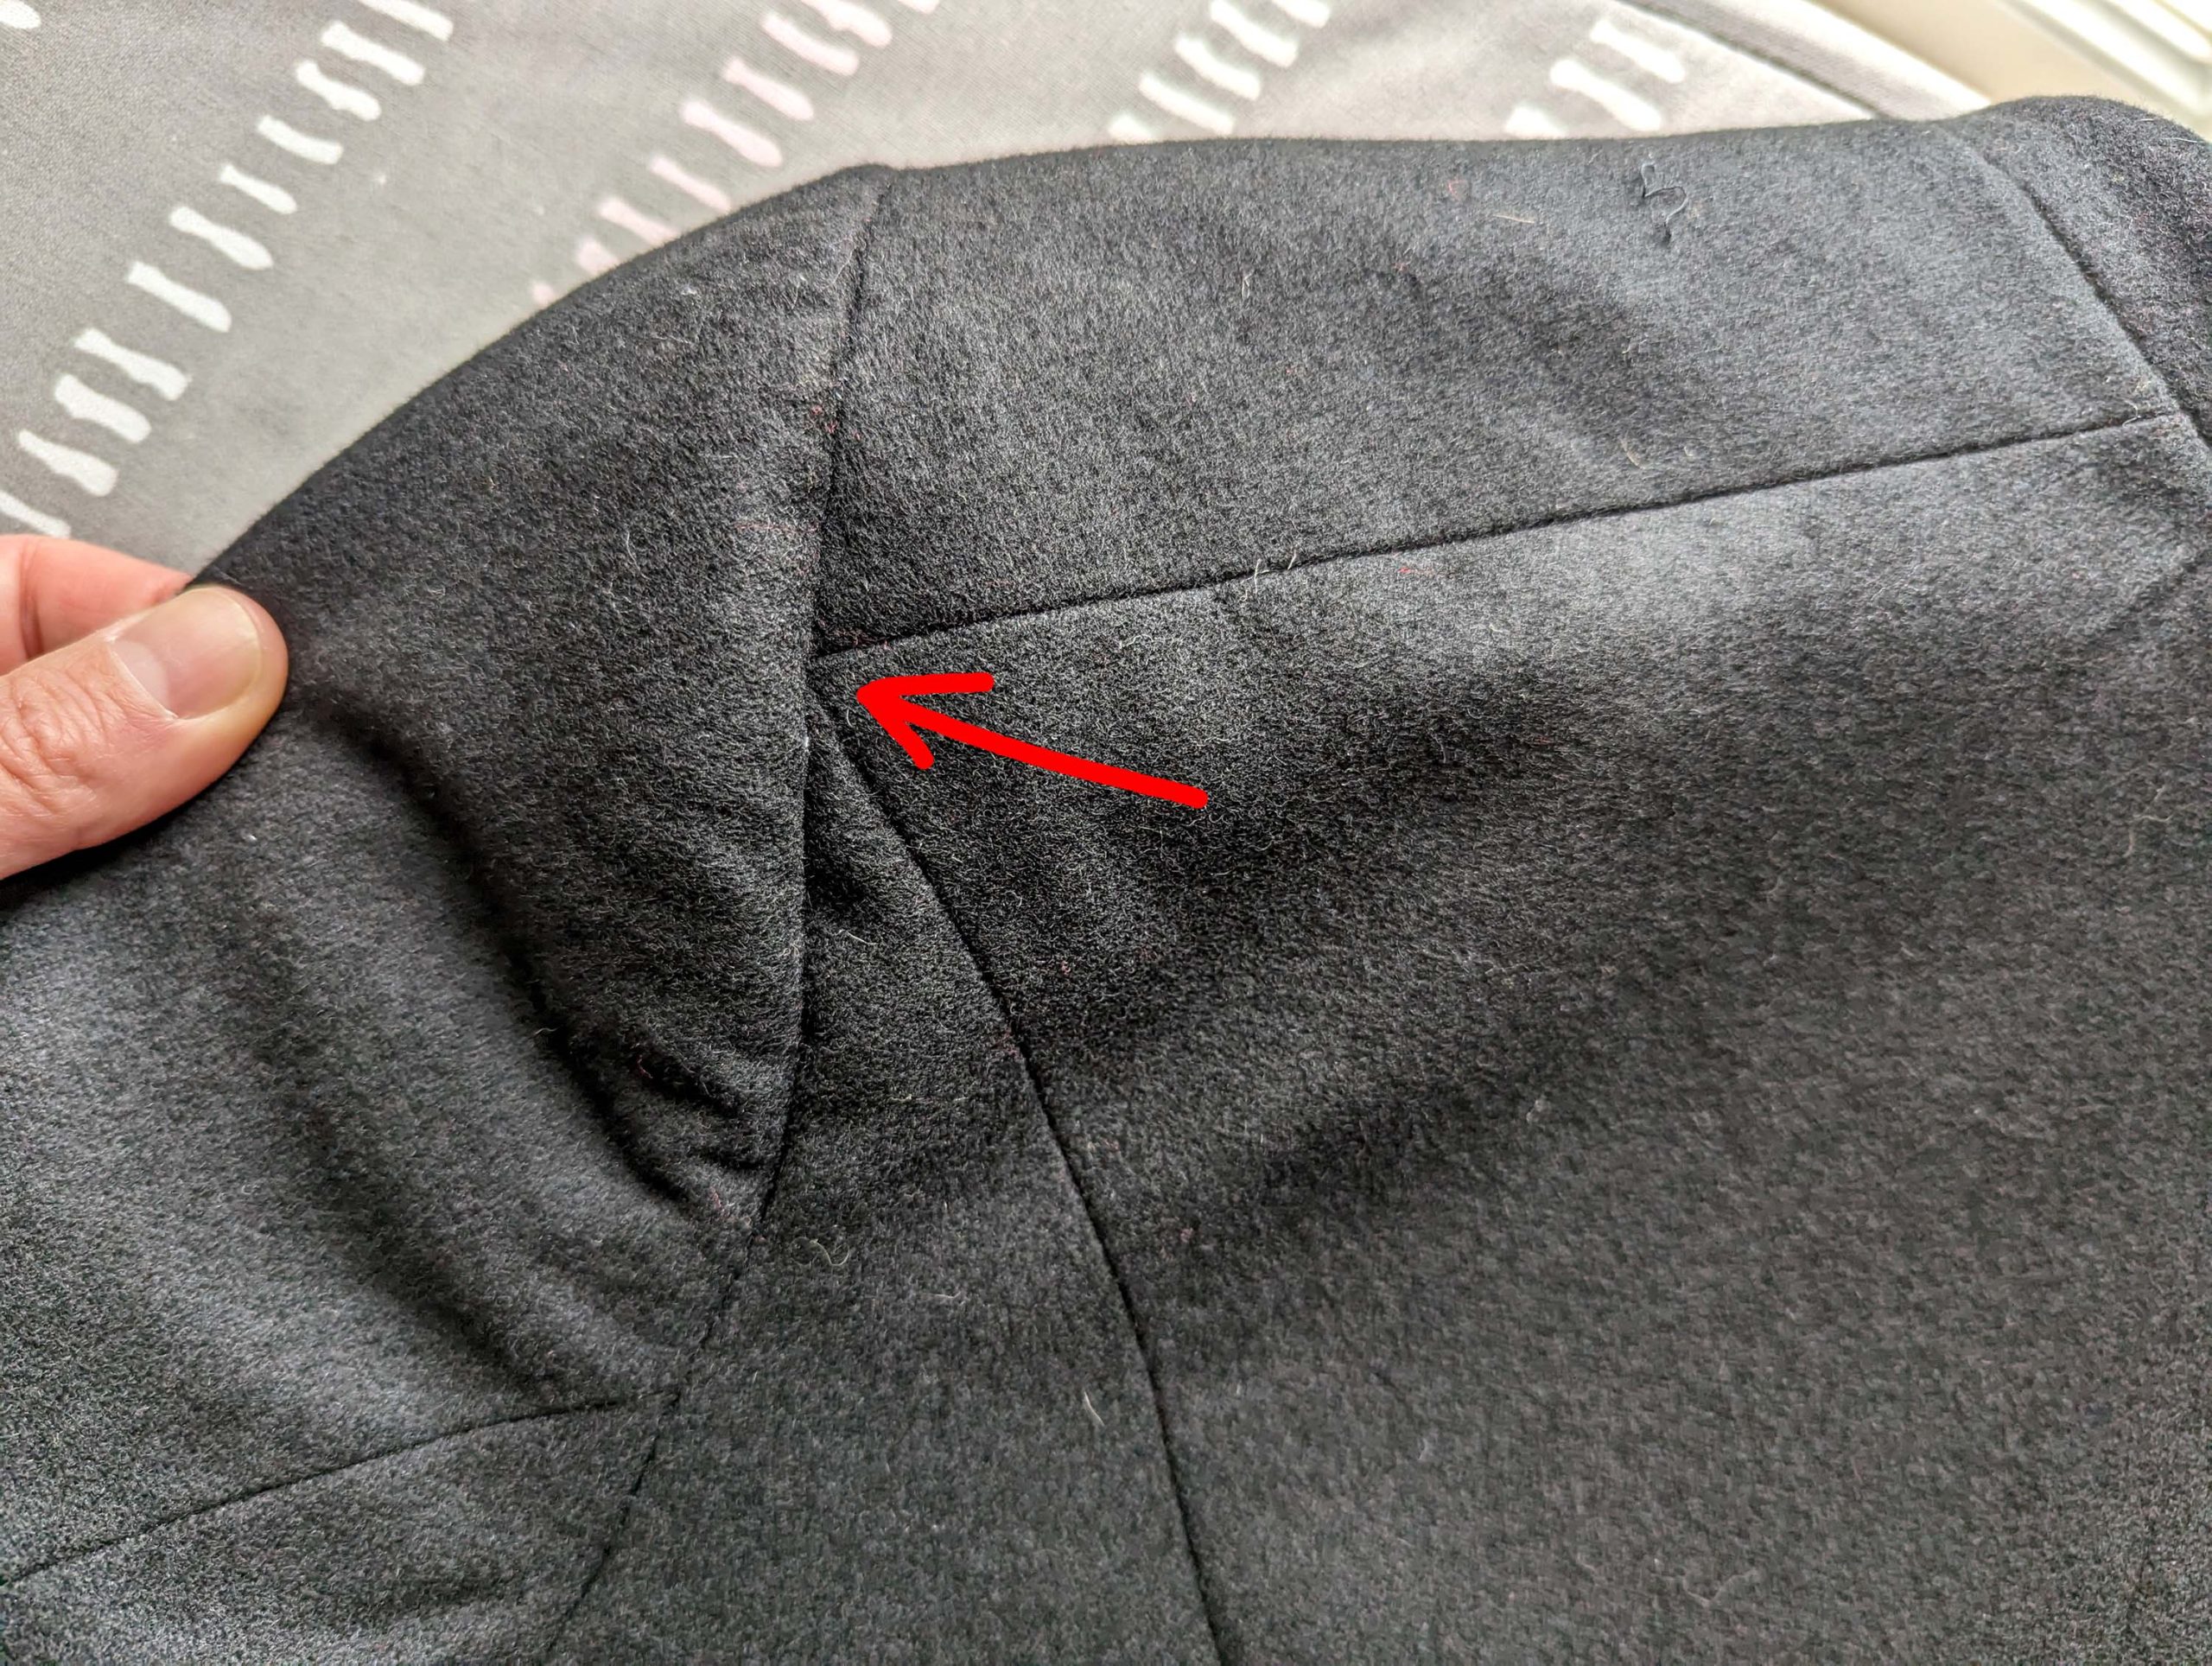
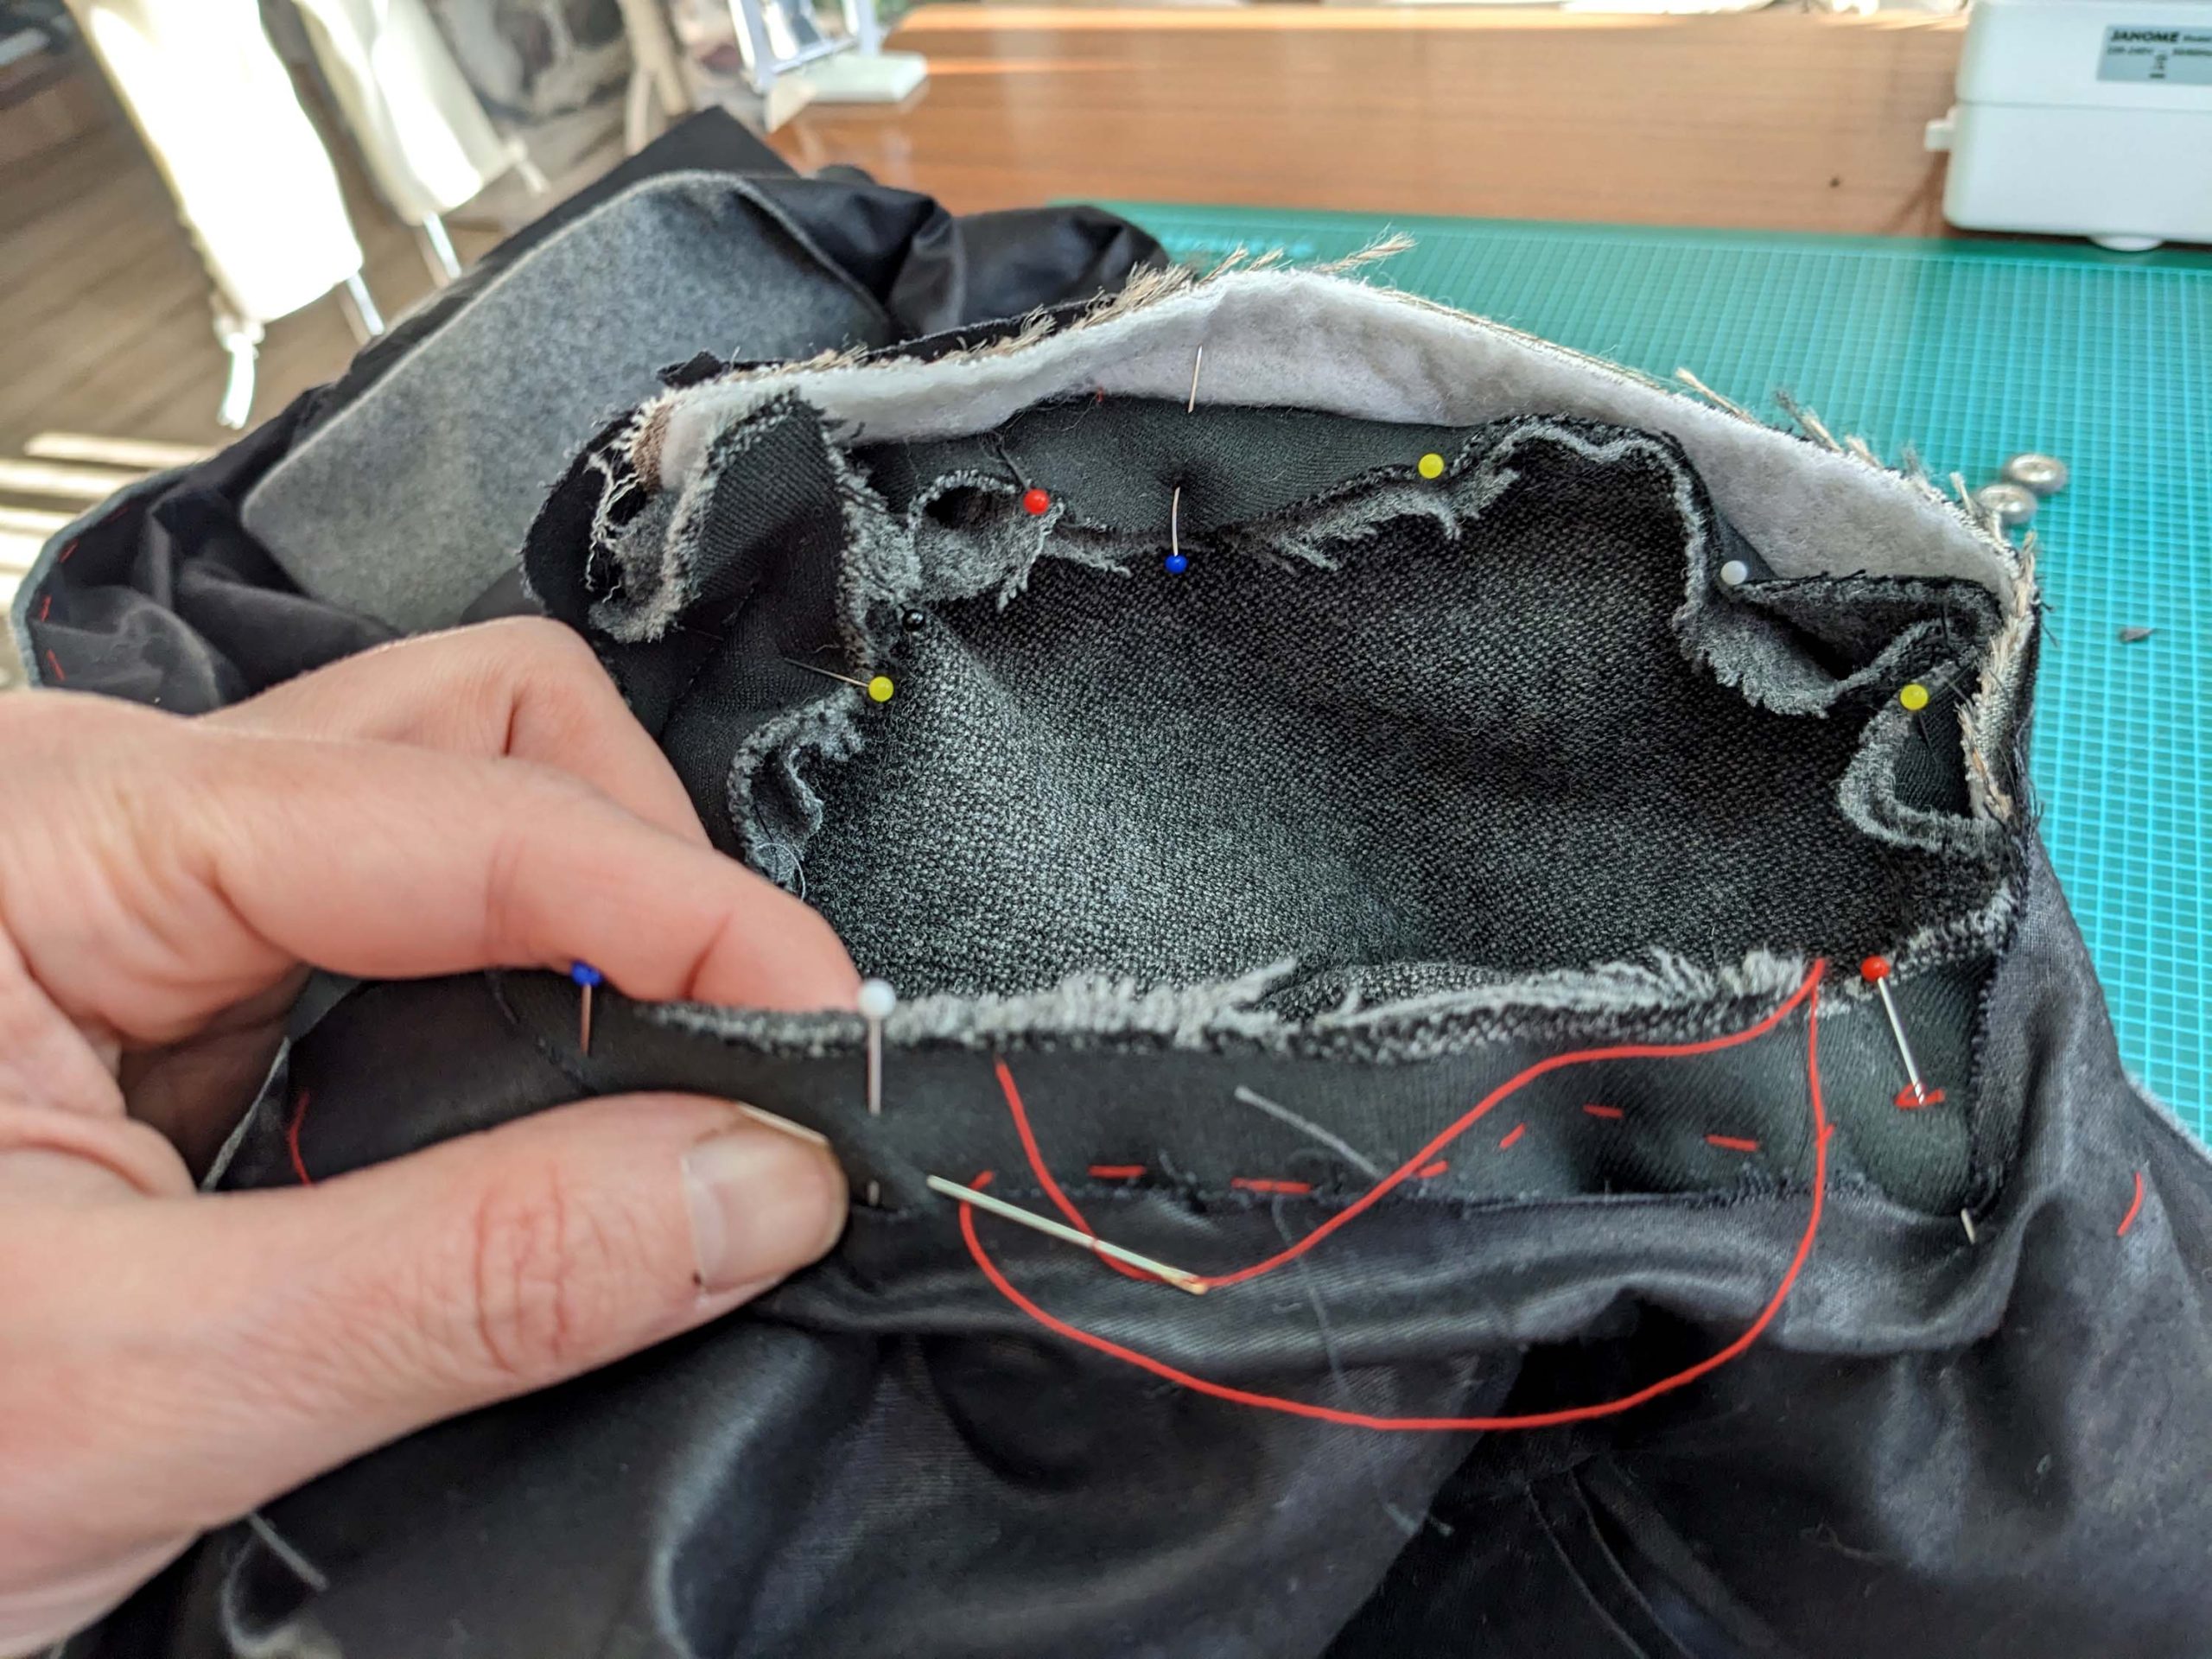
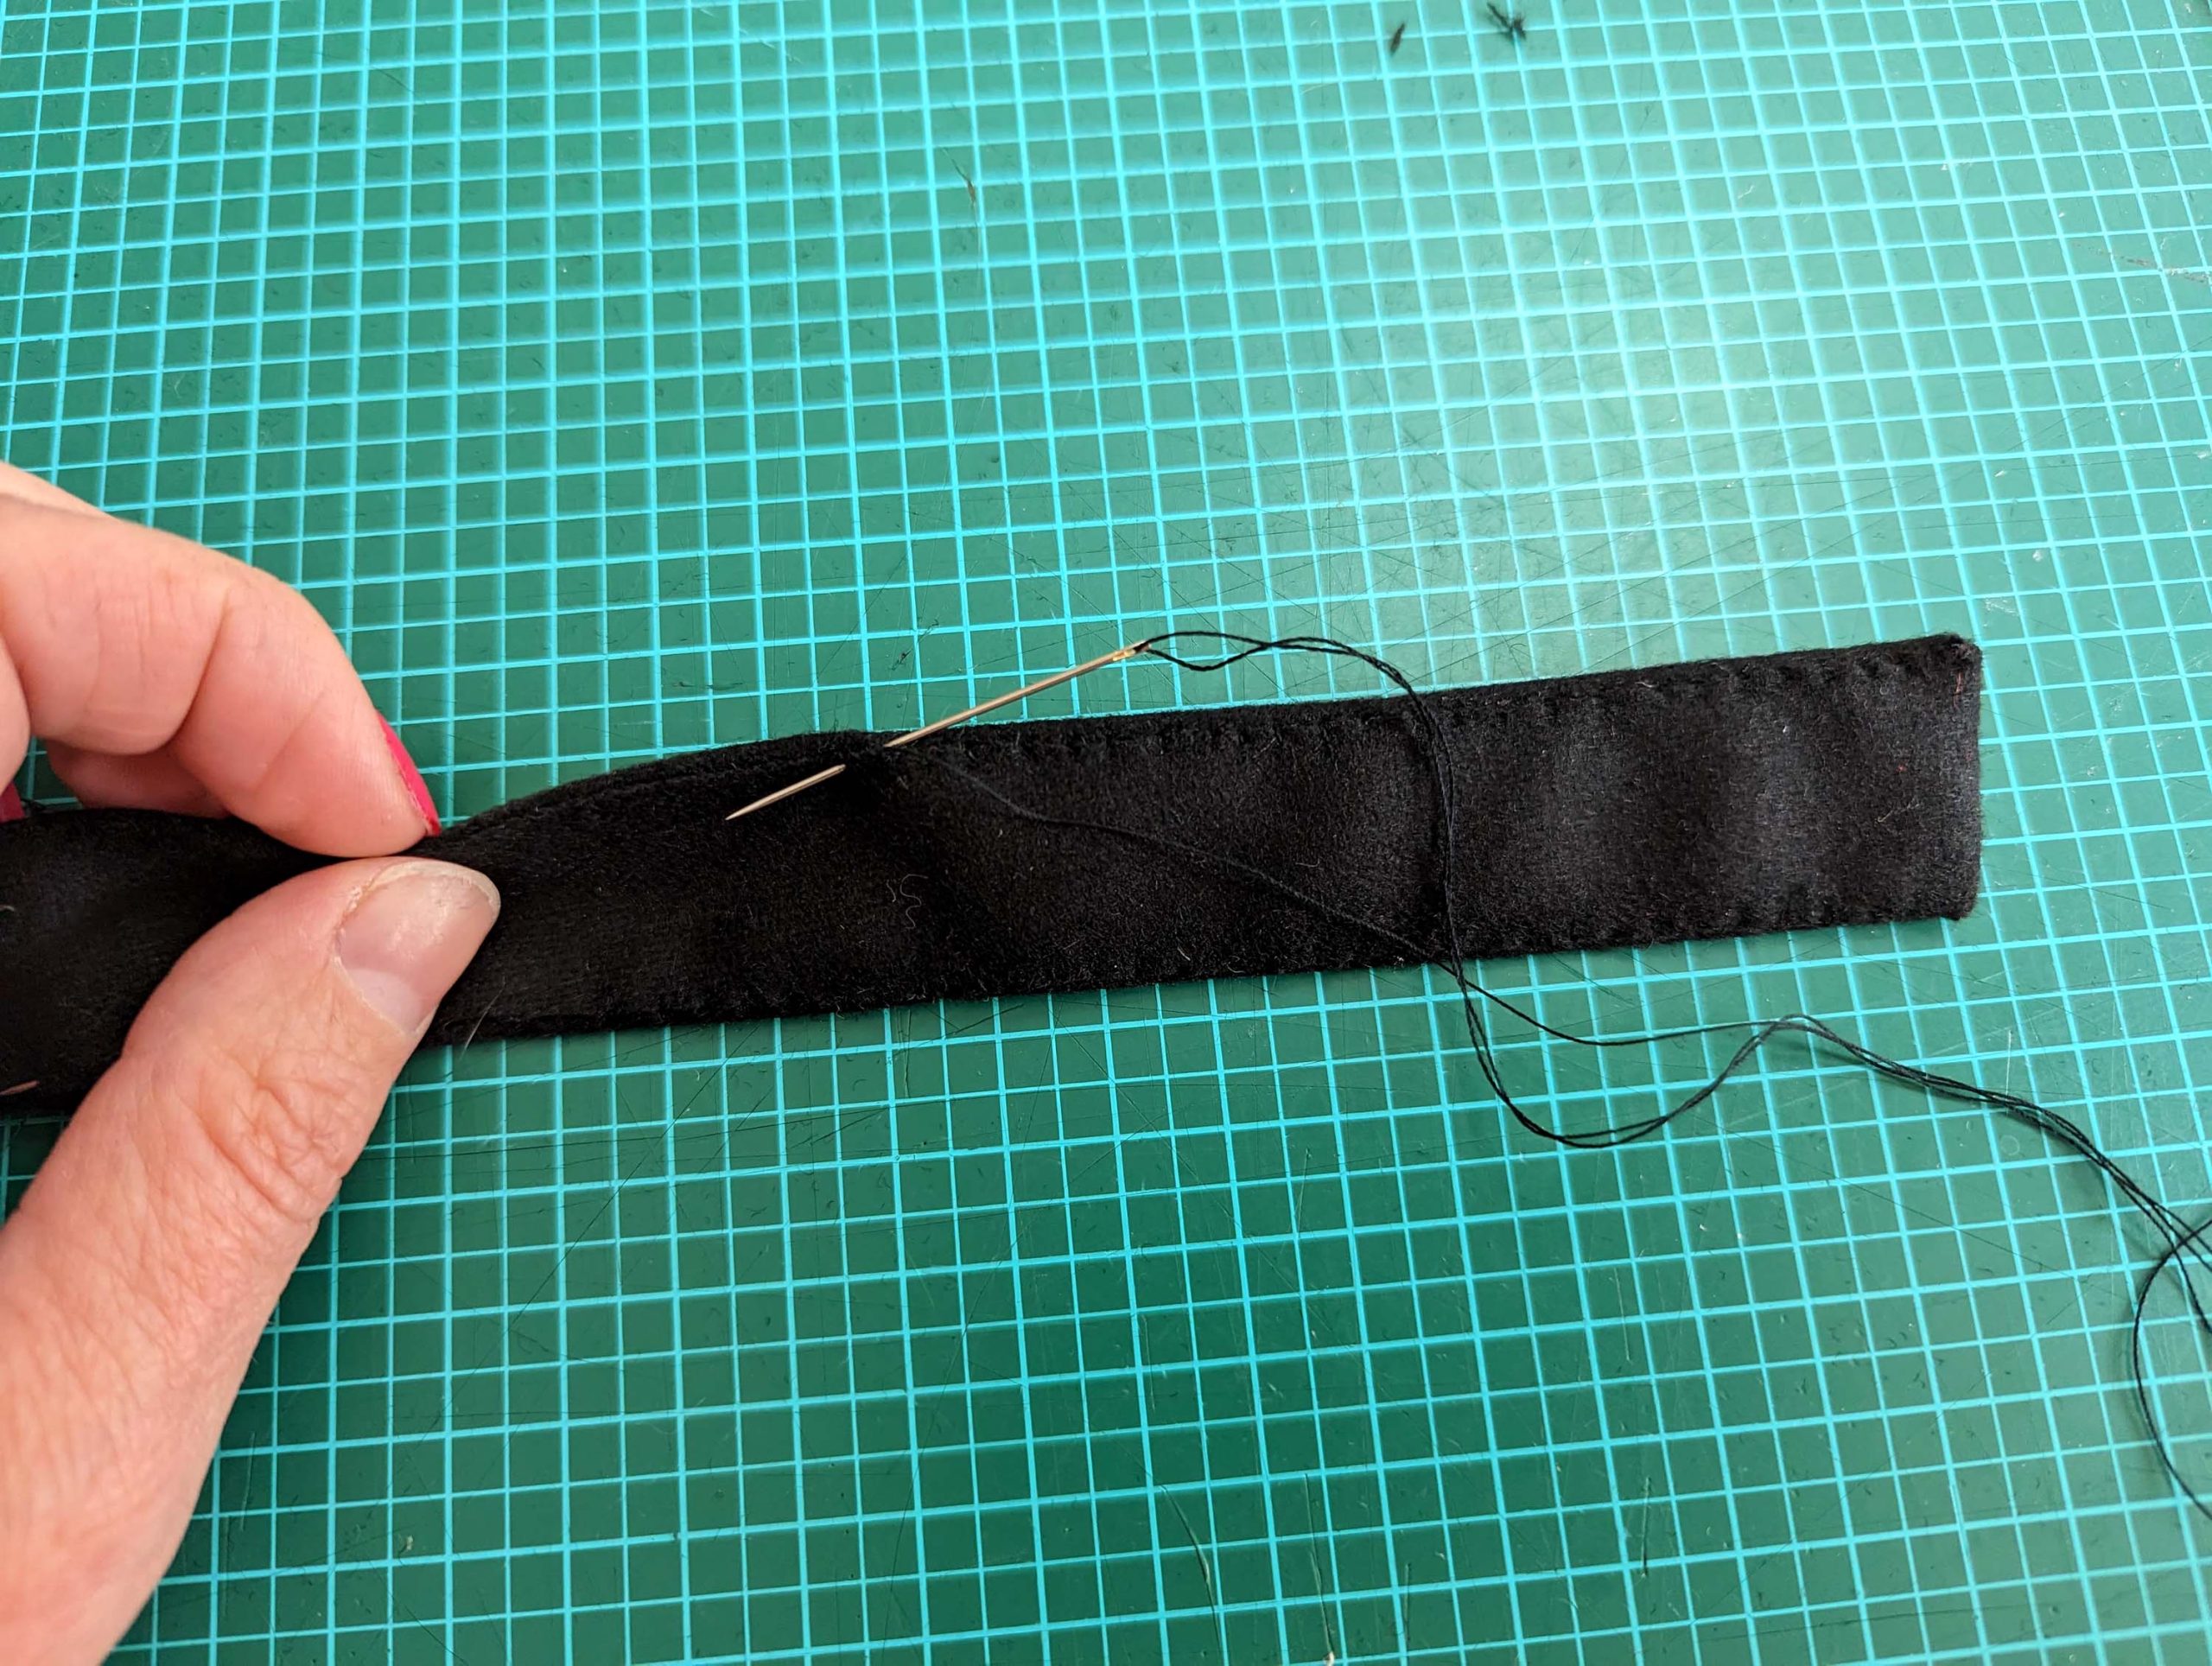
(4) Turn in the seam allowances of the belt from the fashion fabric around the interlining and catch stitch to the latter.

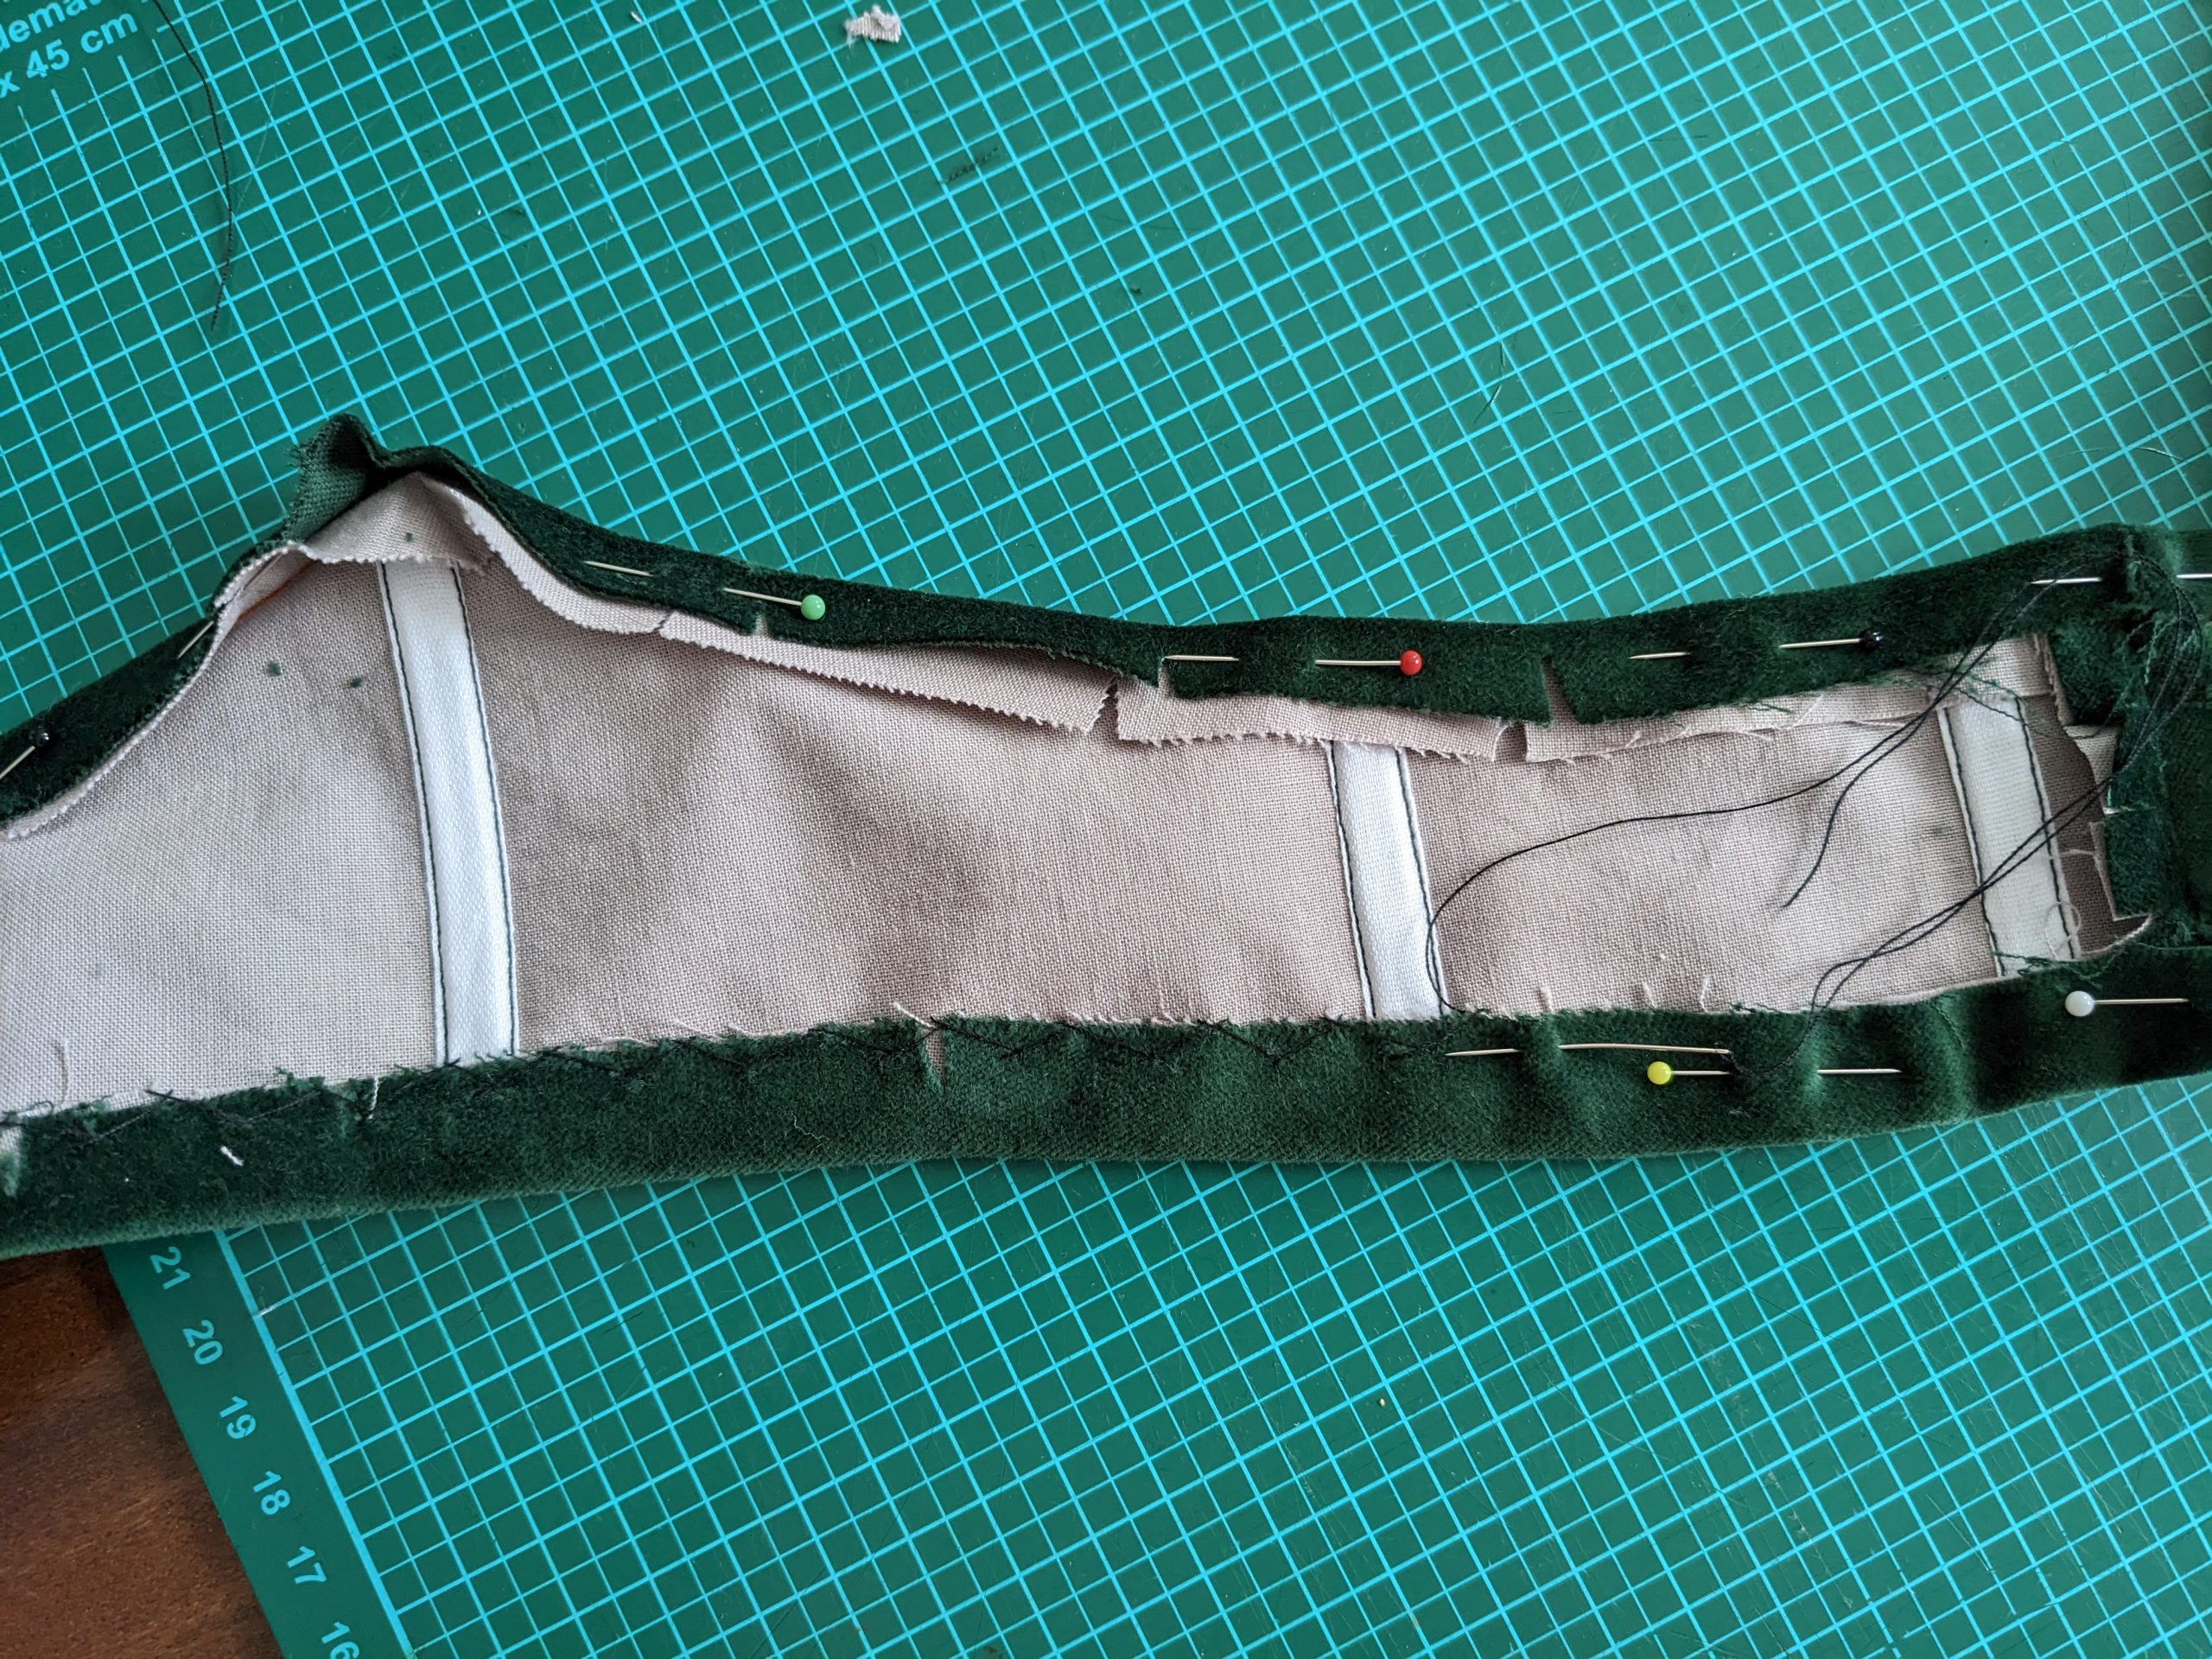
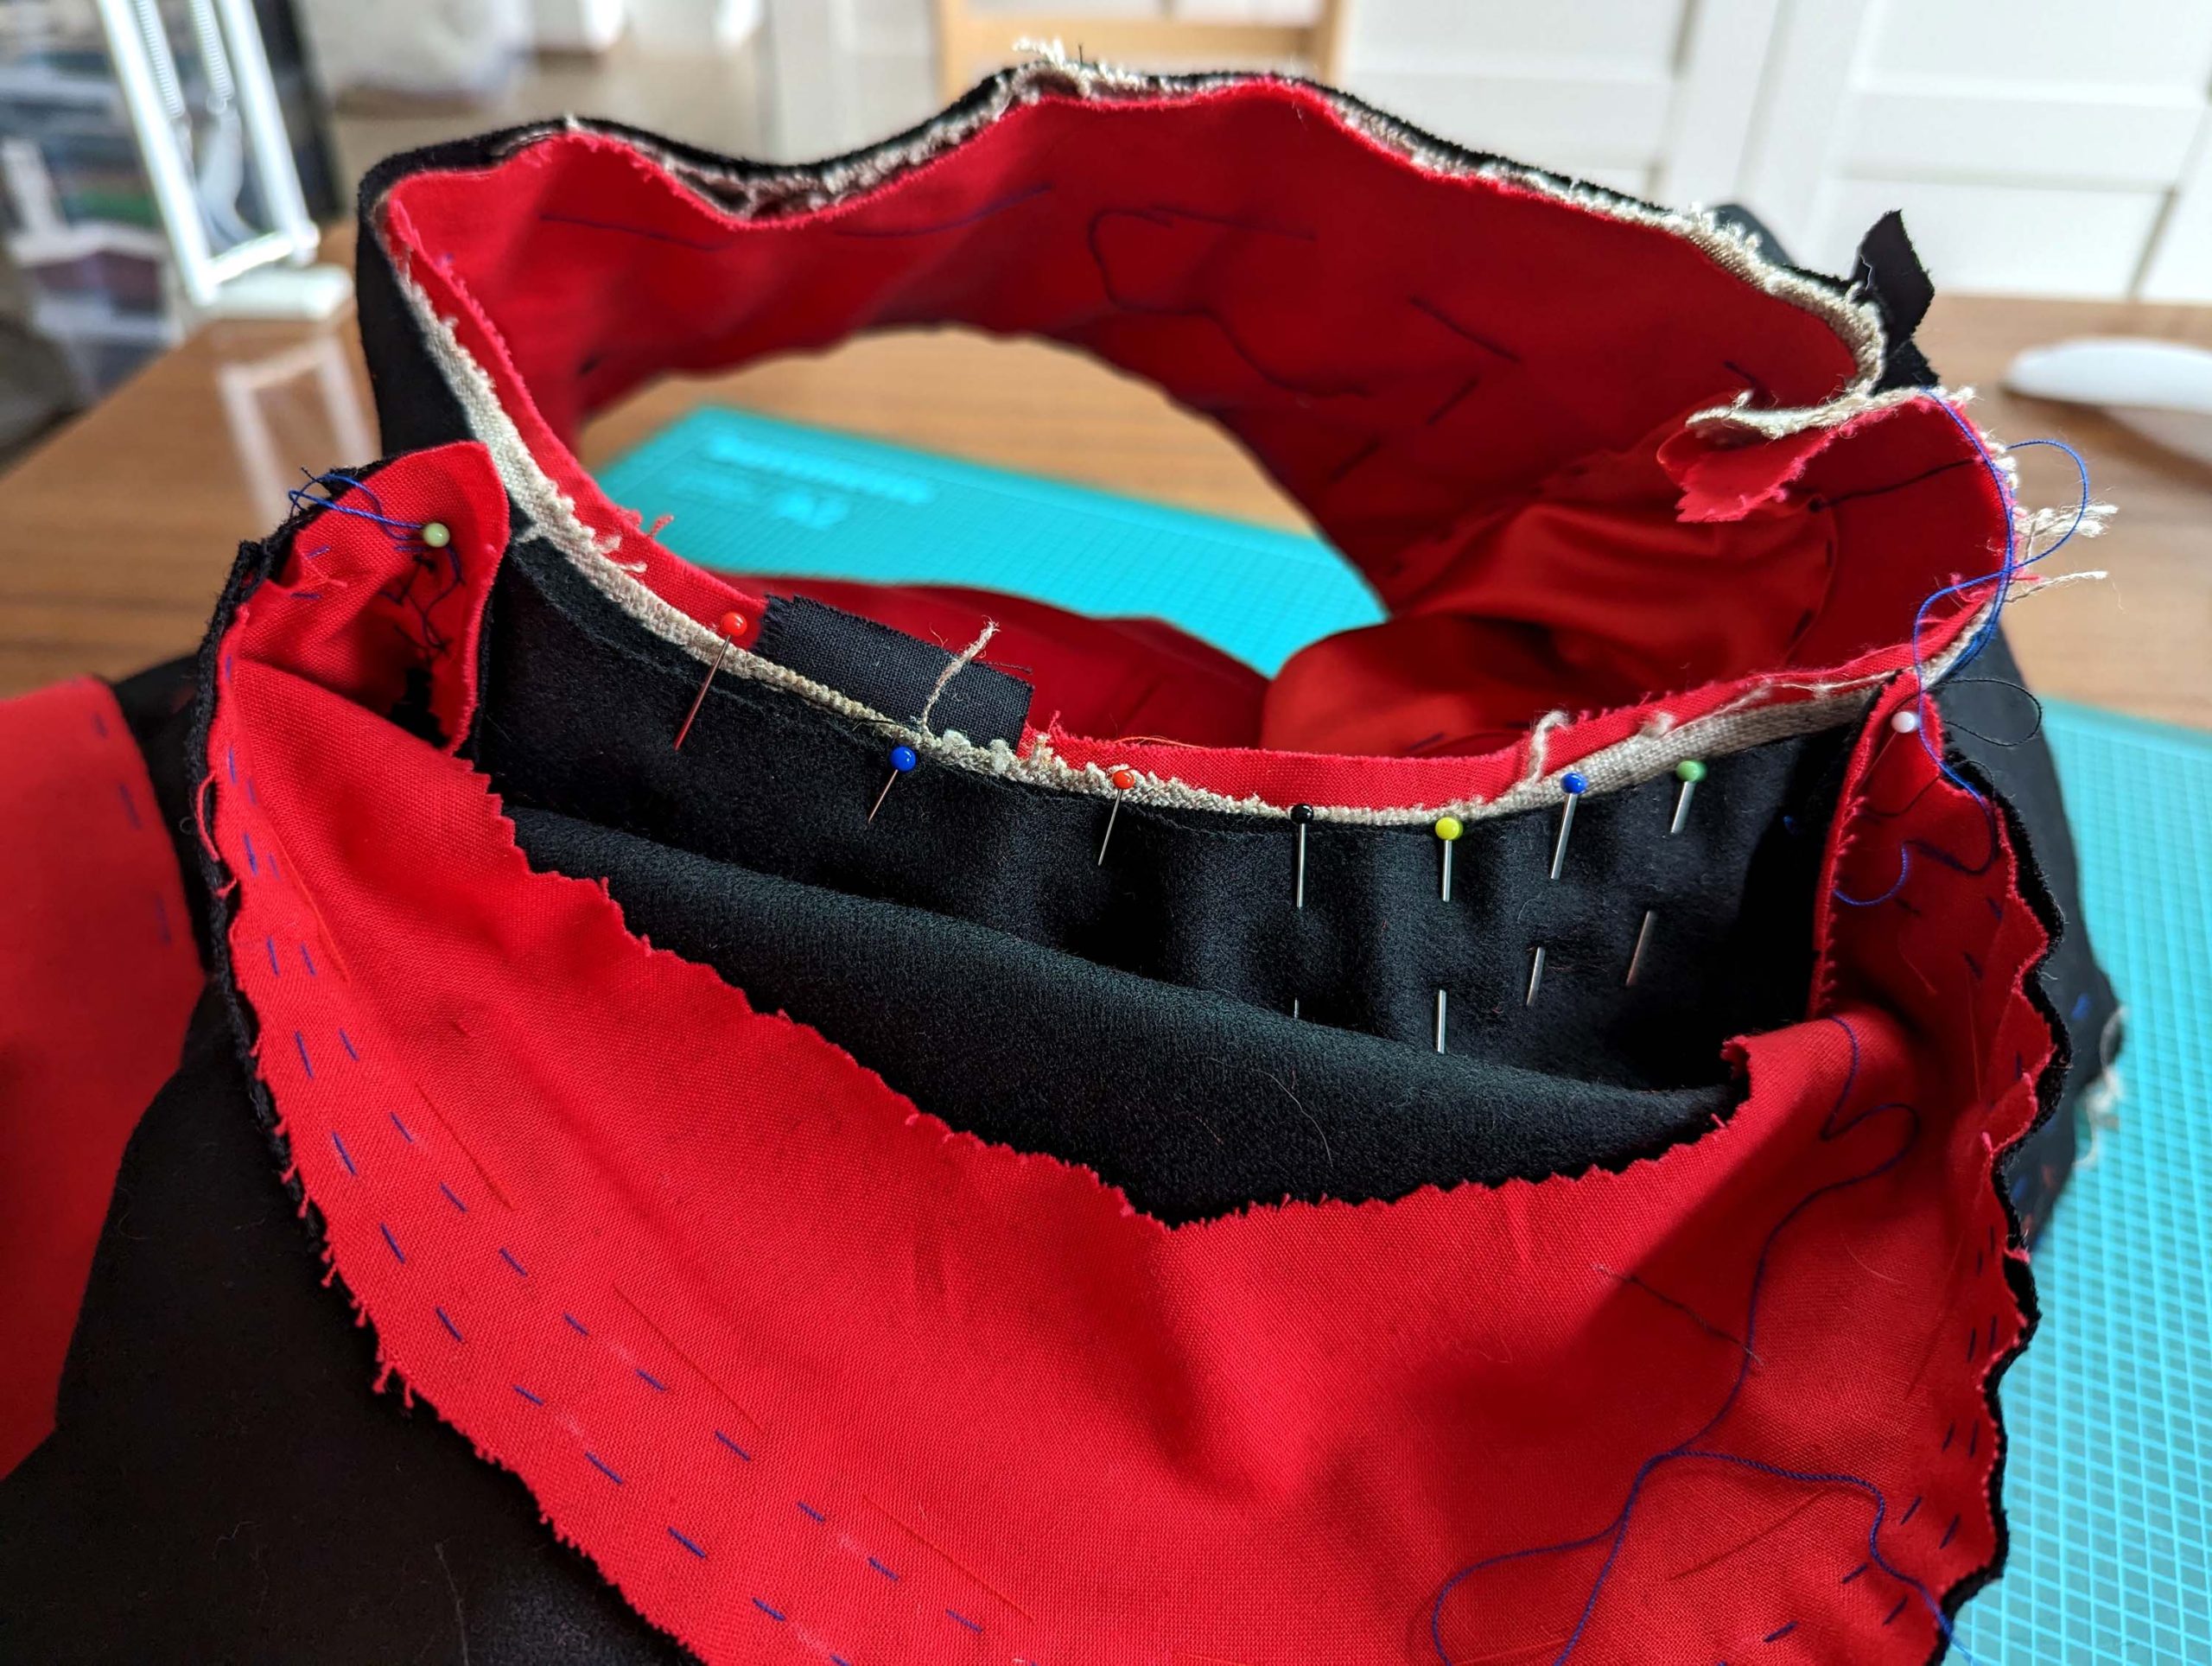
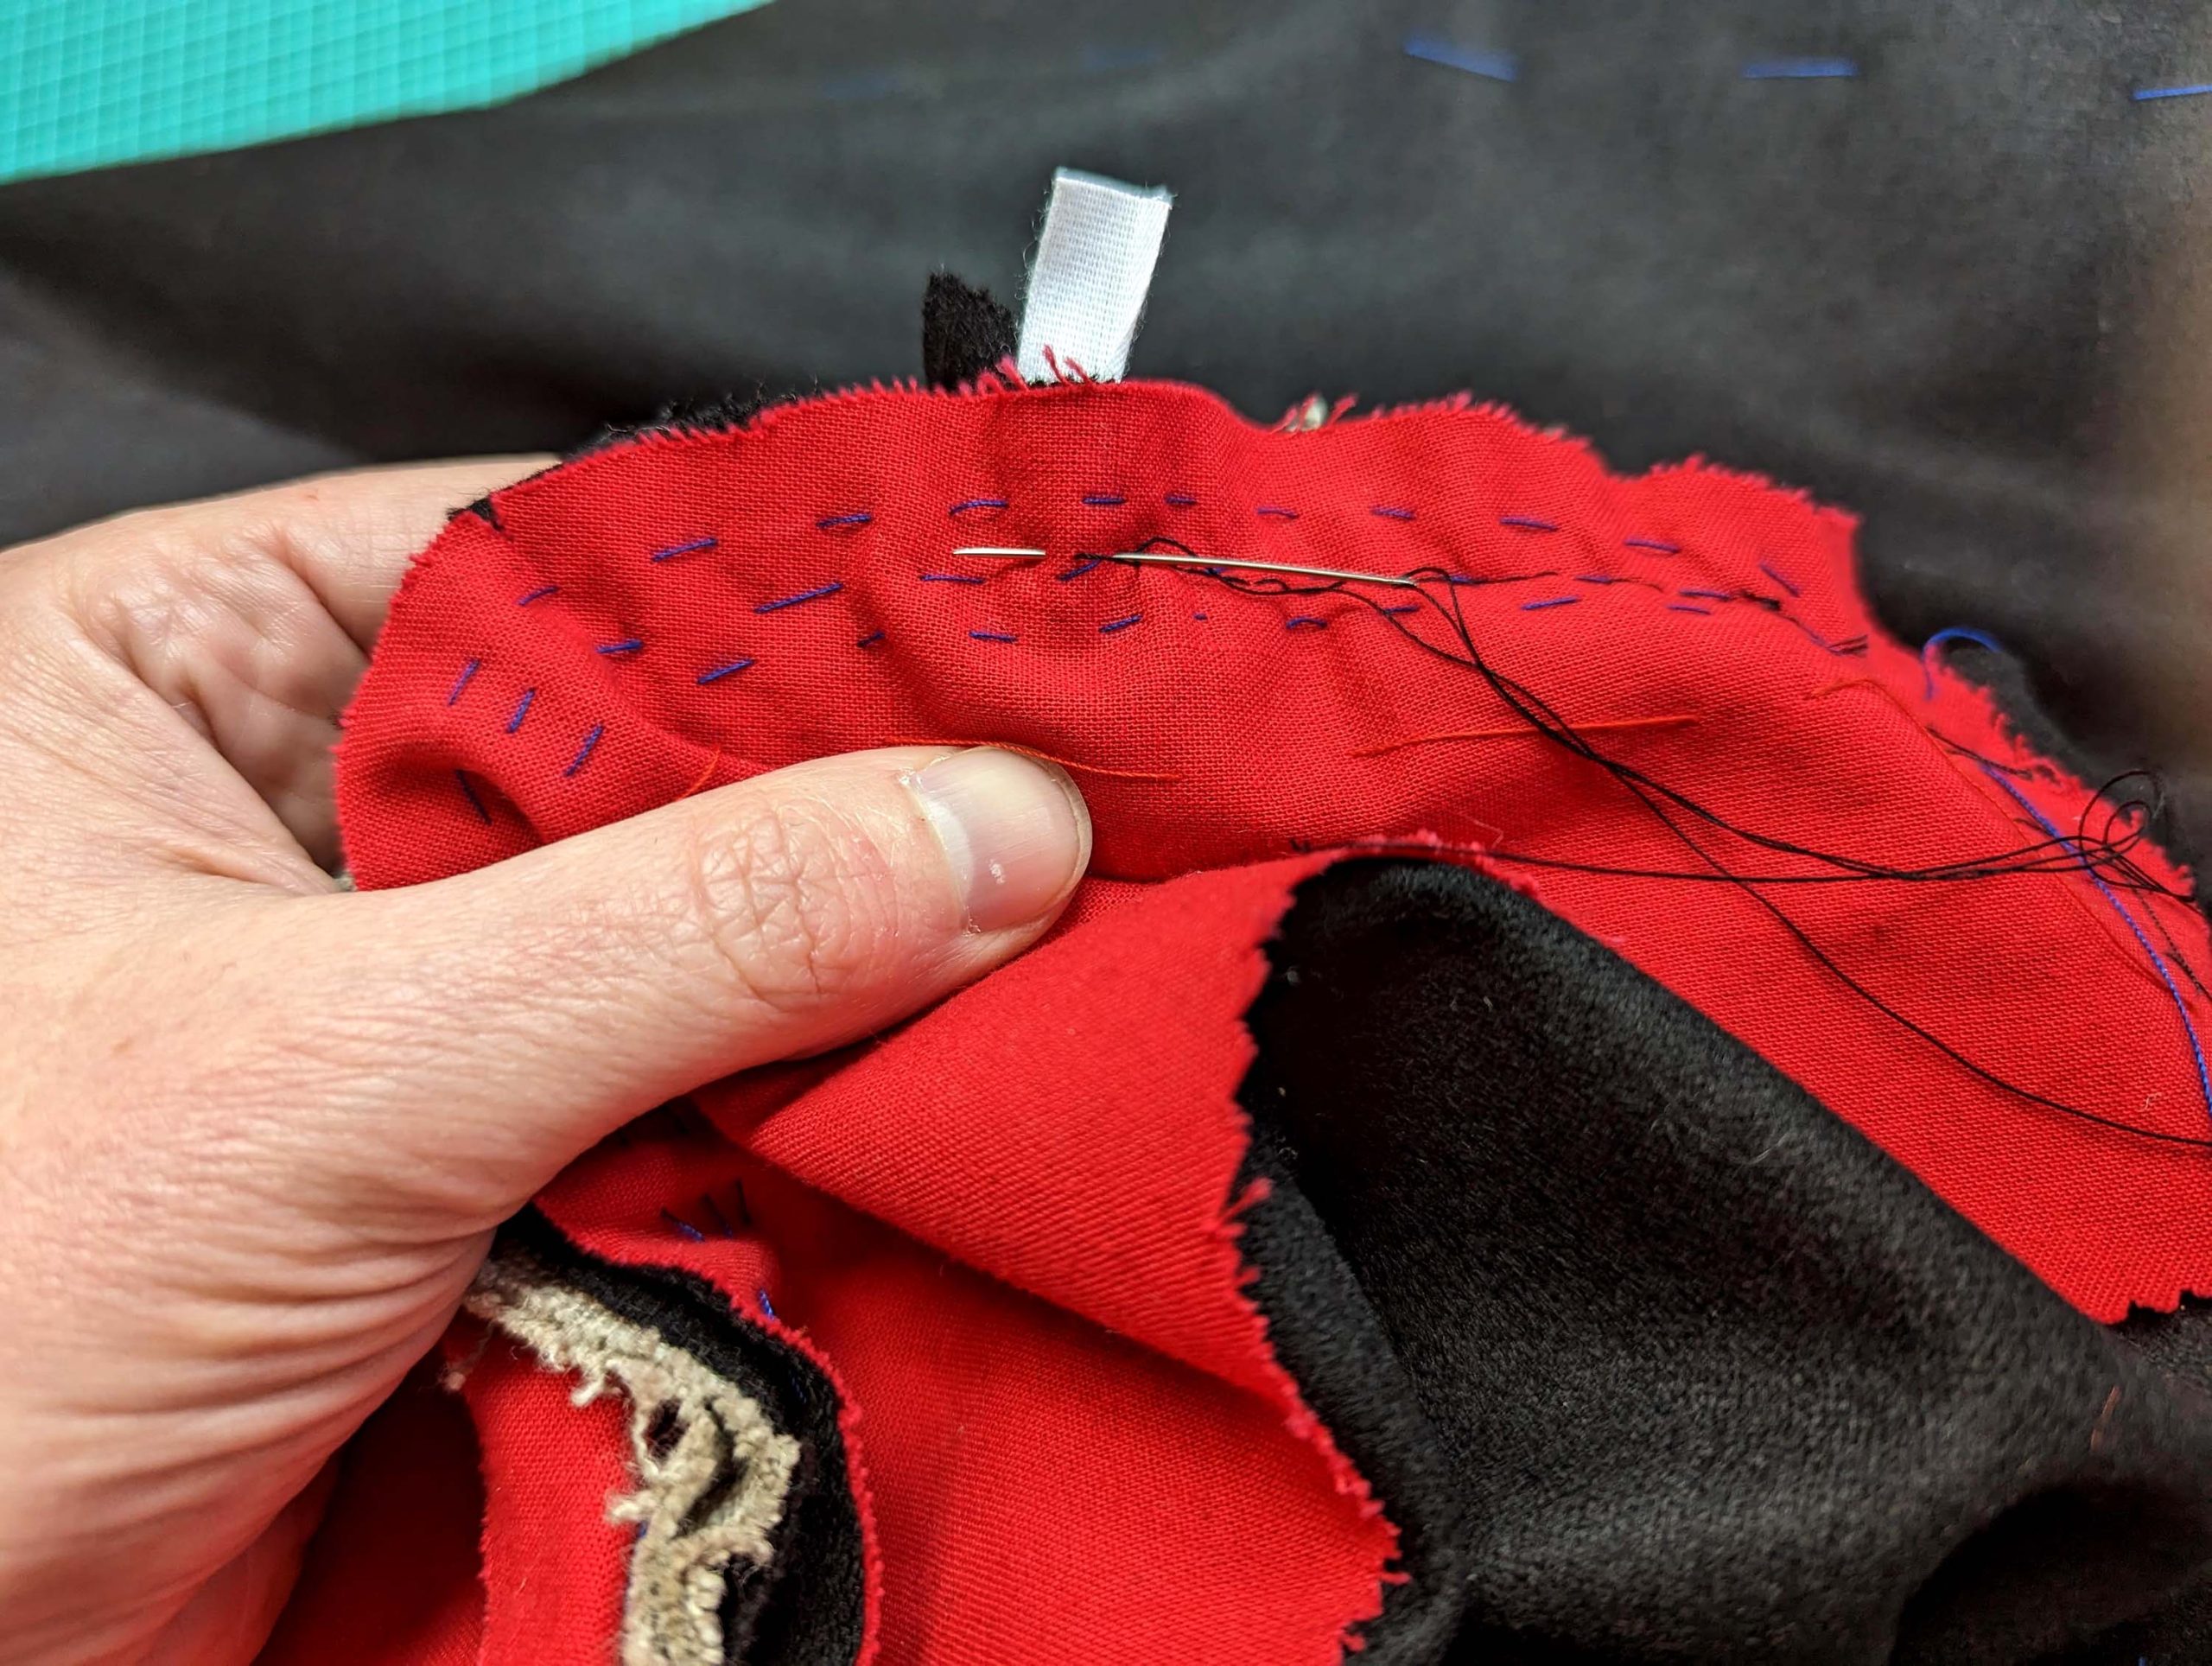
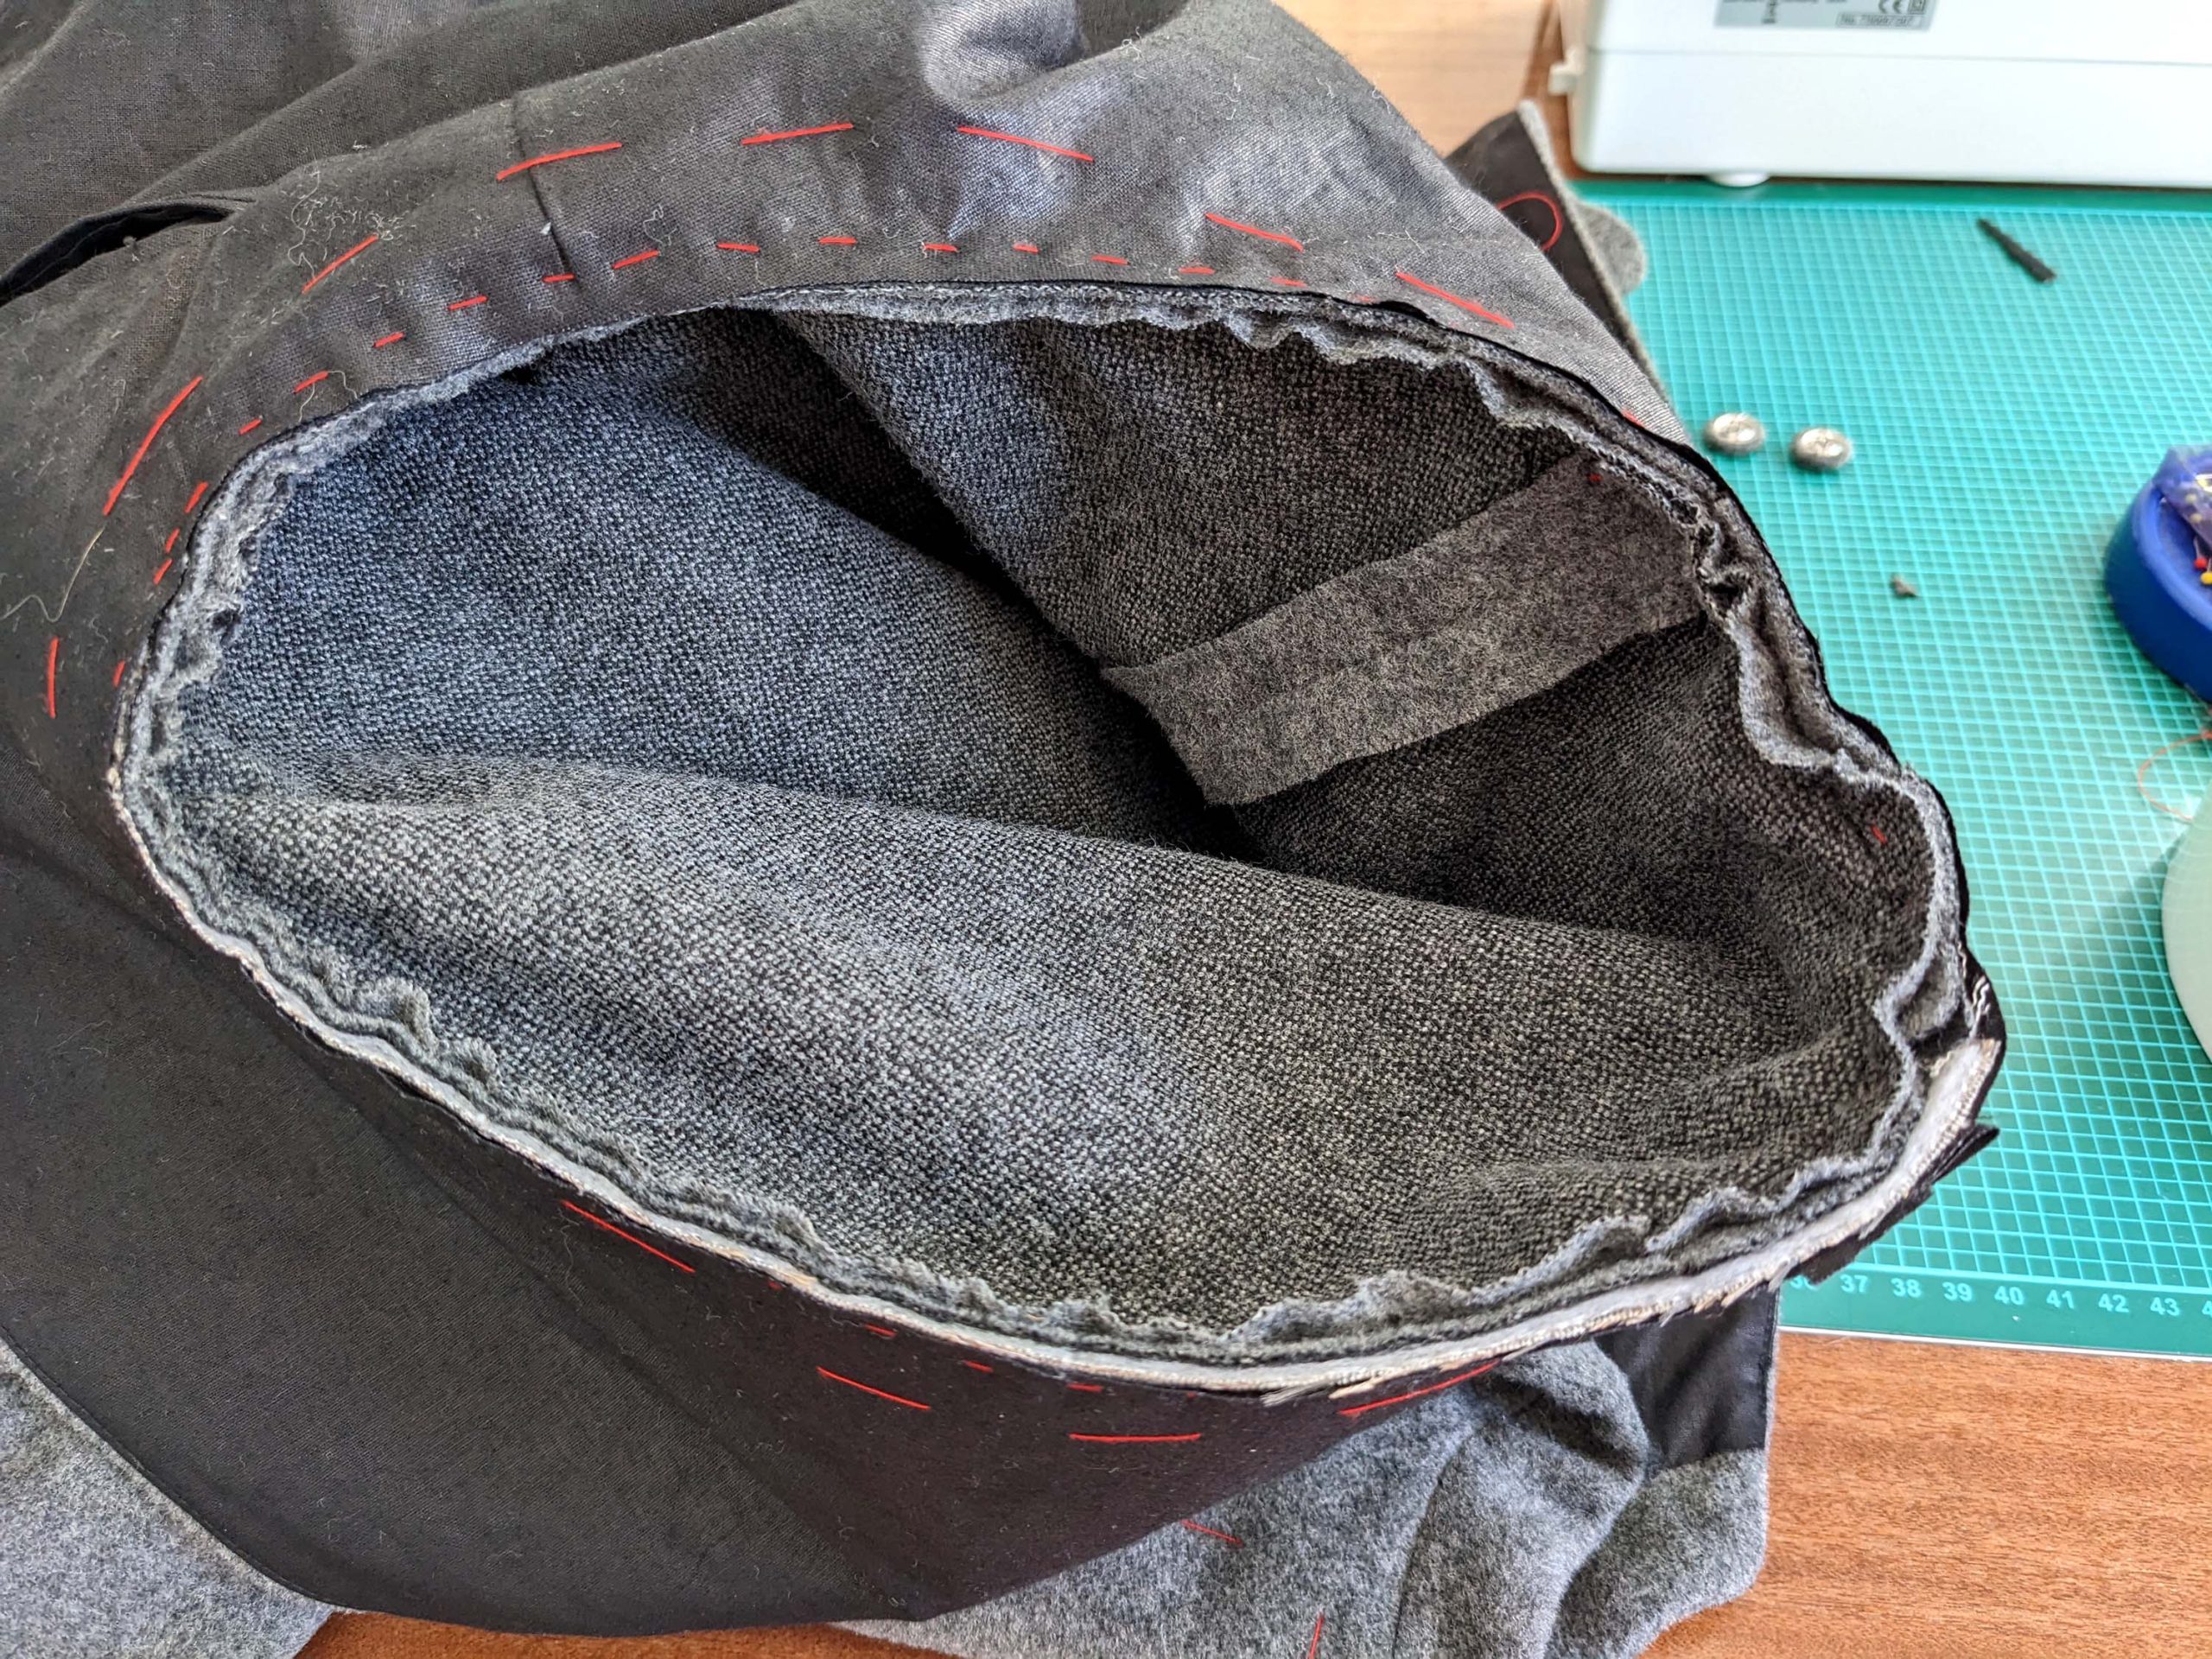
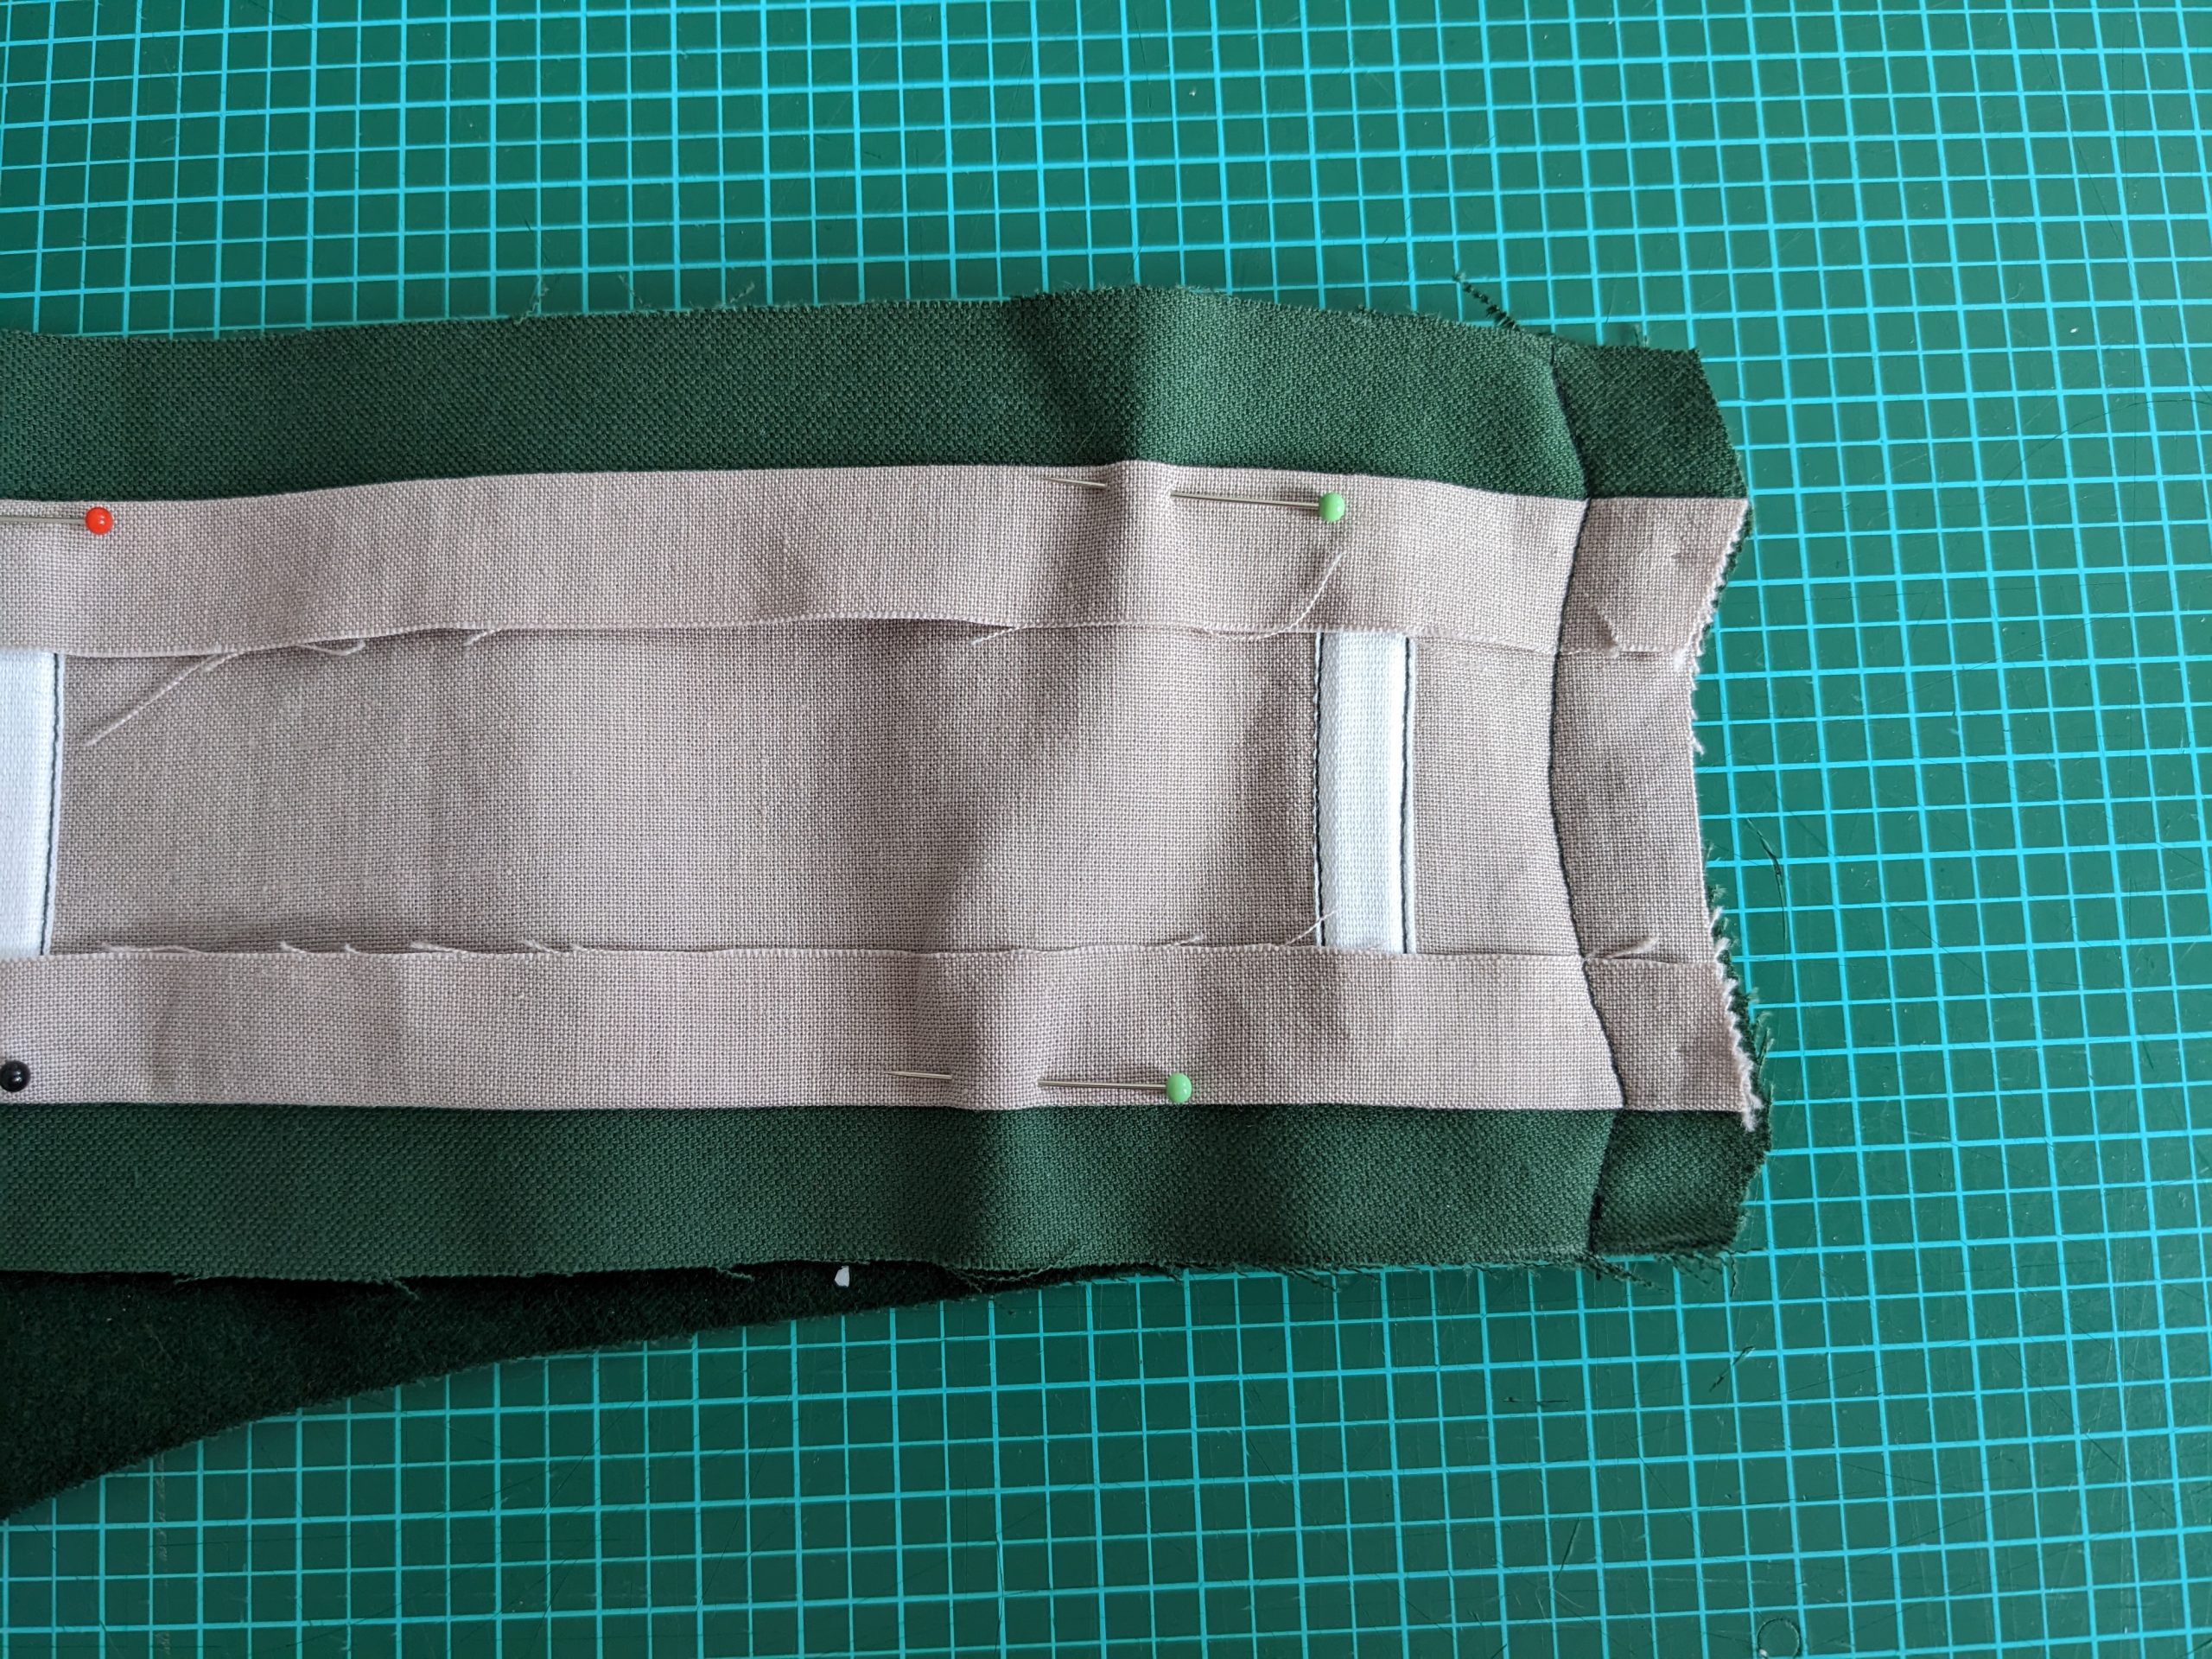
(5) Take the lining, sew the side seams and trim back the seam allowances in the same way as you did with the belt, press open. Turn in a seam allowance of ¾” (2cm) all around and clip at the curves to lay flat. Line up the lining with the belt, wrong sides together, with the edge of the fashion fabric extending past the lining about 1/8” (2mm). Fell stitch the lining to the belt without any stitches showing on the right fabric side.

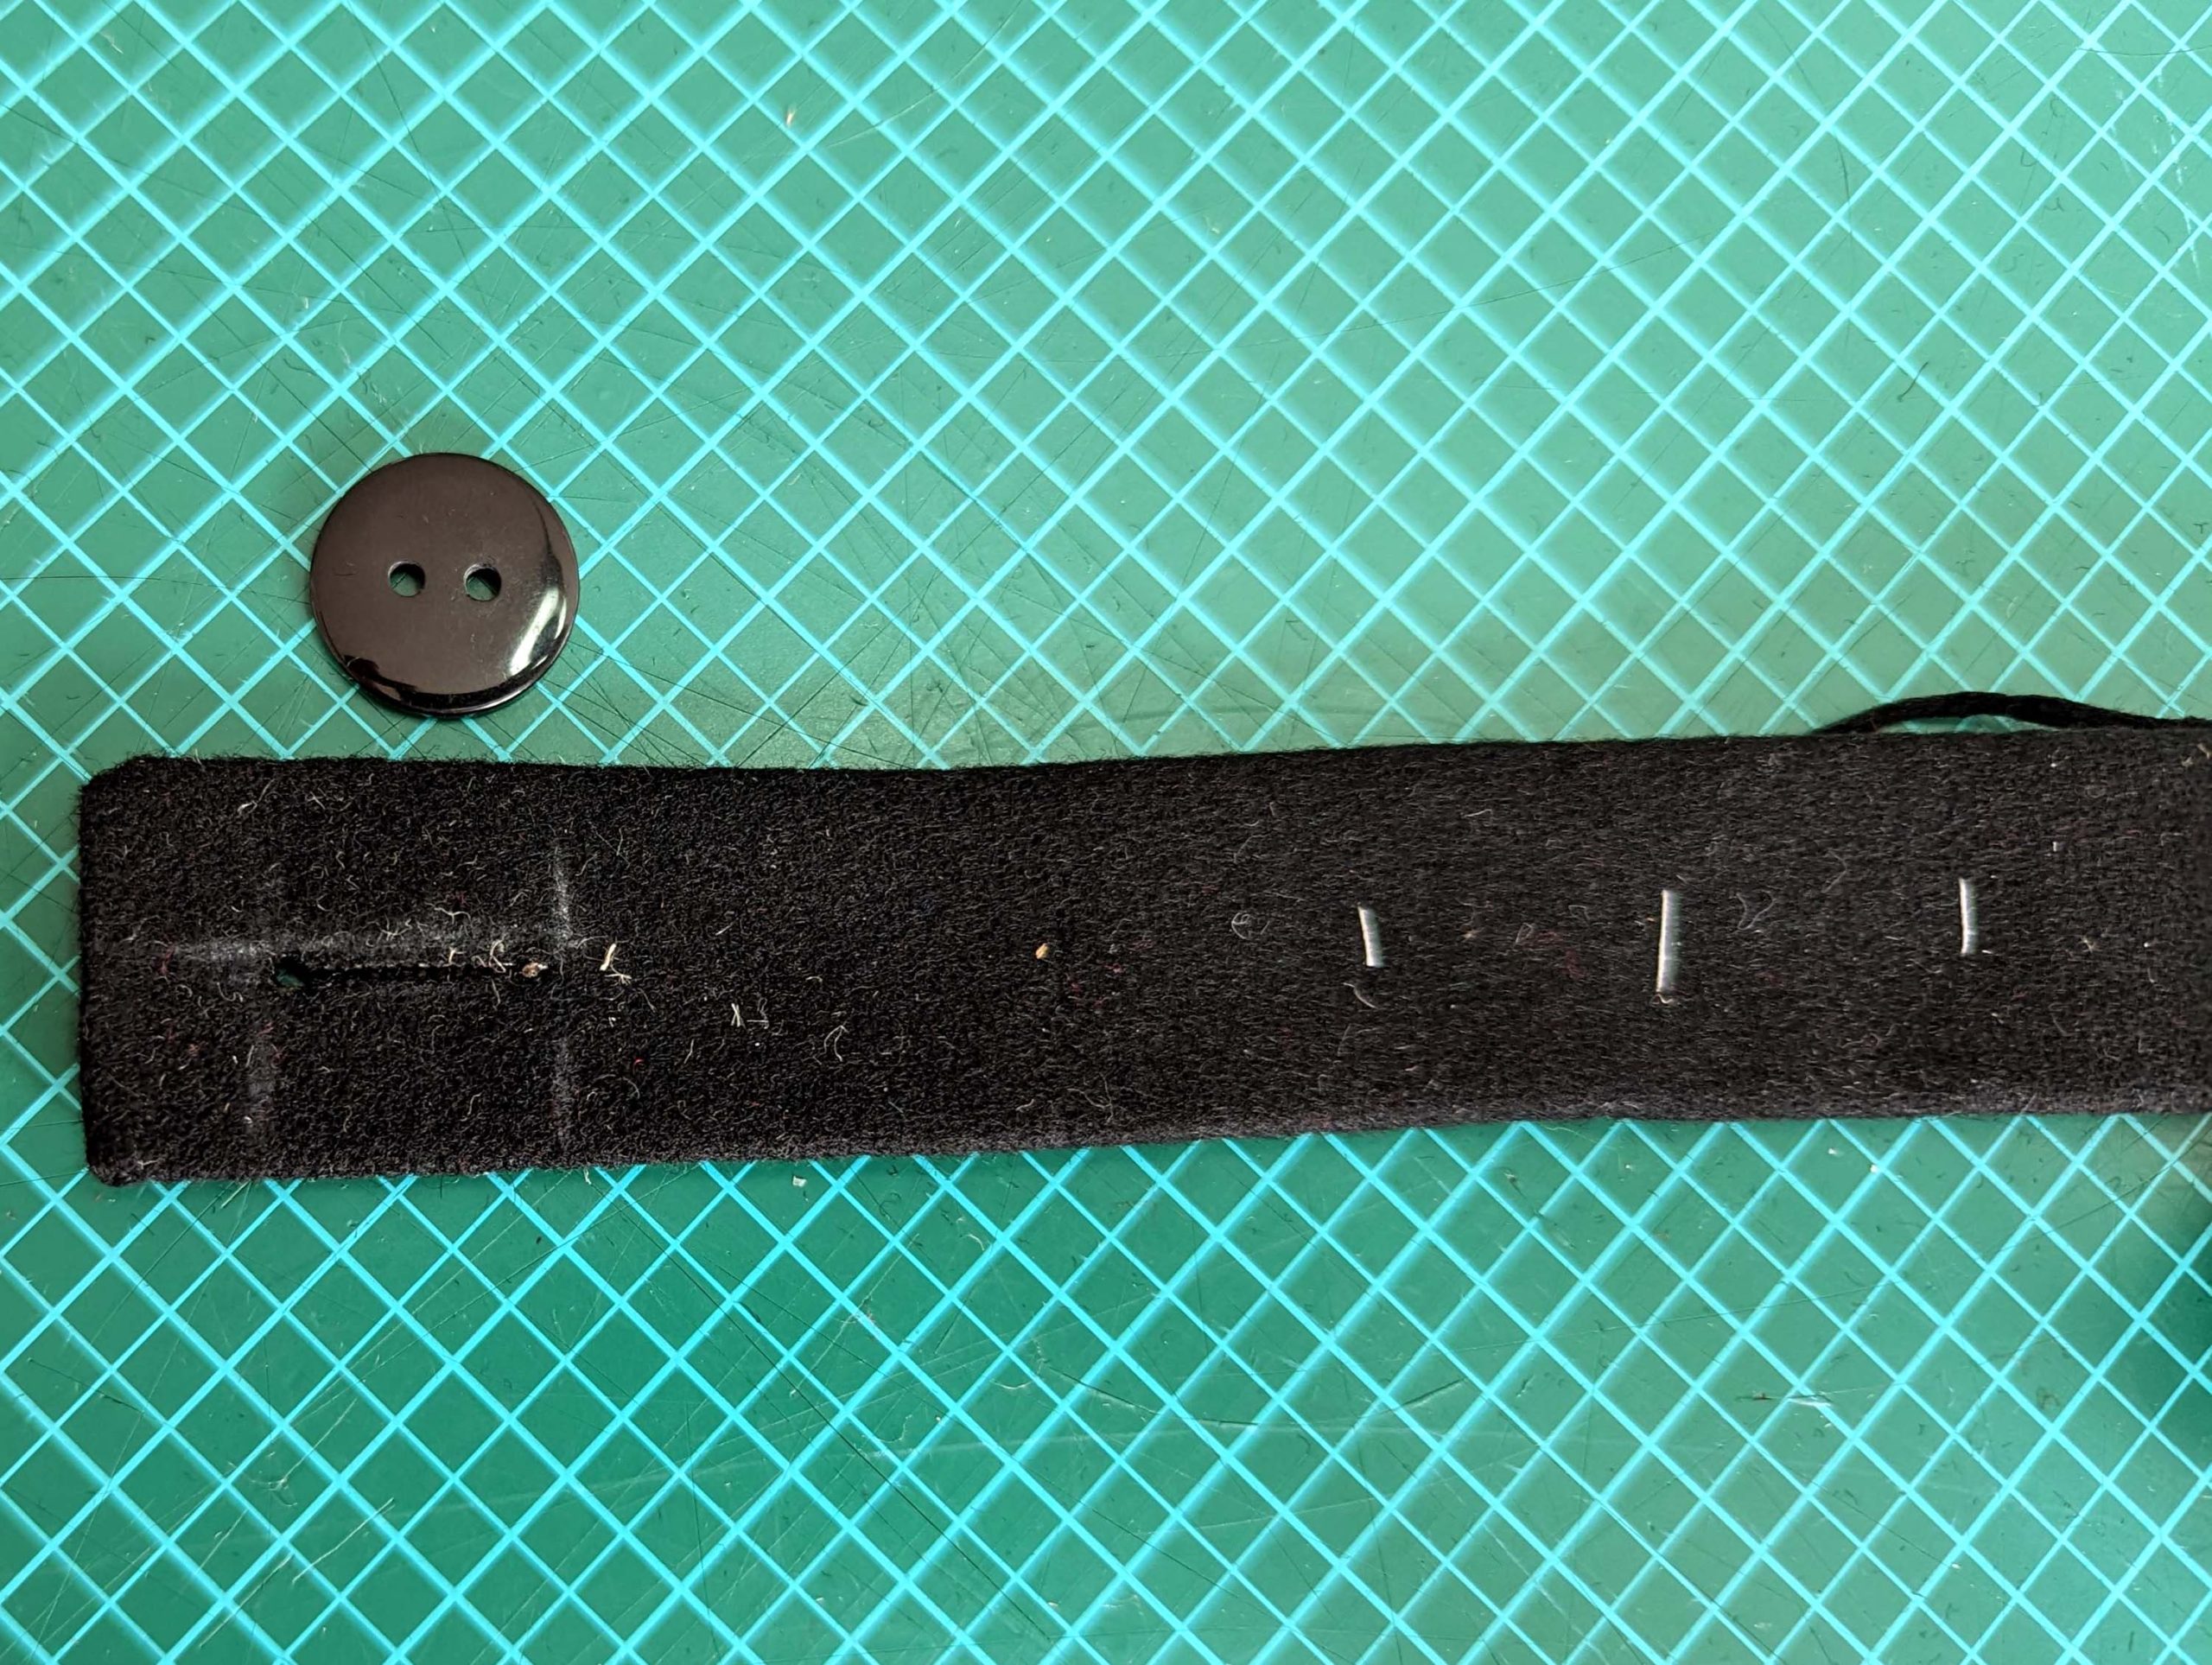
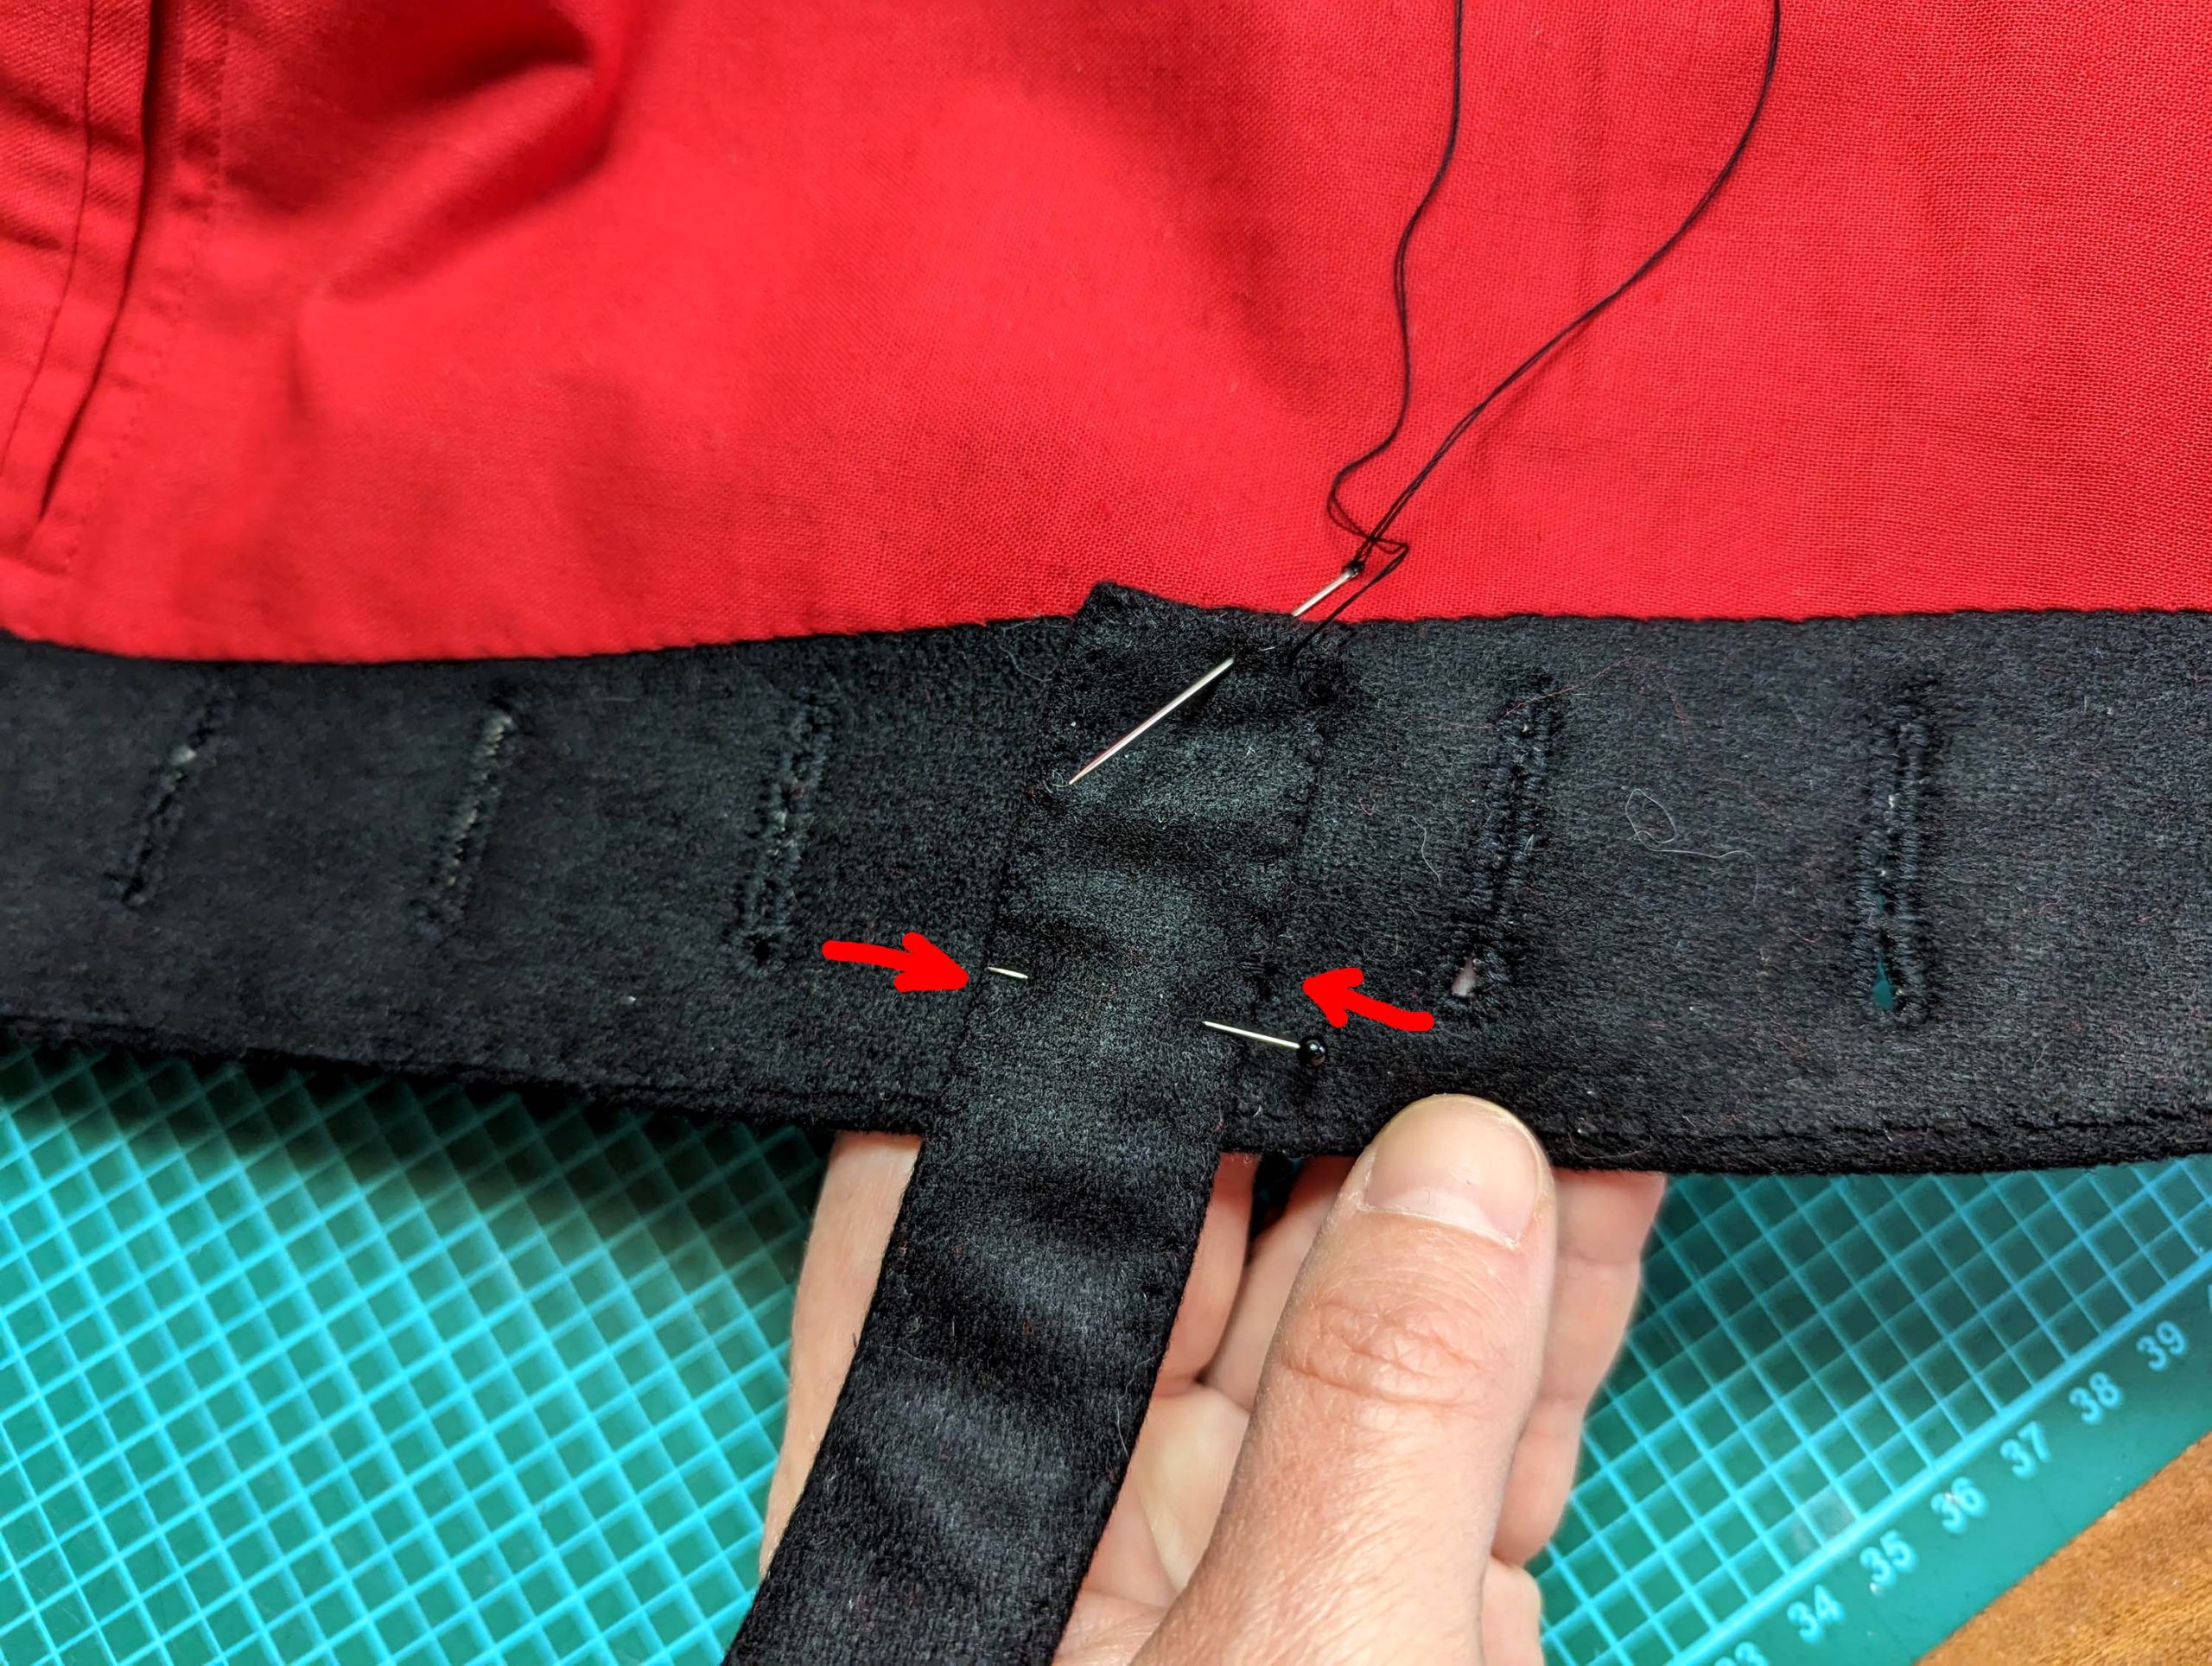
(6) Sew hooks to the right back edge and make thread bars along the left center back instead of metal eyes.

Middle Franconian men’s coat – an attempt at reconstruction based on drawings and physical reports from the 1850s – historical part 1 point (1) – (2)

In mid-2022, Ms. Katrin Weber from the Research and Advisory Center for Traditional Costumes of the Middle Franconia District approached me to develop a pattern for a Sunday gentleman’s coat worn by the rural population.

Unfortunately, at that time, the research center did not have any preserved original garments. Only the medical reports and illustrations commissioned by King Maximilian II in the 1850s were available.

The physikatsberichten and illustrations were created between 1852 and 1858 and vary greatly in their depictions. They do not take into account everyday clothing and the social status of the wearers. With this background, it is challenging to precisely determine the temporal and regional attribution of a specific form of traditional costume to a particular district.

Some of the depictions clearly show the fashionable influence of the Biedermeier period. The contemporary physikatsberichten mention multiple times that rural clothing is increasingly influenced by urban fashion trends.

However, based on the illustrations, we can draw some conclusions about the origin and development of the gentleman’s coat in rural Mittelfranken. In the stylistically simpler illustrations, the influence of the 18th century is evident, with the depicted coats resembling the Juste au Corps style of the 18th century.

The further development of the gentleman’s coat in the early 19th century is traceable through the shape of collars and sleeves. The influence of the Biedermeier period is clearly visible in some illustrations.

Therefore, we agreed to reconstruct a long, tightly-fitted coat based on Illustration No. 55 from the Landgericht Wassertrüdingen (district court Wassertrüdingen).

Quelle: Gillmeister-Geisenhof, Evelyn (1996): Kleidungsweise in Mittelfranken um 1850, 2. Auflage, Bad Wimsheim: Delp Verlag

Continue reading

Mittelfränkische Herrentracht – ein Rekonstruktionsversuch anhand von Zeichnungen und Physikatsberichten aus den 1850ern – historisch Teil 2 Punkt (3) – (7)

Teil 1 – Allgemeine Überlegungen und Punkt (1) – (2)

(3) Vorbereiten der Vorderteile: Optional den Abnäher schließen und Richtung Rücken bügeln.Der Abnäher kann auch aufgeschnitten werden. Das Vorderteil entlang des Hals- und Armausschnitt, und der Schulter etwas mit Hilfe des Bügeleisens dehnen (dressieren), vor den weiteren Schritten auskühlen lassen.

Continue reading

Mittelfränkische Herrentracht – ein Rekonstruktionsversuch anhand von Zeichnungen und Physikatsberichten aus den 1850ern – Historisch Teil 3 Punkt (8) – (9)

Teil 1 – Allgemeine Überlegungen und Punkt (1) – (2)

Teil 2 Punkt (3) – (7)

(8)  Die Seitennaht rechts auf rechts schließen, exakt von Punkt (3) bis Punkt (4) nähen, die Mehrweite am Rückteil zwischen den Markierungen einhalten, die Einlage des Rückens wird mitgefasst, nicht aber das Vorderteilfutter und – Einlage an der Schulter und der Seitennaht. Auch bei Punkt (3) keine Nahtzugaben mitfassen! Nur die Nahtzugabe des Rückteils schräg Richtung Punkt (4) einschneiden und die Nahtzugaben der Seitennaht auseinander bügeln, ev. locker mit einigen Stichen fixieren.

Continue reading

Mittelfränkische Herrentracht – ein Rekonstruktionsversuch anhand von Zeichnungen und Physikatsberichten aus den 1850ern – Historisch Teil 4 Punkt (10) – (12)

Teil 1 – Allgemeine Überlegungen und Punkt (1) – (2)

Teil 2 Punkt (3) – (7)

Teil 3 Punkt (8) – (9)

(10) Den Ärmel entsprechend der Markierungen rechts auf rechts in das Armloch einsetzen. Den Ärmel erst heften, den Sitz kontrollieren und dann erst nähen. Dabei wird sowohl am Oberteil, als auch am Ärmel nur der Oberstoff vernäht, Futter und Einlage werden zur Seite gefaltet. An Punkt (3) muss genau gearbeitet werden, die Nahtzugaben werden hier nicht mitgenäht.

Am Armloch Einlage und Futter wieder zurücklegen und glattstreichen, knapp neben der Nahtlinie alle Lagen zusammenheften und die Nahtzugaben am Armloch auf 1cm zurückschneiden.

Für die Ärmelfische je ein bis zwei Schichten Volumenvlies (je nach gewünschter Polsterung) und eine Schicht Haareinlage aufeinander legen. In die Armkugel entsprechend der Markierung legen, die schmale Kante zeigt nach vorne, das Vlies zum Ärmel. An die Nahtzugaben von Armloch und Ärmel nähen. Das Futter durch das Armloch heraufziehen, die Nahtzugabe einschlagen und entlang der Ärmelnaht ausrichten. Damit werden die unversäuberten Nahtzugaben des Armloches abgedeckt. Anstaffieren, die Mehrweite an der Armkugel in kleine Falten legen und anstaffieren.

(11) Beziehbare Knöpfe oder Holzscheiben mit Stoff beziehen, und an der linken Vorderkante passende Knopflöcher nähen, dabei die gebogene Vorderkante mit dem unteren, geraden Abschnitt an einer Geraden anlegen und die Knopflöcher parallel zur gedachten Verlängerung dieser Geraden anzeichnen. Rund um die Knopflöcher alle Schichten zusammenheften, damit beim Nähen nichts verrutschen kann.

Für Augenknopflöcher erst ein Loch stanzen und dann das Knopfloch aufschneiden, die Kanten mit dünnem Faden umstechen. Das Knopfloch mit Knopflochstich umstechen, ich verwende gerne einen dünnen Faden doppelt anstatt eines Knopflochfadens.

Die Knöpfe an die rechte Kante nähen, in Höhe der Spange bekommt der Knopf auf der Innenseite einen kleinen Gegenknopf. Die Knöpfe dienen nur zur Zierde, daher können die Knopflöcher, müssen aber nicht aufgeschnitten werden.

Die Knöpfe am Ärmel dienen ebenfalls nur zur Zierde und werden, wenn keine Knopflöcher genäht wurden, durch alle Schichten angenäht. Der Aufschlag von Ärmel A wird durch die Knöpfe in der richtigen Position festgehalten. Am oberen Ende der Falte im Rücken je einen Knopf anbringen.

(12) Hier etwas anders als in der Anleitung, kein Futter in dem Sinne, sondern das Futter besteht auch aus Oberstoff und wird angeschnitten.

Die Spange mit Einlage verstärken und diese einheften, die Nahtzugaben einschlagen, auf eine gleichmäßige Breite achten und an den Ecken V-förmig einschneiden. Bügeln und die Nahtzugaben an die Einlage hexen. Am Futterteil die Nahtzugaben zurückschneiden, links auf links auf die Spange falten und anstaffieren. Am rechten Ende ein kleines Knopfloch anbringen, das linke Ende wird innen angenäht.

Und hier das fertige Kleidungsstück: