Inspired by Bridgerton Season 2, we had the idea of modifying the ball gown sewing pattern #0422 to be even more Briderton-like and documenting the sewing process here on the blog.
Click here if you are interested in purchasing the sewing pattern:
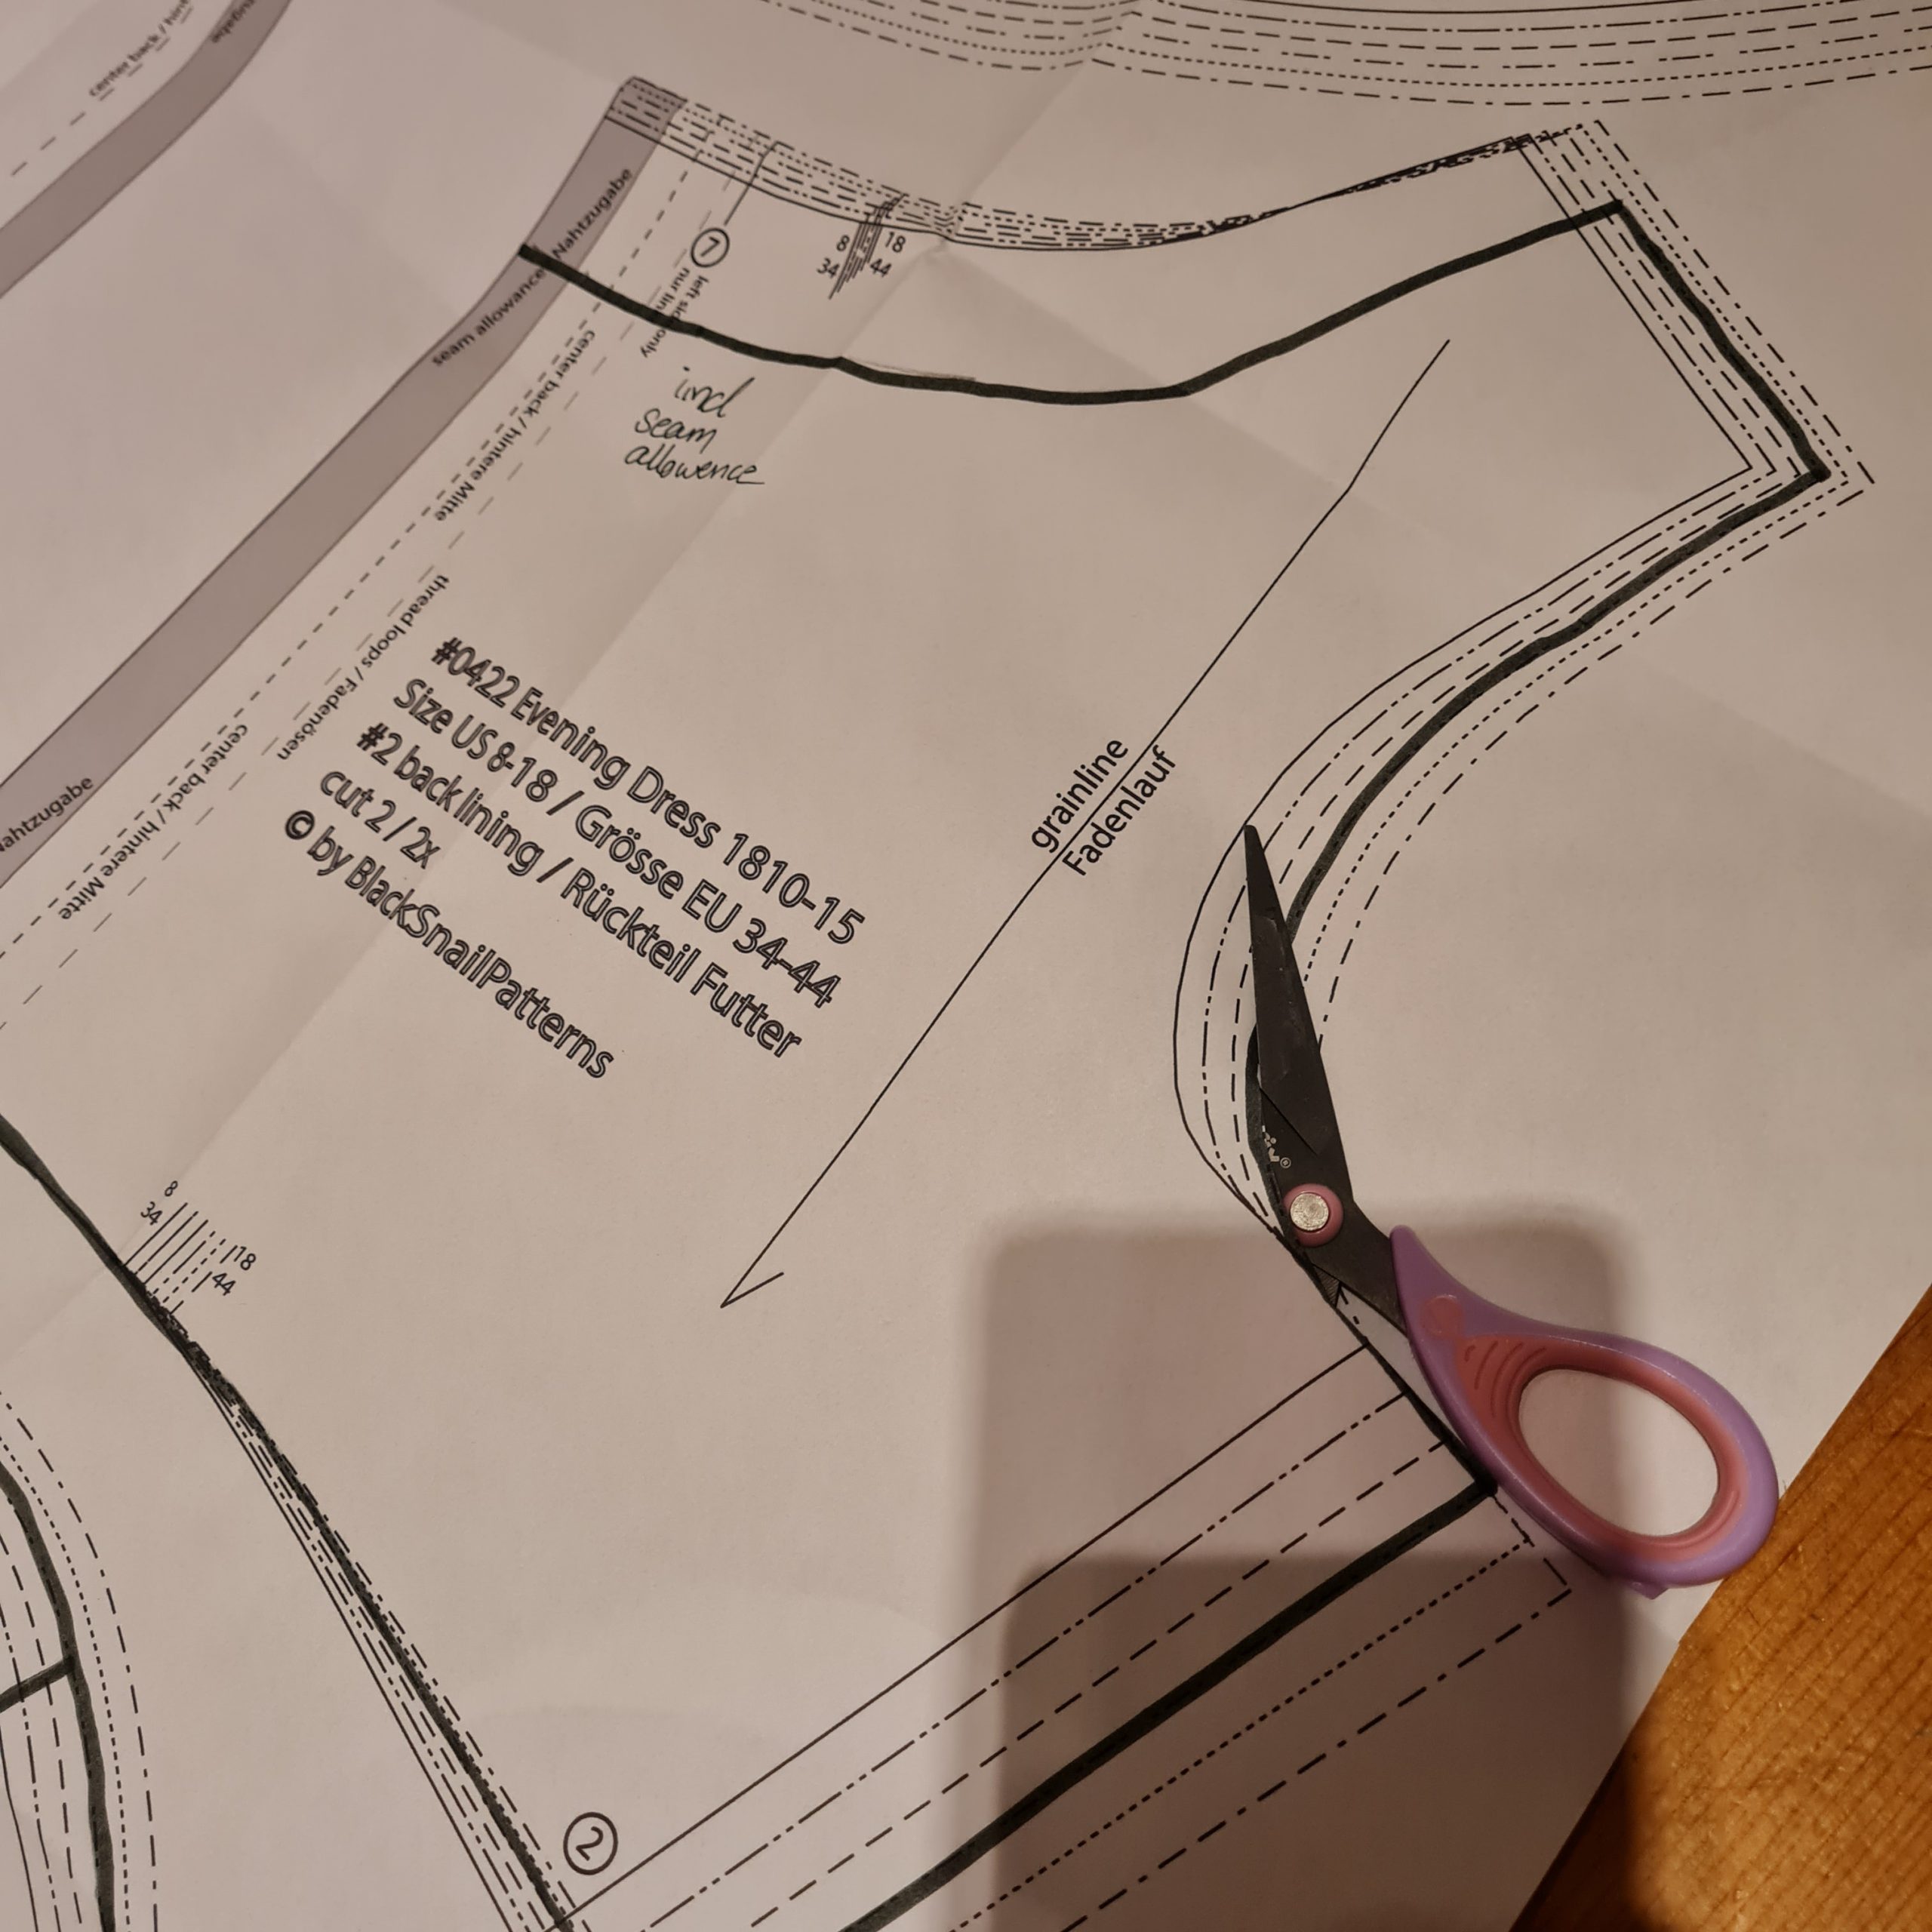
The dresses of the main characters in season 2 look very different from pattern 0422 at first glance, but on closer inspection they are relatively simple in cut. Using the lining pattern pieces, I’ll show you the basic changes.
First I made a sketch of how I imagined the dress and wrote down the details. It closes with hook and eye at the back and I’ve added an optional belt, the waistband of the original dress is omitted. The sleeves are given the tulip shape, seen on many dresses in the series. Neckline and sleeves are piped with contrasting fabric for a neat finish.
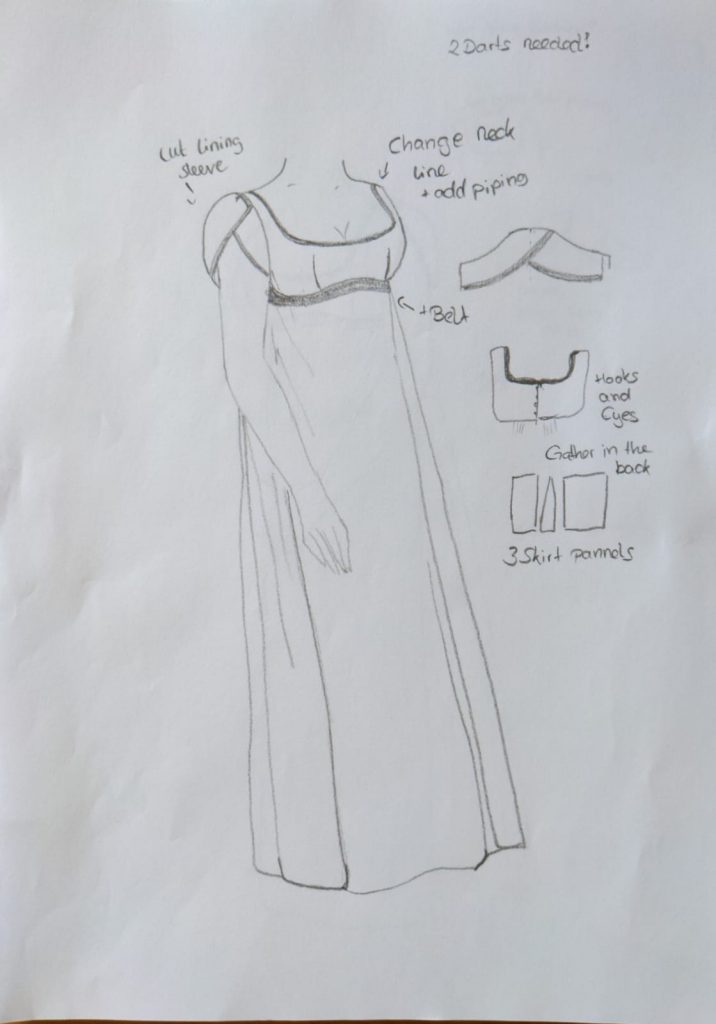
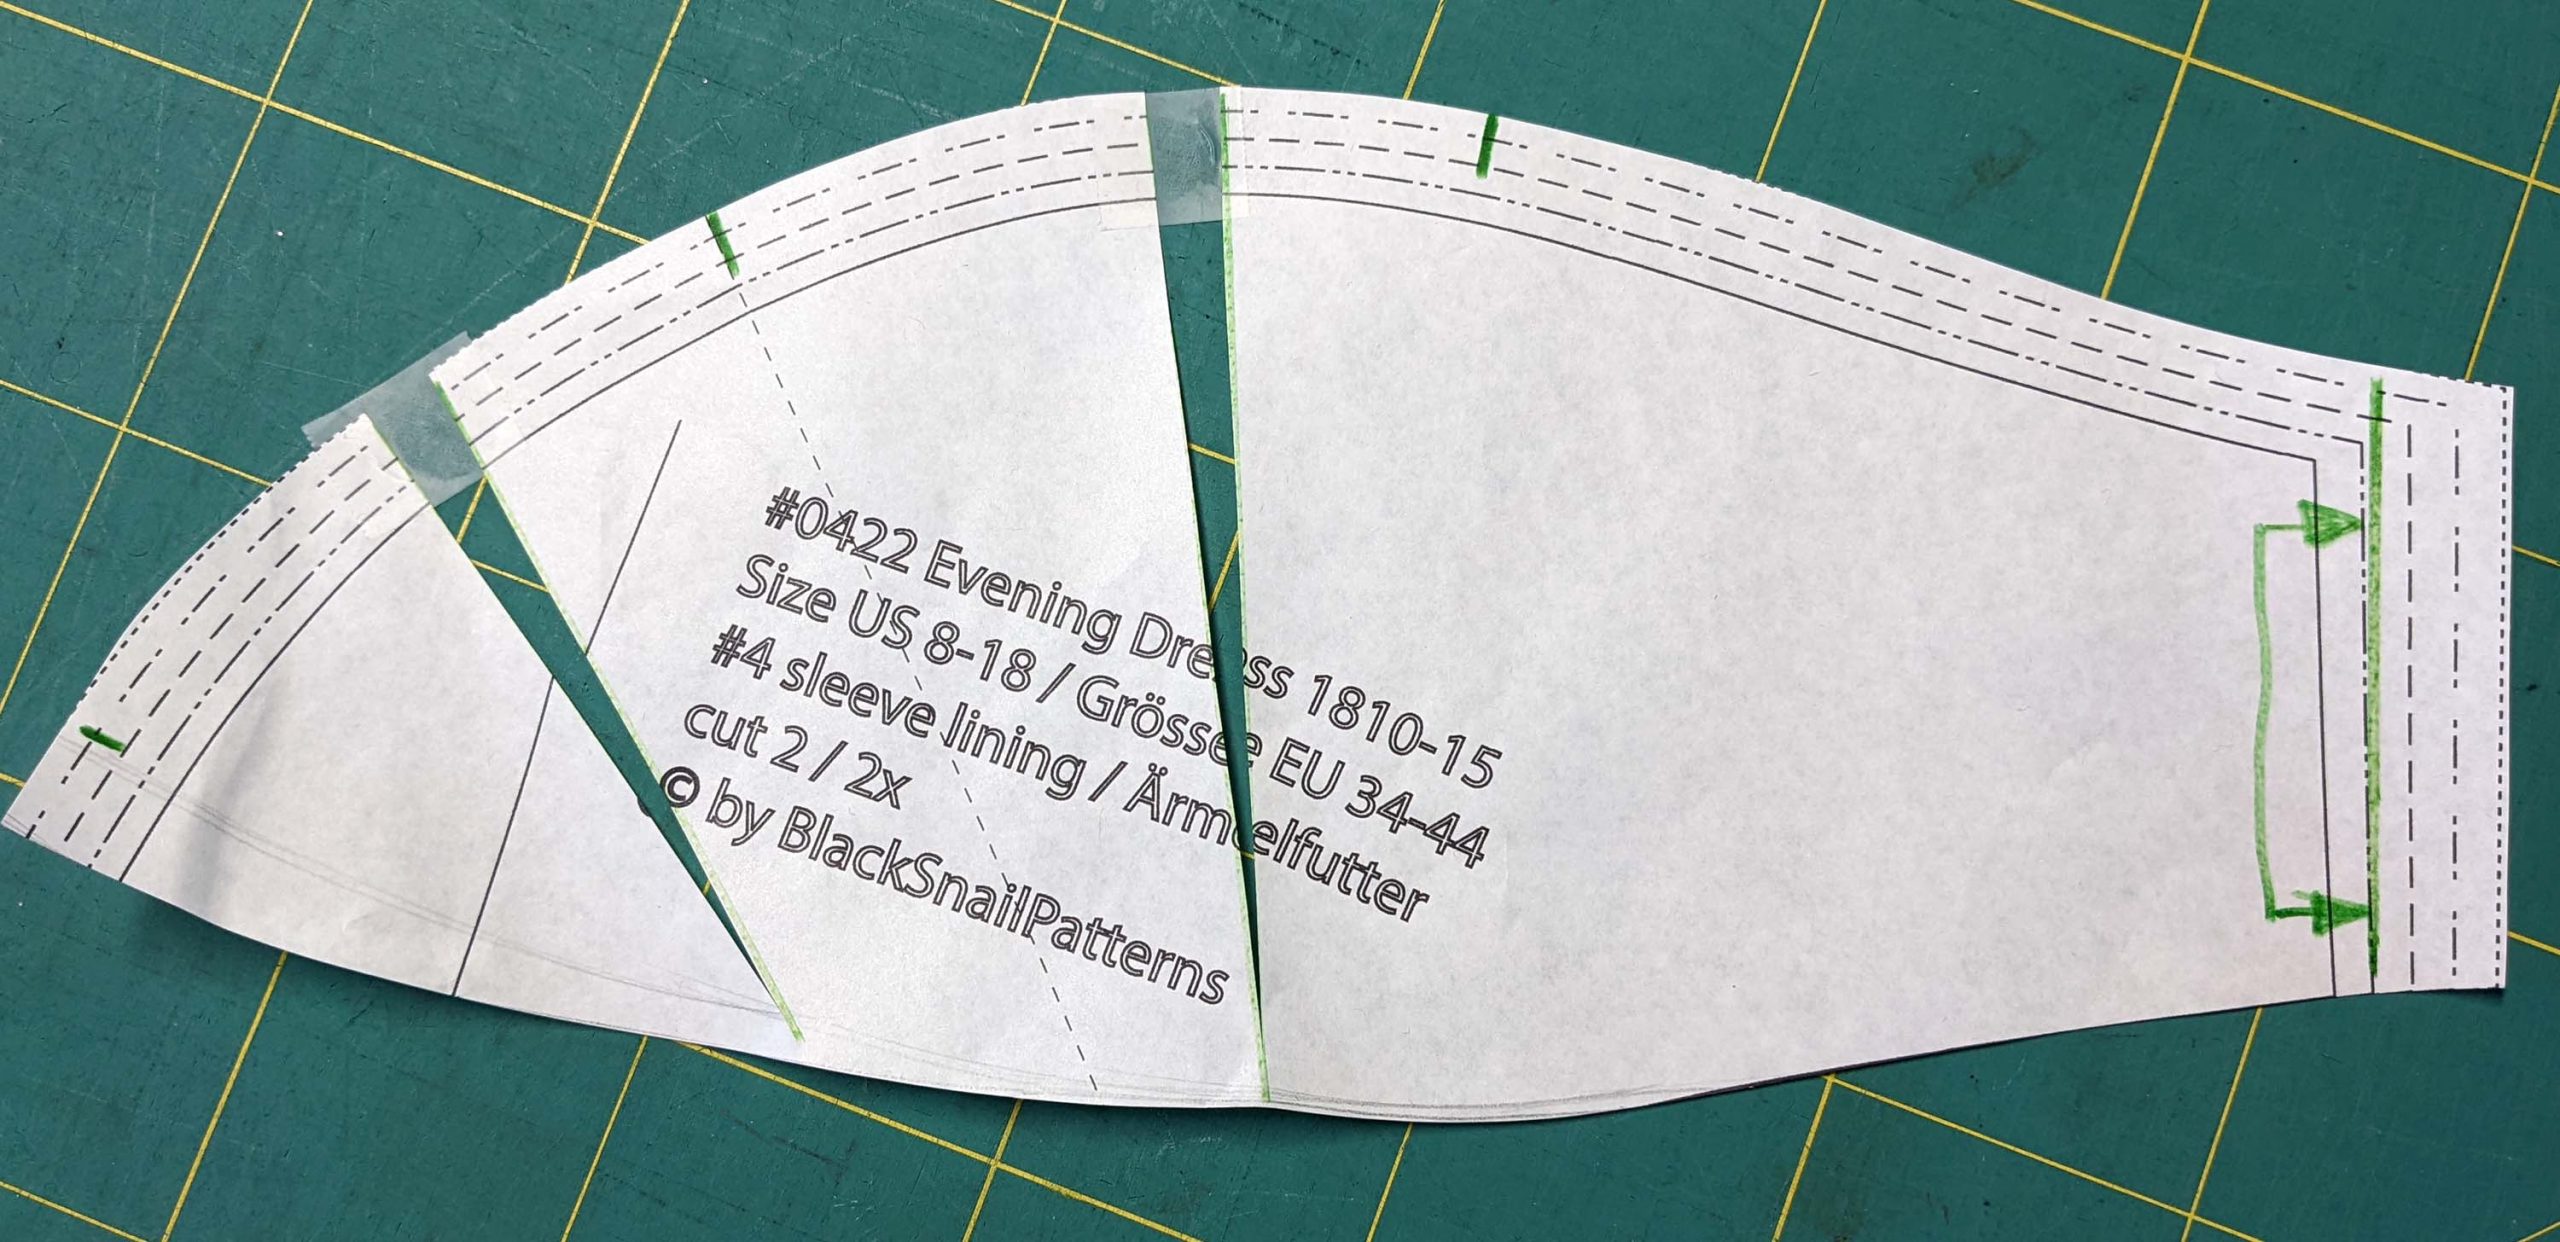
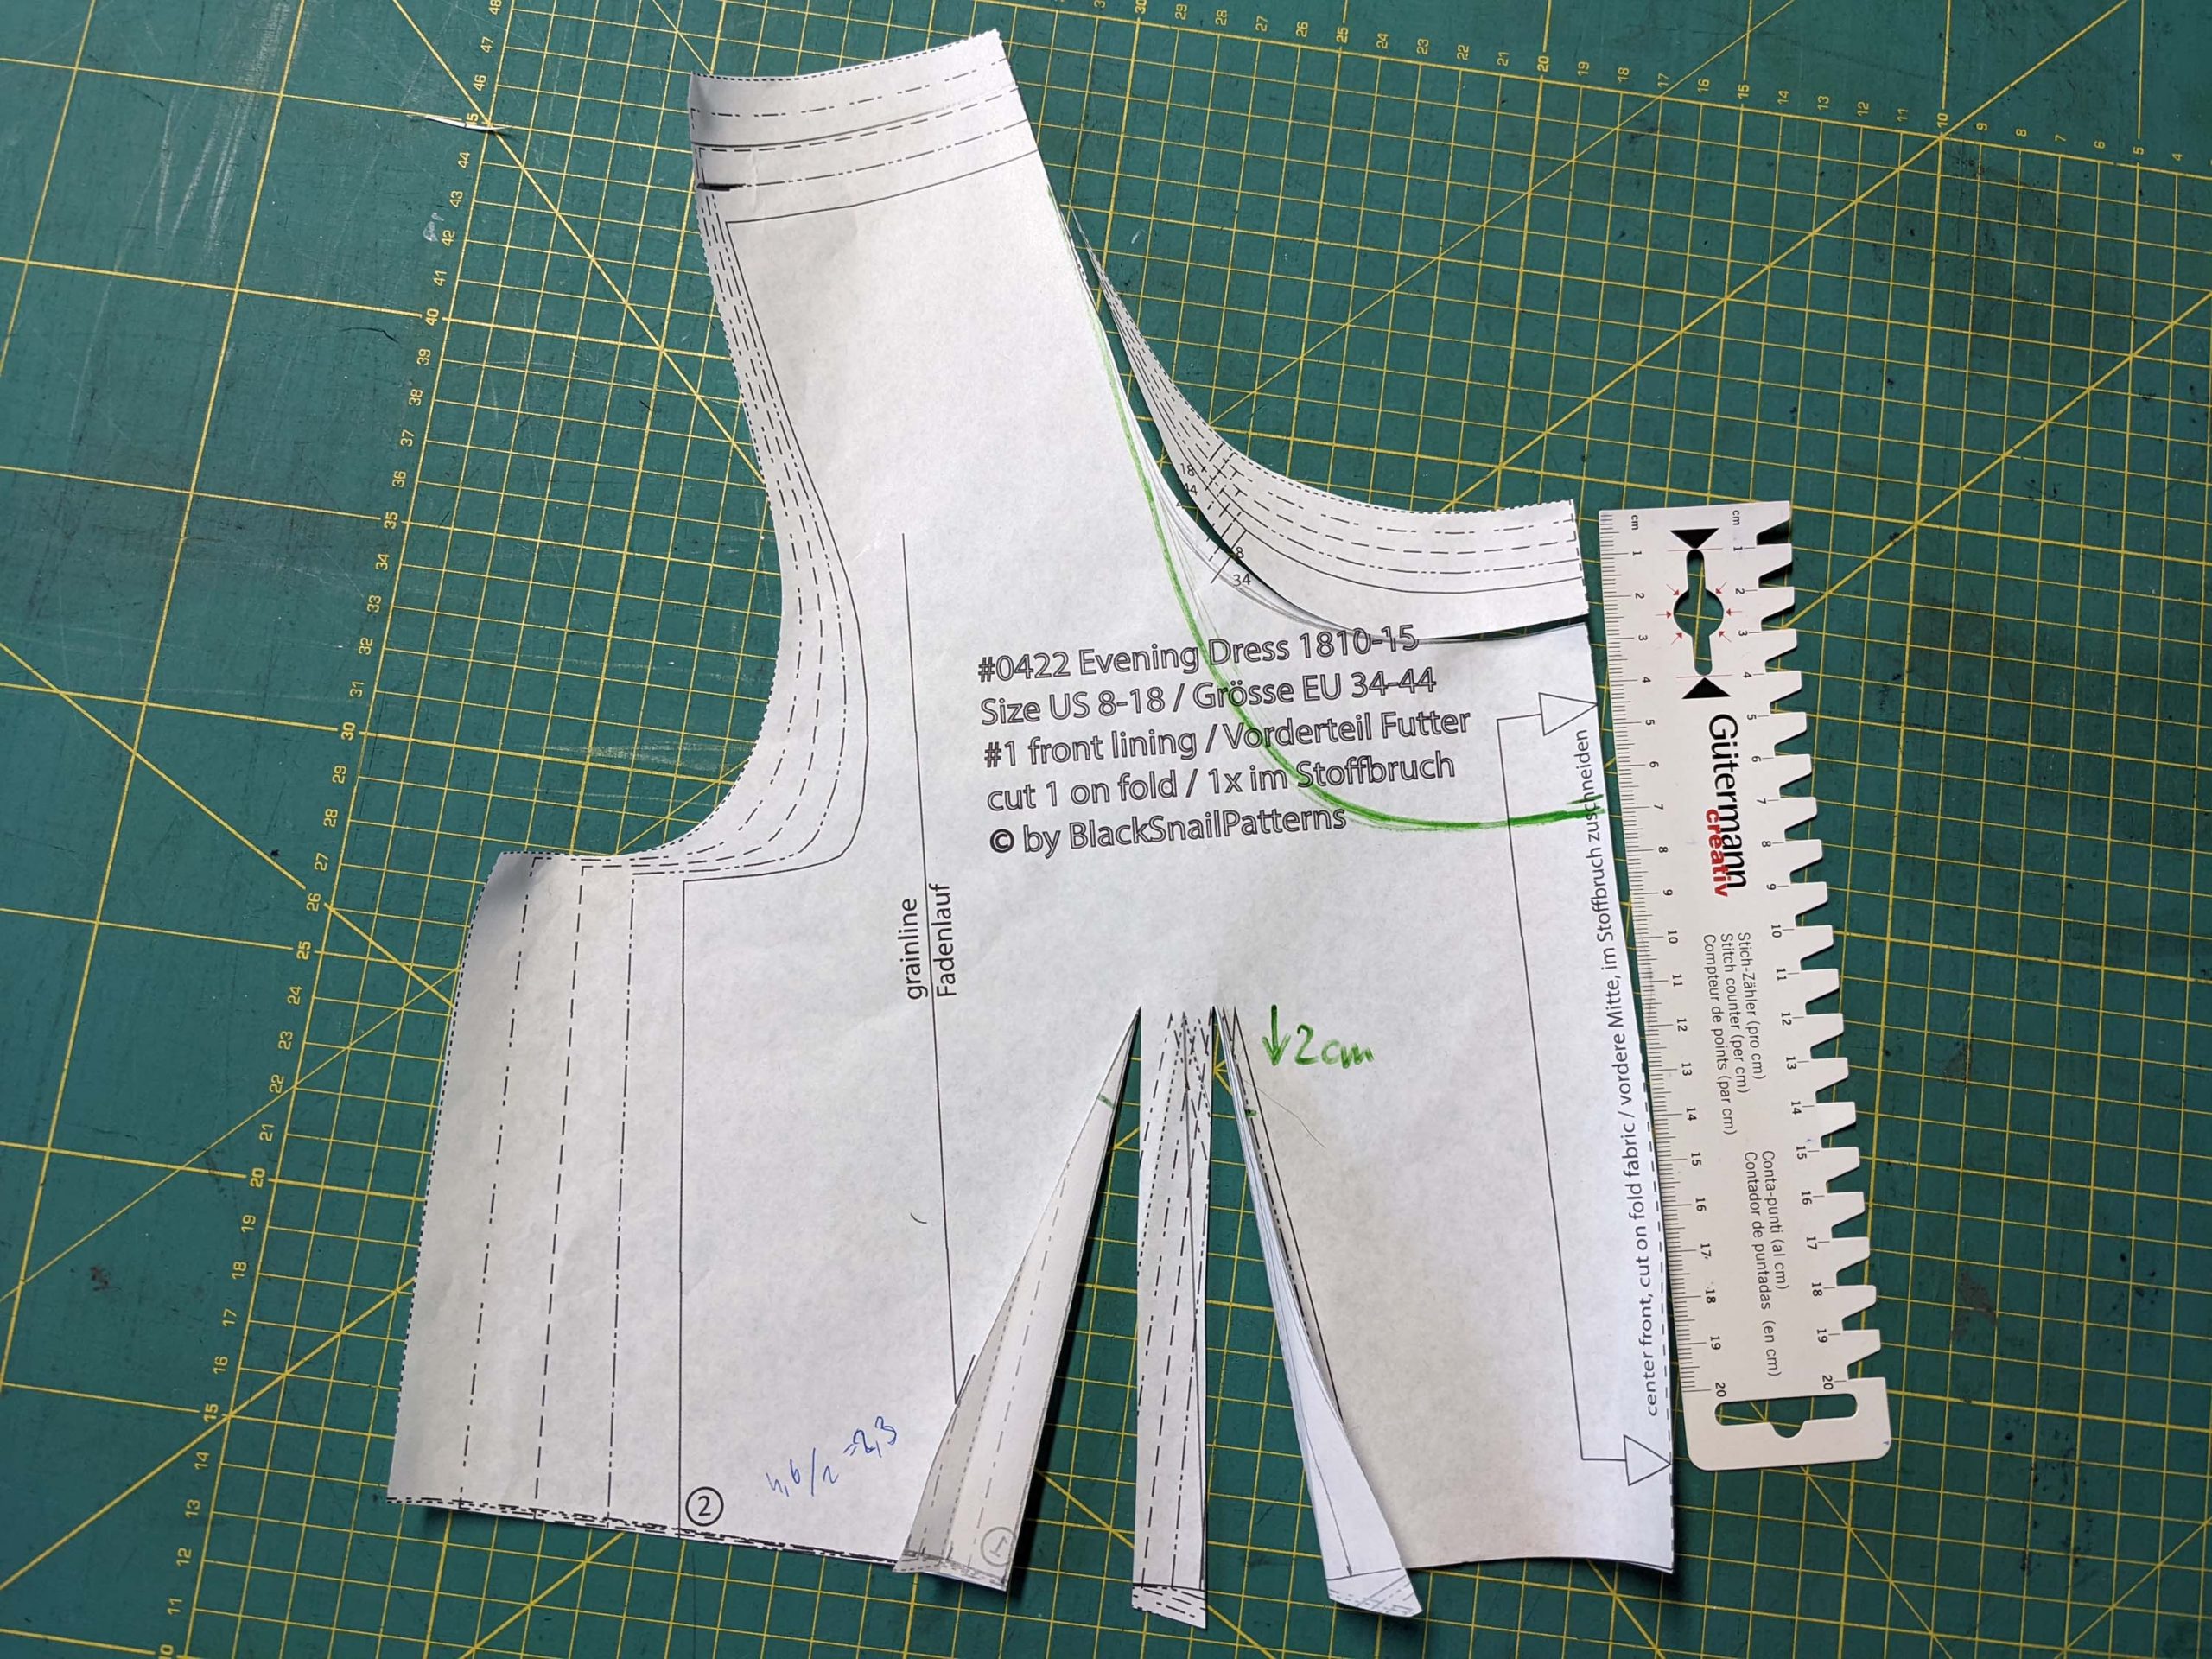
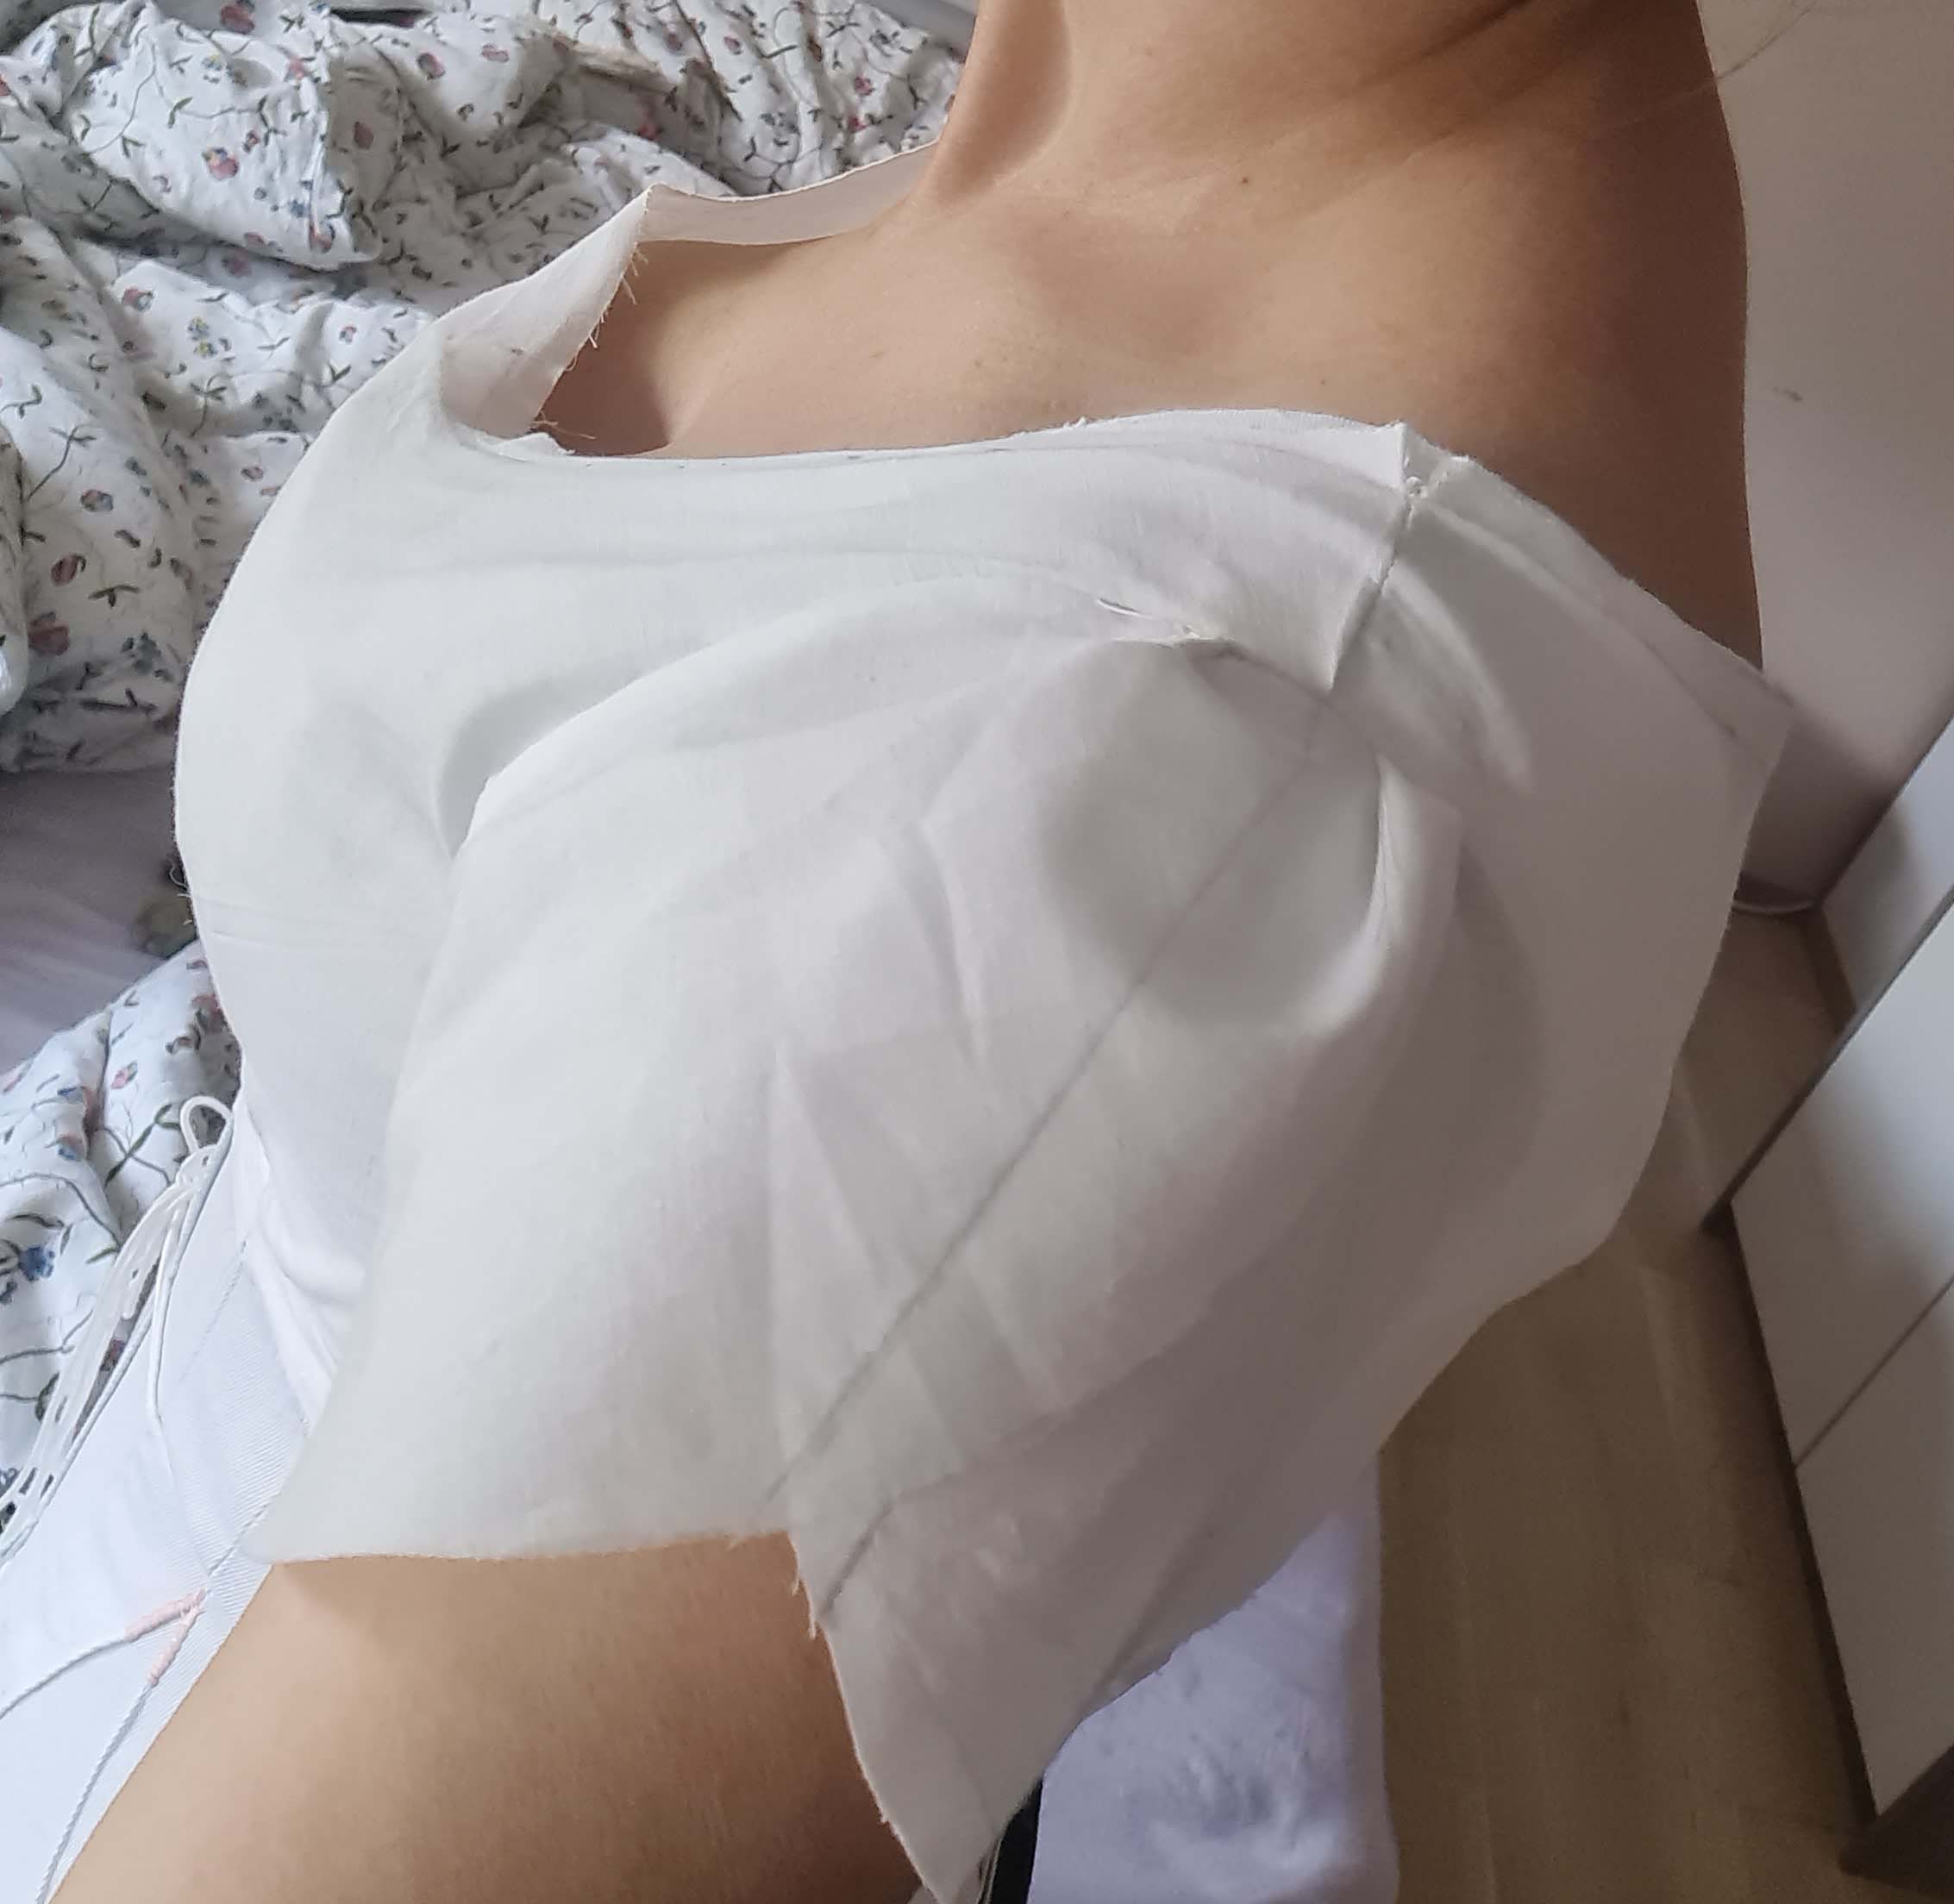
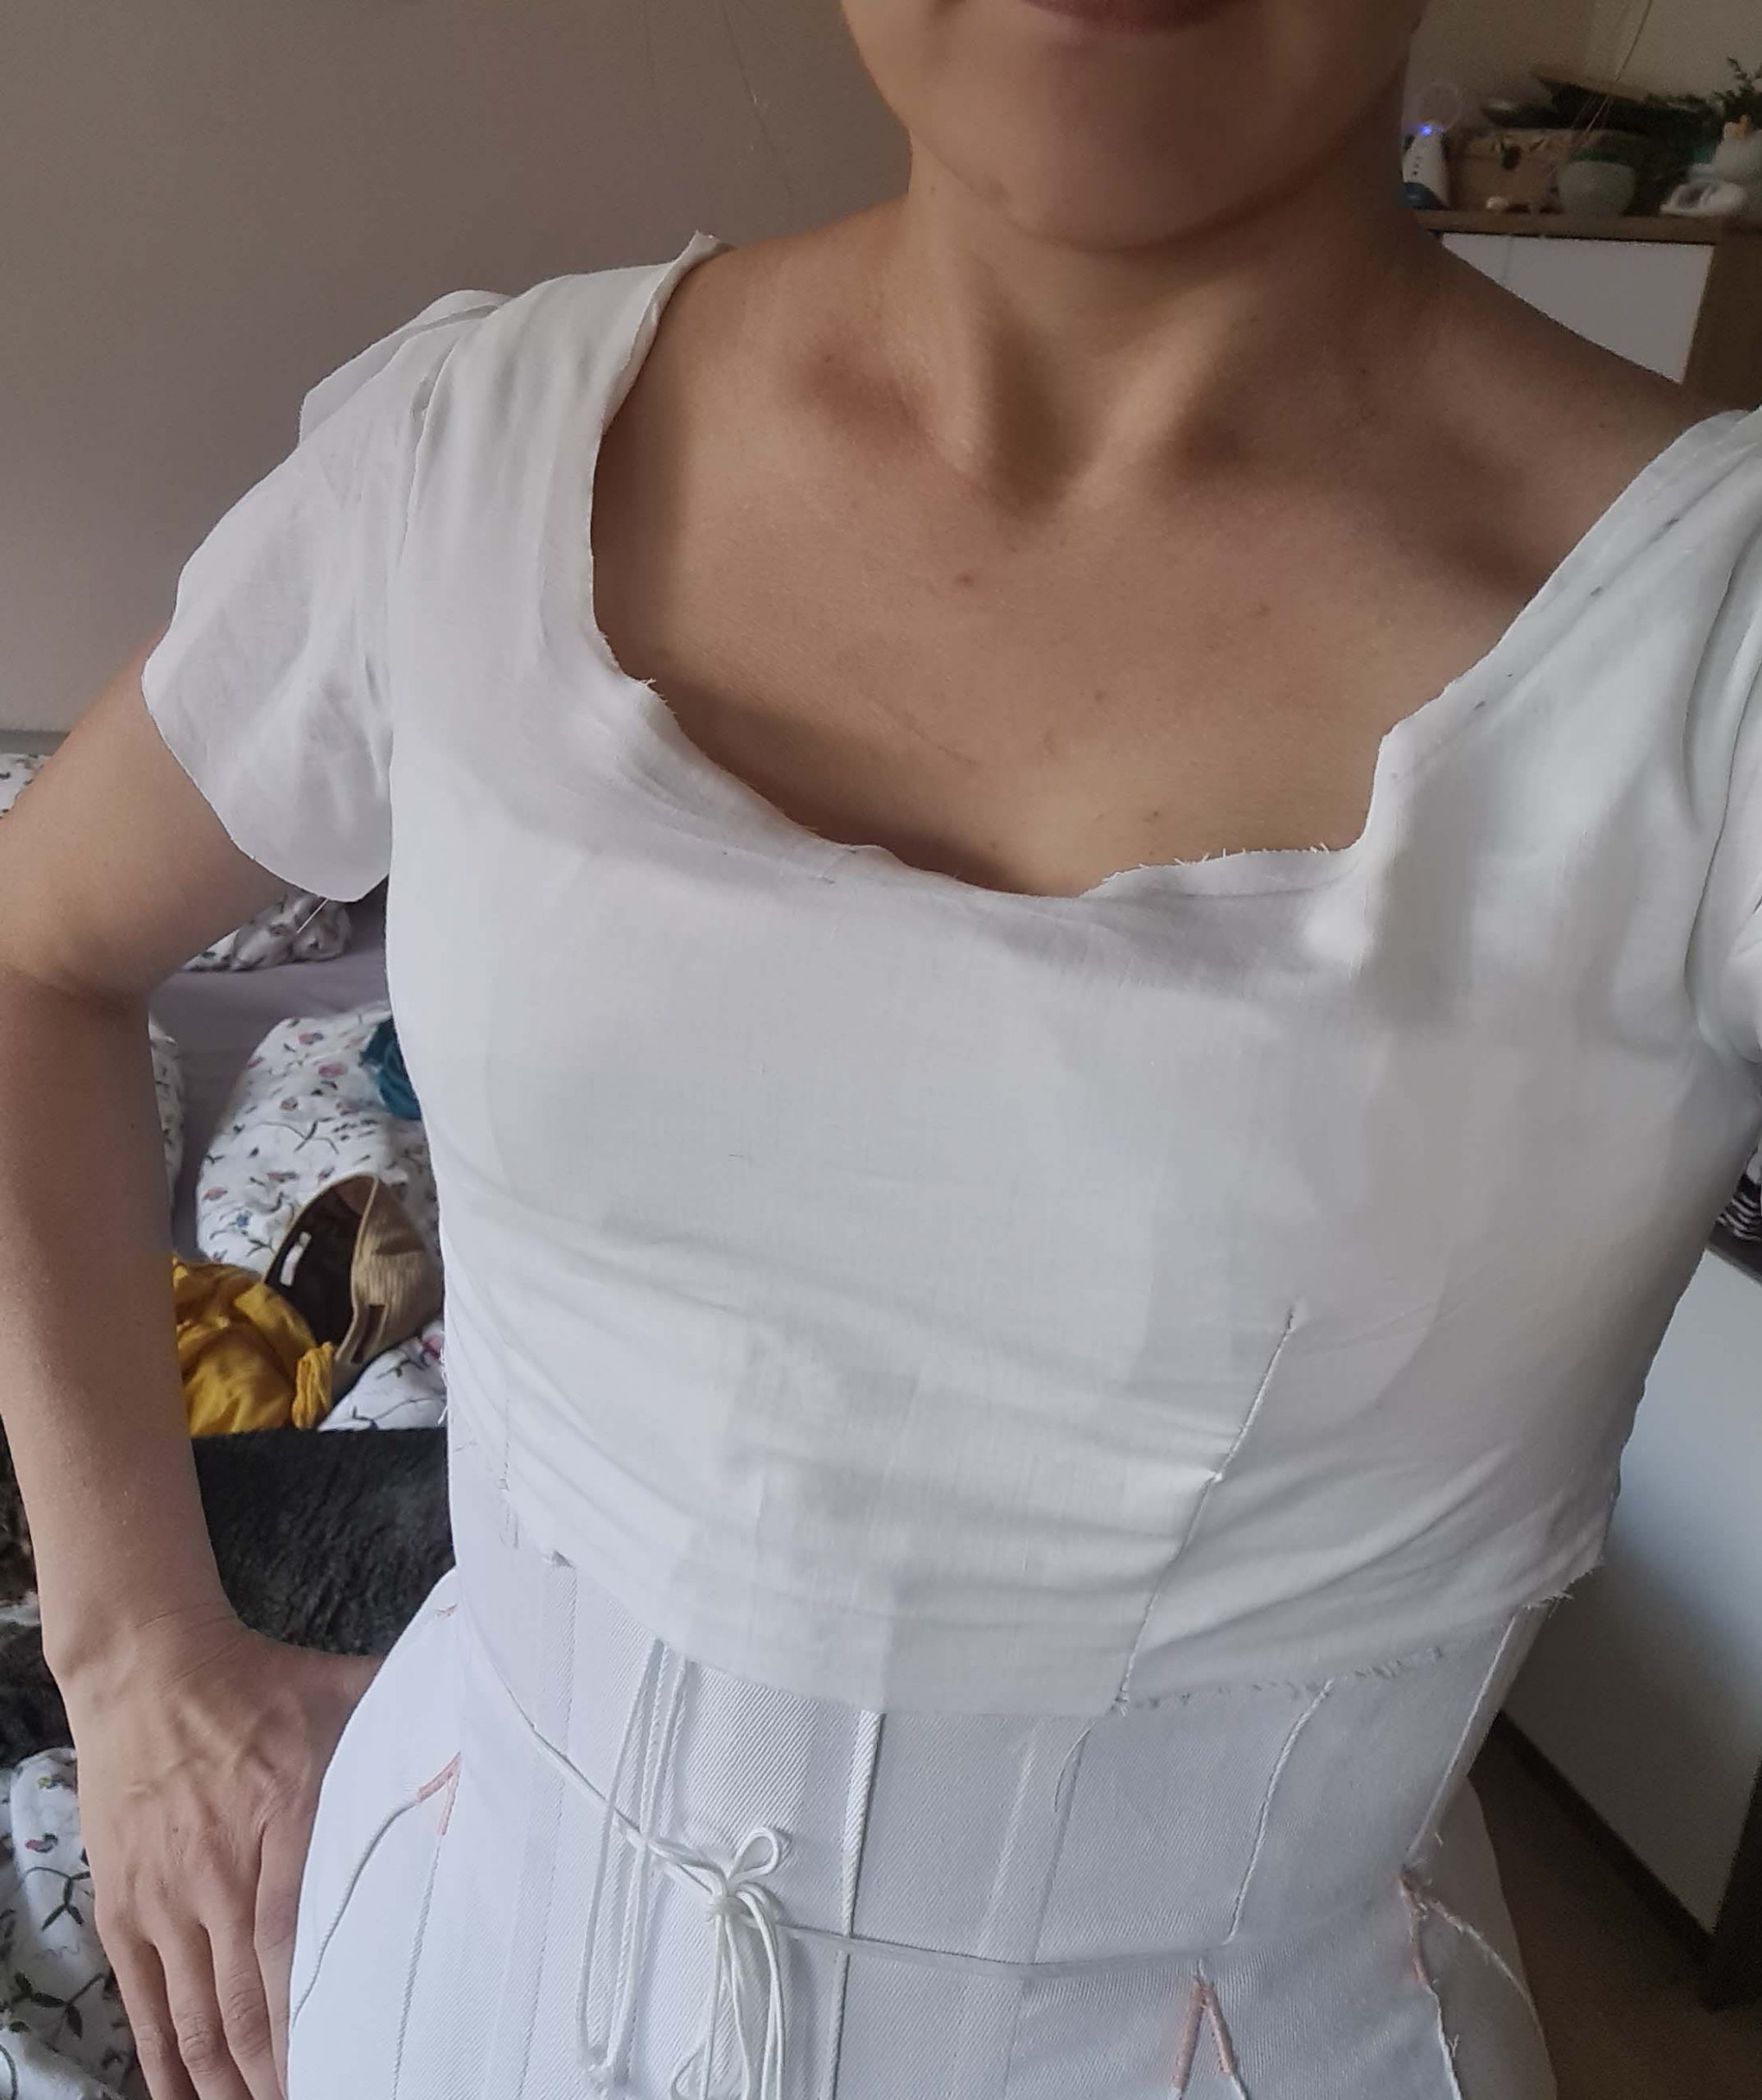
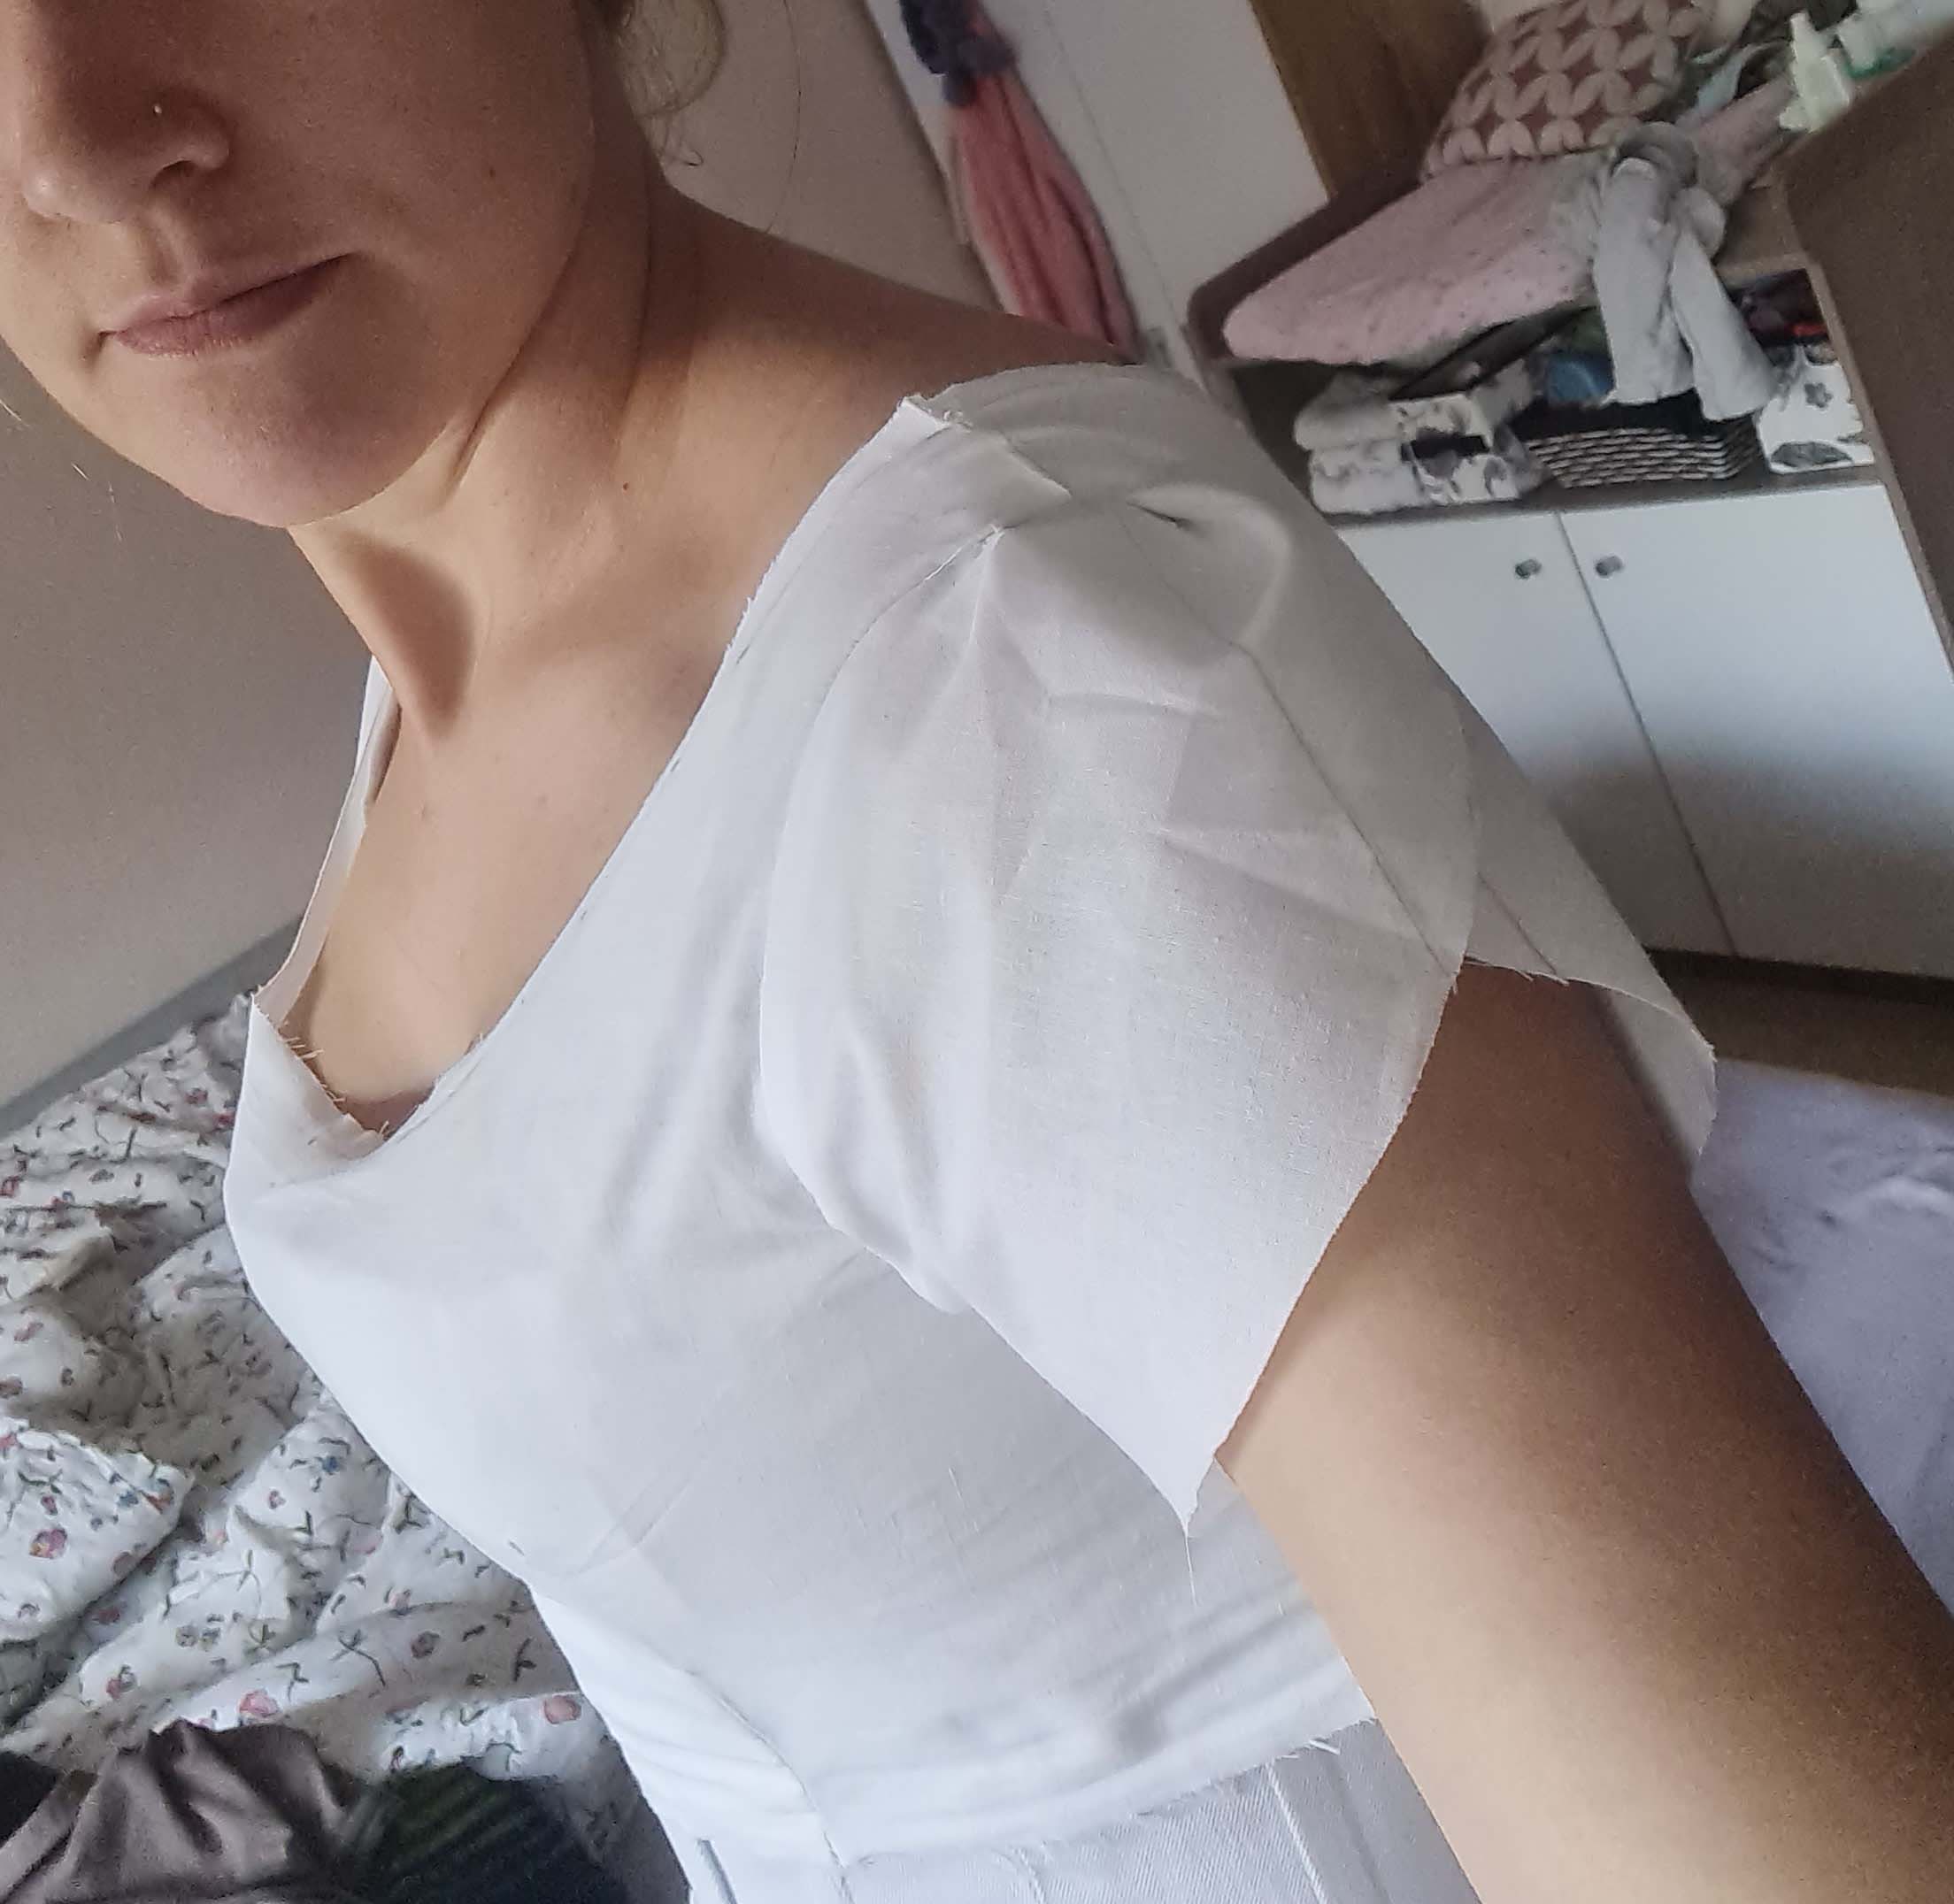
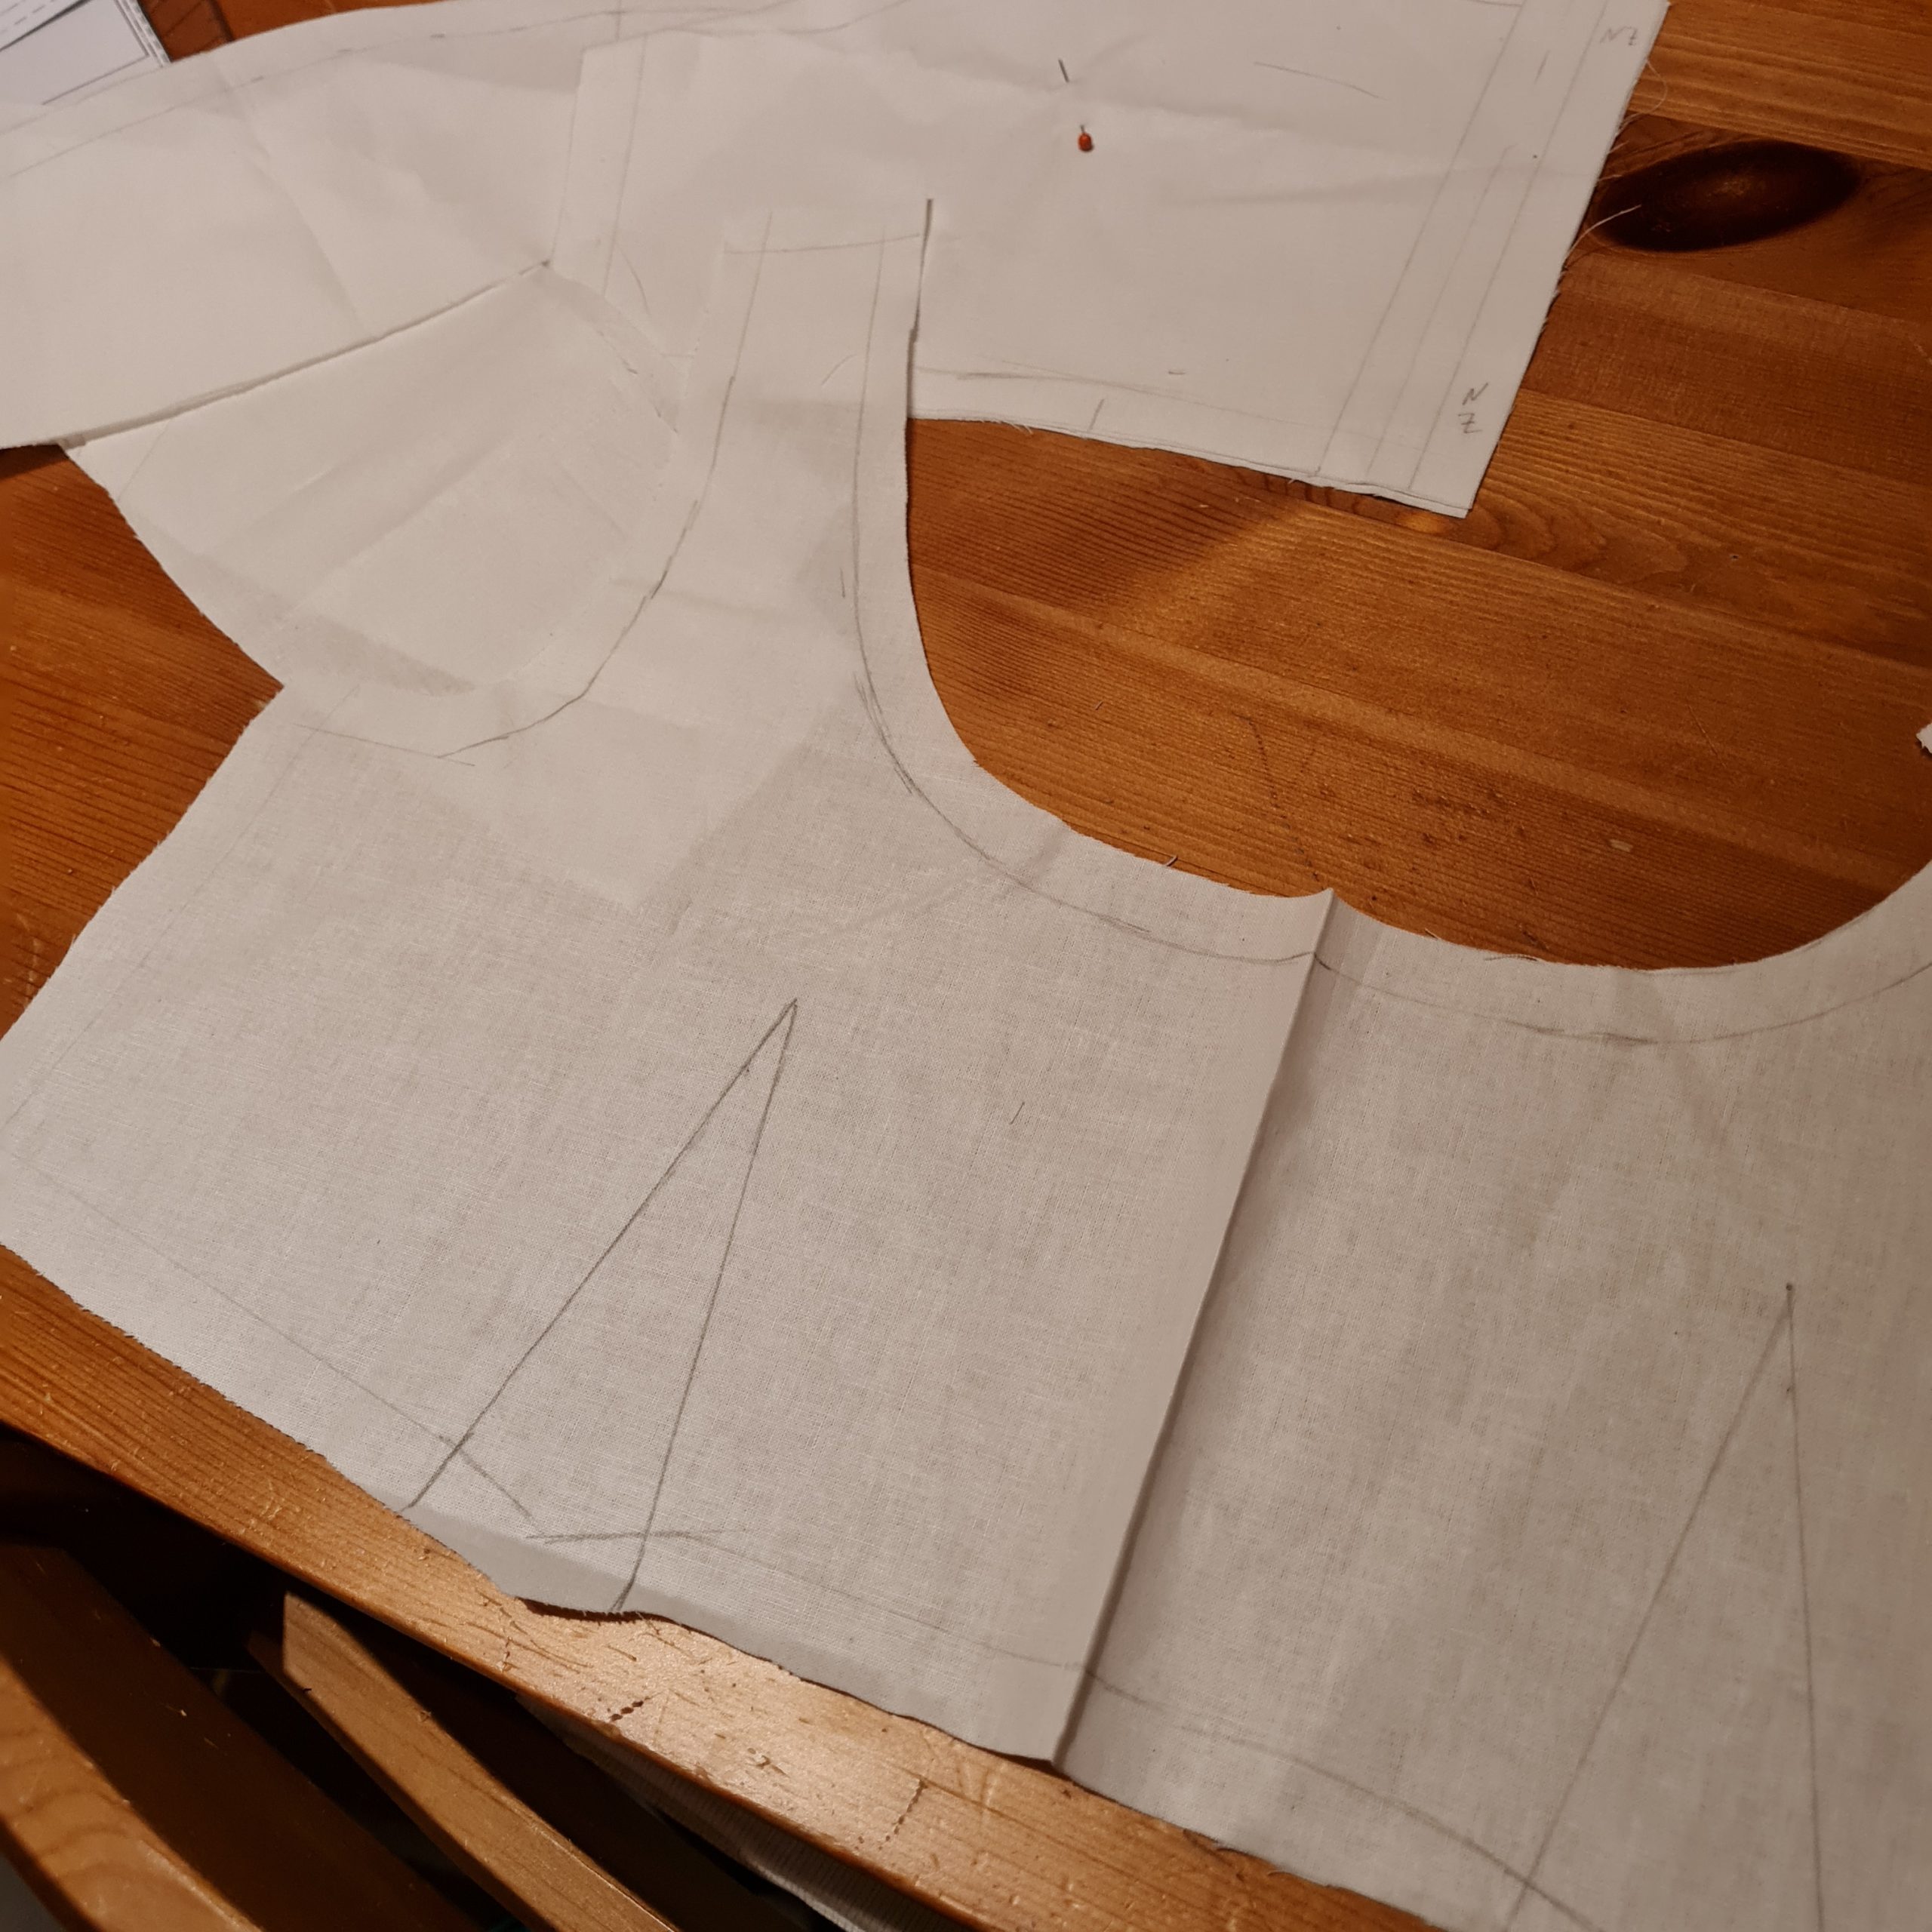
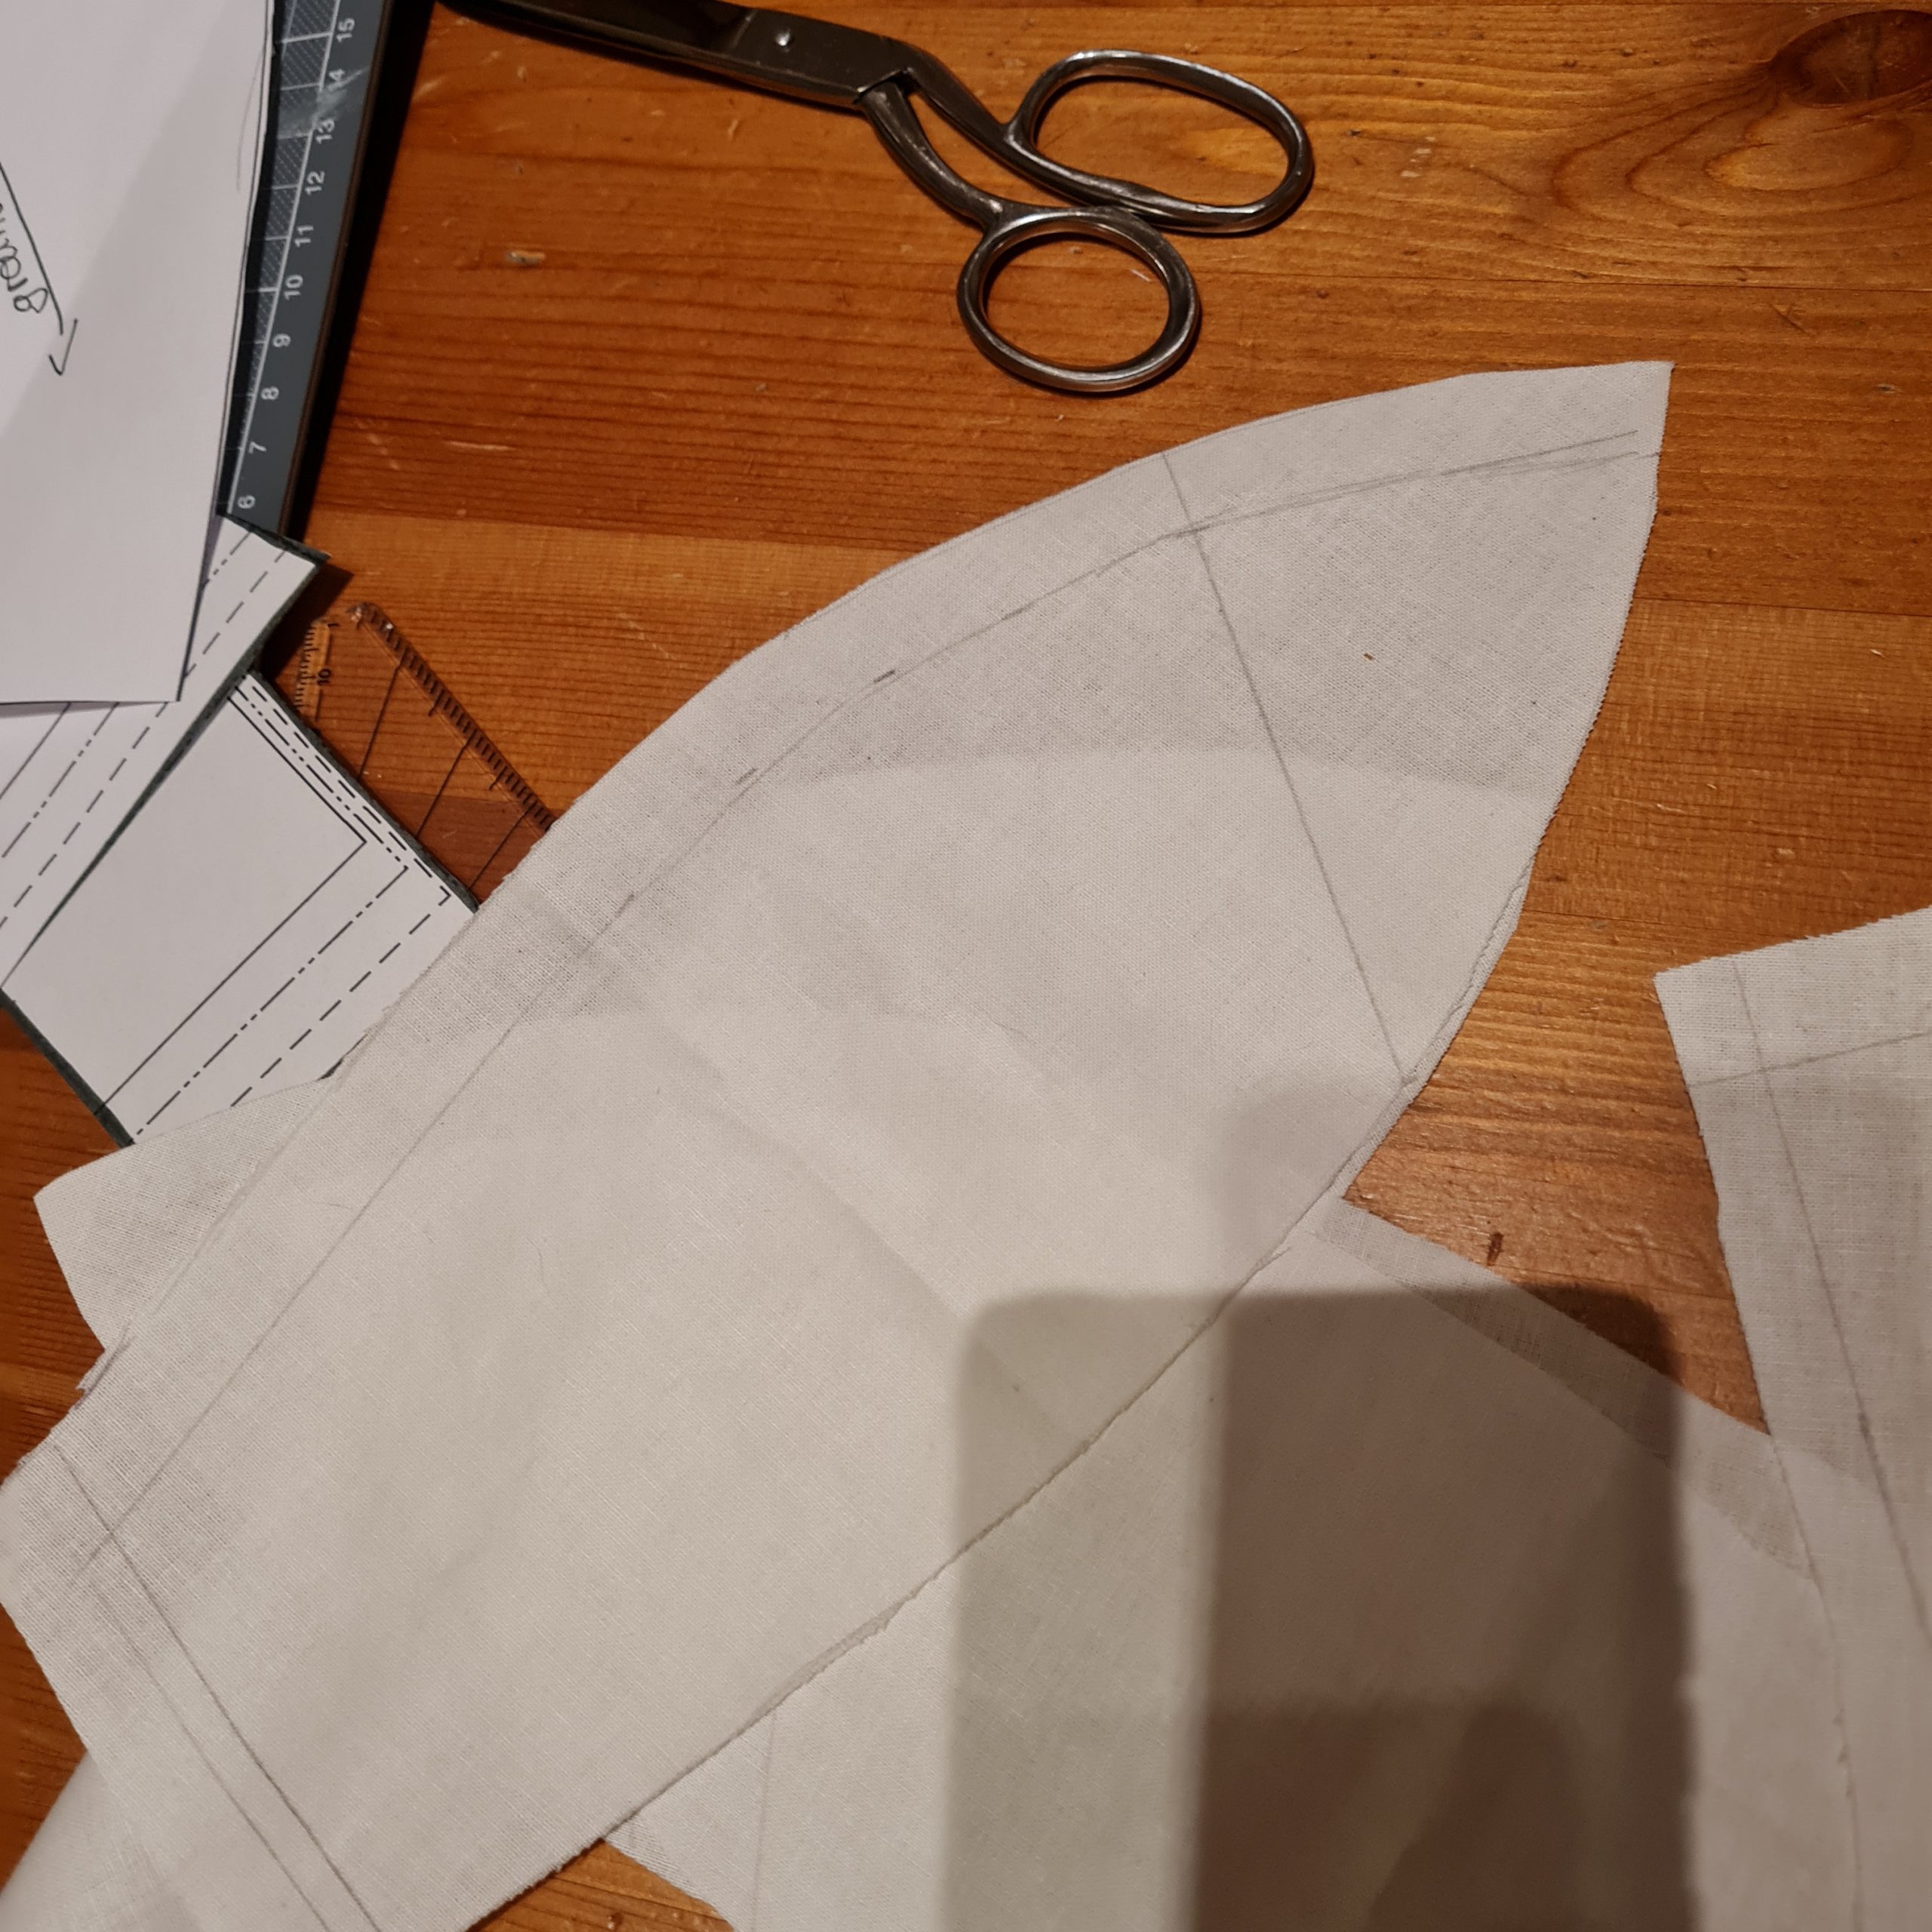
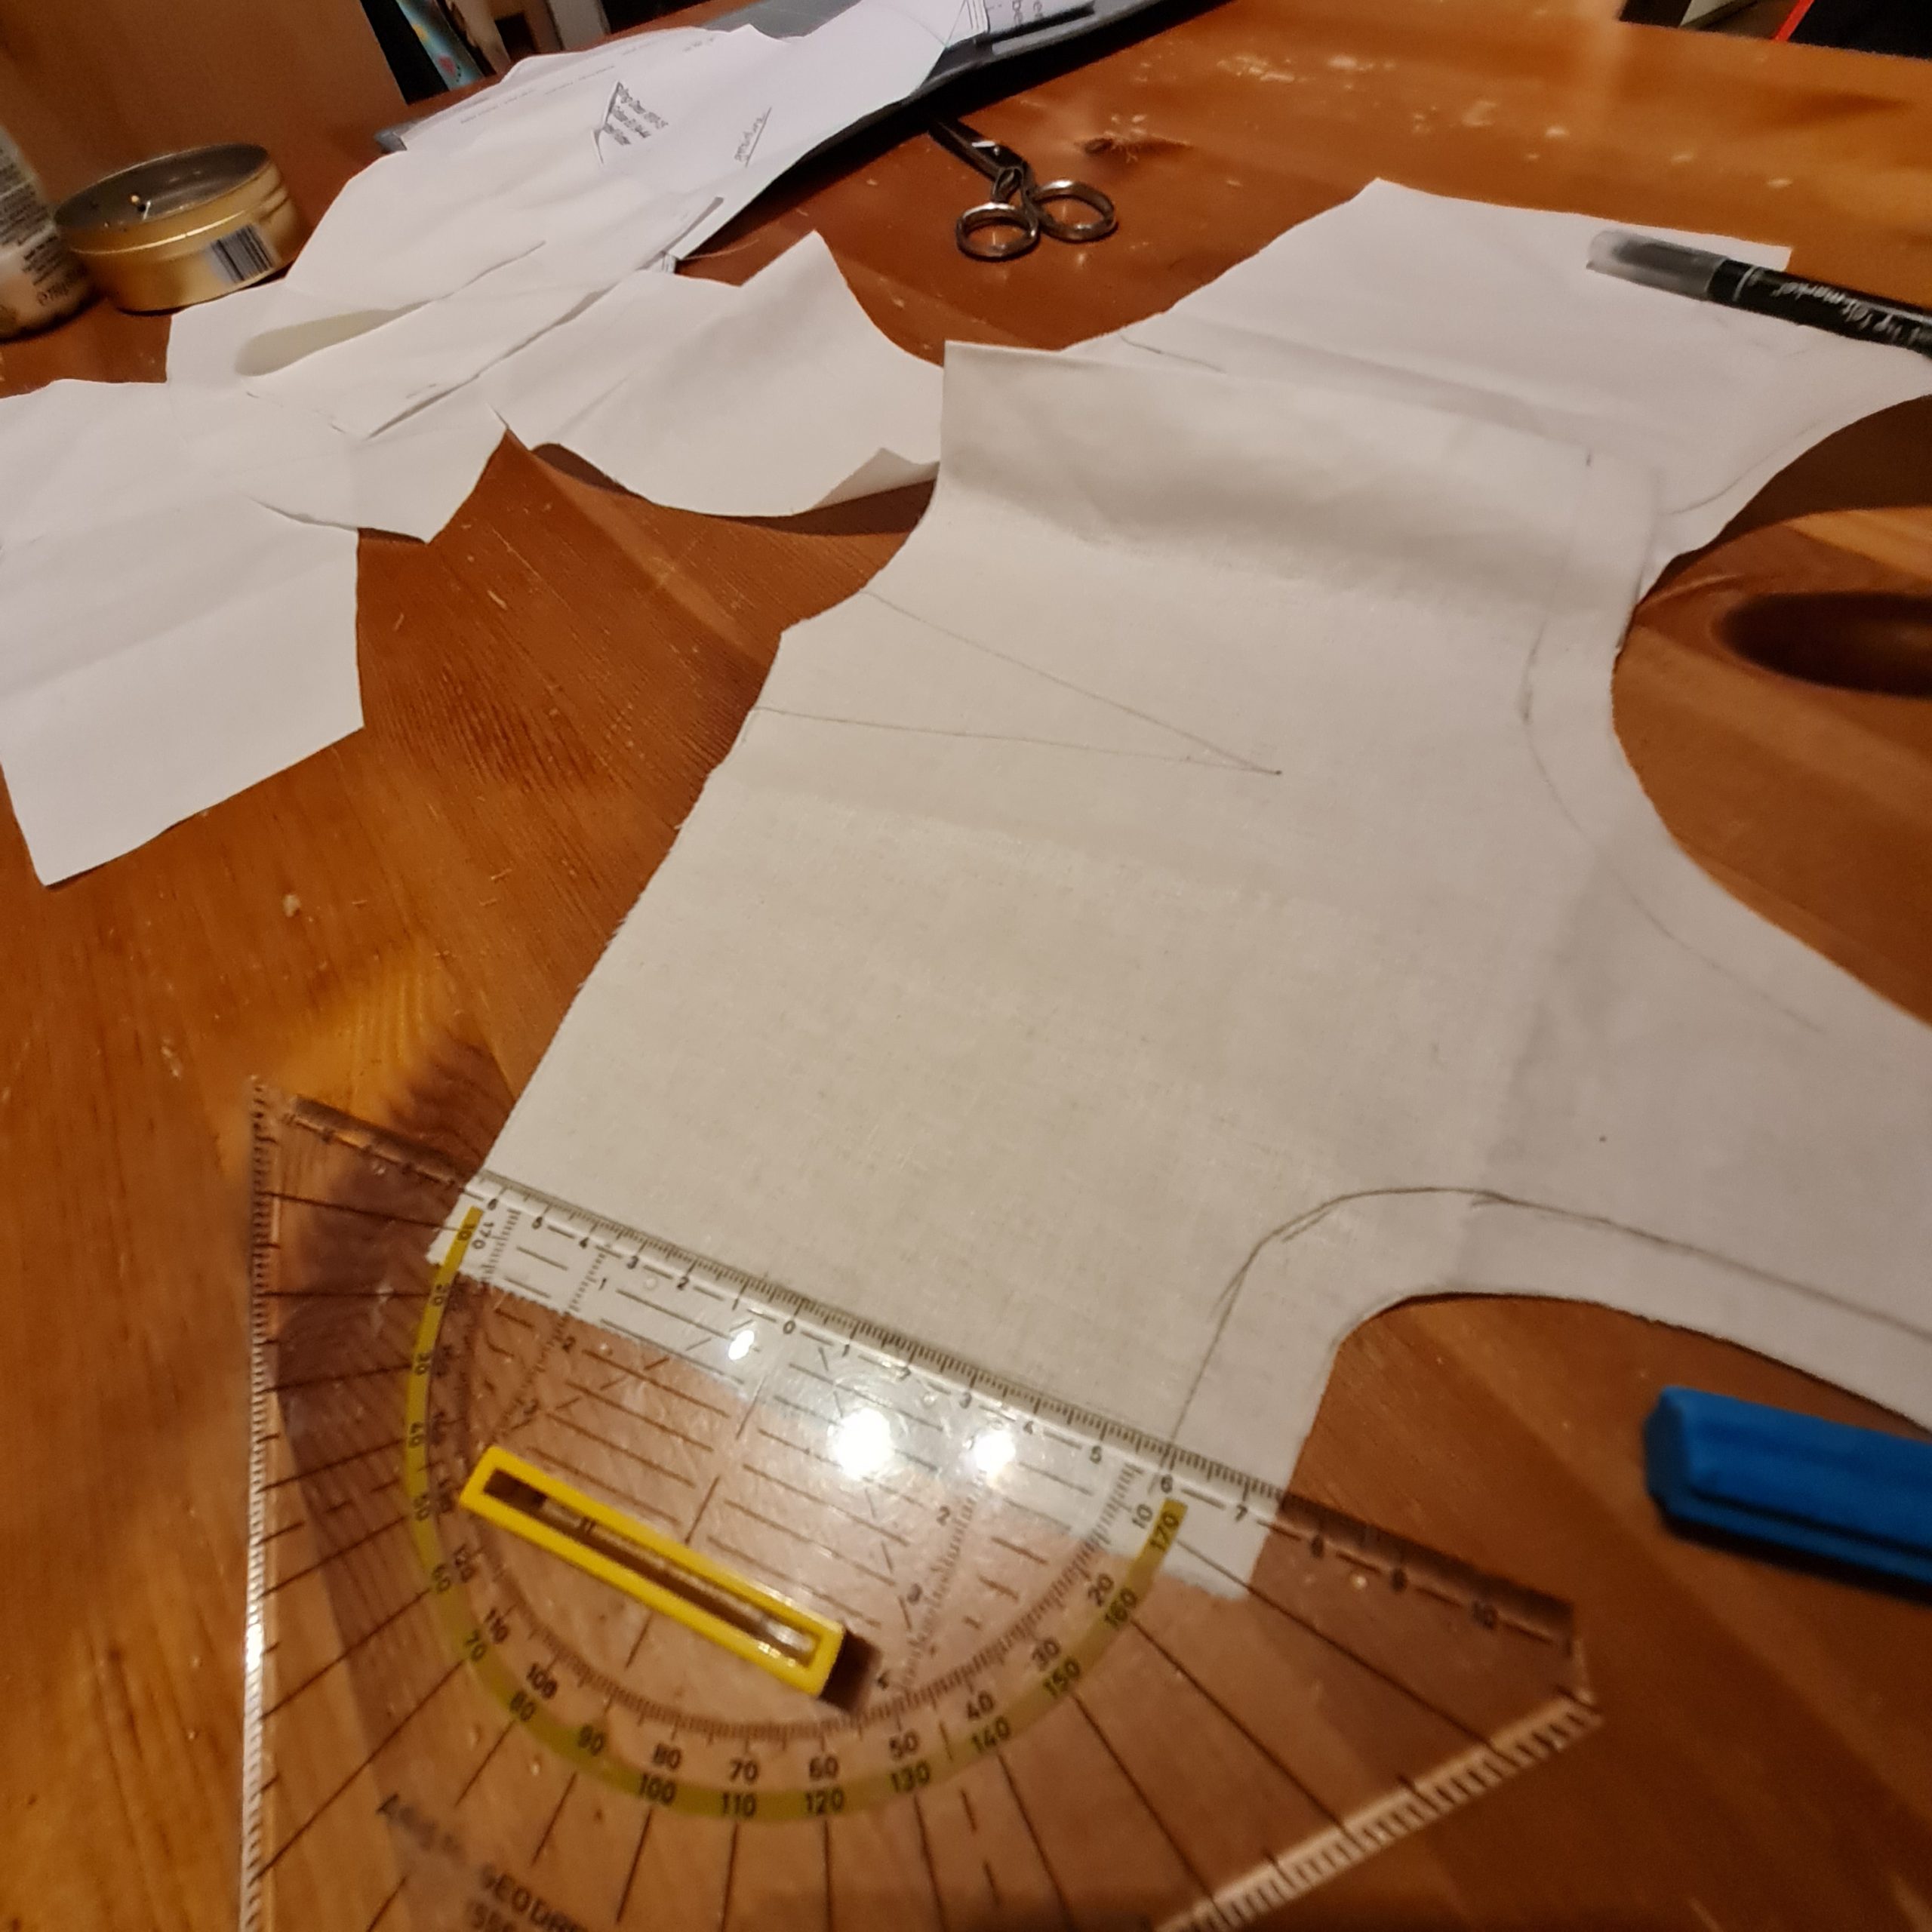
Let’s start with the original pattern and make the necessary changes. I lowered the neckline on the front and back and shaped the sleeve into the tulip shape as shown in the picture, don’t forget to mark the original center line to easily line up the two sleeve pieces later.
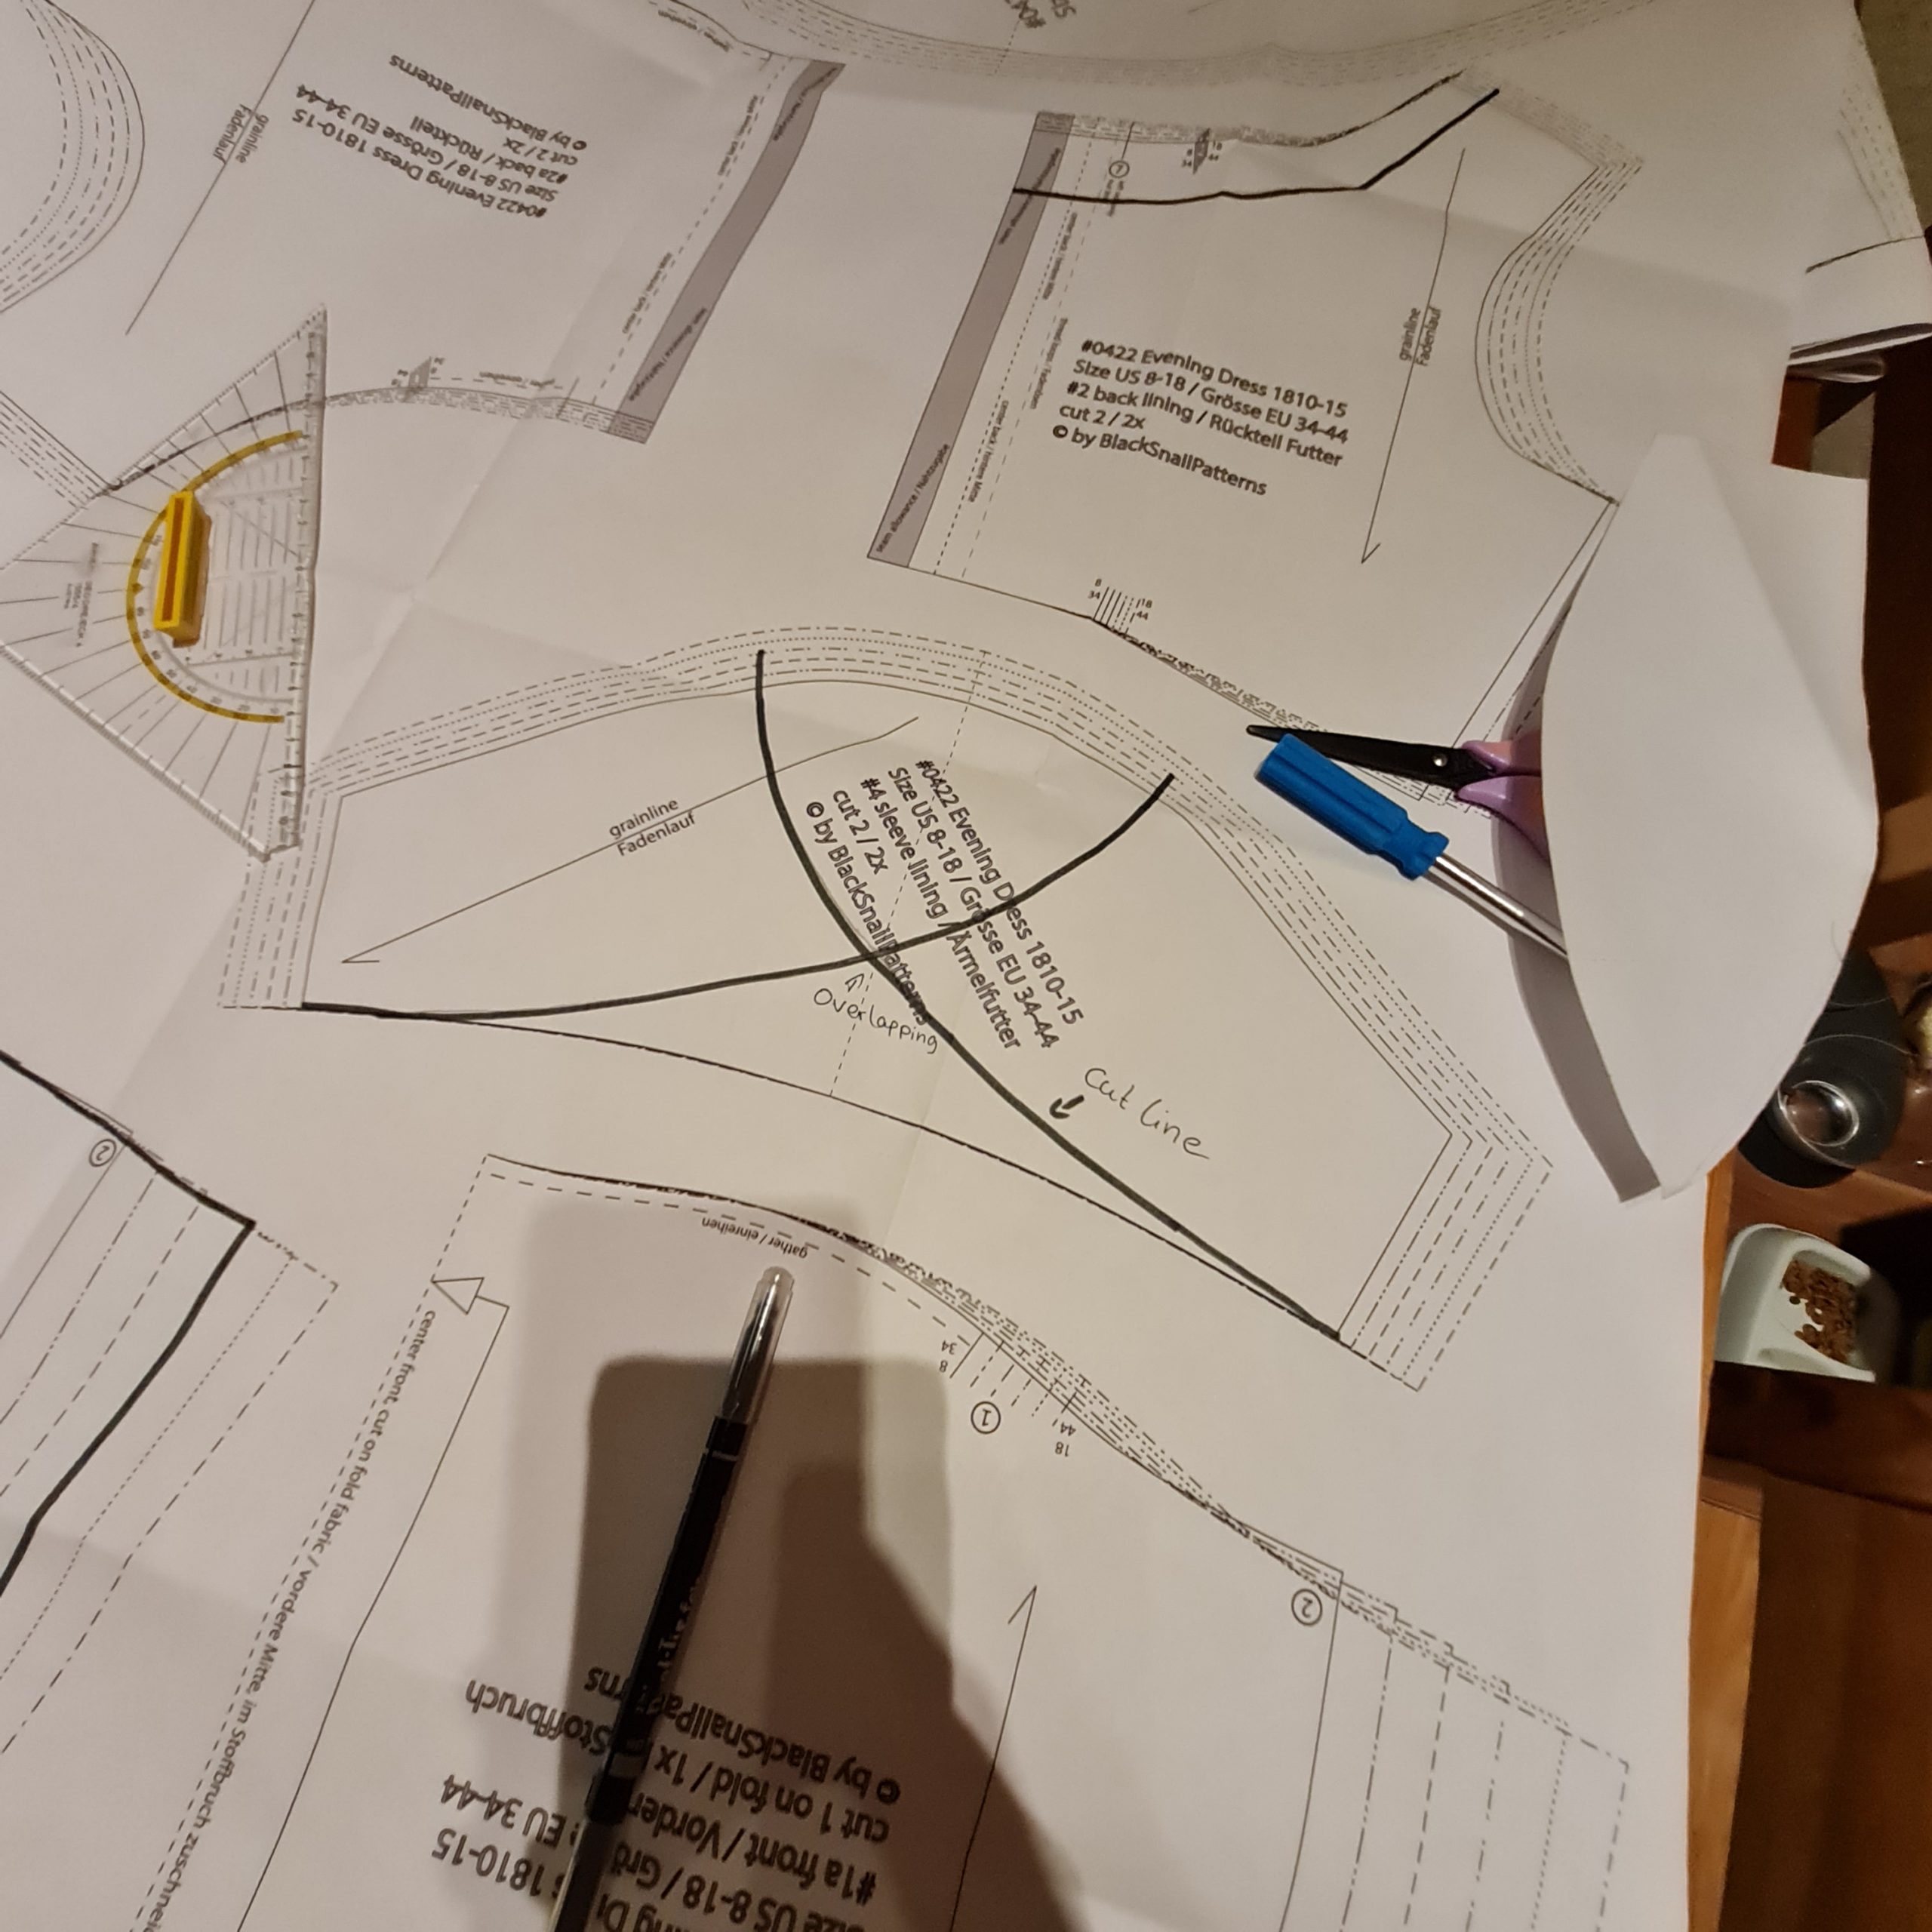
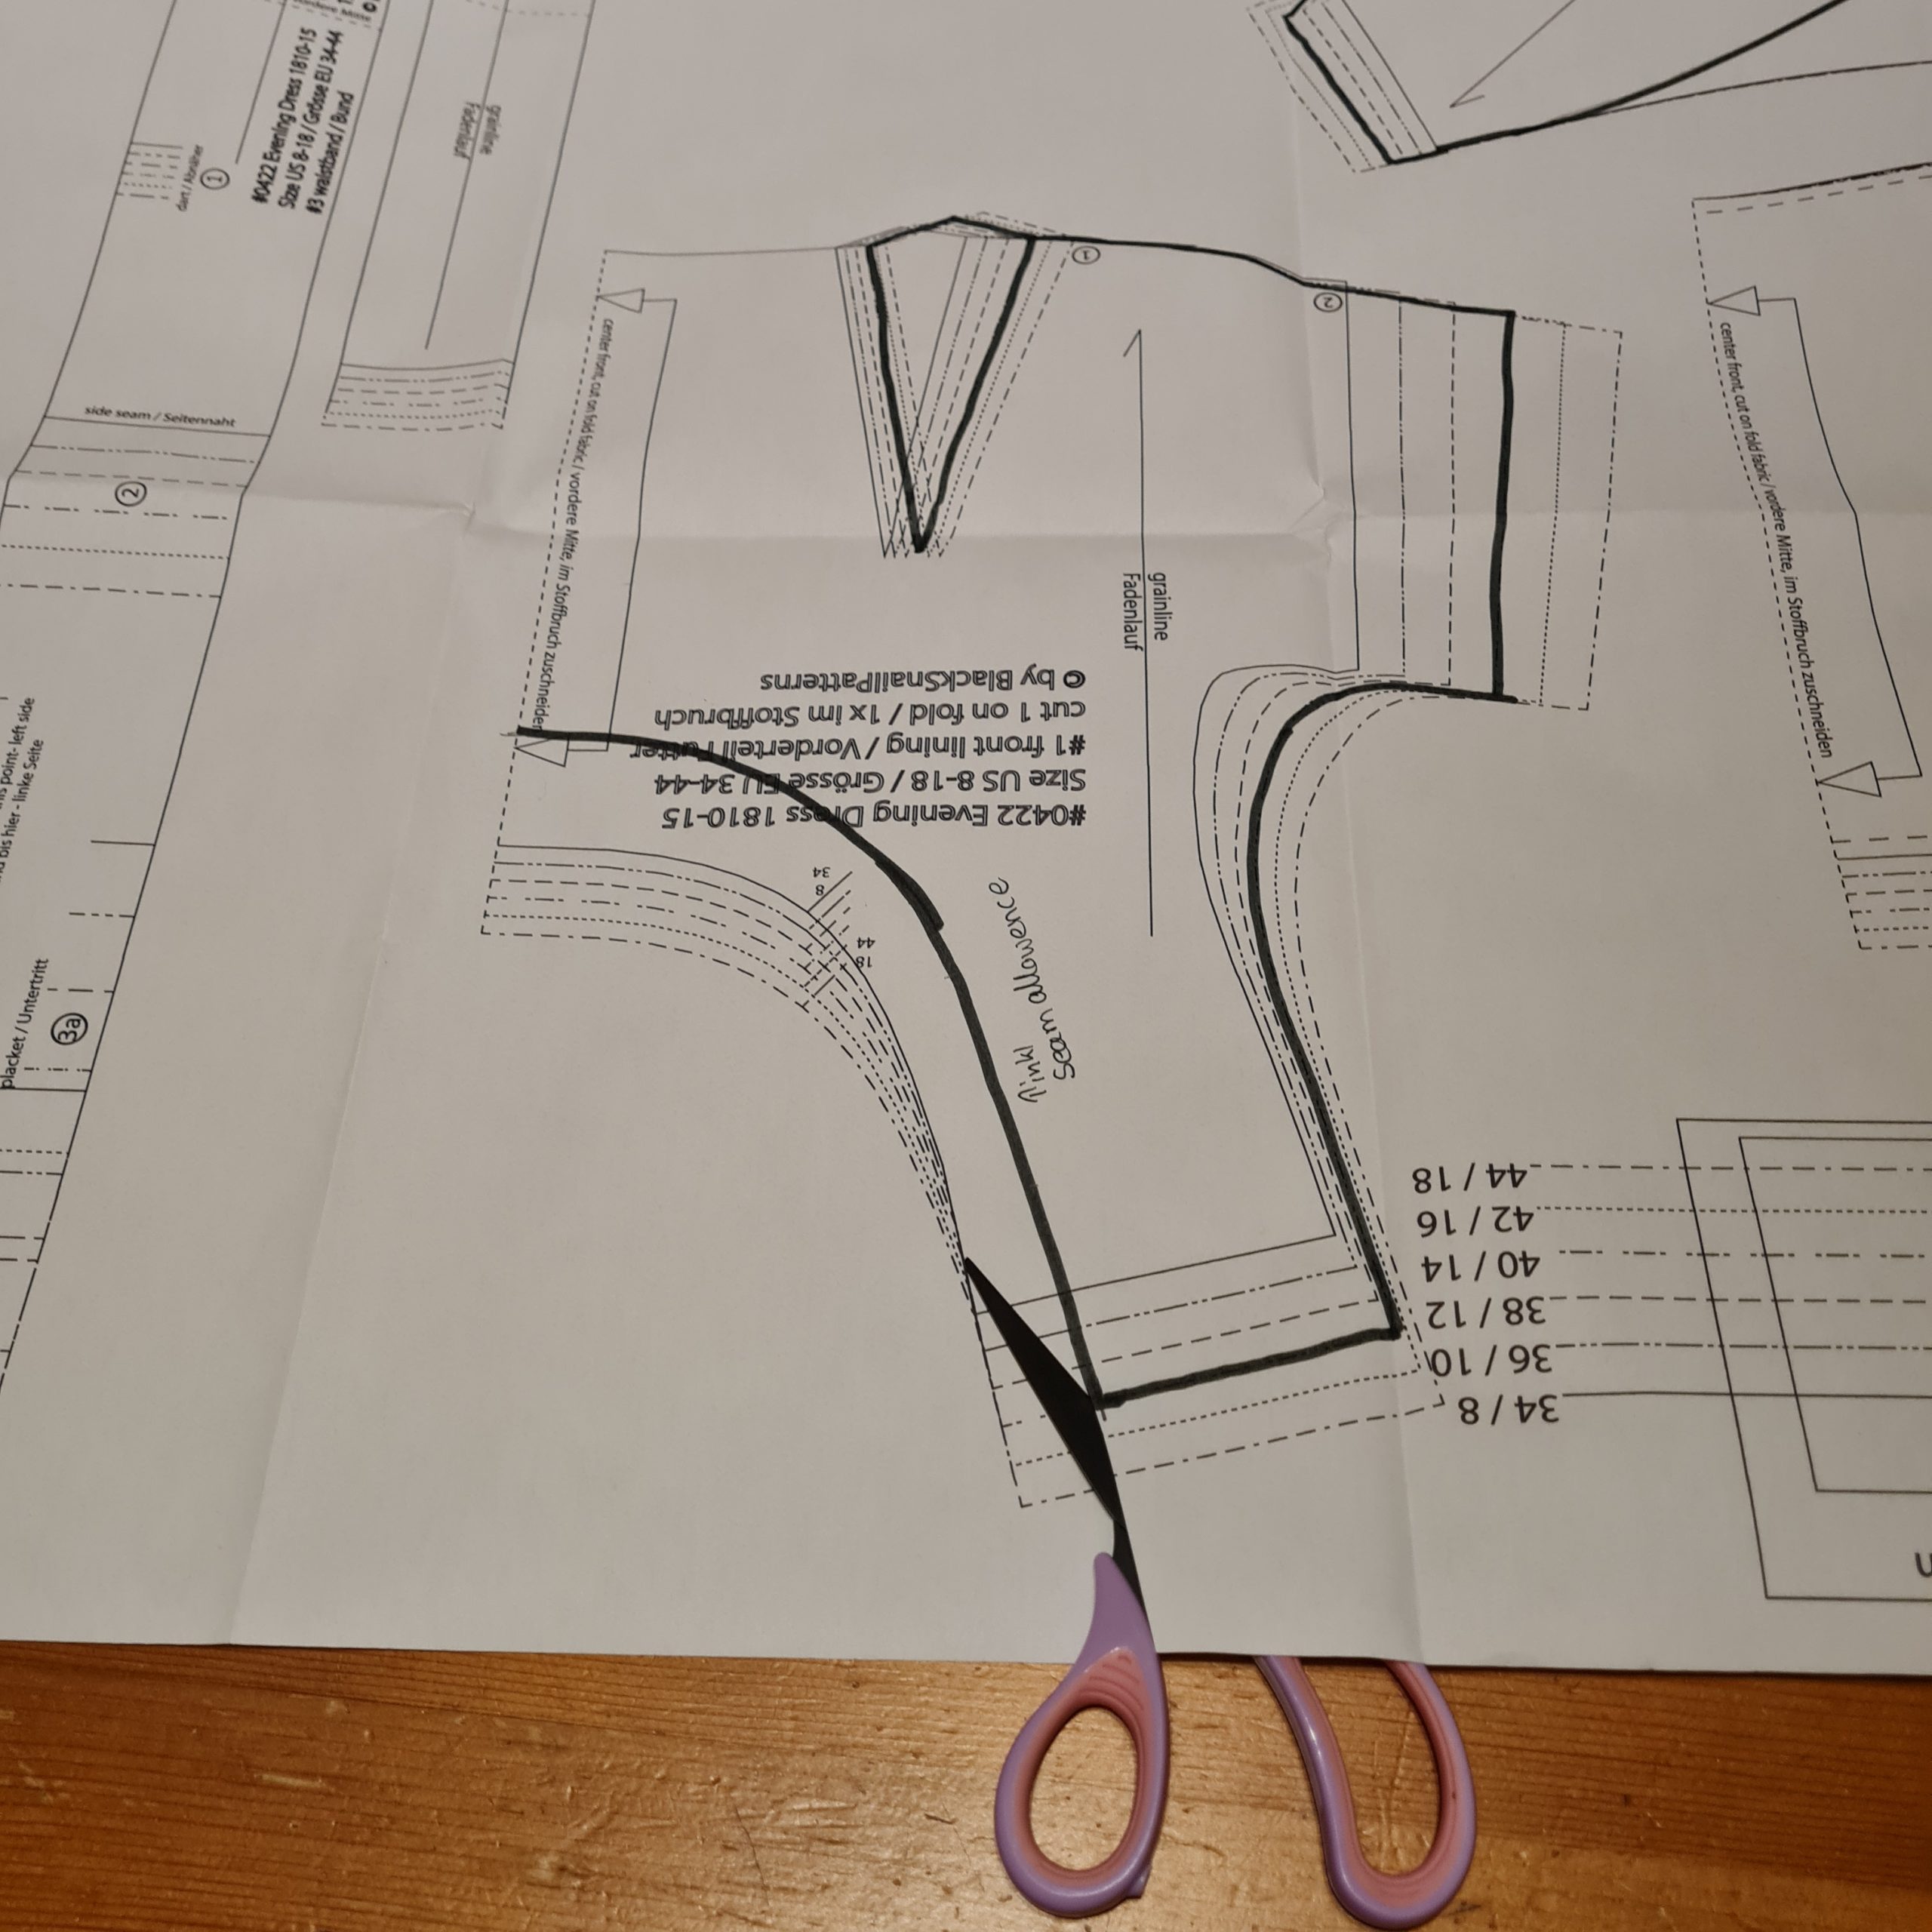

Notes from Roti: Don’t make the shoulder straps too narrow, otherwise you’ll see the shoulder straps of the shift and stays underneath later, for my dress I left the back as it was. Lower the bust point about 1″ (2cm) and make two instead of just one dart. Cut the sleeve on the bias and on the fold, using the stitching line of the underarm seam for mirroring the pattern. Give the sleeve a bit of extra width on the sleeve head.

My first mock-up from a cheap cotton fabric. It’s looking pretty good, isn’t it?
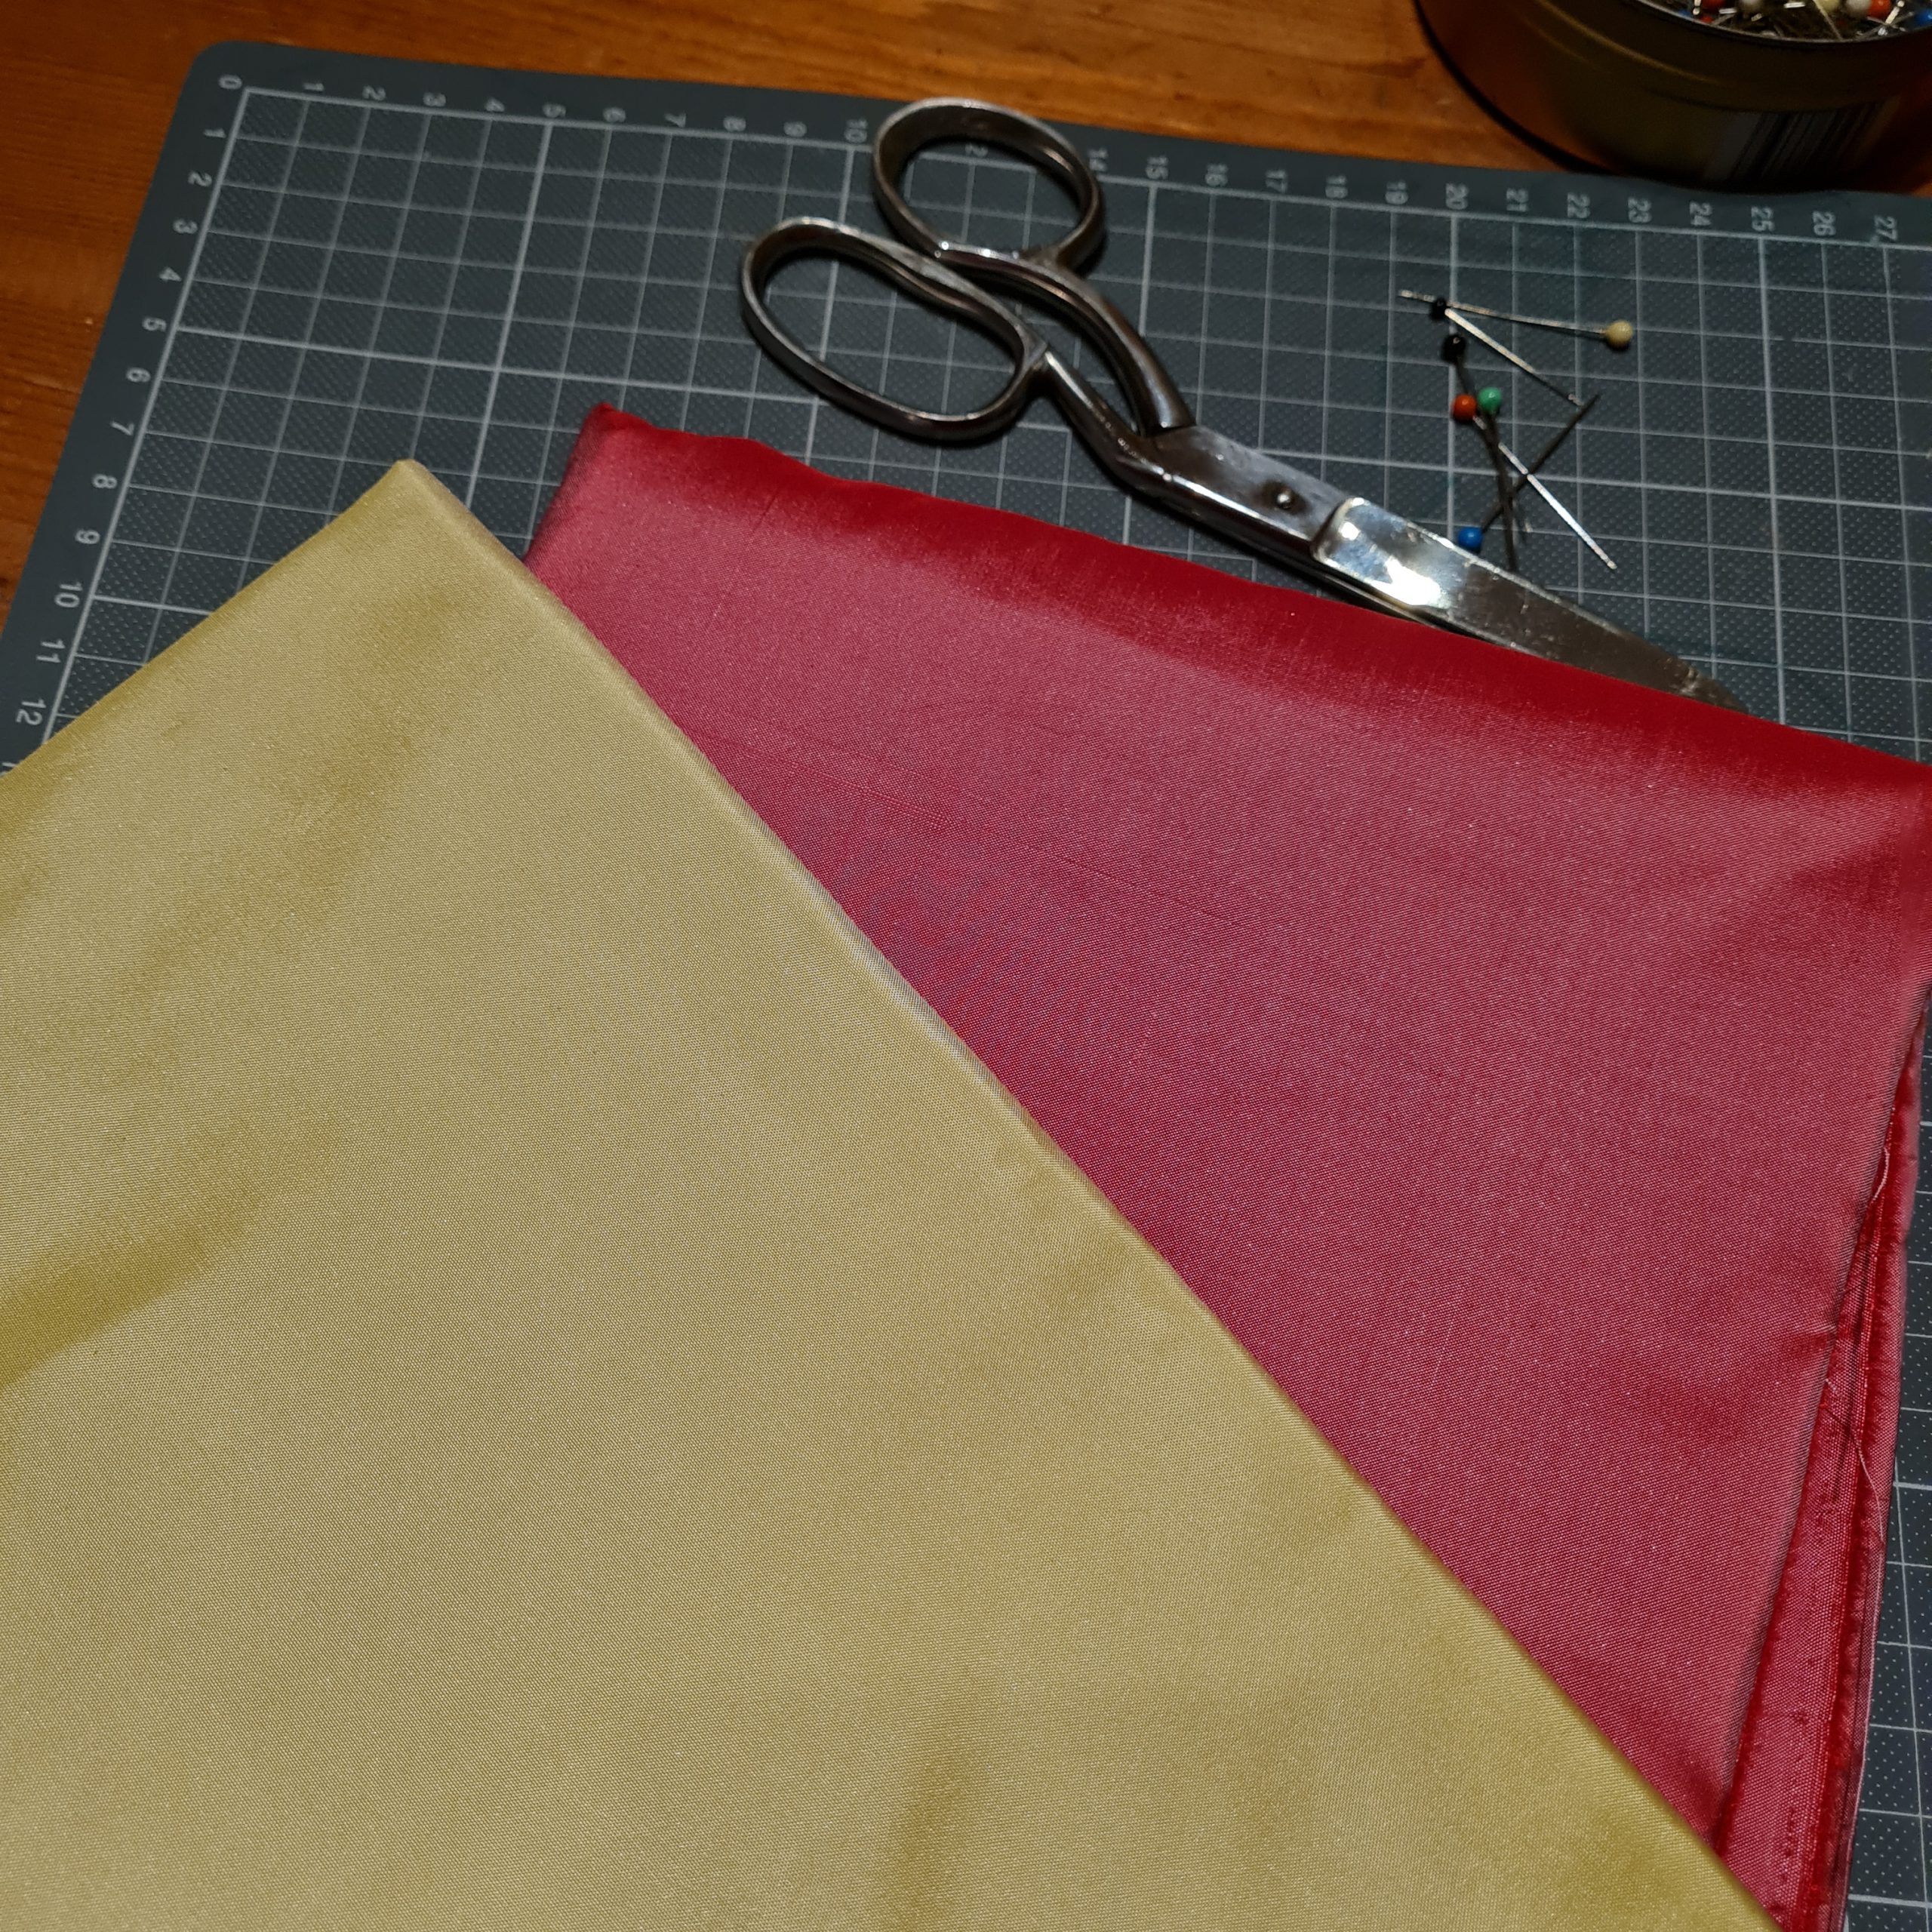
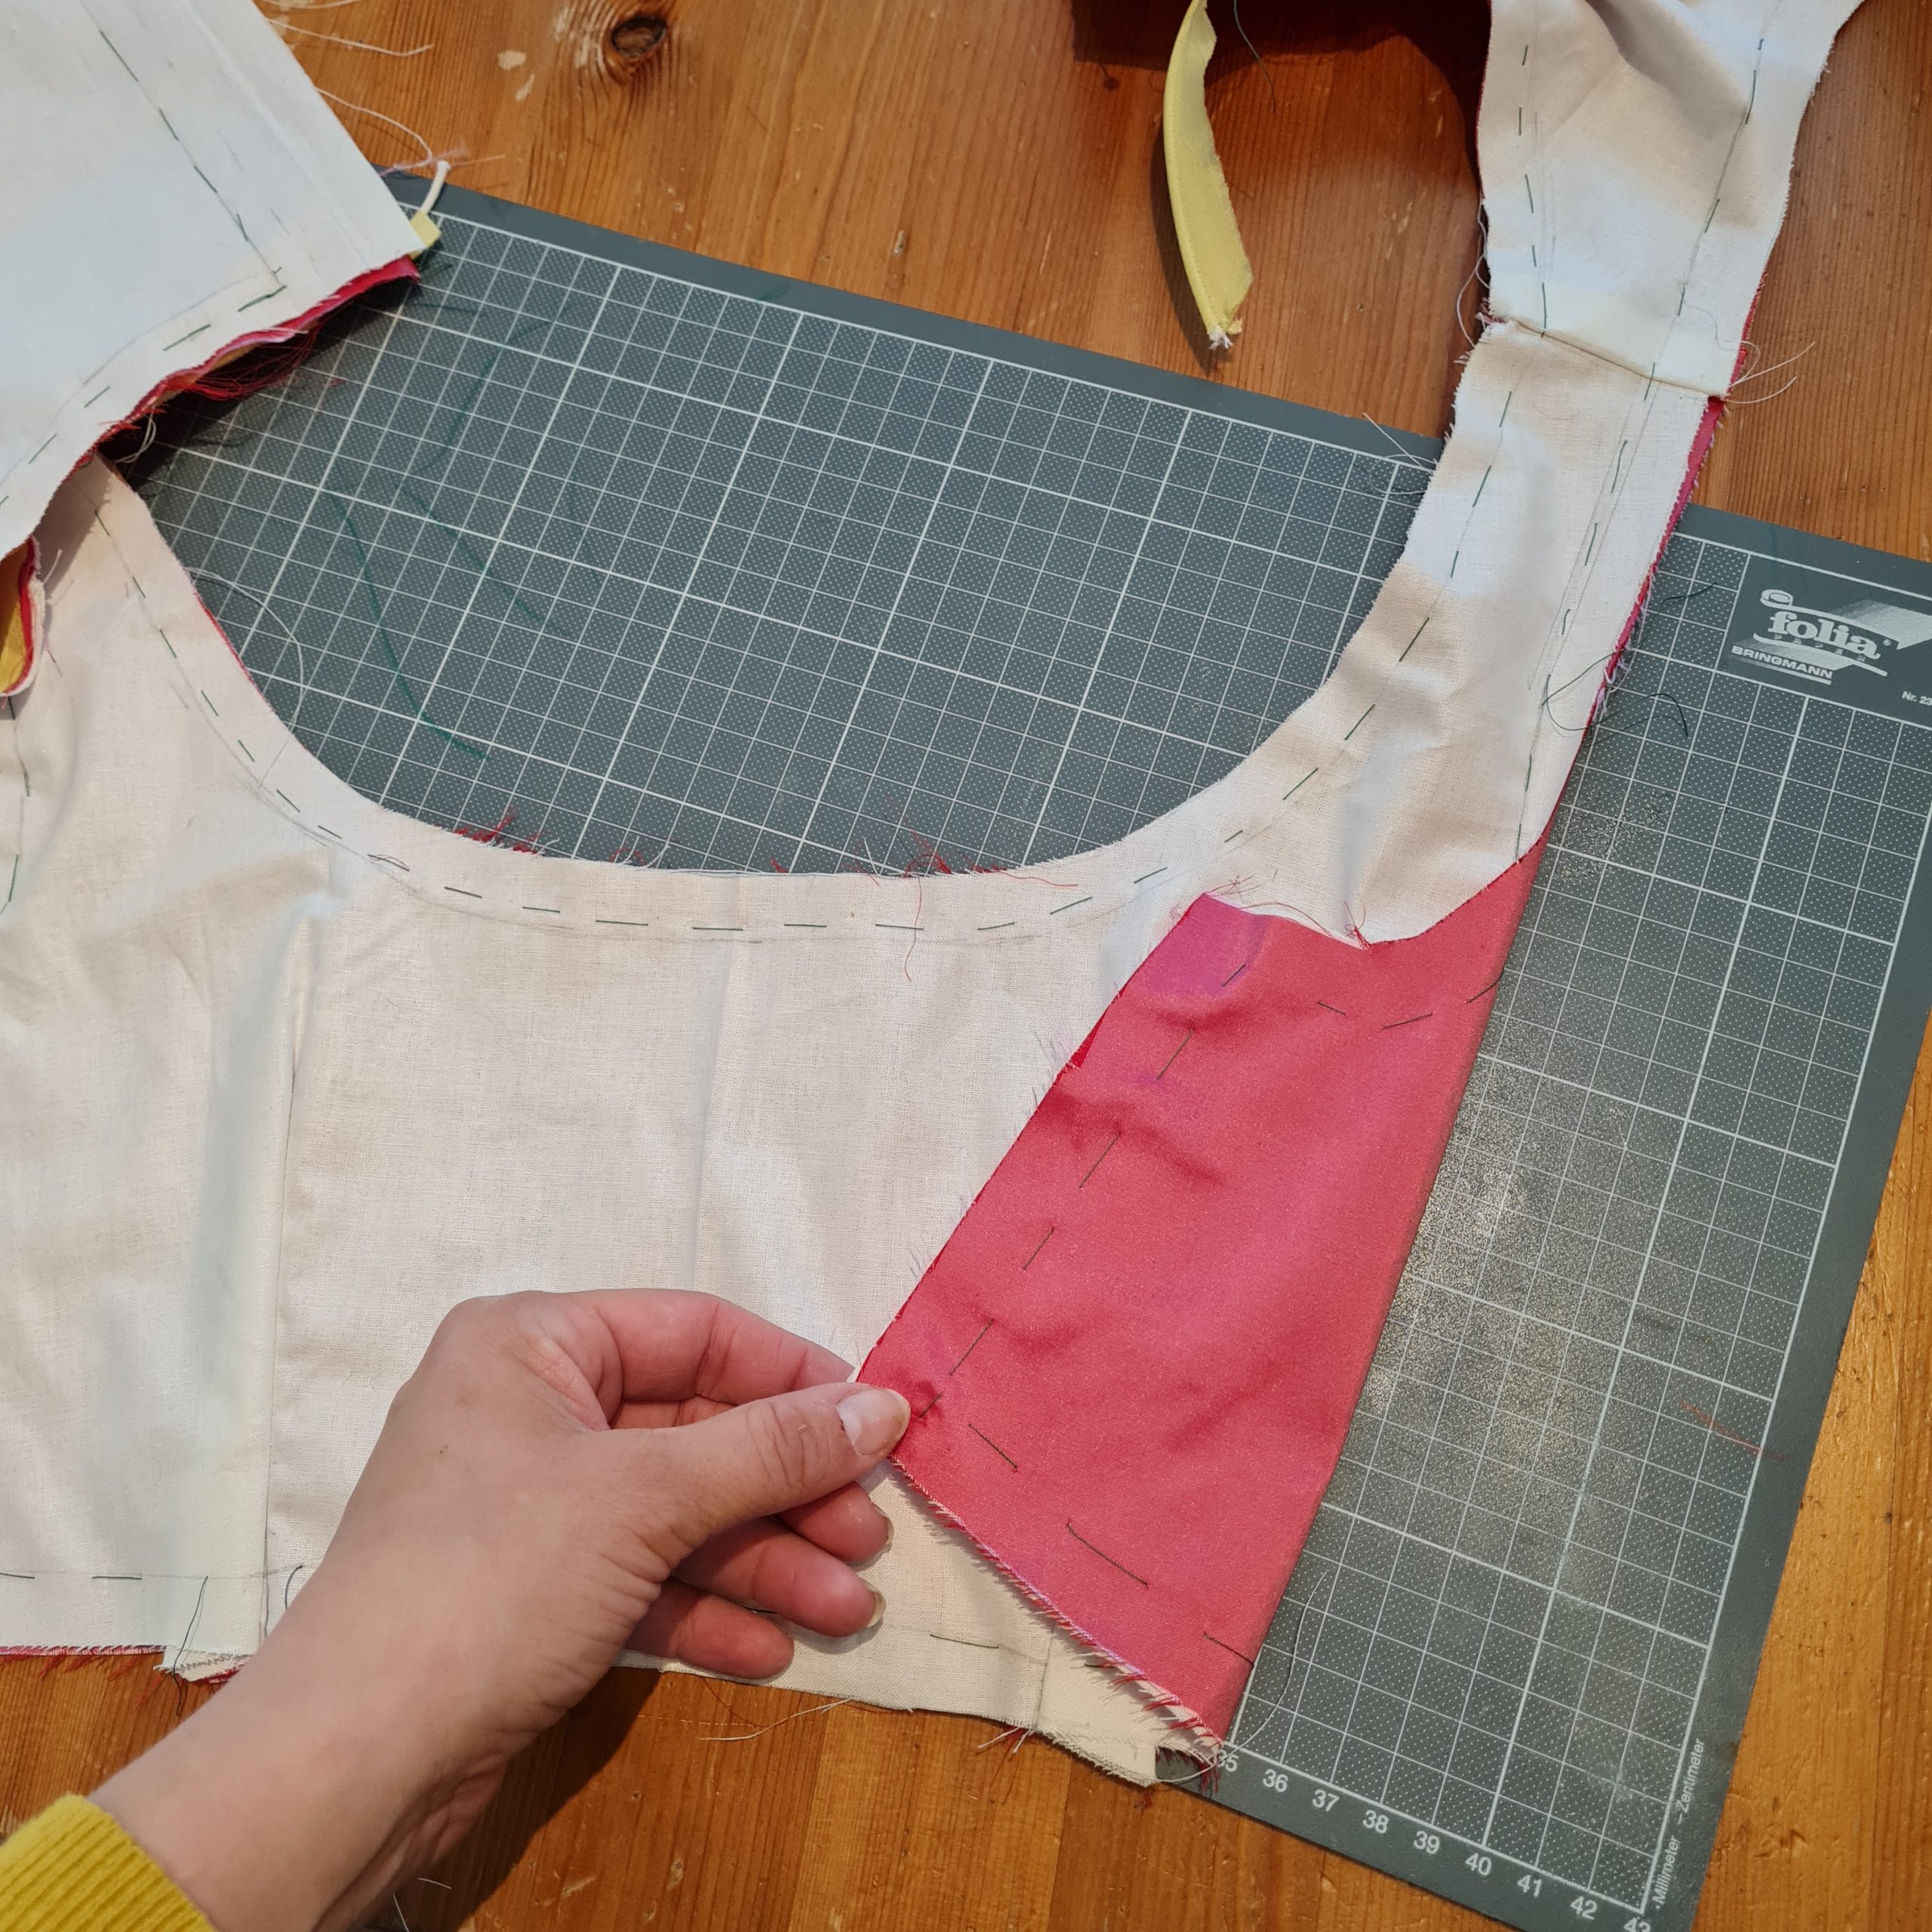
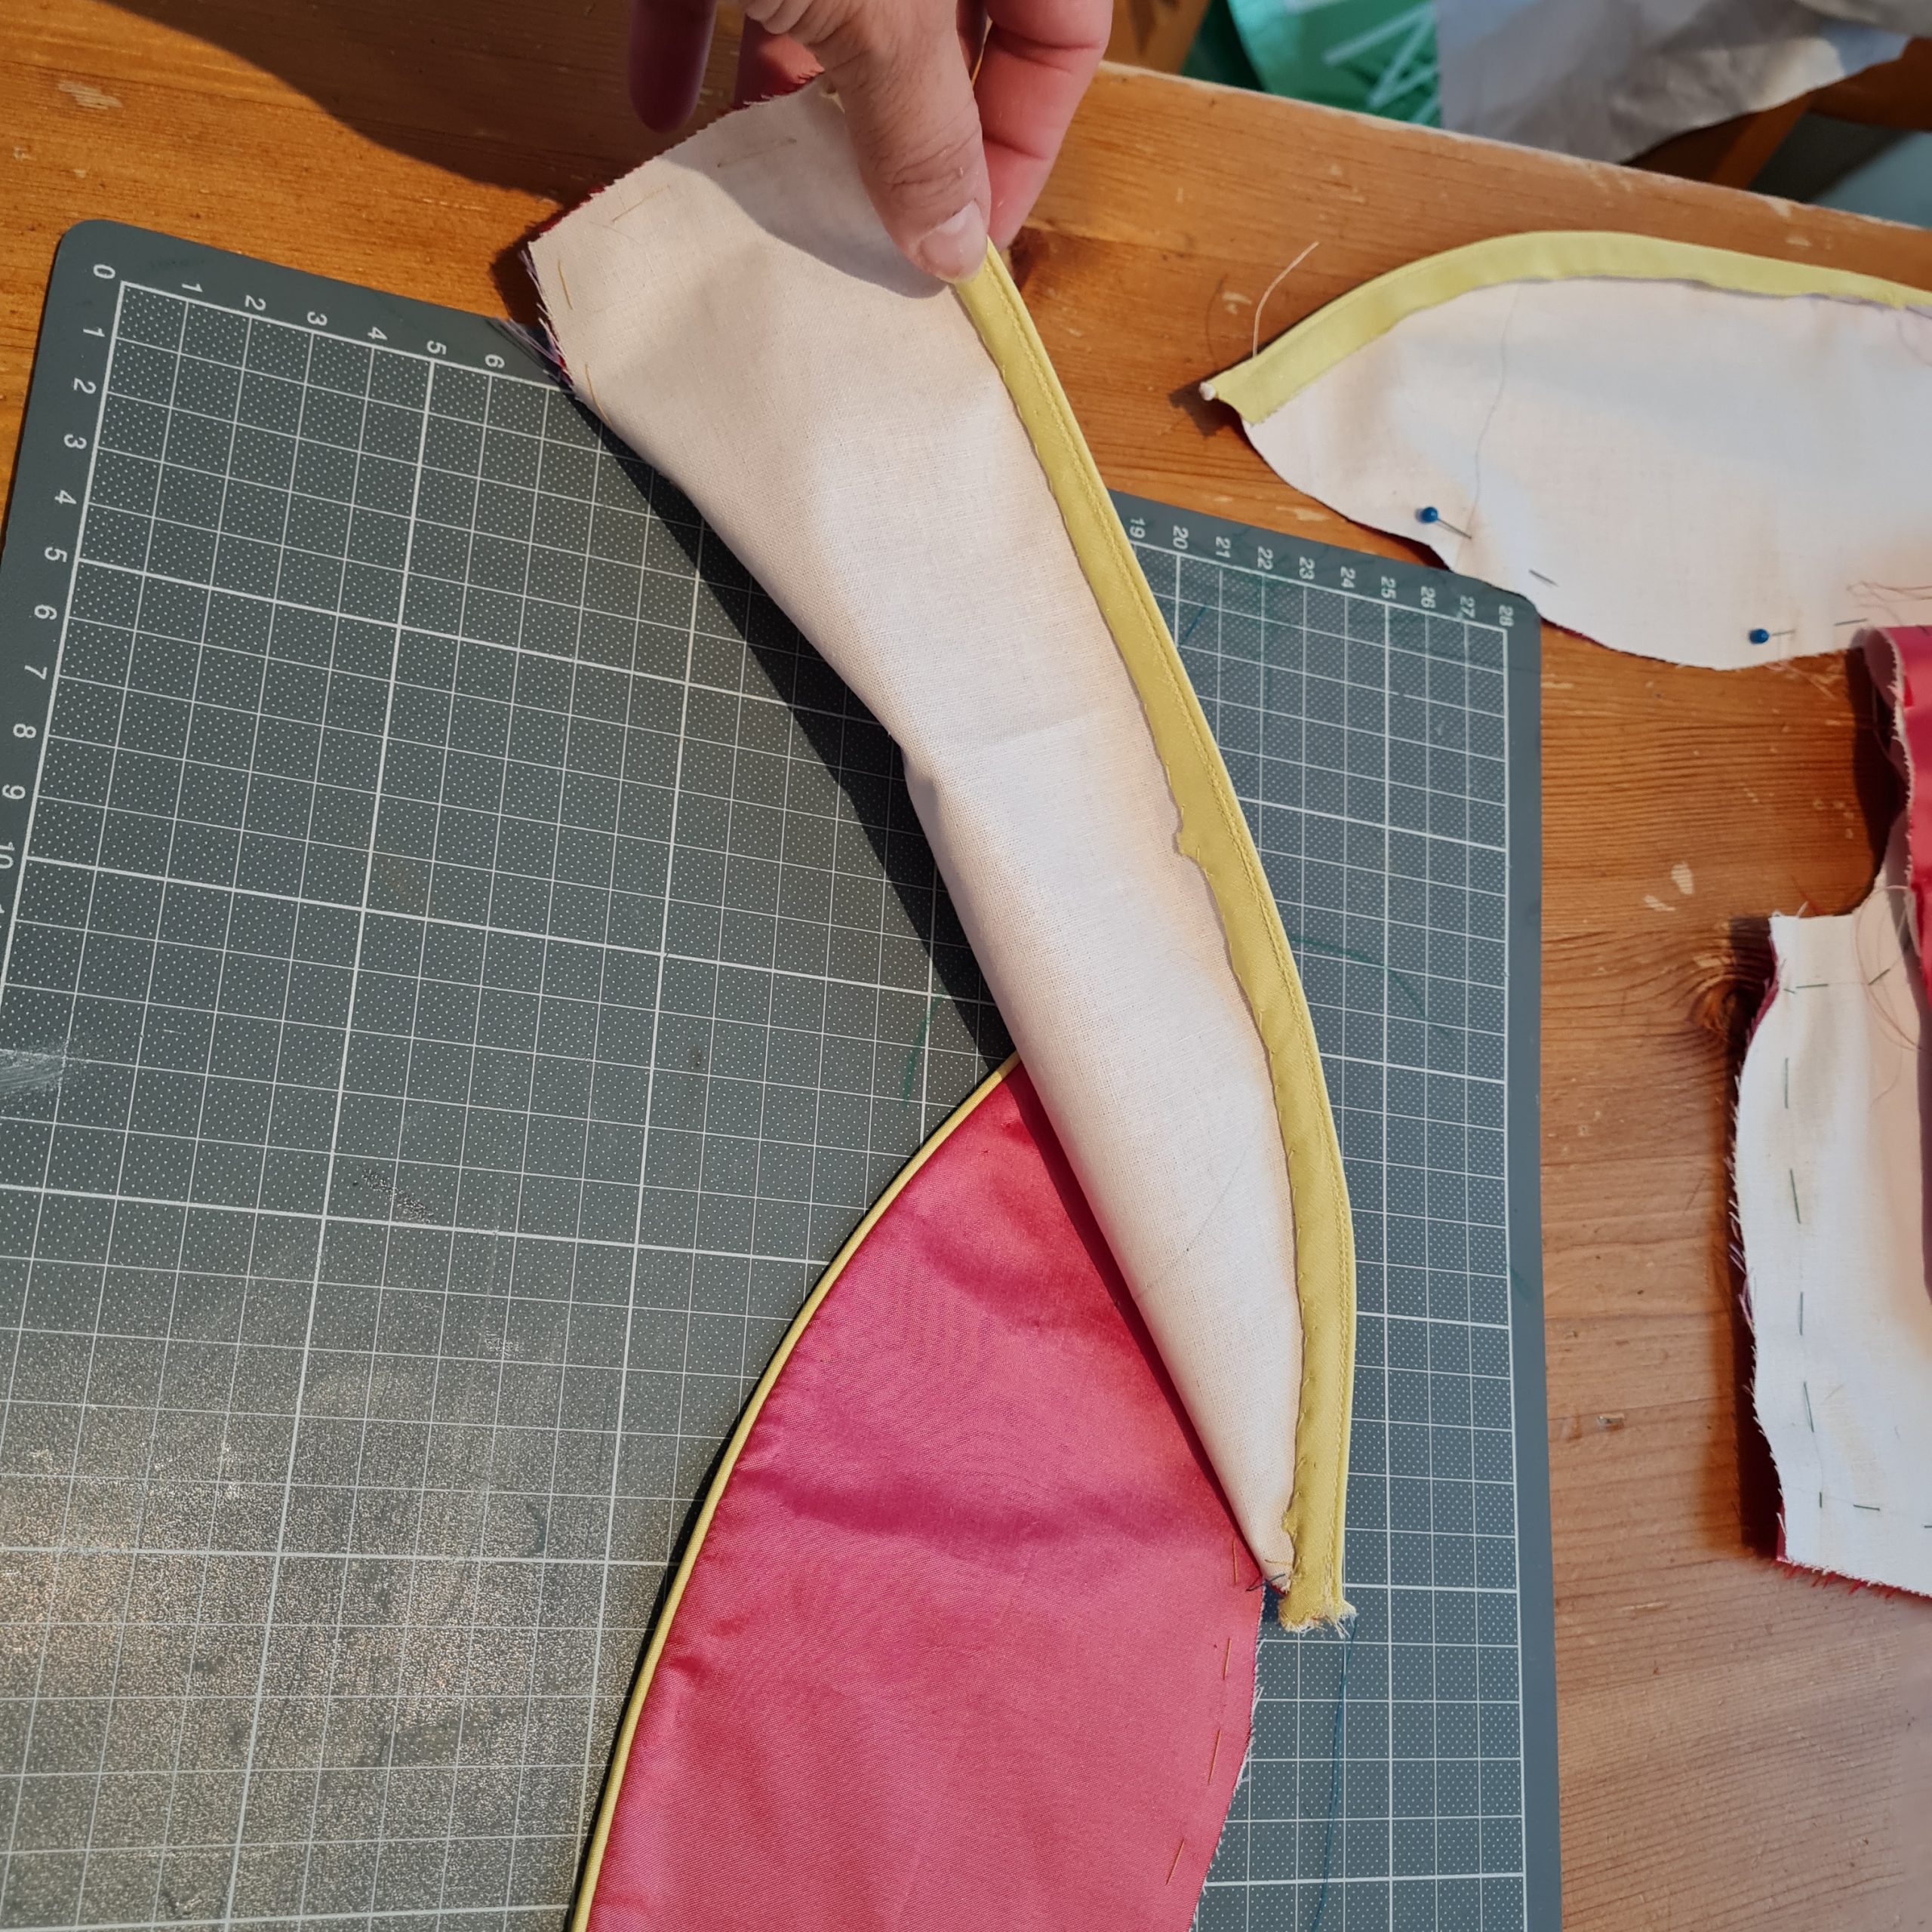
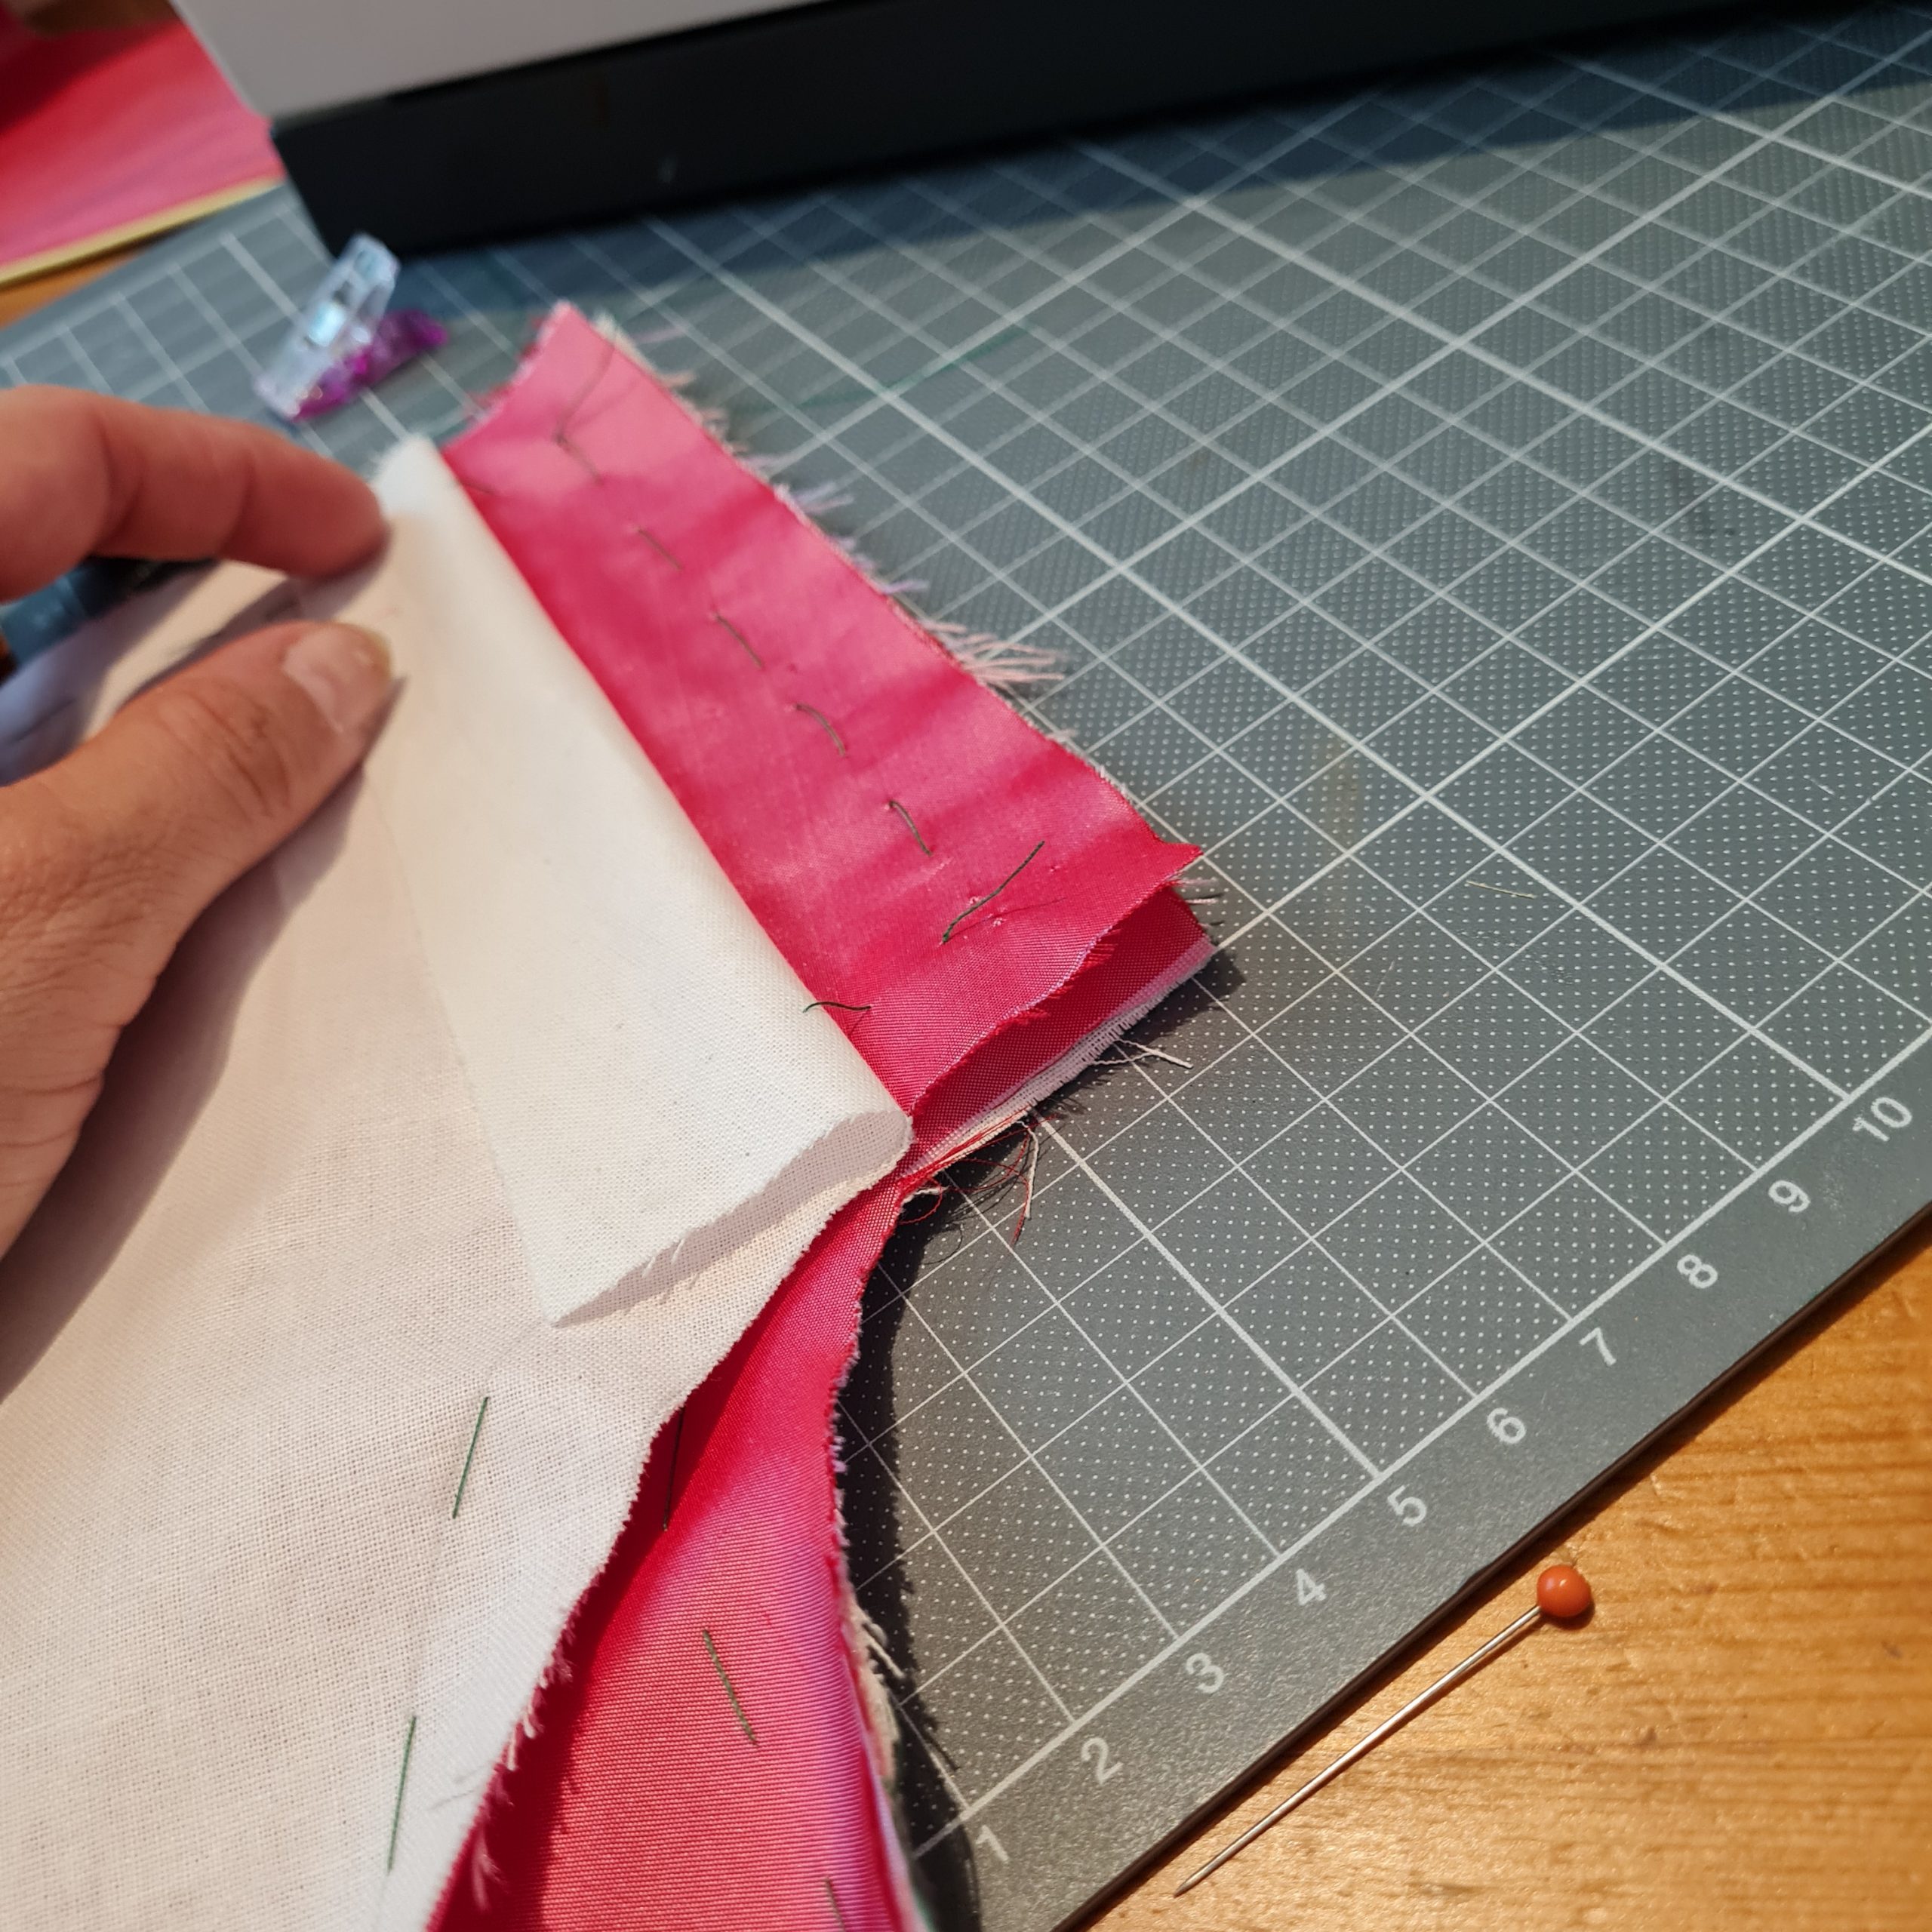
After all pattern pieces are cut, the hibiscus-colored silk is flatlined with a cotton fabric and basted together within the seam allowances.


Darts and shoulder seams are sewn with a backstitch – I sewed the darts and seams on the fashion fabric and lining separately, before I flatlined the fashion fabric with the lining, wrong sides together.
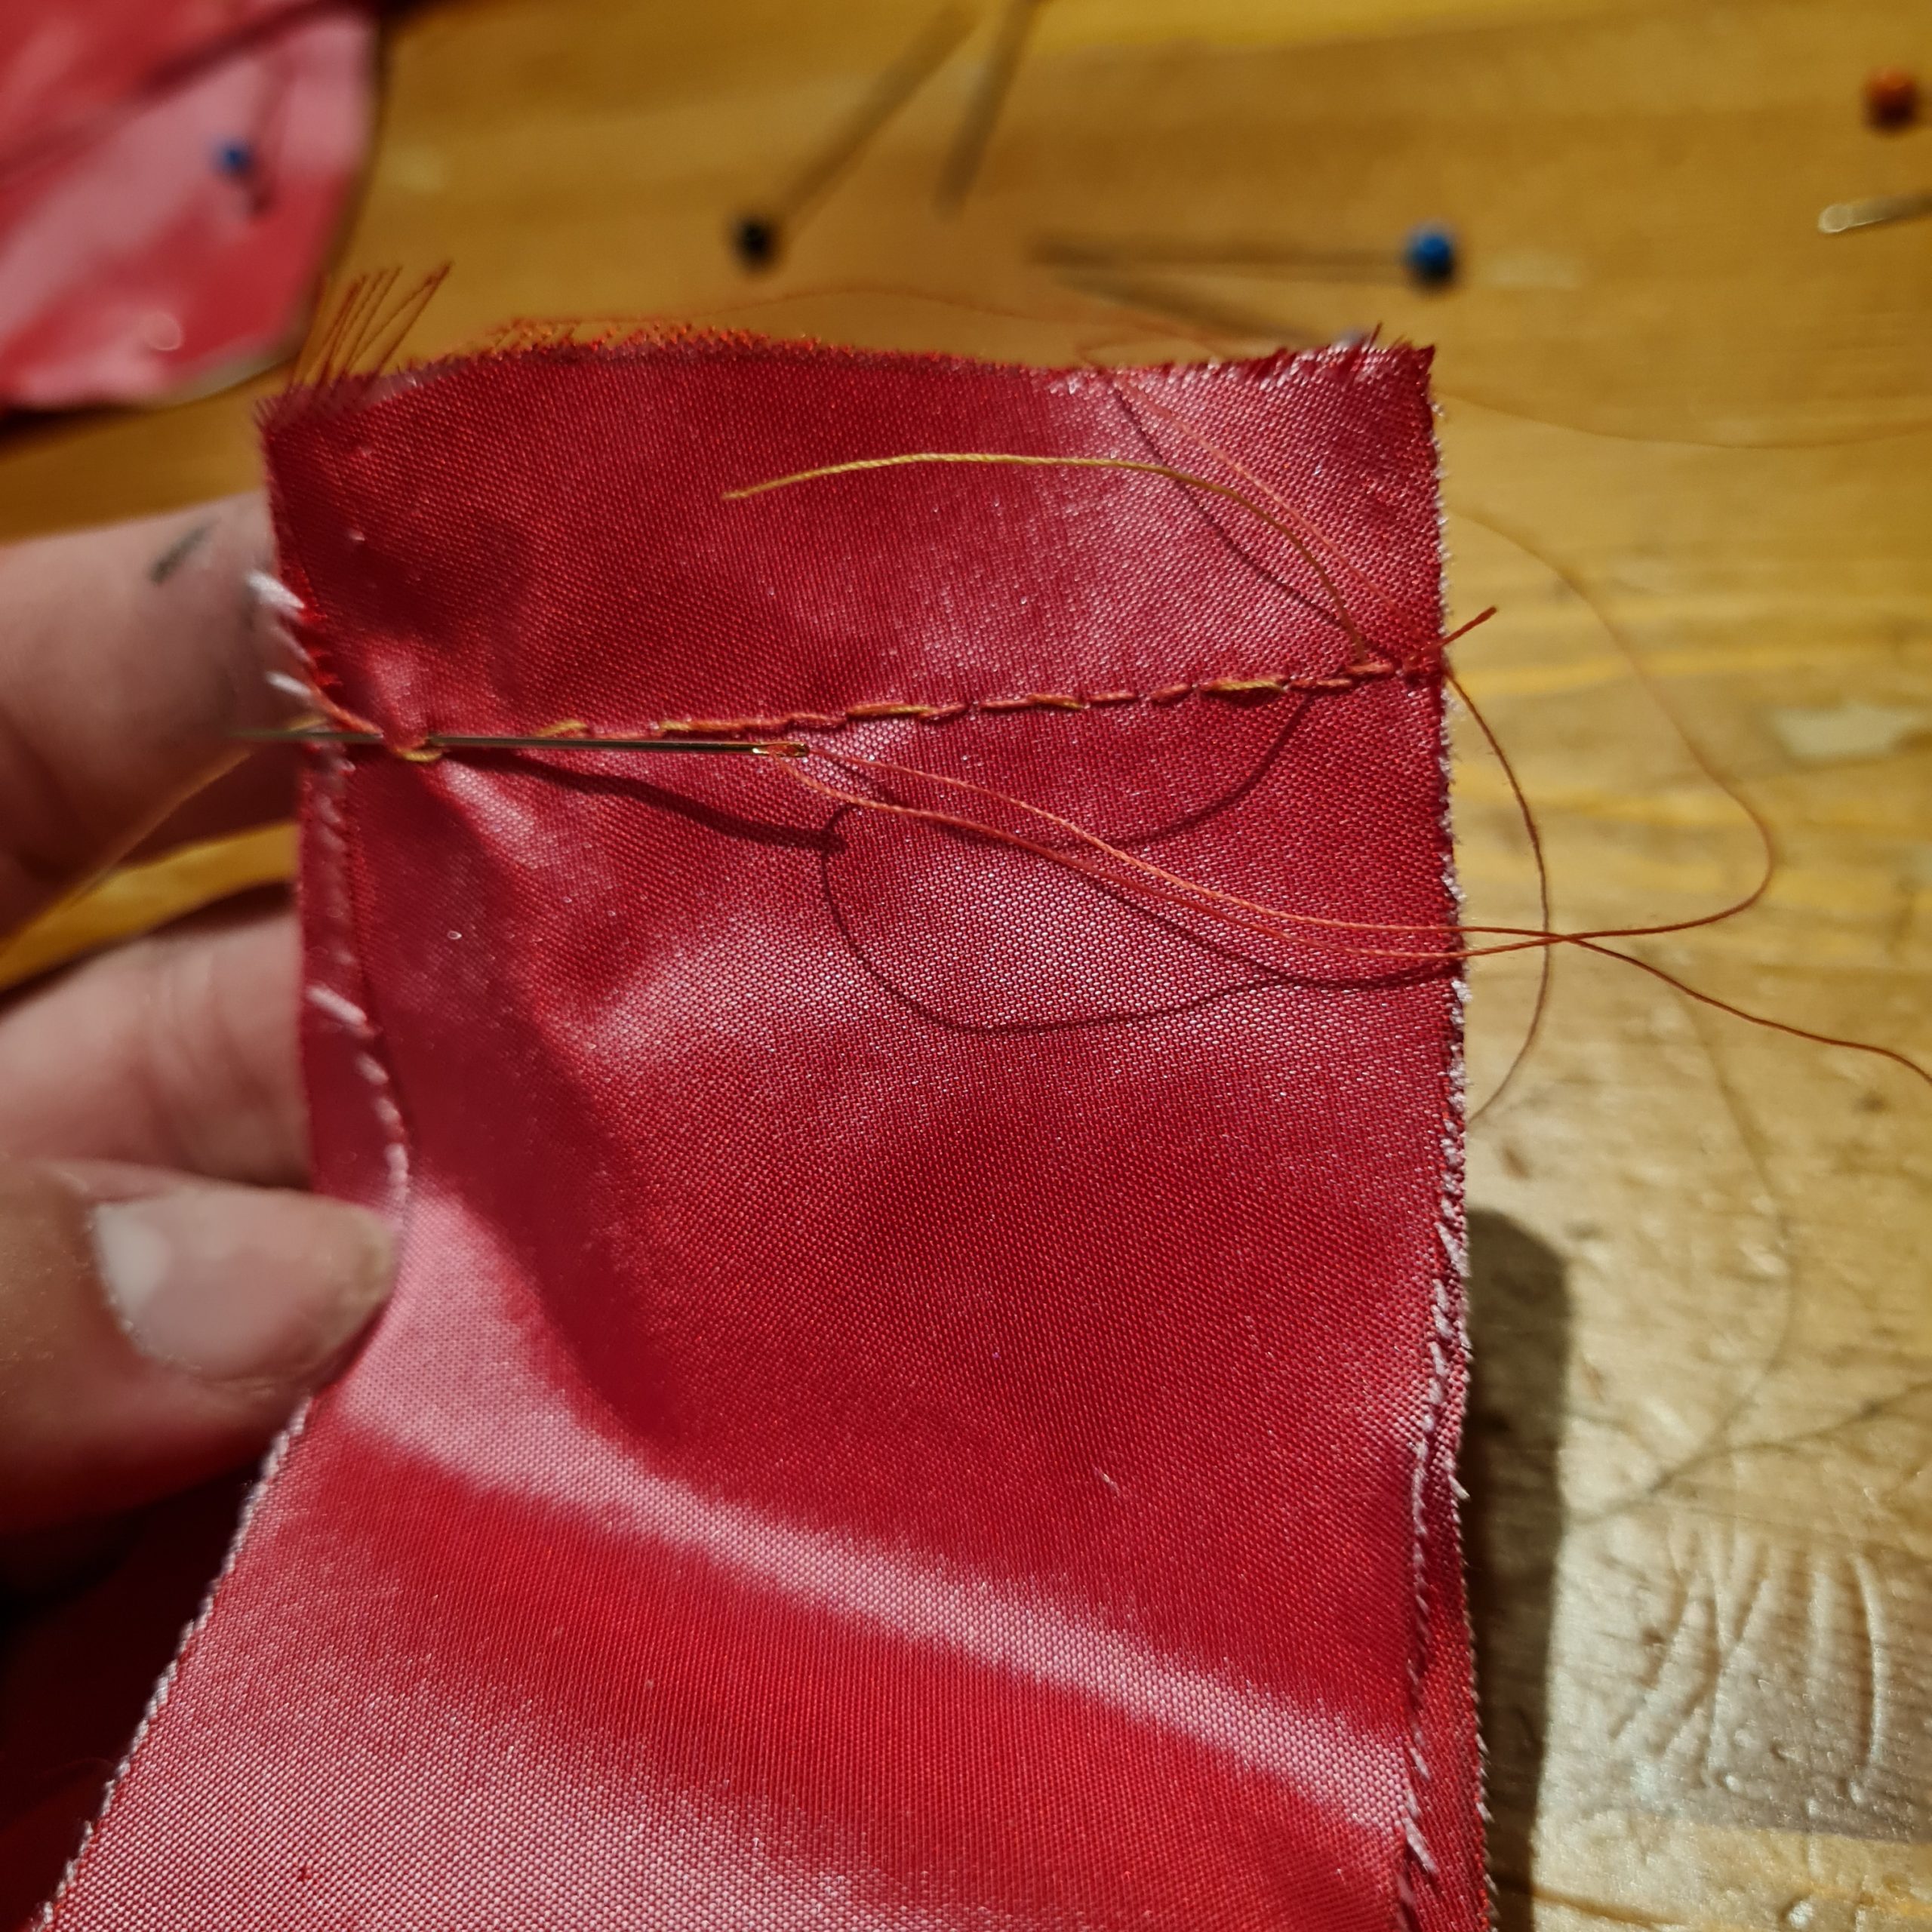
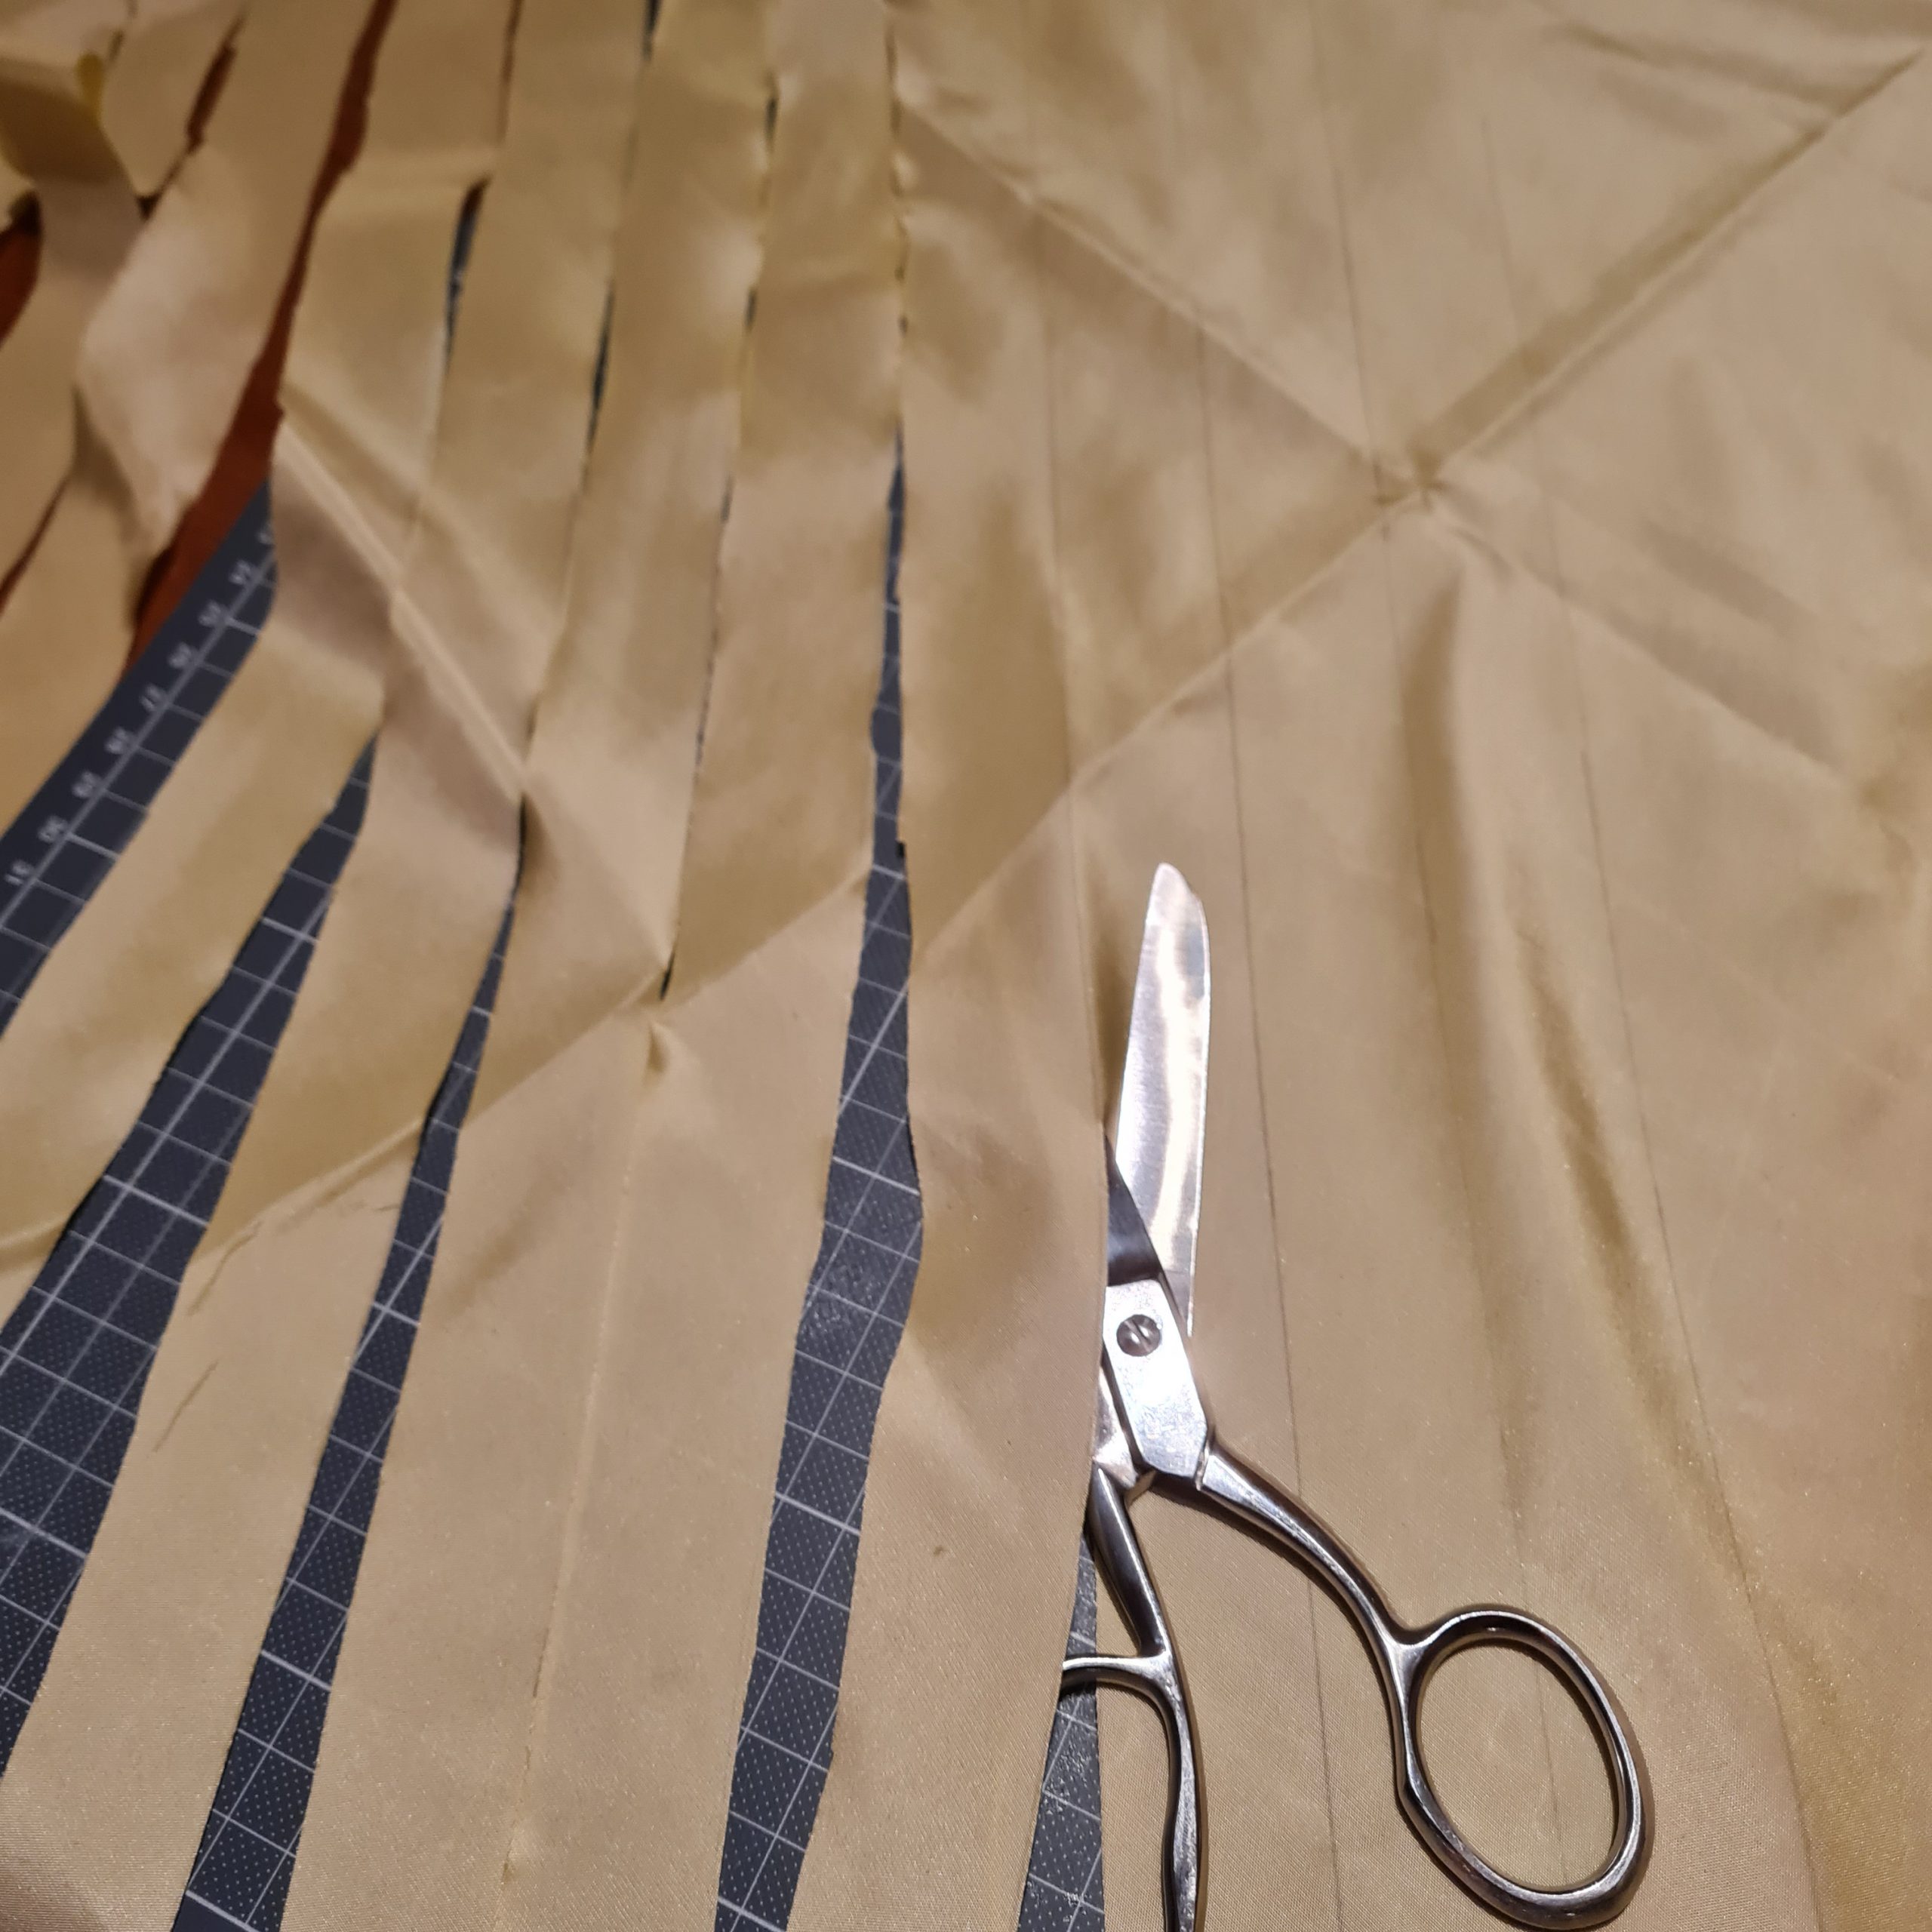
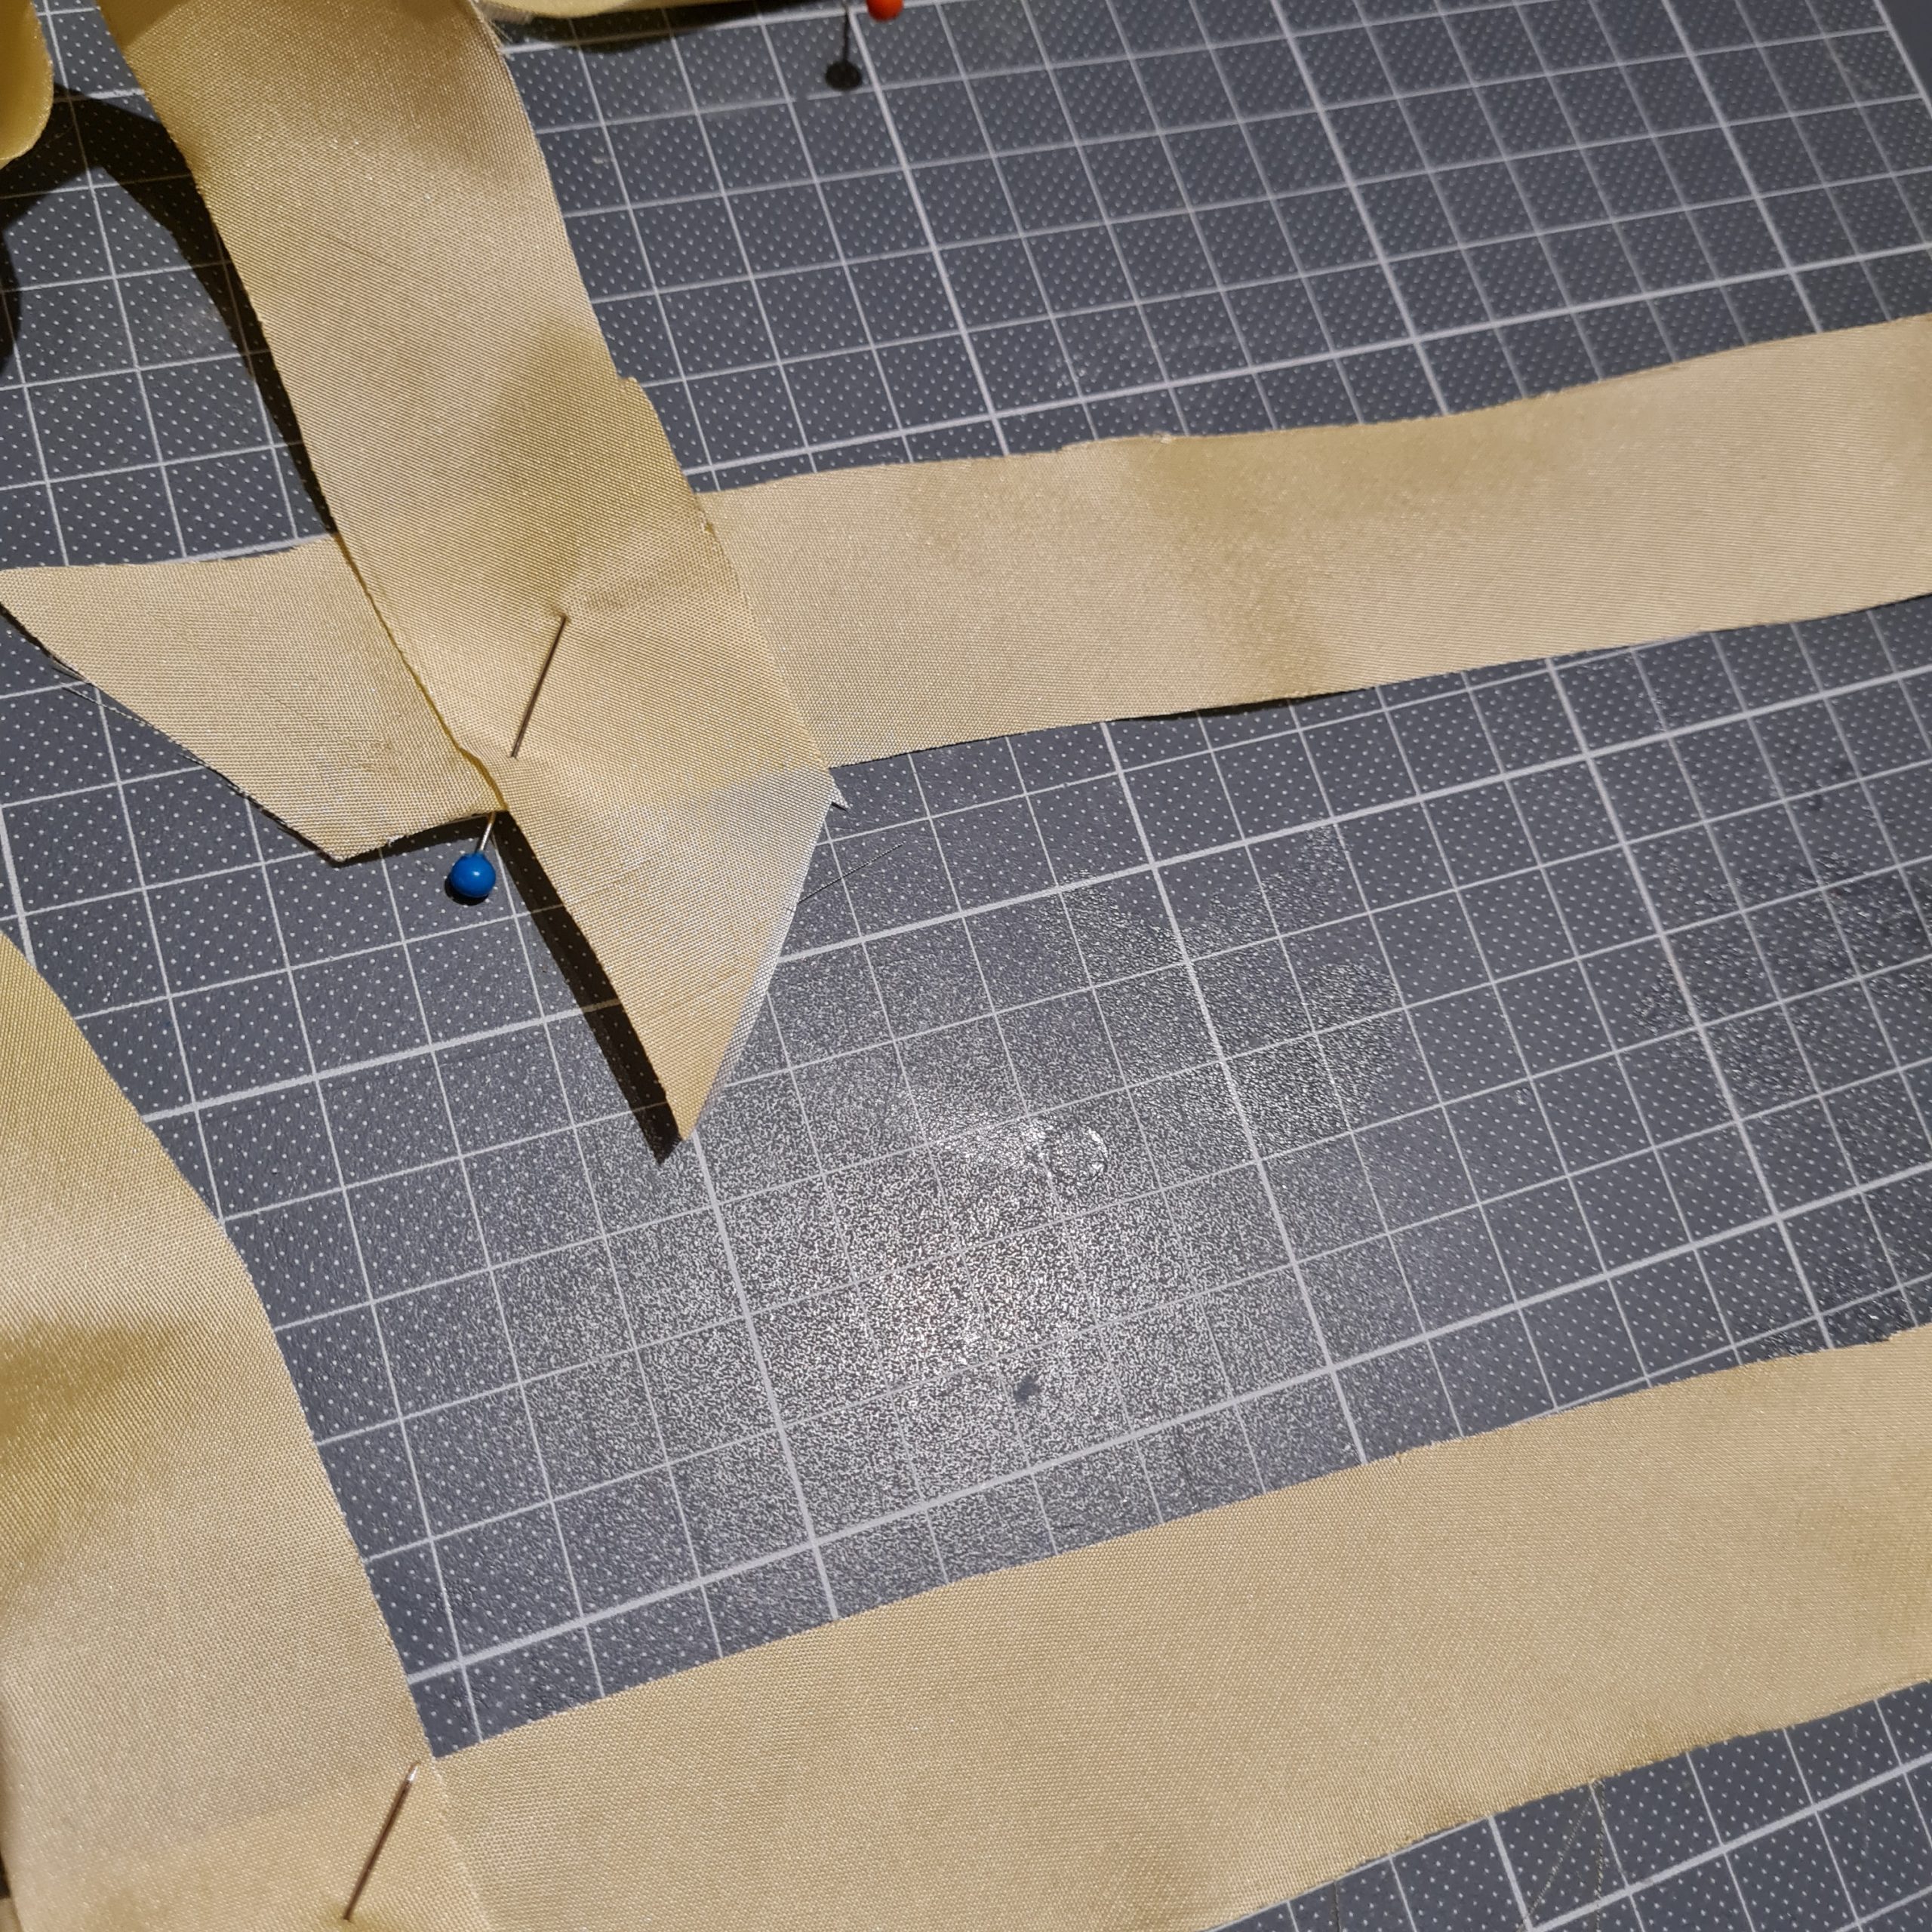
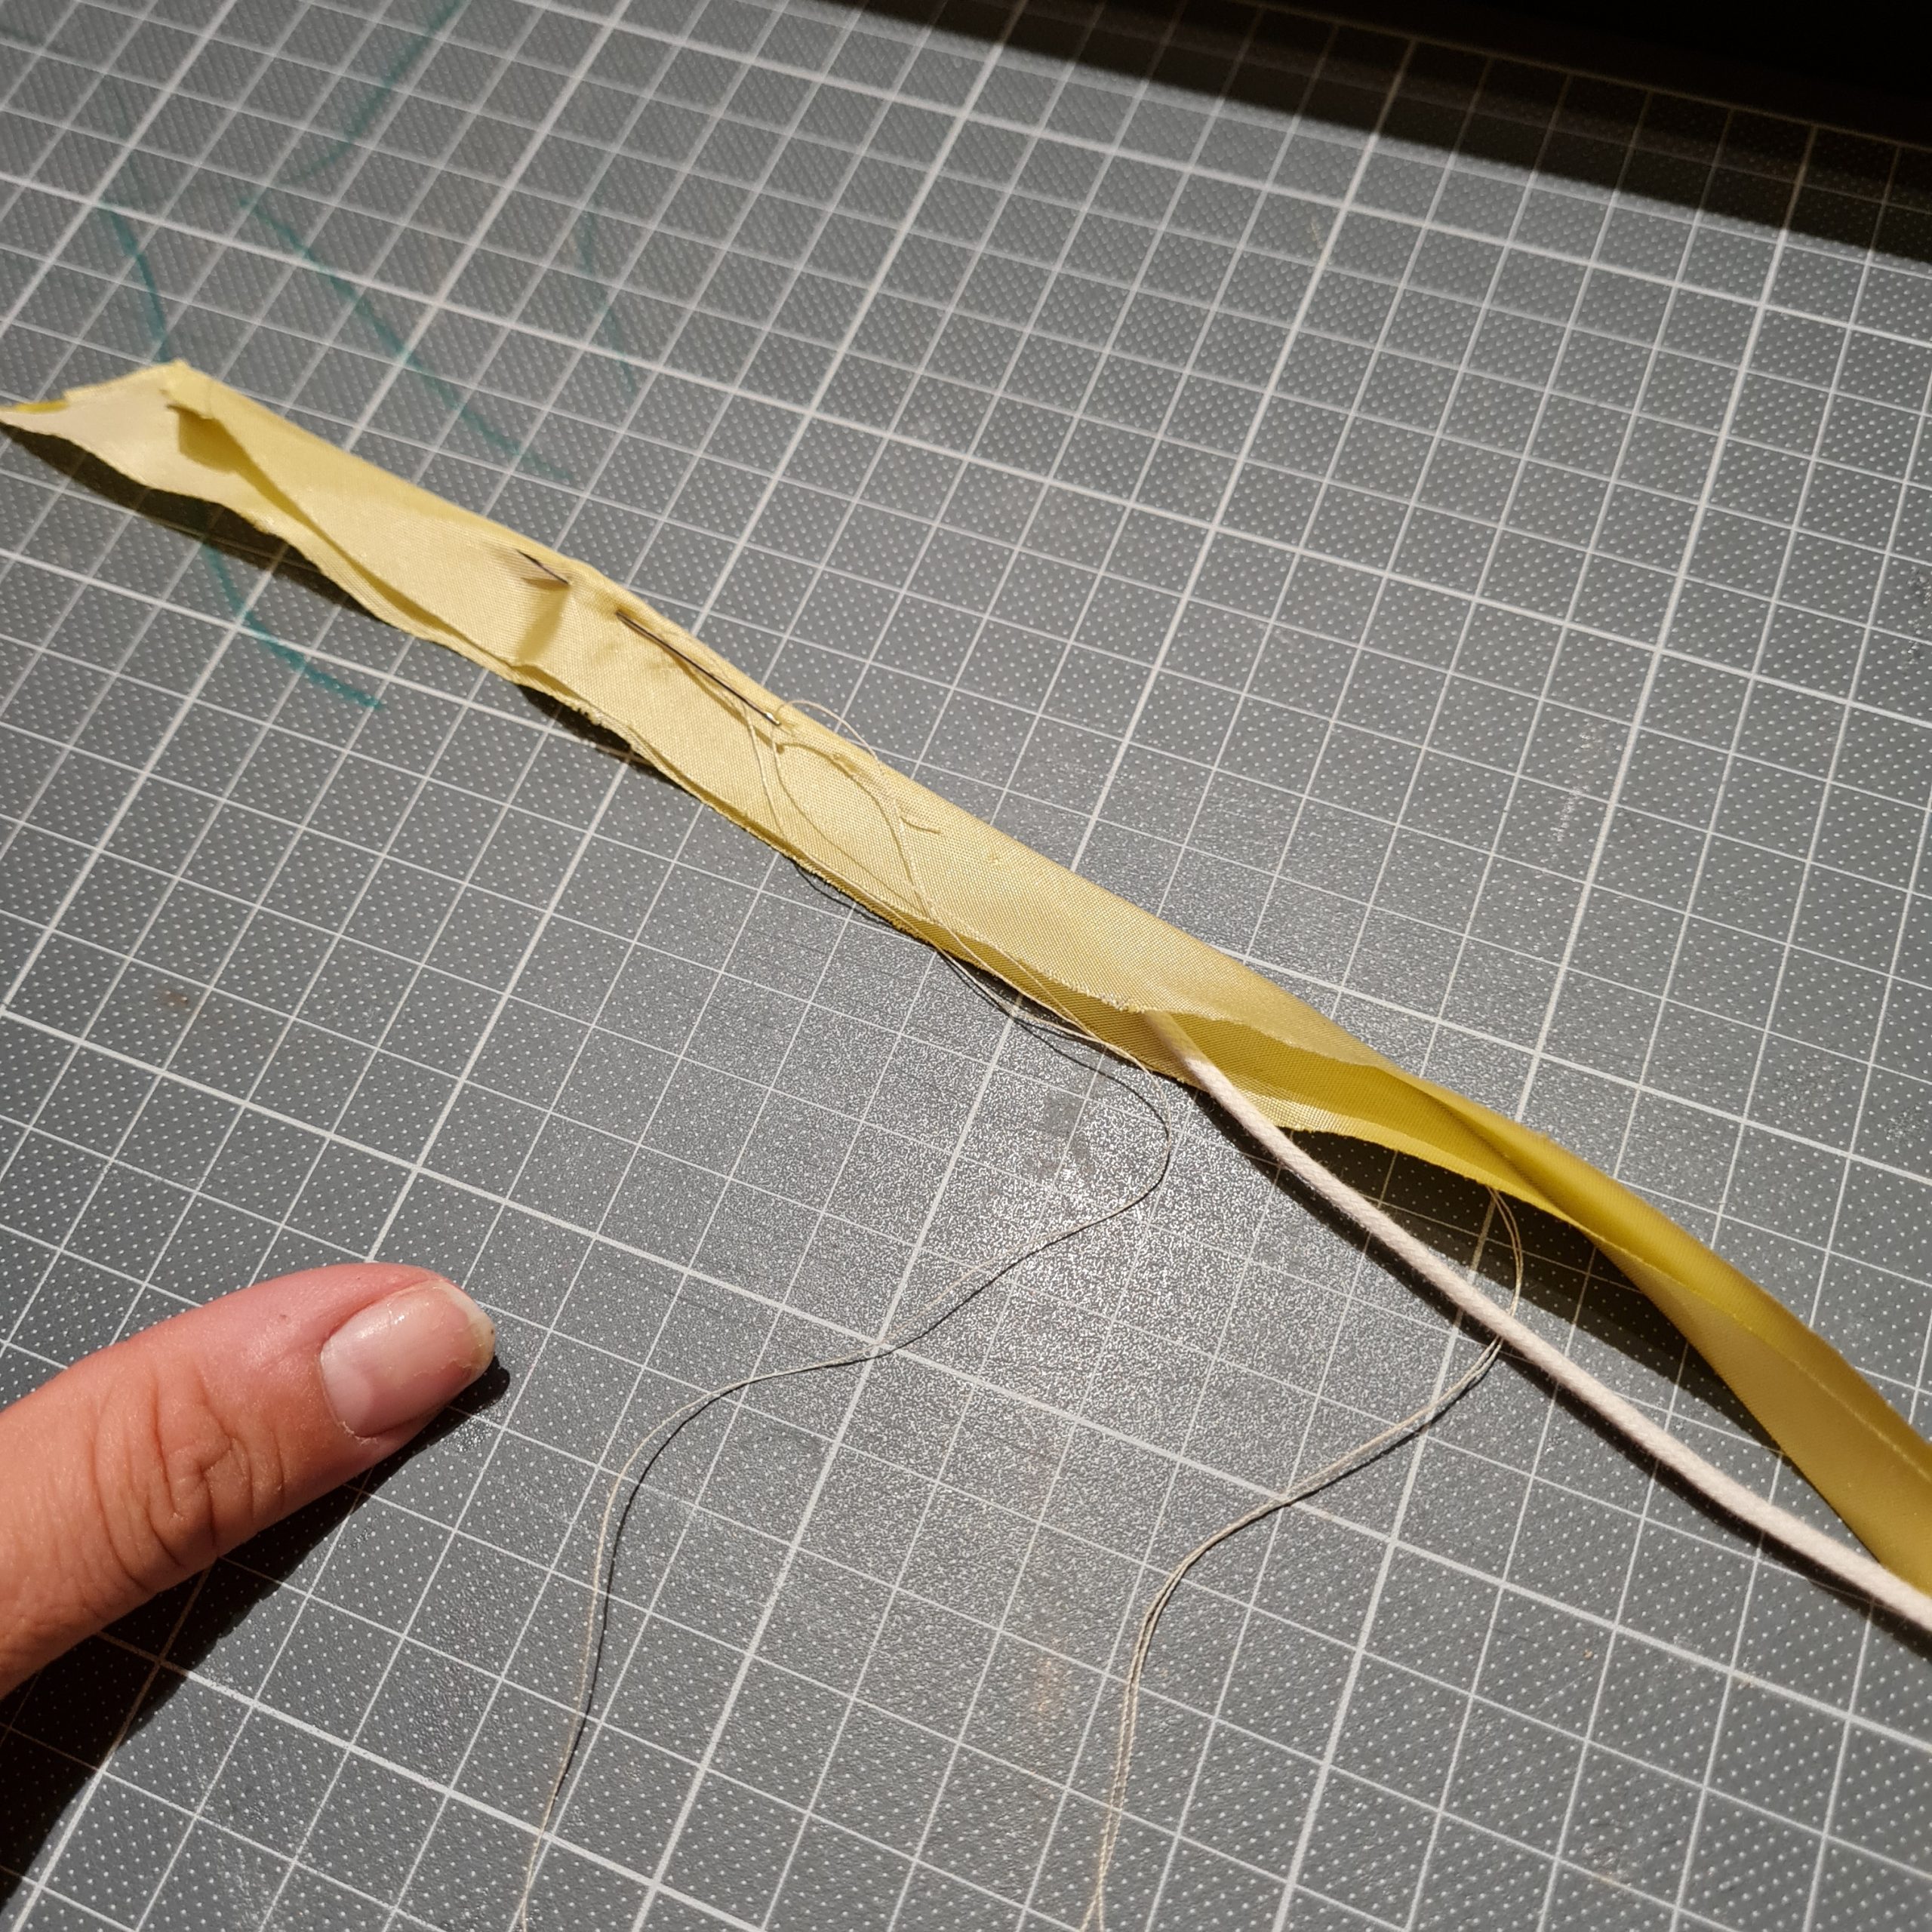
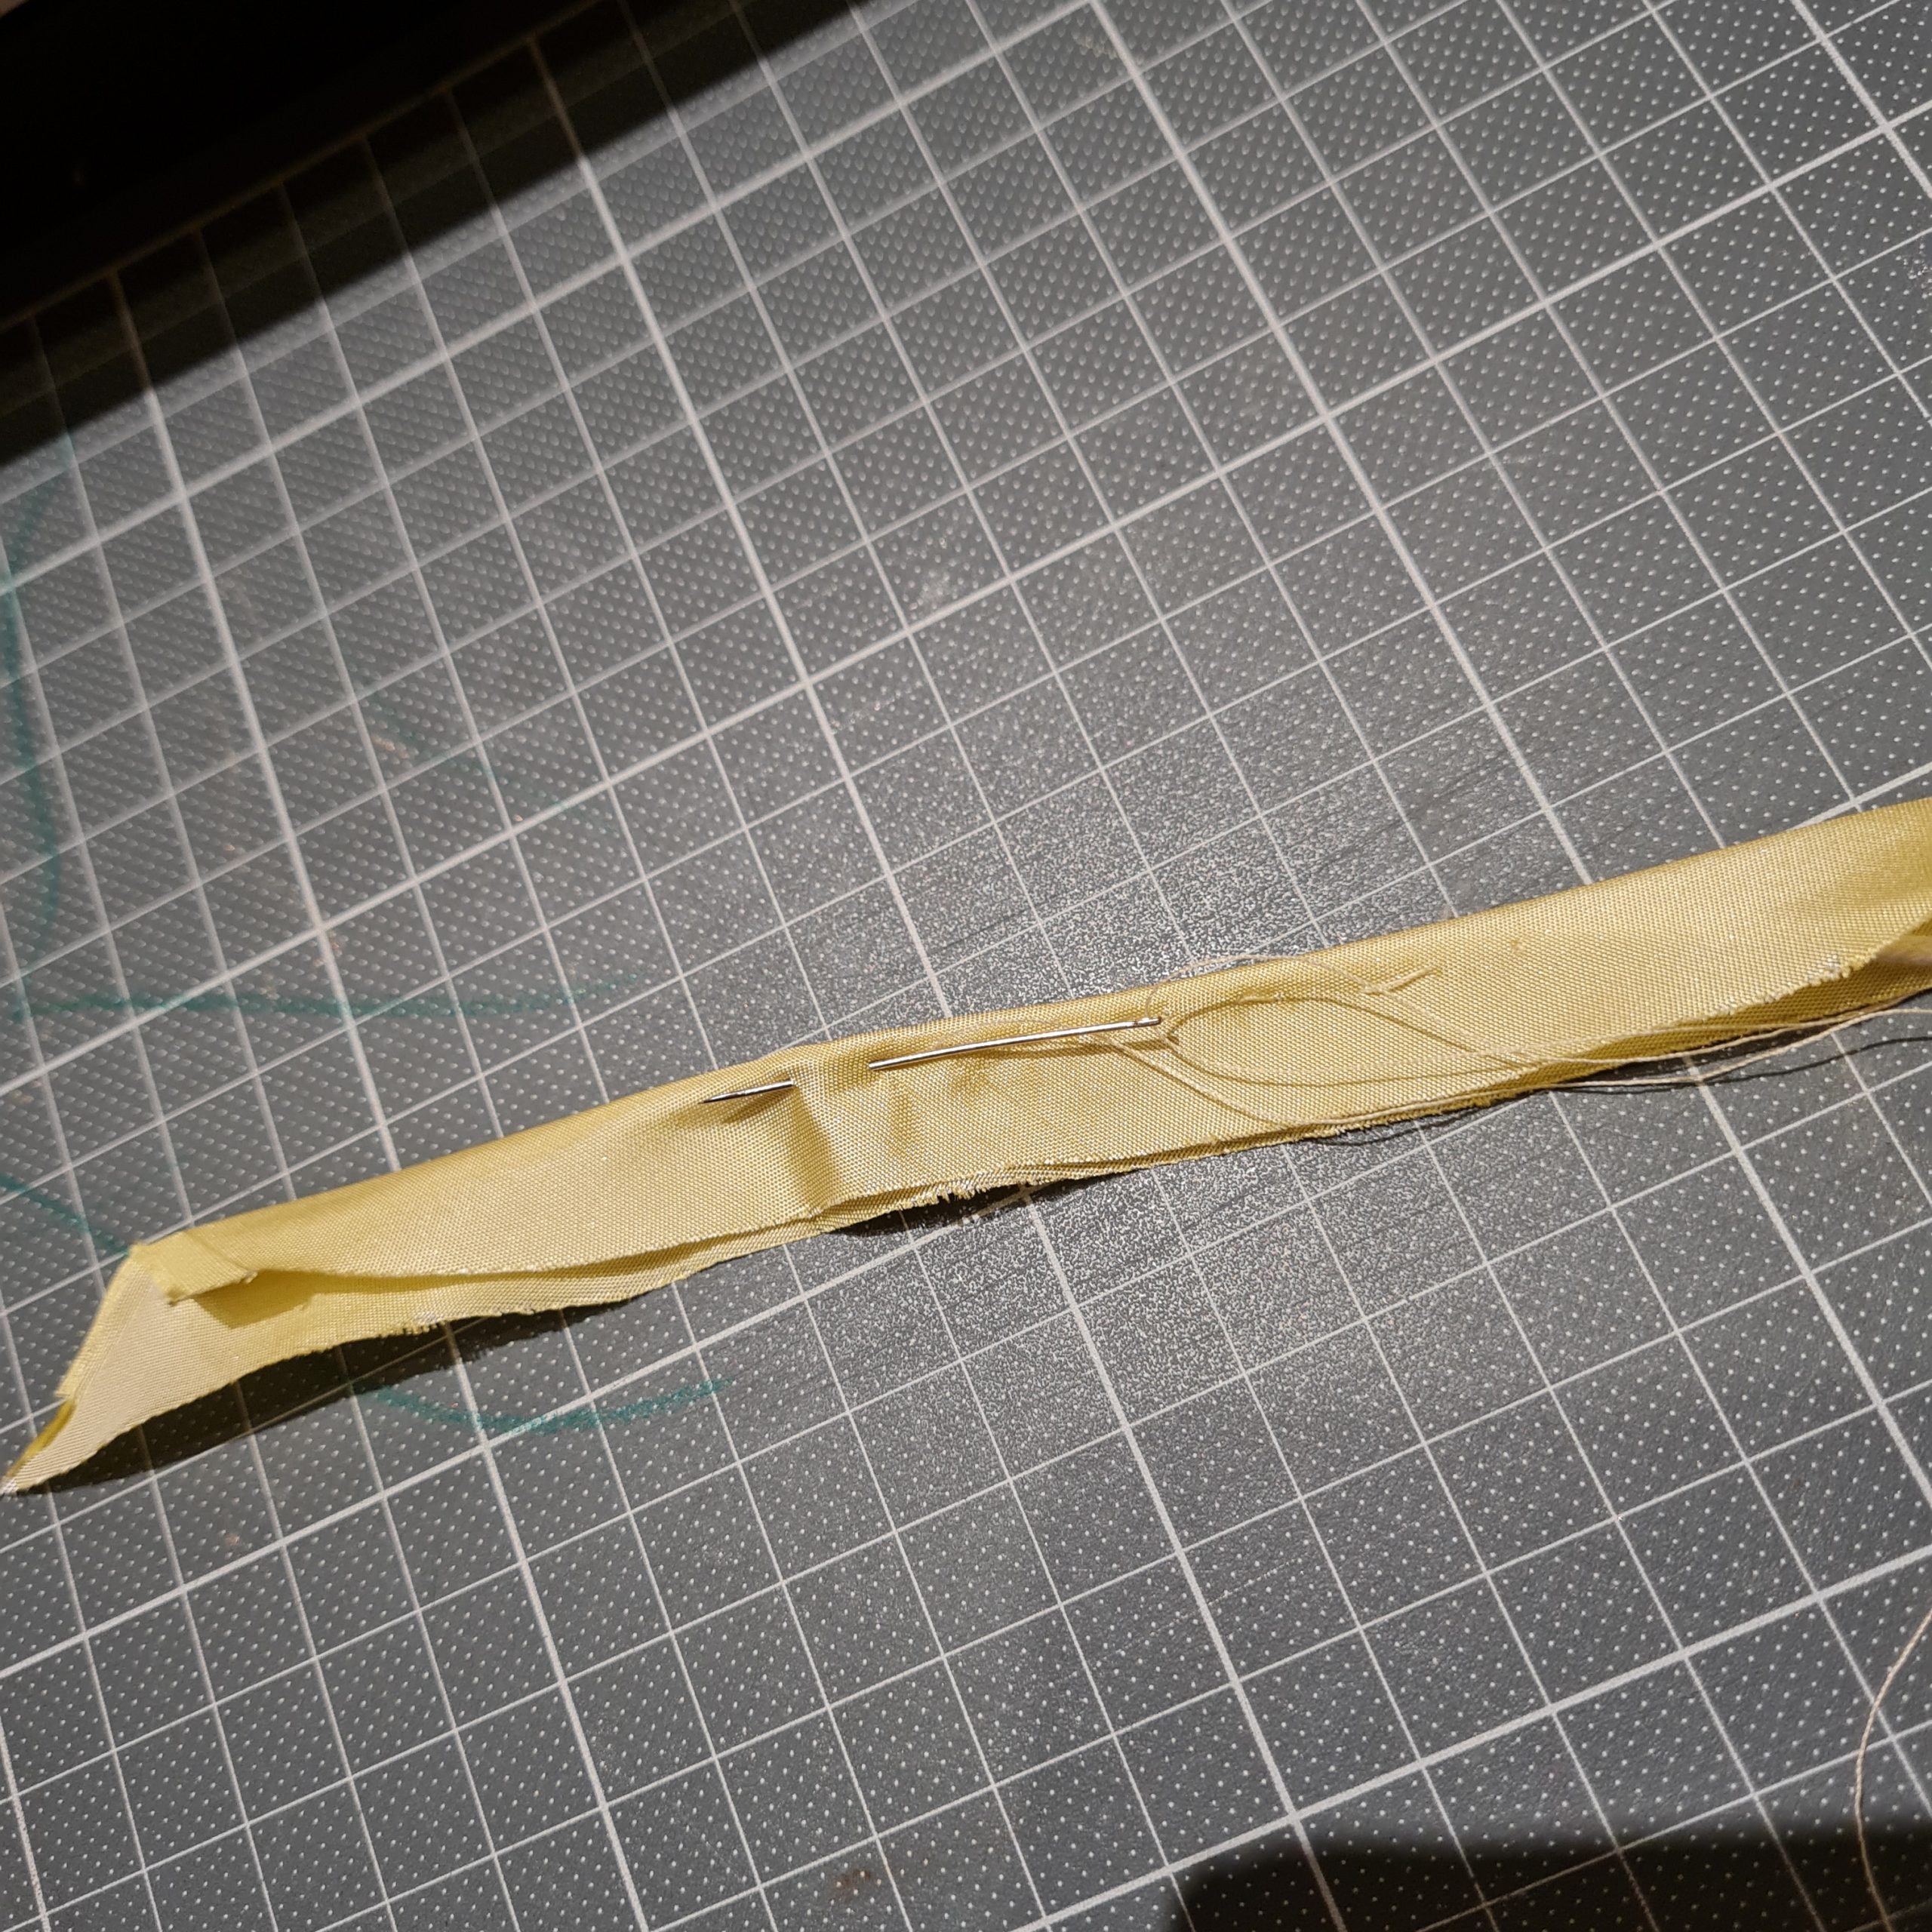
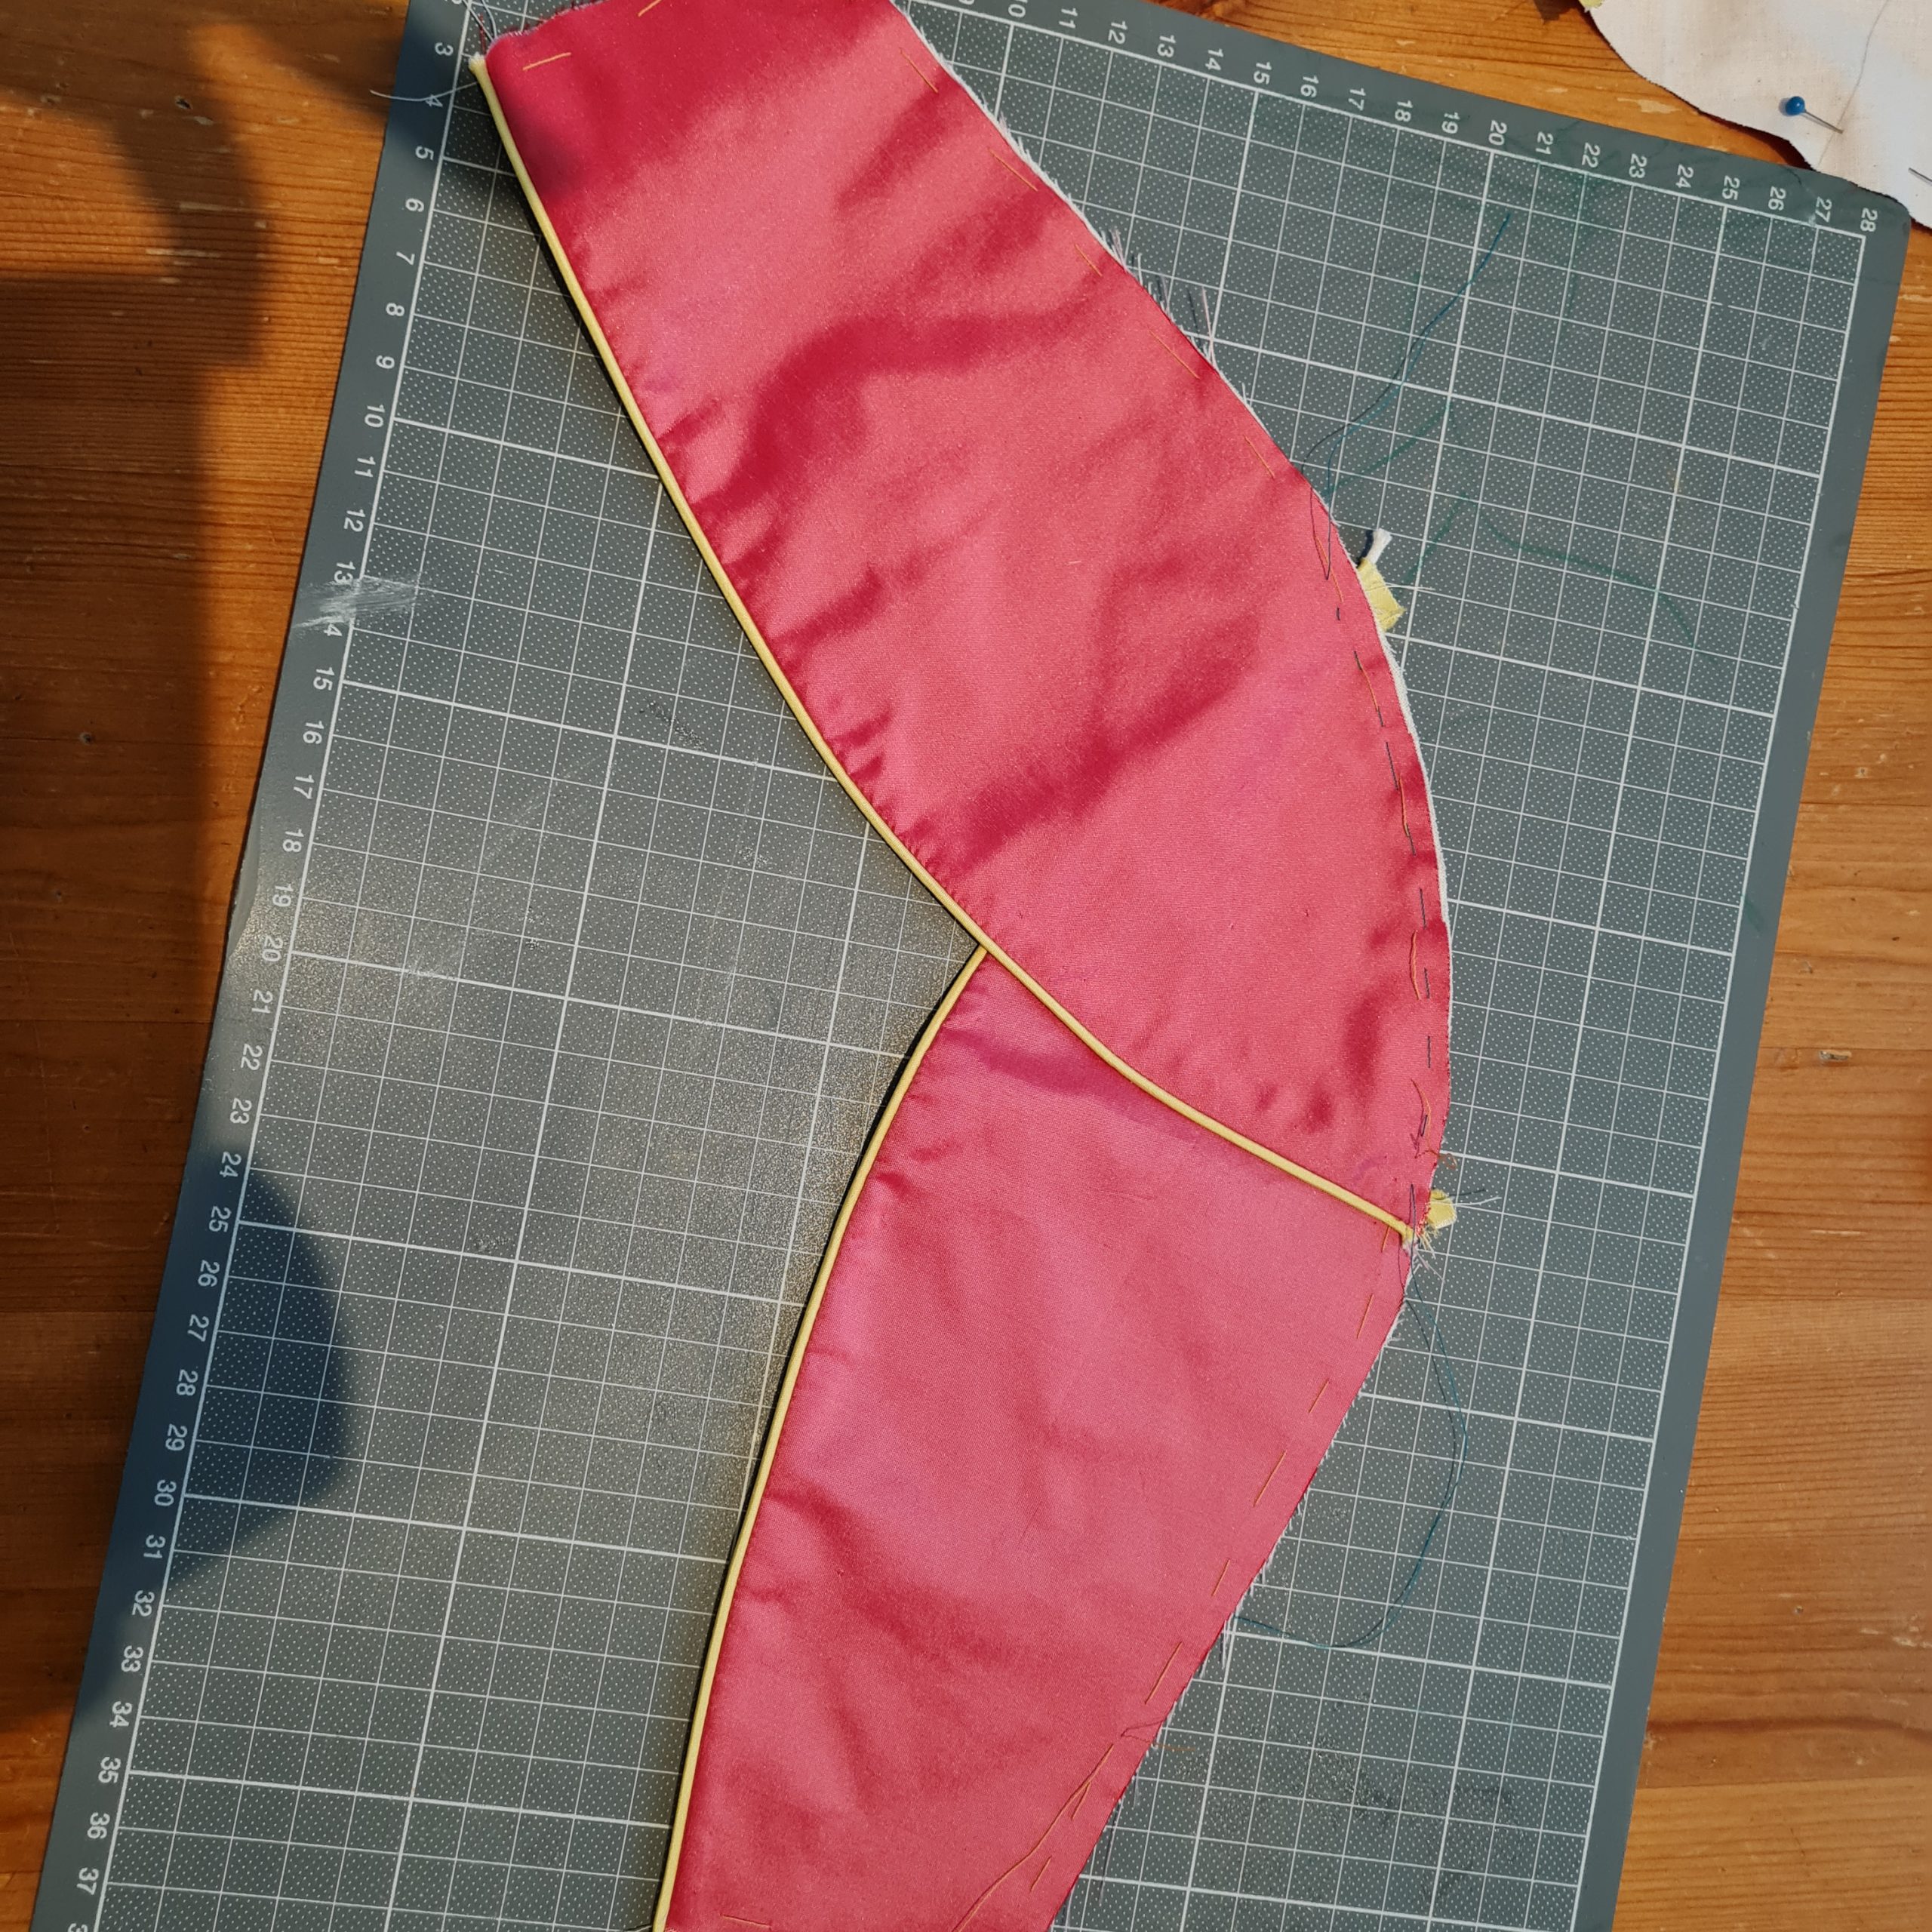
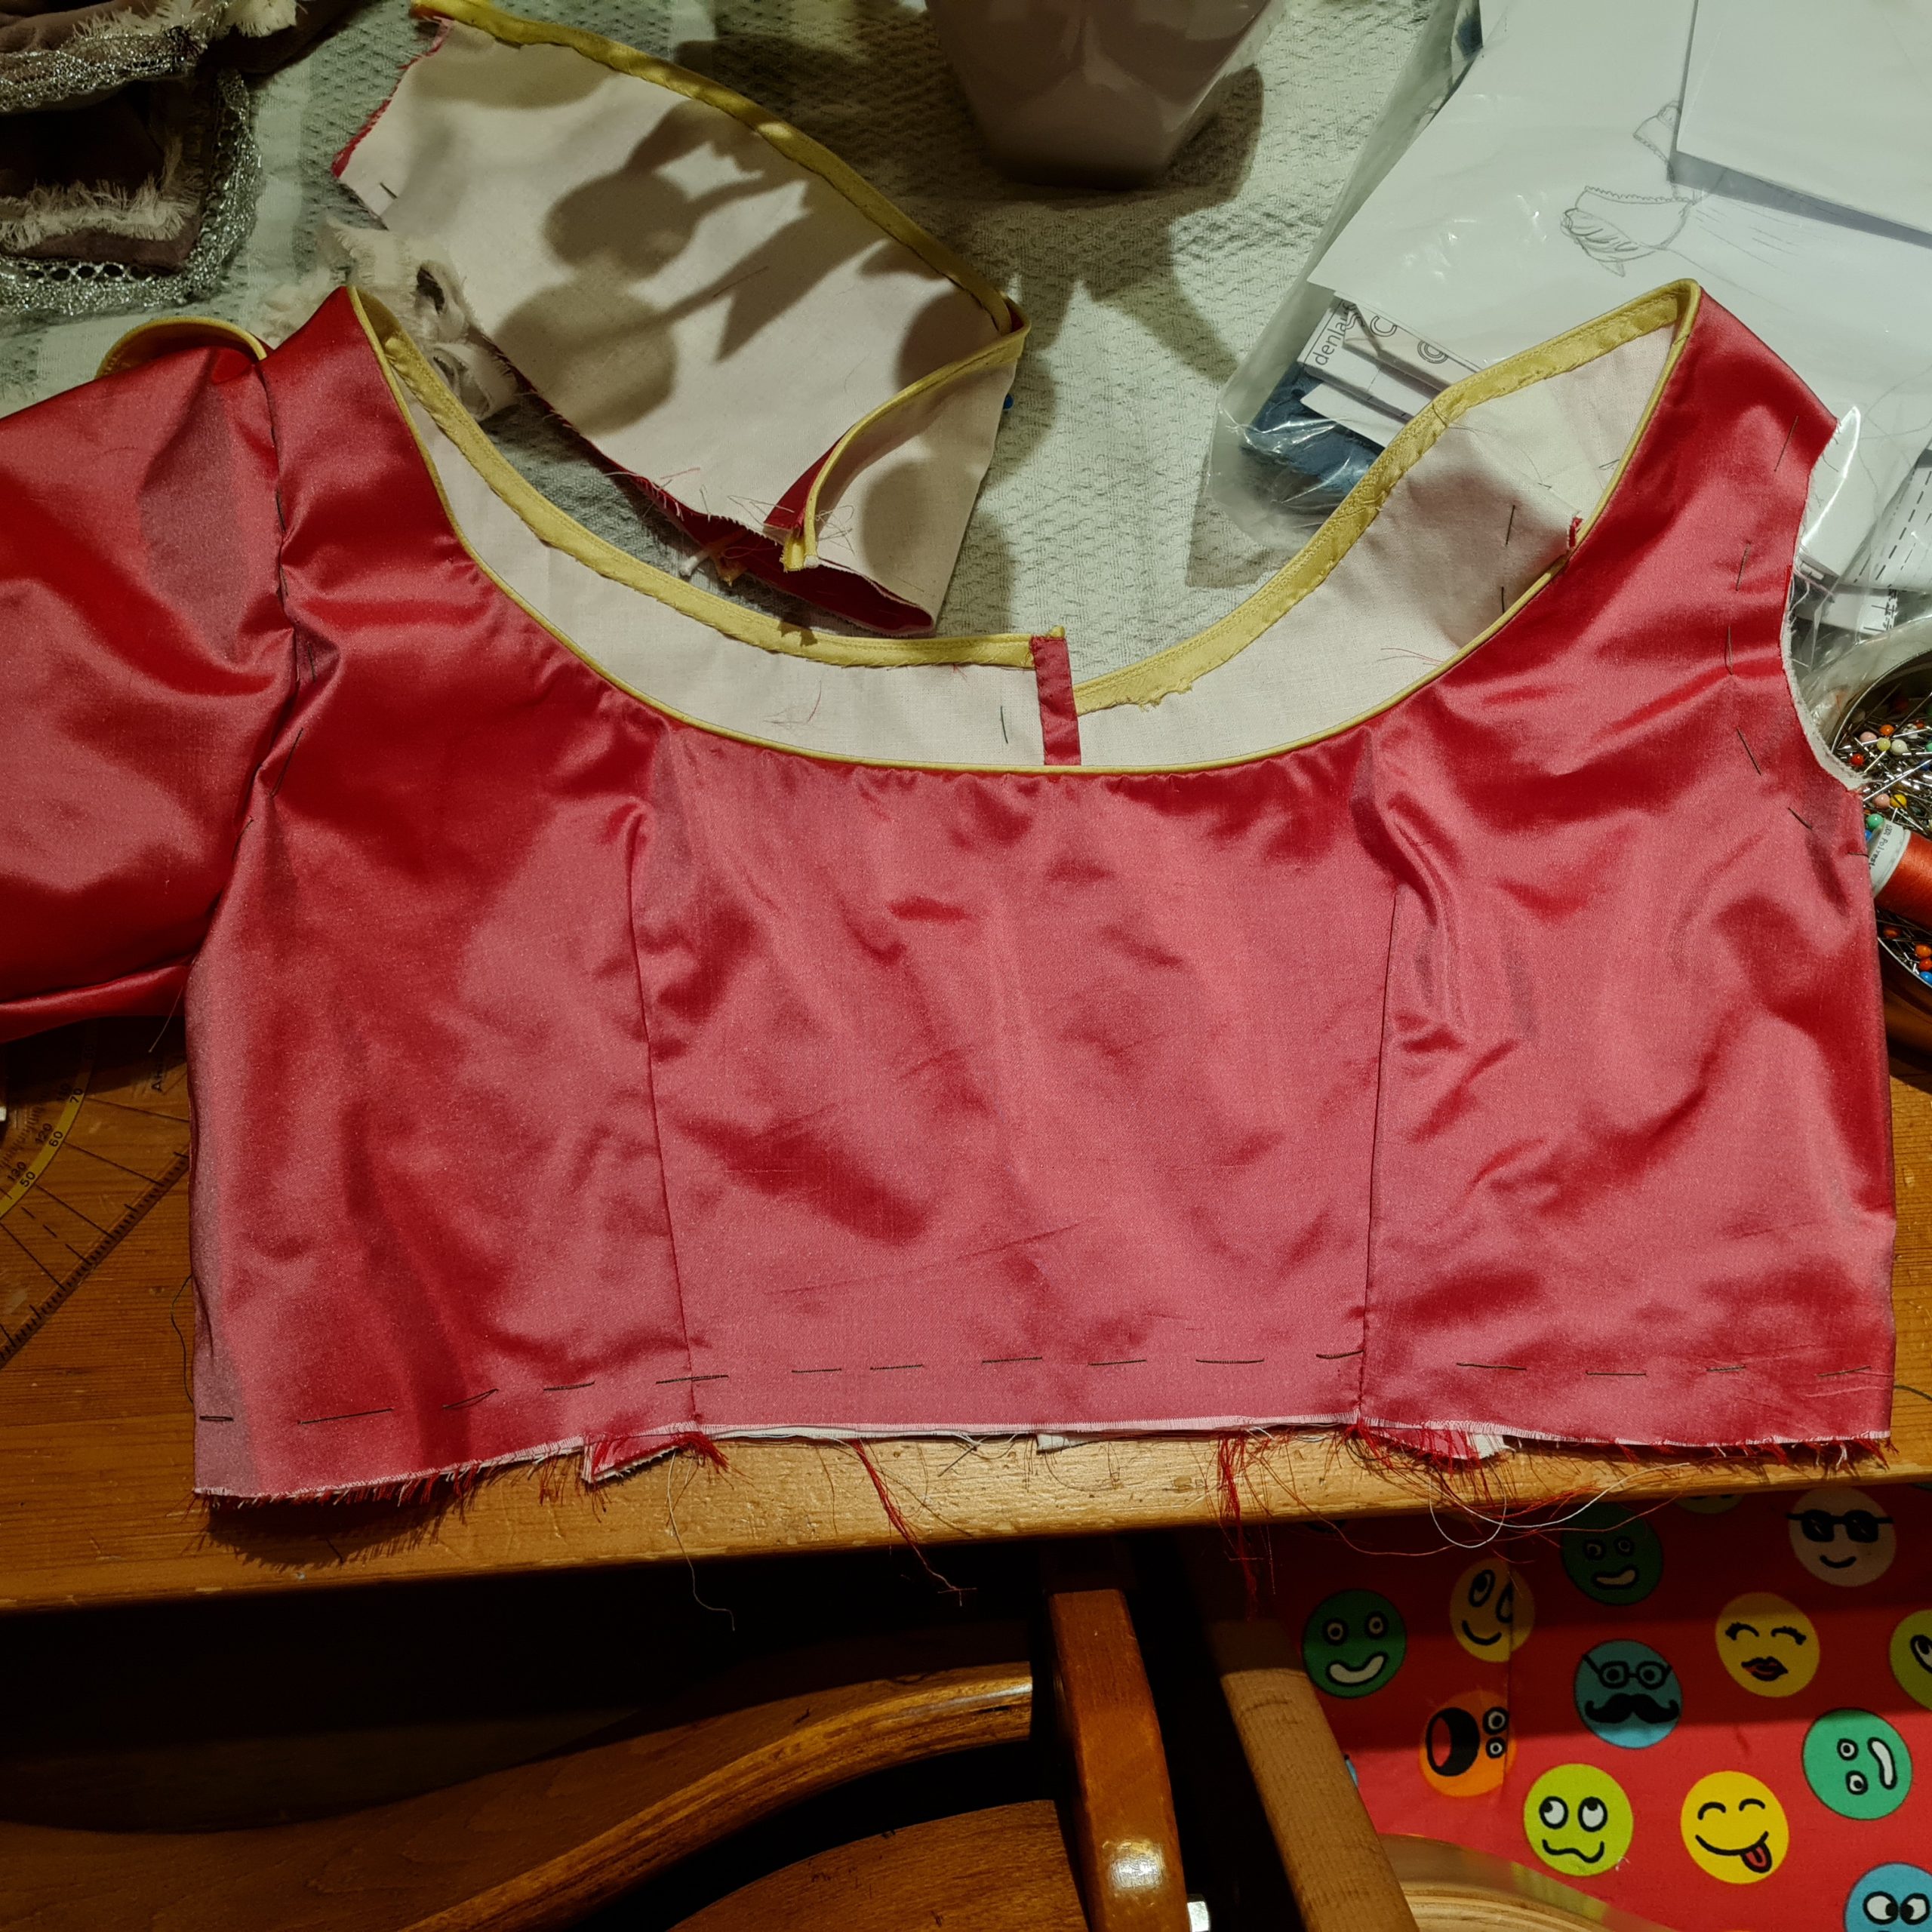
I prepared the piping from the yellow silk, cutting several strips on the bias. The short strips were sewn together with a backstitch into a long strip and a piping cord placed in the middle.
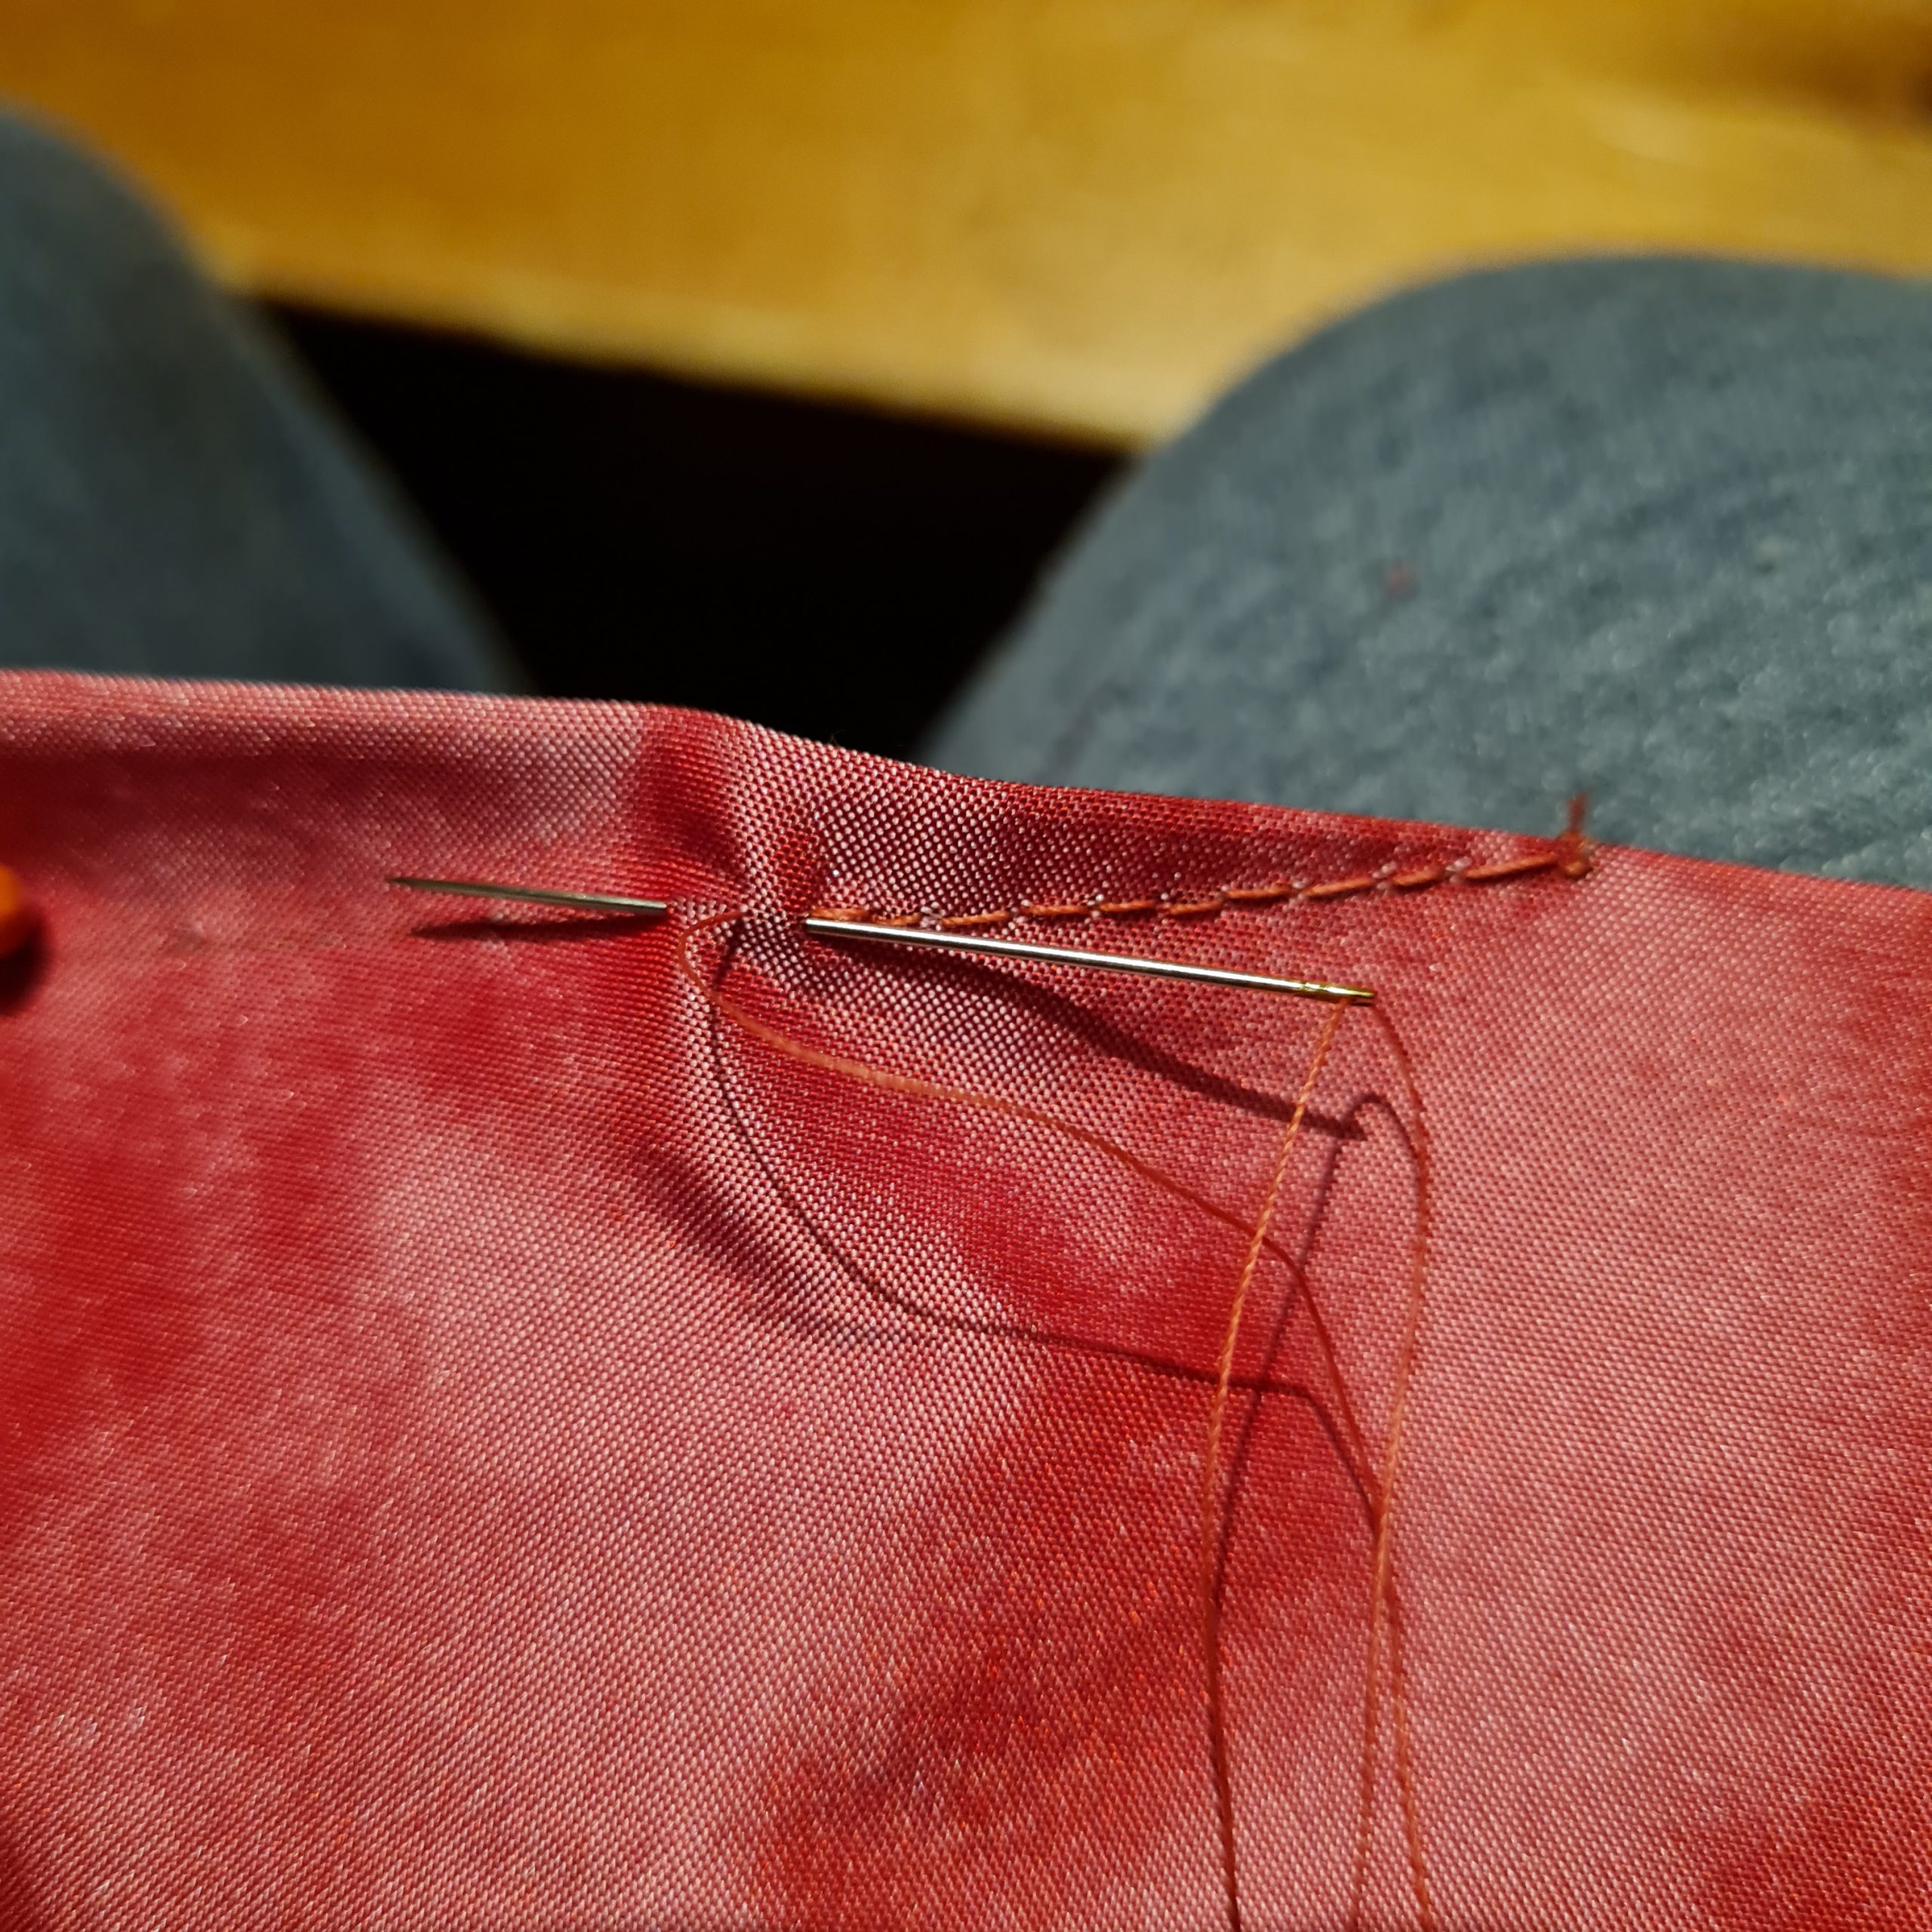
I lined up the piping with the neckline and sewed with a back stitch. I trimmed back the seam allowances, leaving the uppermost. Then I folded the wide seam allowance around the trimmed and fell stitched in place just catching the lining layer.

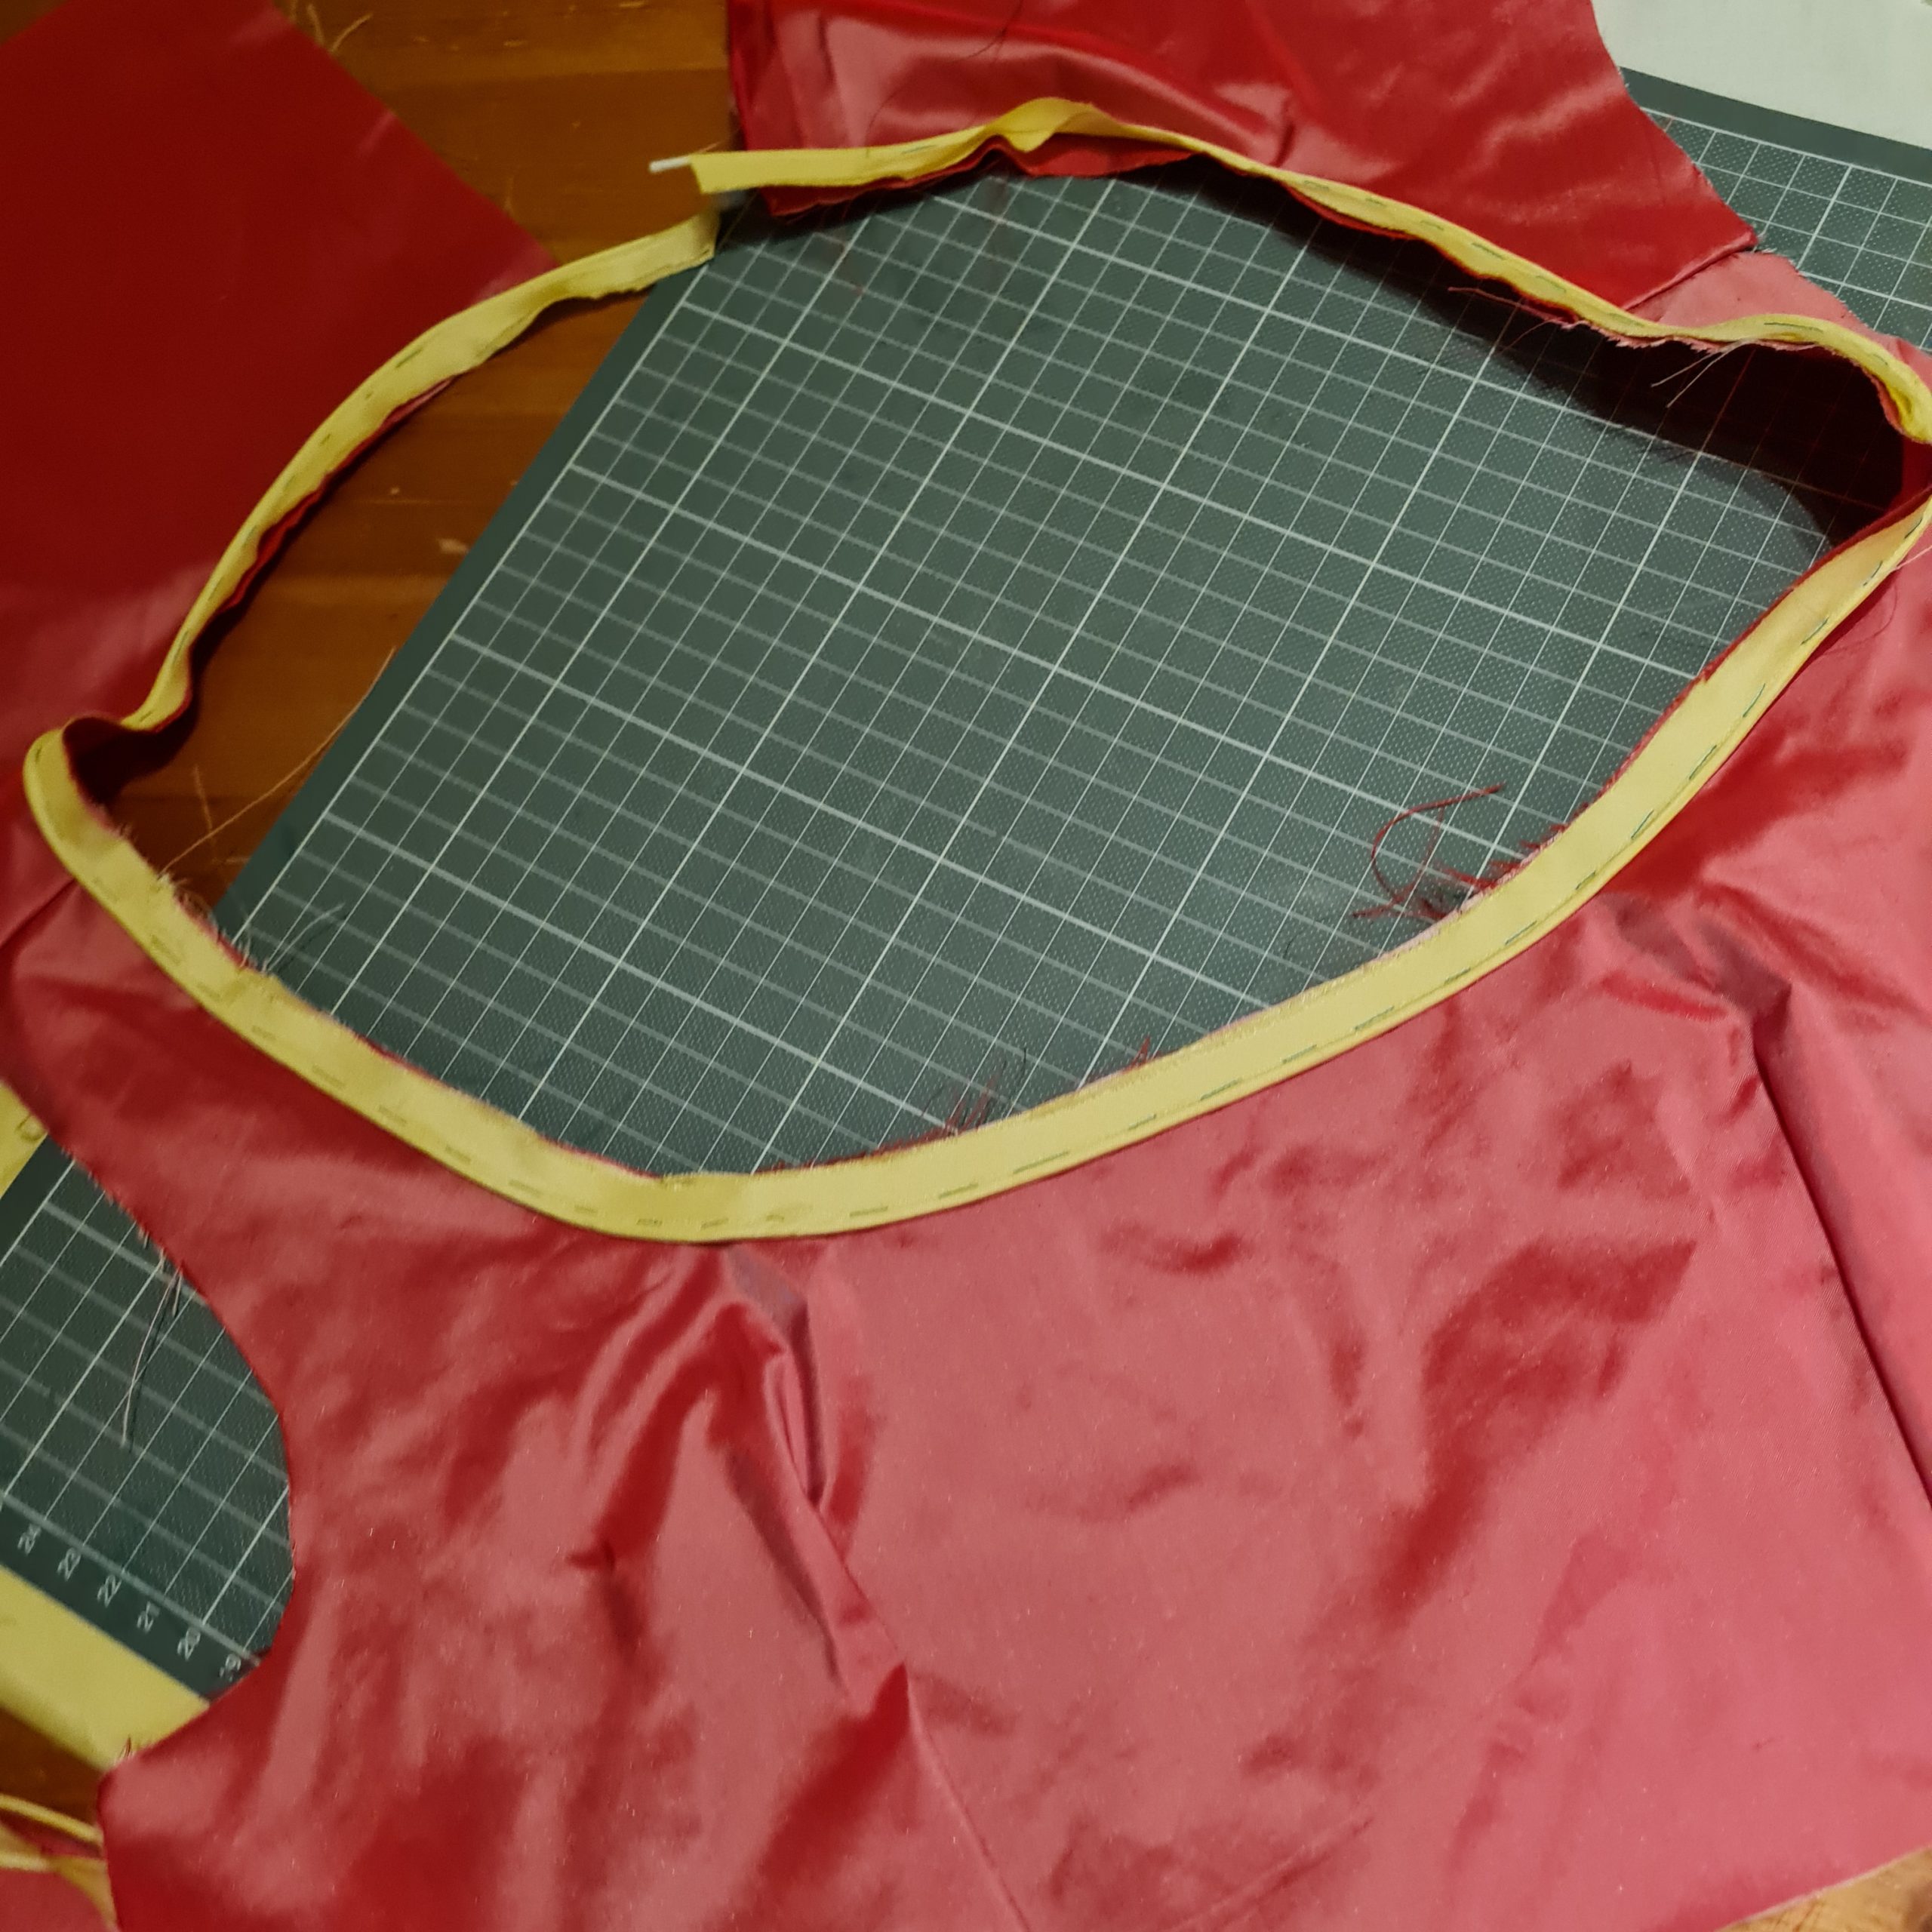
I piped the bottom edge of the sleeves in the same way before I sewed the sleeve seam (omit the last step if yoo´ve cut the sleeve on the fold along the sleeve seam). Then I lined up the two sides of the tulip sleeve along the center line. Don´t forget to mirror the both sides.

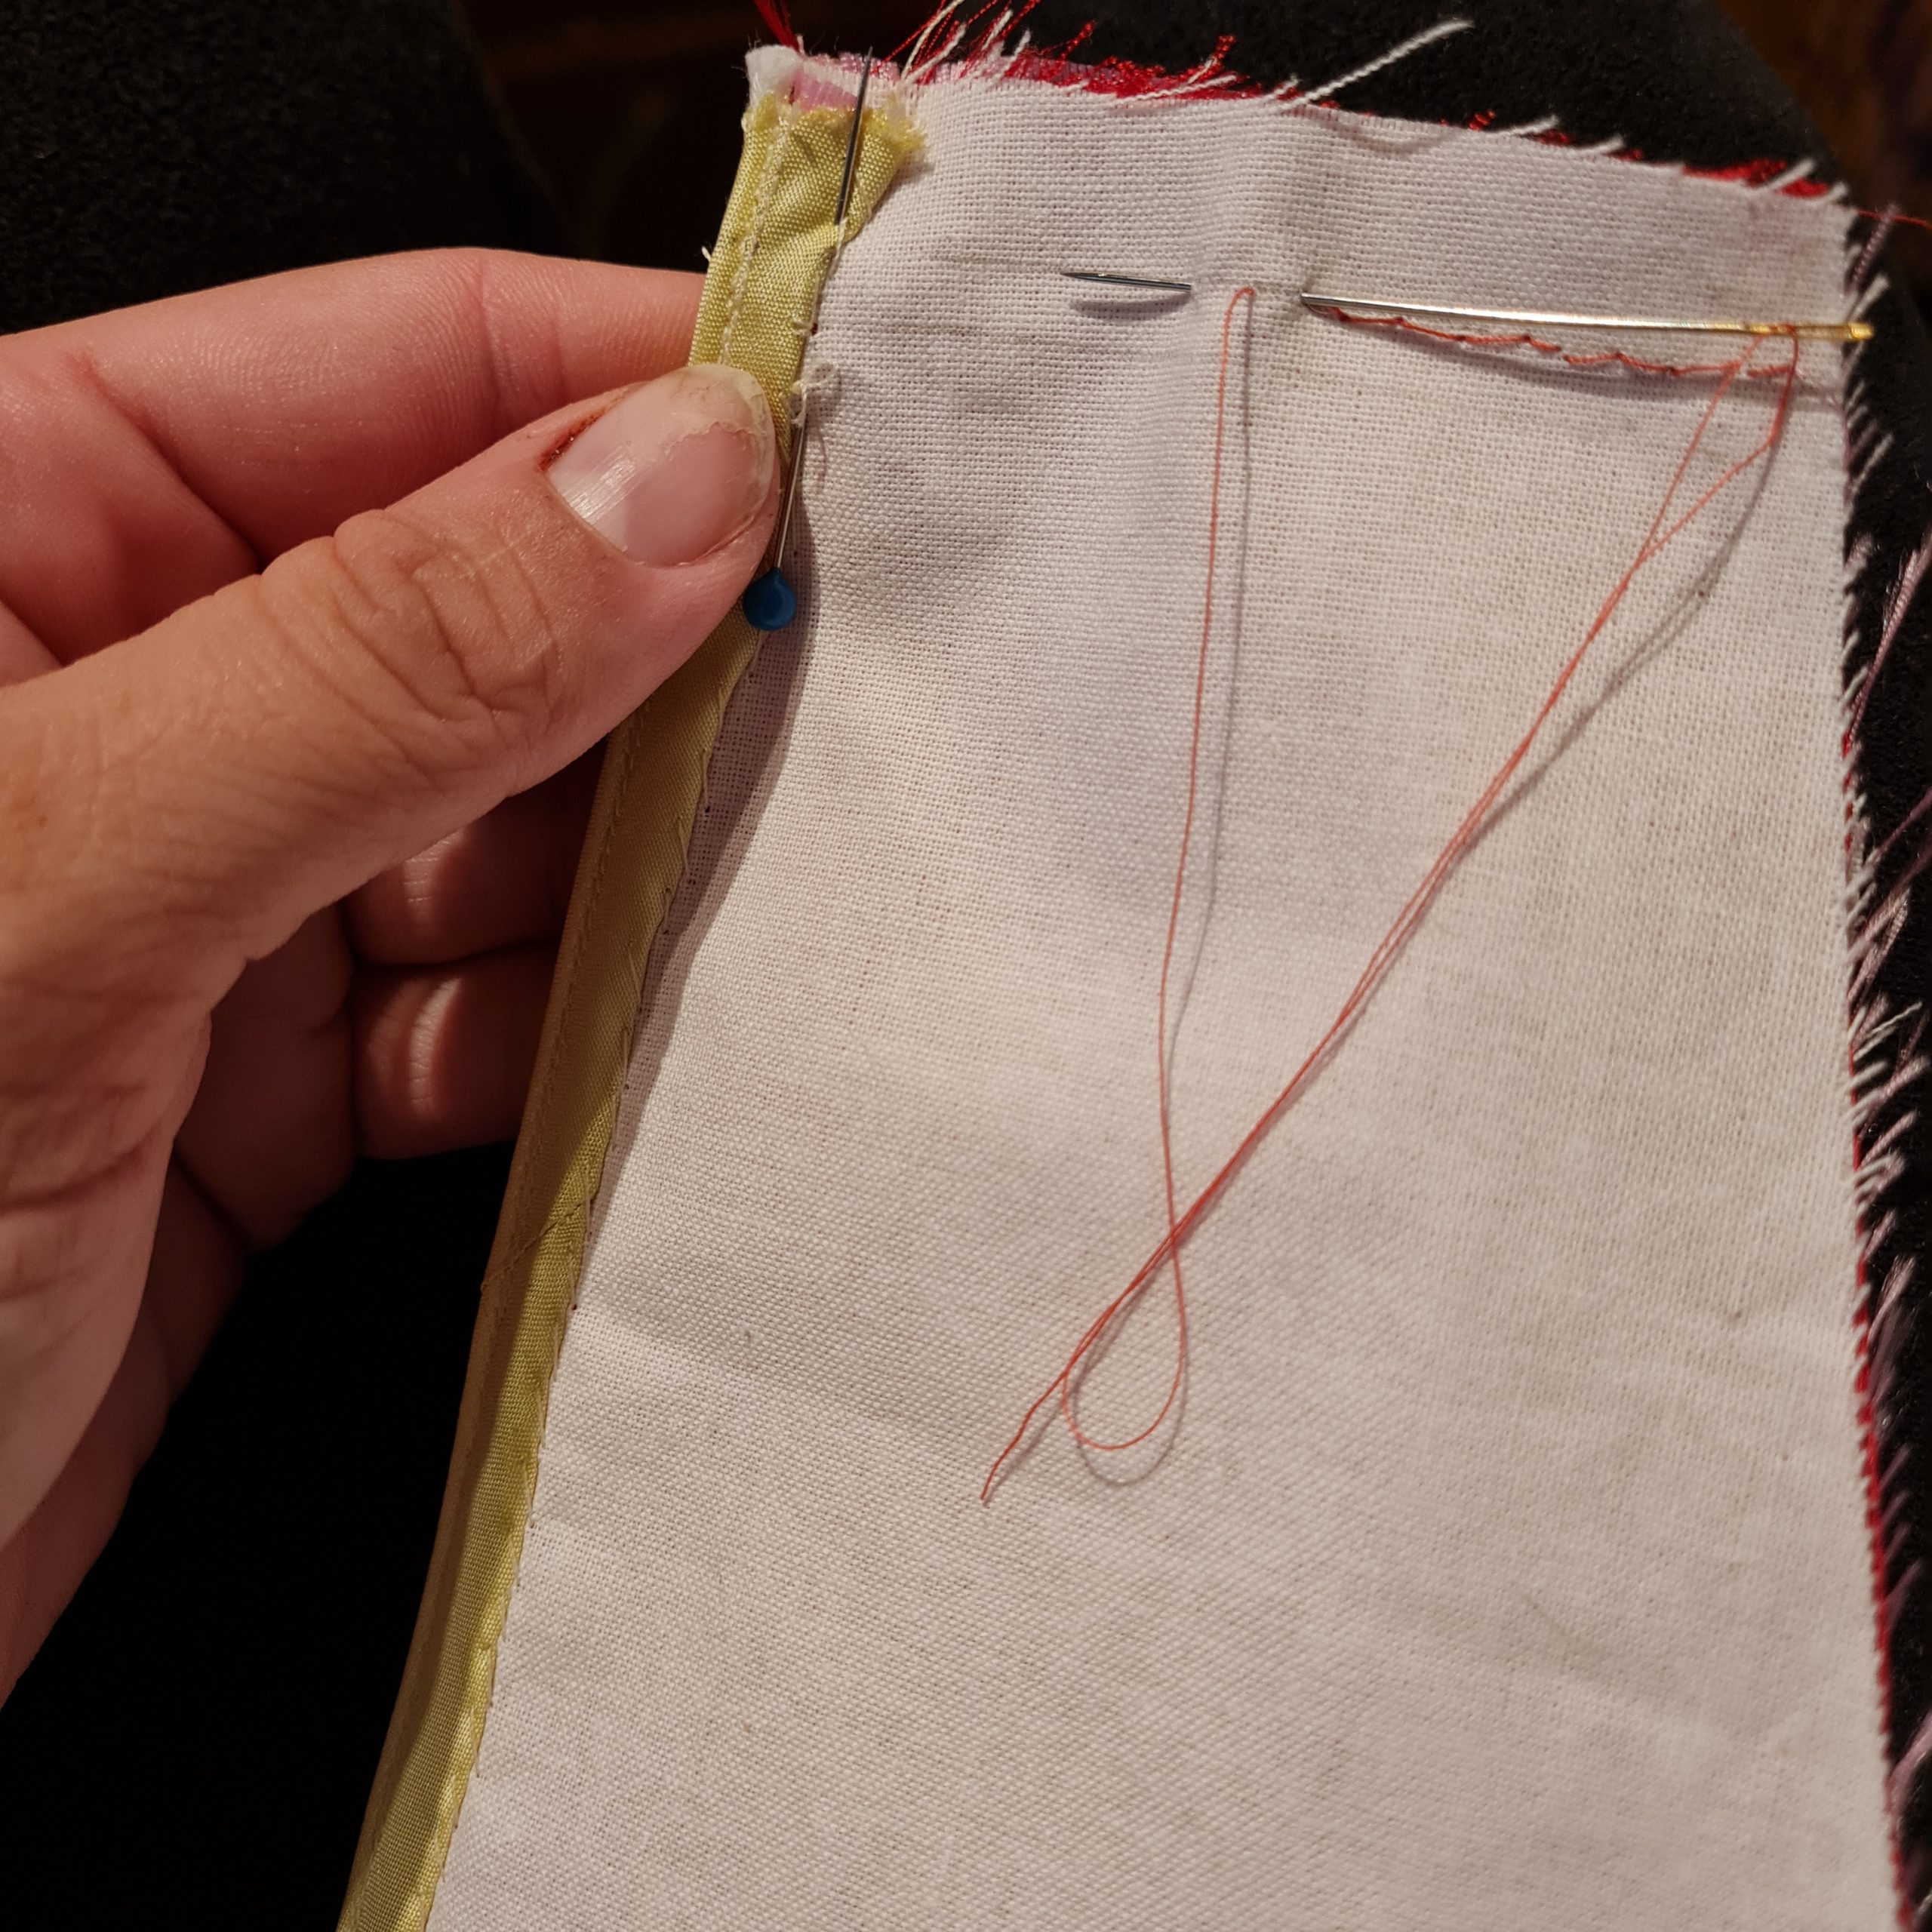

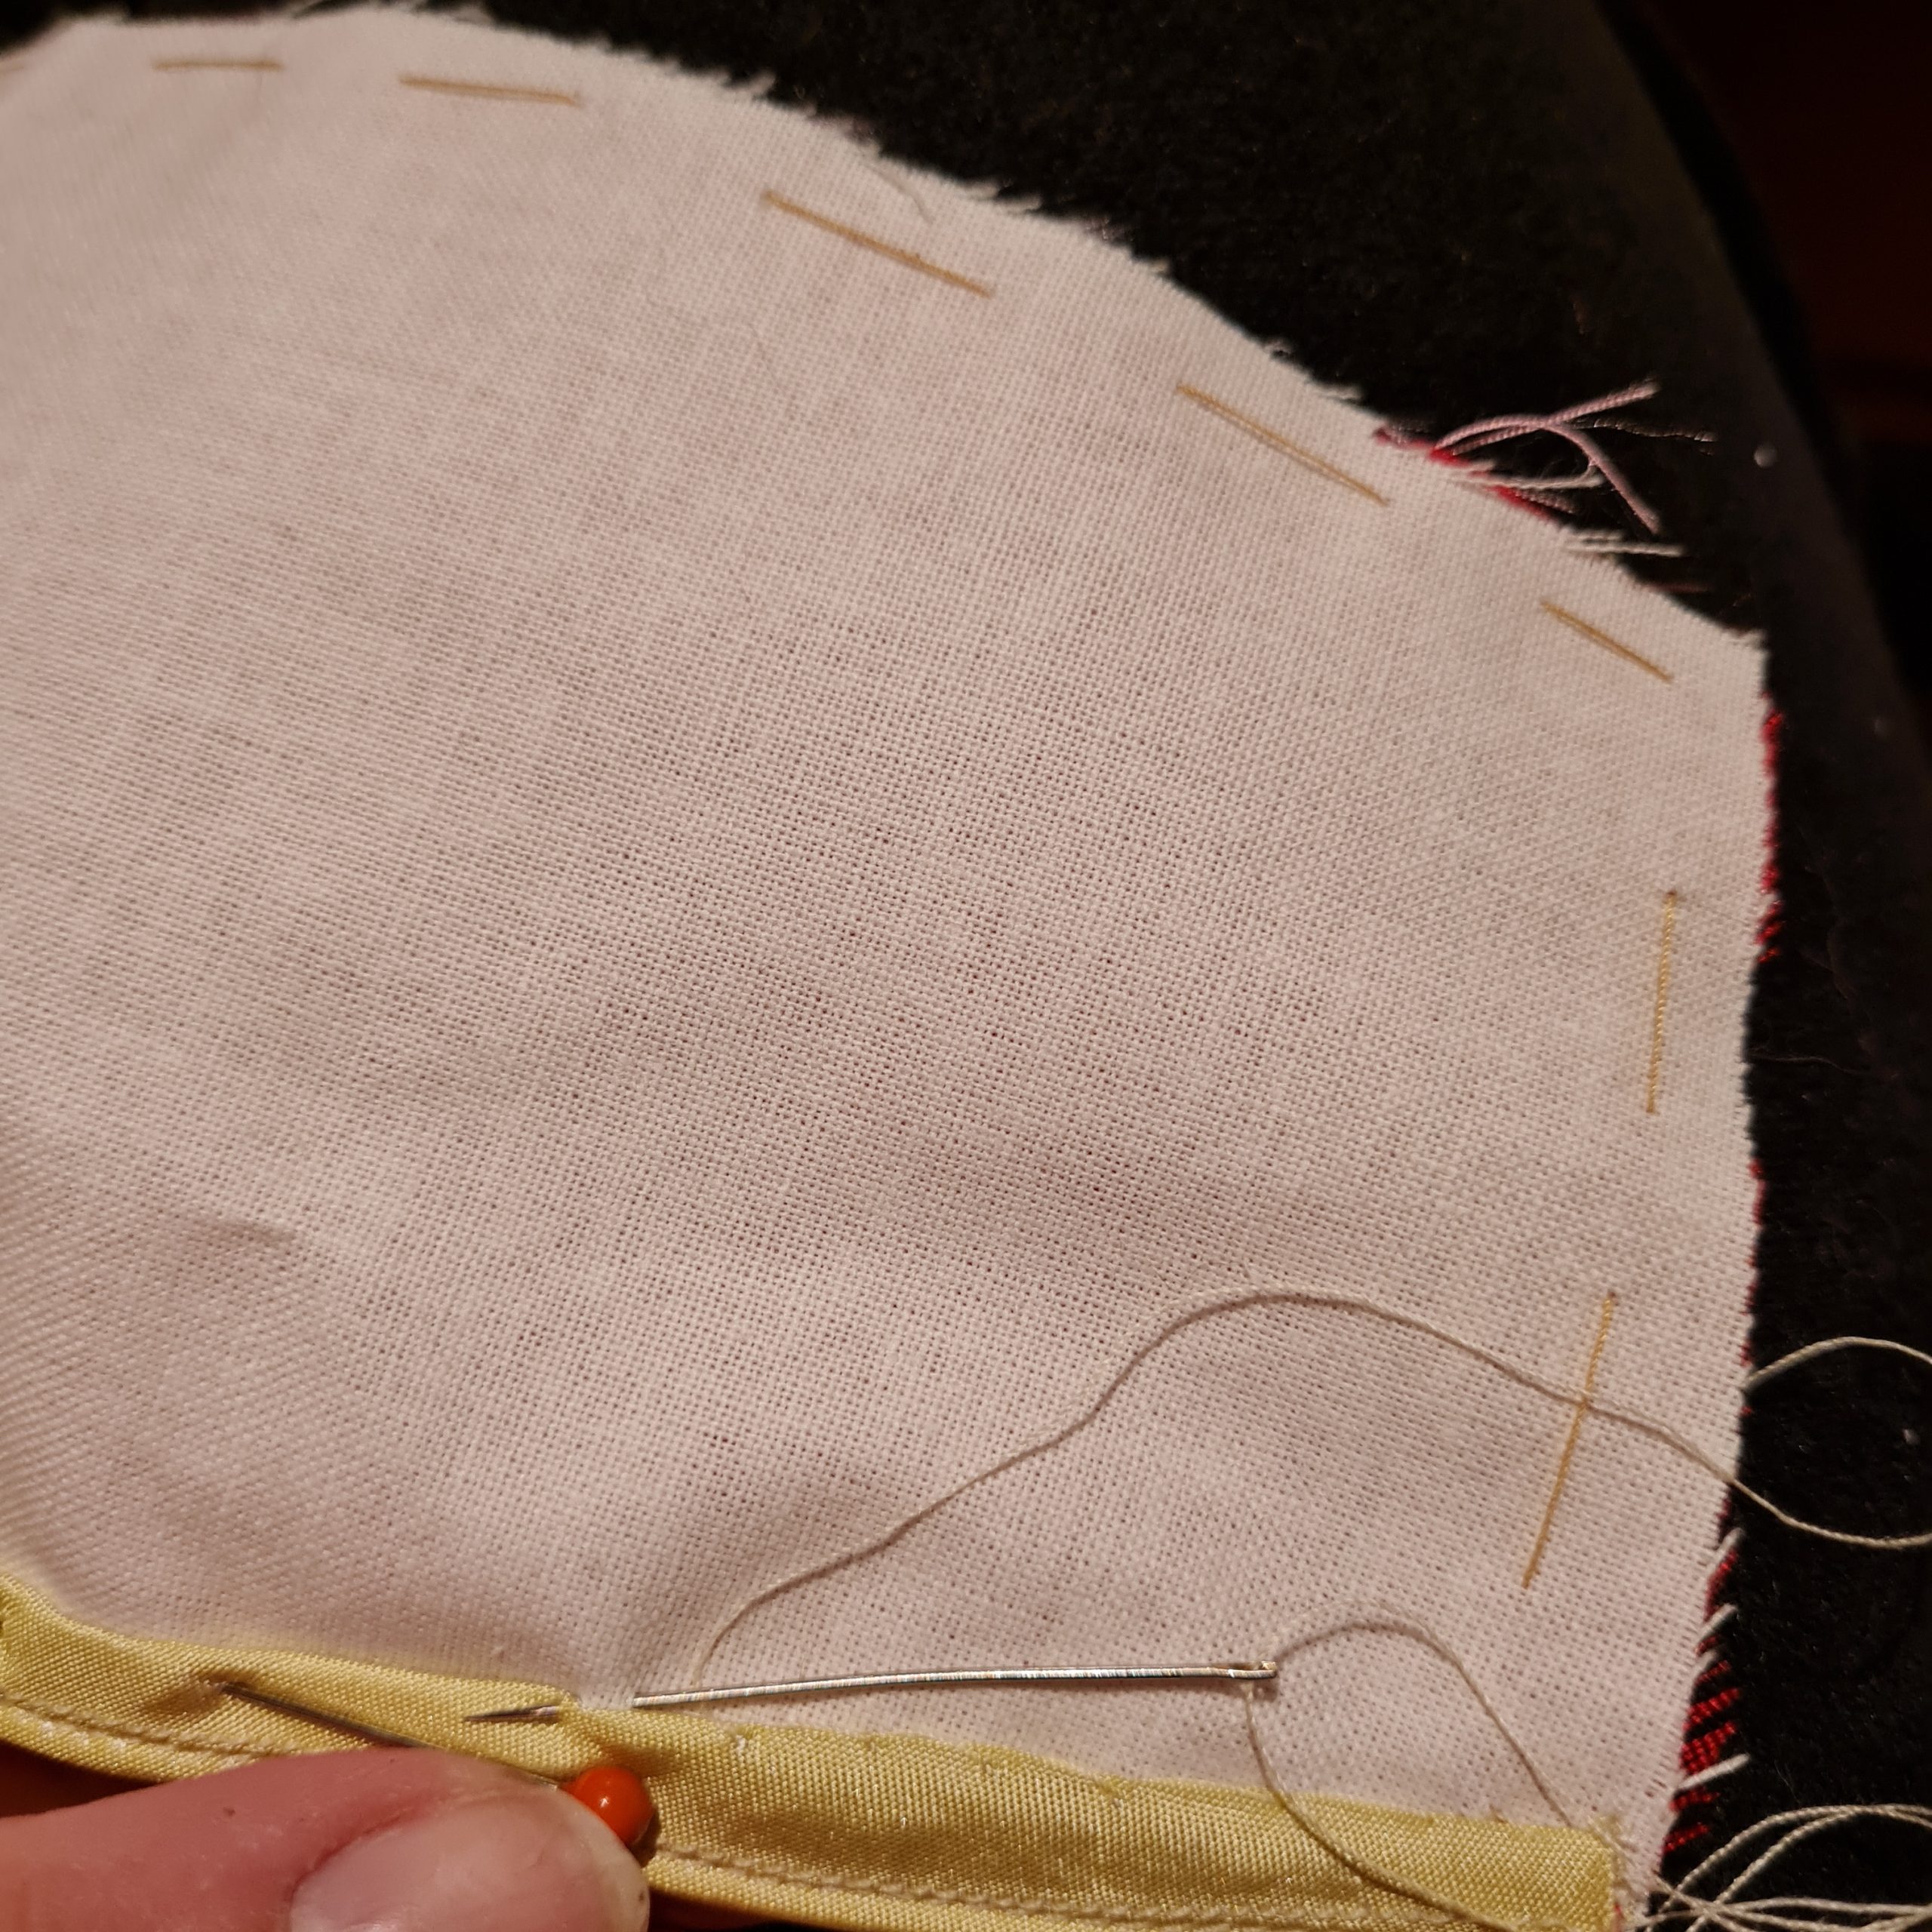
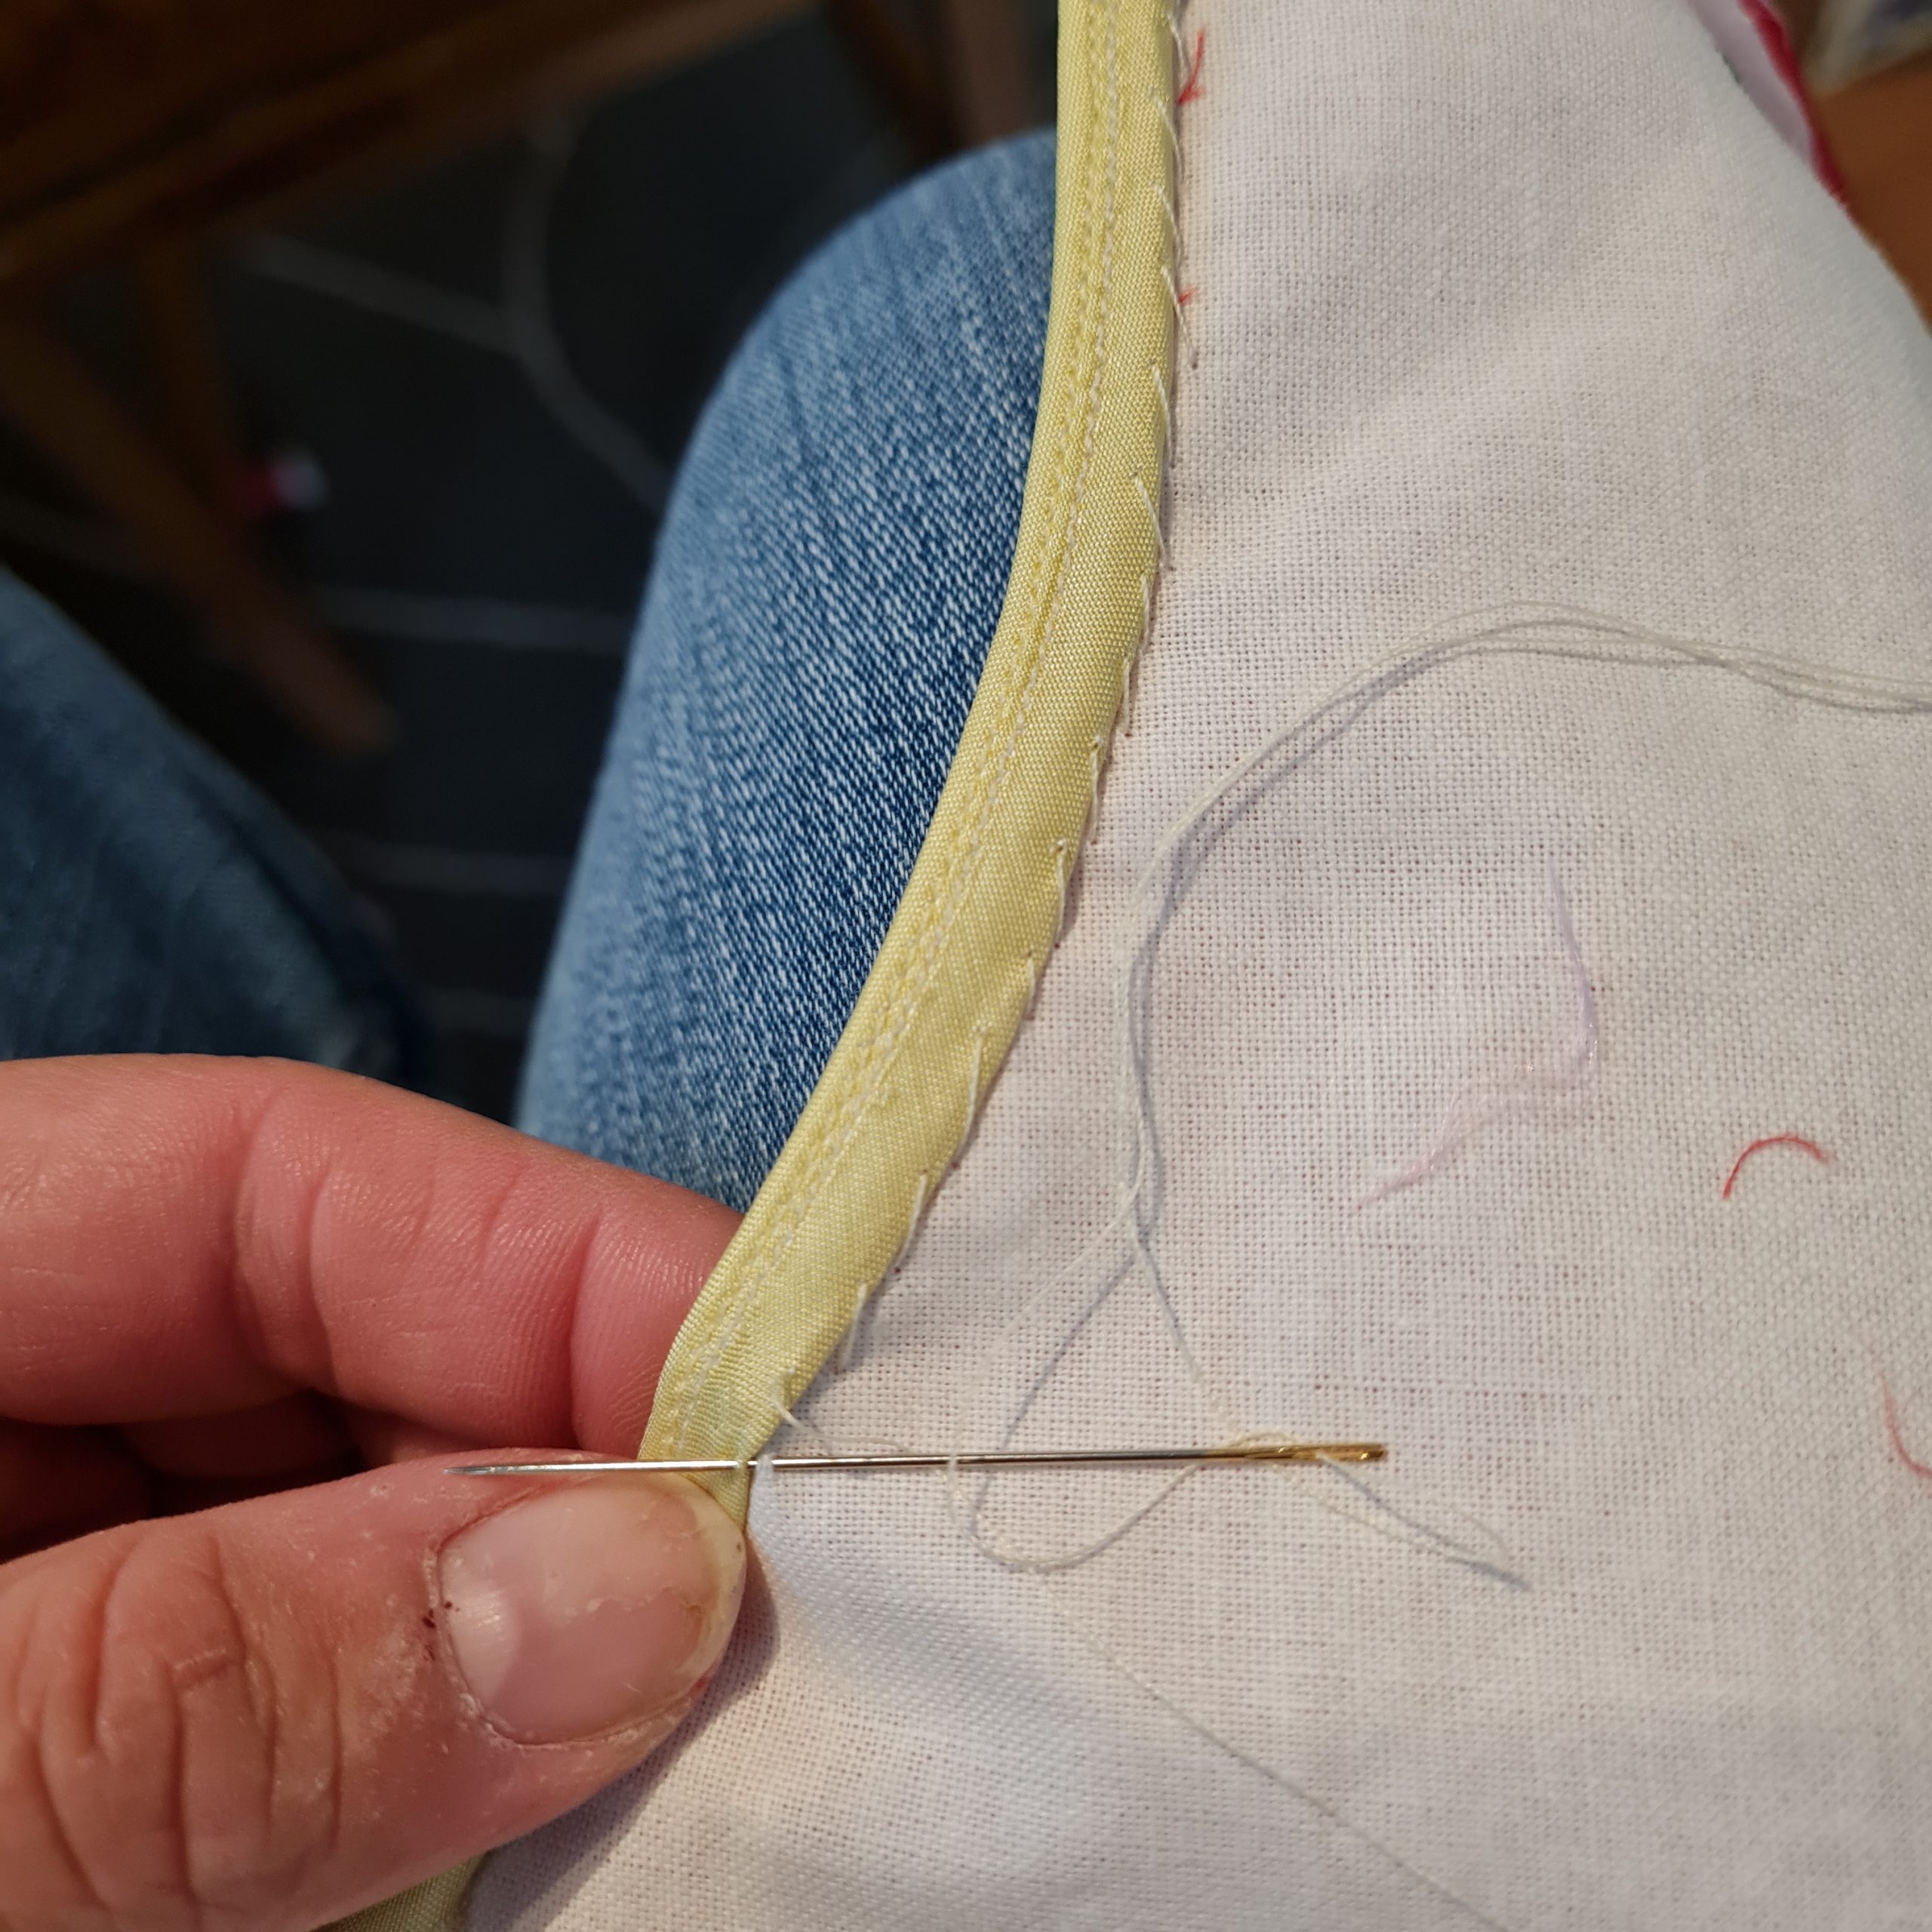
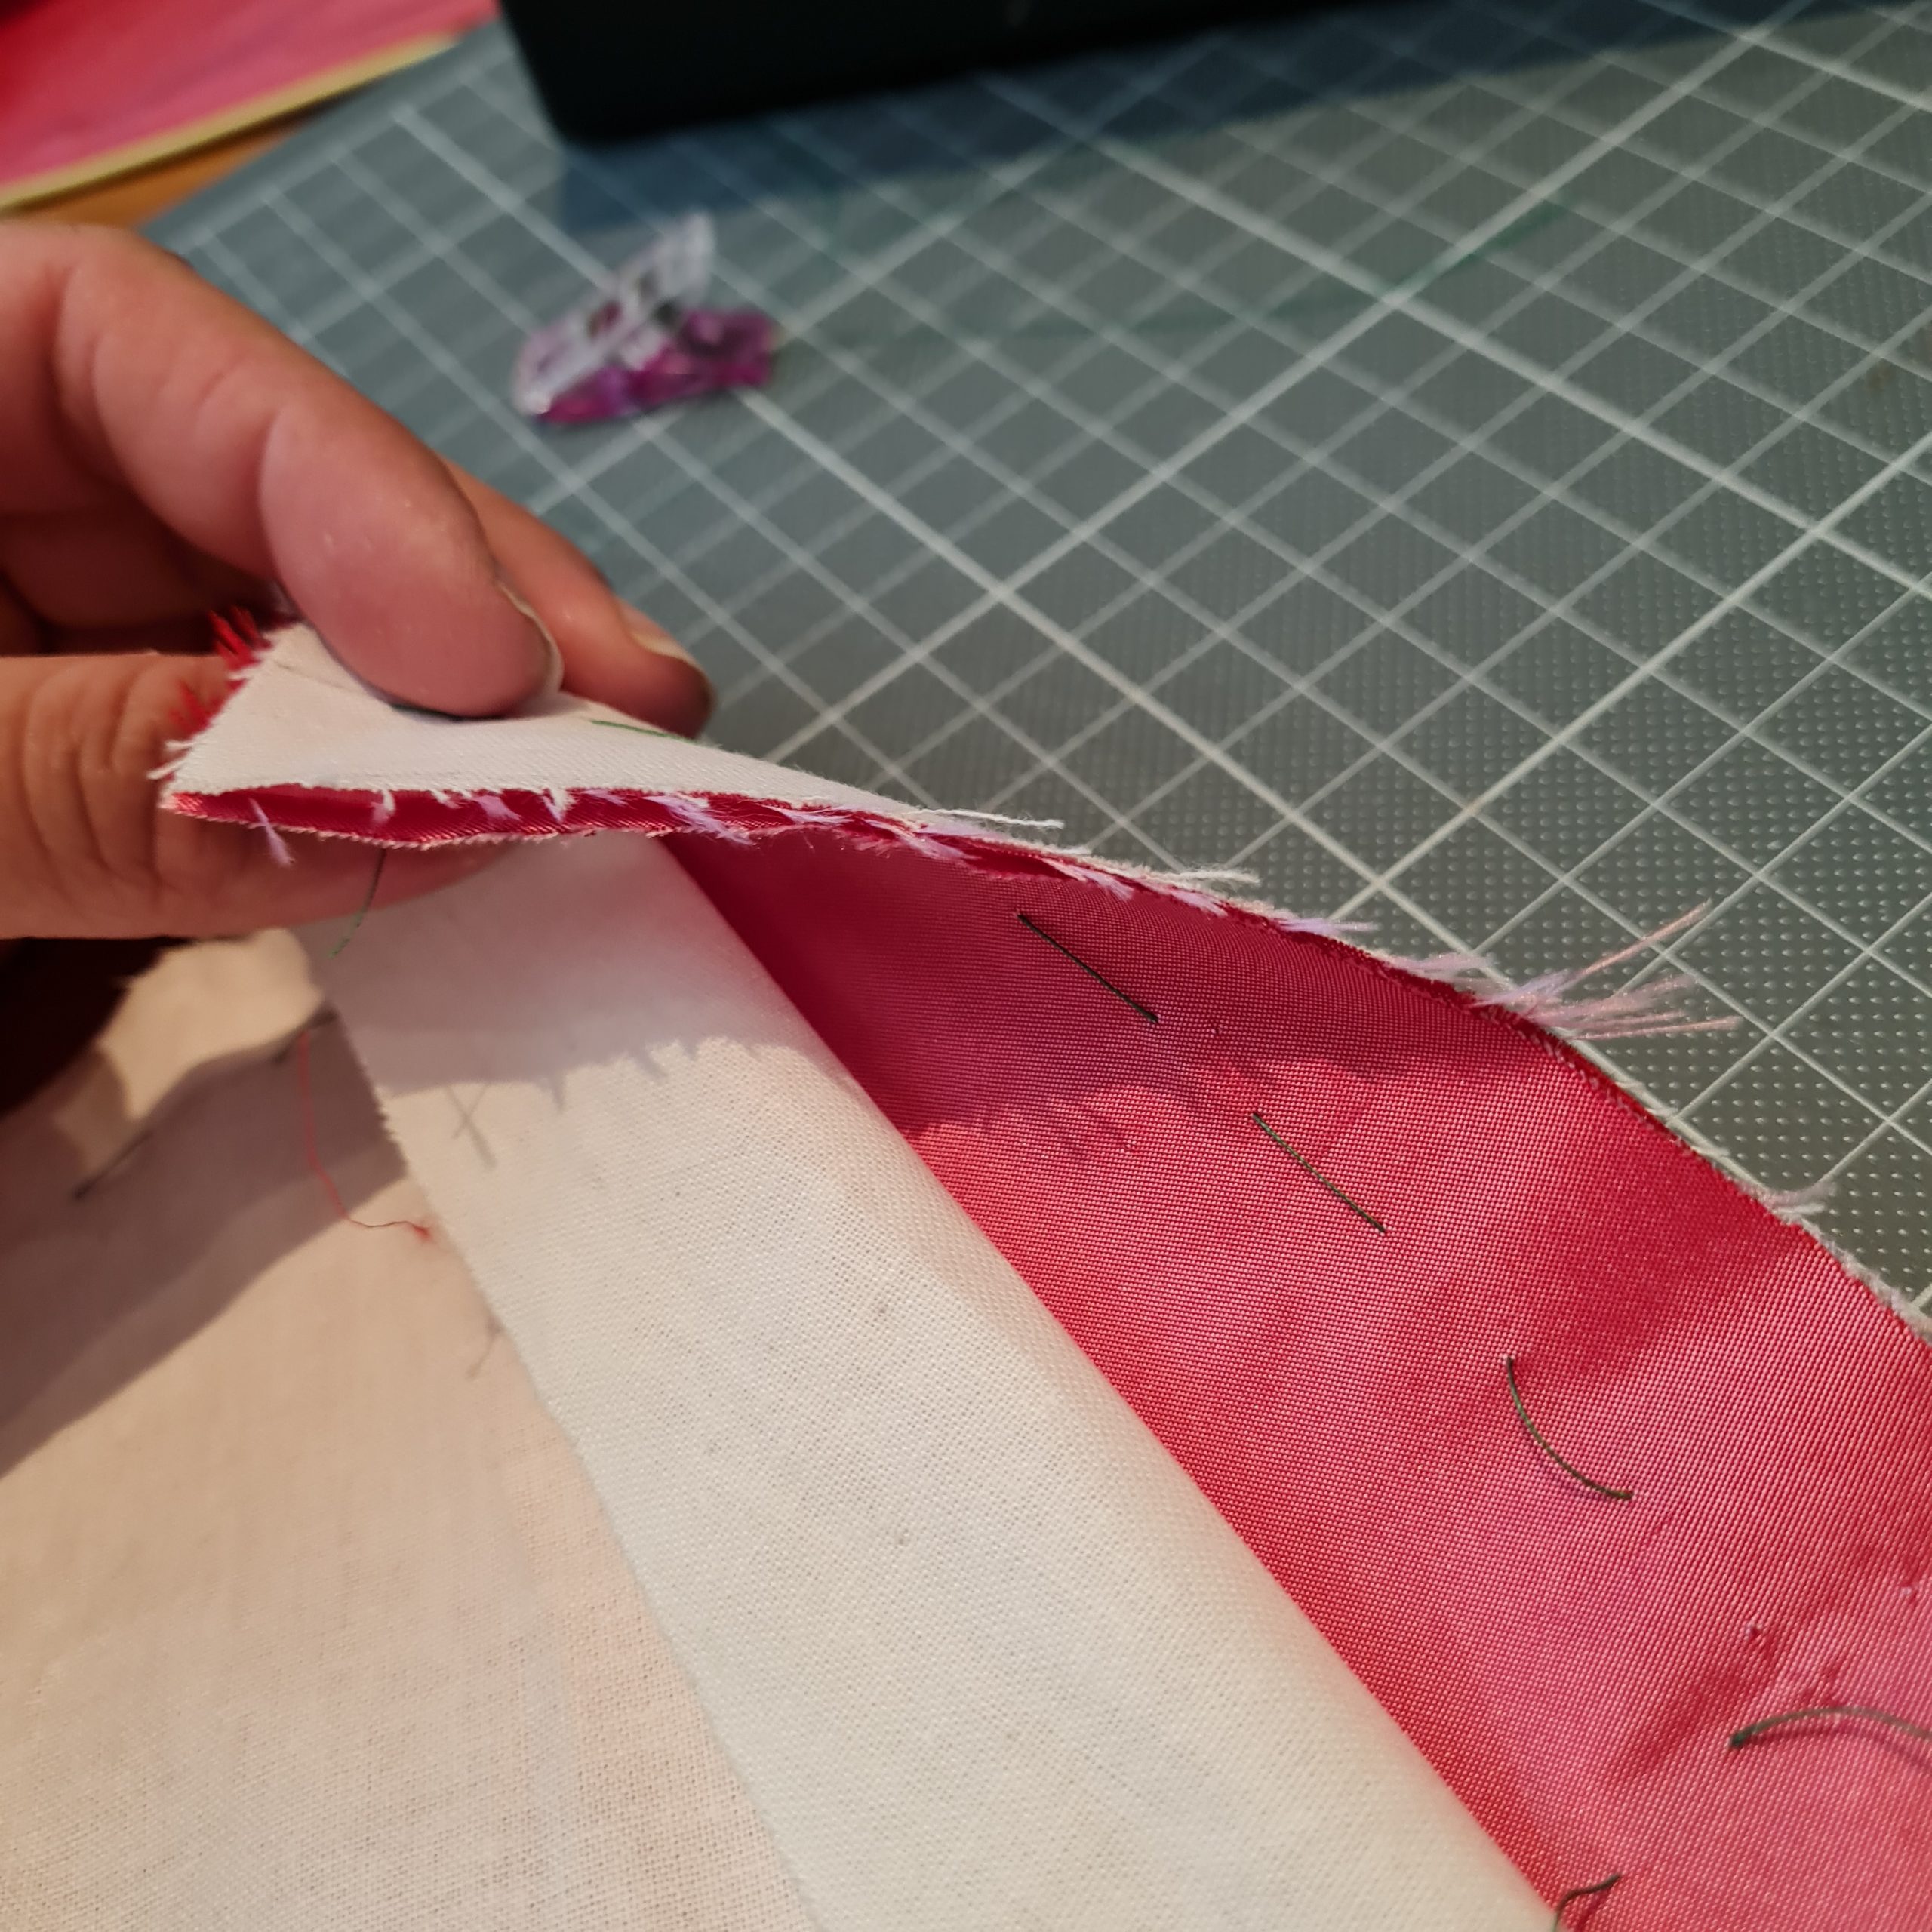
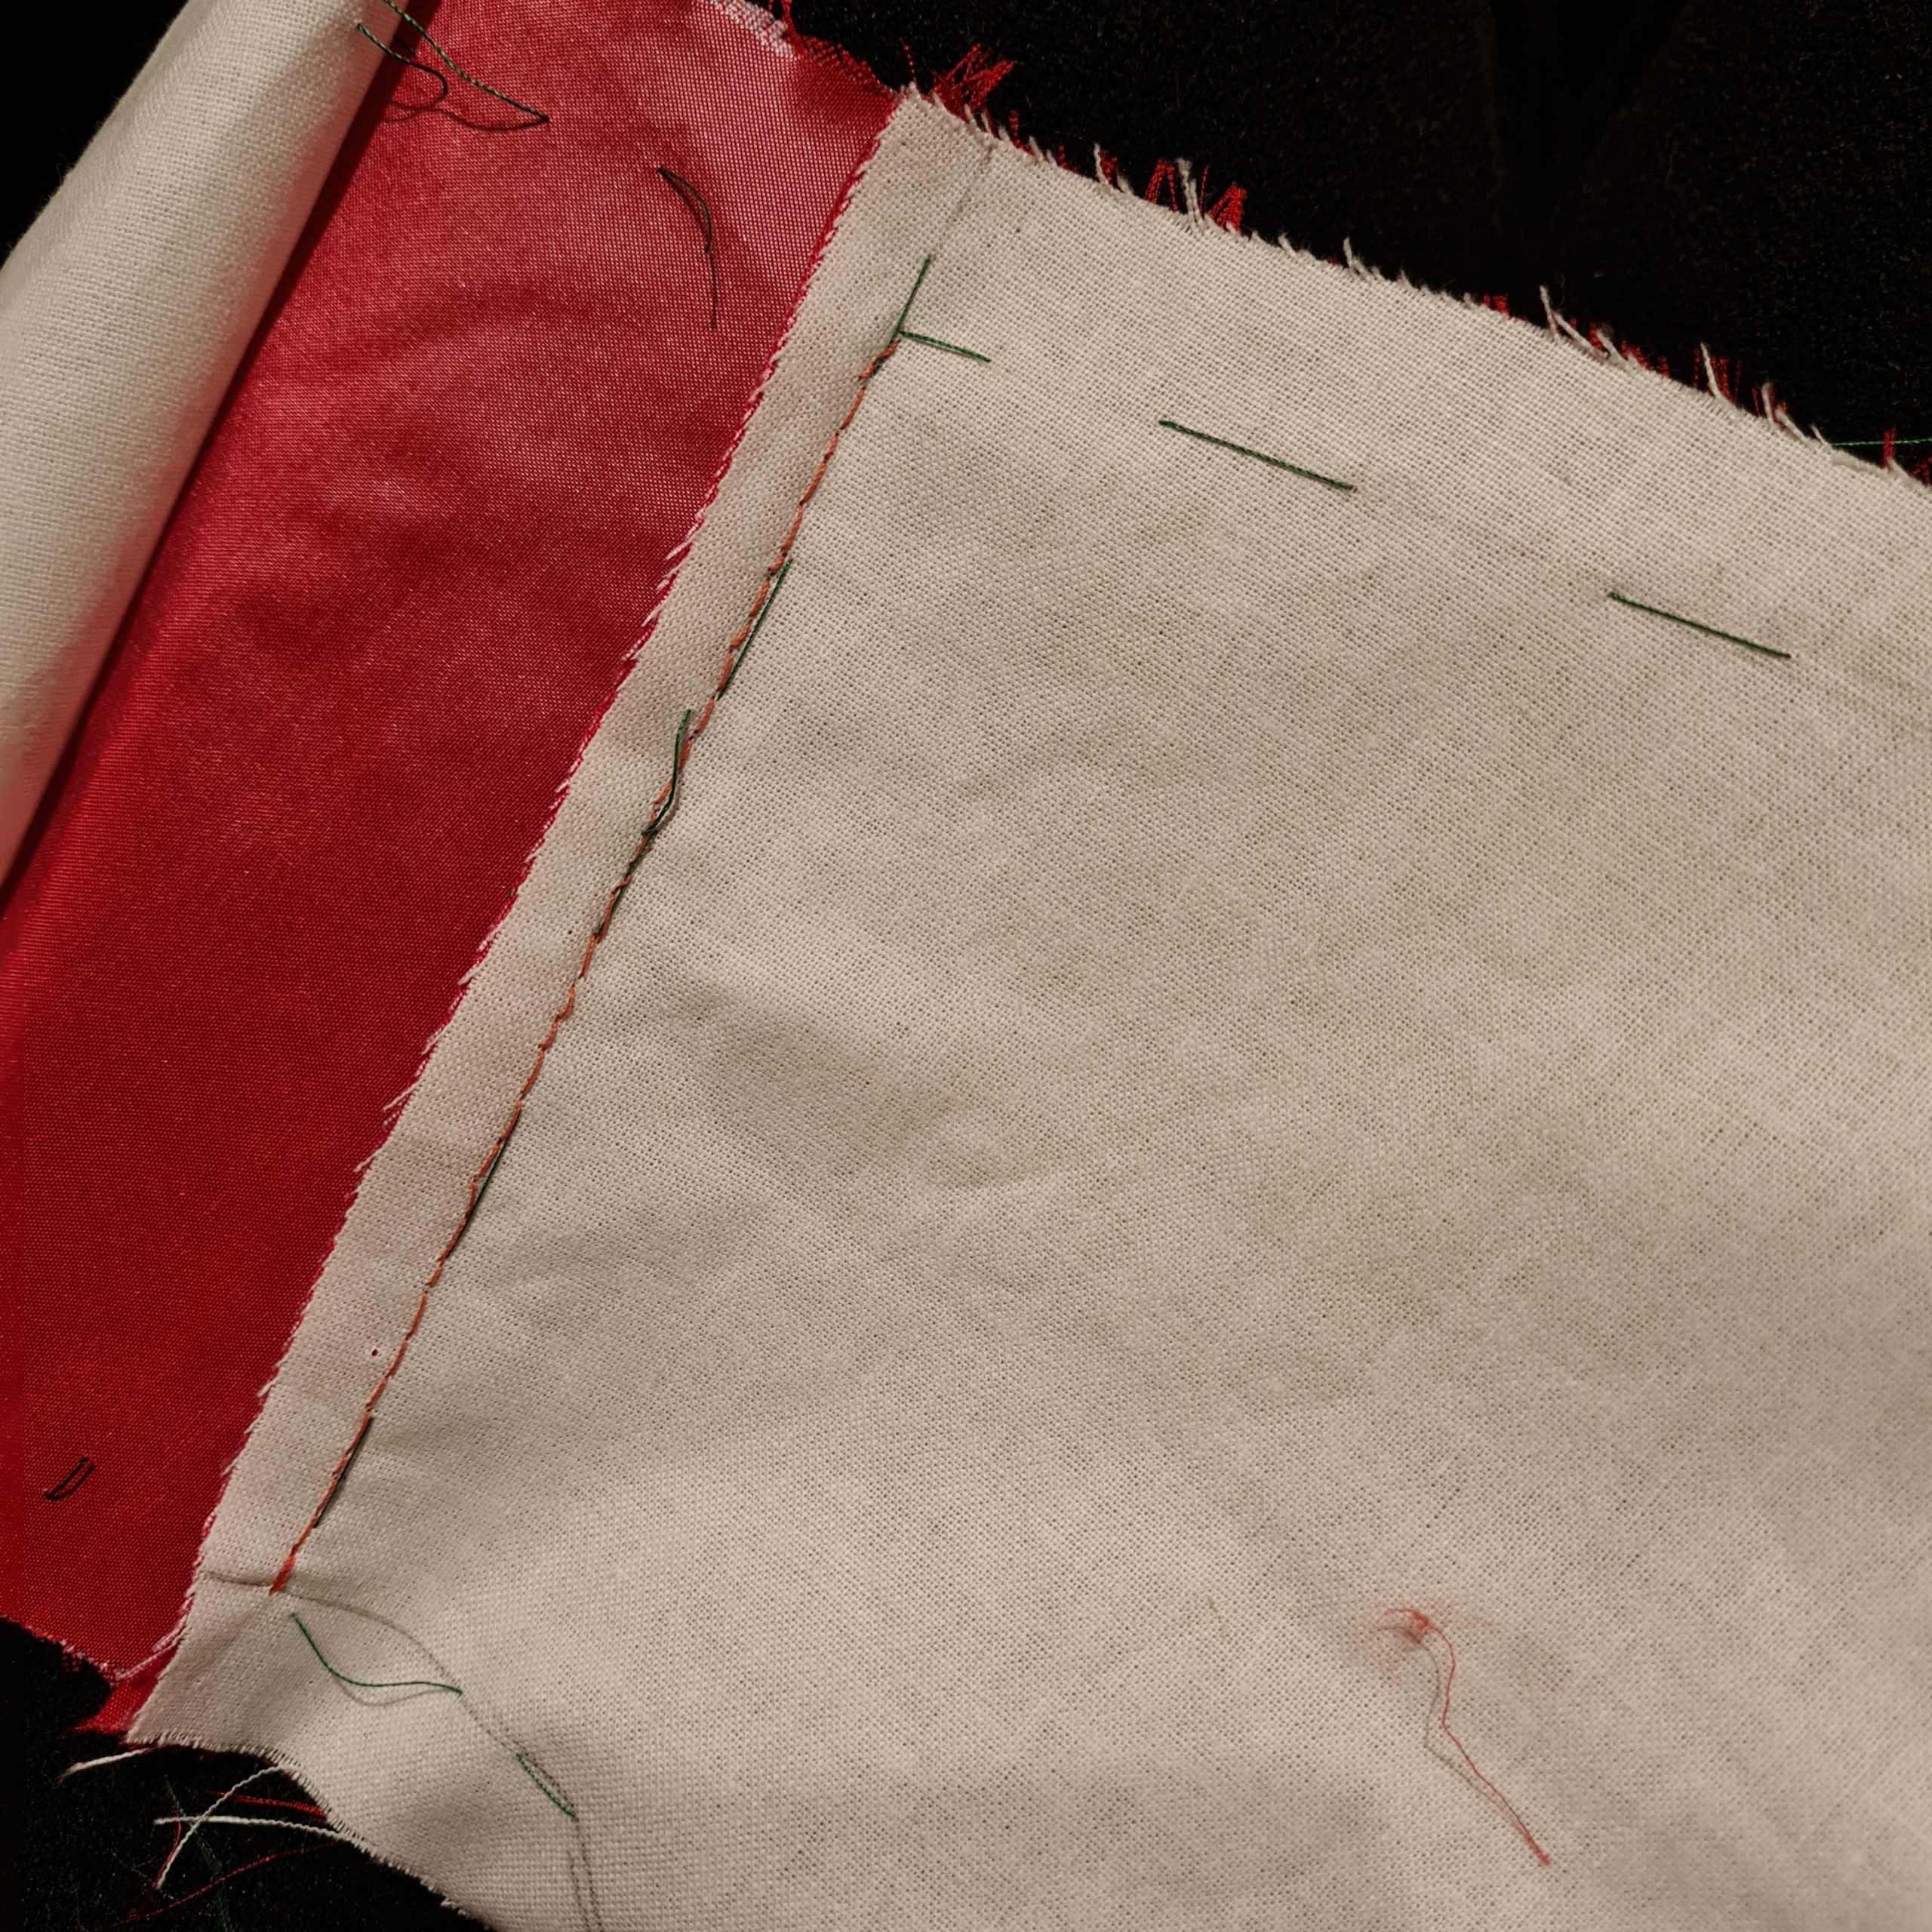
Before I could insert my sleeves I had to sew the side seam of the bodice. I decided to hide all the raw seam allowances by lining up the front and back, right sides together, just that I folded one lining layer to the side before stitching. I pressed the seam allowances to the side, where I just caught the fashion fabric, then, I turned in the seam allowance of the loose edge of the lining and covered all the raw edges. I felled down the lining along the side seam and decided to prick stitch the fashion fabric from the right side to get a more period look.

I inserted the sleeves to the armhole to finish the bodice.
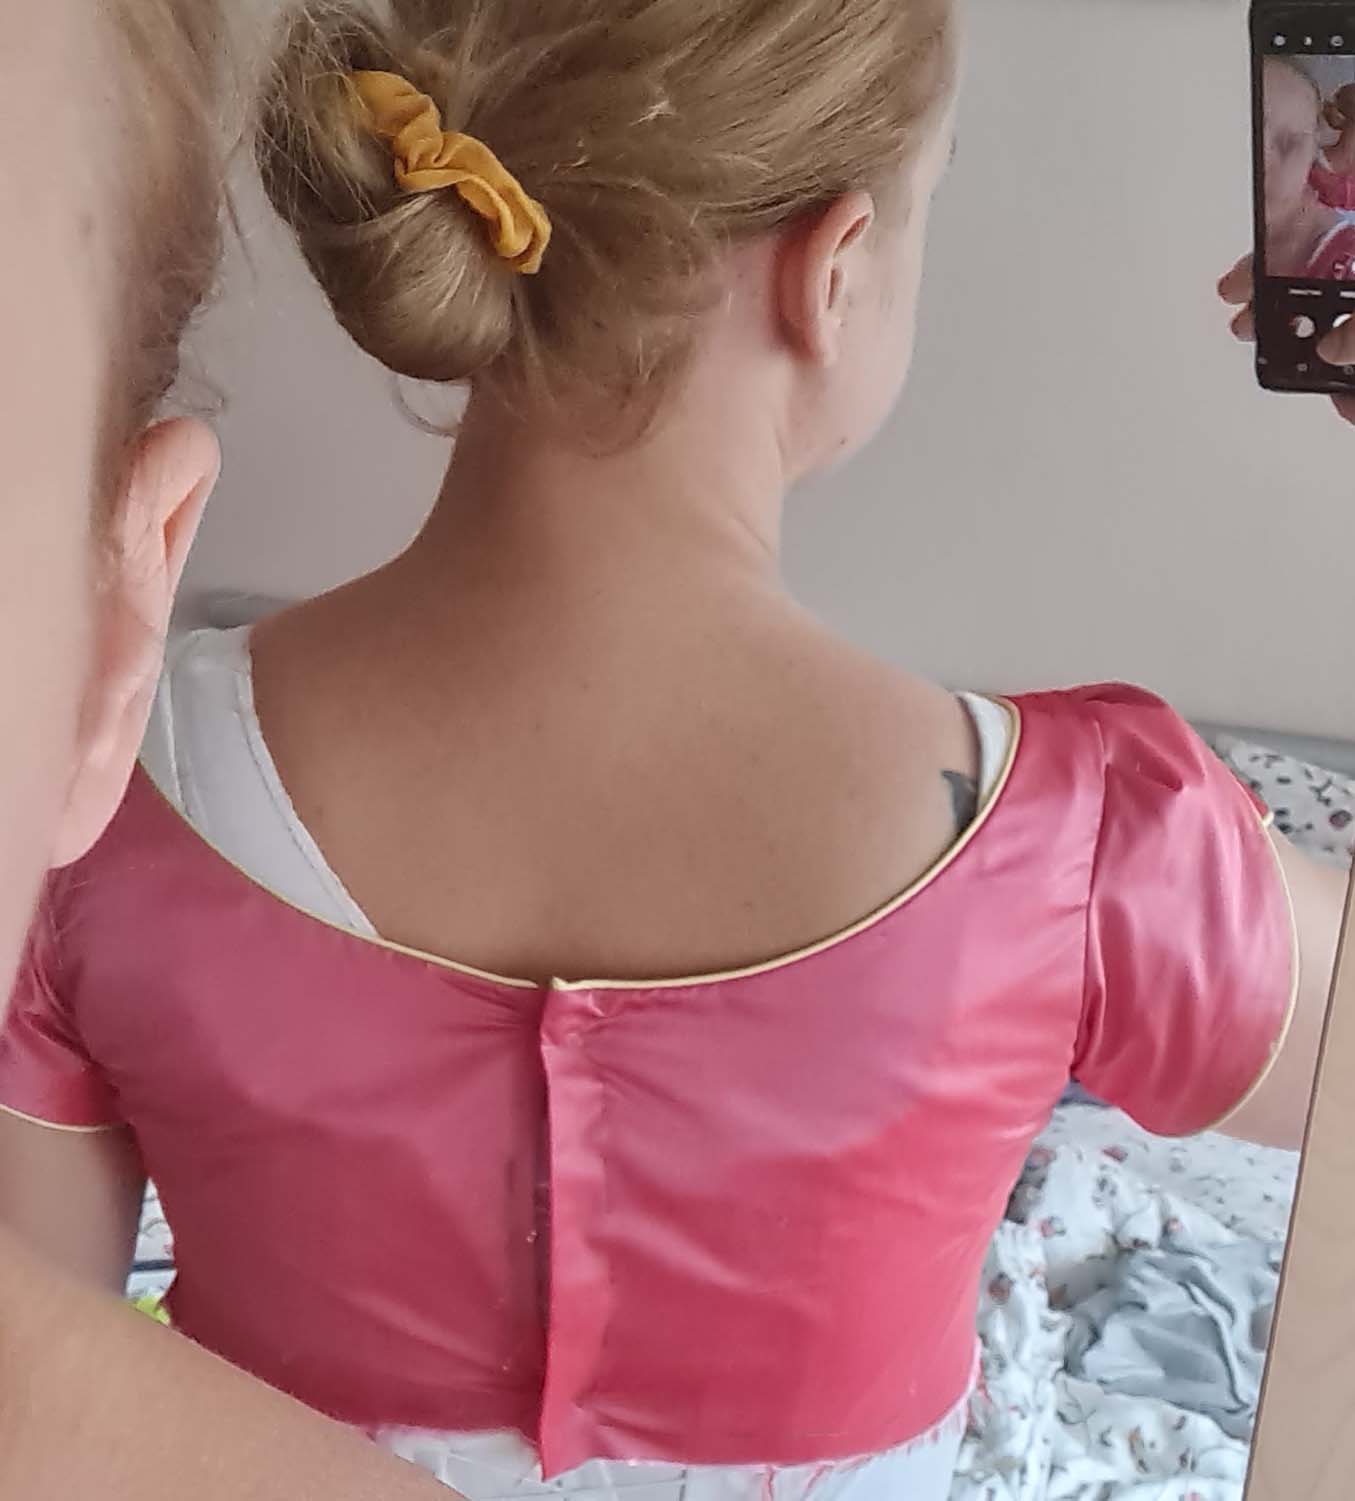

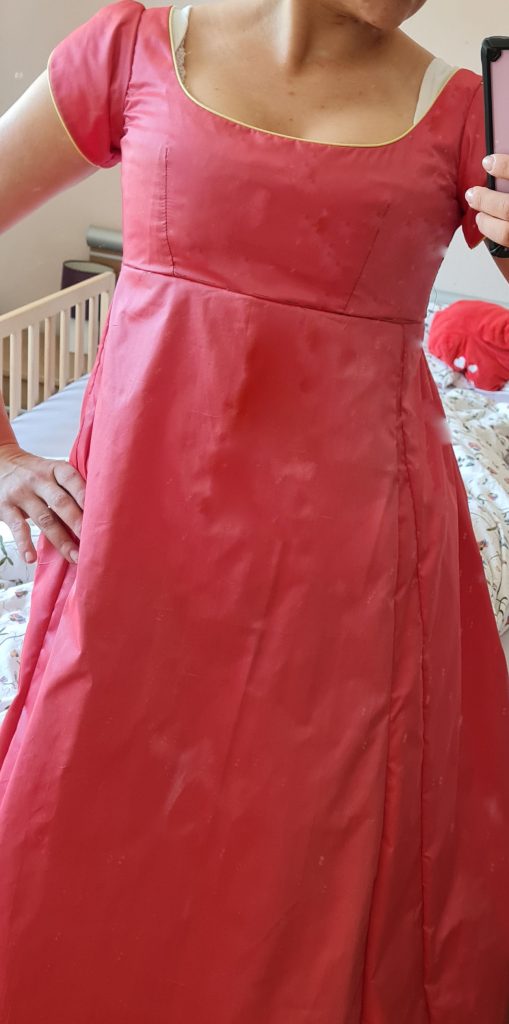
And finally a snapshot of the finished dress. I hope you enjoyed my tutorial, please leave a comment if so.