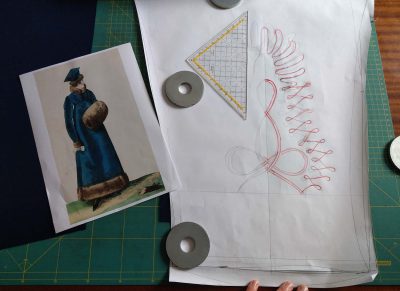
When I first planned my redingote it seemed there was no time left to do all that soutache embroidery I wanted to do. Sadly the event I made the redingote for was canceled, but fortunately now I had enough time. As I am a little bit lazy I was searching for a method to attach about 70 meters of soutache braid neatly to the skirt.
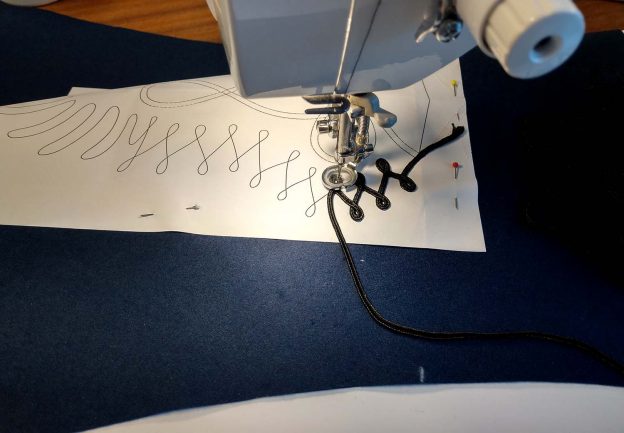
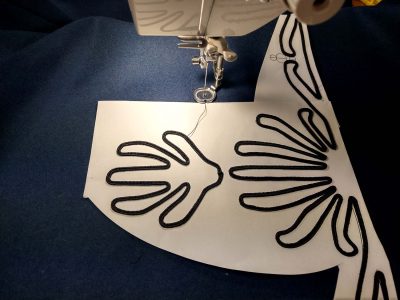
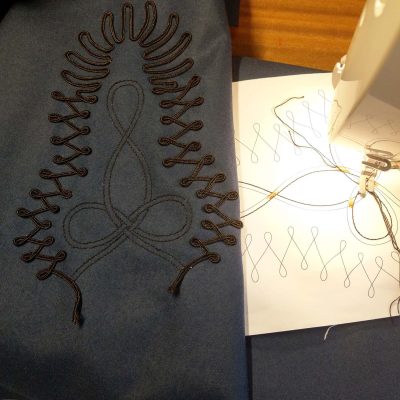
First I drew the pattern directly on the sleeve pattern piece and then digitized. For the skirt I drew and digitized each block of the pattern separately to arrange the blocks to fit my seam. Then I printed the pattern on several pieces of paper which I pinned to the skirt along the seam. Now it was easy to follow the lines while attaching the soutache braid with the free motion quilting foot.

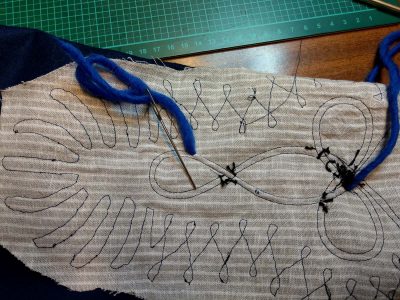
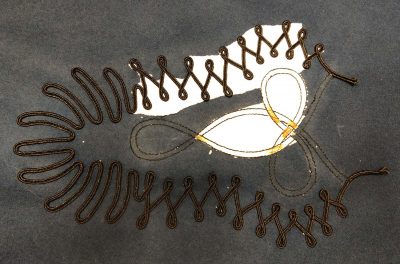
For the Trapunto part I threaded a topstitching needle with a quite thick thread, but used a thinner thread on the bobbin. For stitching the tunnels with the pattern going up and down I left long threads without locking. After doing all the stitching I pulled the threads to the wrong side and knotted there. As you can see I used a cotton fabric as backing. With an ale I pierced the backing to insert felt wool threads.
Advantages: It´s time saving, it´s accurate, no need to transfer the pattern on to the fabric.
Disadvantages: As you can see on several pics the wrong side is a little bit of a mess, with a looping bobbin thread. To get rid of the paper wasn´t as easy as I thought. Inside the little loops I needed a tweezers to pull out the paper. Overall I´d do it that way again!
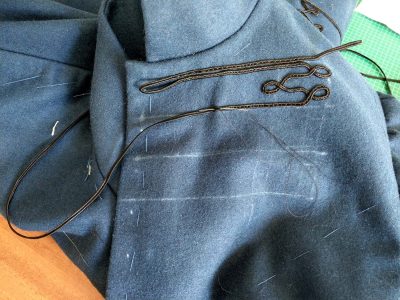
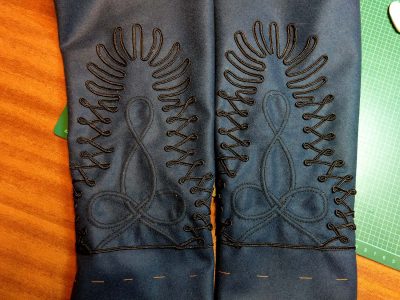
On the bodice front I attached the braid by hand. I used Fray-Check to secure the ends of the soutache braid.