
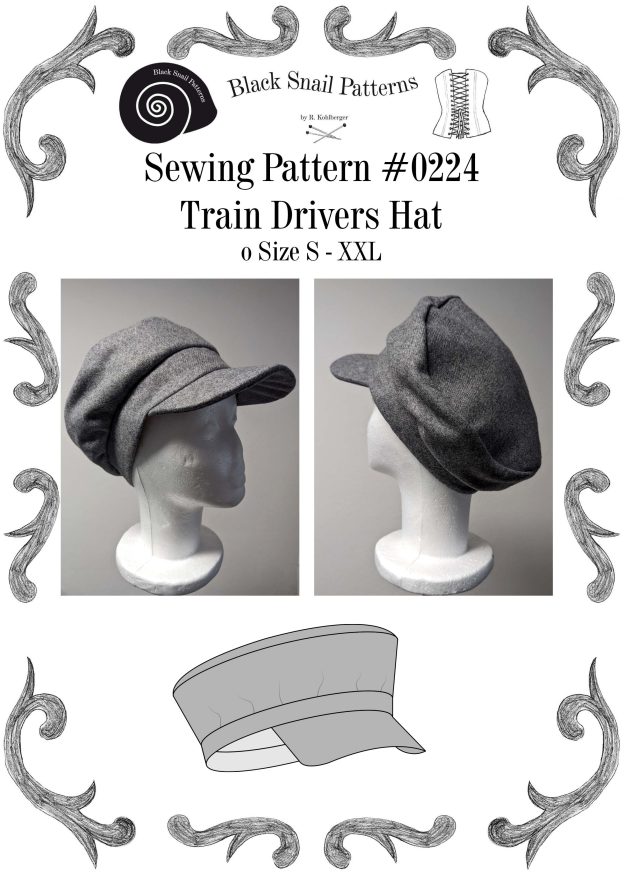
In our previous posts, we dived into the timeless appeal of a vintage three-piece cycling outfit, comprising the Norfolk jacket, cycling breeches, and matching waistcoat (ok, not quite finished jet, but in progress).
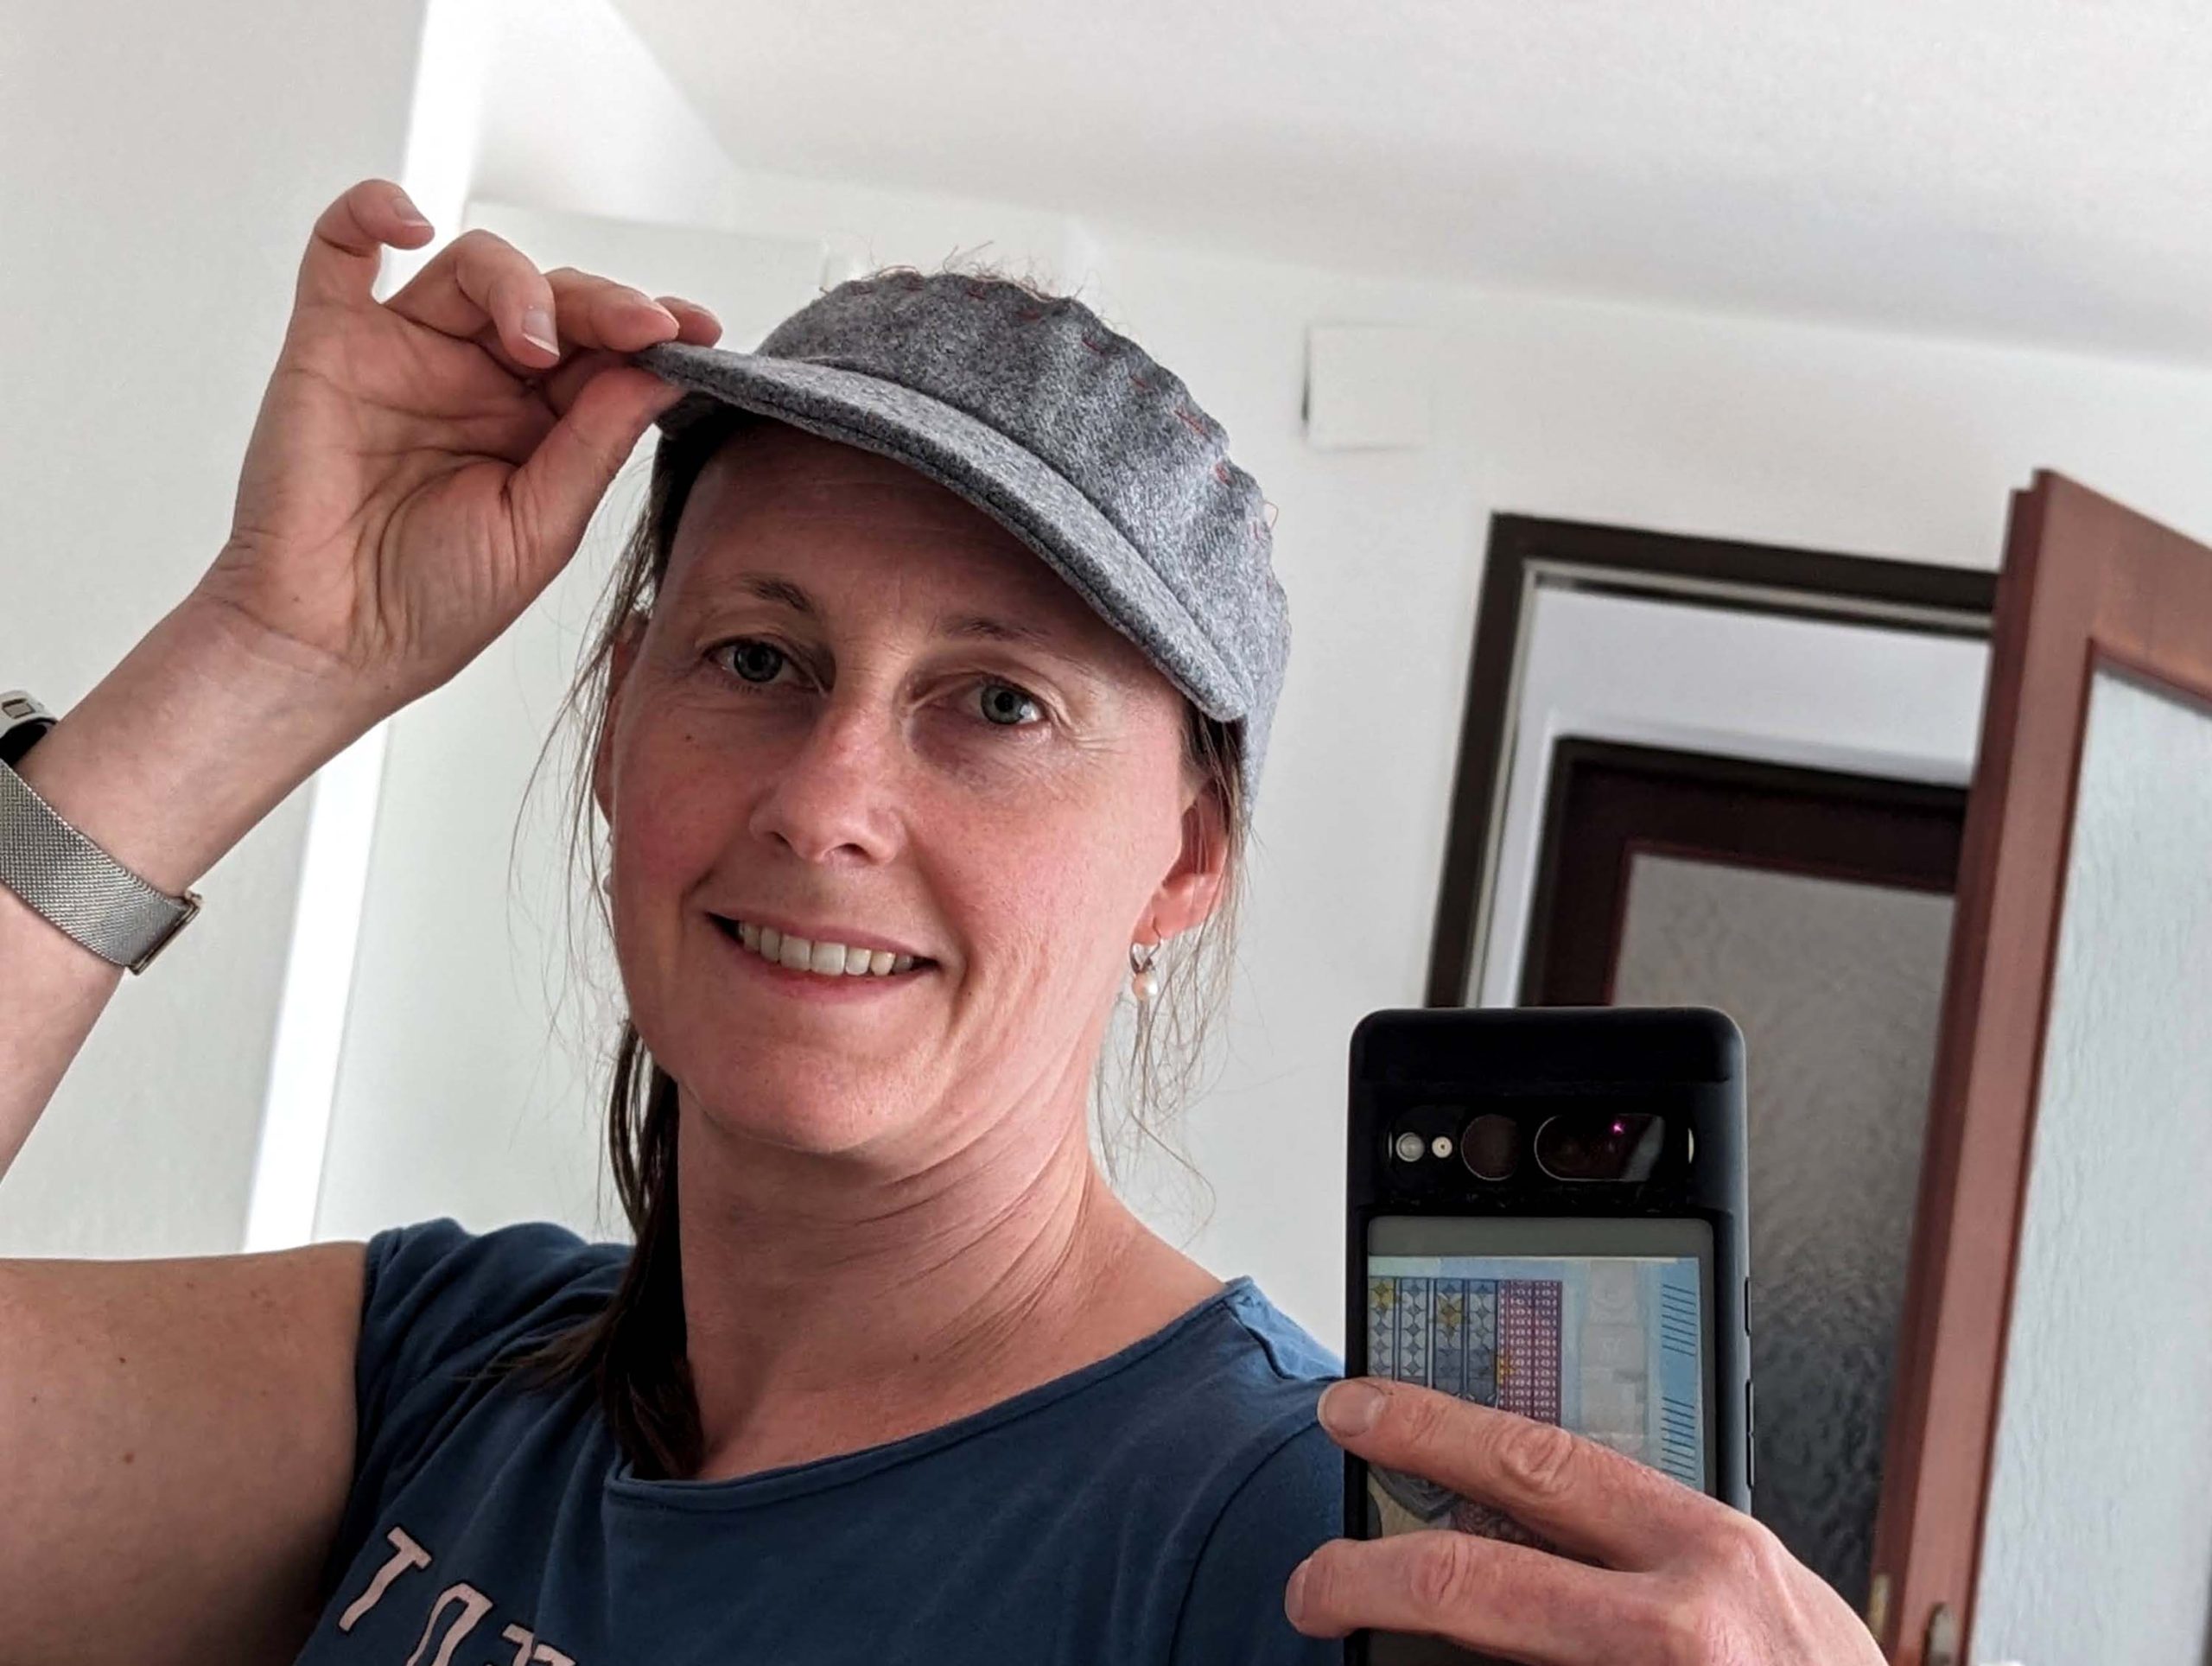
Now, to complete the ensemble and add that perfect finishing touch, we’re moving over to the world of headwear, with a tutorial on crafting your very own train driver’s hat or cap. This accessory not only evokes nostalgia for the 20th century but also offers practicality and style for any cycling adventure. Plus, by using the remaining fabric from your ensemble, you can achieve a cohesive look that’s both bespoke and charming.
Grab your free pattern here: Train Drivers Hat
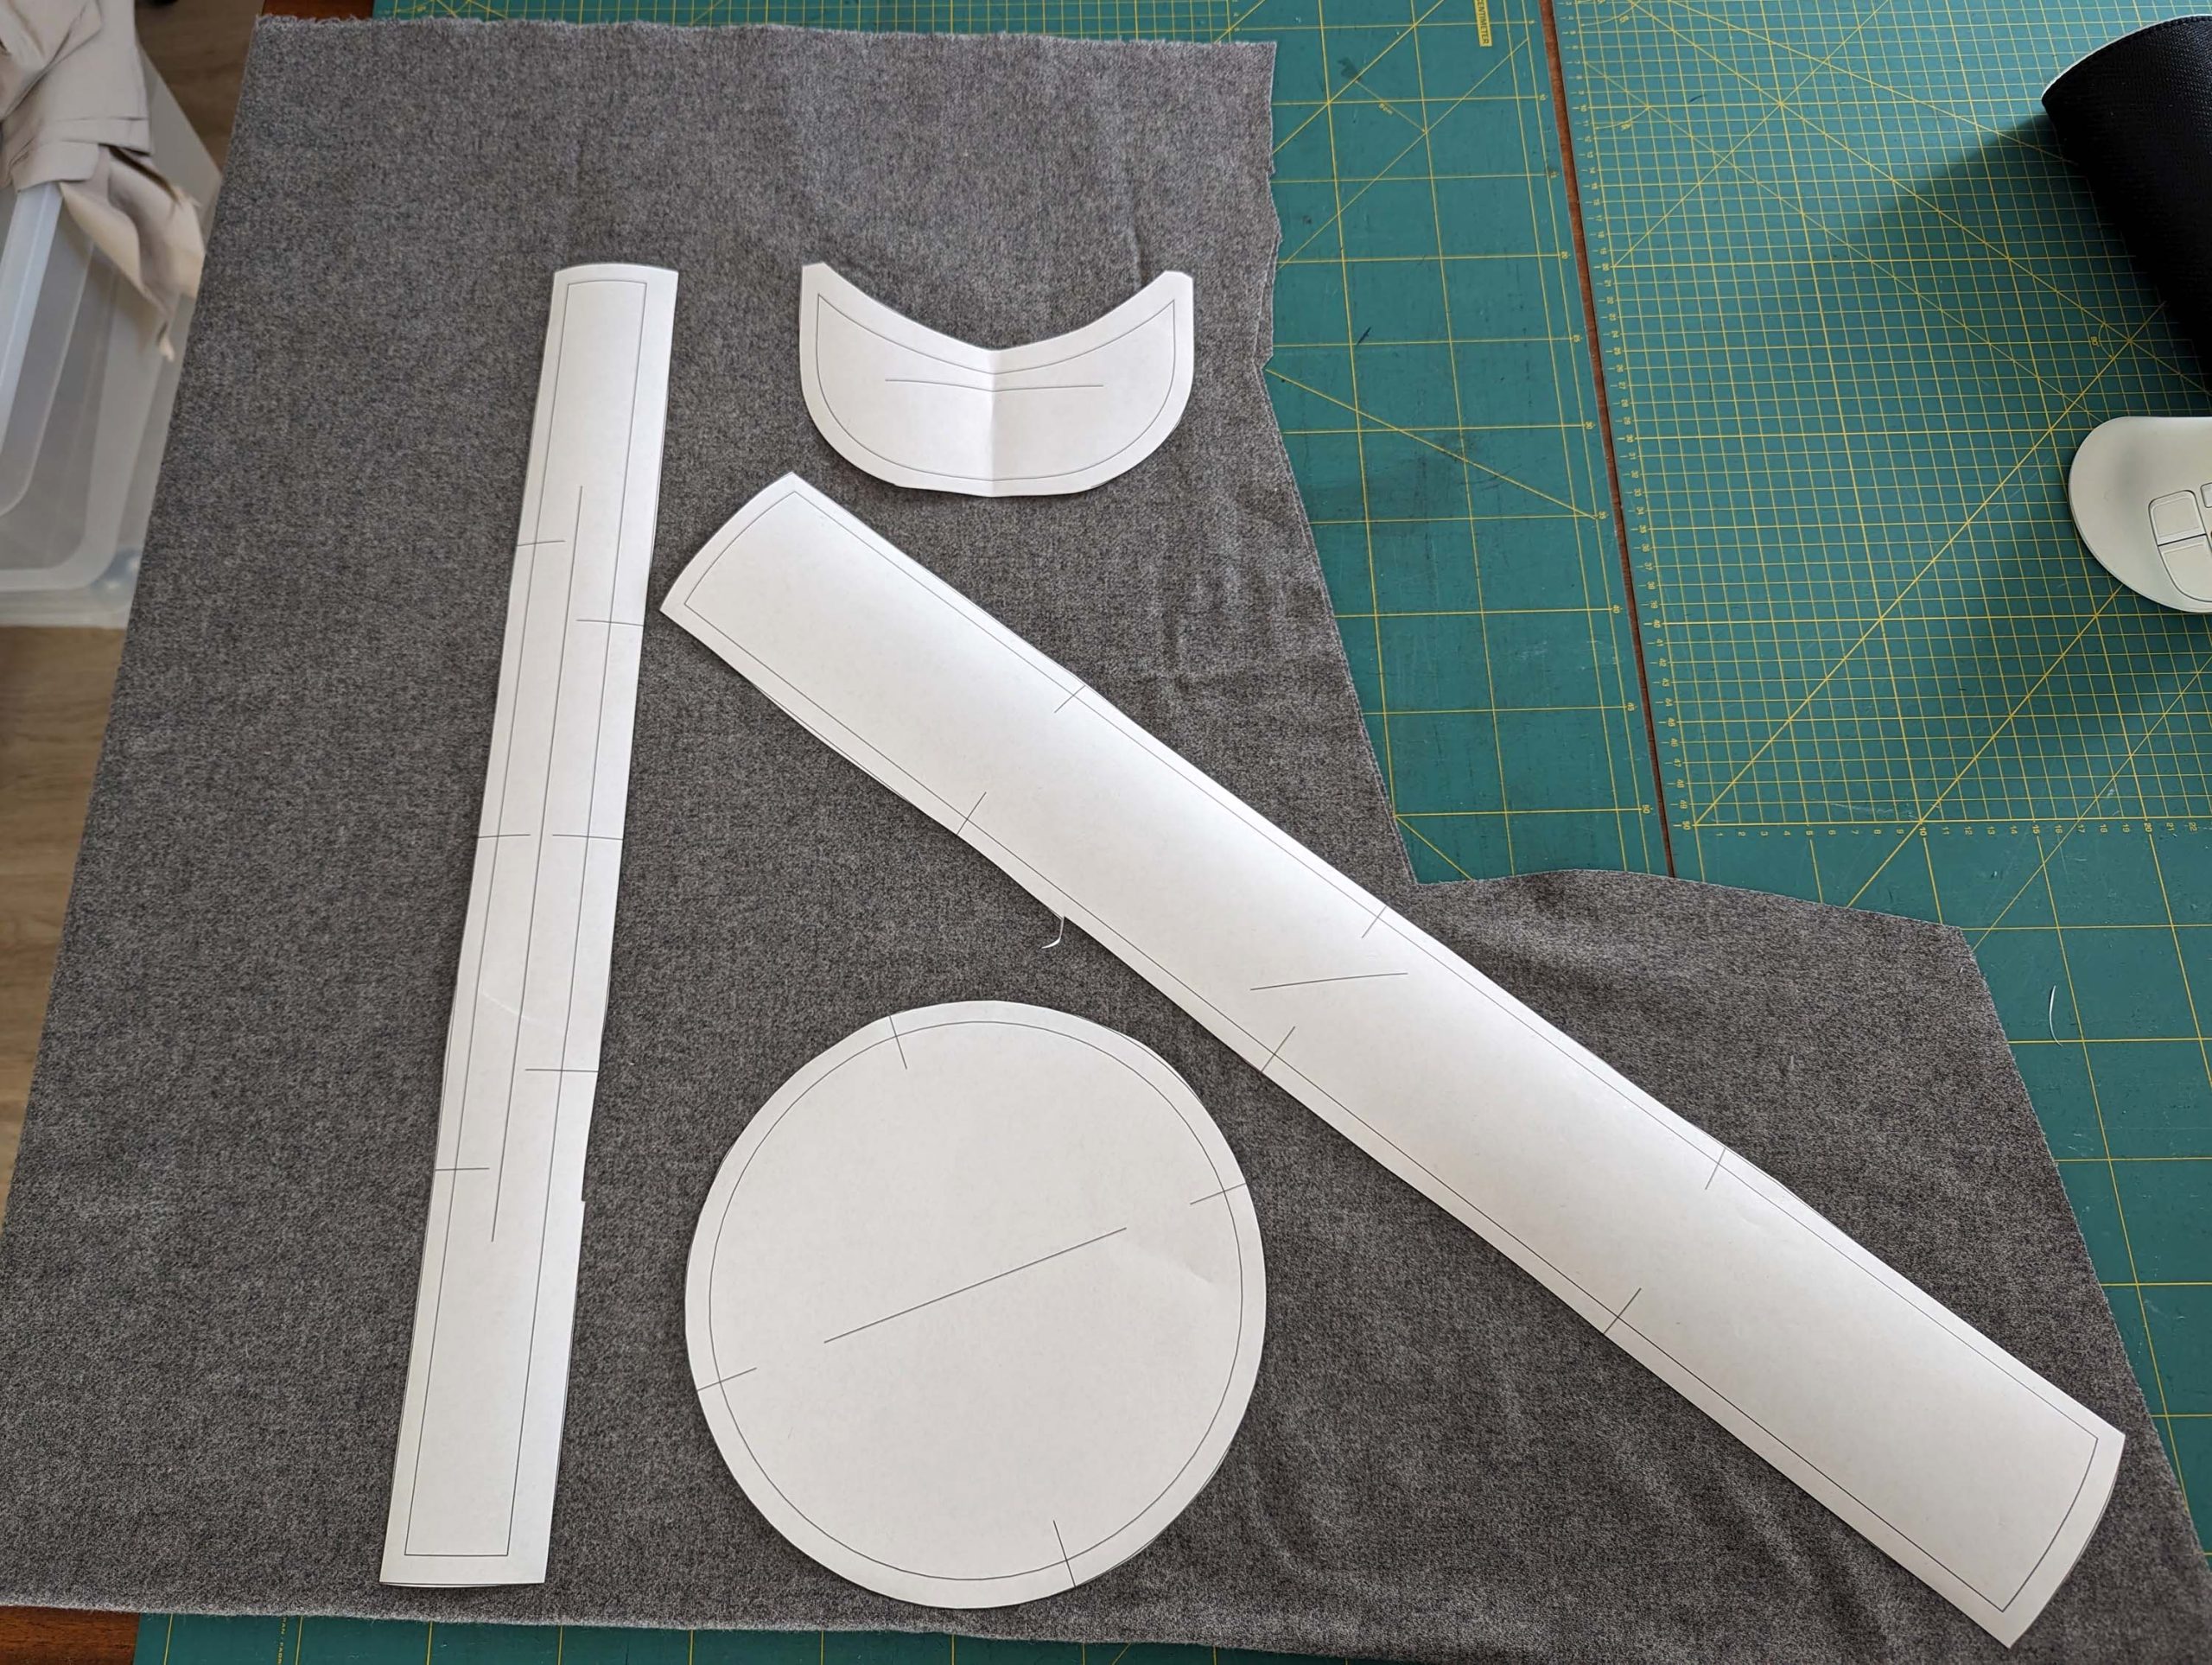
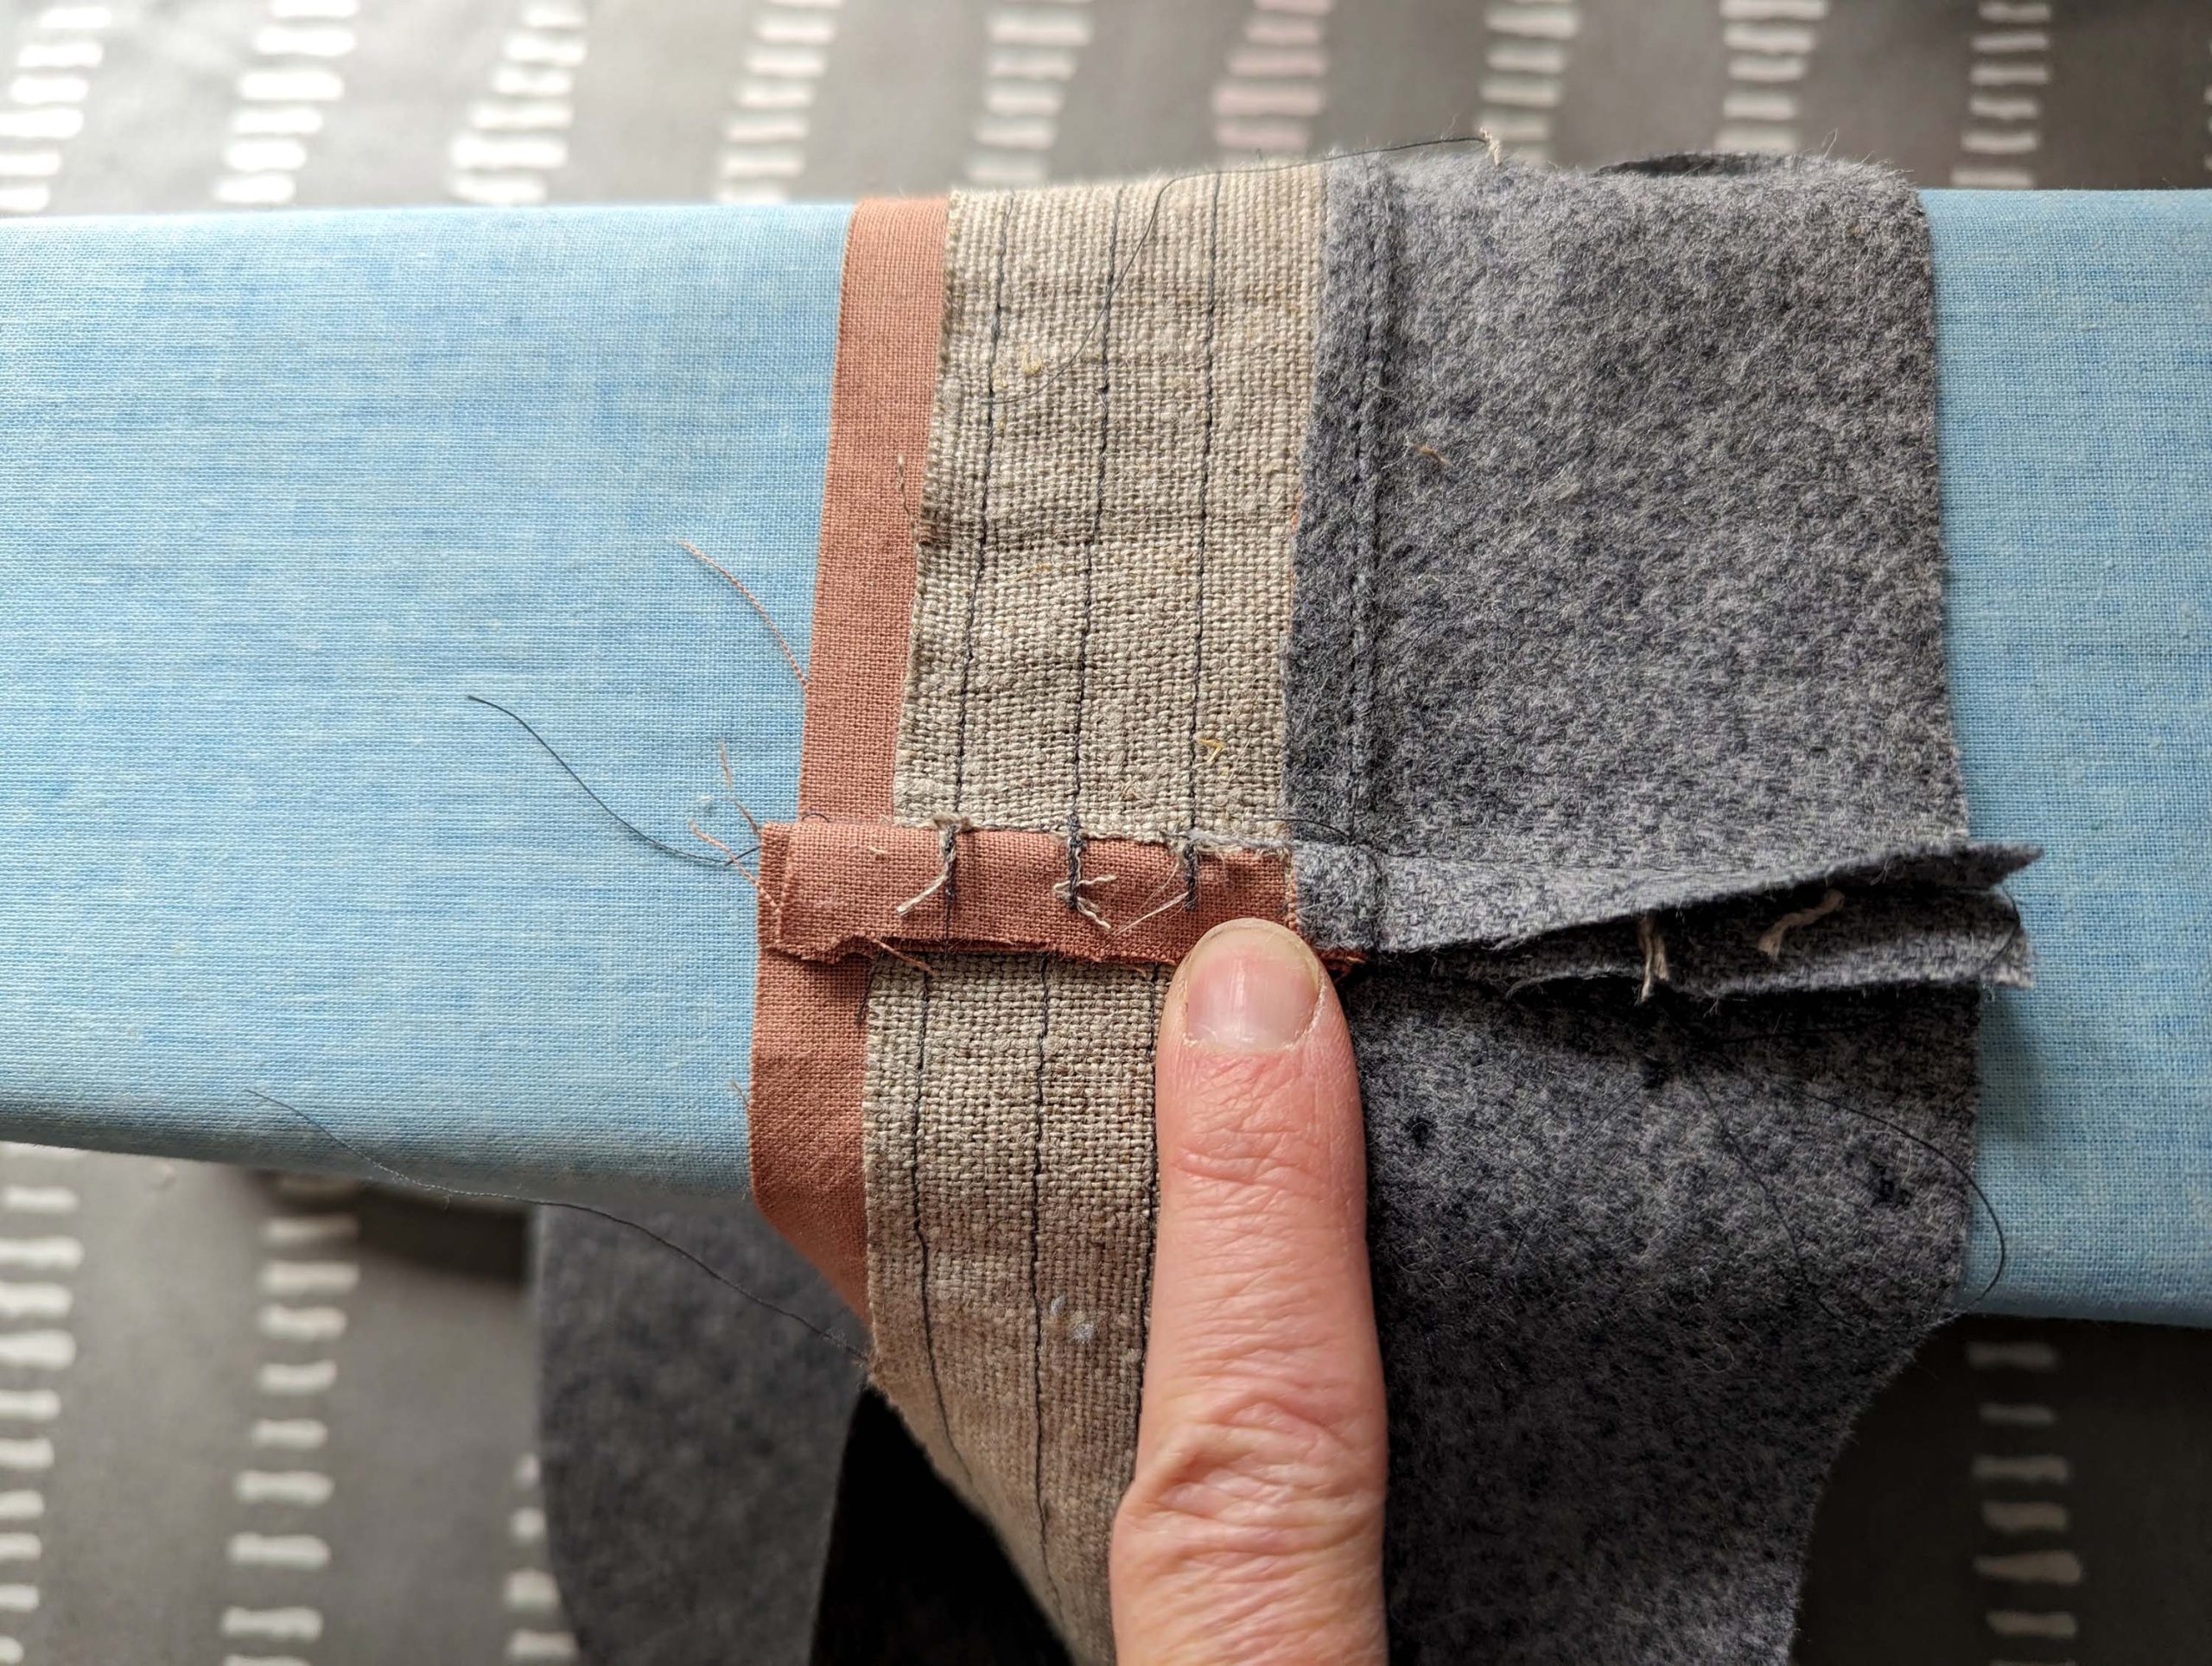
After downloading the pattern and assembling the sheets we are ready for cutting. Take care of the grainline and the pattern when sewing with checked or striped fabrics. Mine was plain grey, so nothing to bother. Take care of the seam allowances, it’s just 3/8″ (1cm) for easy sewing at all the curves, except where noted on the individual pattern pieces.
After downloading and assembling the pattern sheets, we’re all set for the step of cutting out our fabric pieces. While working with checked or striped fabrics, it’s crucial to pay attention to the grainline and pattern alignment to ensure a neat finish. However, if, like mine, your fabric is plain grey, you’re spared this accuracy.
For crafting the visor, I opted for cork instead of traditional cardboard due to its waterproof nature. You can find thin cork sheets at your local hardware store, typically used for floor isolation. To ensure sturdiness and durability, I glued together two layers of cork, providing a better grip.

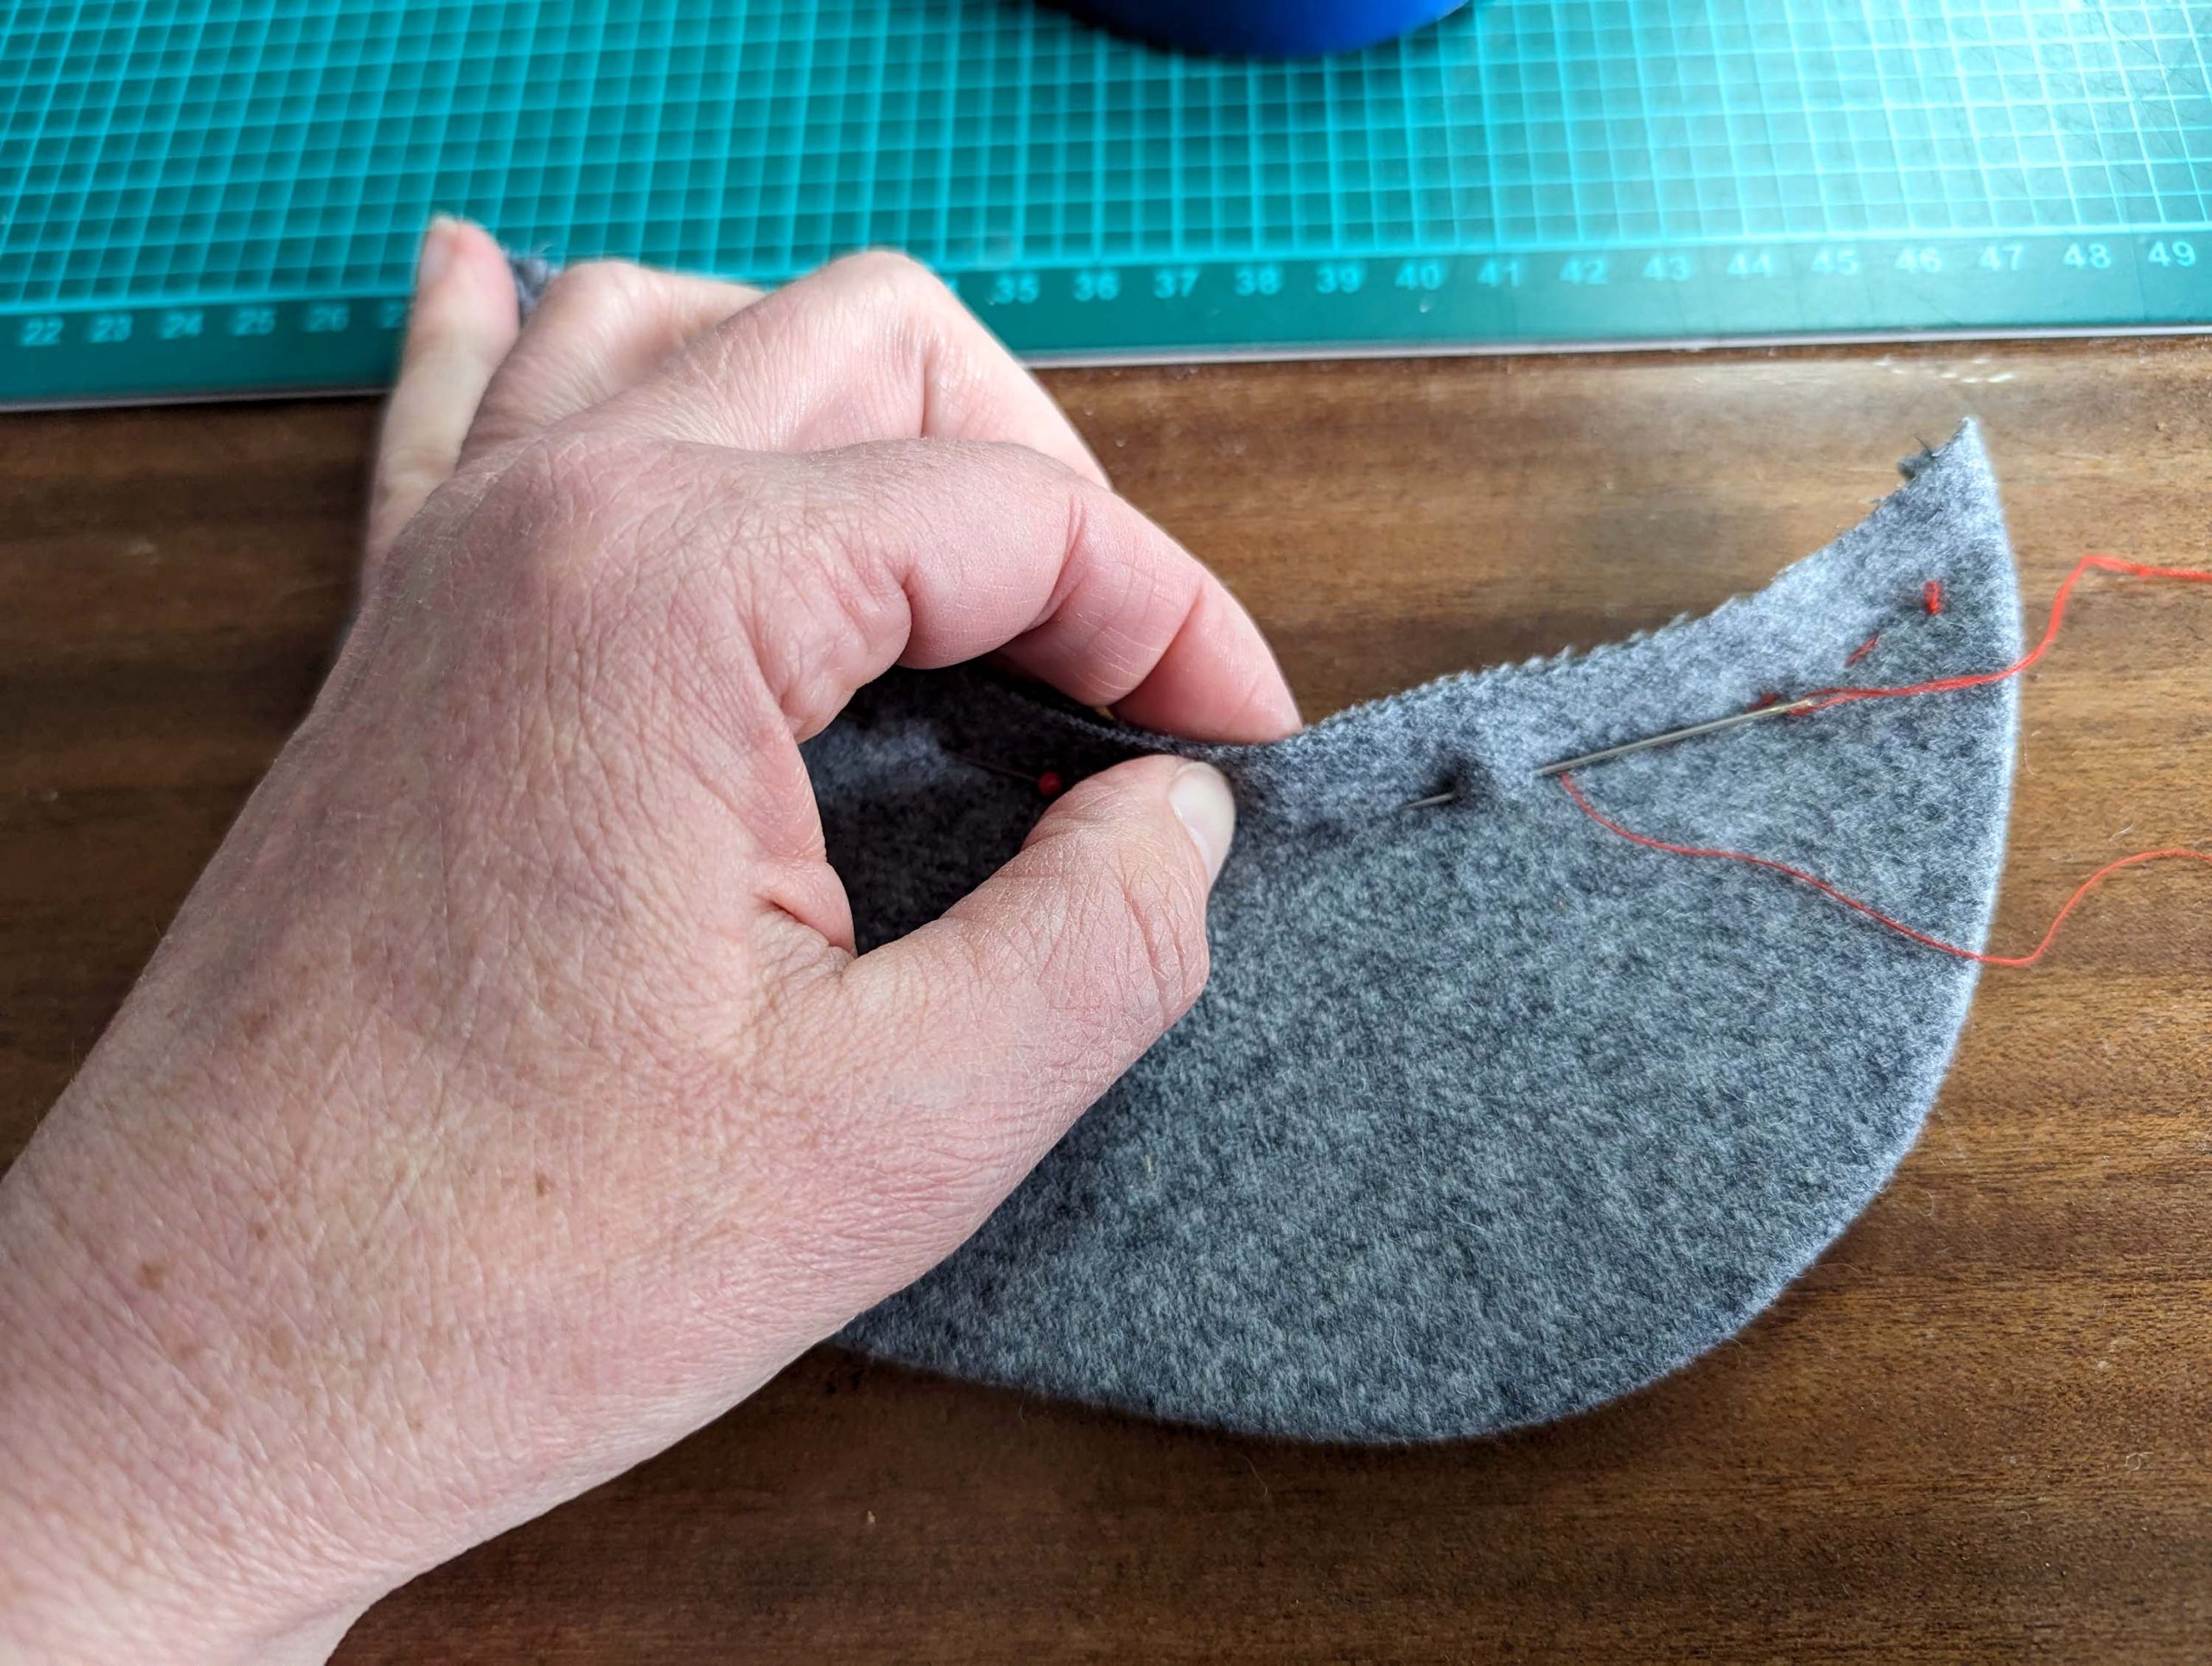
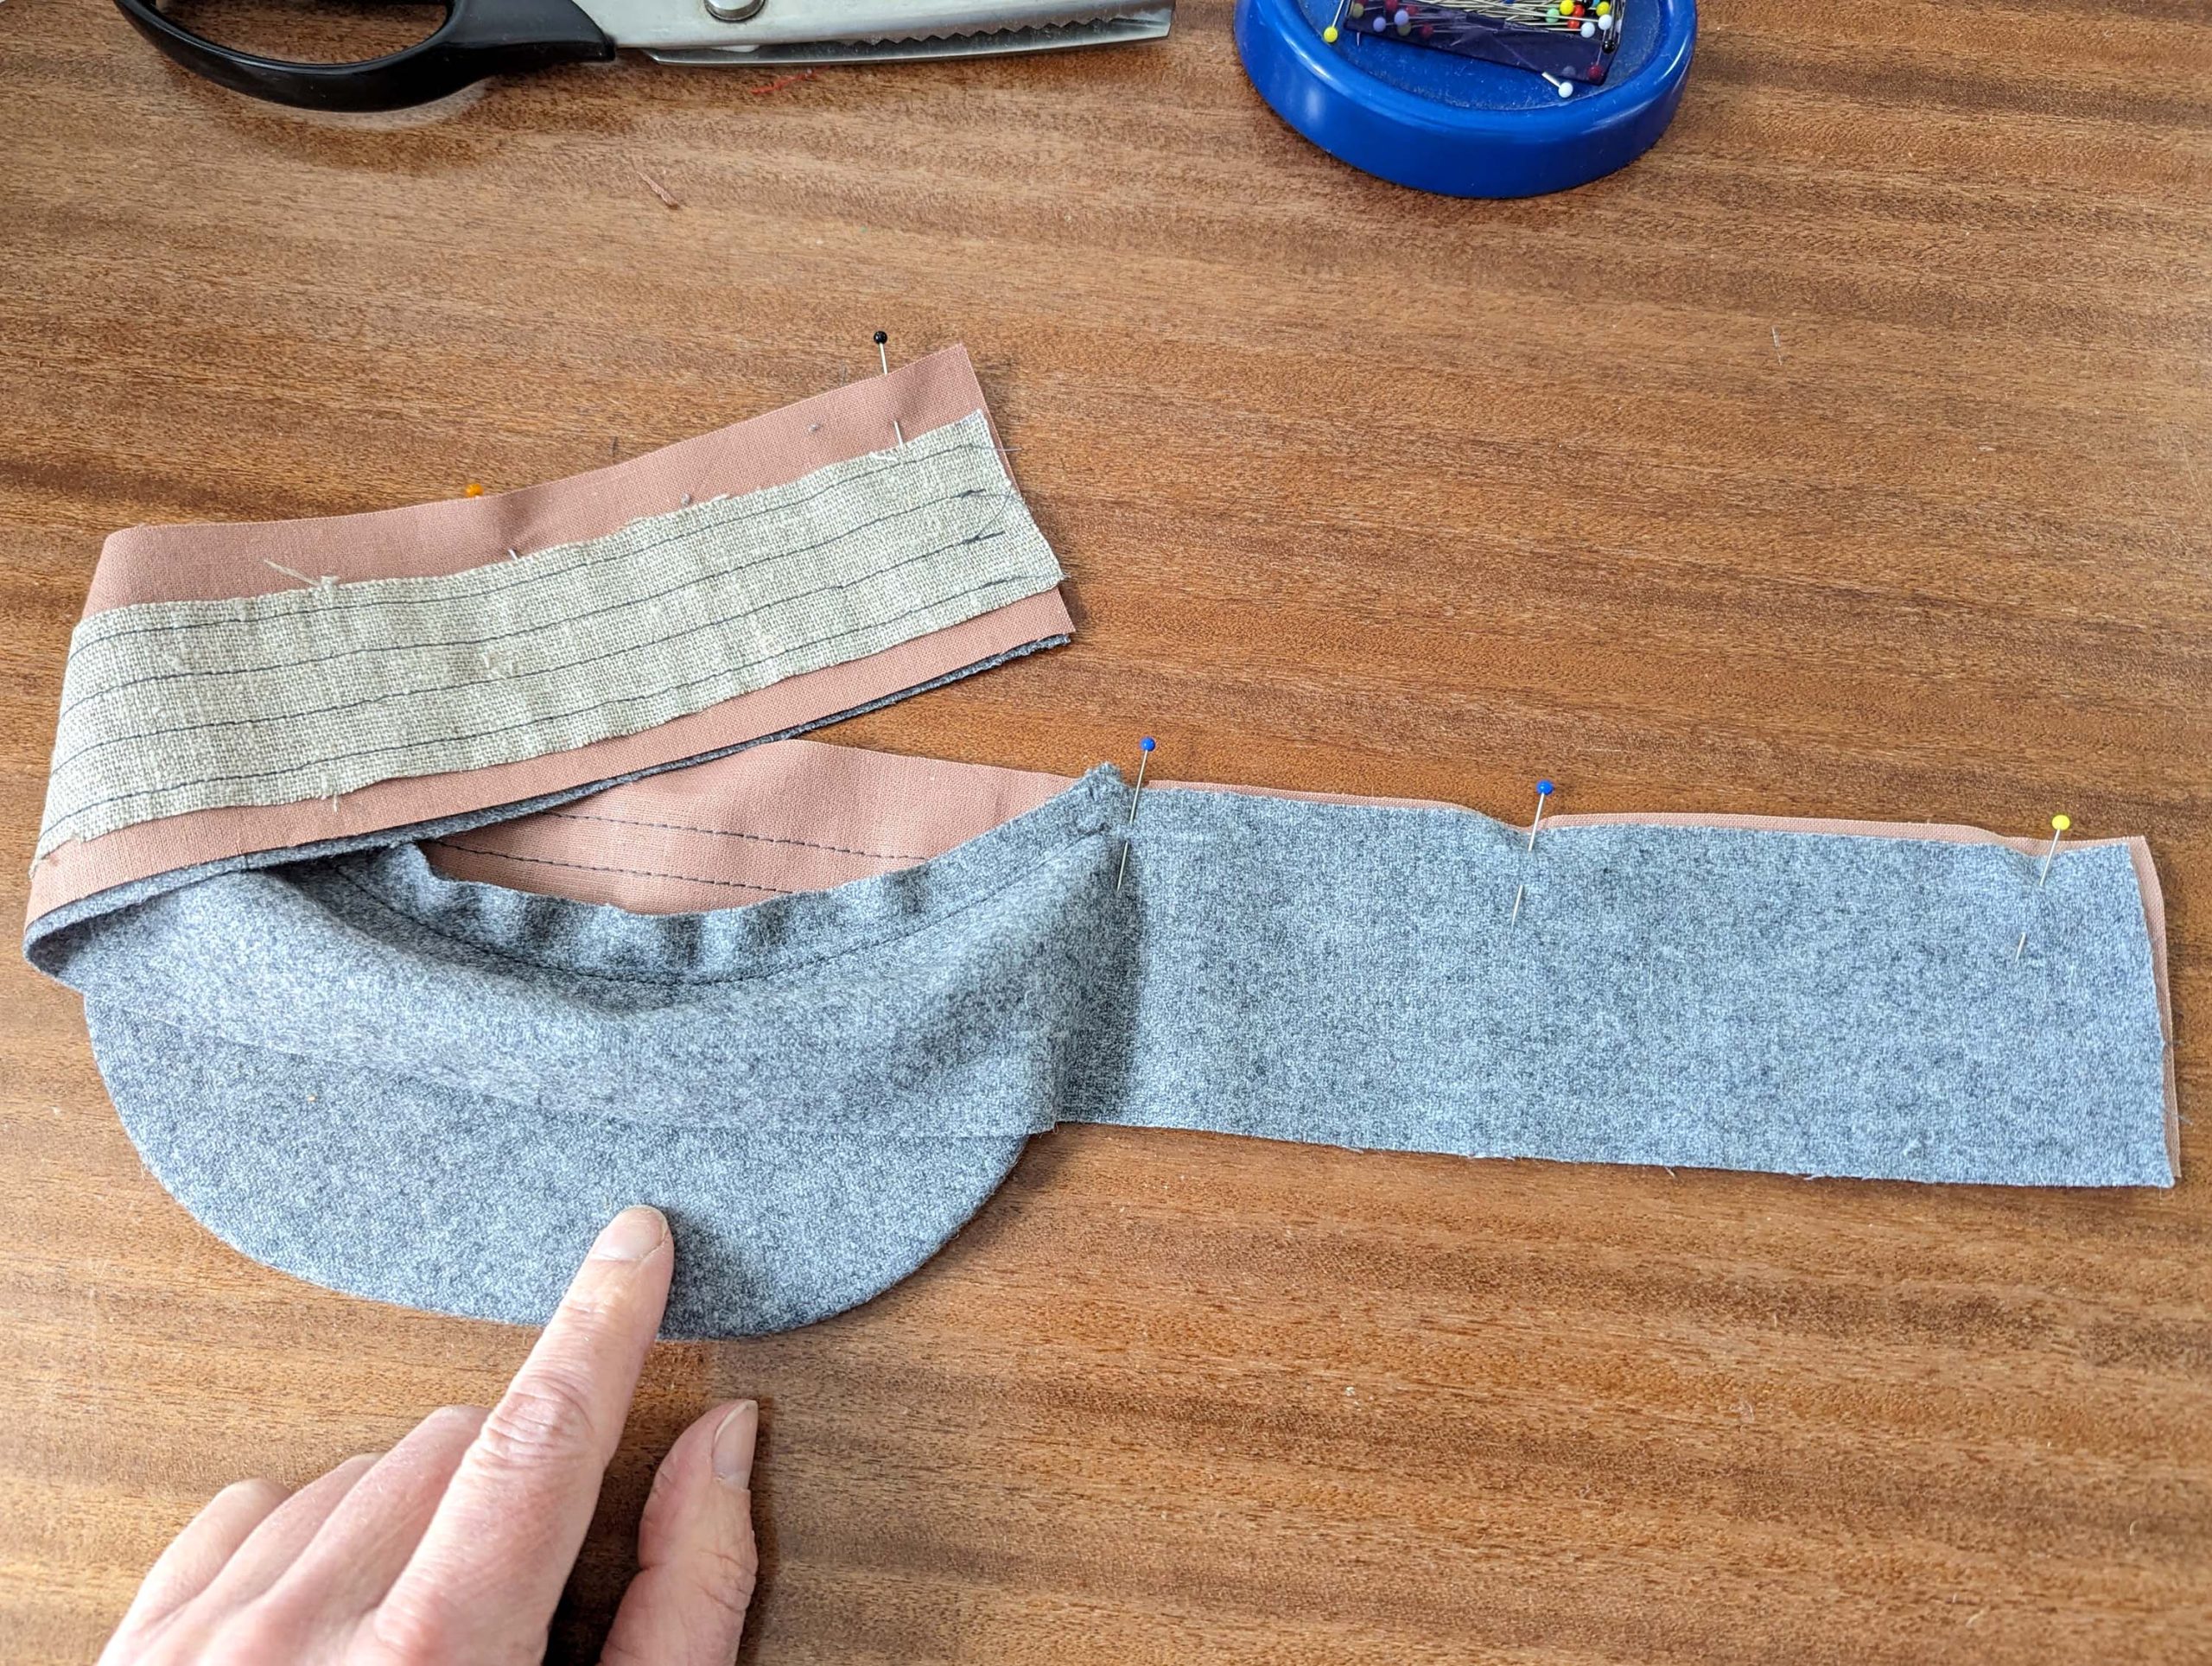
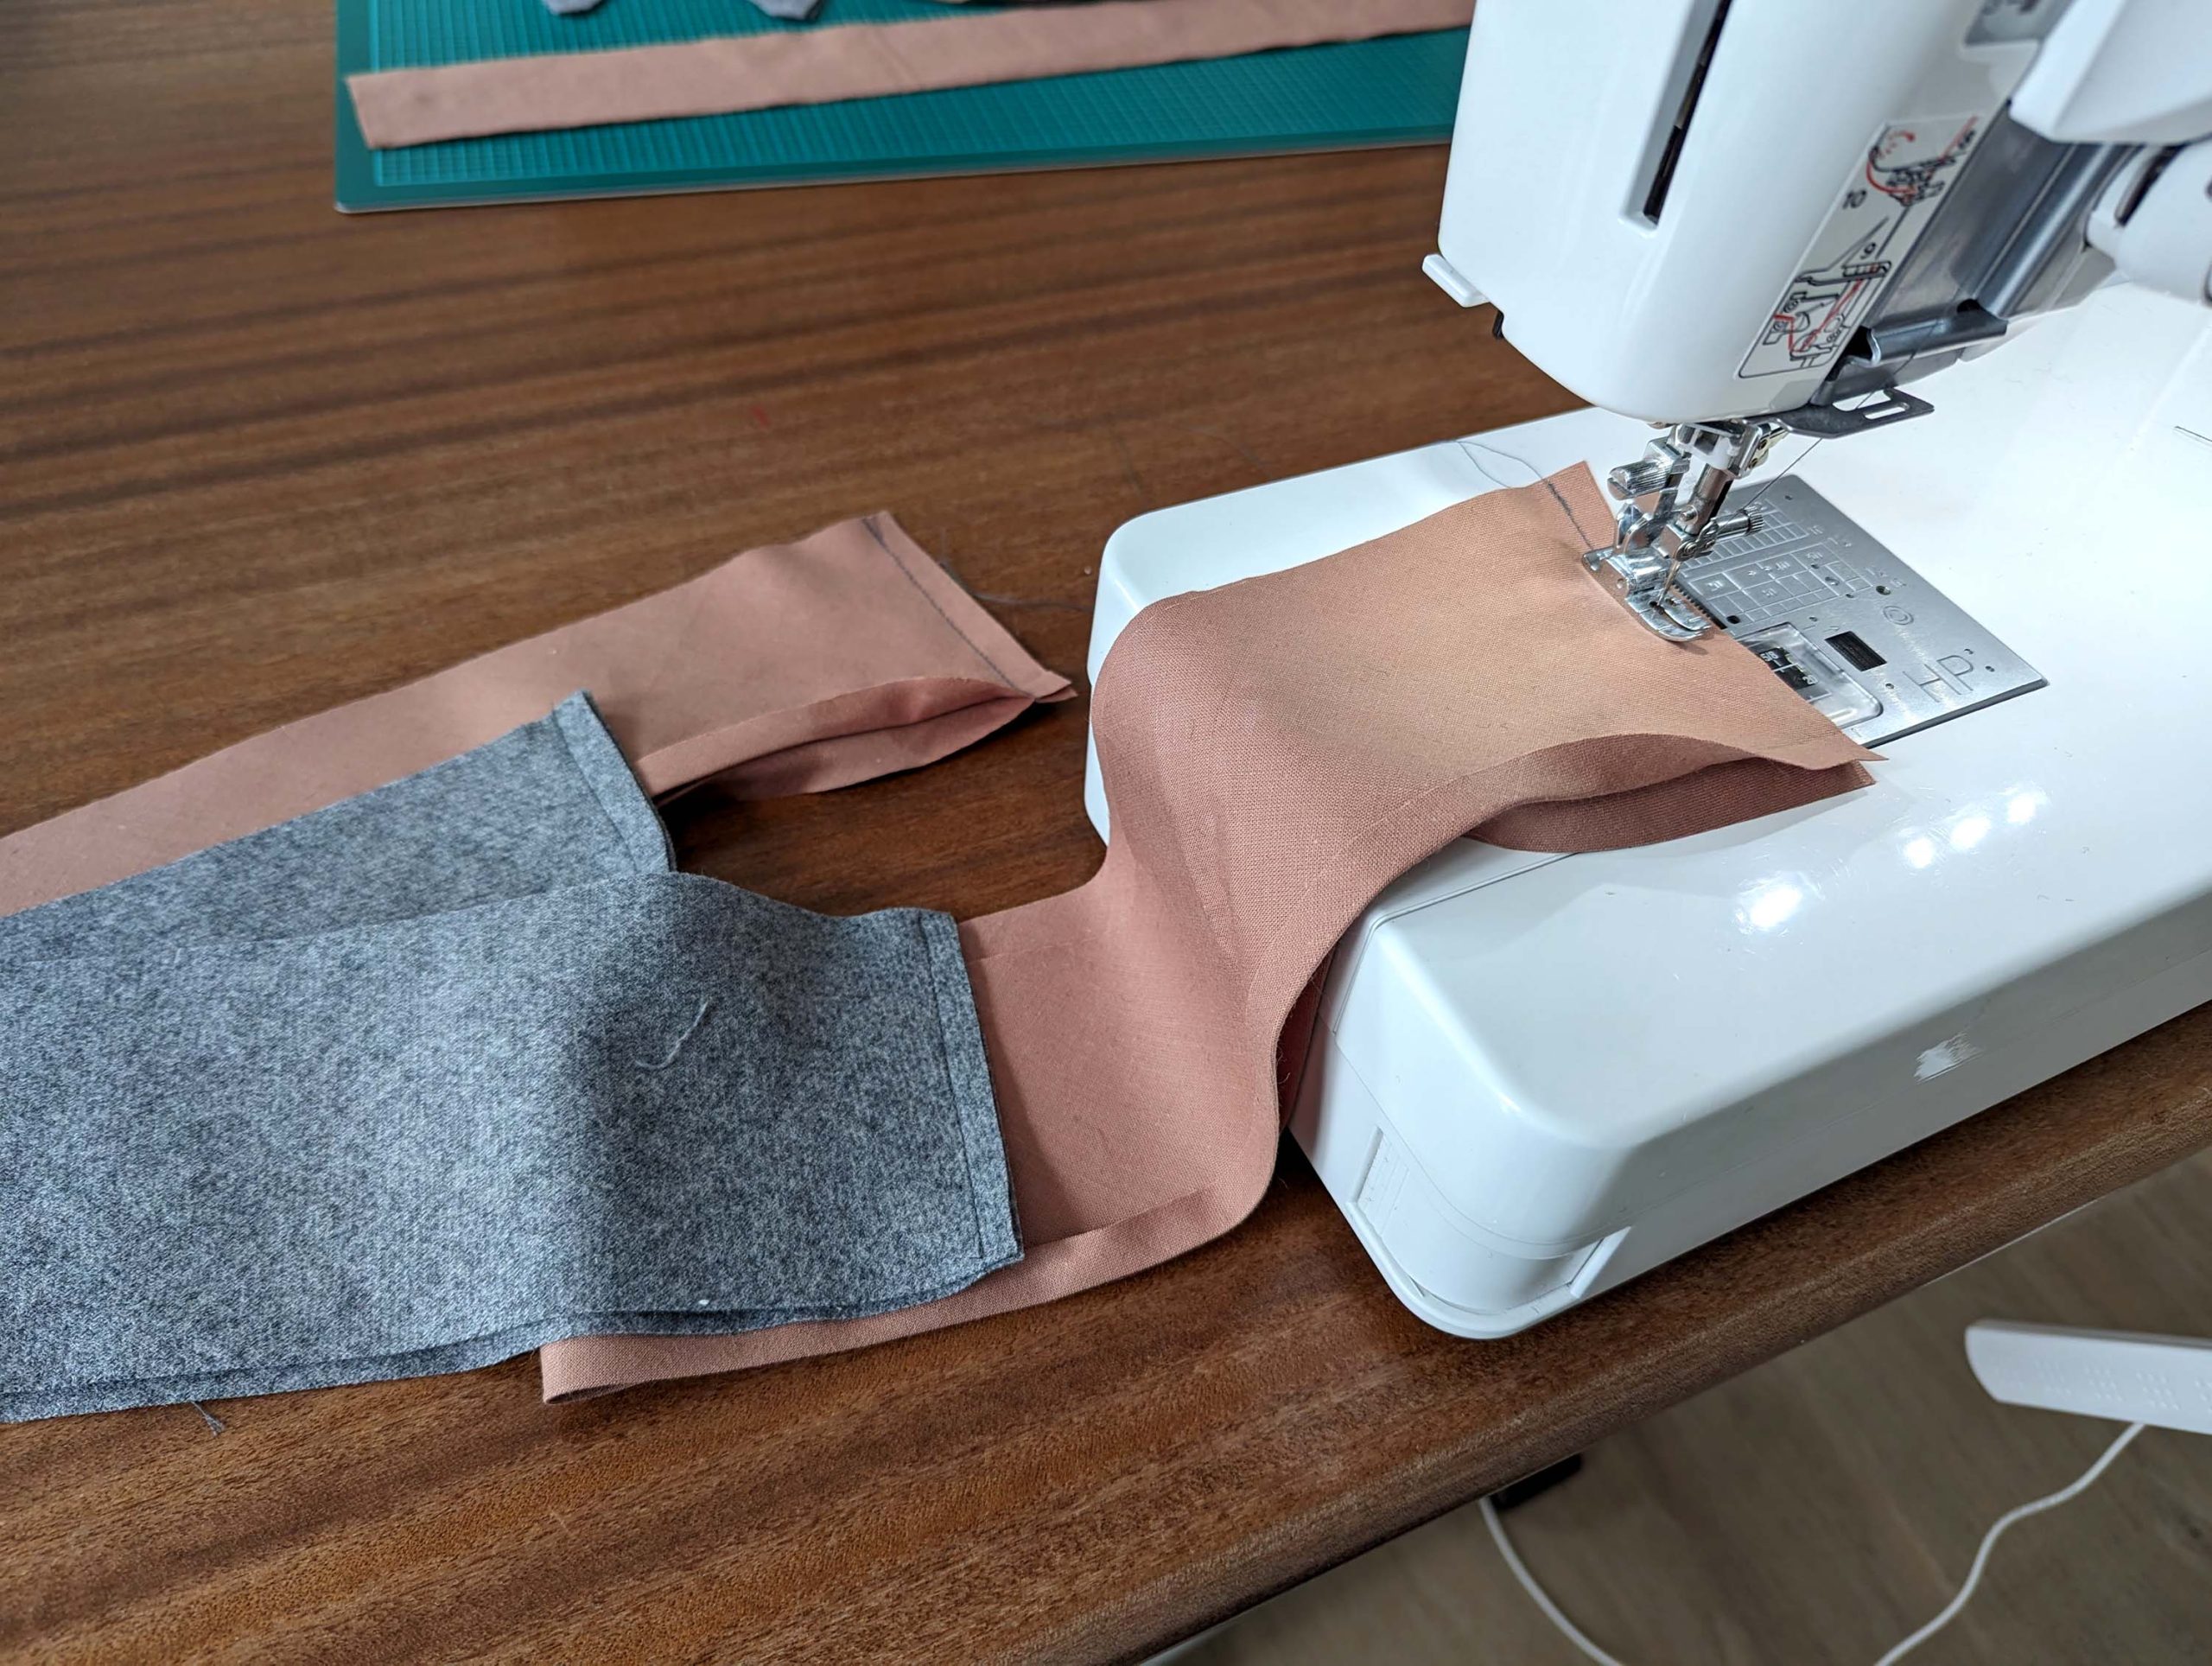
The next step is to get on with the visor, sewing together the two layers of fashion fabric. You´d need some extra with at the top layer for the turn of cloth, so push back the top layer about 1/8″ (2-3mm). First, sew with the bottom up, then sew again, with the top layer up. Trim back the seam allowances and mark the top and bottom. Turn with the right side out and insert the prepared cork.

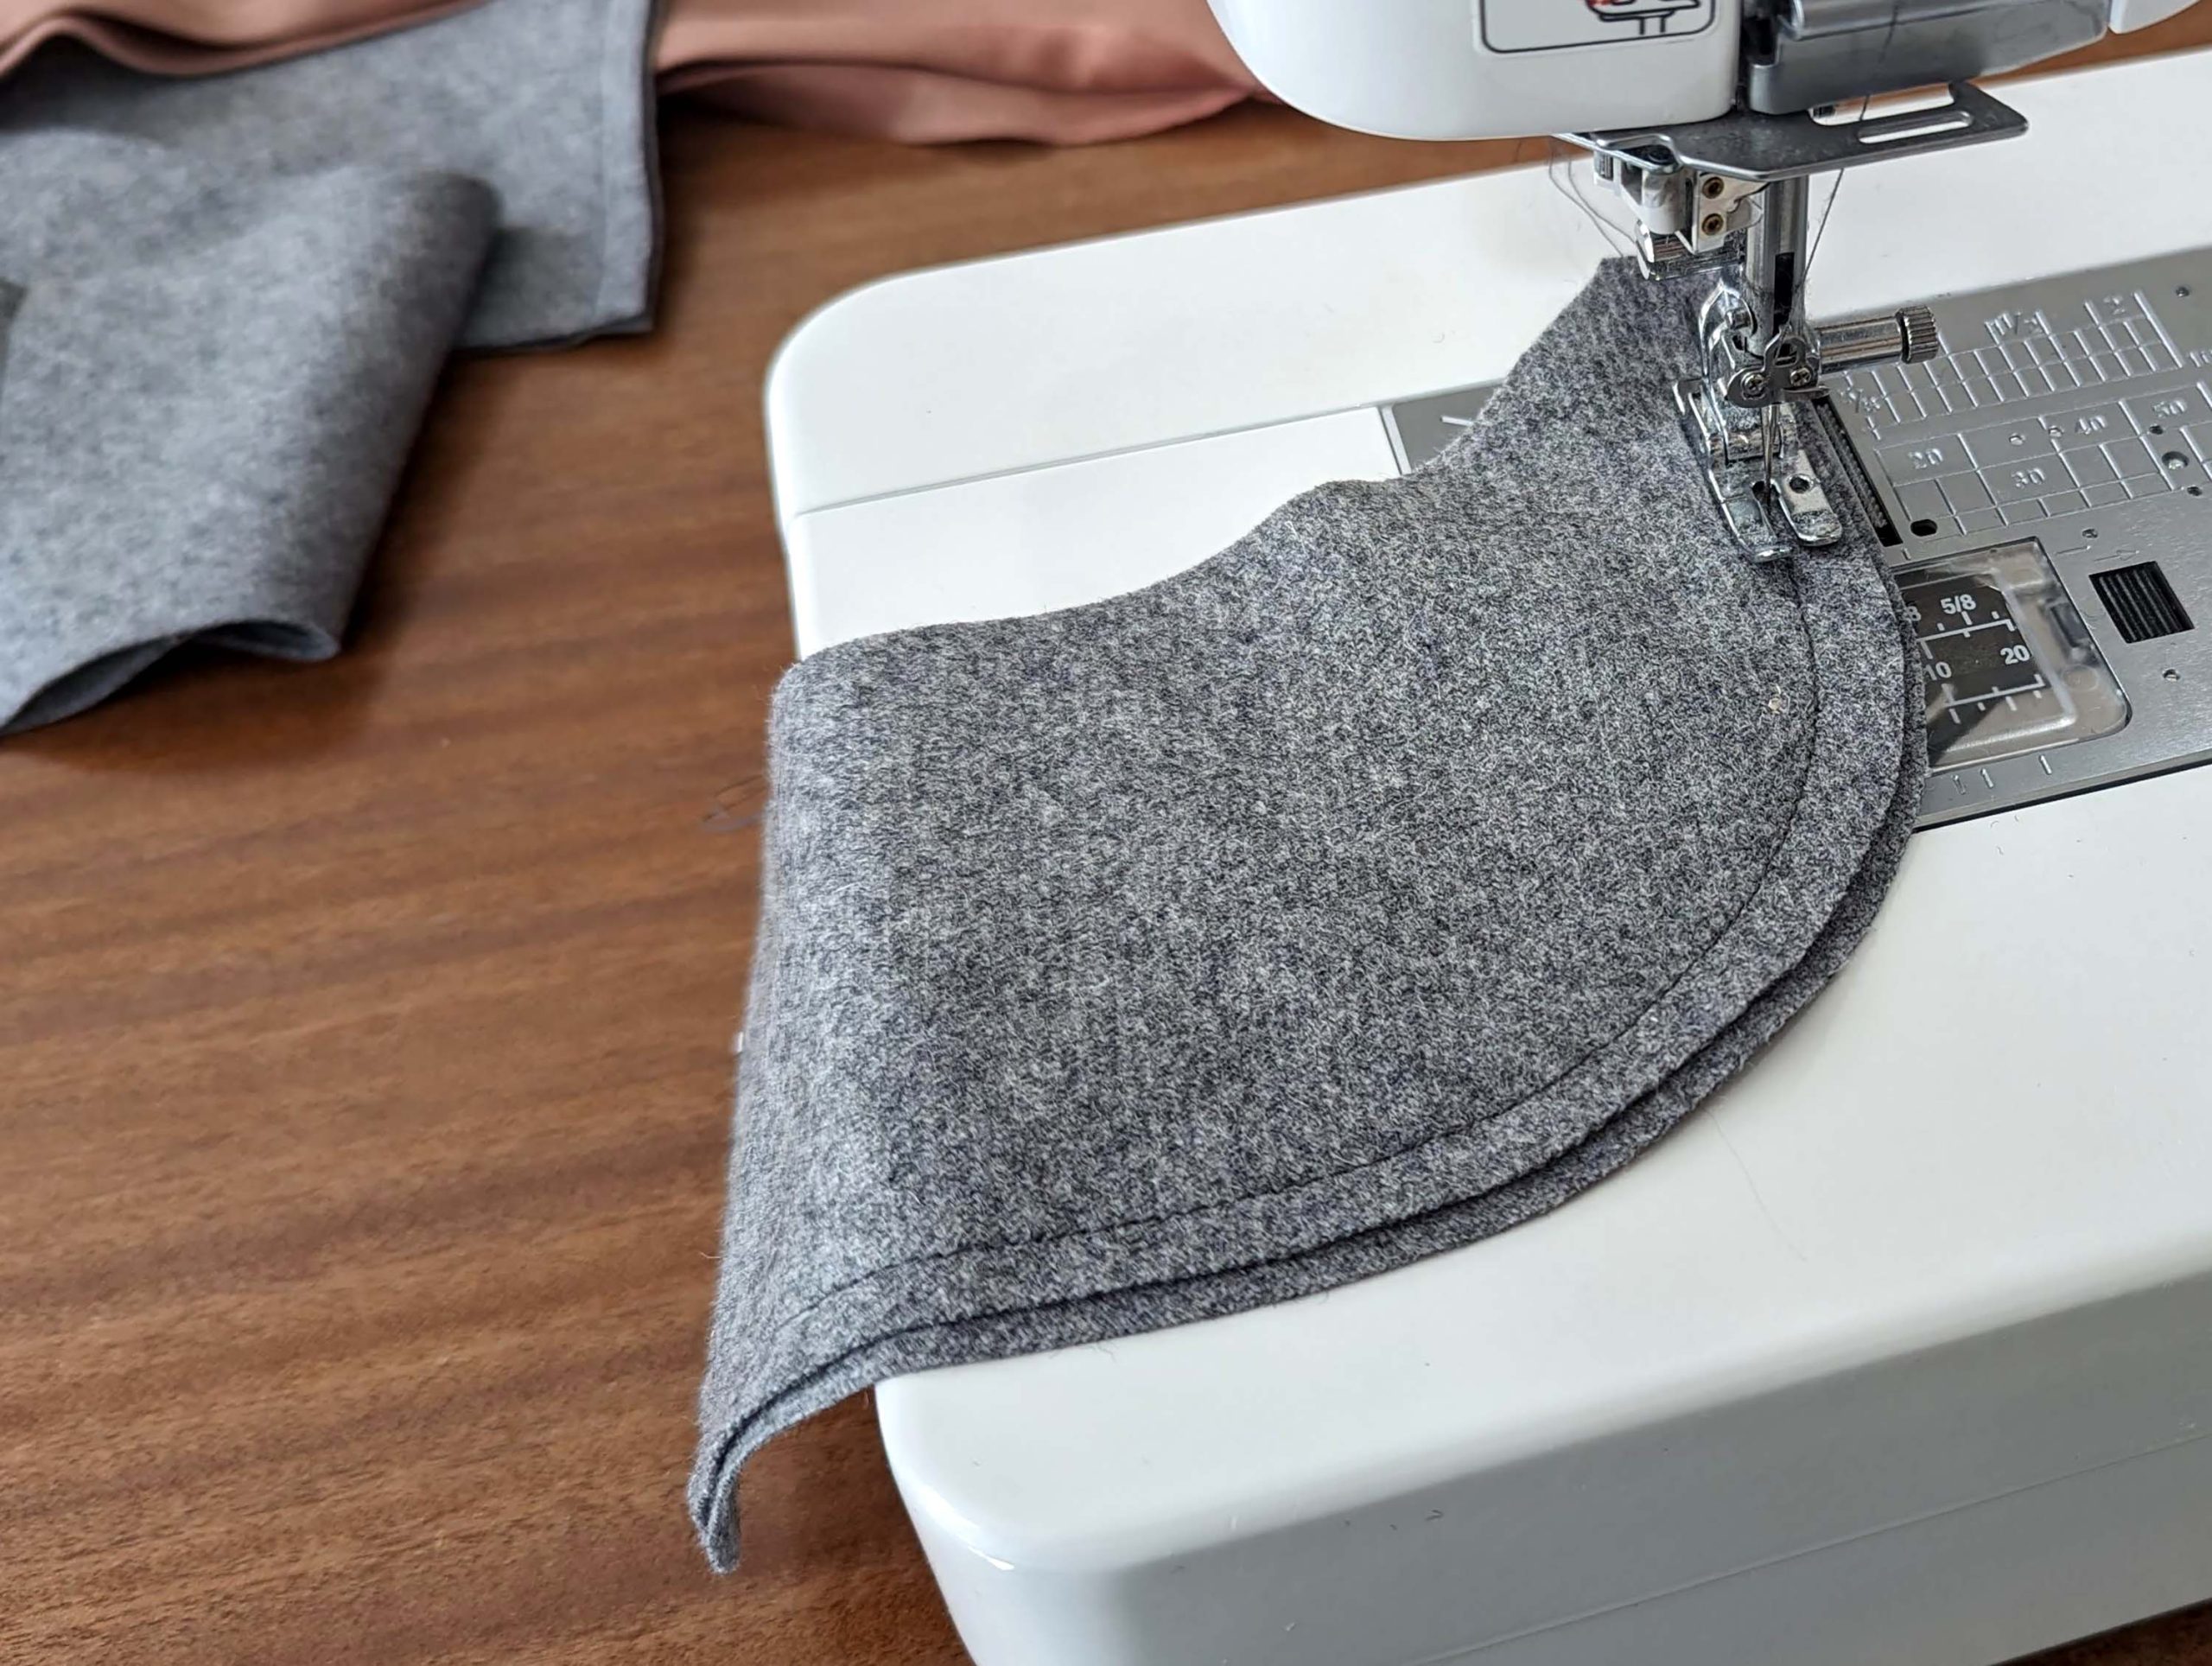
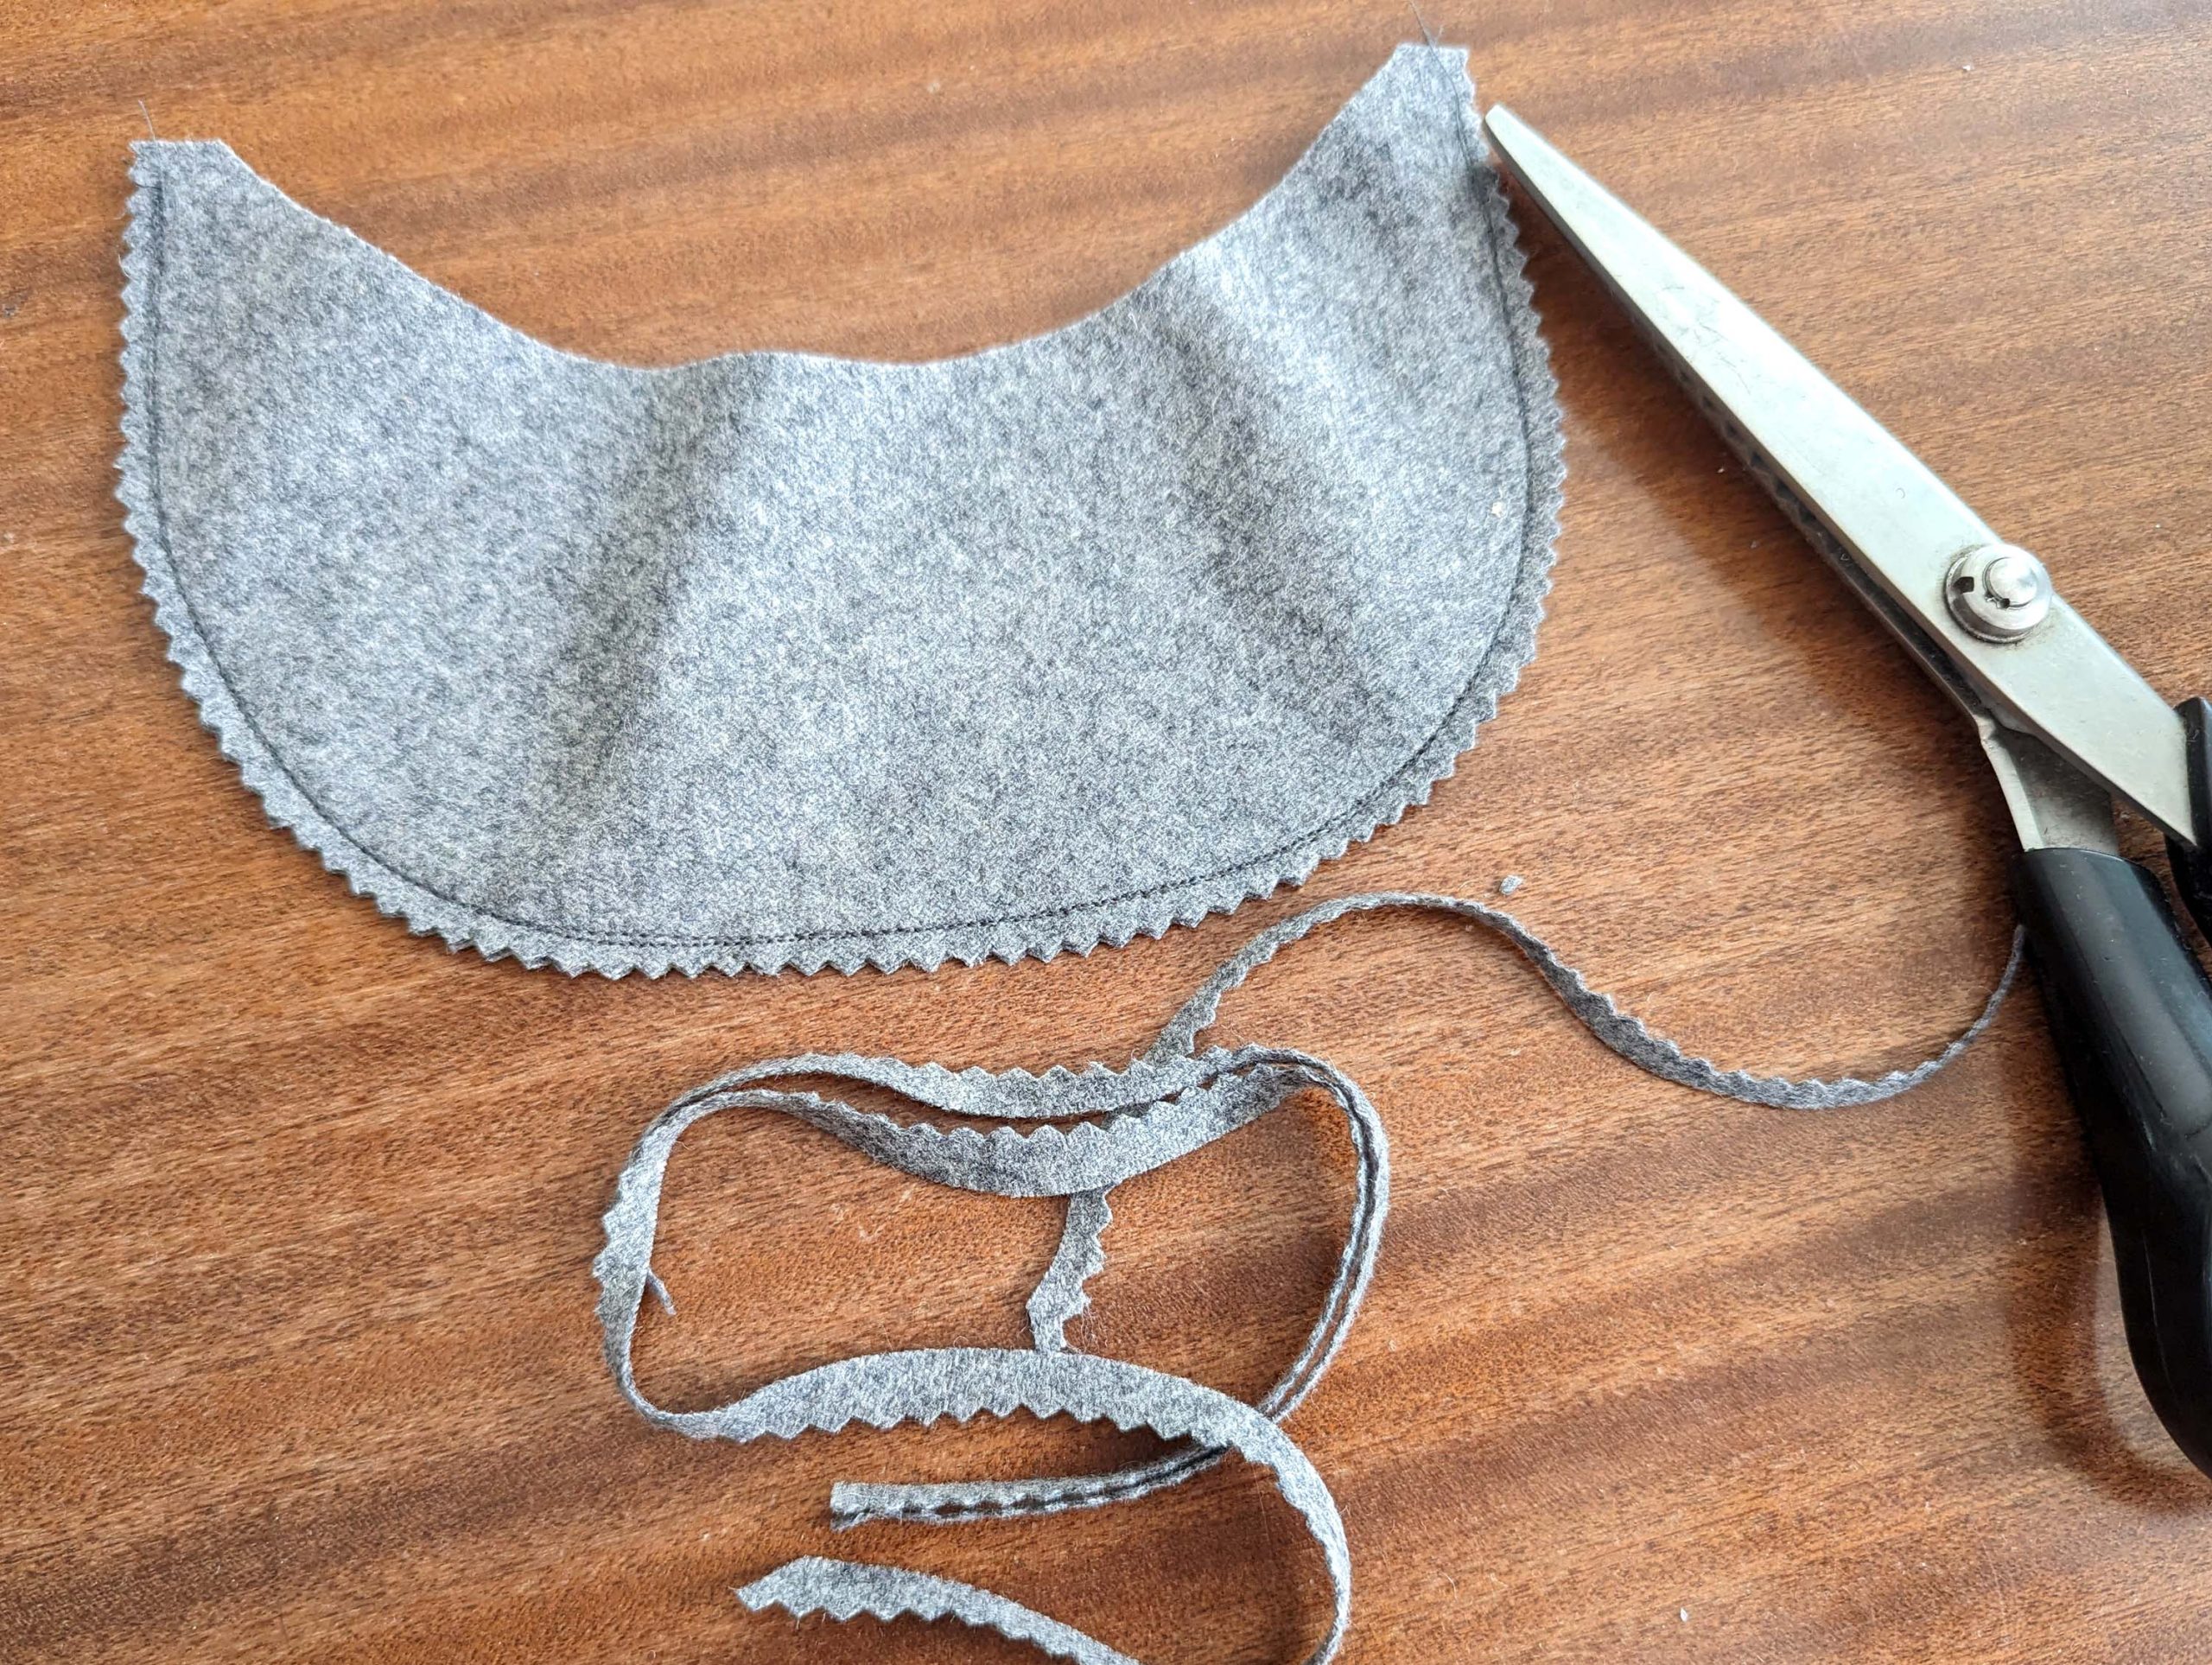


Now it’s crucial to work exactly when pushing the fabric over the visor from the cork evenly. Take great care to ensure the seam allowance inside lays smoothly towards the bottom side of the visor. With patience and attention to detail, push and pull the fabric until you achieve a neat result. Baste together the layers along the opening, right beside the cork, to hold them in place temporarily. Clip the seam allowances, maintaining a distance of about 1/4 inch (5mm) from the basting stitches. These basting stitches will serve as our stitching line. In many cases, the 5/8″ (1,5cm) seam allowance diminished to a smaller amount.

We are going to another complicated step, just when you master this, the rest is going to be easy.
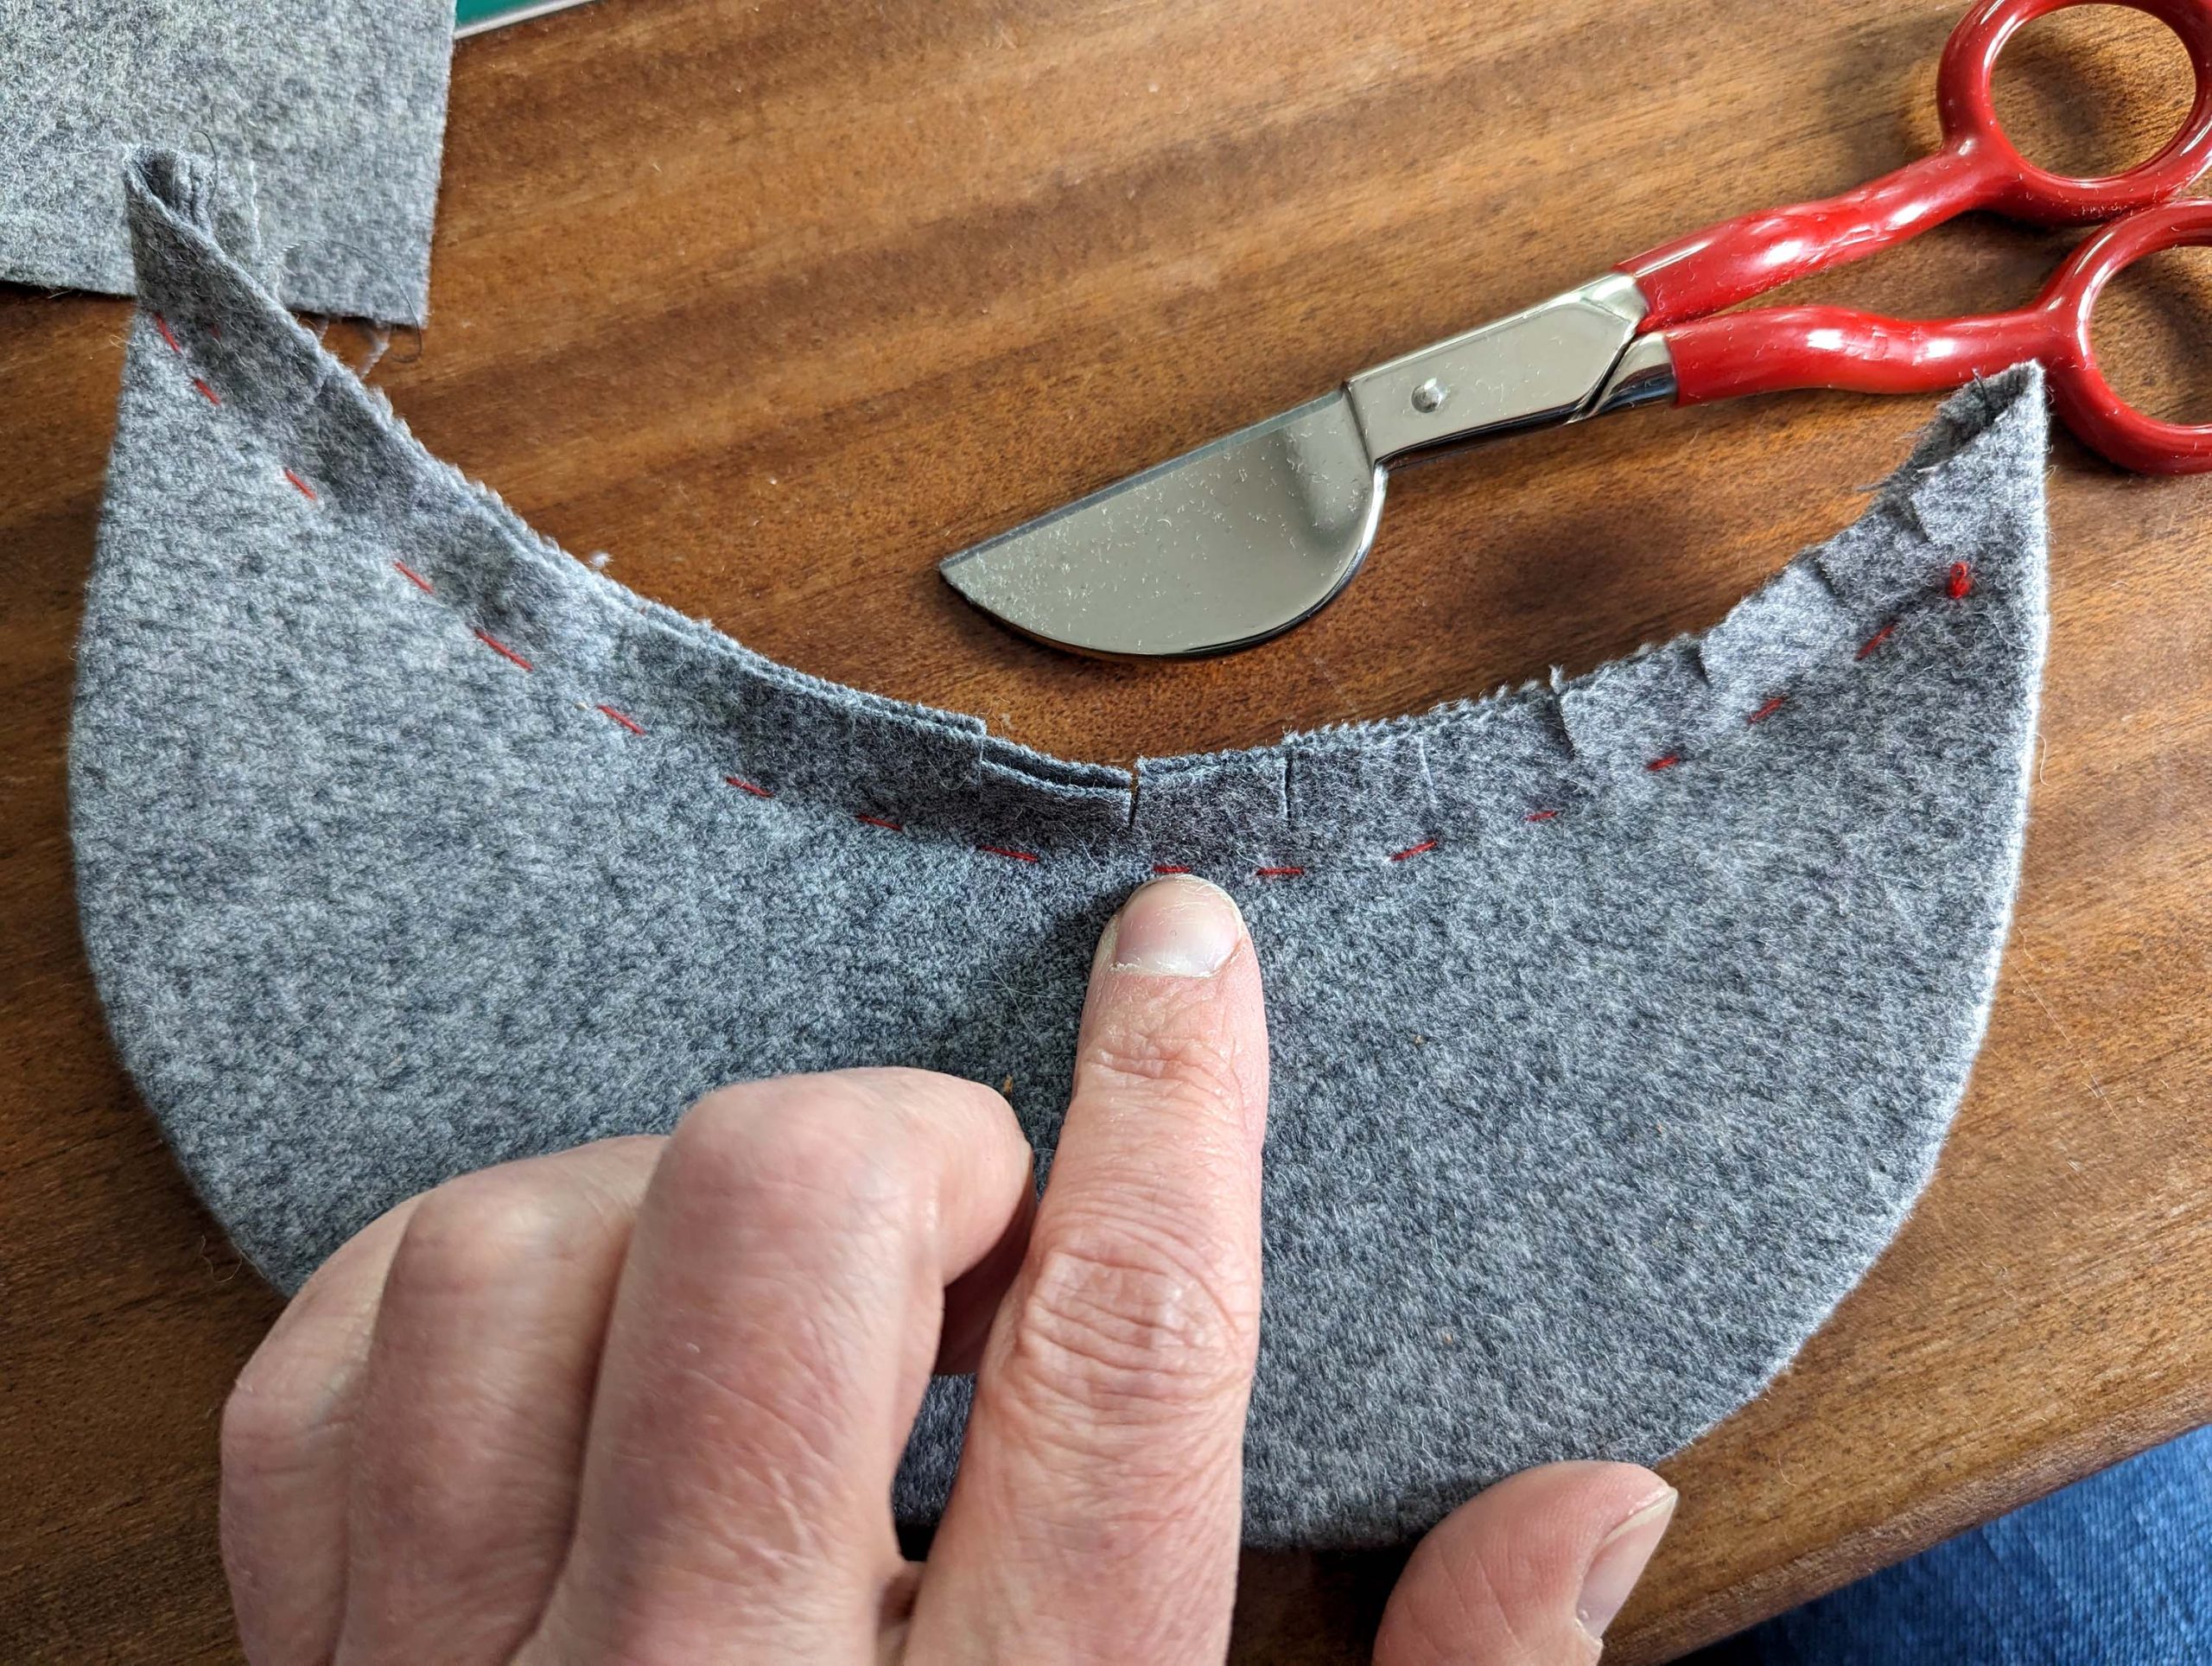
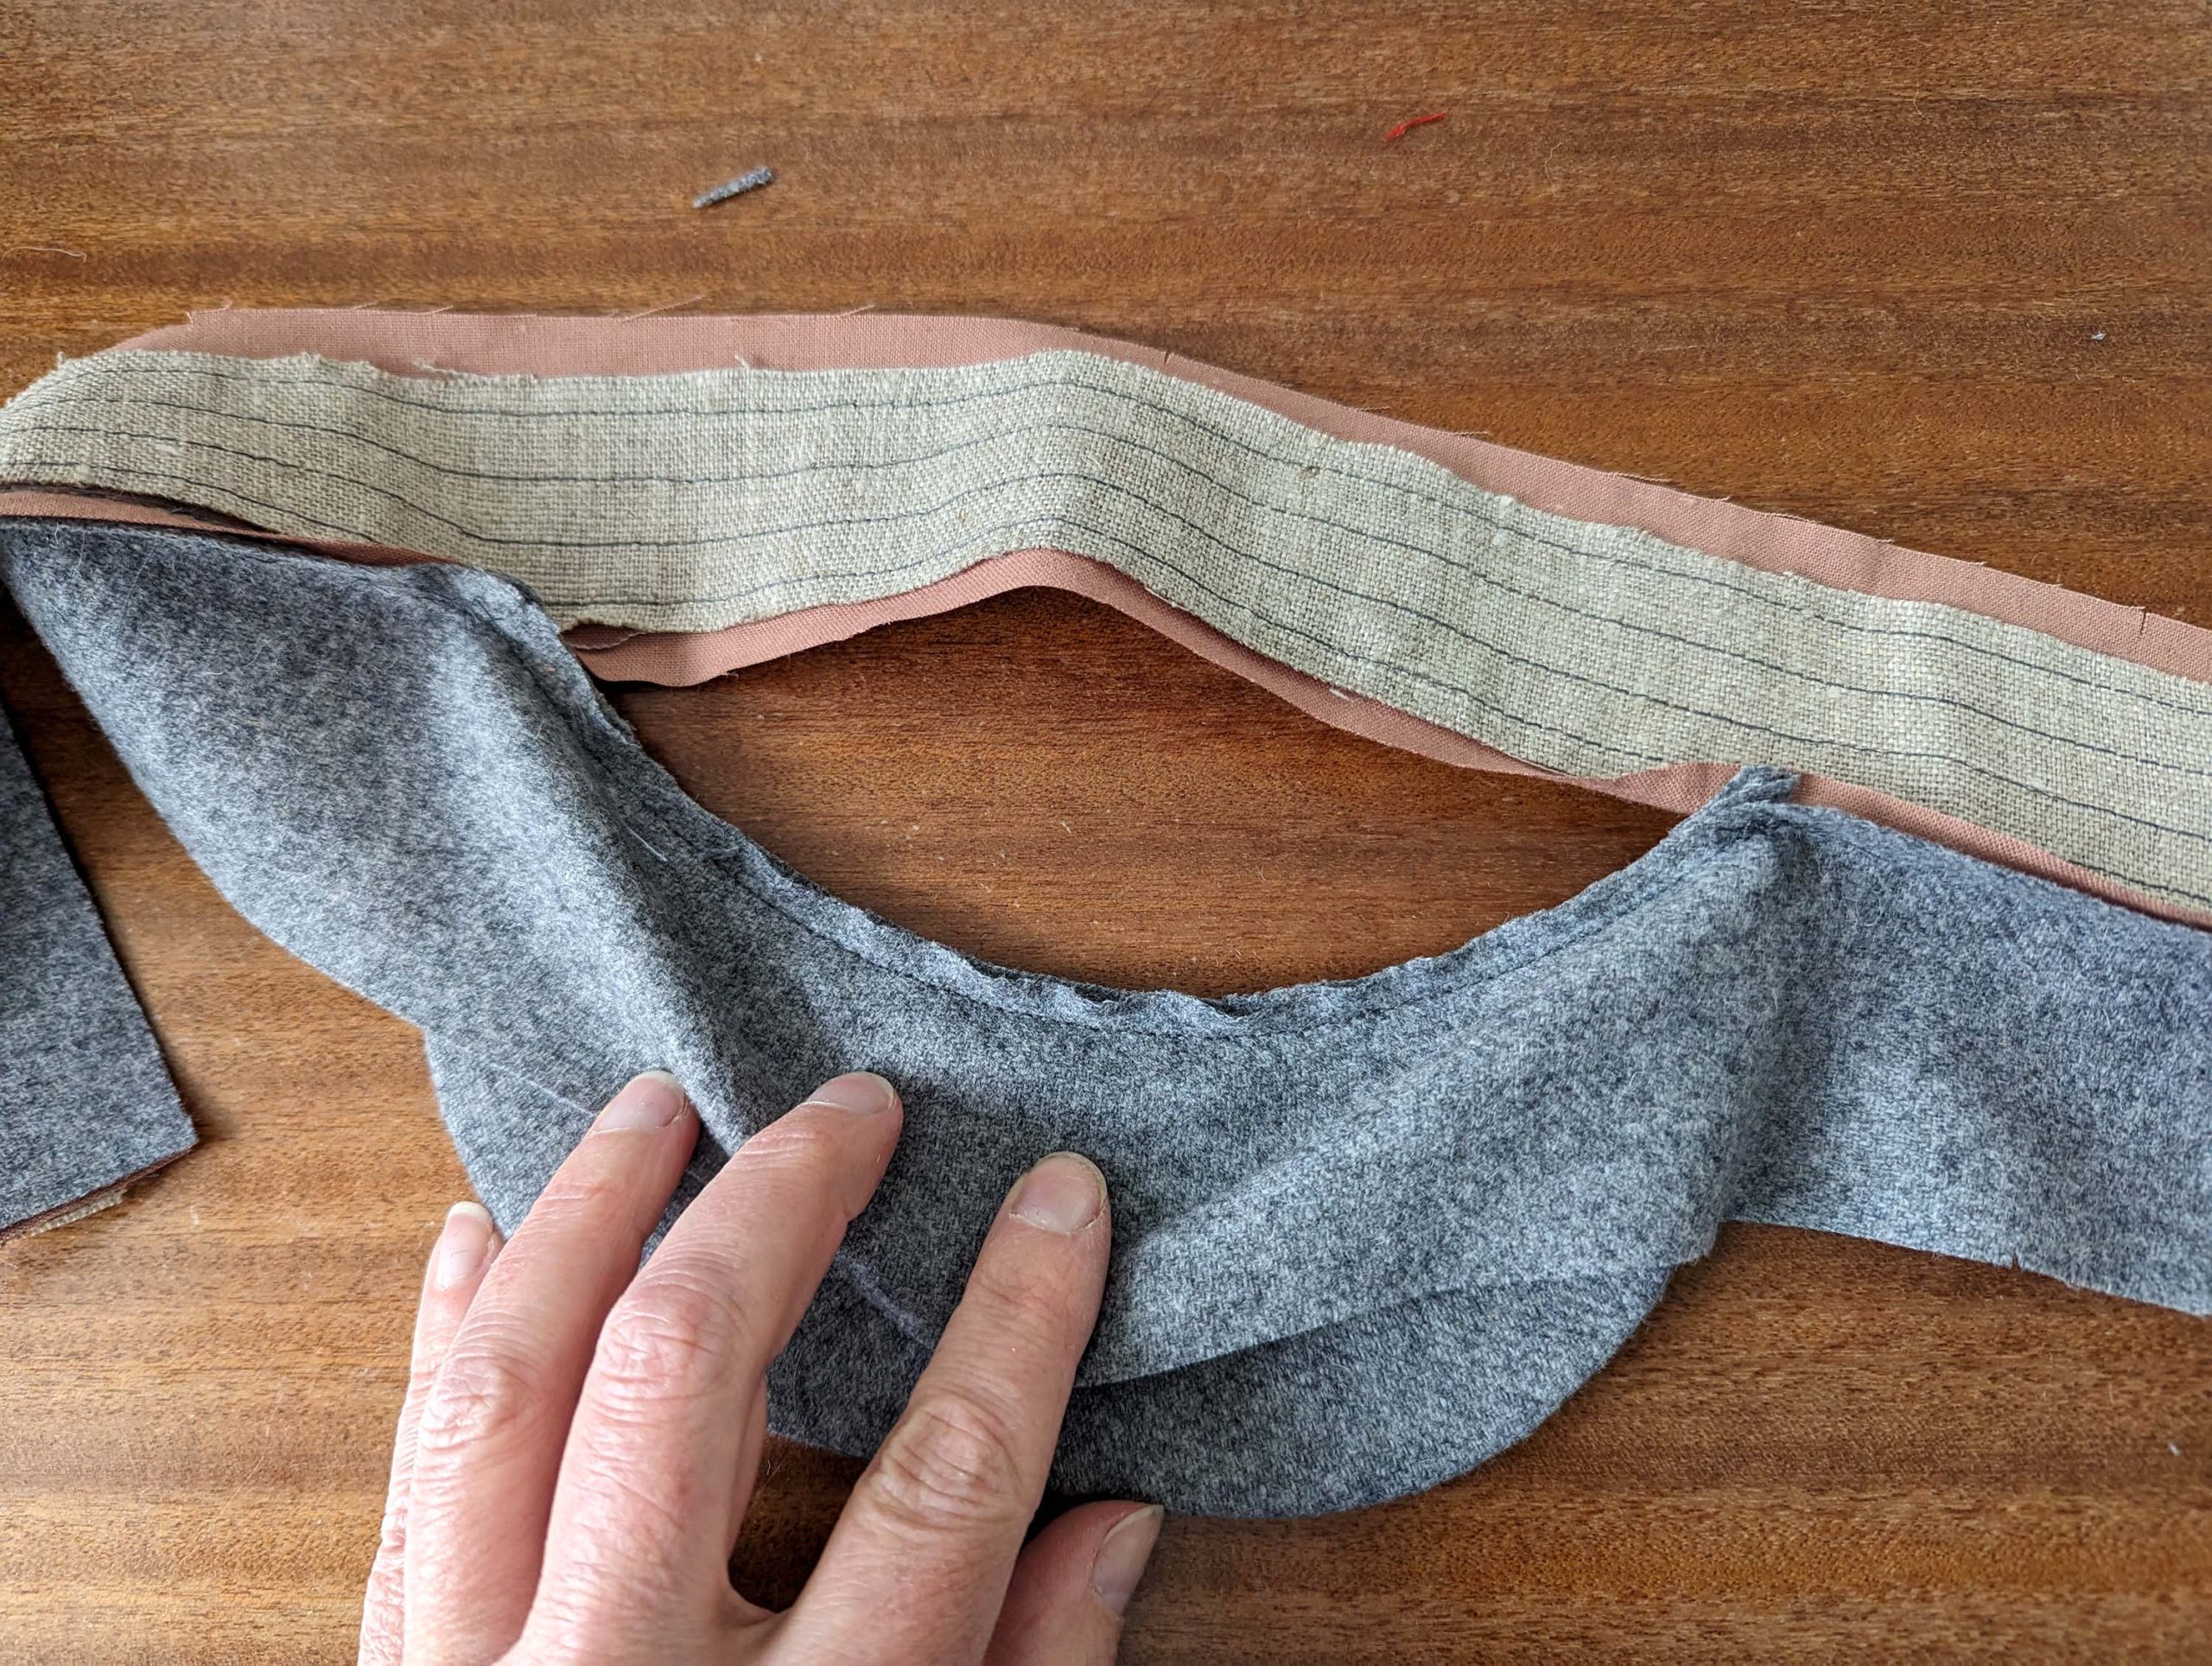
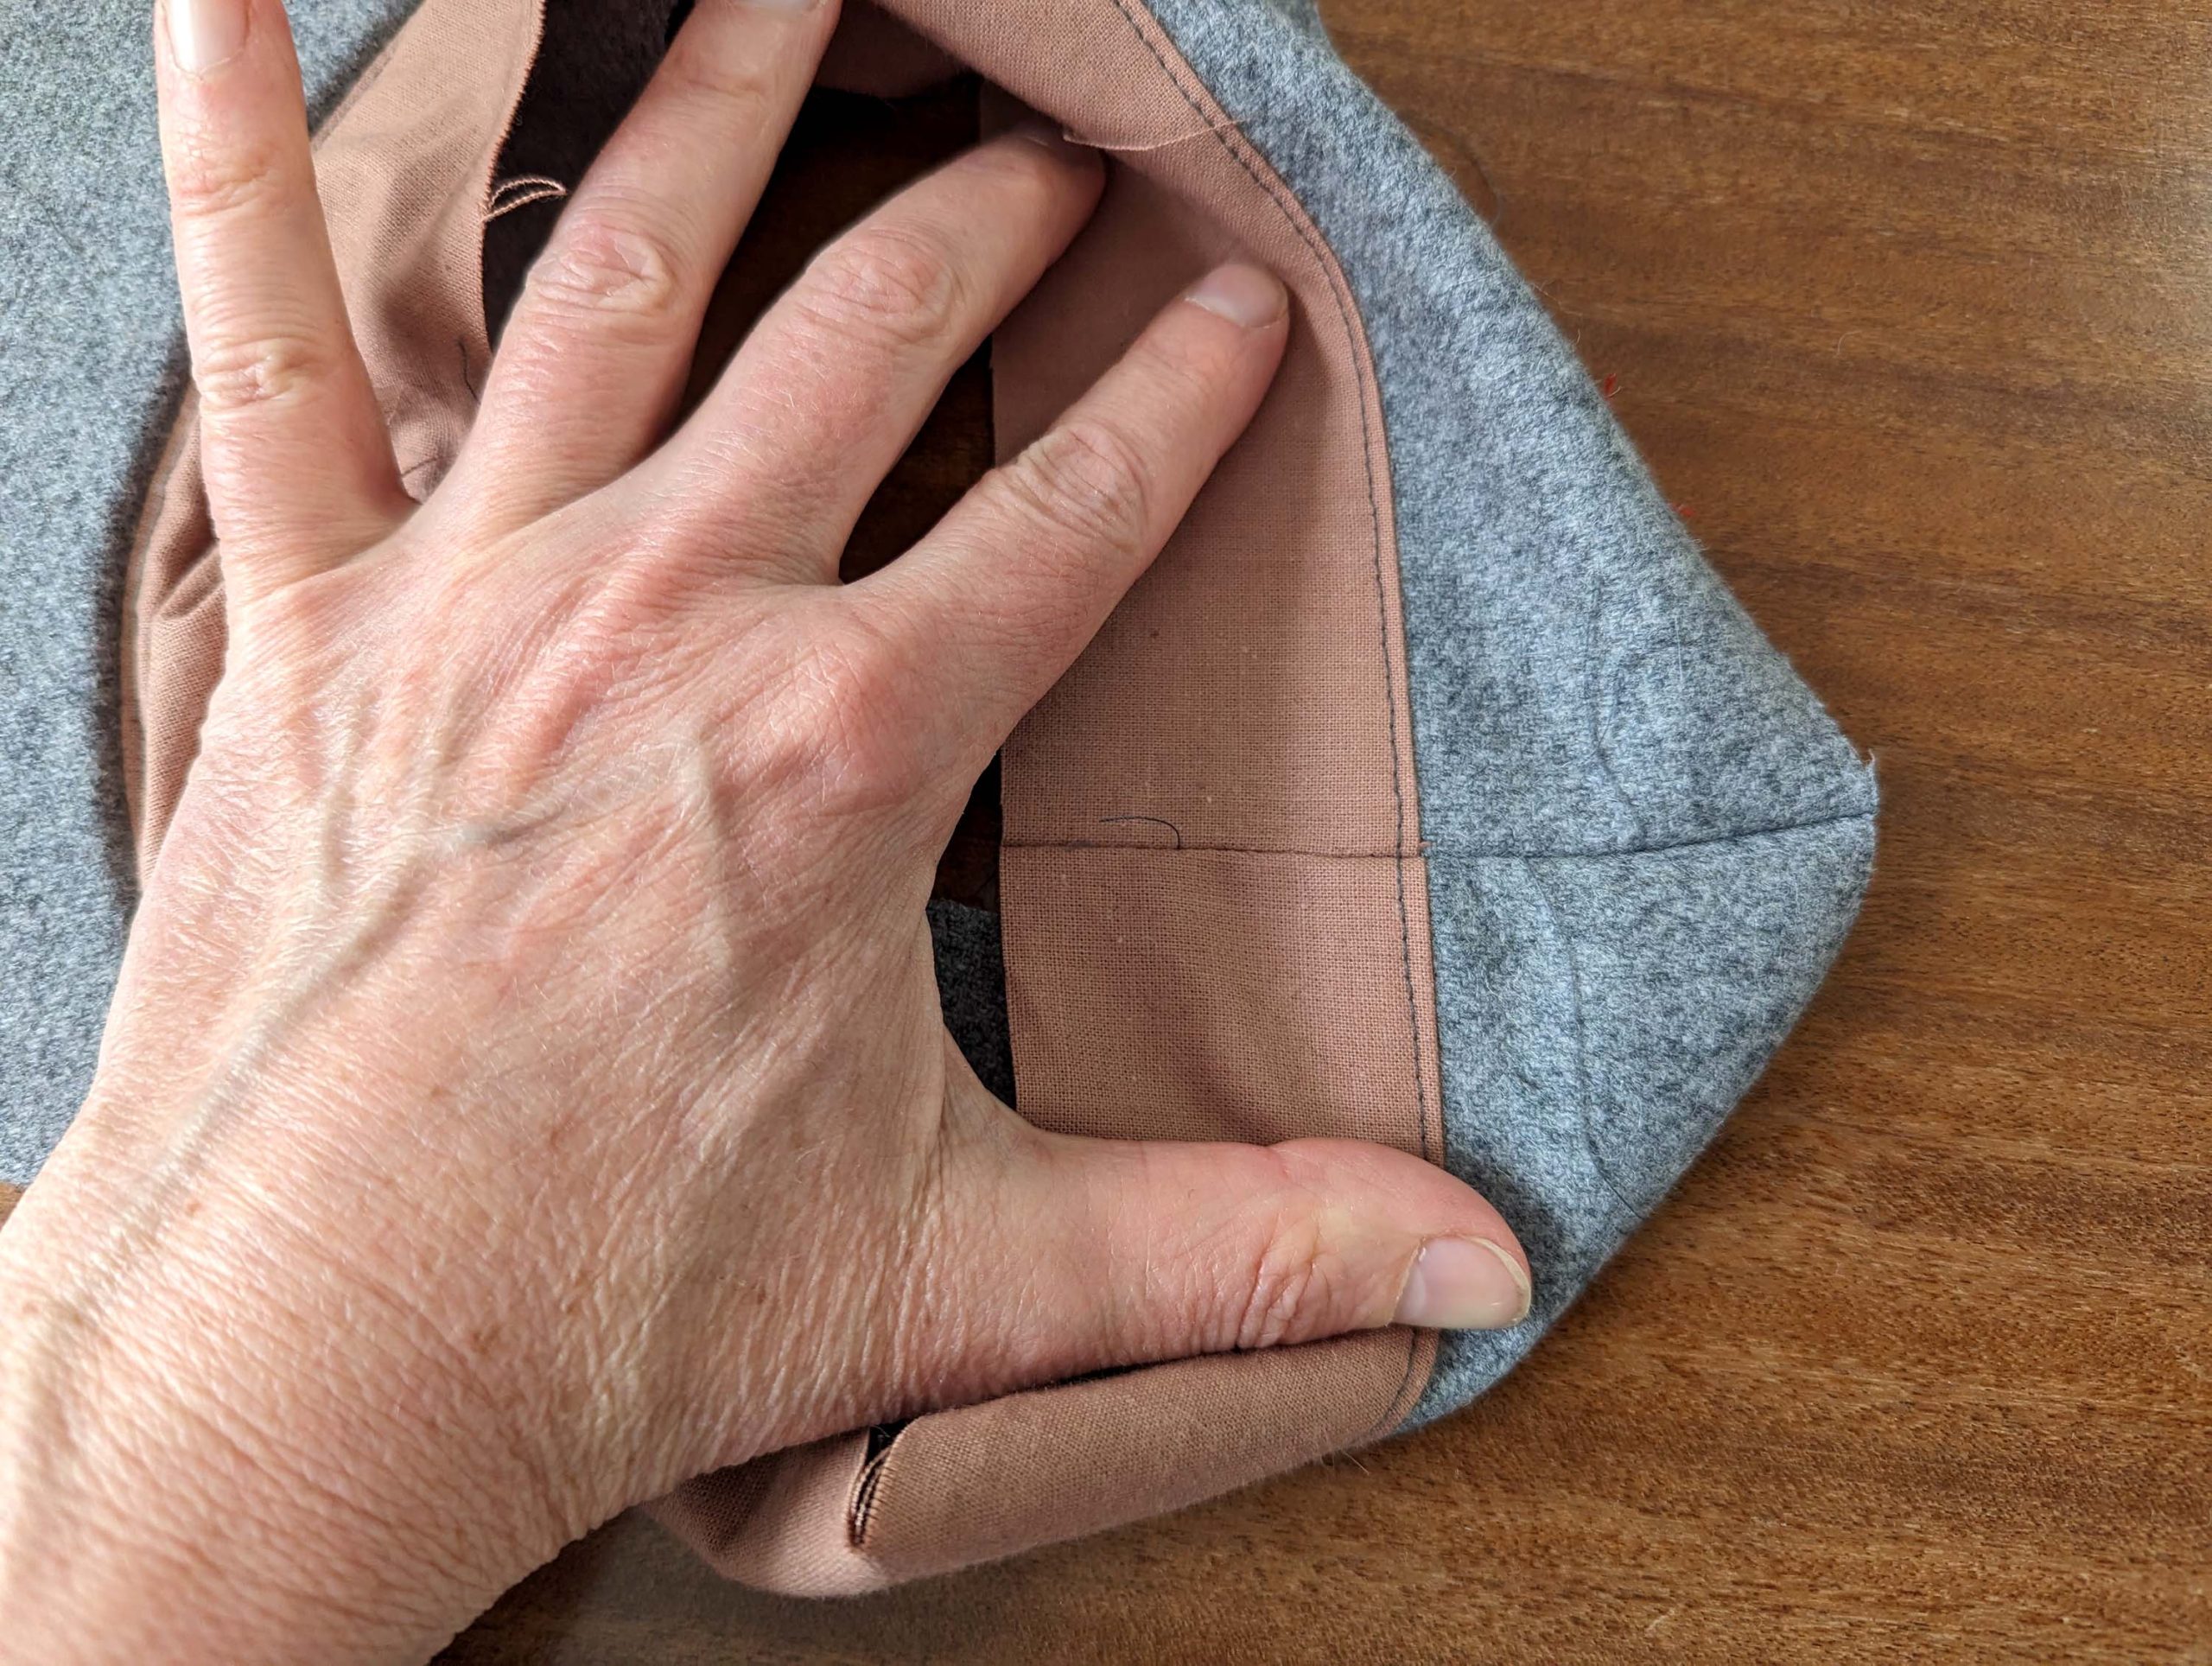
Respecting the marks, sew the visor to the headband, lining up the basting line of the visor with the stitching line on the pattern (1/2″ (1,2cm) seam allowance), the topside of the visor faces the right side of the band. Use your zipper foot!
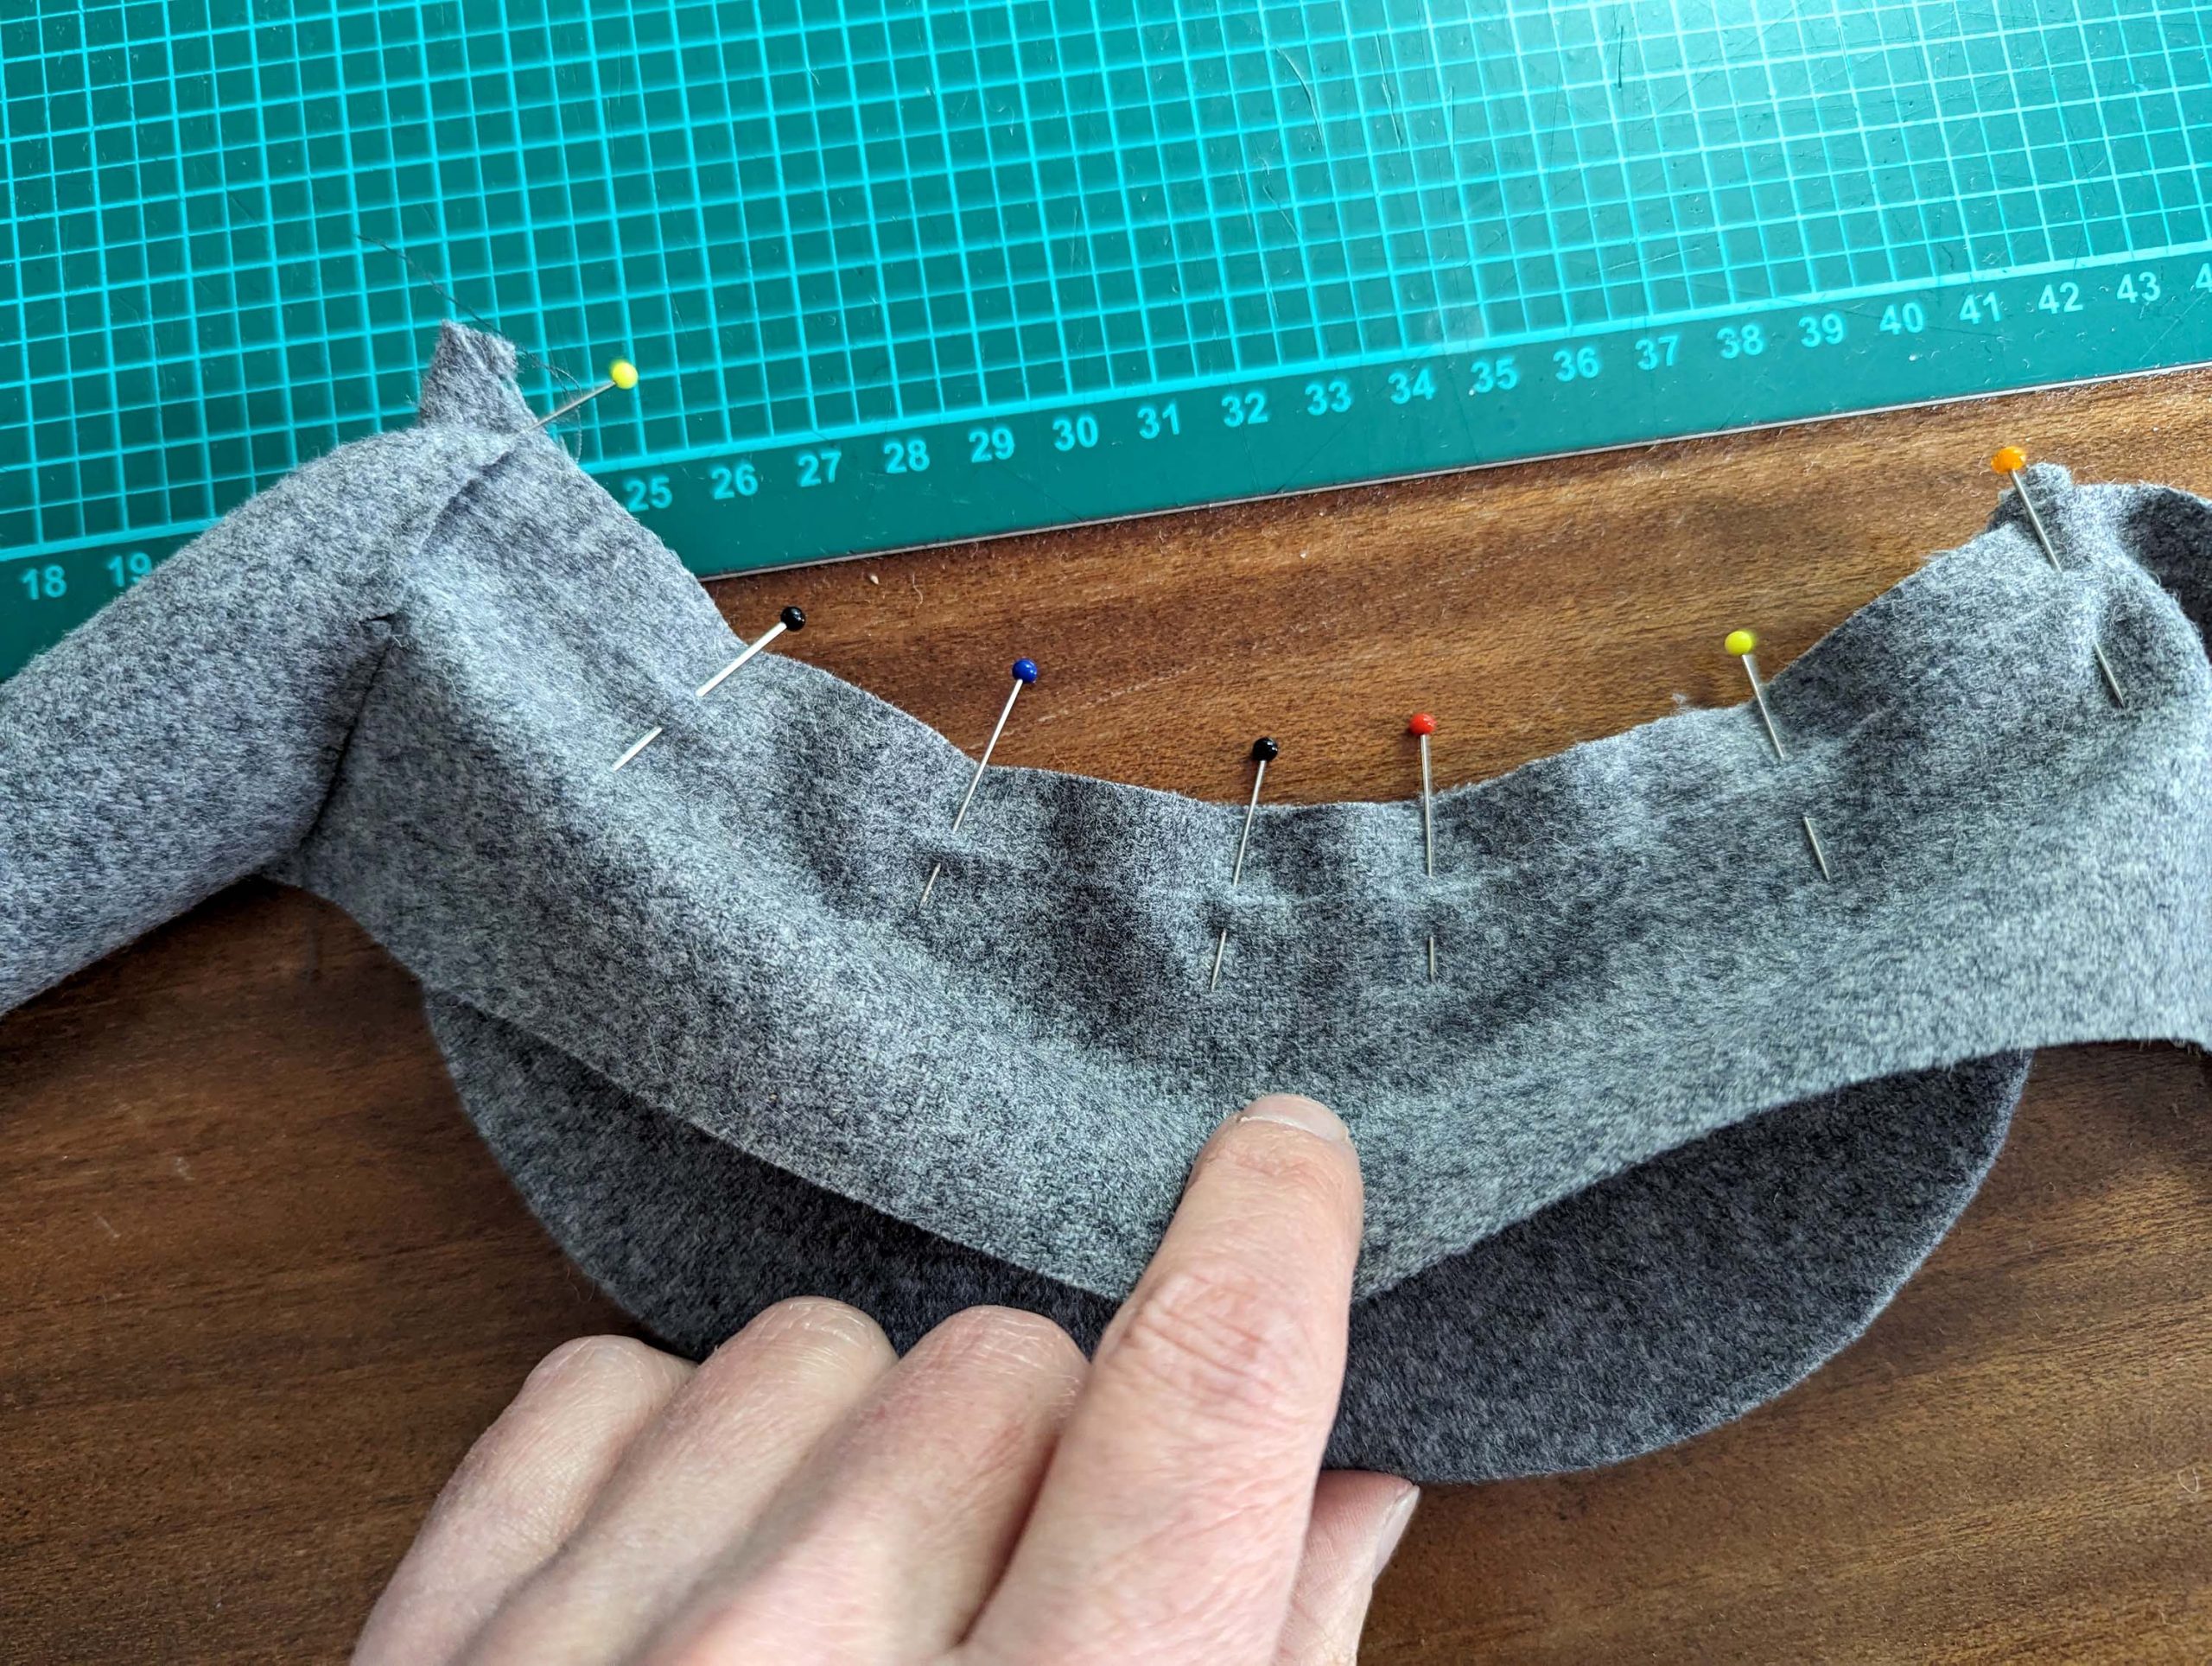
Line up the interfacing with the headband lining, wrong sides together, taking care of the different seam allowances at the top and bottom edge. Sew the interfacing to the lining with several parallel rows of stitching.
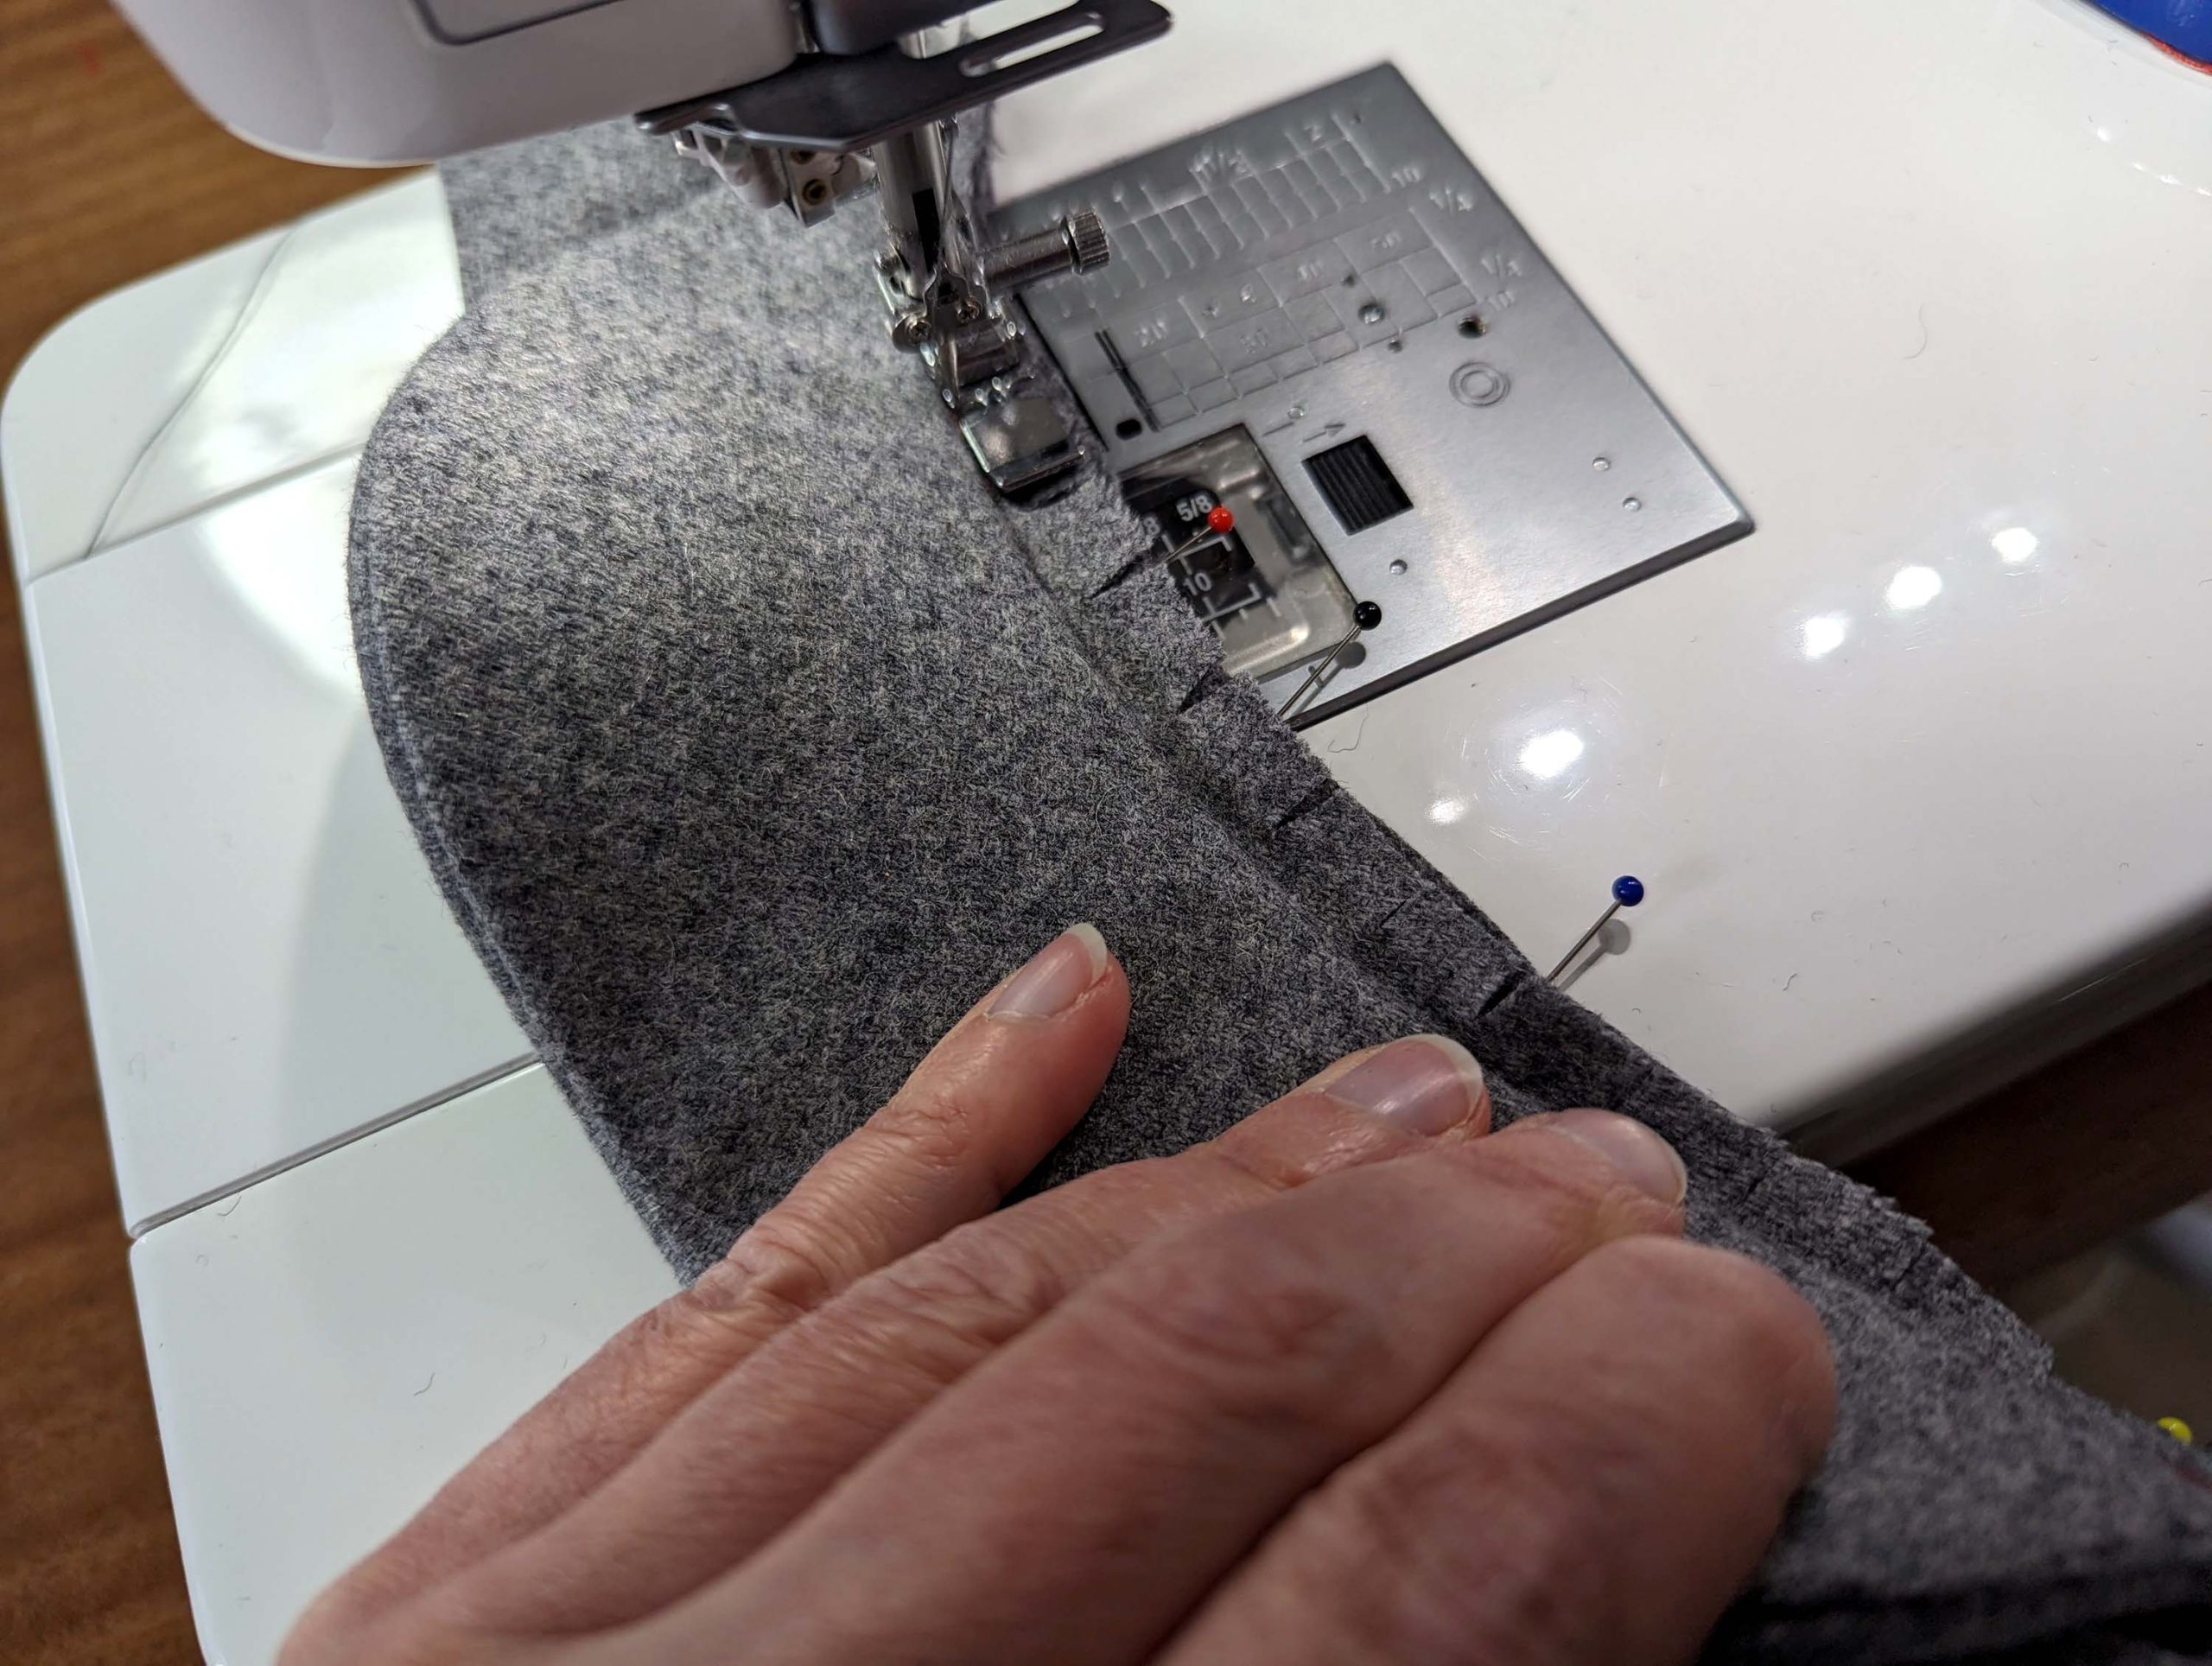
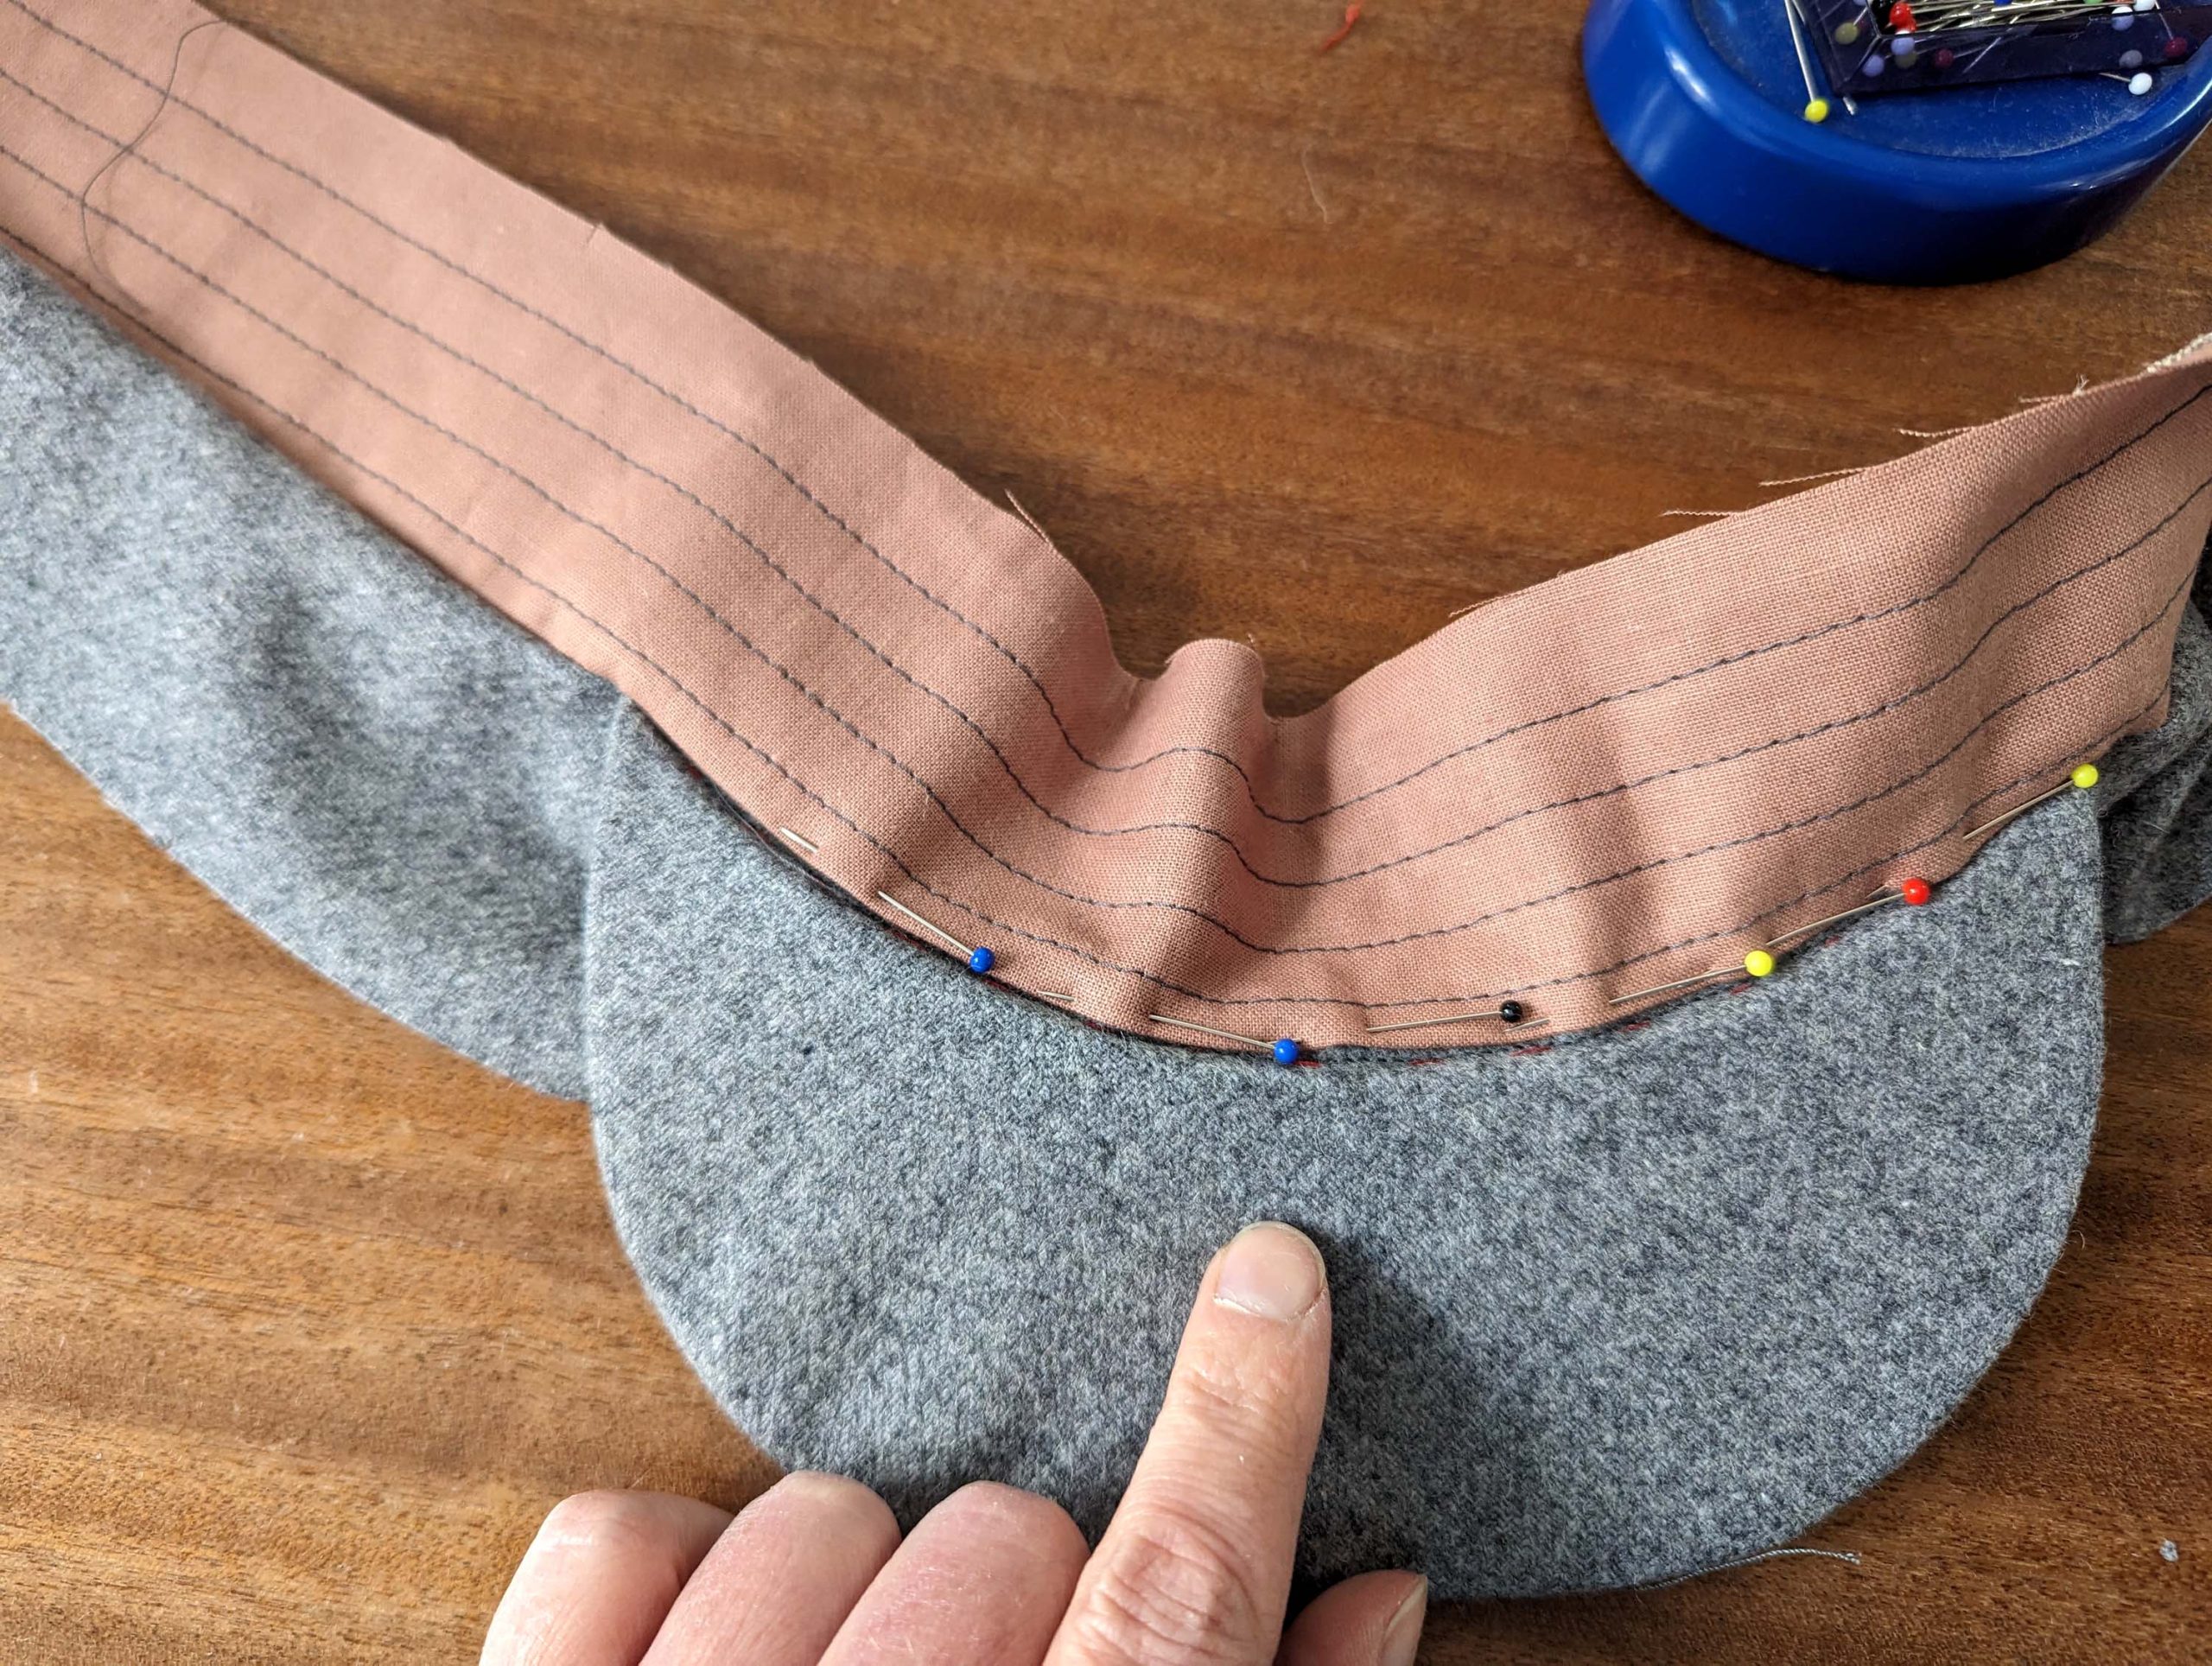
Line up the lining with the headband, right sides together. For the turn of cloth, push the fashion fabric about 1/8″ (2-3cm) behind the edge of the lining. Switch to your normal presser foot and sew with a 5/8″ (1,5cm) seam allowance. Stop and start sewing exactly at the end of the stitching of the visor.


Trim back the seam allowance along the bottom edge of the waistband to about 3/8″ (1cm) and press towards the lining. Turn in along the loose portion. Understitch, along the visor, stitch the lining to the seam allowances.
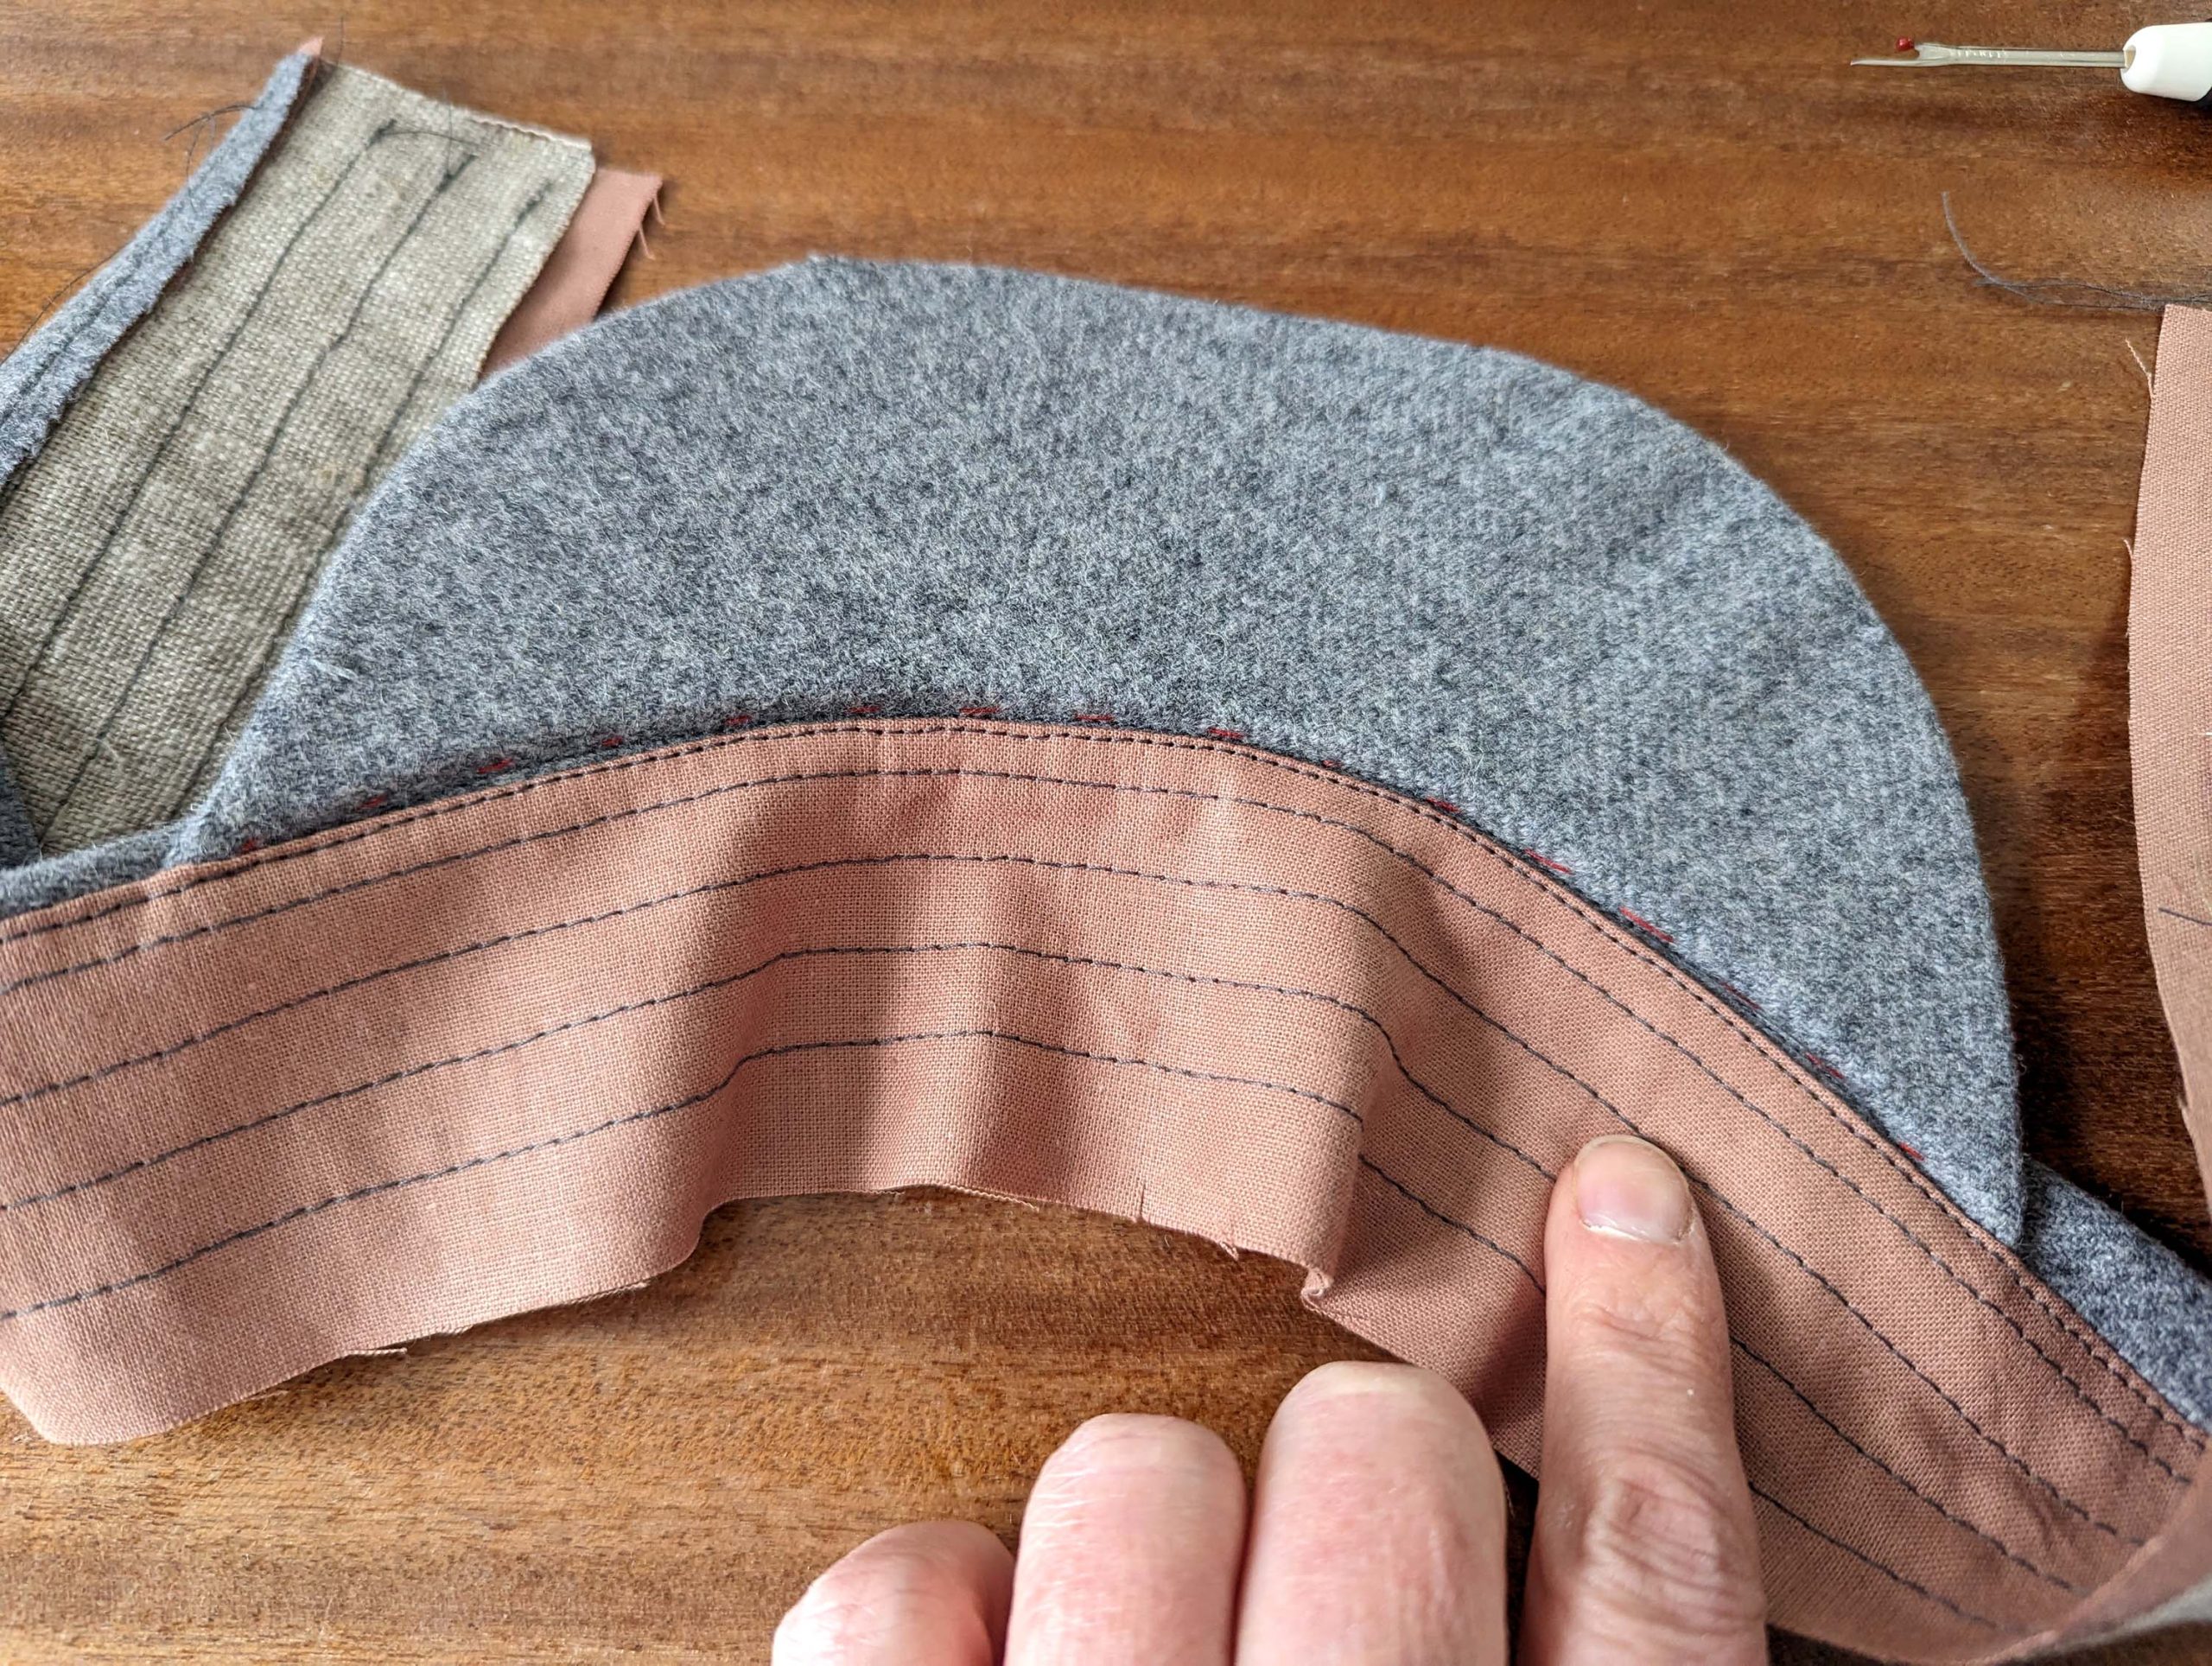
Sew the headband to a ring, right sides together, taking care of matching the seams. Press open the seam allowances, and trim back the interfacing when needed to avoid bulk. Check the size of the headband!
Press, rolling the stitching line slightly out of side towards the garment’s wrong side, and baste together the layers along the top edge.
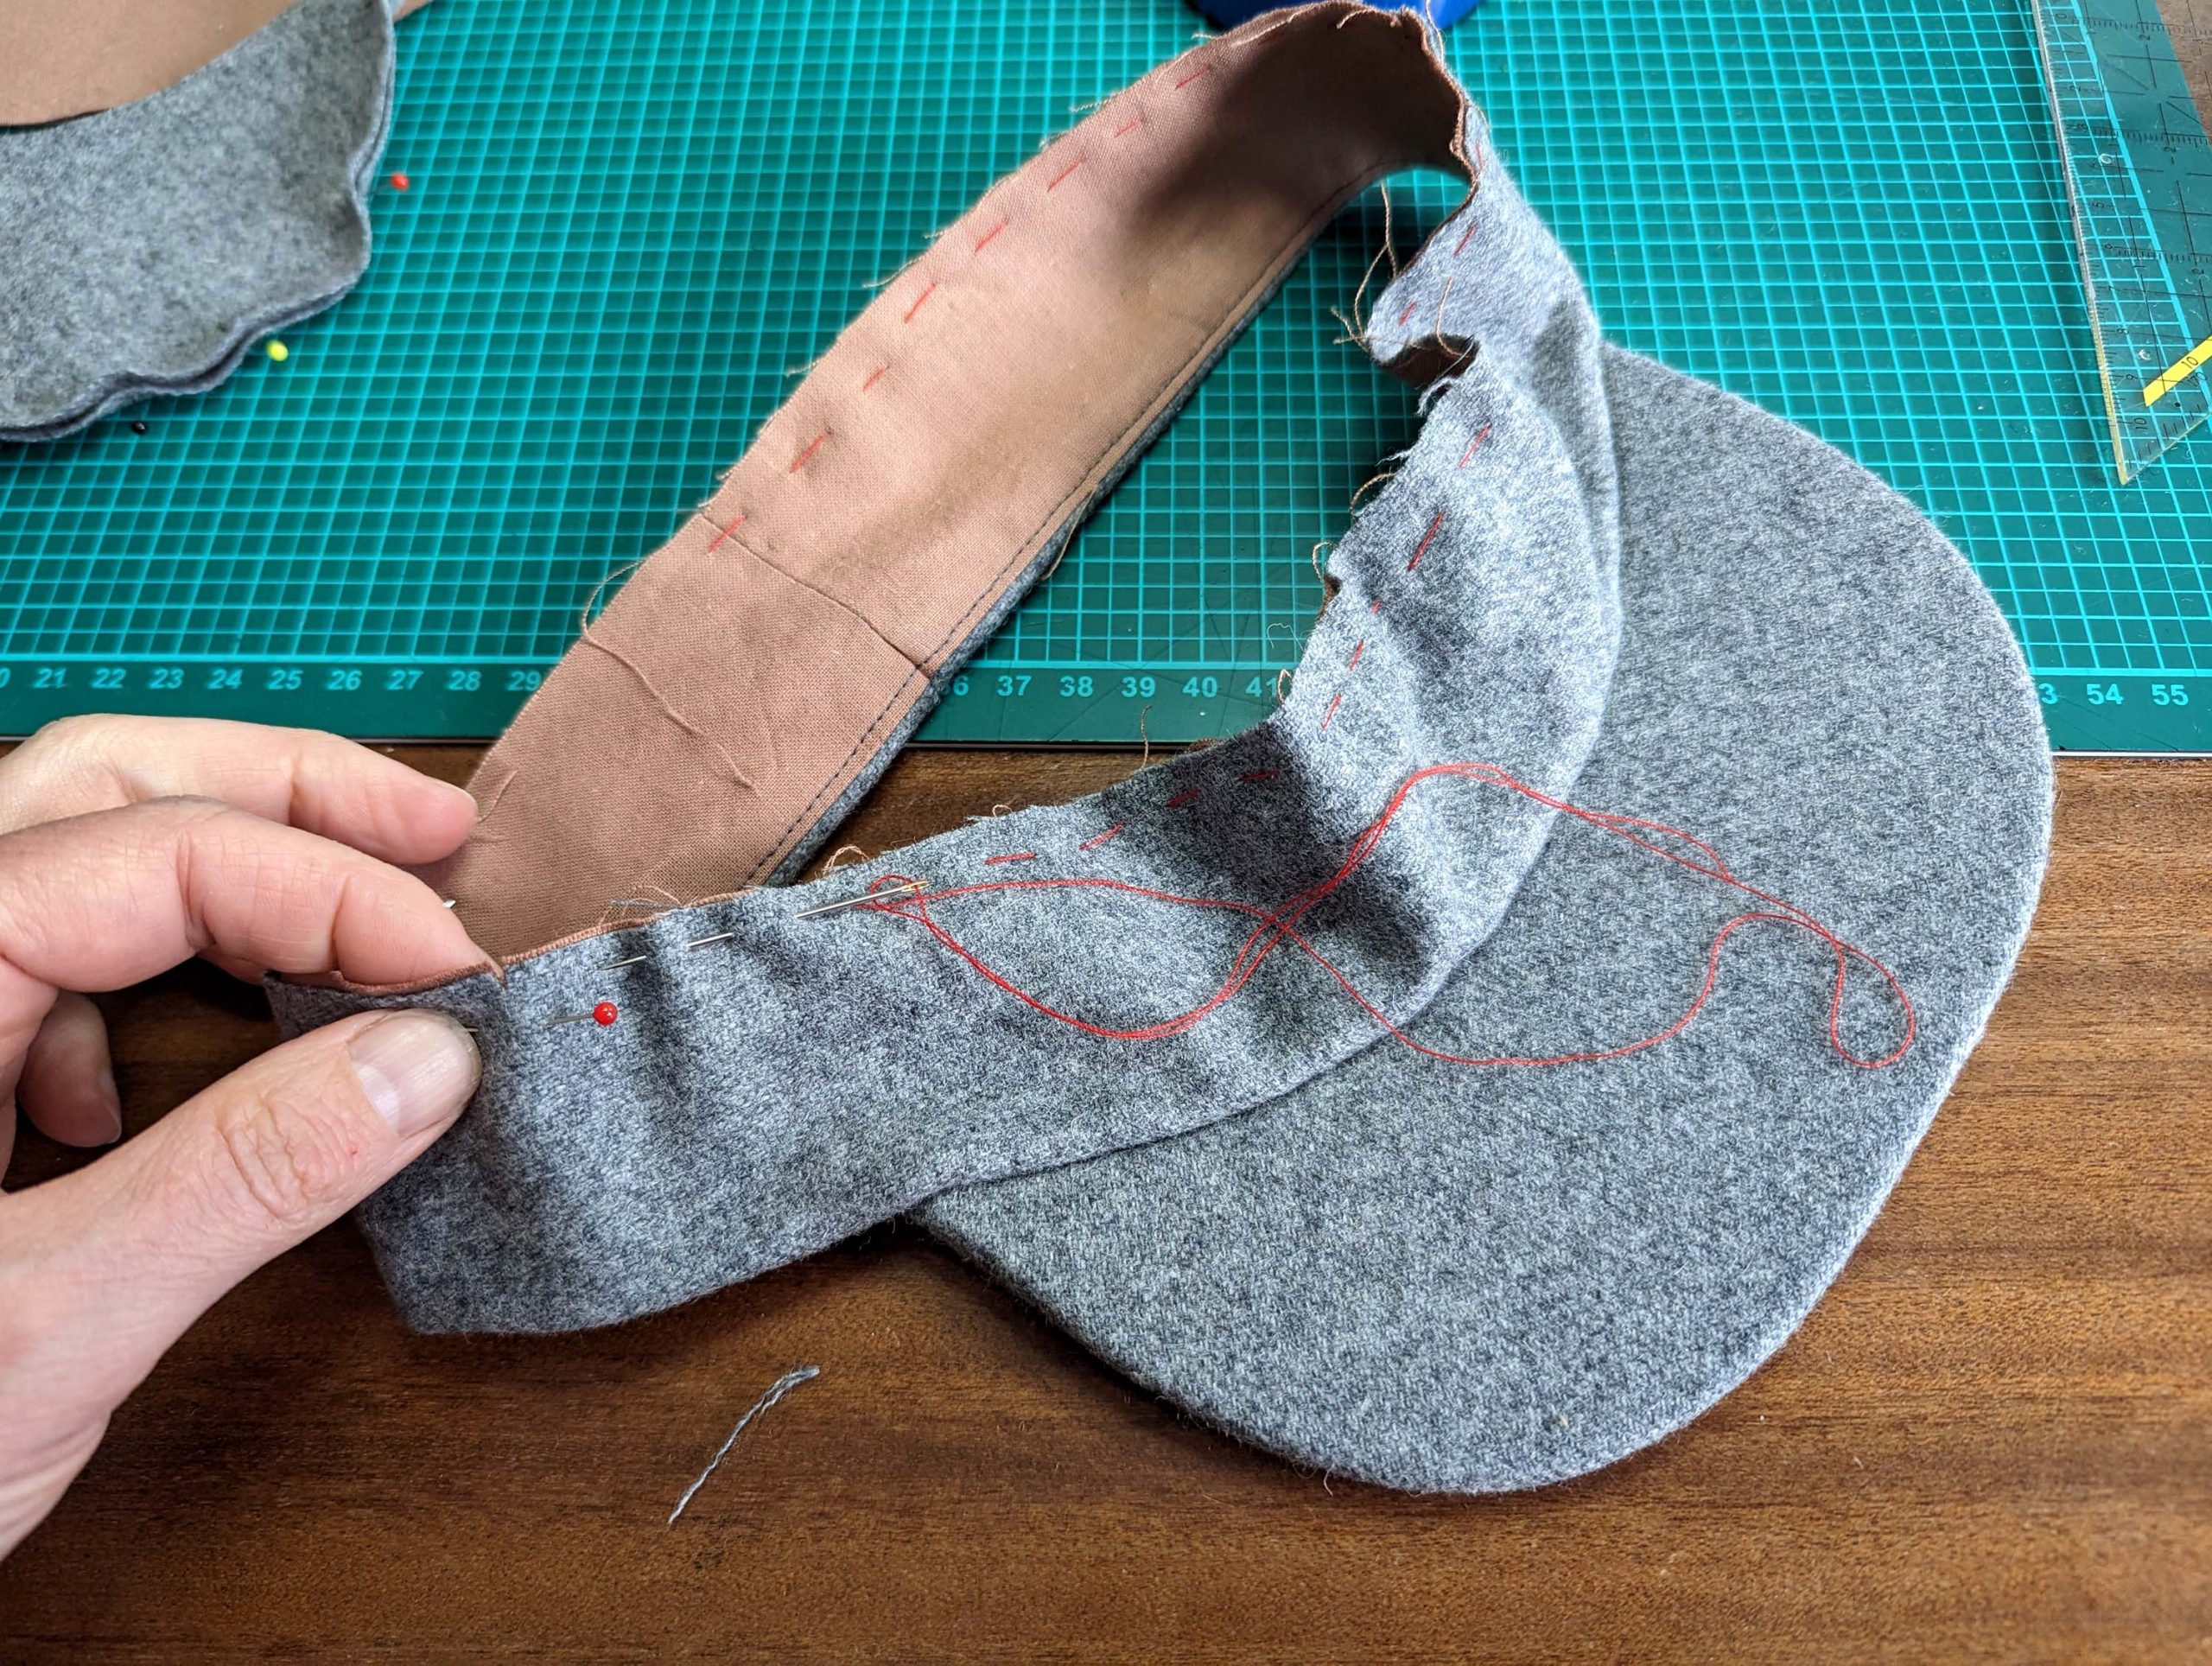
Line up the top from the fashion fabric with the lining, right sides together, baste. Take the crown from the fashion fabric and sew it to a ring, right sides together, and press open the seam allowances. Repeat with the lining, and turn in the seam allowance along the bottom edge.
Line up the crown with the top, right sides together, matching the marks. Repeat with the lining, sandwiching the top in between. First baste, then stitch, and trim back the seam allowances to 1/4″ (7mm), press the seam carefully.
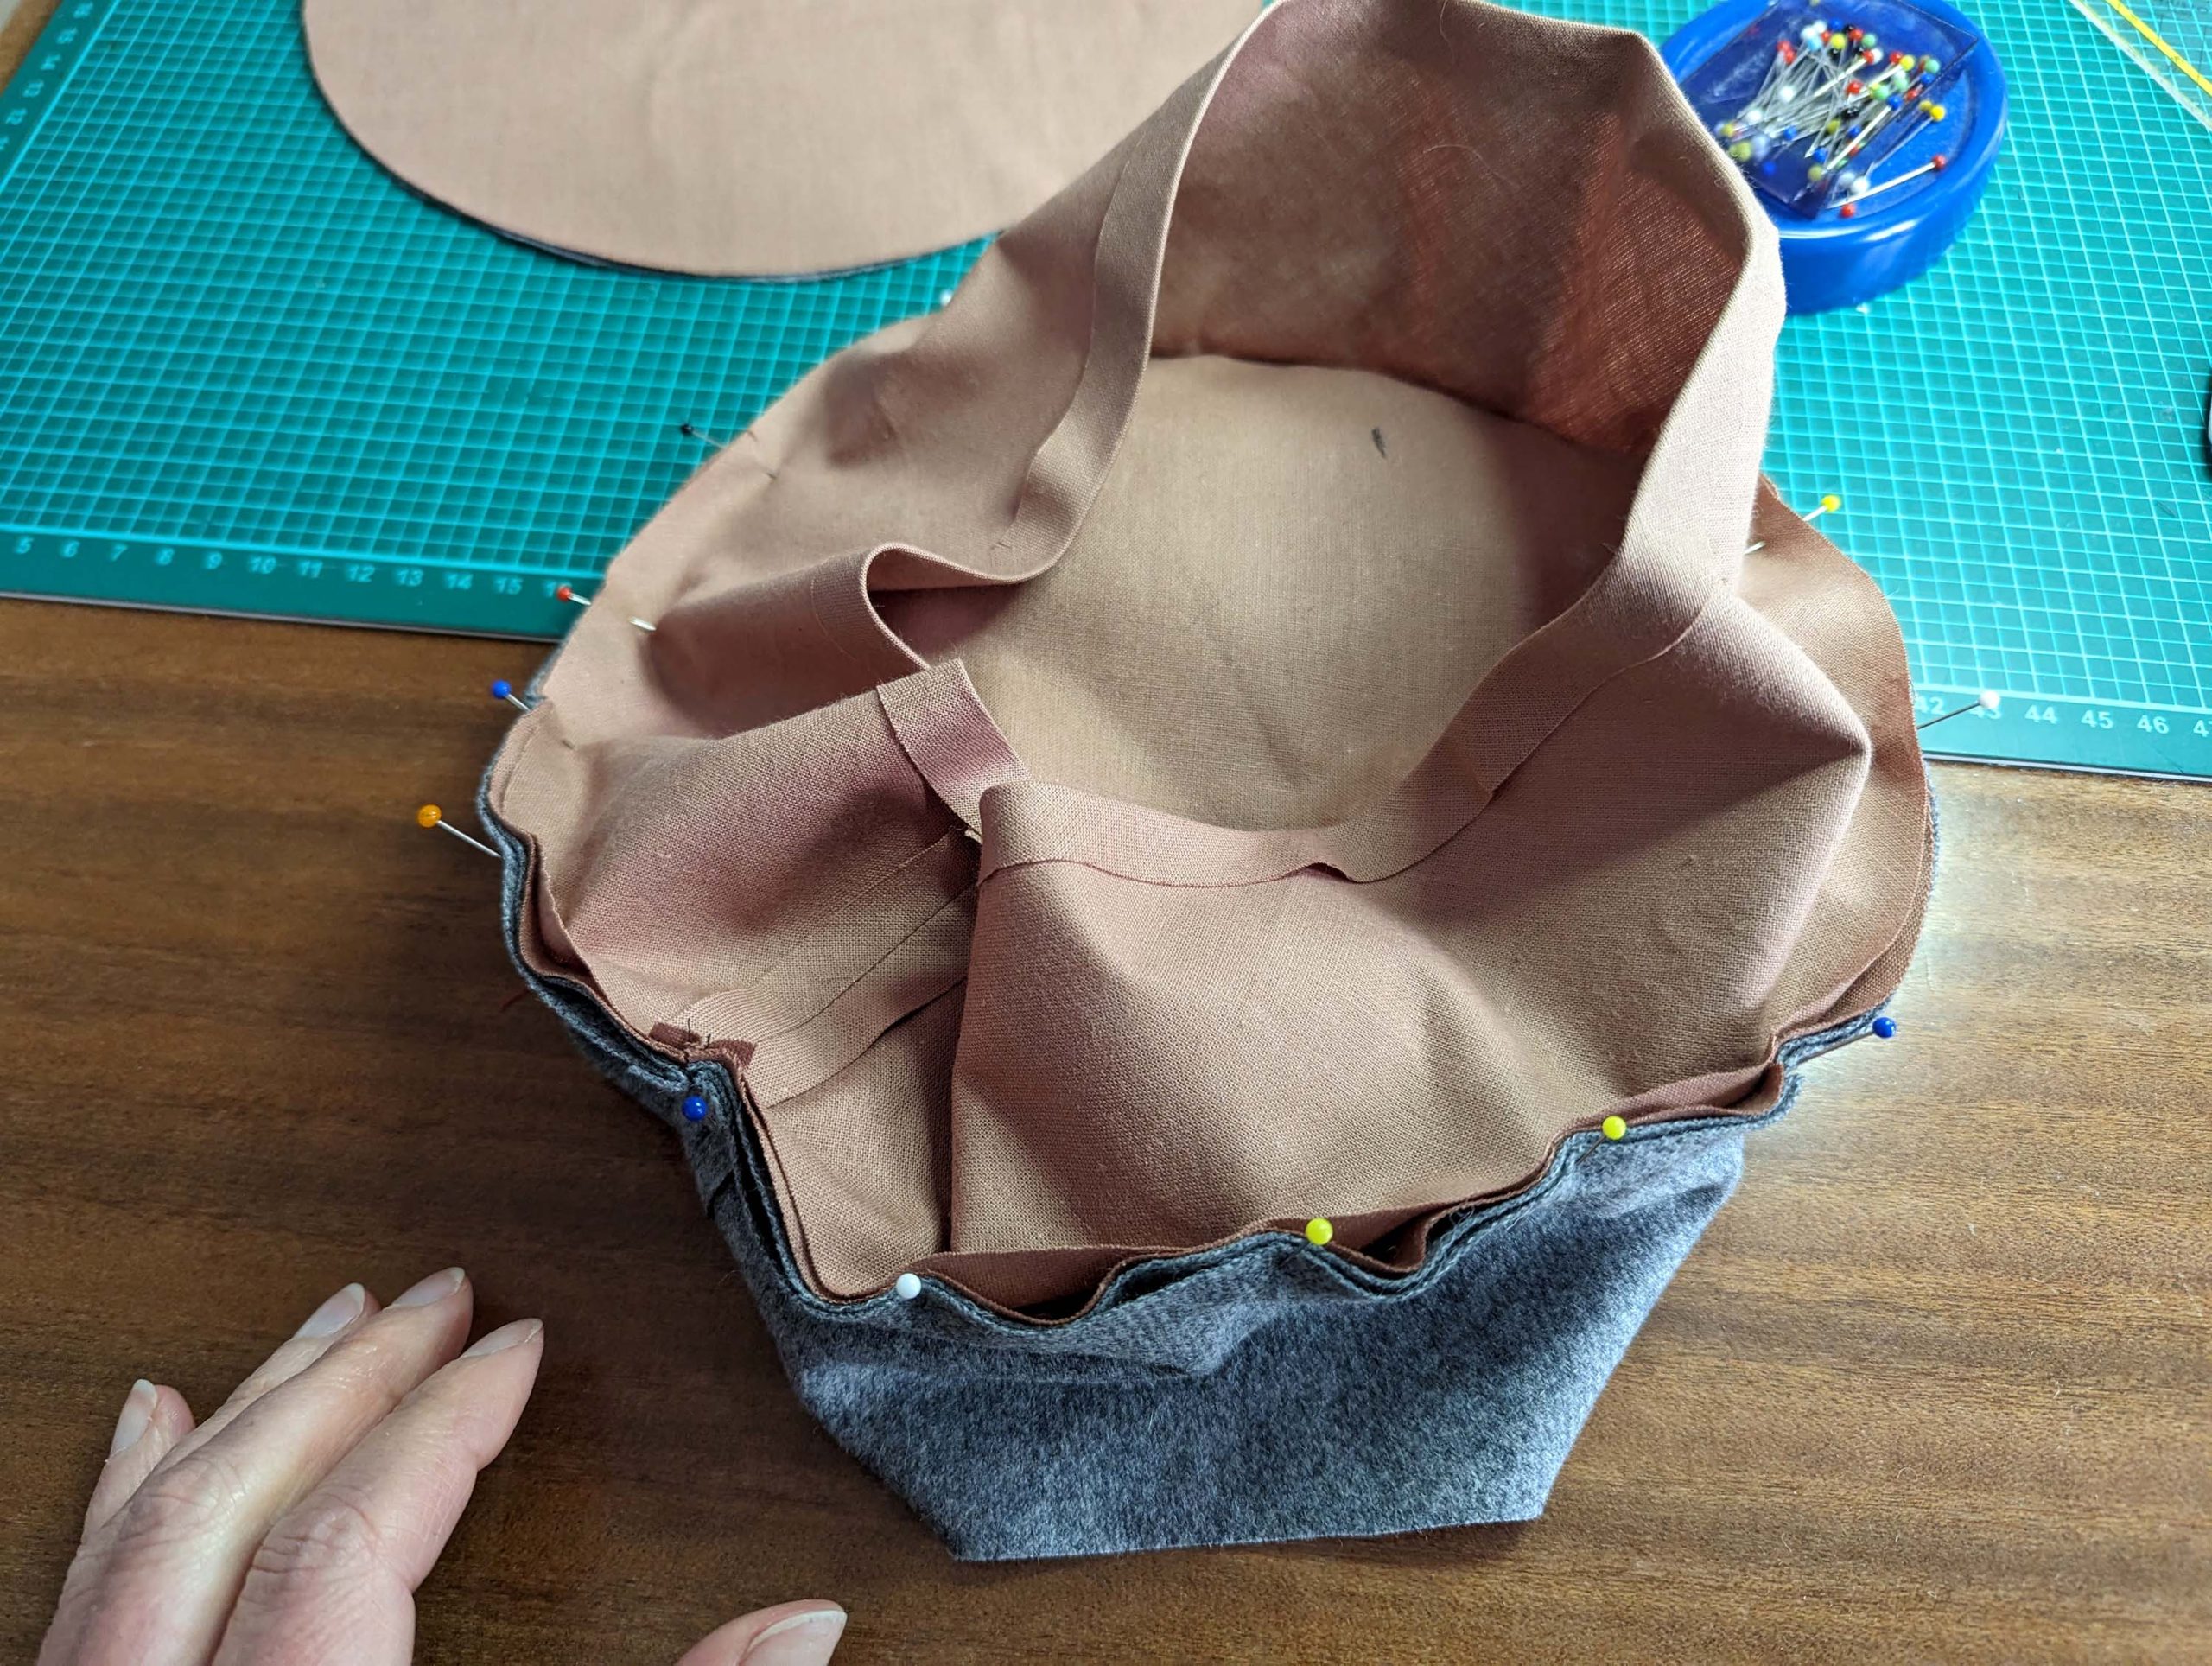

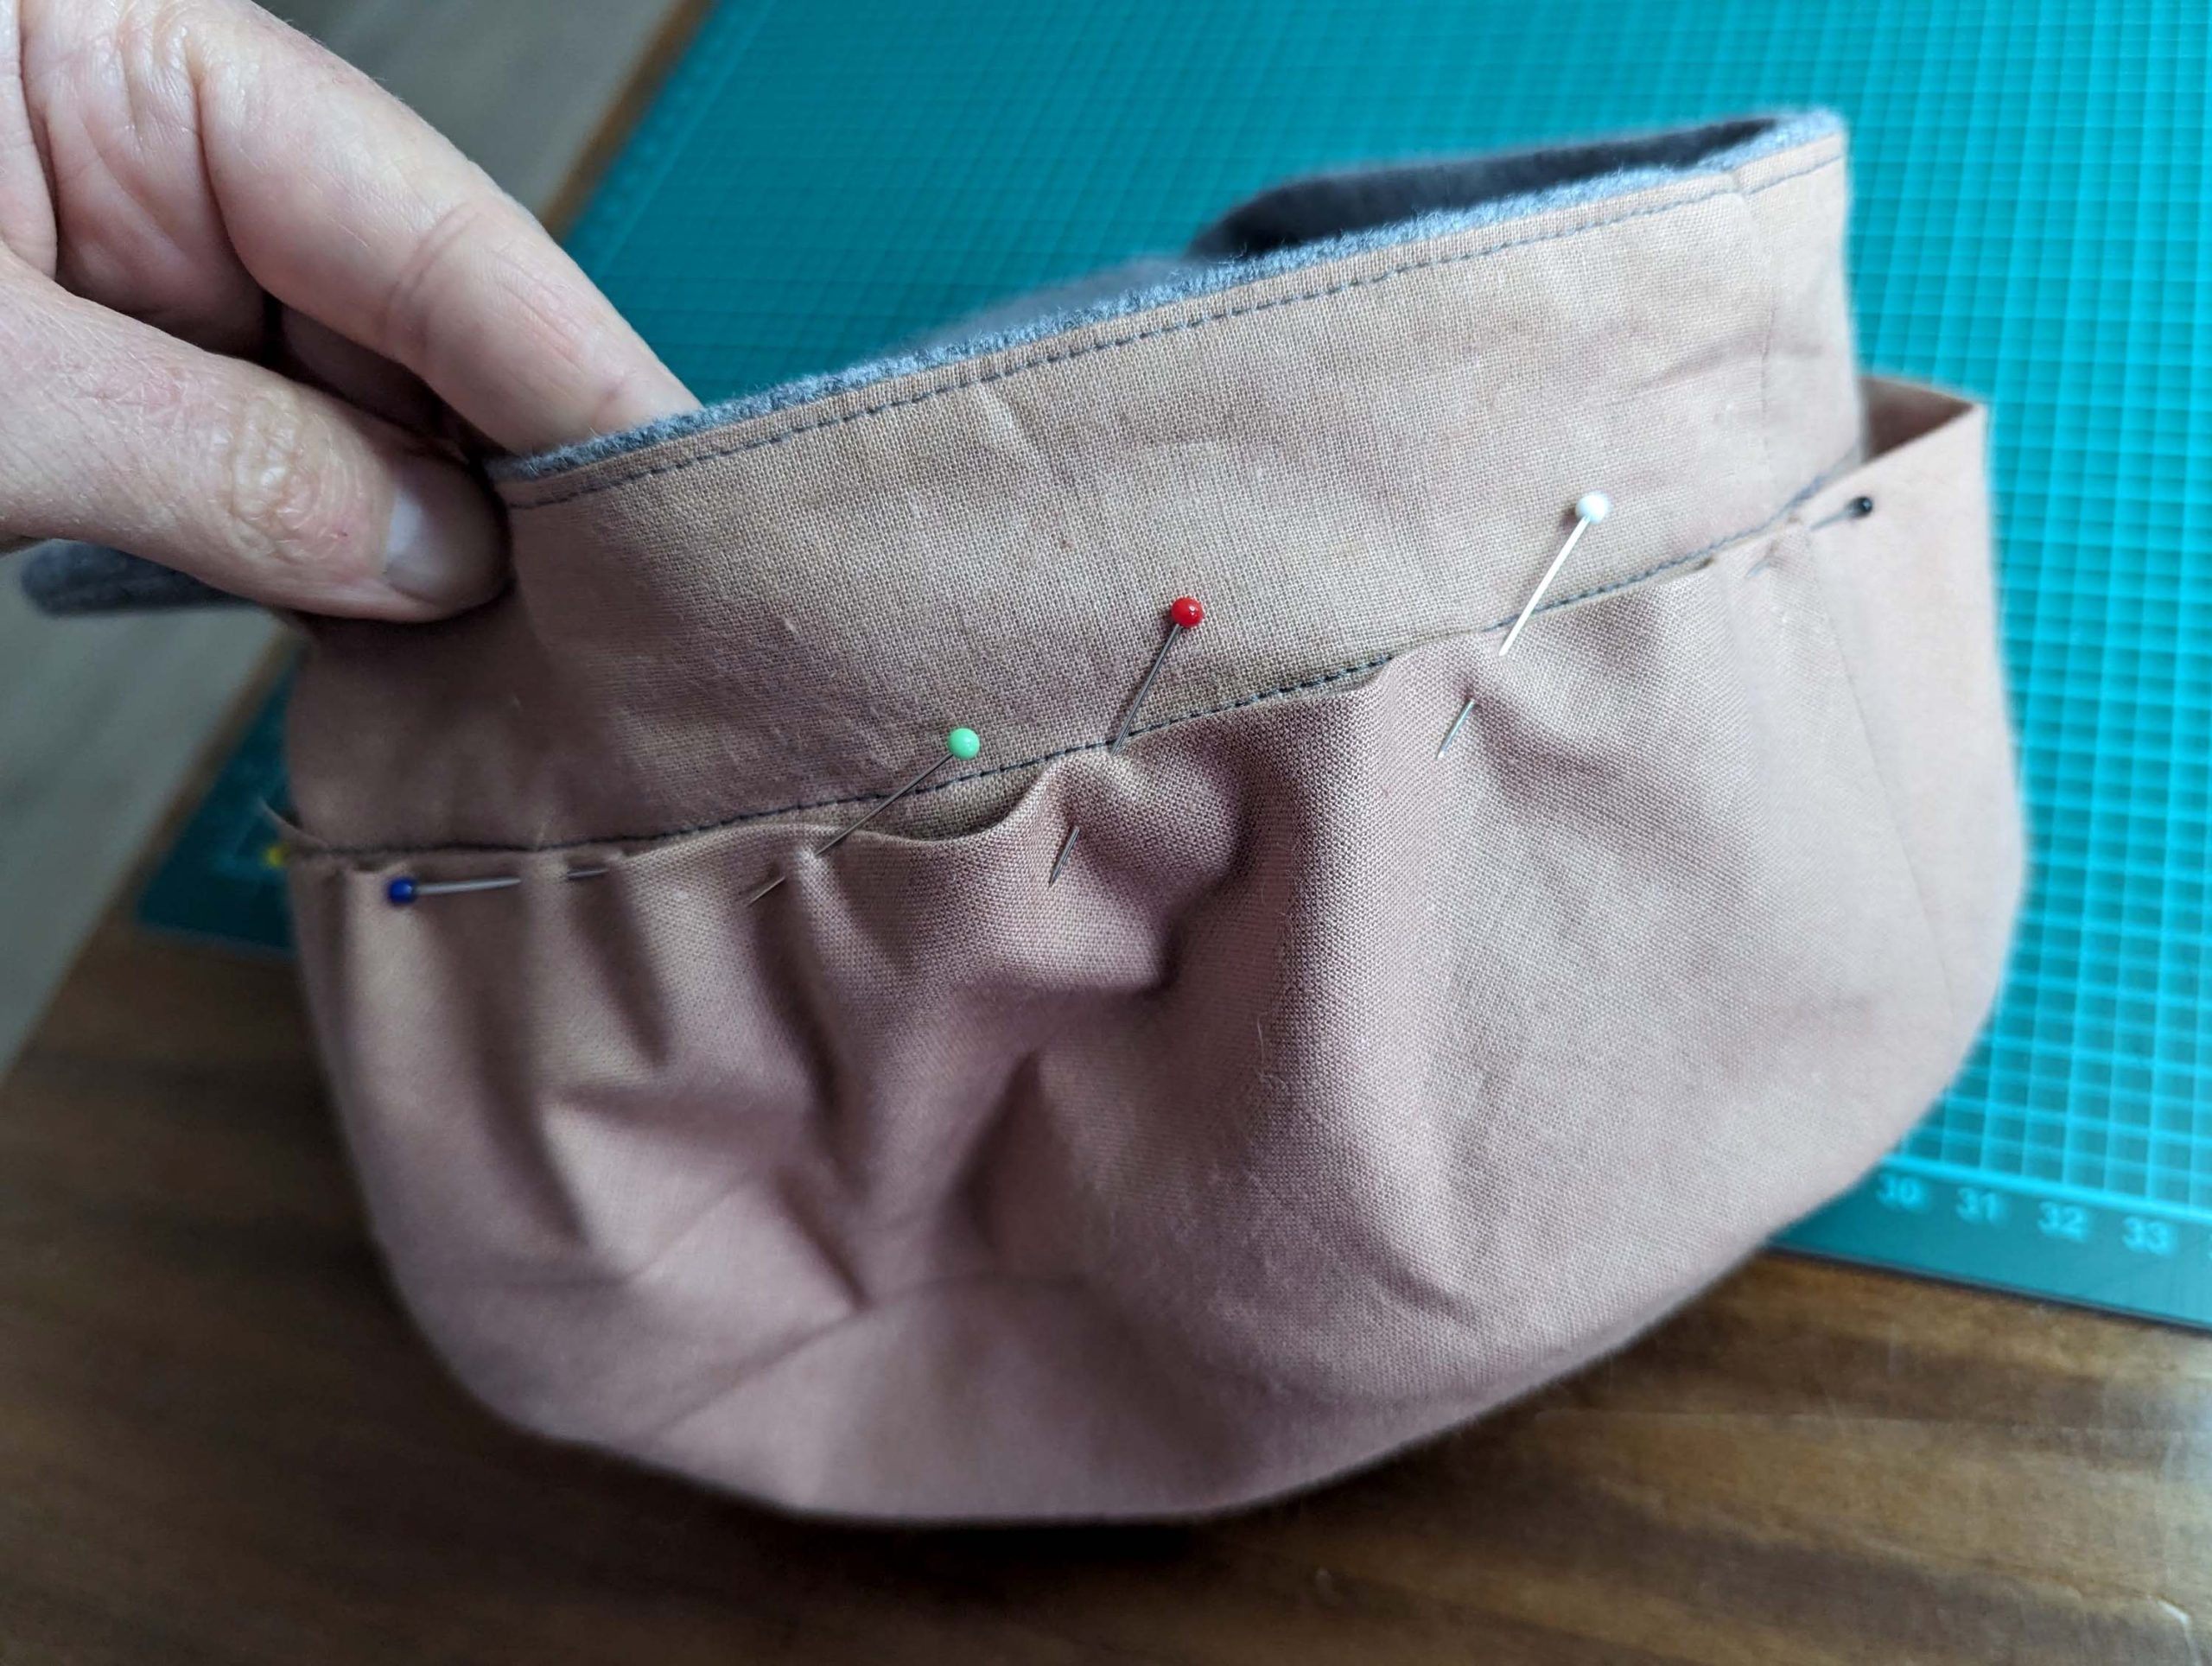
Sew to rows of gathering stitches along the bottom edge of the crown (don´t catch the lining), and line up with the top edge of the headband, right sides together, respecting all marks. Pull the threads to ease in the excess fabric, and sew.
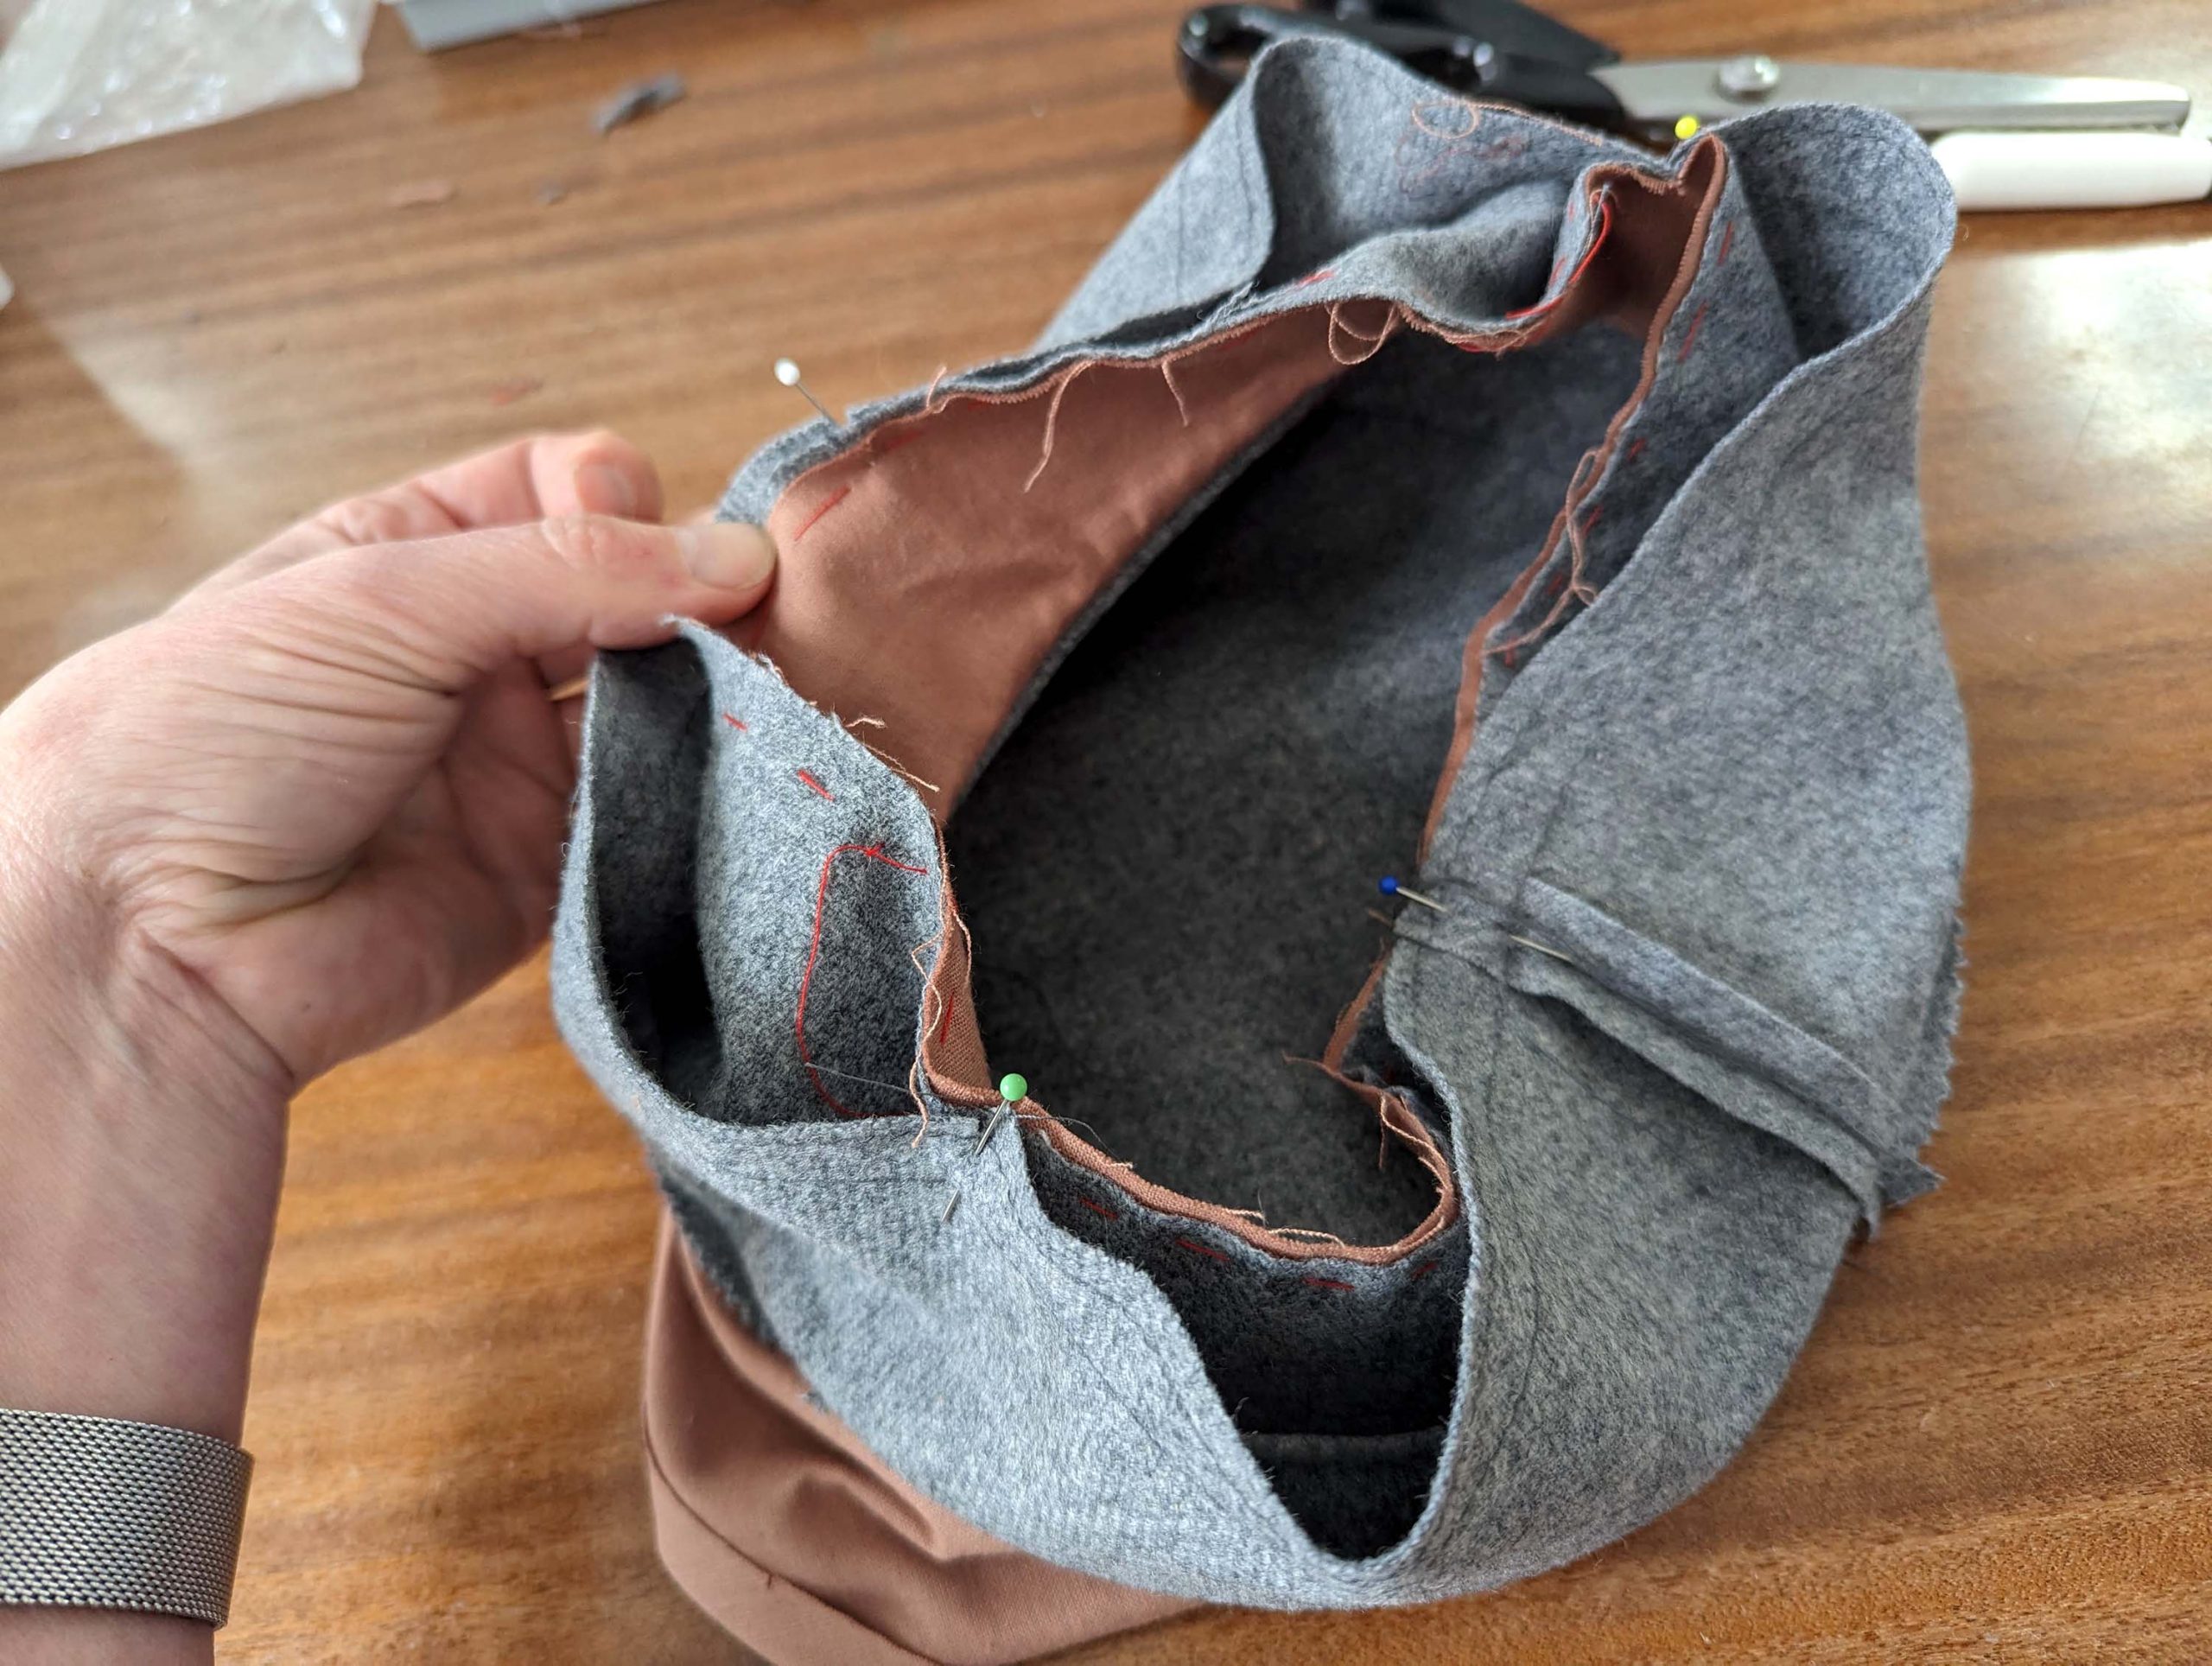
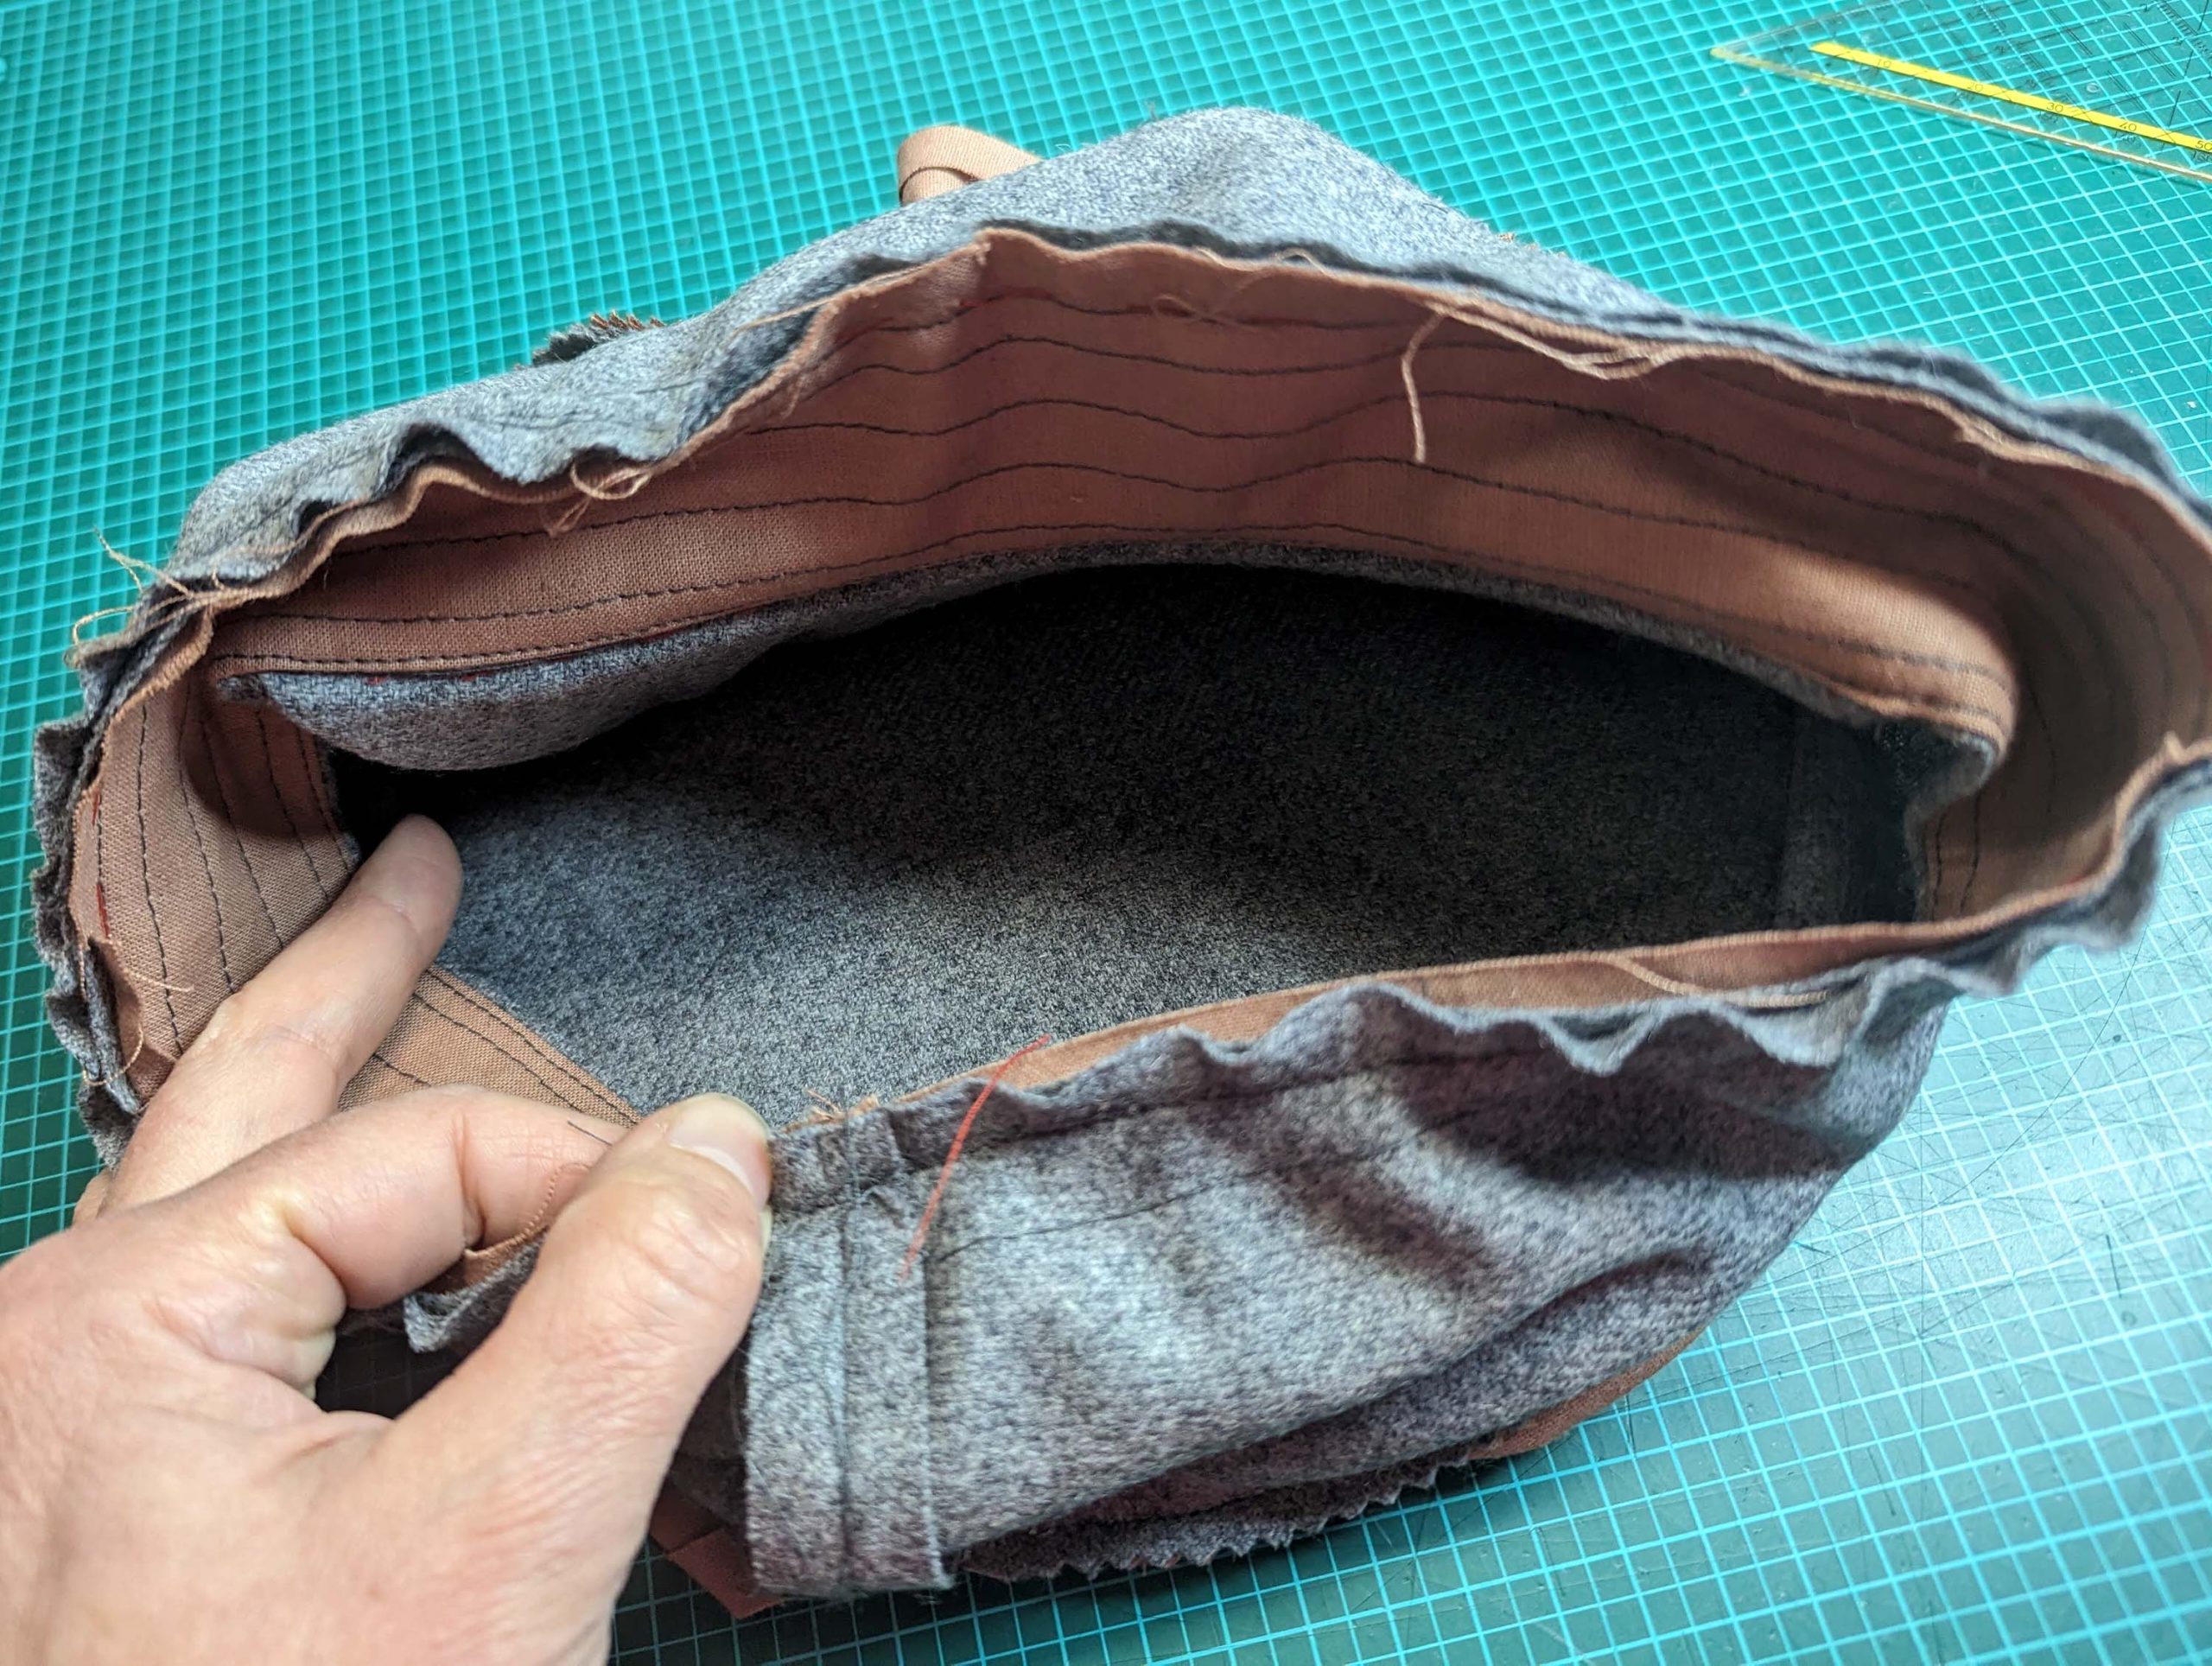
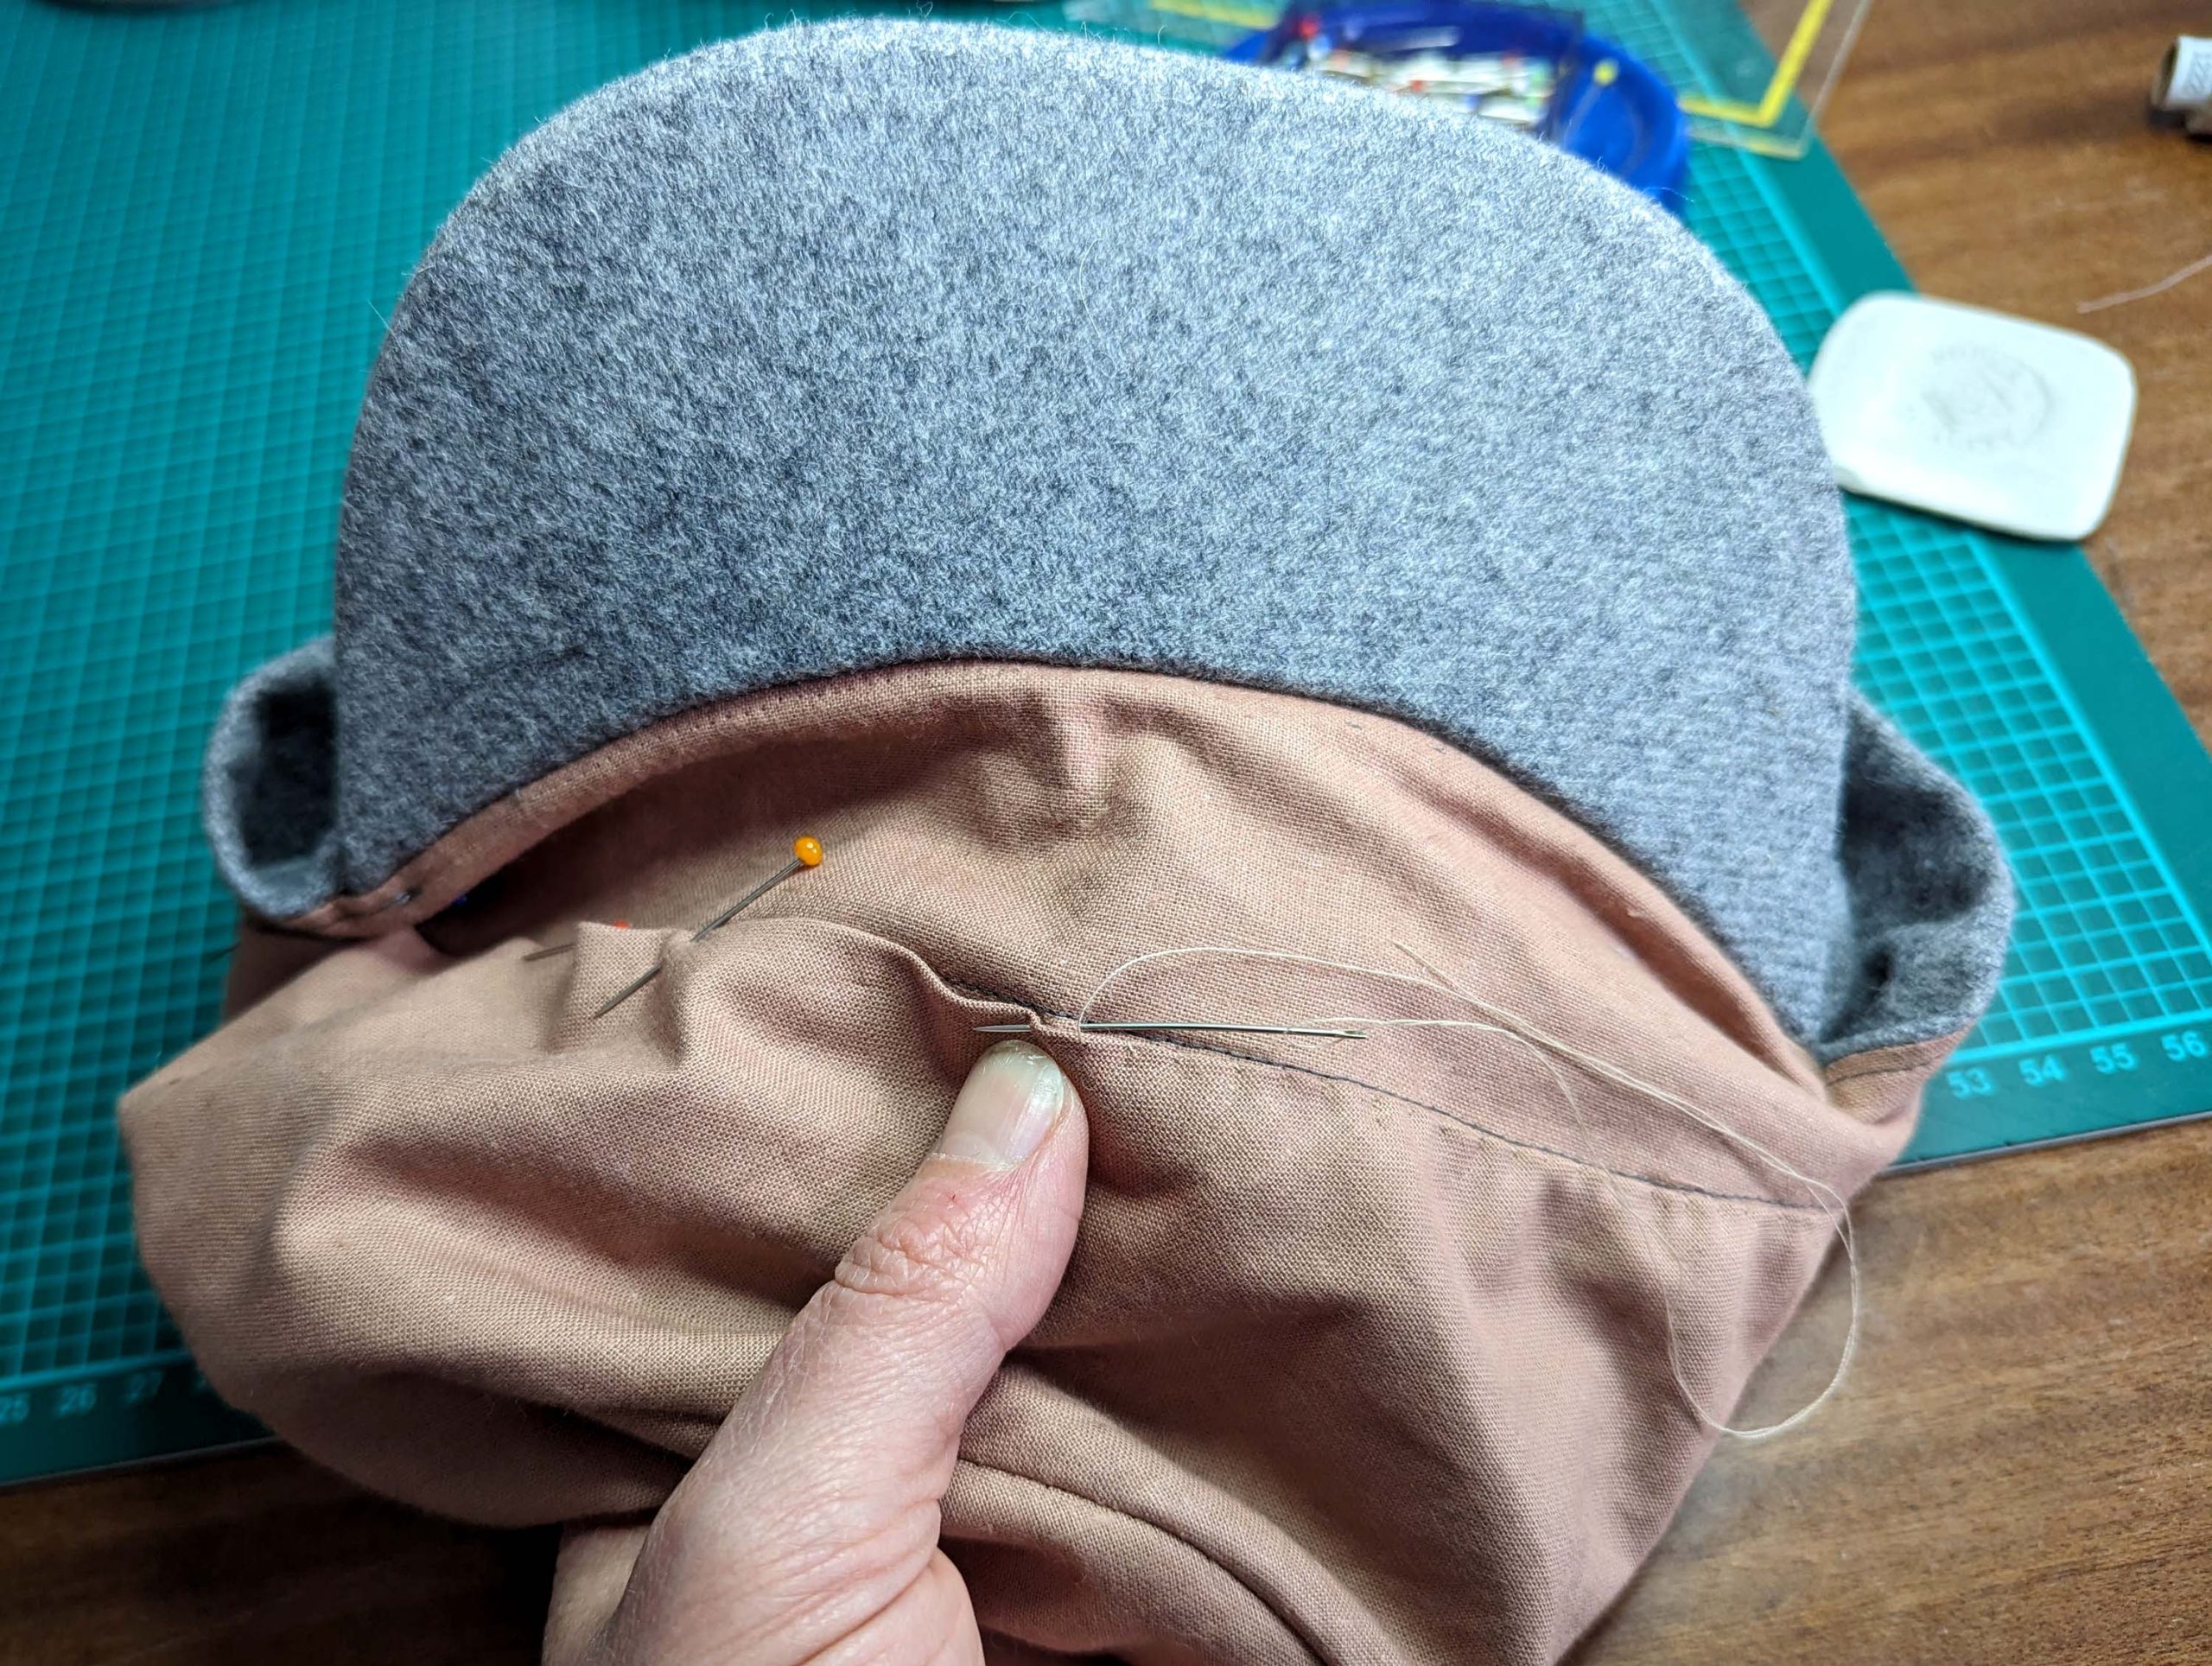
Line up the bottom edge of the crown lining with that stitching line and fell stitch in place, easing in the excess fabric.

Finally, we are finished! Enjoy your cycling trip.