Category Archives: Tutorials

How to get small, regular pleats on 17th or 18th century skirts

For small folds (minimum ¼” (5mm)), measure the distance of the waistband or bodice section, where you want to attach the skirt.

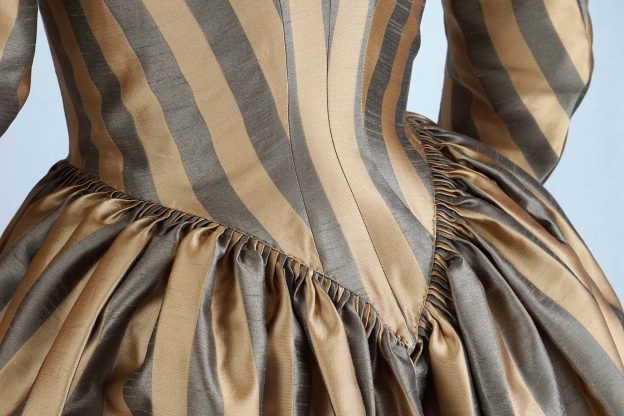
Let´s say 35cm for an 18th century robe a l´Anglaise. Determine the width of folds and therefore the number of folds – with a width of 5mm there would be 70 folds each side (that makes a total of 140! folds).

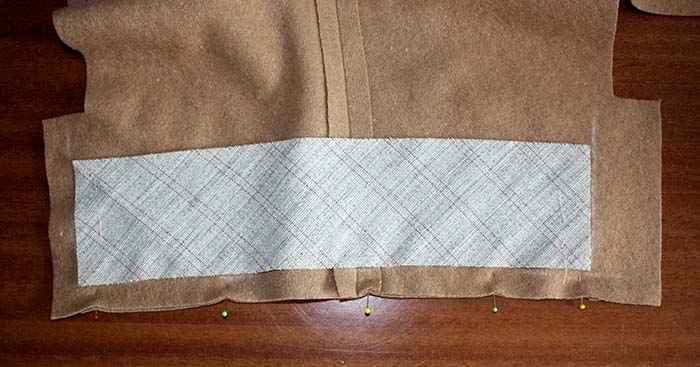
Measure along the top edge of the skirt, from center back to the front edge, subtract about 1” from this measurement (e.g. 138cm-2cm=136cm). Divide this measurement by the number of folds (136cm/70=1,9cm). This is how much fabric each folds contains. Transfer that measurements to the wrong side of the top edge of the skirt. Mark the fold´s width (5mm) beside. As a rule, the skirt width has to be minimum three times the distance at the bodice/waistband.

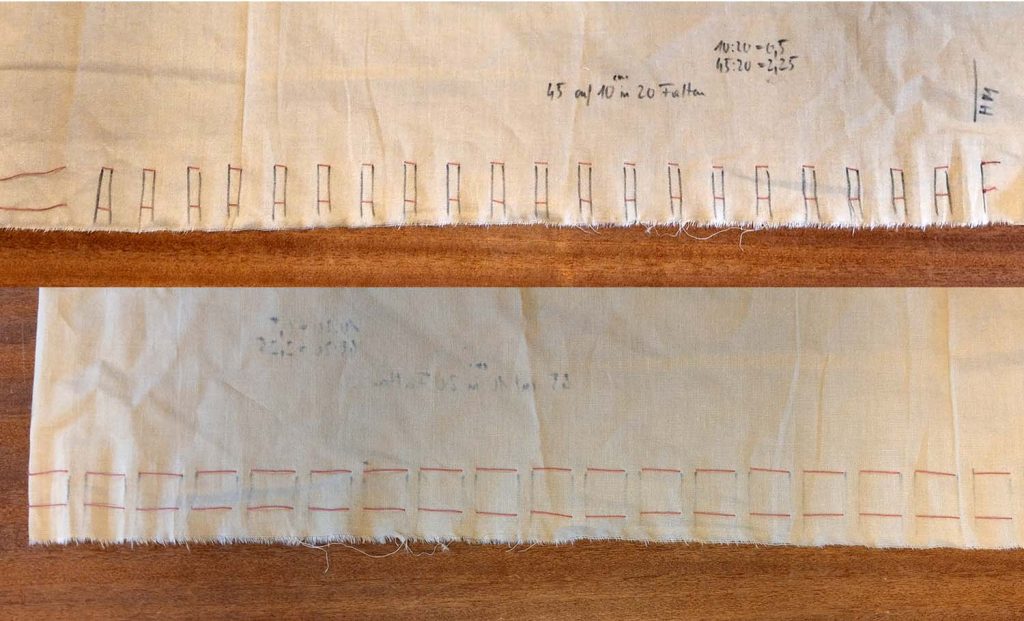
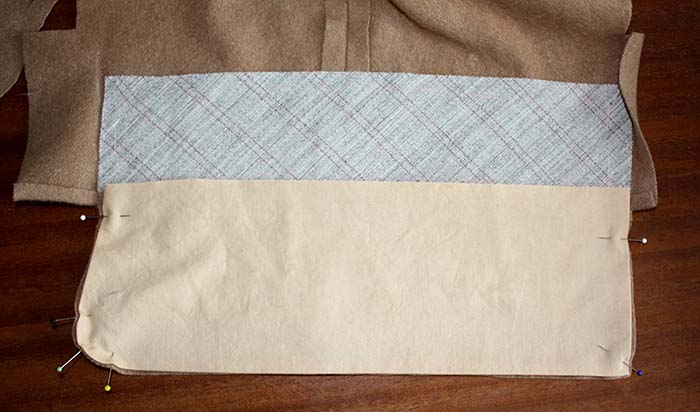
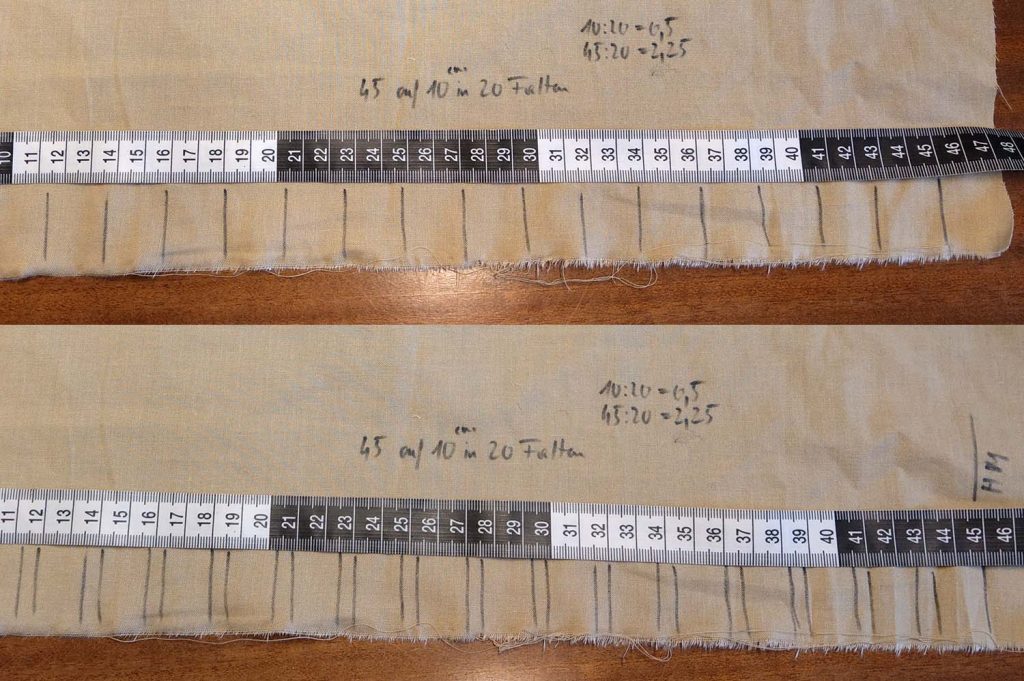
In this sample I wanted to gather 45cm into 10cm, with pleats of 5mm. That means I divided 45cm by 20, that is 2,25cm for each fold. On the picture above I marked this 2,25cm at the wrong fabric side along the top edge. On the picture below, I marked the fold´s width of 5mm beside.

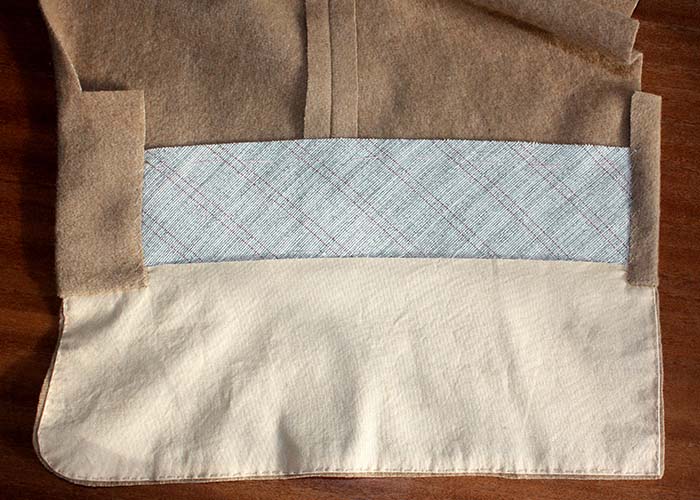
Sew two rows of gathering stitches with a thicker thread on both sides of the seamline. Above you see the wrong side, below the right fabric side of the skirt with the gathering threads already stitched.

Continue reading

How to attach soutache with the sewing machine

When I first planned my redingote it seemed there was no time left to do all that soutache embroidery I wanted to do. Sadly the event I made the redingote for was canceled, but fortunately now I had enough time. As I am a little bit lazy I was searching for a method to attach about 70 meters of soutache braid neatly to the skirt.

Continue reading

A Muff Tutorial (Georgian, Regency, Victorian….)

I muff is an accessory which you never should omit wearing an historical fall/winter costume. The advantages are obvious. You´ll never get cold hands and you can hide all that things a modern women needs, like your car keys and of course your cell phone! With a cord or a loop attached to secure the muff around your neck or wrist you get your hands free.

Continue reading

An 1830´s Frock Coat Part 3

Part 1 

Part 2 

The sleeve cuff shown here is different to the cuff described in the sewing instructions, but similar.
Sew together top and under sleeve along the front sleeve seam and attach the interlining with basting treads. In the sewing instruction, the interfacing reaches the bottom edge. Underneath you can see the cuff pined along the bottom edge, right sides together. I decided to use the fashion fabric for the cuff with raw edges to avoid bulk with that heavy fabric.

IMG_4433

For that reason I used a cotton fabric for lining the cuff. The cuff lining is cut with seam allowances, these are turned in and pressed. The two layers are joined narrow by the edge with small stitches. Better than shown on the pics would have been to stitch down the vent facing (left side) and seam allowance (right side) first.IMG_4434IMG_4437

Continue reading