Category Archives: Victorian

The Victorian Waistcoat – Sewing Pattern #0516 – Part 1 (Pockets) – Steps (1) and (2)

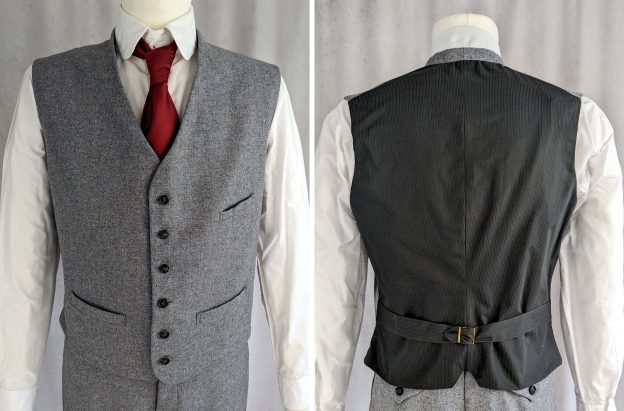
After the Norfolk jacket and the breeches, we’re now focusing on another essential garment in the men’s wardrobe: the waistcoat.

Similar to the patterns mentioned before, this one also originates from my early days as a pattern maker, marking my initial exploration into men’s tailoring in the 19th century. The waistcoat pattern represented my first endeavor in digital illustration, departing from my usual hand-sketching method. Despite the learning curve, it marked a significant milestone in my journey of pattern-making.

However, despite its age, a detailed blog post and sewing guide for the waistcoat was missing. That’s where this upcoming blog post comes in, especially focusing on the pockets. Join me as I delve into the nuances of constructing the waistcoat, offering practical insights and step-by-step instructions to help you bring this timeless garment to life.

Choosing the materials: A waistcoat, typically worn with trousers and a coat or jacket, evolved in material and style throughout the 19th century. At the start of the century, waistcoats were often crafted from contrasting materials. By the century’s end, they matched the trousers and jacket for informal occasions, forming a three-piece suit as we recognize today.

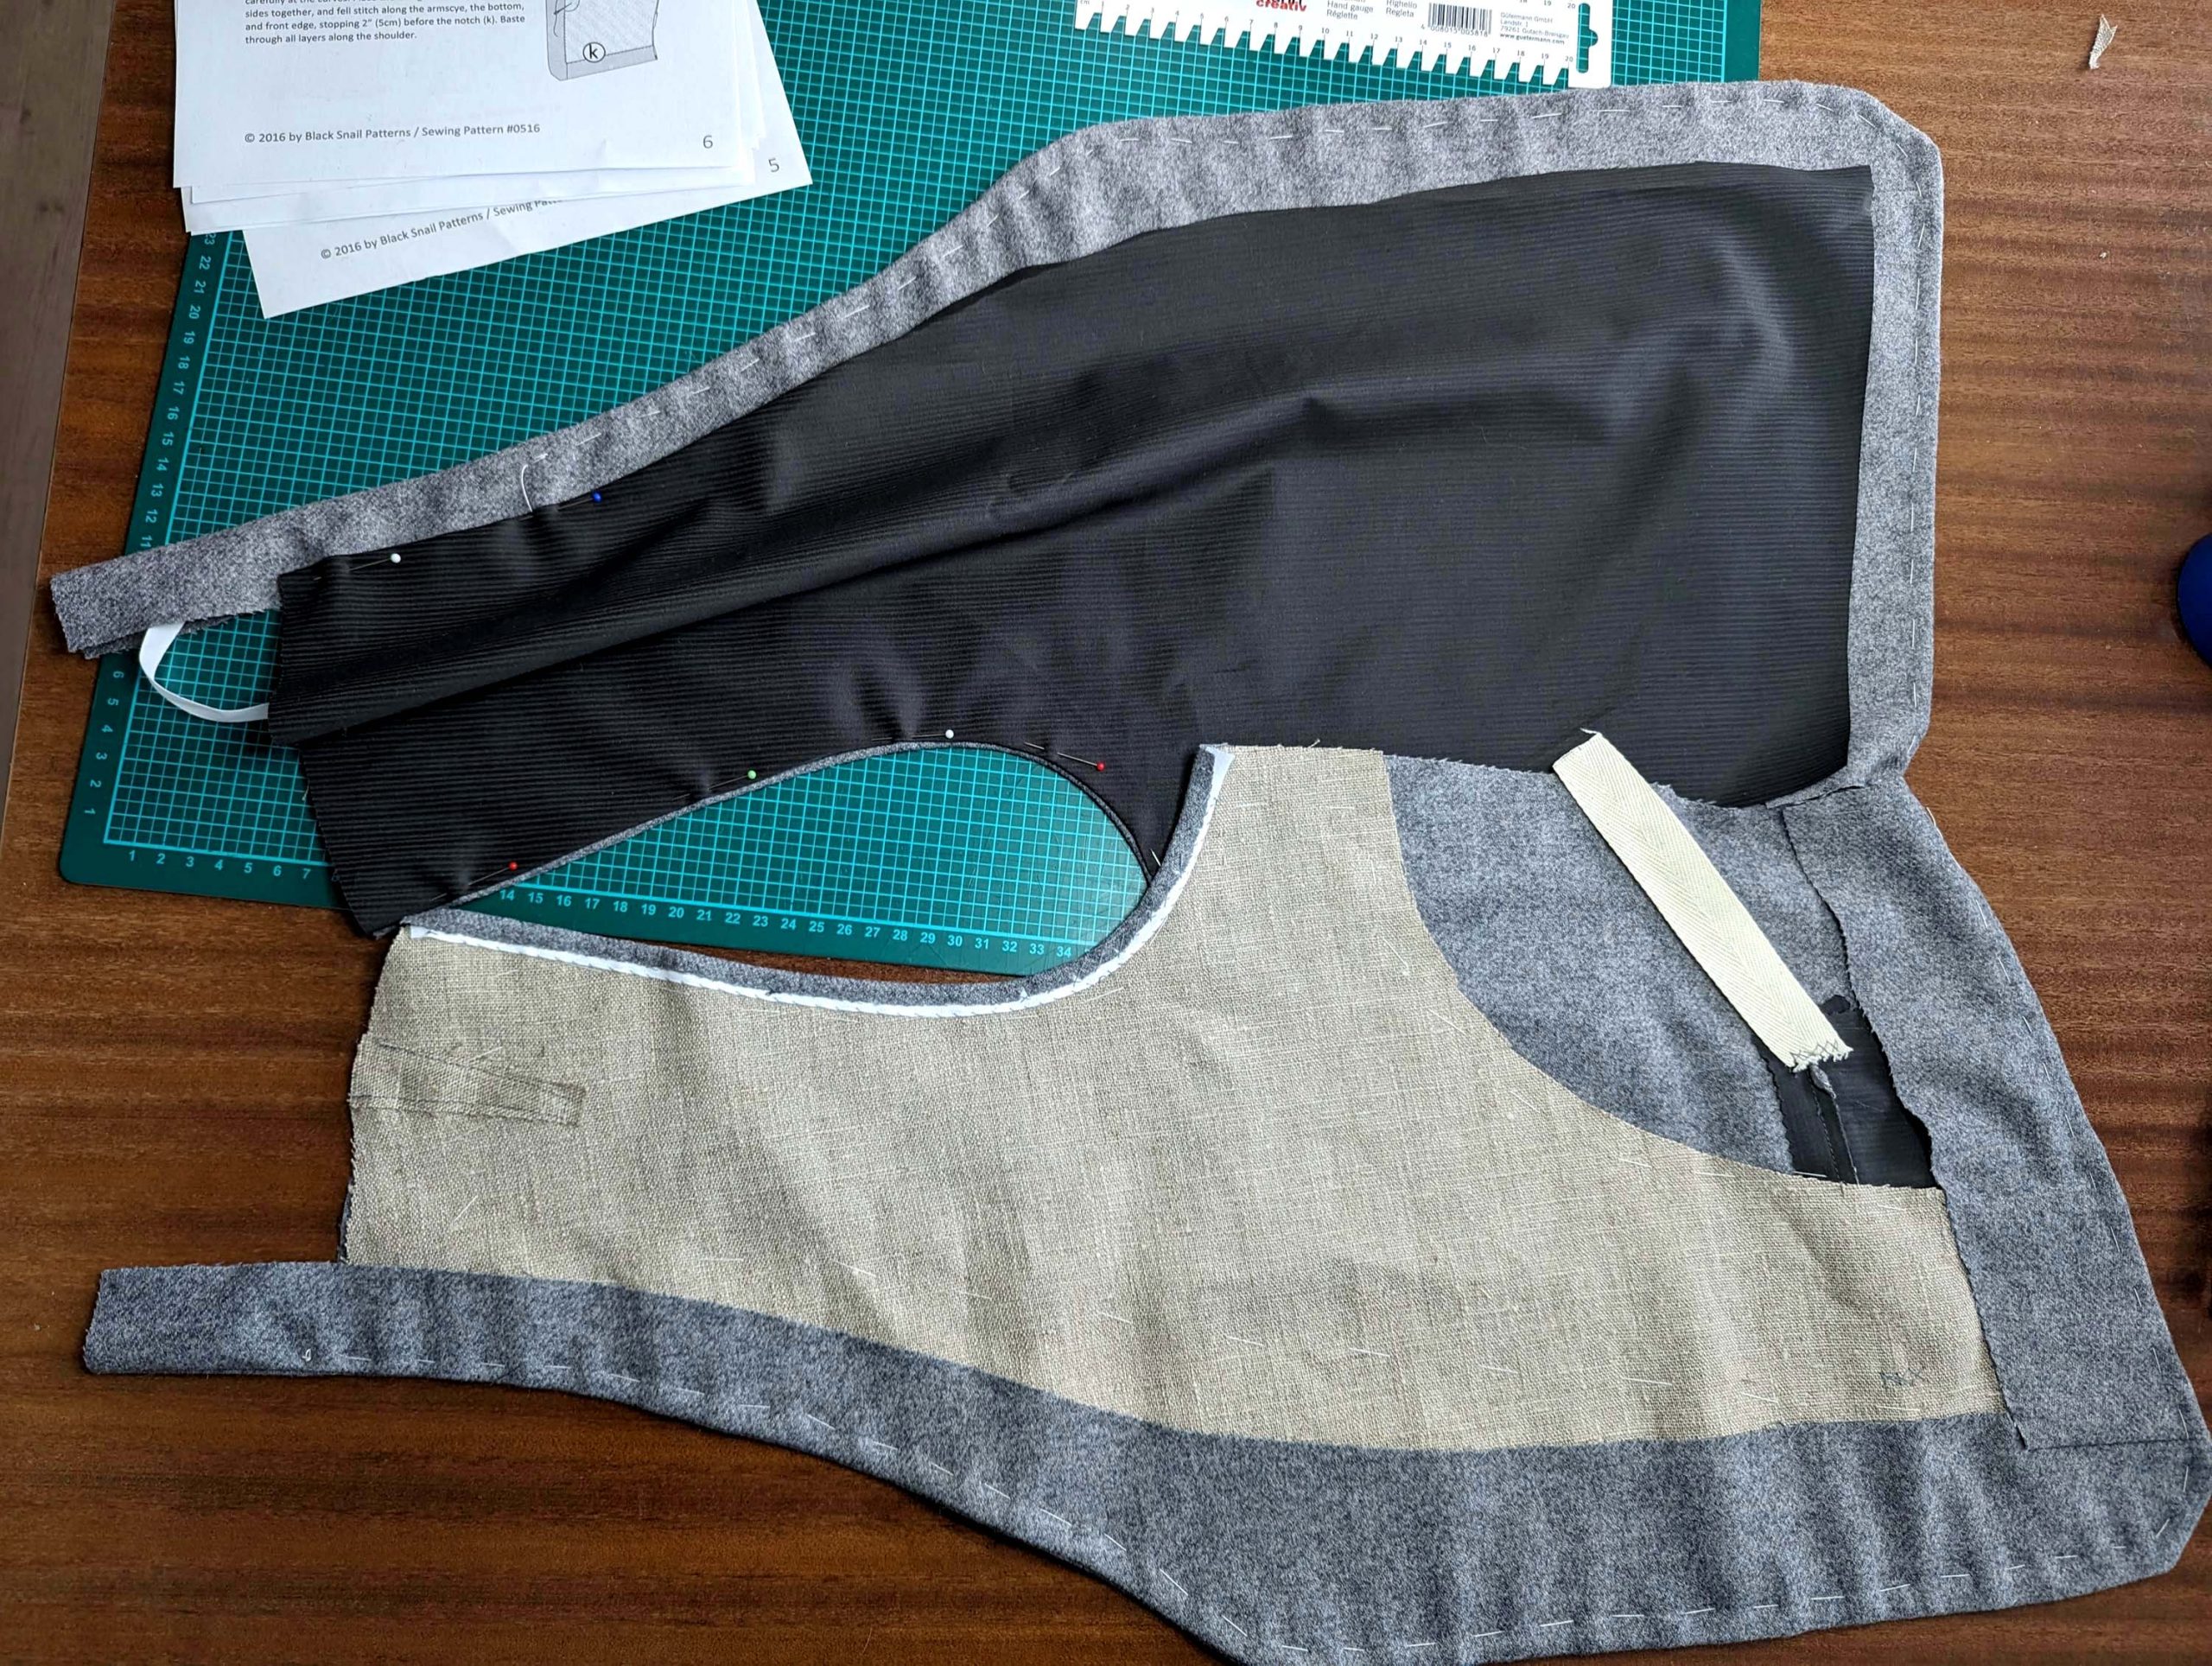
Similarly to modern practices, the back of the waistcoat was typically made from lighter materials. Polished cotton or fine twill/satin was commonly used for the back, straps, and lining.

Let´s dive into sewing, step by step as usual!

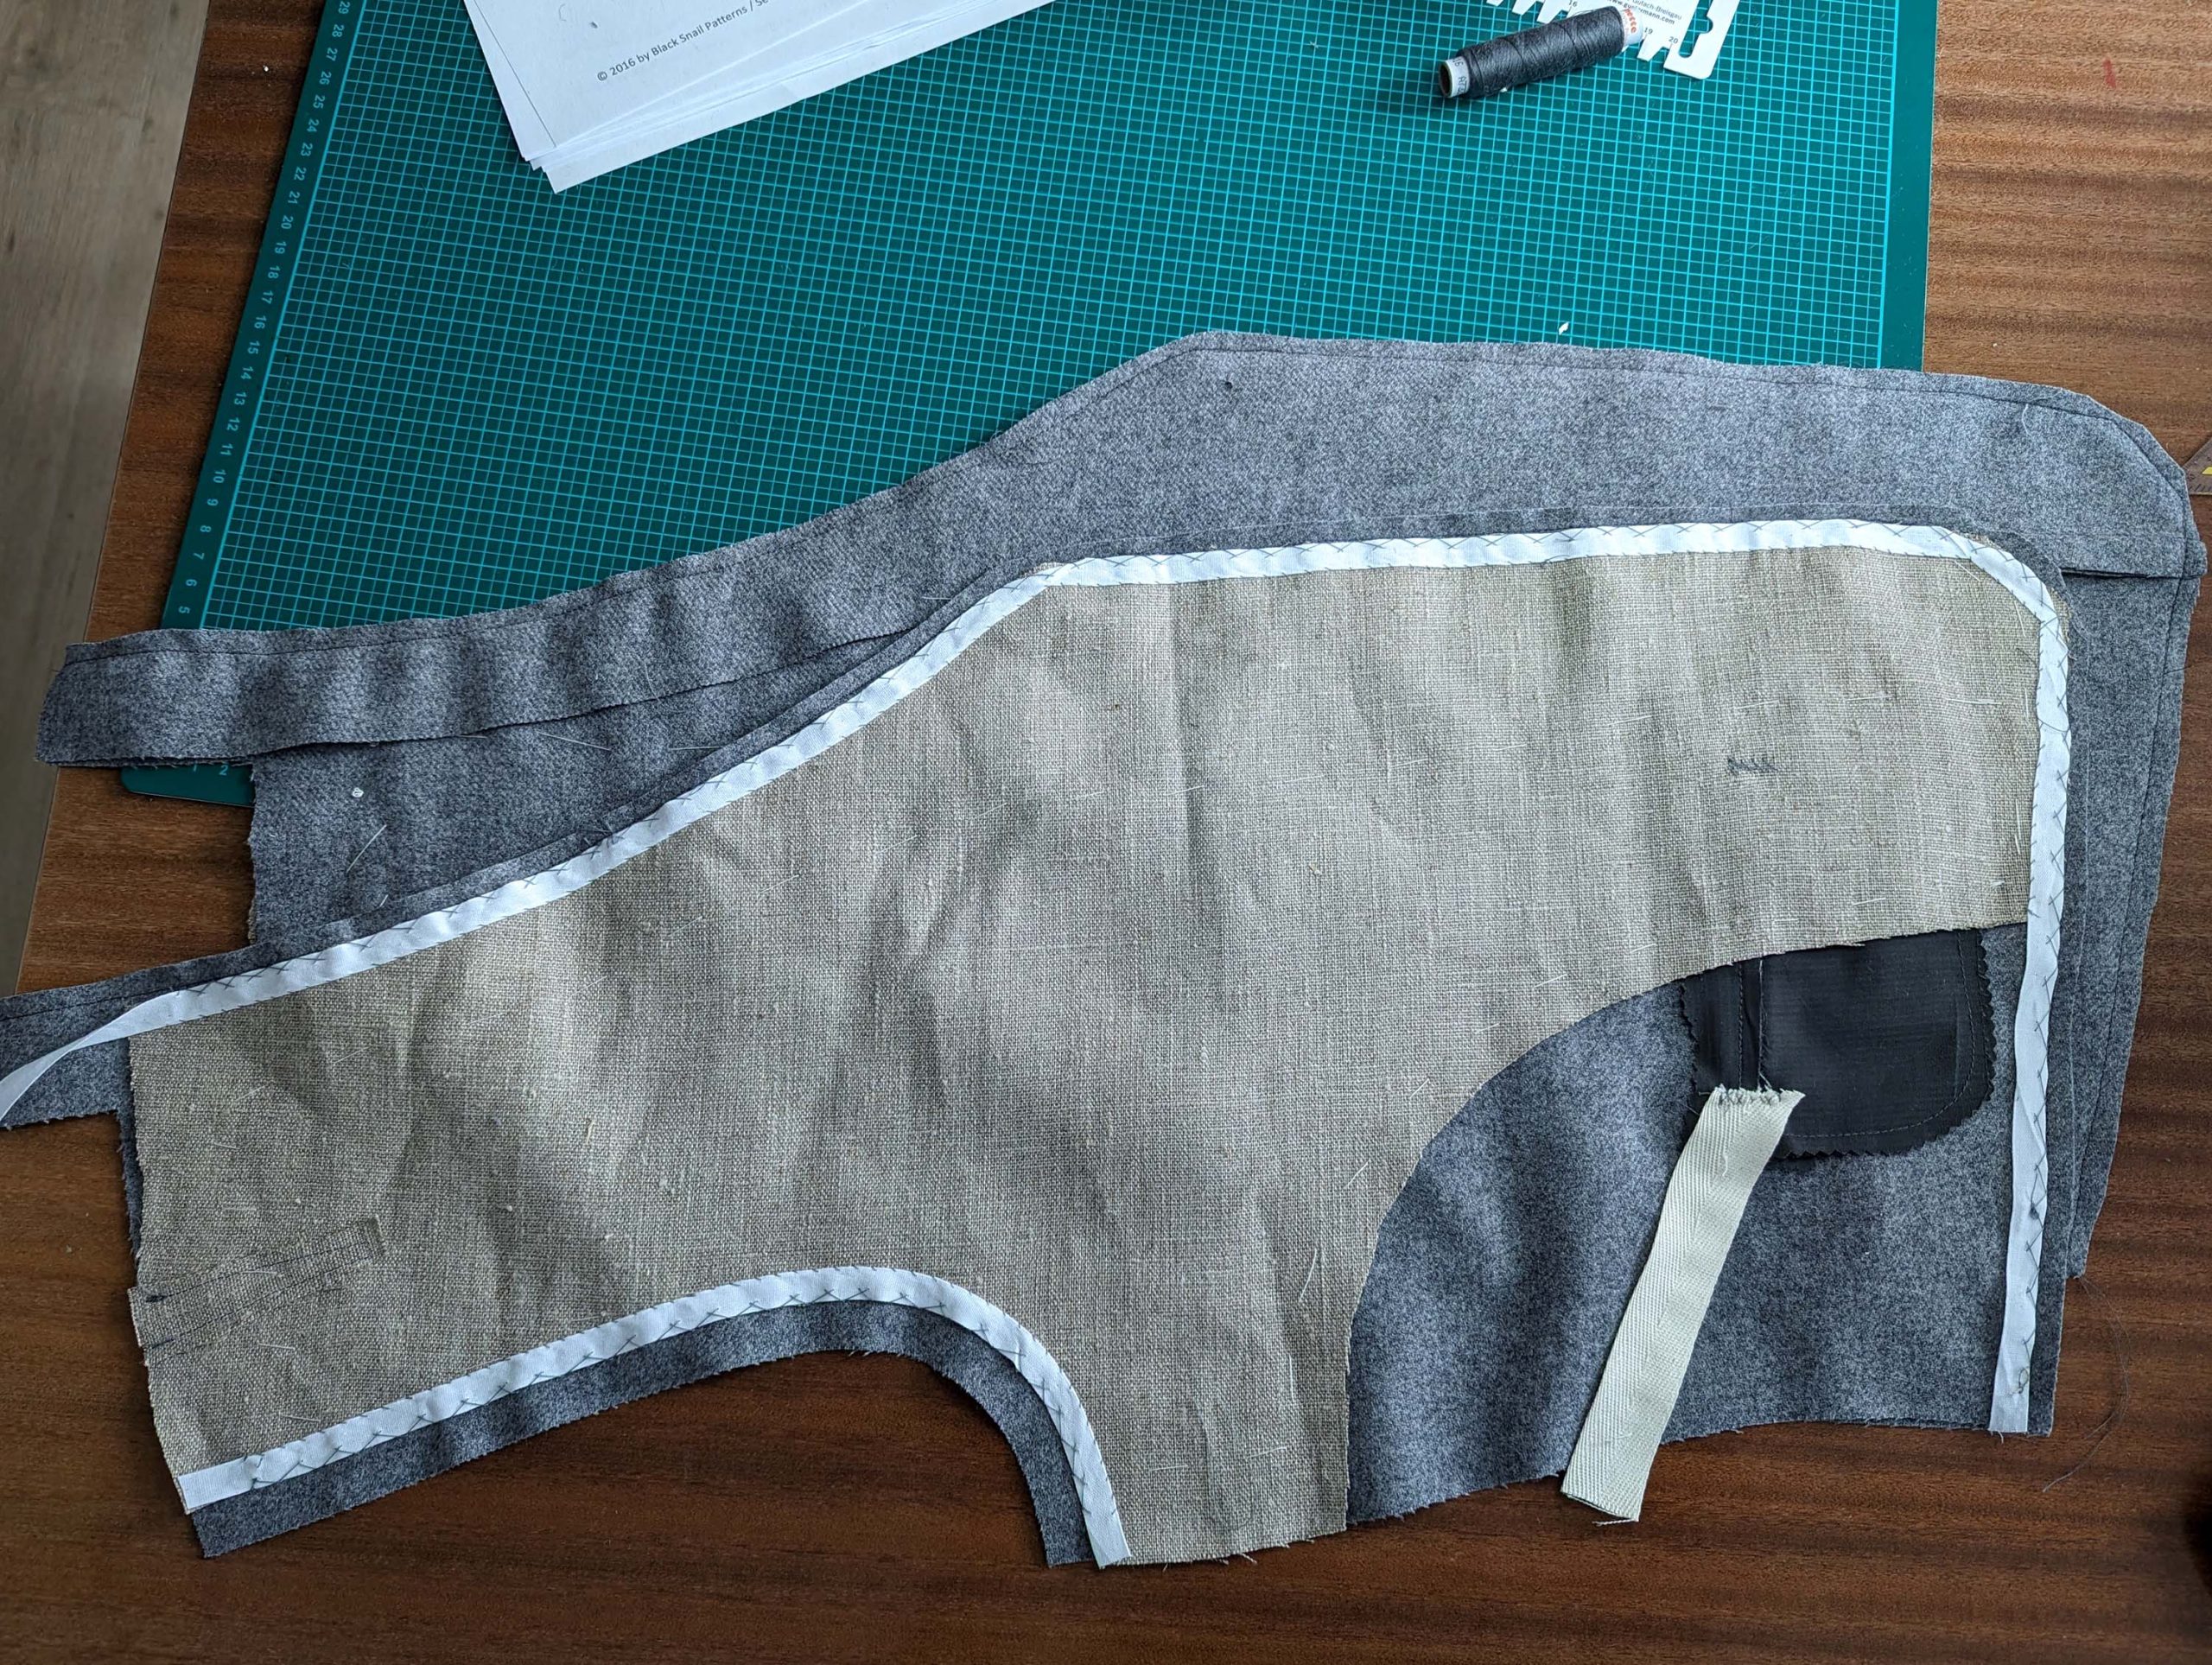
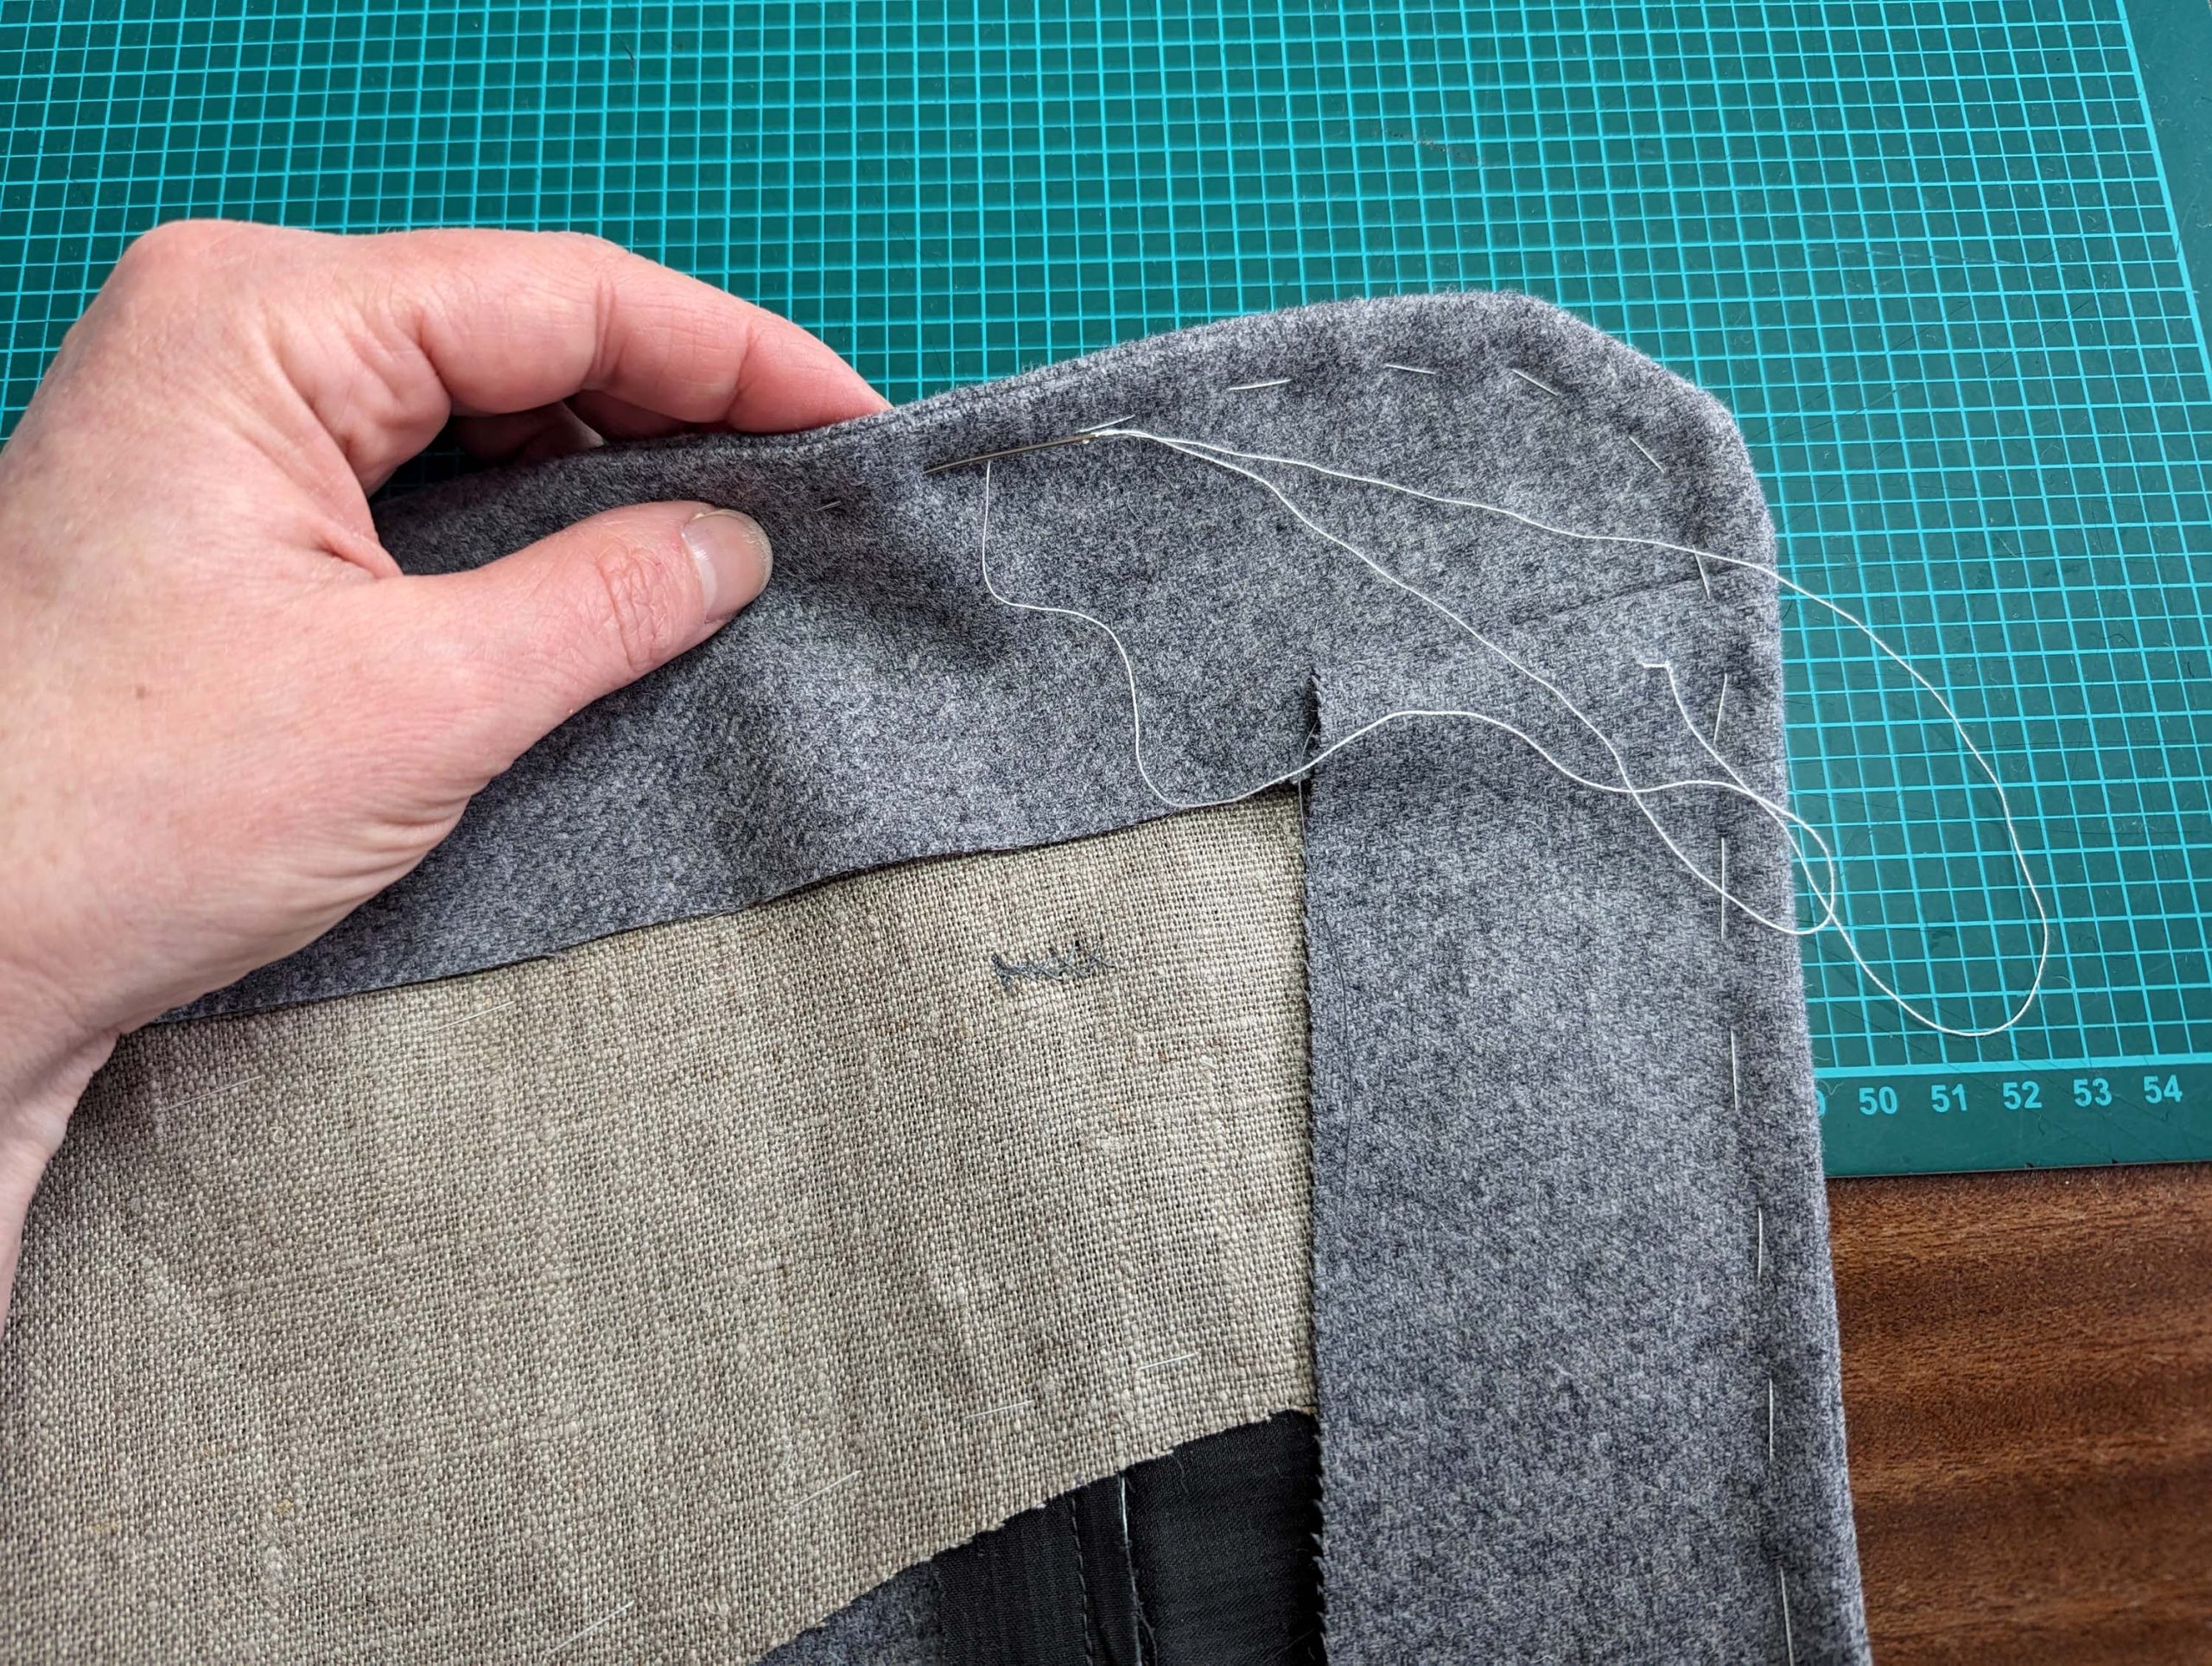
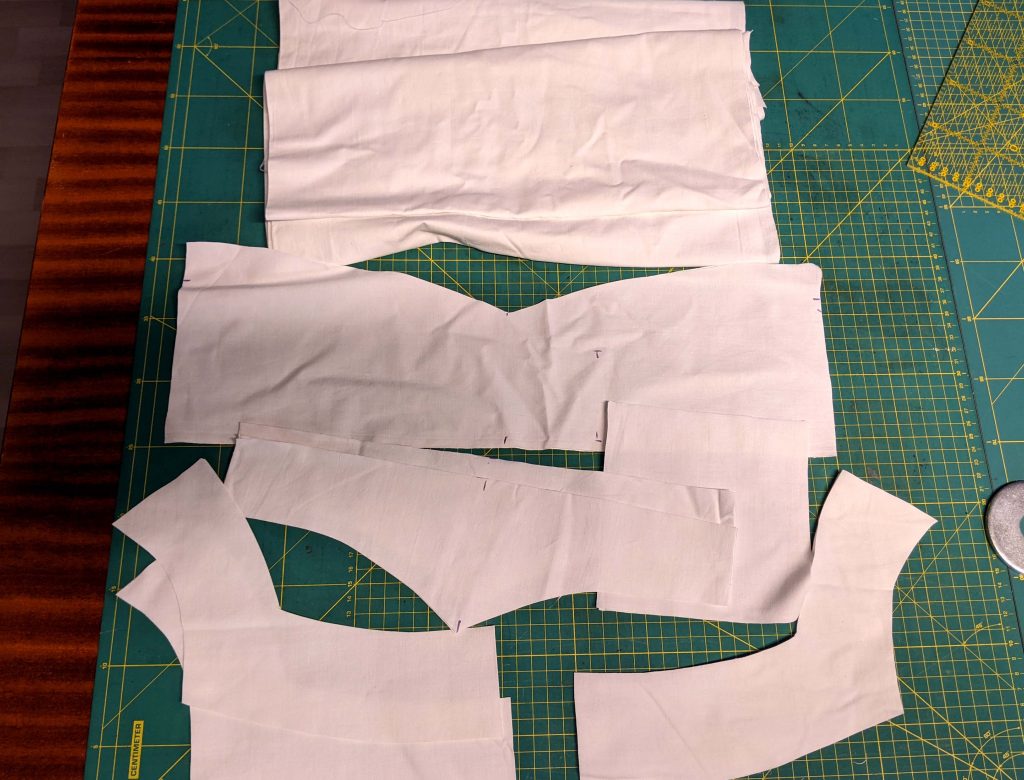
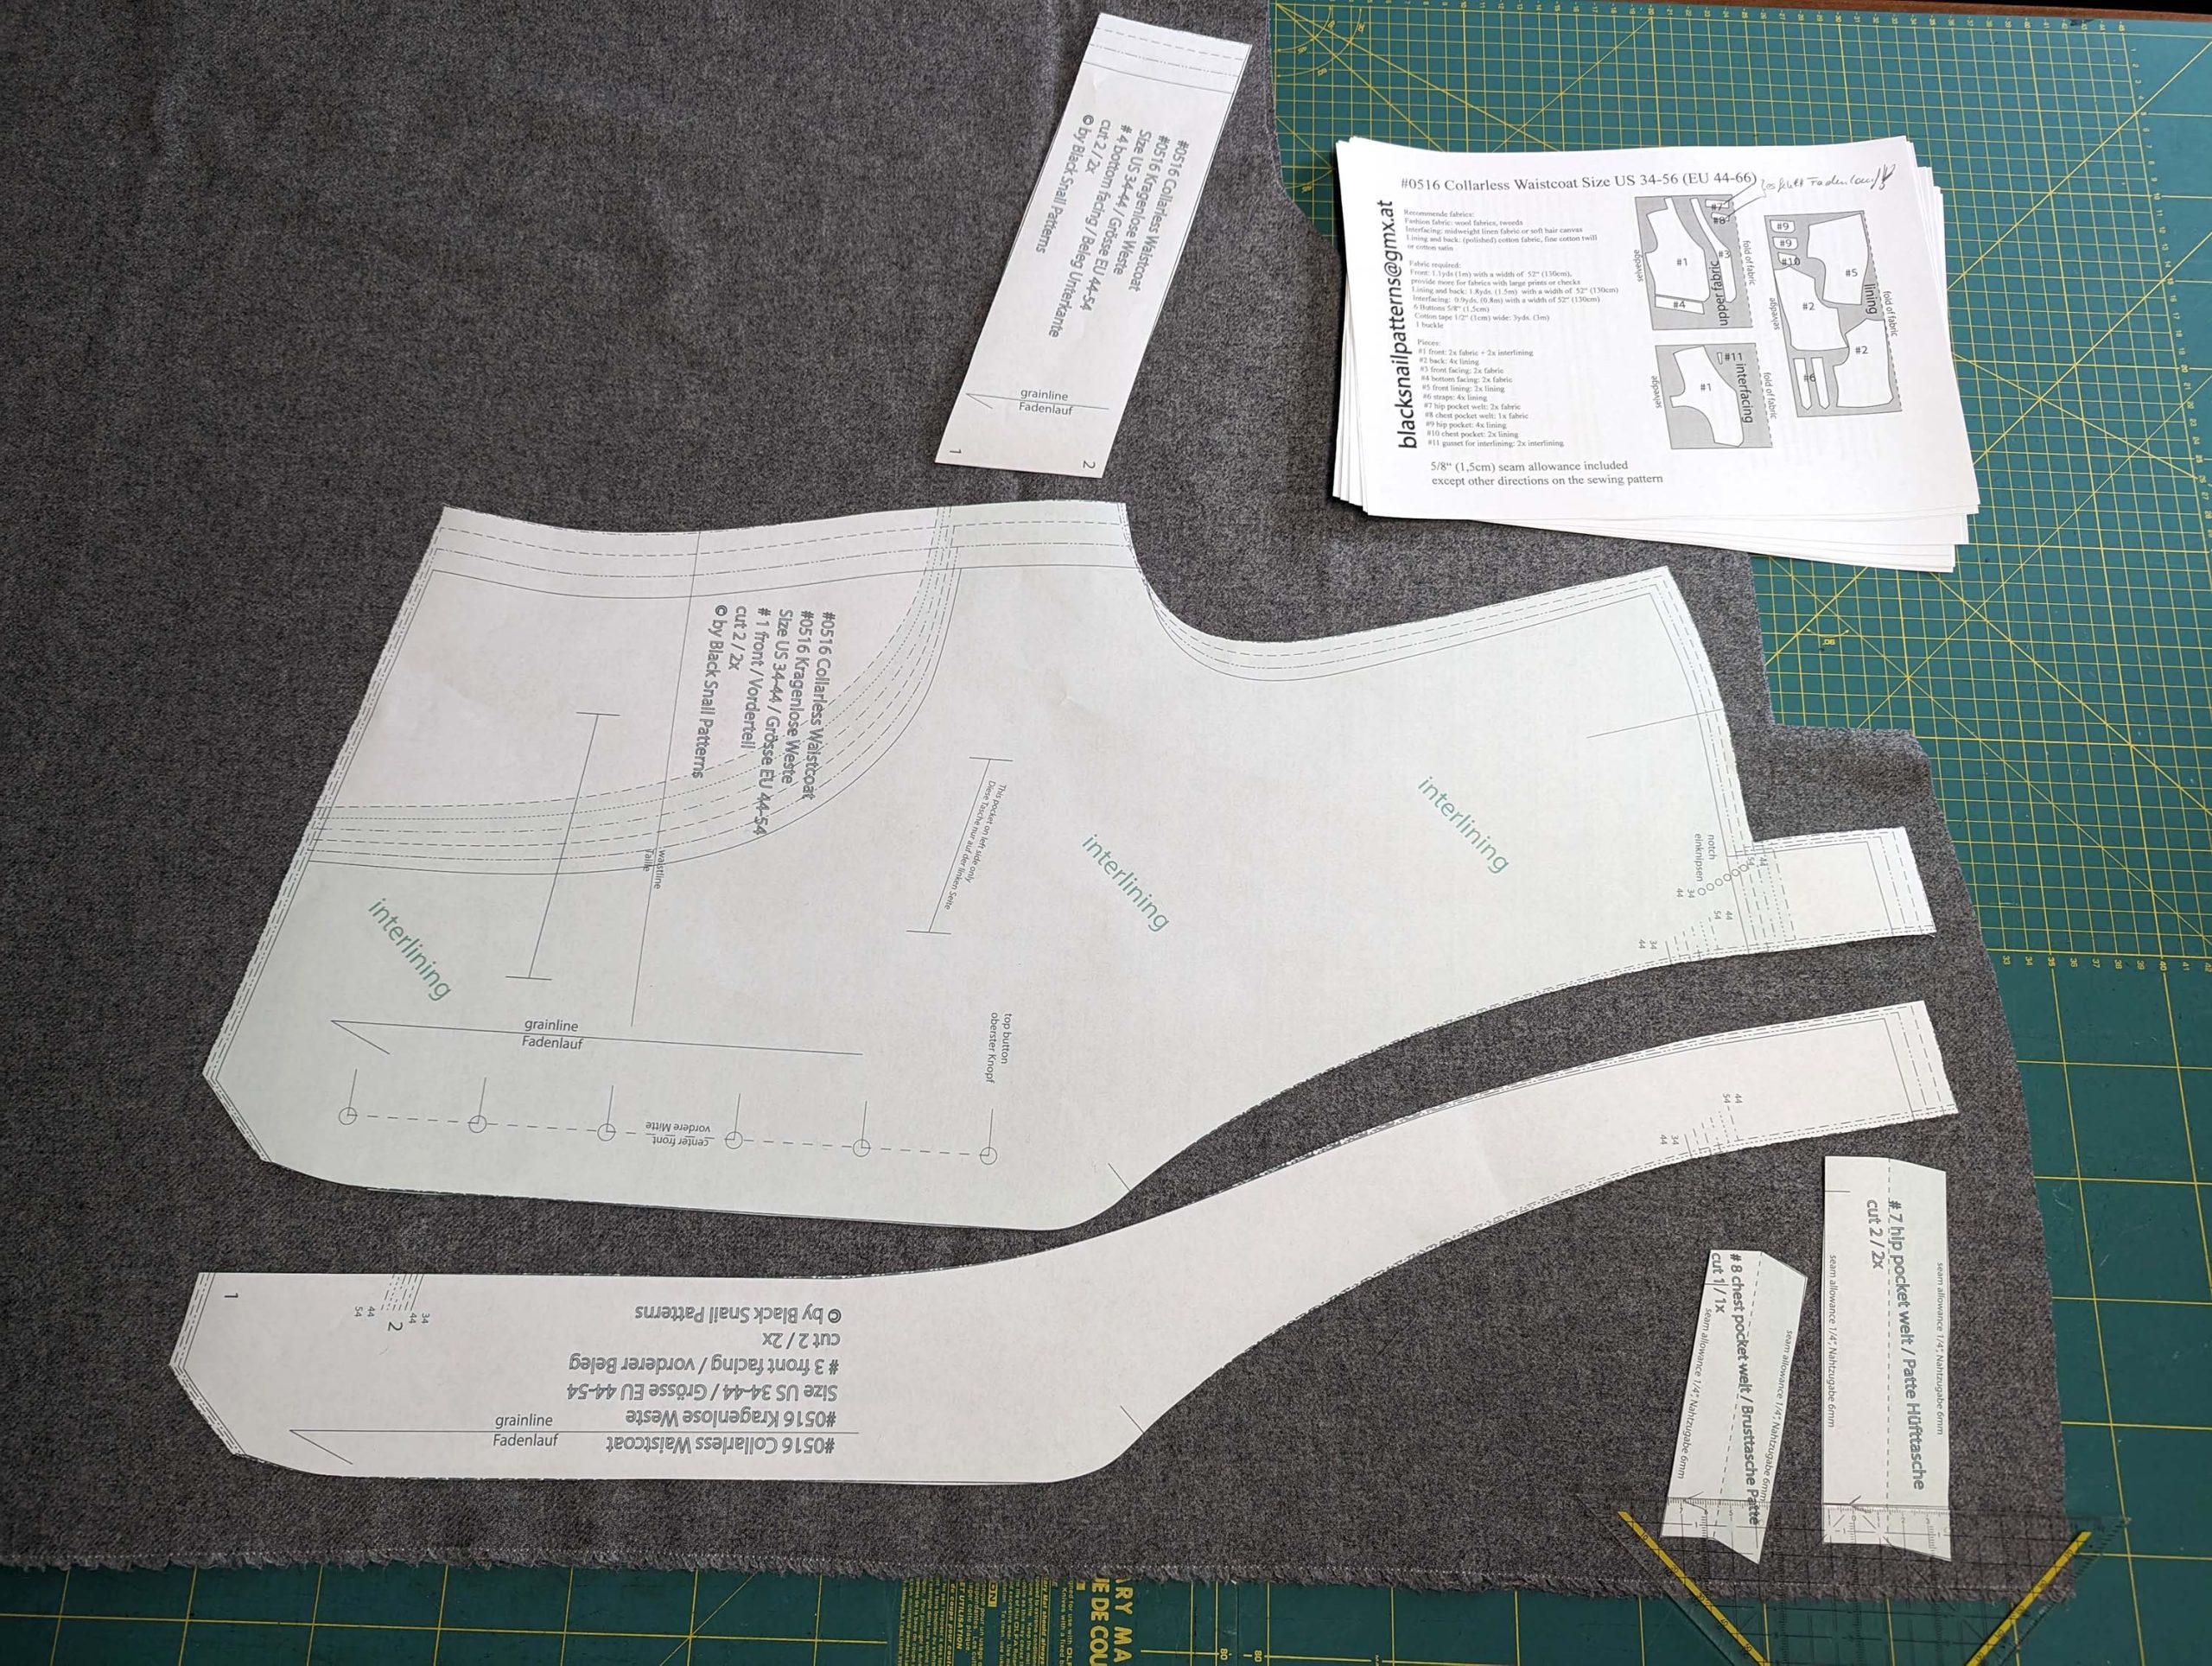
(1) As usual, start with cutting all the pieces from fashion fabric, interfacing, and lining, and carefully transfer all marks and notches, especially the little corner marks on the collar. The waistcoat is called collarless, but that´s not quite true, it´s kind of a shawl collar, just with a collar stand.


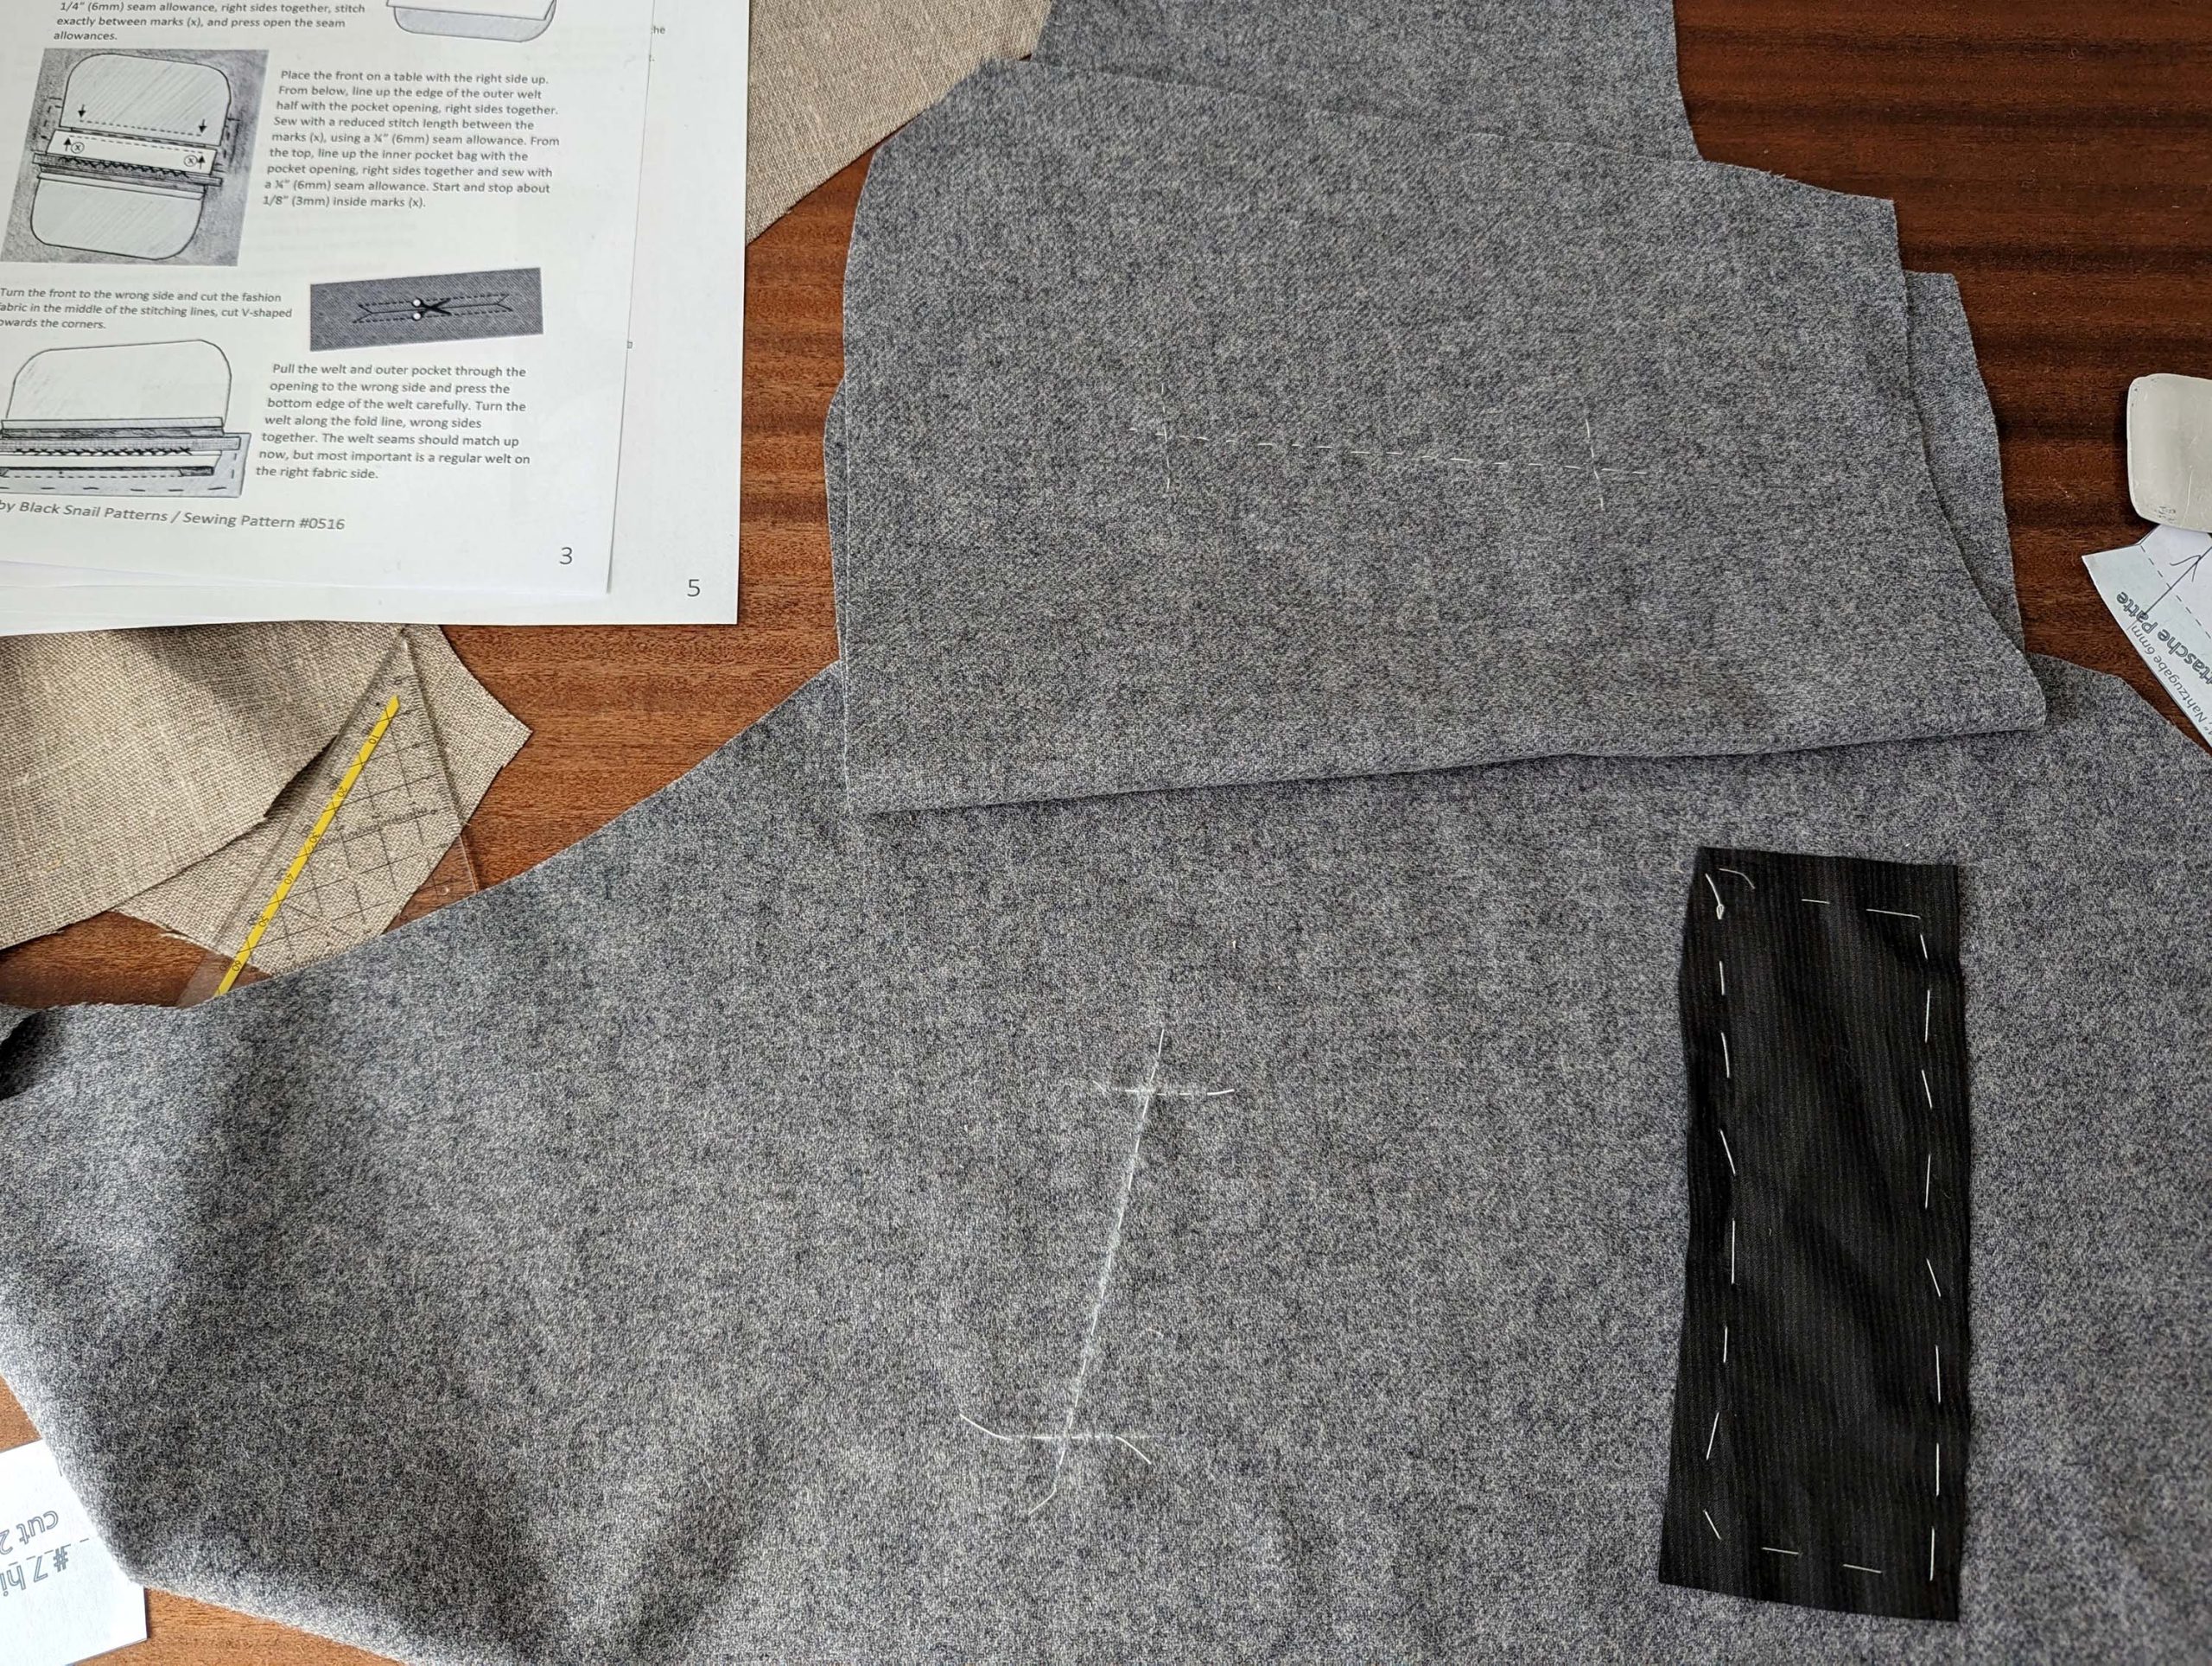
Now, let’s proceed straight to the intricacies of pocket sewing. I encountered some challenges with the 19th-century method, especially when working with thick wool fabric. The more angled breast pocket posed significant issues with bulk, therefore, I decided to change this pocket in the pattern to a less angled one. Also the pictures are not the waistcoat, to show you improved instructions, without all the mess I made with my first attempt on this wool fabric.

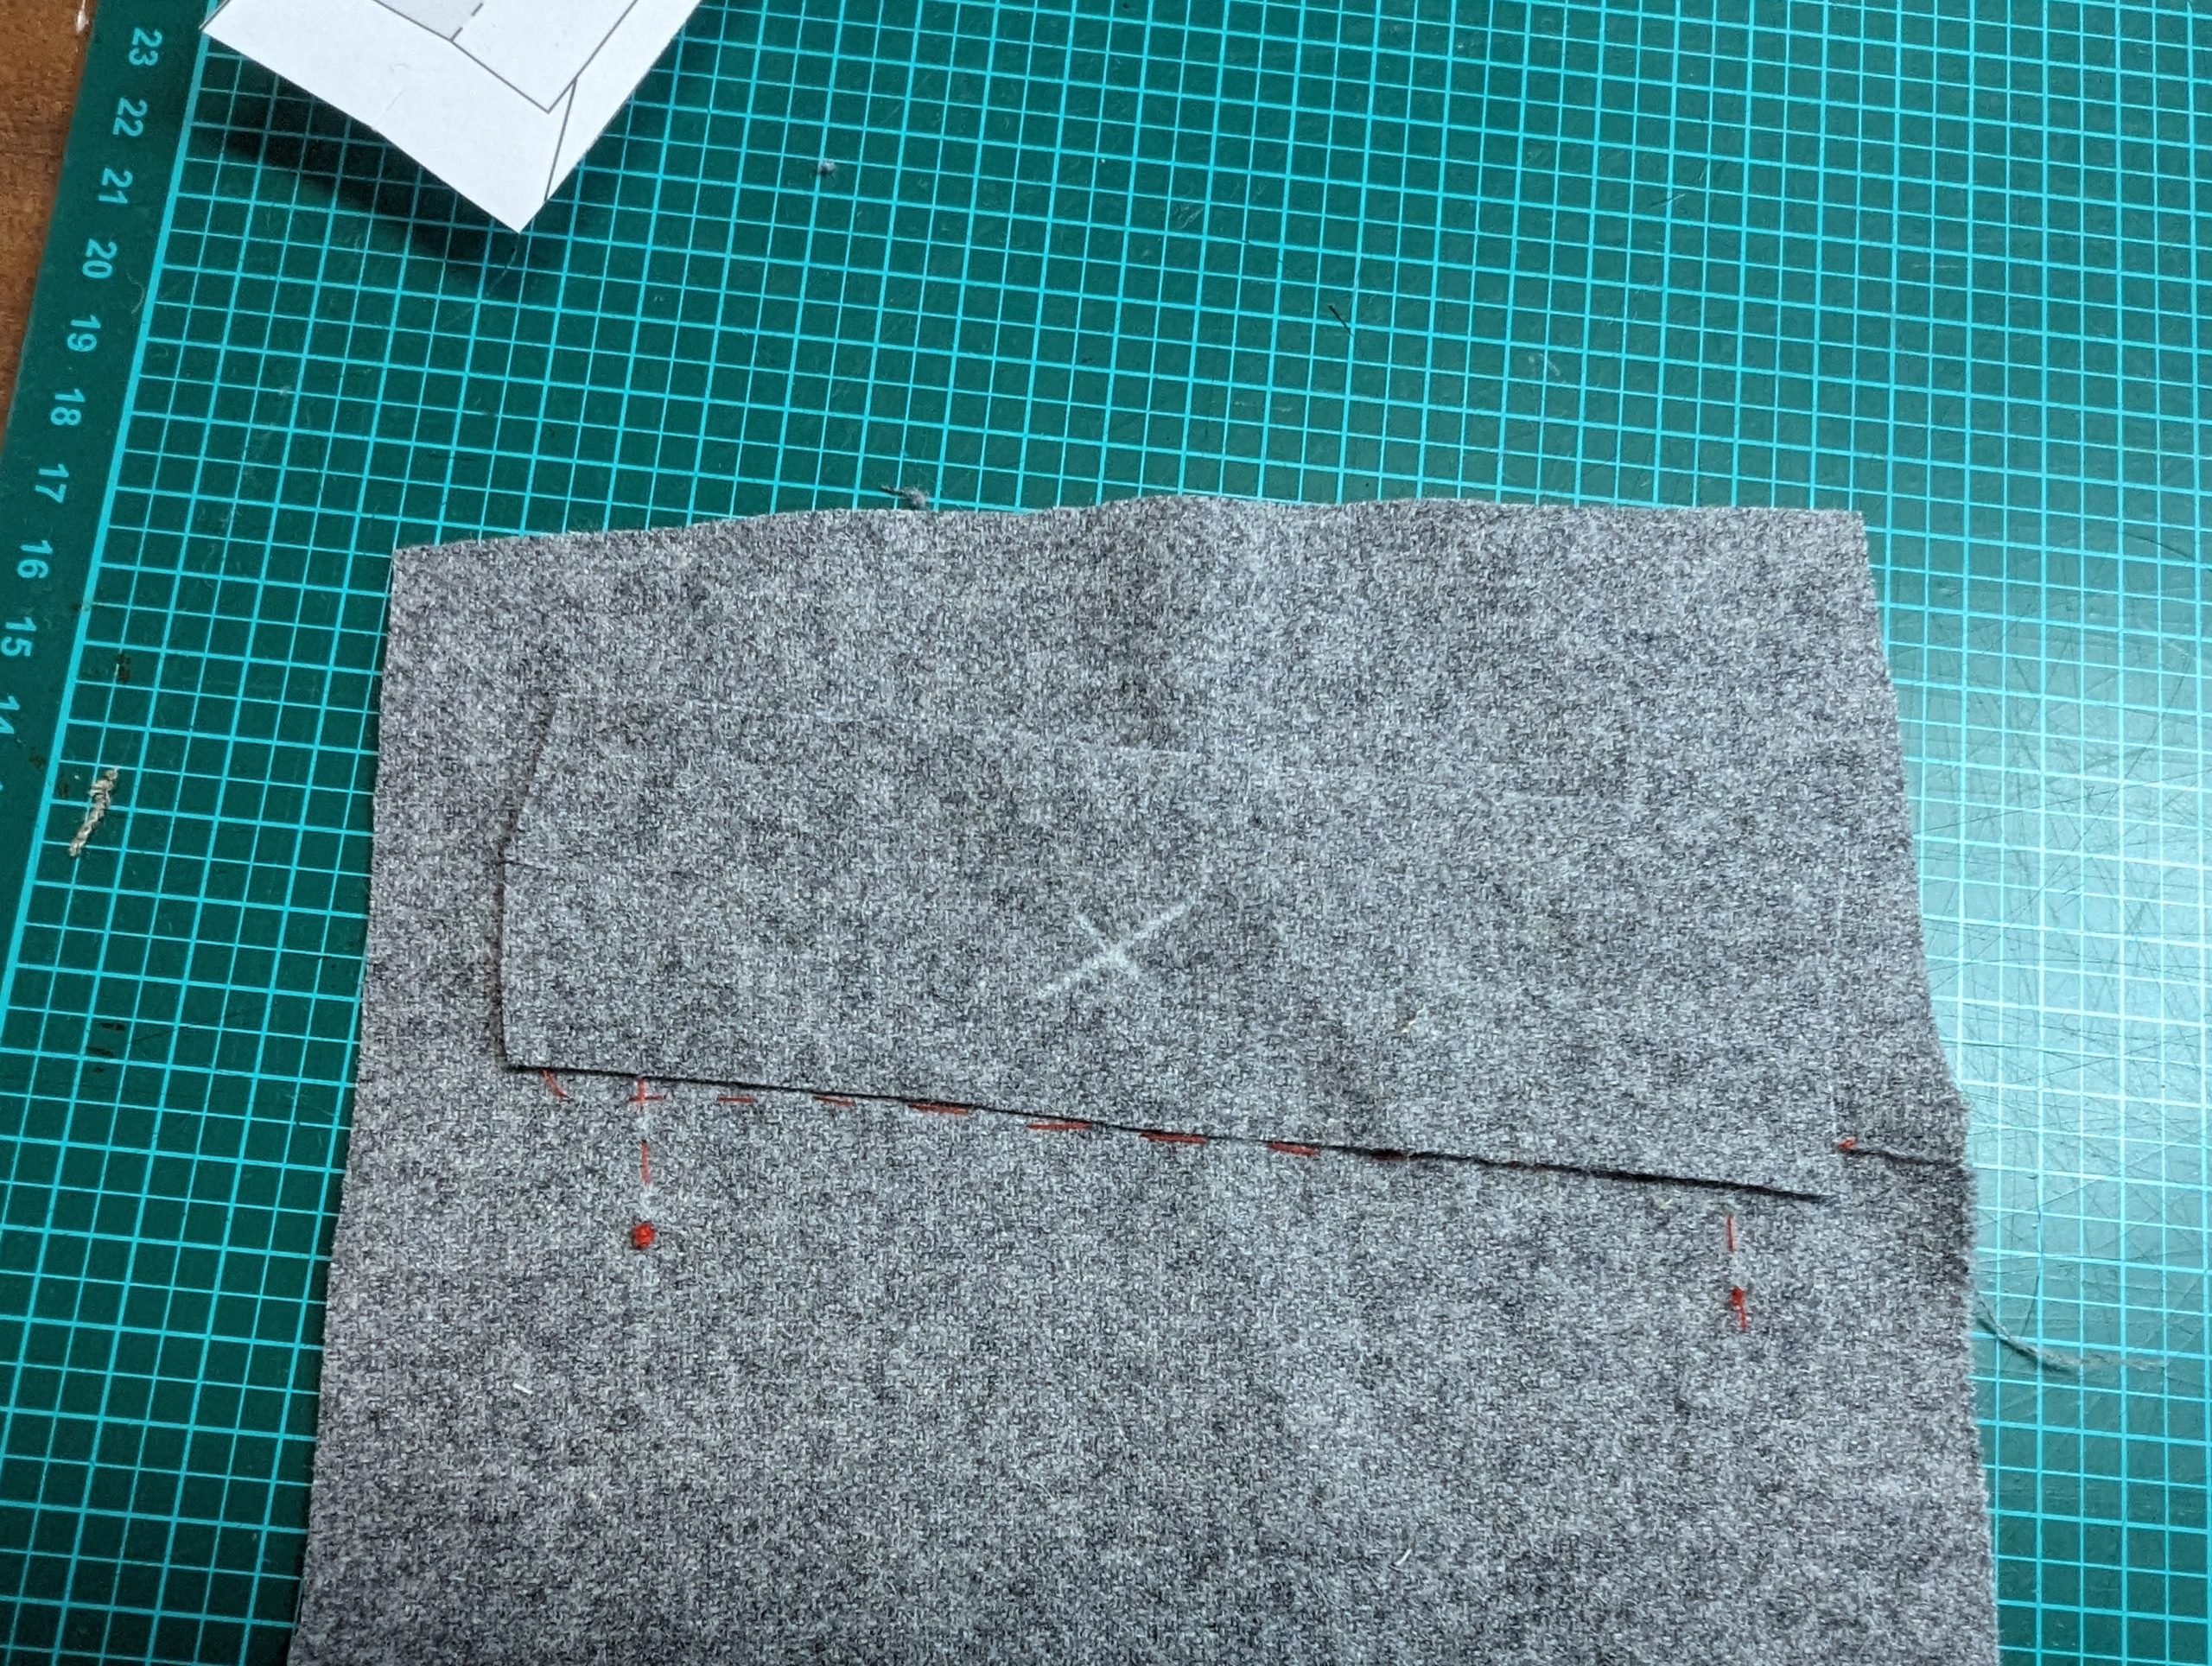
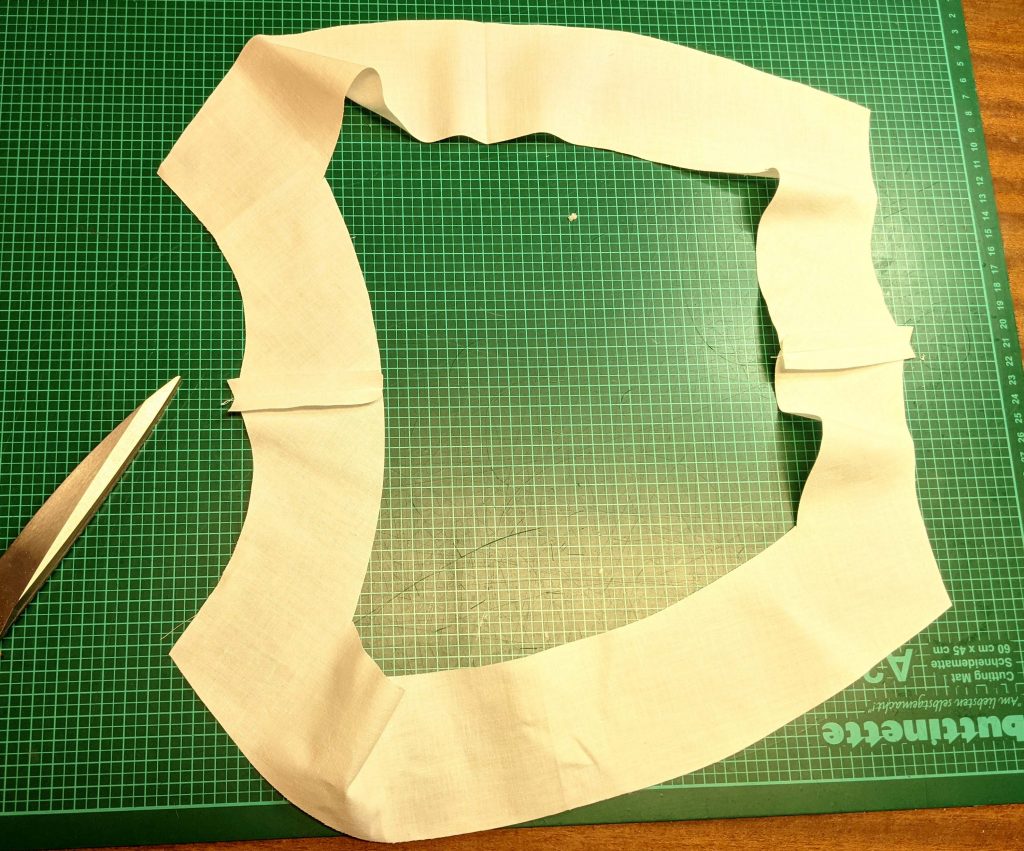
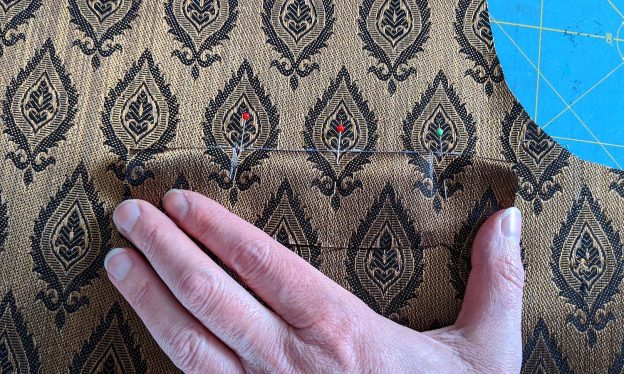
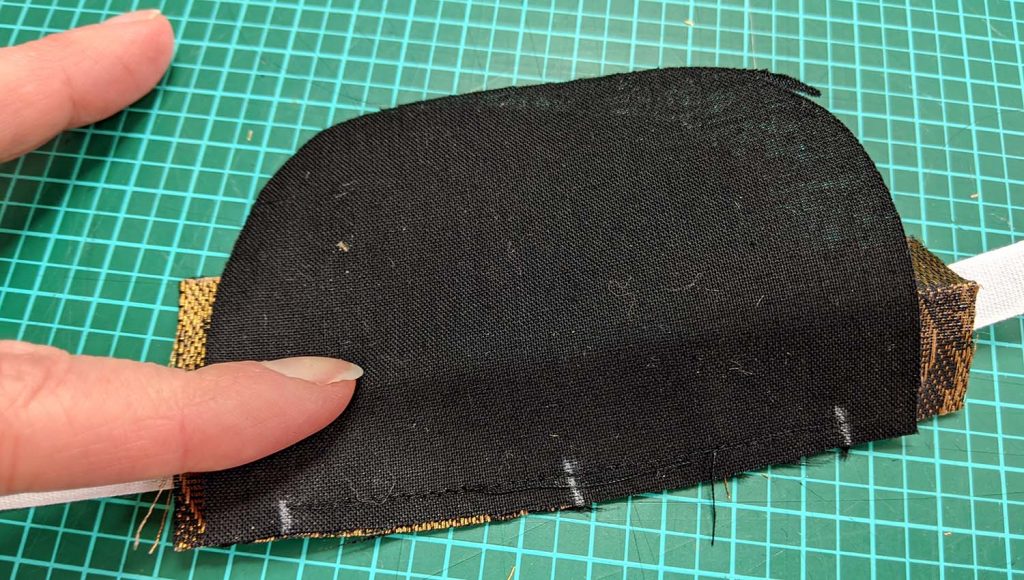
First, baste a piece of linen or cotton to the wrong side of the front, covering the pocket opening. Mark the pocket opening with a basting thread, clearly visible on the right side of the fabric.

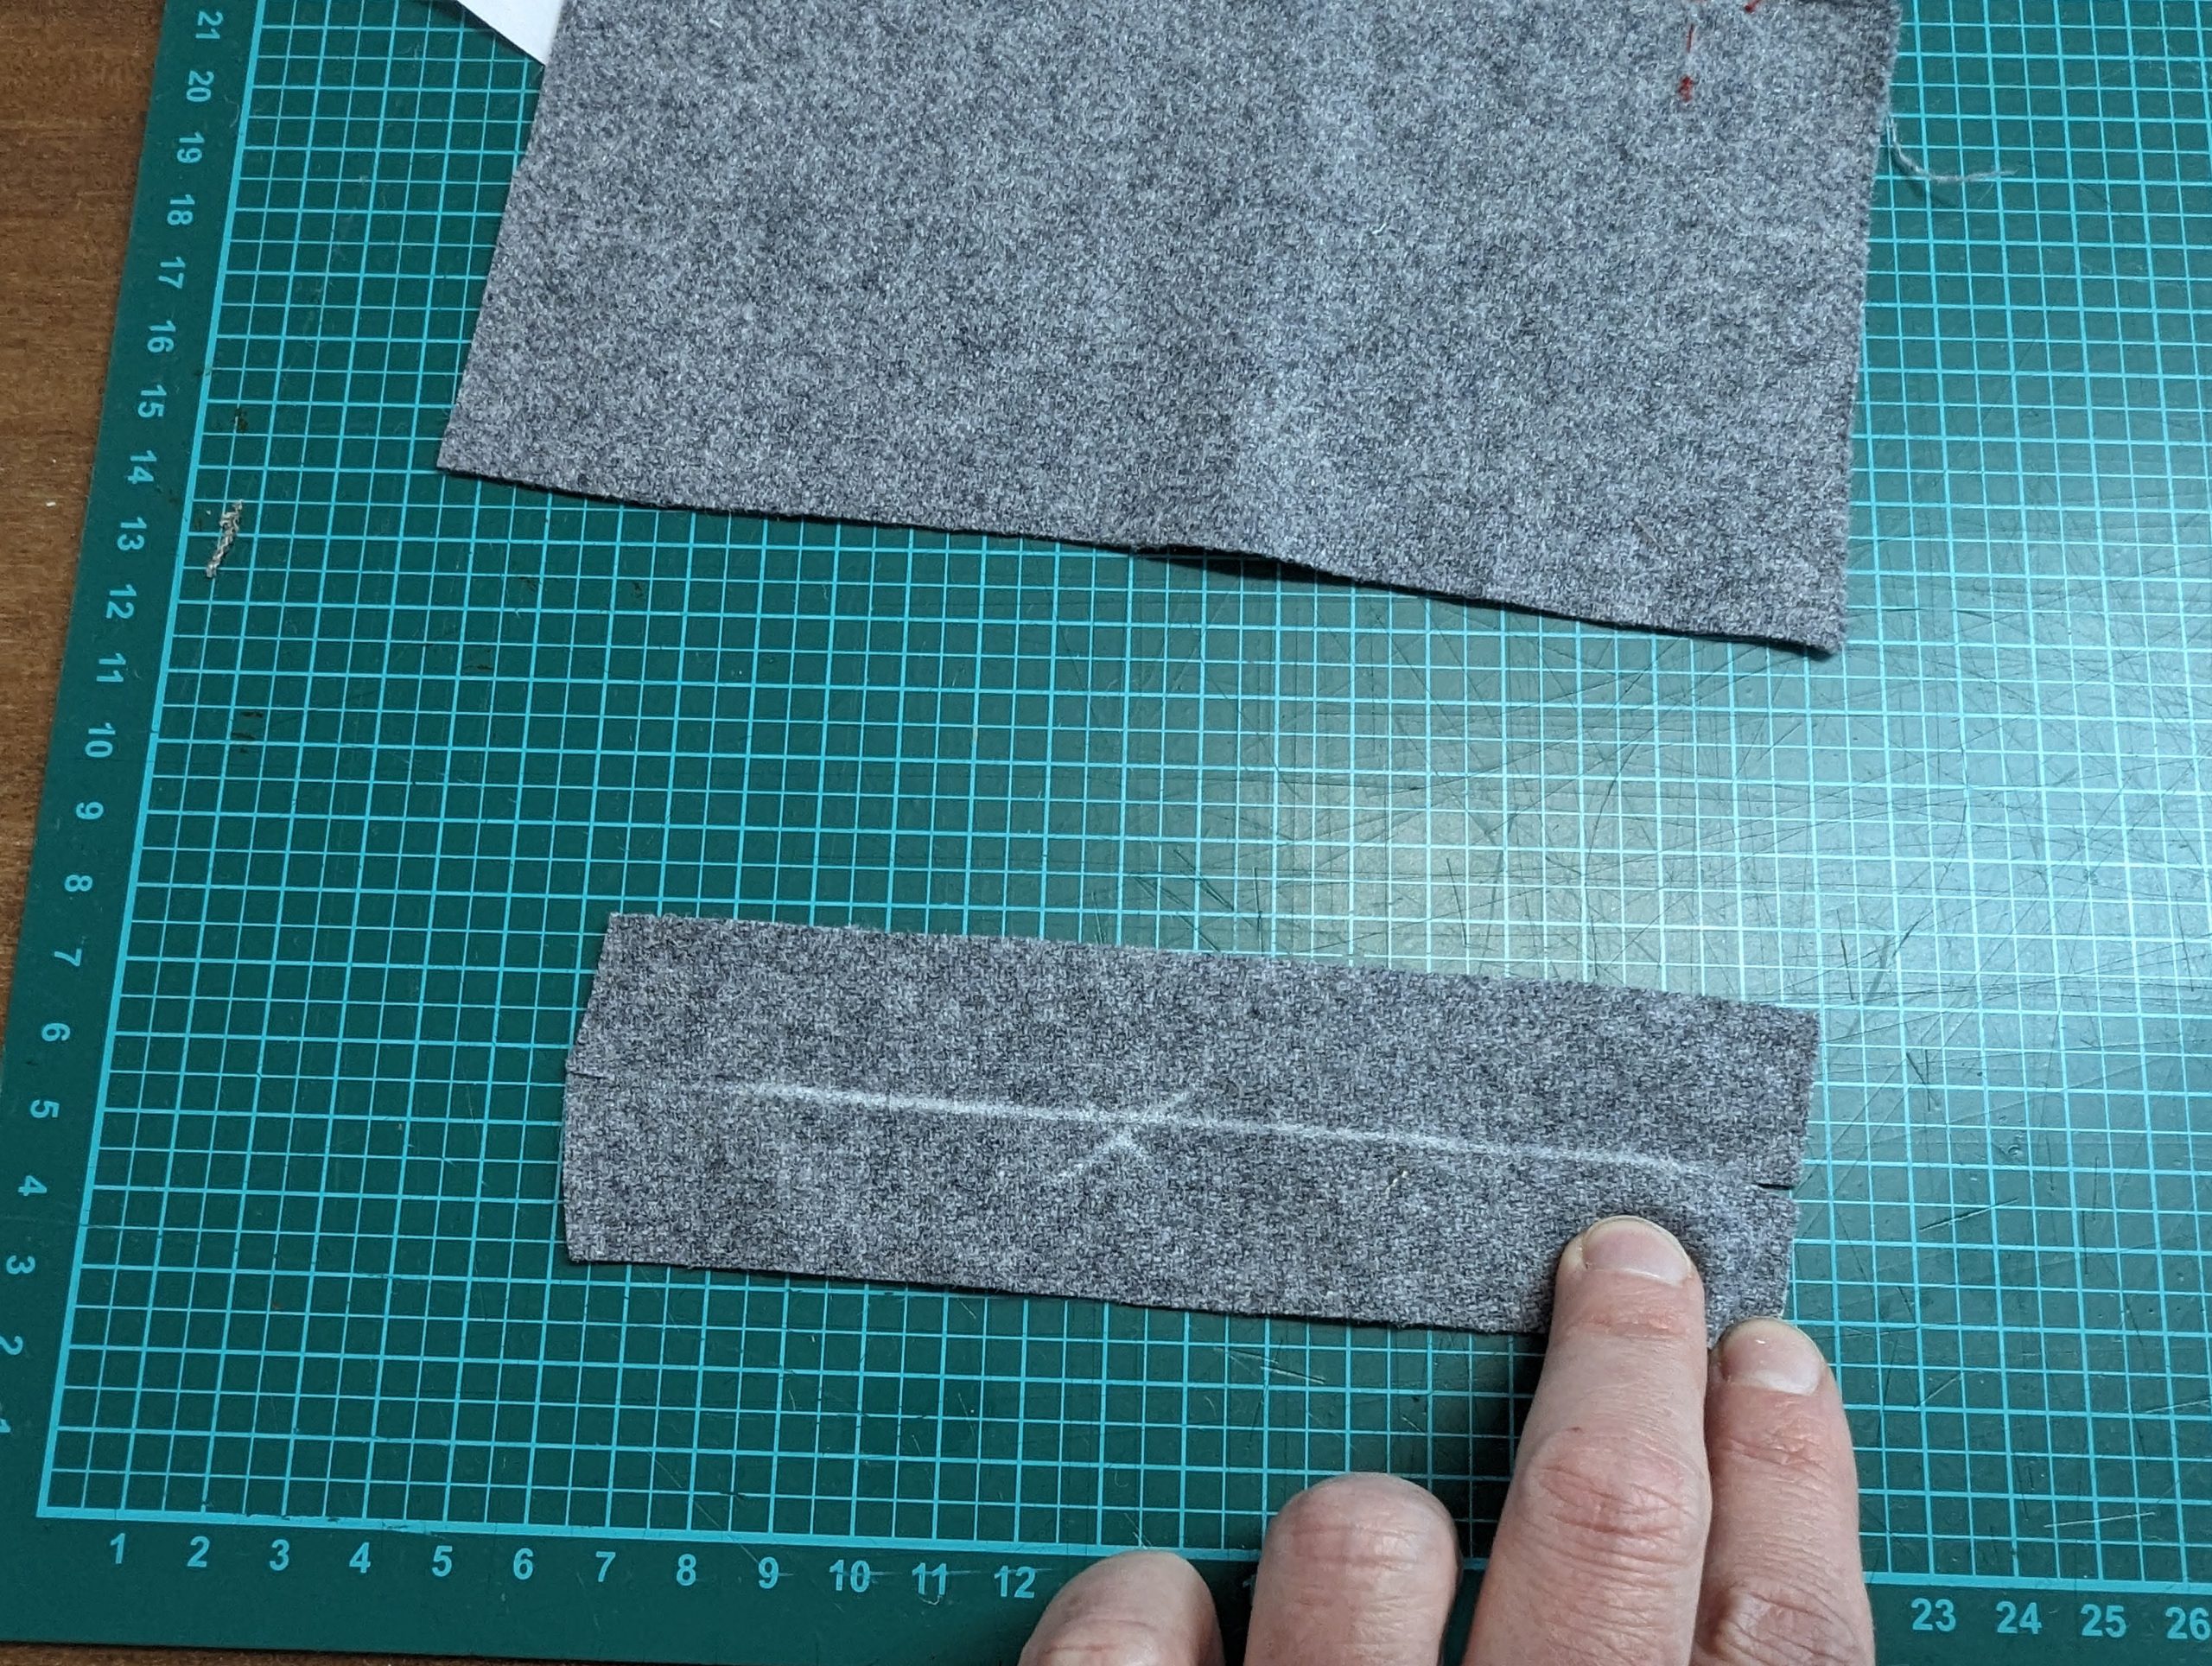
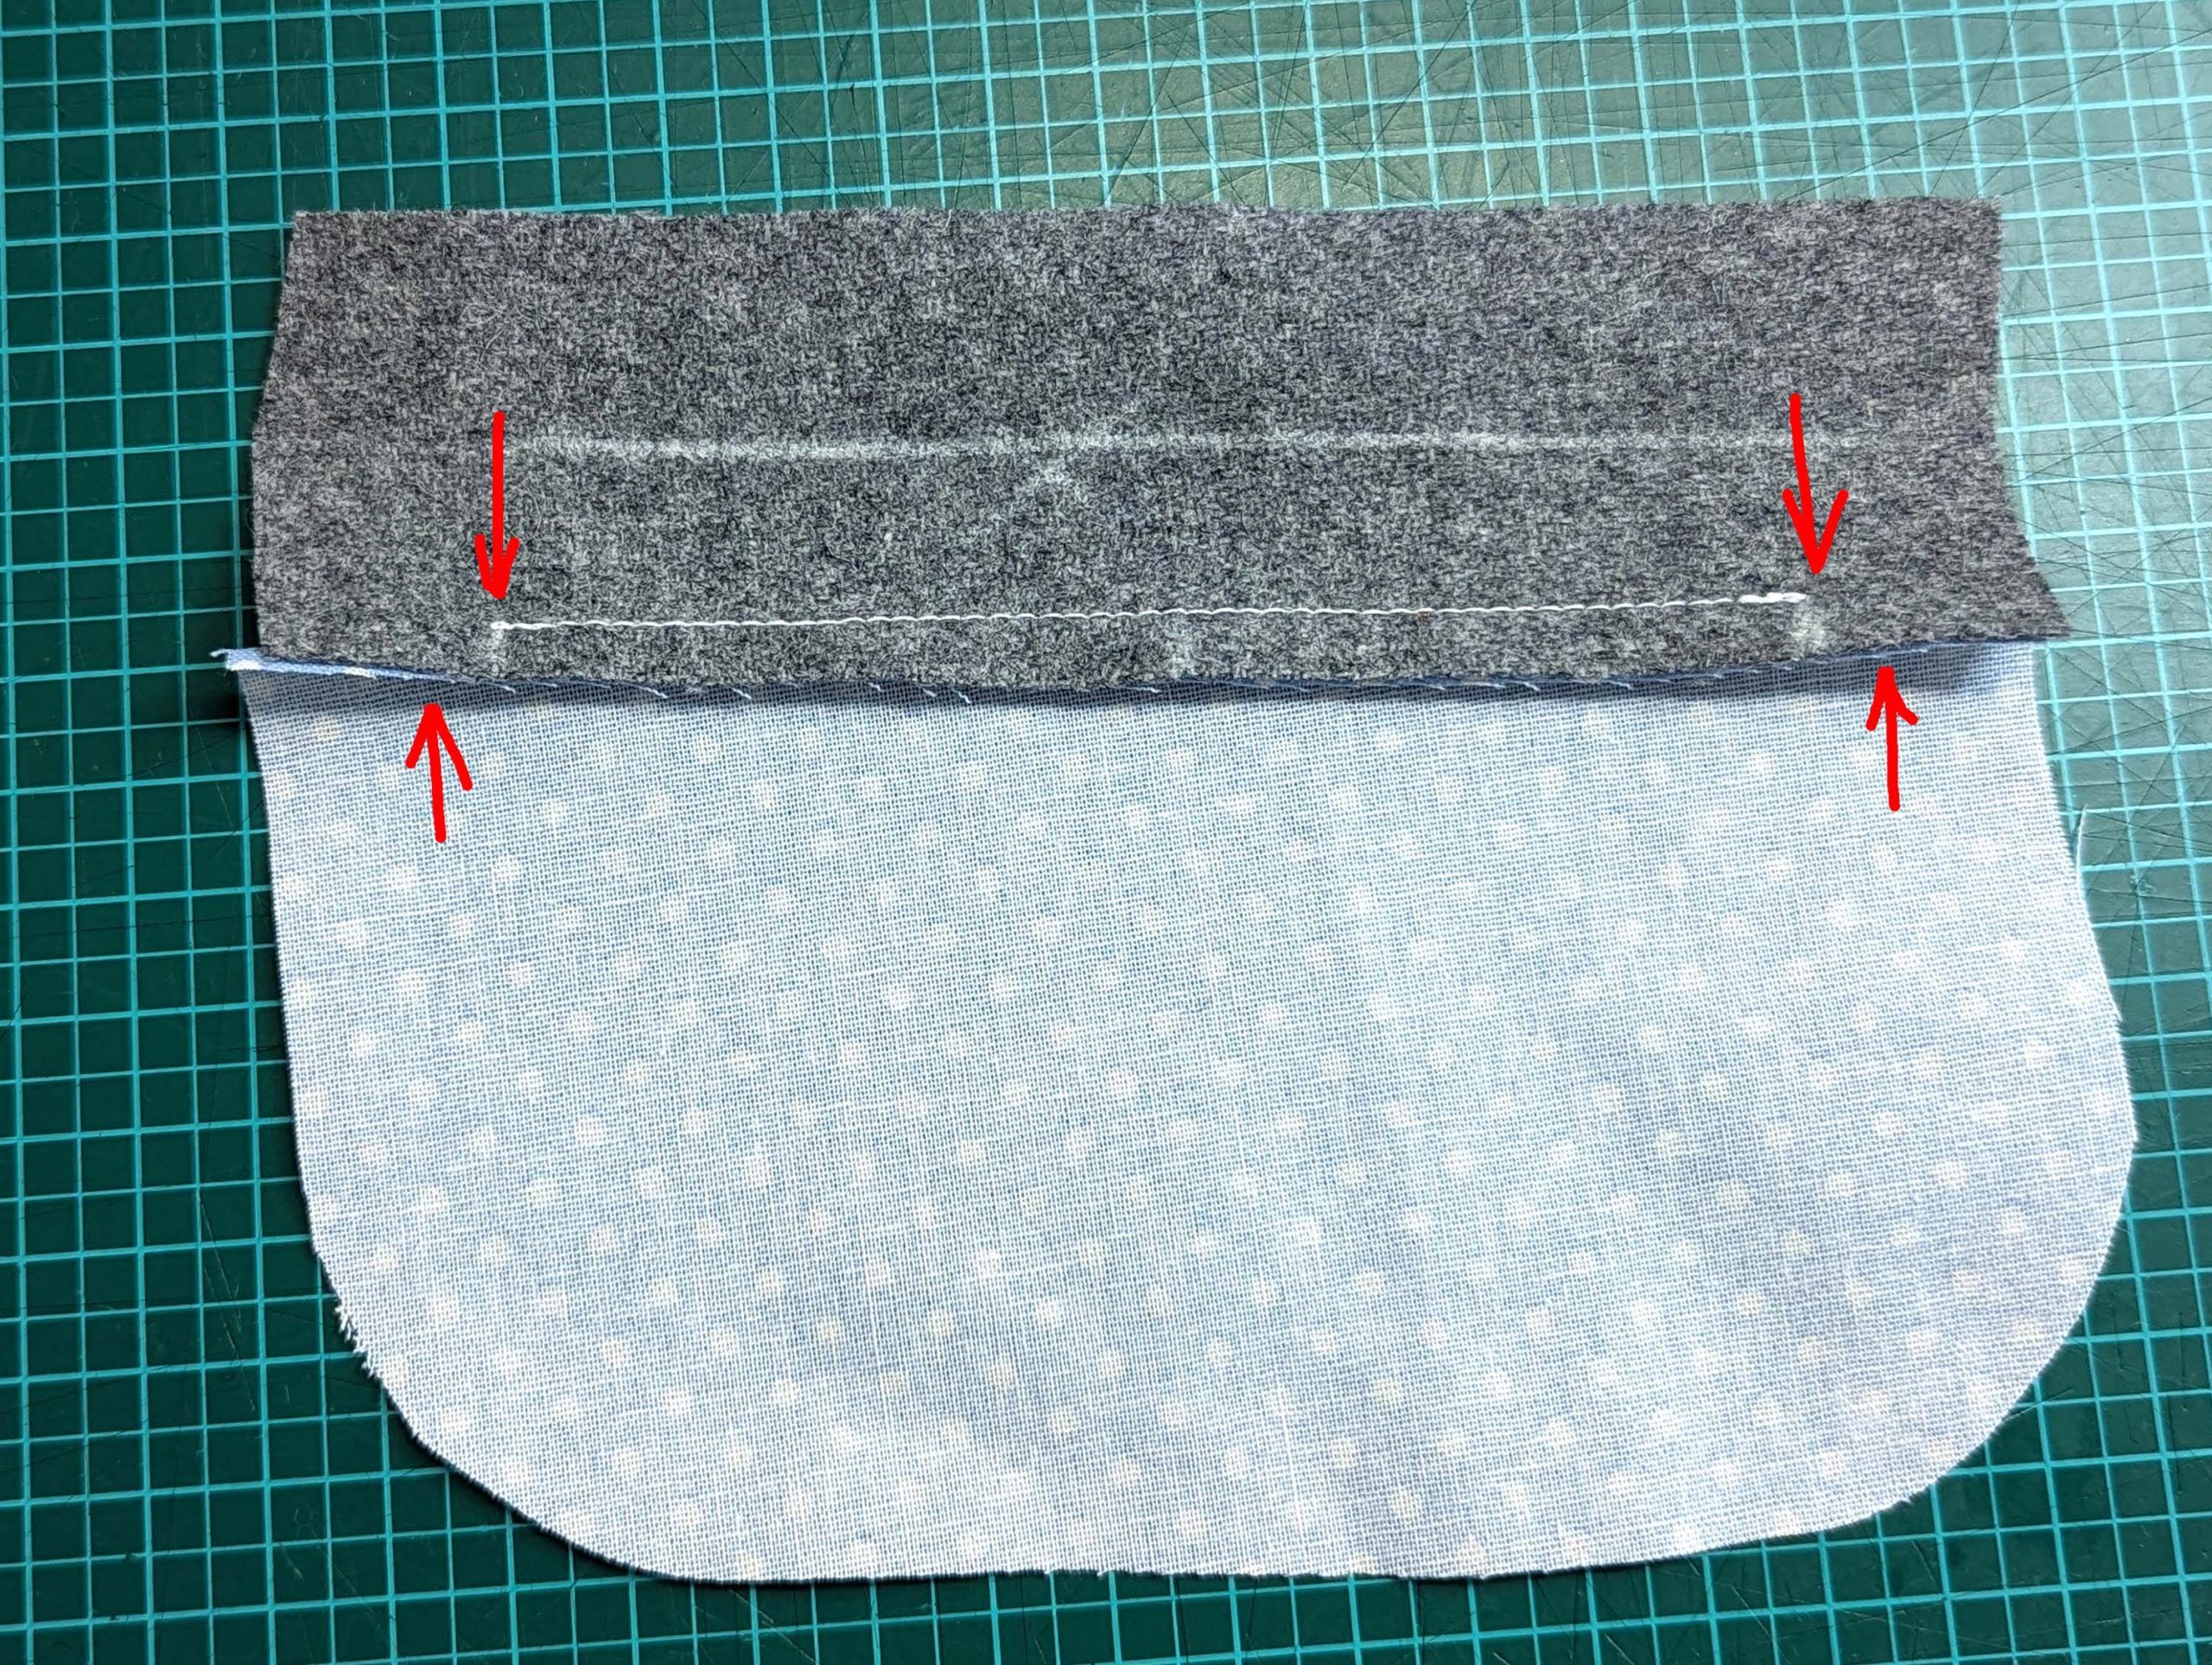
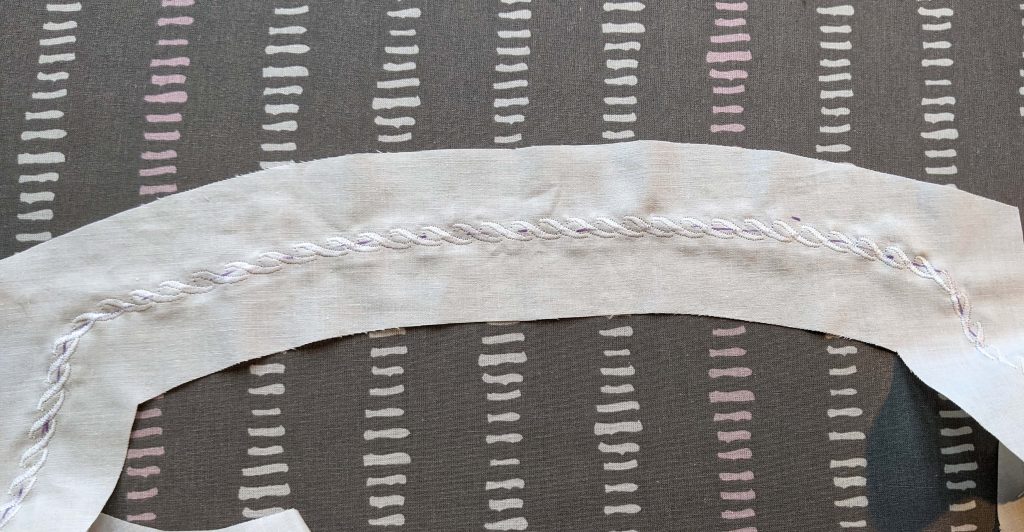
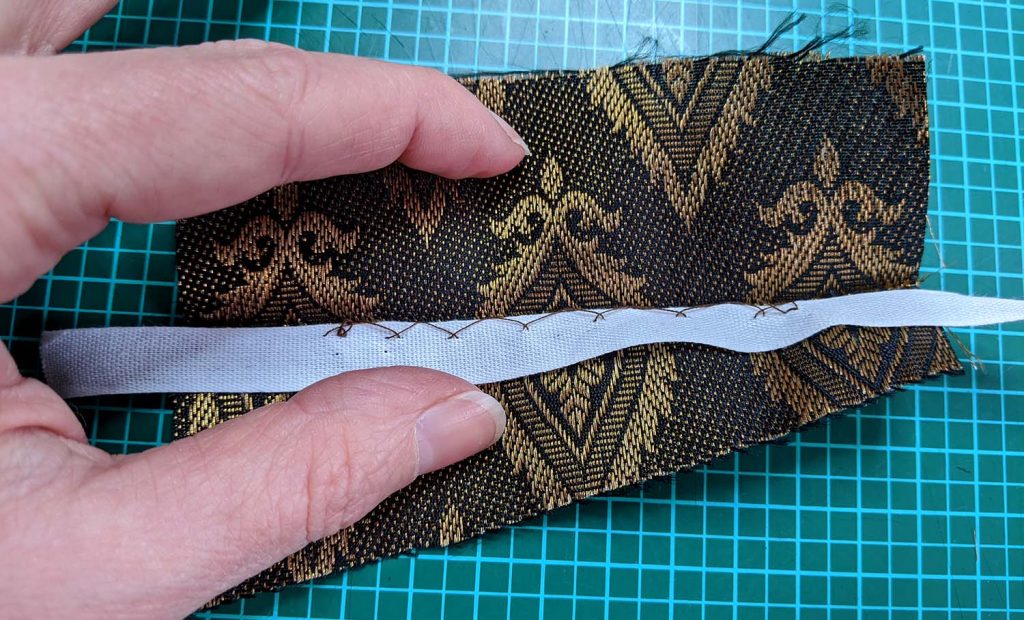
Fold the welt in half lengthwise, wrong sides together, and press. Reopen and mark the inside, as well as the half line. Sew the outer pocket bag to the inner half of the welt using a 1/4” (7mm) seam allowance, right sides together. Re-check before sewing, and stitch exactly between marks (x). Trim back the seam allowances as shown and press towards the pocket.

Continue reading

The Victorian Waistcoat – Sewing Pattern #0516 – Part 2 – Steps (3) to (9)

Part 1 – Steps (1) and (2)

After all that hand-sewing of the first part, let´s do some machine sewing on all the long seams. Remember, the sewing machine had already been invented by then, so there’s no need to feel guilty about using it!

(3) Sew the bottom facing to the front-facing, right sides together, matching all marks. Trim back the seam allowance and press towards the bottom facing. Understitch if desired.

Line up the facing with the front, right sides together, and stitch right beside the bridle tape. Trim back the seam allowances and turn the right sides out. Press the edges, rolling the seam slightly out of sight towards the garment’s wrong side. Baste along the edges to hold the pressed seam in place. At the armscye trim back the seam allowance to 3/8” (1cm) and fold around the bridle tape. First, baste, then fell stitch the seam allowance to the interfacing/bridle tape. Fell stitch the loose edges of the facing to the interfacing, stop 2” (5cm) before the collar notch.

Continue reading

1840 to 60´s Underwear Part 1 – Chemise

Finally, the matching underwear for the last two dress patterns I published recently is finished. Two corsets, a chemise and a quilted petticoat (quilting won’t be my passion in the future either) later I´m happy to present my new sewing pattern for 1840´s to 1860´s underwear.

Beside the sewing instructions, coming with the pattern, I´ll show some additional information and pictures here in my blog.

Let´s start with the chemise, all pattern pieces prepared for sewing.

Before I made up the sleeves, I decided to sew the yoke and embroidered it with a decorative stitch of my sewing machine. Instead of polyester thread I used a cotton thread for all seams and the embroidery.

After doing all the gathering on front, back and the sleeves, I lined up the bottom edge of the sleeve with the sleeve cuff and clipped the sleeve at the corner to sew more easily.

Continue reading

1840 to 60´s Underwear Part 2 – The Corset

Part 1 – The Chemise

The first time I stumbled over this corset was some years ago, when I made the young Queen Victoria cosplay for my daughter. I was looking for an easy to sew, period accurate and comfortable corset for a 16 years old and found a four gored corset dated to 1844 in Norah Waughs “Corset and Crinolines”. Further research leaded me to the original publication of the pattern, “Vollständiges Lehrbuch der modernen Bekleidungskunst für Damen“ from C. Kawitsch and H. Klemm, Dresden 1852. The 3rd edition from 1856 is downloadable via the digital collections of the University of Dresden: https://digital.slub-dresden.de/werkansicht/dlf/29313/5/0/

The original pattern served well for a very slender young girl, just when I mad my first mock-up, I noticed, that it is cut very deep at the armpit and will work better with shoulder straps. At this point I decided to make two corsets, one with shoulder straps and another without. The patterns are similar, just the top edge is raised at the armpit to give the support needed at the sides without straps.

Let´s start sewing the corset! Inserting gussets to a corset is not as difficult as it seams to be in the first moment. I cut the slits and turned in a narrow seam allowance, lined up the edges with the marked line on the gussets and pined in place. After edgestitching the gussets to the corset, I made a decorative bar with a contrasting (silk) thread to avoid fraying. On the lining, I omitted that step, but a bar tack, made with the sewing machine will serve was well.

Continue reading

19th century welt pockets

19th century welt pockets where made different from modern welt pockets. In this tutorial I´ll show you the period correct method.

Baste a piece of linen or cotton to the wrong side of the left front, covering the pocket opening. Mark the pocket opening with a basting thread, clearly visible on the right side of the fabric. Cut your welt from fabric, matching the pattern of your fabric, with a 1/4” (6mm) seam allowance added to top and bottom and a 5/8″ (1,5cm) seam allowance added to the sides.

Fold the welt in half lengthwise, wrong sides together, press the edge and reopen. Attach a cotton tape along the fold to the inner half of the welt with a catch stitch. Sew the outer pocket bag to the inner half of the welt using, right sides together, stitch exactly between the marks of the pocket opening and press open the seam allowances.

Continue reading