Category Archives: Romantic Era

A 1830´s Stock Collar for my husband

During the last months I sewed some 1830´s clothes for my husband. He got trousers, skirts, waistcoats, a Frock Coat and a Tail Coat. To be properly dresses just a stock collar was missing.  I´ll show you how I made it from silk sateen fabric and inlay, all fabrics came from stock except the buckle. 


First, I cut two collar pieces from the inlay, one on the straight, one on the bias. As it was a fusible inlay I didn´t had to pad stitch the pieces together, just fuse with the iron. Now it had the desired stiffness for my collar. Then I covered the inlay with the silk sateen using a catch stitch on the inside.

IMG_4563


Next was to cover two pieces of linen for the belts with the sateen and prepare two straps for the buckle on the back.

IMG_4610


I attached the belts to the collar with the straps for the buckle underneath.

IMG_4613

IMG_4614

IMG_4615

IMG_4616


I placed the belt pieces on top of the collar and basted them to the collar on the center front. Think of additional width needed for the belt when the collar lays around the neck.
For the bow, I lined up the two straps, right sides together, and sewed around. I left an opening and turned inside out after trimming the seam allowances. I pressed the bow strap carefully and closed the opening with some invisible stitches. I made a bow, arranged the loops and ends carefully and fixed everything with some stitches. Then I attached the bow to the collar.
I covered the back of the collar with lining fabric, attached with a felling stitch.

IMG_4617


For the inside collar I lined up the collar pieces, right sides together, sewed and trimmed back the seam allowances.  I turned the inside out and pressed. I lined up the straps for the collar stand, right sides together. Placed the collar pieces between, leaving a gap at the center front, and stitched along short and upper edges.  I trimmed back the seam allowances, turned inside out and pressed.  I turned in the seam allowances of the bottom edge of the collar stand and stitched along the bottom edge.
At least I starched and pressed the inside collar, folded the front edges and basted to the inside of the stock collar.

IMG_4619

IMG_4629

IMG_4628

IMG_4630


You can download the pattern for the stock collar here, have fun with sewing:

0217_StockCollar1830


Men´s waistcoat 1820-40

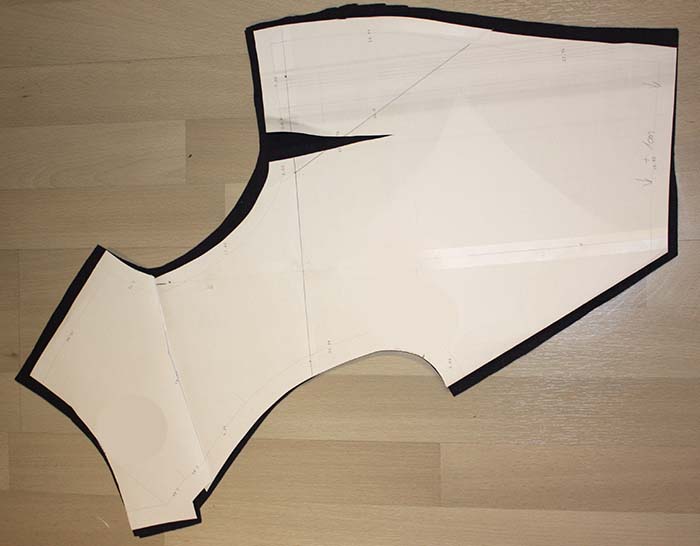
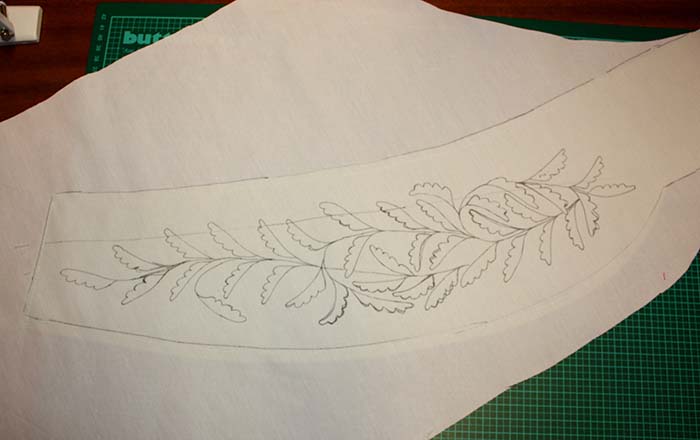
As I promised I show you some pics from the making off a men´s 1820-40´s waistcoat.


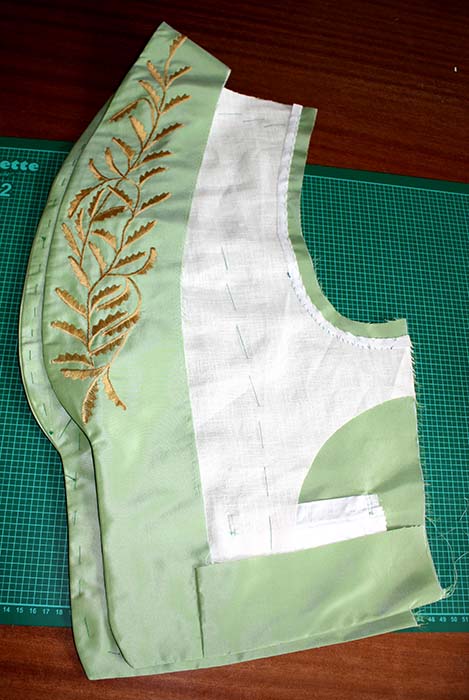
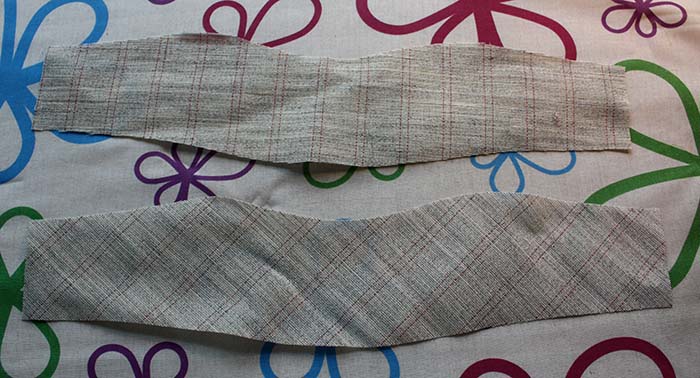
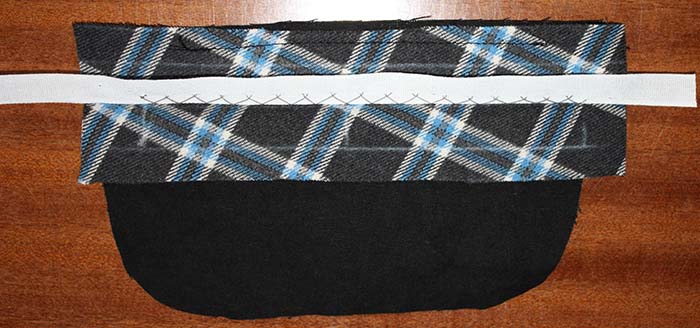
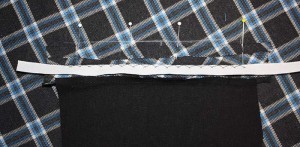
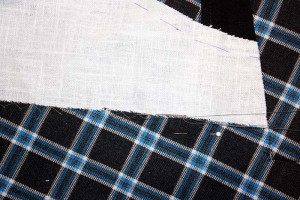
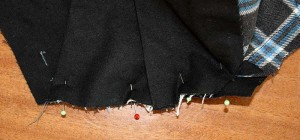
First the front part with the pockets. The welt pockets are made a little bit different as nowadays. Baste a piece of linen or cotton to the wrong side of the left front, covering the pocket opening. Mark the pocket opening with a basting thread, clearly visible on the right side of the fabric. Cut your welt from fabric, matching the fabric pattern and fold in half lengthwise, wrong sides together, press the edge and reopen. Attach a cotton tape along the fold to the inner half of the welt with a catch stitch. Sew the outer pocket bag to the inner half of the welt using, right sides together, stitch exactly between the marks of the pocket opening and press open the seam allowances.


IMG_4293

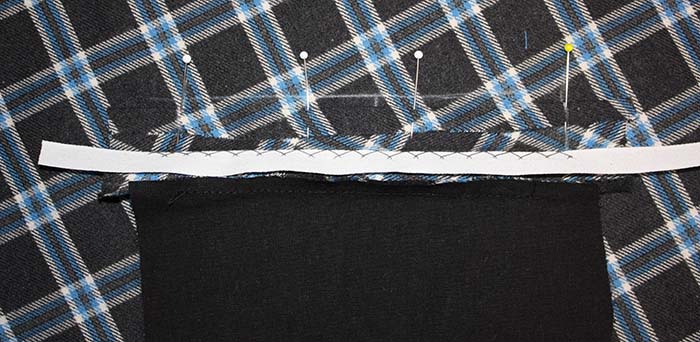
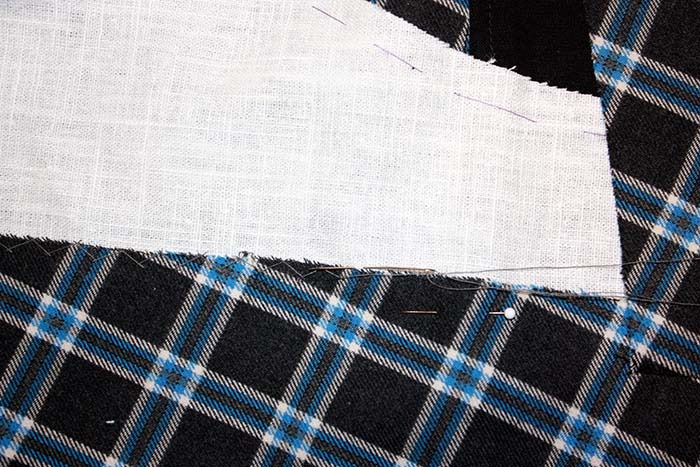
Place the front on a table with the right side up. From below, line up the edge of the outer welt half with the pocket opening, right sides together. Sew with a reduced stitch length exactly between marks, indicating your pocket opeining. From above, line up the inner pocket bag with the pocket opening, right sides together and sew, starting and stoping about 1/8” (3mm) inside the marks.

IMG_4294


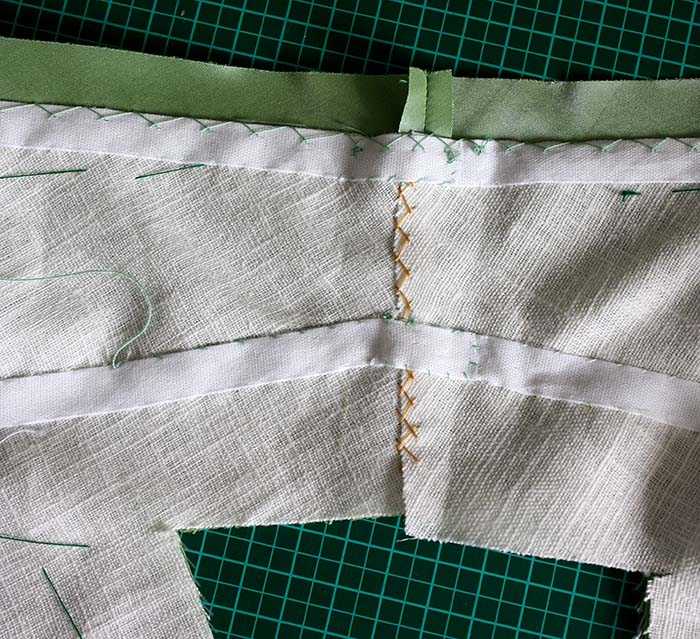
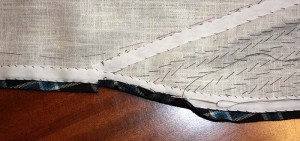
Turn the front to the wrong side and cut the fashion fabric in the middle of the stitching lines, cut V-shaped towards the corners. Pull the welt and outer pocket throught the opening to the wrong side and press the bottom edge of the welt carefully. Turn the welt along the fold line, wrong sides together. The welt seams should match up now, but most important is a regular welt on the right fabric side. Baste together the welt layers and pull through the opening to the right side. From the right side, stitch (invisible) in the ditch of the welt seam, joining the layers.

IMG_4295


Pull the inner pocket bag to the wrong side and close the pocket, stitching the small triangles to the pockets, press. Finish the welts,  after basting the interfacing to the fronts.


IMG_4296


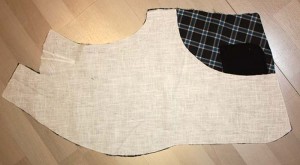
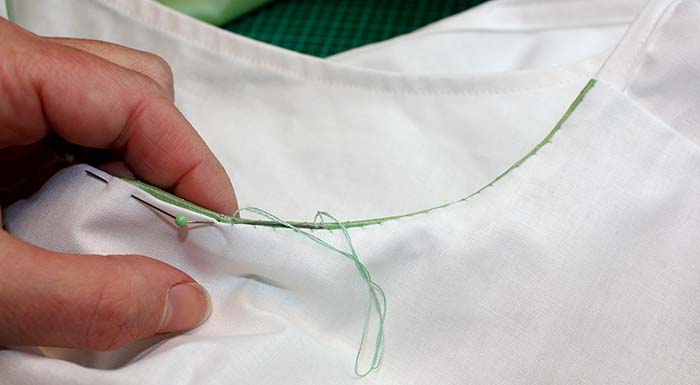
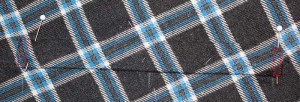
Turn the front right side up again and turn in the loose ends of the welt. Sew down the edges with a prick stitch through all layers, make a second row of prick stitches about ¼” (6mm) from the first. Trim back the turned in ends of the welt close to the second row of stitching.

IMG_4297


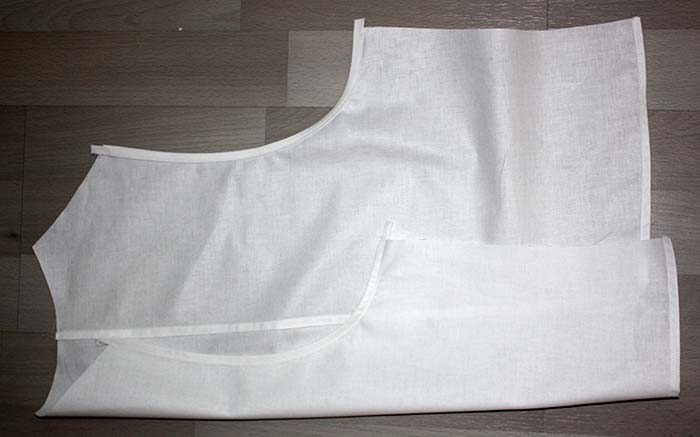
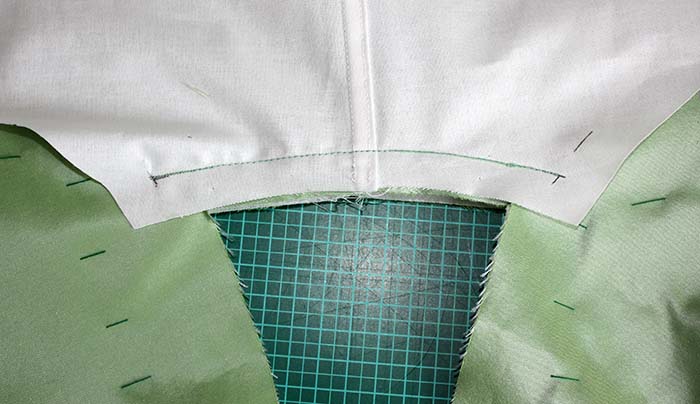
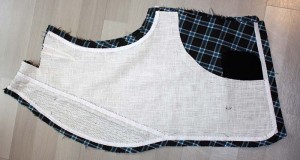
Join the front pieces at the center back, press. Don´t catch the interlining, place the edges of the interlining one above the other to avoid bulk.


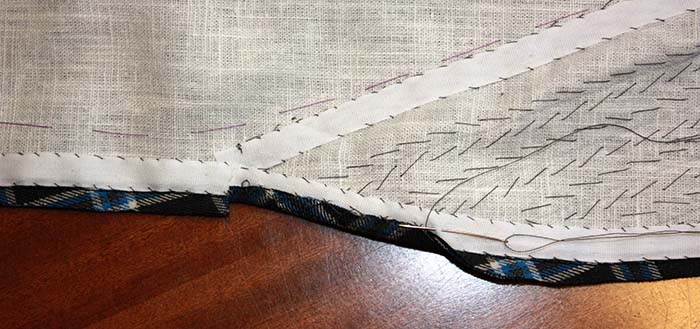
Attach a cotton tape a little bit behind the roll line, prick stitch the collar (you can skip this step). Trim back the interlining right behind the sewing line and attach a cotton tape all around the outside edges (Front, bottom and armhole).

IMG_4298


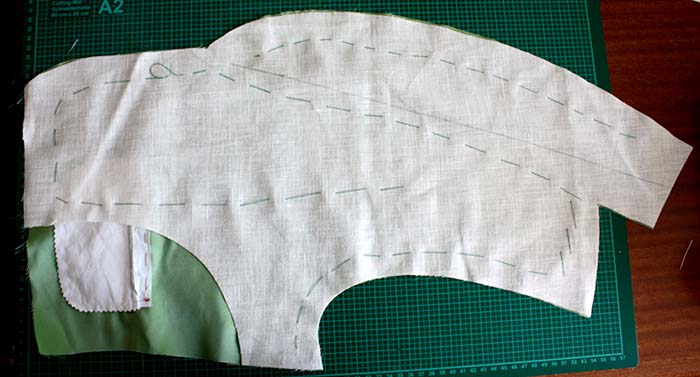
Sew on the collar facing and trim back seam allowance, along the collar attach the seam allowance with a catch stitch to the interlining.

IMG_4300


Turn inside out and press. Attach the raw edges of the facing to the interlining with a felling stitch.

IMG_4301

IMG_4302


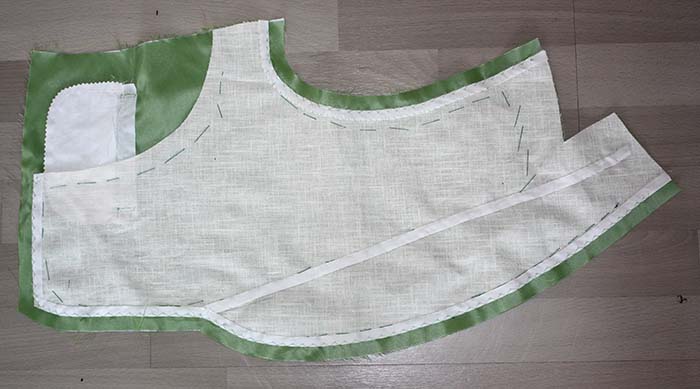
Take the lining and sew to the front along the armhole, trim back seam allowance and place inside the front parts. Attach the lining with a felling stitch.

IMG_4305


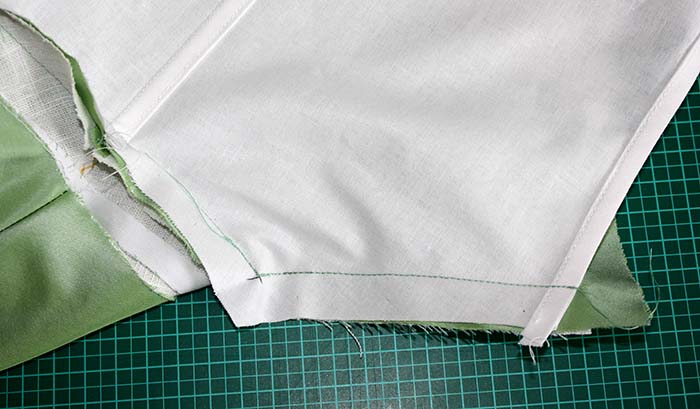
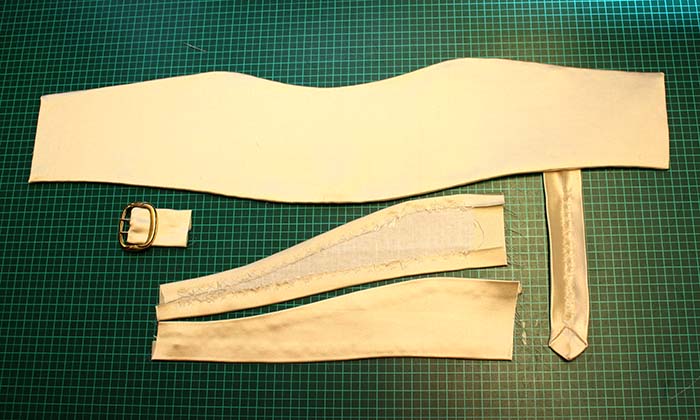
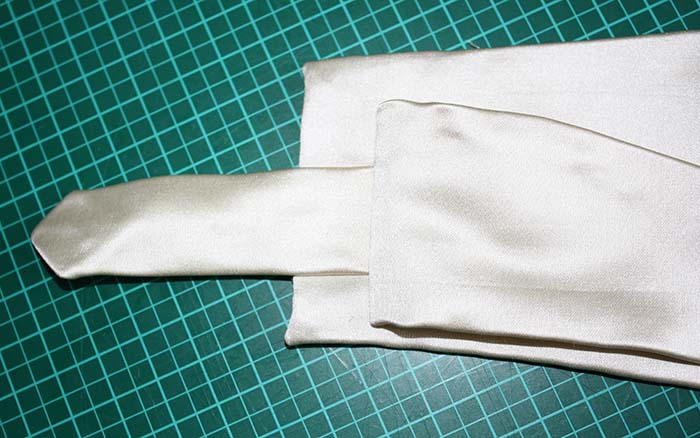
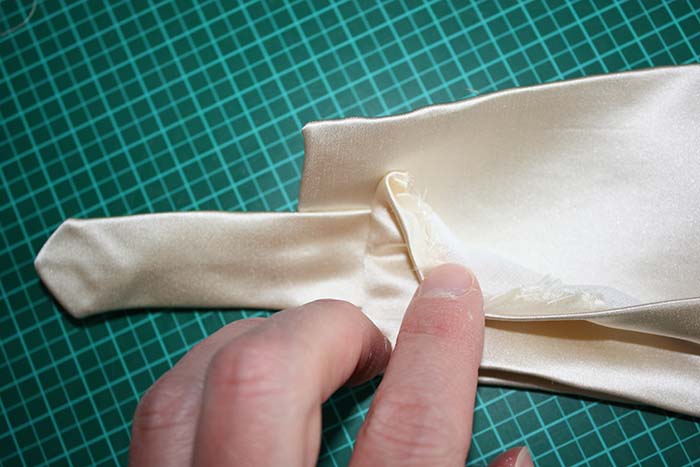
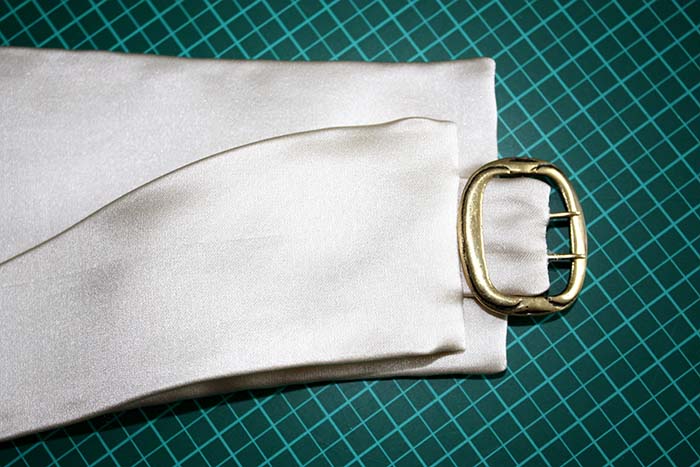
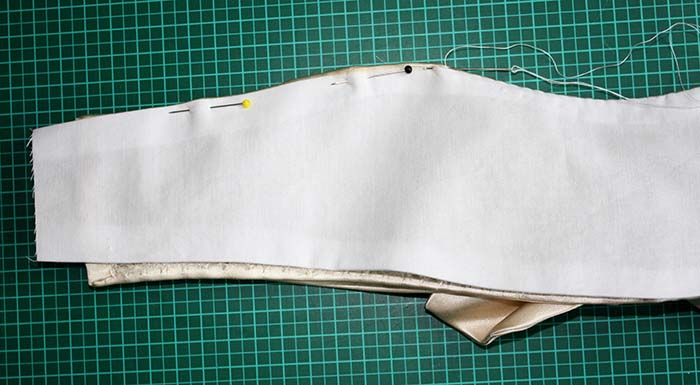
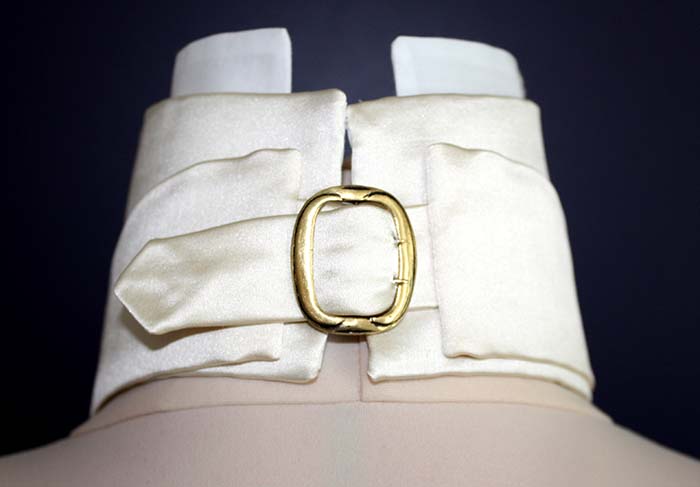
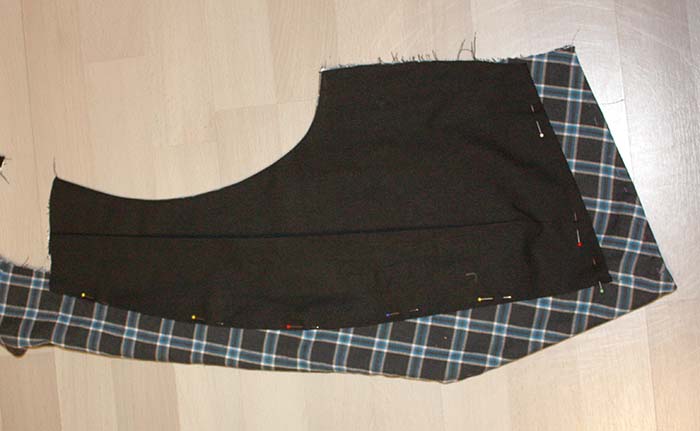
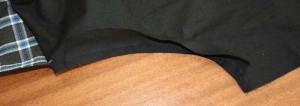
As I need the waistcoat for summer, I decided to make single layer back. Join back parts with a flat felled seam, cut straps for the bottom facing, join and turn over. Attach buckle straps.

IMG_4306

IMG_4307


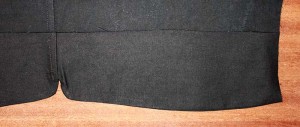
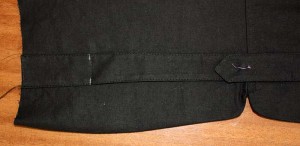
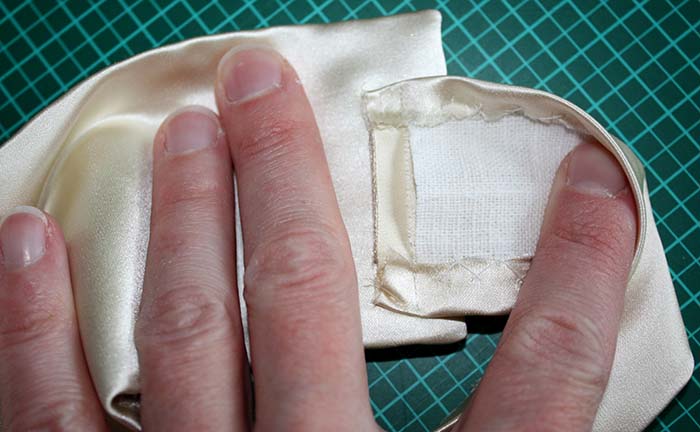
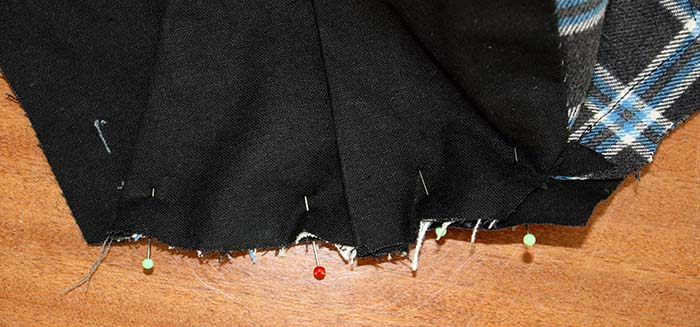
Join back and fronts, now you have raw edges at the side seams, the back armholes, shoulders and neckline. Cut bias straps, about 2” wide and cast the raw edges with the straps.

IMG_4308

IMG_4310


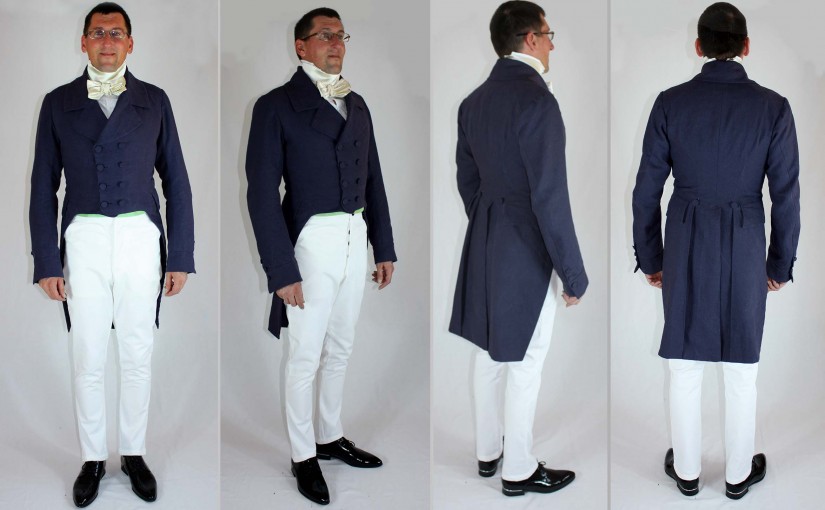
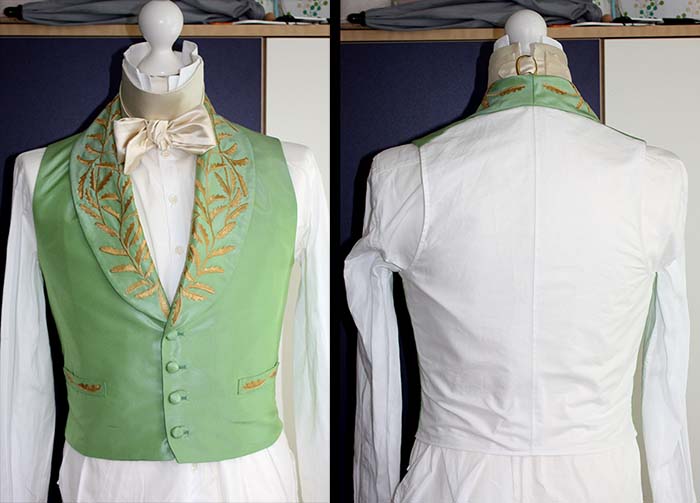
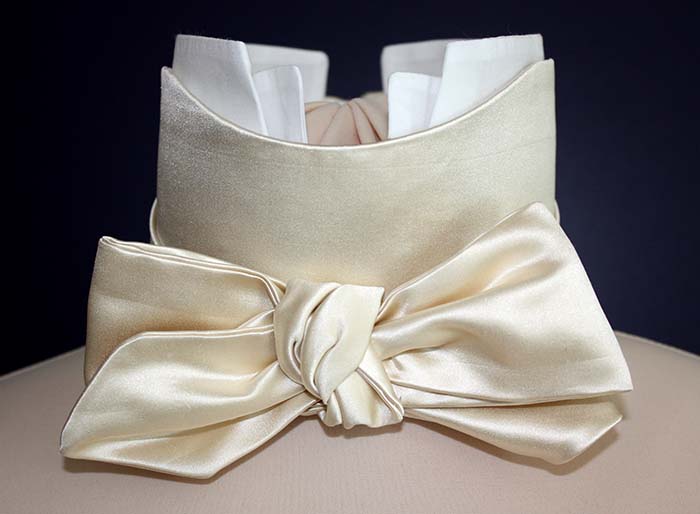
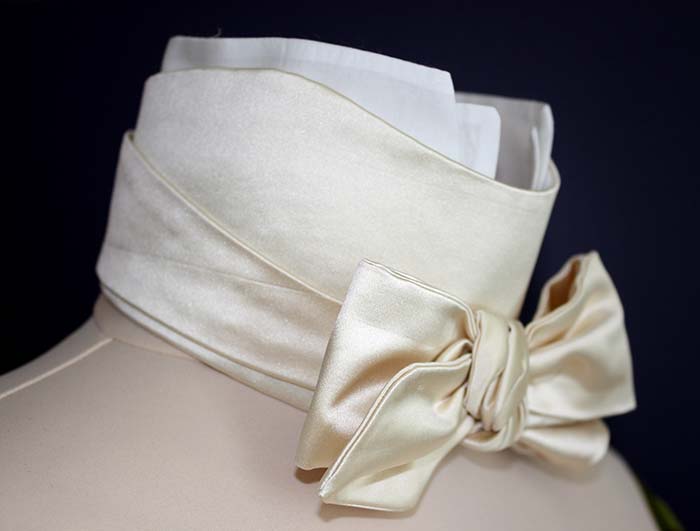
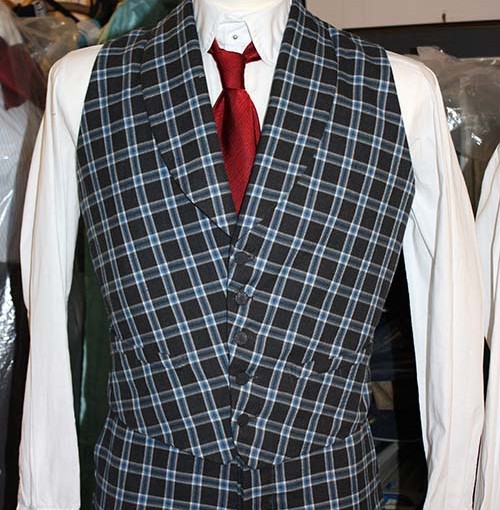
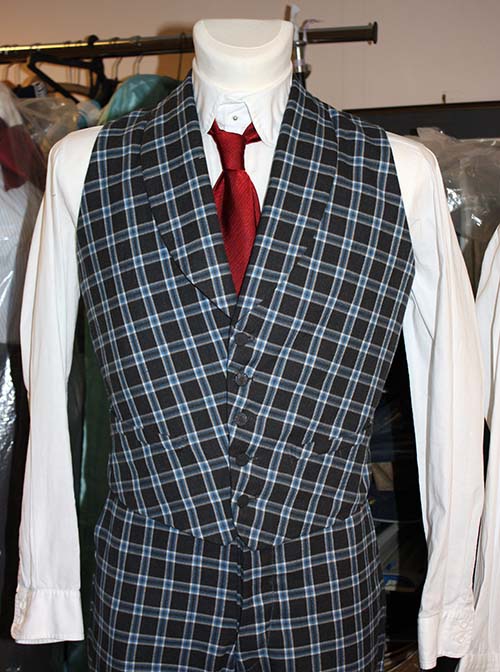
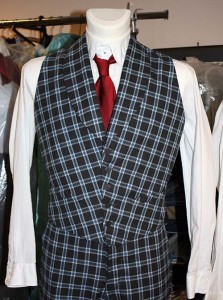
Here you see the finished waistcoat with fabric covered buttons.


IMG_4355


Next project? A matching frock coat, what else?


Men´s trousers 1840

This year we do again our history Sumer retreat. This time near Leipzig. As costume theme the romatic era would be suitable.

During the last years I made two Dresses for me, just a suit for the Gentleman is missing.

Let´s start with trousers. After some research it was clear I´ll sew checked trousers with a front fly. From 1830-40 front fall trousers became unfashionable. At the back they have a saddle like Jeans, a gusset and straps.

Unfortunately, I didn’t find pictures or anything else about pockets bags. So I decides to make them like Jeans pockets. 


Let´s start with the pockets! The back pocket back gets a facing from fashion fabric and is joined to the front pocket back with a French seam.

Sew the front pocket back to the front trousers along the pocket opening, right sides together, trim seam allowances, turn inside out and press. 


IMG_4256
IMG_4257
IMG_4258
IMG_4259


Sew the fly facing to the left front piece, prepare the buttonhole stand and sew five button holes. Pin the buttonhole stand to inside of the left front edge. Sew together with a curved seam from the right side.

Sew button stand to the right front edge.


IMG_4260
IMG_4261
IMG_4262


Close pant legs and press. Close the crotch seam. Overcast all raw edges.

IMG_4264


Insert gusset at the saddle.

IMG_4265


For a clean finish the back seams are covered with a curtain.

IMG_4267

IMG_4268


The waistband is divided into two parts with a curved back edge.

IMG_4275


Here you see the back straps with the buckle.

IMG_4314


For the hem cut pieces of linen at the bias and baste to the inside along the hemline.

IMG_4315


Make button holes at the corners of the pockets, close pockets with small covered buttons.

 IMG_4277


Finished! 

IMG_4353 IMG_4354


Next time I´ll show you the making of the waistcoat.


19th century mitts

Next summer some friends of mine are going to organize an early 19th century costume ball.  Of course a lady needs a pair of gloves to wear with her ball gown. But I don’t like gloves at all, so I decided to make mitts out of modern tights. I´ll show you my first attempt to sew a pair of mitts out of a cheap pair of tights.

First I thought a small size will be perfect to fit my arm, but it seemed to be a little bit too bulky at the wrist, so I had to make them tighter and ad a seam at the hand edge. I sewed all seams with a normal sewing thread and a normal sewing needle by hand.

All seams are sewn quite loose respecting the elasticity of the material. To give more stability to the seams they are sewn twice.

On the whole it worked better than I thought. Next time I´ll try it with tights with a looser pattern.


IMG_4283

IMG_4286

IMG_4280

IMG_4288

IMG_4287


Making-of my 1830 Dress Part 3 The Skirt

The original skirt is made from georgette, I don´t know if there is a sateen layer underneath, but it looks like.
For the skirt panels I took three times my waist plus 2cm for the underlap at the back. If you are quite thin (thinner than me, my waist measurement with the corset is 78cm) you should take more to reach the desired diameter of the seam.
I sewed togehter the skirt panels first and made a slash at the center back, folded in the raw egdges and stitched them down. Why I didn´t used a seam at the center back? Because so I would have a visible seam at the front side.


IMG_3630


I made 7 folds each side, opening to the back, shift the edges to form a curved waistline

IMG_3622

IMG_3623


Sew the skirt to the bodice. The picture shows how it looks like at the center back.

IMG_3632


Trim the seam allowance at the waistline, fold it into the bodice and stitch down, catch only the lining.

IMG_3633


Fold in the fabric along the hemline. The skirt should end about 10cm from the floor at the ankle. You would wear ballerina shoes with that dress. I decided to sew my hem with small stitches from the right fabric side, because the original dress has a visible hem stitching line, not even tried to be covered with the trimmings and I was aware the sateen fabric doesn´t tolerate a hem stitch.

IMG_3637


For the belt I took one layer of sateen and one layer of cotton fabric, the edges neatend with bias binding. The belt is closed with hooks and sewn eyes. Finally a large bow is attatched.

IMG_3624

IMG_3626


That´s the finished dress. Excuse the picture but the dress doesn´t fit the dress form quite well and I just made a quick picture of the finished dress to show you.

IMG_3642

Go to Part 1 or Part 2