A 1830´s Stock Collar for my husband

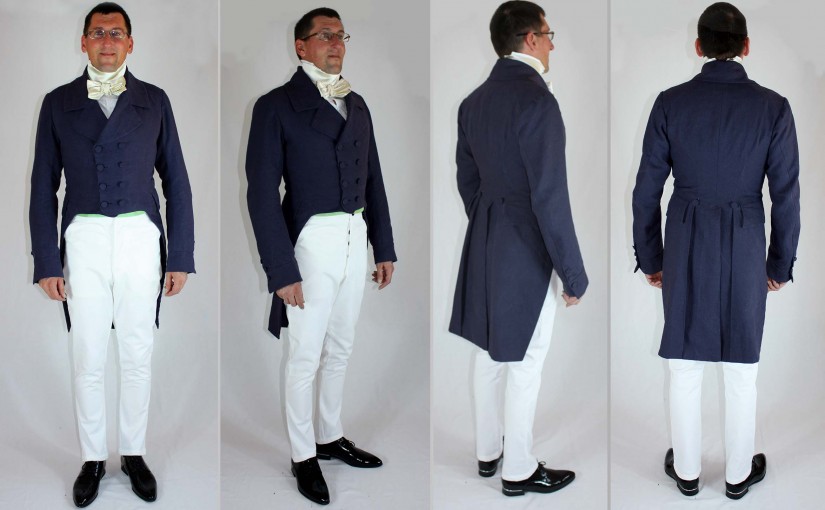
During the last months I sewed some 1830´s clothes for my husband. He got trousers, skirts, waistcoats, a Frock Coat and a Tail Coat. To be properly dresses just a stock collar was missing.  I´ll show you how I made it from silk sateen fabric and inlay, all fabrics came from stock except the buckle. 


First, I cut two collar pieces from the inlay, one on the straight, one on the bias. As it was a fusible inlay I didn´t had to pad stitch the pieces together, just fuse with the iron. Now it had the desired stiffness for my collar. Then I covered the inlay with the silk sateen using a catch stitch on the inside.

IMG_4563


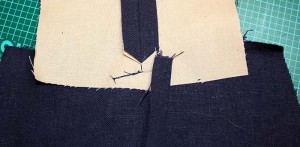
Next was to cover two pieces of linen for the belts with the sateen and prepare two straps for the buckle on the back.

IMG_4610


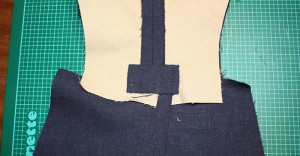
I attached the belts to the collar with the straps for the buckle underneath.

IMG_4613

IMG_4614

IMG_4615

IMG_4616


I placed the belt pieces on top of the collar and basted them to the collar on the center front. Think of additional width needed for the belt when the collar lays around the neck.
For the bow, I lined up the two straps, right sides together, and sewed around. I left an opening and turned inside out after trimming the seam allowances. I pressed the bow strap carefully and closed the opening with some invisible stitches. I made a bow, arranged the loops and ends carefully and fixed everything with some stitches. Then I attached the bow to the collar.
I covered the back of the collar with lining fabric, attached with a felling stitch.

IMG_4617


For the inside collar I lined up the collar pieces, right sides together, sewed and trimmed back the seam allowances.  I turned the inside out and pressed. I lined up the straps for the collar stand, right sides together. Placed the collar pieces between, leaving a gap at the center front, and stitched along short and upper edges.  I trimmed back the seam allowances, turned inside out and pressed.  I turned in the seam allowances of the bottom edge of the collar stand and stitched along the bottom edge.
At least I starched and pressed the inside collar, folded the front edges and basted to the inside of the stock collar.

IMG_4619

IMG_4629

IMG_4628

IMG_4630


You can download the pattern for the stock collar here, have fun with sewing:

0217_StockCollar1830


Carnival costume for Pikachu-Fans

My ten-year-old son is a great Pokémon Go fan, and even a greater Pikachu-Fan. Clear that he asked me to sew a Pikachu costume for him. Here we go:


Take a real large sheet of paper and trace a Pikachu shape around your child.

IMG_4479


Trace the sleeve like a T-Shirt´s sleeve; keep it wide at the wrist.
Here you see all parts of the pattern; the tail is even at the top for a male Pikachu and would be heart shaped for a female. I stiffened the tail with some interfacing fabric I had at home.

IMG_4484


Cut out the back on folded fabric, cut two pieces for the front, ad some extra width for a placket at the center front, close with snap fasteners. Don´t forget the brown stripes at the back of Pikachu. I used felt. Cast the neckline with a neckband. Insert an elastic at sleeves and legs openings.


I made a separate hood; the ears are wadded and sewn to the hood with some stitches. Just painted the ear tips with acrylic paint.


IMG_4487


Done! Paint the face yellow  with red cheeks and a black nose.

IMG_4480


Kinderkostüme Weltraumprinzessin und dunkler Space Lord

Ja, der Fasching kommt mit großen Schritten. Wer von und nähbegeisterten Eltern kleidet seine Kinder nicht gerne in individuelle und selbstgenähte Faschingskostüme?

Immer wieder kommen meine Kinder mit großen Wünschen, die auch mich vor große Herausforderungen stellen.

Ein großes Thema bei den lieben Kindern sind immer wieder die Star Wars Filme mit Heldinnen in großen Roben, finsteren Bösewichten und guten Rittern.

So habe ich bereits vor einigen Jahren diese beiden Kostüme für meine Kinder genäht und sie nun gemeinsam mit der Nähszene für euch in eine schöne Nähanleitung verpackt. (Bisher nur auf Deutsch)

Möge der Nähspaß mit euch sein!

Faschingskostuem_Weltraumprinzessin_Gr_140_146

Faschingskostuem_Dunkler_Space_Lord_Gr_122_128

Men´s waistcoat 1820-40

As I promised I show you some pics from the making off a men´s 1820-40´s waistcoat.


First the front part with the pockets. The welt pockets are made a little bit different as nowadays. Baste a piece of linen or cotton to the wrong side of the left front, covering the pocket opening. Mark the pocket opening with a basting thread, clearly visible on the right side of the fabric. Cut your welt from fabric, matching the fabric pattern and fold in half lengthwise, wrong sides together, press the edge and reopen. Attach a cotton tape along the fold to the inner half of the welt with a catch stitch. Sew the outer pocket bag to the inner half of the welt using, right sides together, stitch exactly between the marks of the pocket opening and press open the seam allowances.


IMG_4293

Place the front on a table with the right side up. From below, line up the edge of the outer welt half with the pocket opening, right sides together. Sew with a reduced stitch length exactly between marks, indicating your pocket opeining. From above, line up the inner pocket bag with the pocket opening, right sides together and sew, starting and stoping about 1/8” (3mm) inside the marks.

IMG_4294


Turn the front to the wrong side and cut the fashion fabric in the middle of the stitching lines, cut V-shaped towards the corners. Pull the welt and outer pocket throught the opening to the wrong side and press the bottom edge of the welt carefully. Turn the welt along the fold line, wrong sides together. The welt seams should match up now, but most important is a regular welt on the right fabric side. Baste together the welt layers and pull through the opening to the right side. From the right side, stitch (invisible) in the ditch of the welt seam, joining the layers.

IMG_4295


Pull the inner pocket bag to the wrong side and close the pocket, stitching the small triangles to the pockets, press. Finish the welts,  after basting the interfacing to the fronts.


IMG_4296


Turn the front right side up again and turn in the loose ends of the welt. Sew down the edges with a prick stitch through all layers, make a second row of prick stitches about ¼” (6mm) from the first. Trim back the turned in ends of the welt close to the second row of stitching.

IMG_4297


Join the front pieces at the center back, press. Don´t catch the interlining, place the edges of the interlining one above the other to avoid bulk.


Attach a cotton tape a little bit behind the roll line, prick stitch the collar (you can skip this step). Trim back the interlining right behind the sewing line and attach a cotton tape all around the outside edges (Front, bottom and armhole).

IMG_4298


Sew on the collar facing and trim back seam allowance, along the collar attach the seam allowance with a catch stitch to the interlining.

IMG_4300


Turn inside out and press. Attach the raw edges of the facing to the interlining with a felling stitch.

IMG_4301

IMG_4302


Take the lining and sew to the front along the armhole, trim back seam allowance and place inside the front parts. Attach the lining with a felling stitch.

IMG_4305


As I need the waistcoat for summer, I decided to make single layer back. Join back parts with a flat felled seam, cut straps for the bottom facing, join and turn over. Attach buckle straps.

IMG_4306

IMG_4307


Join back and fronts, now you have raw edges at the side seams, the back armholes, shoulders and neckline. Cut bias straps, about 2” wide and cast the raw edges with the straps.

IMG_4308

IMG_4310


Here you see the finished waistcoat with fabric covered buttons.


IMG_4355


Next project? A matching frock coat, what else?


Men´s trousers 1840

This year we do again our history Sumer retreat. This time near Leipzig. As costume theme the romatic era would be suitable.

During the last years I made two Dresses for me, just a suit for the Gentleman is missing.

Let´s start with trousers. After some research it was clear I´ll sew checked trousers with a front fly. From 1830-40 front fall trousers became unfashionable. At the back they have a saddle like Jeans, a gusset and straps.

Unfortunately, I didn’t find pictures or anything else about pockets bags. So I decides to make them like Jeans pockets. 


Let´s start with the pockets! The back pocket back gets a facing from fashion fabric and is joined to the front pocket back with a French seam.

Sew the front pocket back to the front trousers along the pocket opening, right sides together, trim seam allowances, turn inside out and press. 


IMG_4256
IMG_4257
IMG_4258
IMG_4259


Sew the fly facing to the left front piece, prepare the buttonhole stand and sew five button holes. Pin the buttonhole stand to inside of the left front edge. Sew together with a curved seam from the right side.

Sew button stand to the right front edge.


IMG_4260
IMG_4261
IMG_4262


Close pant legs and press. Close the crotch seam. Overcast all raw edges.

IMG_4264


Insert gusset at the saddle.

IMG_4265


For a clean finish the back seams are covered with a curtain.

IMG_4267

IMG_4268


The waistband is divided into two parts with a curved back edge.

IMG_4275


Here you see the back straps with the buckle.

IMG_4314


For the hem cut pieces of linen at the bias and baste to the inside along the hemline.

IMG_4315


Make button holes at the corners of the pockets, close pockets with small covered buttons.

 IMG_4277


Finished! 

IMG_4353 IMG_4354


Next time I´ll show you the making of the waistcoat.