Category Archives: Tutorials

Paletot 1876 – How to Part 1

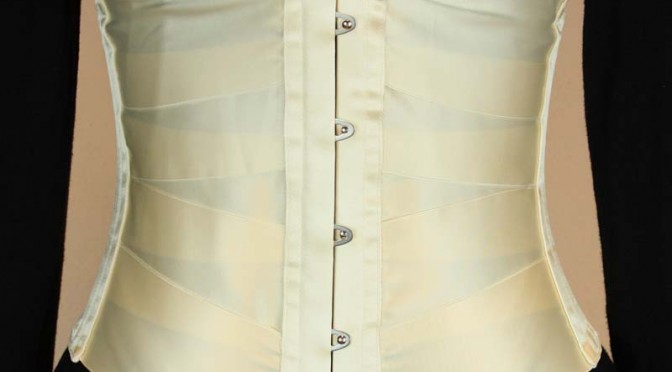
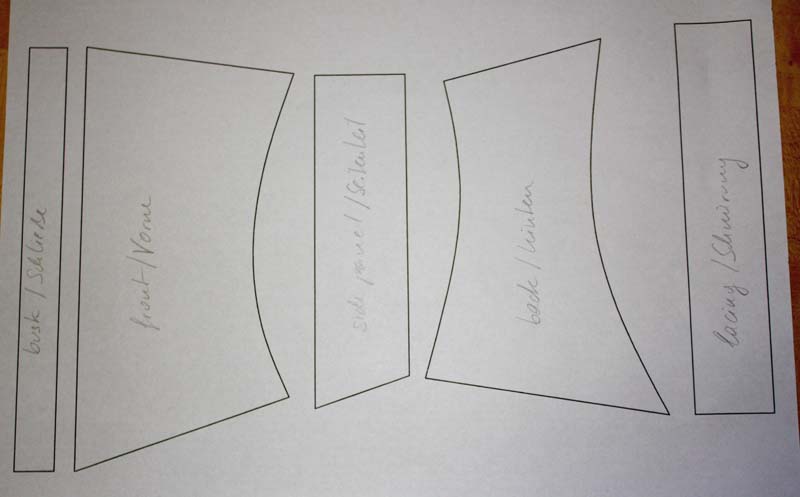
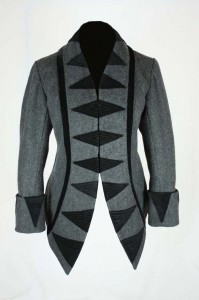
Promised in spring, now the time has finally come. A pattern for a Victorian jacket (paletot) based on a model from “The Bazaar” from 1876. This is a small guide with many pictures intended to support the sewing pattern.

IMG_2119 klein

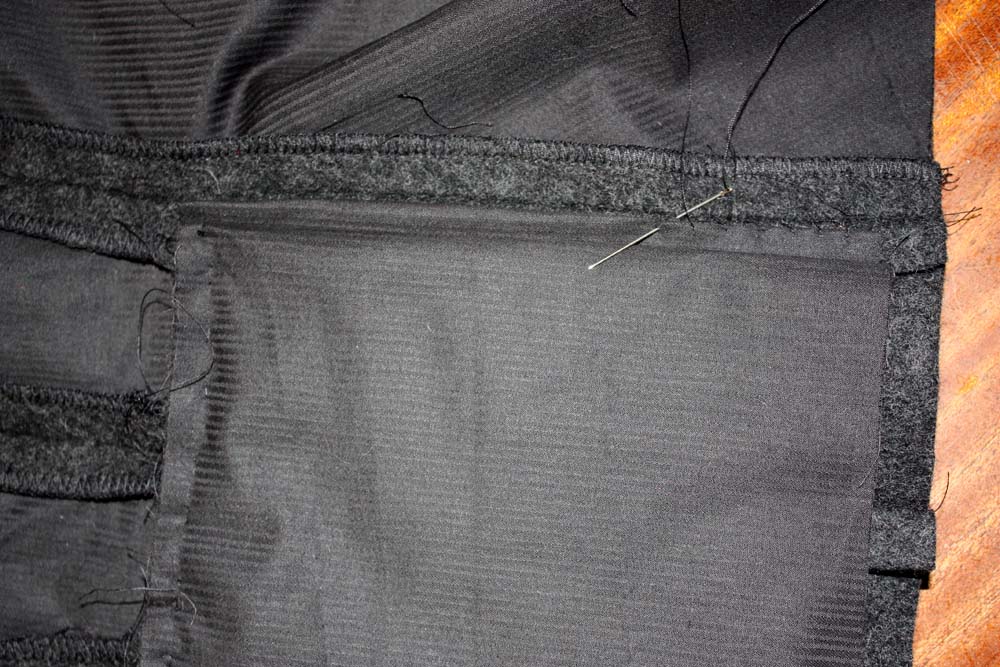
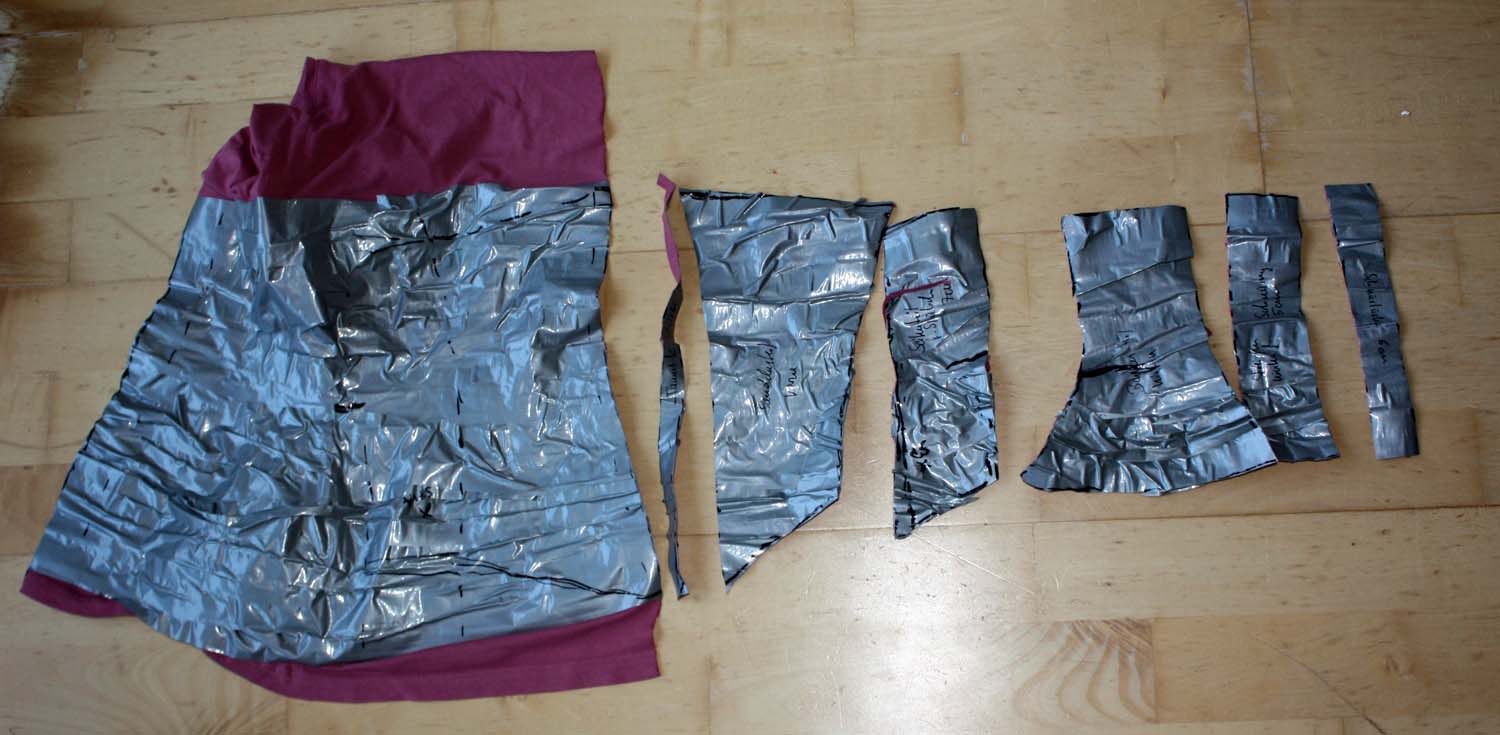
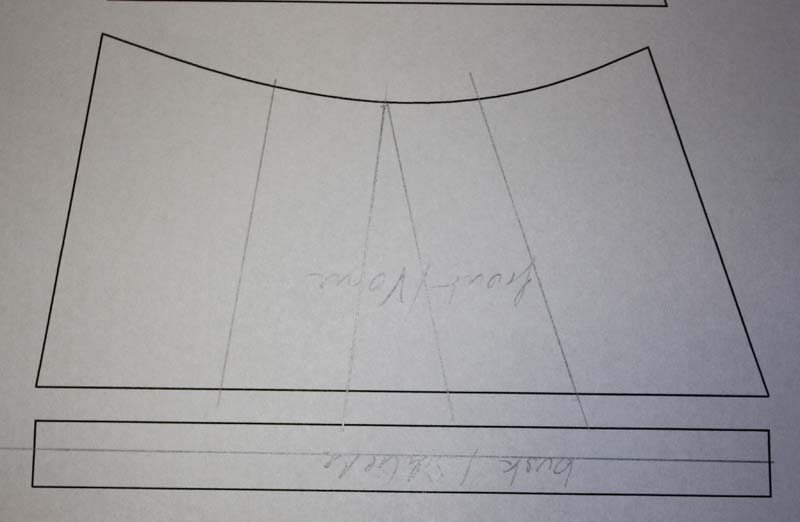
First, cut out all pieces, the lining for the back piece ends at waistline. The pleats will be lined with a separate stripe of fabric. The back, side back and side front are flatlined with lining fabric and  processed like one layer in the further. Serge the edges together, that later on nothing will slip while sewing. Interline collar, placket and outer cuff.

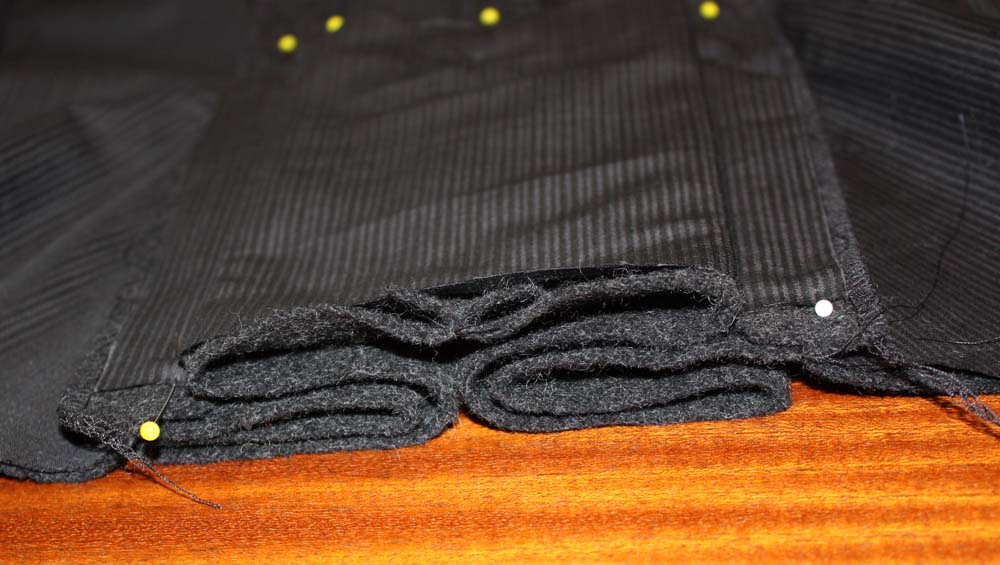
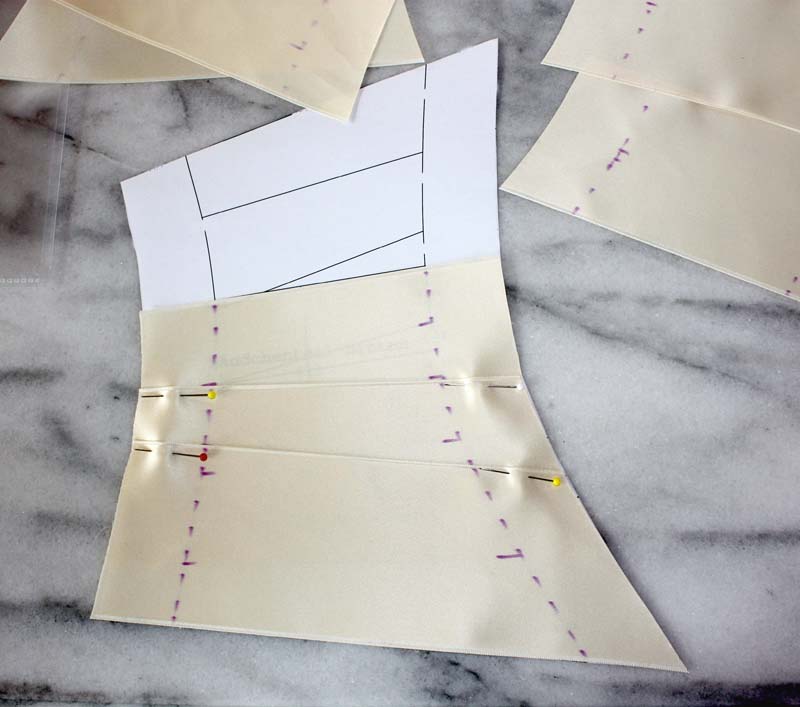
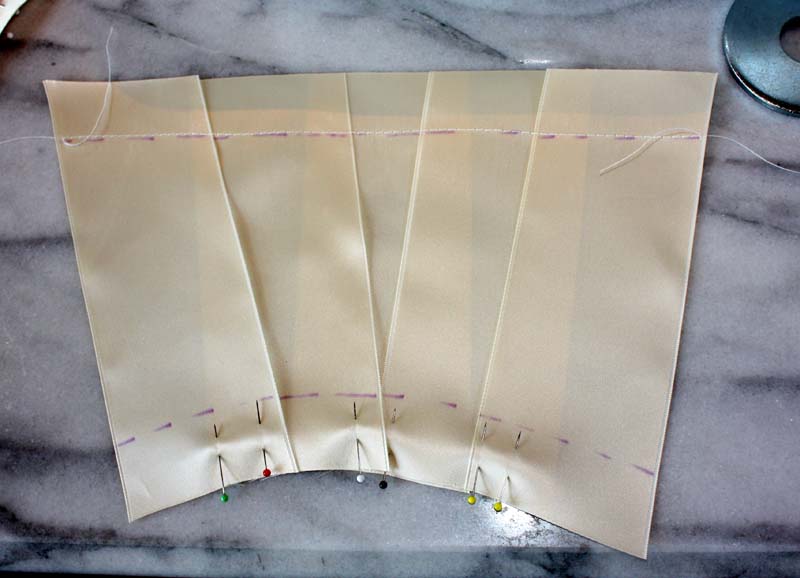
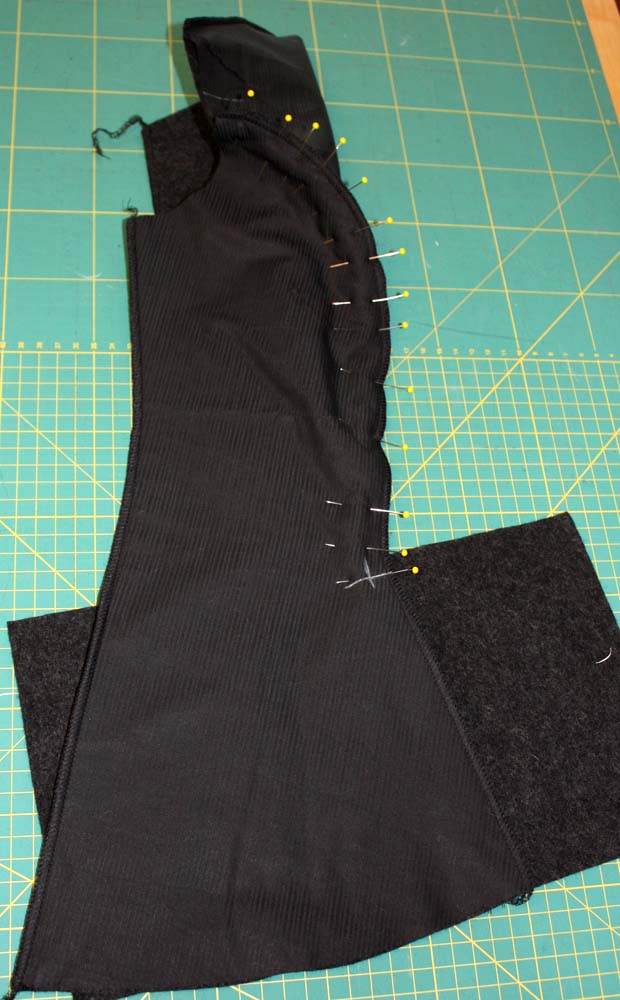
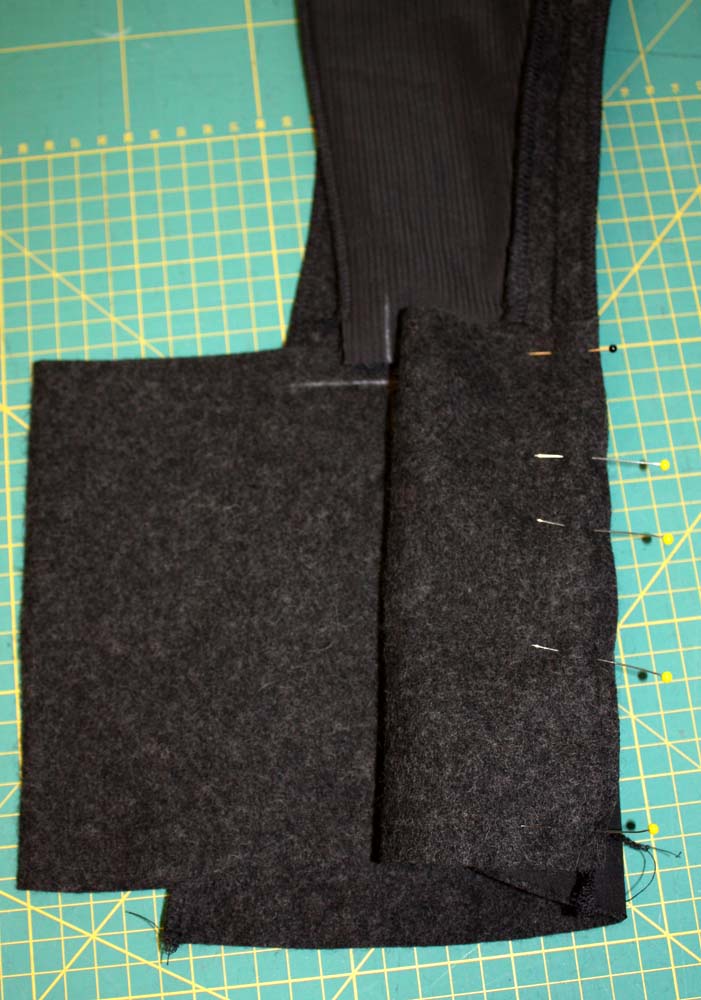
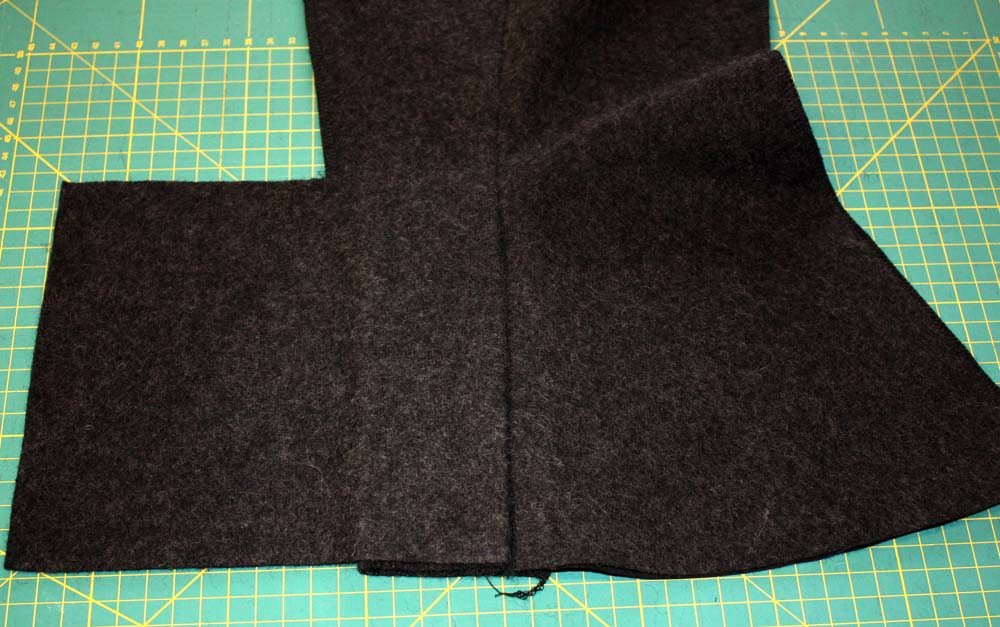
At corners of back and side back (waistline) mark seam allowance exactly and sew side back to back, end at markings. Open seam allowance. Sew side of pleat to side part, be careful to stay within seam allowance meeting seam at upper edge. Open seam allowance and fold pleats, press. Sew side front to side back, open seam allowance, seam at center back is still left open. Close shoulder seam.

. IMG_2073                         IMG_2074 IMG_2075


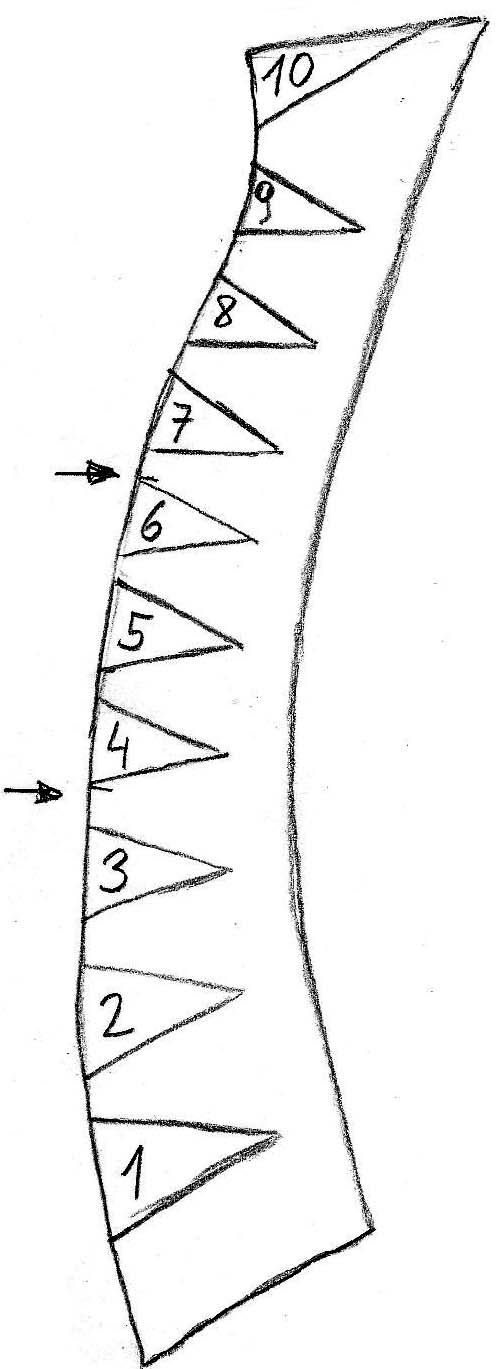
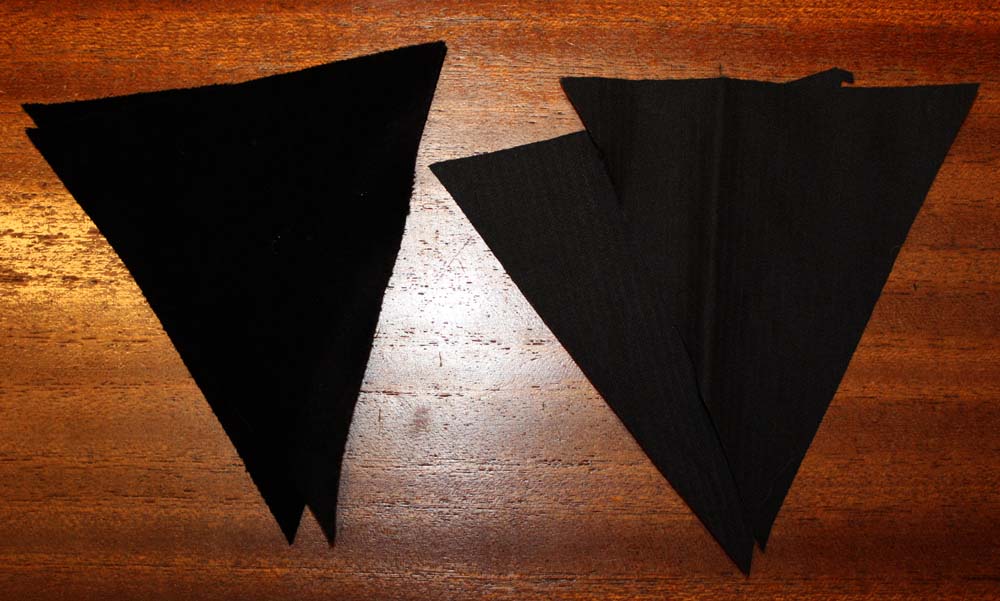
Prepare embellishment for the collar. Take your collar pattern piece and mark triangles, ad 3/8″ (1cm) seam allowance and copy. Number pieces. Cut 2xvelvet + 2xlining each triangle. Sew velvet and lining, right sides together, at the point use a small stitch. Leave short edge open. Trim seam allowance, turn inside out and press.

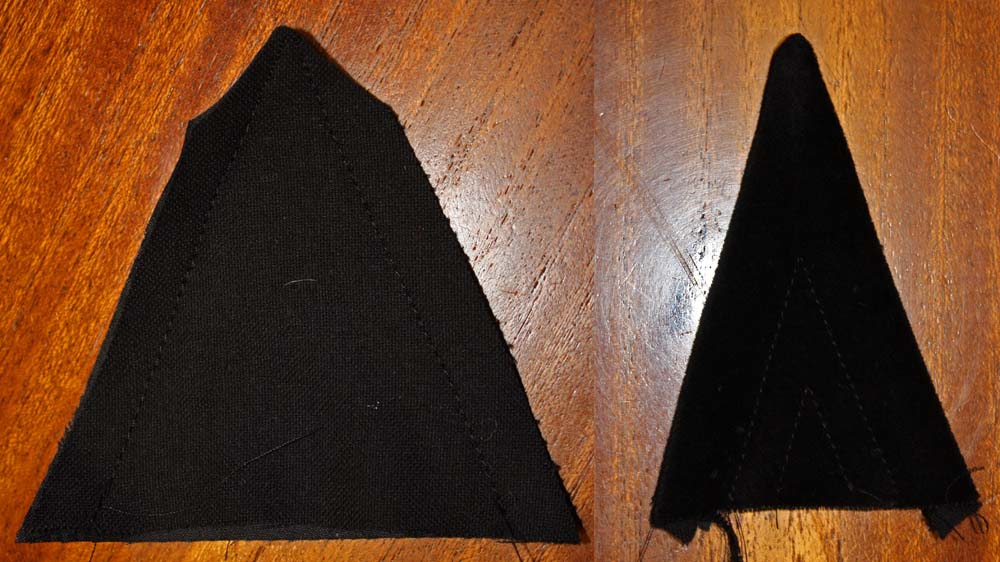
With velvet side up topstitch 5/8” (1,5cm) distant from edge, topstitch again at a distance about 1cm (width of presser foot) until the triangle is filled.

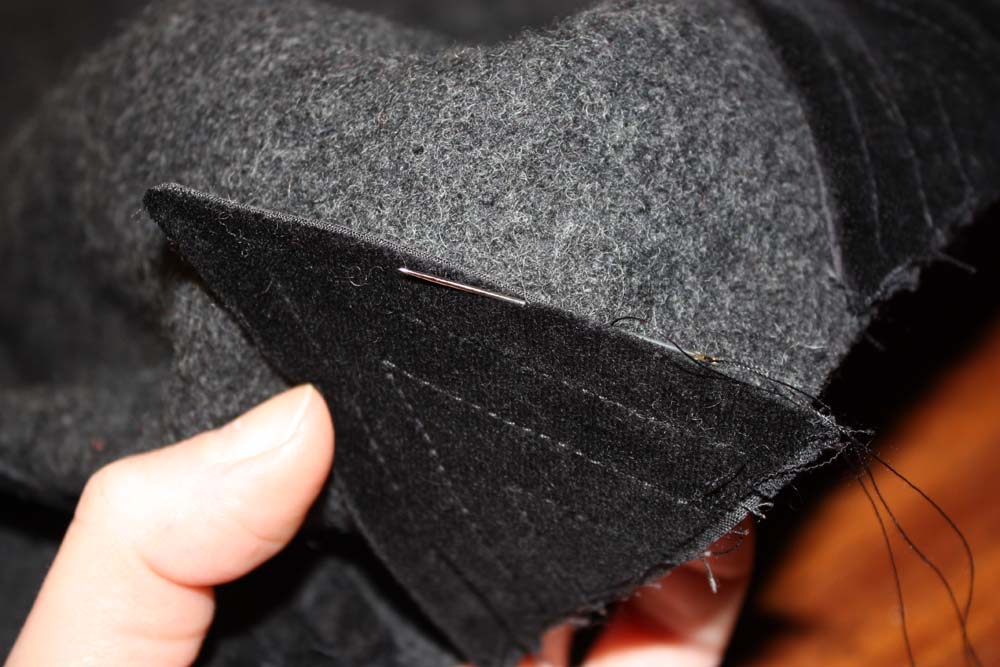
Attach triangles to collar piece. Topstitch with your sewing machine between edge and first stitching. Sew along edges with small hand stitches. The triangle at the center back will be attached later.

Bild 13
IMG_2077
IMG_2078
IMG_2081

4. Sew collar to side front, fold seam allowance toward collar, trim the inner part of seam allowance.

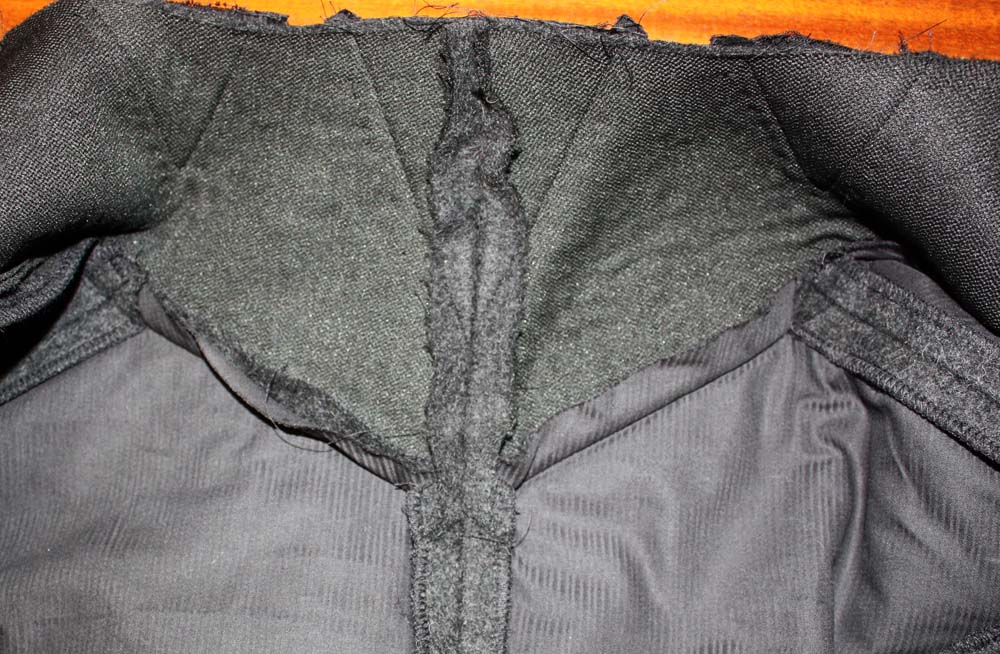
Sew back parts together, take care to match collar seam exactly. At the bottom stop exactly in the corner at waistline. Open seam allowance and sew the last triangle to center back of collar.

IMG_2082

Attach velvet ribbon close to collar seam.

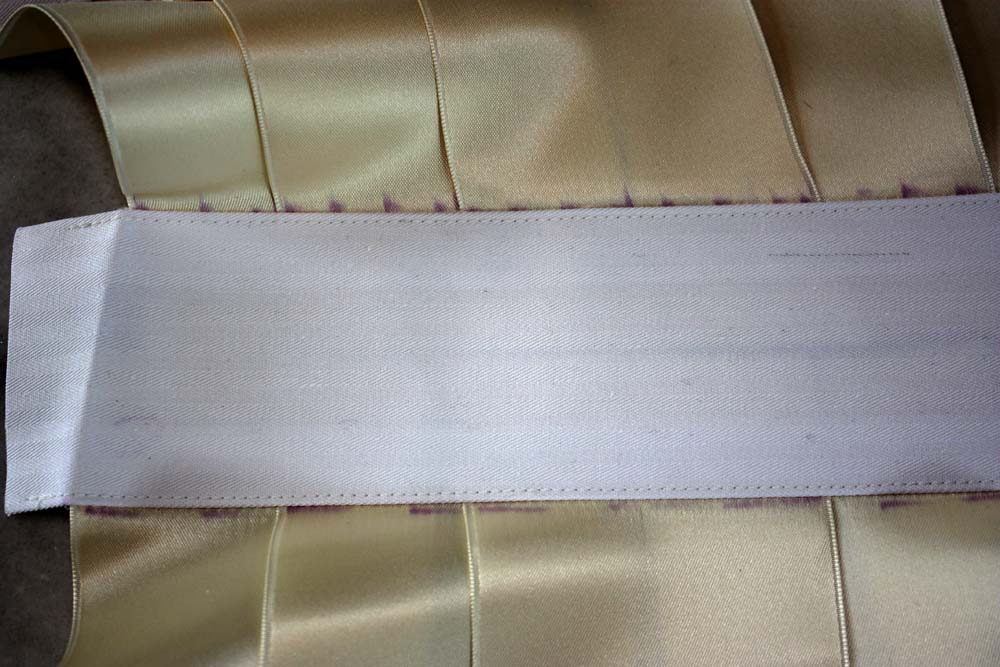
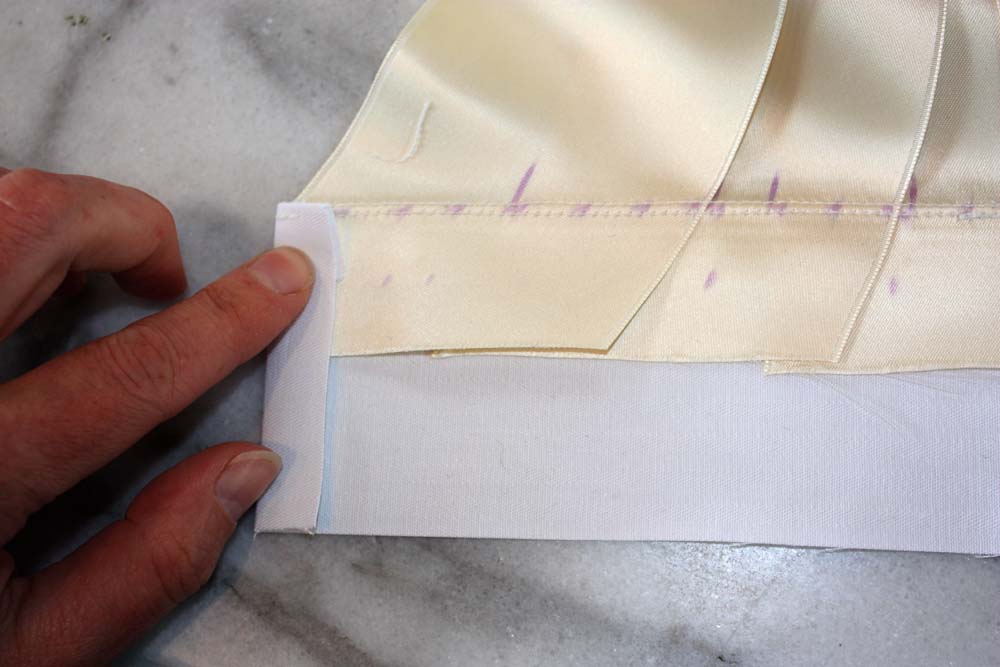
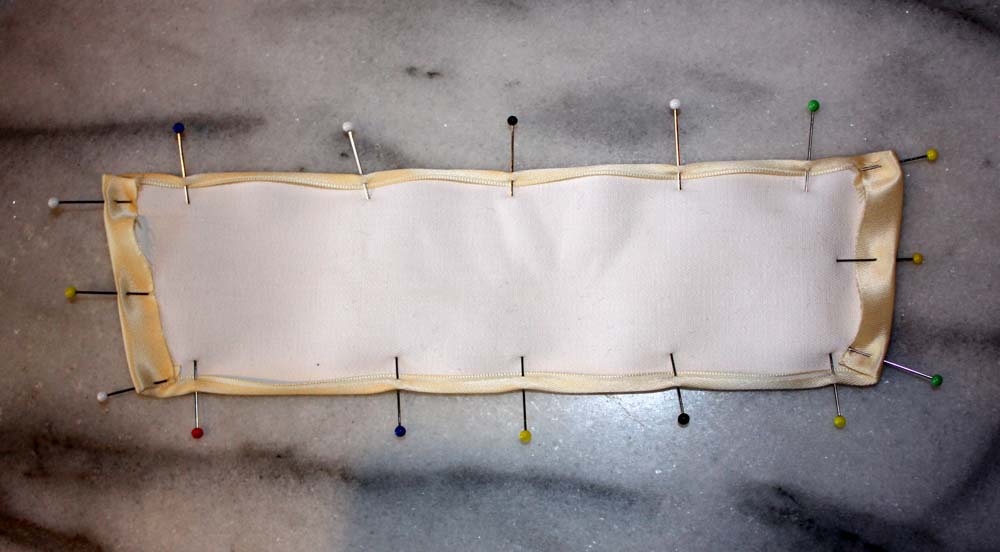
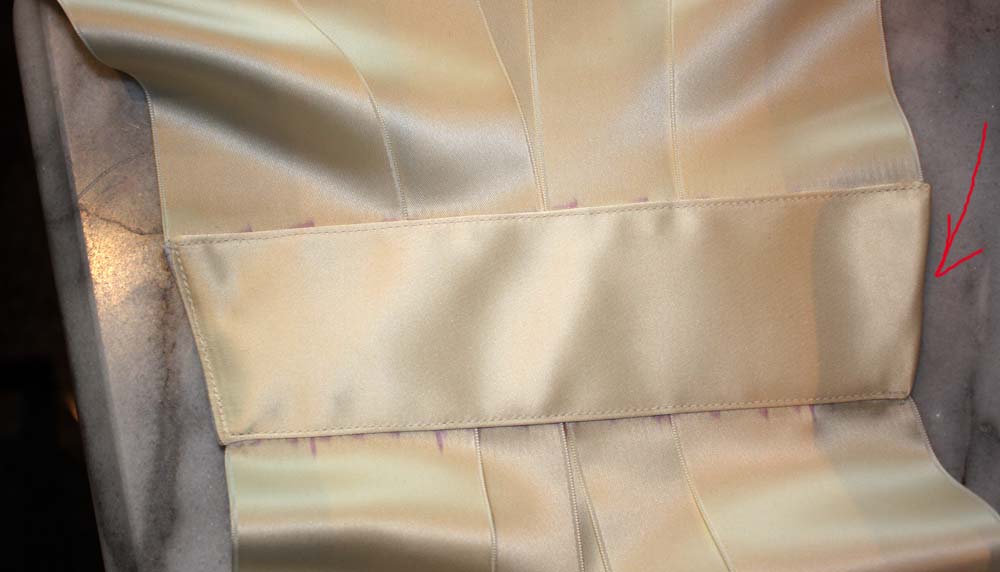
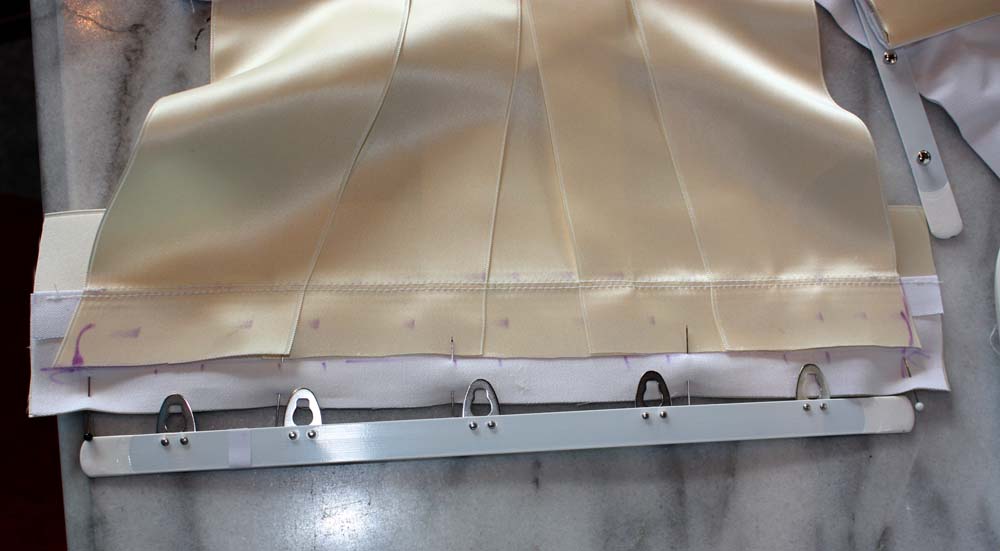
Close peplum at center back and open seam allowance. Take your stripe of lining and baste it to upper edge of pleats, fold pleats and press. Turn in seam allowance at the sides of strip and sew with a felling stitch to seam allowance of outer fabric.

IMG_2085
IMG_2088
IMG_2087

Part 2 / Teil 2

You can by the pattern for this jacket here

How to sew a ribbon corset

Cycling with a corset, is impossible? With one of my half-bust corsets, I couldn´t imagine. But with an underbust corset? Let´s try it! Especially love that gorgeous ribbon corsets. You´ll find a lot of examples on the internet, also in Norah Waugh´s “Corset and Crinolines” there is a pattern for a ribbon waist cincher.

Constructing the pattern:

First I put on a good-fitting corset, above an old T-Shirt. Then my husband wrapped me up firmly with duct tape. Mark the center front and back precisely, also mark your desired gap at the back, the length and width of the busk, and the location of the iliac crest. On Originals the location of the side panels is not exactly at the sides, but a little bit more in the front.

http://www.metmuseum.org/collection/the-collection-online/search/157929

Now cut carefully along the center front and back. Place the halves on a plain area and adjust your markings as needed.

Mark your pattern pieces and transfer them to a sheet of paper.

This is how your pattern looks like now, it is essential to mark the parts exactly.

My ribbon has a width of 7 centimeters, therefore I mark the front and back parts the position of the ribbons accordingly. Also mark the width of your busk, the position of the lacing, and the tunnels for your boning at the side panel.

Now trace the single parts for the ribbons, number them exactly, and ad 3 centimeters allowance at the ribbon parts. For the other parts only add 1.5 centimeters.

Cut the ribbons, I prefer to use the rotary cutter.

Mark the seam line, then pin the single parts together and baste. (The trick marker from Prym disappears by itself after a few days.)

Cut out lining for the busk, side part, and lacing of coutil fabric with seam allowance, sew to ribbon parts, fold seam allowance to coutil parts, and topstitch. It is important not to cut back seam allowance, later on by sewing the tunnels the ribbons will be stabilized.

Fold the upper and lower seam allowance of the side and lacing parts to the inside and press.

Now cut again parts from the coutil which will be faced with your Satin ribbon. Therefore cut side parts without seam allowance at all, lacing parts without seam allowance on the upper and lower edges, and also at the edge for the ribbon part. At the busk part leave seam allowance just at the edge for the ribbon part.

My satin ribbon has a width of 7cm therefore I can cover my side part in one piece. If your ribbon is narrower sew two parts together. Pin exactly to the side part of the corset and topstitch. Leave one edge open (red arrow). Sew tunnels. I made 5 tunnels but only 3 bones will be inserted.

At the back (lacing) sew parts of the coutil together with the sateen ribbon between. Open seam allowance, iron. Fold in the upper and lower seam allowance of facing. Fold the sateen ribbon around the edge of the coutil and sew like a side part. Sew tunnels, and leave open upper edge.

The busk part is a little bit more complicated to sew. At the right front edge mark Position for the loops. Sew the front edge, skip gaps at the right edge, and sew along the left front side without gaps.

At the upper and lower edges of the busk part mark the end of the busk, ad about 3/16″ (1/2cm) and sew with small stitches. Cut back seam allowance and turn inside out. Insert busk, at left side mark Position for the posts. Make holes with an awl and pop posts through the holes.

Fold the sateen ribbon around the coutil edge, sew like side part and lacing part. Sew busk in place, use your Zipper foot, and sew as close as possible.

At the back part mark the Position for the grommets and insert them. Insert boning and close upper edges. Insert lacing.

If your corset hits you at the breast bone sew a little pad and fix it with some stitches at the upper edge of the busk. Finished!