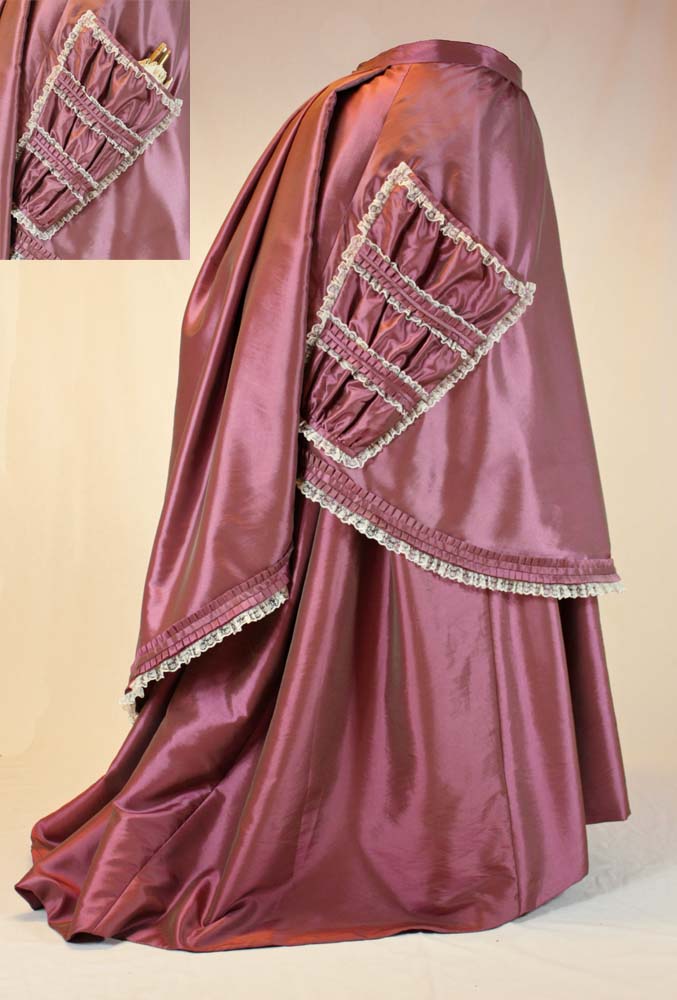
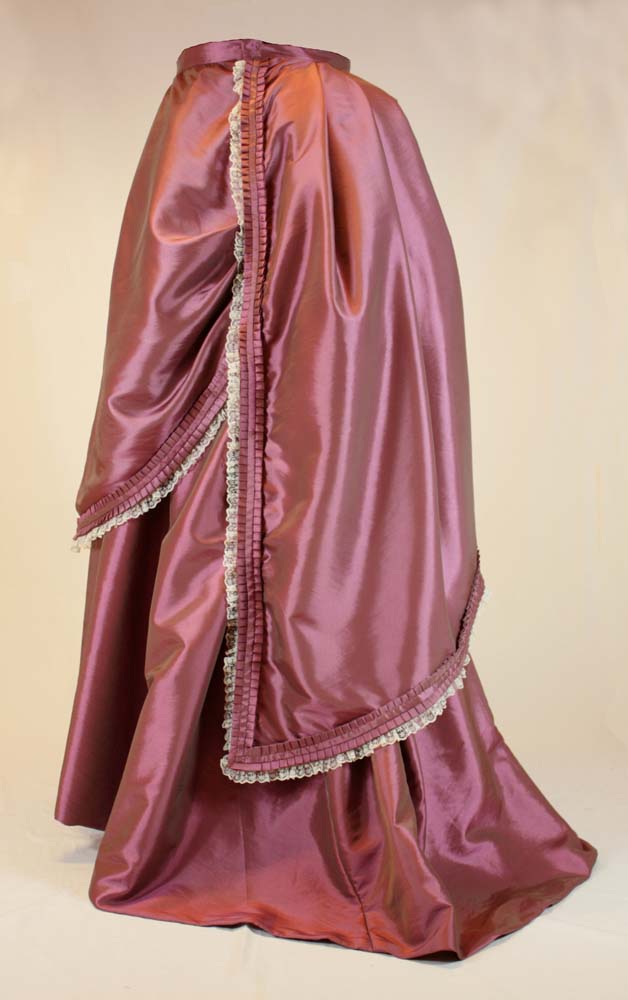
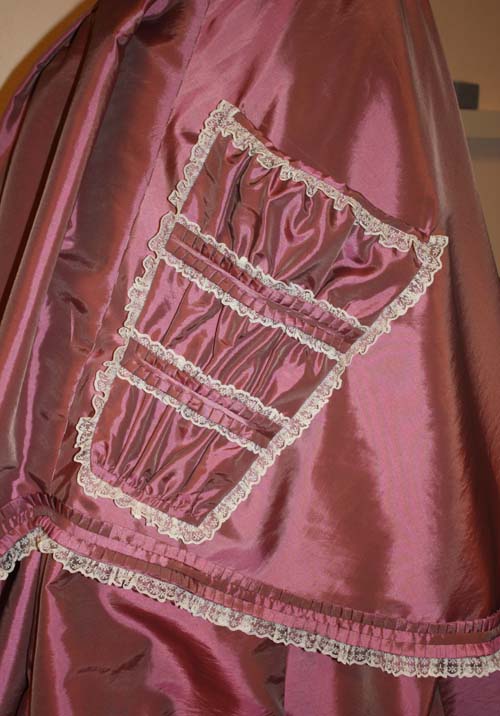
In this tutorial, I want to show you, how to sew a patch pocket for a Victorian bustle dress. You can see these pockets on several extant dresses, house dresses, as well as walking dresses, and of course on fashion plates. But what were these pockets for? Years ago, when I started my sewing pattern business I thought to hold a parasol. But that seems to be wrong. They maybe were meant to hold a handkerchief, a fan or just for decoration, as there are now visible signs of wear inside and outside the pockets on extant dresses. Visit this great article for more details. https://brokecostumer.blogspot.com/2016/02/that-mysterious-pocket.html?fbclid=IwAR1jeTo3wuViCpFIlyFCTMpjn-ph8oKwpQ2yoI_BS6Pv1xu1iKfA3_HBPdA
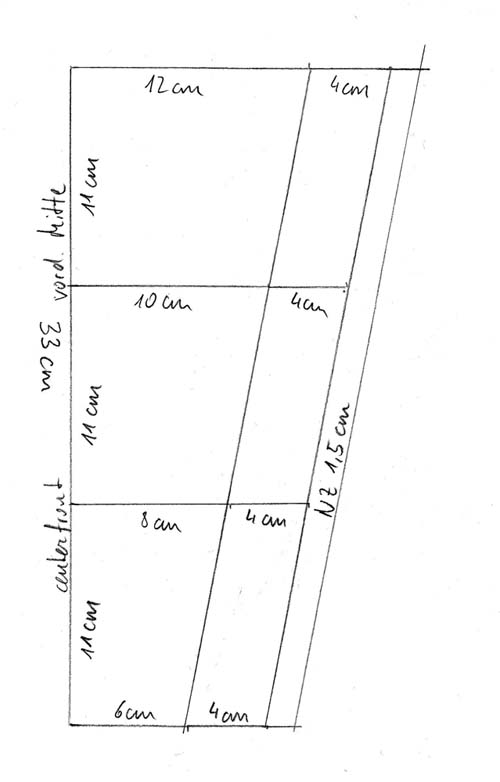
Draft the pattern on a piece of paper, ad seam allowance just at the sides.
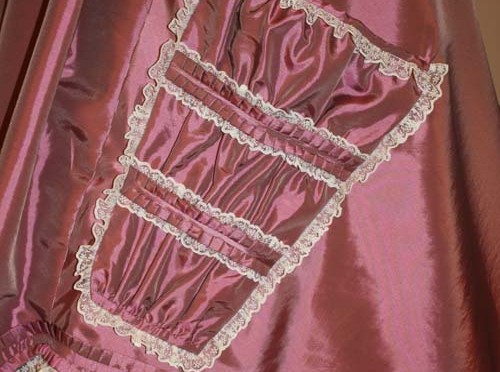
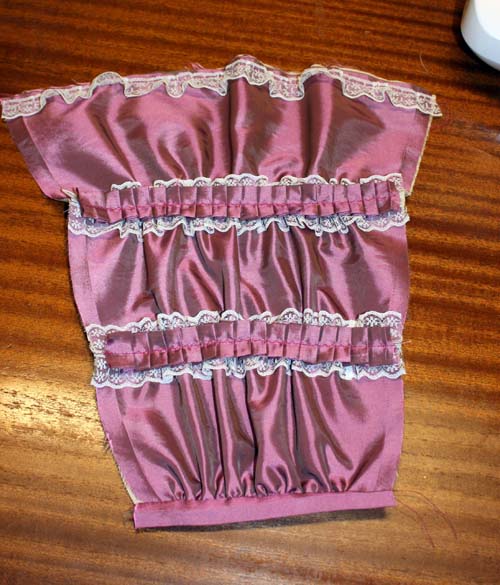
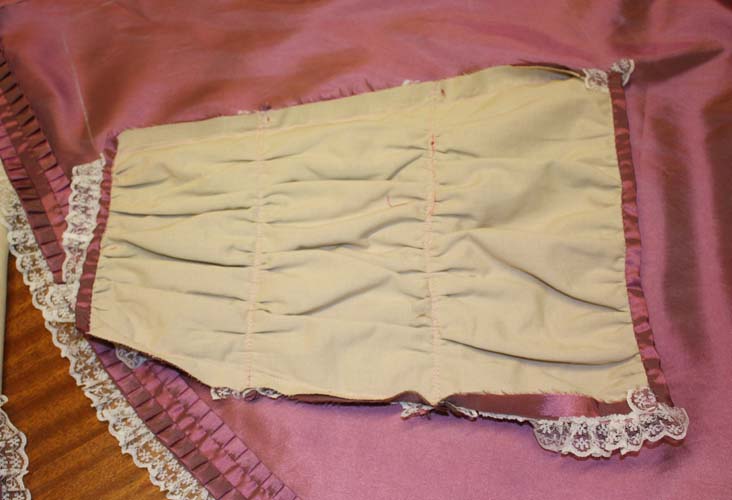
Cut from upper fabric and lining. The two layers will be treated as one. Lower the tension of your upper thread and sew with a long running stitch along the horizontal lines and along the top and bottom edges. Shirr fabric, at the bottom from 20cm to 12cm, at the top from 32cm to 24cm, and along the horizontal stitching too. I decided to add a lace trim before shirring the fabric.
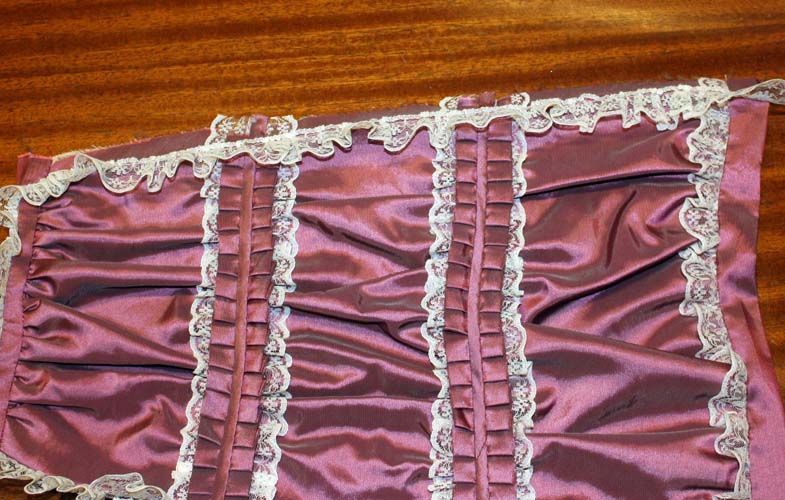
Cut a strip of fabric on the straight grain, fold like you would fold a bias tape, and cut to parts with a length of 15cm, 19cm, 23cm and 27cm. I added more trimmings first. Open your folded strips of fabric and pin them in place. Sew along the fold line. Fold your strip again and sew the open edge with invisible stitches to the pocket. At the top and bottom fold the strip over the edge and sew to the back side.
If desired trim with lace all around the edges.
Sew pocket to your overskirt. The first edge you can do with your sewing machine, the bottom, and the second side sew by hand.
Making a piping tape is easy. You can make it out of nearly any fabric and color desired for your project. Depending on the diameter and rigidity of the cord you become piping tapes for different uses.
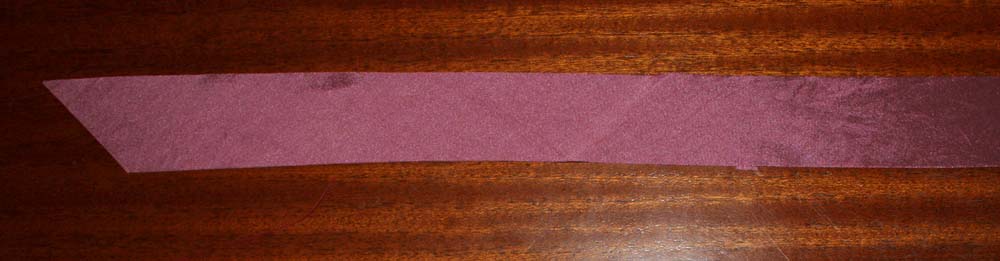
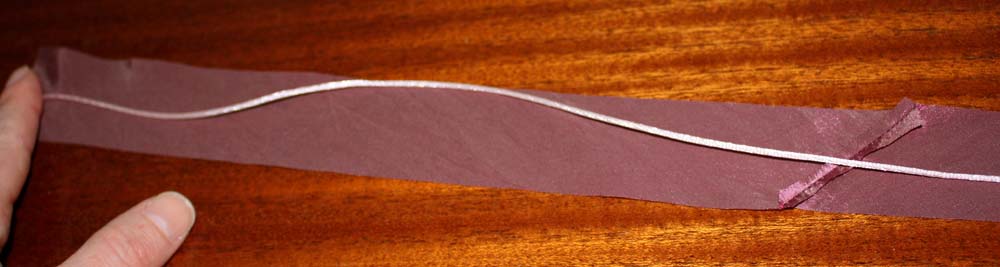
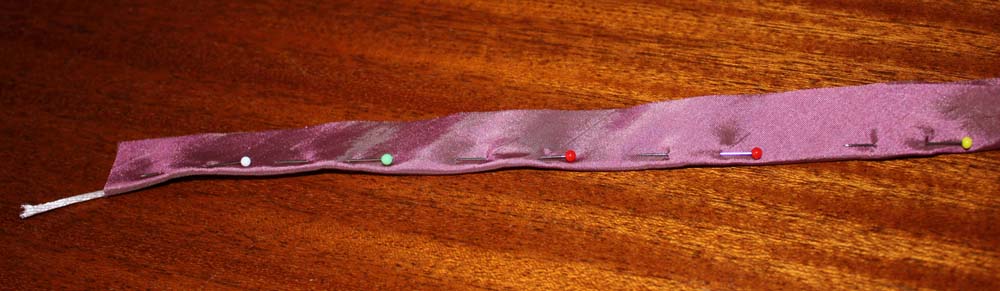
Take a stripe of fabric on the bias, about 4cm wide. Lay your cord on top of the left side and fold it. Pin the cord in place and sew with the zipper foot tightly along the cord. Ready!
To achieve the perfect shape for your vintage skirt more support than just flatlining the skirt with cotton fabric is needed, especially the hem line needs additional structure. Depending on the choosed fabrics and materials the skirt will be washable or not.
In extant dresses often buckram is used, not only to reinforce the hemline, sometimes every single skirt panel was interfaced throughout to achieve the desired shape. Buckram is still available, but can not be washed. When I made this skirt, I decided to use a washable and light weight hair canvas from polyester fibers.
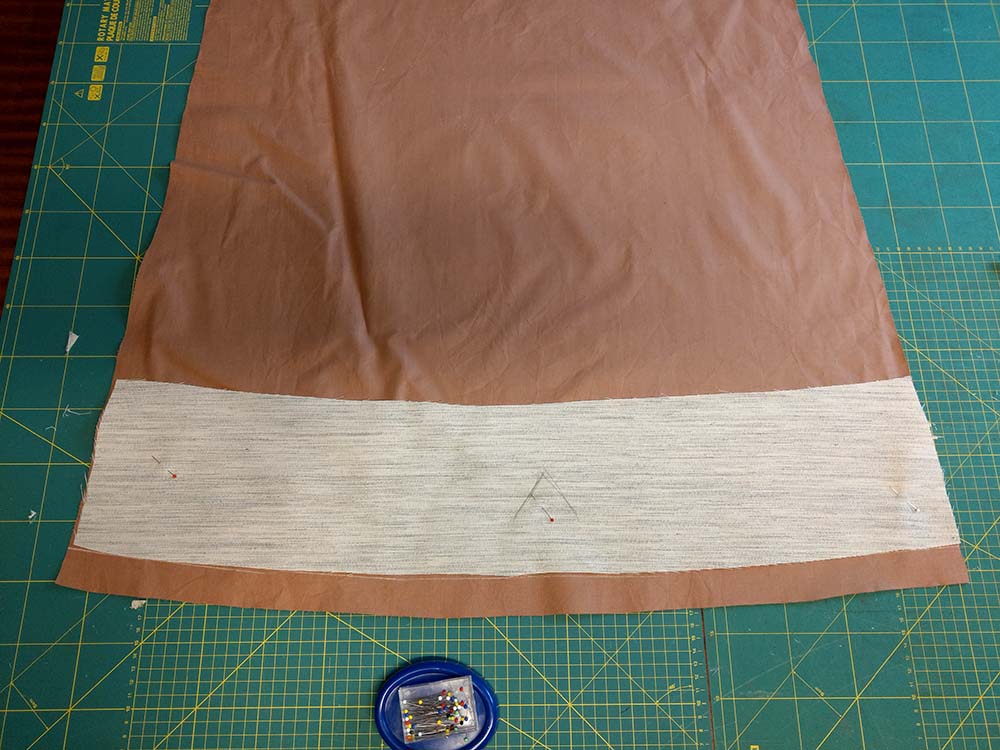
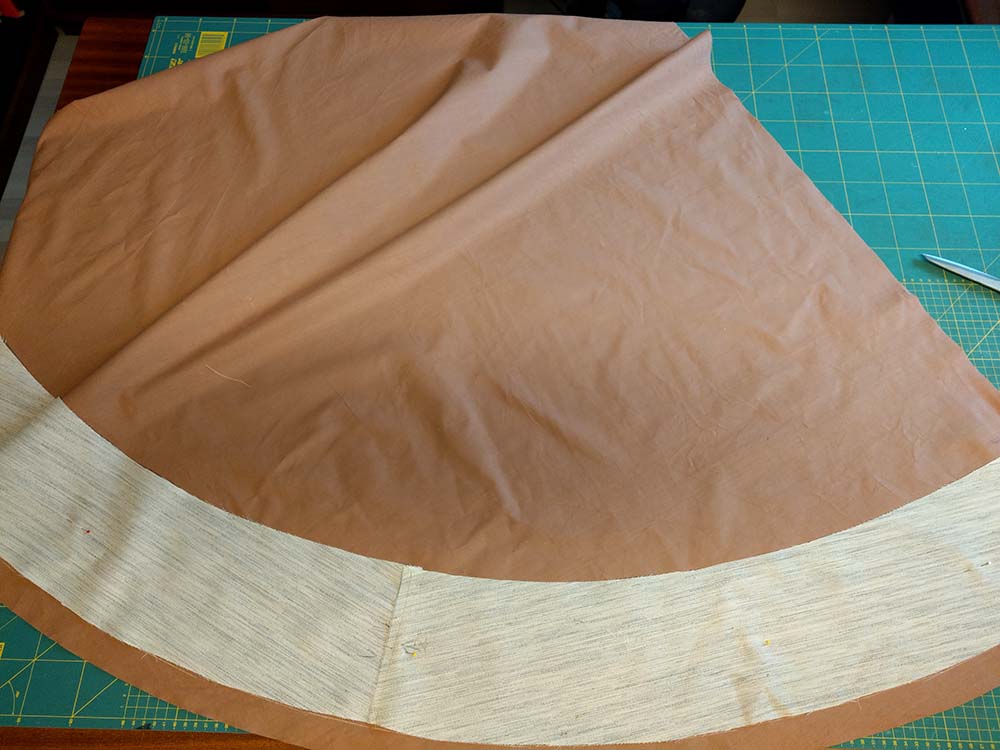
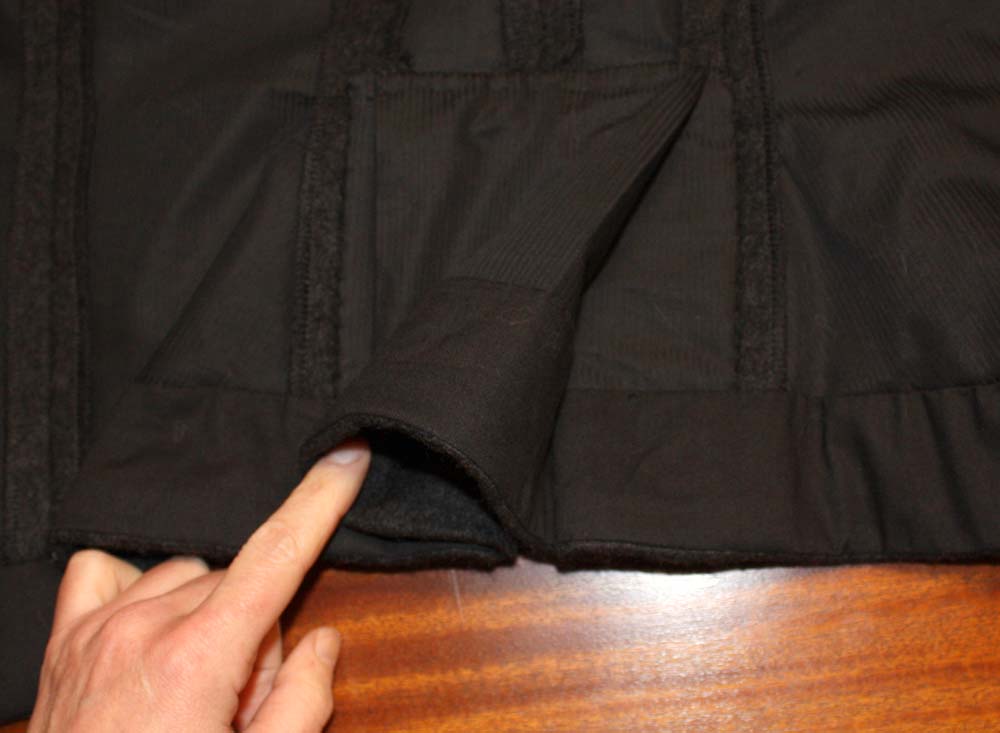
After cutting all pattern pieces from fashion and lining fabric (and of course a fitting with the panels basted together to determine the hemline), prepare the hem interfacing the following way: Take your pattern pieces (with all adjustments transferred) and mark the seamline. Draw another line circa 8″ (20cm) parallel to the seamline. Cut out this 8″ (20cm) wide hem-shaped strips and transfer to your stiffening fabric. For a hemline of several meters , you´ll needed to piece the strips, joining them with a simple overlapping seam (don´t forget to add seam allowance)
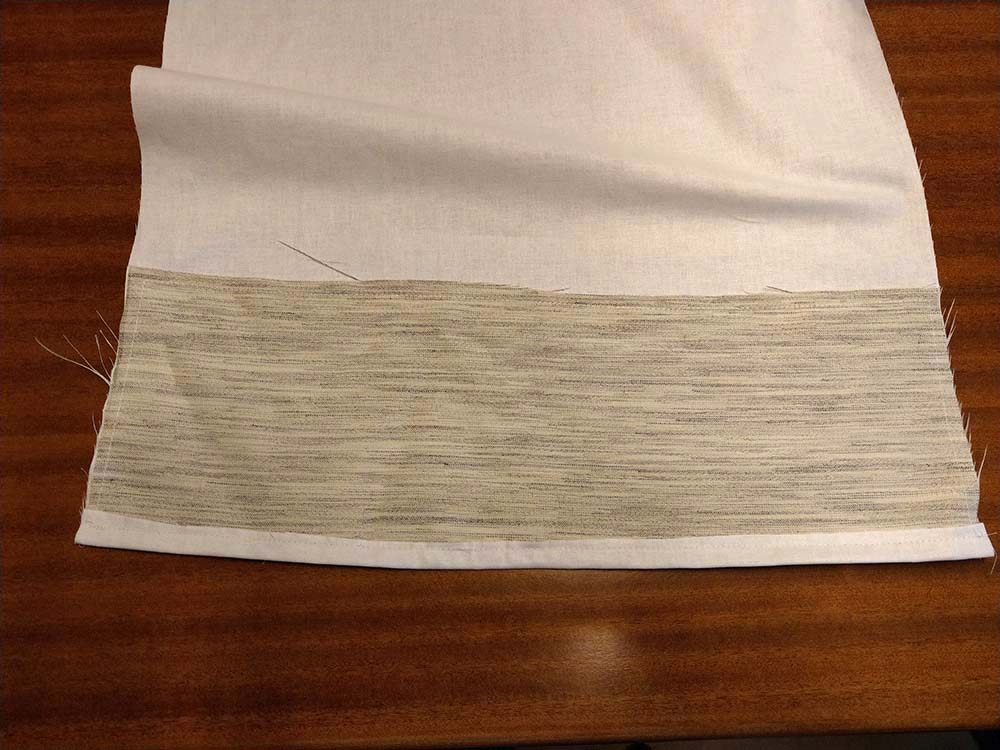
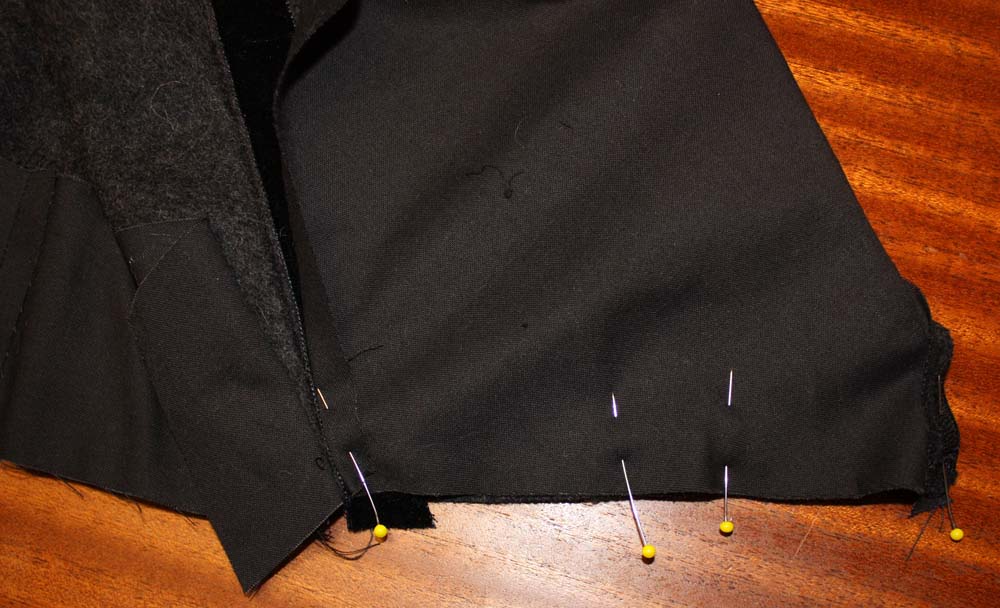
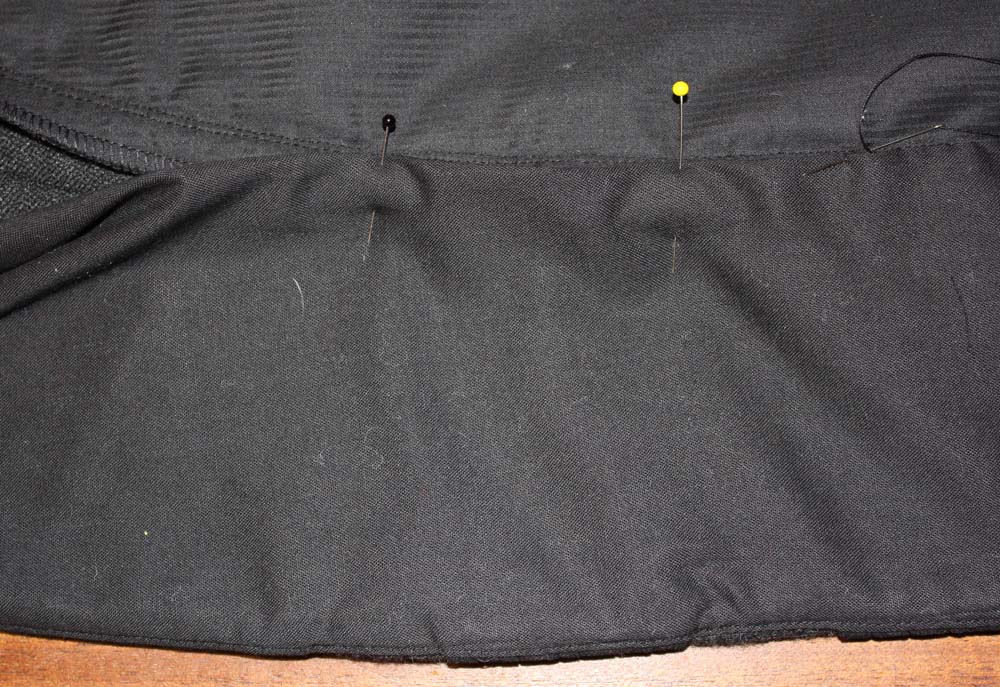
Place the skirt lining on top of a table with the wrong side up, and mark the hem line. Line up the interfacing with this line.
Sew the interfacing to the lining along both edges, circa 3/8″ (1cm) parallel from the edge. Turn the the hem allowance around the edge of the interfacing and stitch down the hem.
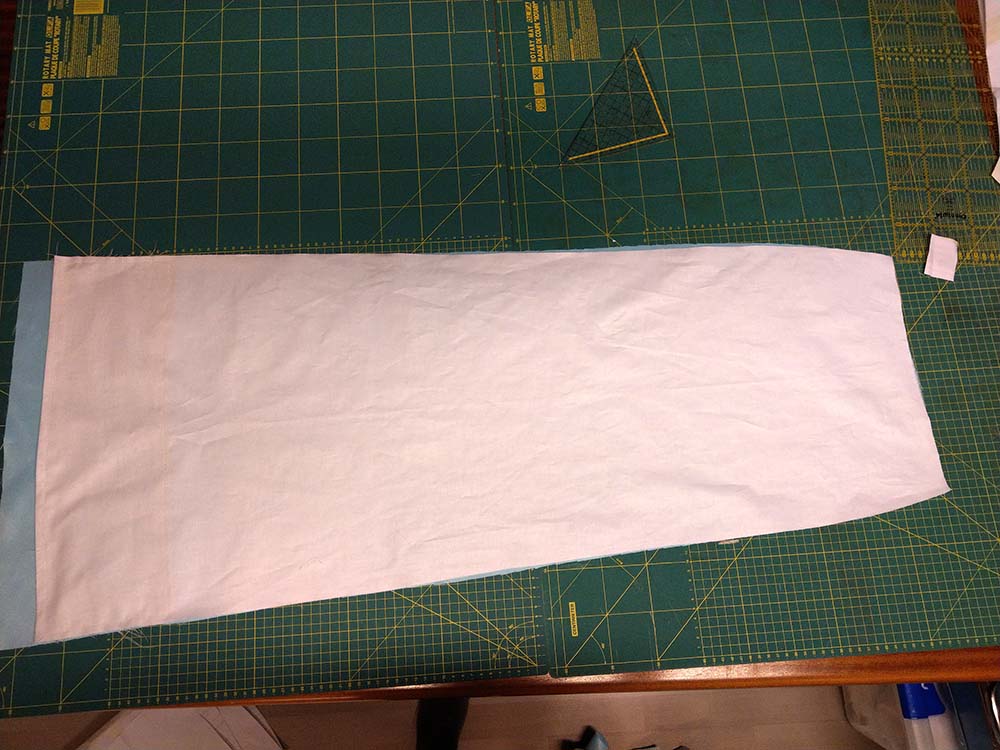
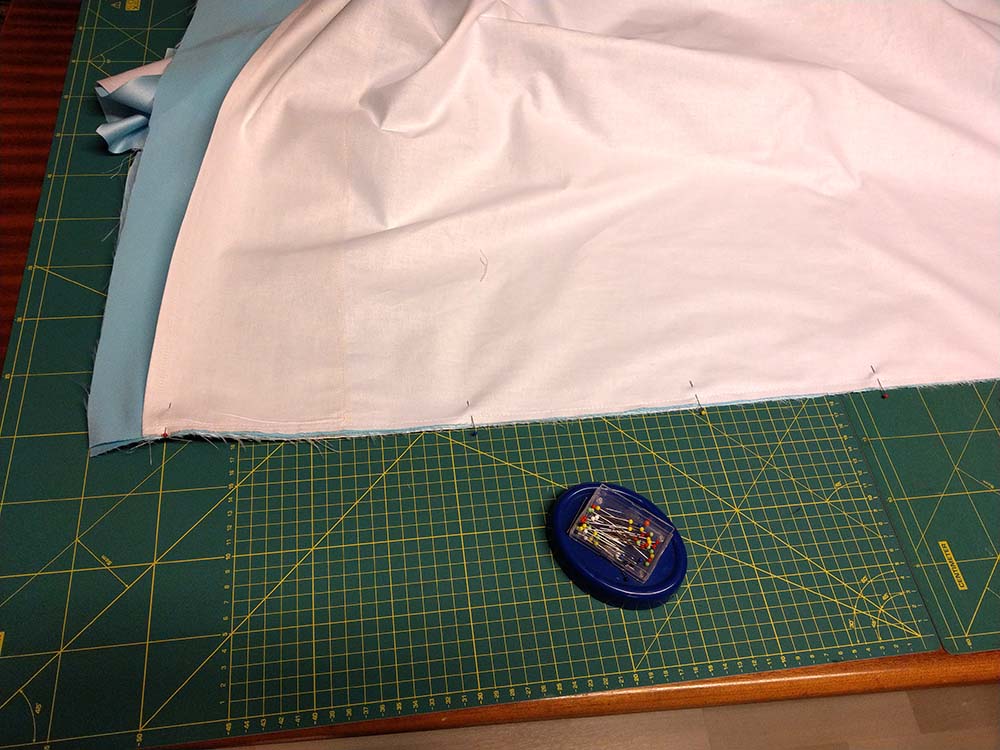
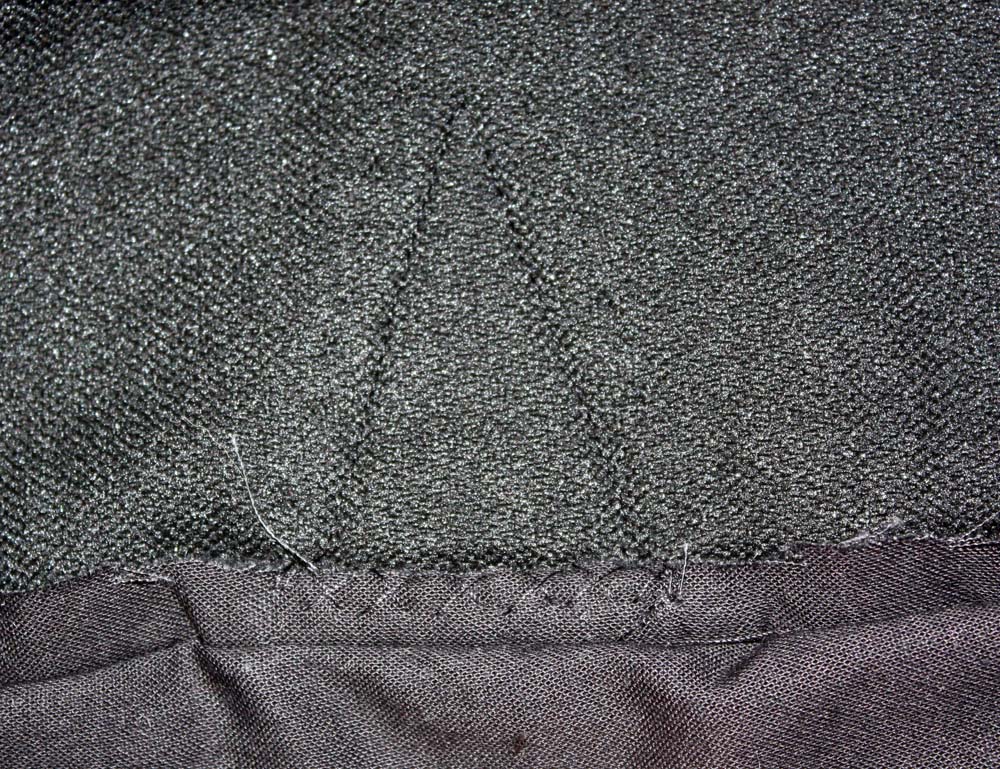
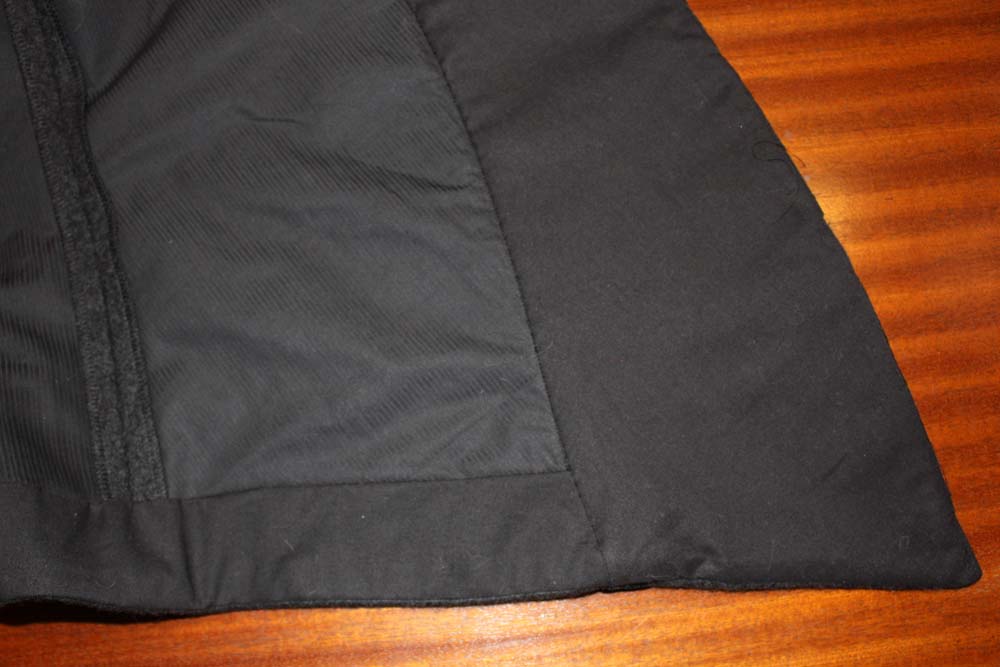
Next step is to flatline the fashion fabric: line up fashion fabric and lining, wrong sides together, and baste the two layers together inside the seam allowance. From her on treat the two layers as one and sew together the skirt as usual.
To finish the seam, turn the seam allowance of the fashion fabric around the edge of the lining towards the gament inside and fell or catch stitch to the lining. Cover the raw edge with a twill or a velvet tape.
Additional to a strong fabric like coutil and facing fabric you need for sewing a corset some other materials and tools. 1. Tools 2. Spiral wire + End caps, plastic coated steel boning 3. Busk 4. Waistband, bias binding 5. Grommets (Eyelets with washers) and lacing
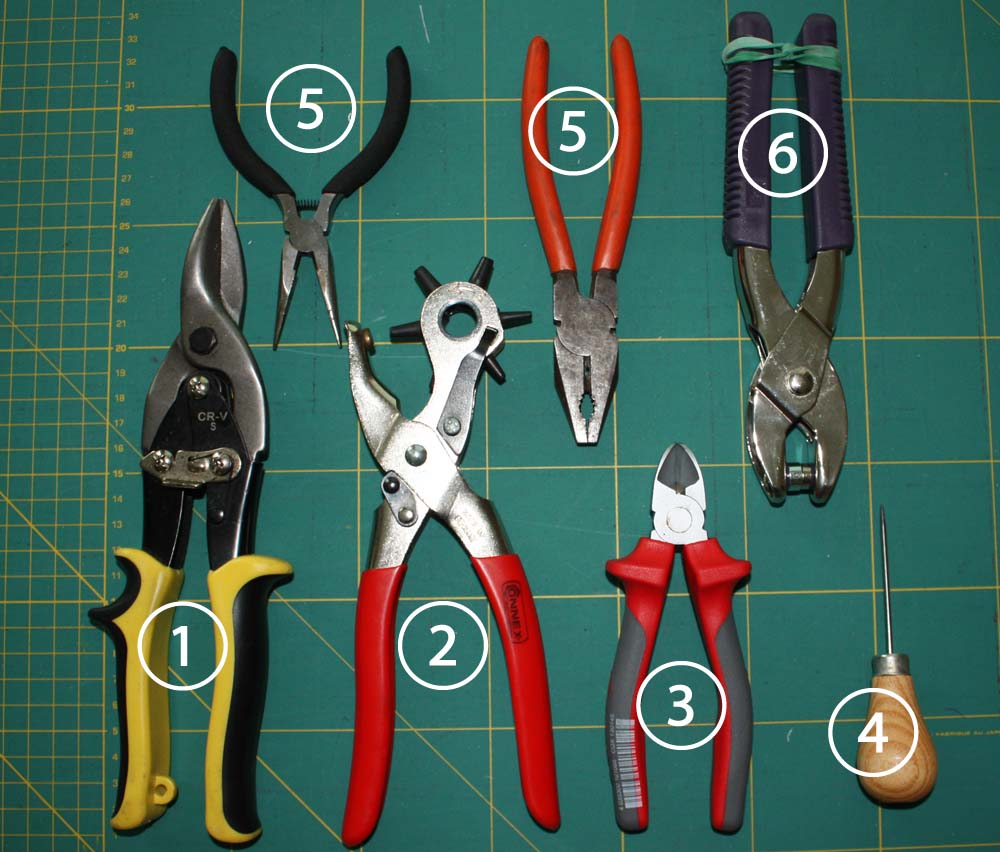
1. Tools
1) Metal shears for cutting metal boning, 2) Punch pliers, 3) Wire cutter for cutting spiral wire, 4) Awl, 5) Pliers for endcaps, 6)Tool for setting grommets 7)Grinder or rasp (optional)
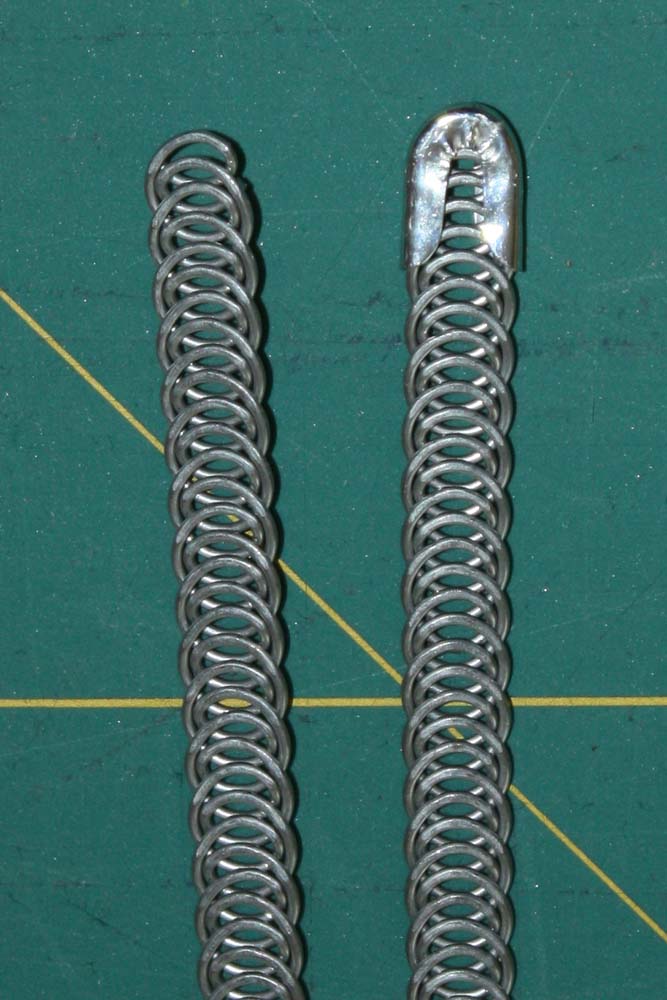
2. Boning
Today as an alternative to whalebone mainly to kinds of boning are used. One side plastic coated metal boning, the other is spiral wire. I do not recommend synthetic whalebone or stuff like Rigilene for a classic corset.
You can buy boning in different length, but also continuous. With continuous boning you can cut your boning exactly the length needed. Boning should be about 1 ¼” (3cm) shorter than the boning channel, that you can sew on your bias binding without problems.
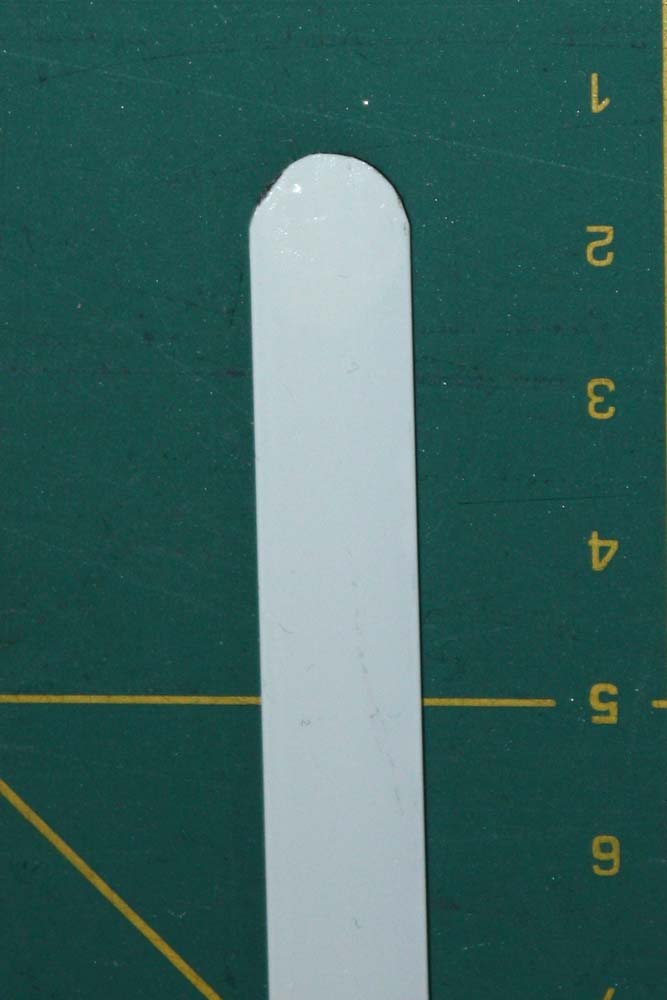
Metal boning is cut with metal shears, optionally you can bevel the corners with the metal shears or round ends with a sander or grinder.
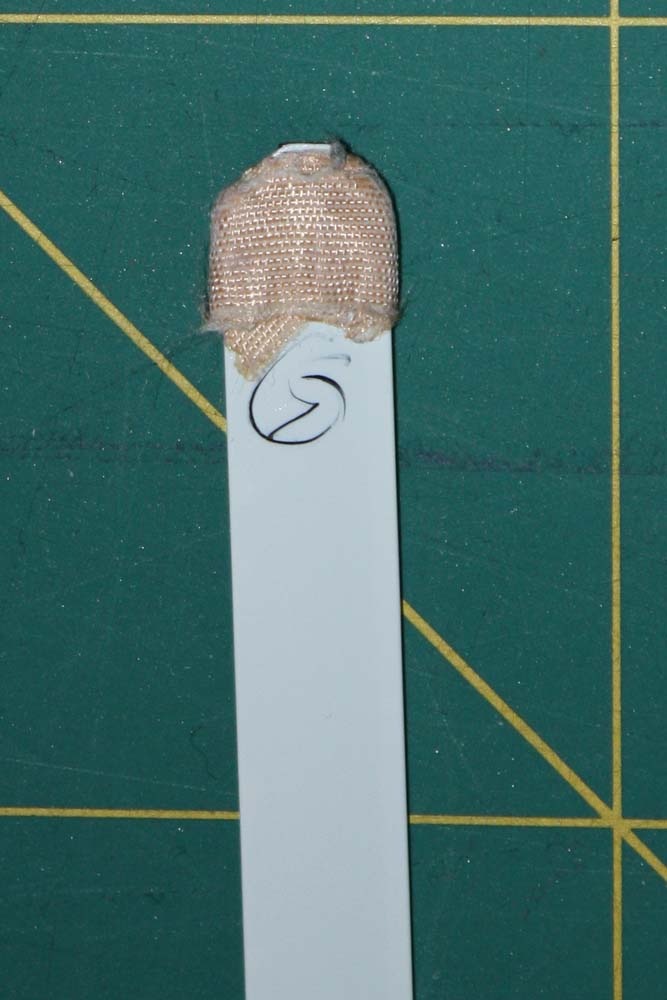
Ends must be coated otherwise they would destroy your fabric. You can buy end caps for metal bones but they slip of easily. On the internet you find a variety of tips coating the ends. I can´t recommend using adhesive tape, you can´t insert your boning easily and ends of boning can cut through the tape.
I tried coating with polymer clay, it is getting crumbly over the years and harden in the oven is a little bit tricky with longer boning. I tried coating with hot glue, but it isn´t a good option too.
My favorite is coating the ends with white acrylic lacquer. Dip ends into the lacquer about 5/8” (1,5cm) and let them dry. Turn over boning in the first few minutes some times that you won´t get beads. After drying repeat process. If you get beads that doesn´t matter, just sand them.
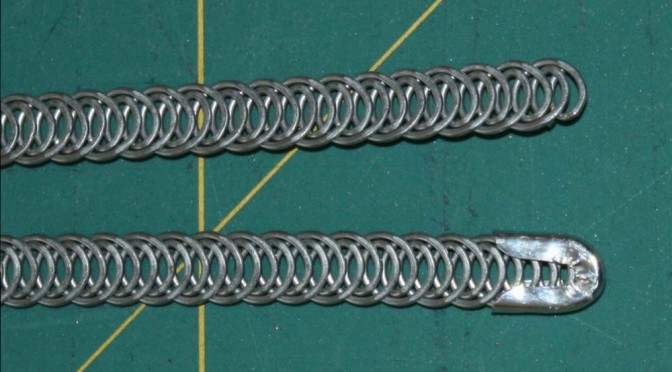
Spiral wire is cut with the wire cutter. The spiral contains of two wires twisted together, so you always have to cut two wires. For coating ends use end caps and press them to the ends with pliers.
3. Busk
You can buy busks in different lengths and widths. The narrower metal busks are more flexible and softer than the wider ones. About 1873 spoon busks appeared, narrow at the top and getting wider, like a “spoon” at the bottom. Modern spoon busks are only slightly curved, in the past they were curving into the waist achieving the desired hour glass silhouette. Spoon busks are more rigid than other busks.
The length of the busk is fixed when you do your mock-up. Always try to sit down.
4. Waistband
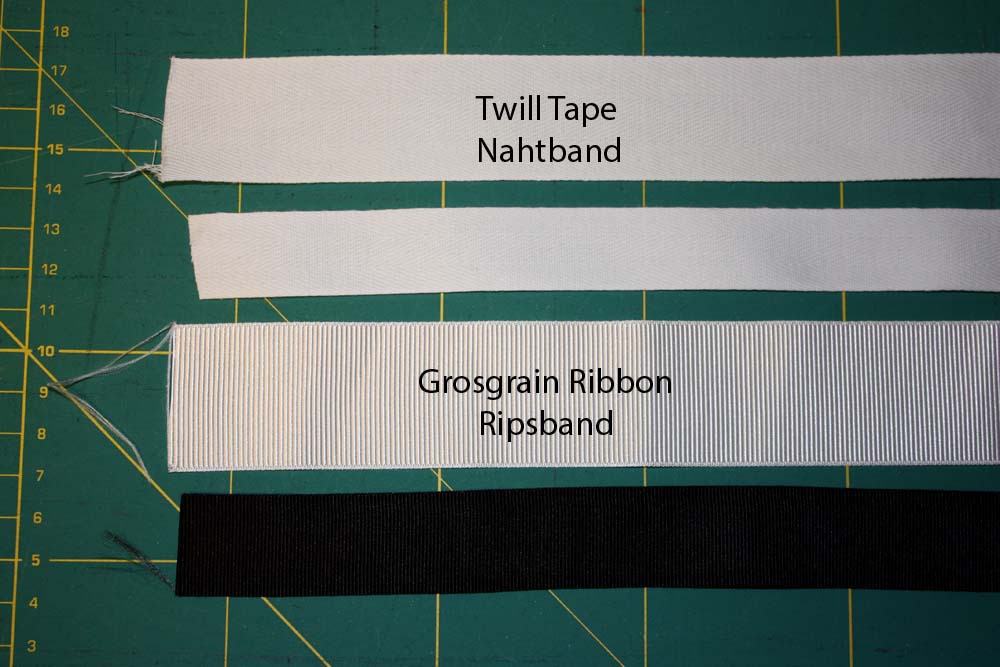
At waistline there is most tension of the corset, therefore it is reinforced with a waistband. You can choose between a cotton twill tape or a grosgrain ribbon. The band shouldn´t be too wide 3/8” – 1 ¼” (1,5 – 3cm).
Before using cotton tape iron hot to shrink.
5. Grommets and Lacing
Grommets (eyelets and washers) are inserted along the back edge for lacing the corset. You always should use eyelets with washers. I prefer to use grommets with a hole of 4mm. The holes for the grommets I cut with punch pliers. At the area of the waist grommets will be set a little bit closer together than at the top and the bottom, because of the higher tension at that area. Insert grommets with a setting tool.
Laces for corsets you can buy from cotton or polyester, ready cut or by the meter. The lace should be long enough to put on the corset comfortable. You can fuse the ends of the lacing with a lighter if it is polyester, for cotton laces you can use heat shrink tubing. Laces from polyester slide a little bit easier through the grommets, I prefer cotton lacings, because I lace up my corsets by myself.
5. Close collar facing at center back sew to collar piece, right sides together. Trim seam allowance and clip curves. Within the range of your velvet appliques sew seam allowance with a cross stitch to outer fabric, be careful not to stitch through appliques. Press collar edge so you won´t see your seam at the outside.
6. Hem:
For the hem facing cut a strip of fabric 3 1/8” (8cm) wide, 67” (170cm), size 18-26 (EU 44-52) 79” (200cm) Long. Pin lining and outer fabric of collar at hem line, right sides together, fold front edge seam allowance towards lining. Fold in seam allowance of the loose end of collar facing. Pin facing strip to hem line, at collar seam overlap collar facing.
Sew hem, don’t catch lining of pleats. Trim seam allowance, clip corners and turn right side out. Fold in upper seam allowance of strip and sew with a felling stitch just to lining, spread fullness when needed. Press pleats again.
Fold in seam allowance of collar facing and sew to collar seam. Lay excess fabric to a little fold at bust point.
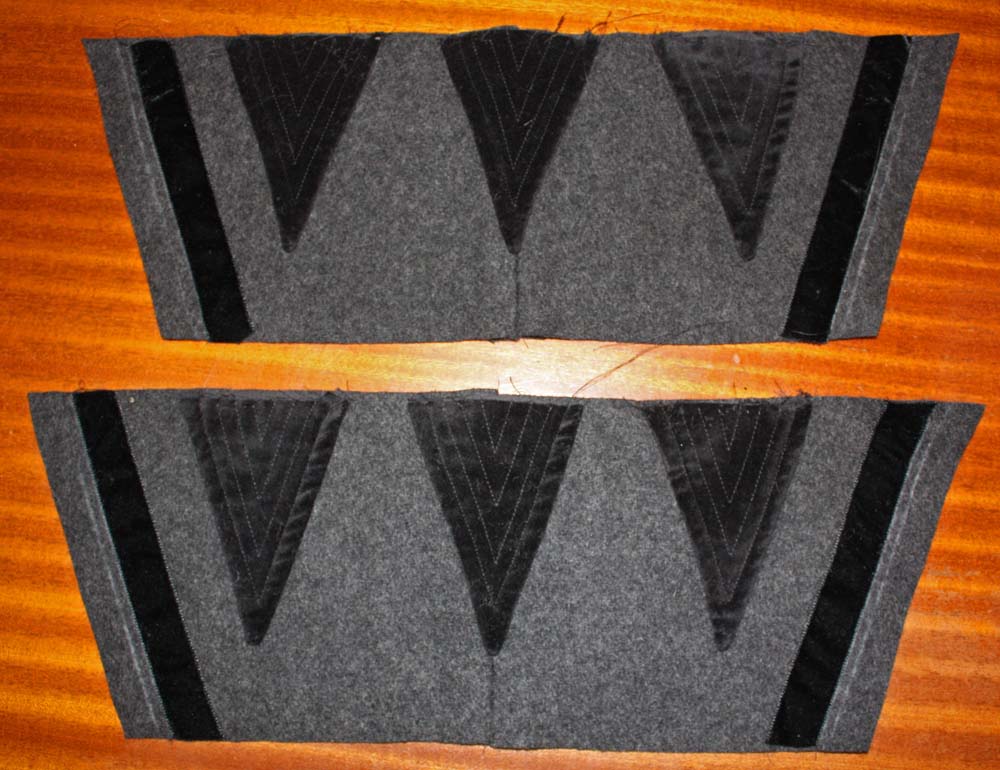
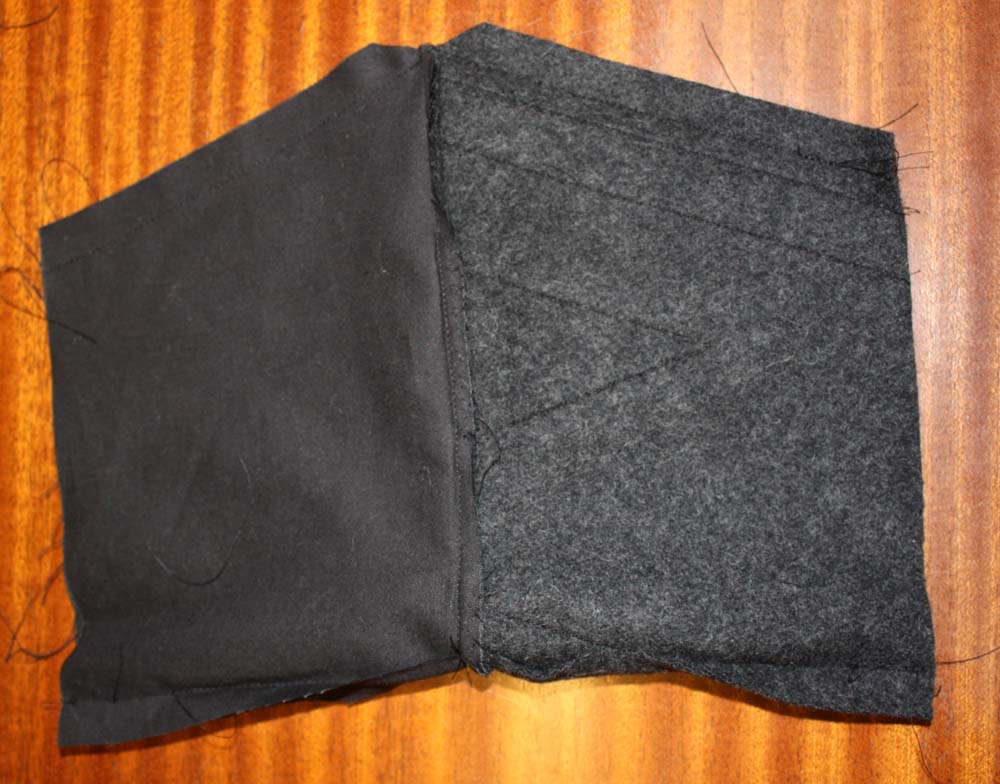
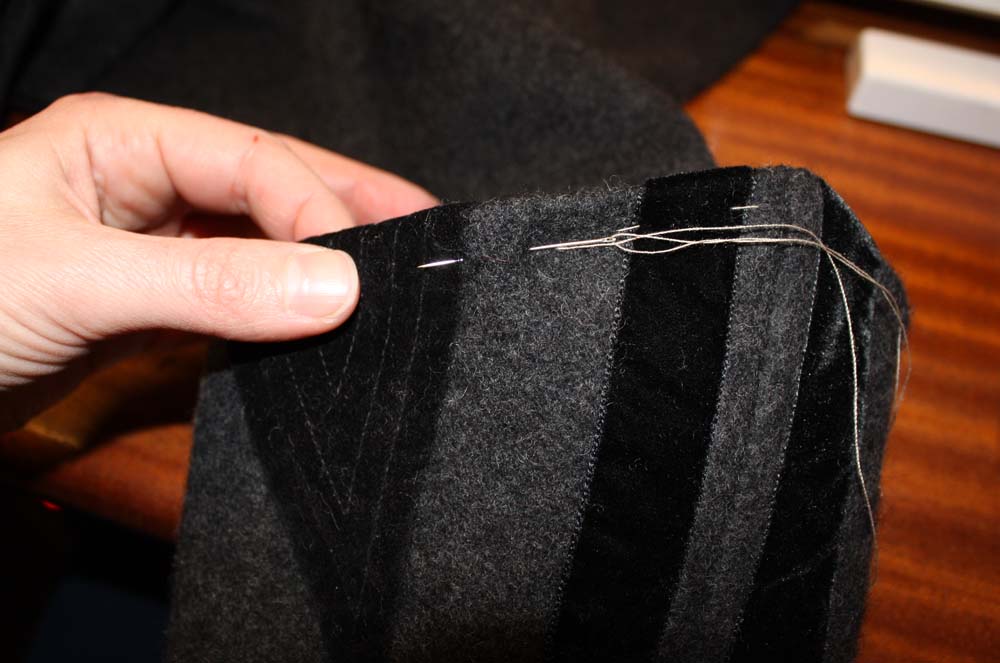
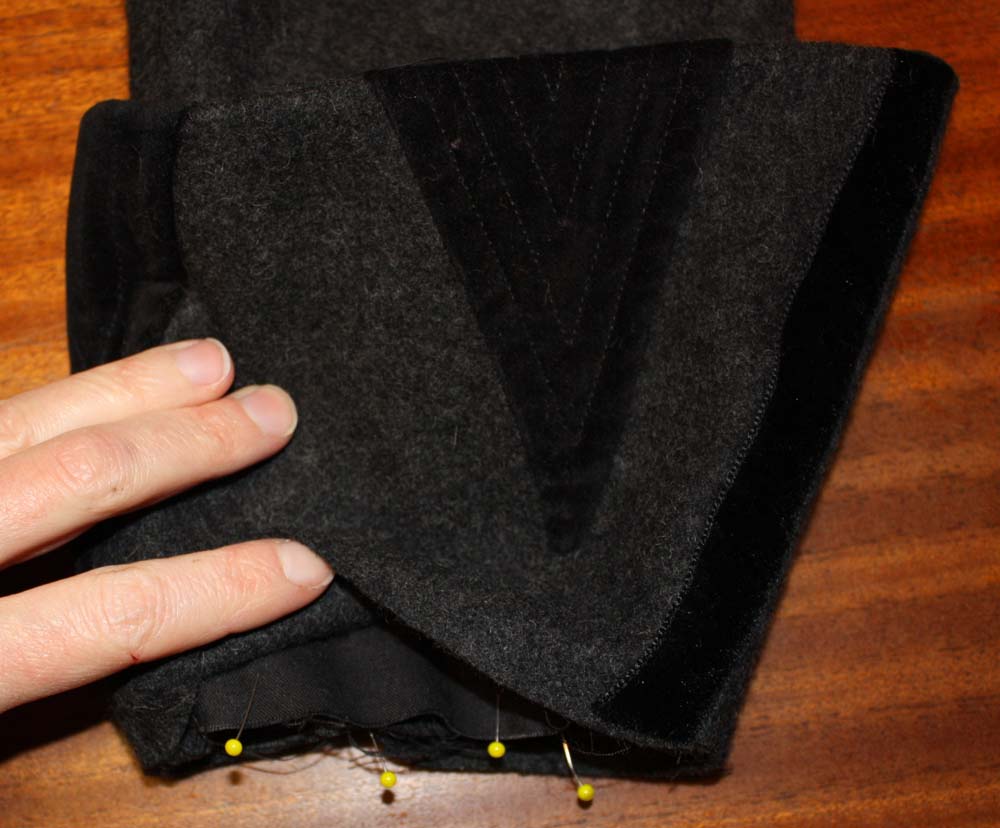
7. Close back seam of sleeve, make gathering stitches at sleeve head. Close front seam, press. Mark and sew velvet appliques to cuff as described before. Close side seam of cuff and cuff lining. Sew cuff to cuff lining at upper edge, right sides together, trim seam allowance. Turn inside out, press edge so you can´t see the seam from outside. At velvet appliques fix seam allowance with a cross stitch to the outer fabric like you did before at the collar.
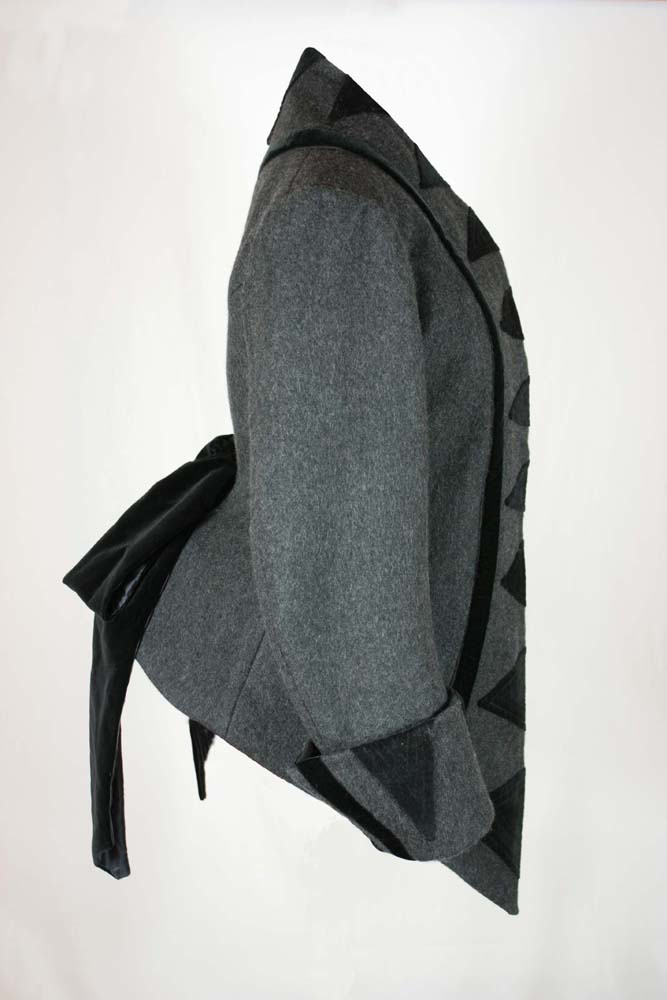
Sew cuff lining to cuff. Trim seam allowance exactly to 3/16” (1/2cm), fold cuff hem neatly to the inside of sleeve and stitch down (see profile)
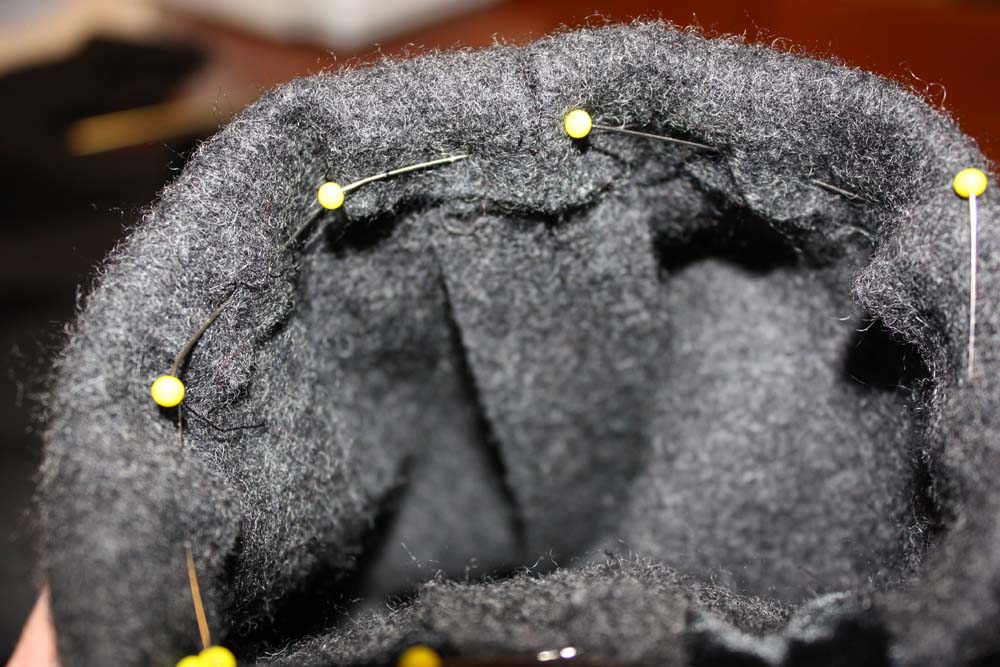
Set in sleeve according marks. With a modern sleeve you will spread most of the fullness to back armhole and sleeve head. This is a Victorian sleeve, at the back armhole insert the sleeve quite plain, spread the fullness at the sleeve head between shoulder seam and forearm pitch. Sew sleeve lining and insert to sleeve. At the armhole attach at seam allowance. At hem fold in seam allowance and sew to hem allowance of cuff. Cover with a velvet ribbon.
8. Sew on Hooks and Eyes, sew velvet placket to the inside of left collar piece between first and last hook. Measure waistband and sew to seam allowance of center back, sew on hooks and eyes in front.
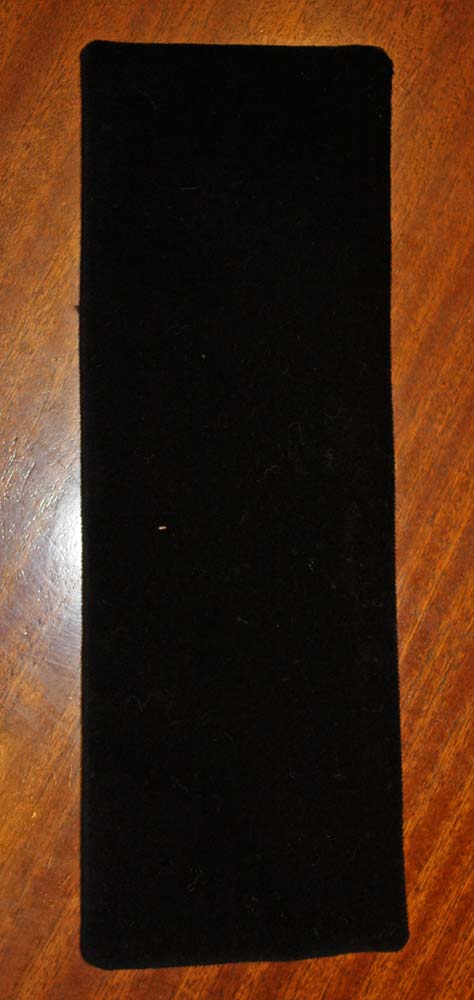
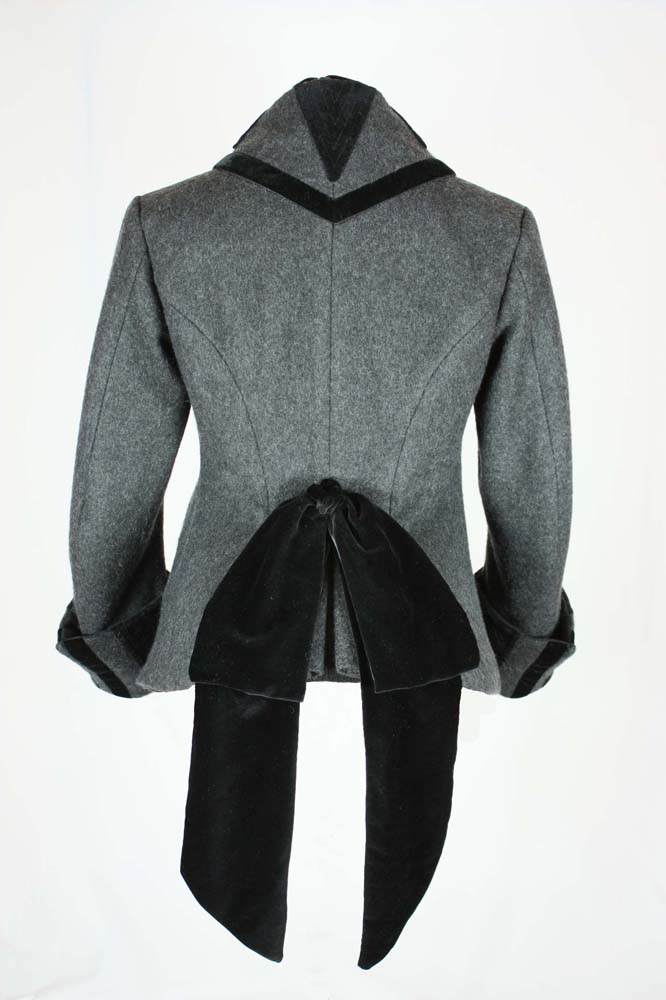
9. Face stripe of velvet 79” x 6” (200 x 15cm) with sateen lining, bevel ends at an angle of 45°, make a bow and sew to center back.