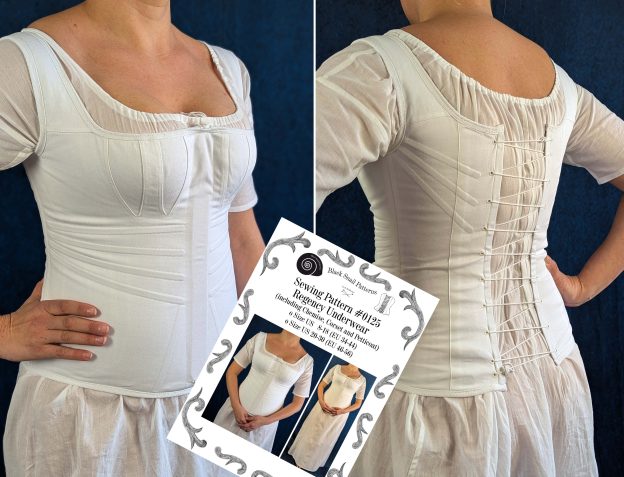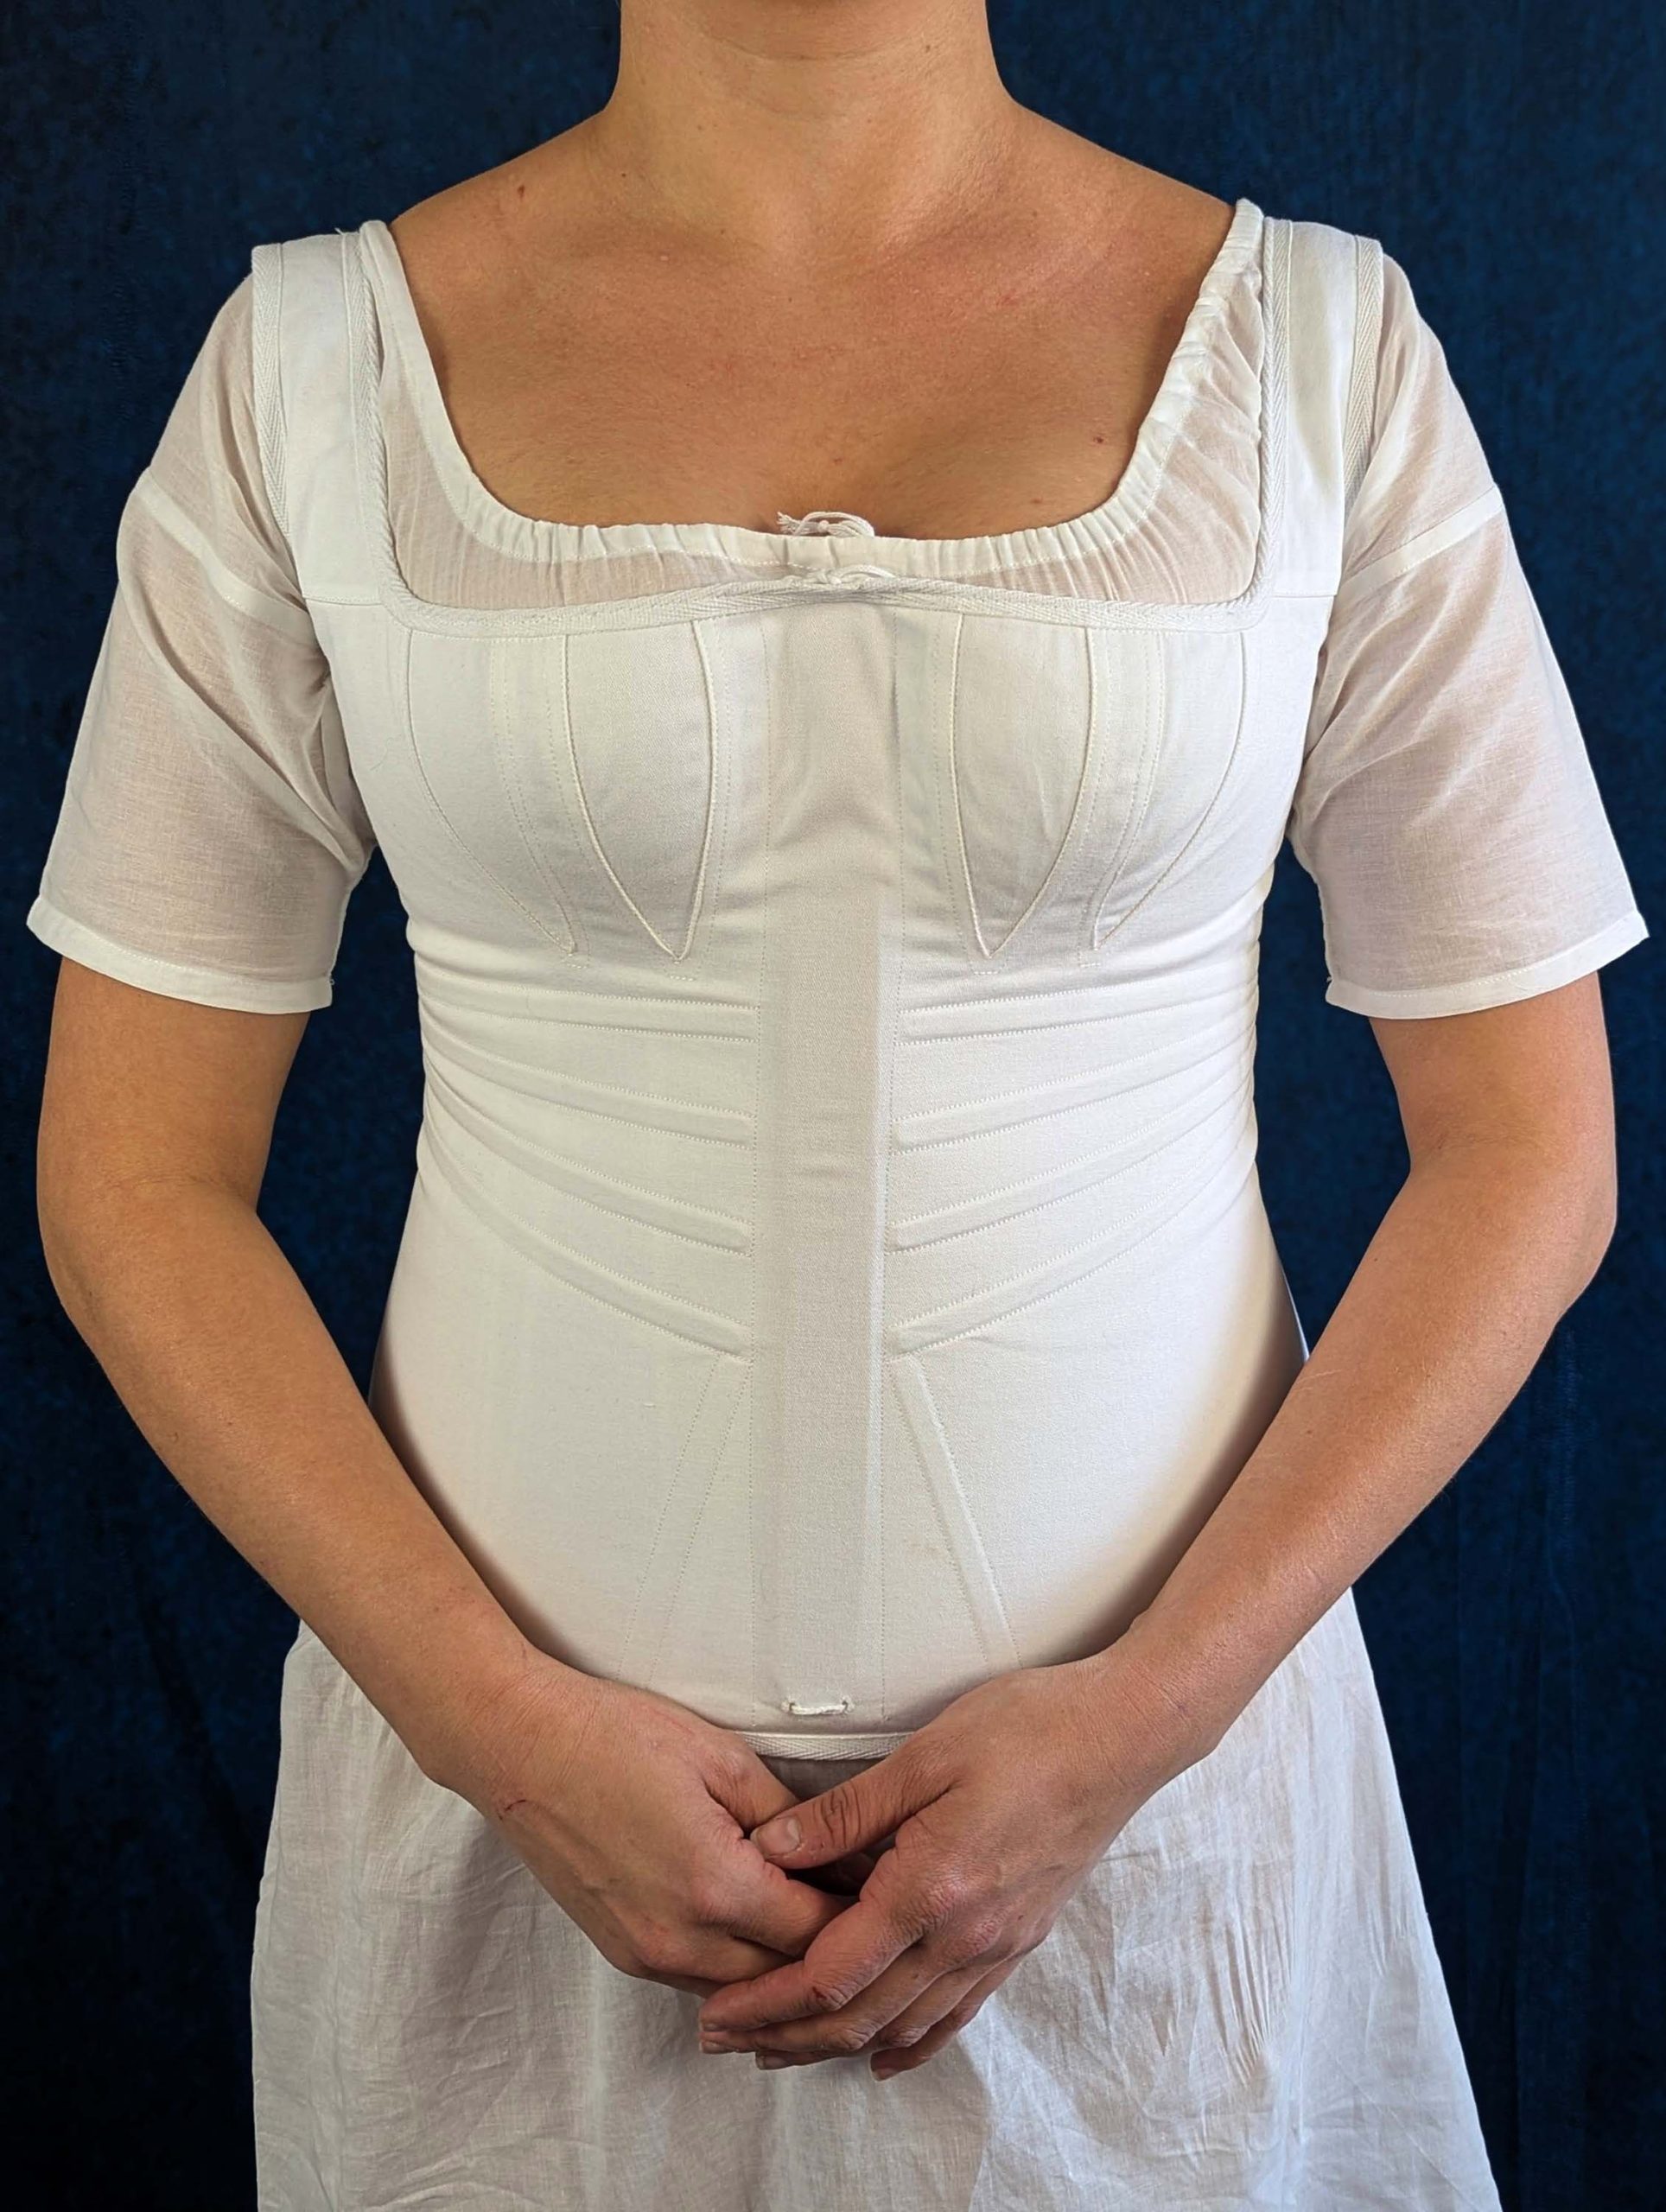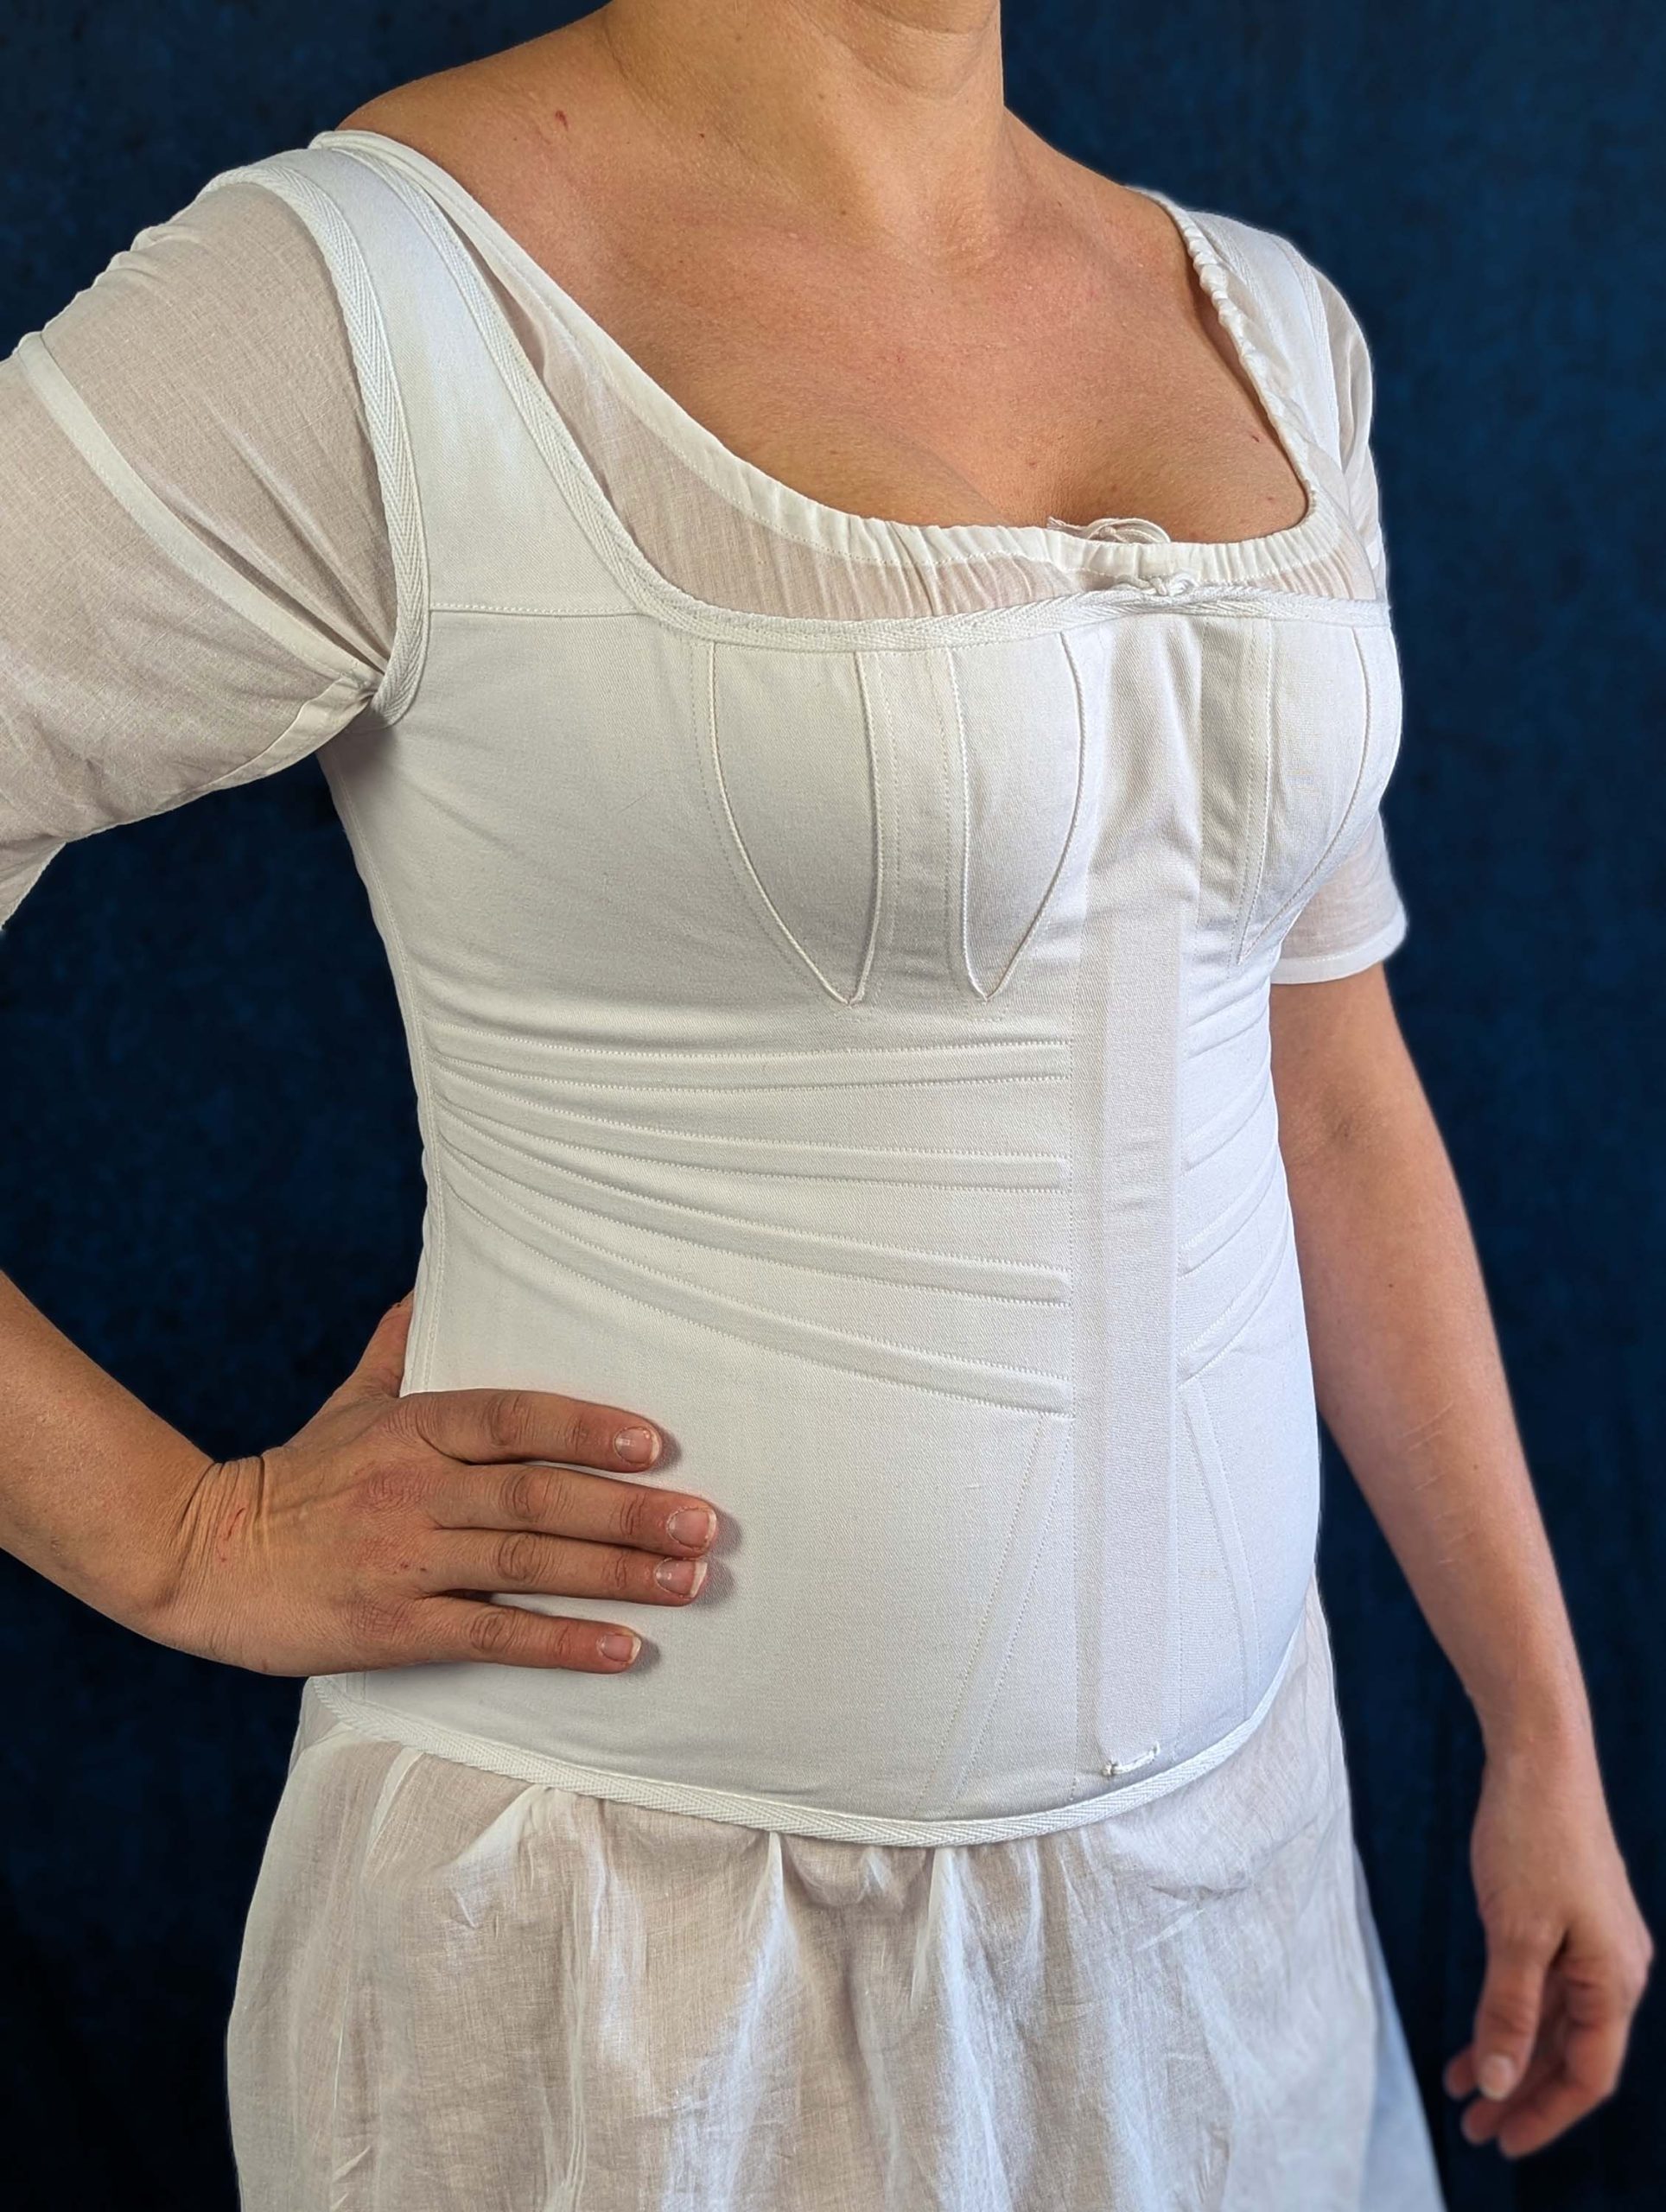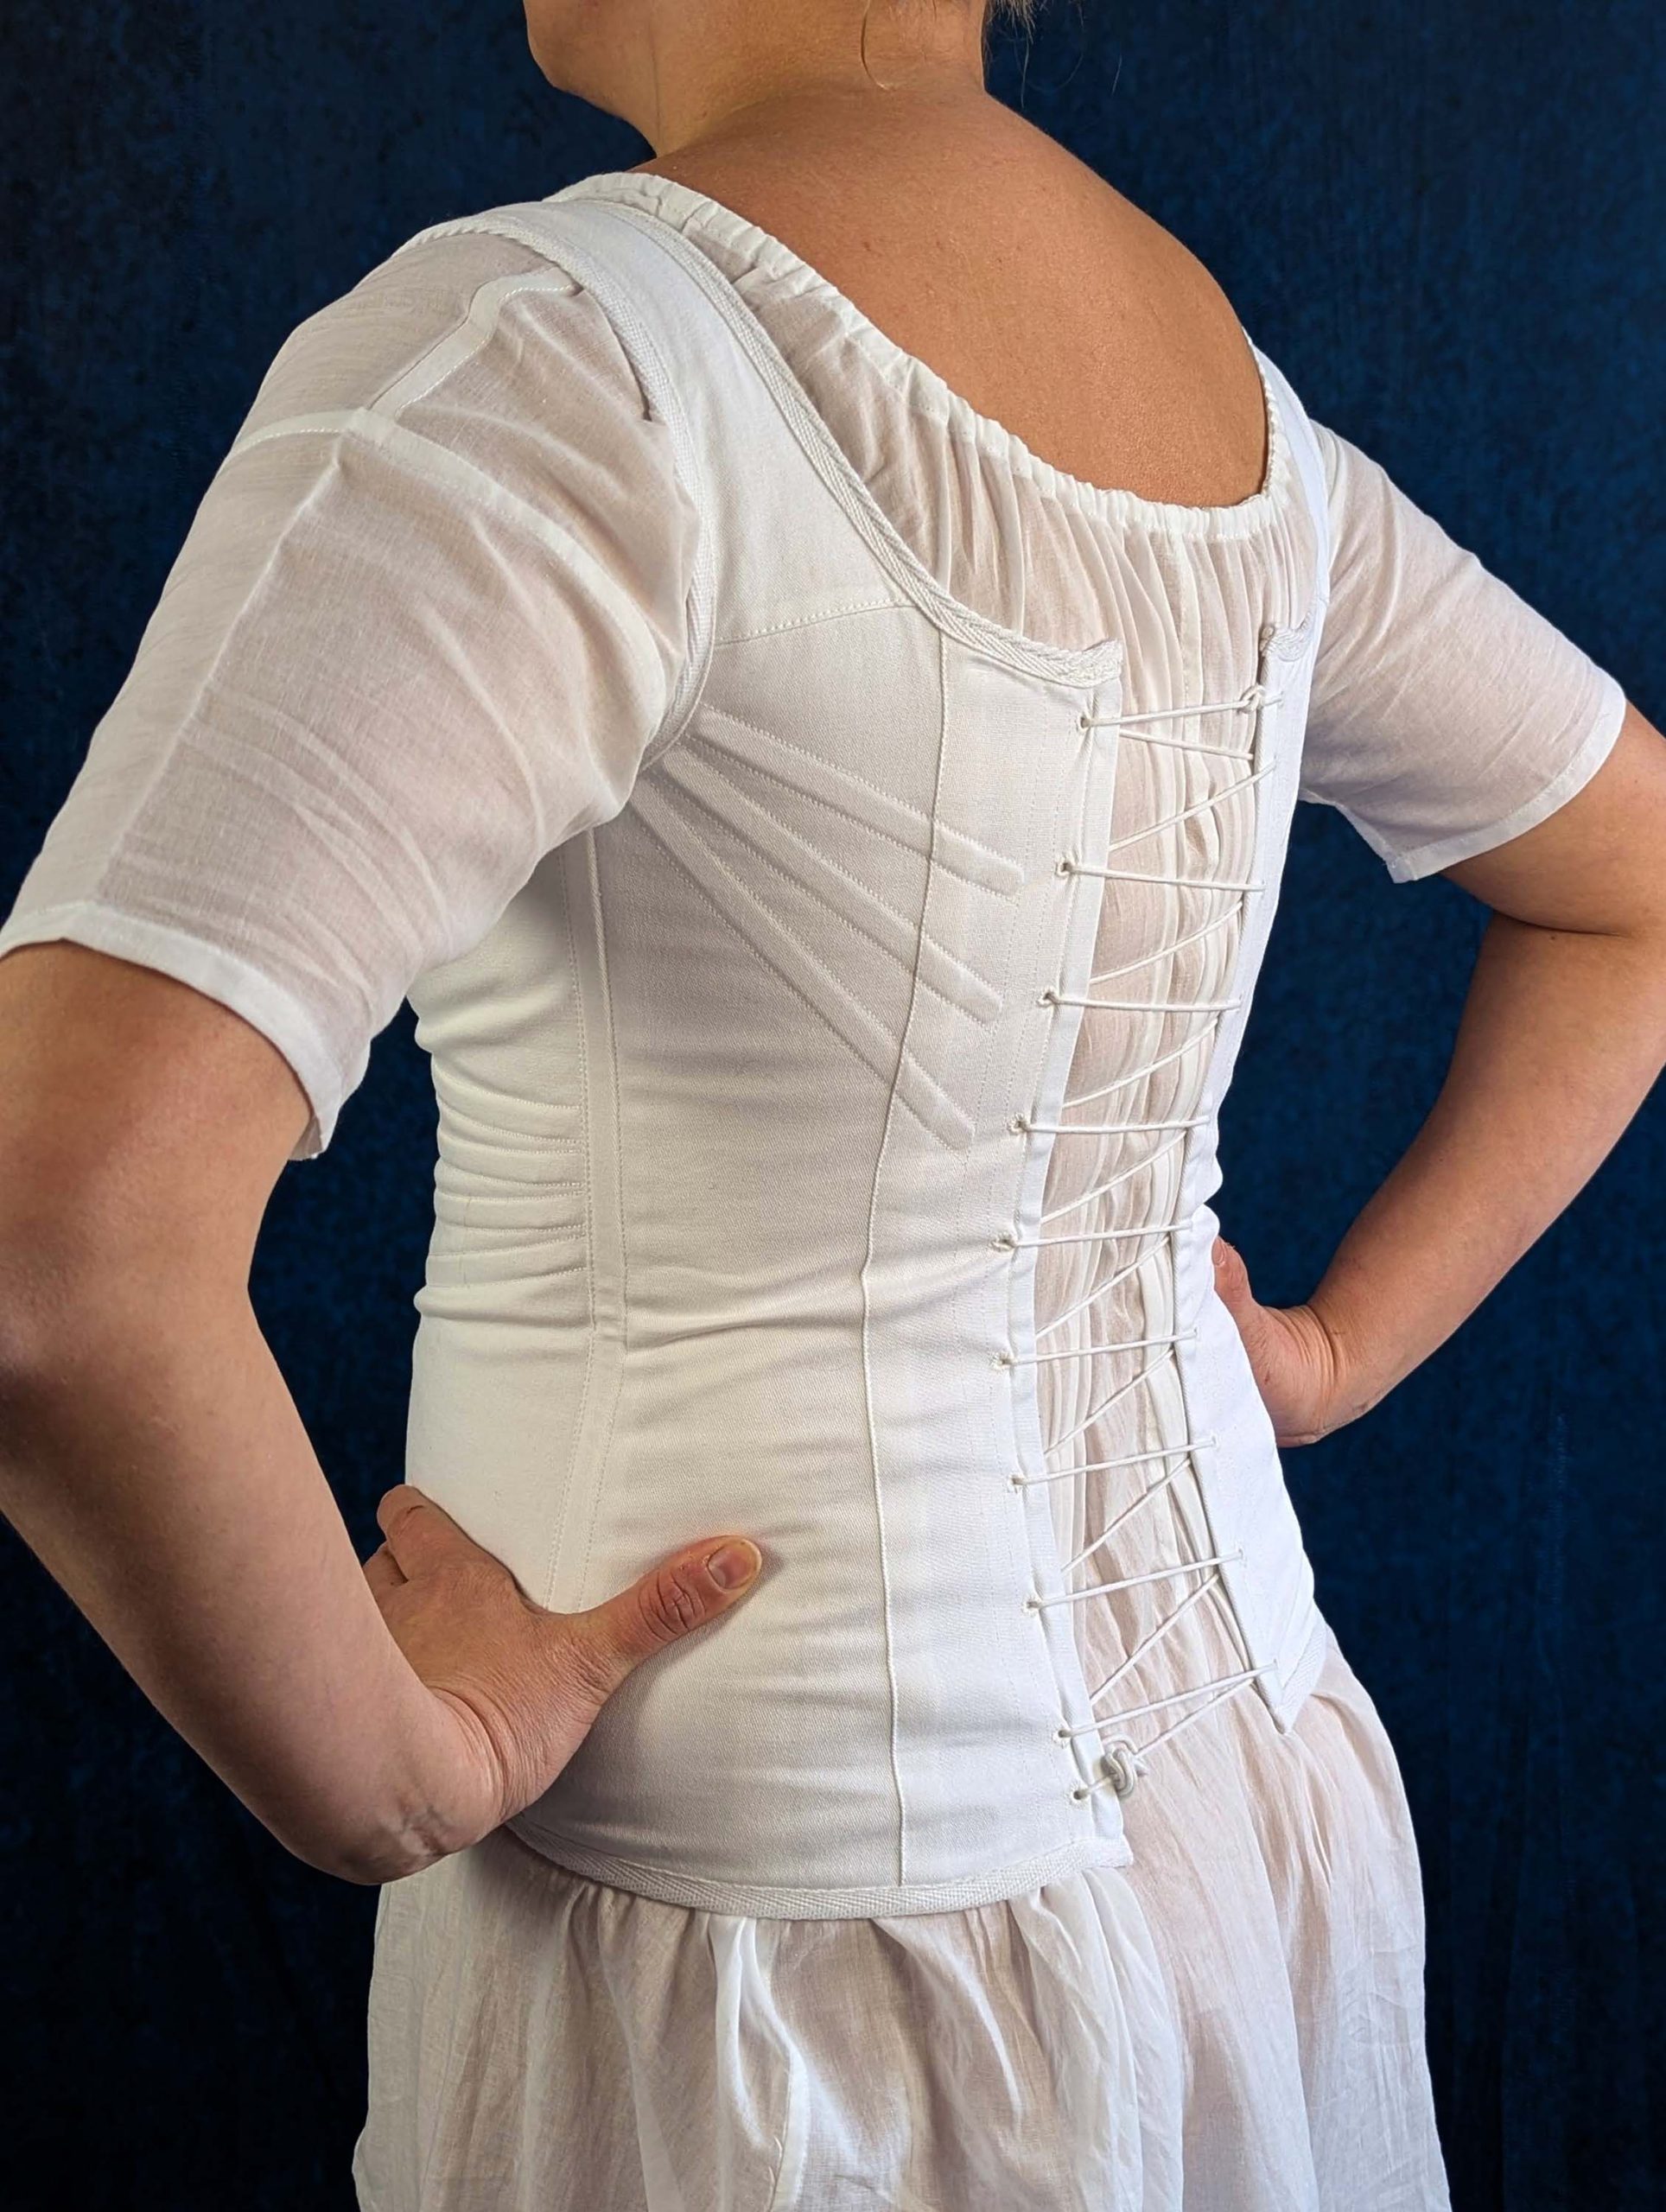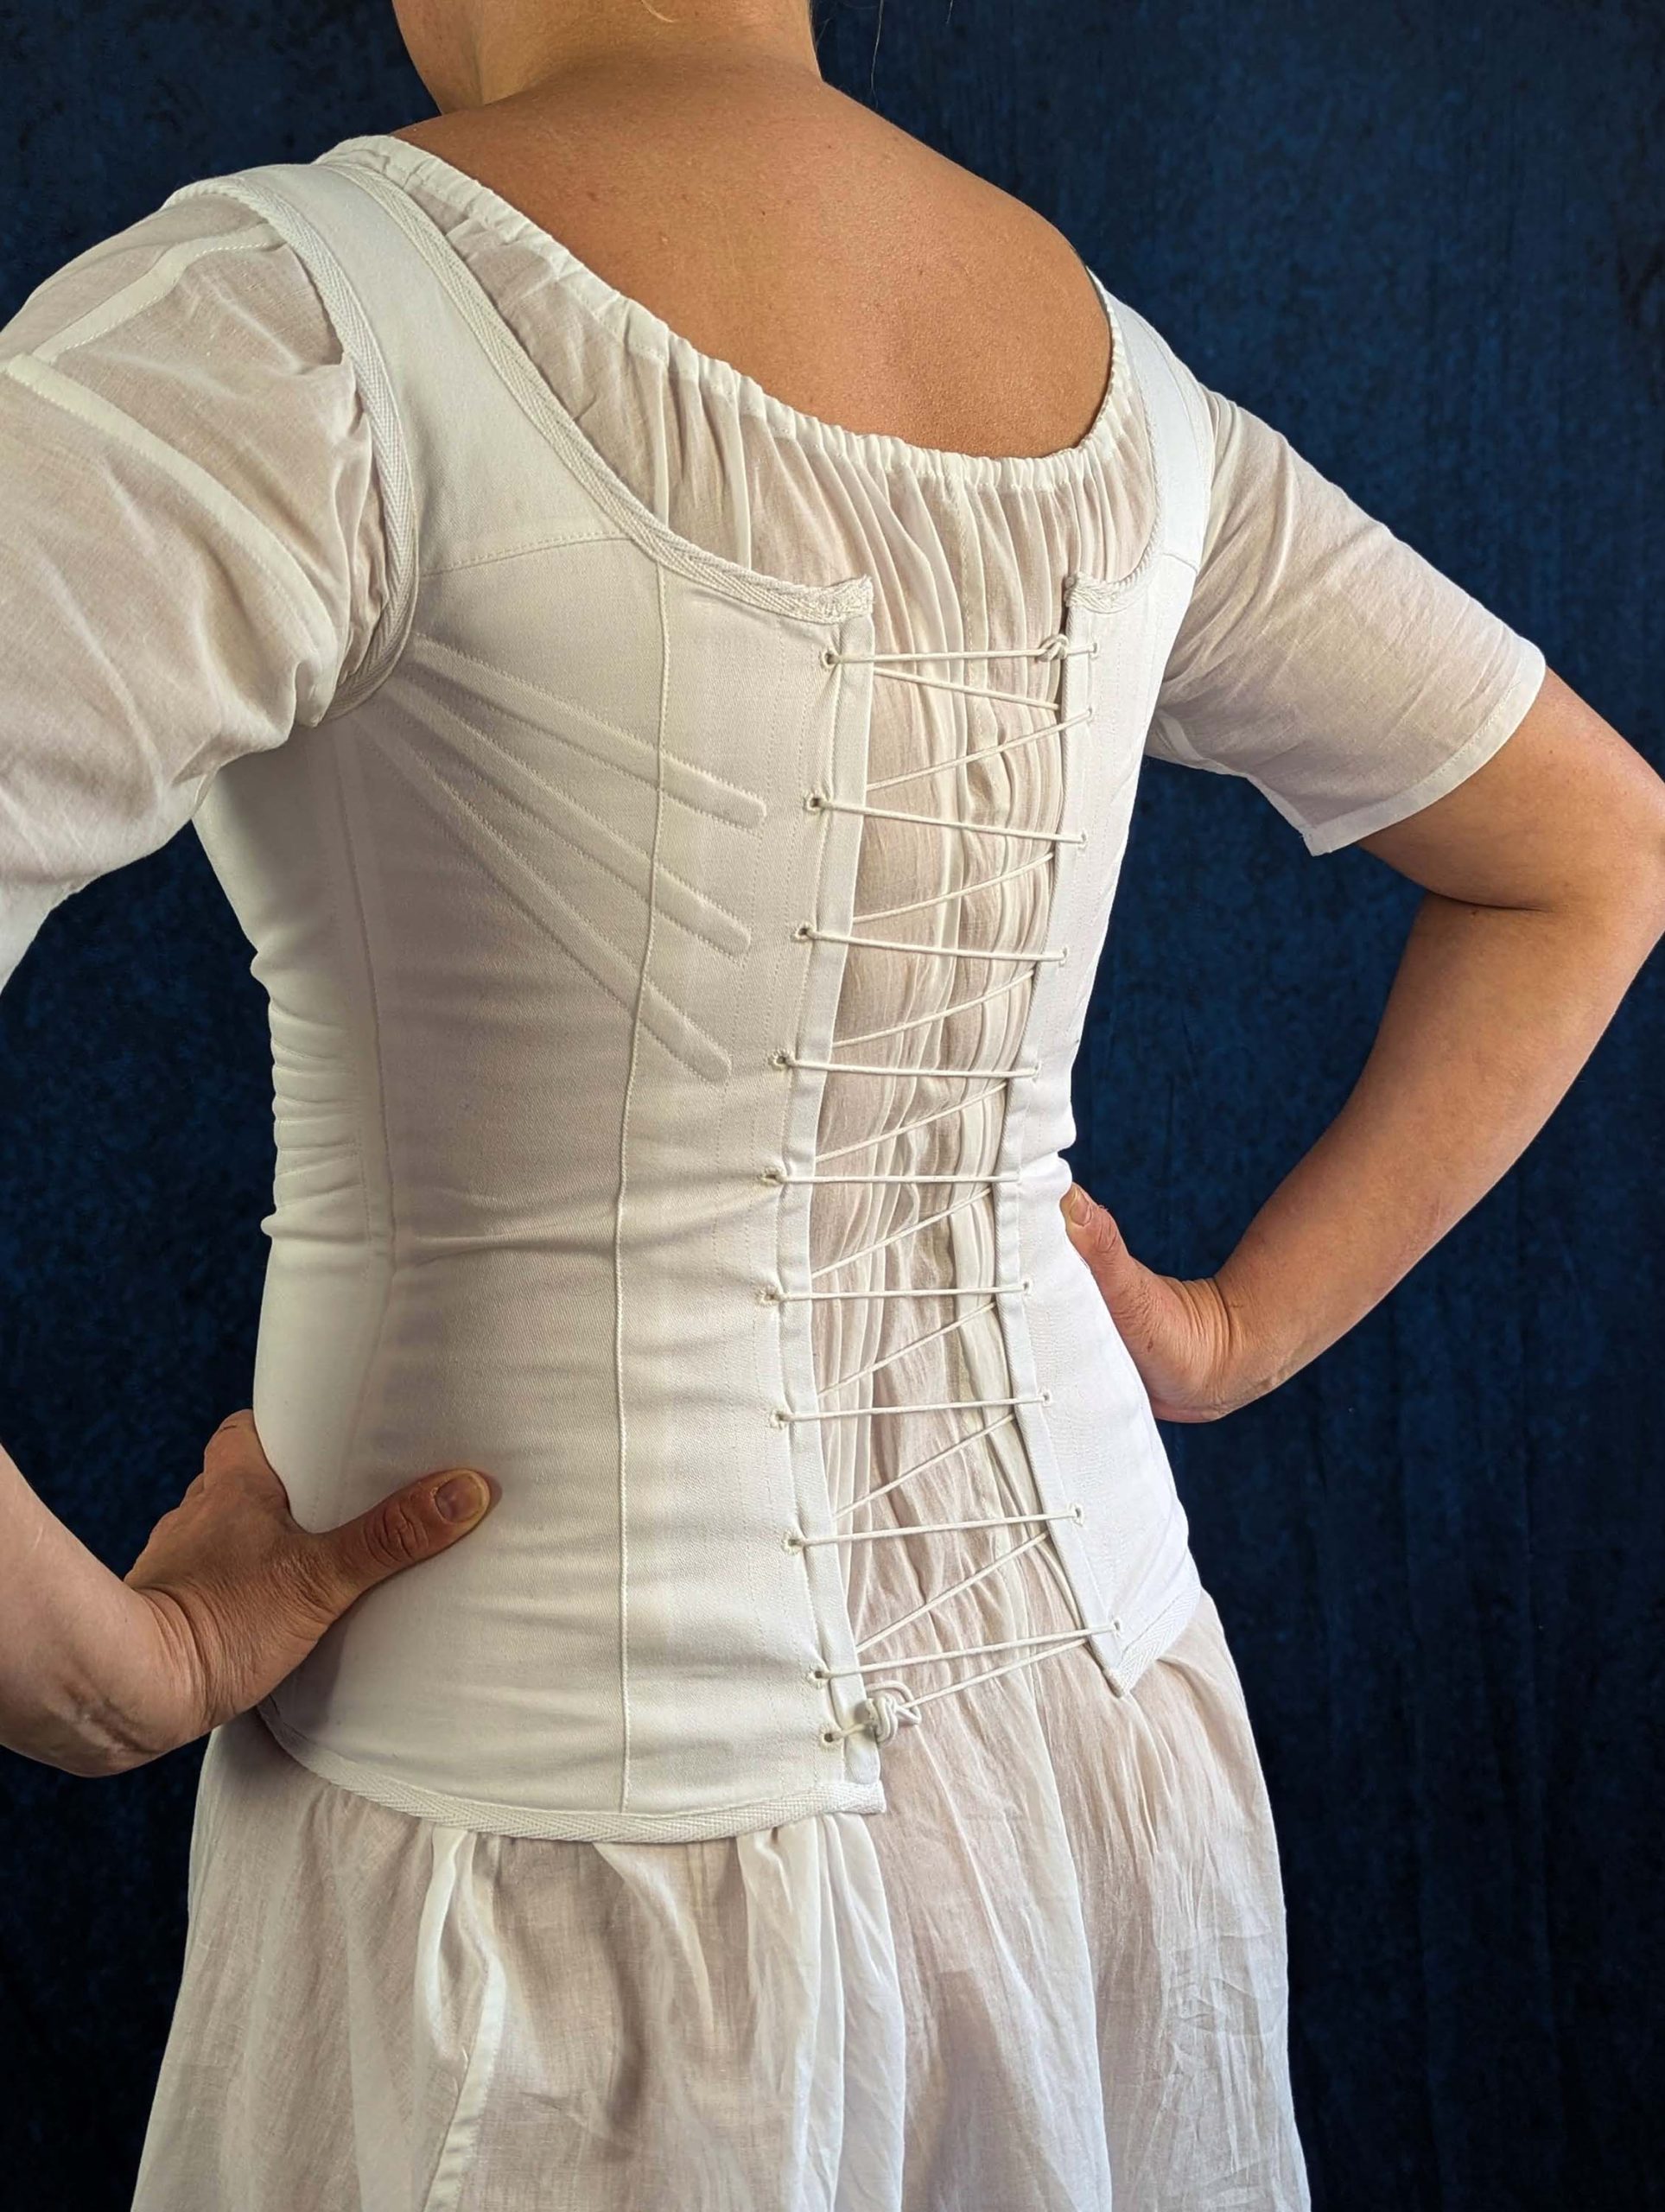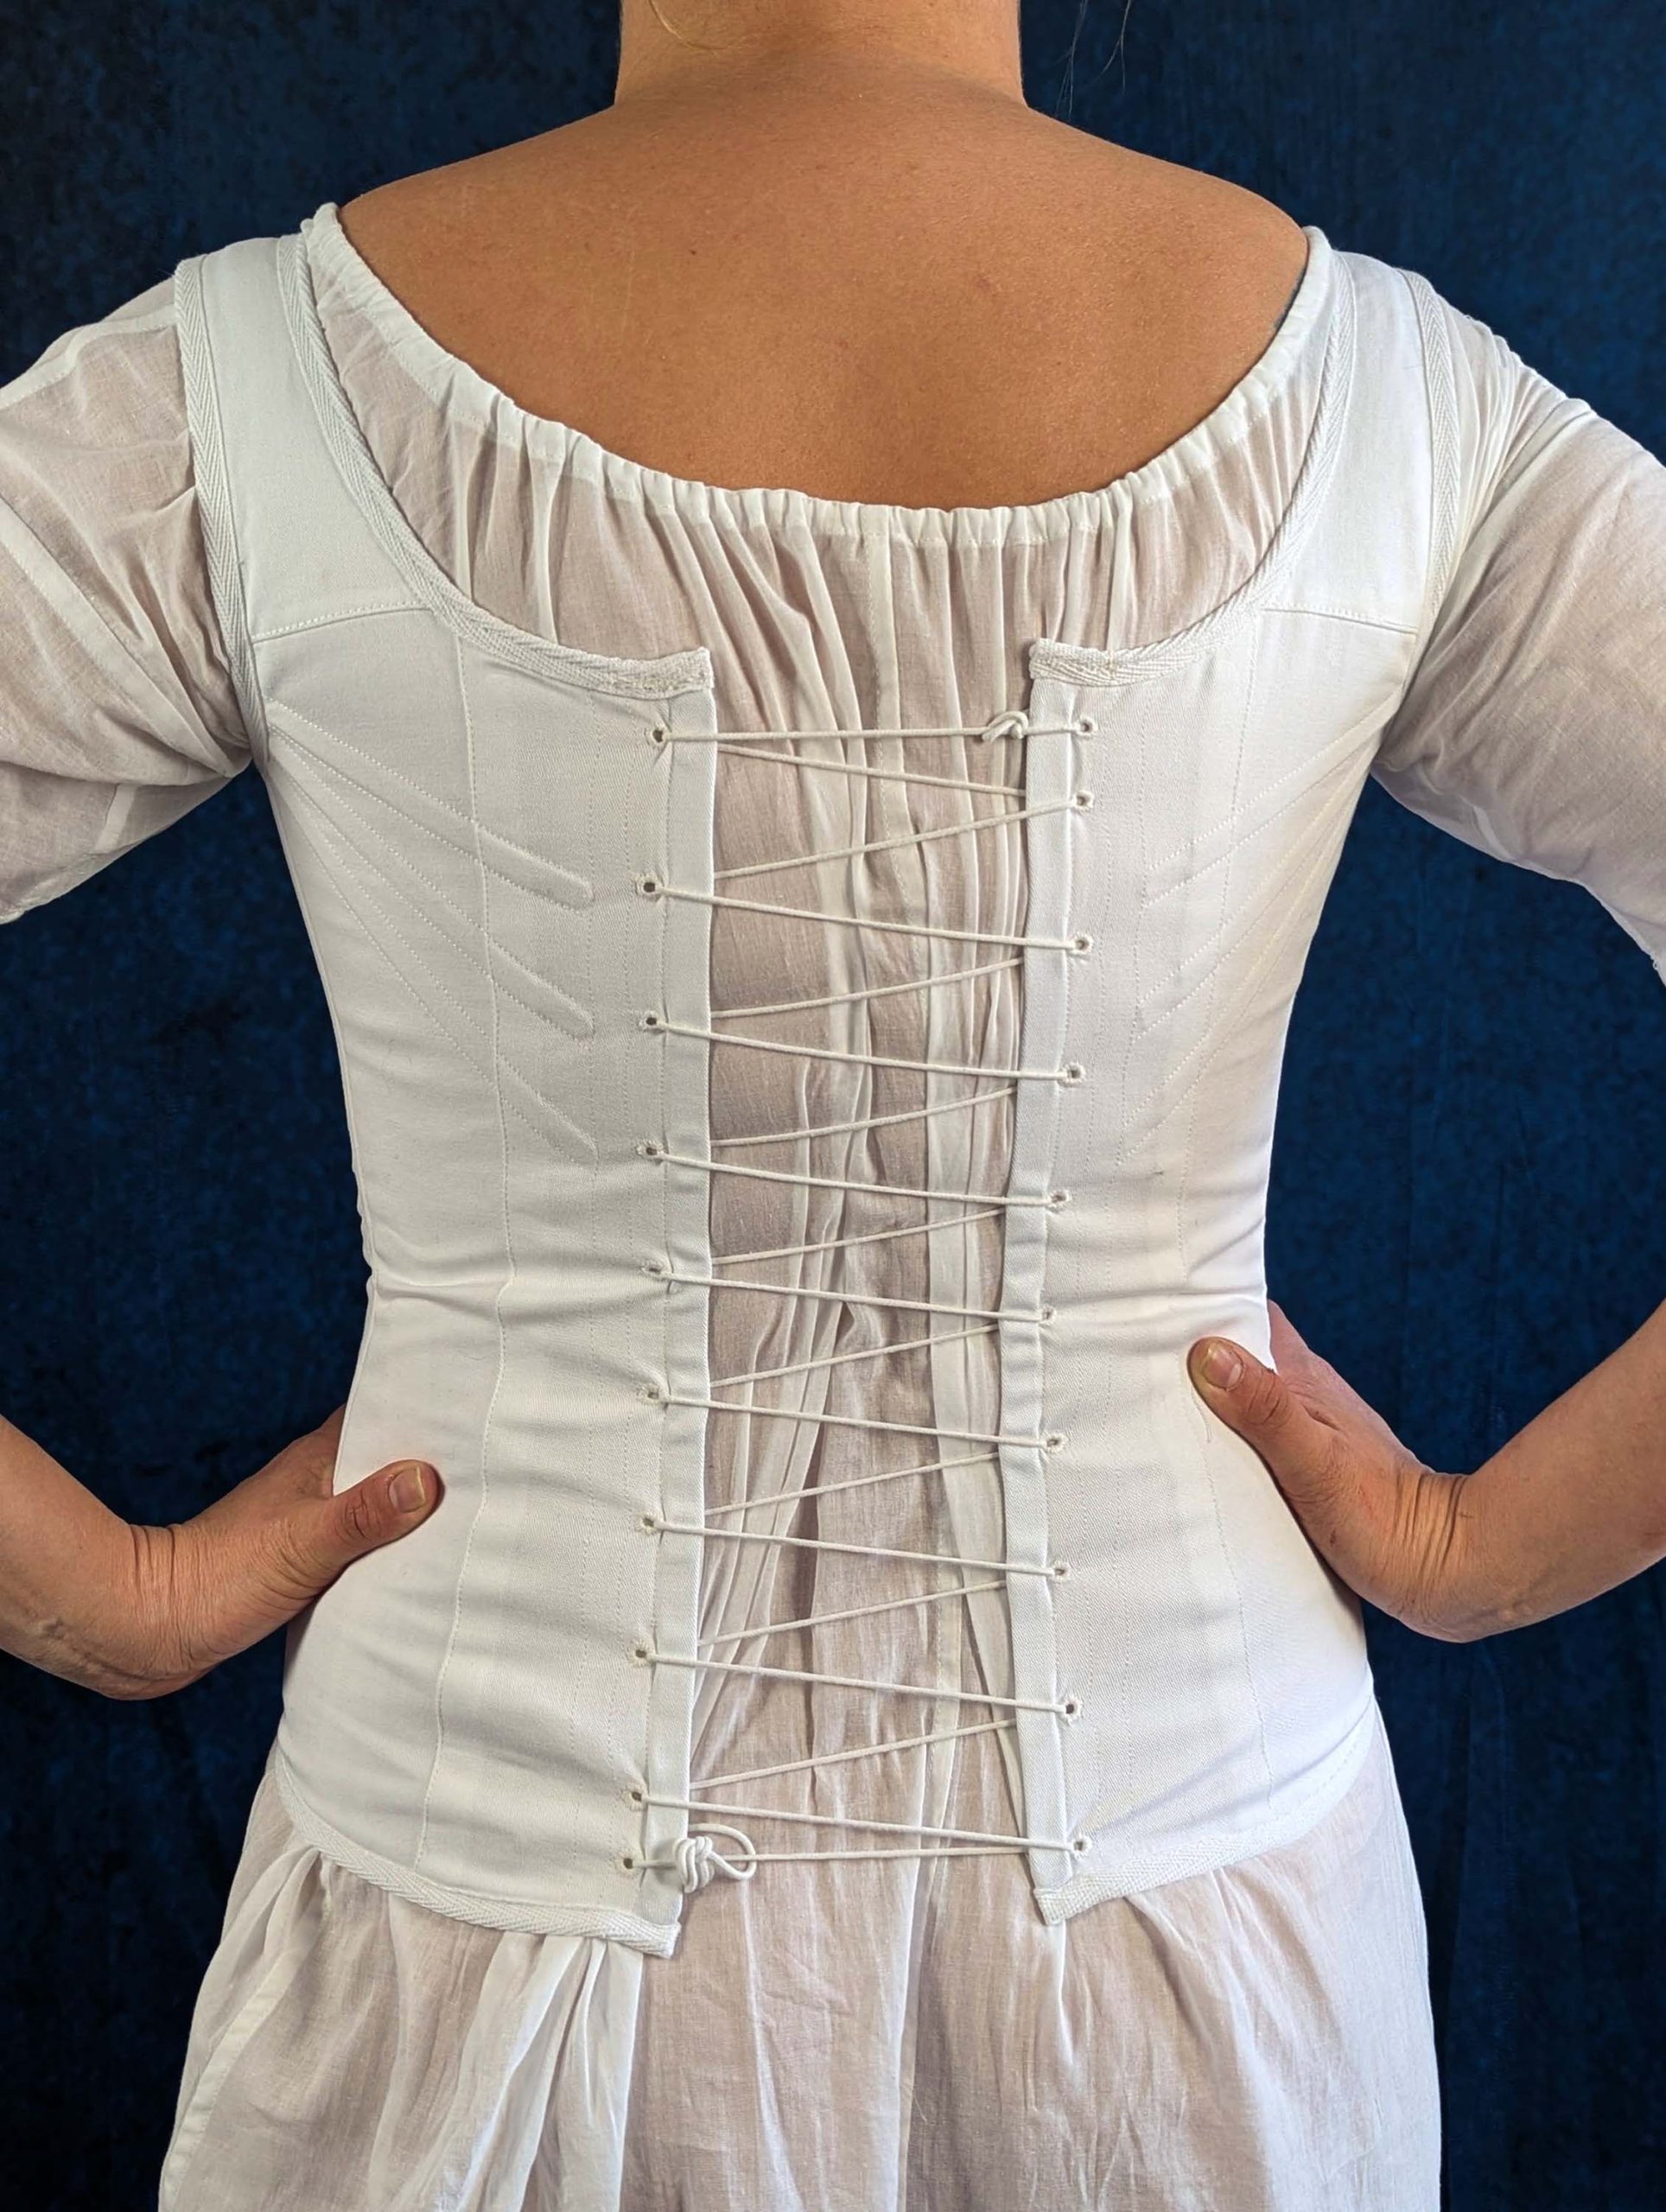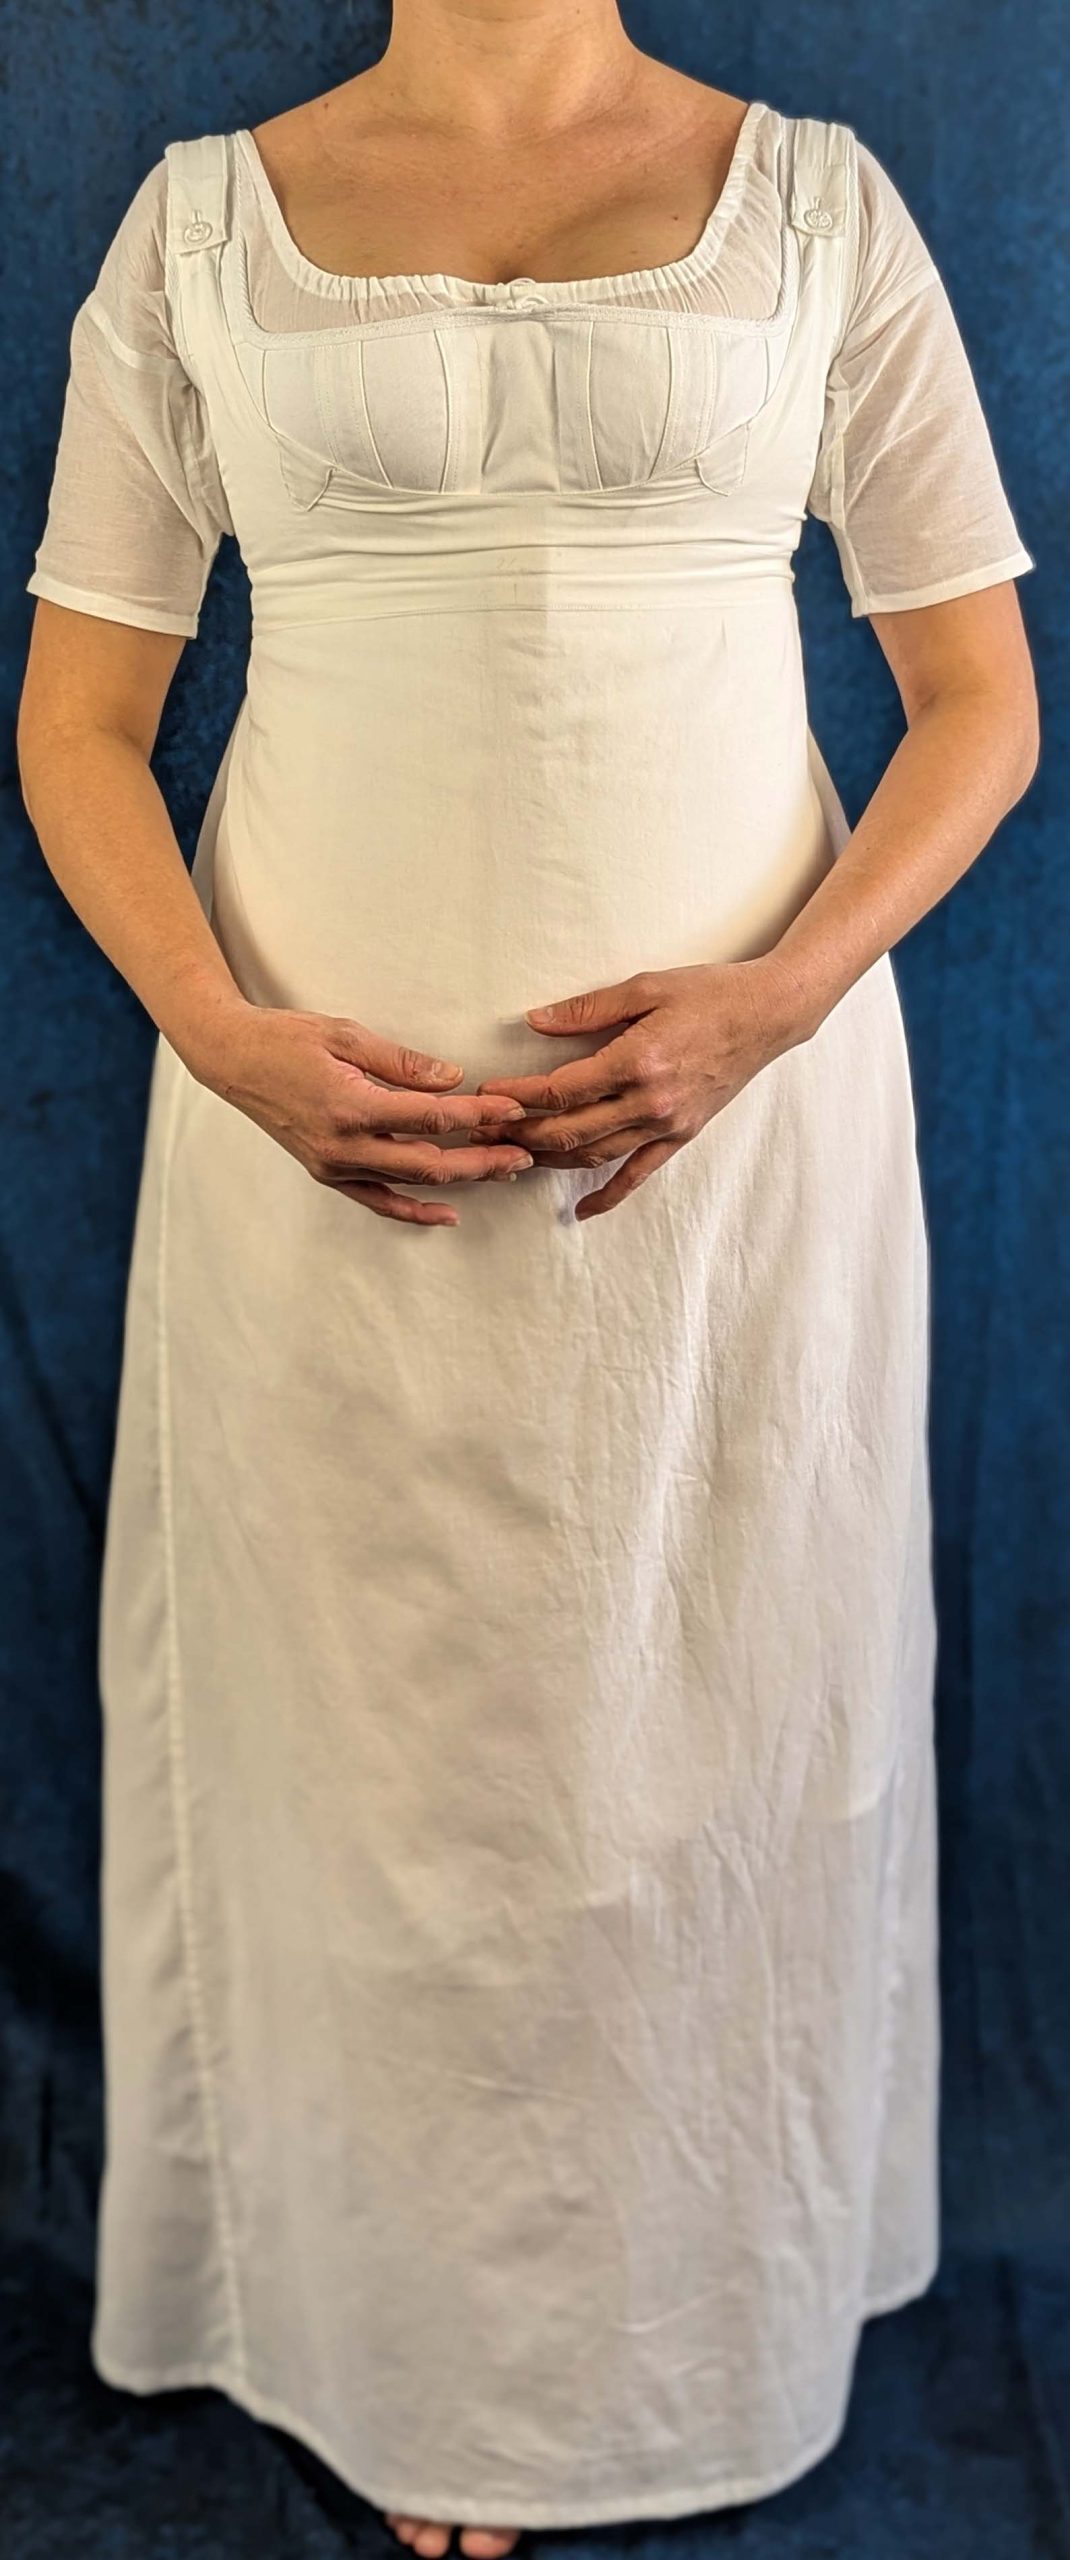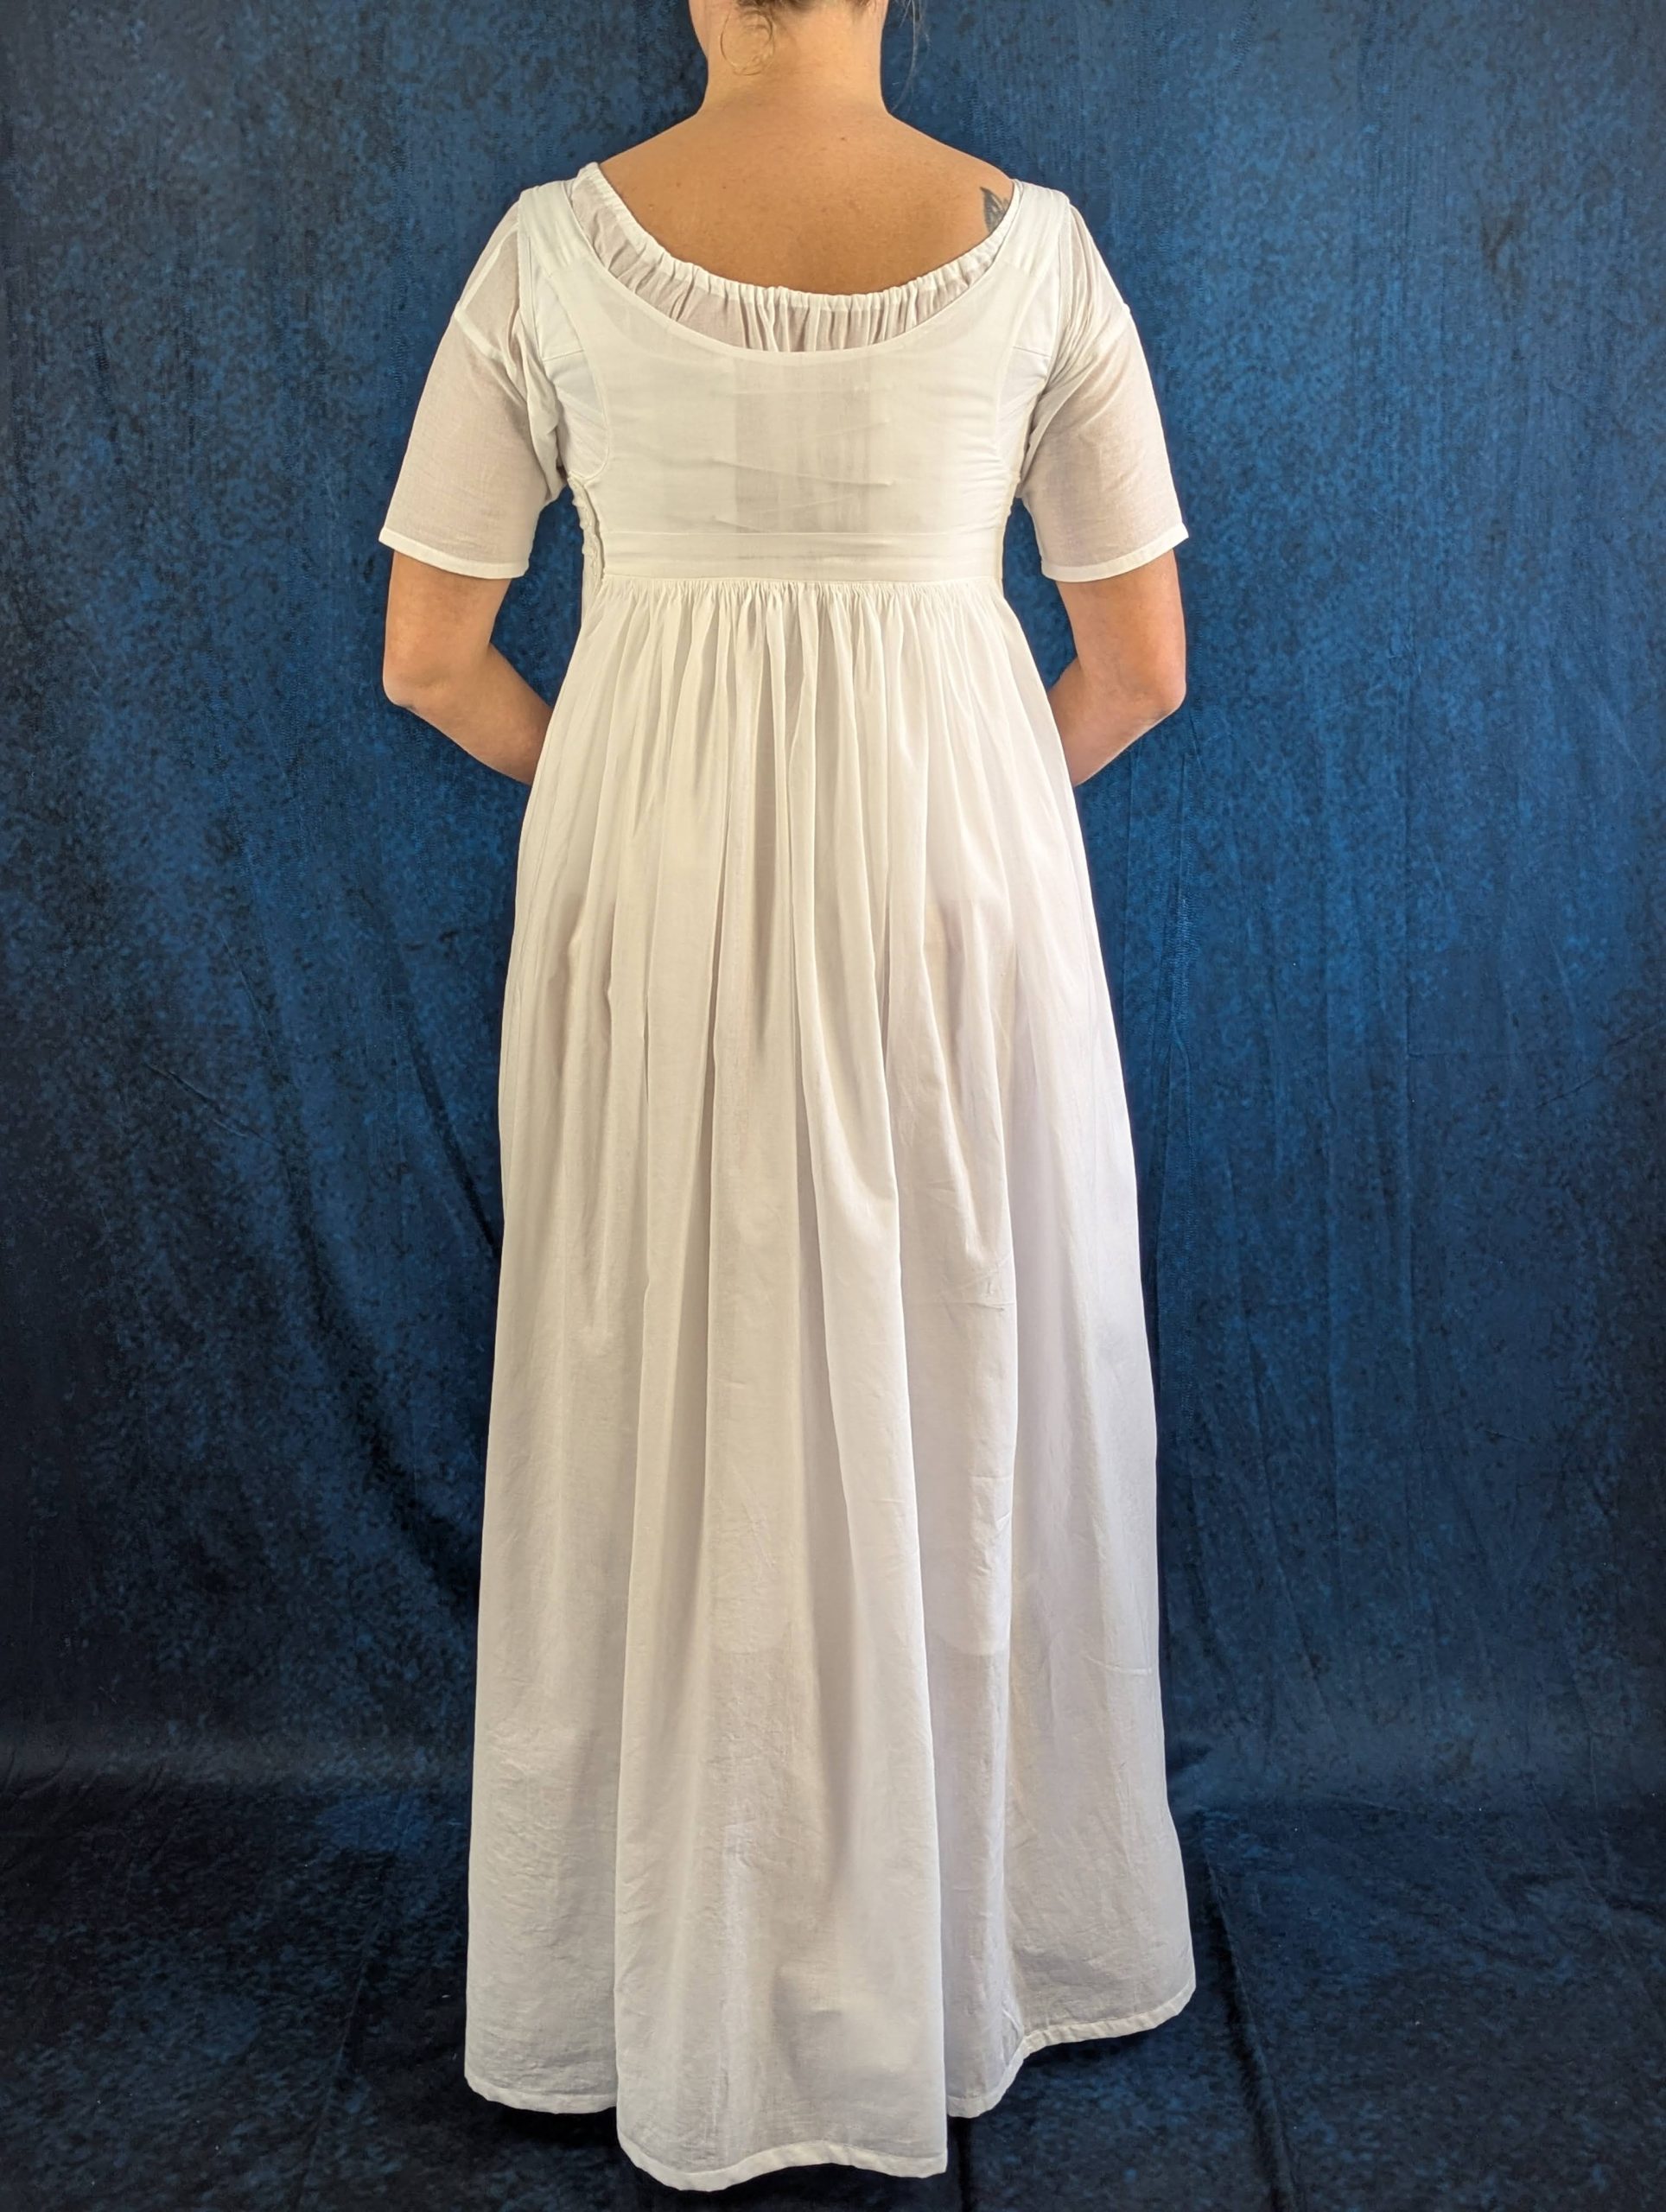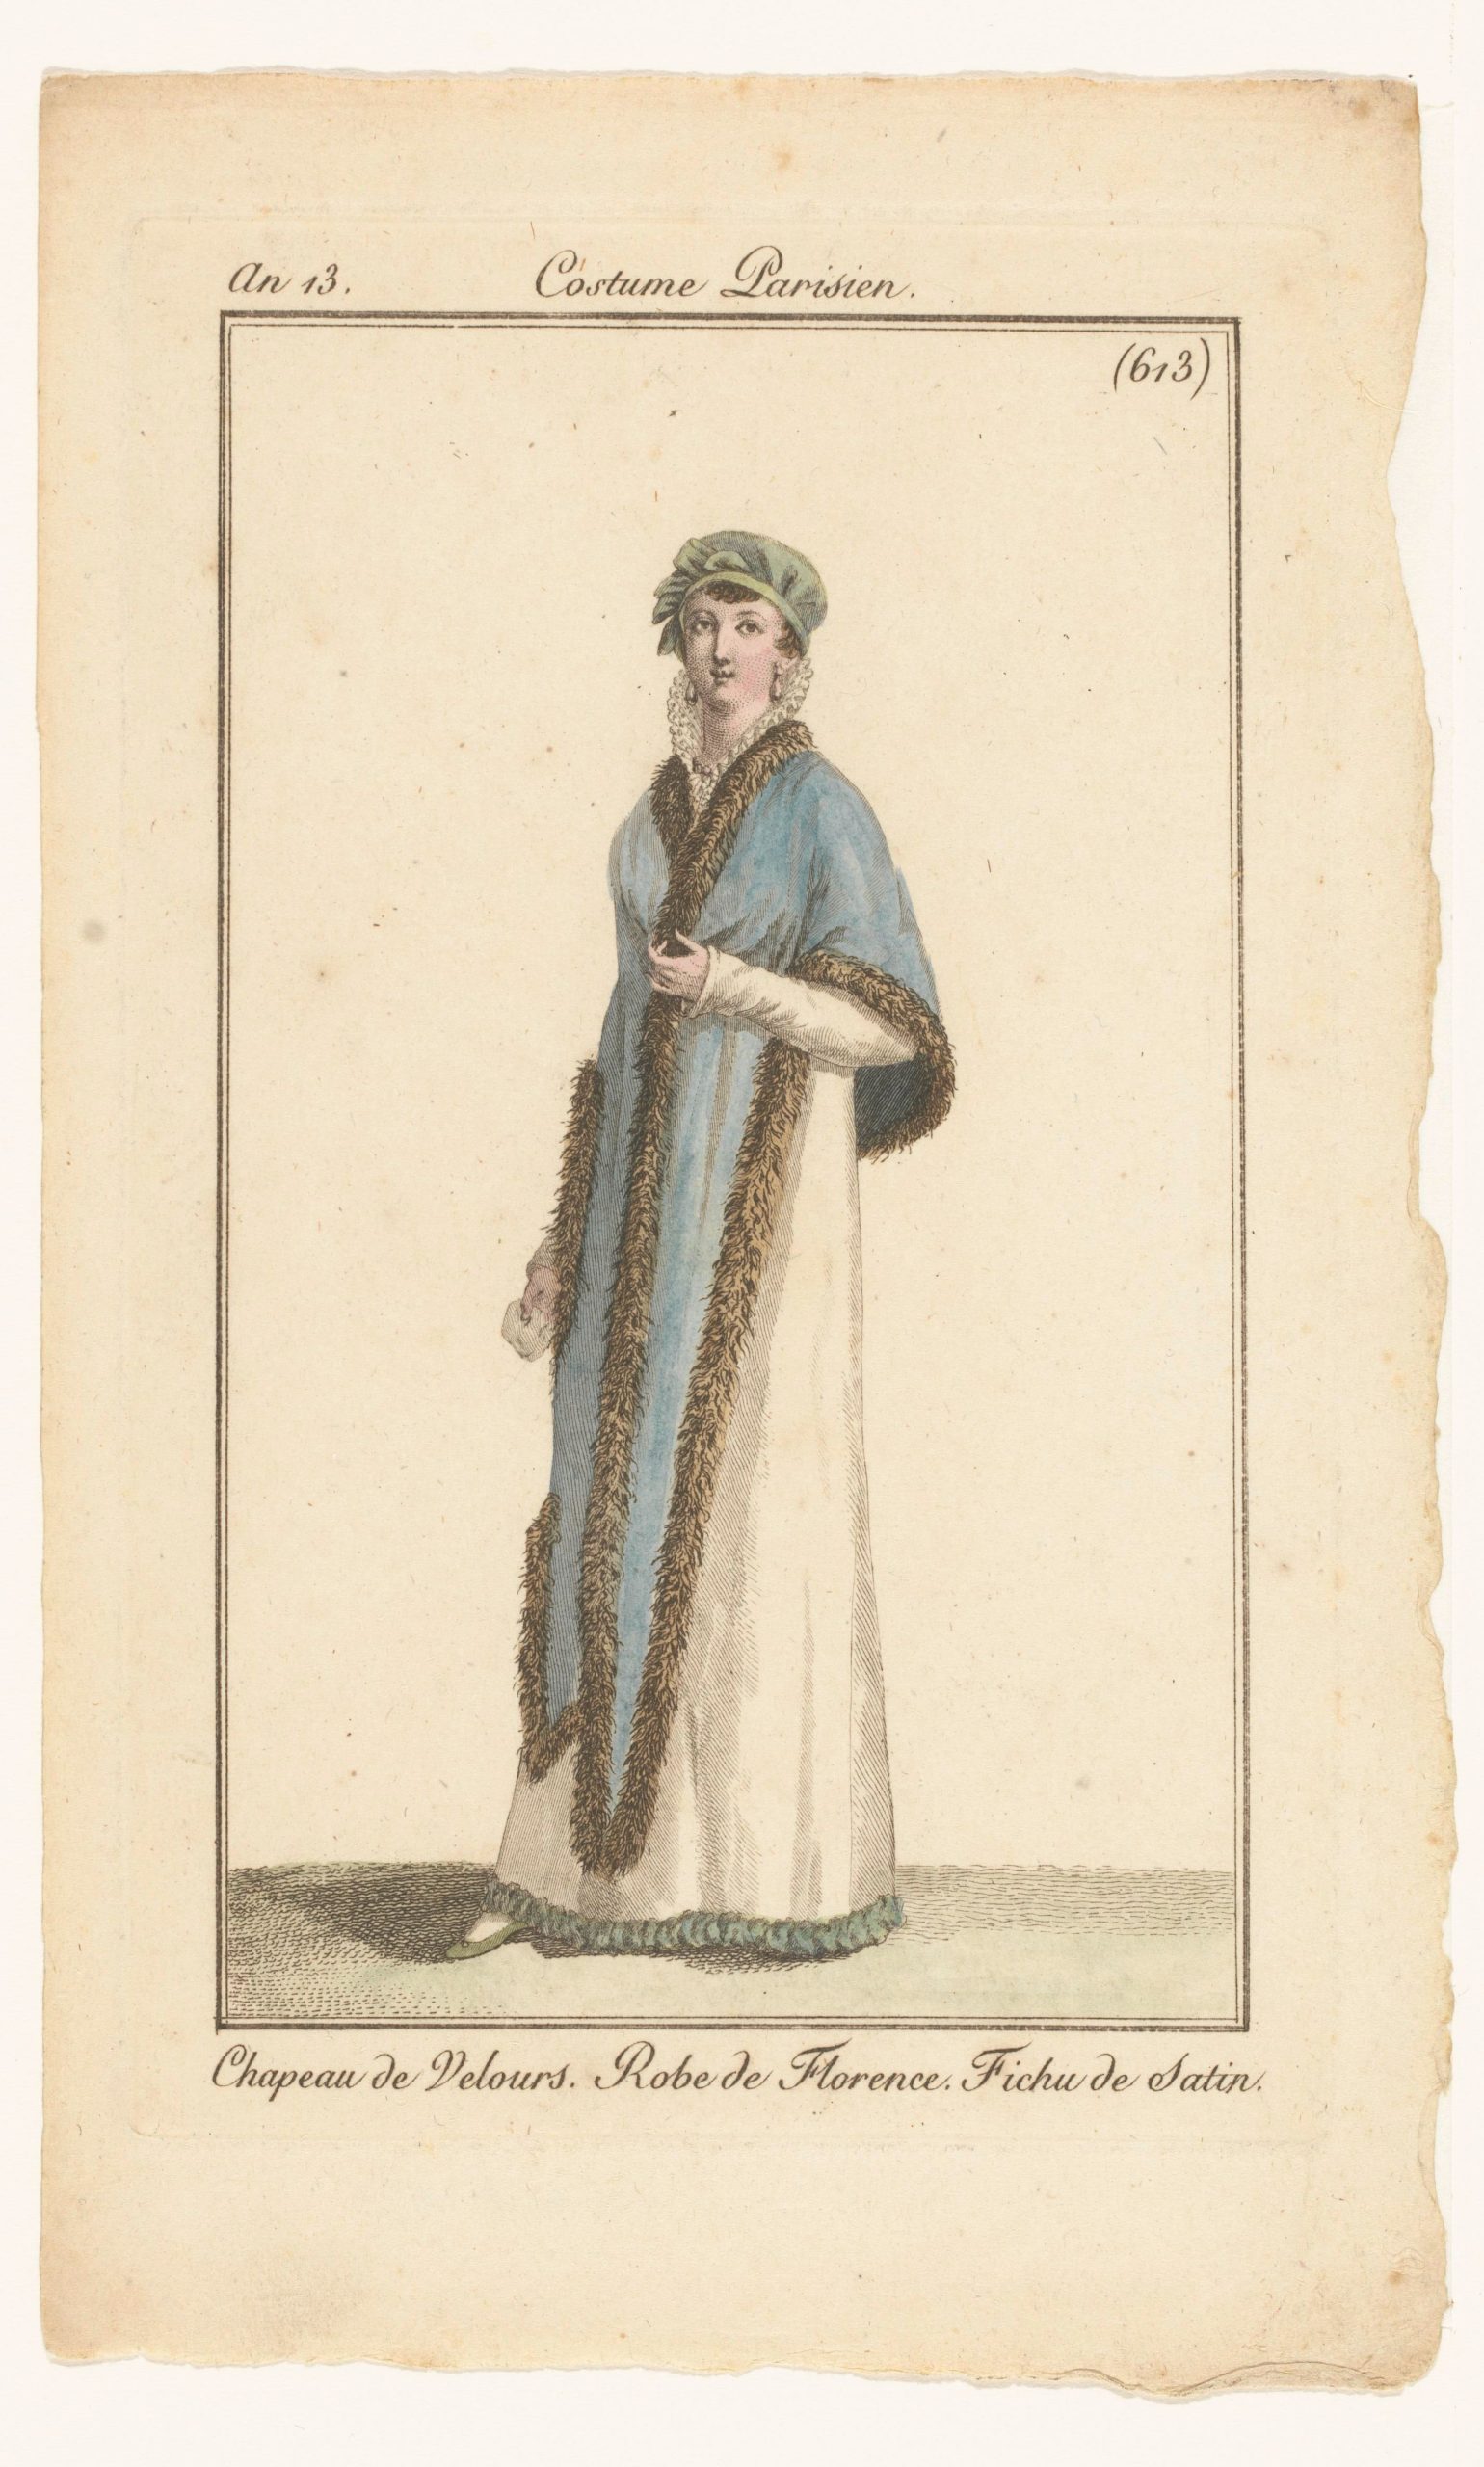
The period between 1795 and 1820, known as the Empire or Regency era, marked a fascinating transition in fashion history. Gone were the rigid, heavily boned stays of the 18th century, replaced by a softer, more natural silhouette inspired by Greek and Roman statuary.
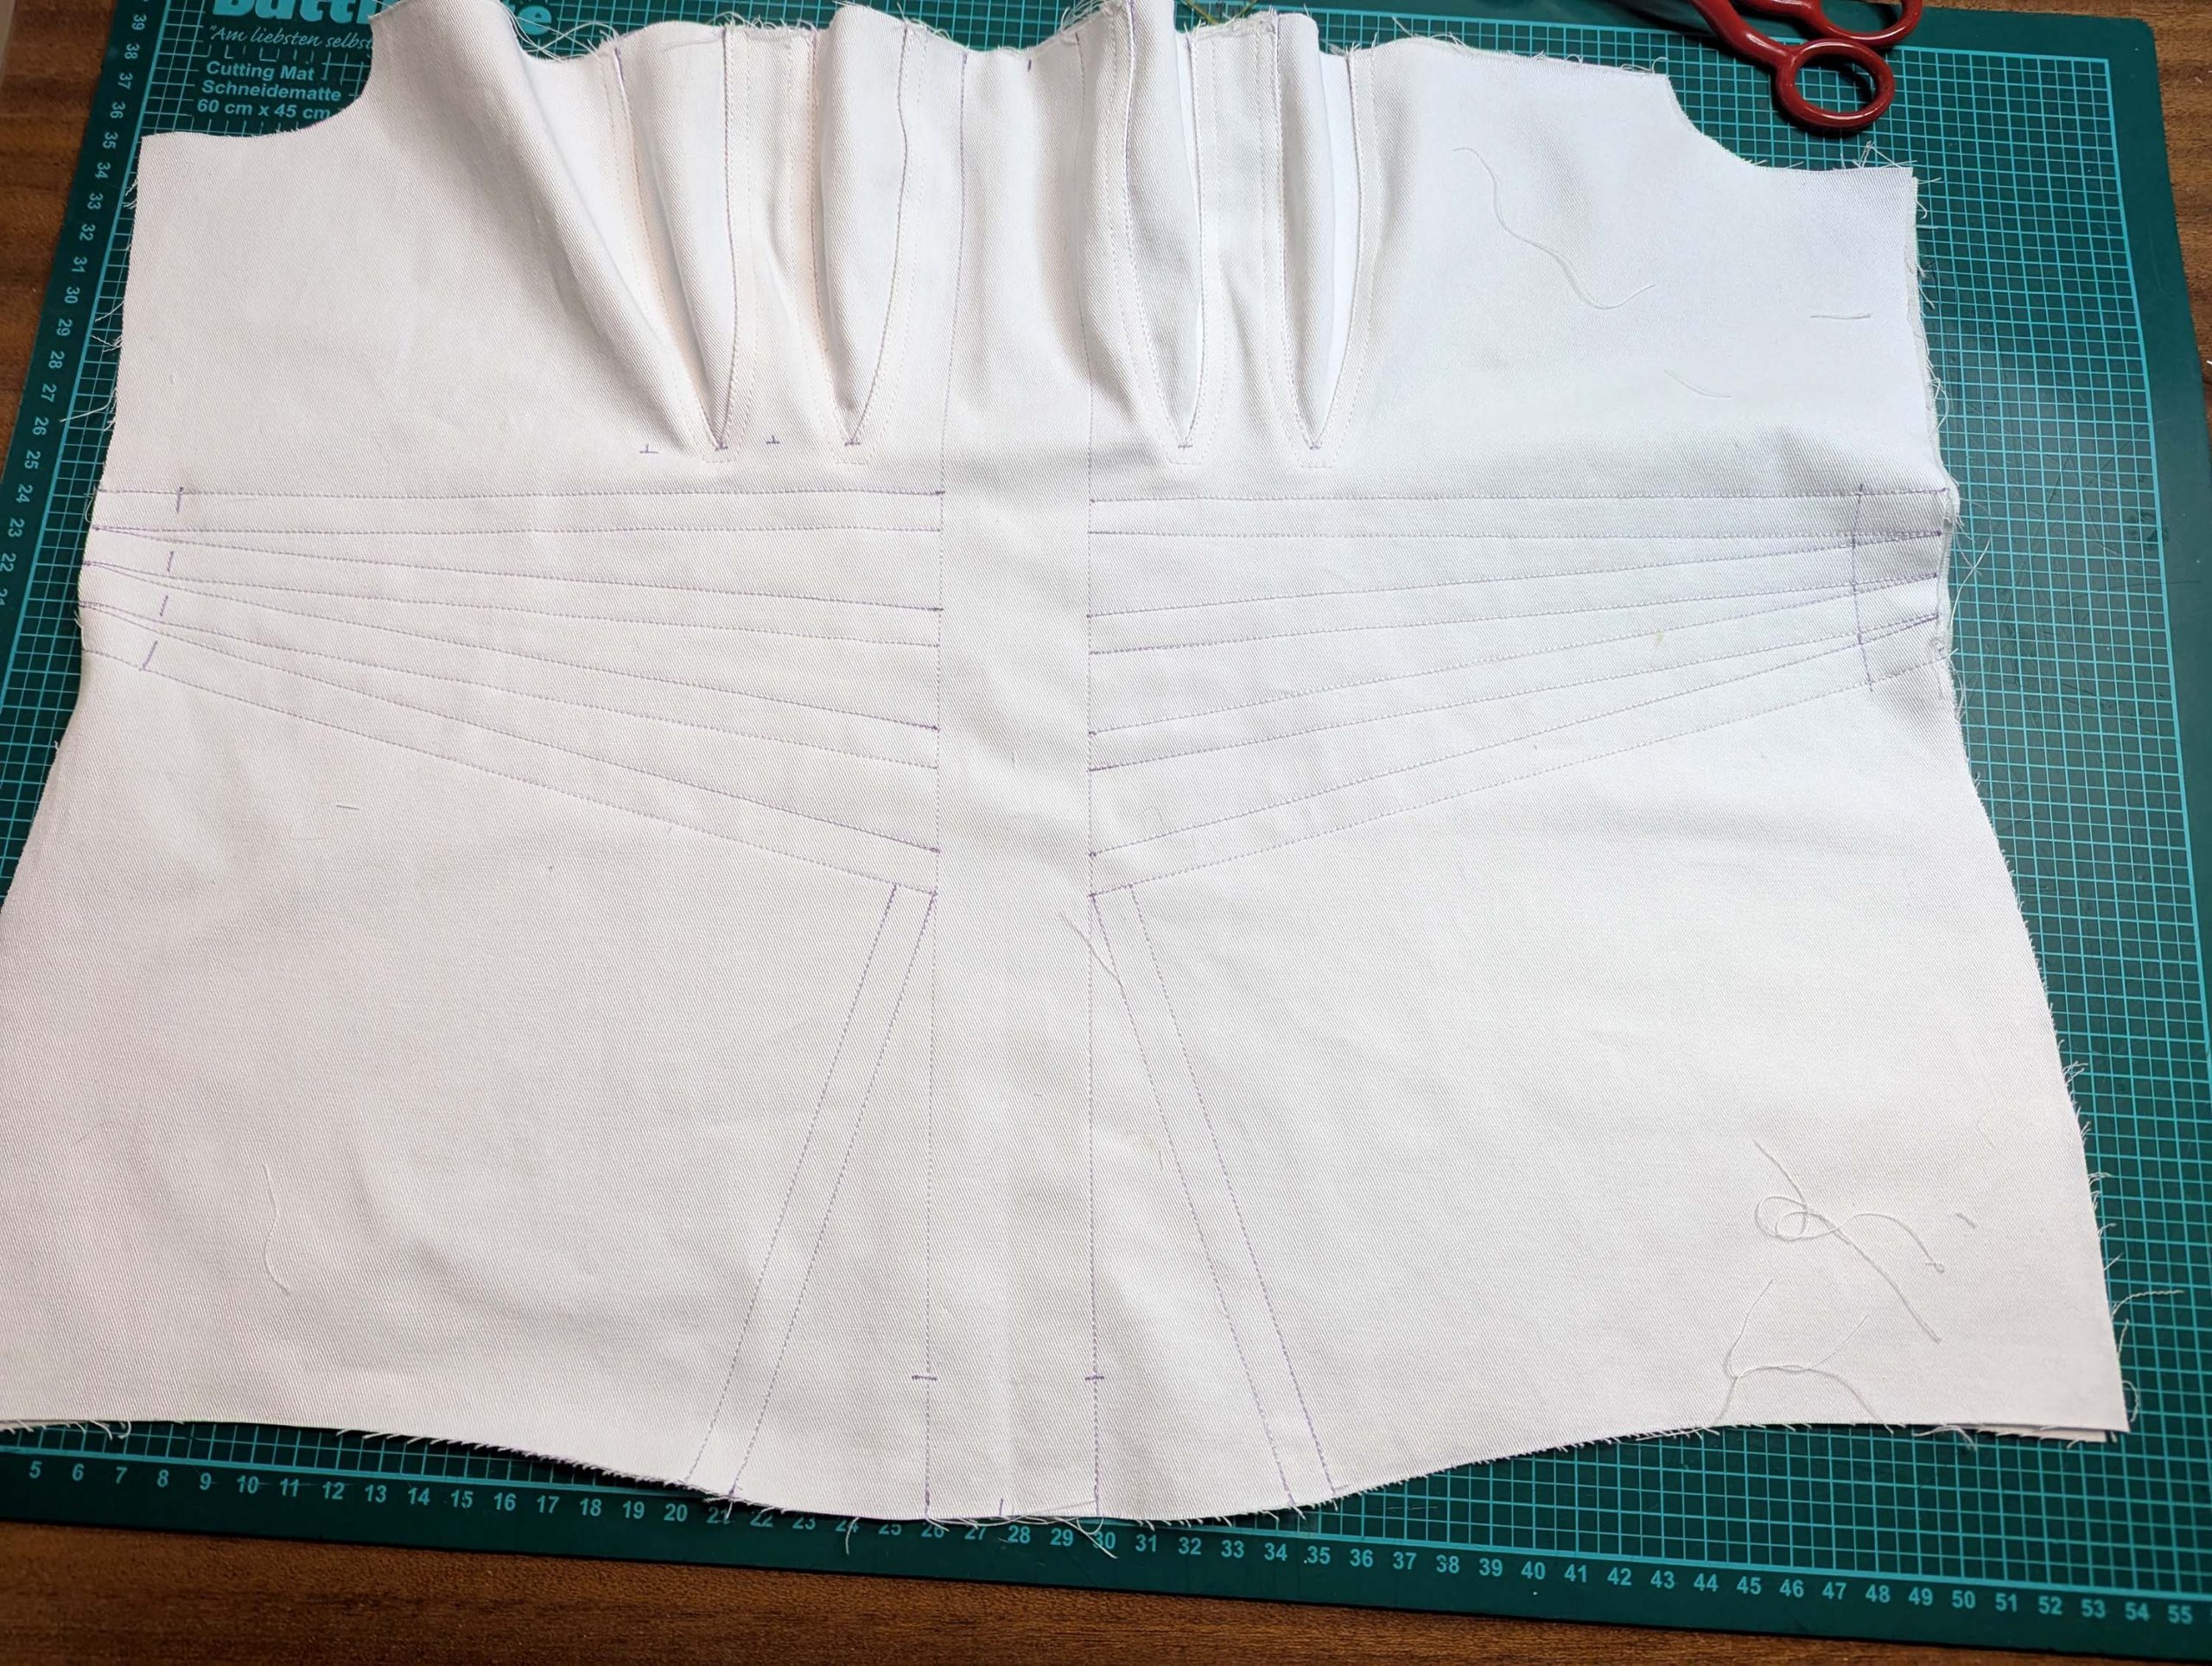
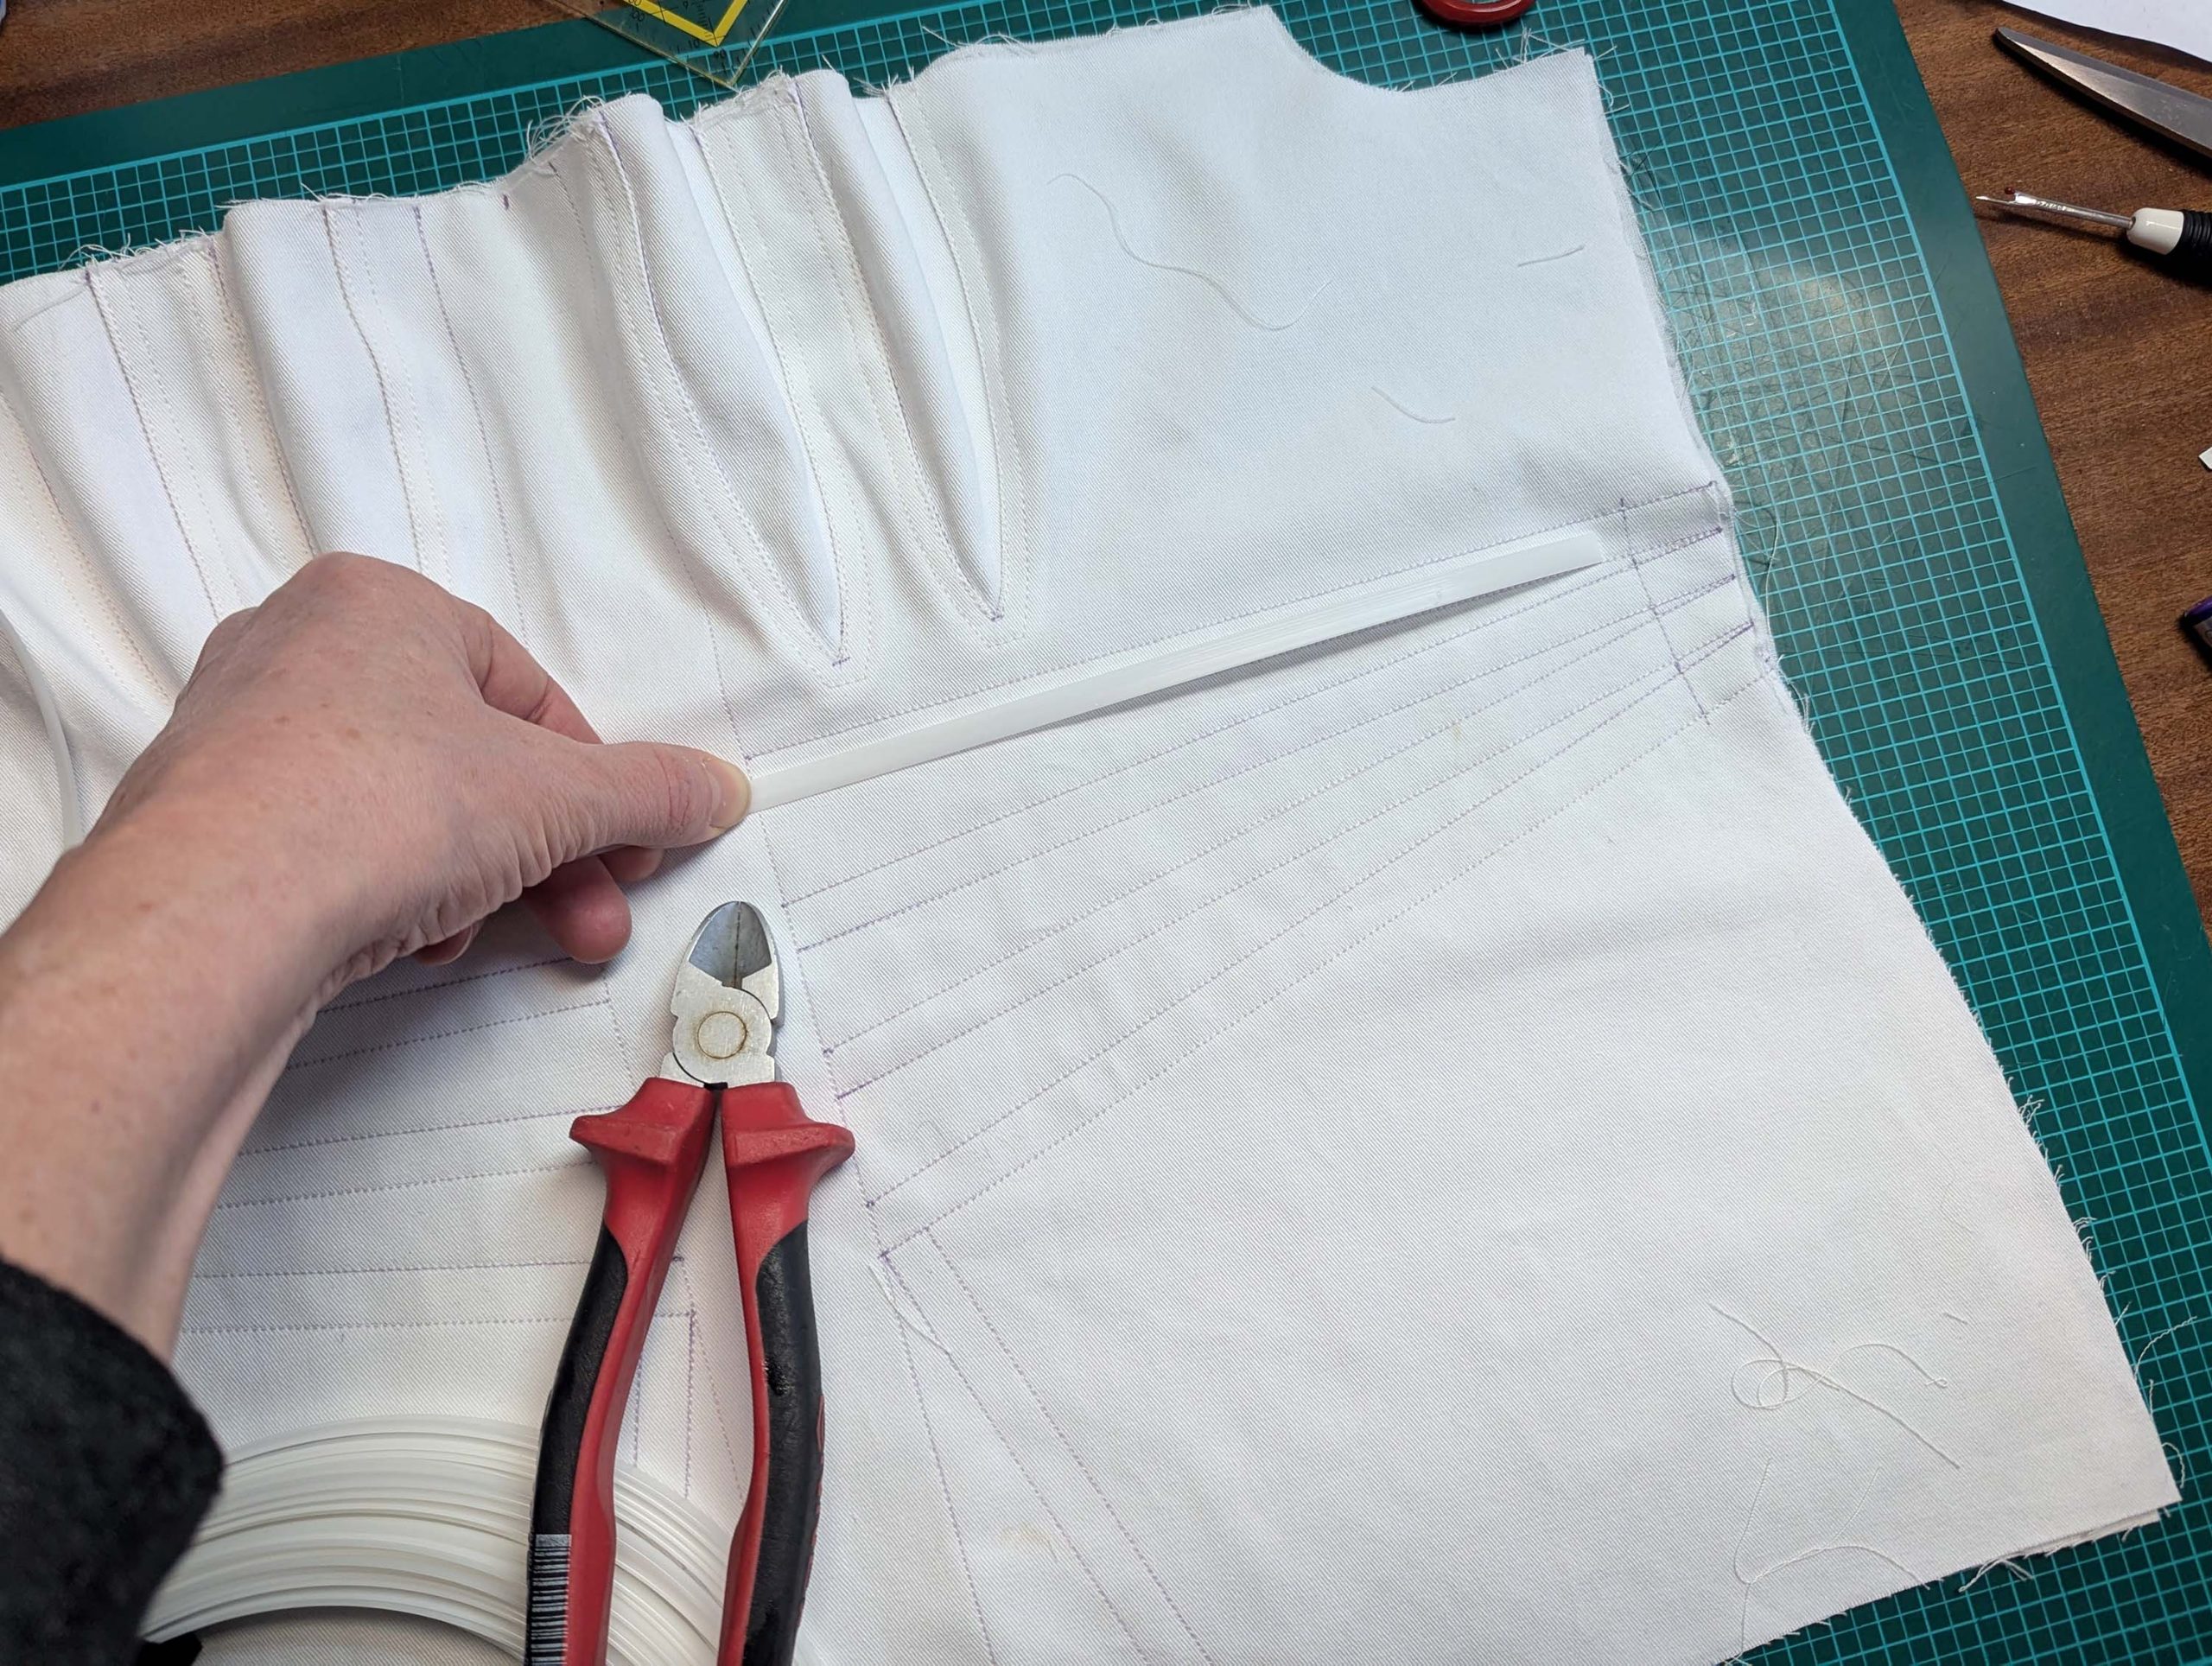
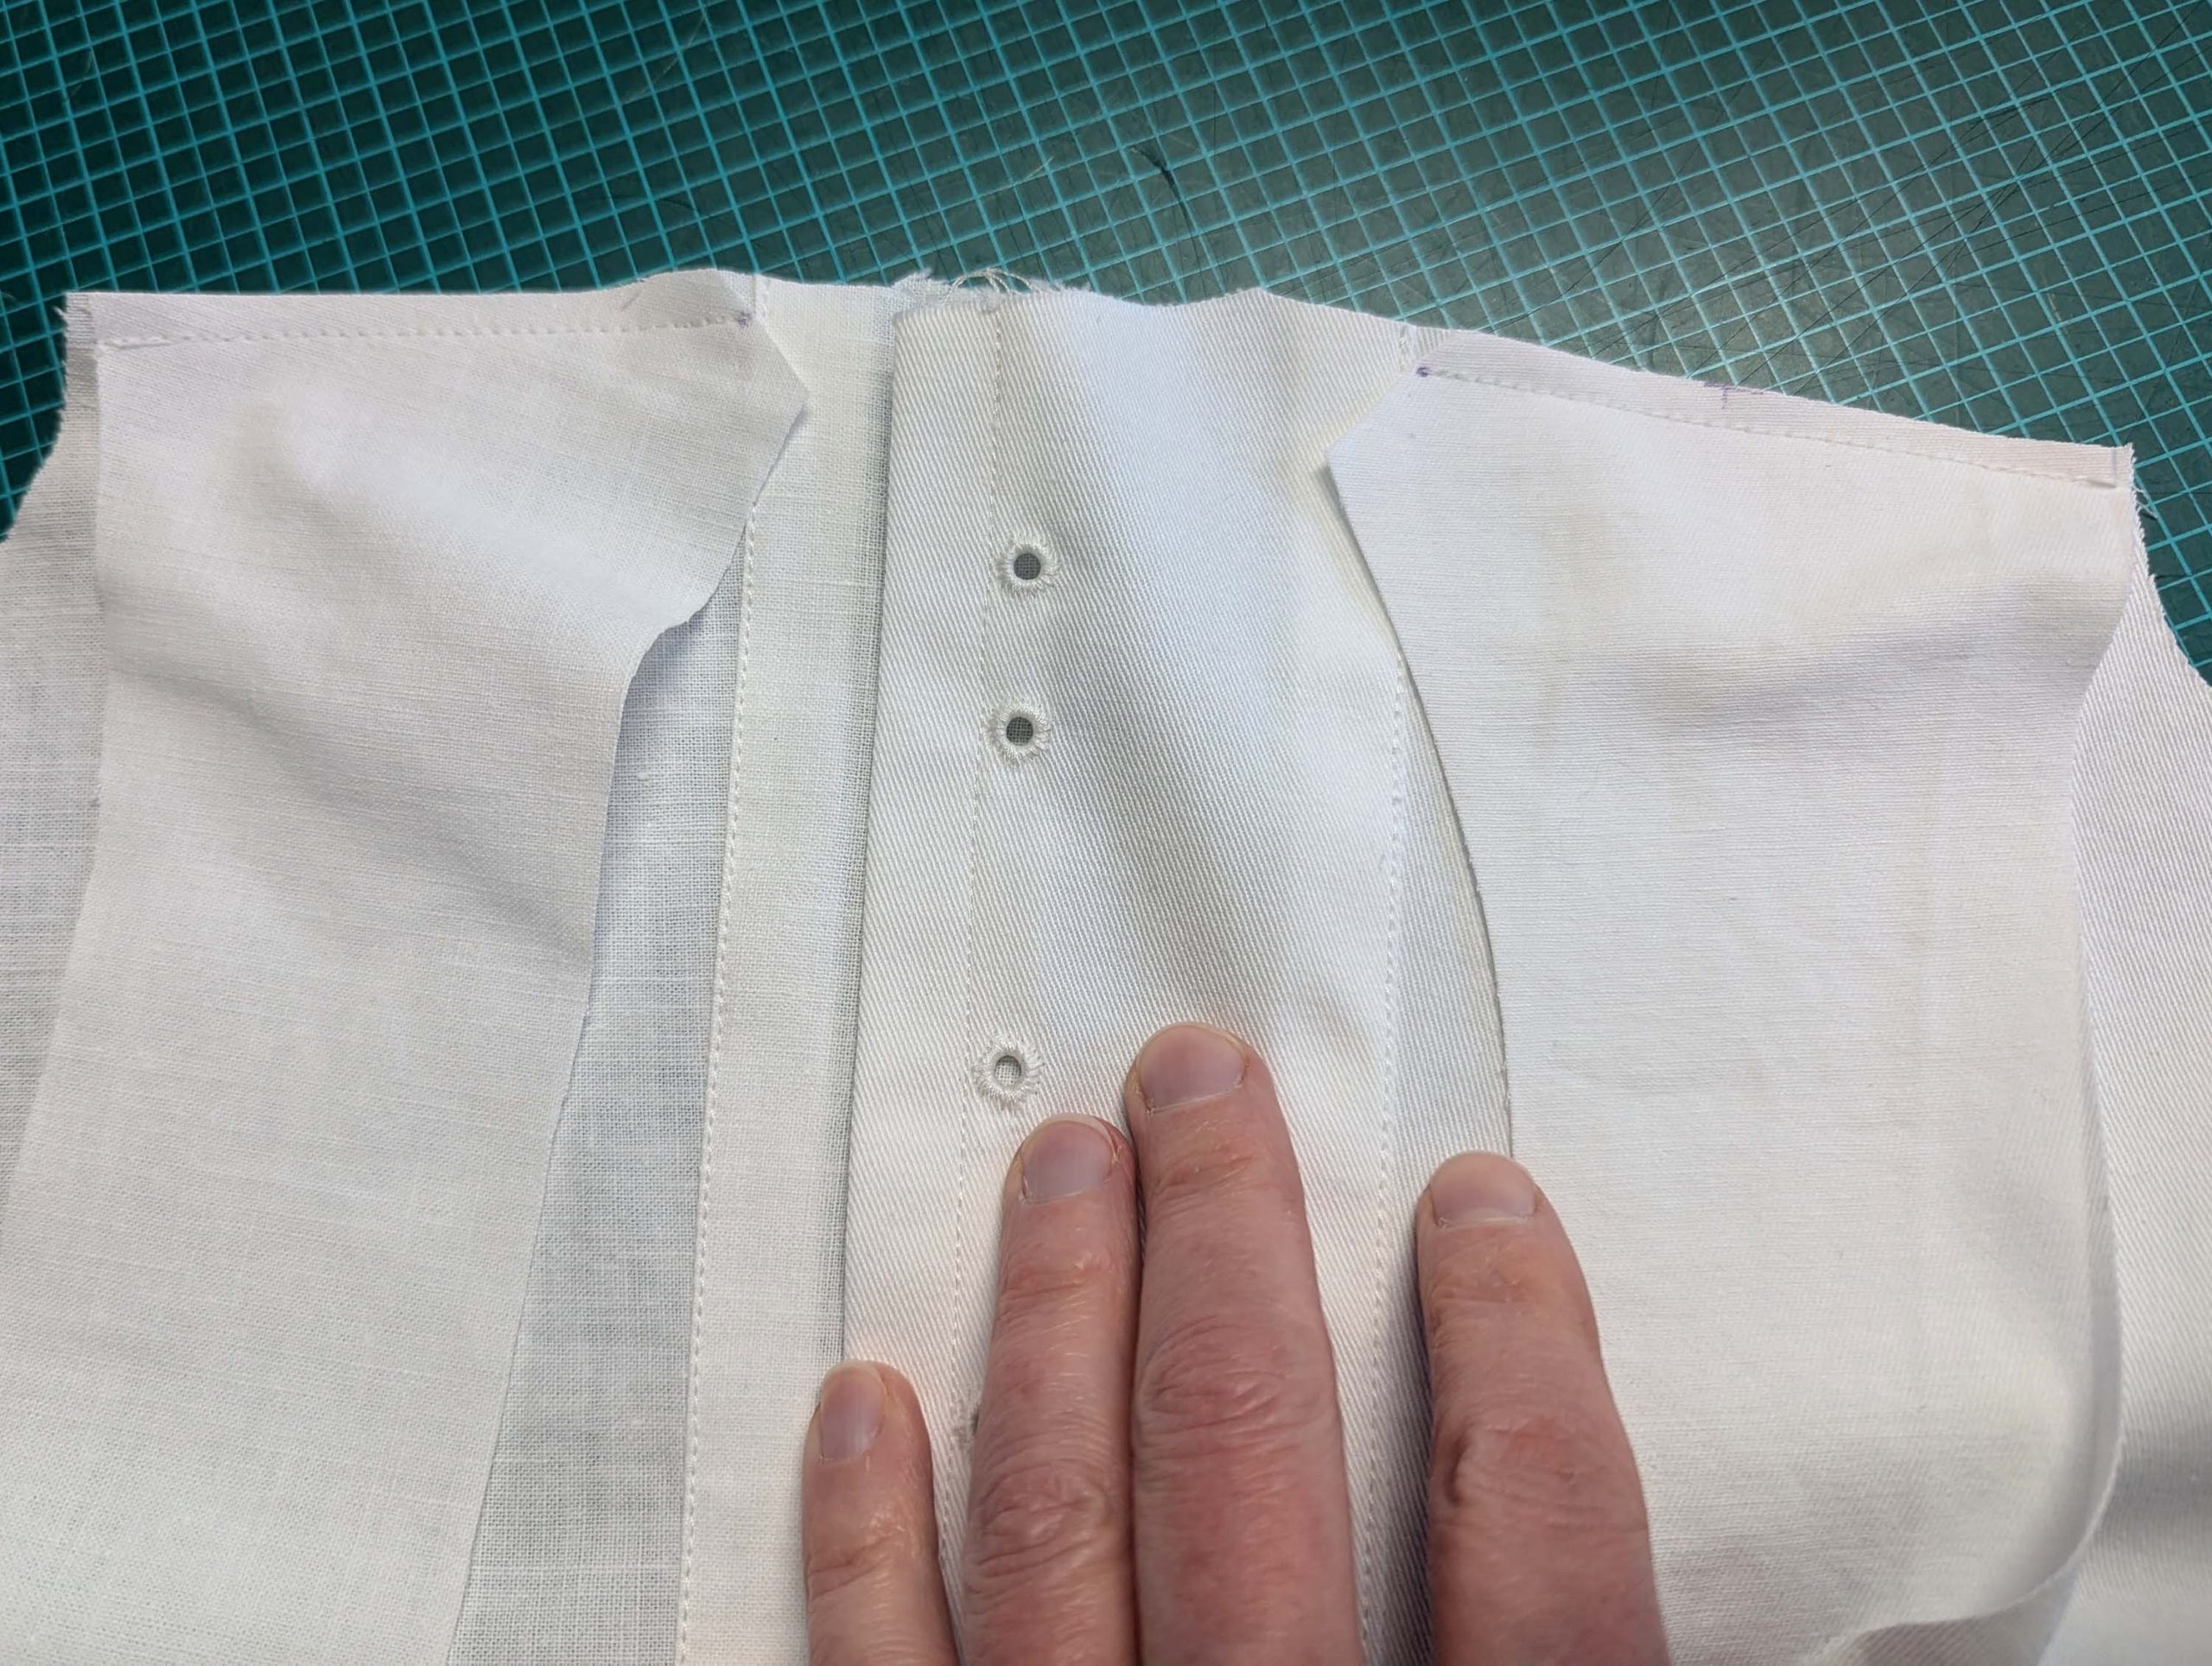
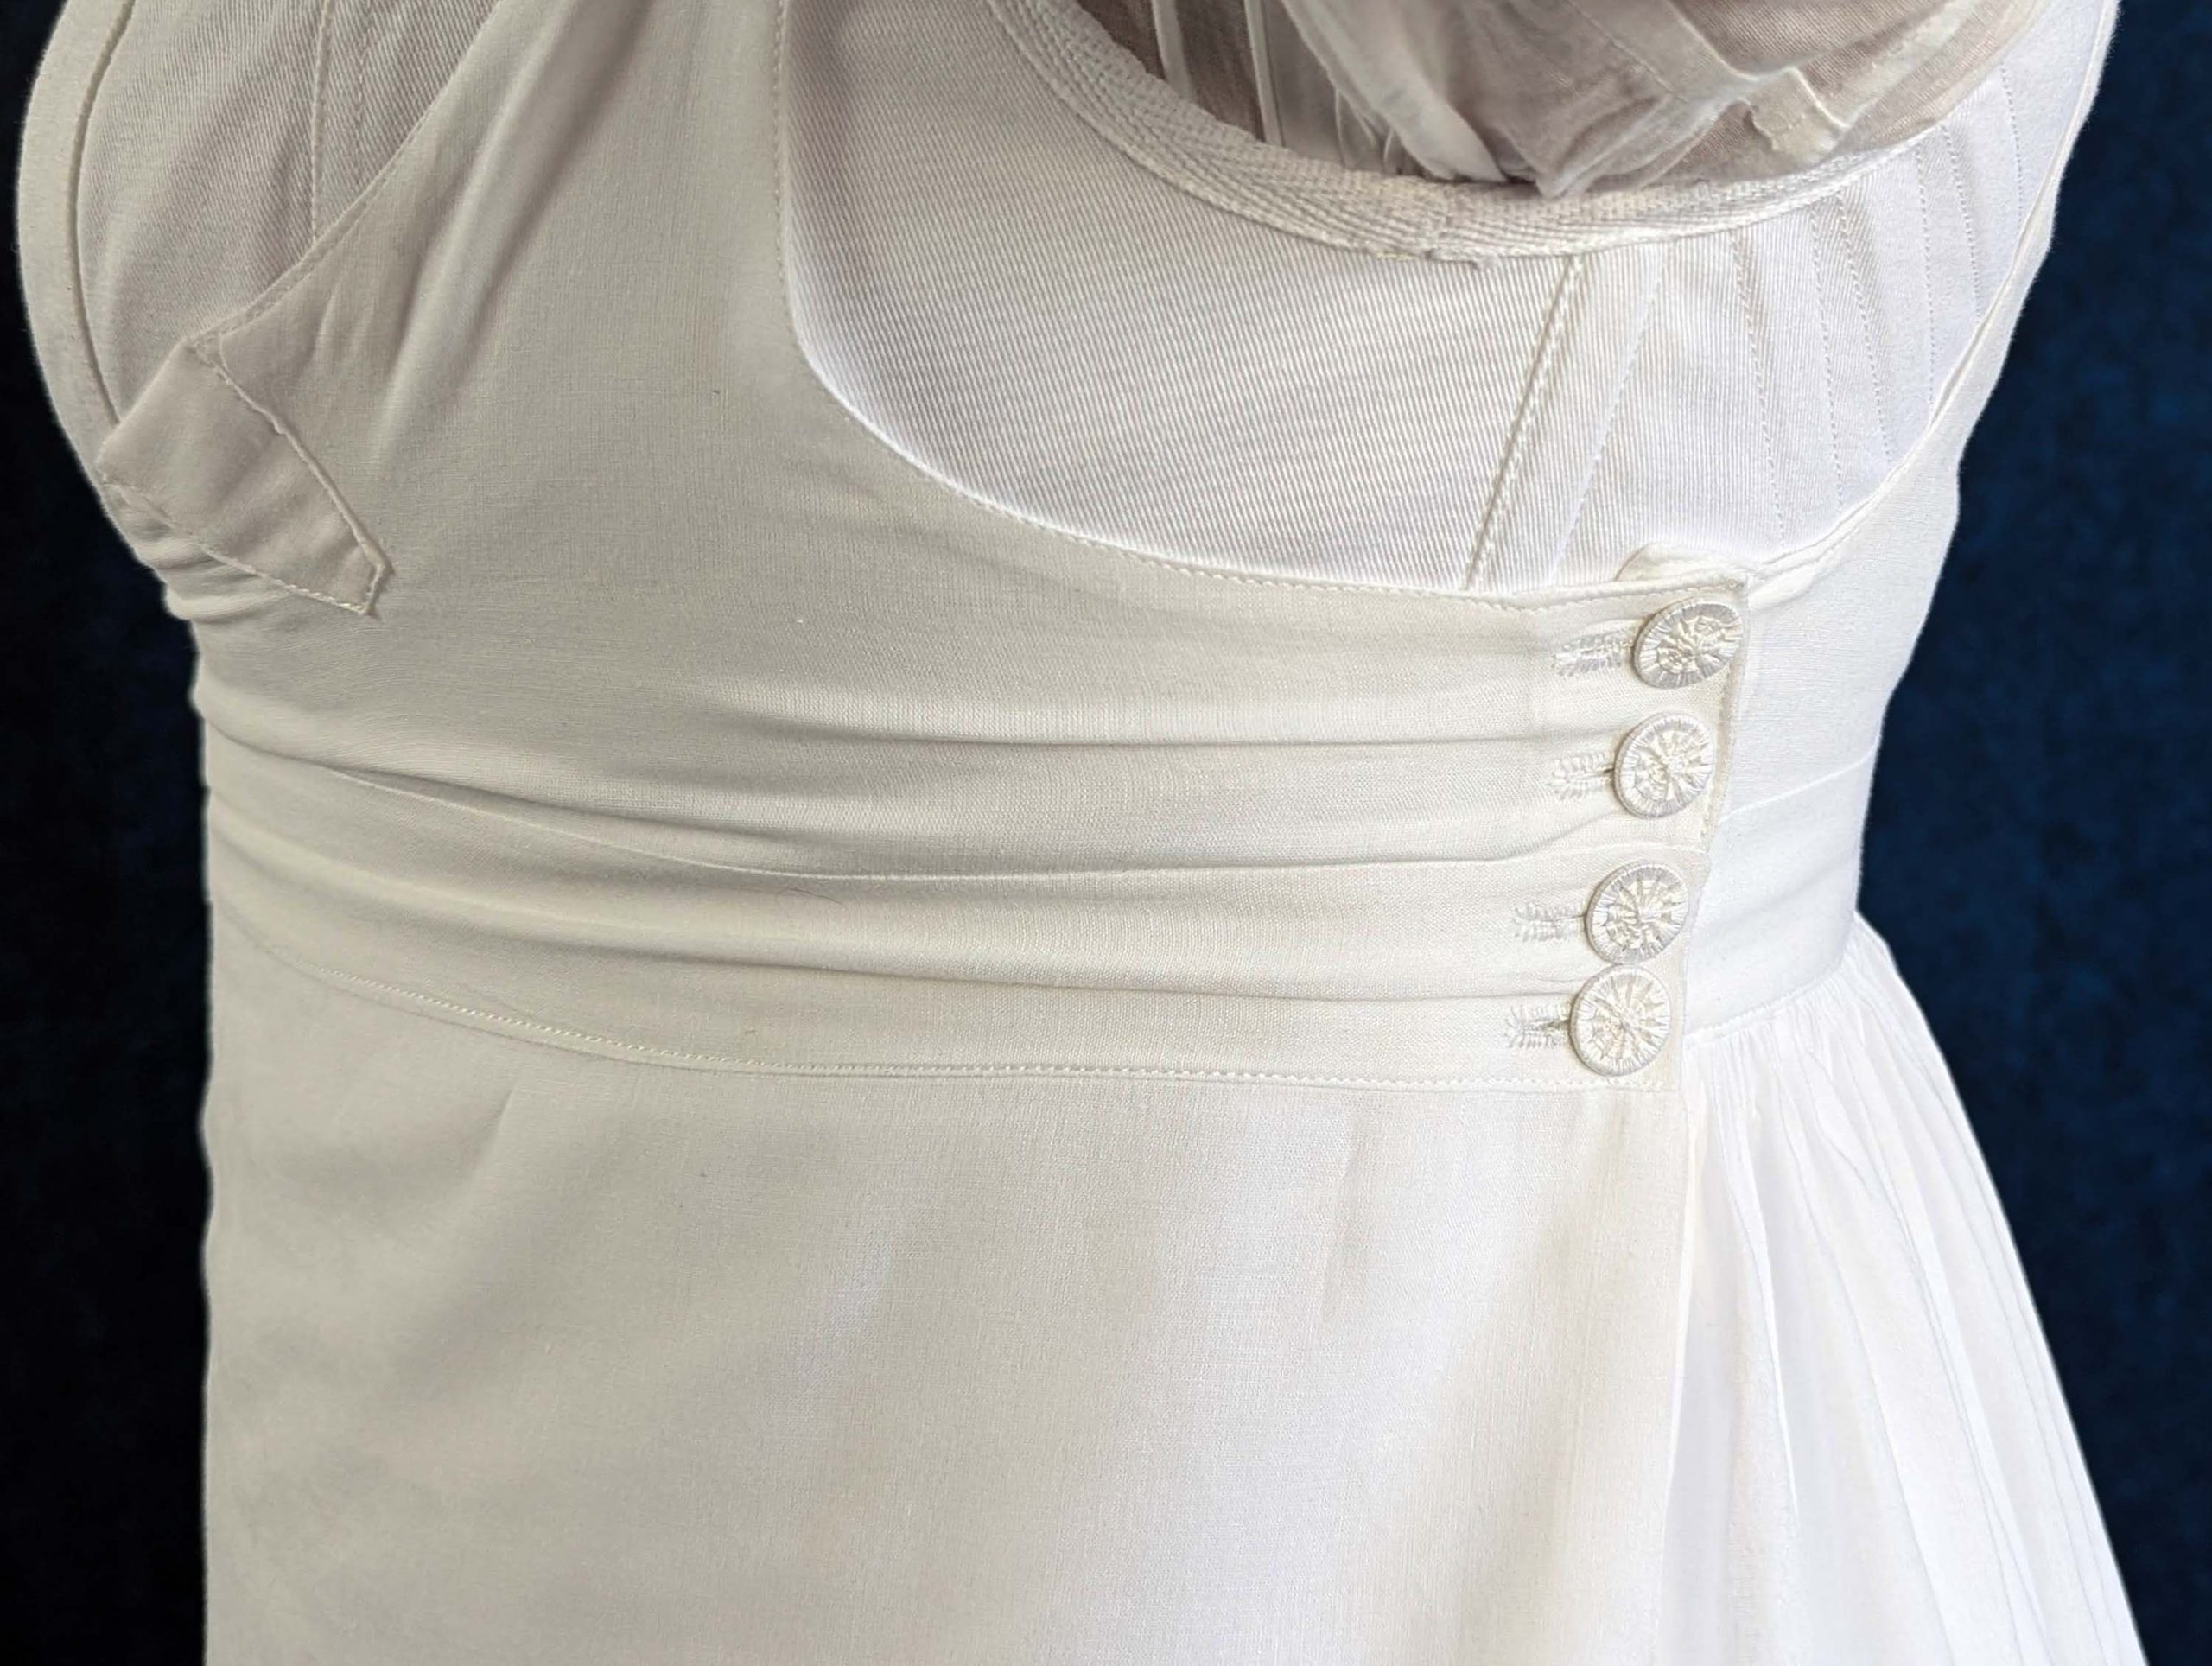
During this period, the transformation from stays to corsets reflected changing attitudes toward fashion and comfort. The term “corset” itself emerged from the Old French word “cors” (body), signaling a shift toward lighter, less restrictive garments. These new corsets were advertised in ladies’ journals as a healthier alternative to their predecessors, while still providing the desired silhouette of high, separated breasts and a smooth line from bust to hip.
The complete Regency undergarment ensemble typically consisted of three pieces:
- A simple chemise of cotton or linen as the first layer against the skin
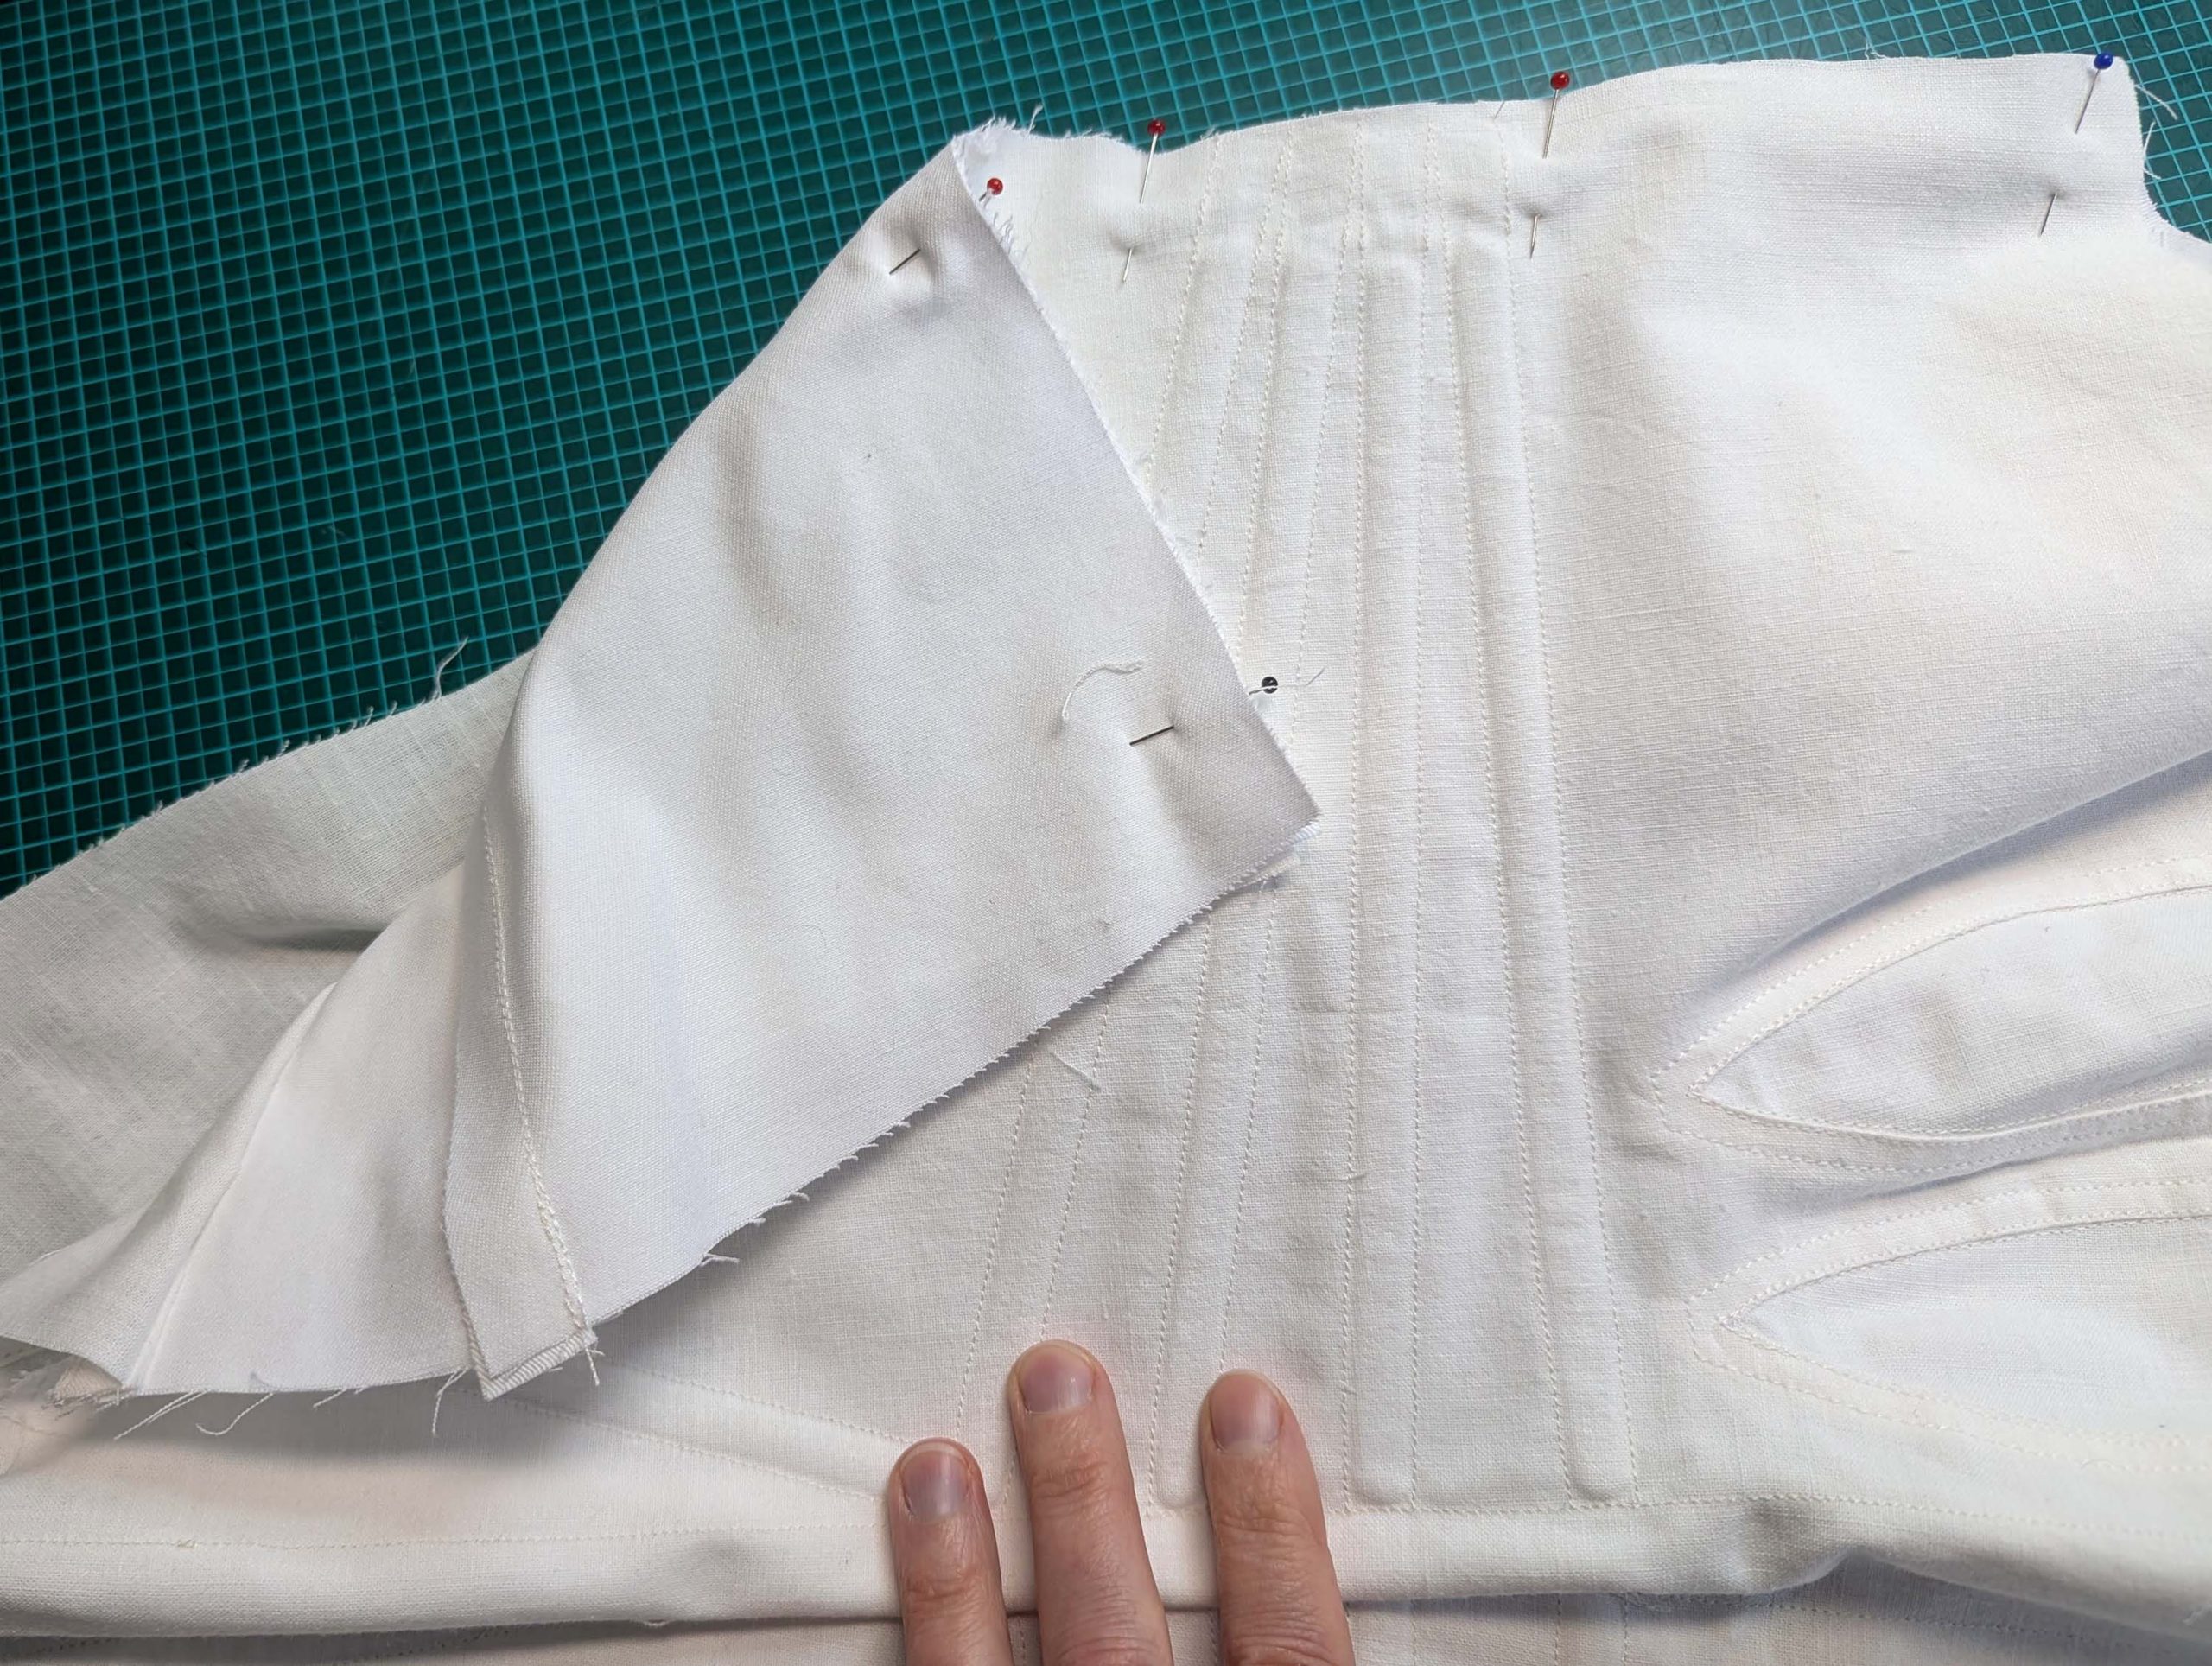
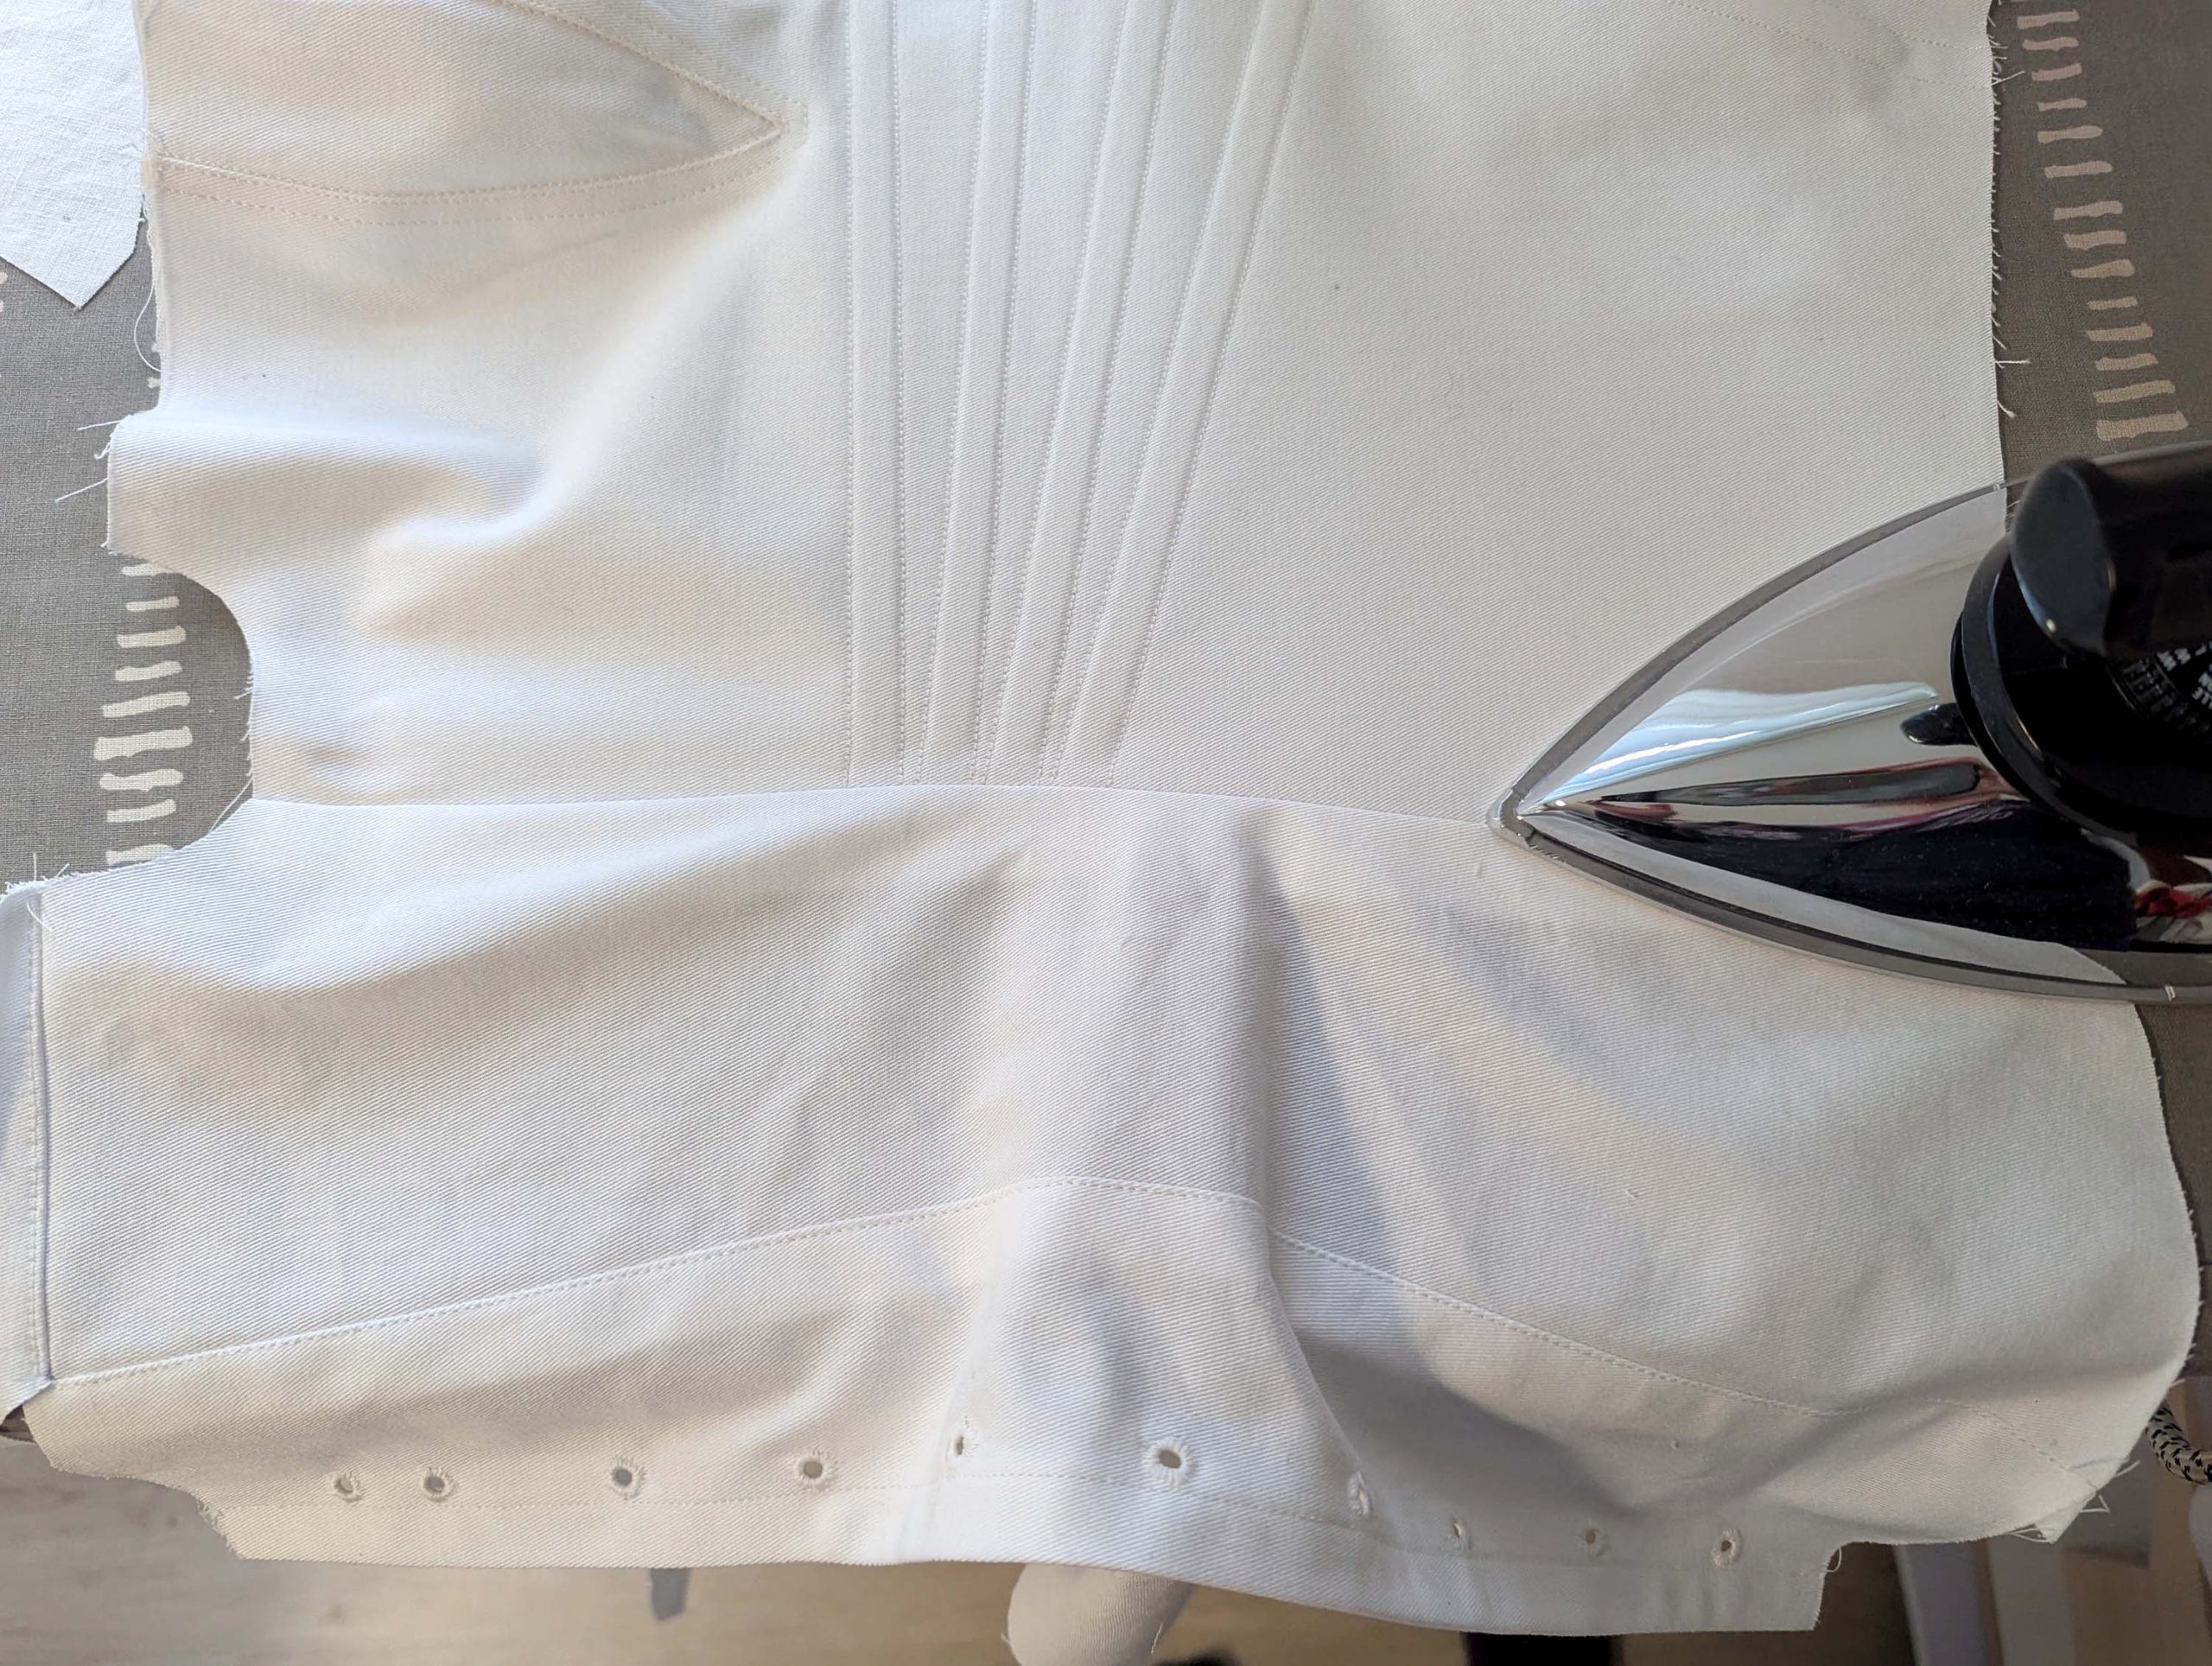
- An early corset with less boning than their predecessors, the stays.
- A supporting petticoat that helped maintain the dress’s elegant drape while providing modesty
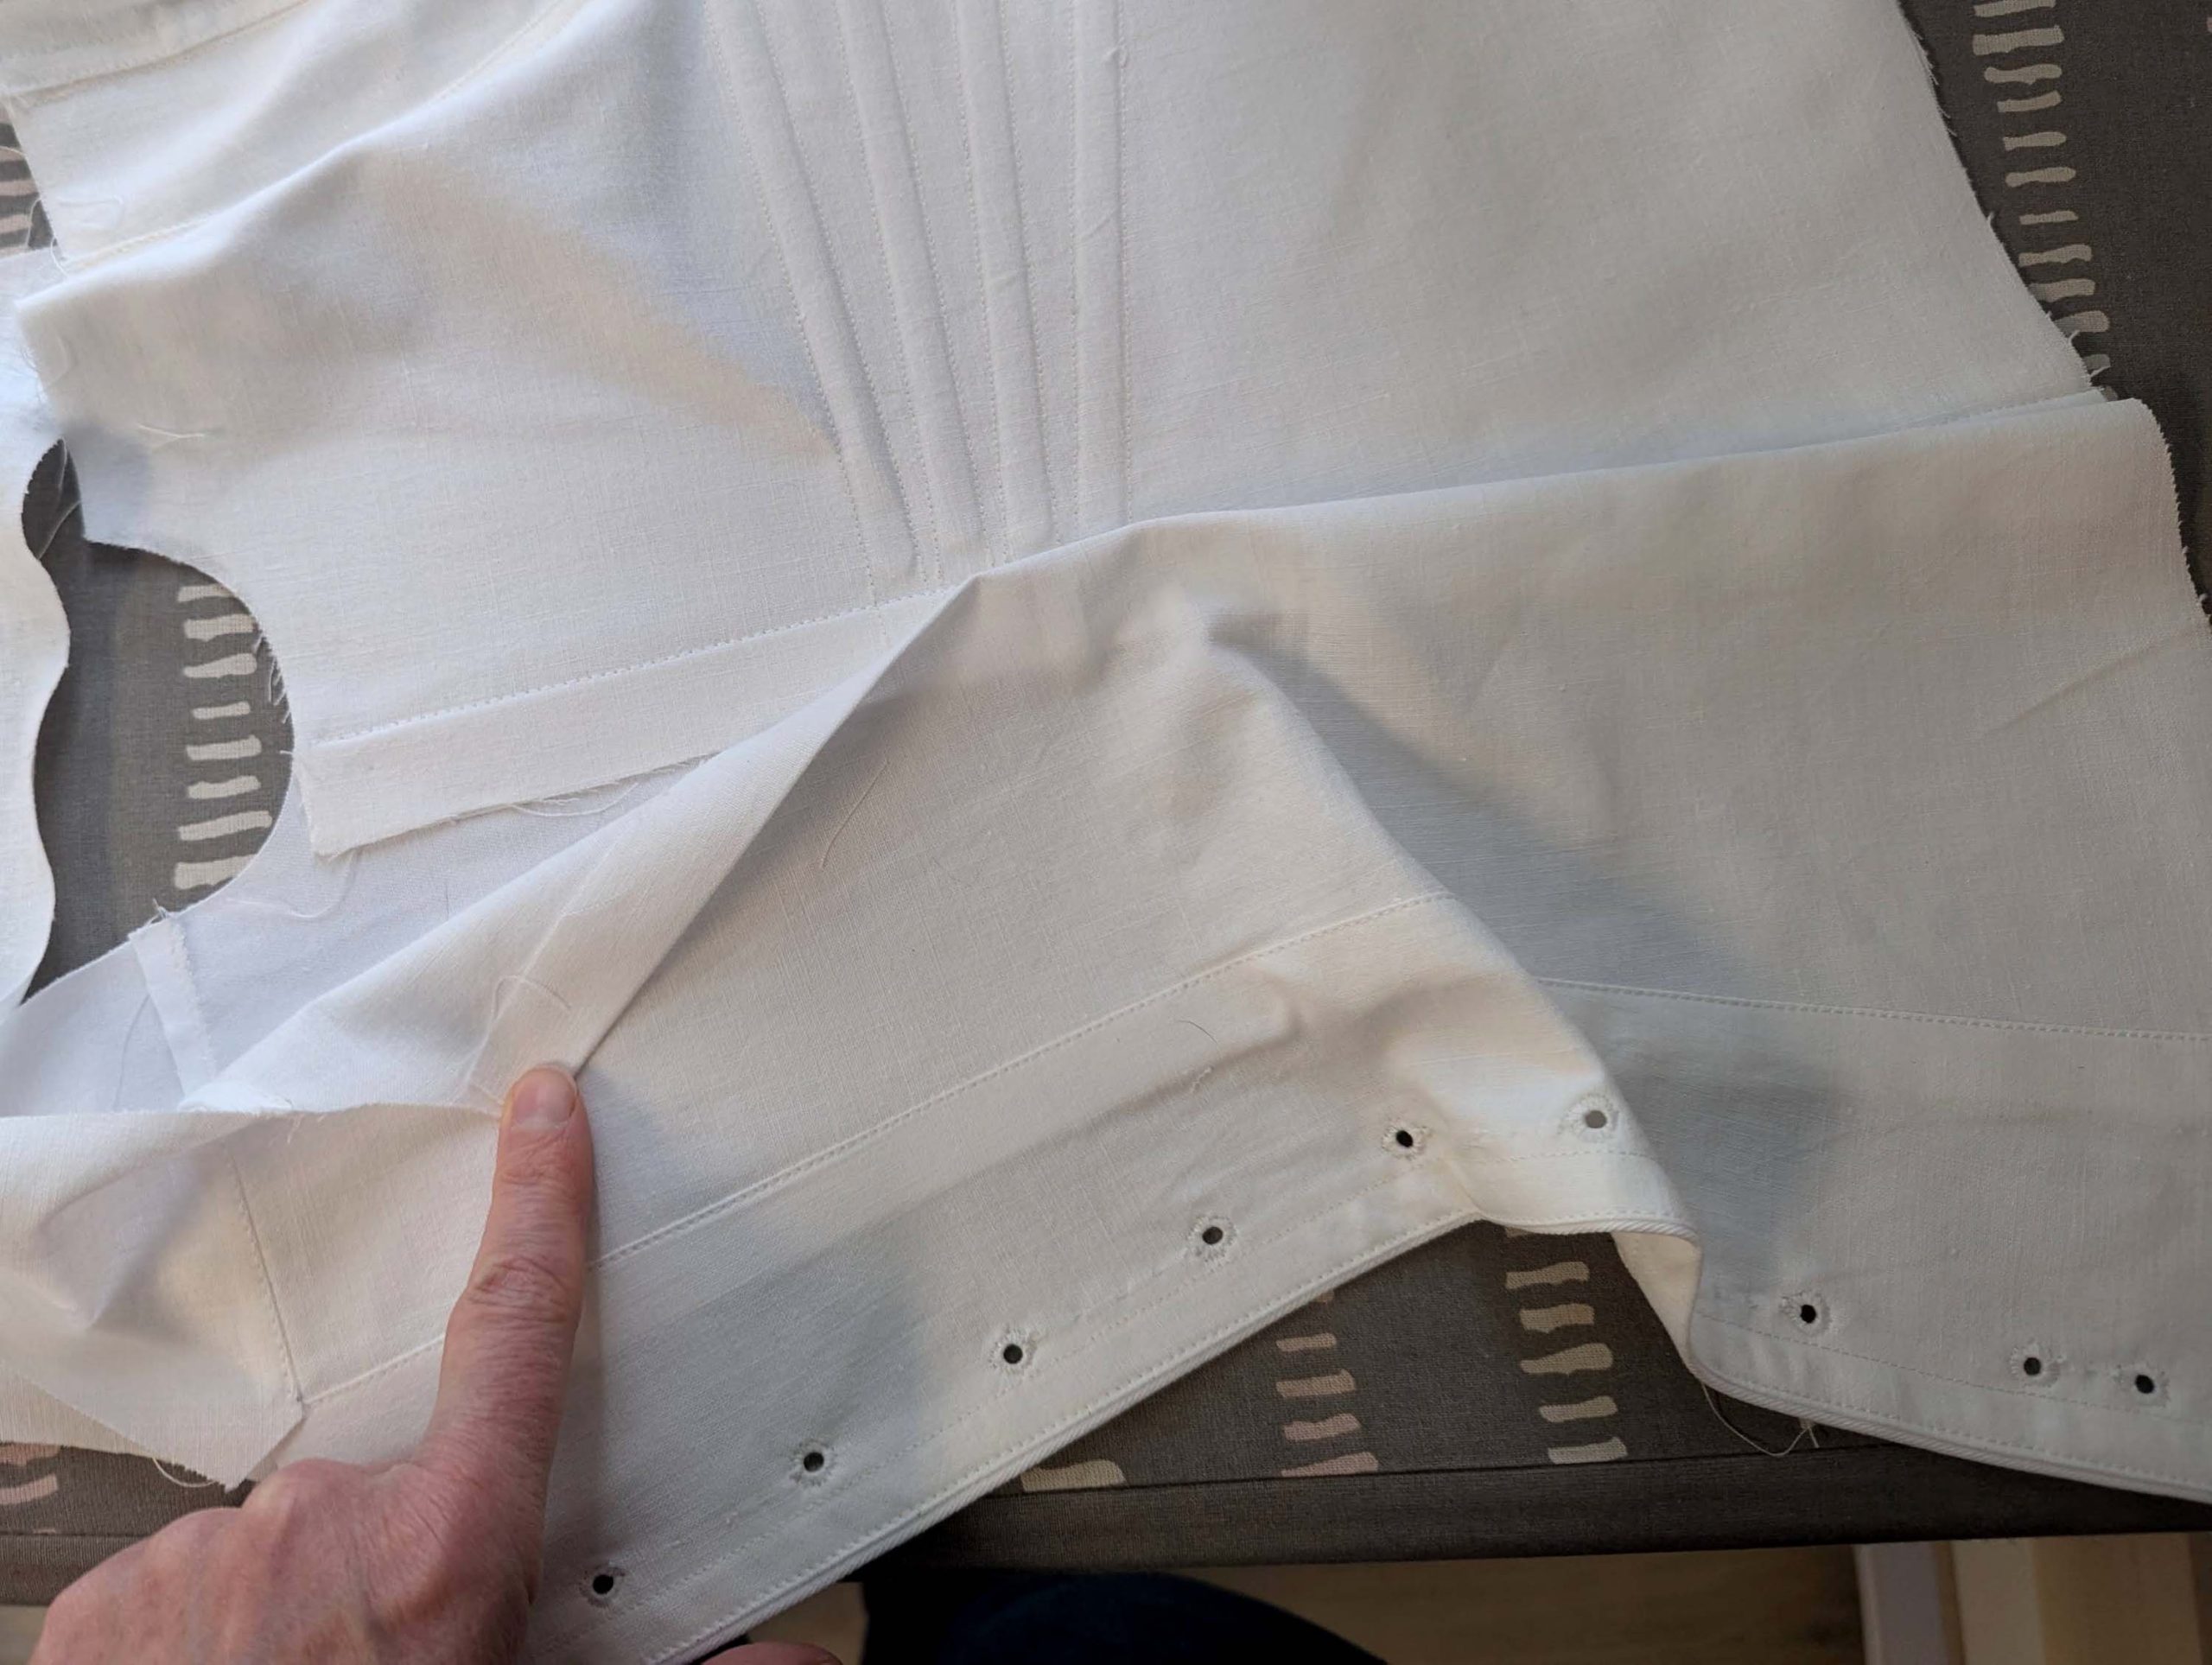
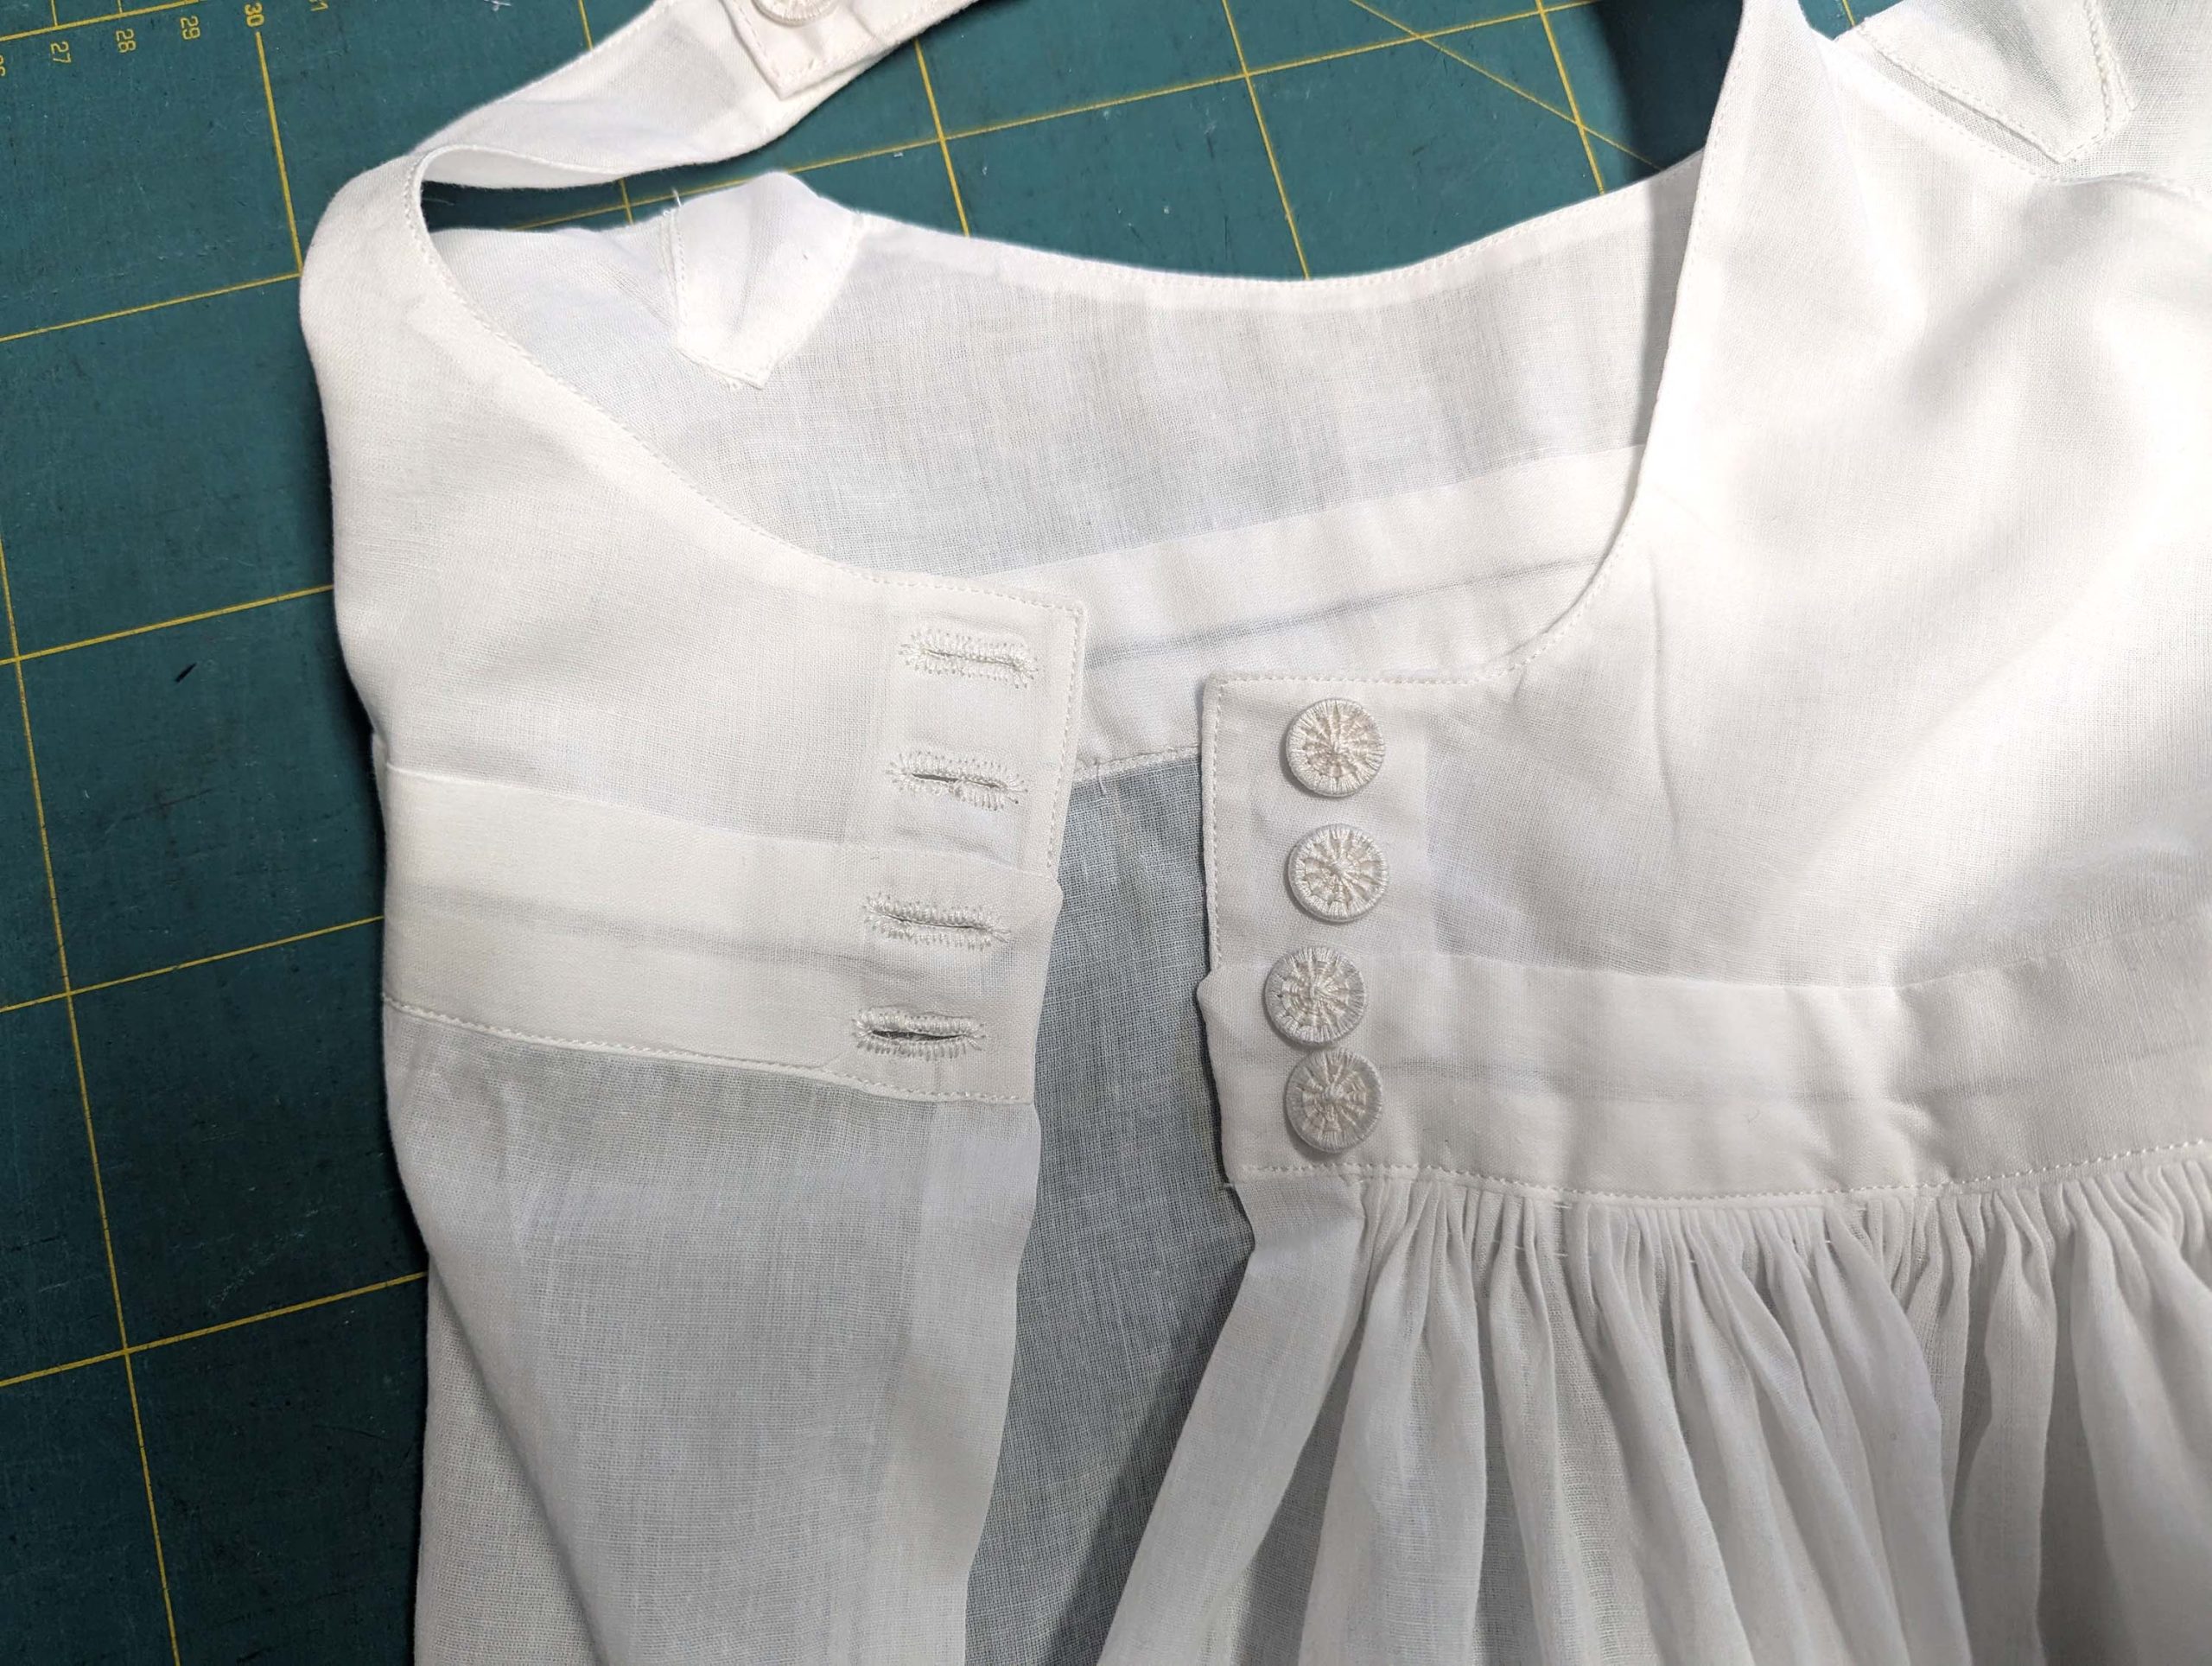
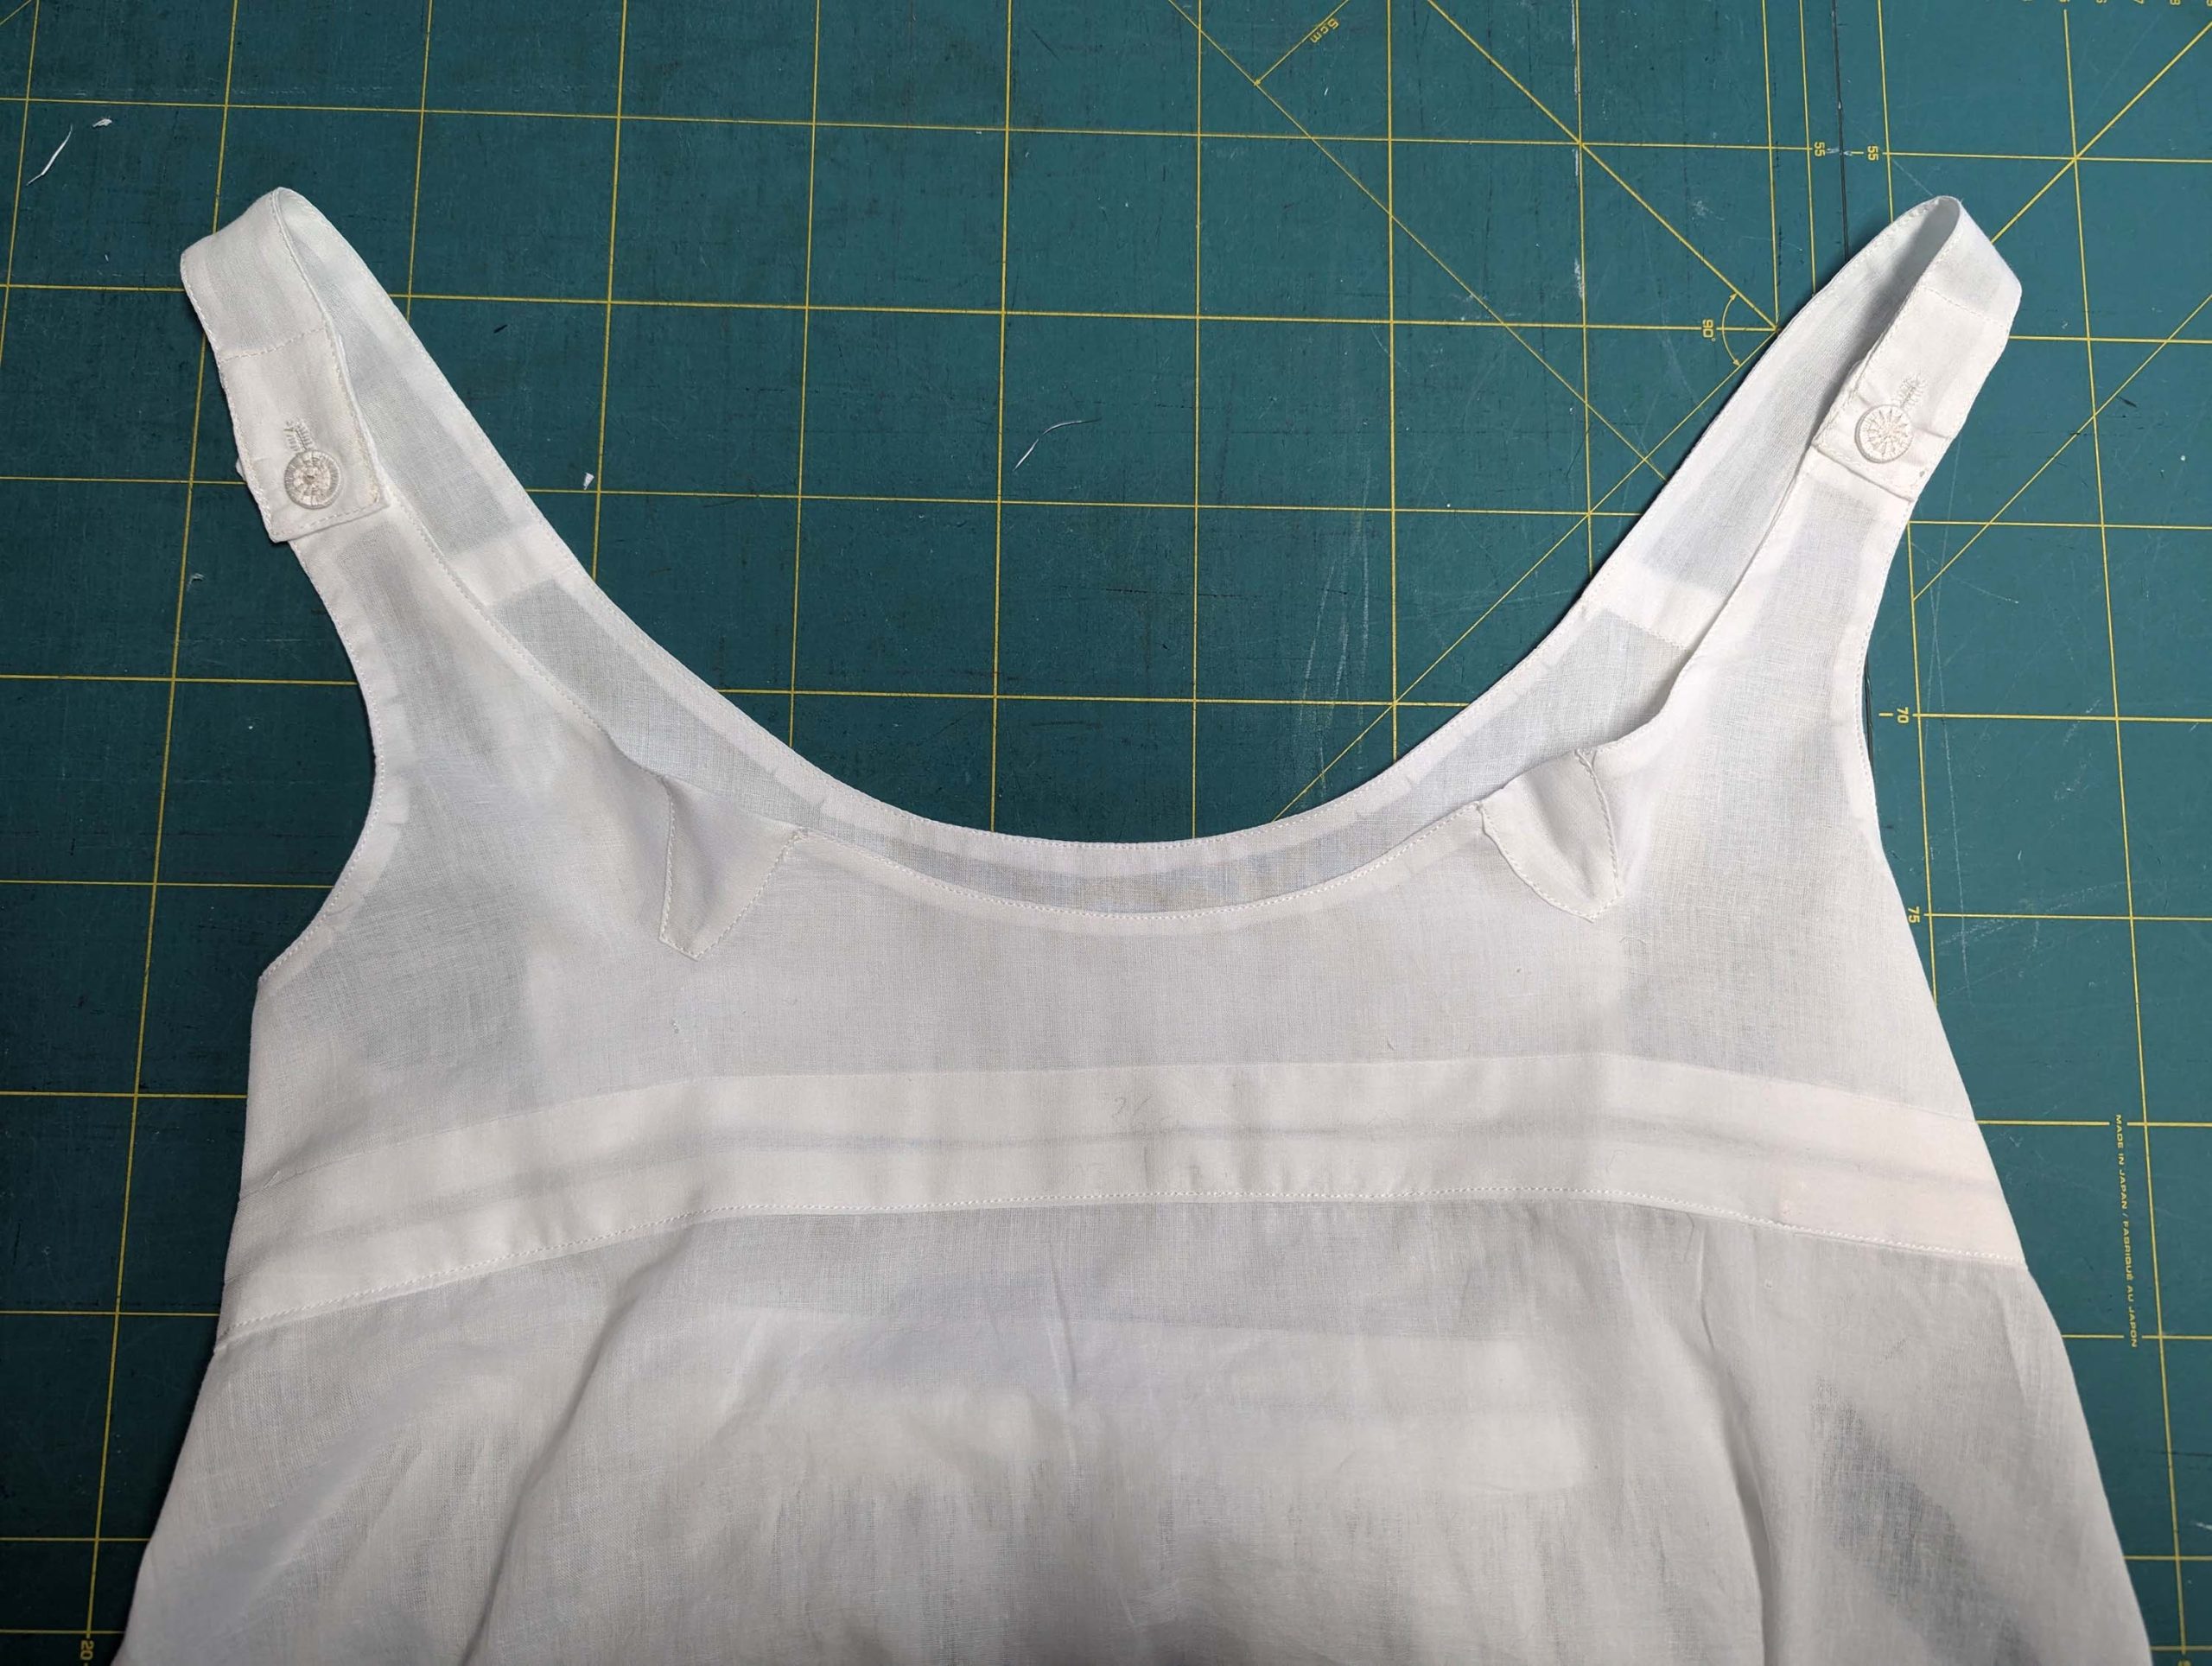
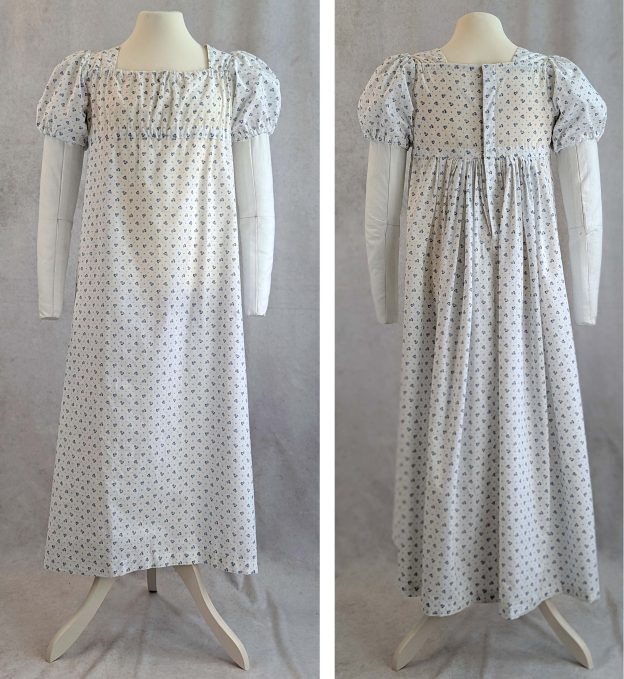
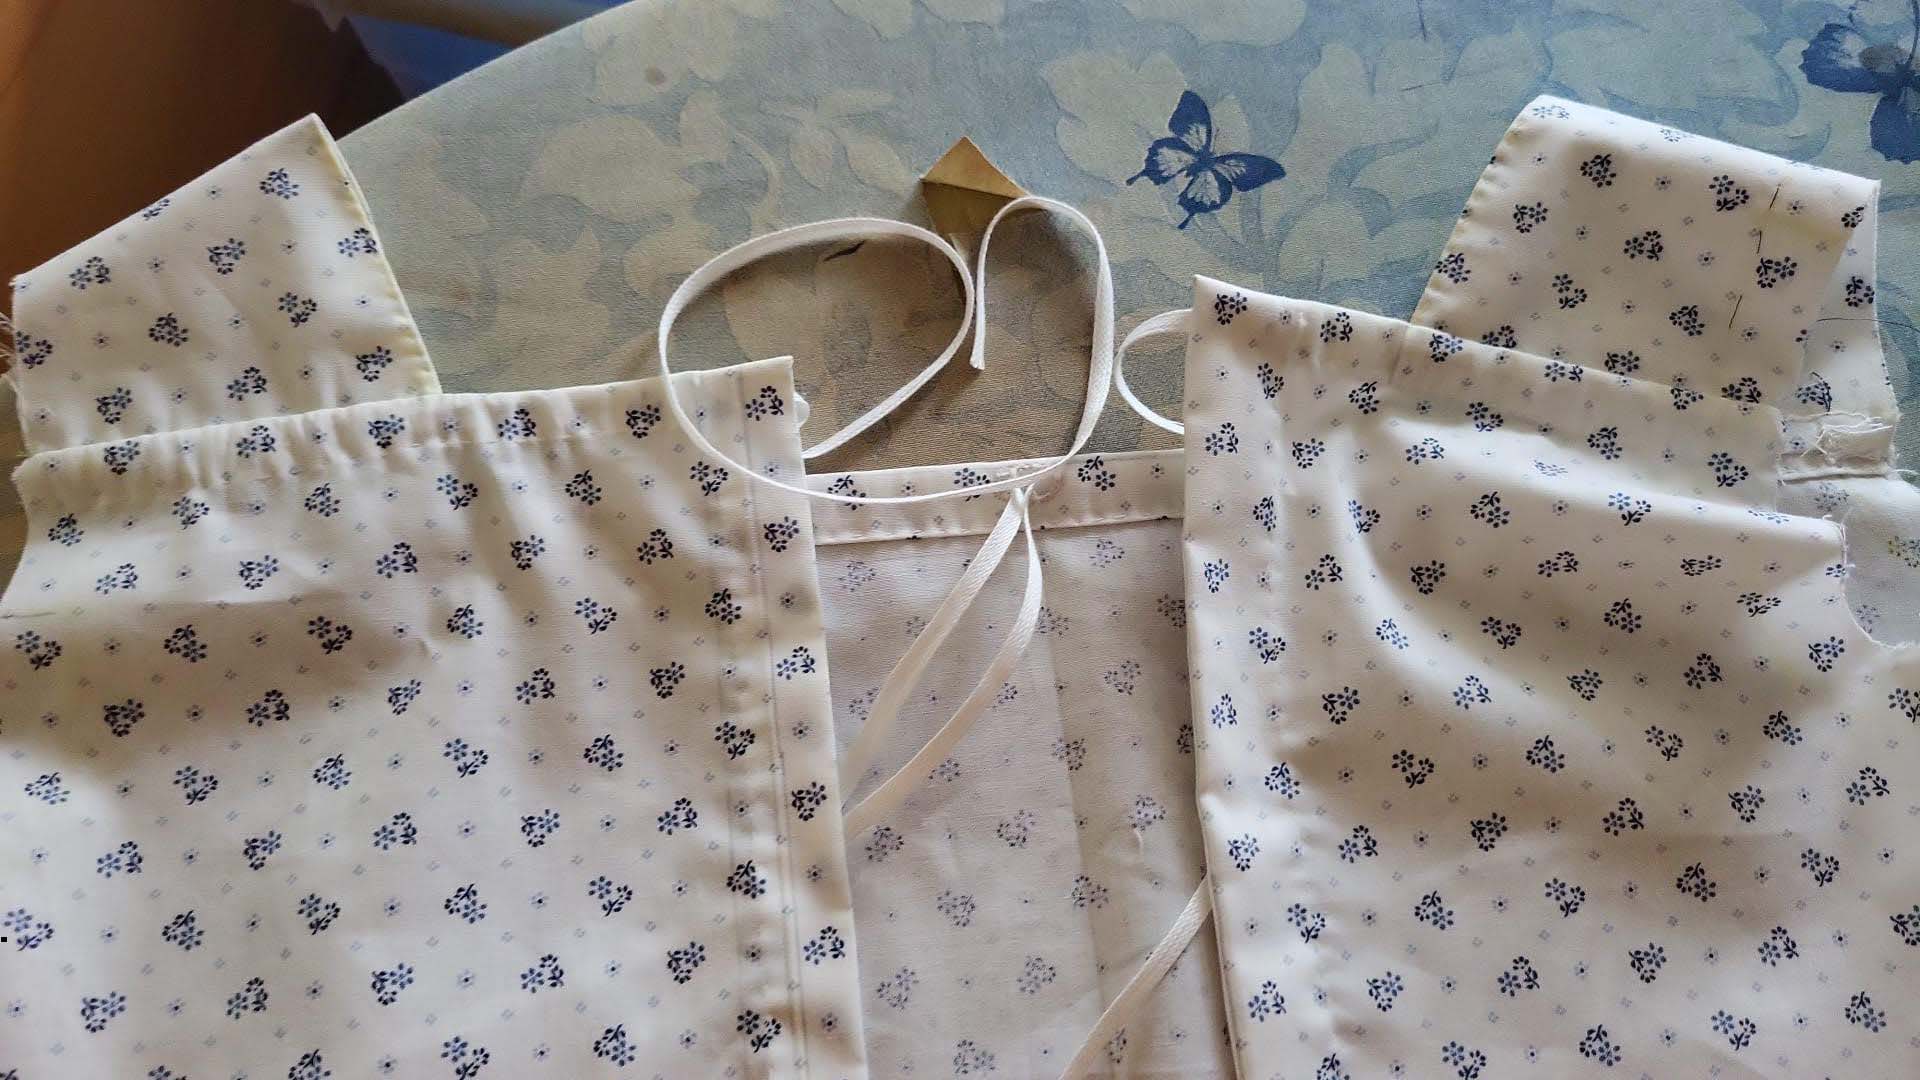
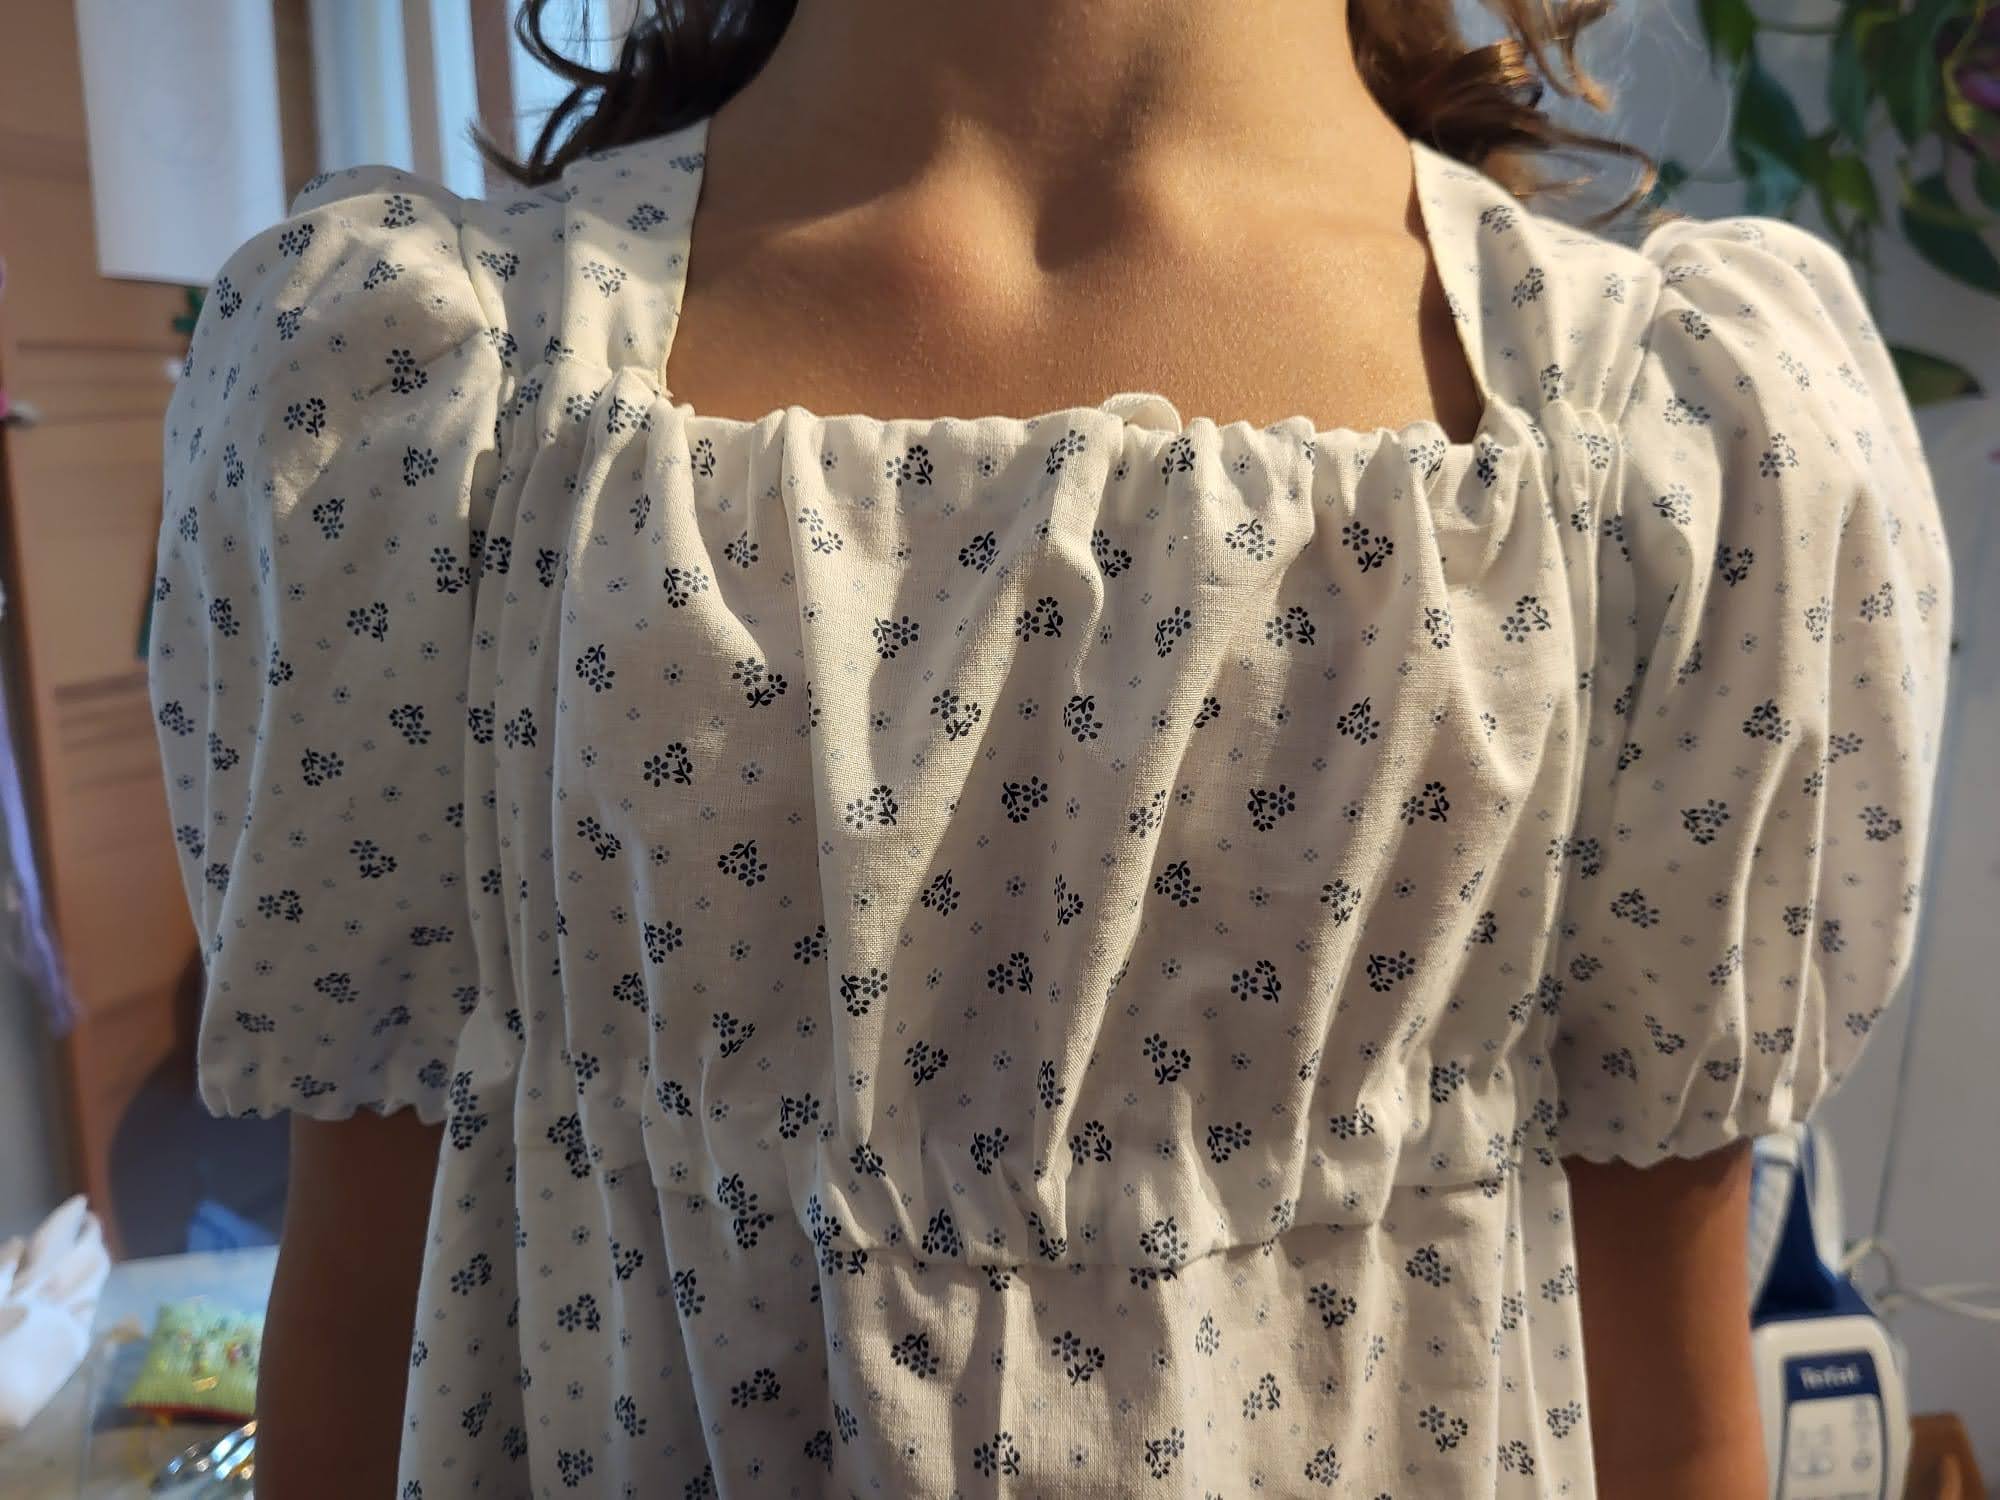
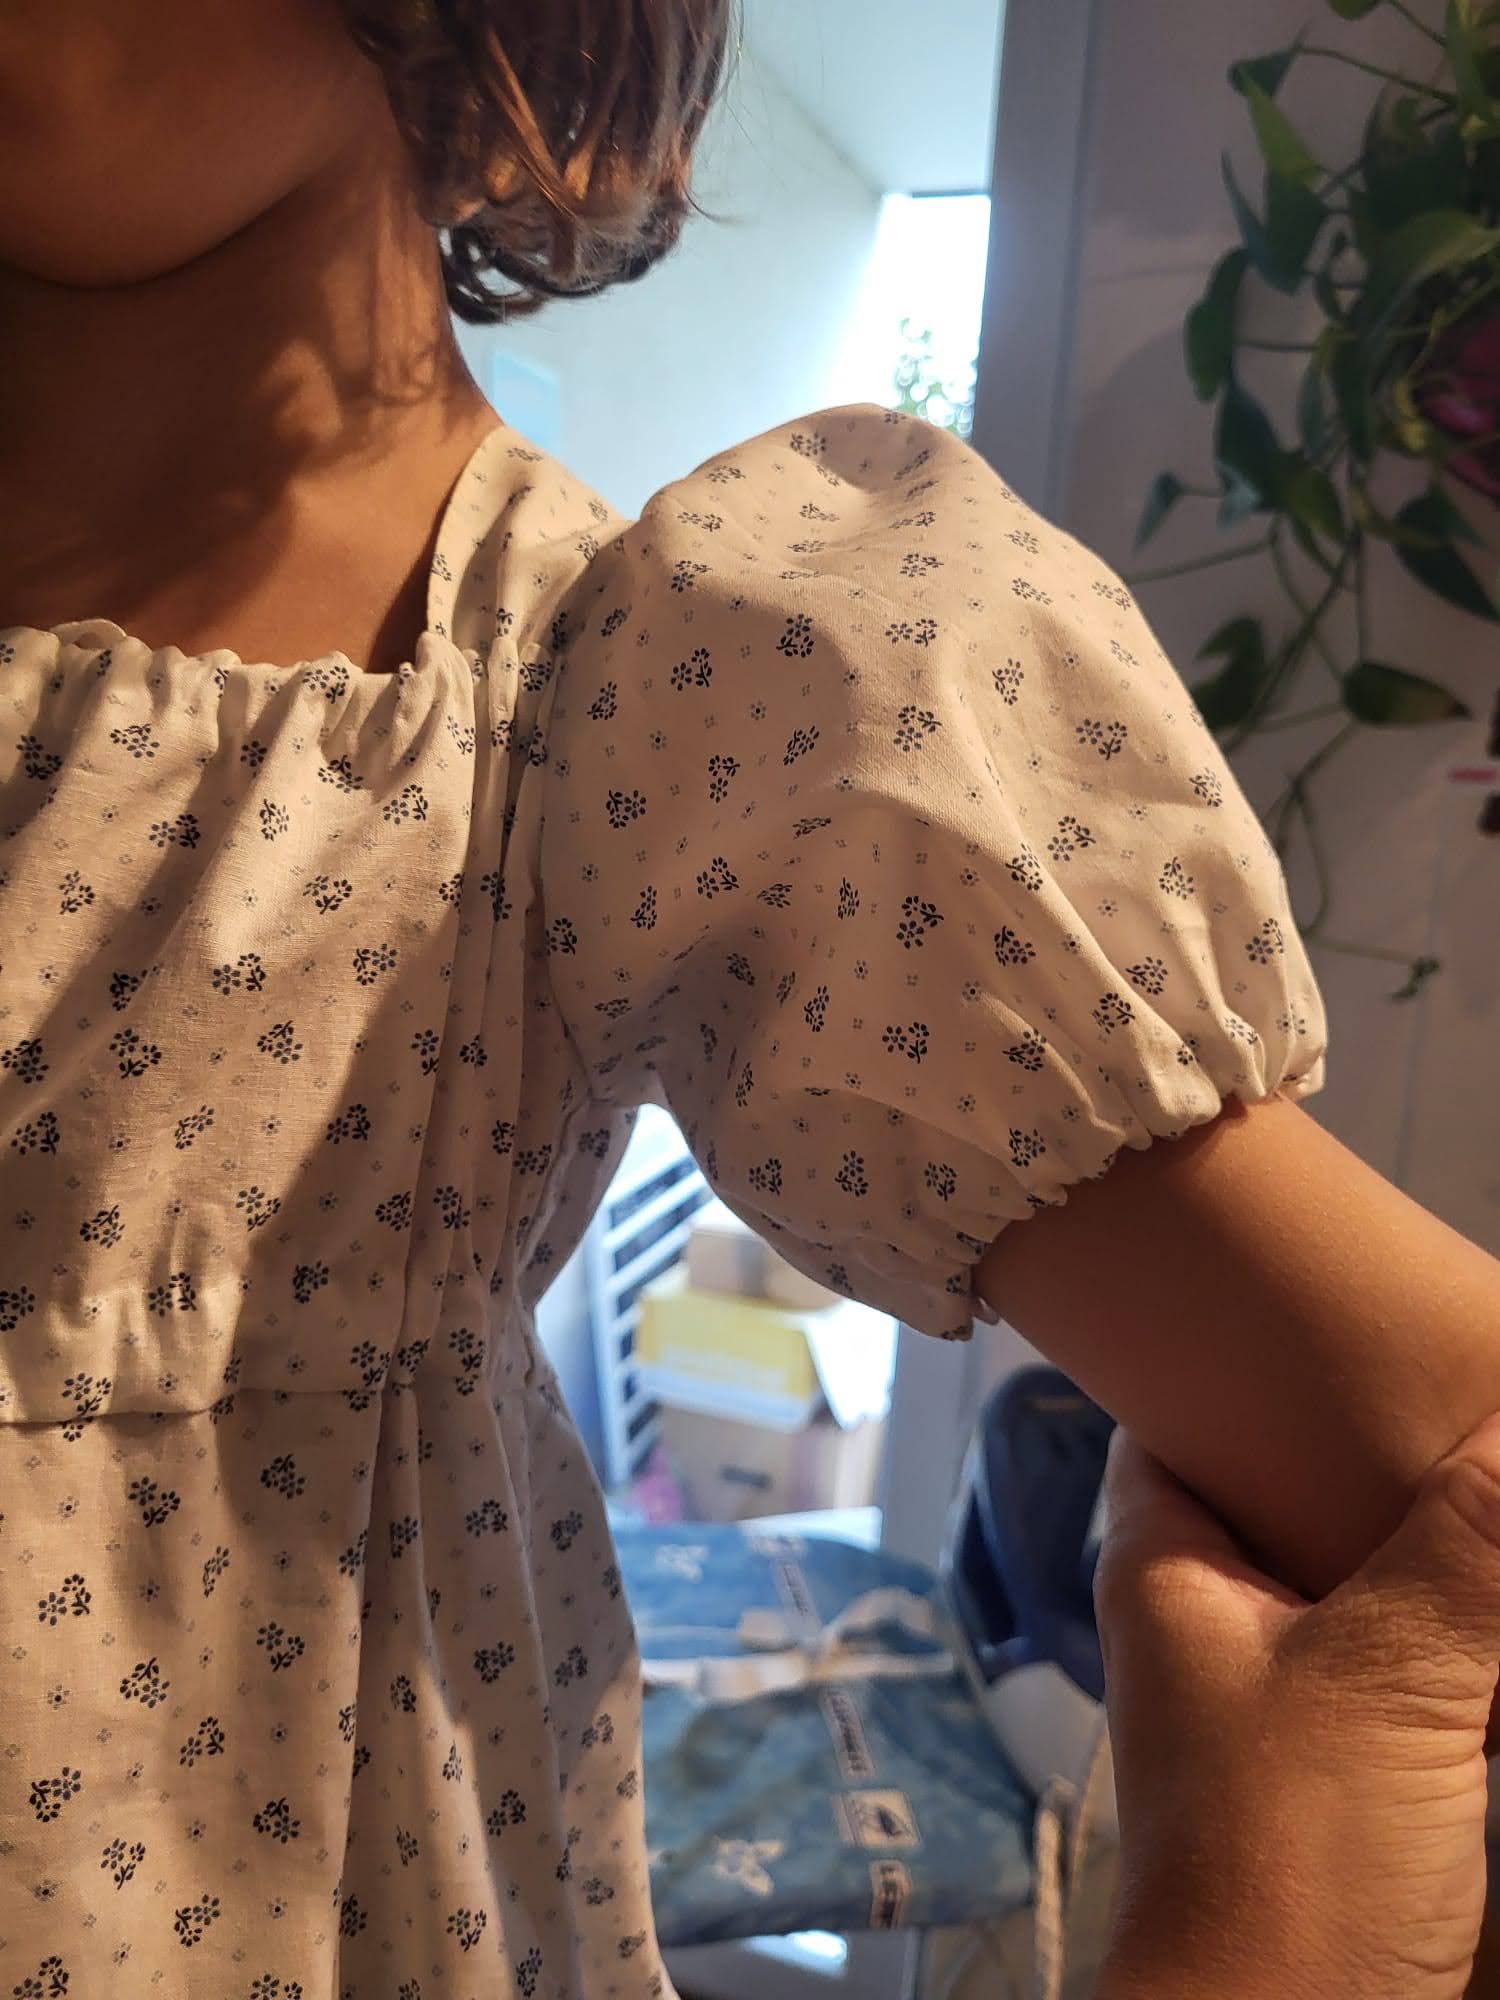
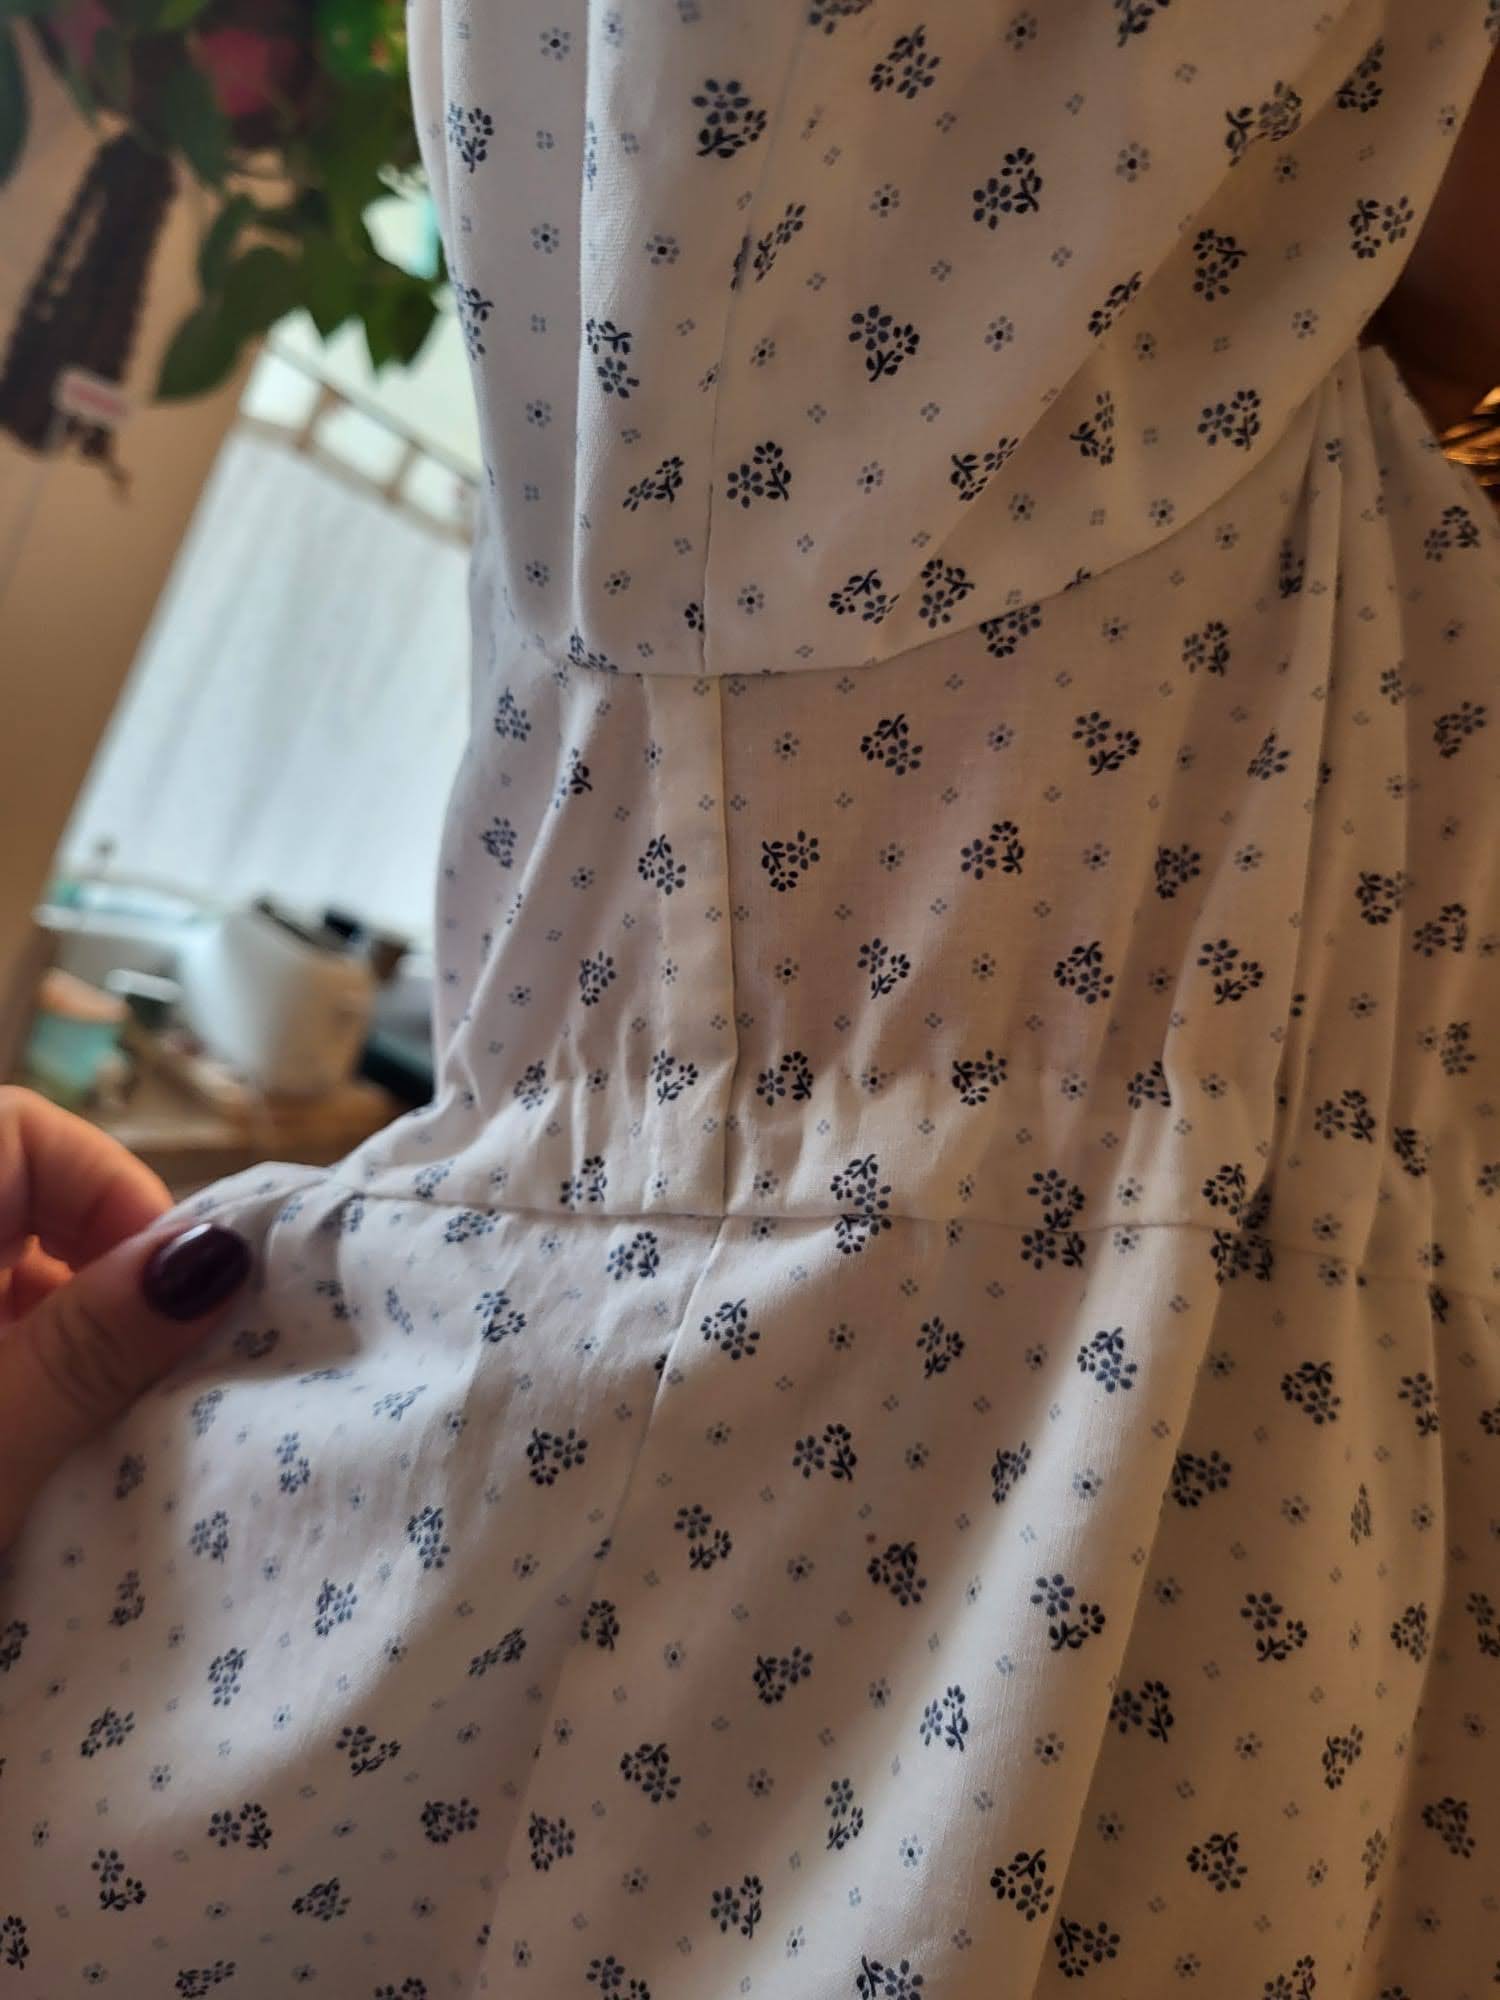
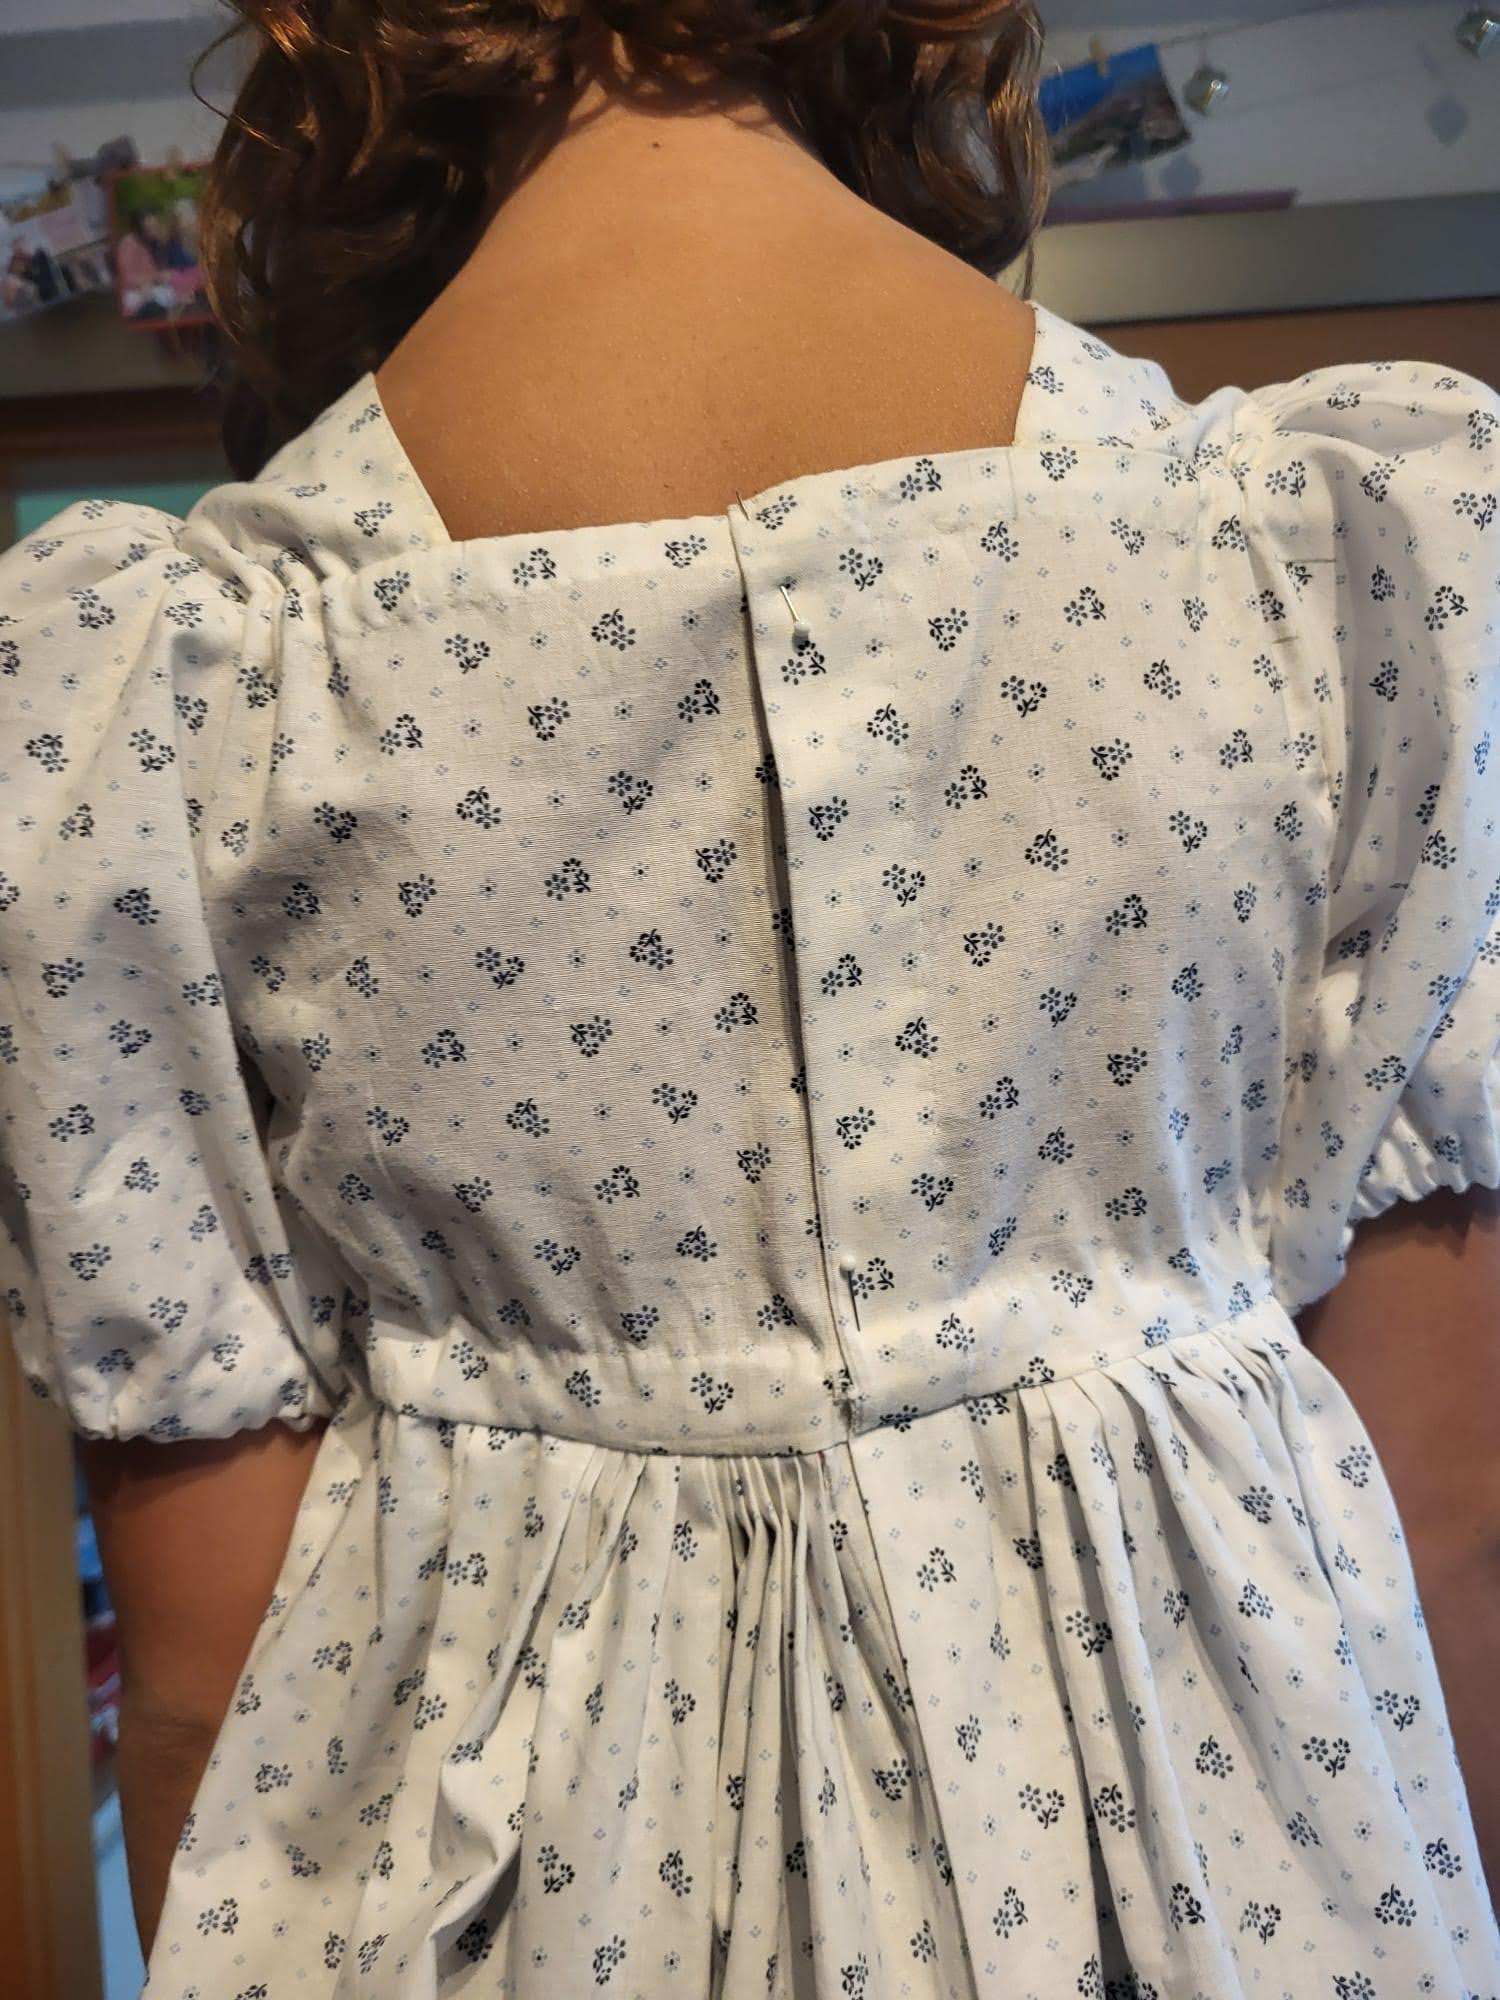
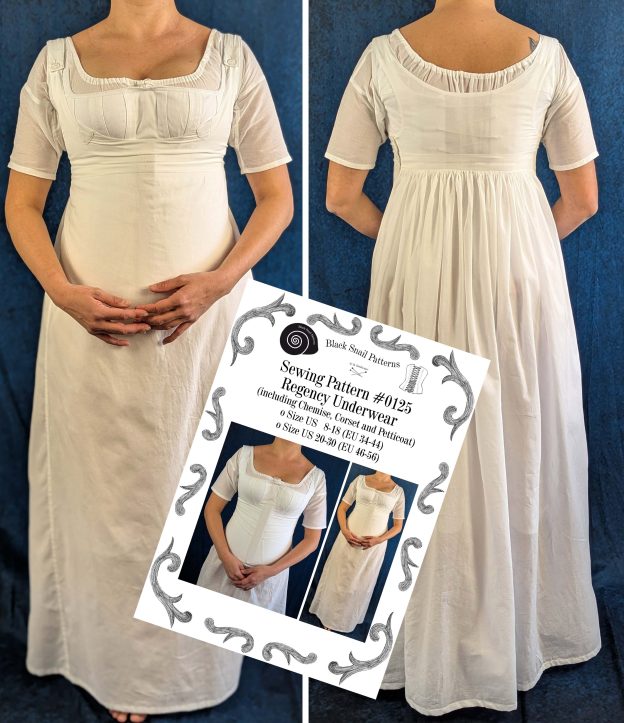
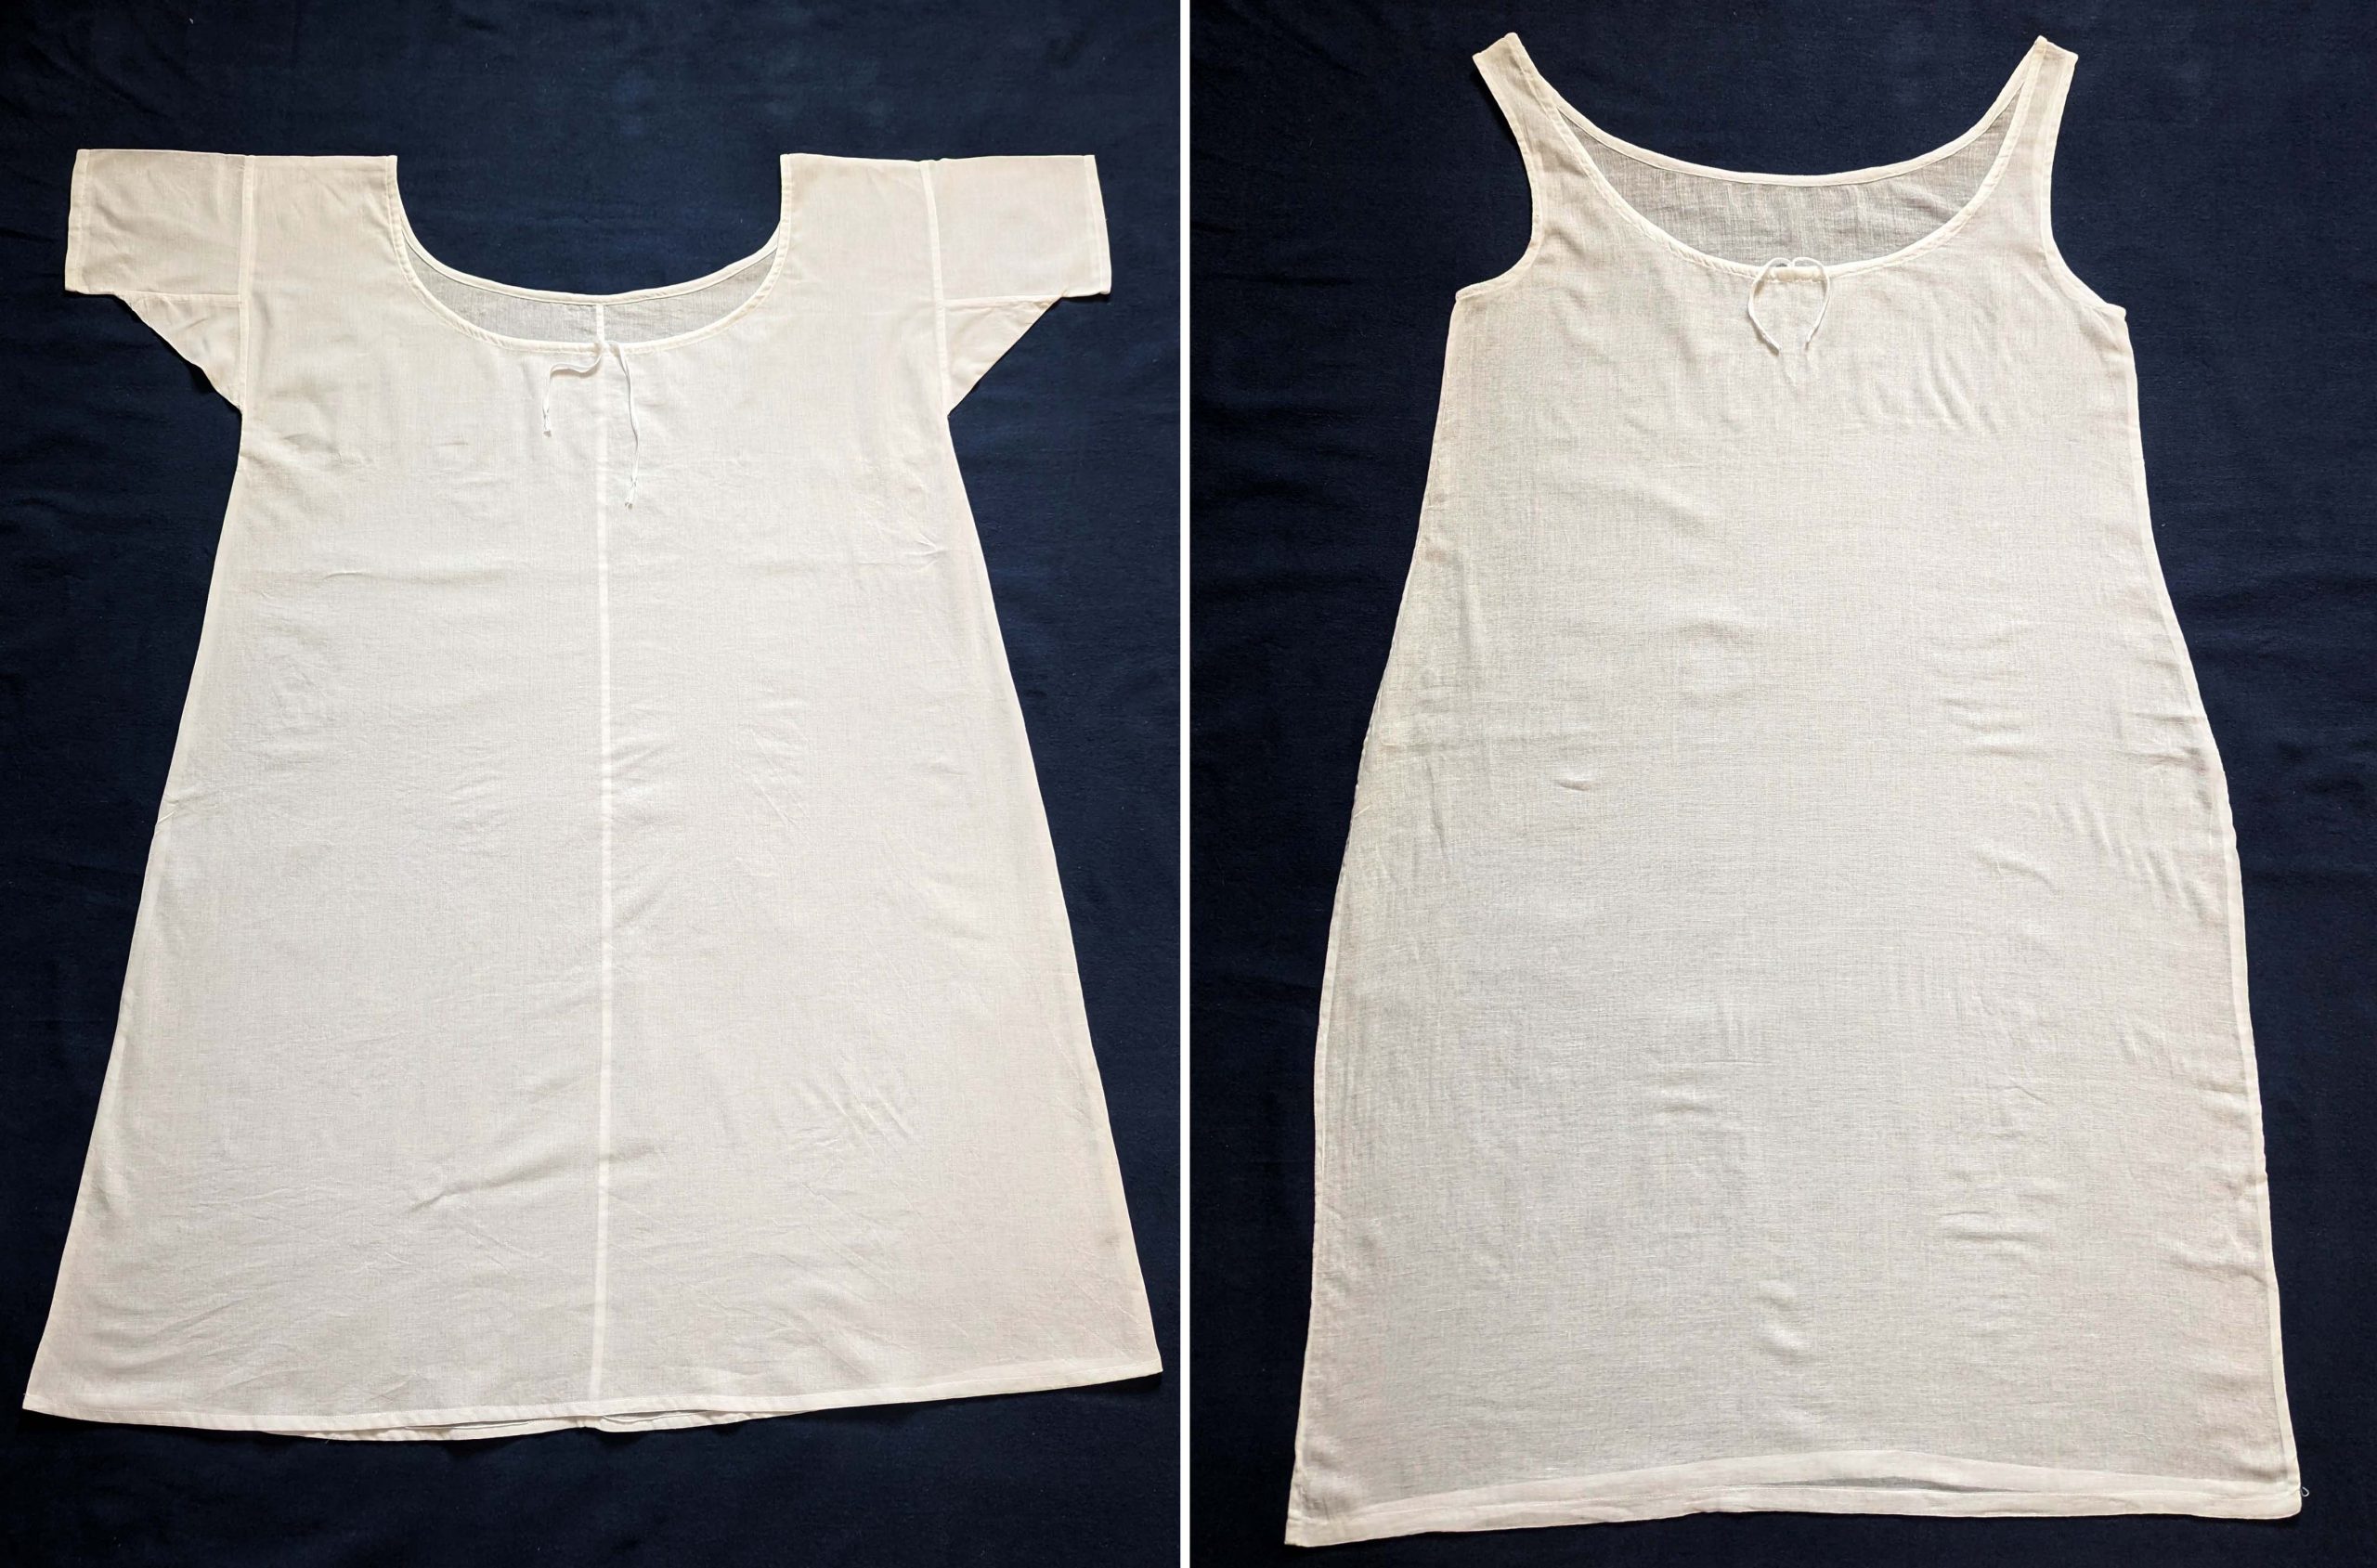
Every great women’s costume starts with a solid foundation: the chemise. Today, we’ll create this essential first layer that graced the wardrobes of Jane Austen’s contemporaries. Made from soft cotton or fine linen, this knee-length garment protected the corset and the outer garments from sweat and body oils.
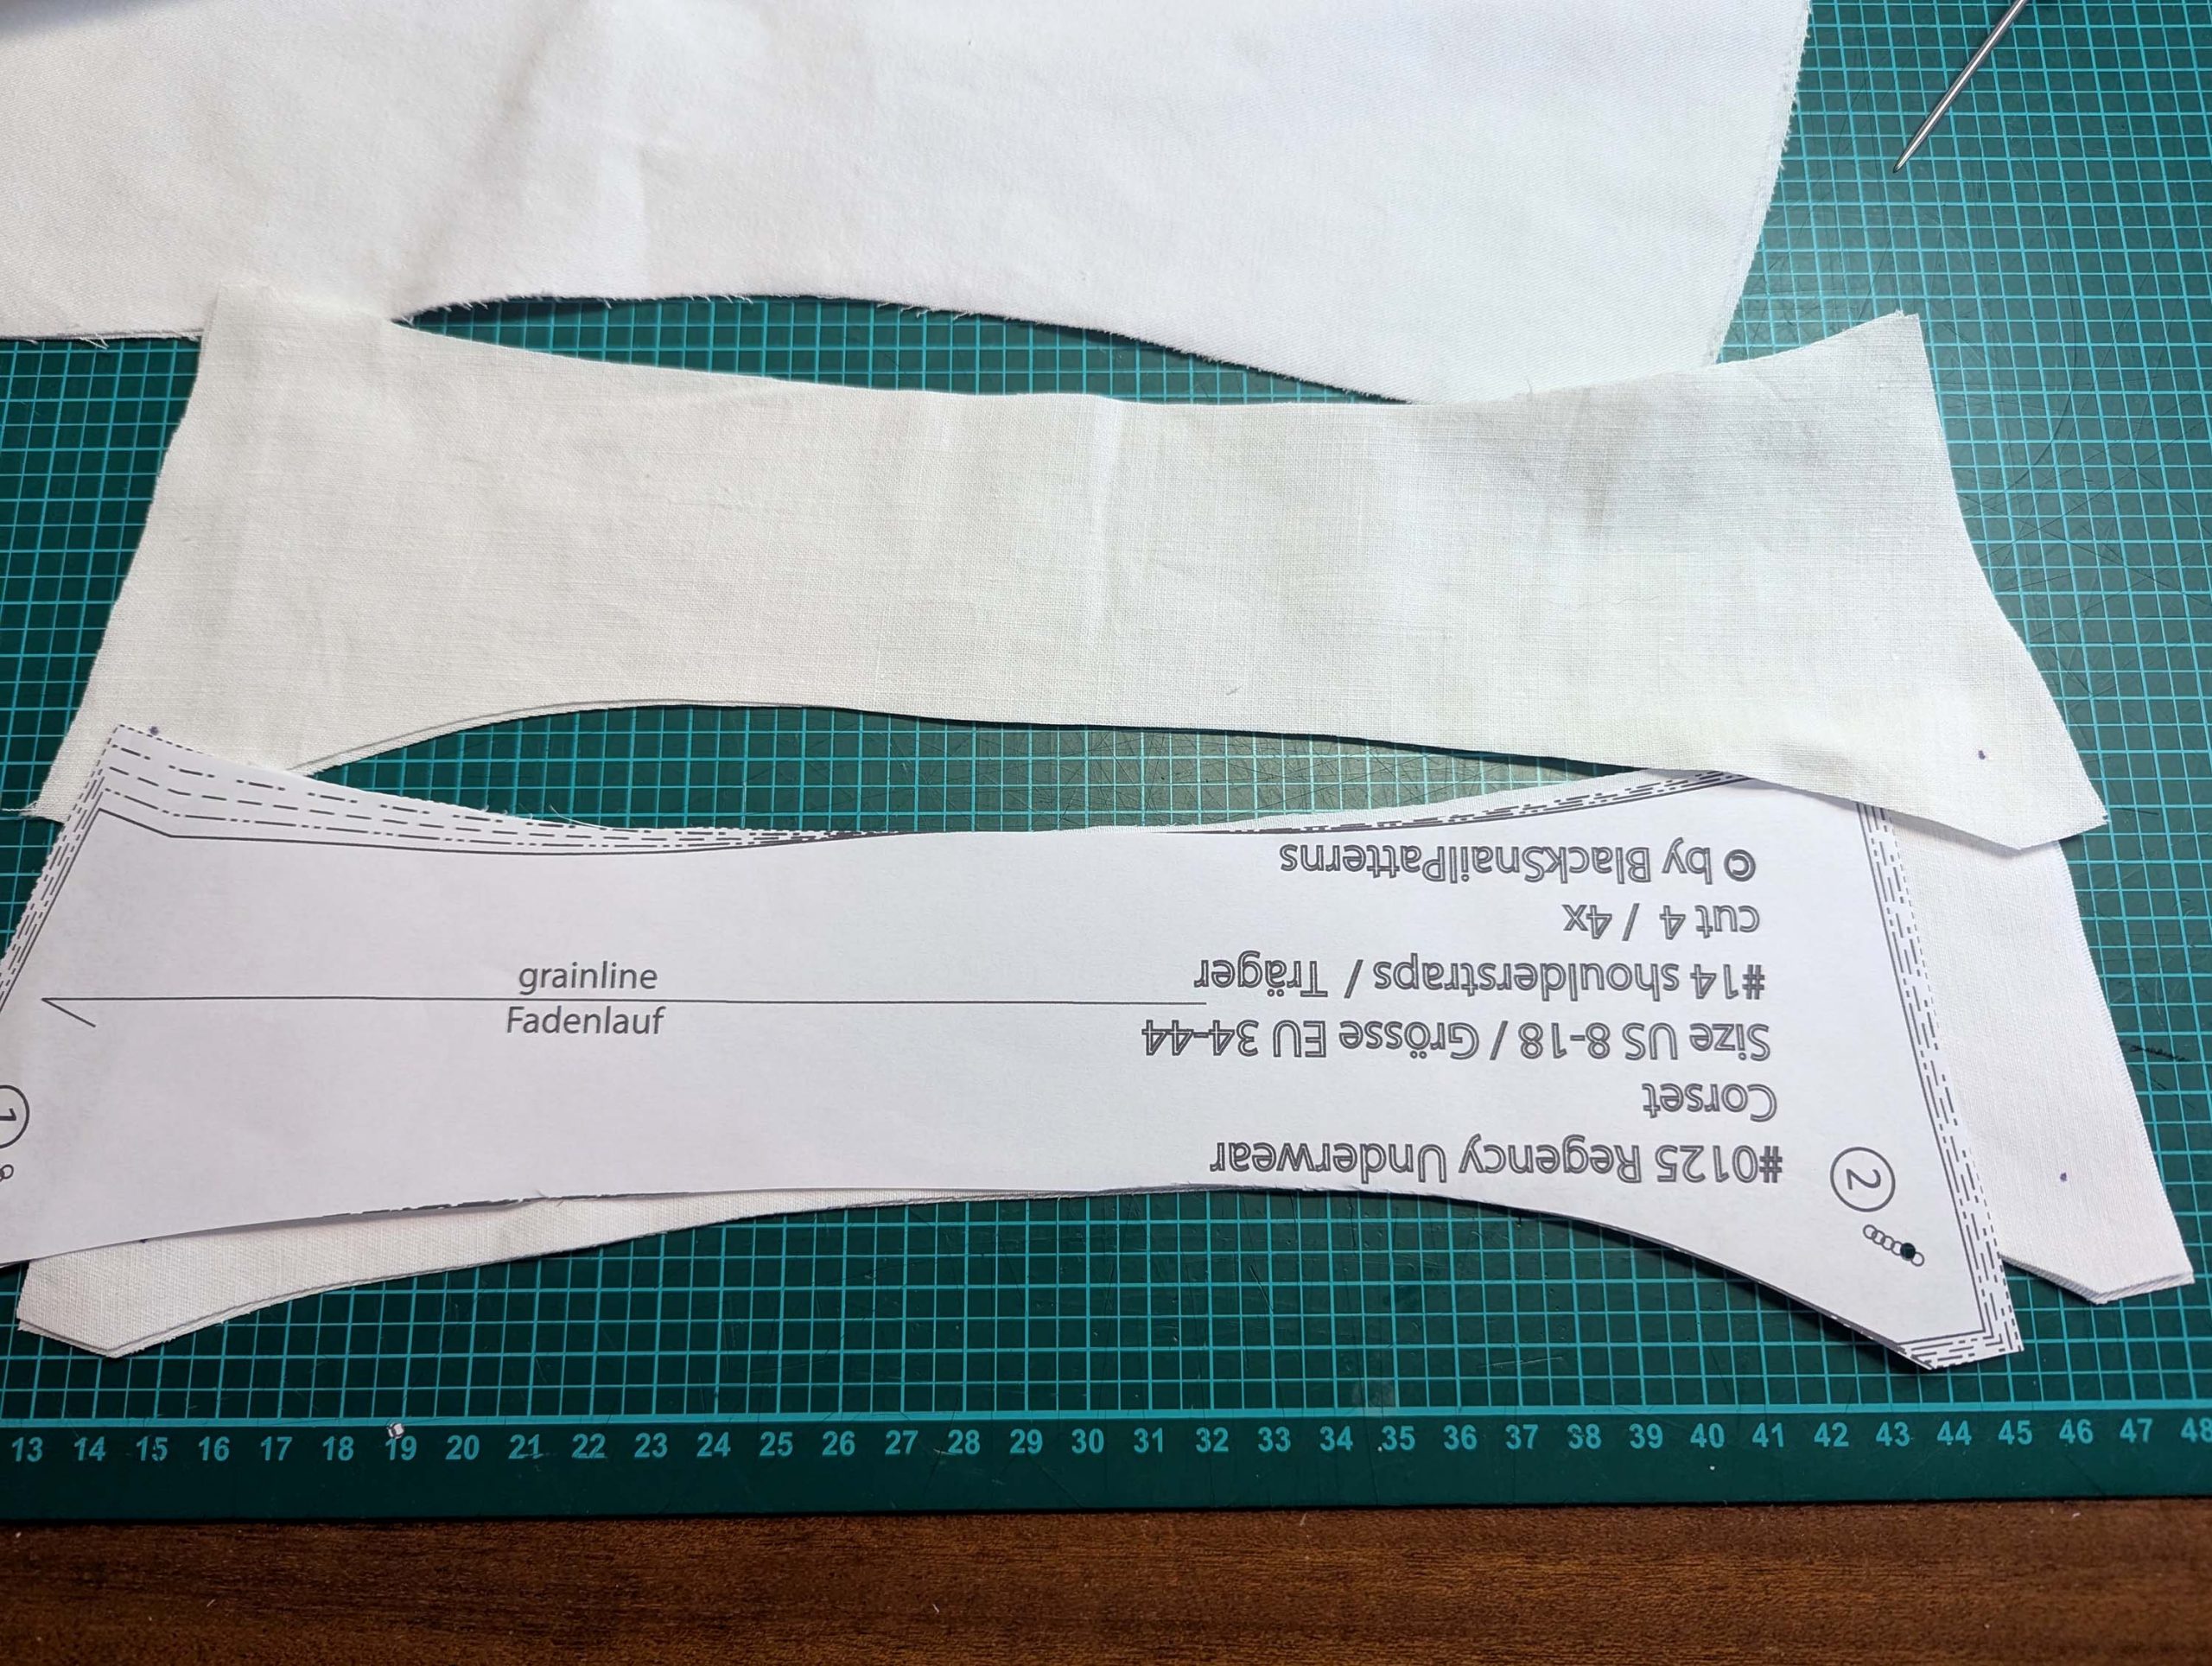
You can purchase the pattern, including chemise, petticoat, and corset here in my webshop:
COMING SOON
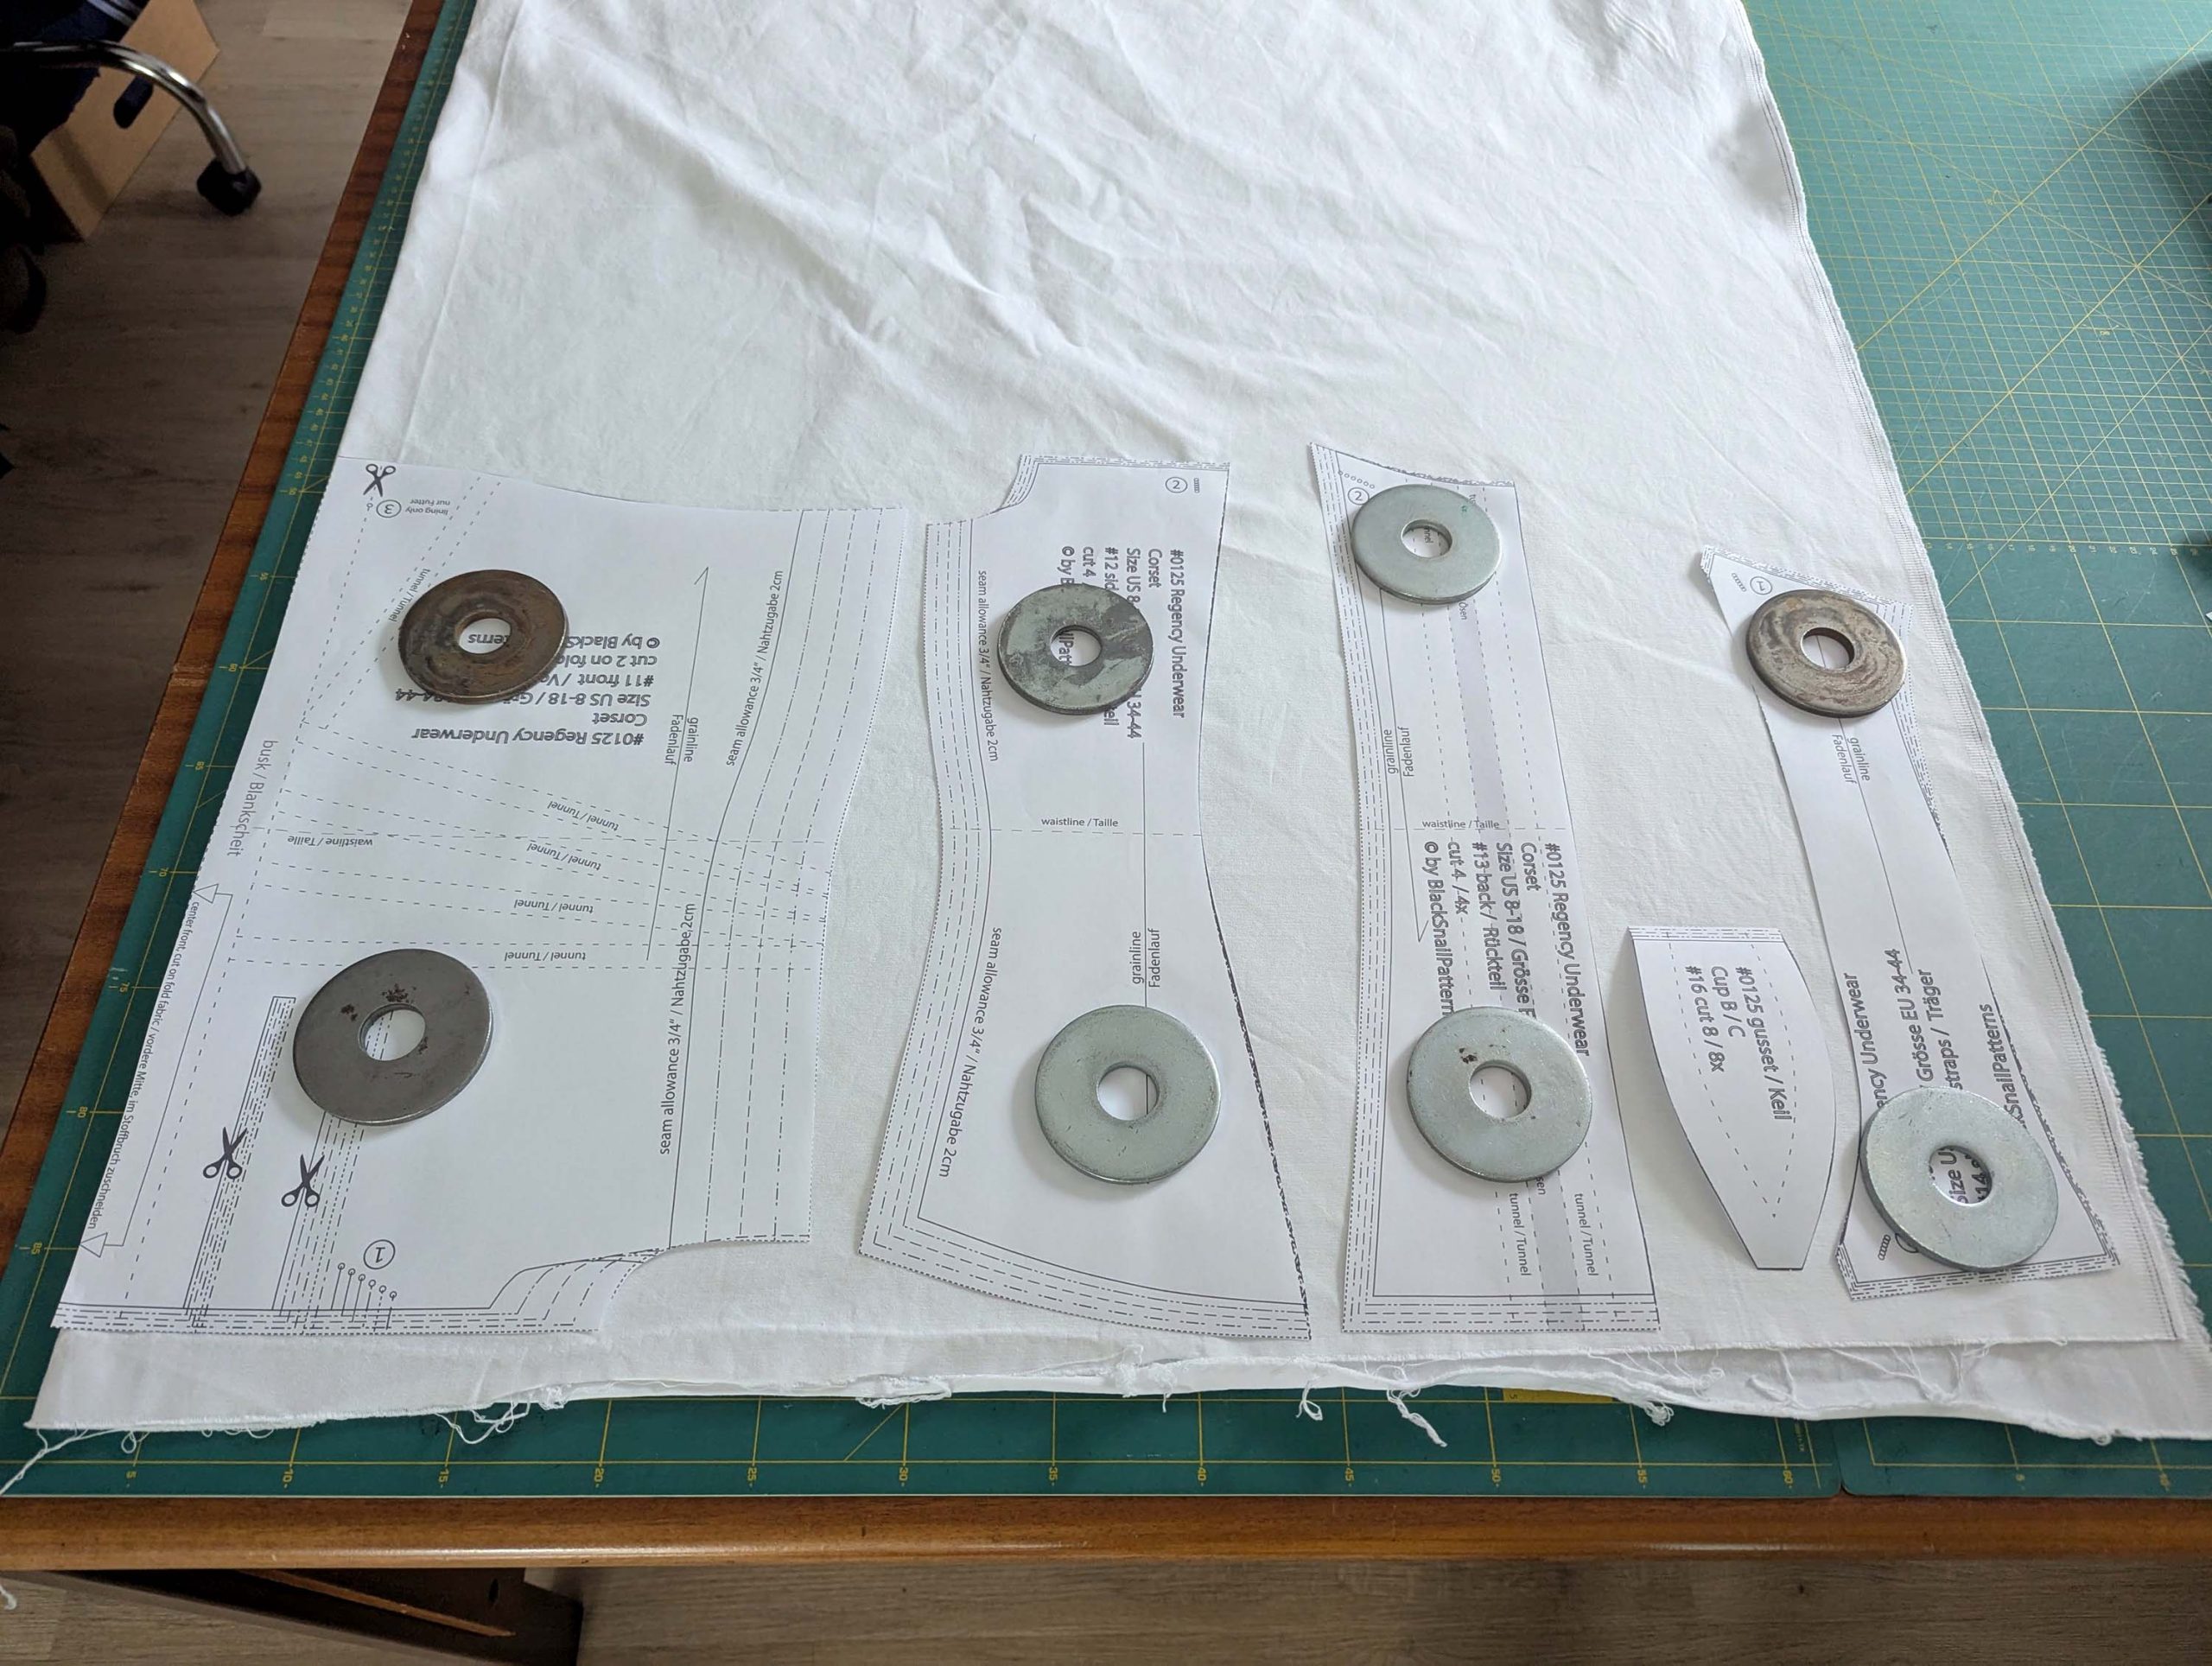
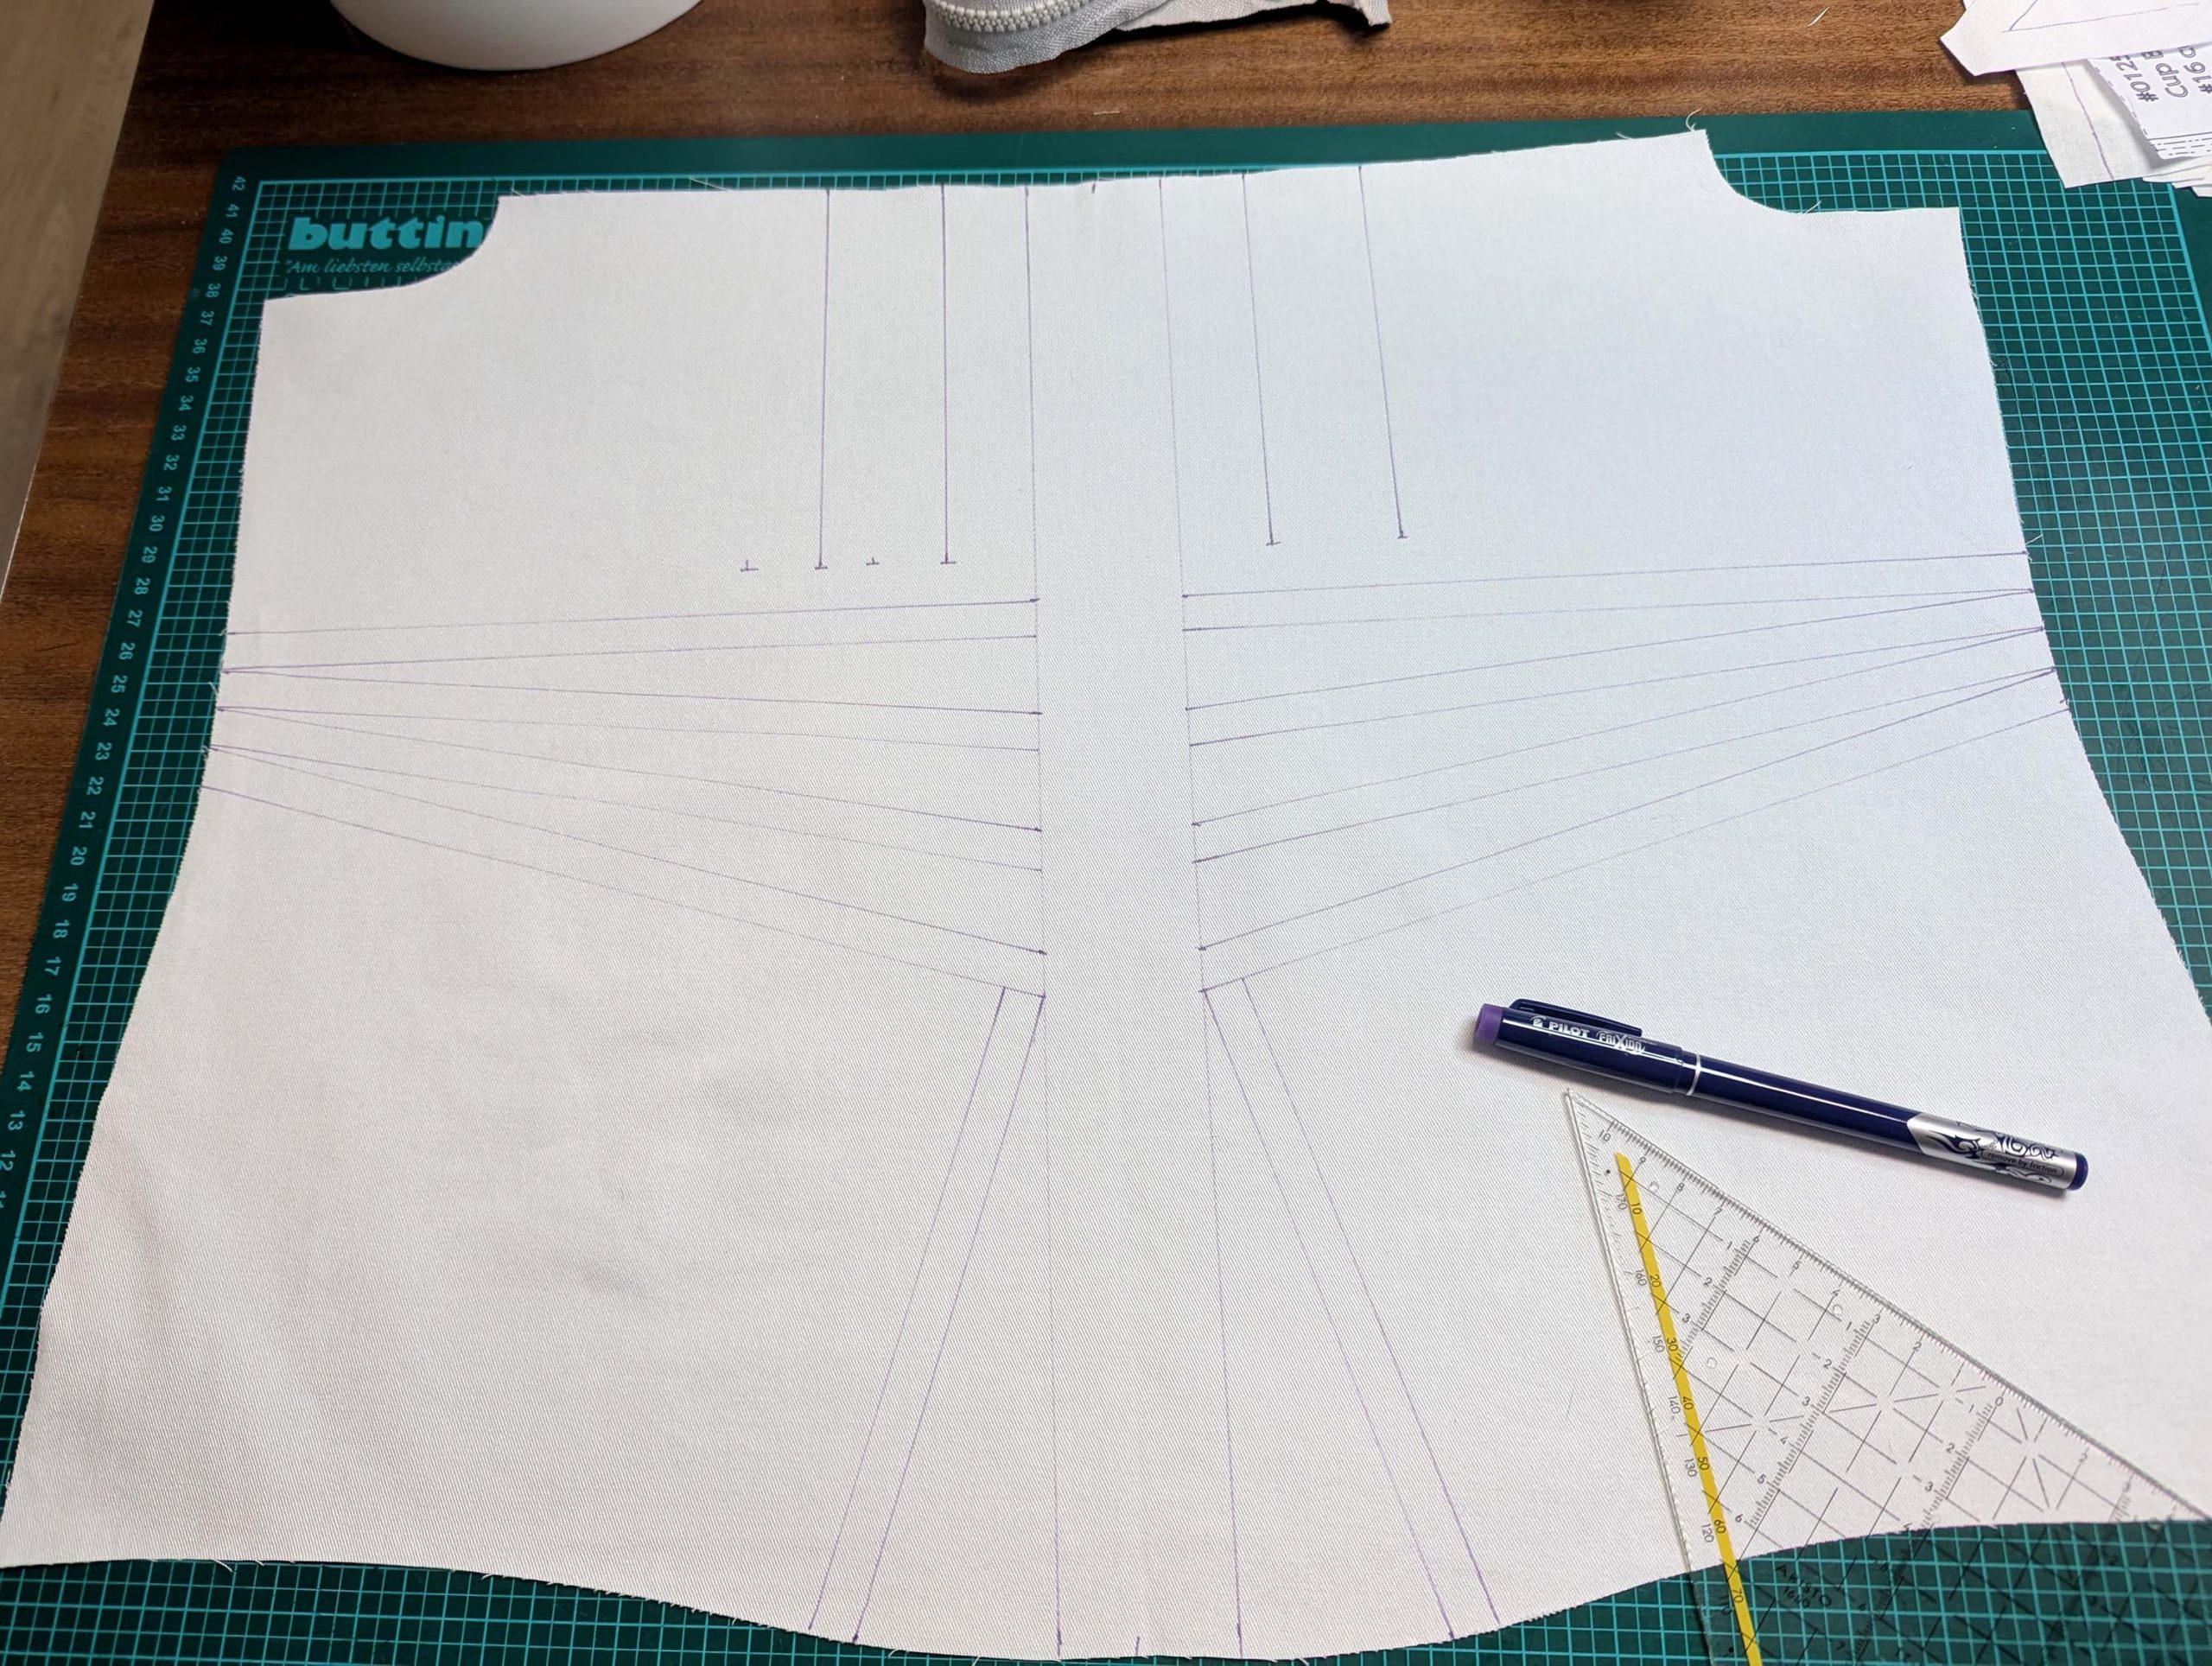
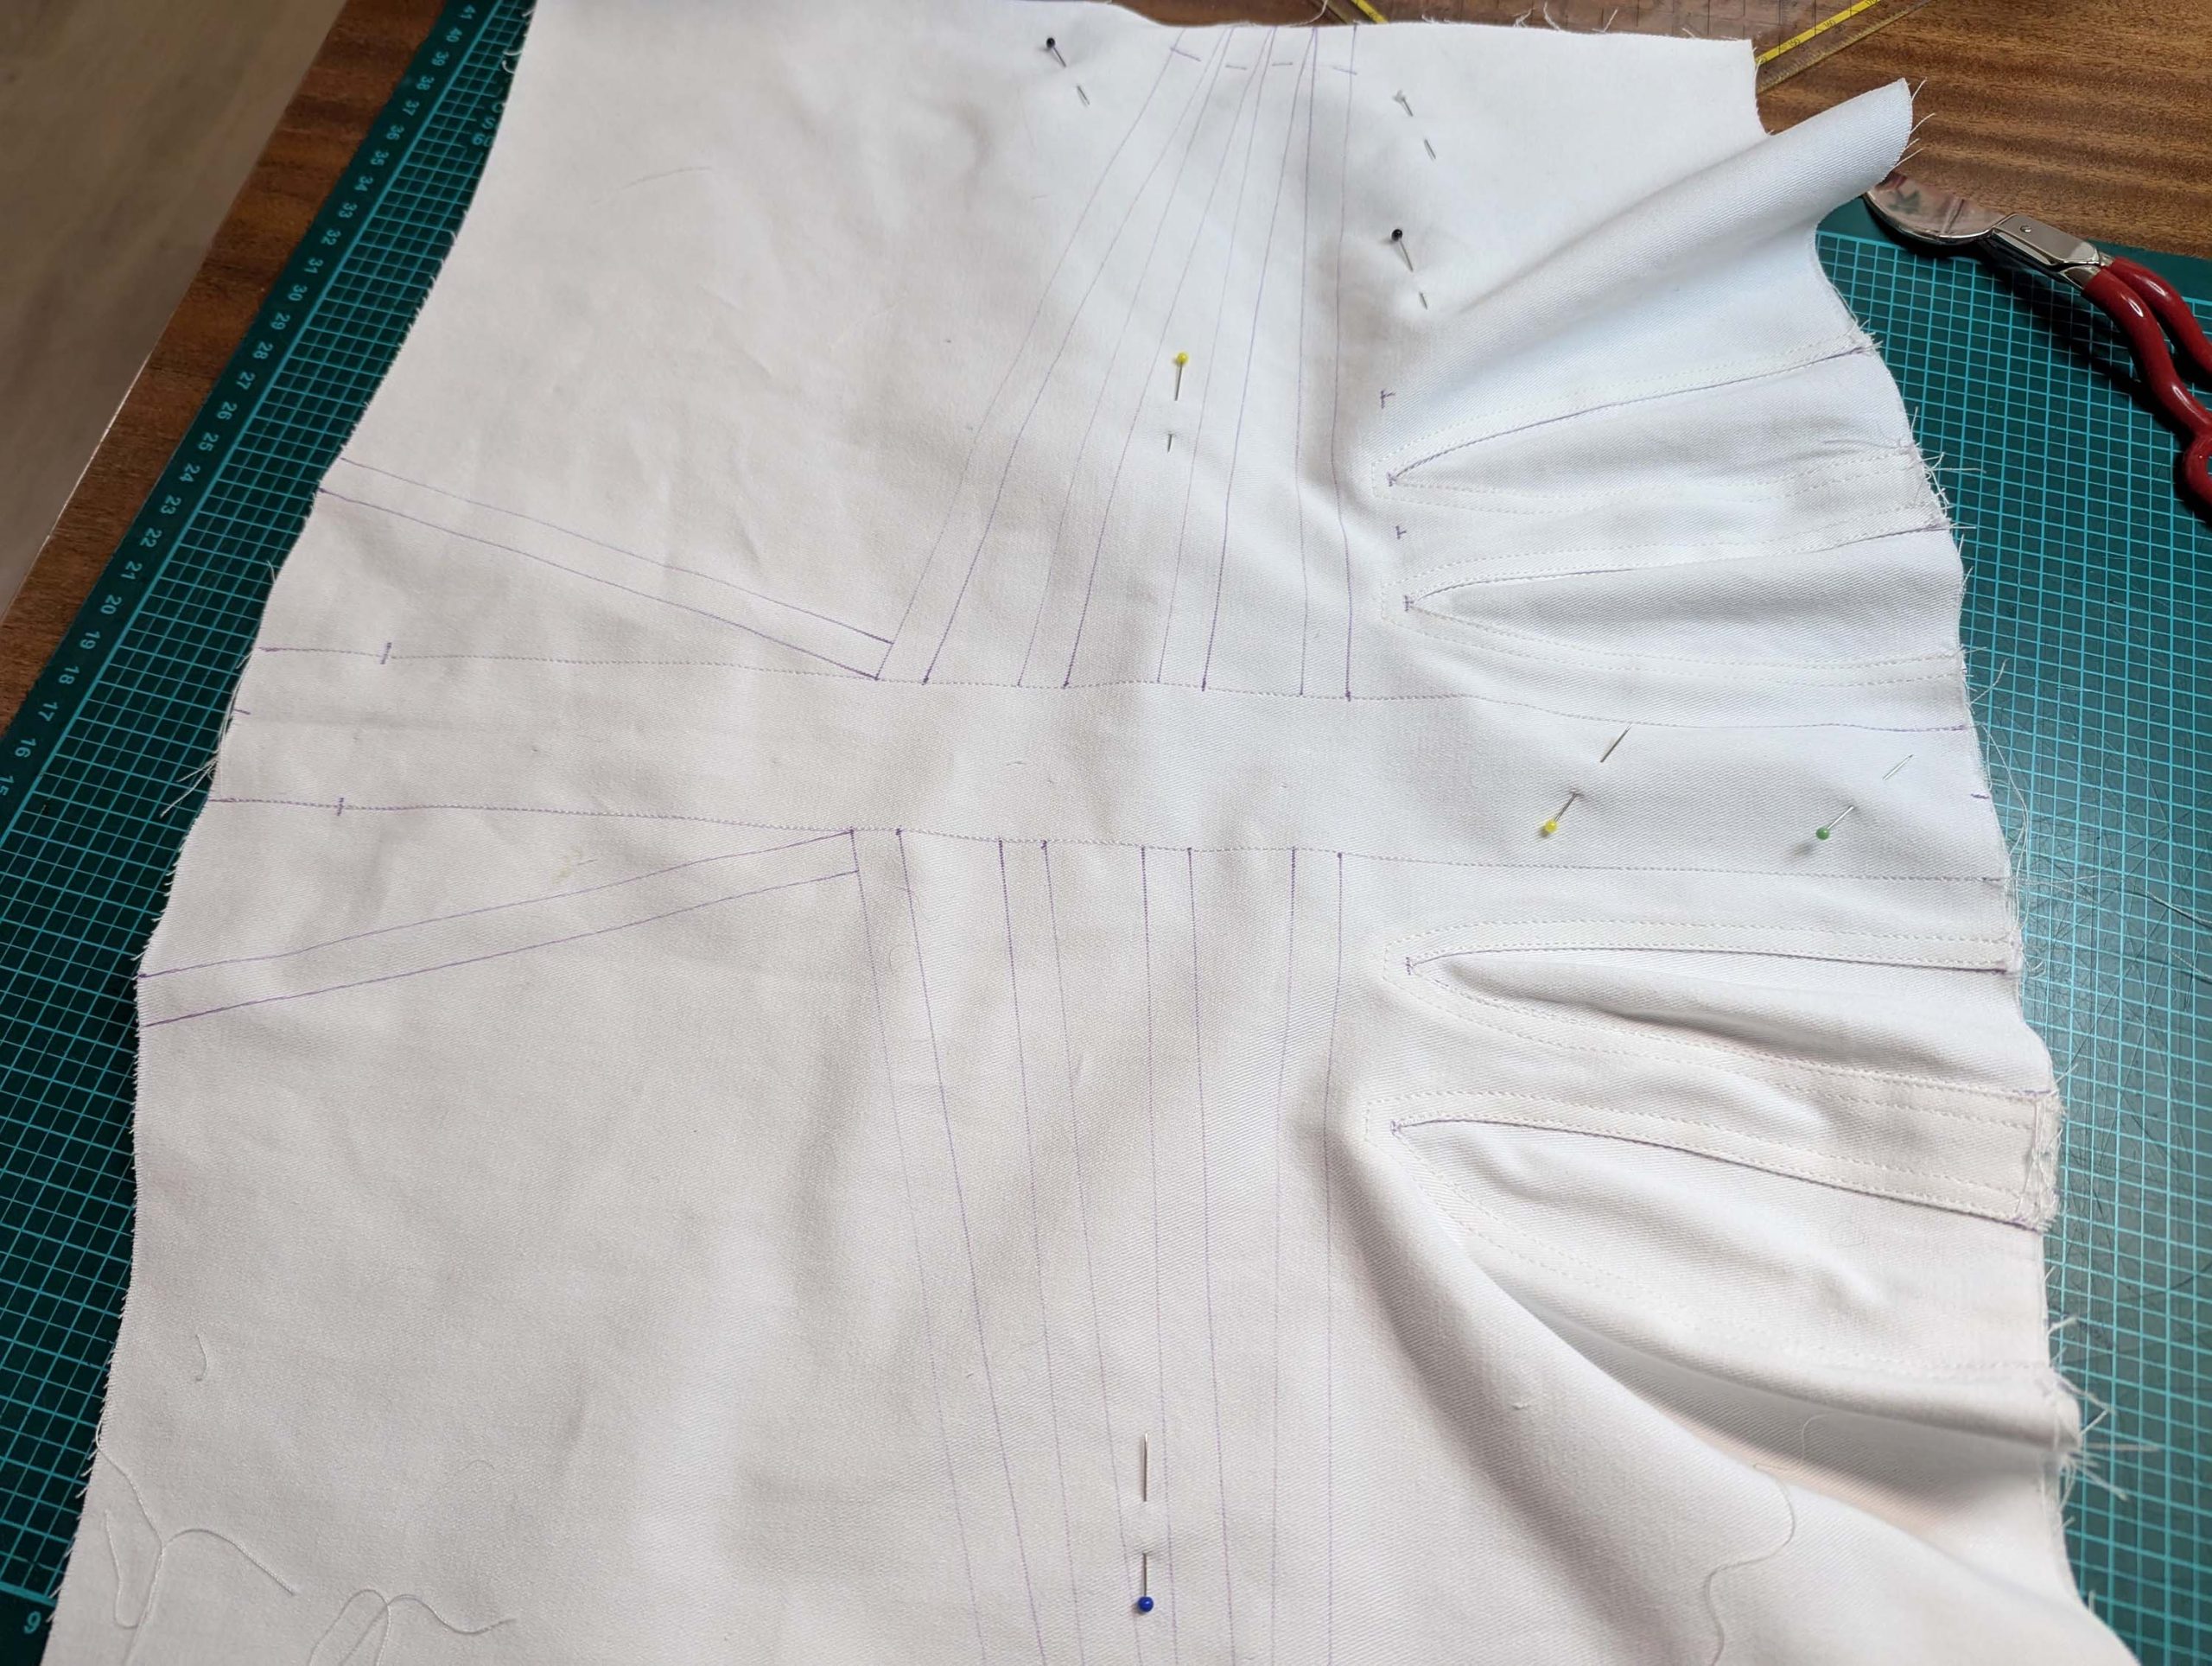
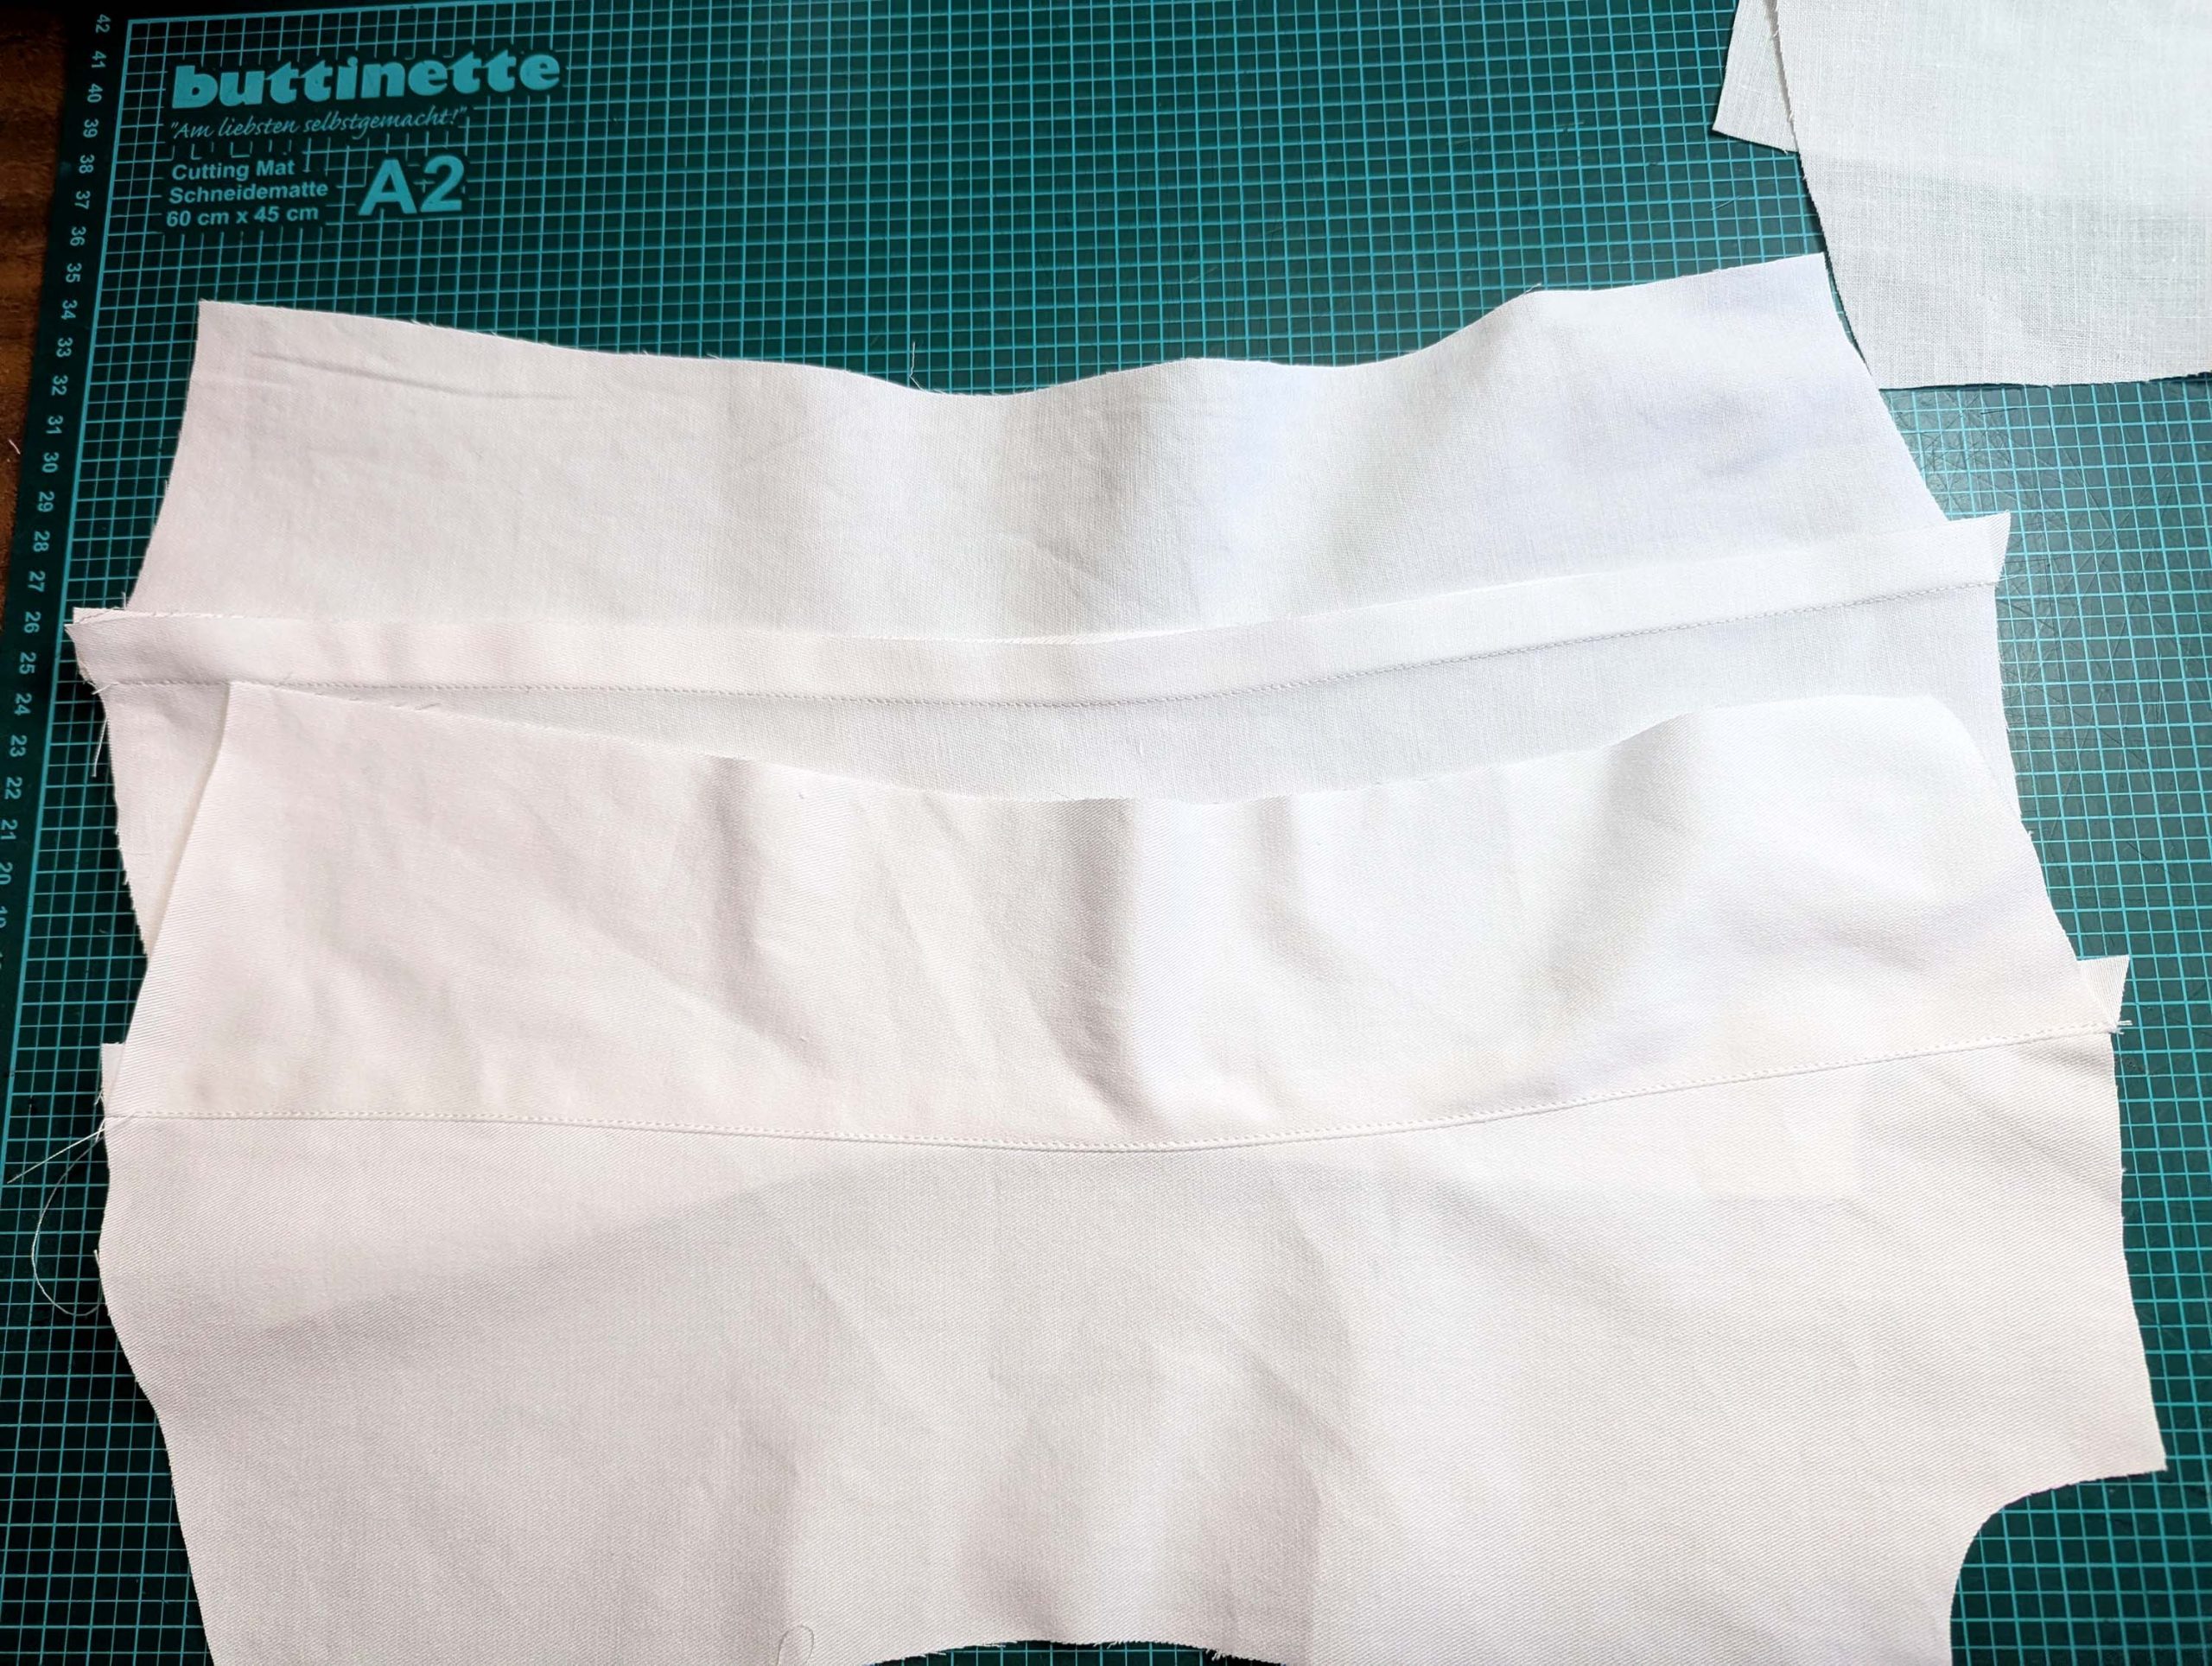
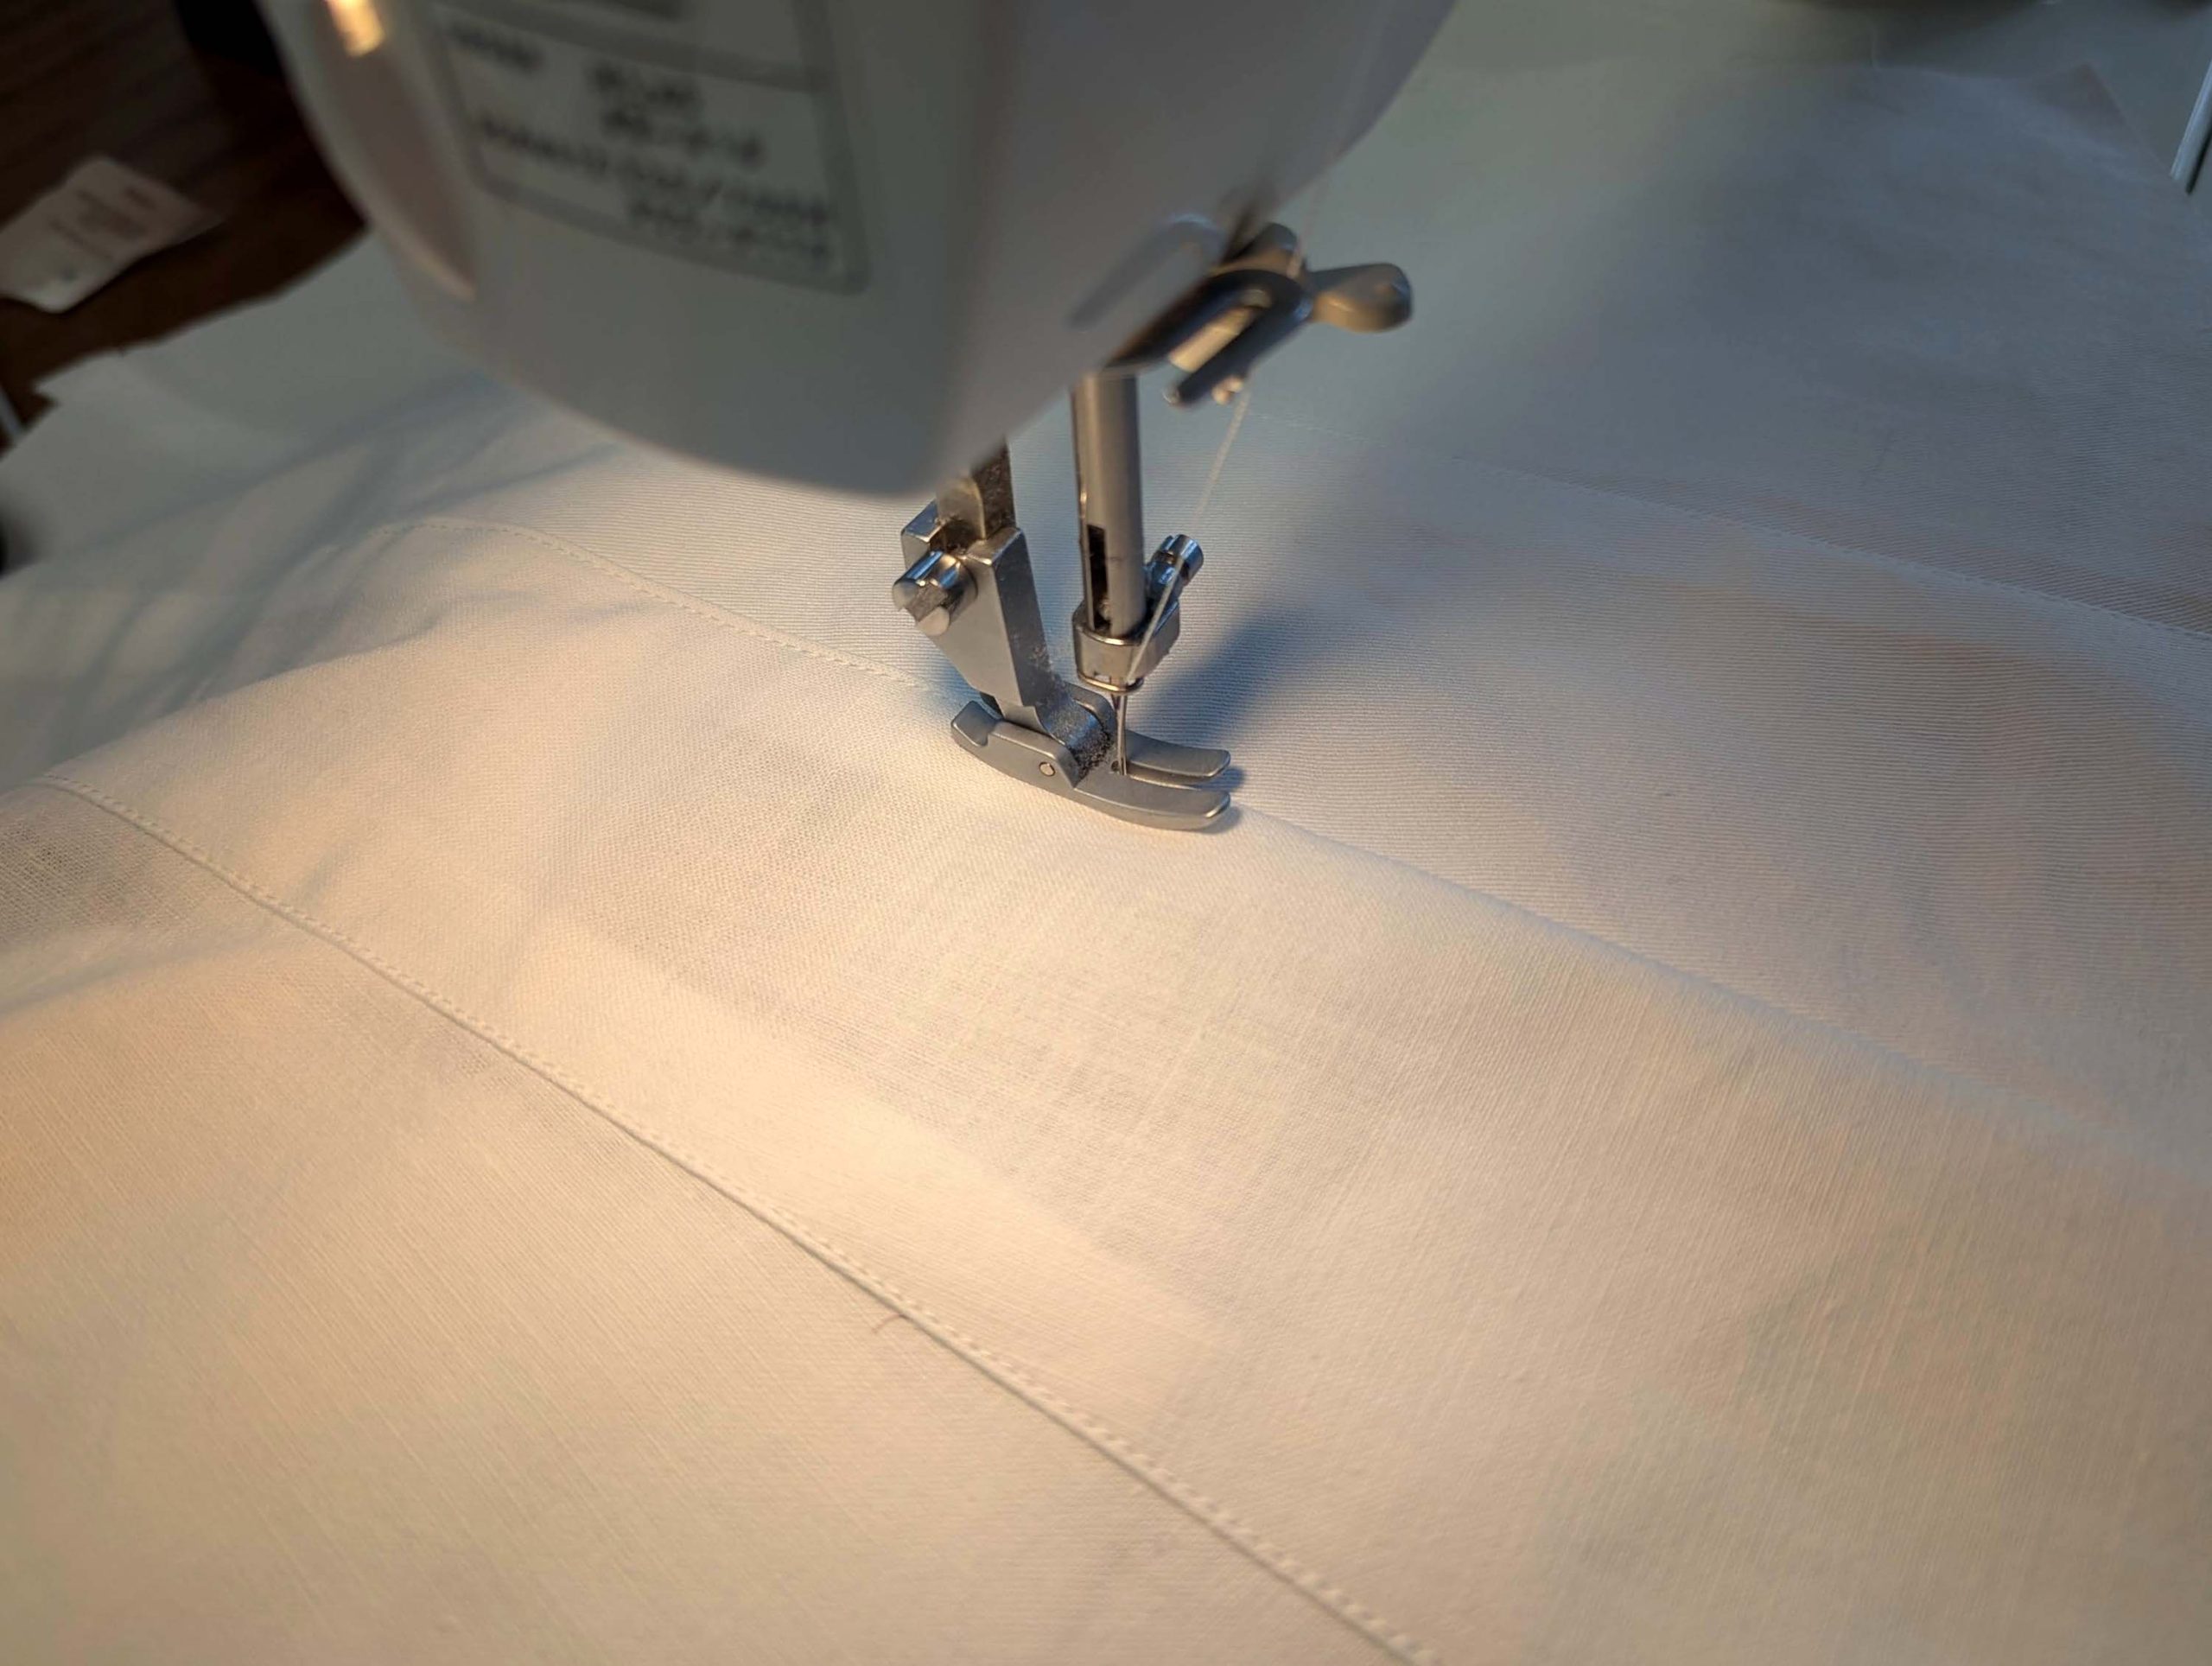
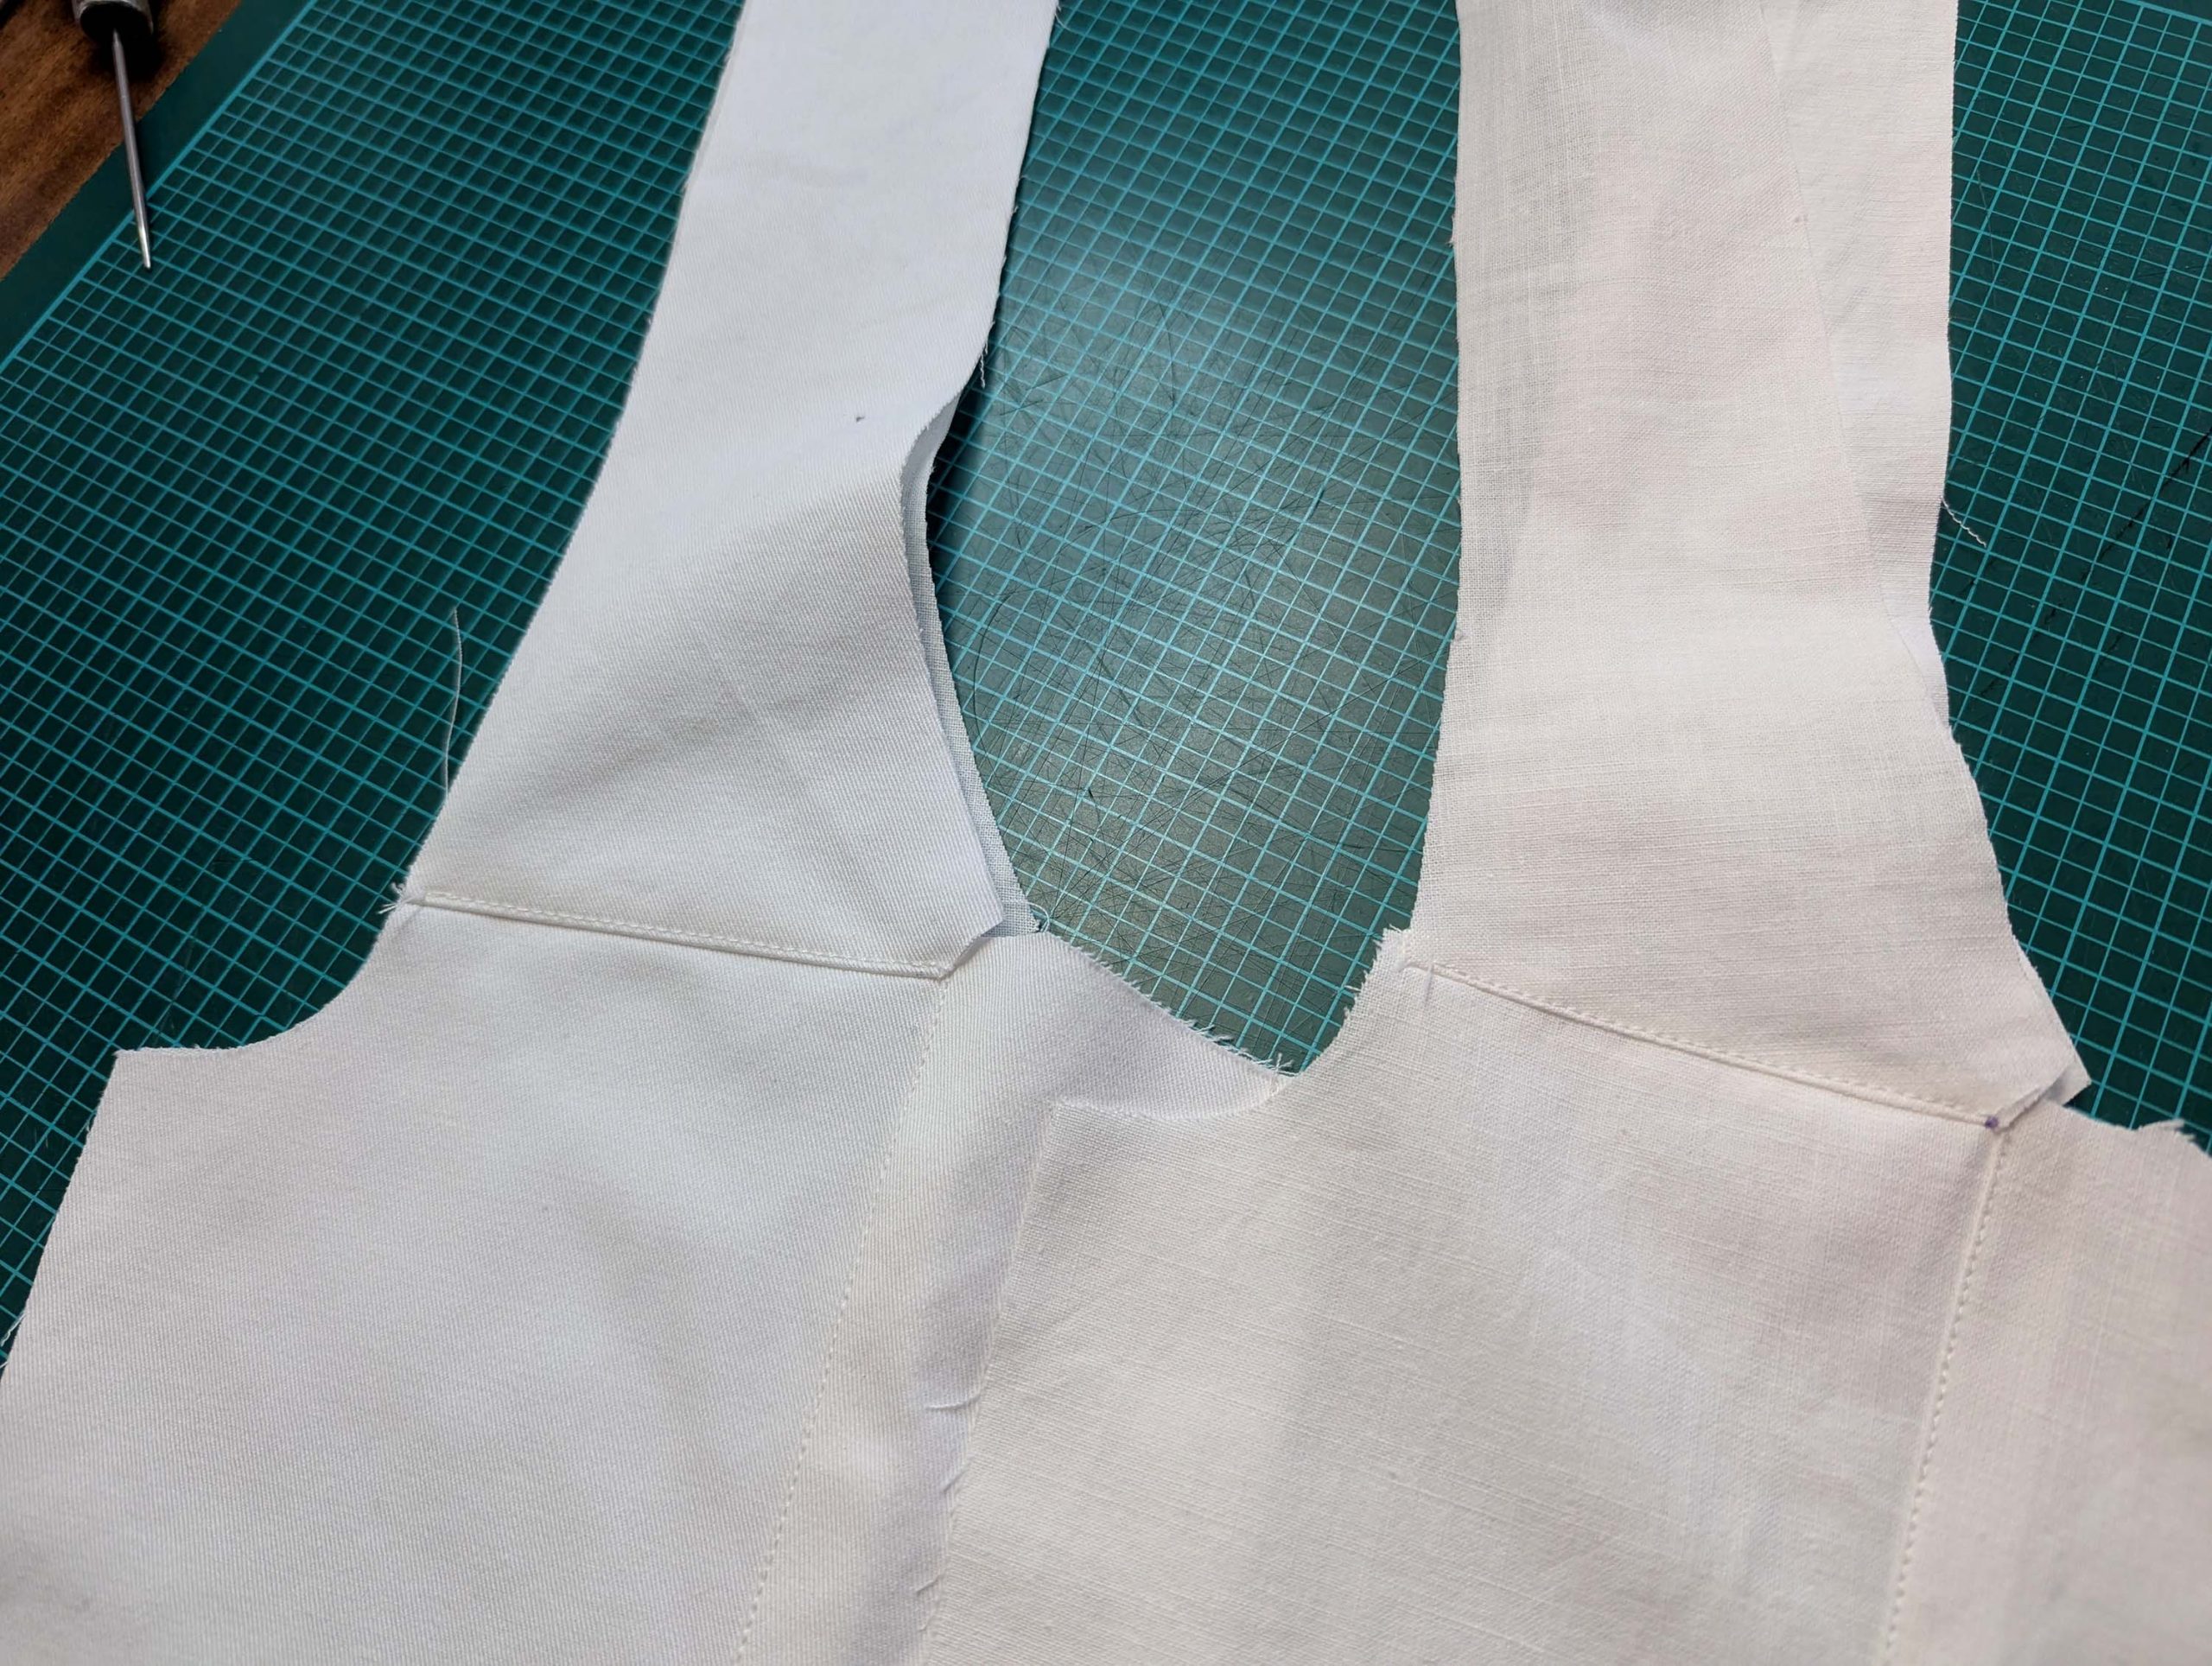
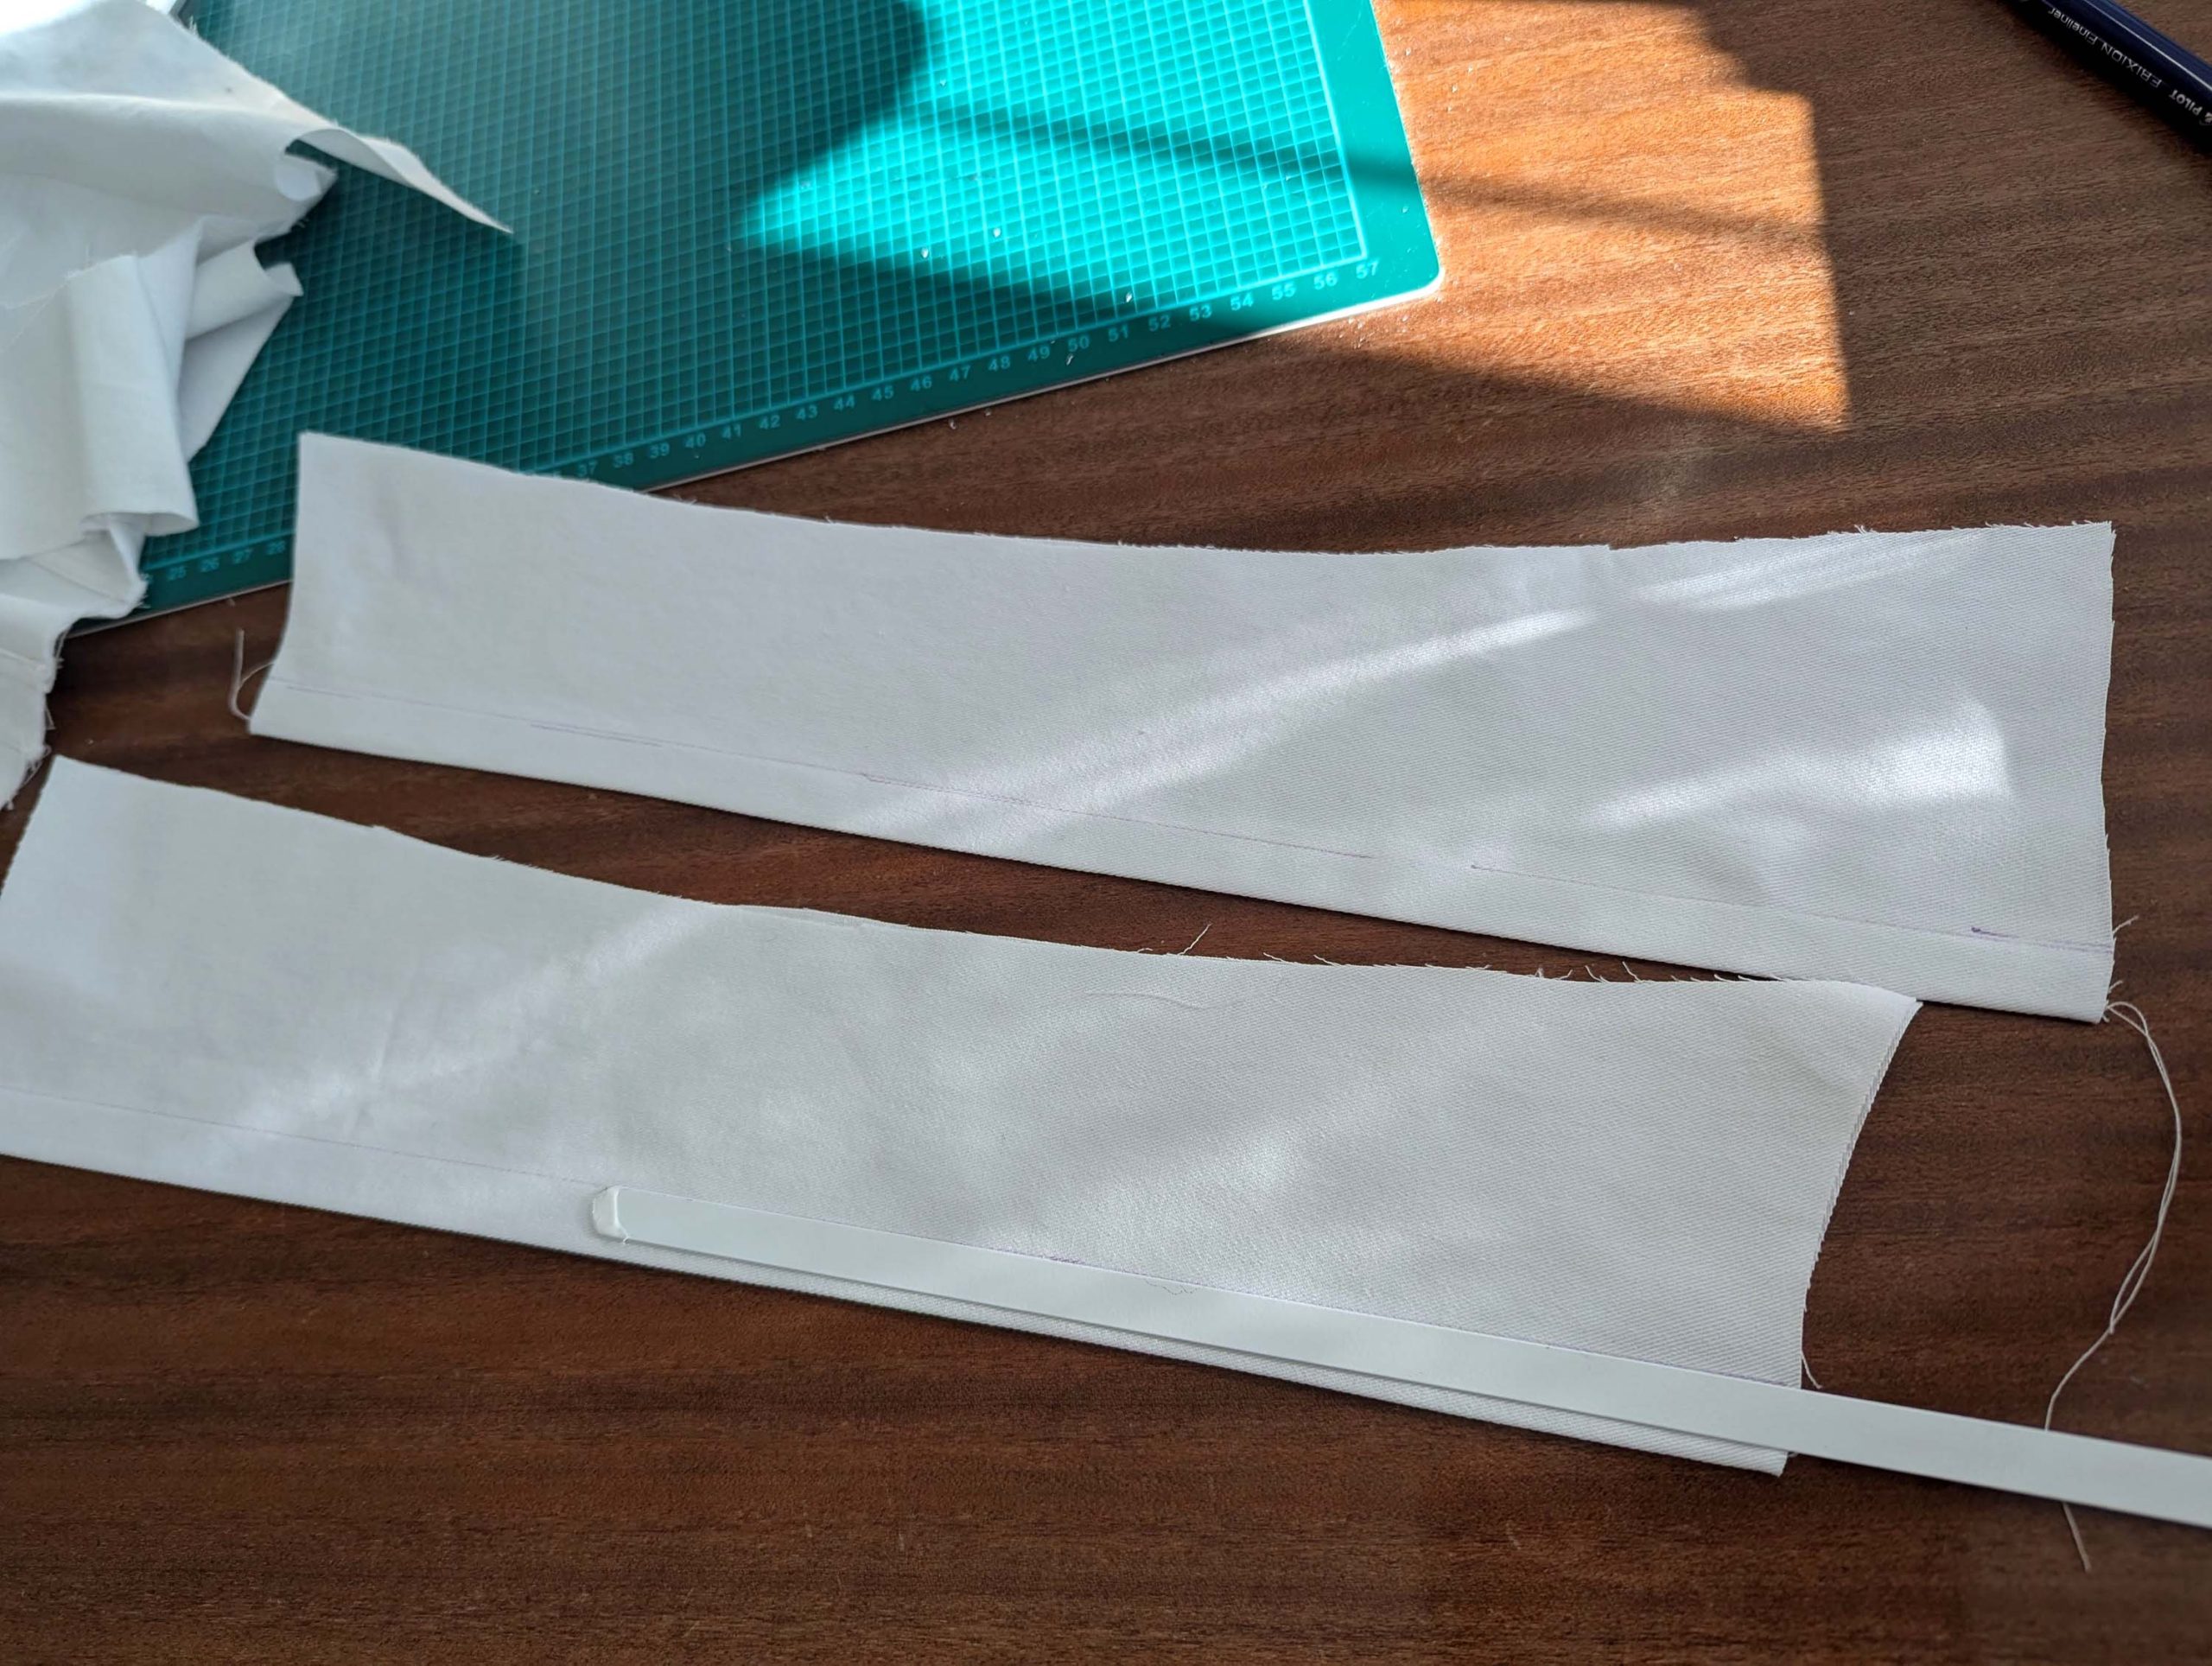
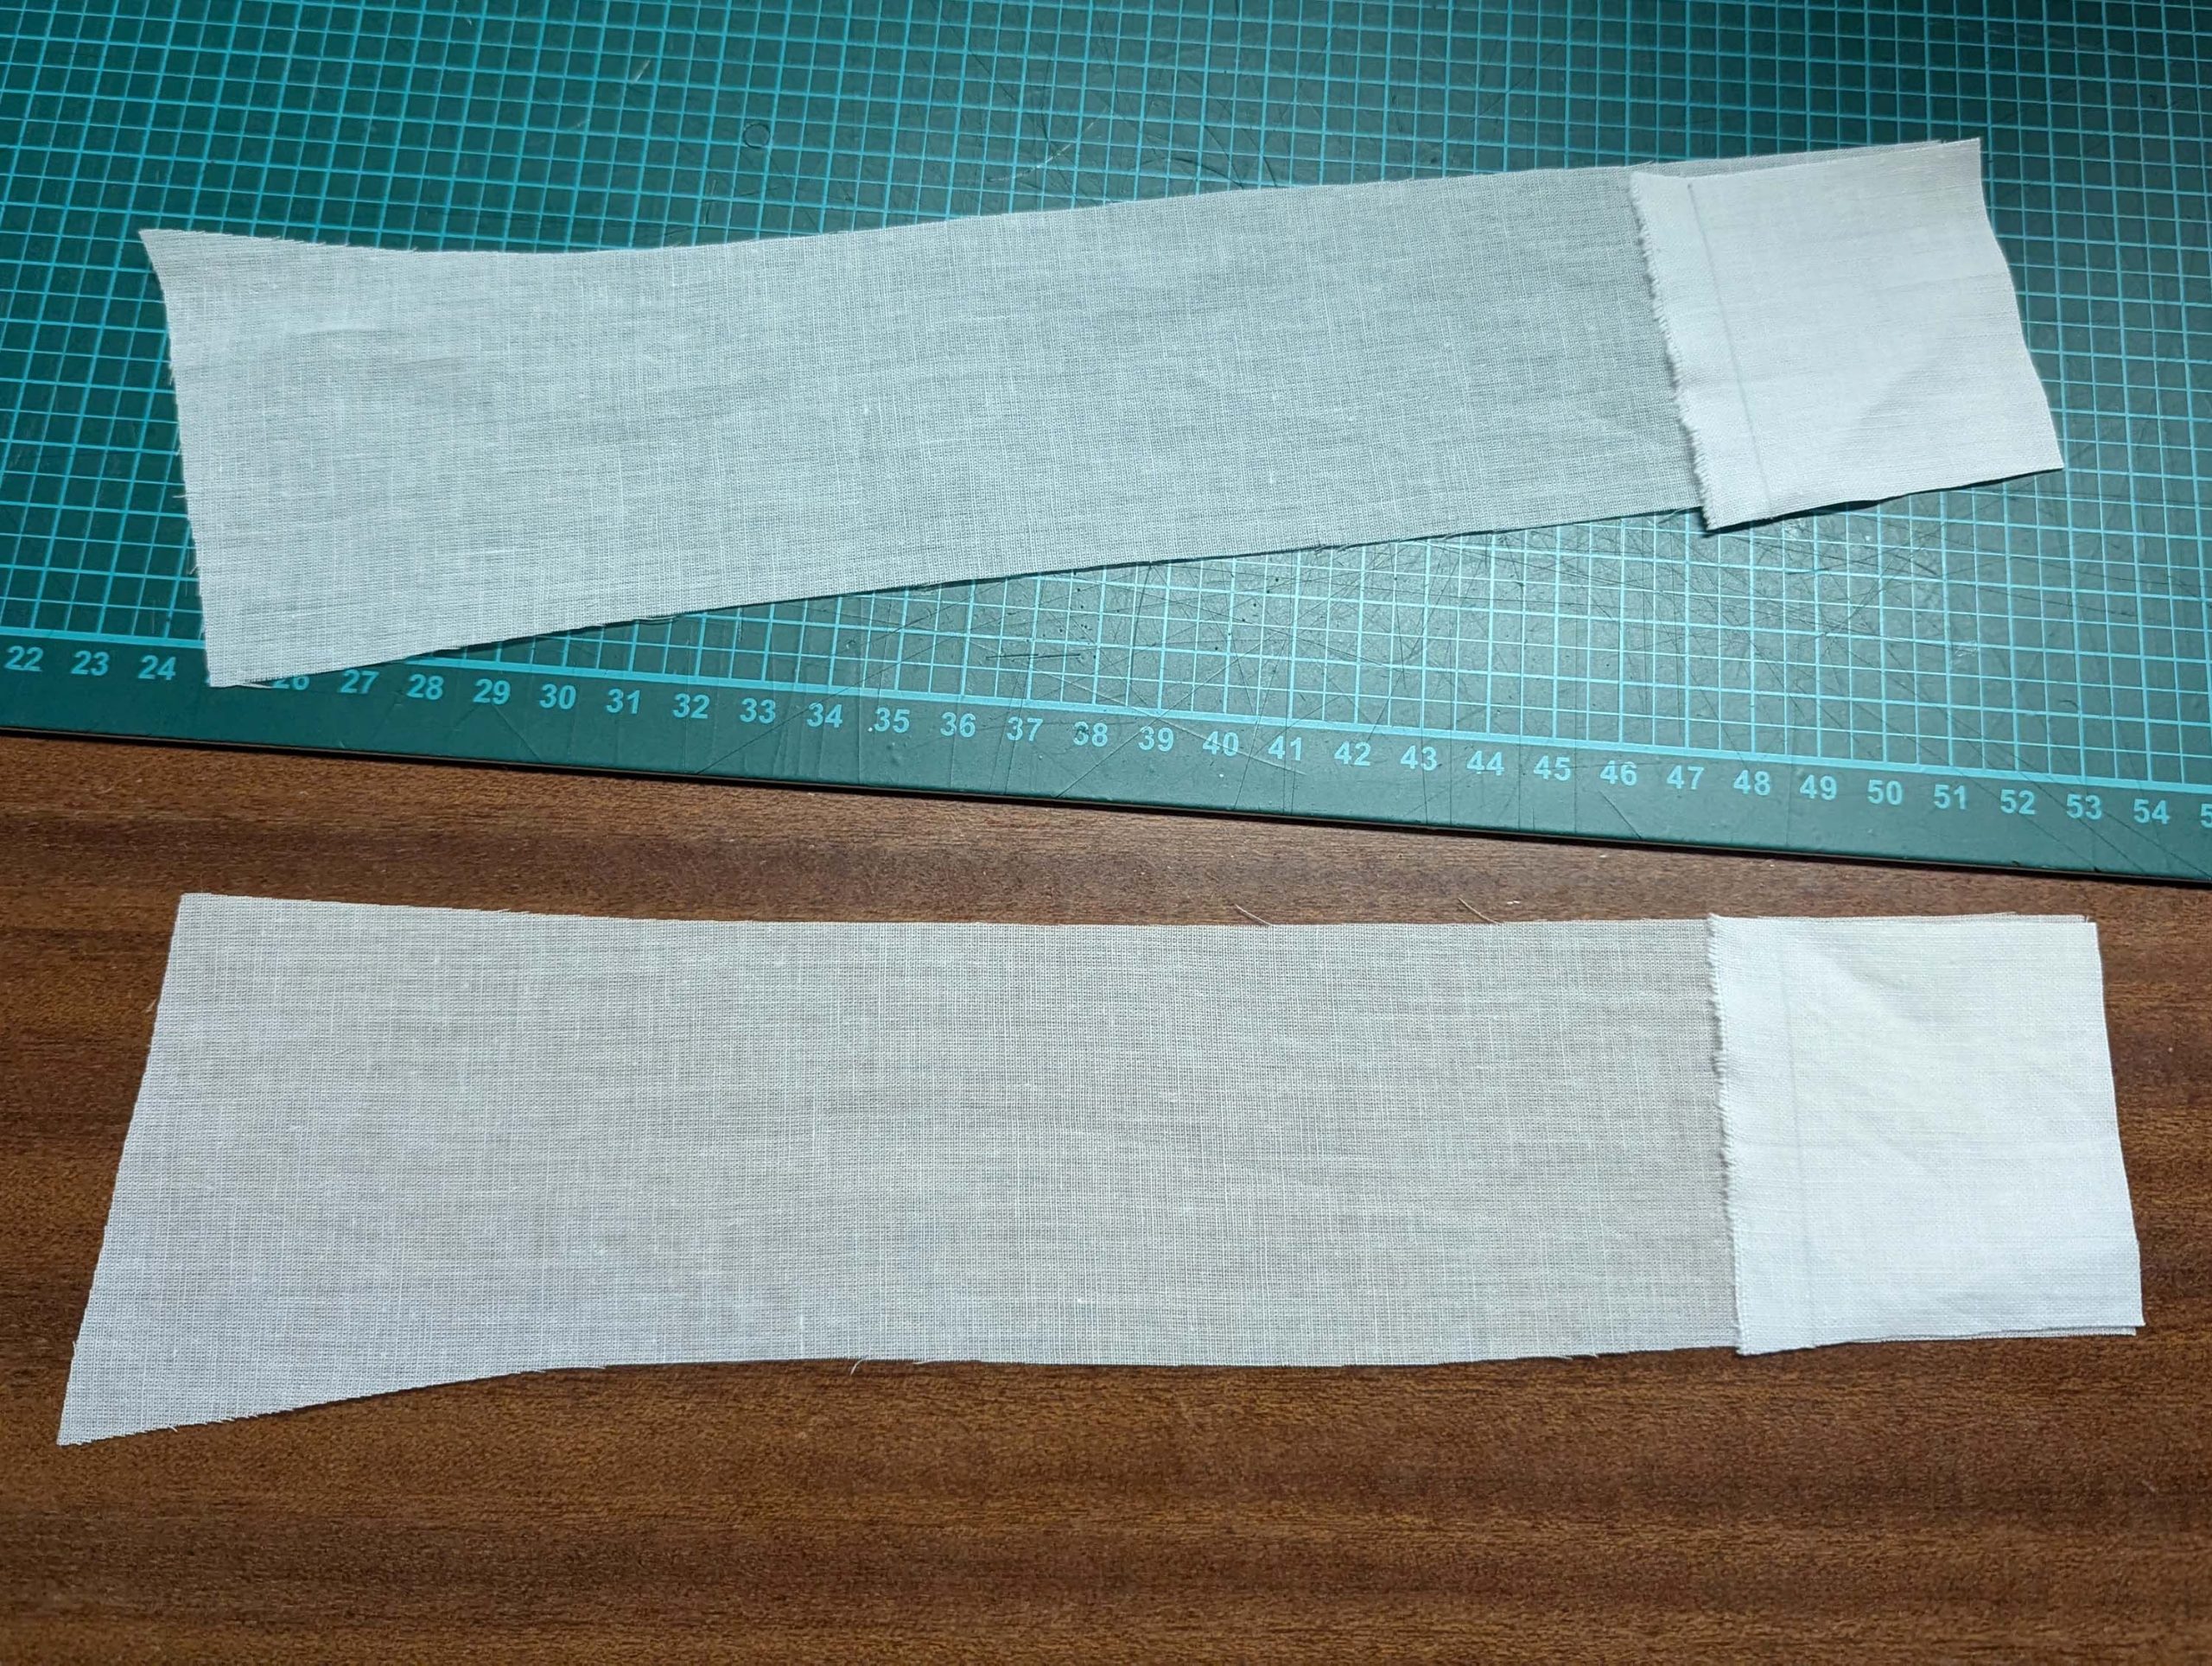
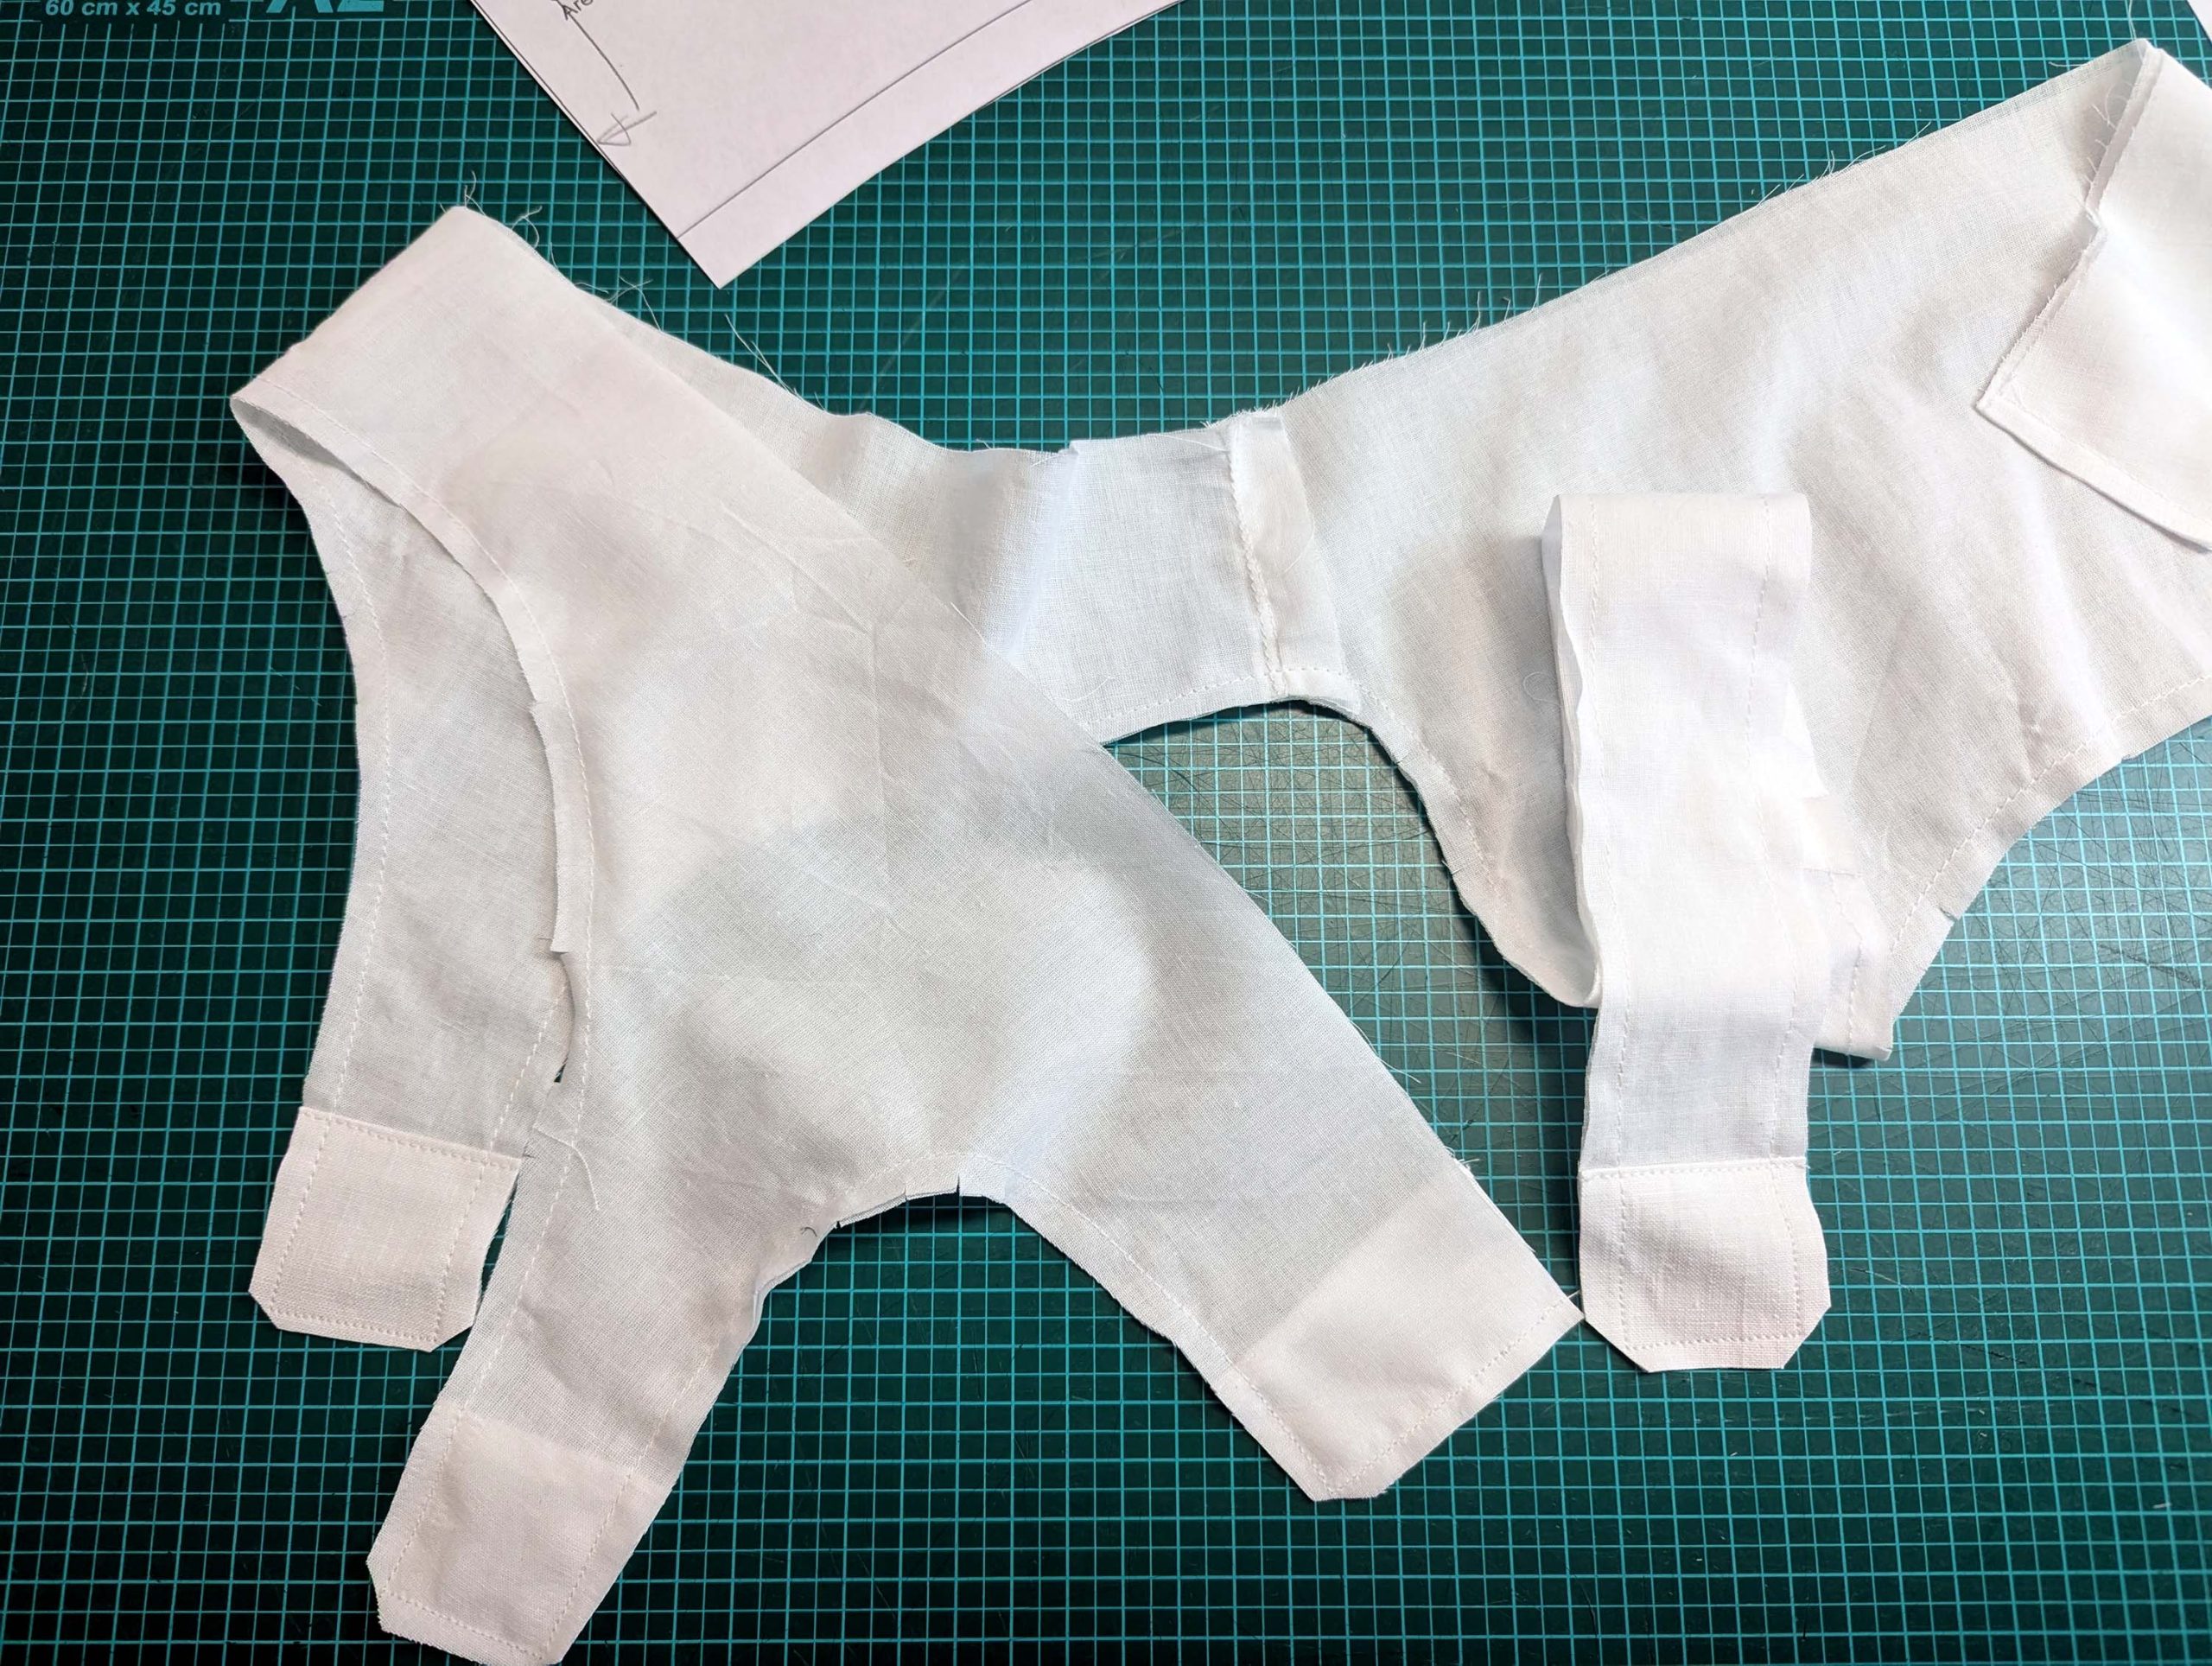
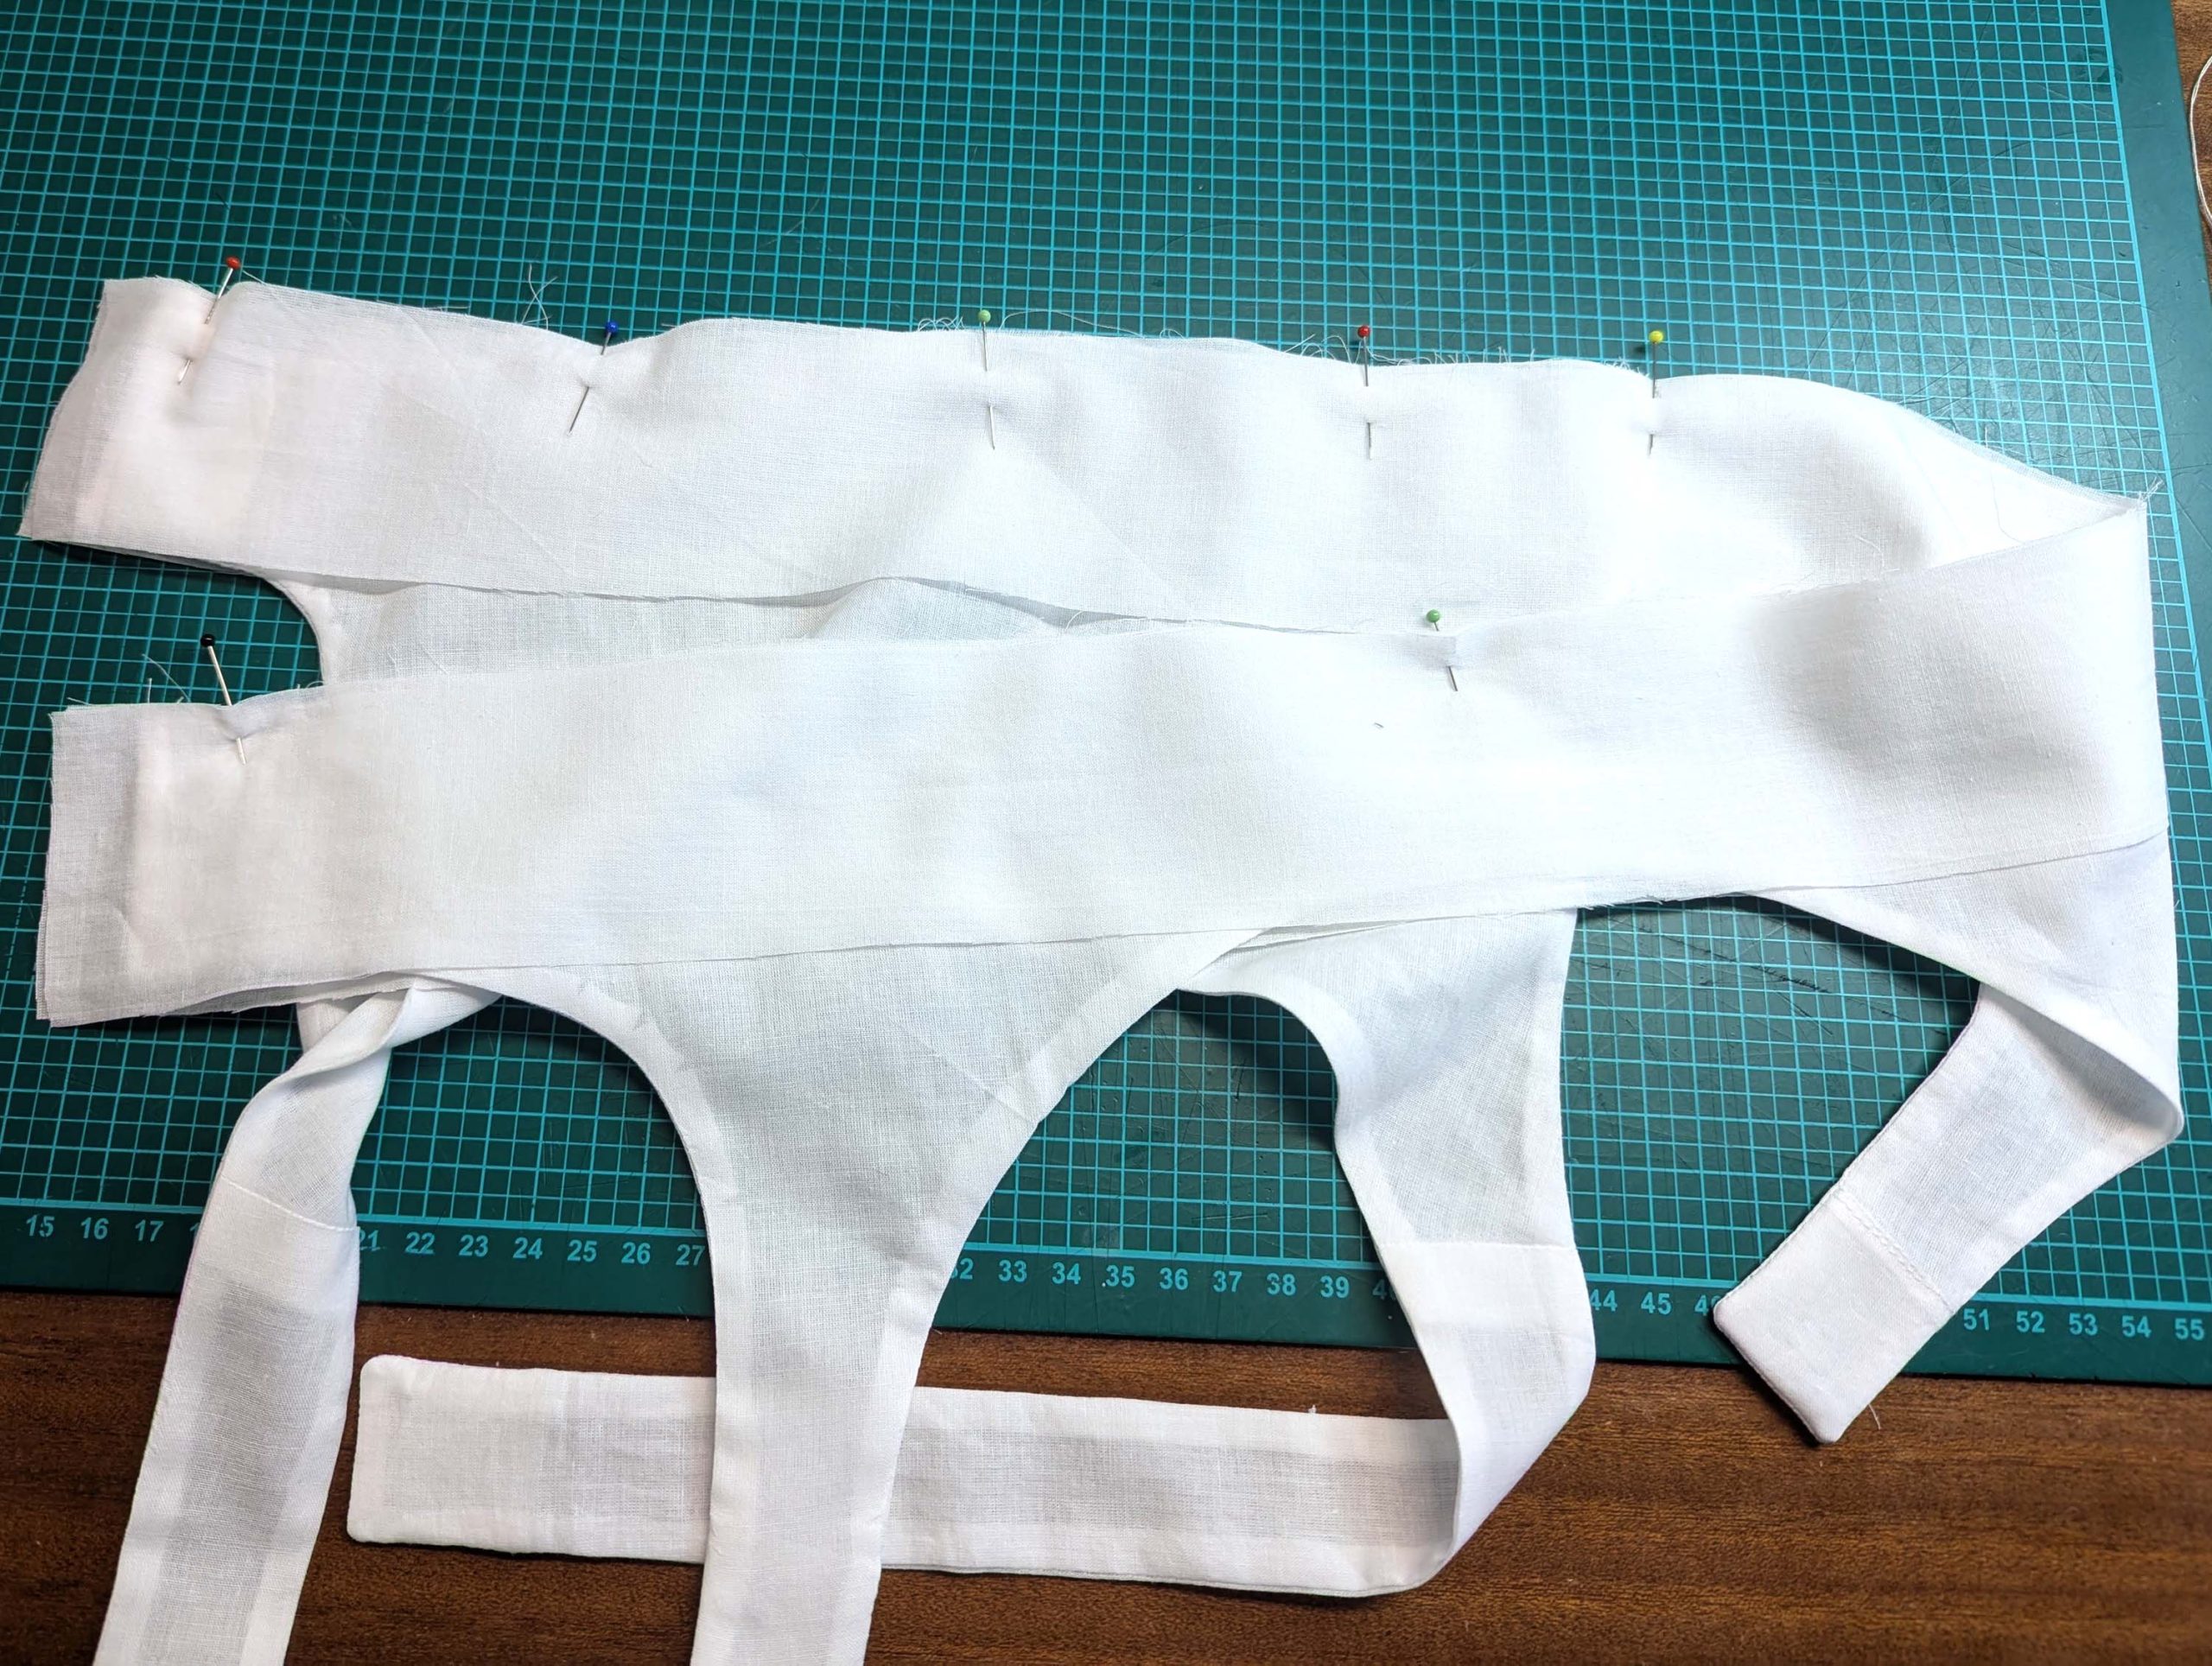
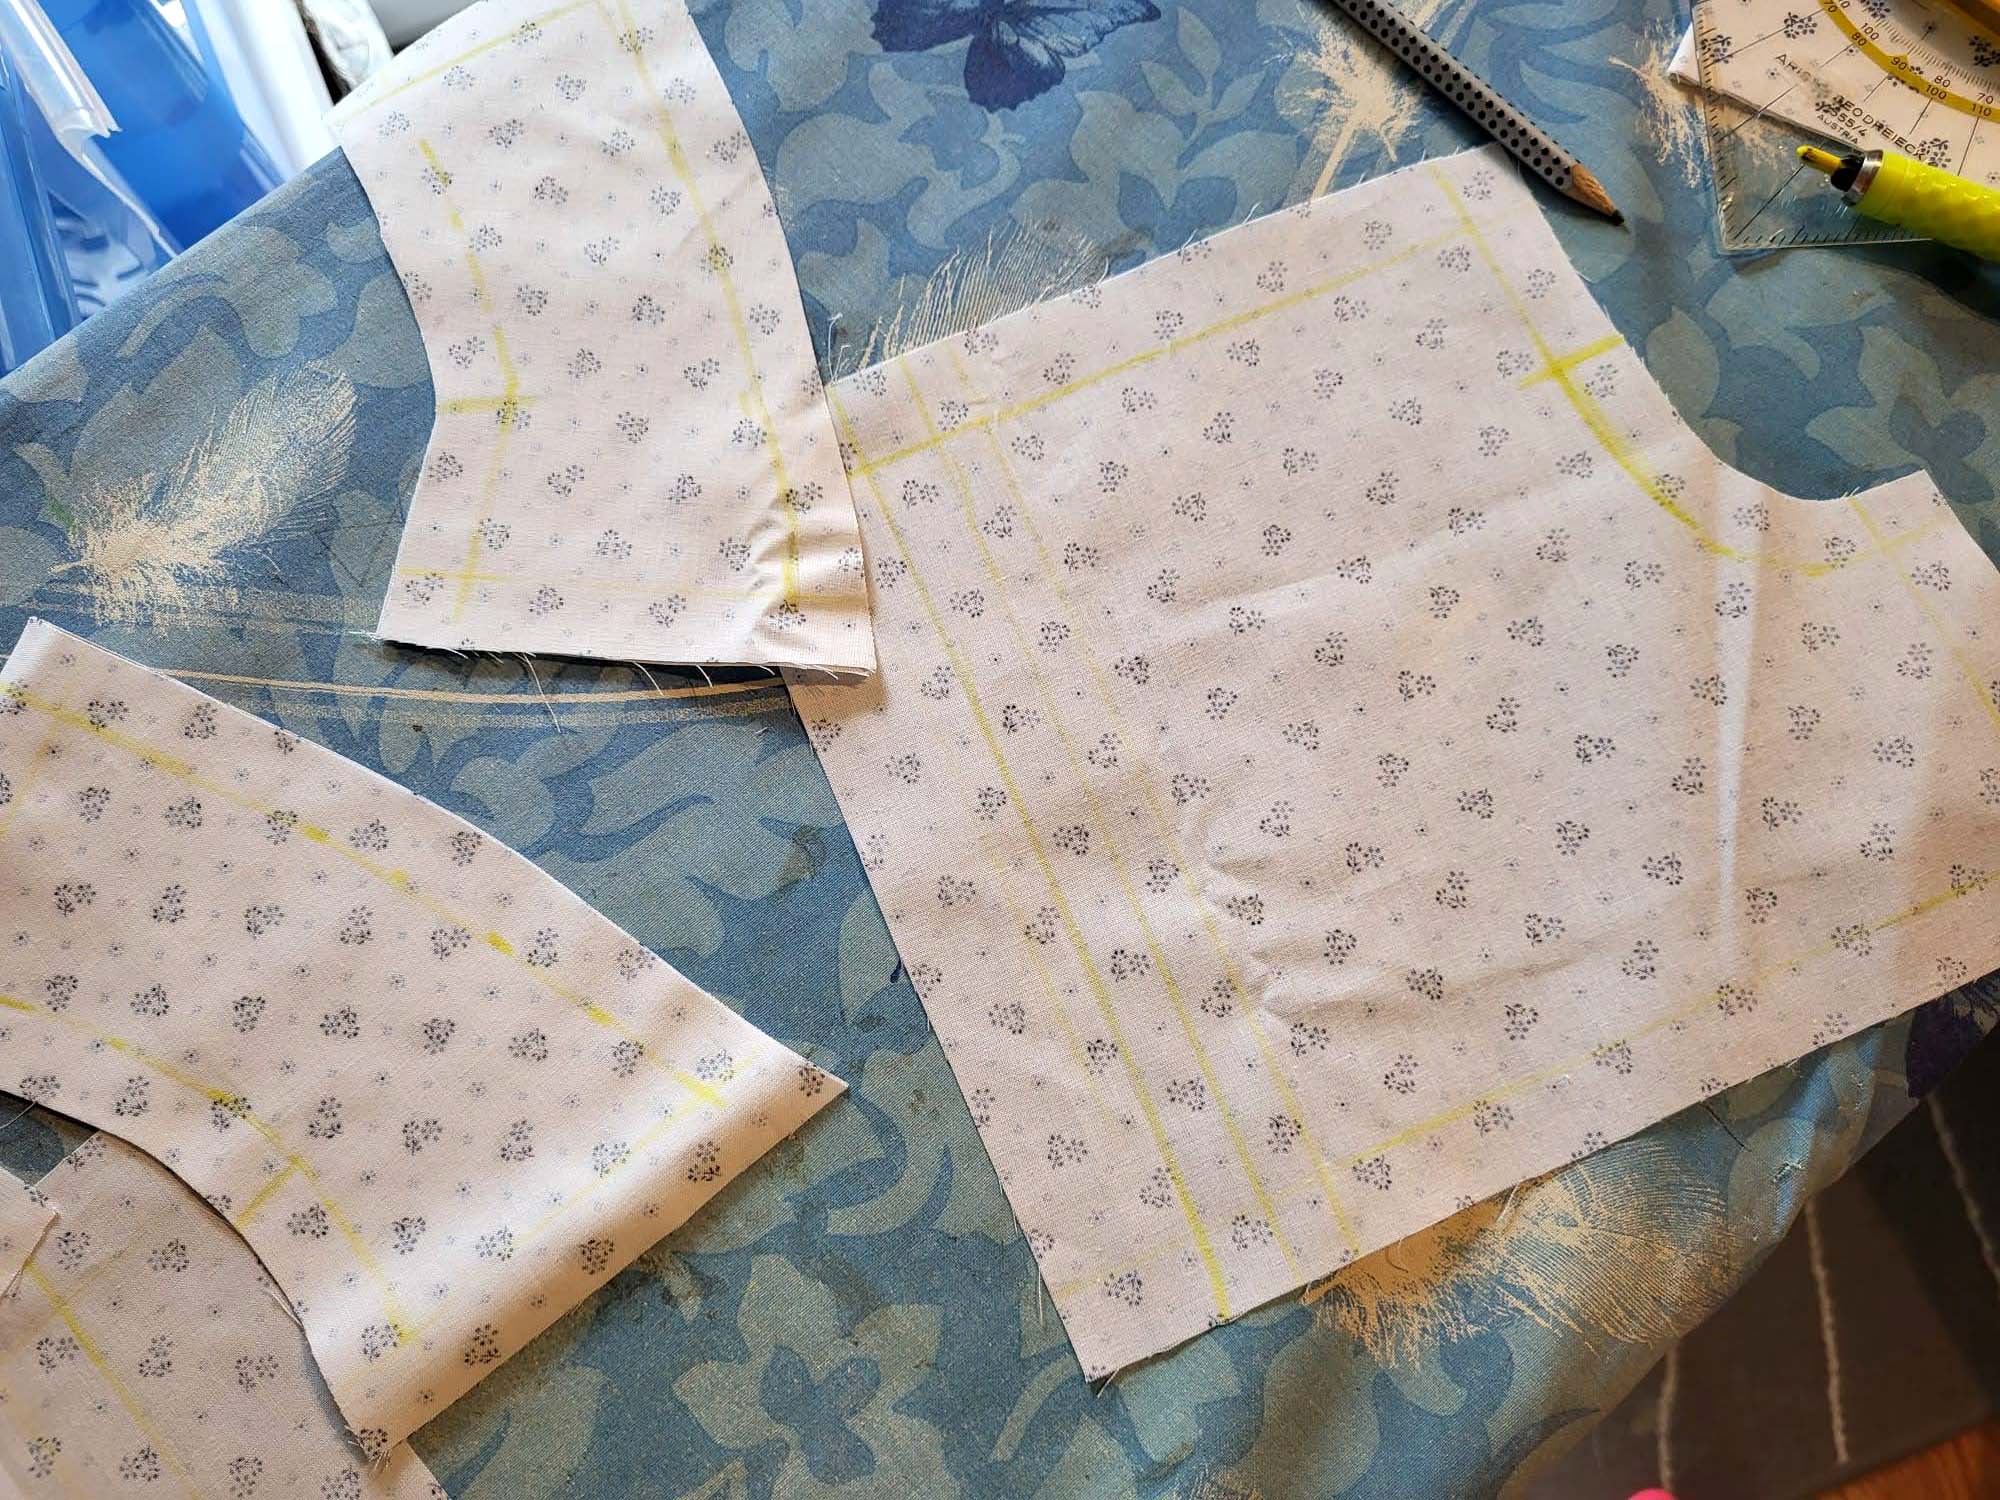
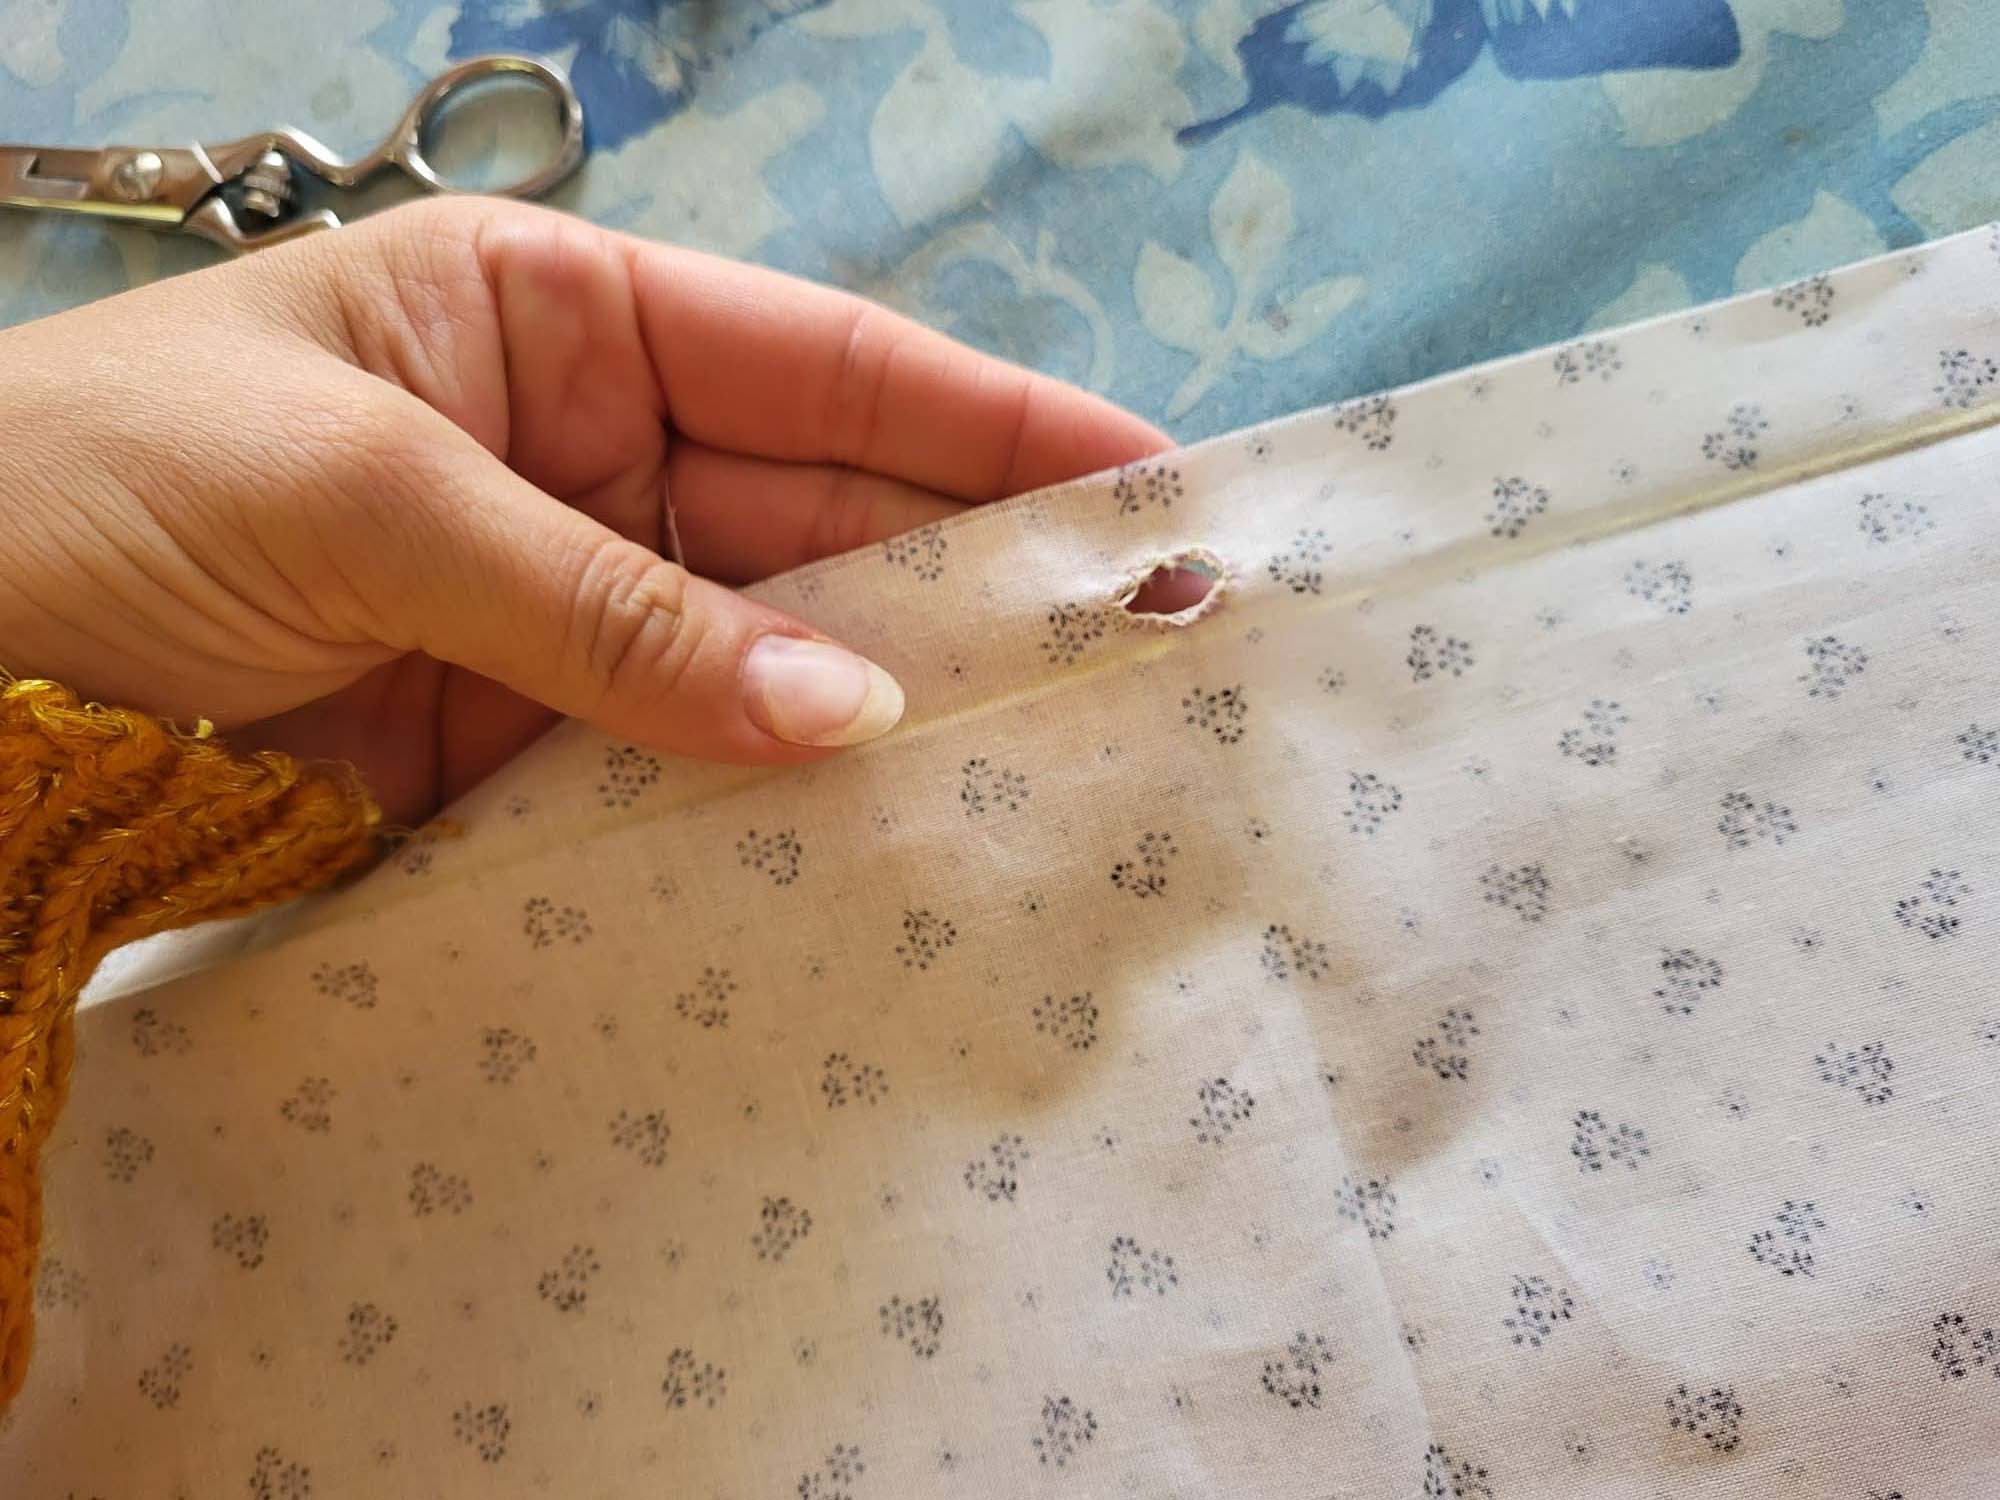
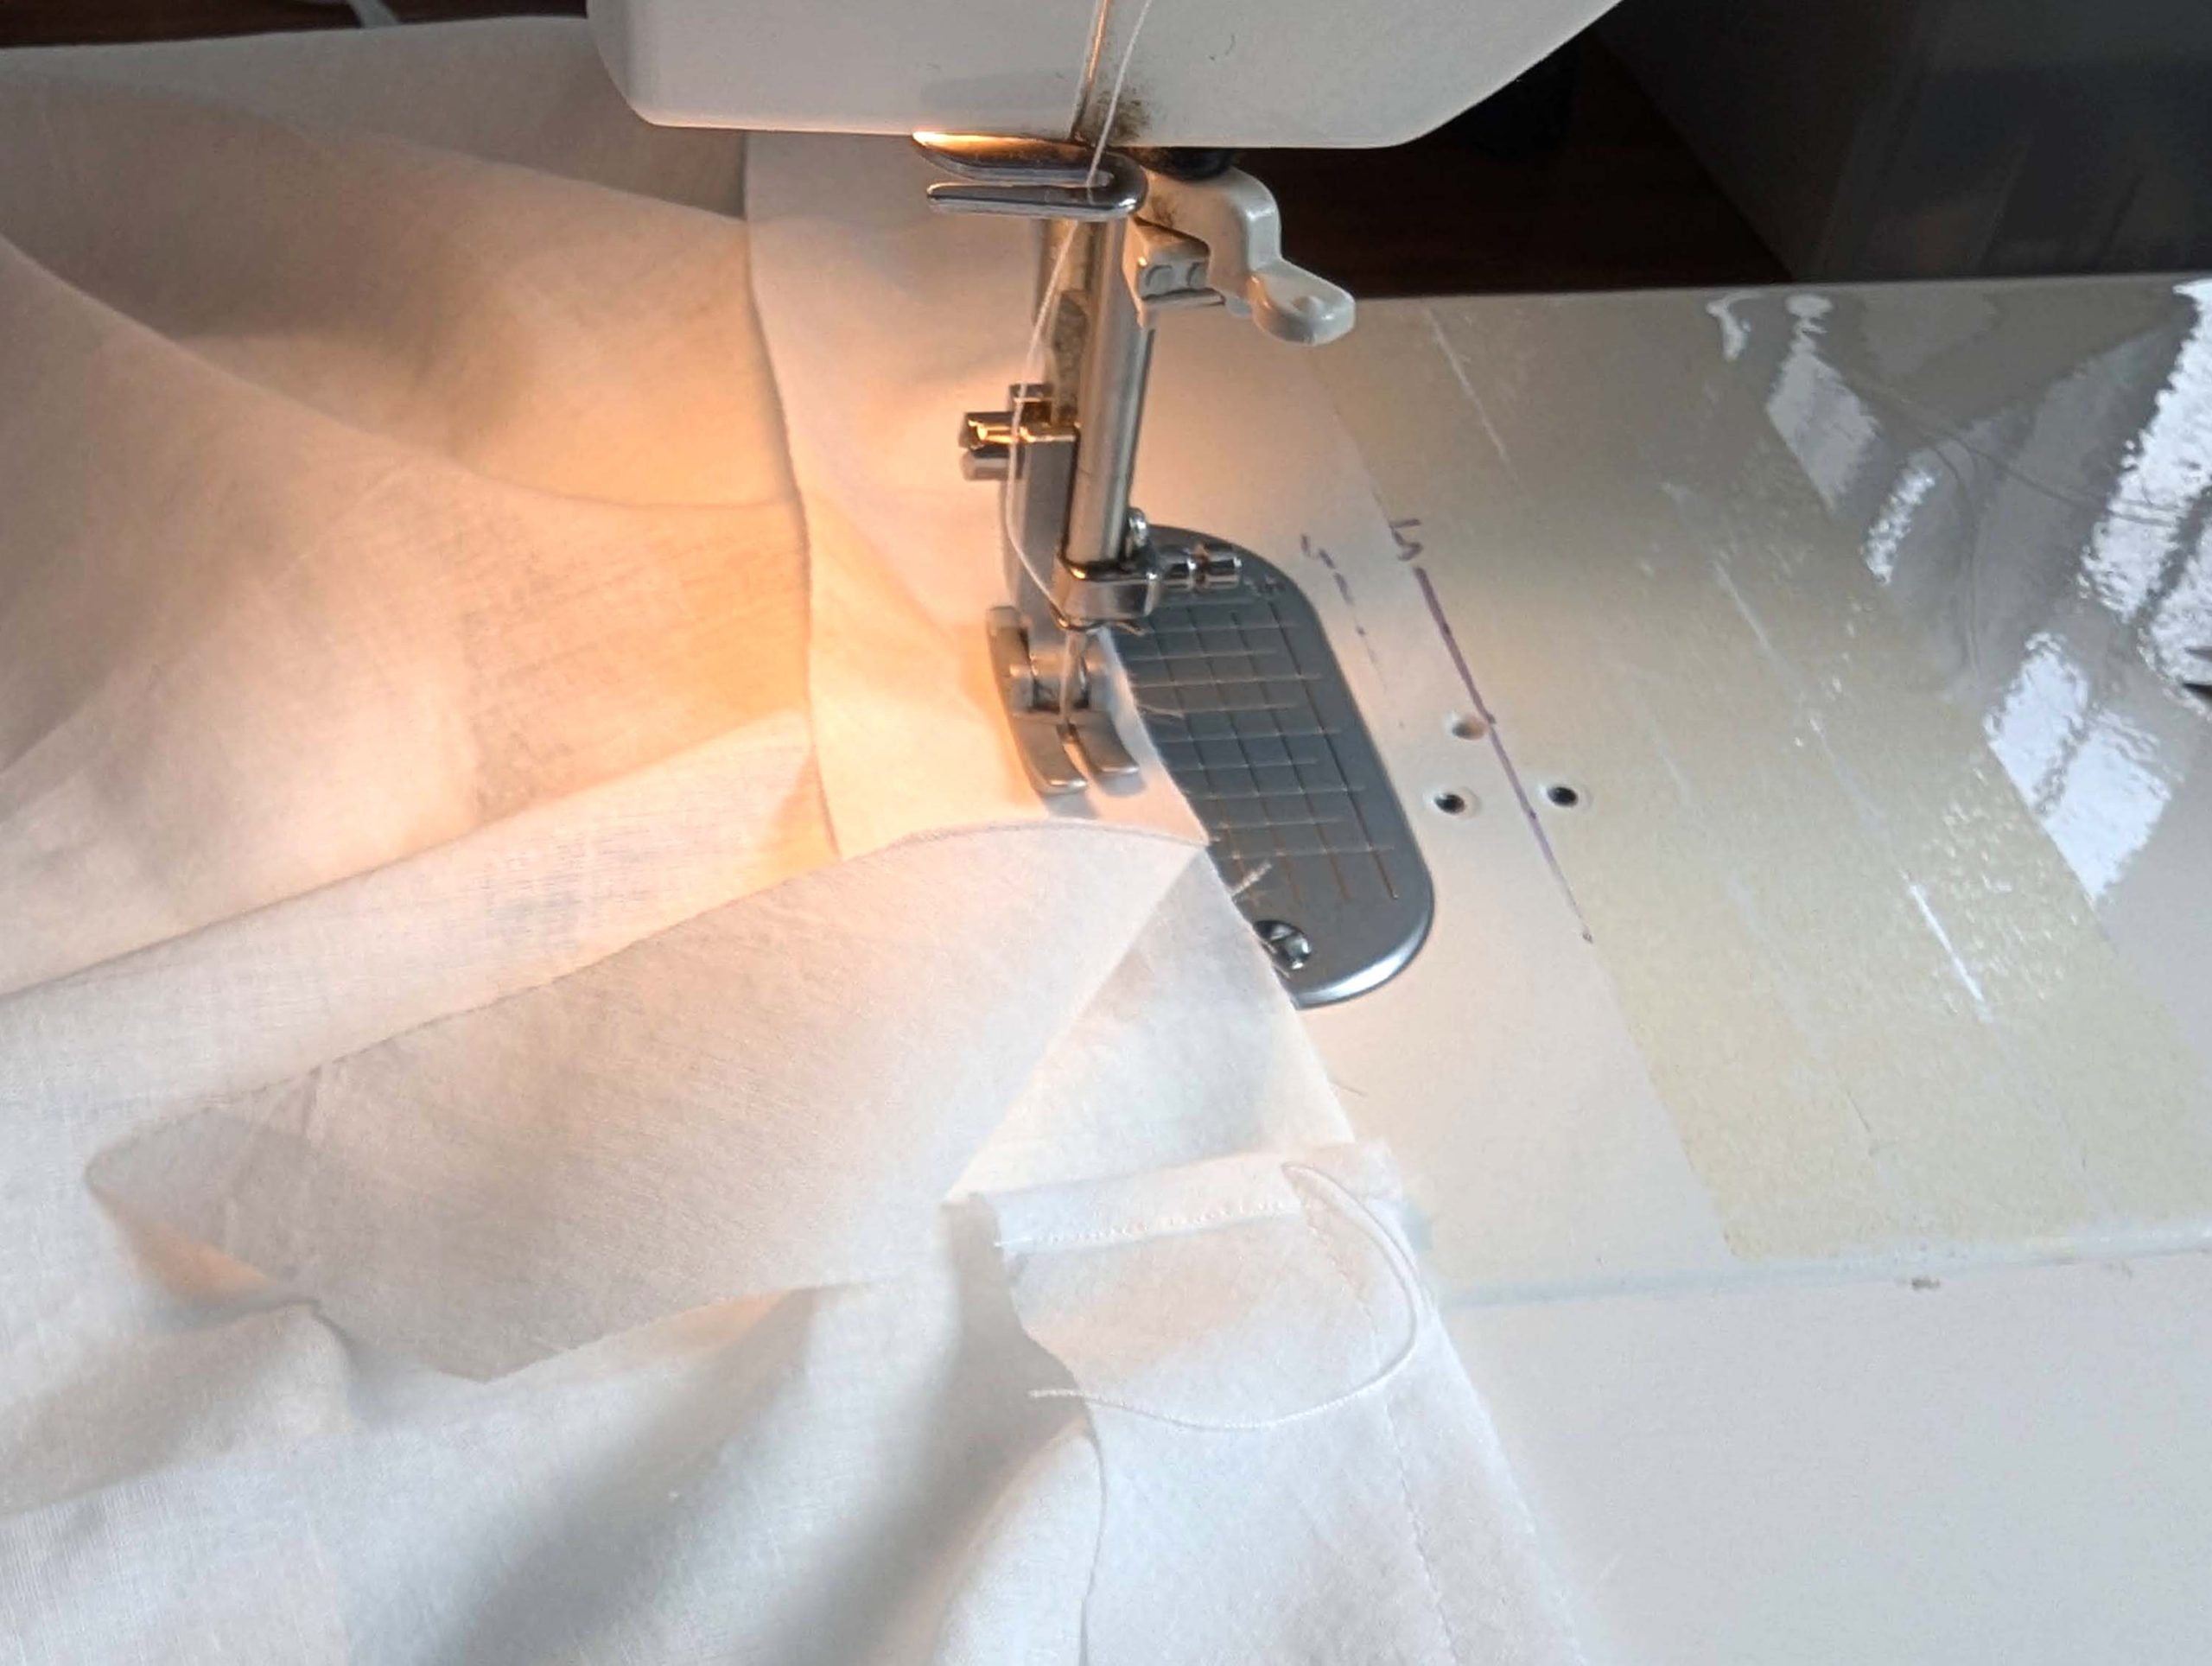
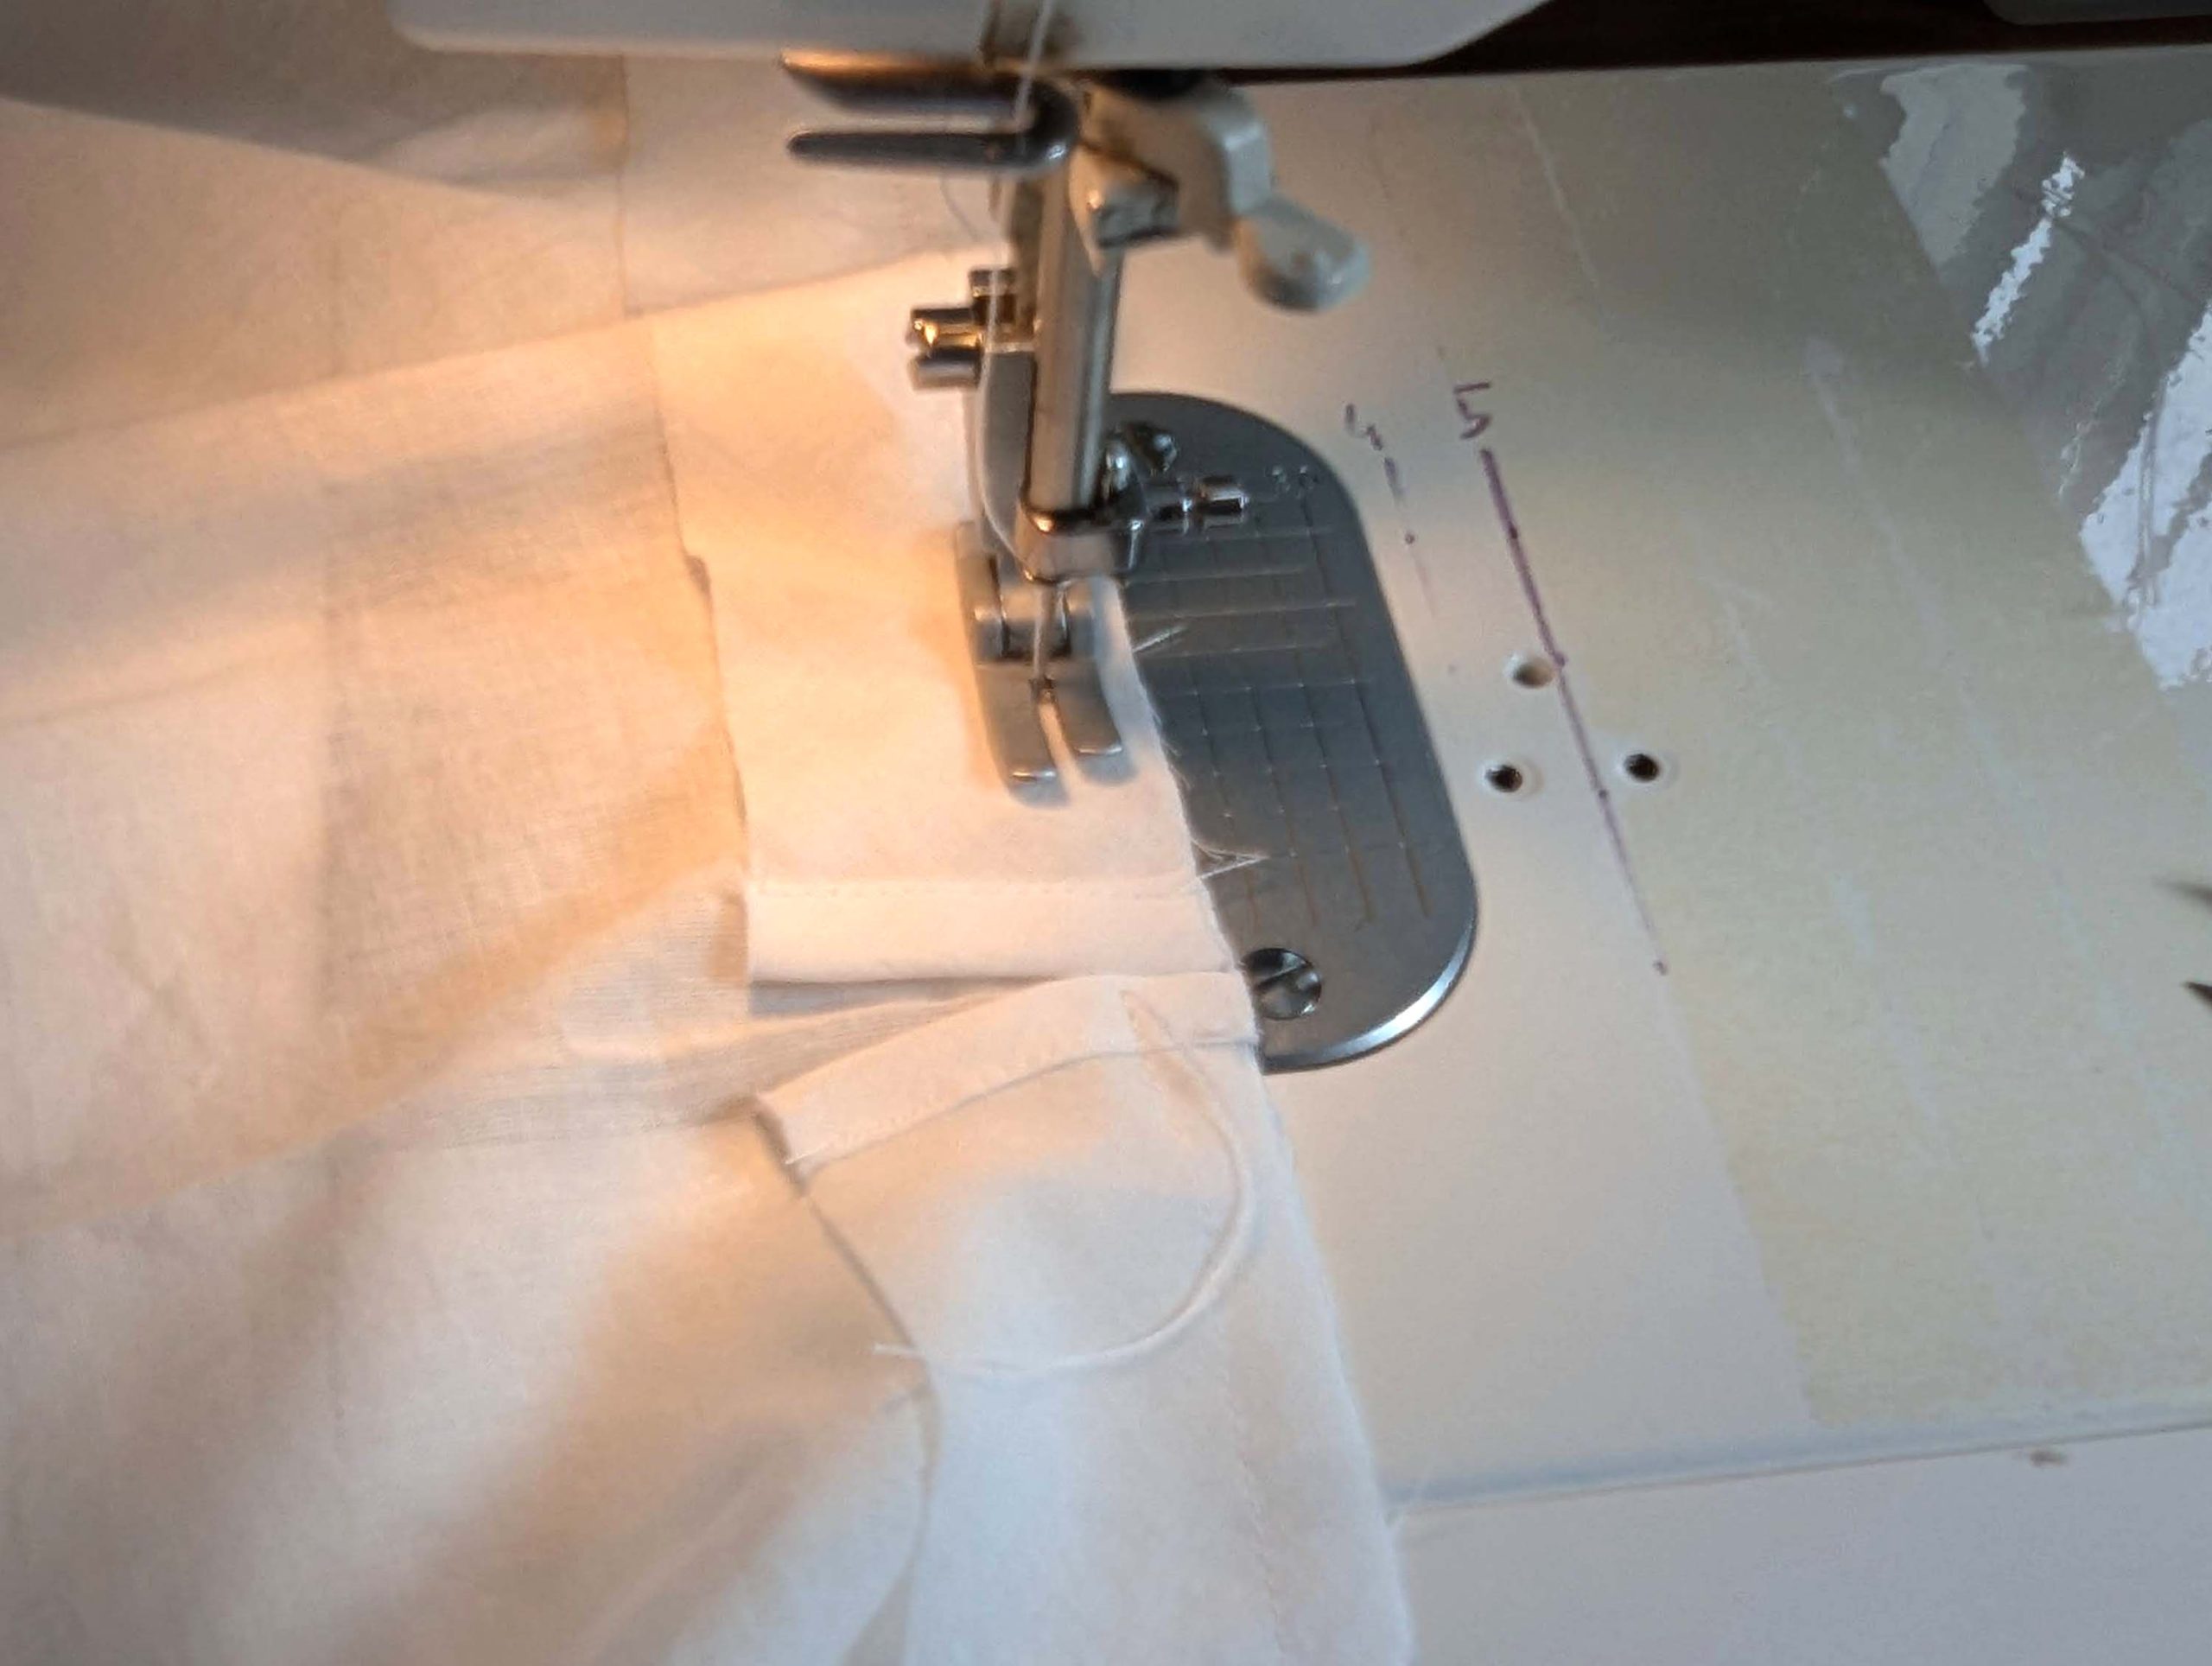
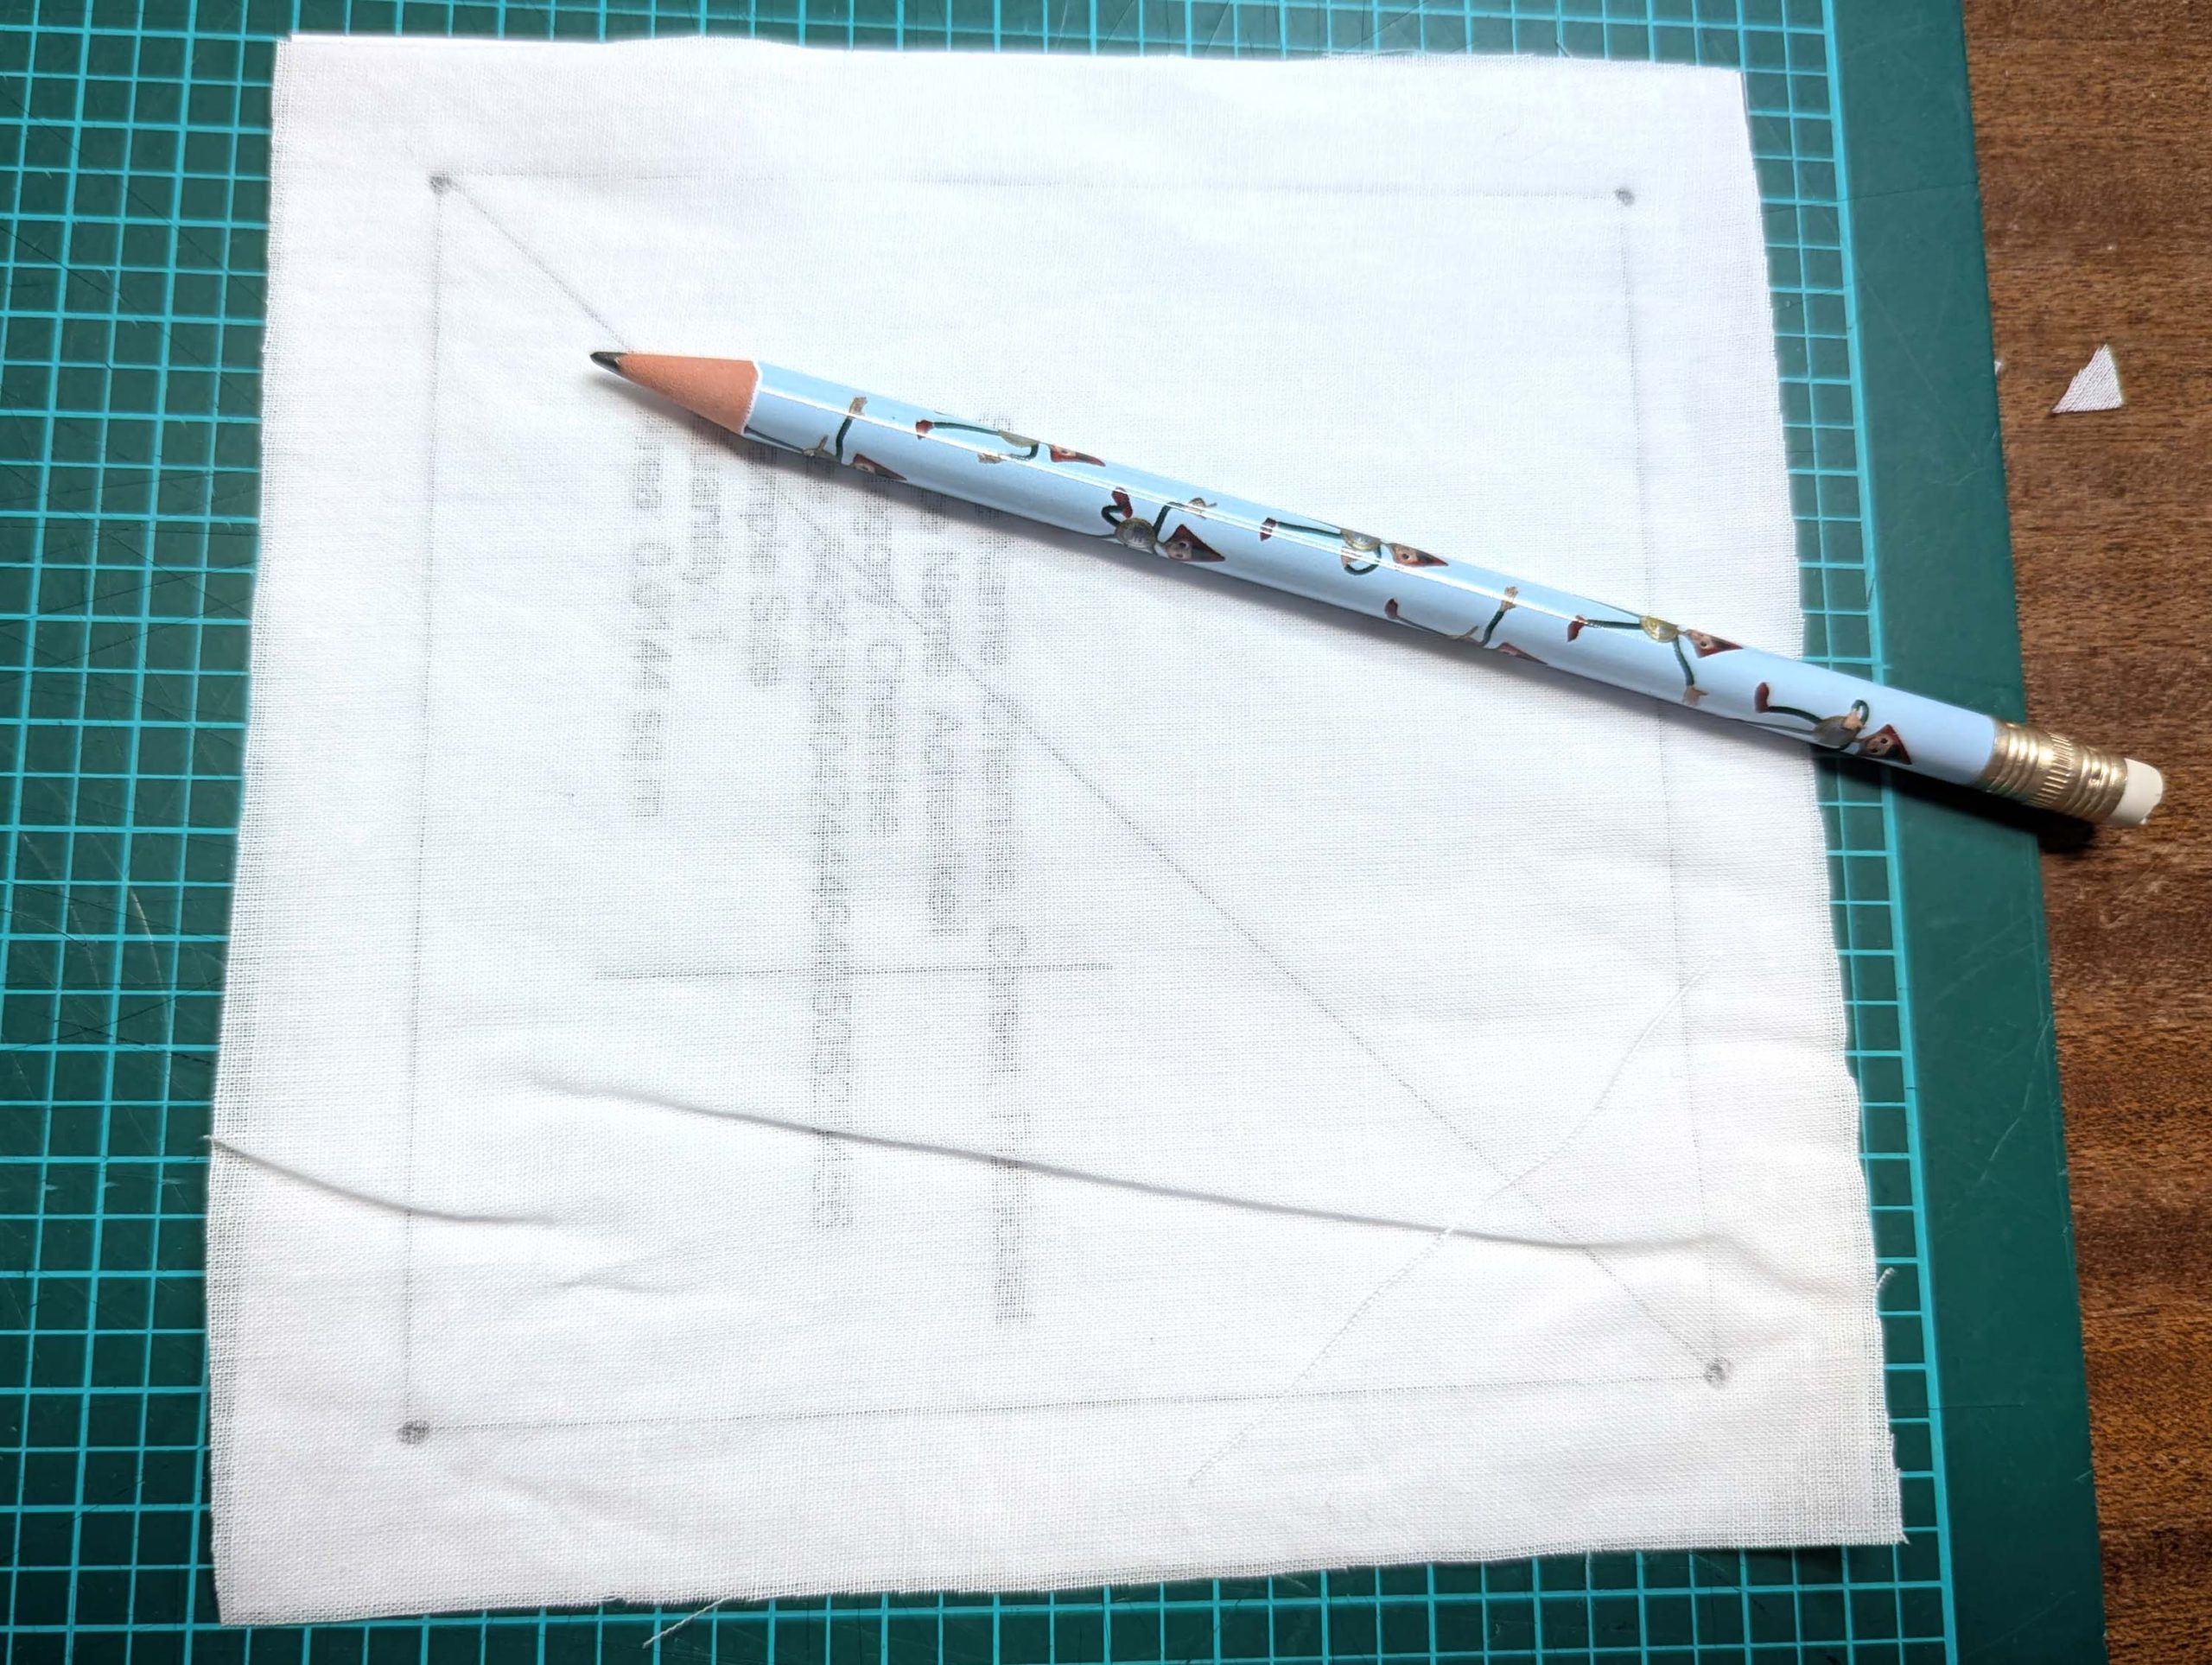
The chemise is a simple garment cut in rectangular and triangular pieces to save fabric. The main difficulty is to insert the underarm gusset properly. For an easier sewing process, as we are using modern fabrics, with modern widths, we just cut the triangle shape of front and back, without inserting some additional gussets, as it would be historically accurate. By the way, this sewing guide will not show a historically accurate hand-sewing process, but machine sewing.

Garsault, François A. de (François Alexandre), 1693-1778
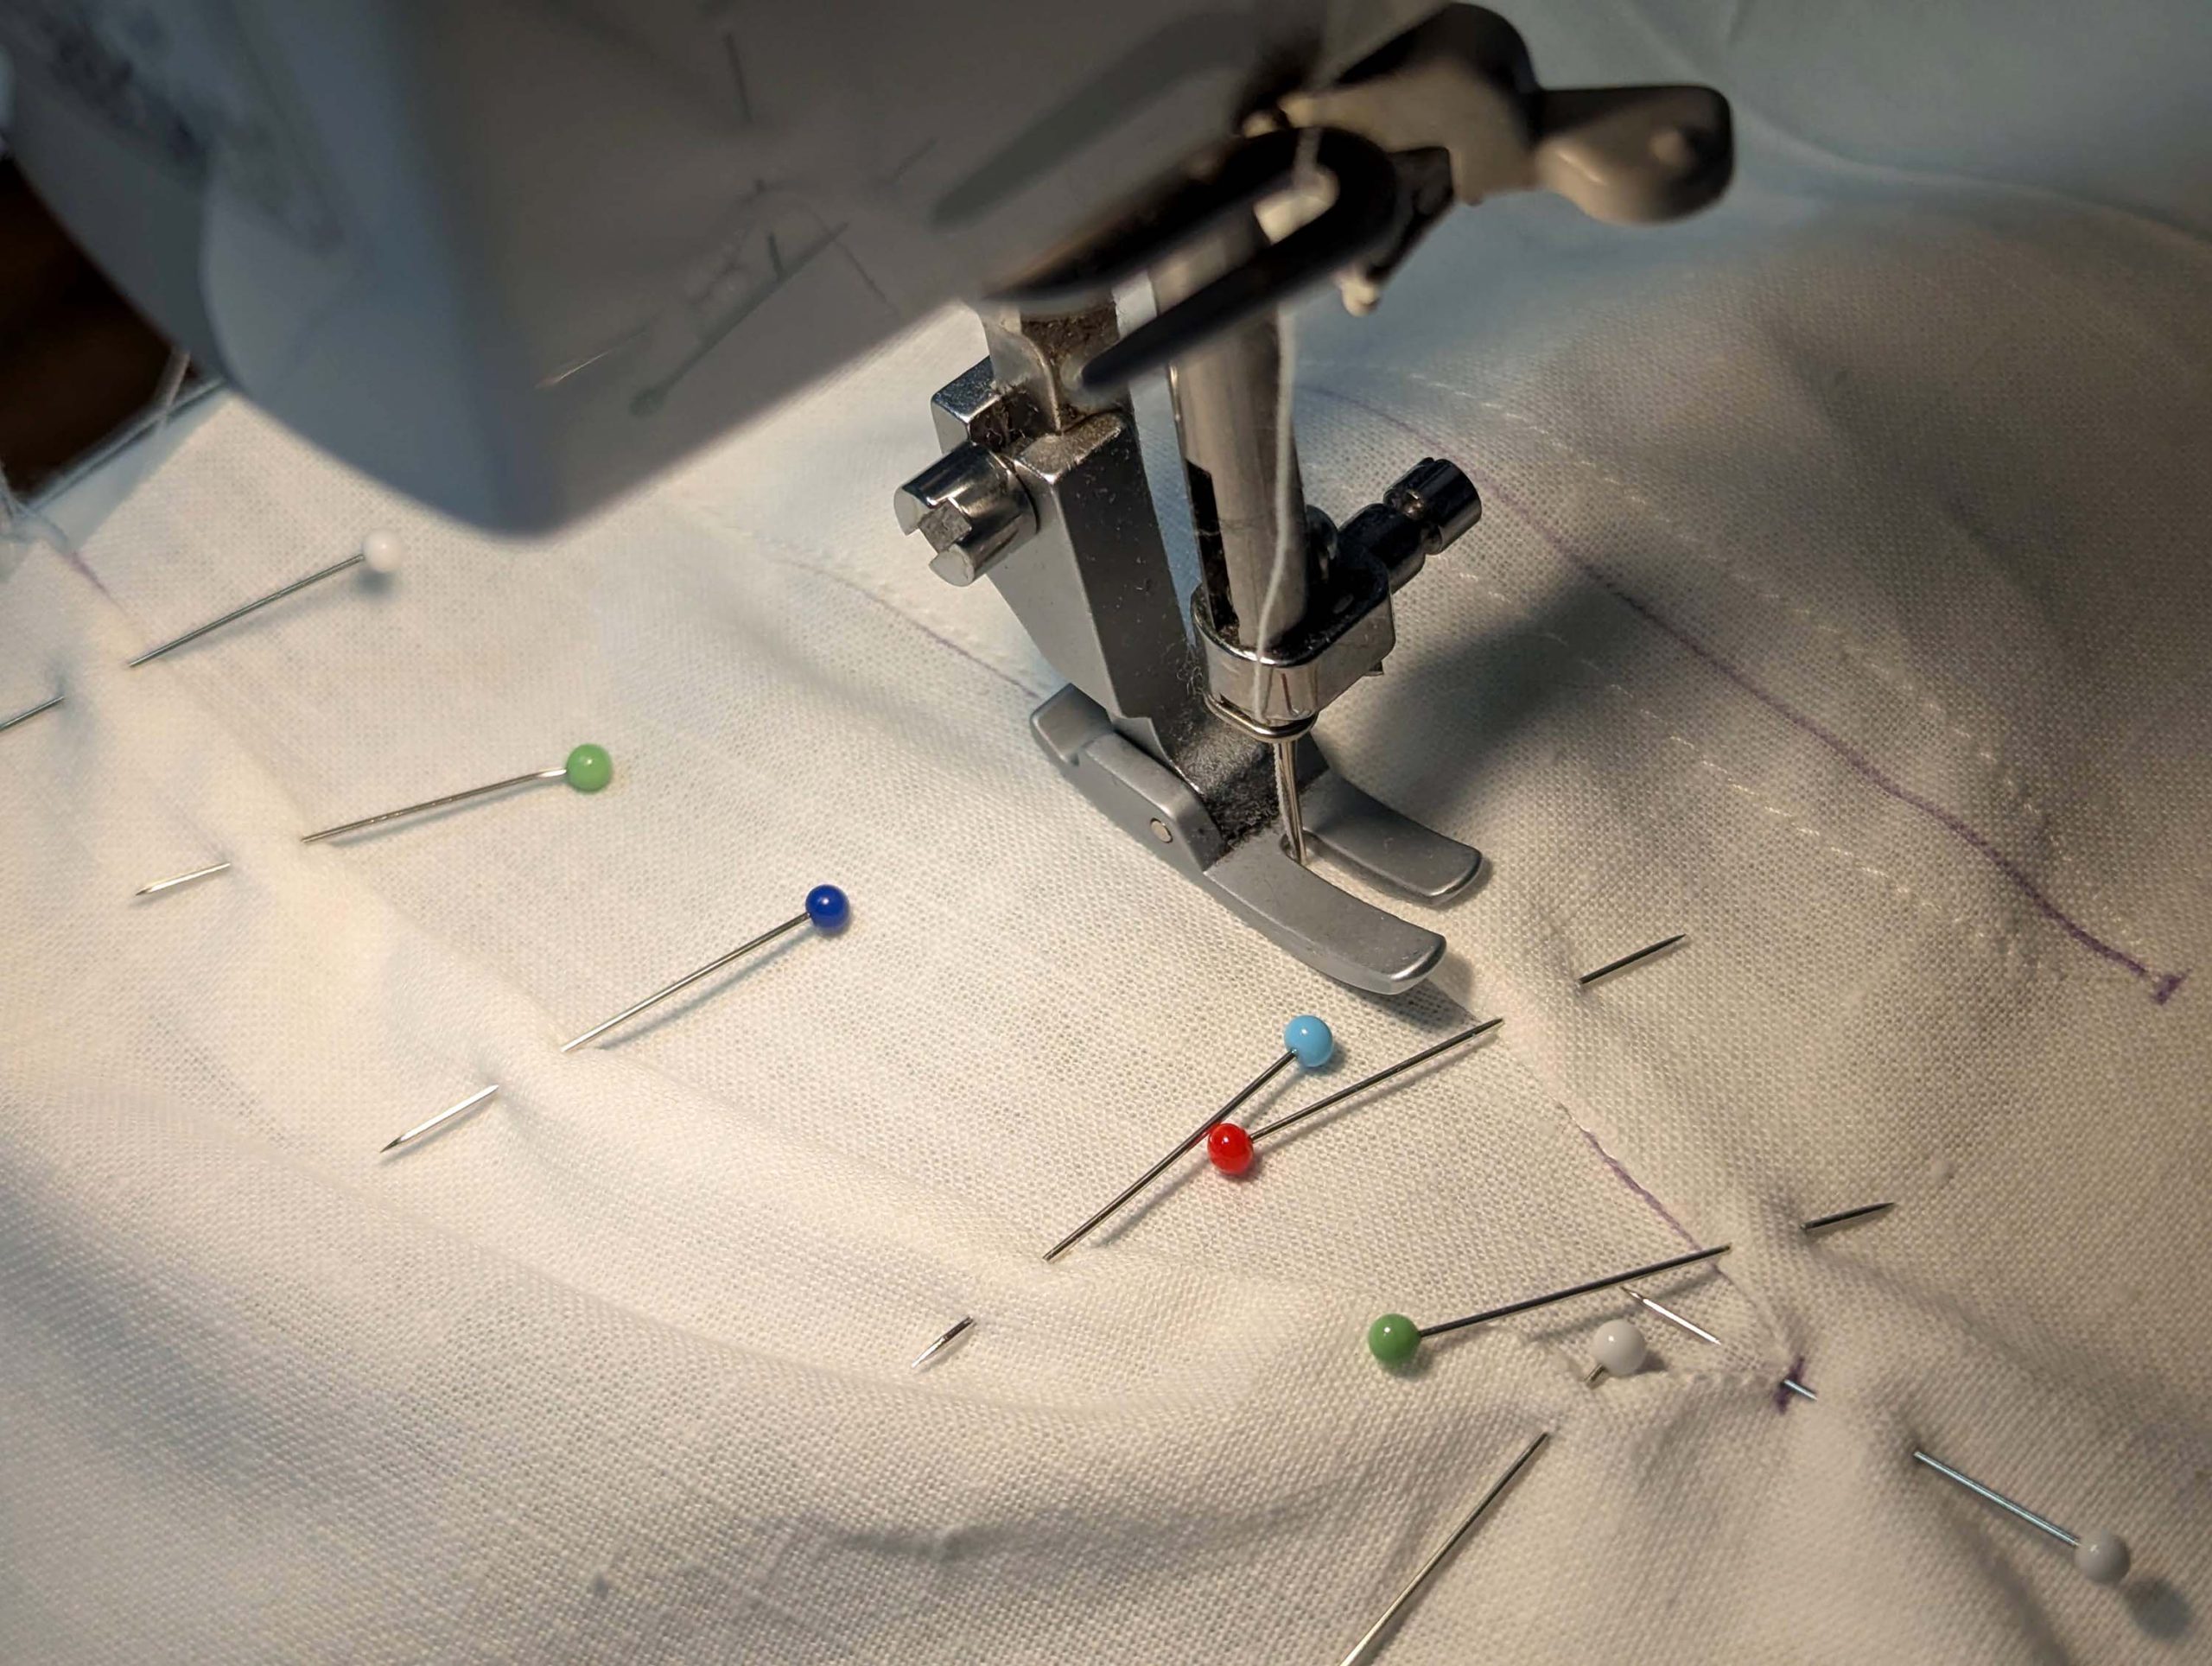
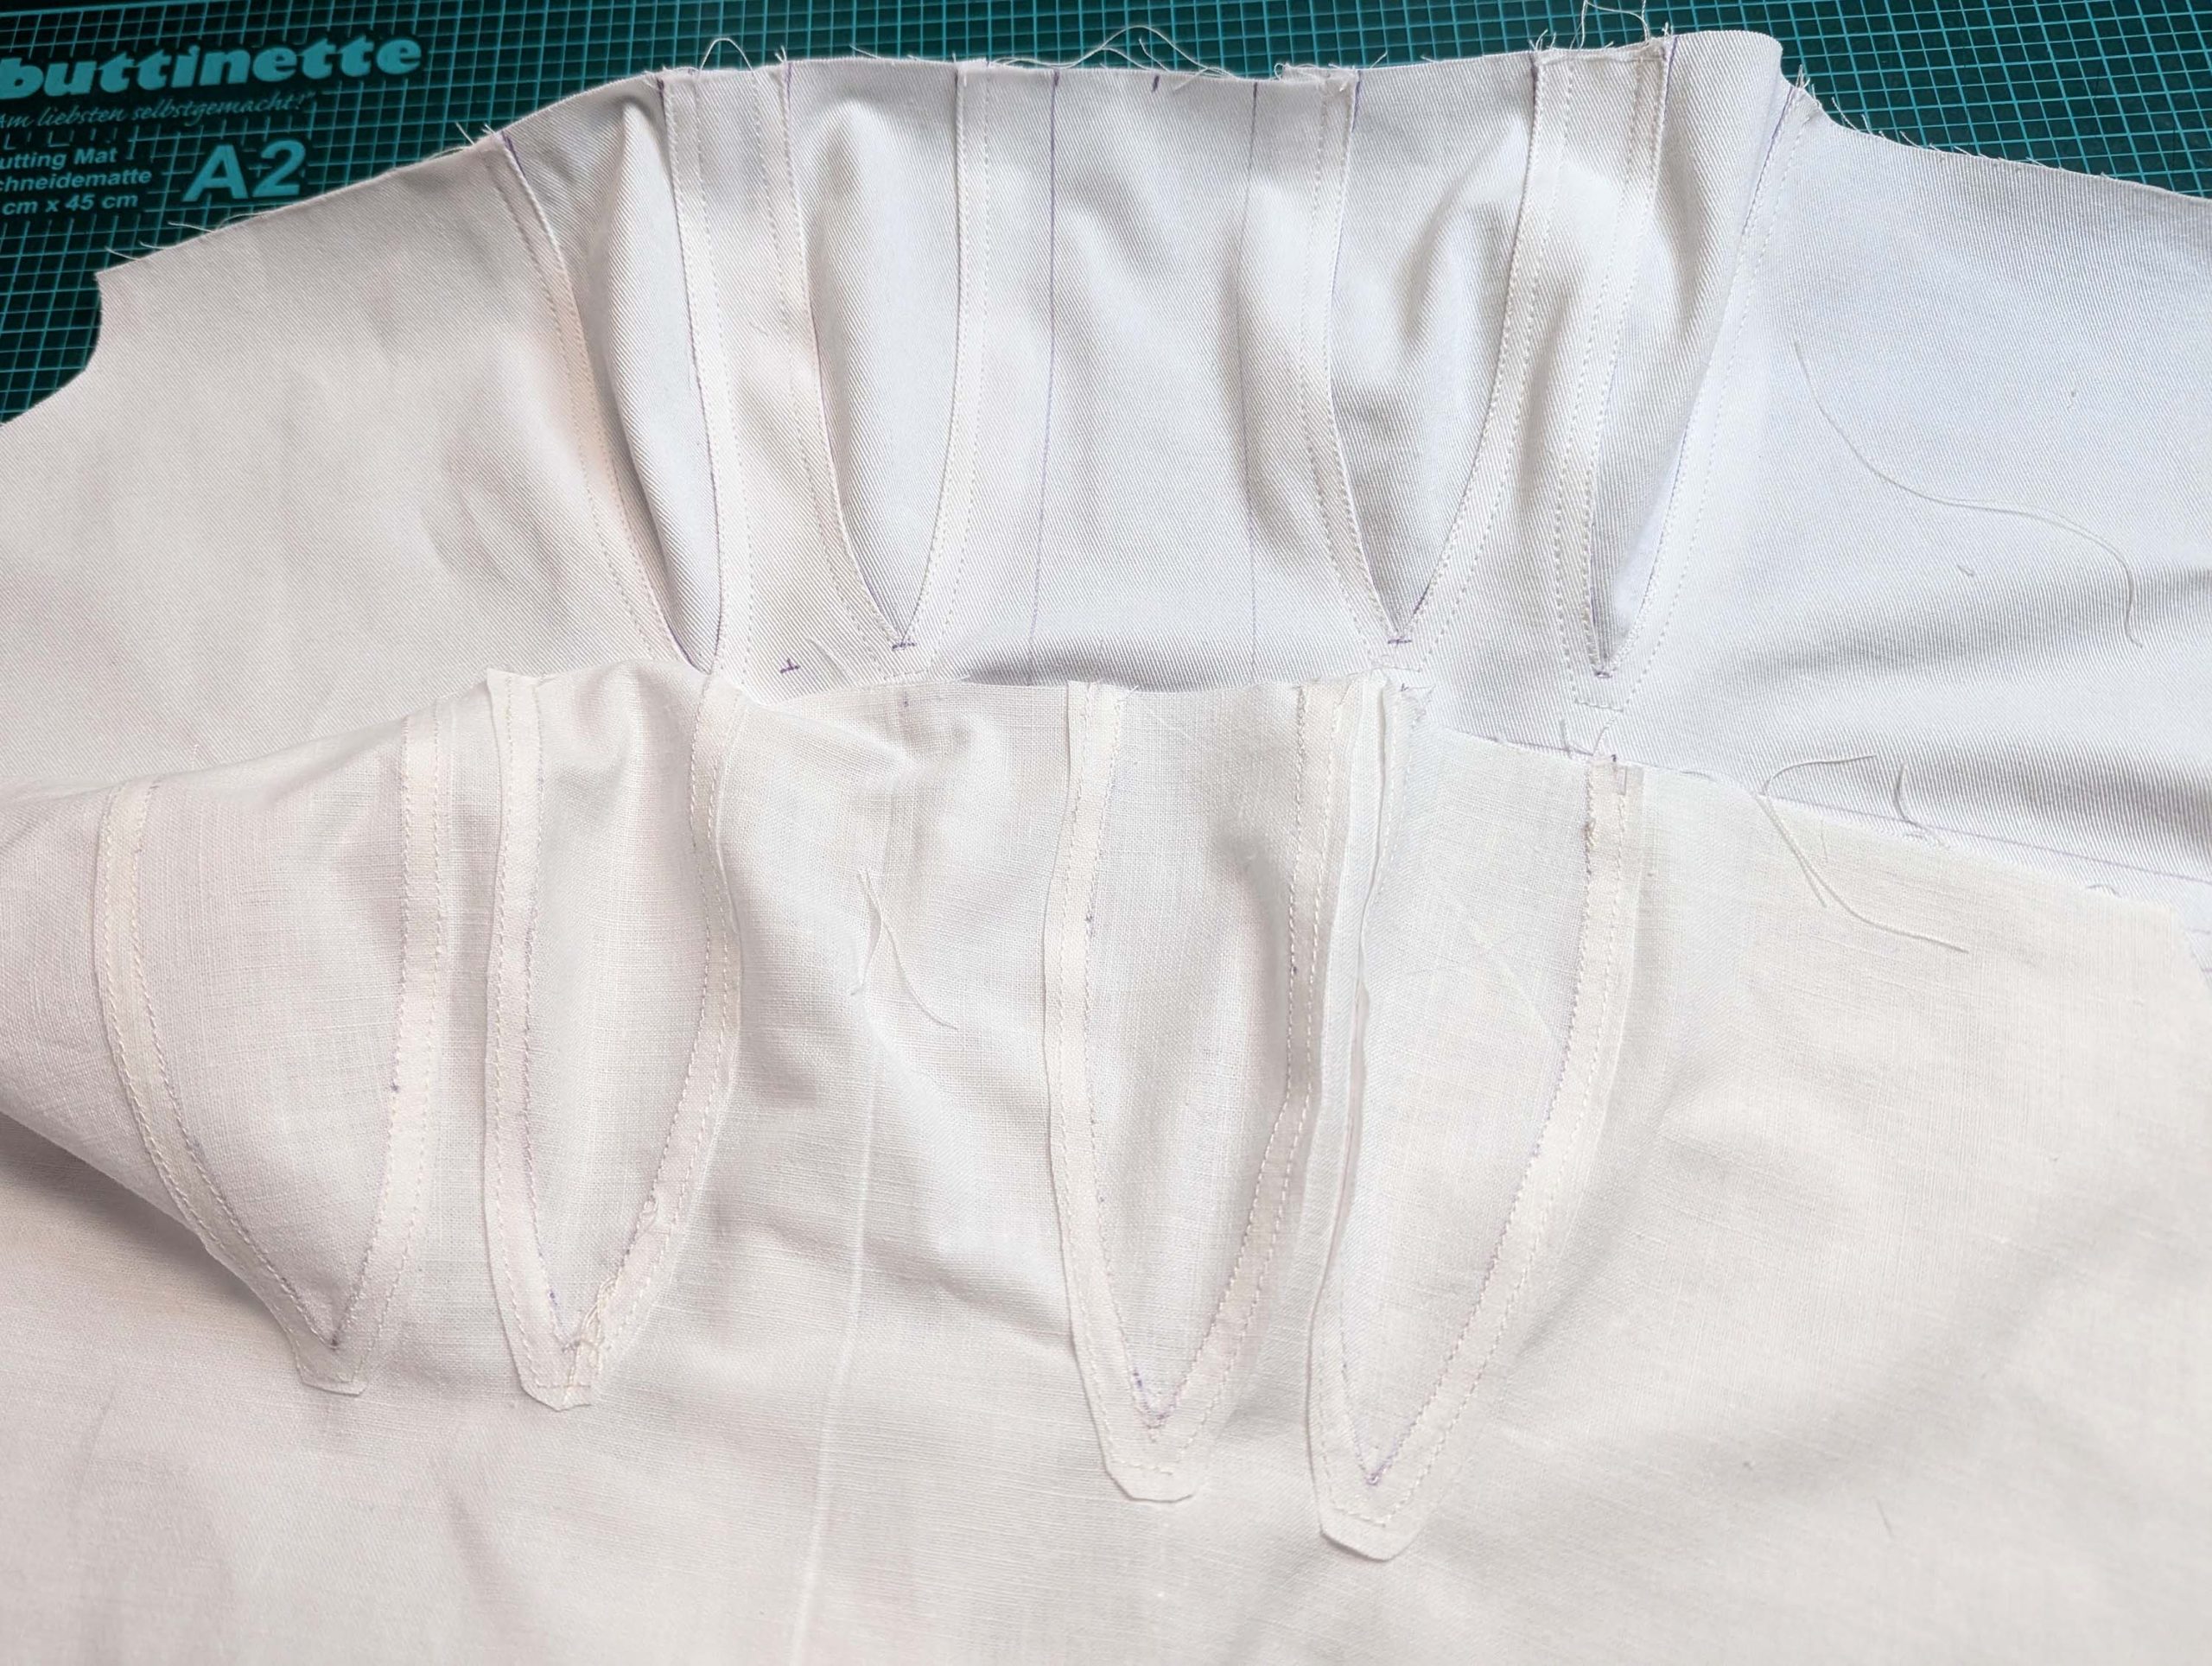
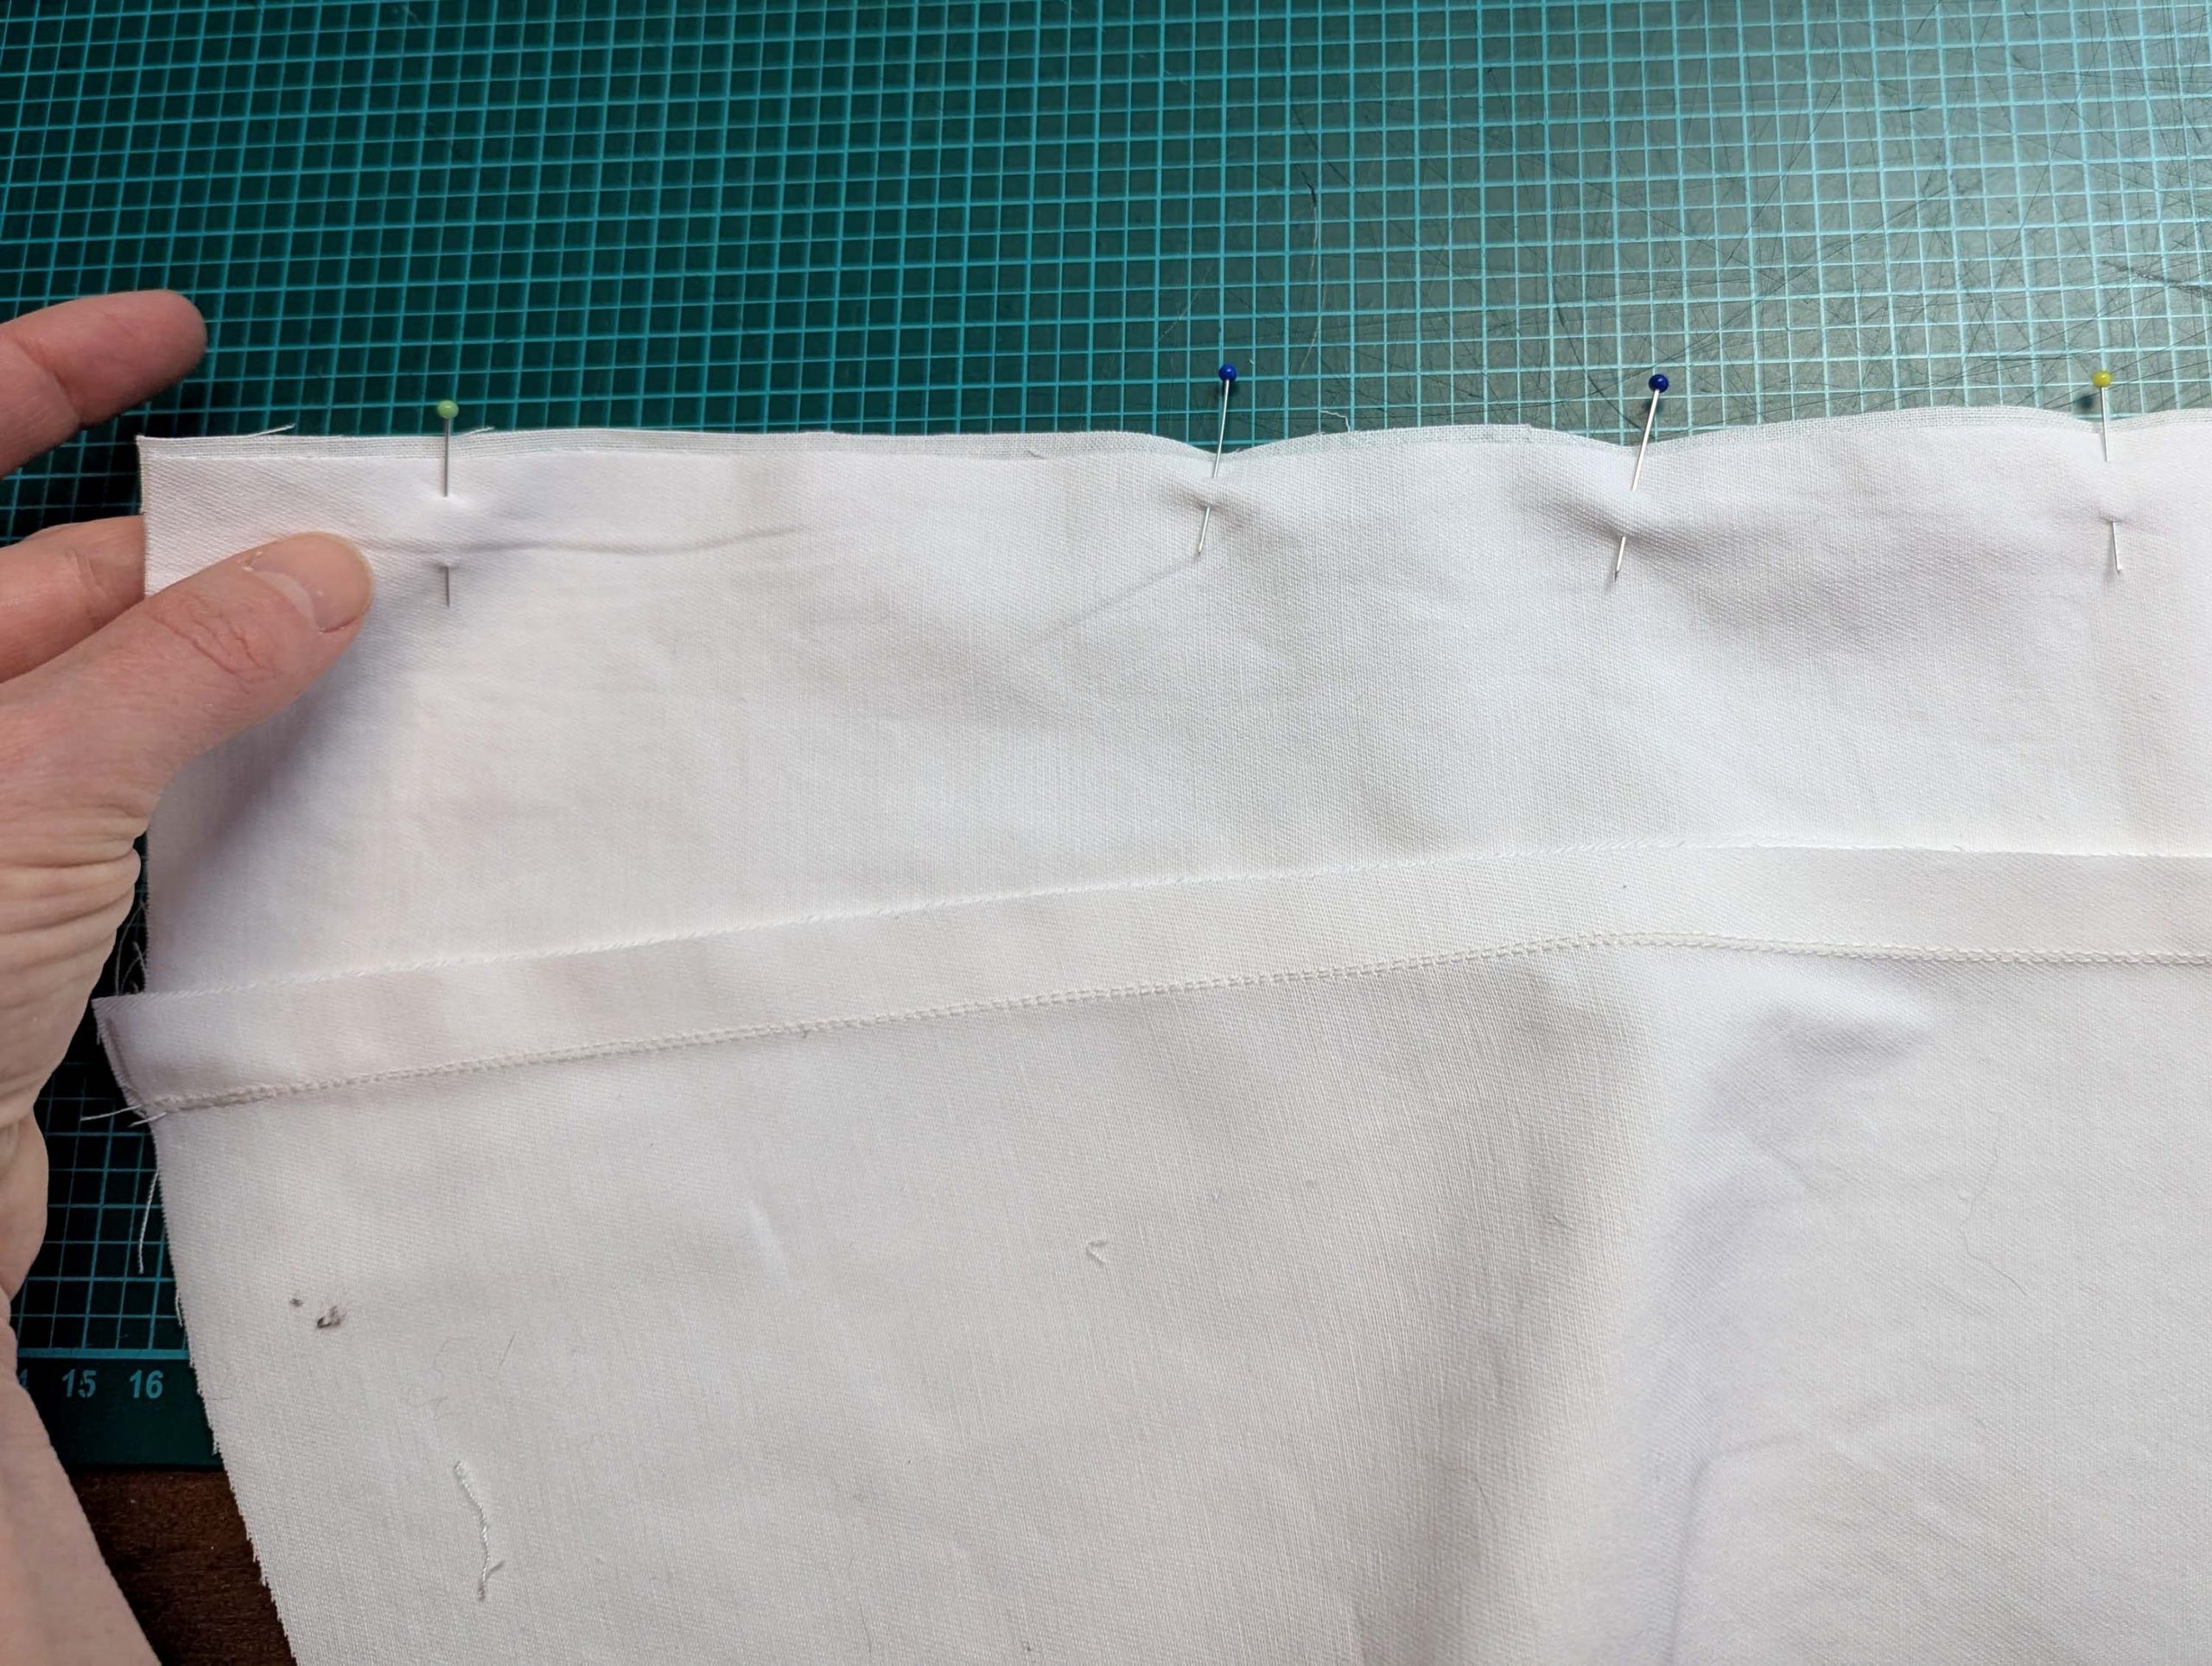
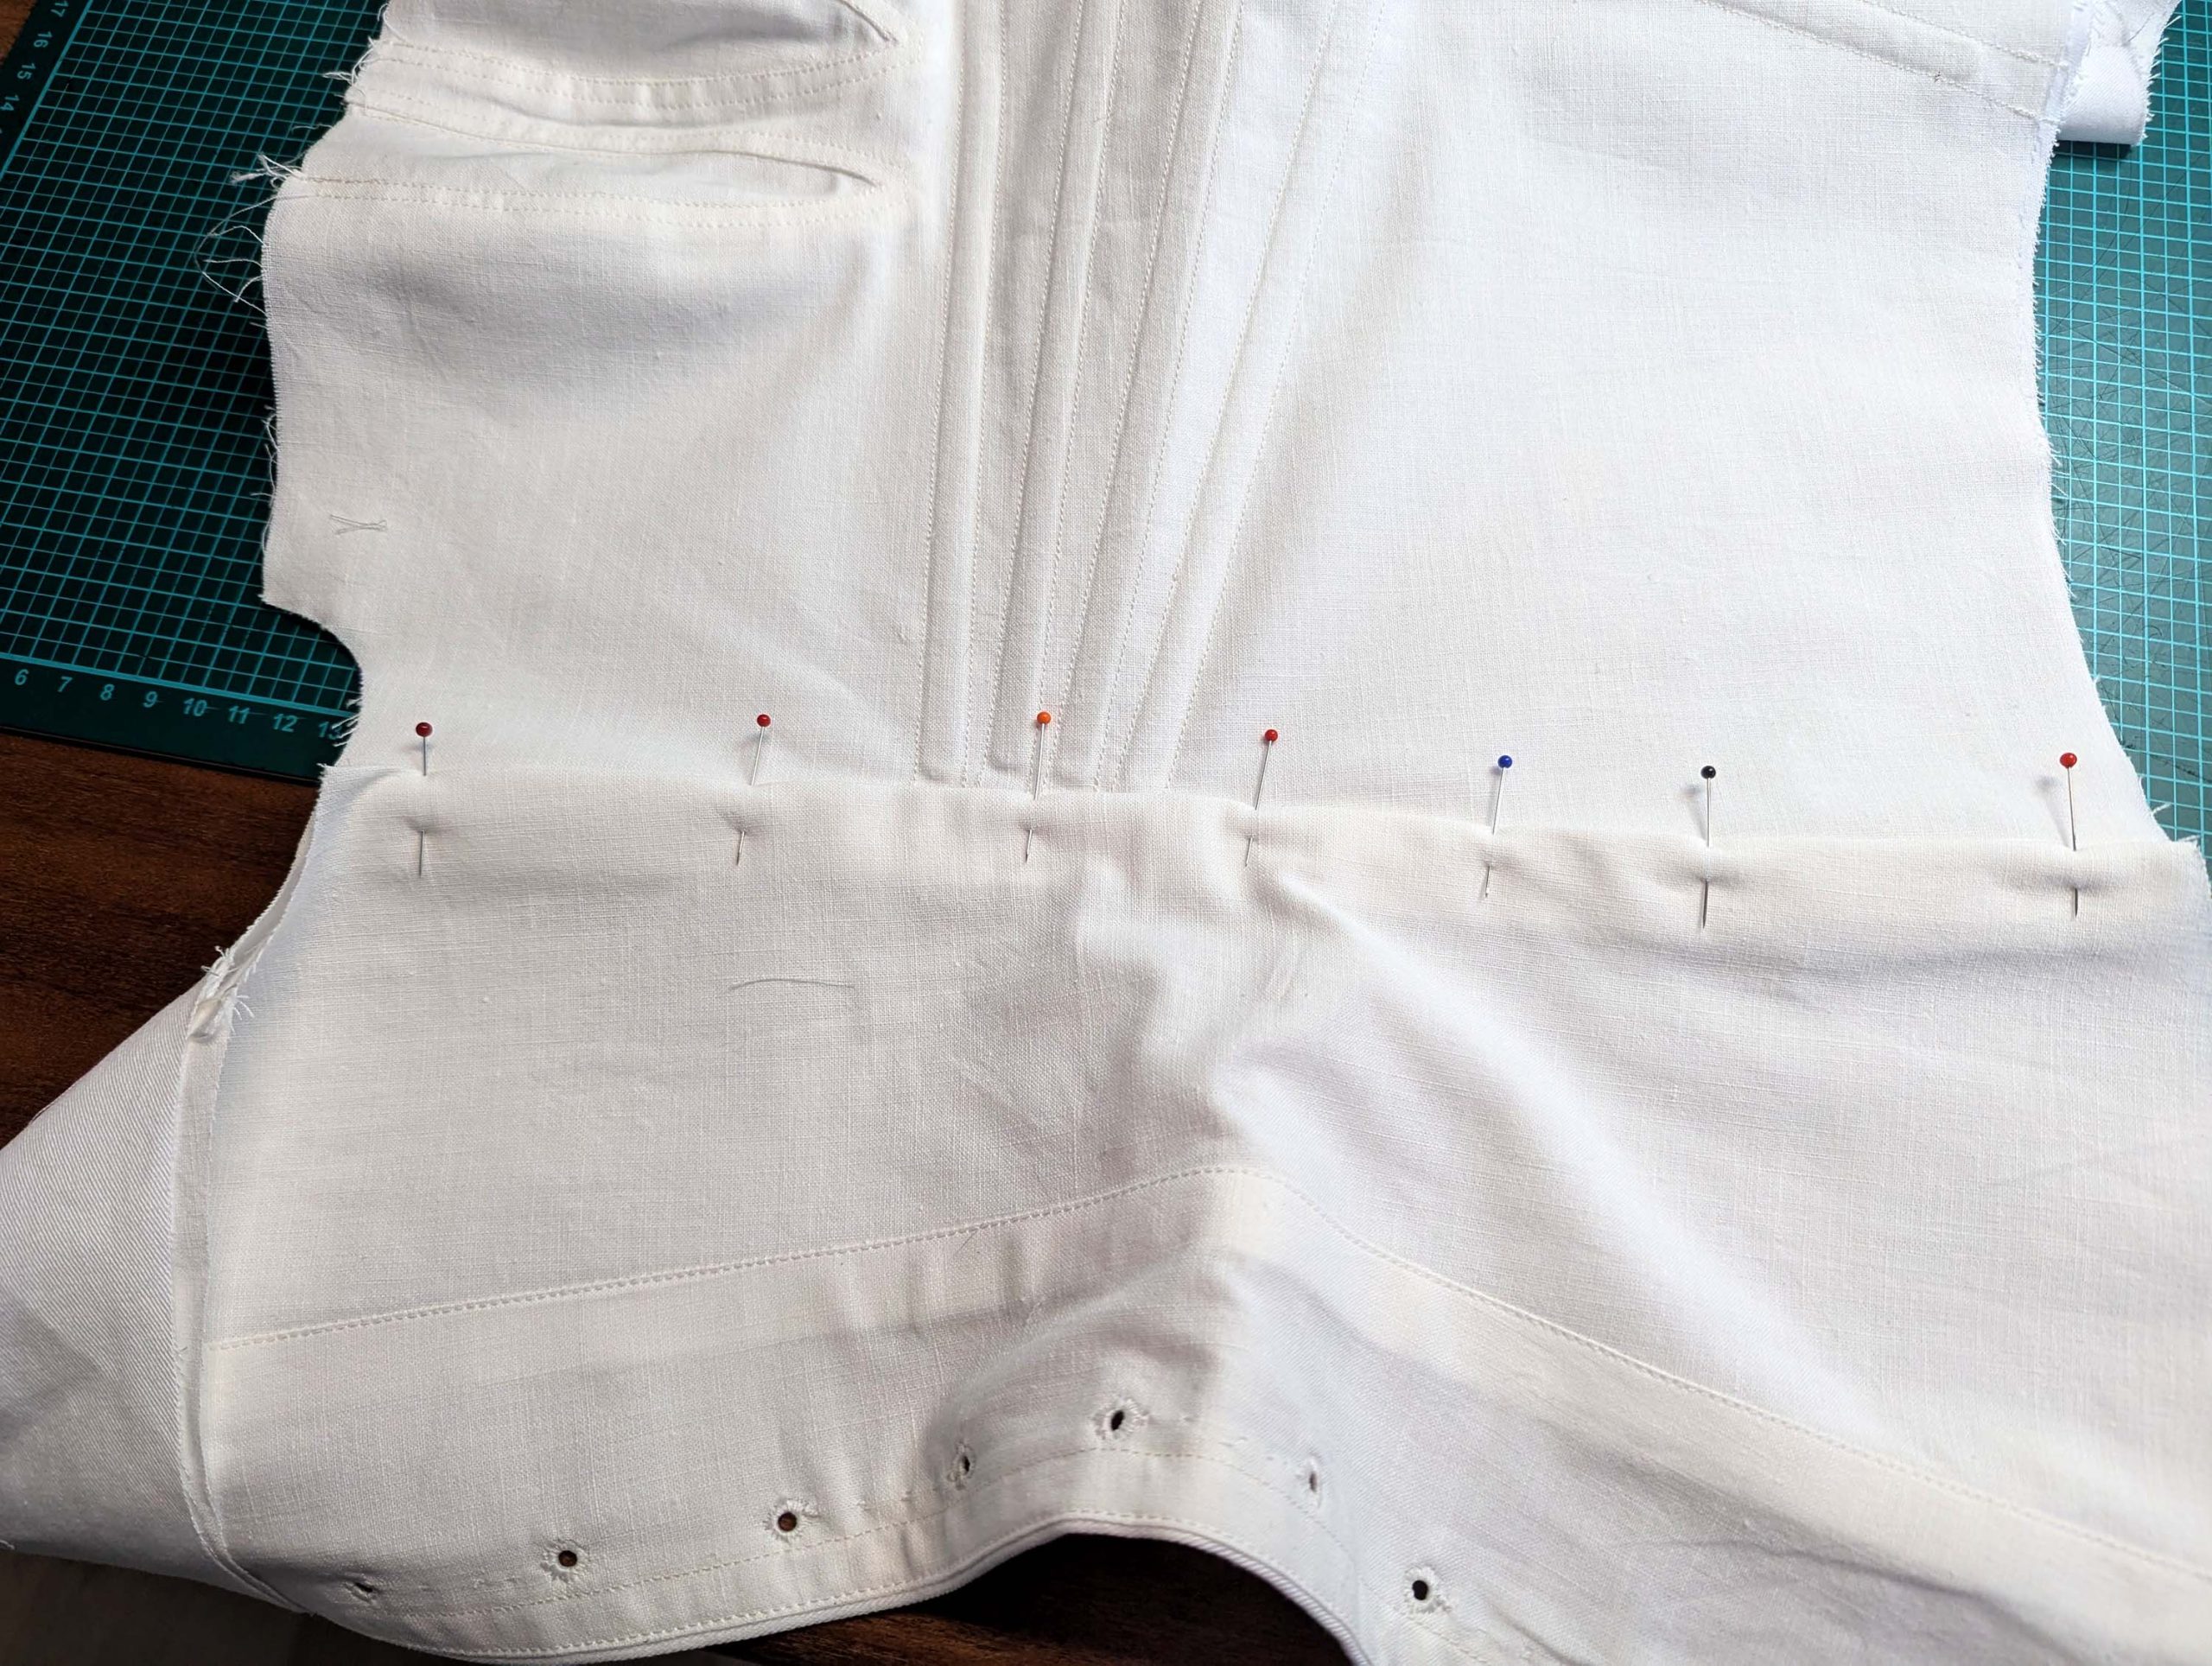
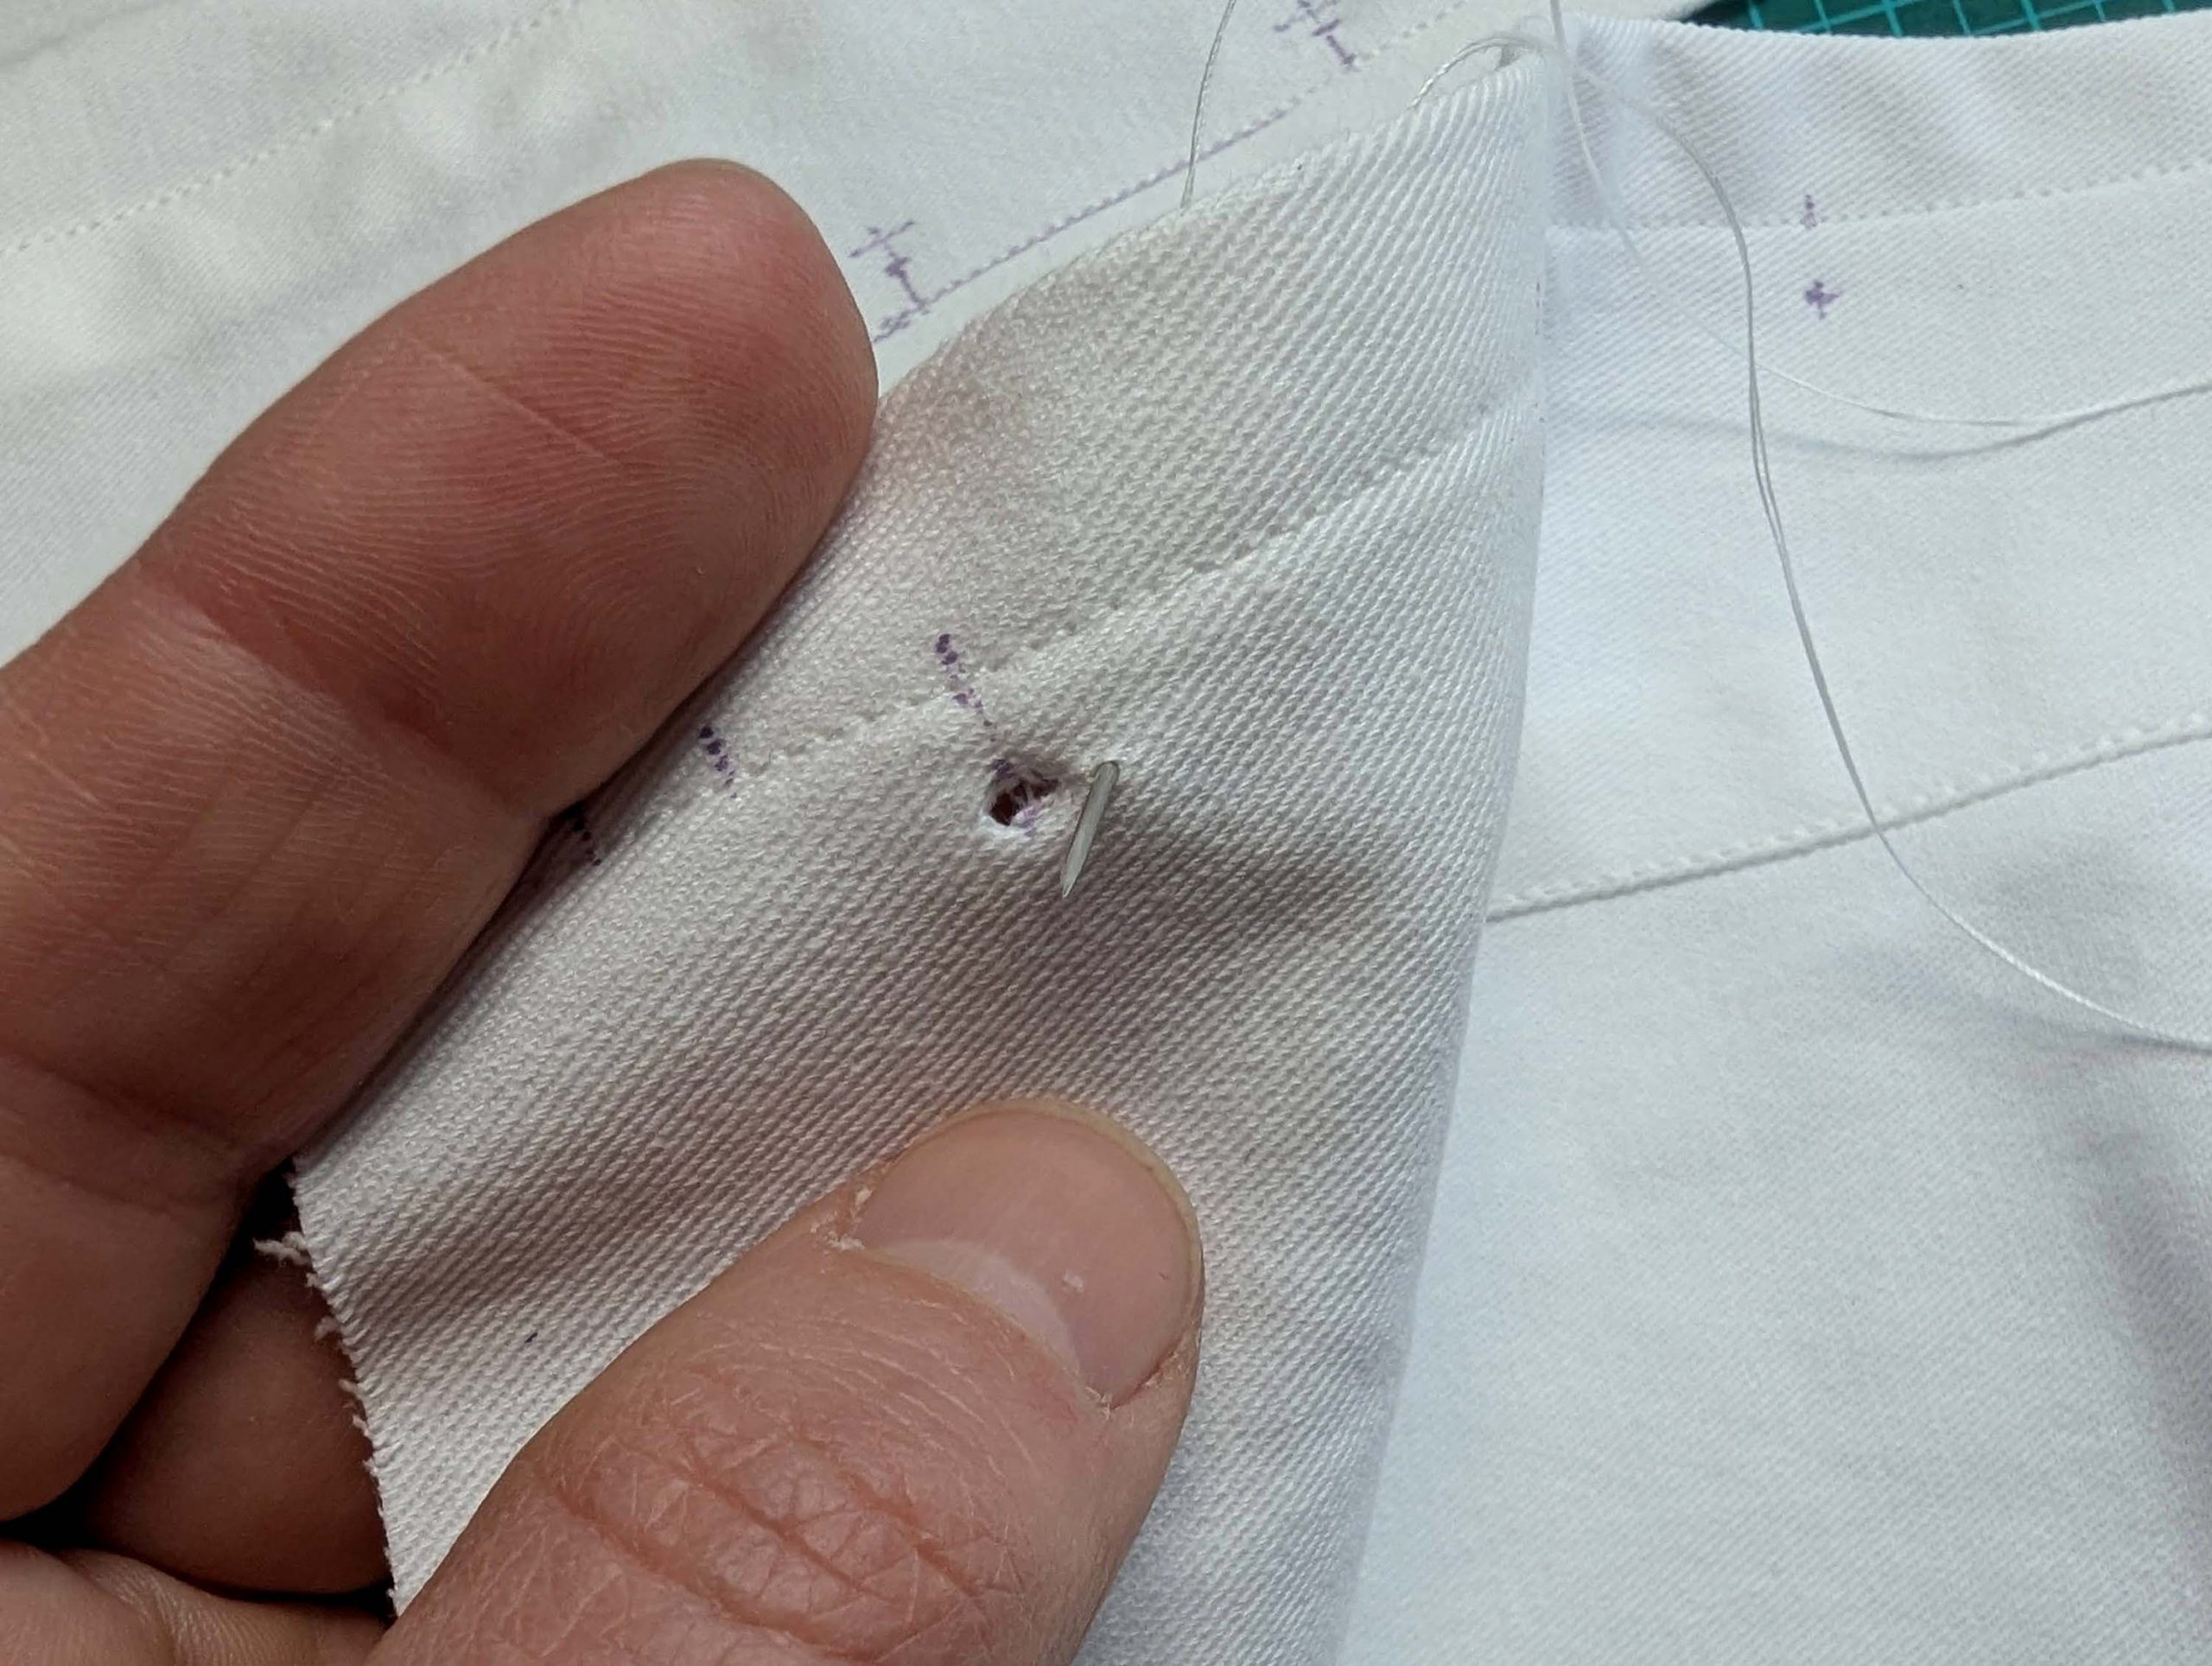
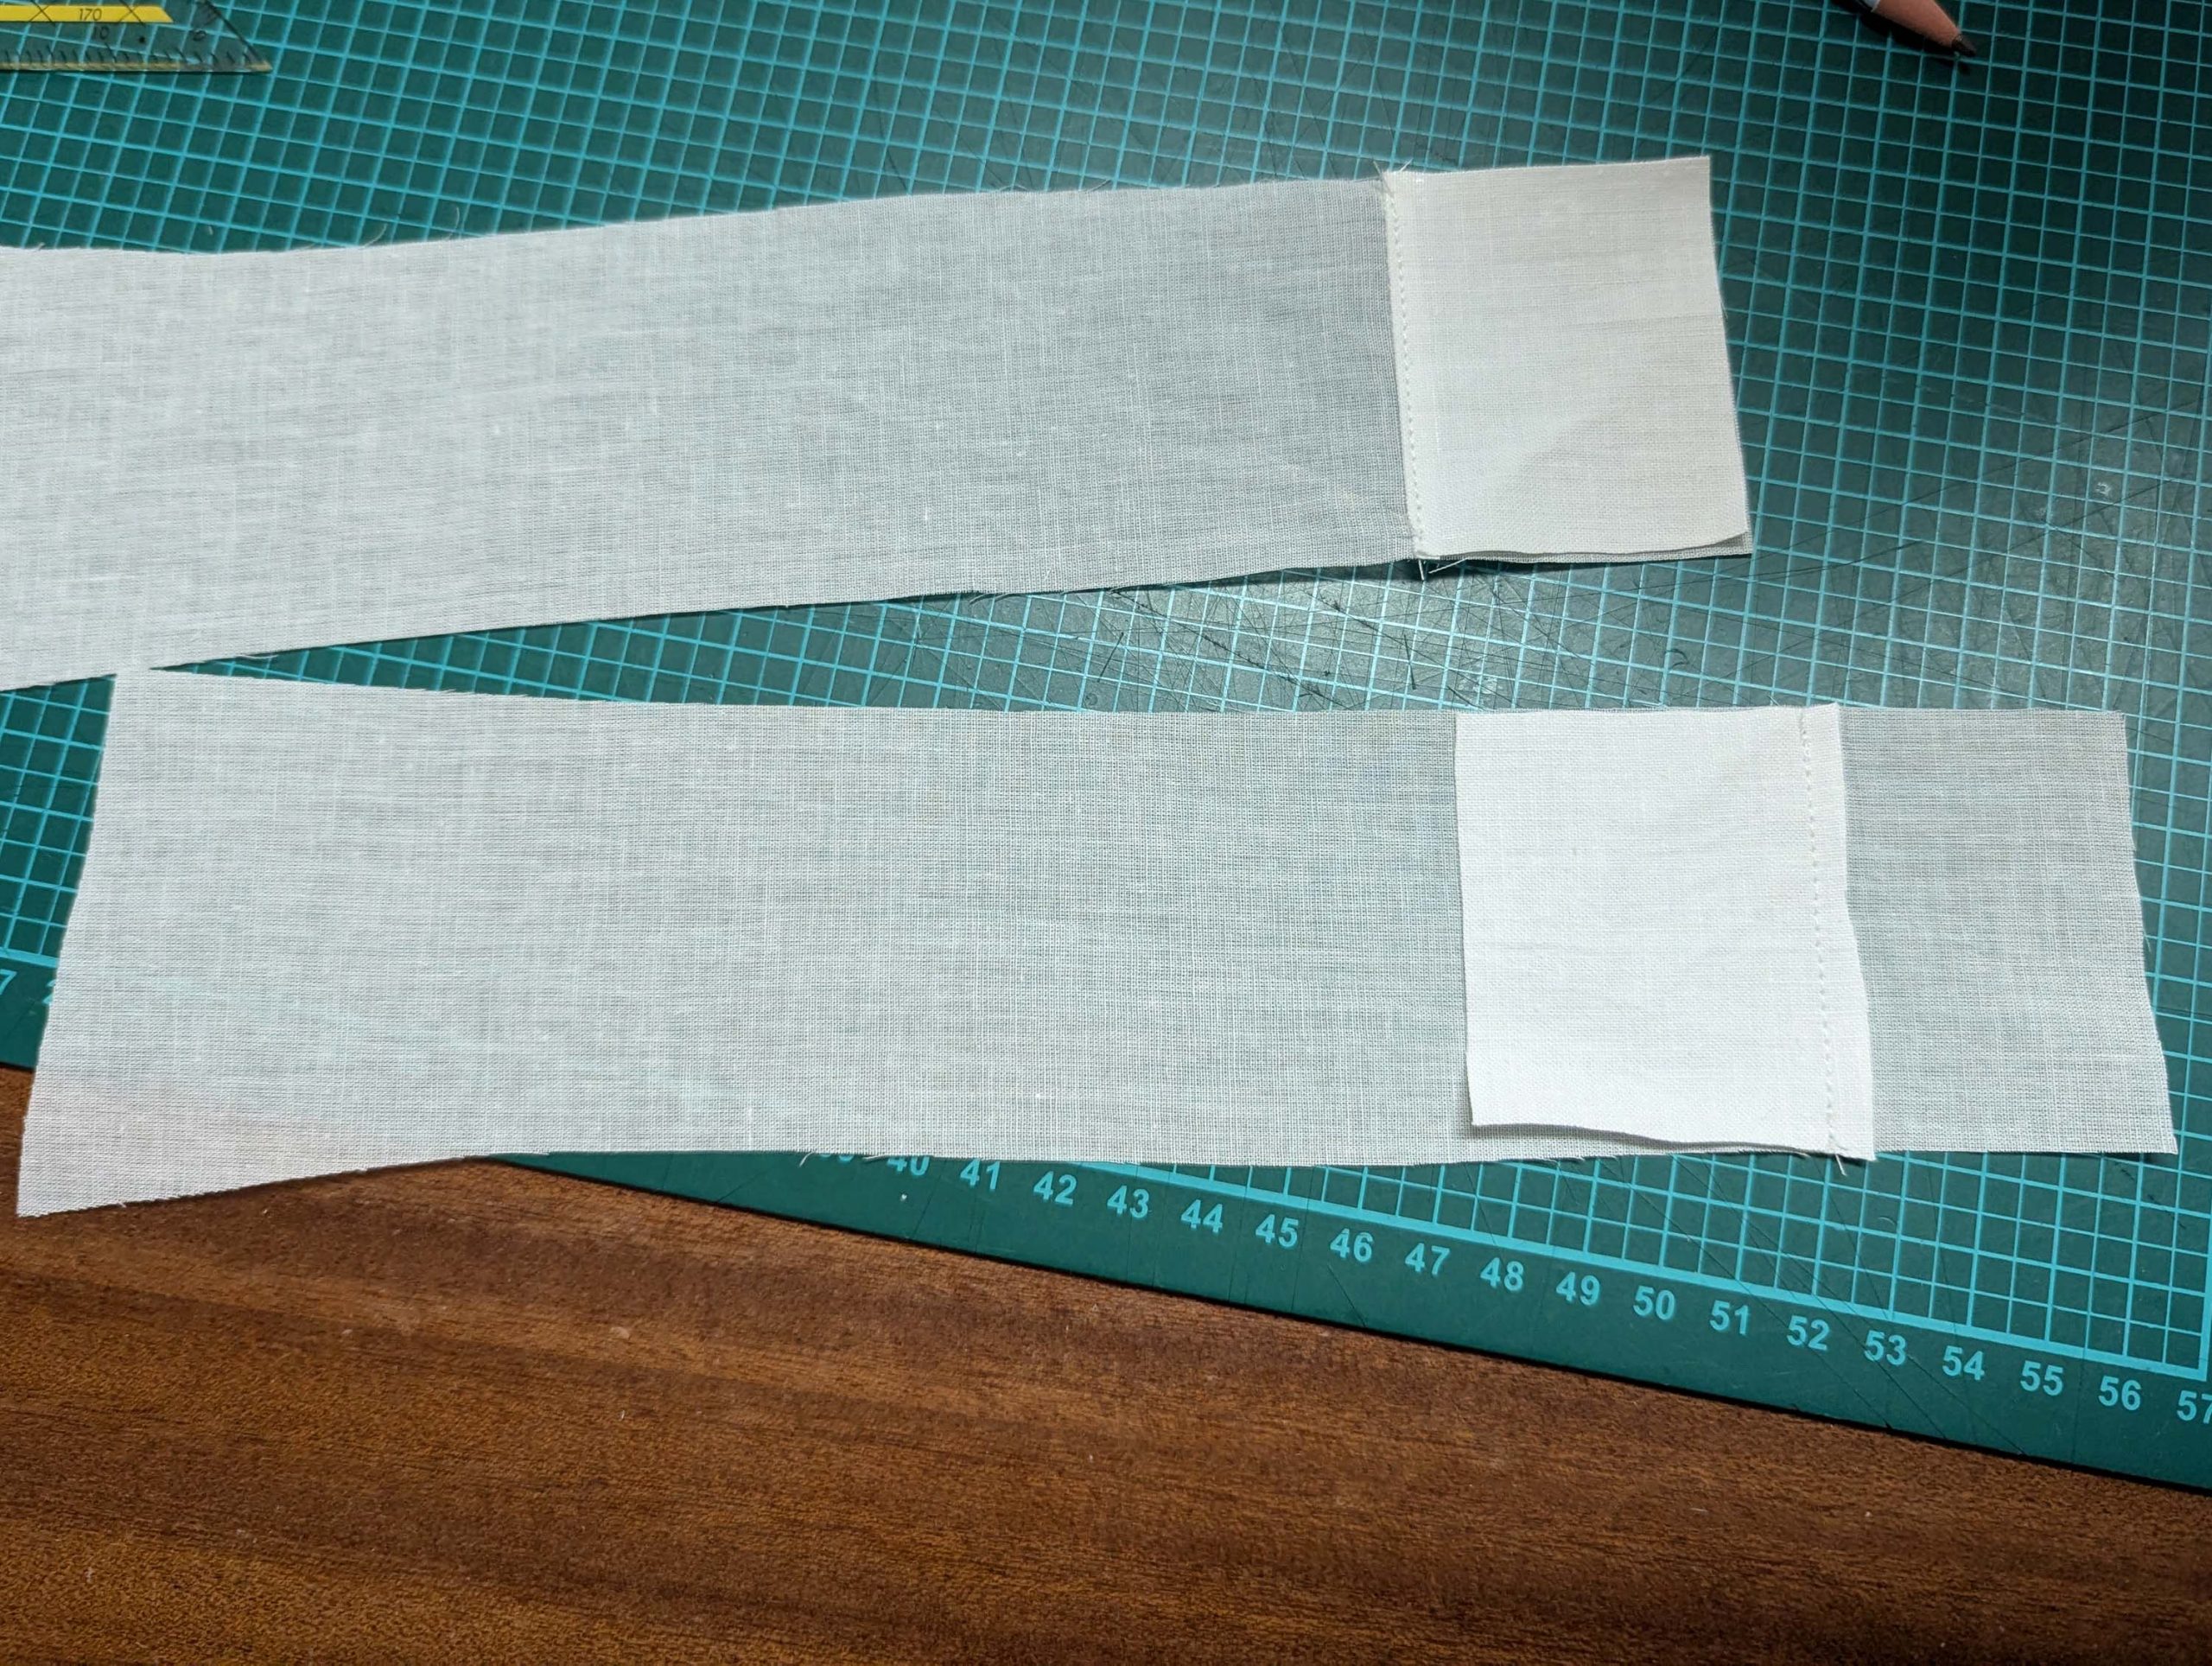
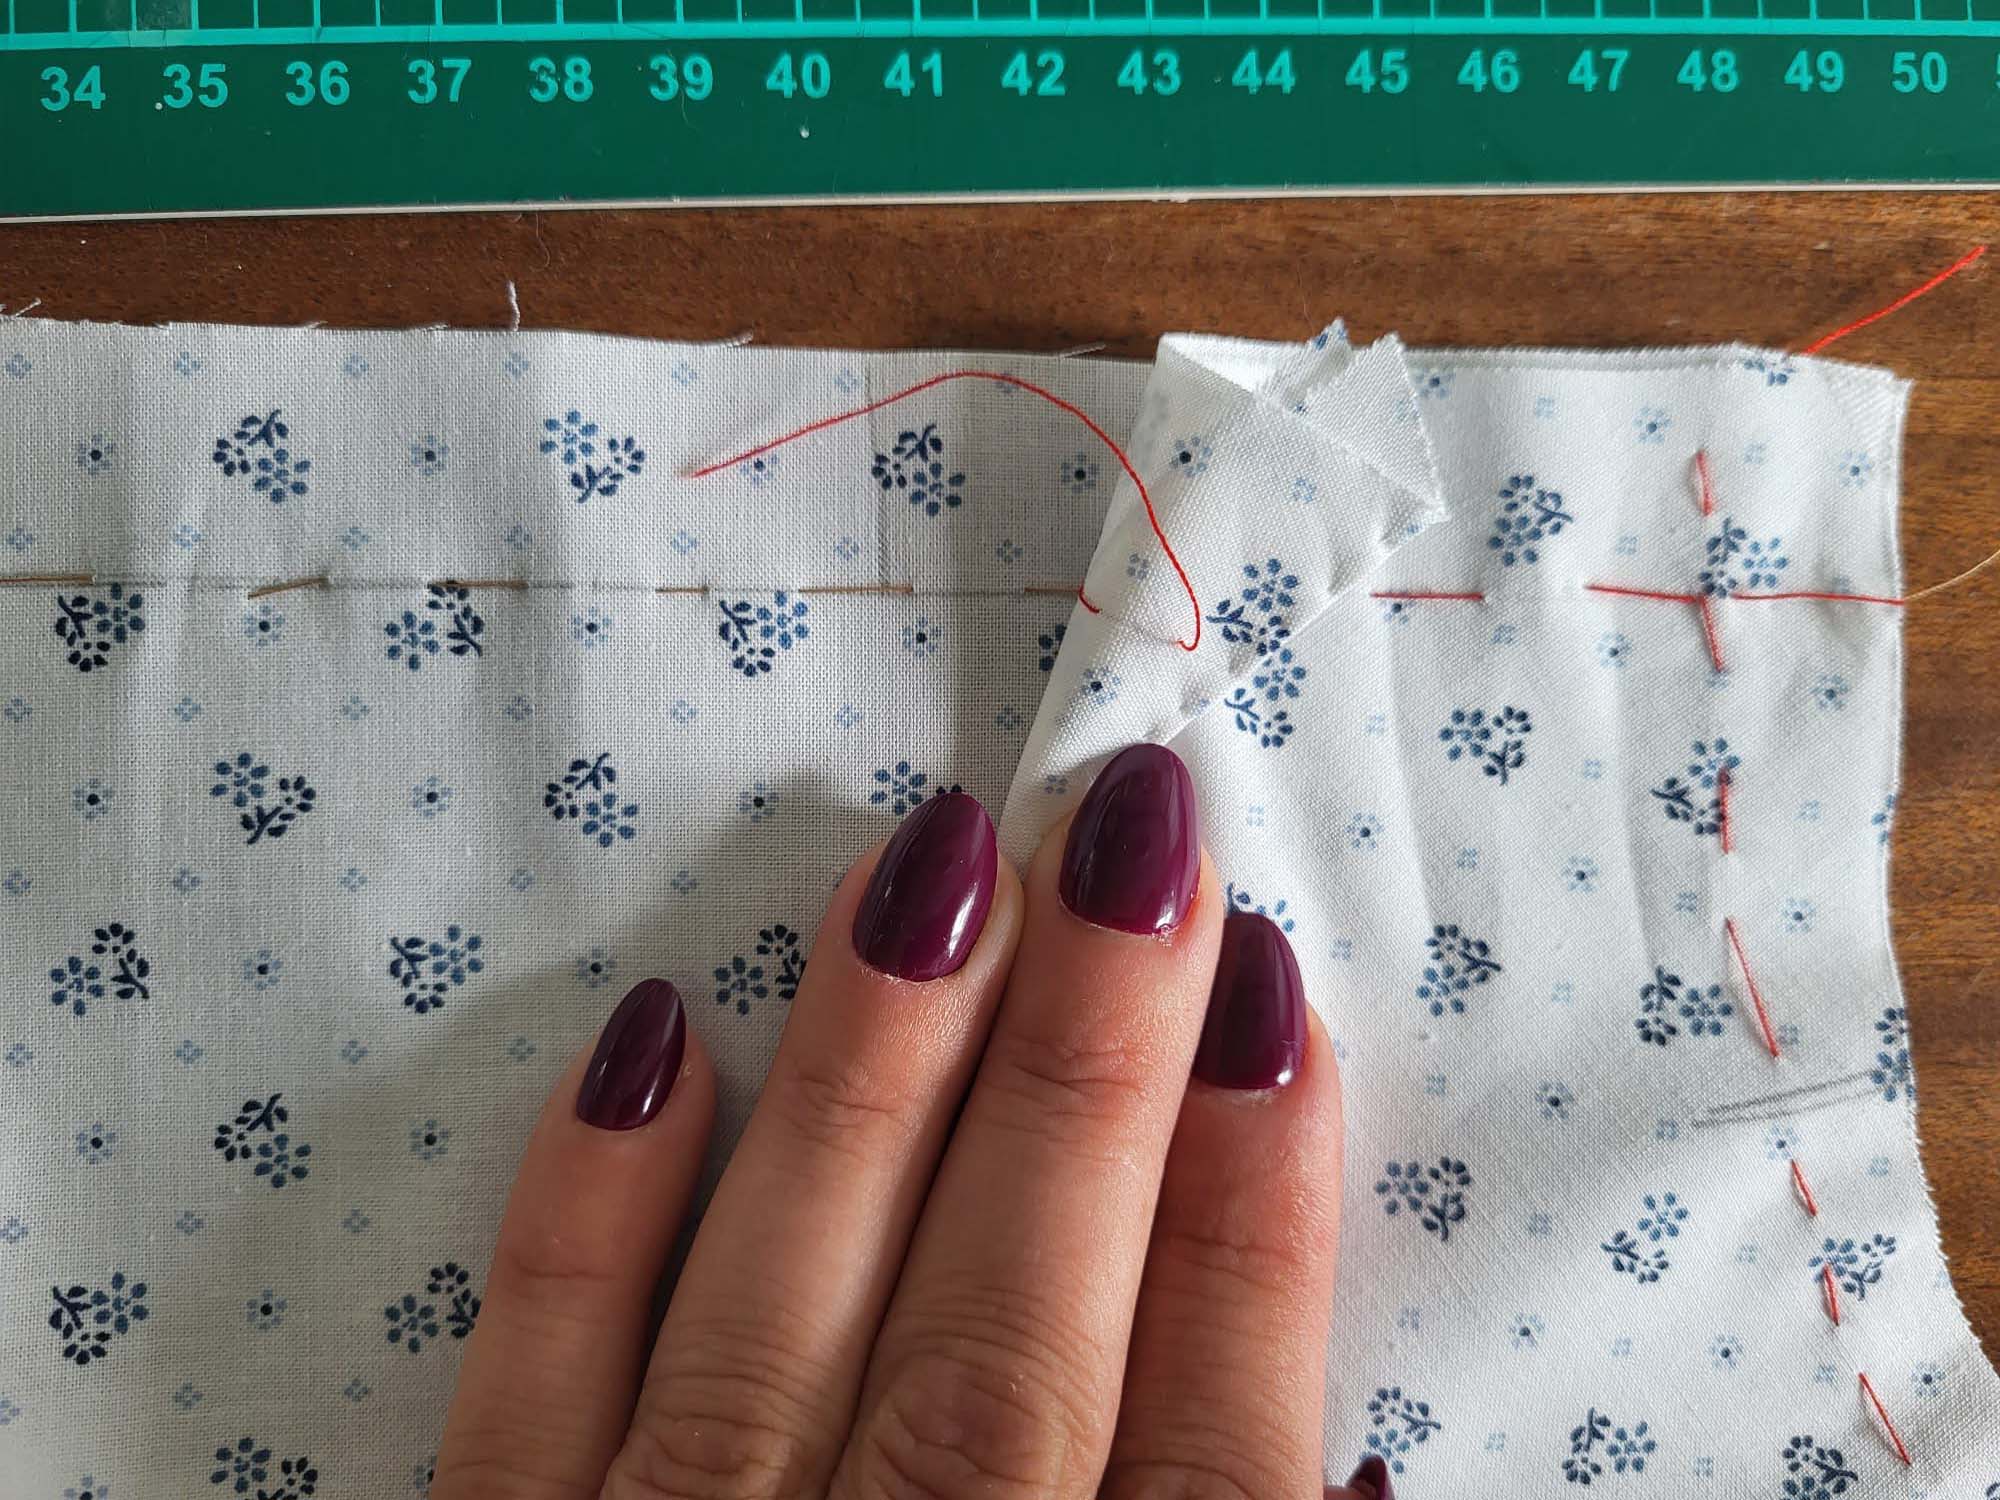
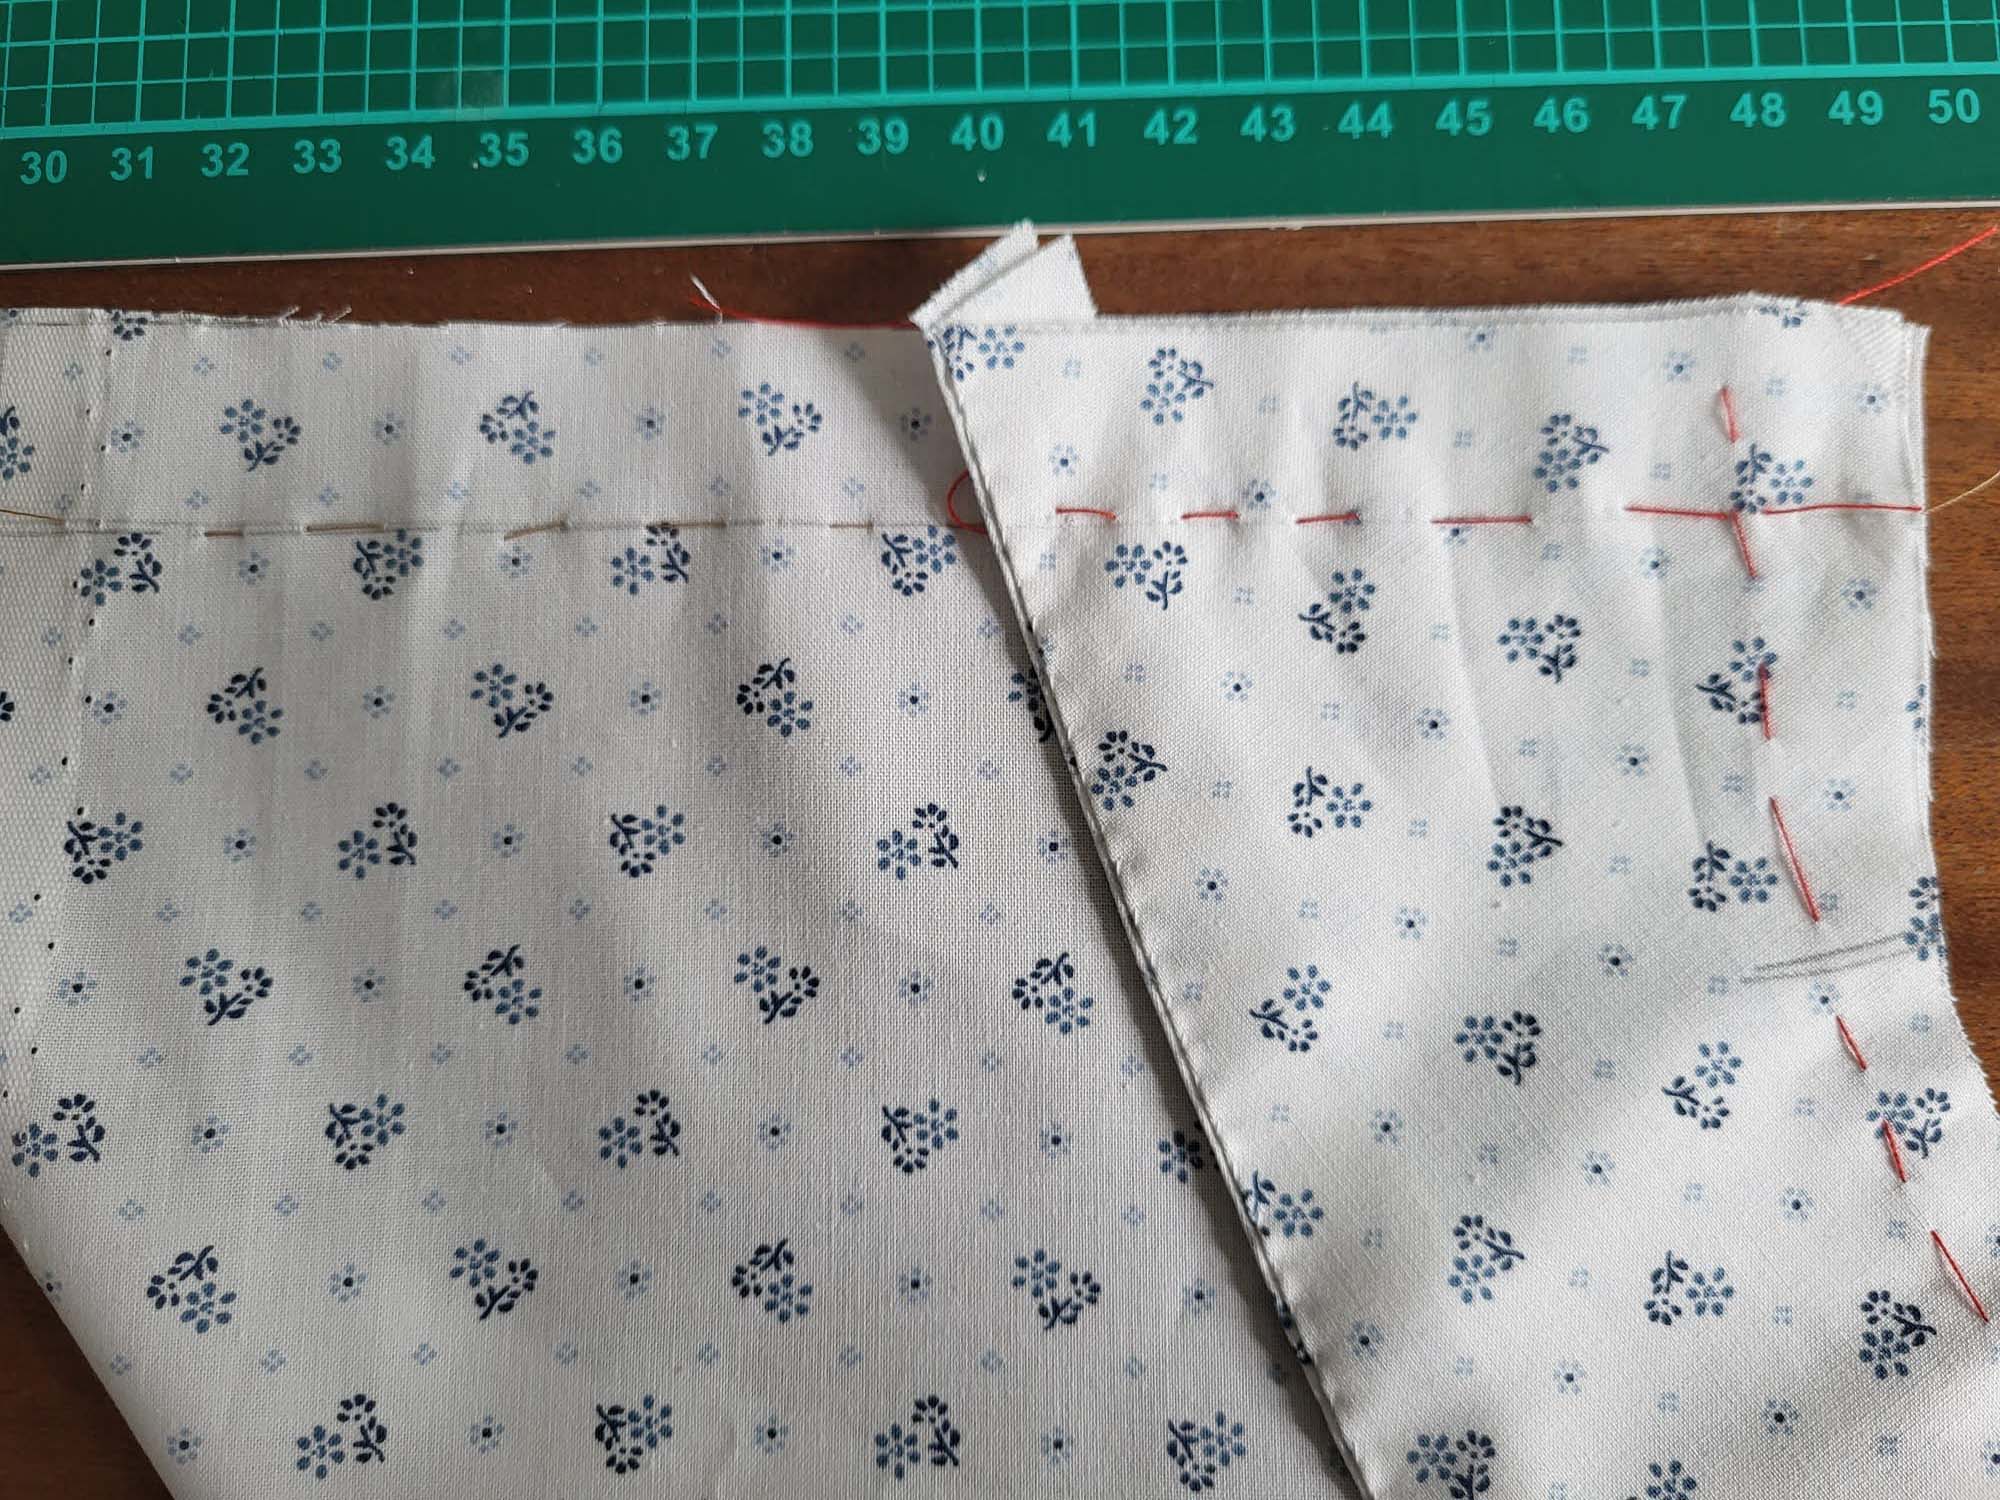
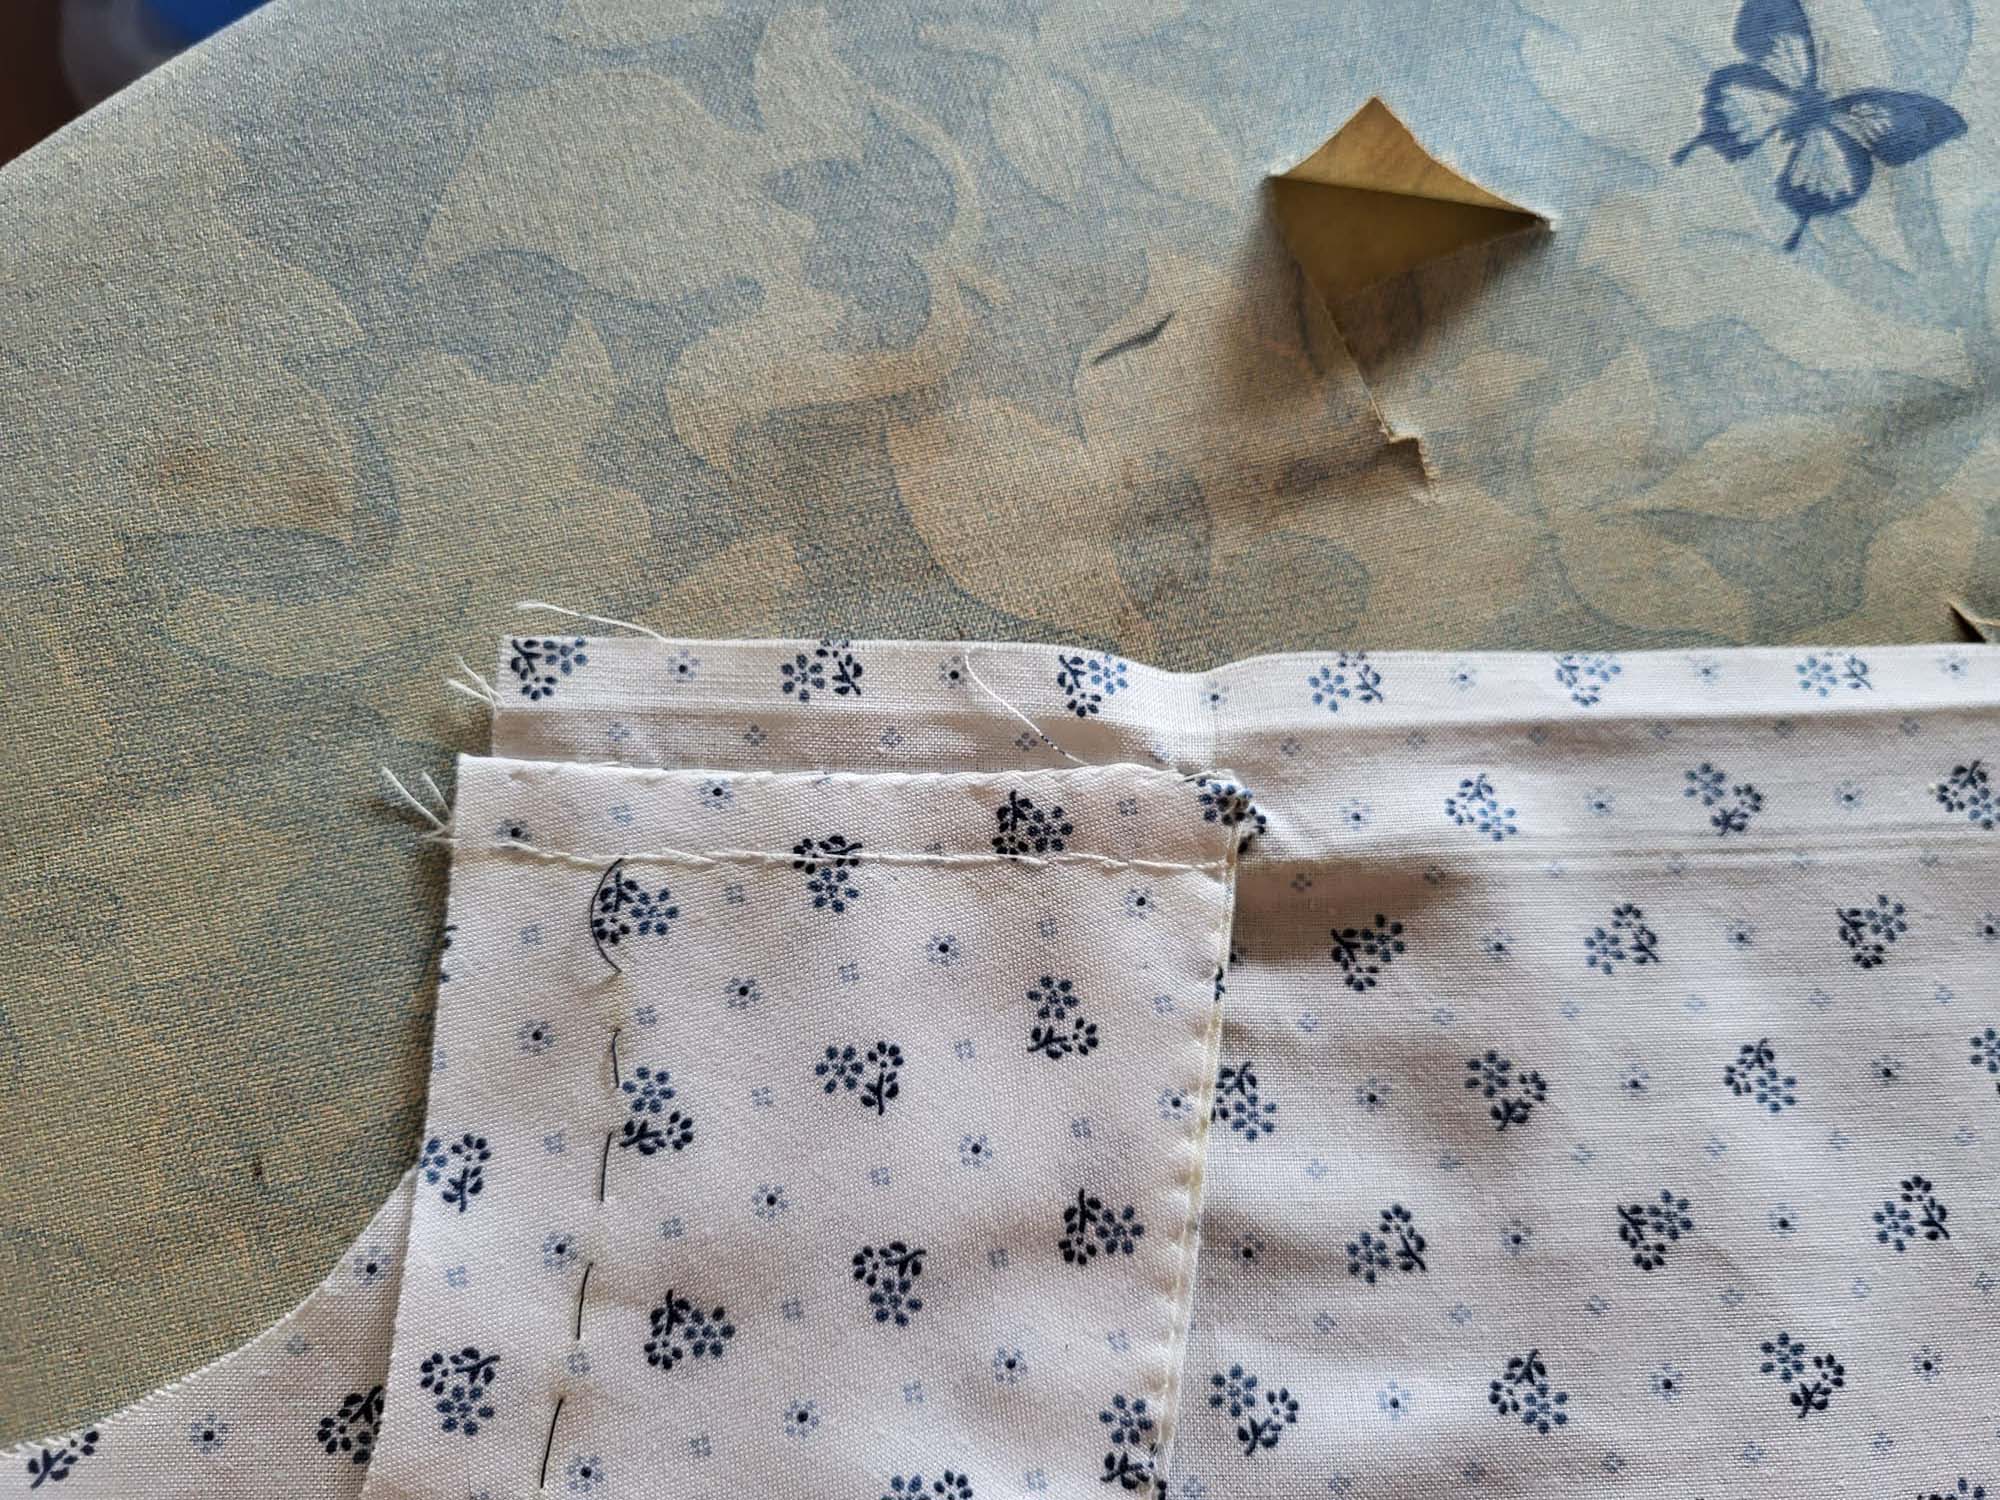
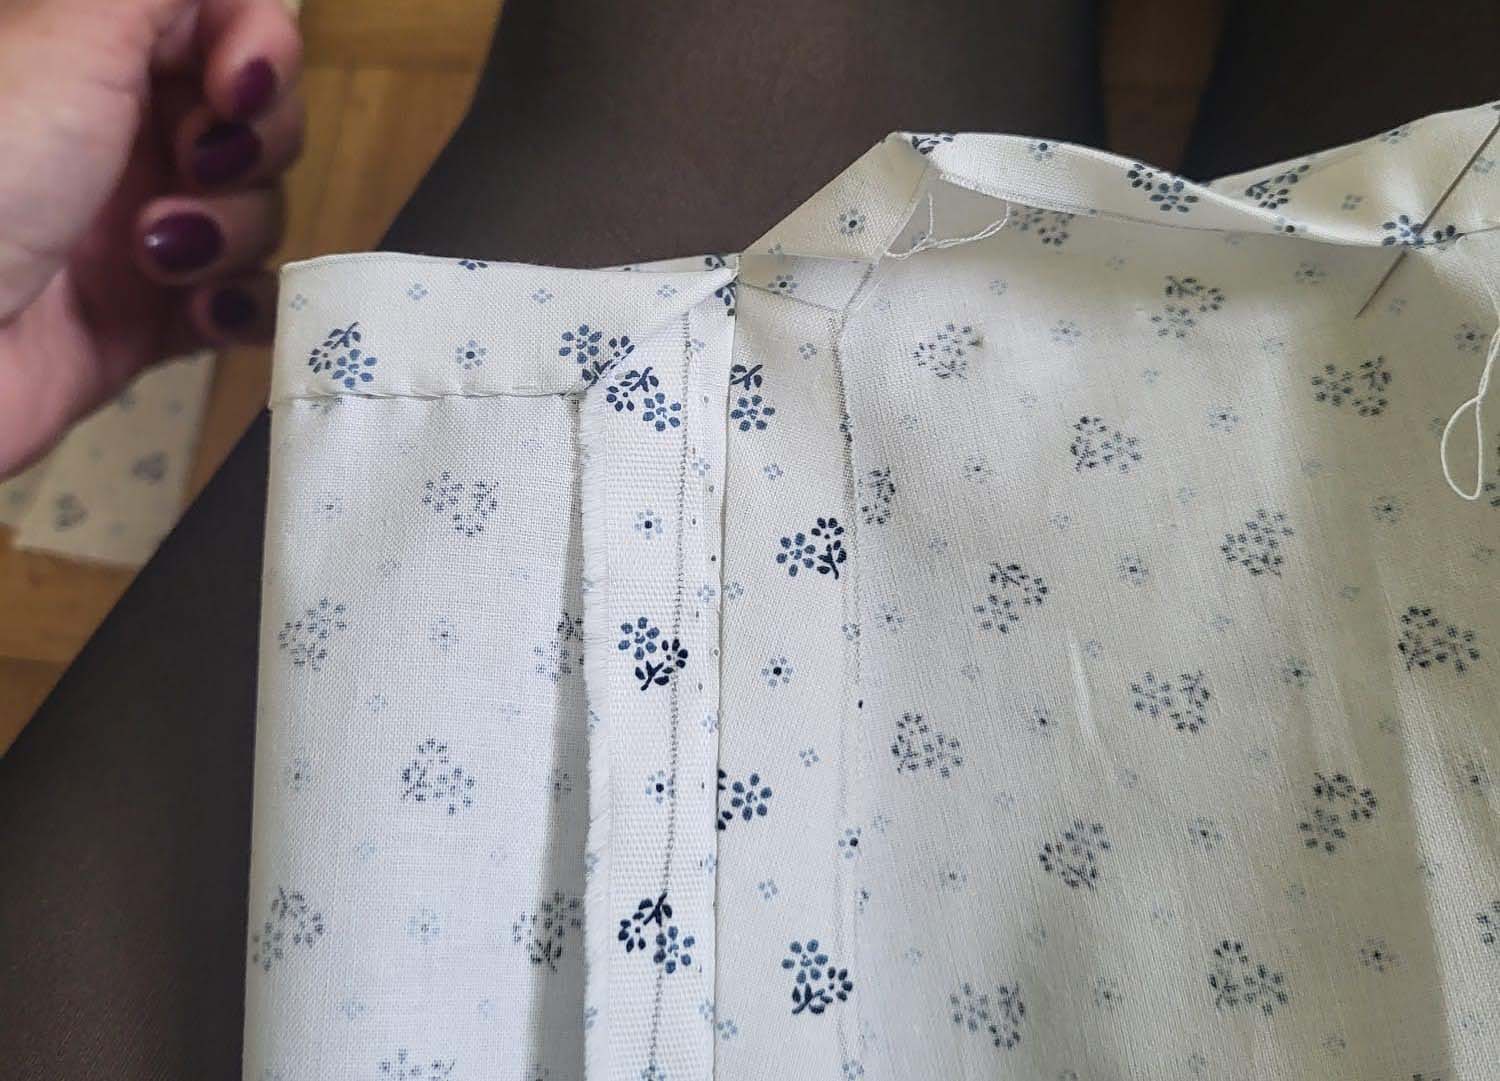
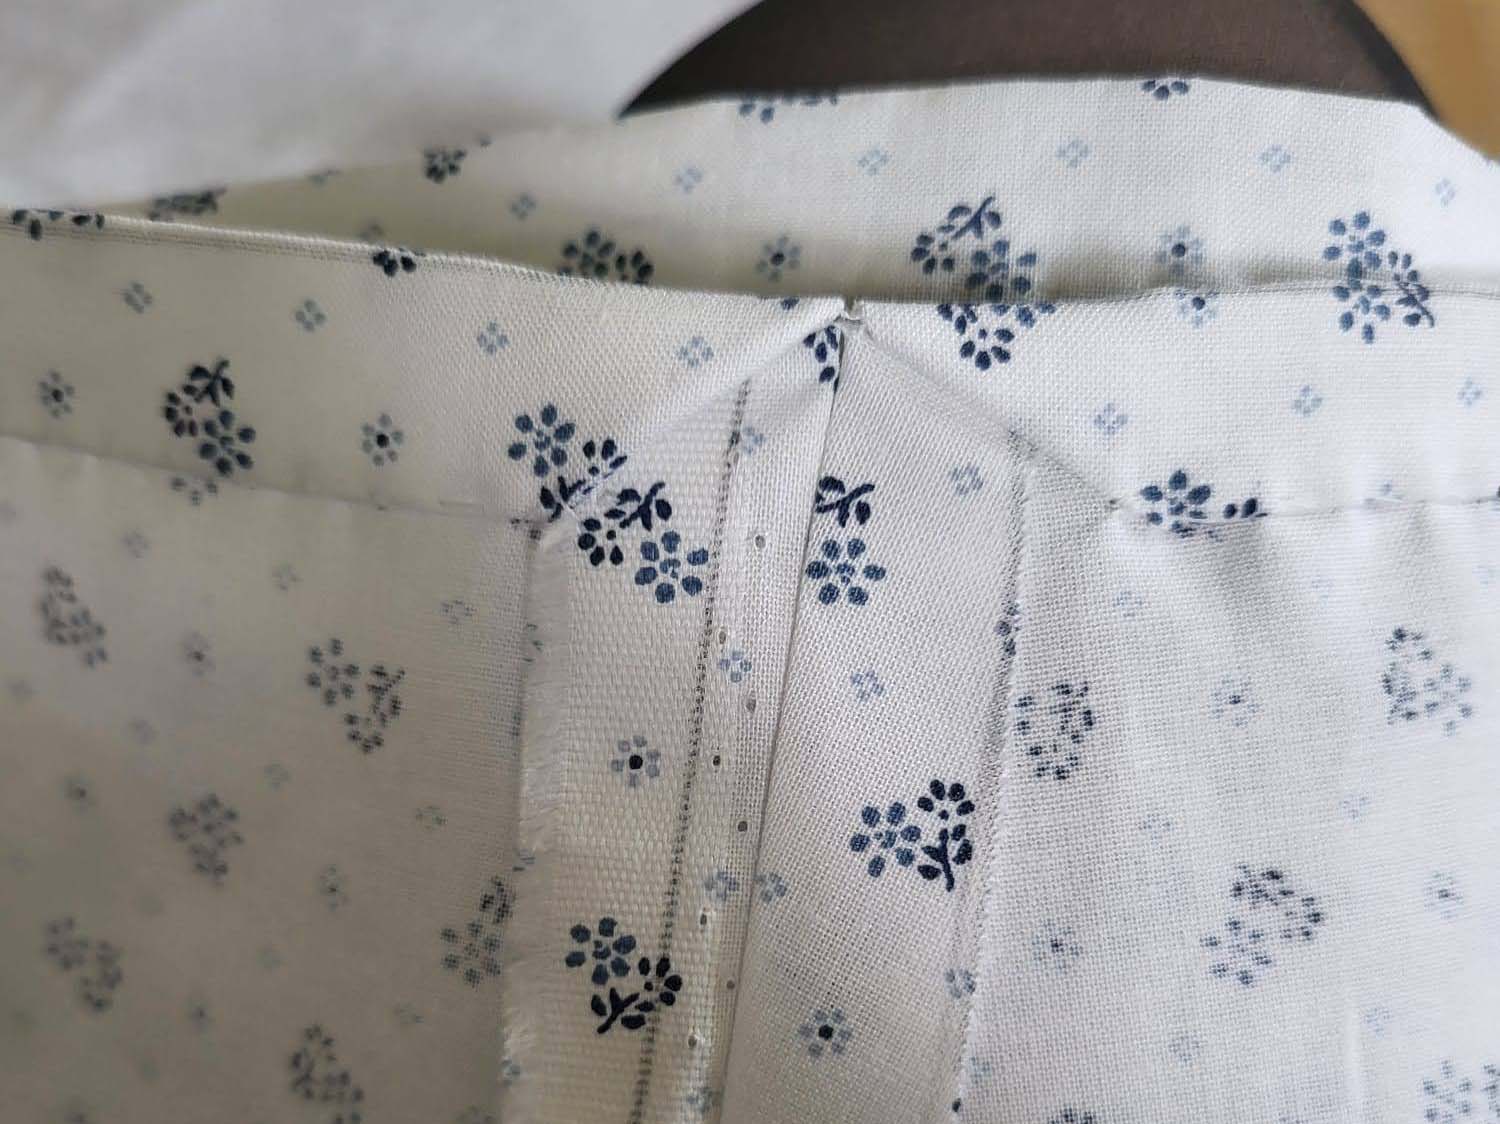
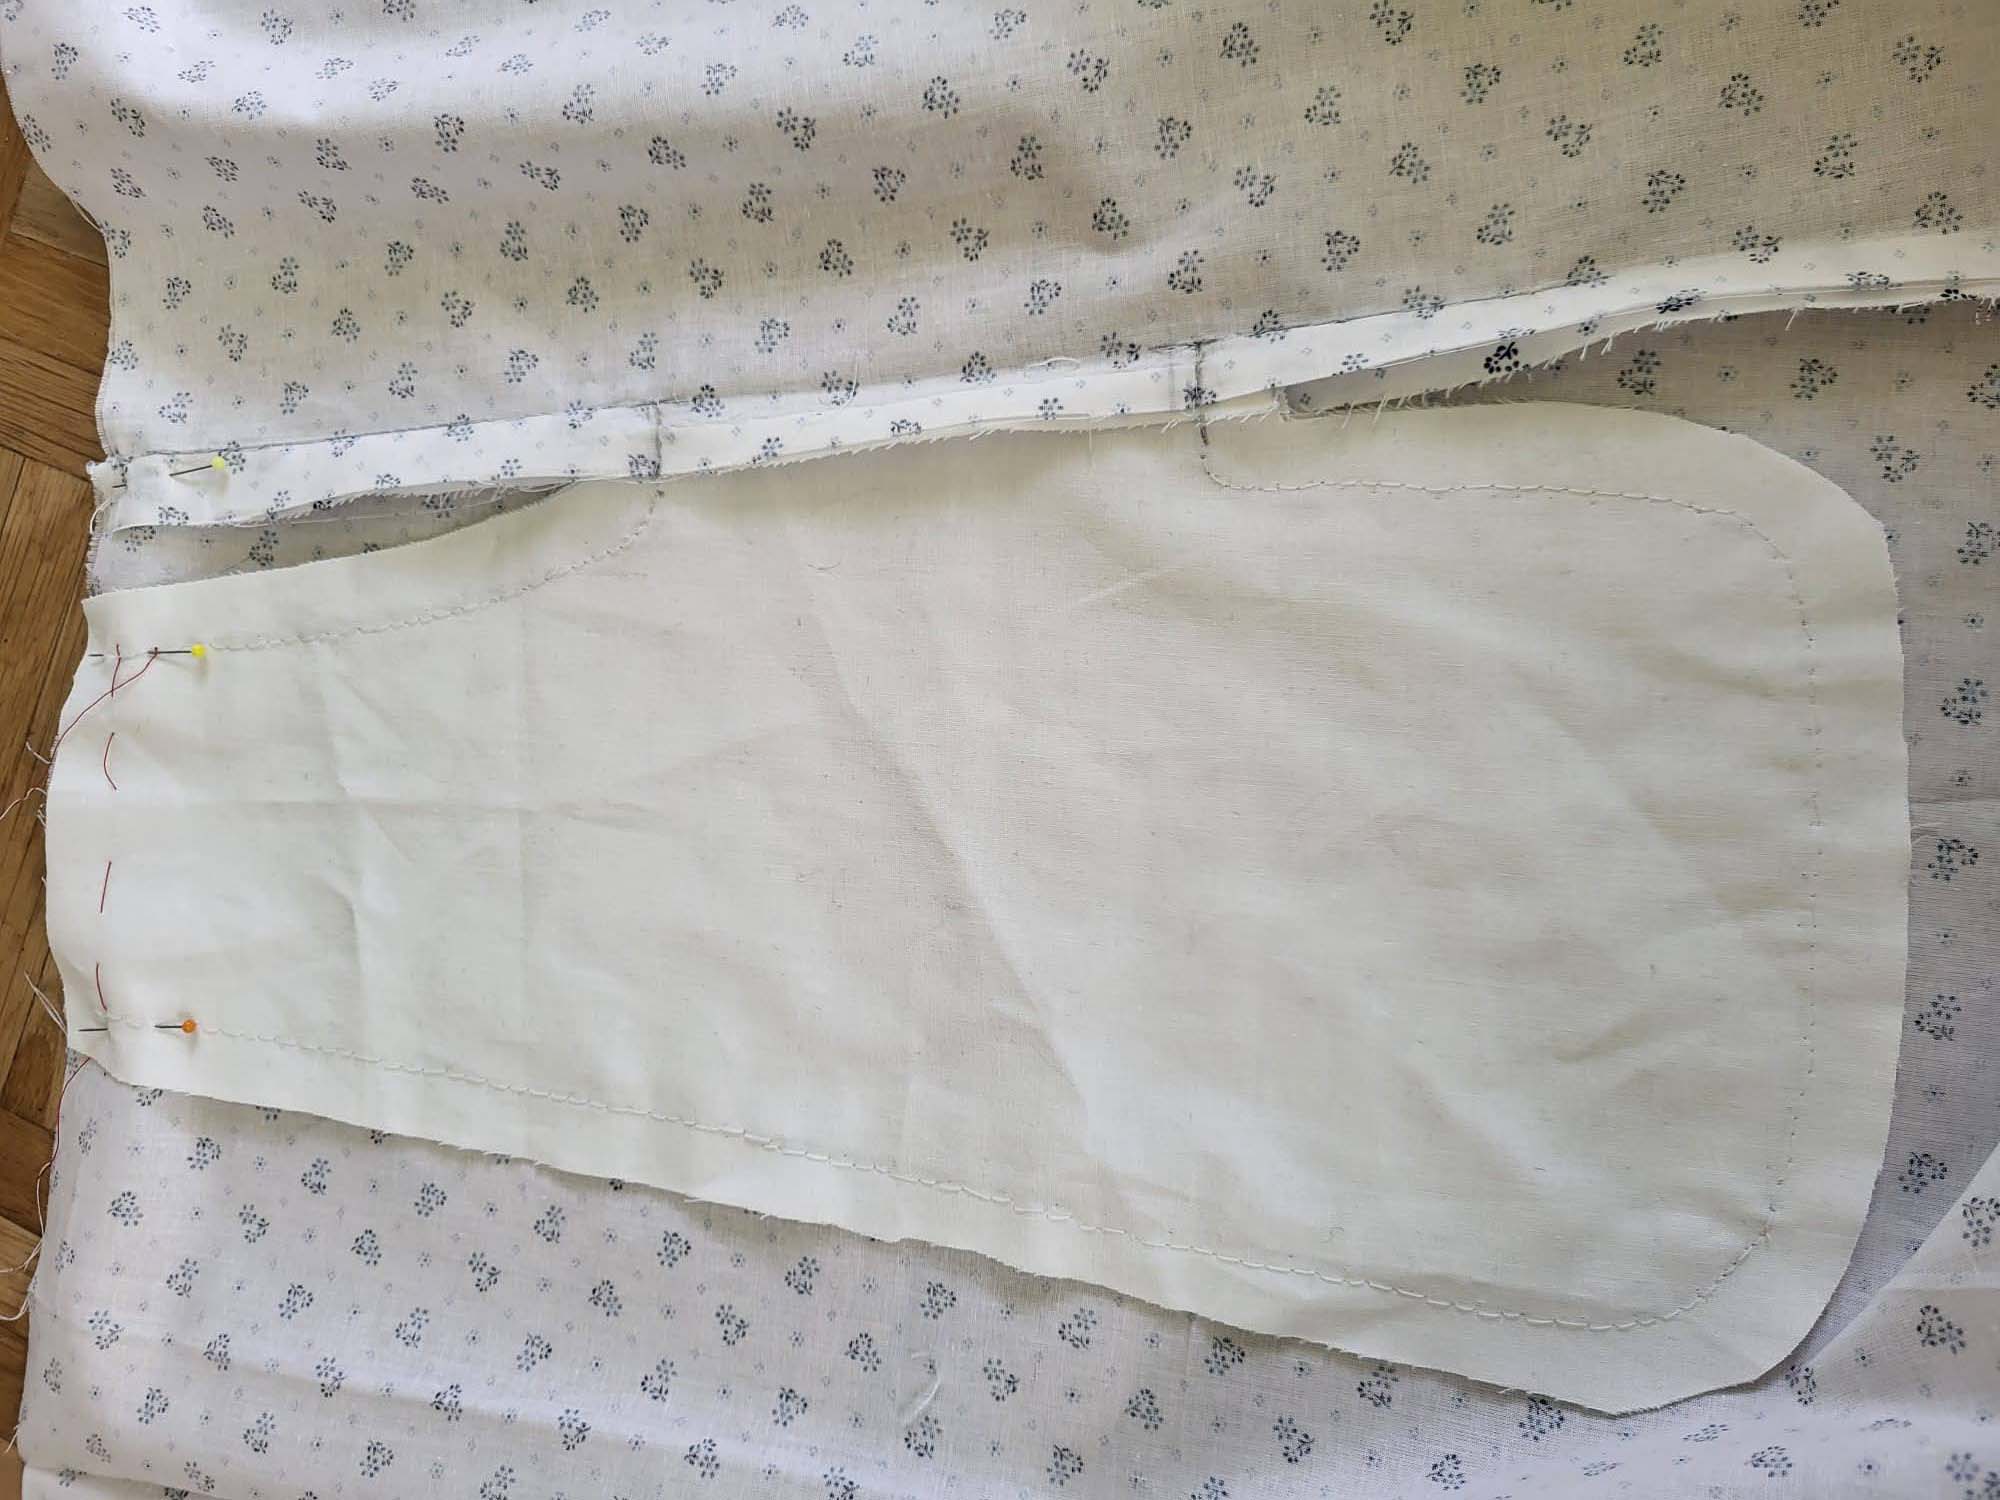
(1) Cut out all pieces, and transfer the notches carefully, especially at the underarm gusset. Sew the center back seam when needed and sew the shoulder seams, right sides together, creating flat felled seams.

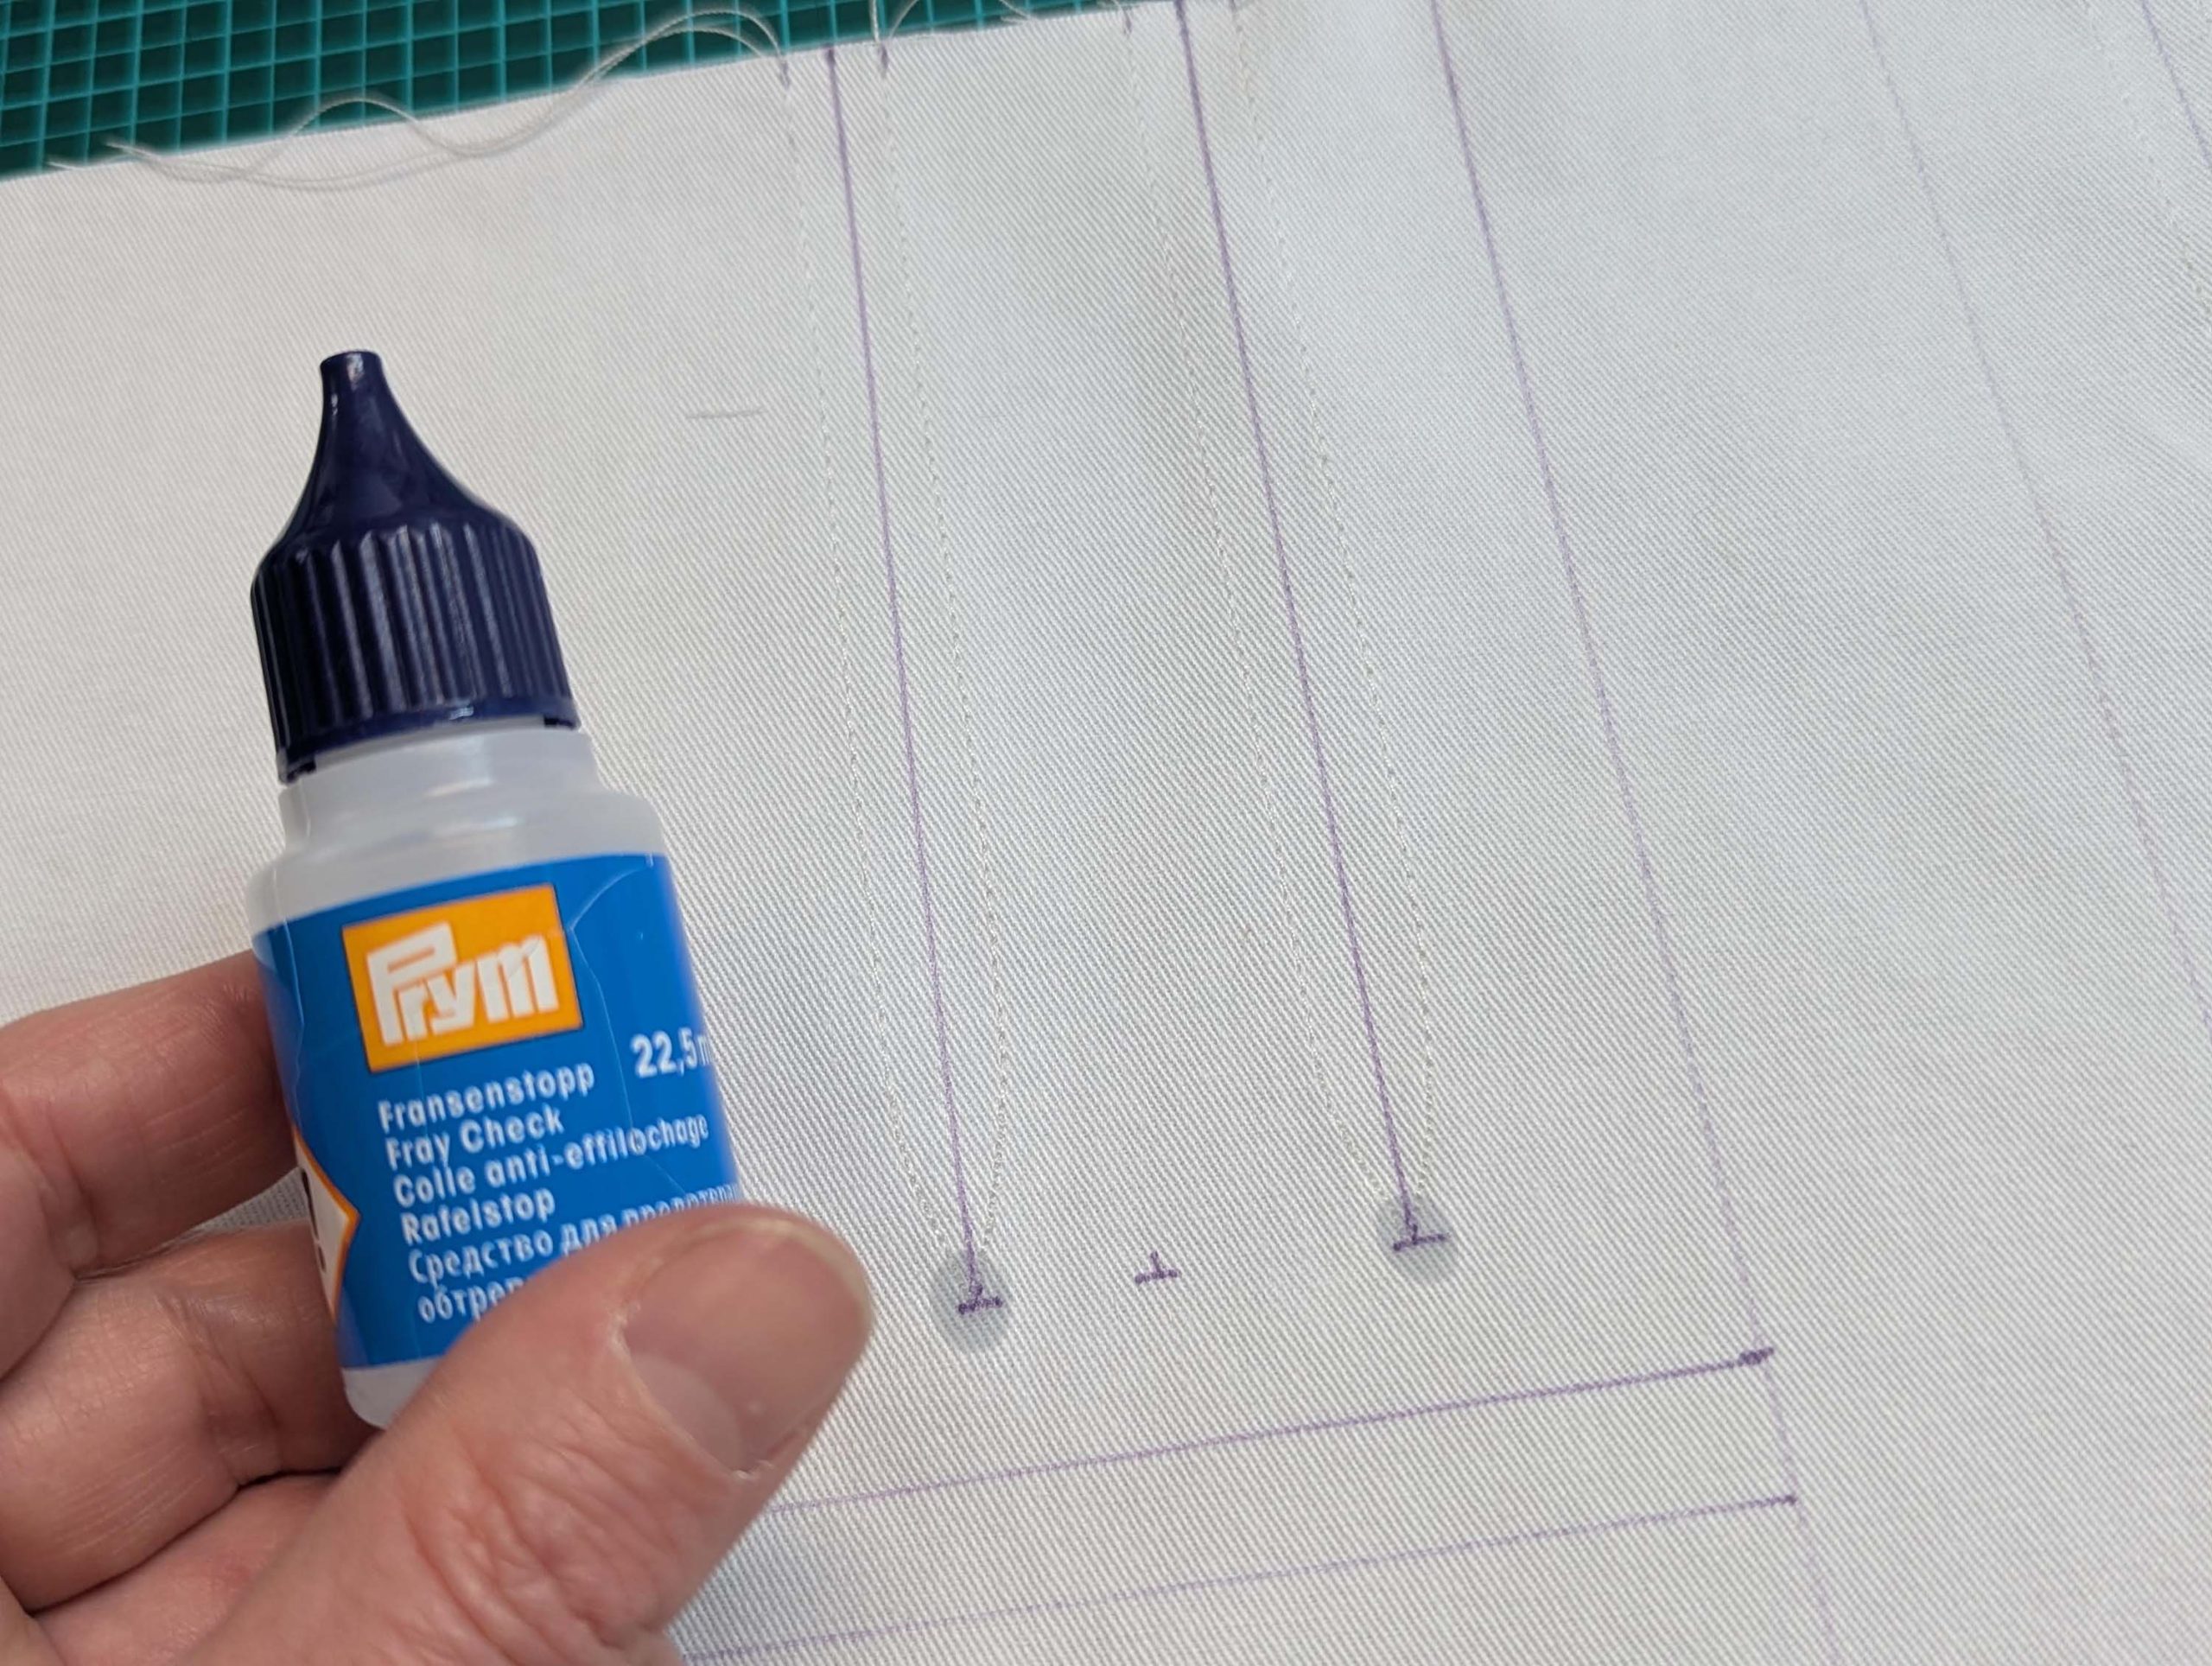
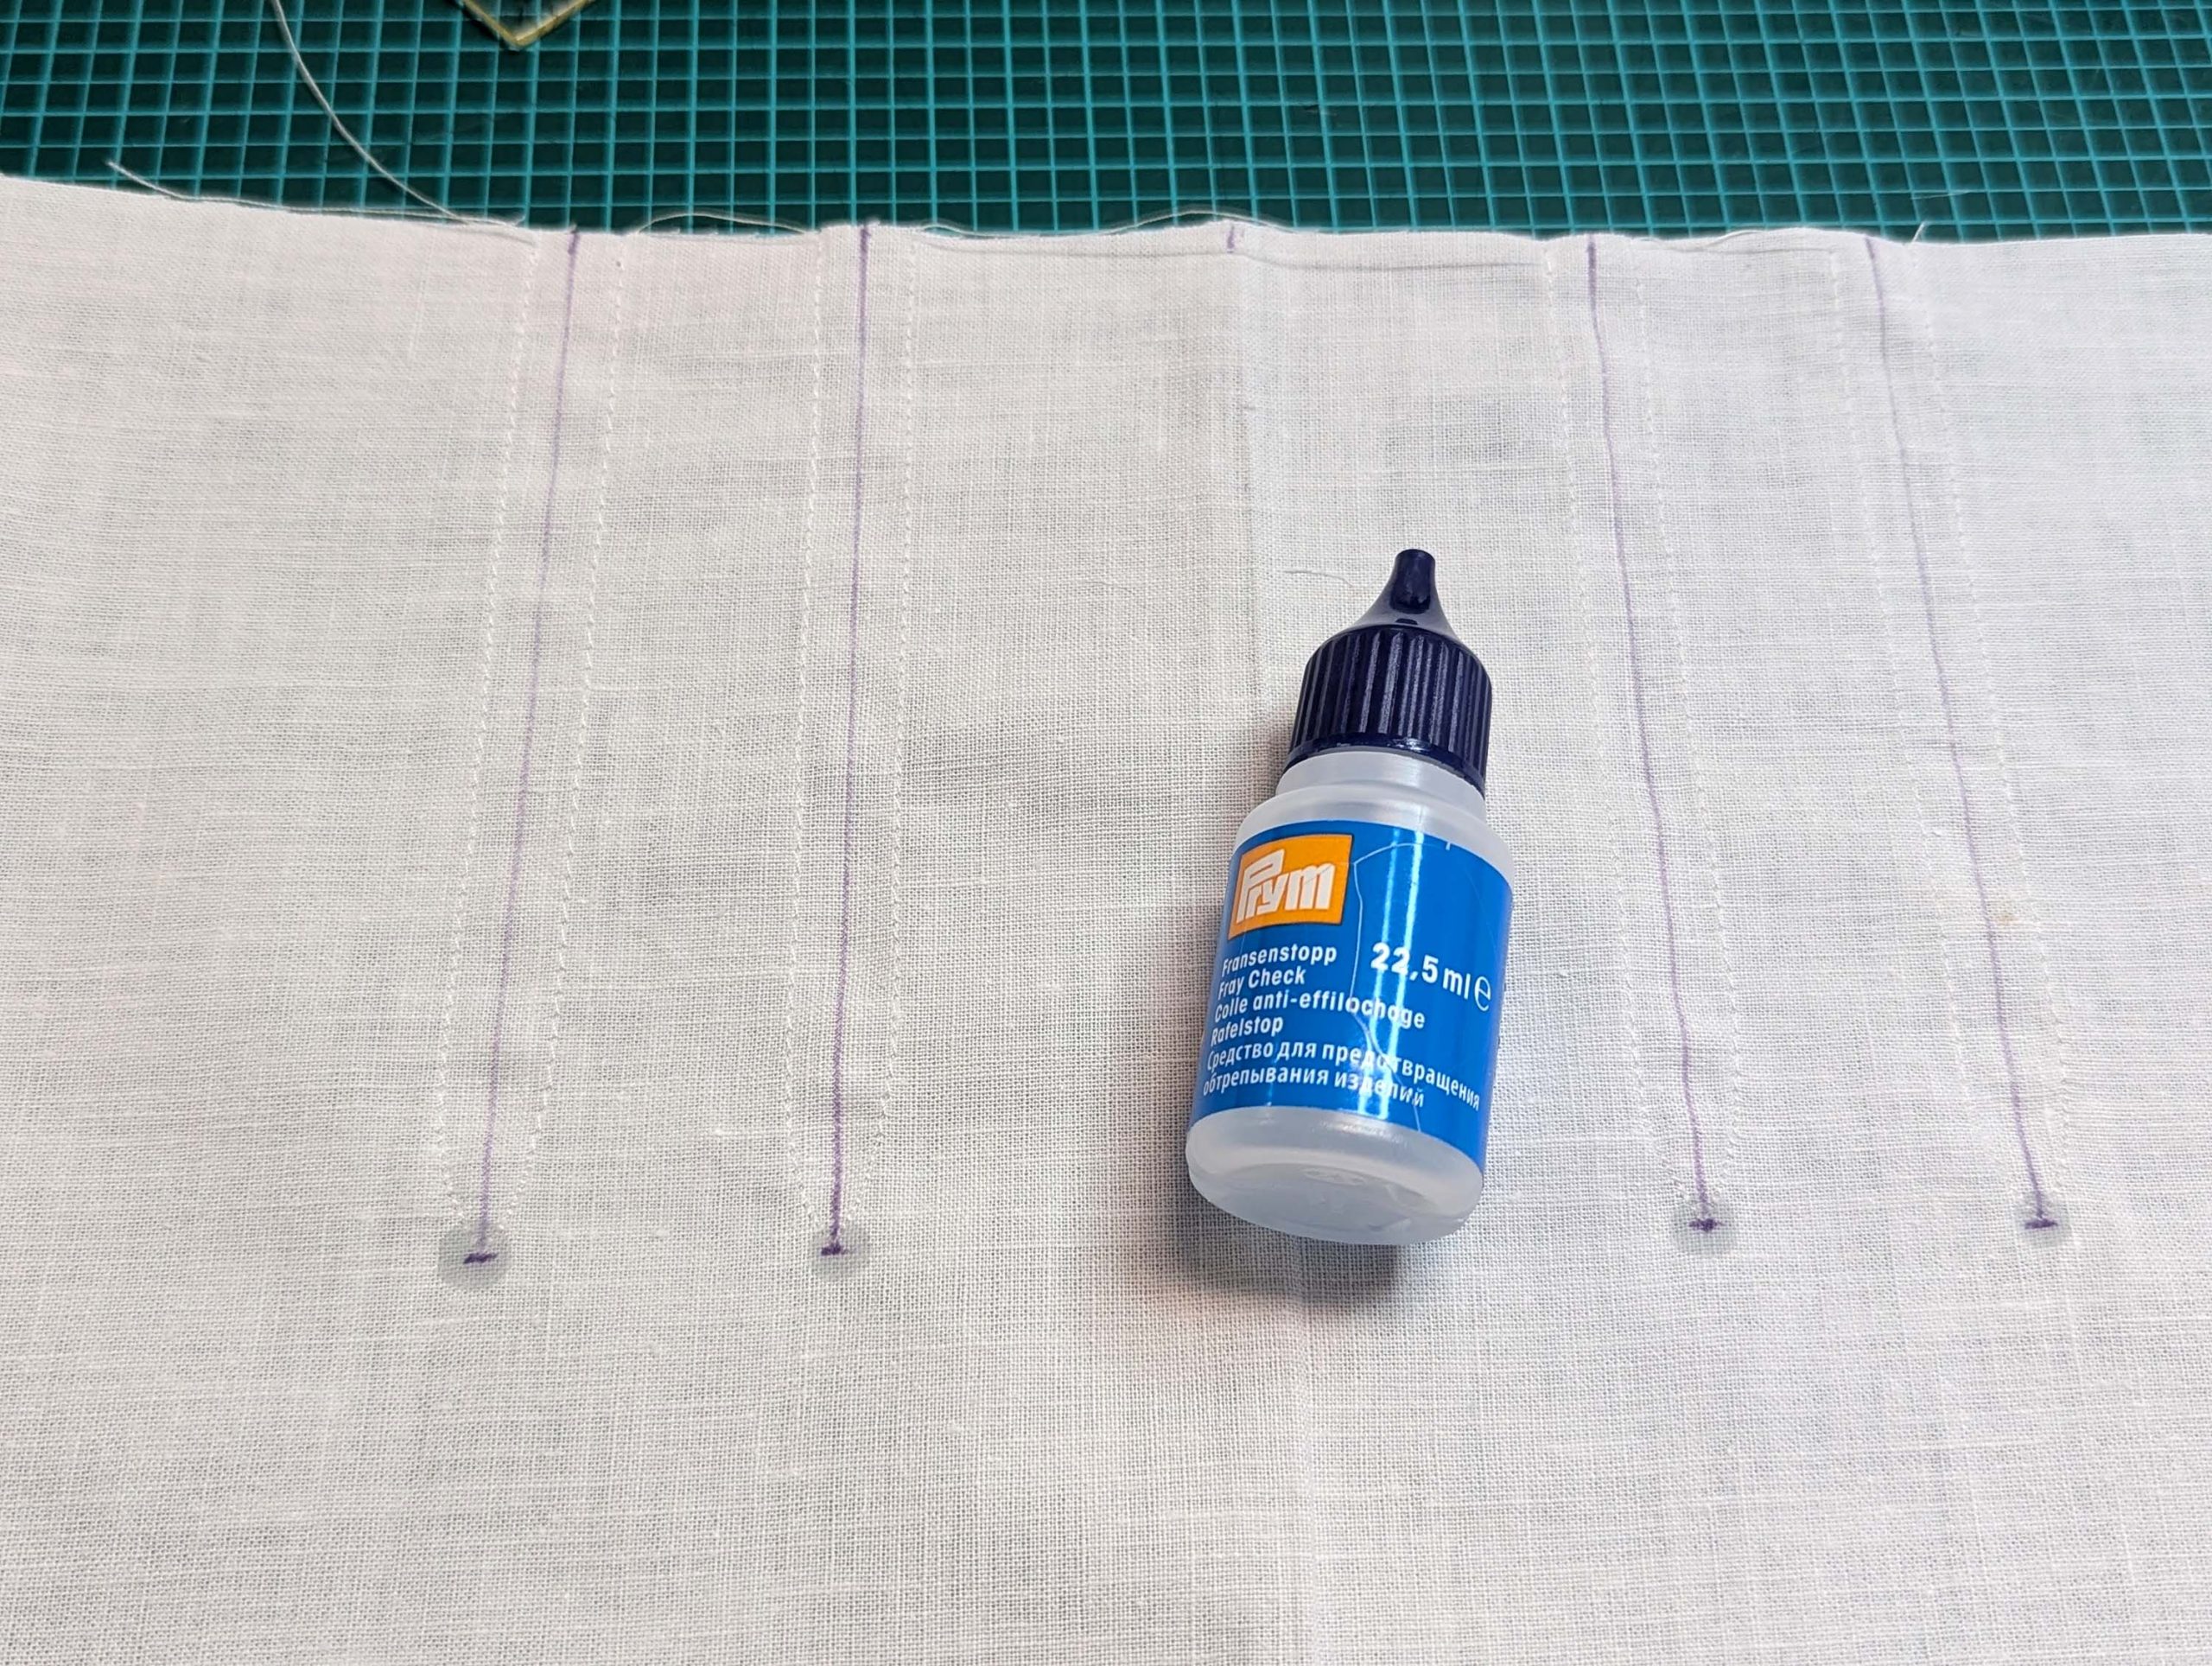
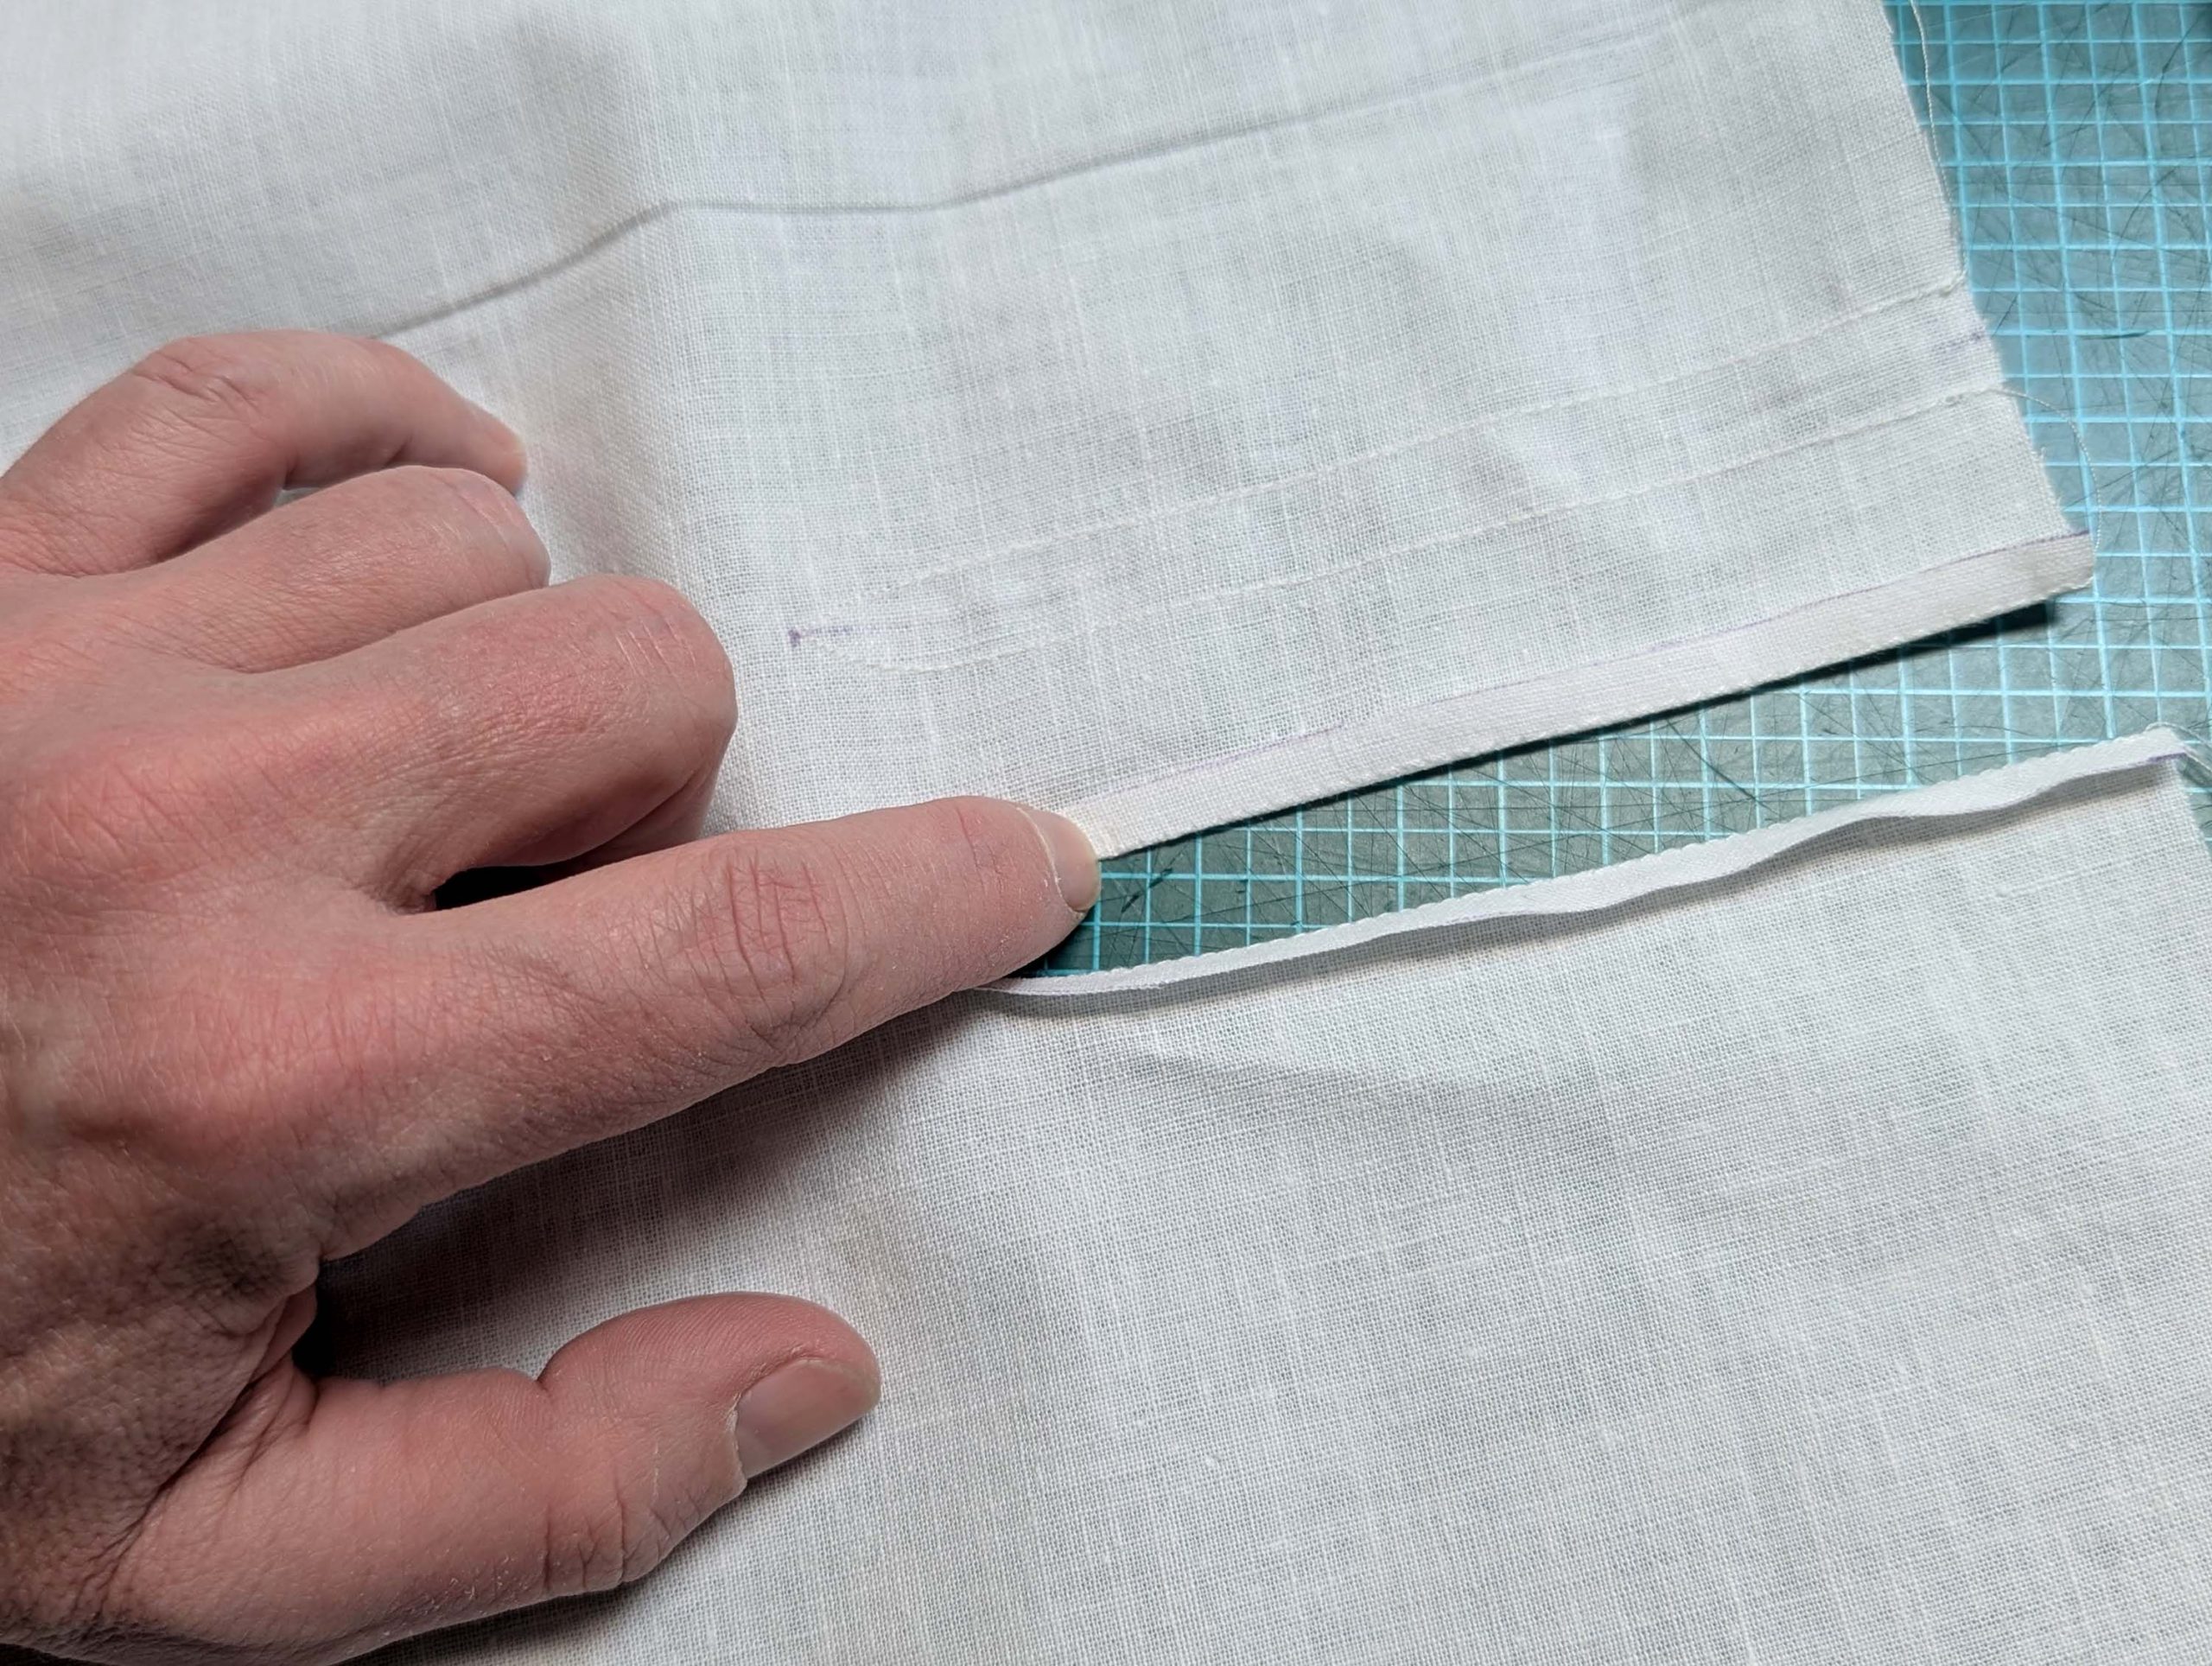
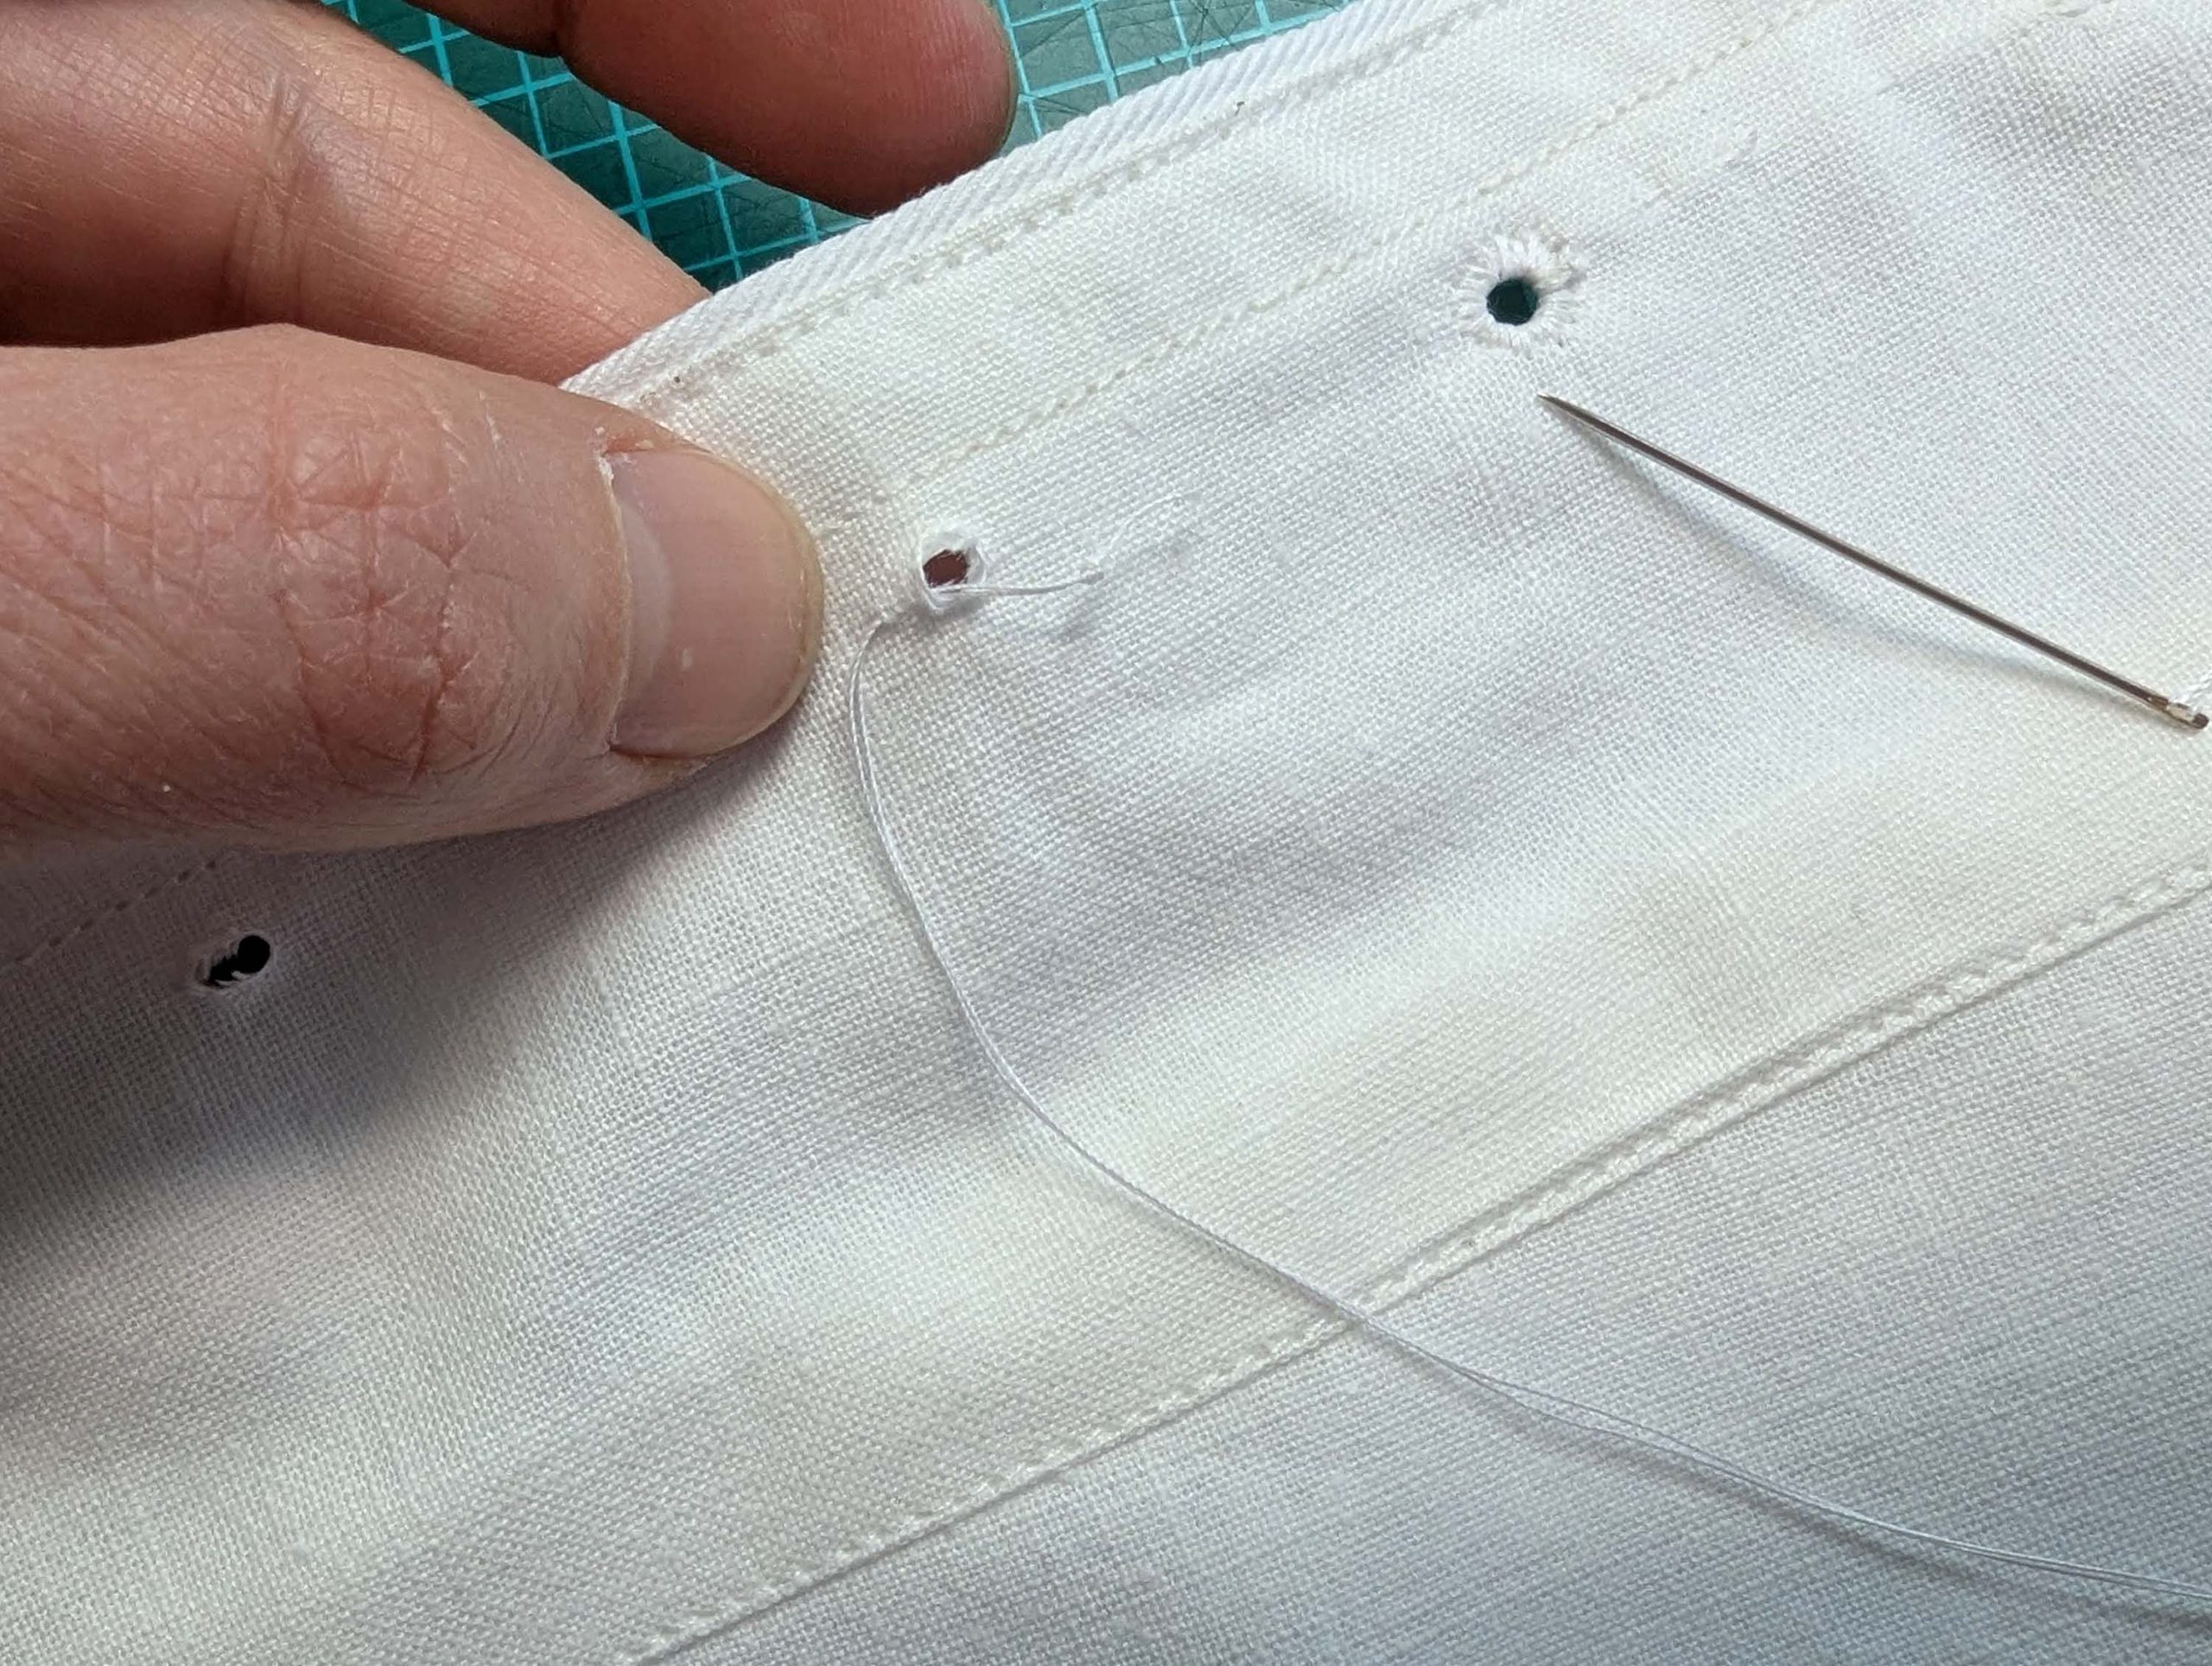
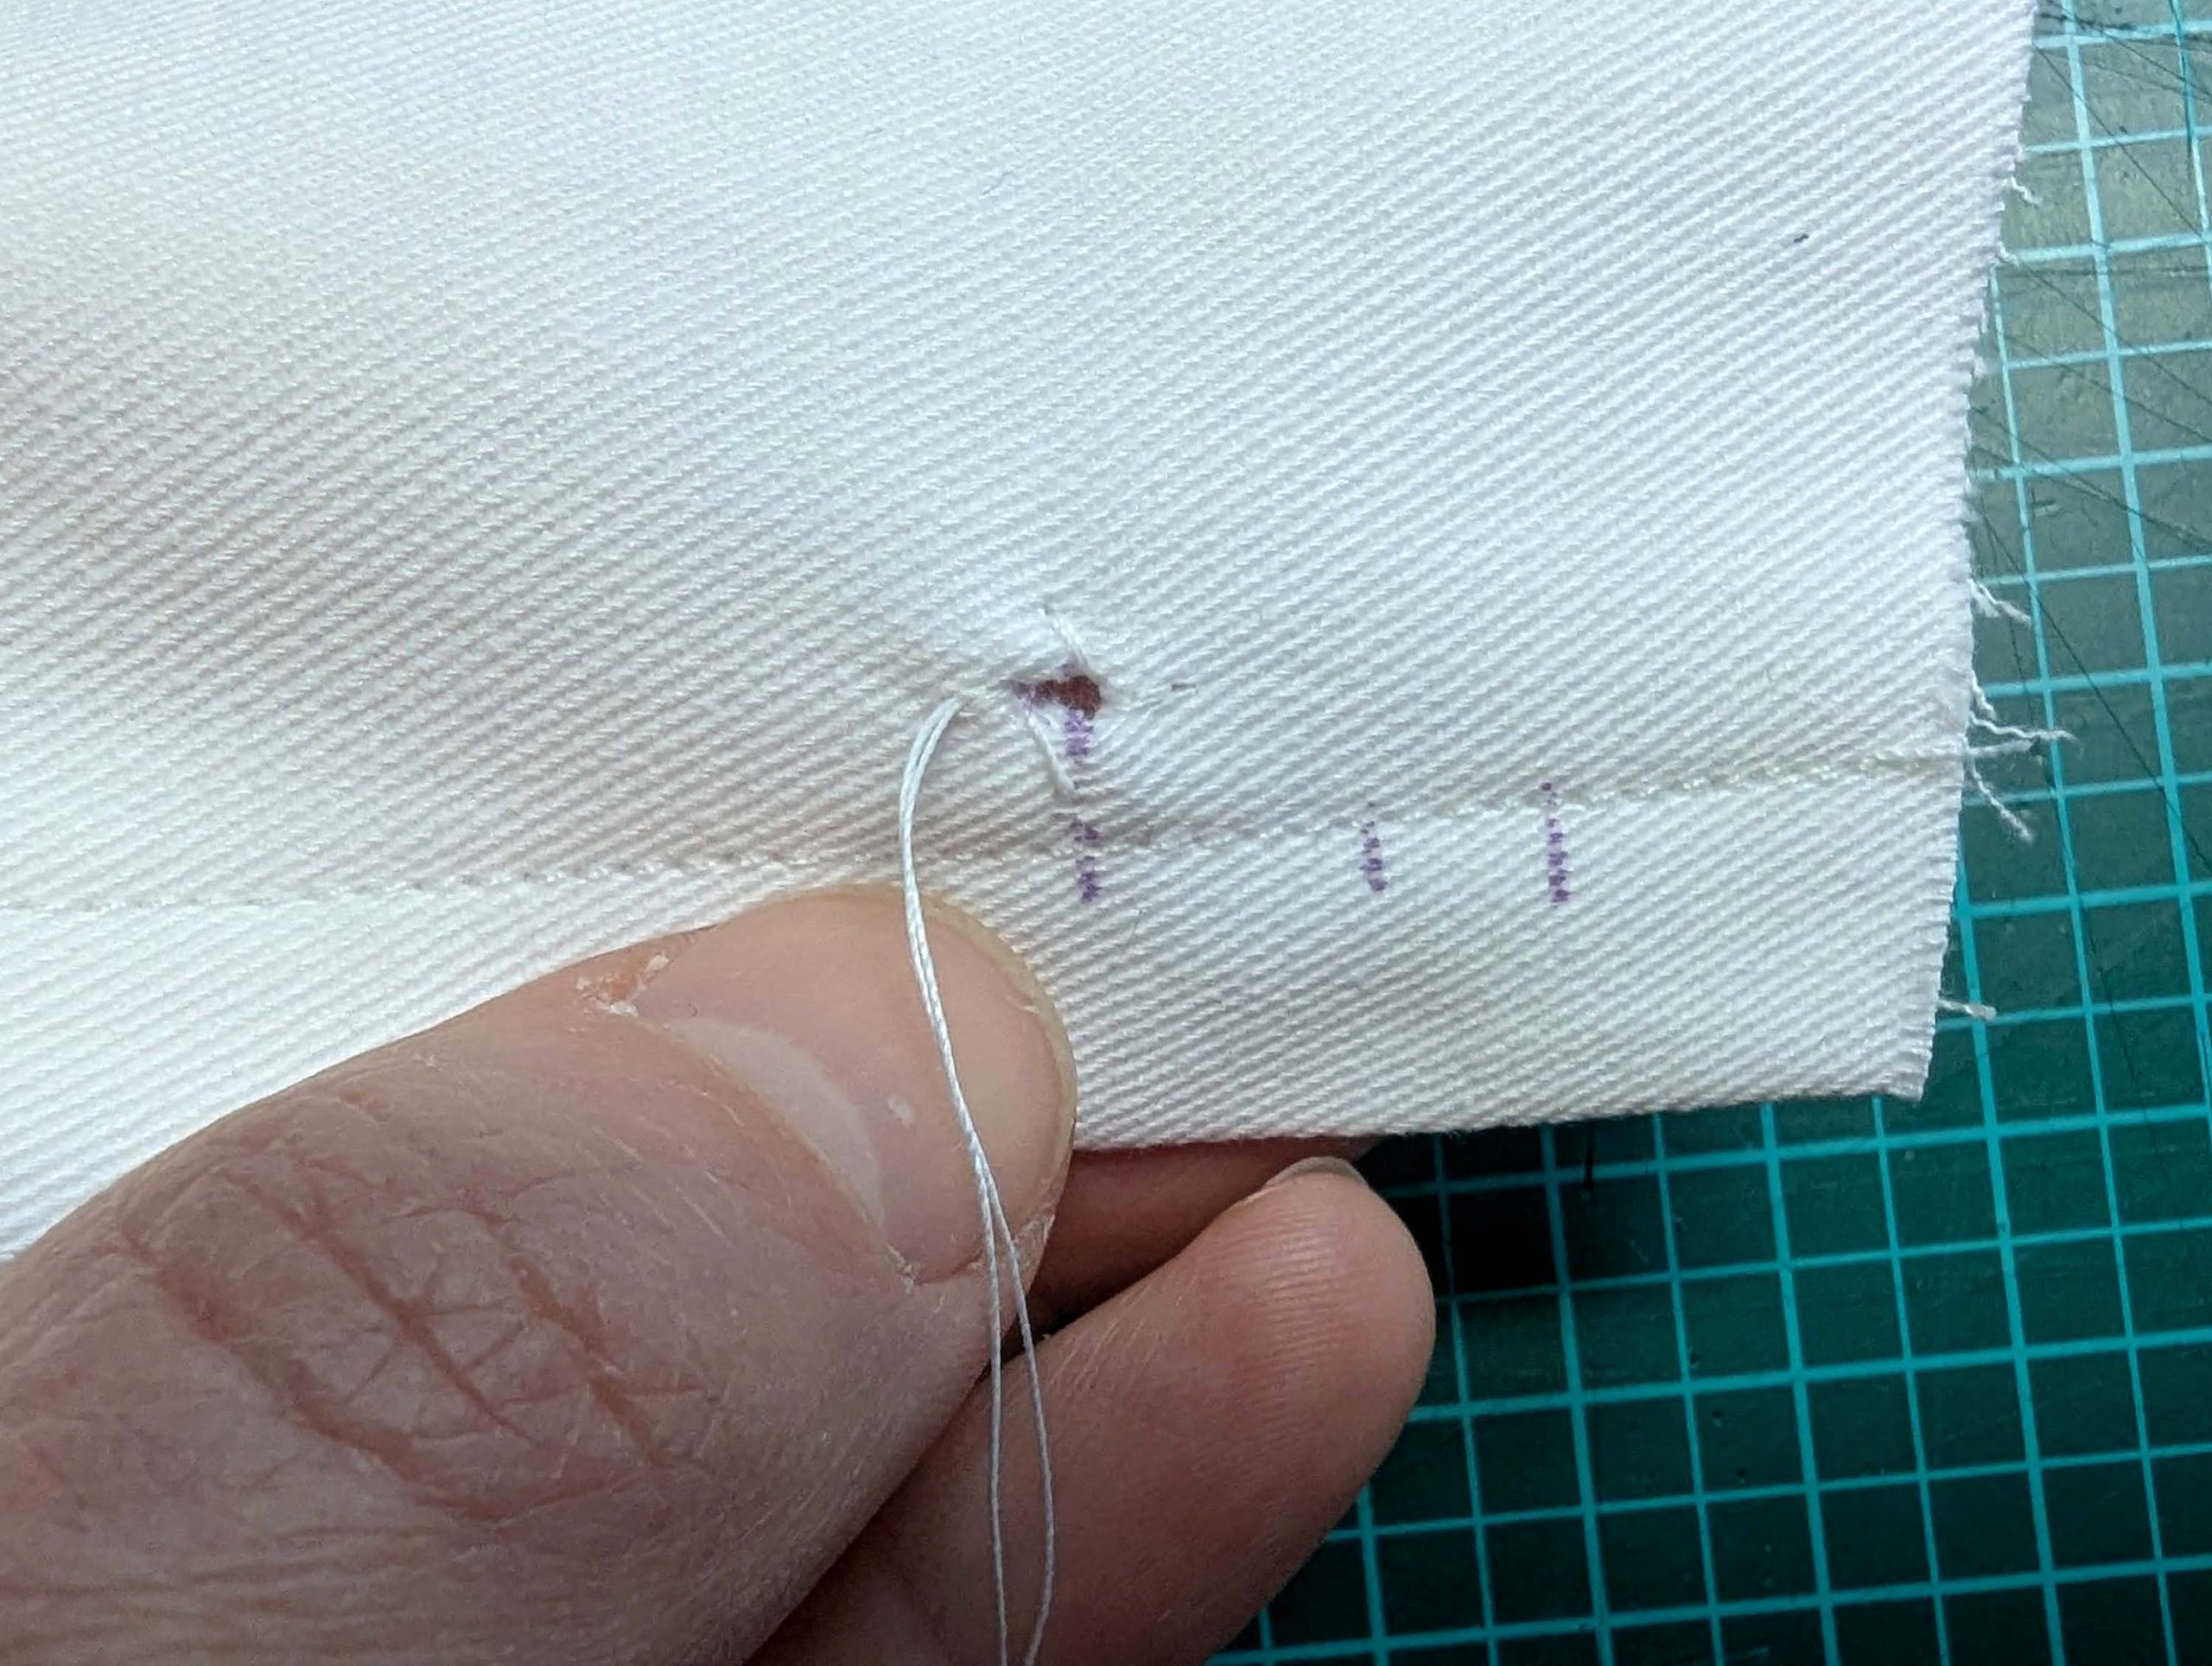
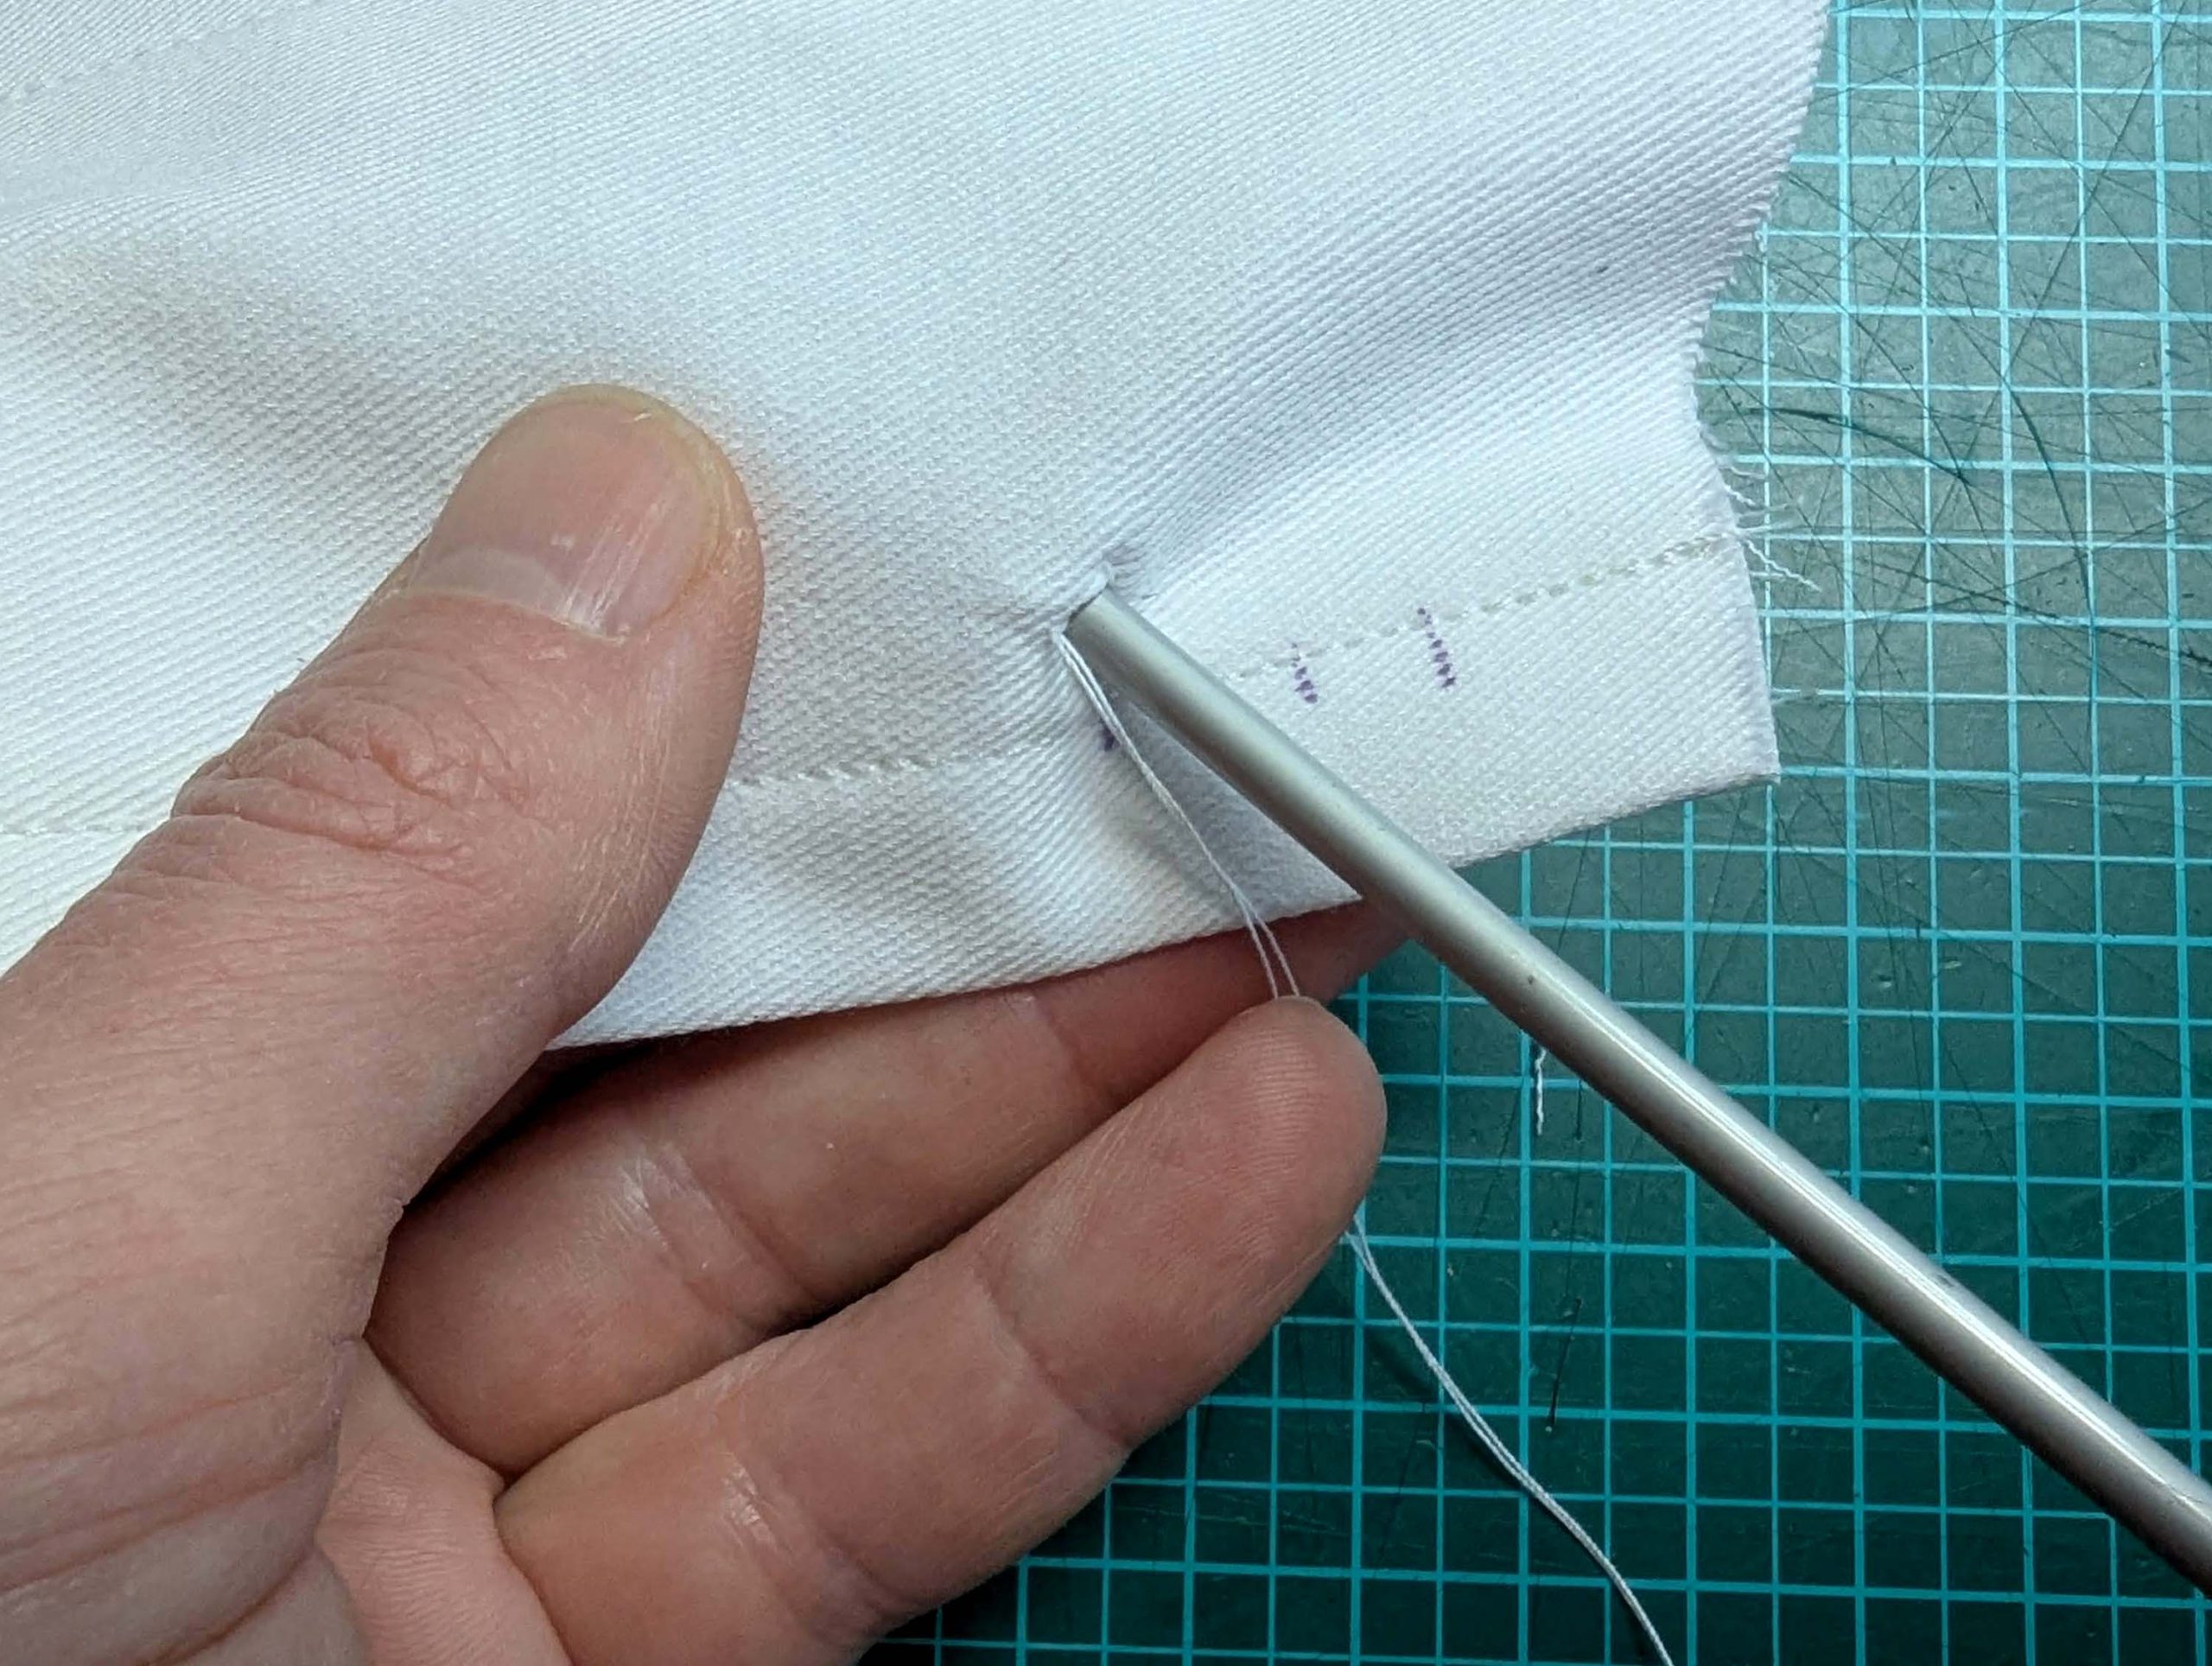
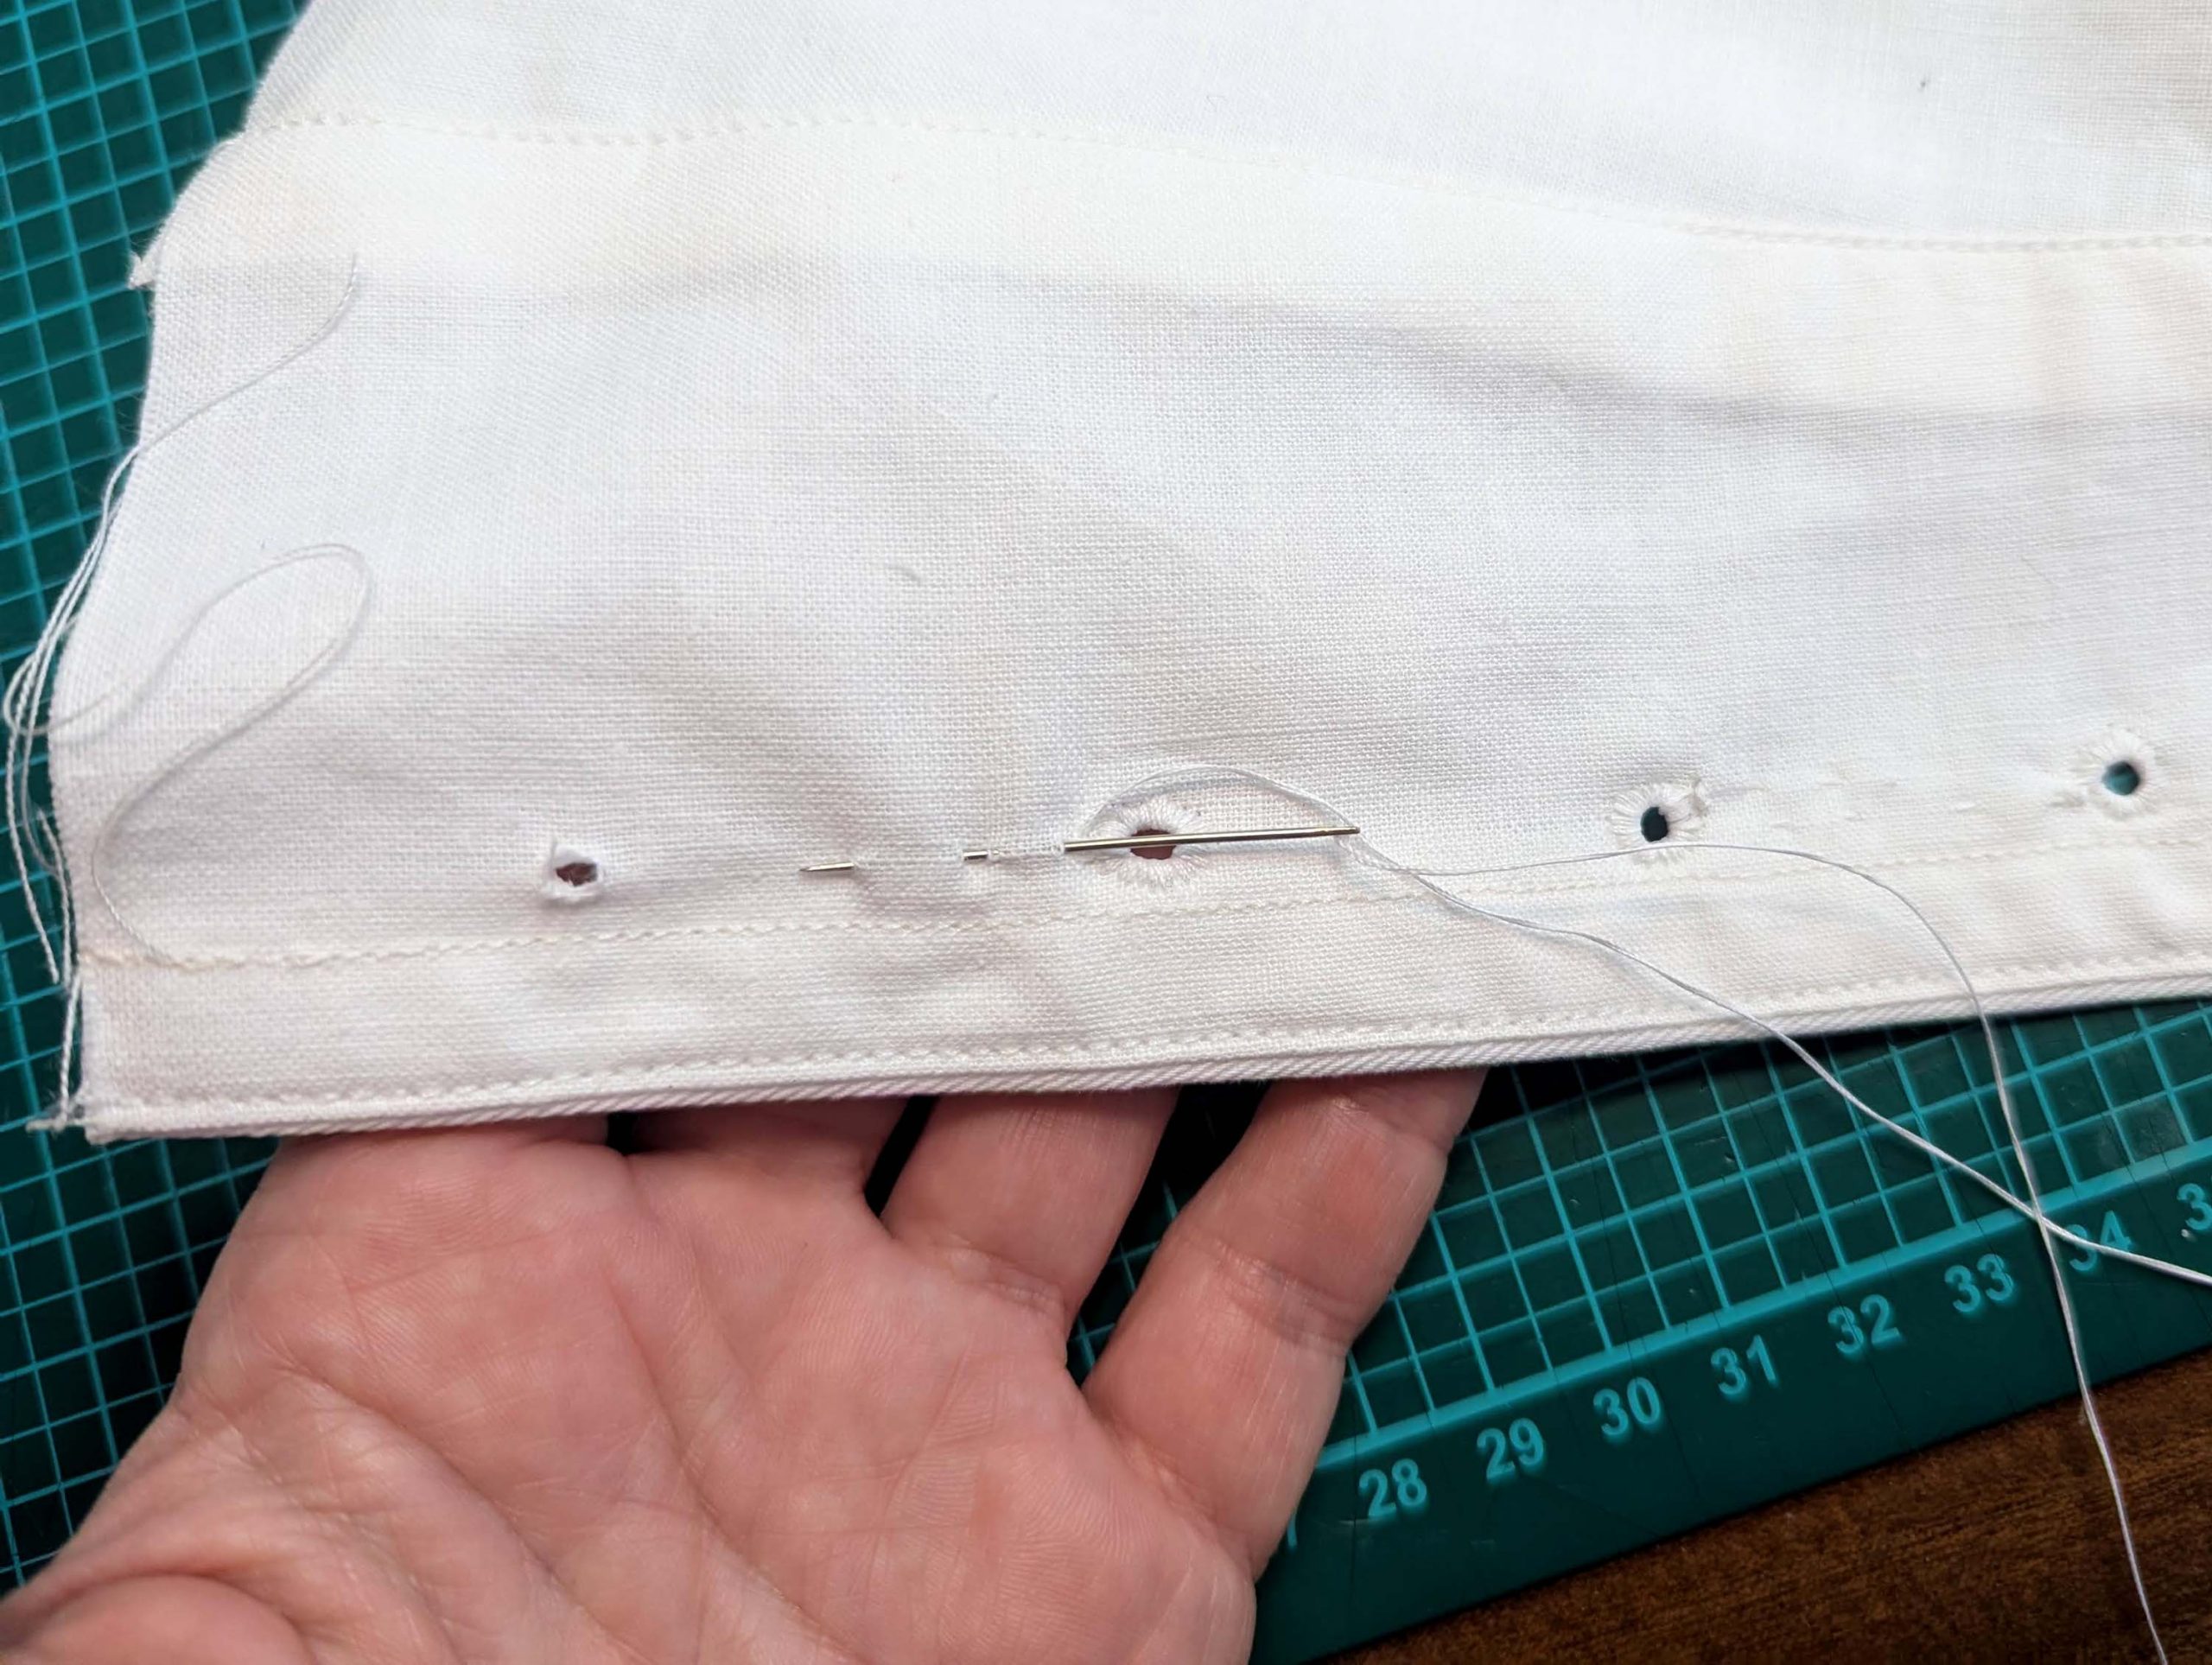
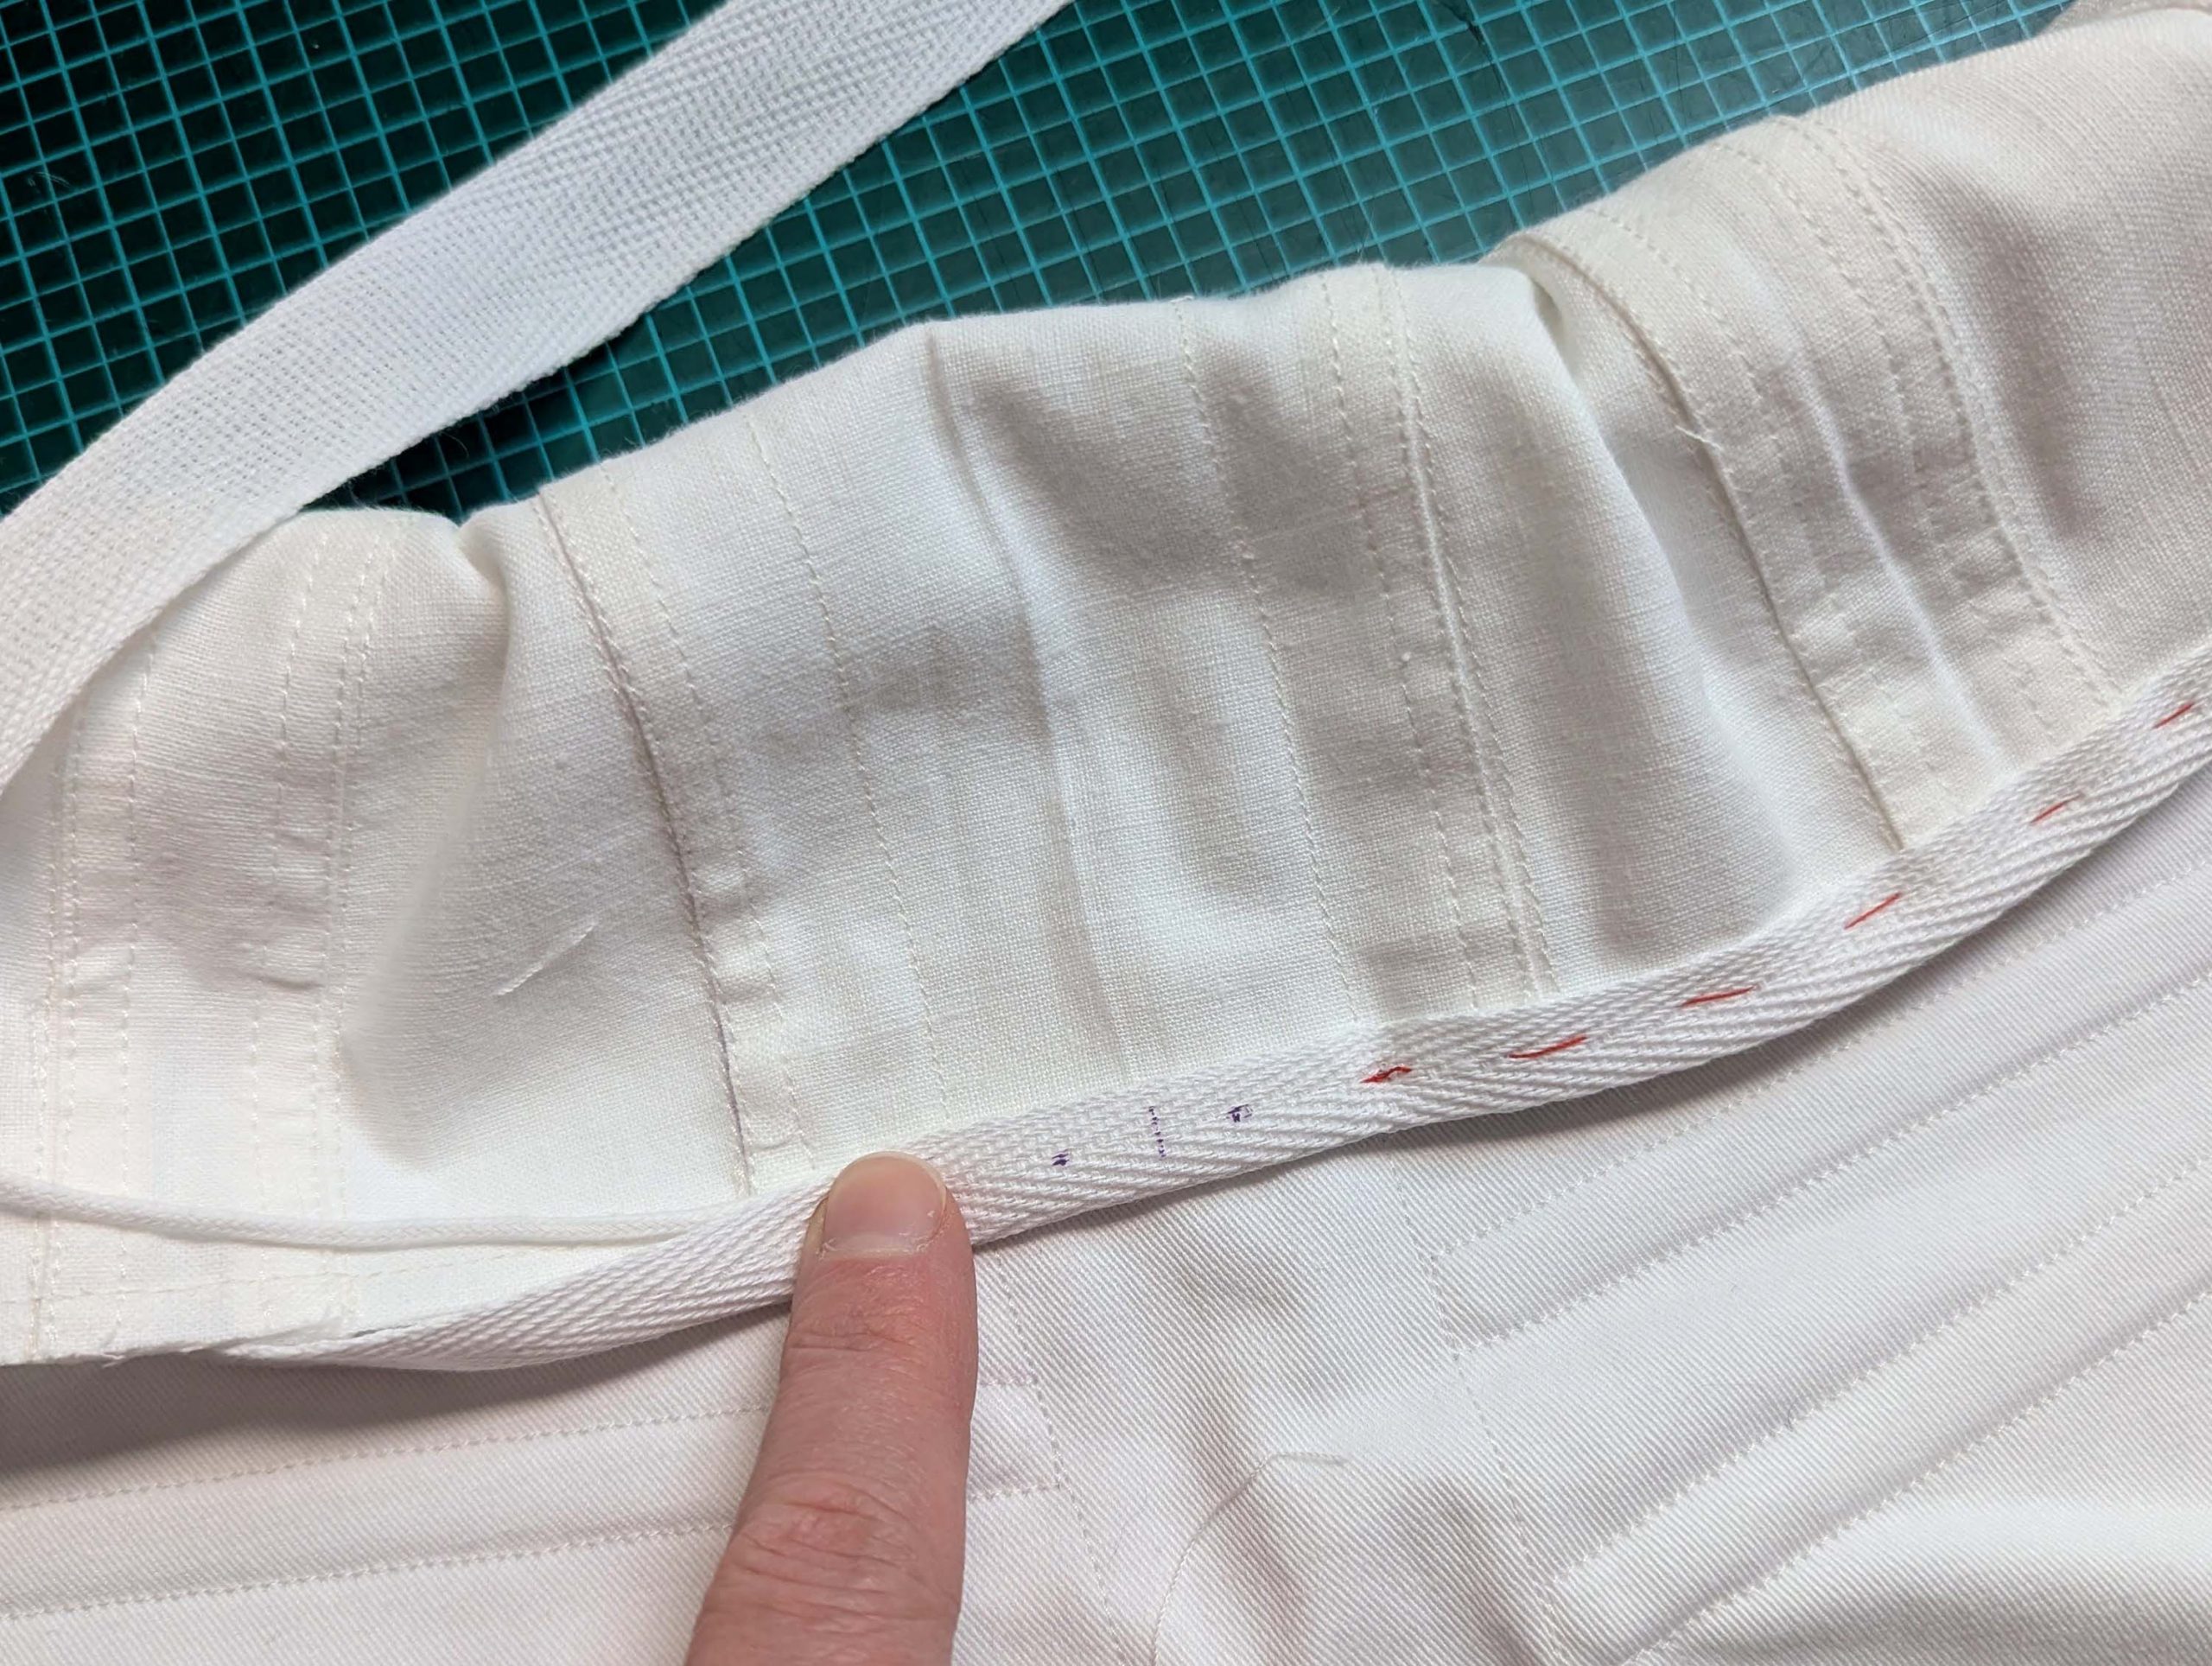
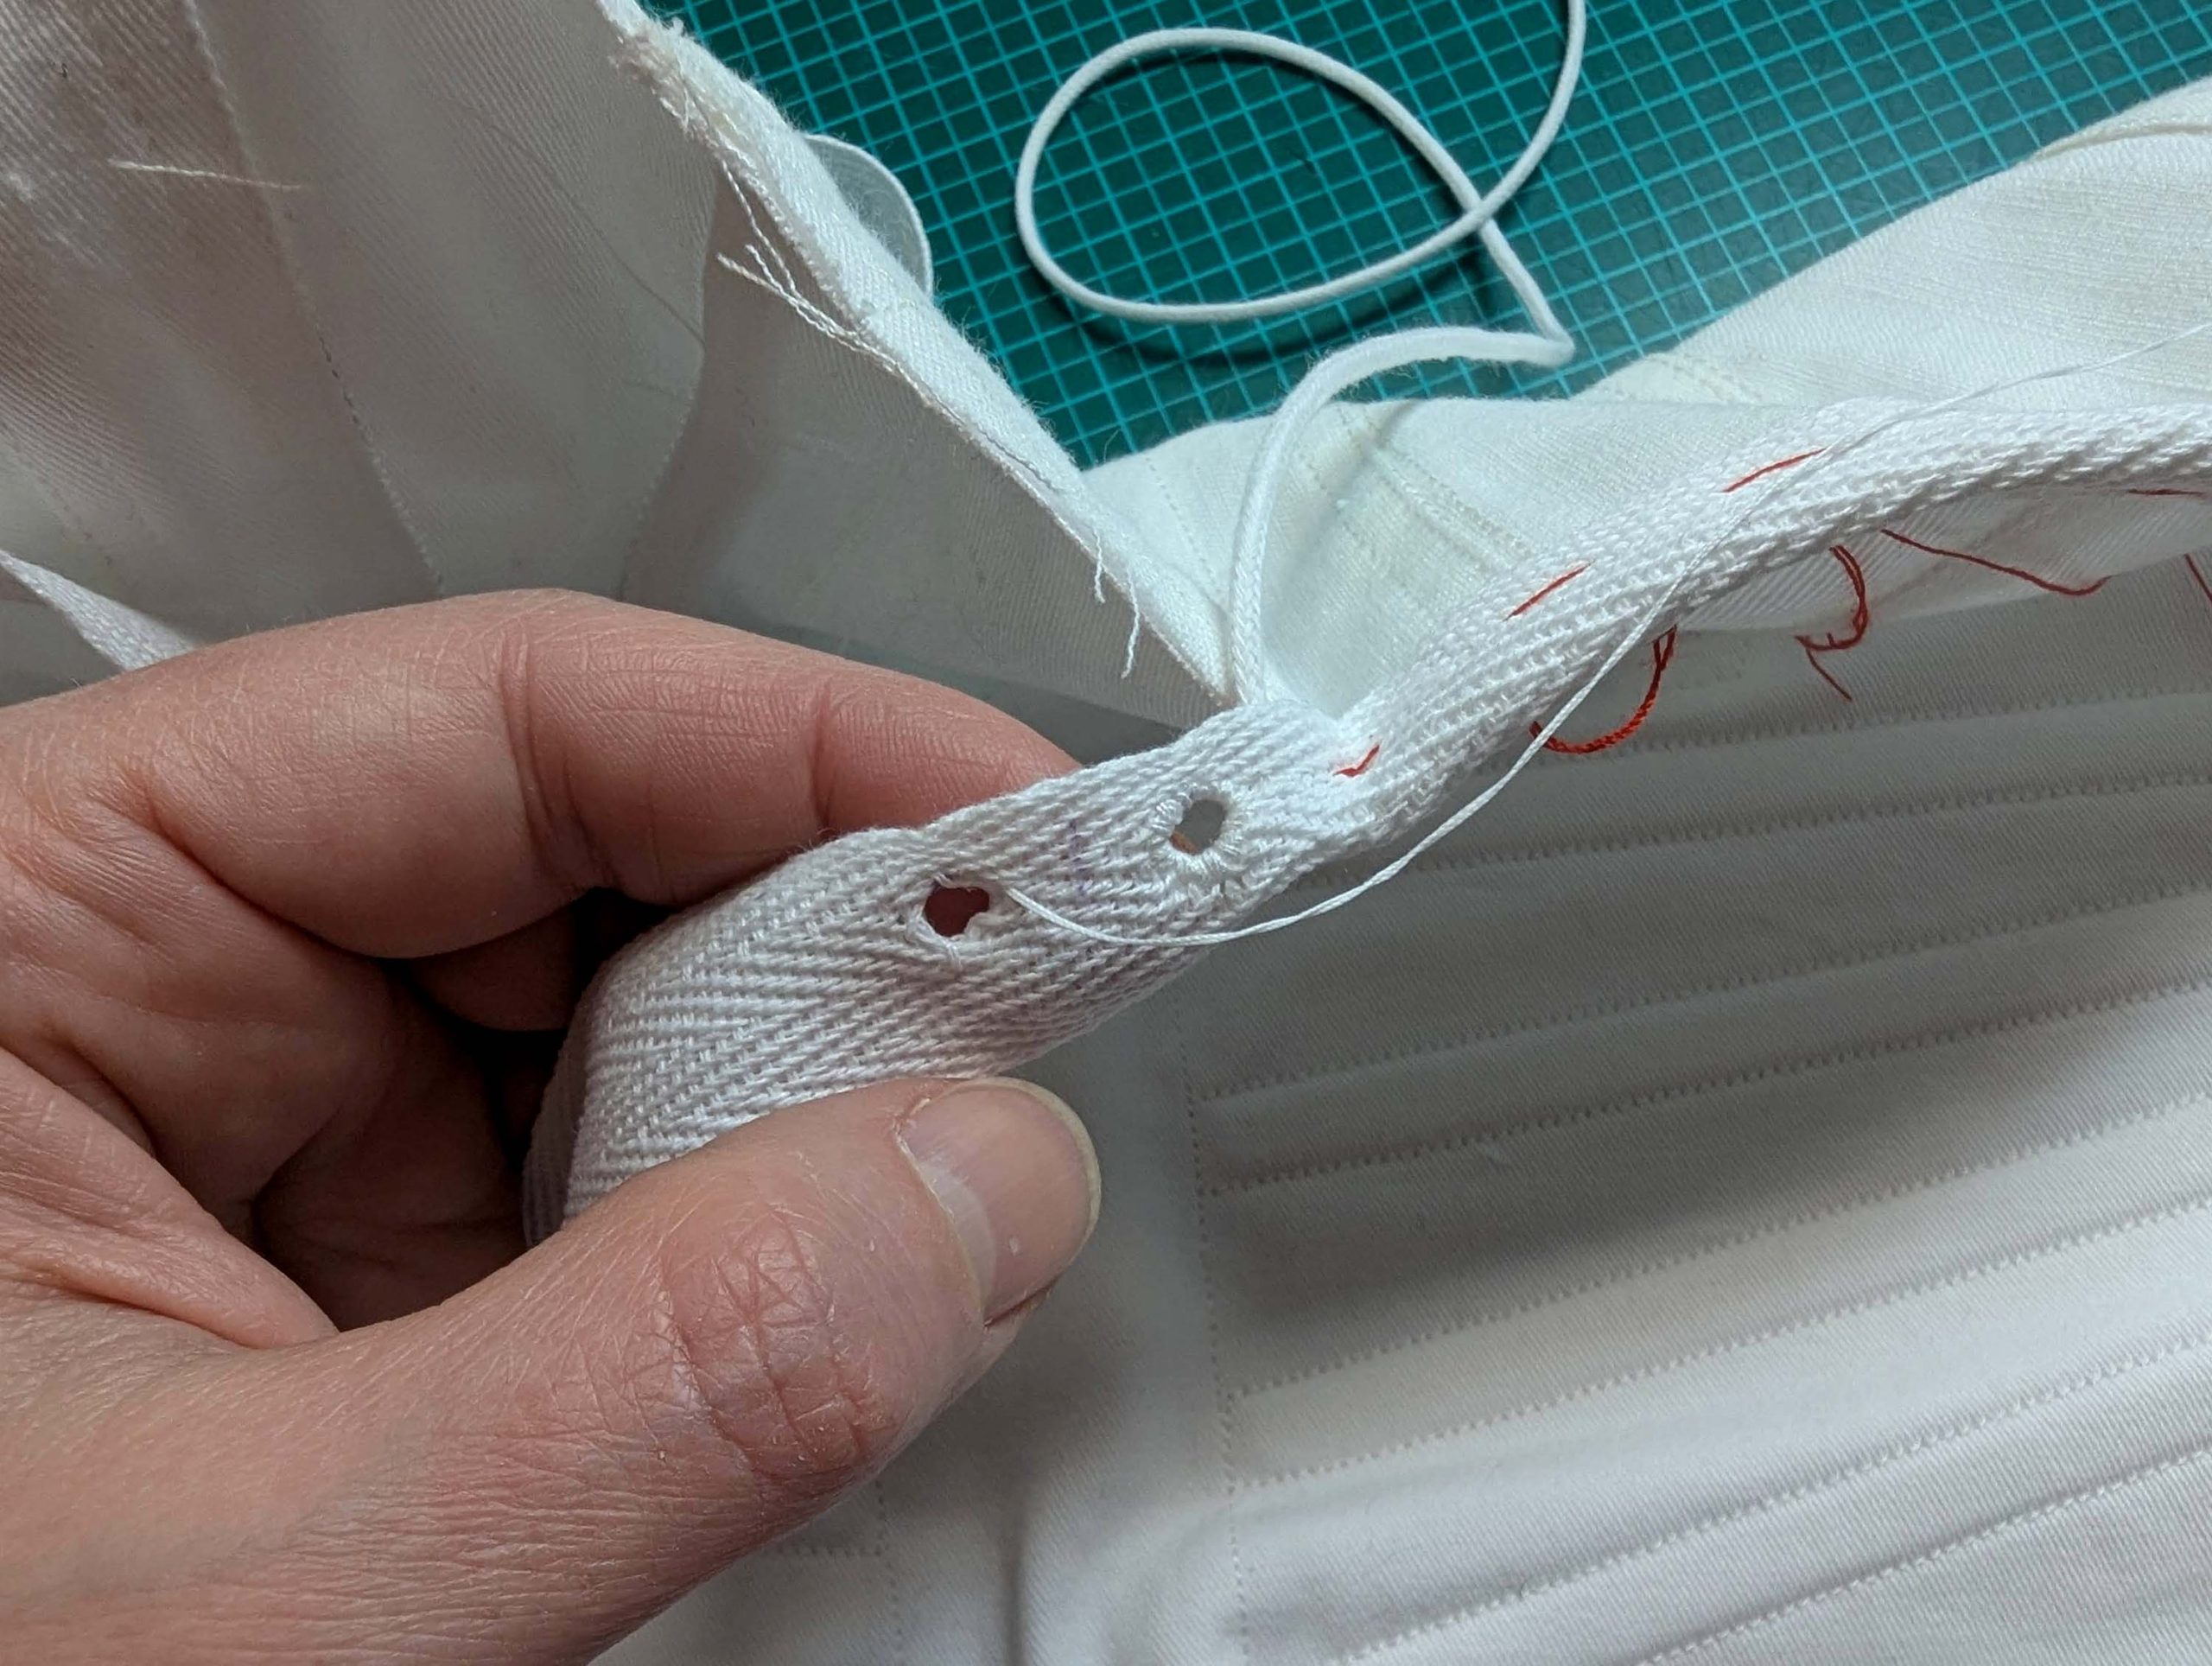
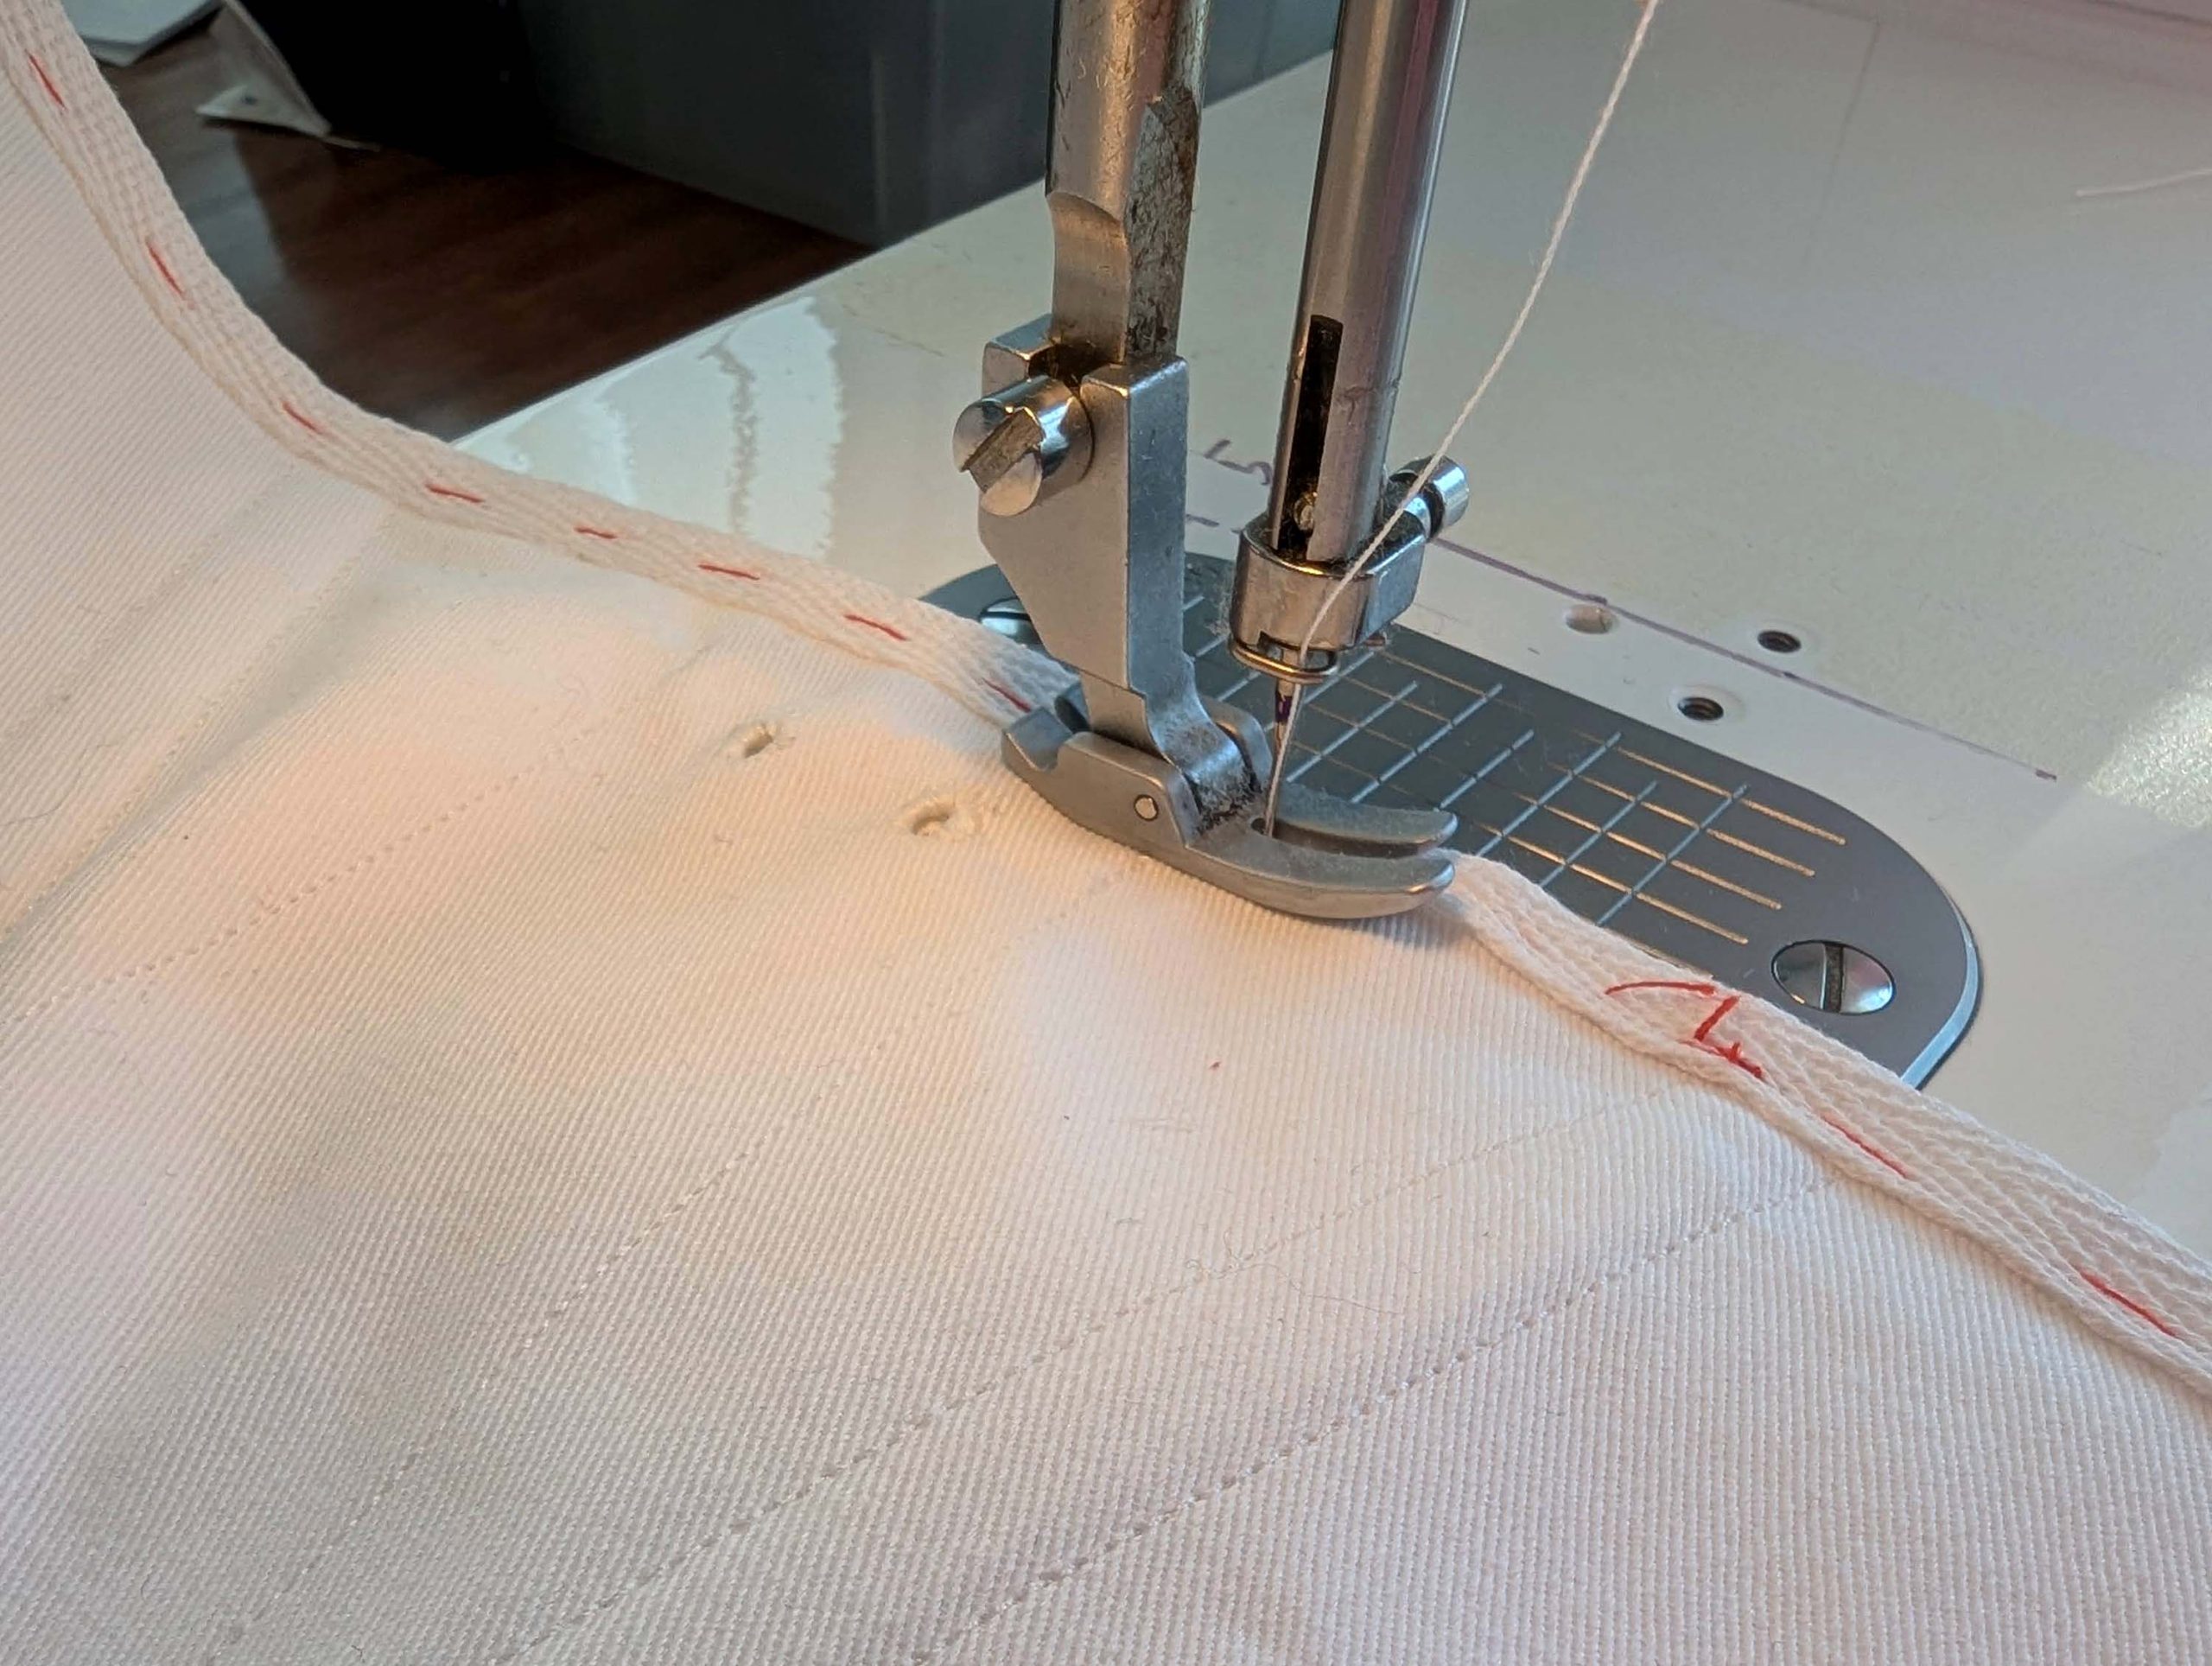
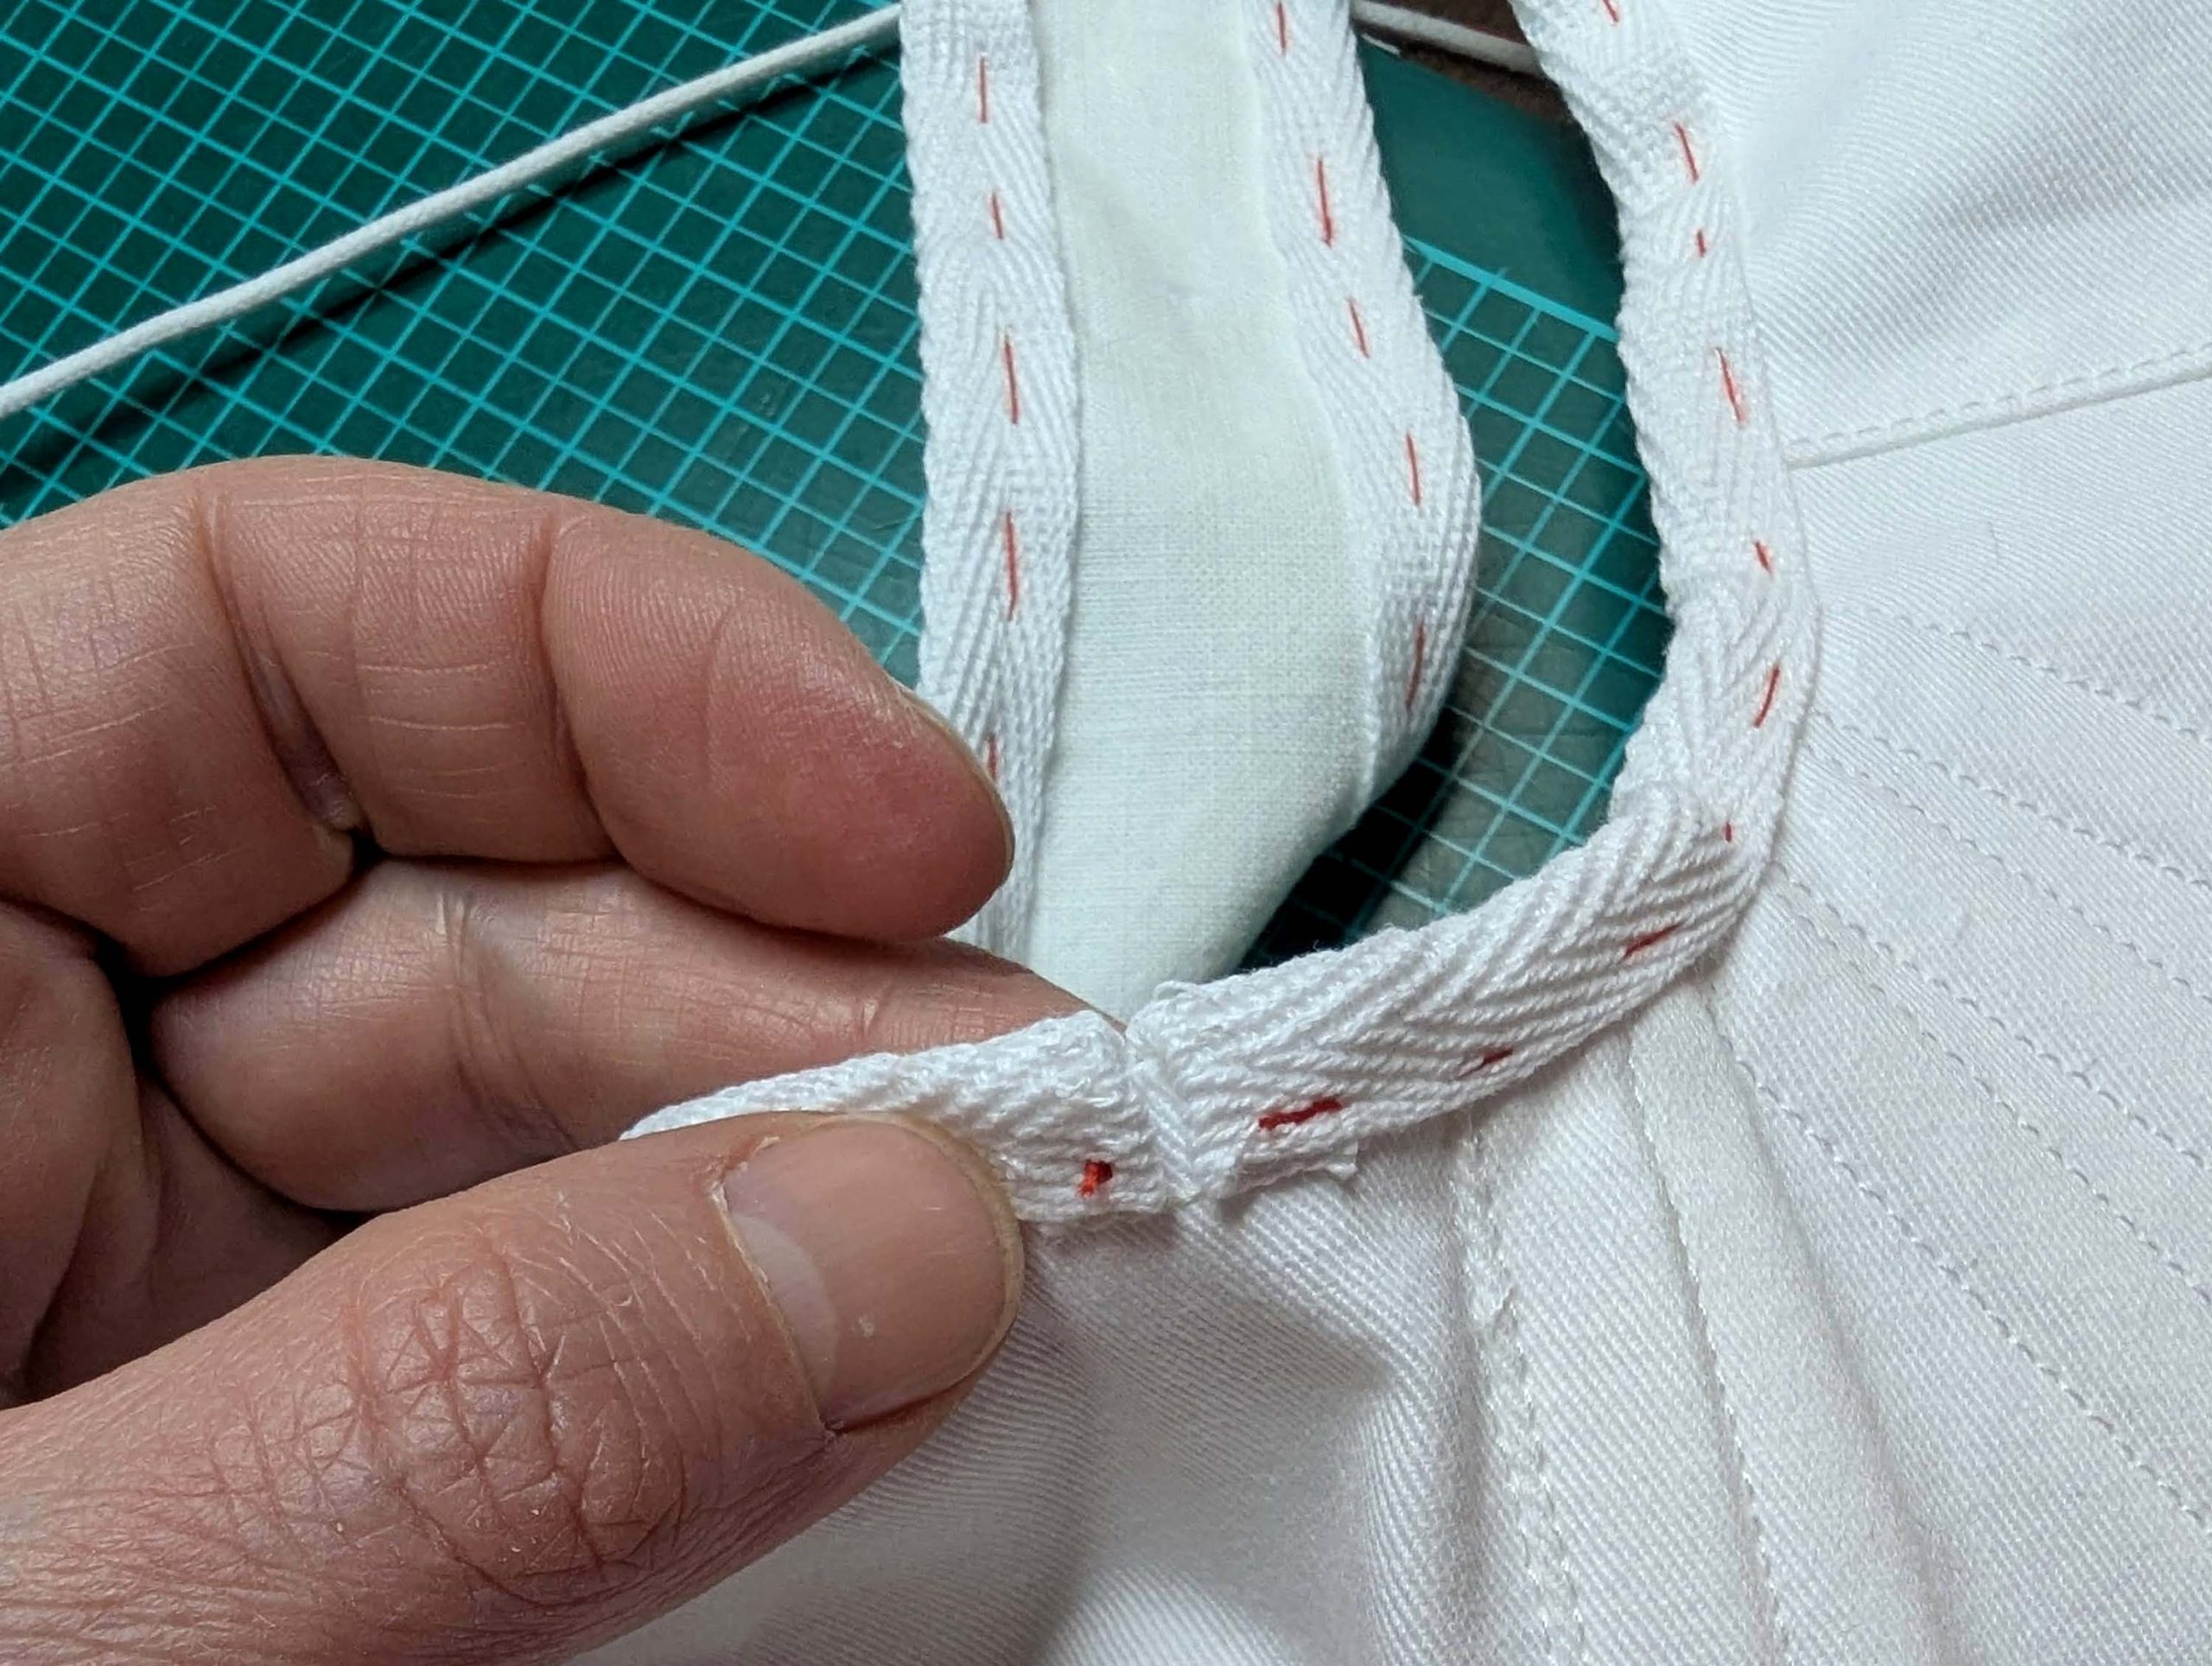
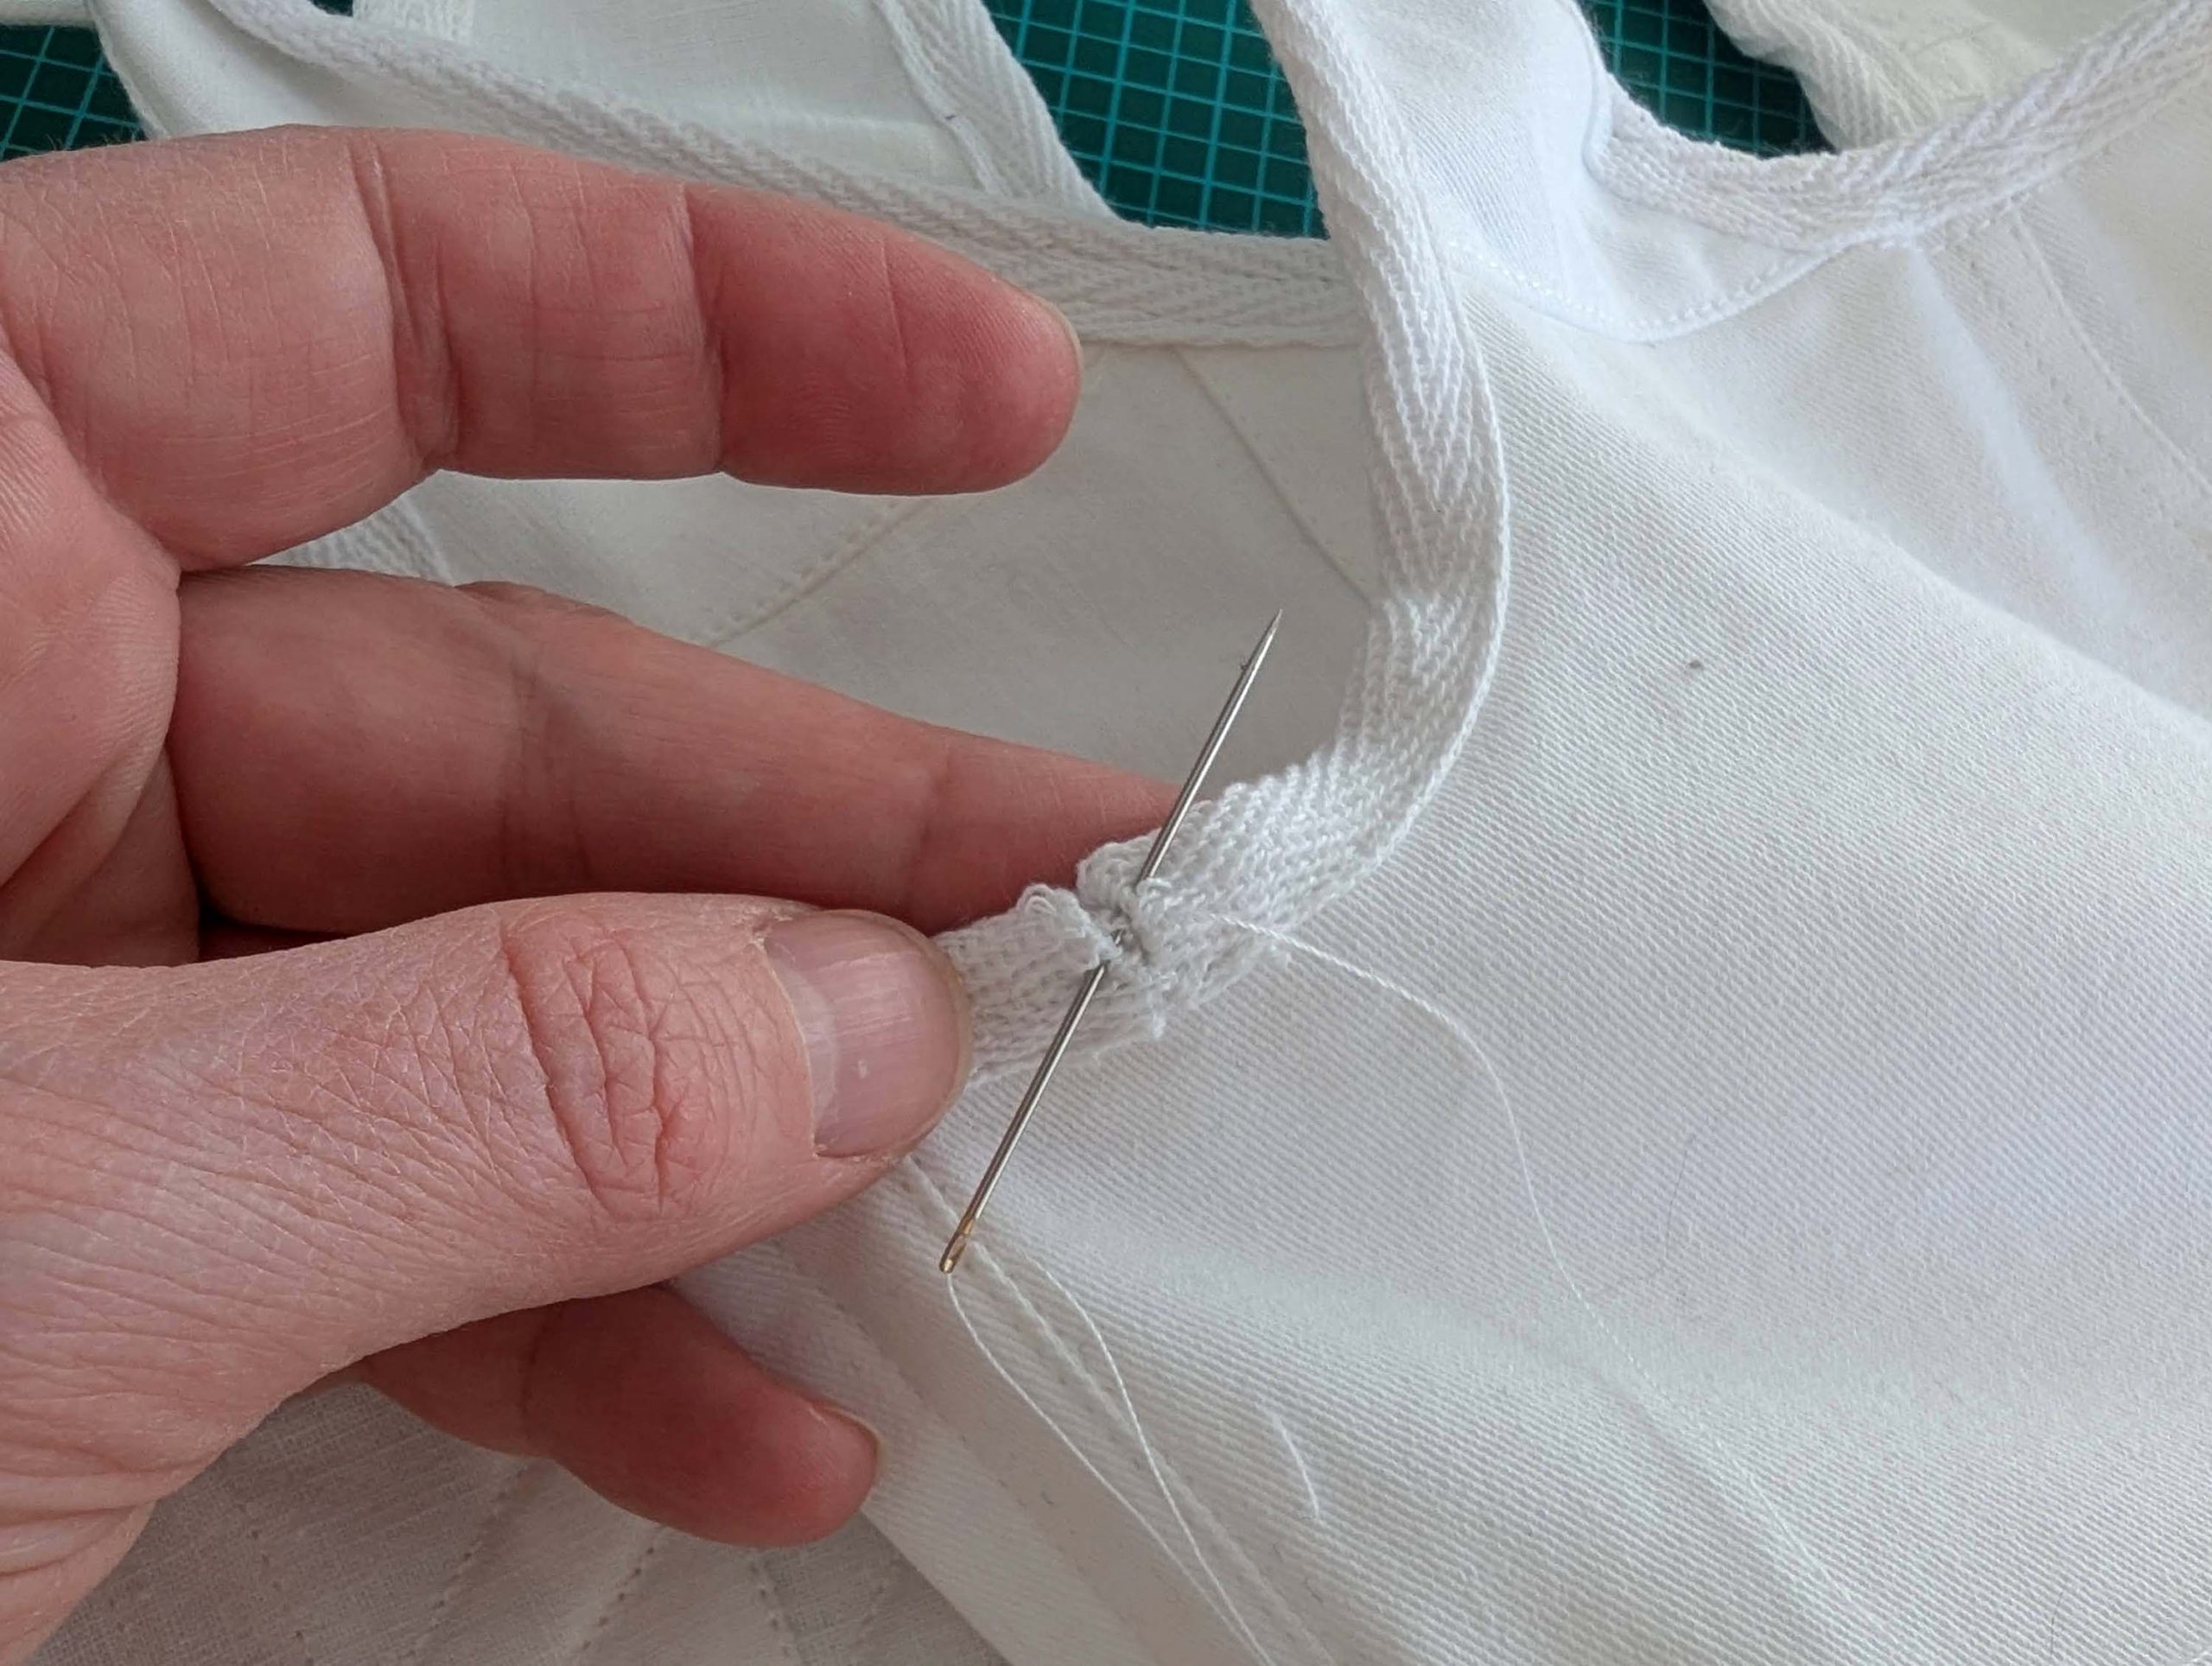
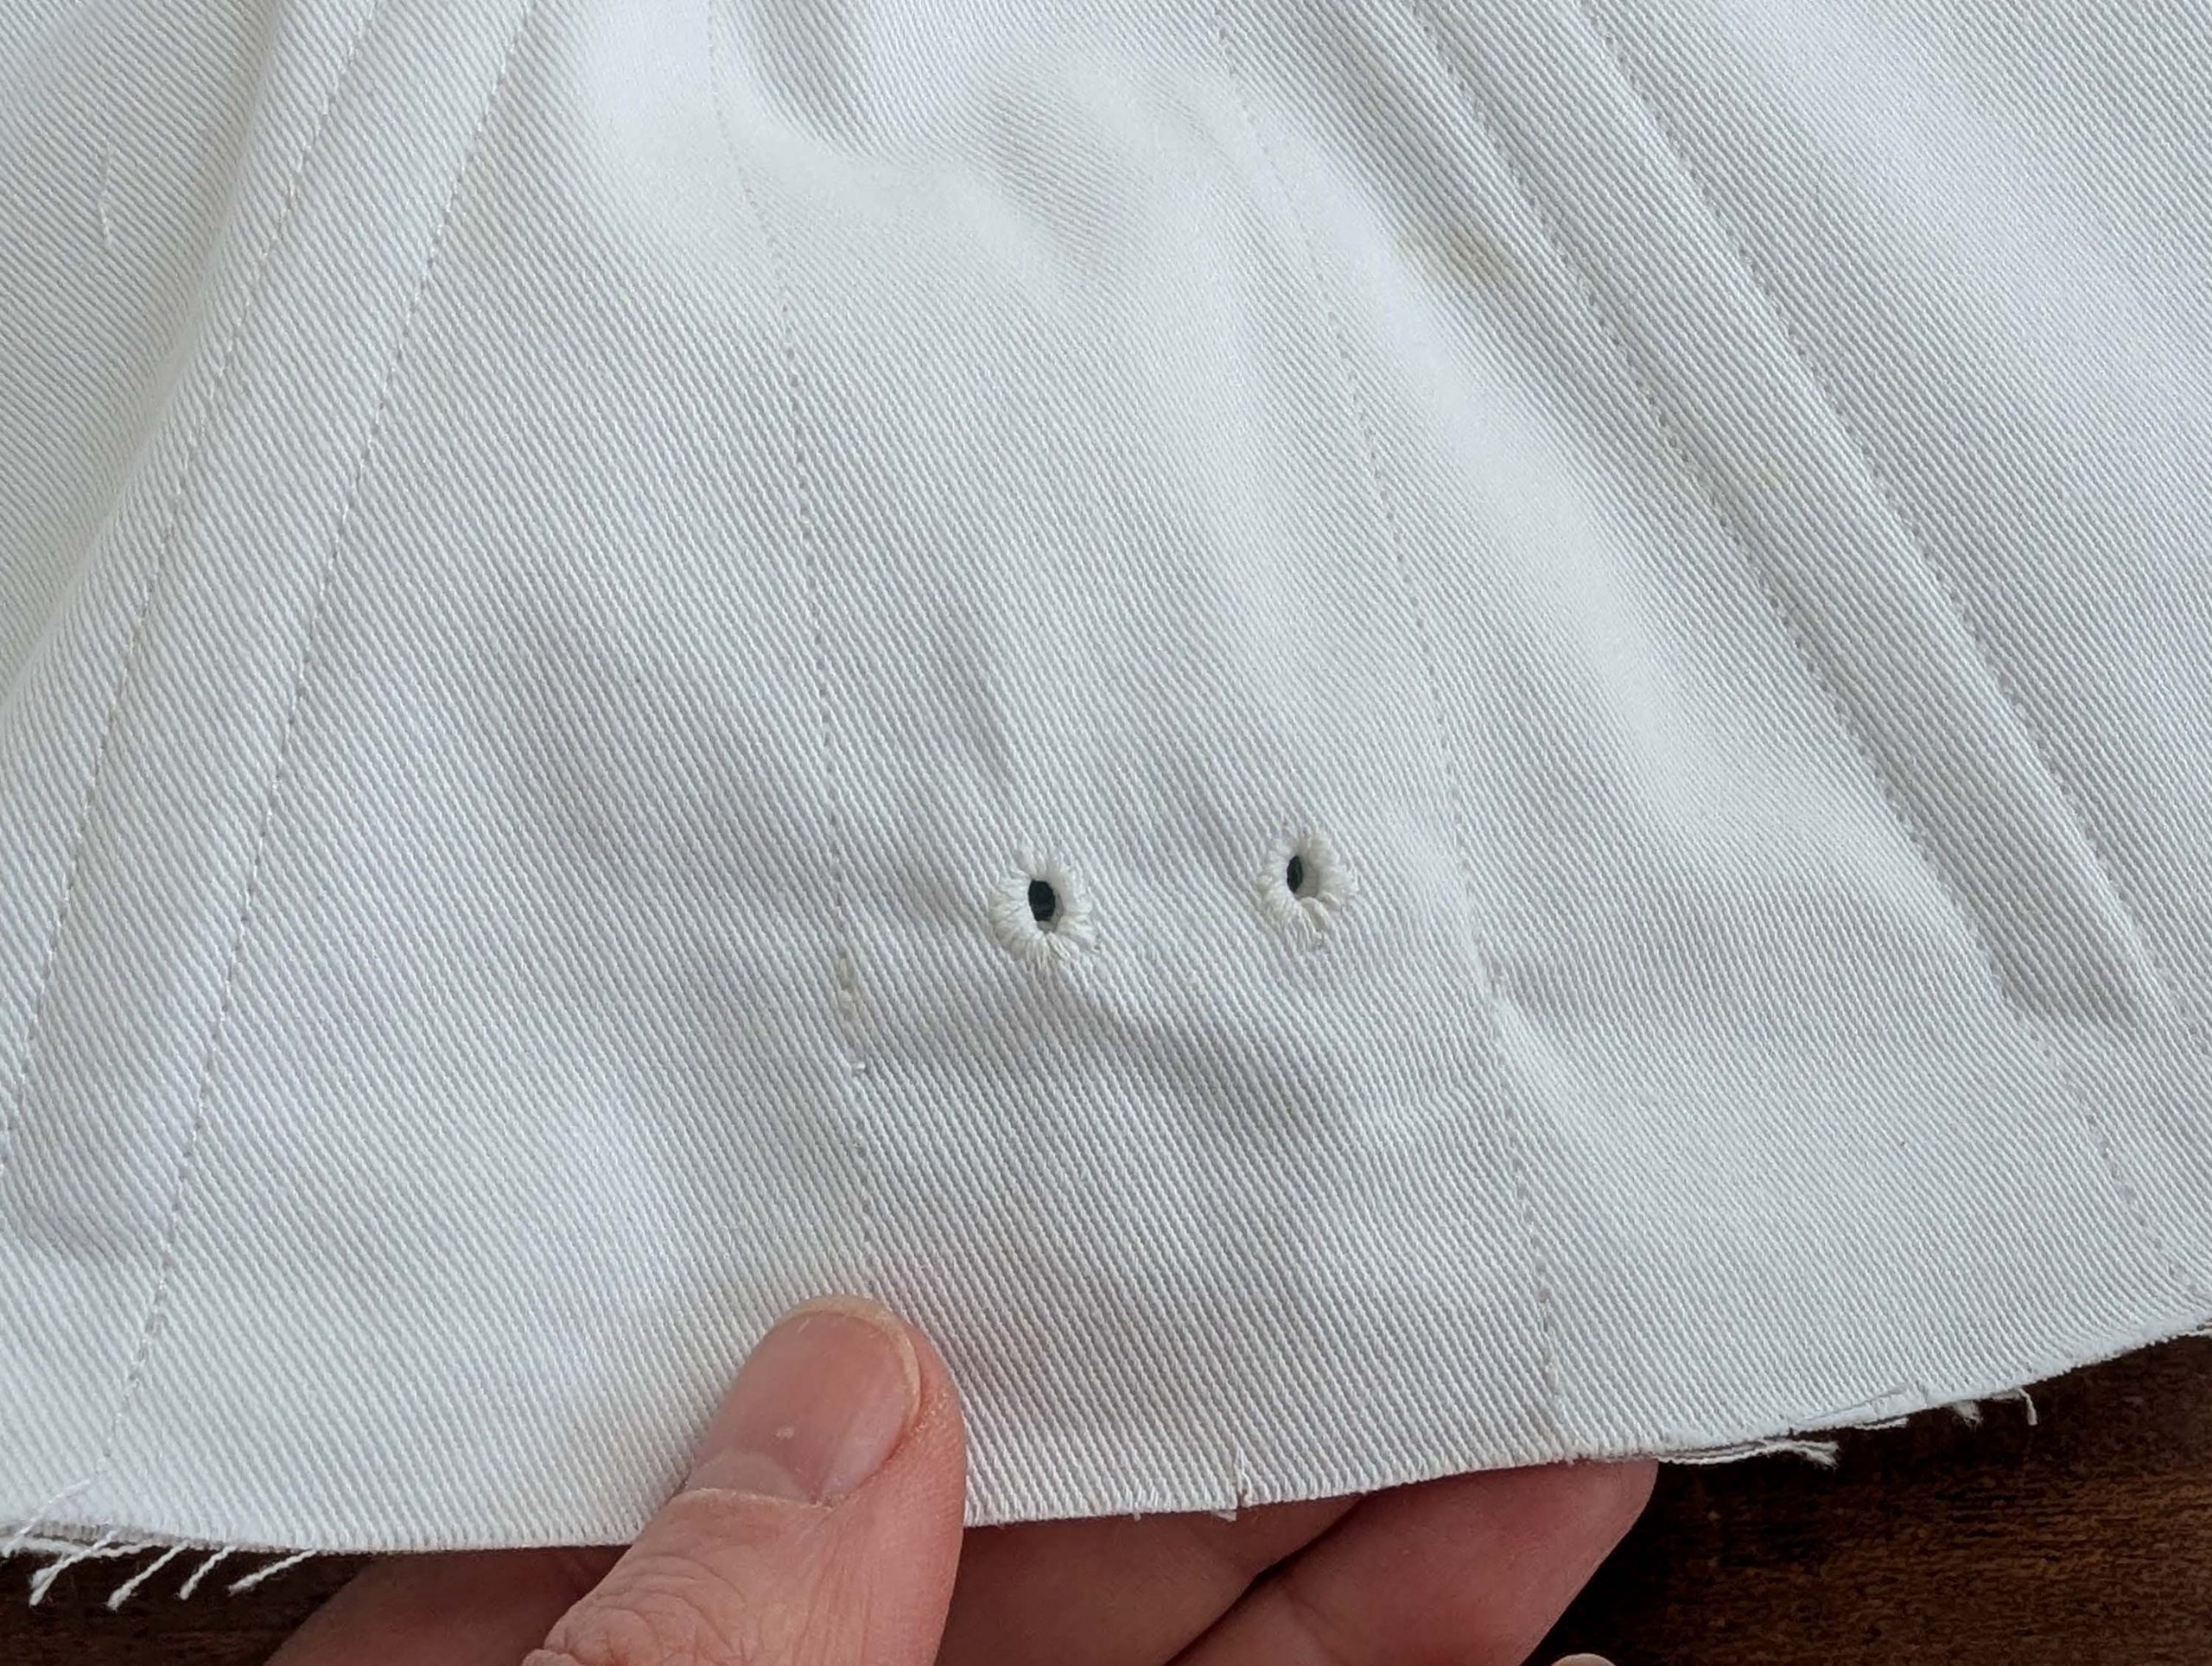
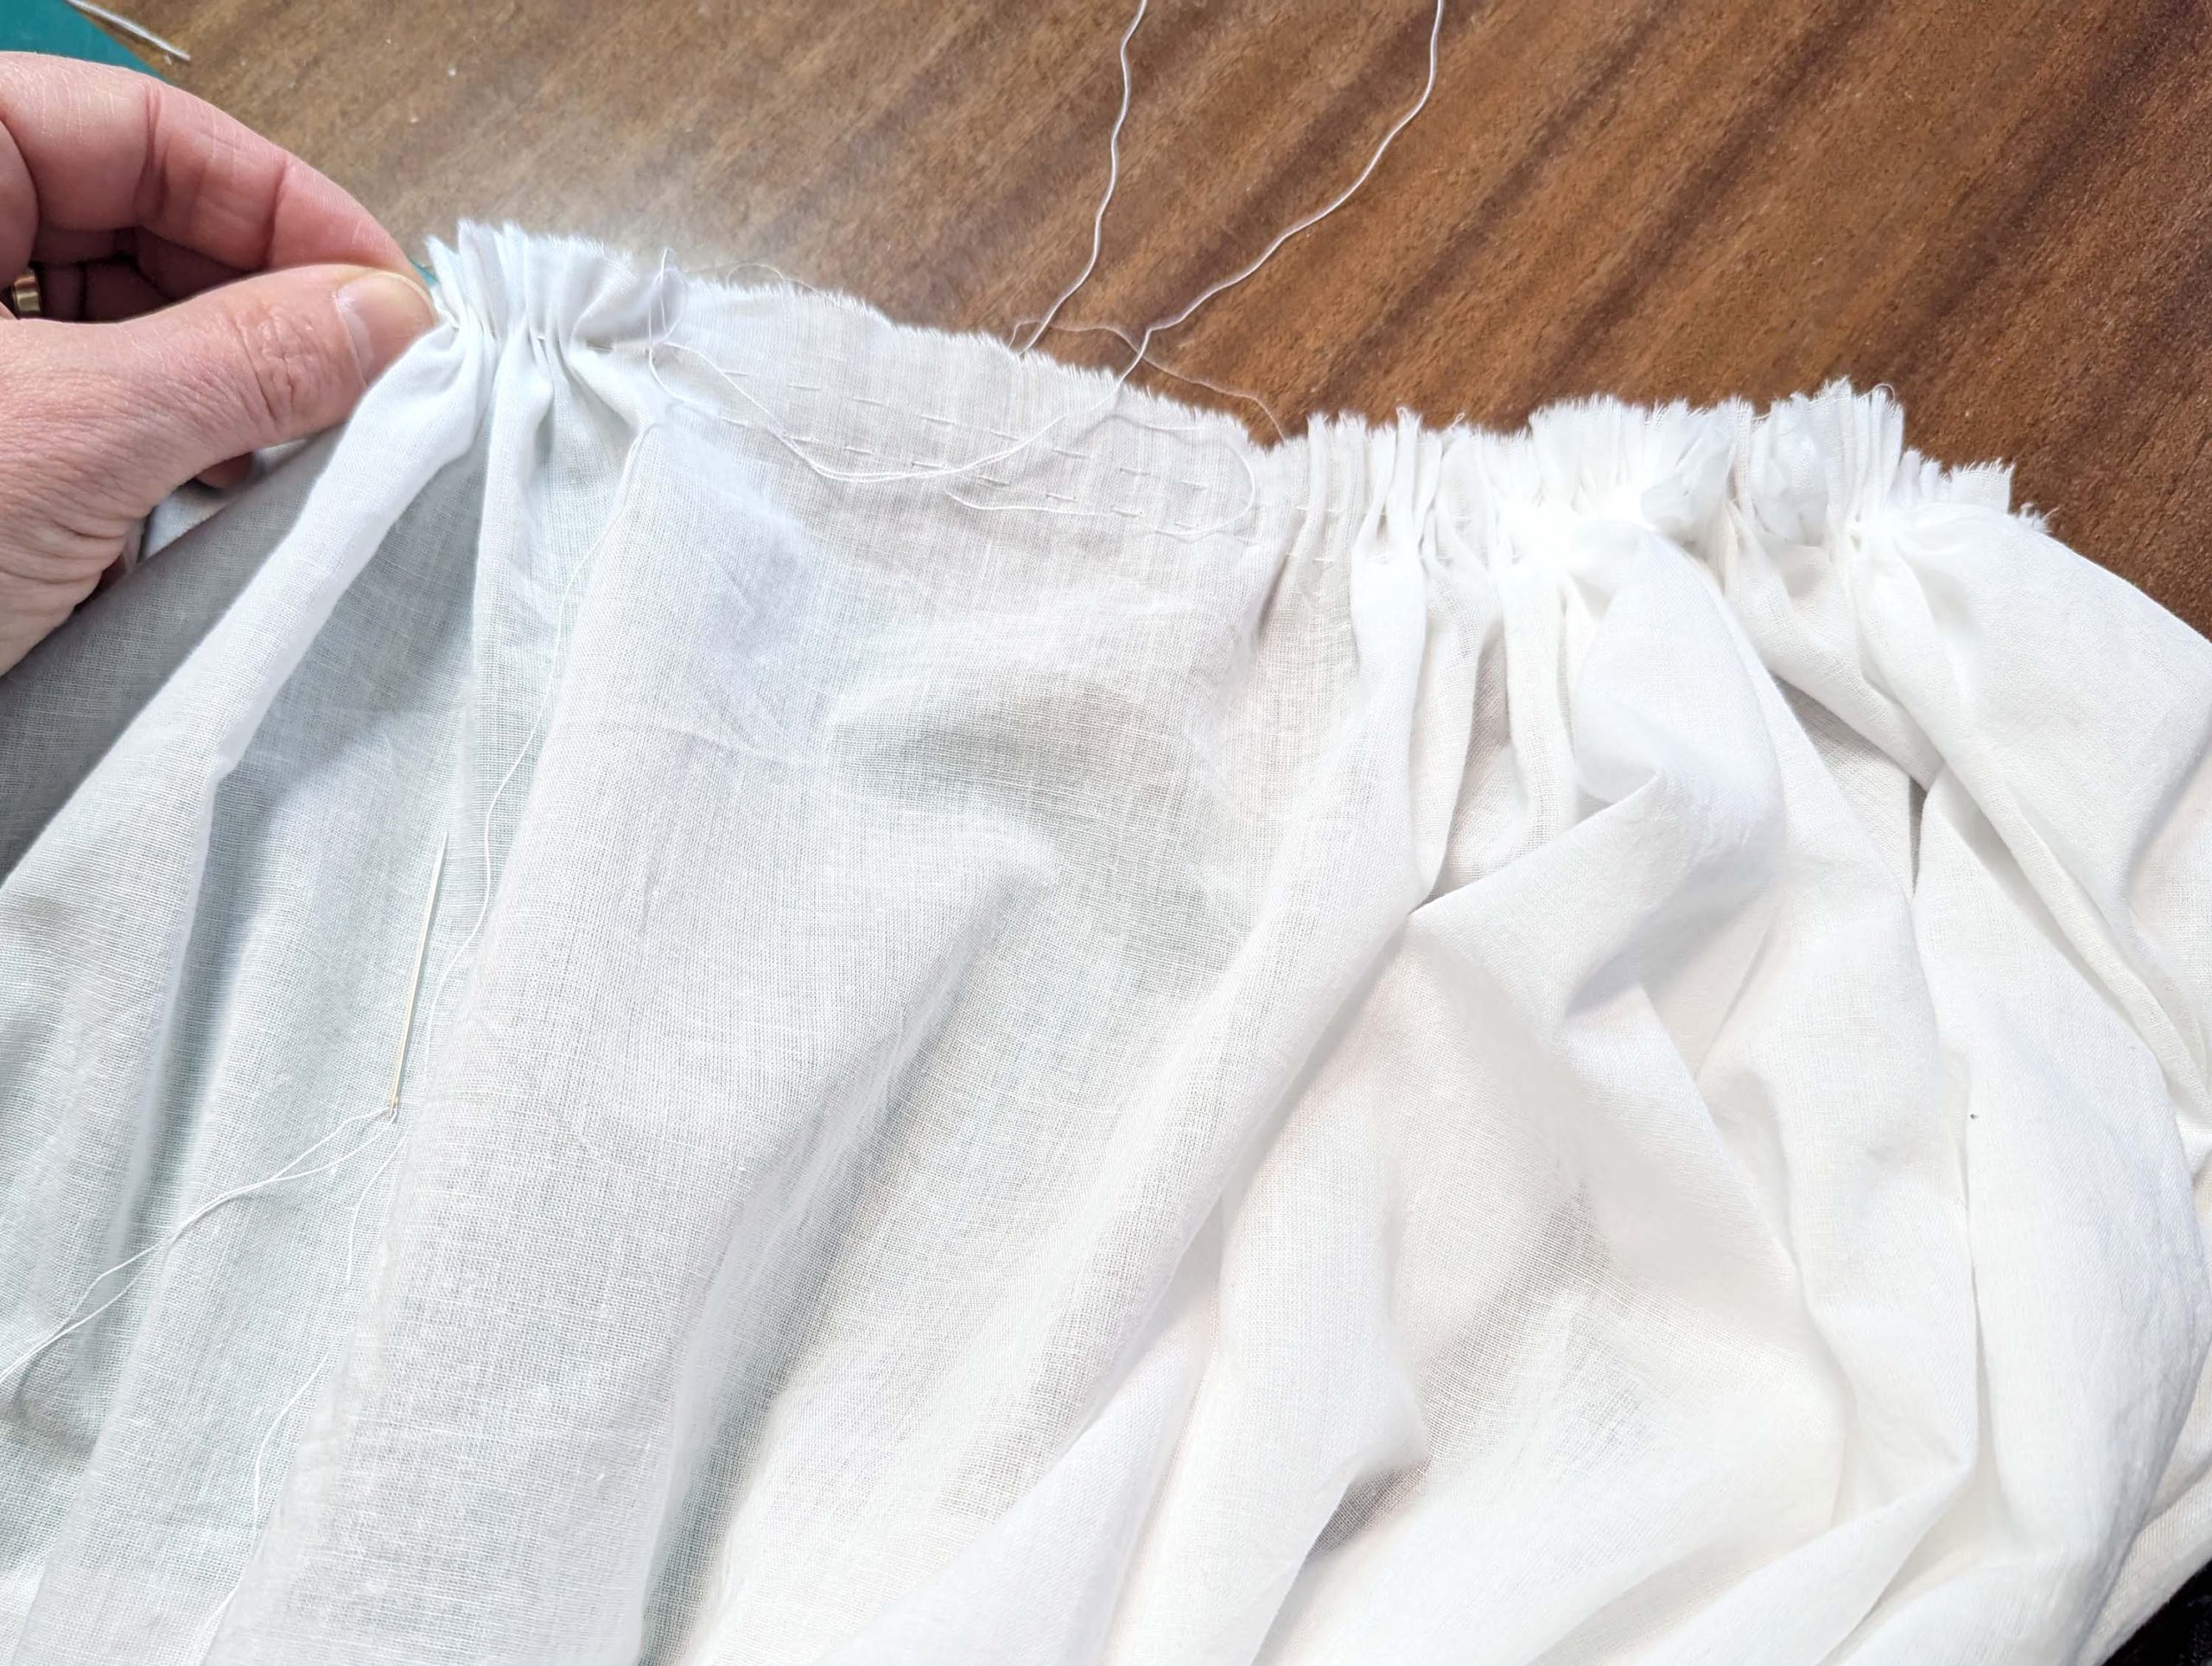
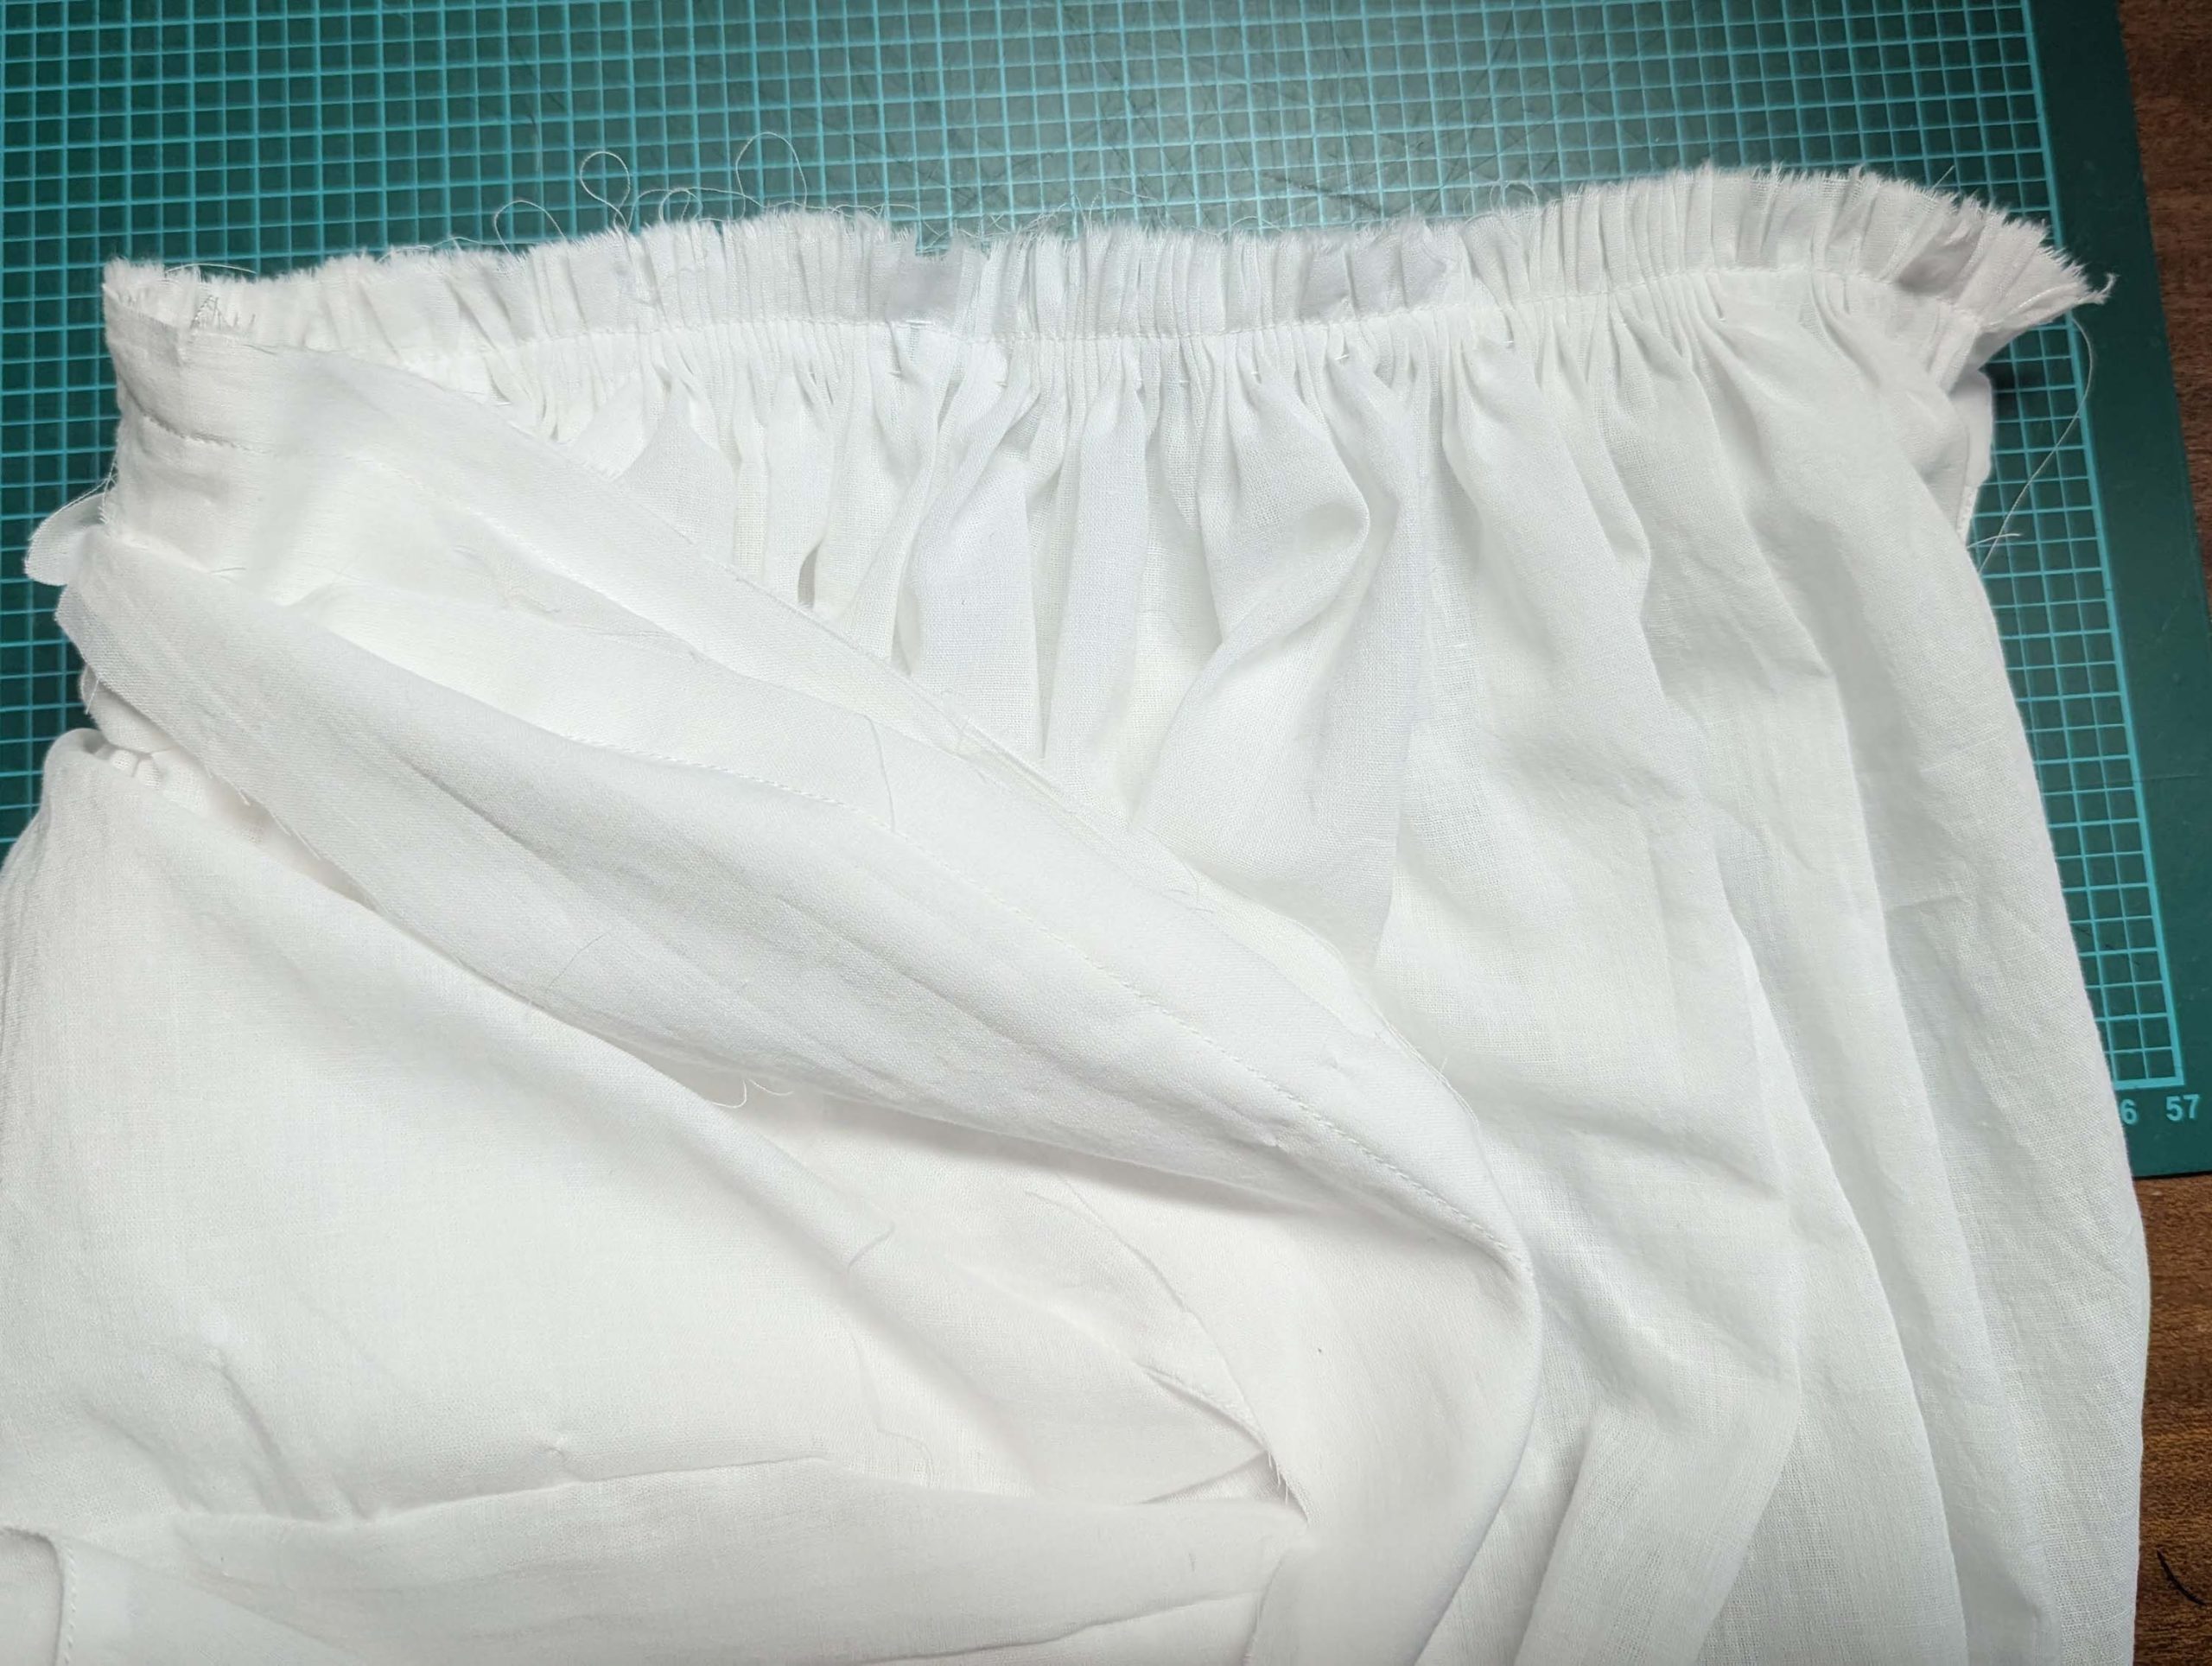
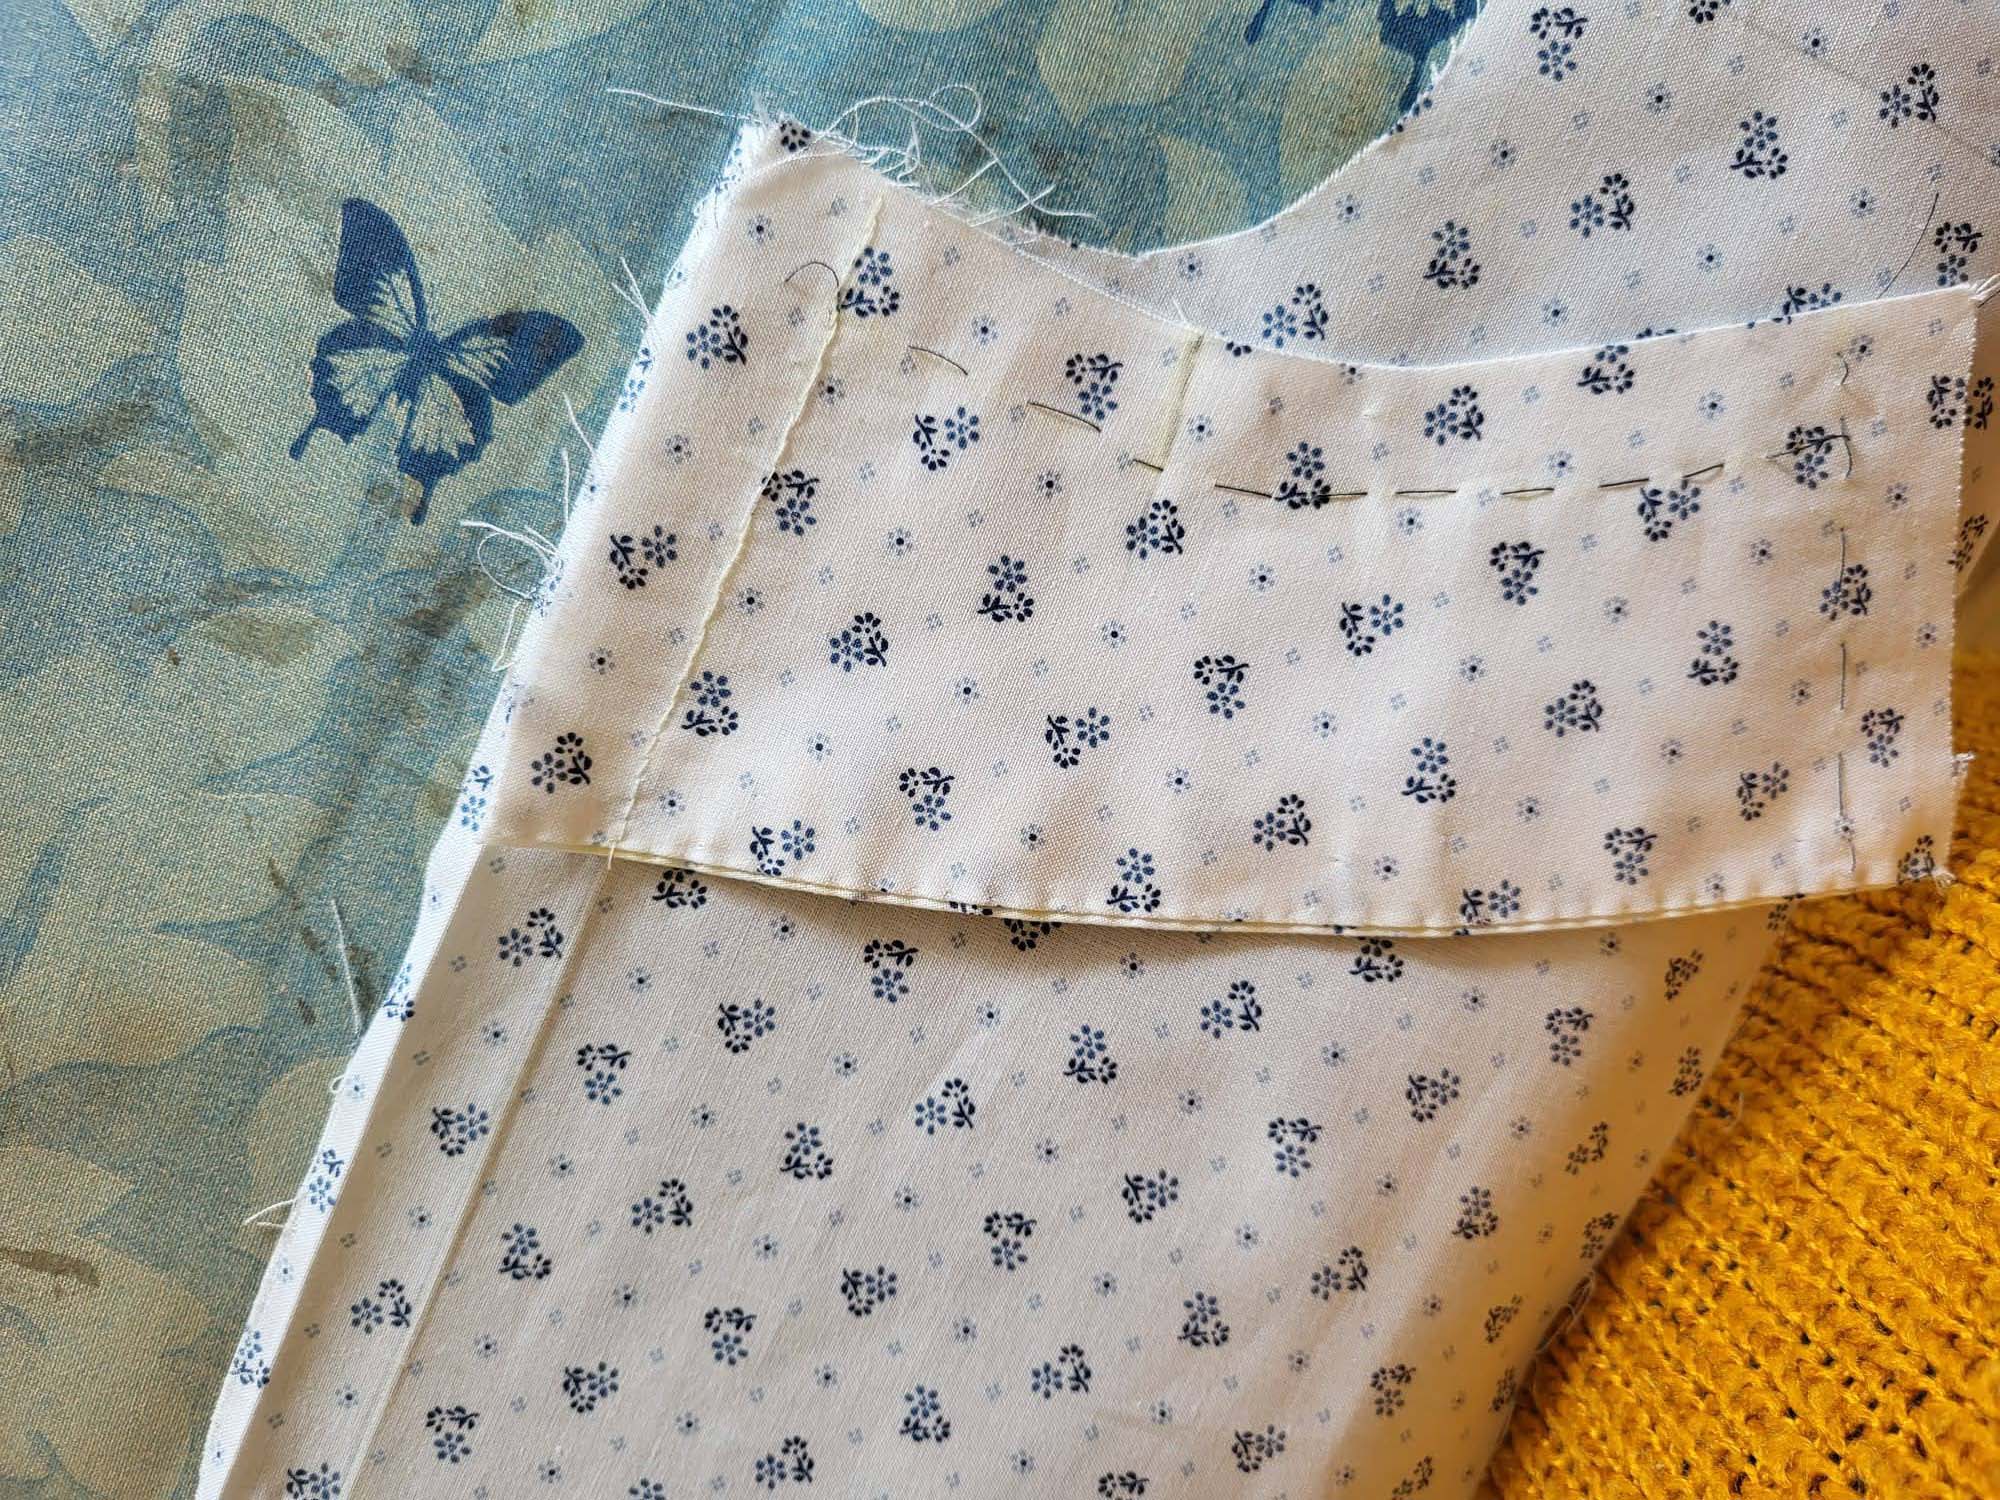
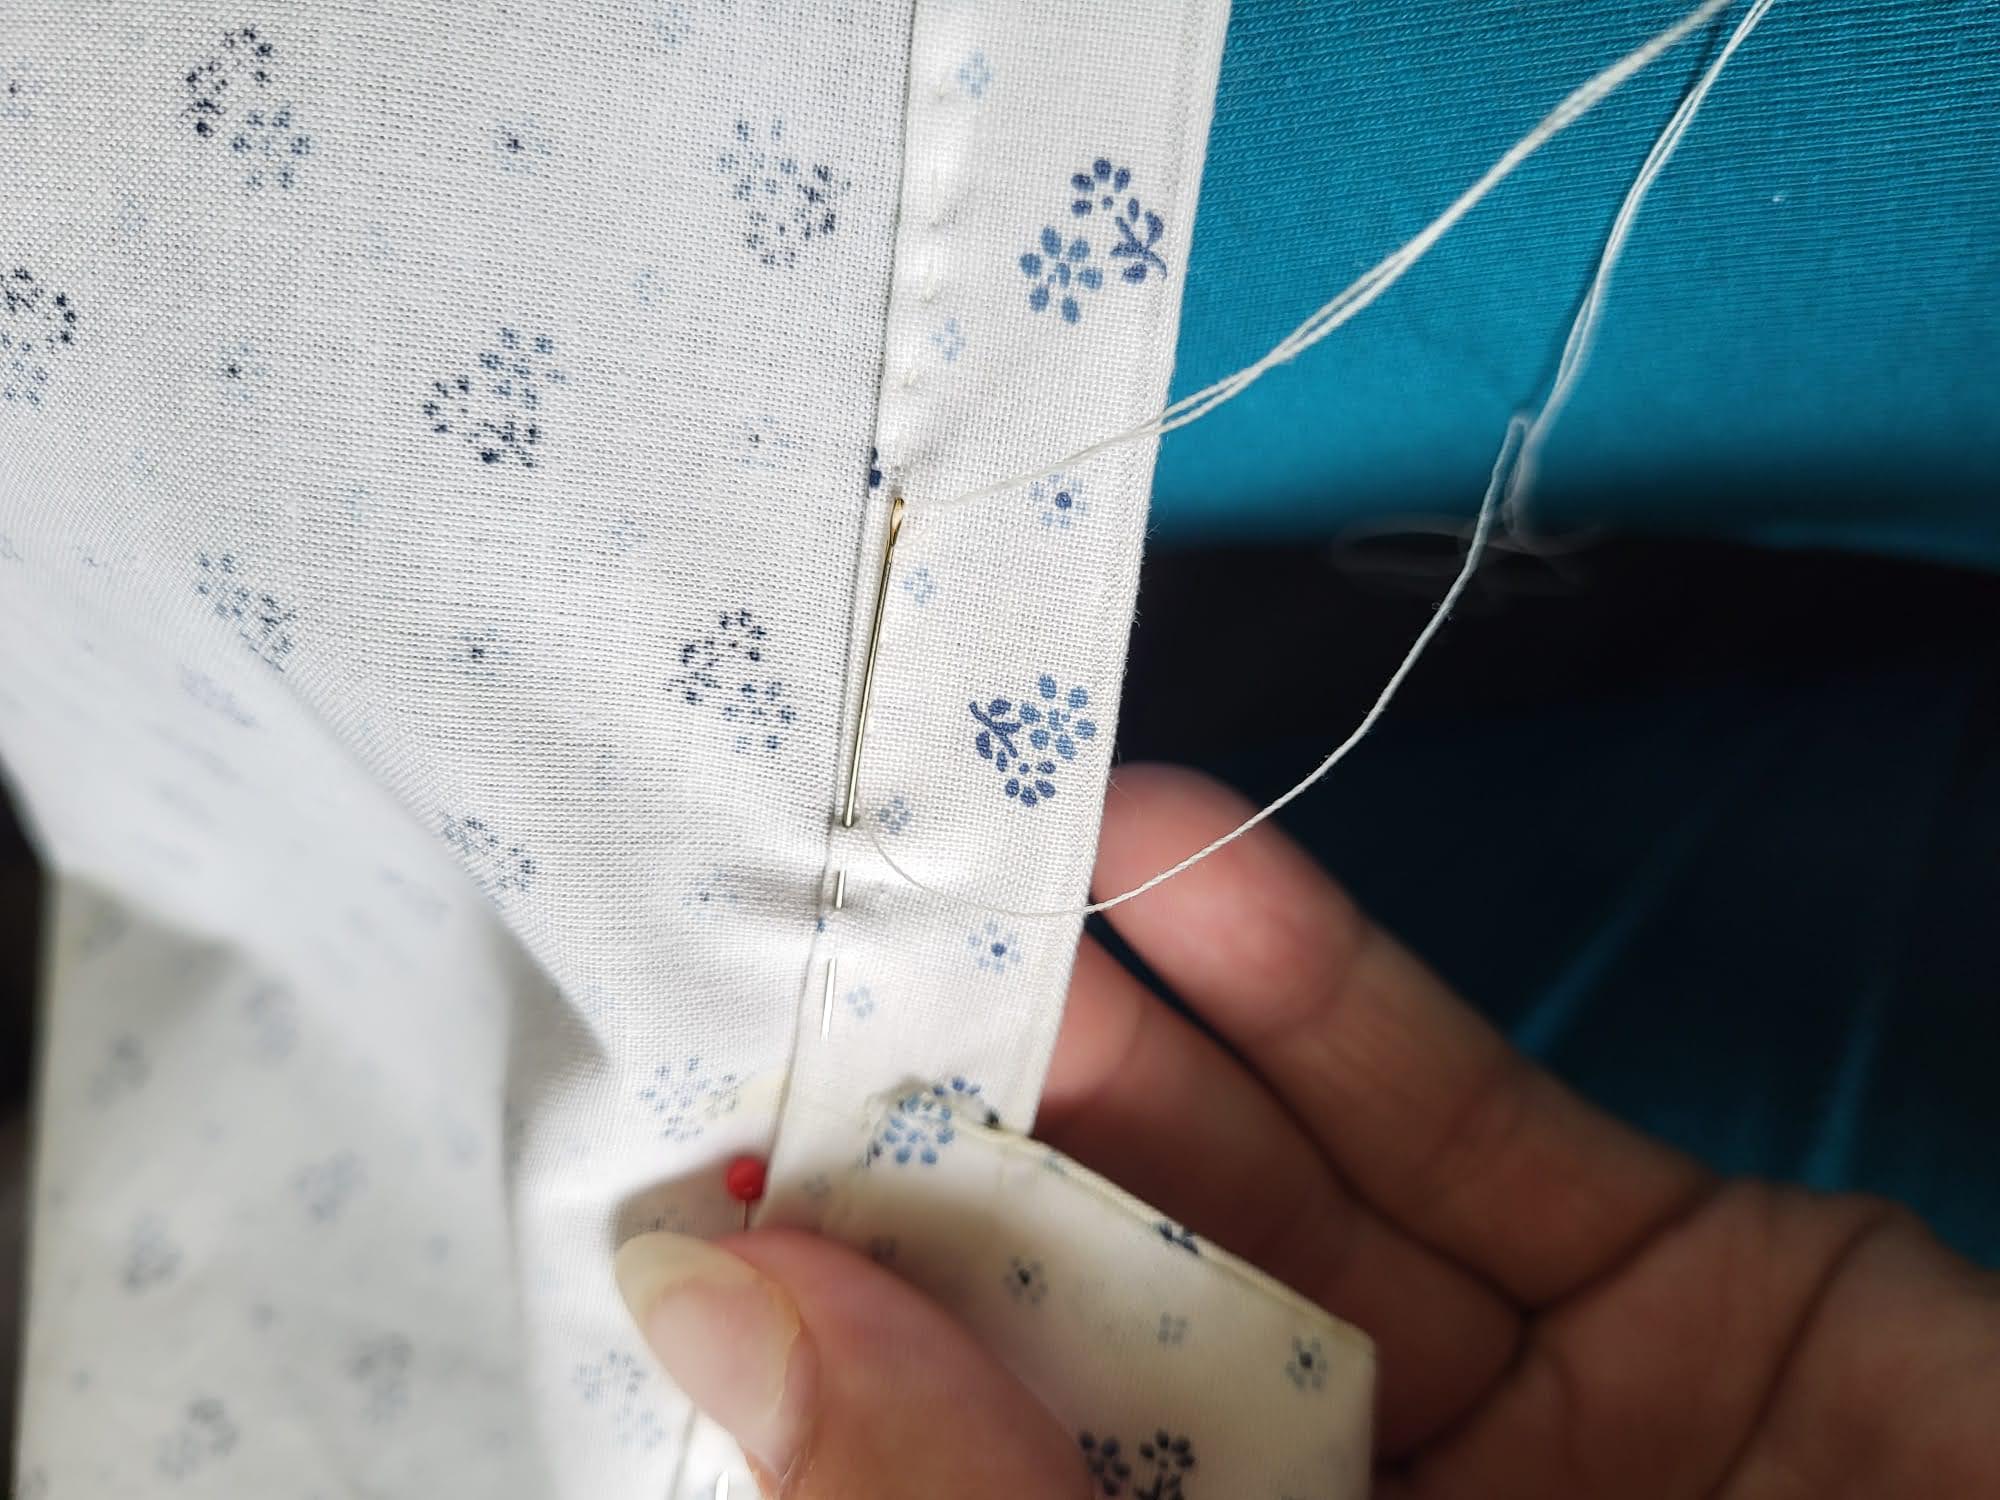
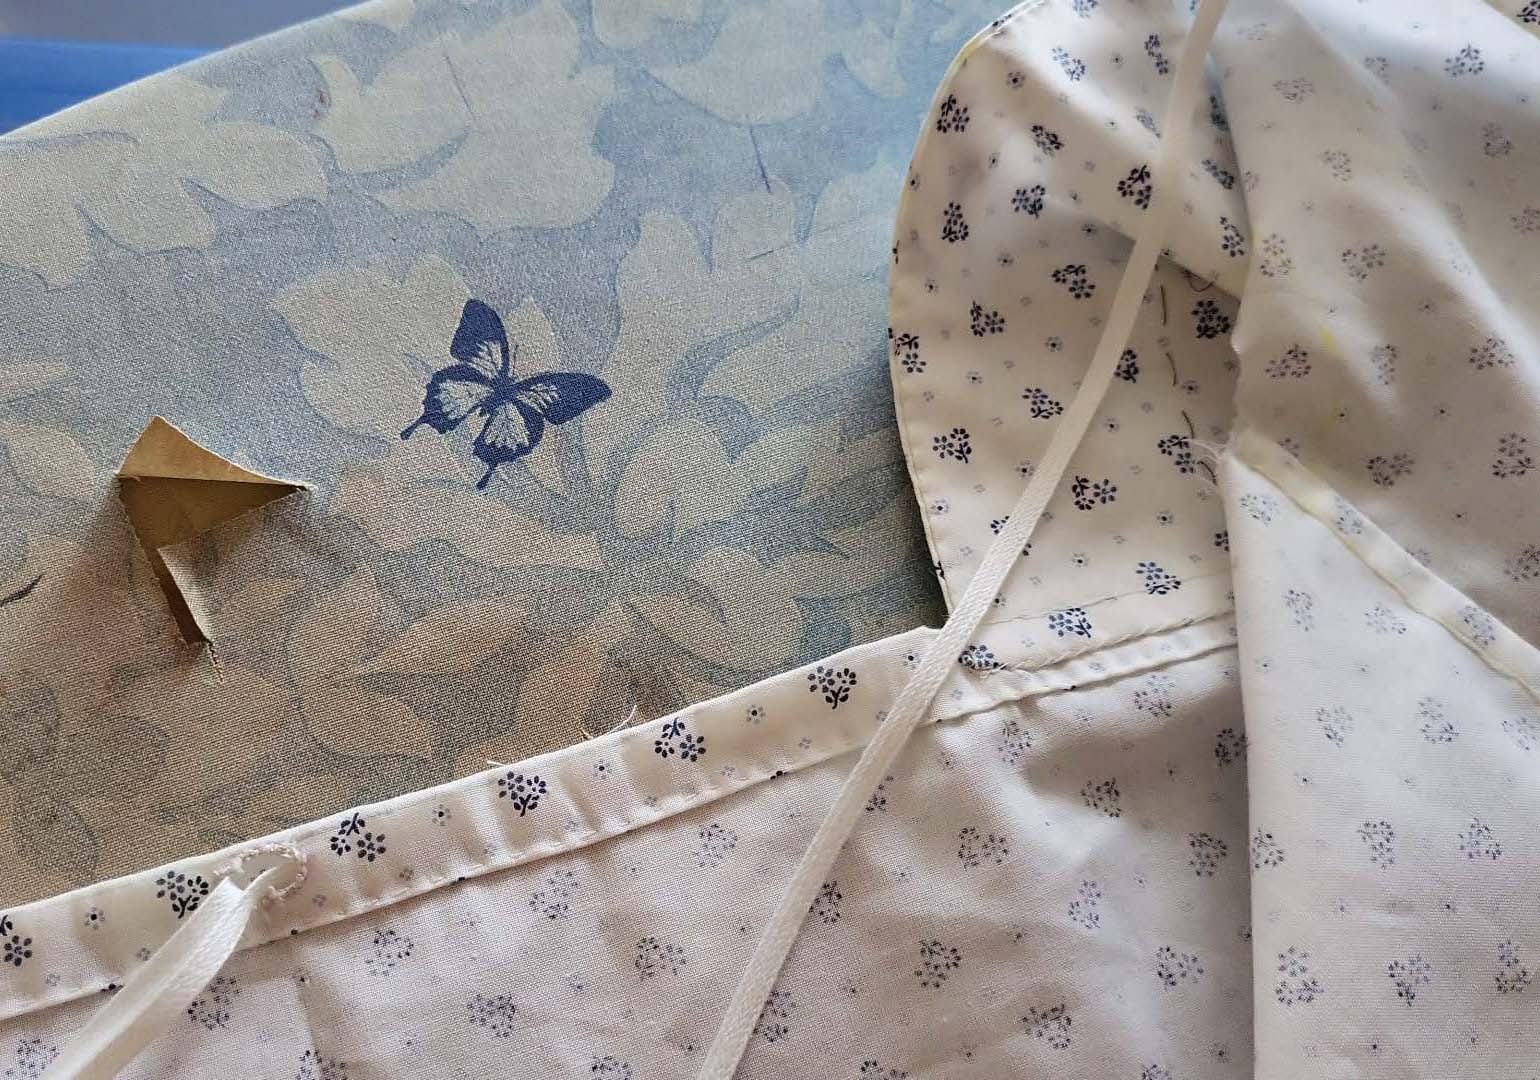
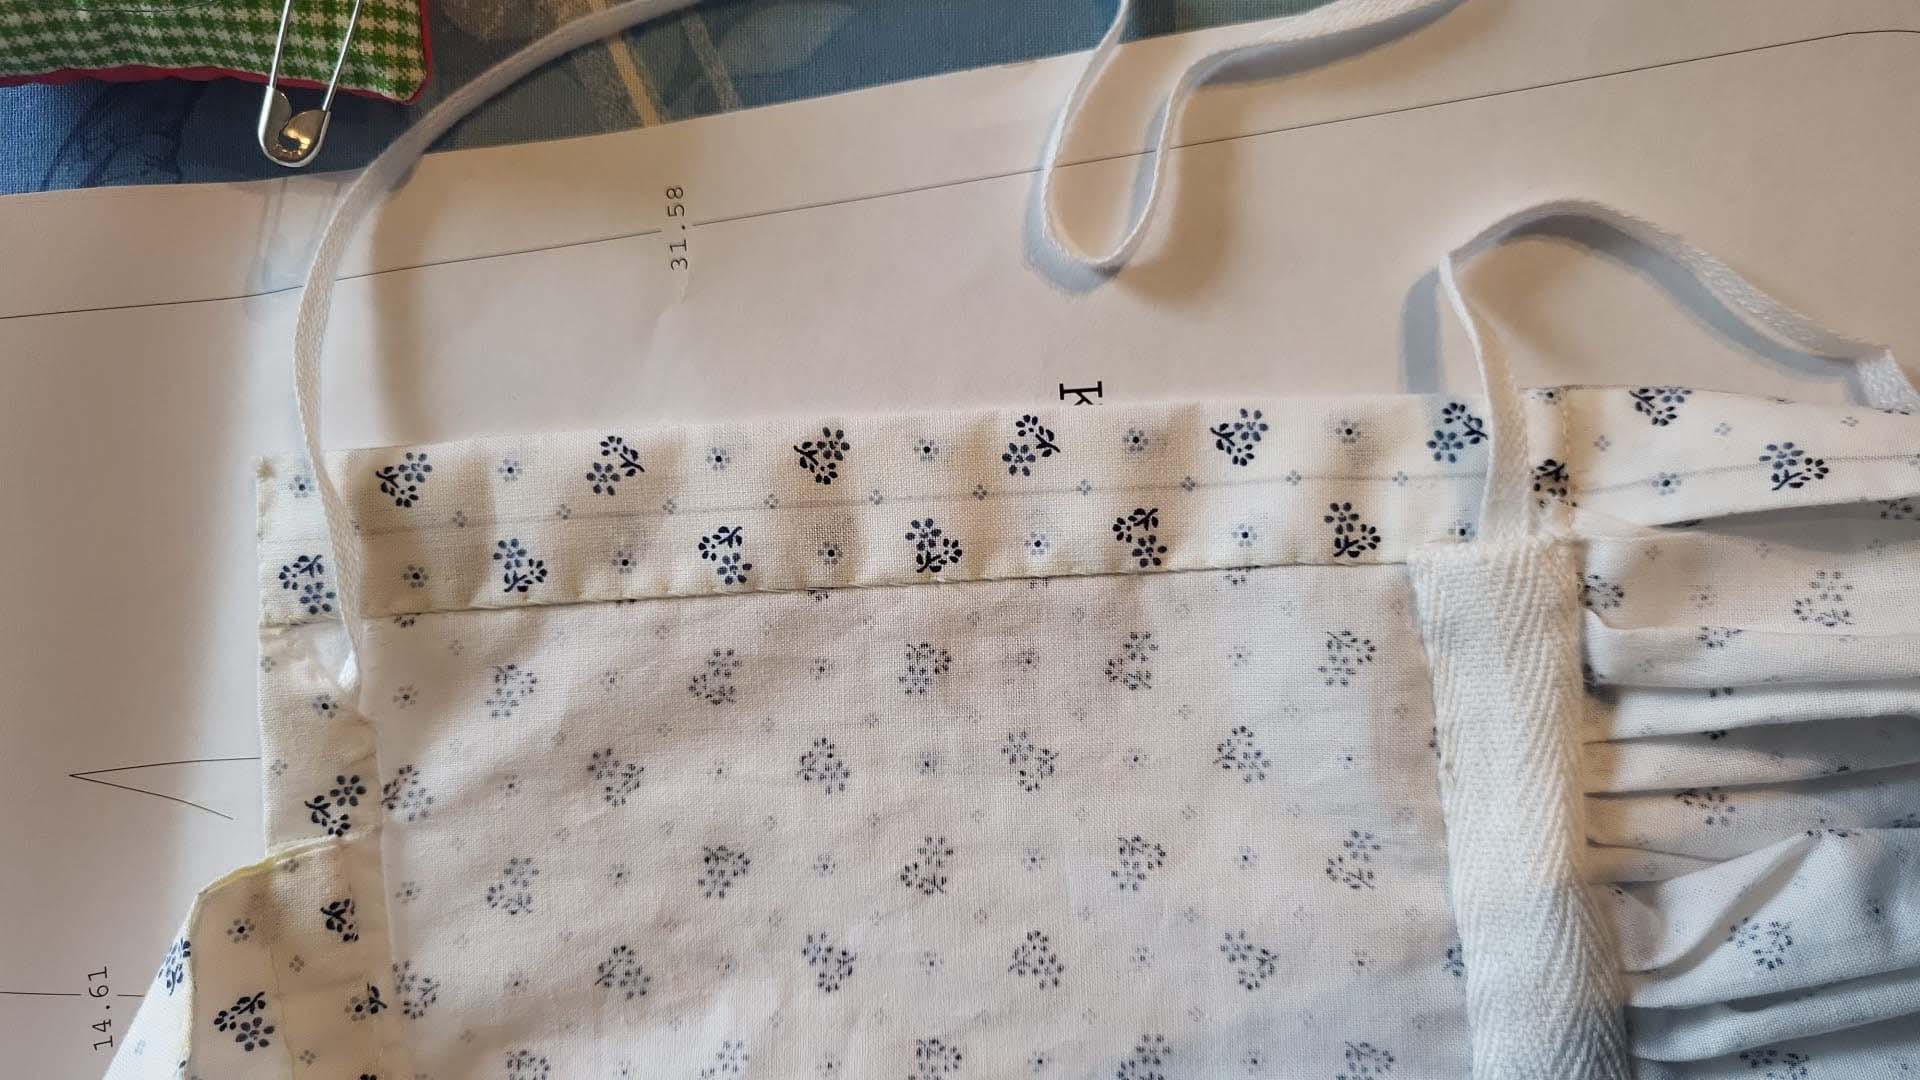
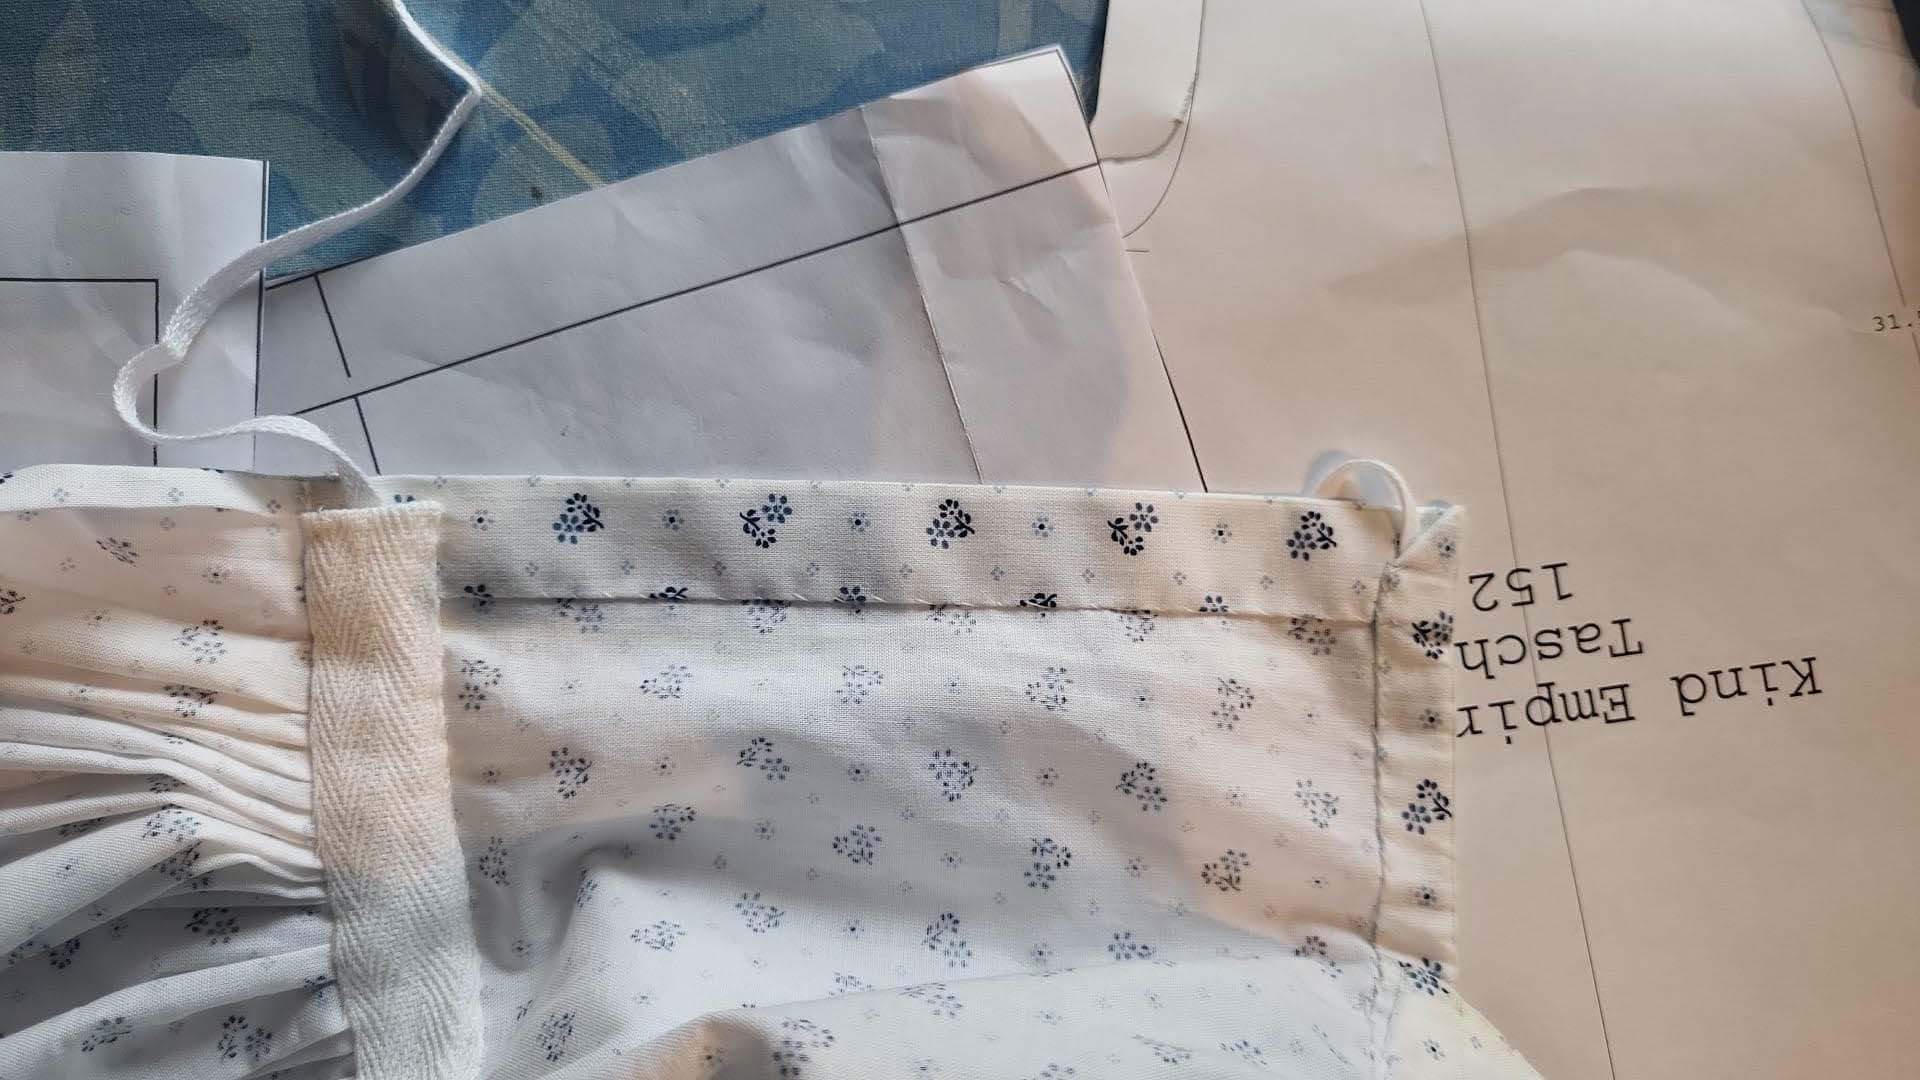
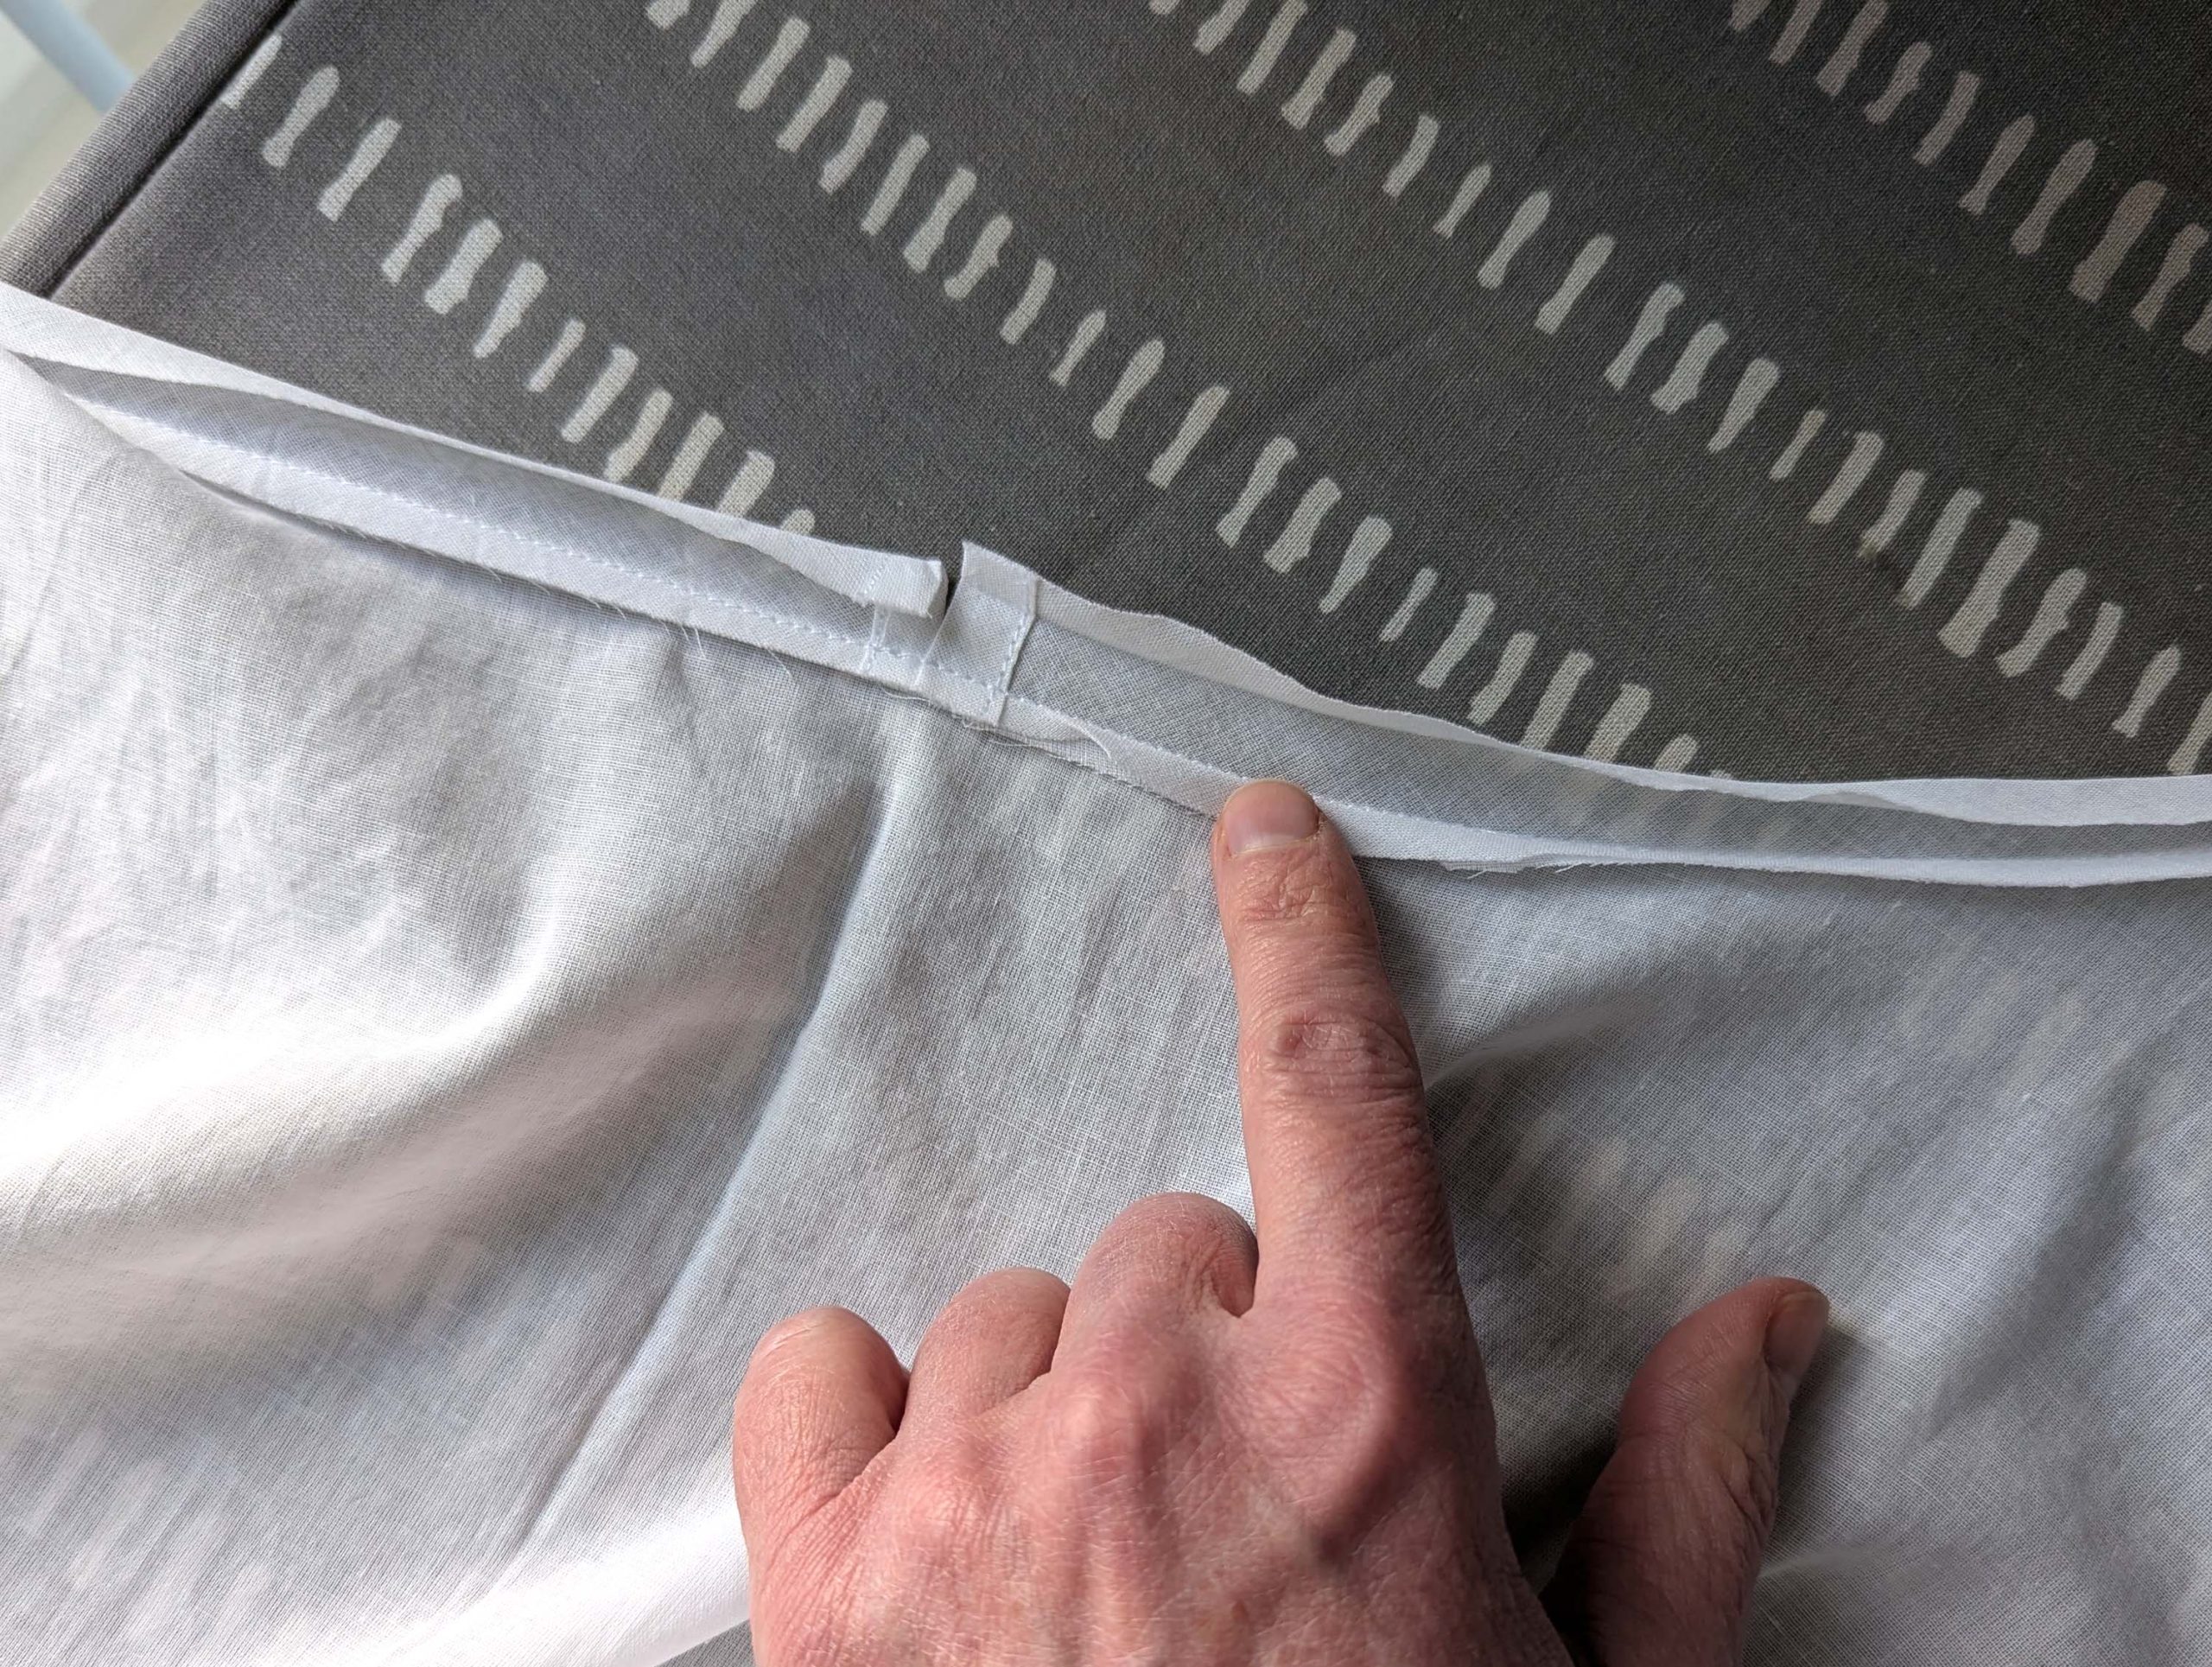
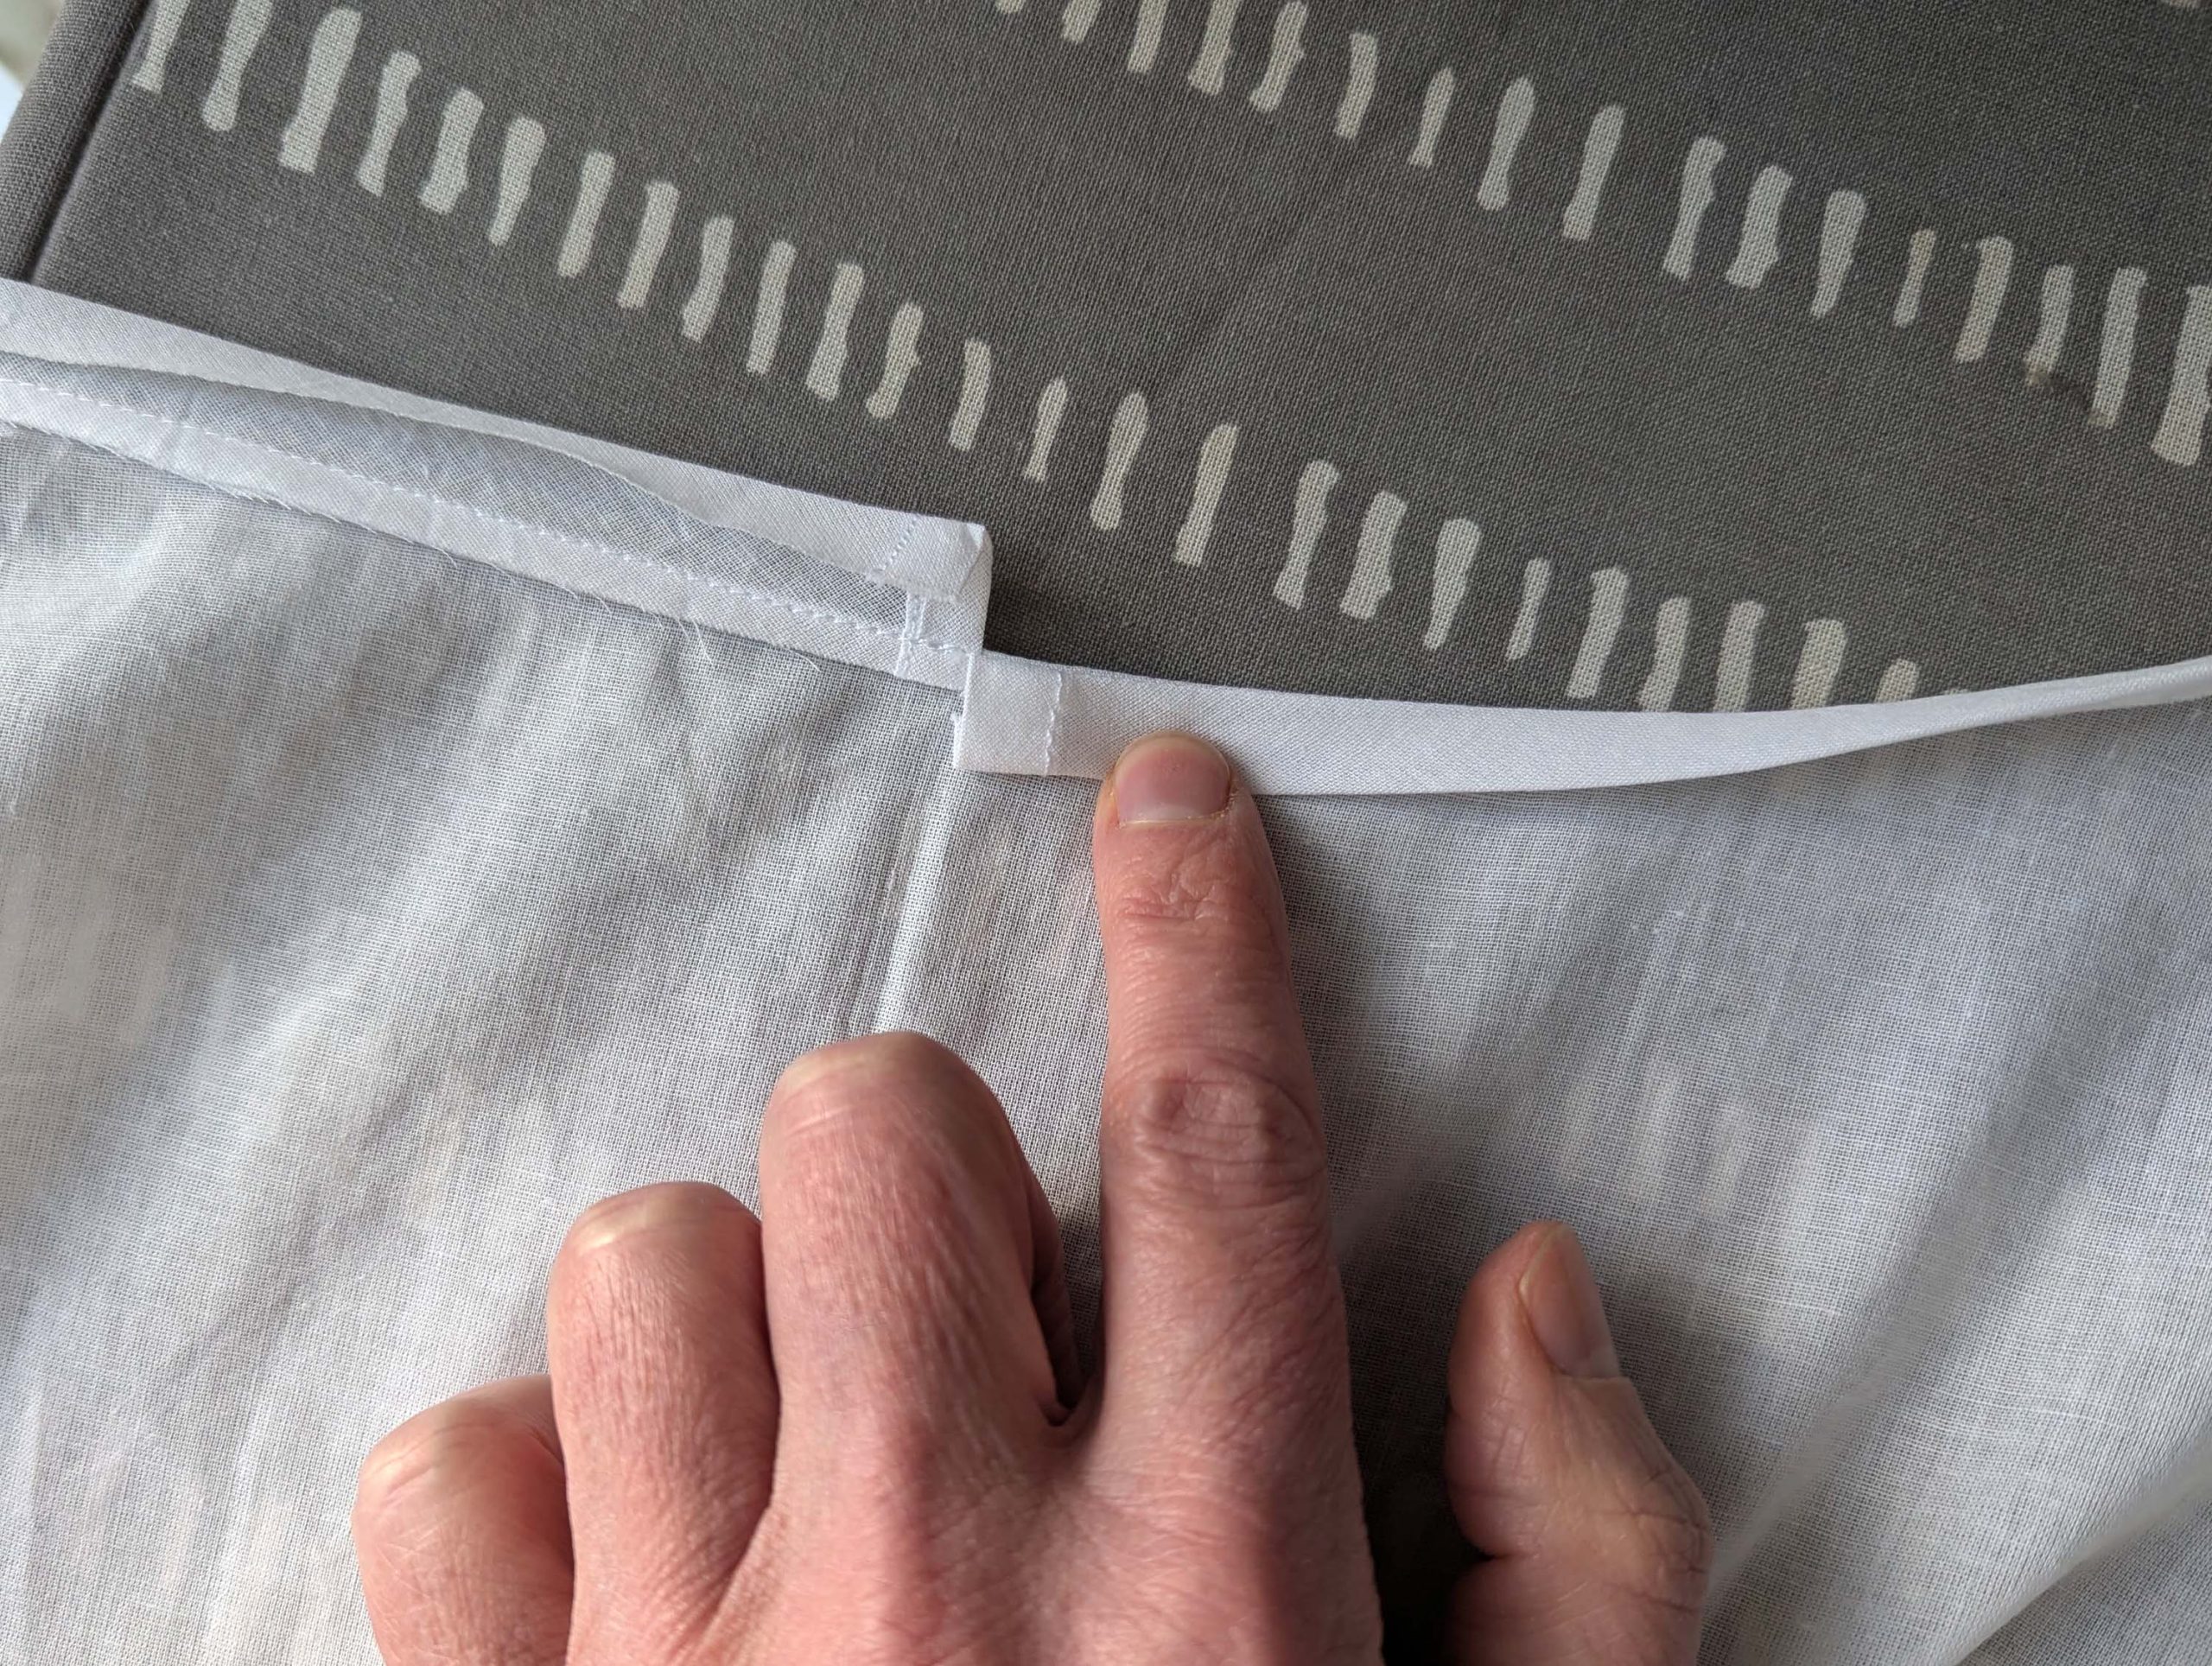
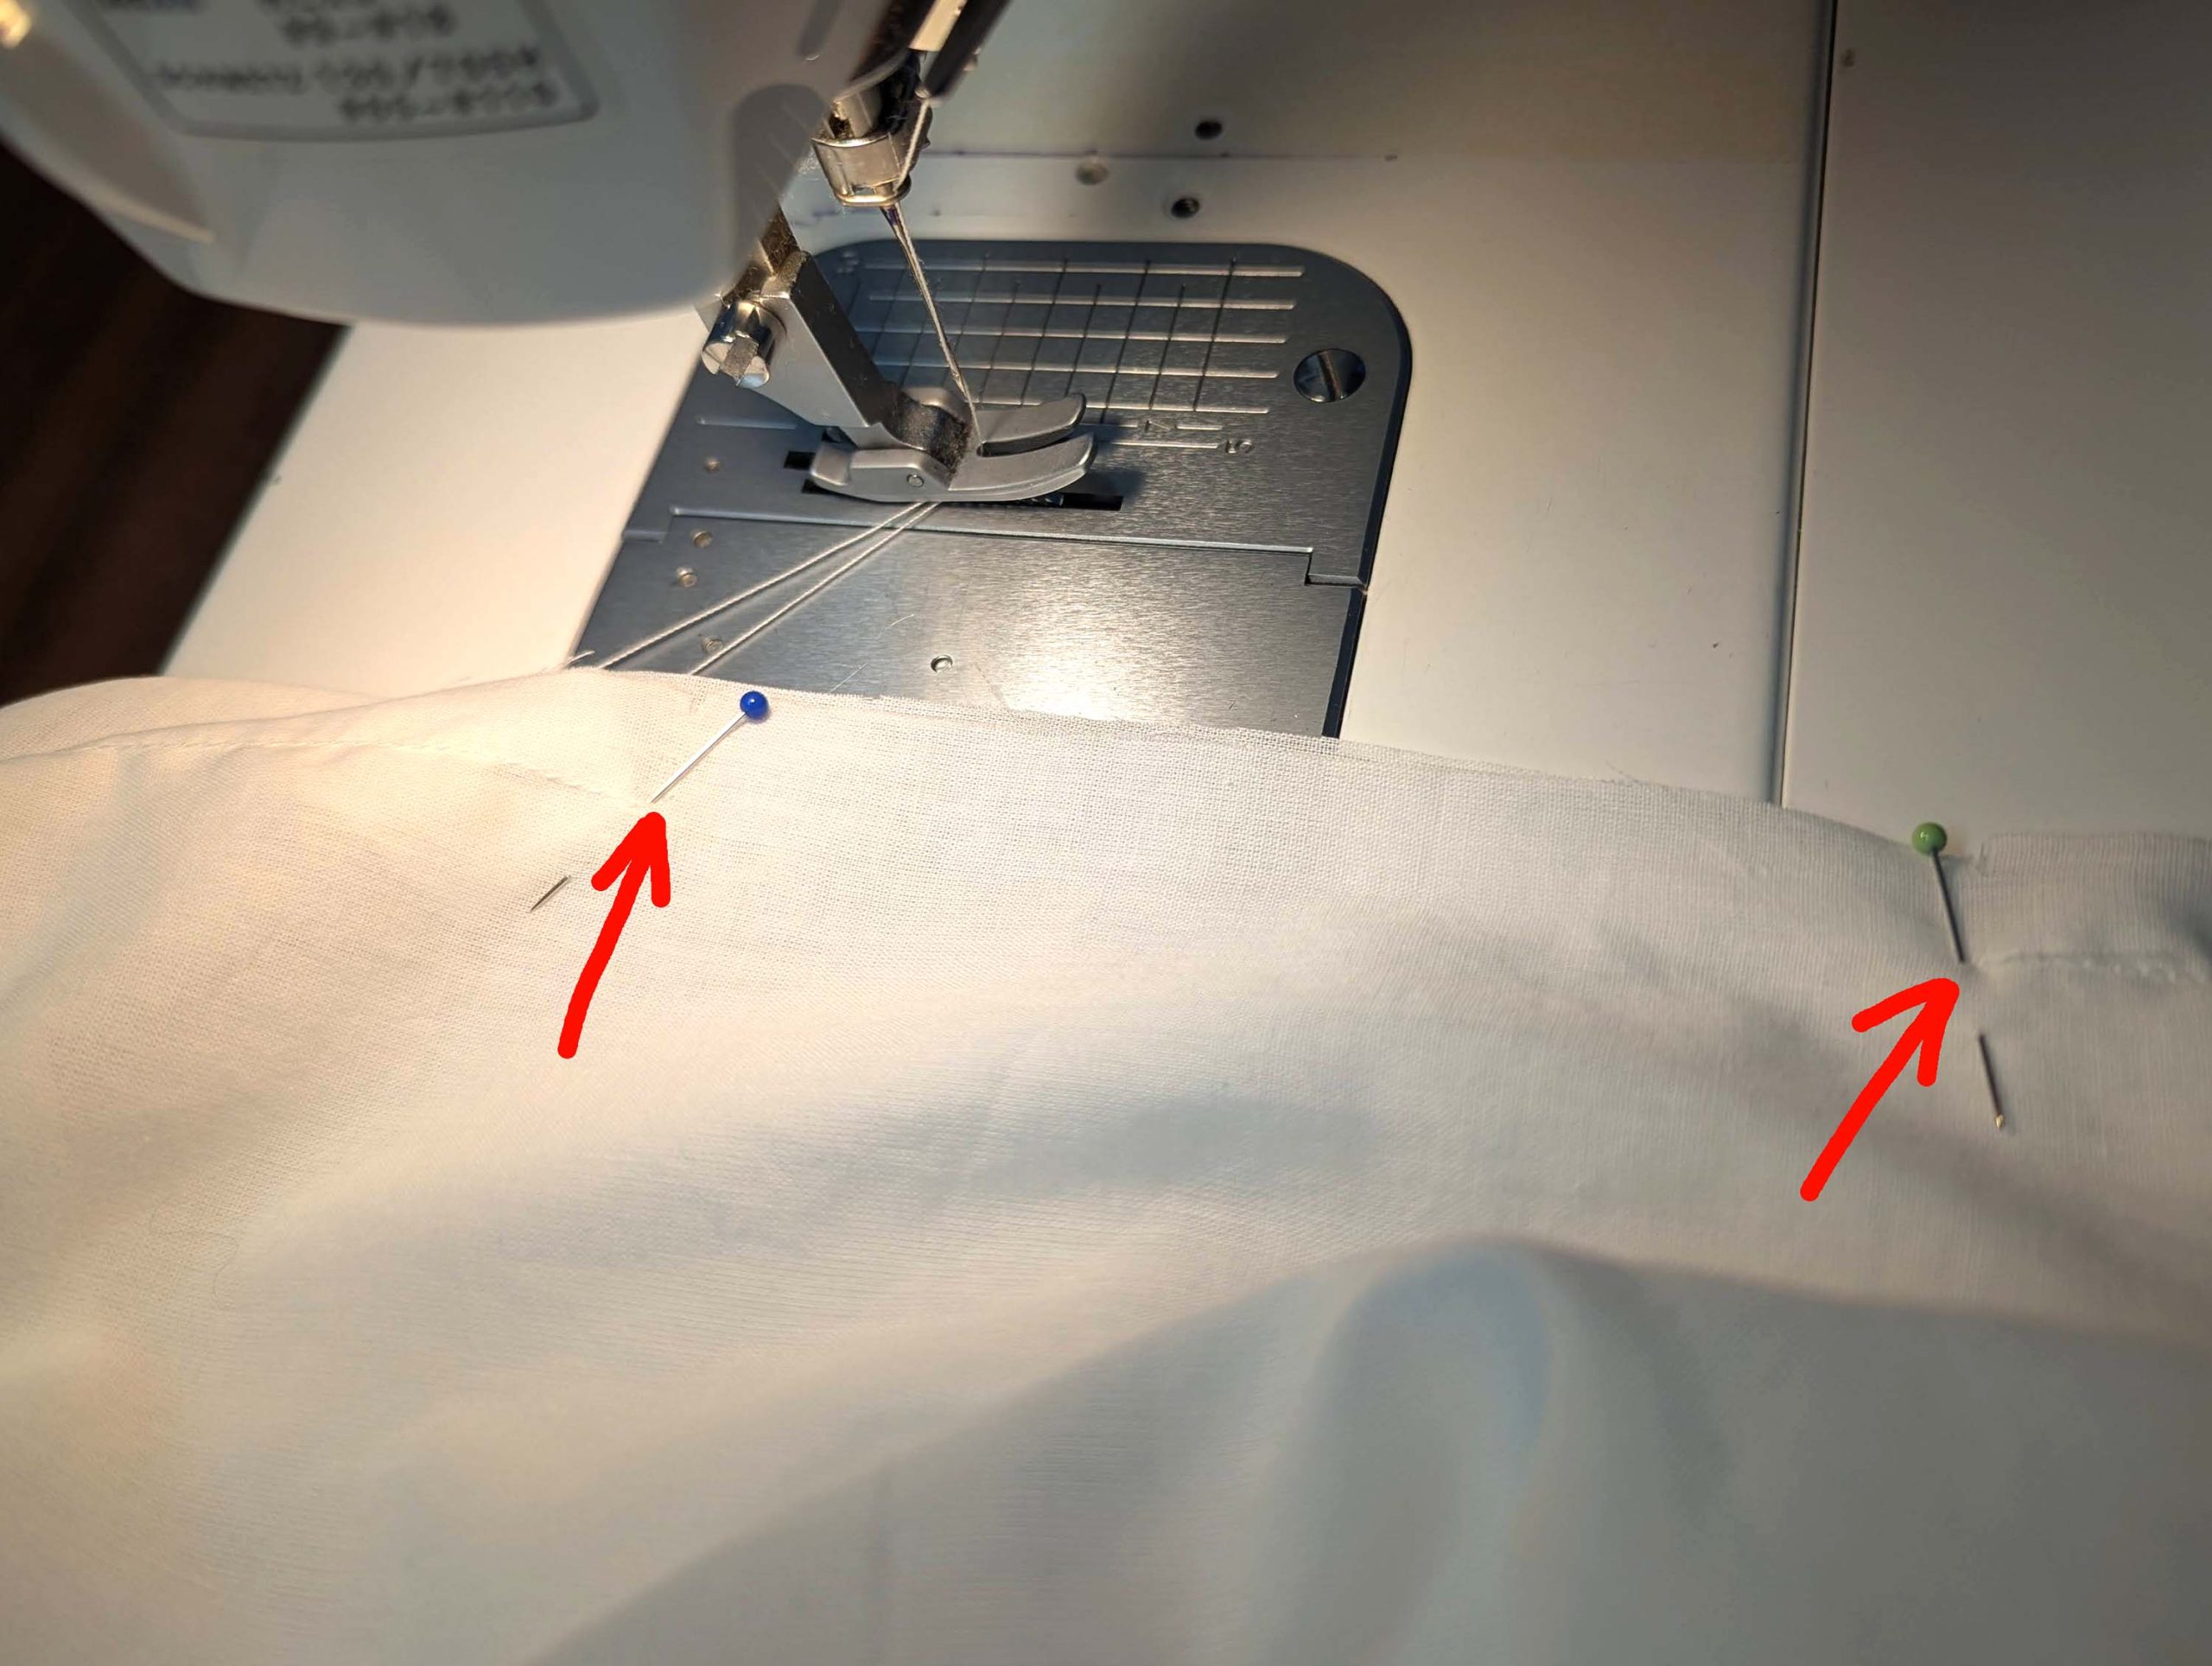
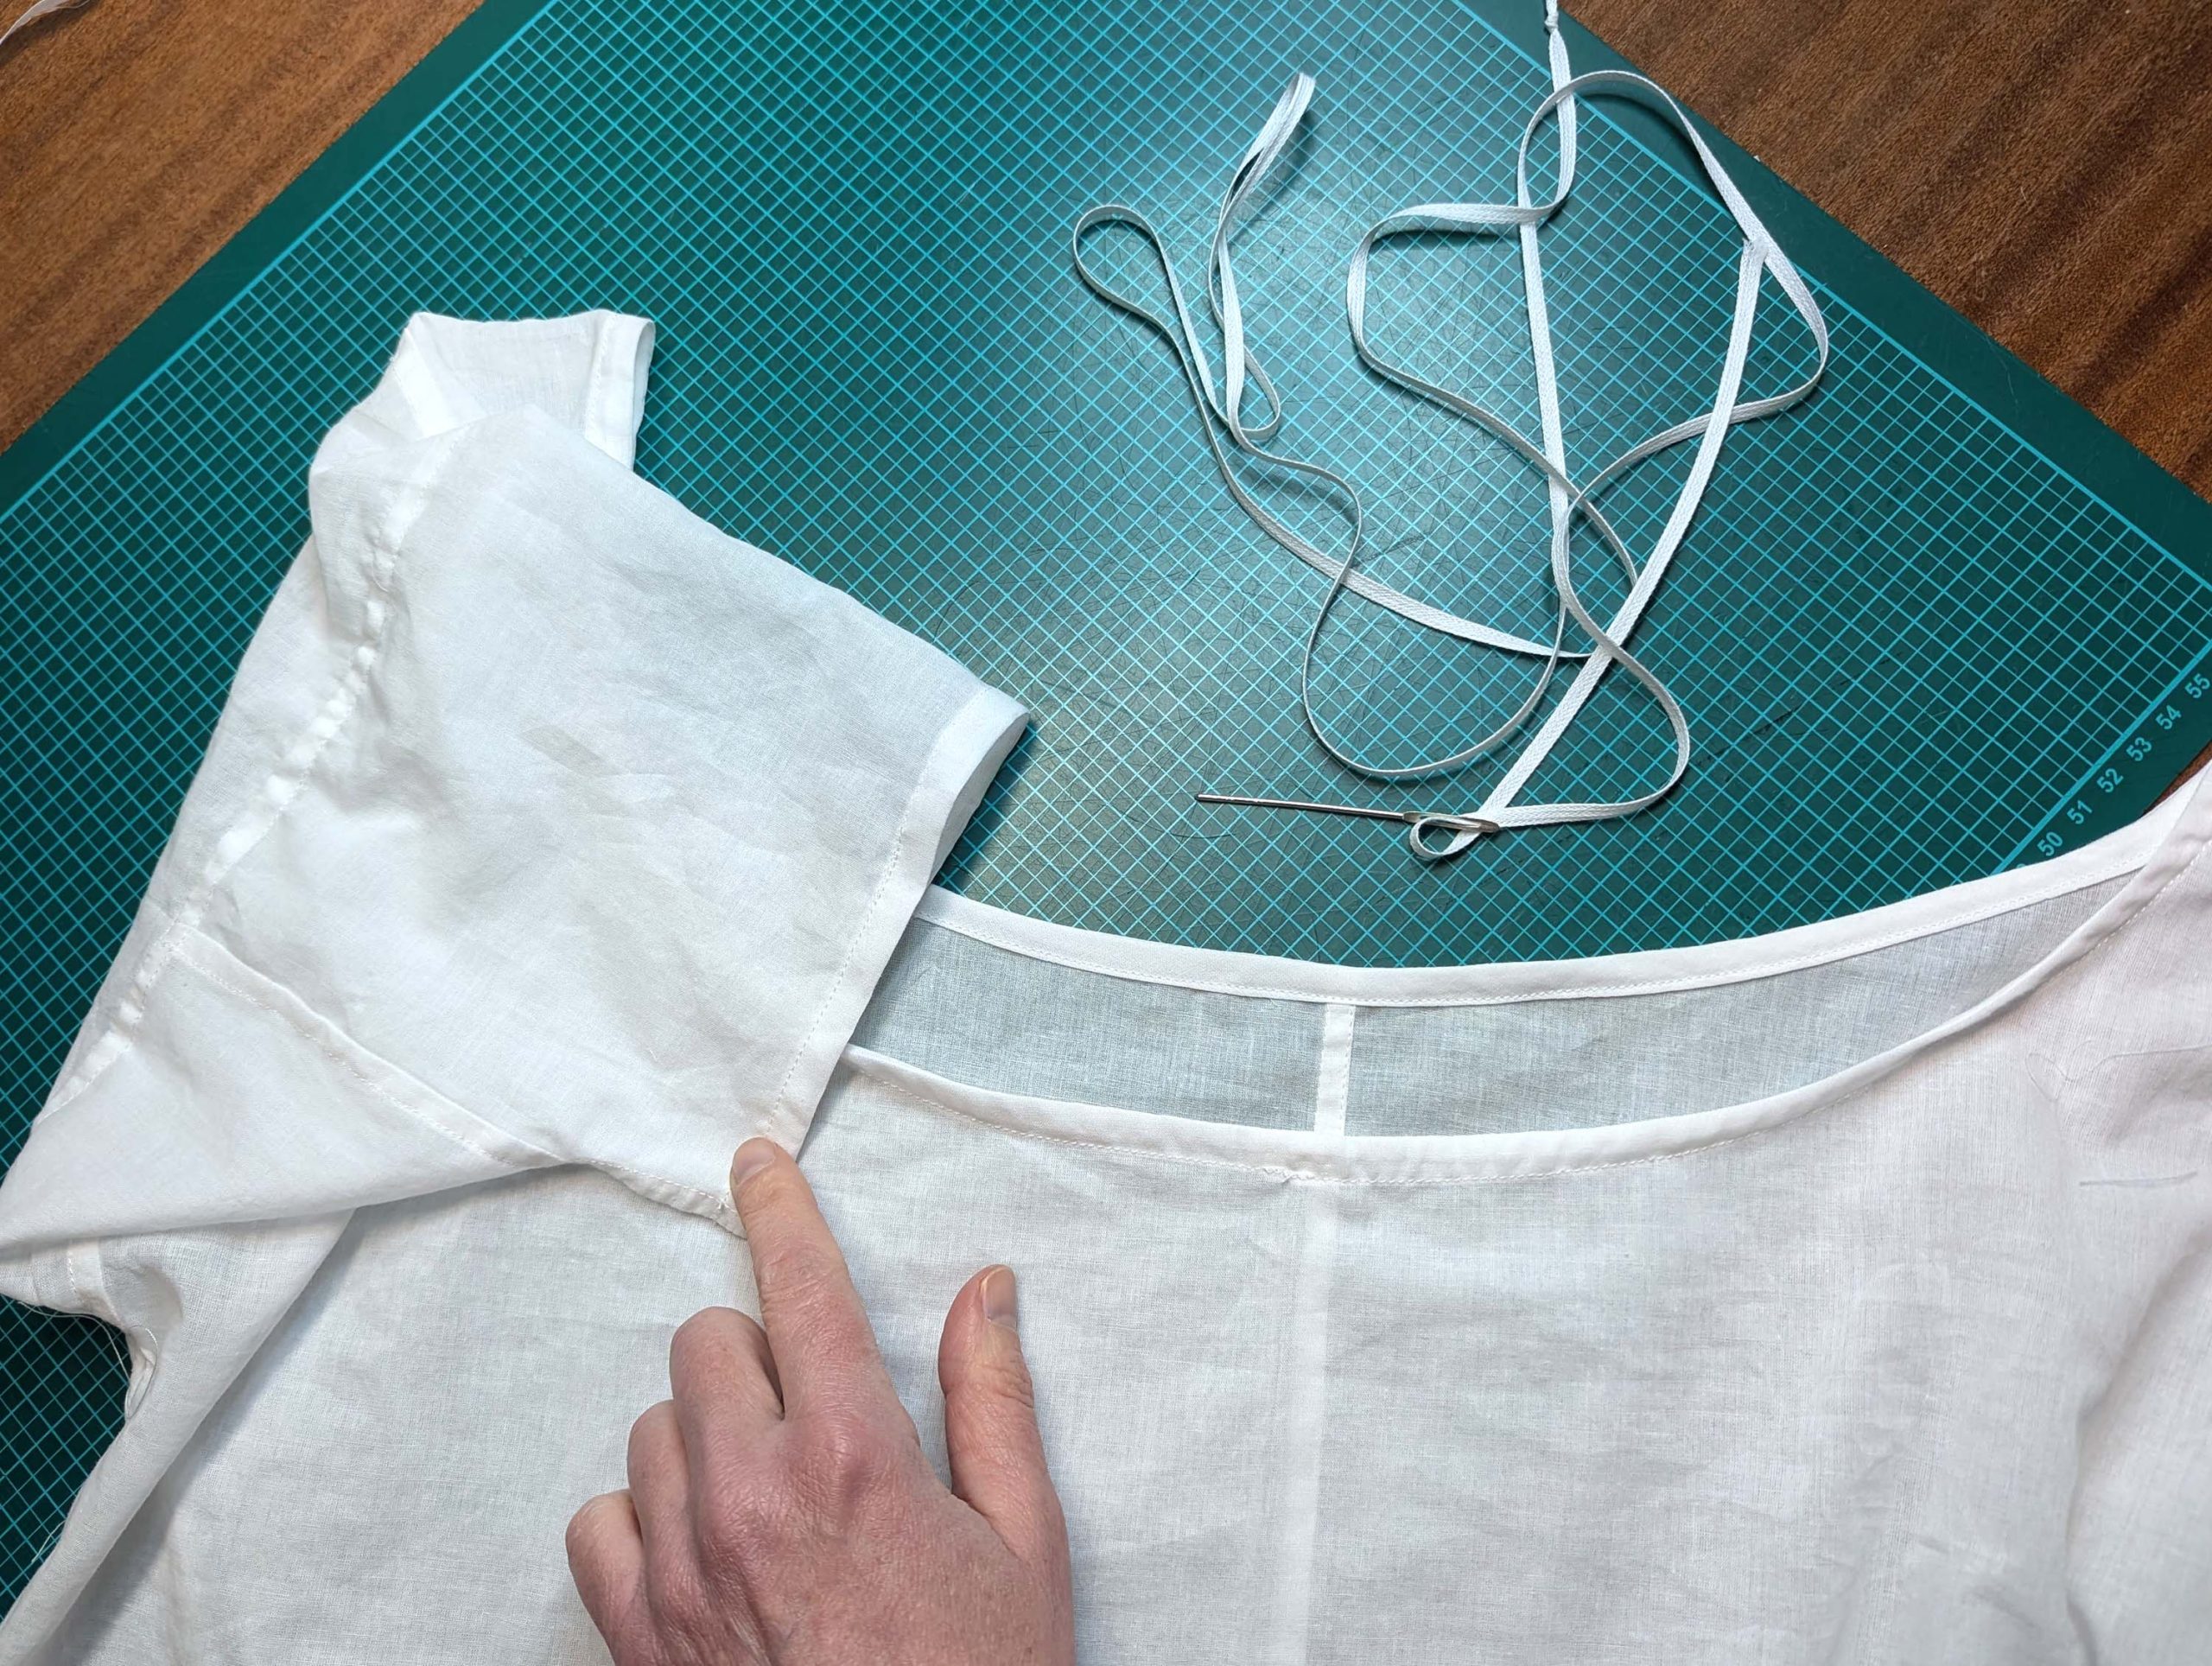
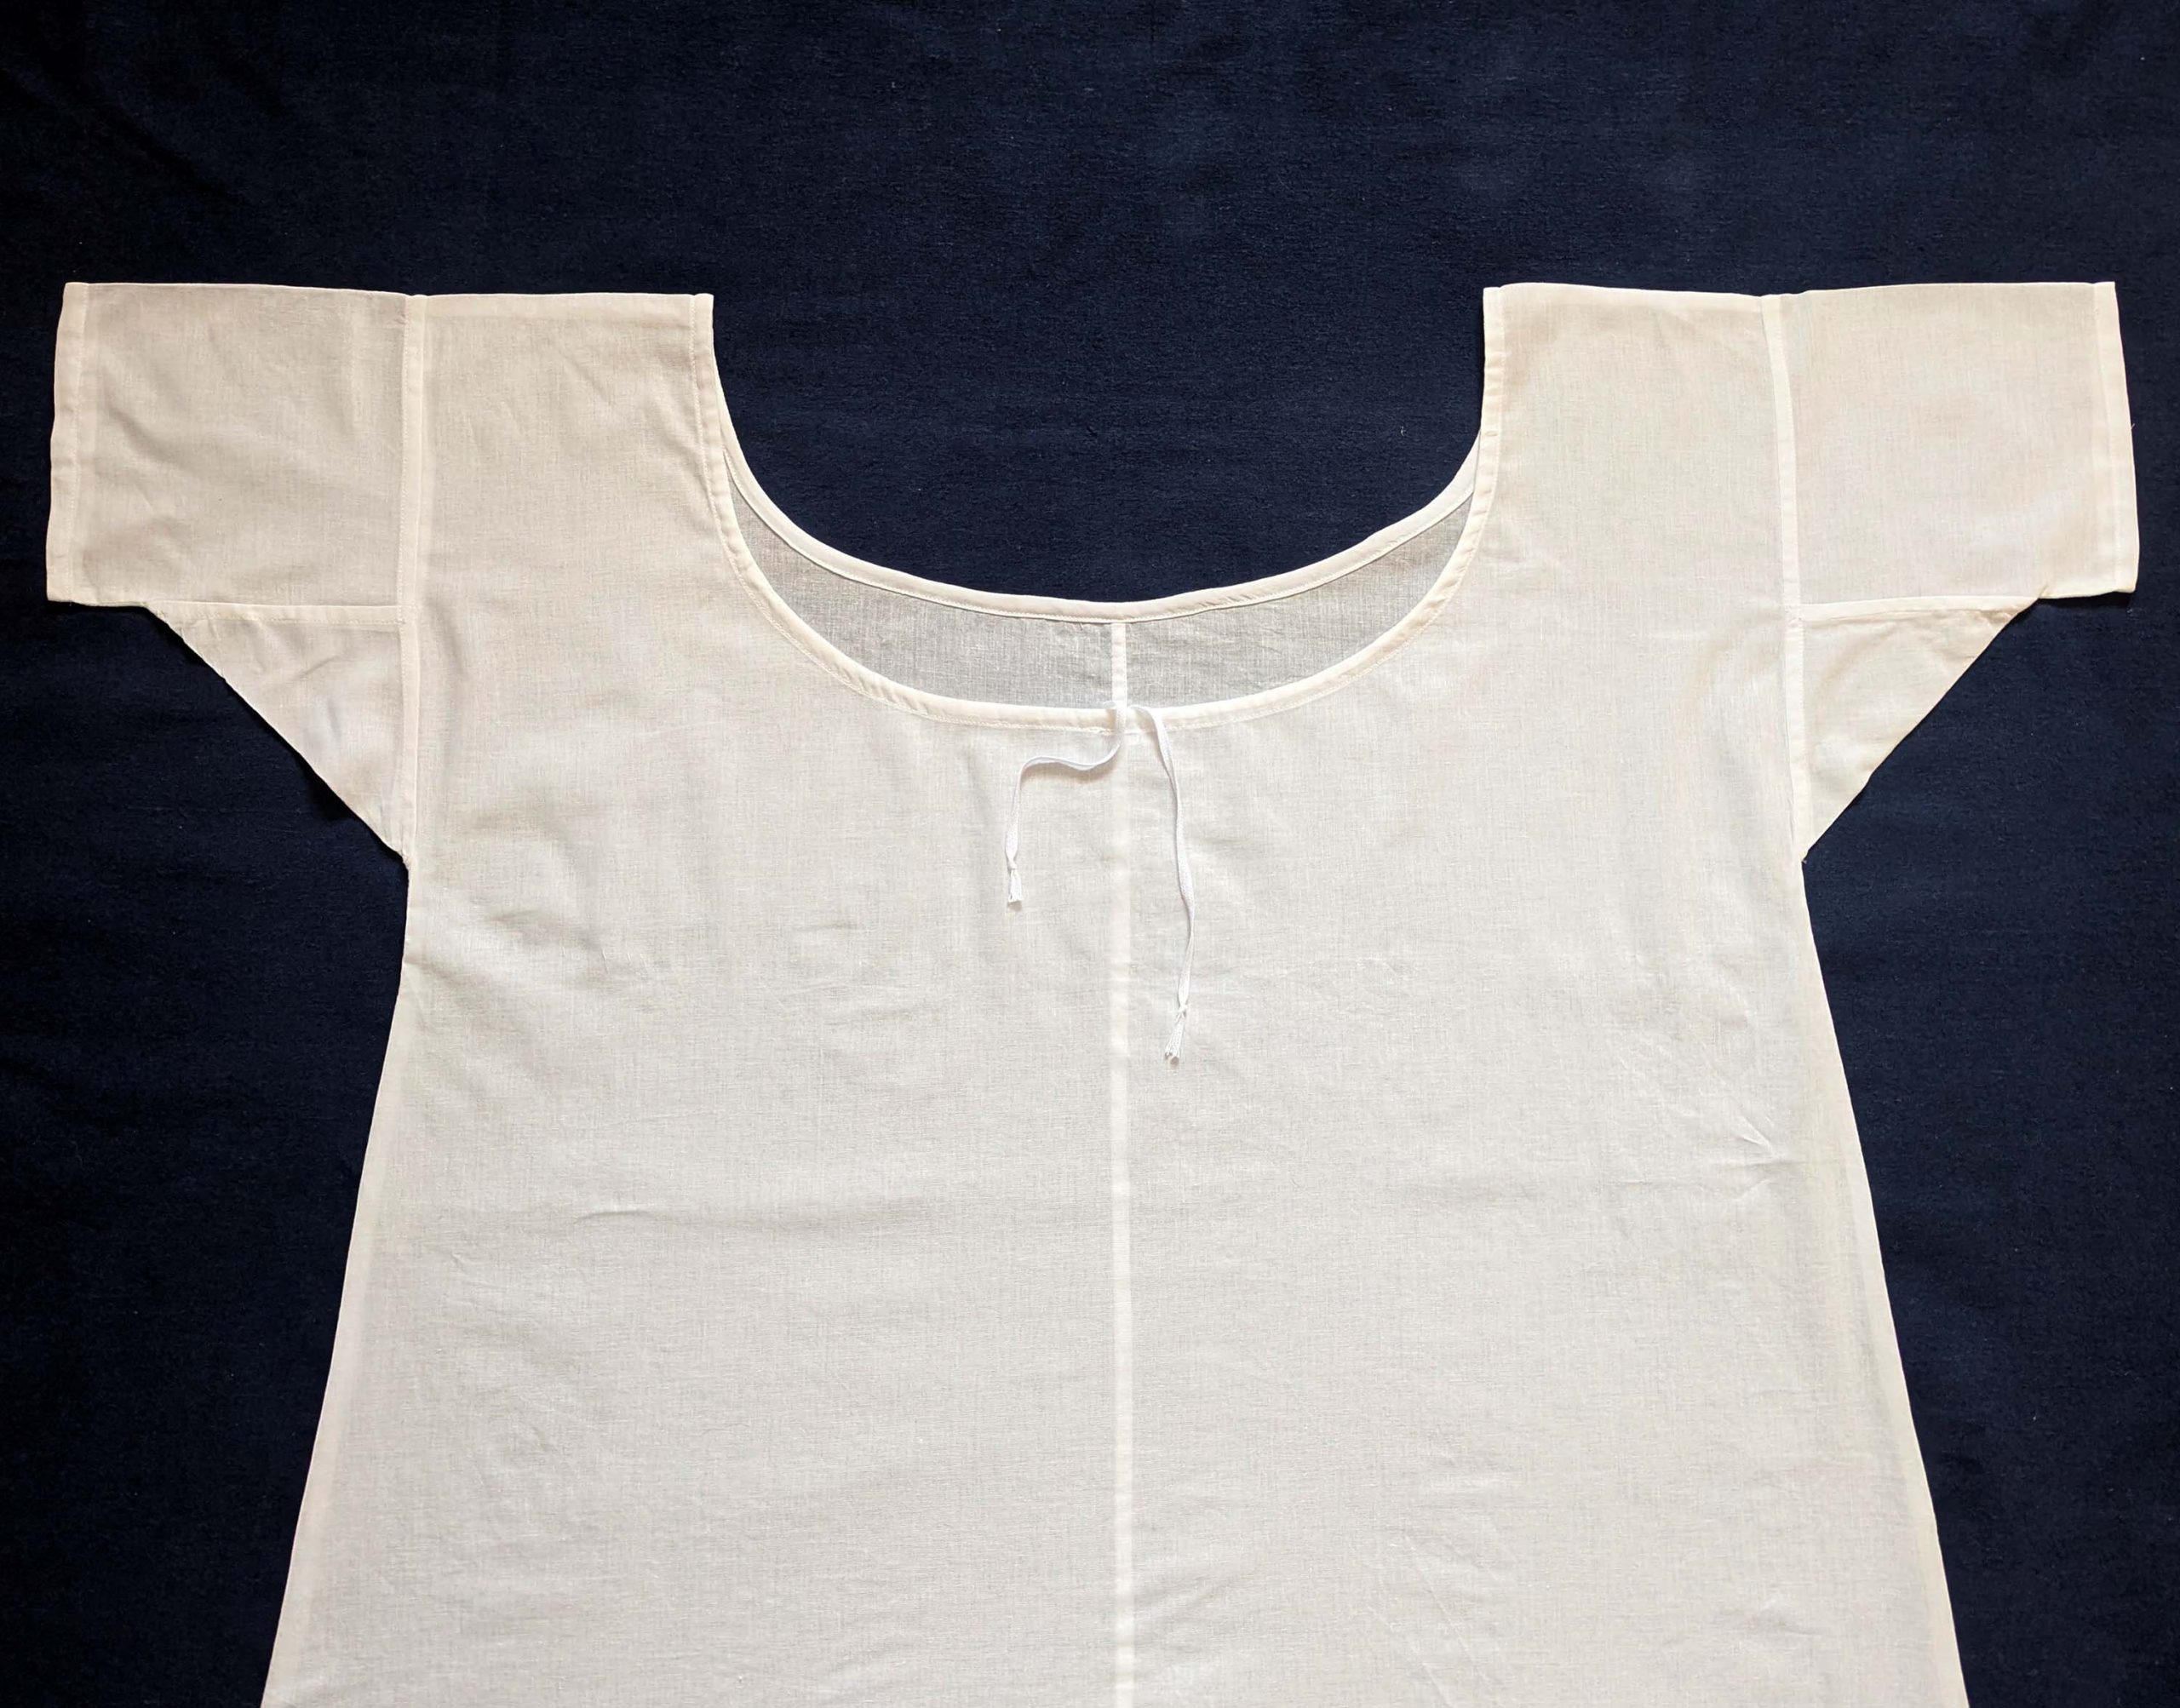
(2) Take the bias tape and line up with the neckline, right sides together. Start and stop at the center front, turning in a narrow seam allowance, and leaving an opening for the drawstrings there.Sew, trim back the seam allowance, and clip at the curves, optionally understitch. Fold the bias tape with the wrong sides matching against the chemise, rolling the seamline slightly out of sight.Turn in the loose edge of the bias tape, creating a narrow tunnel. Fell or edge stitch in place. Finish the armholes with bias tape as well, when sewing the chemise without sleeves.
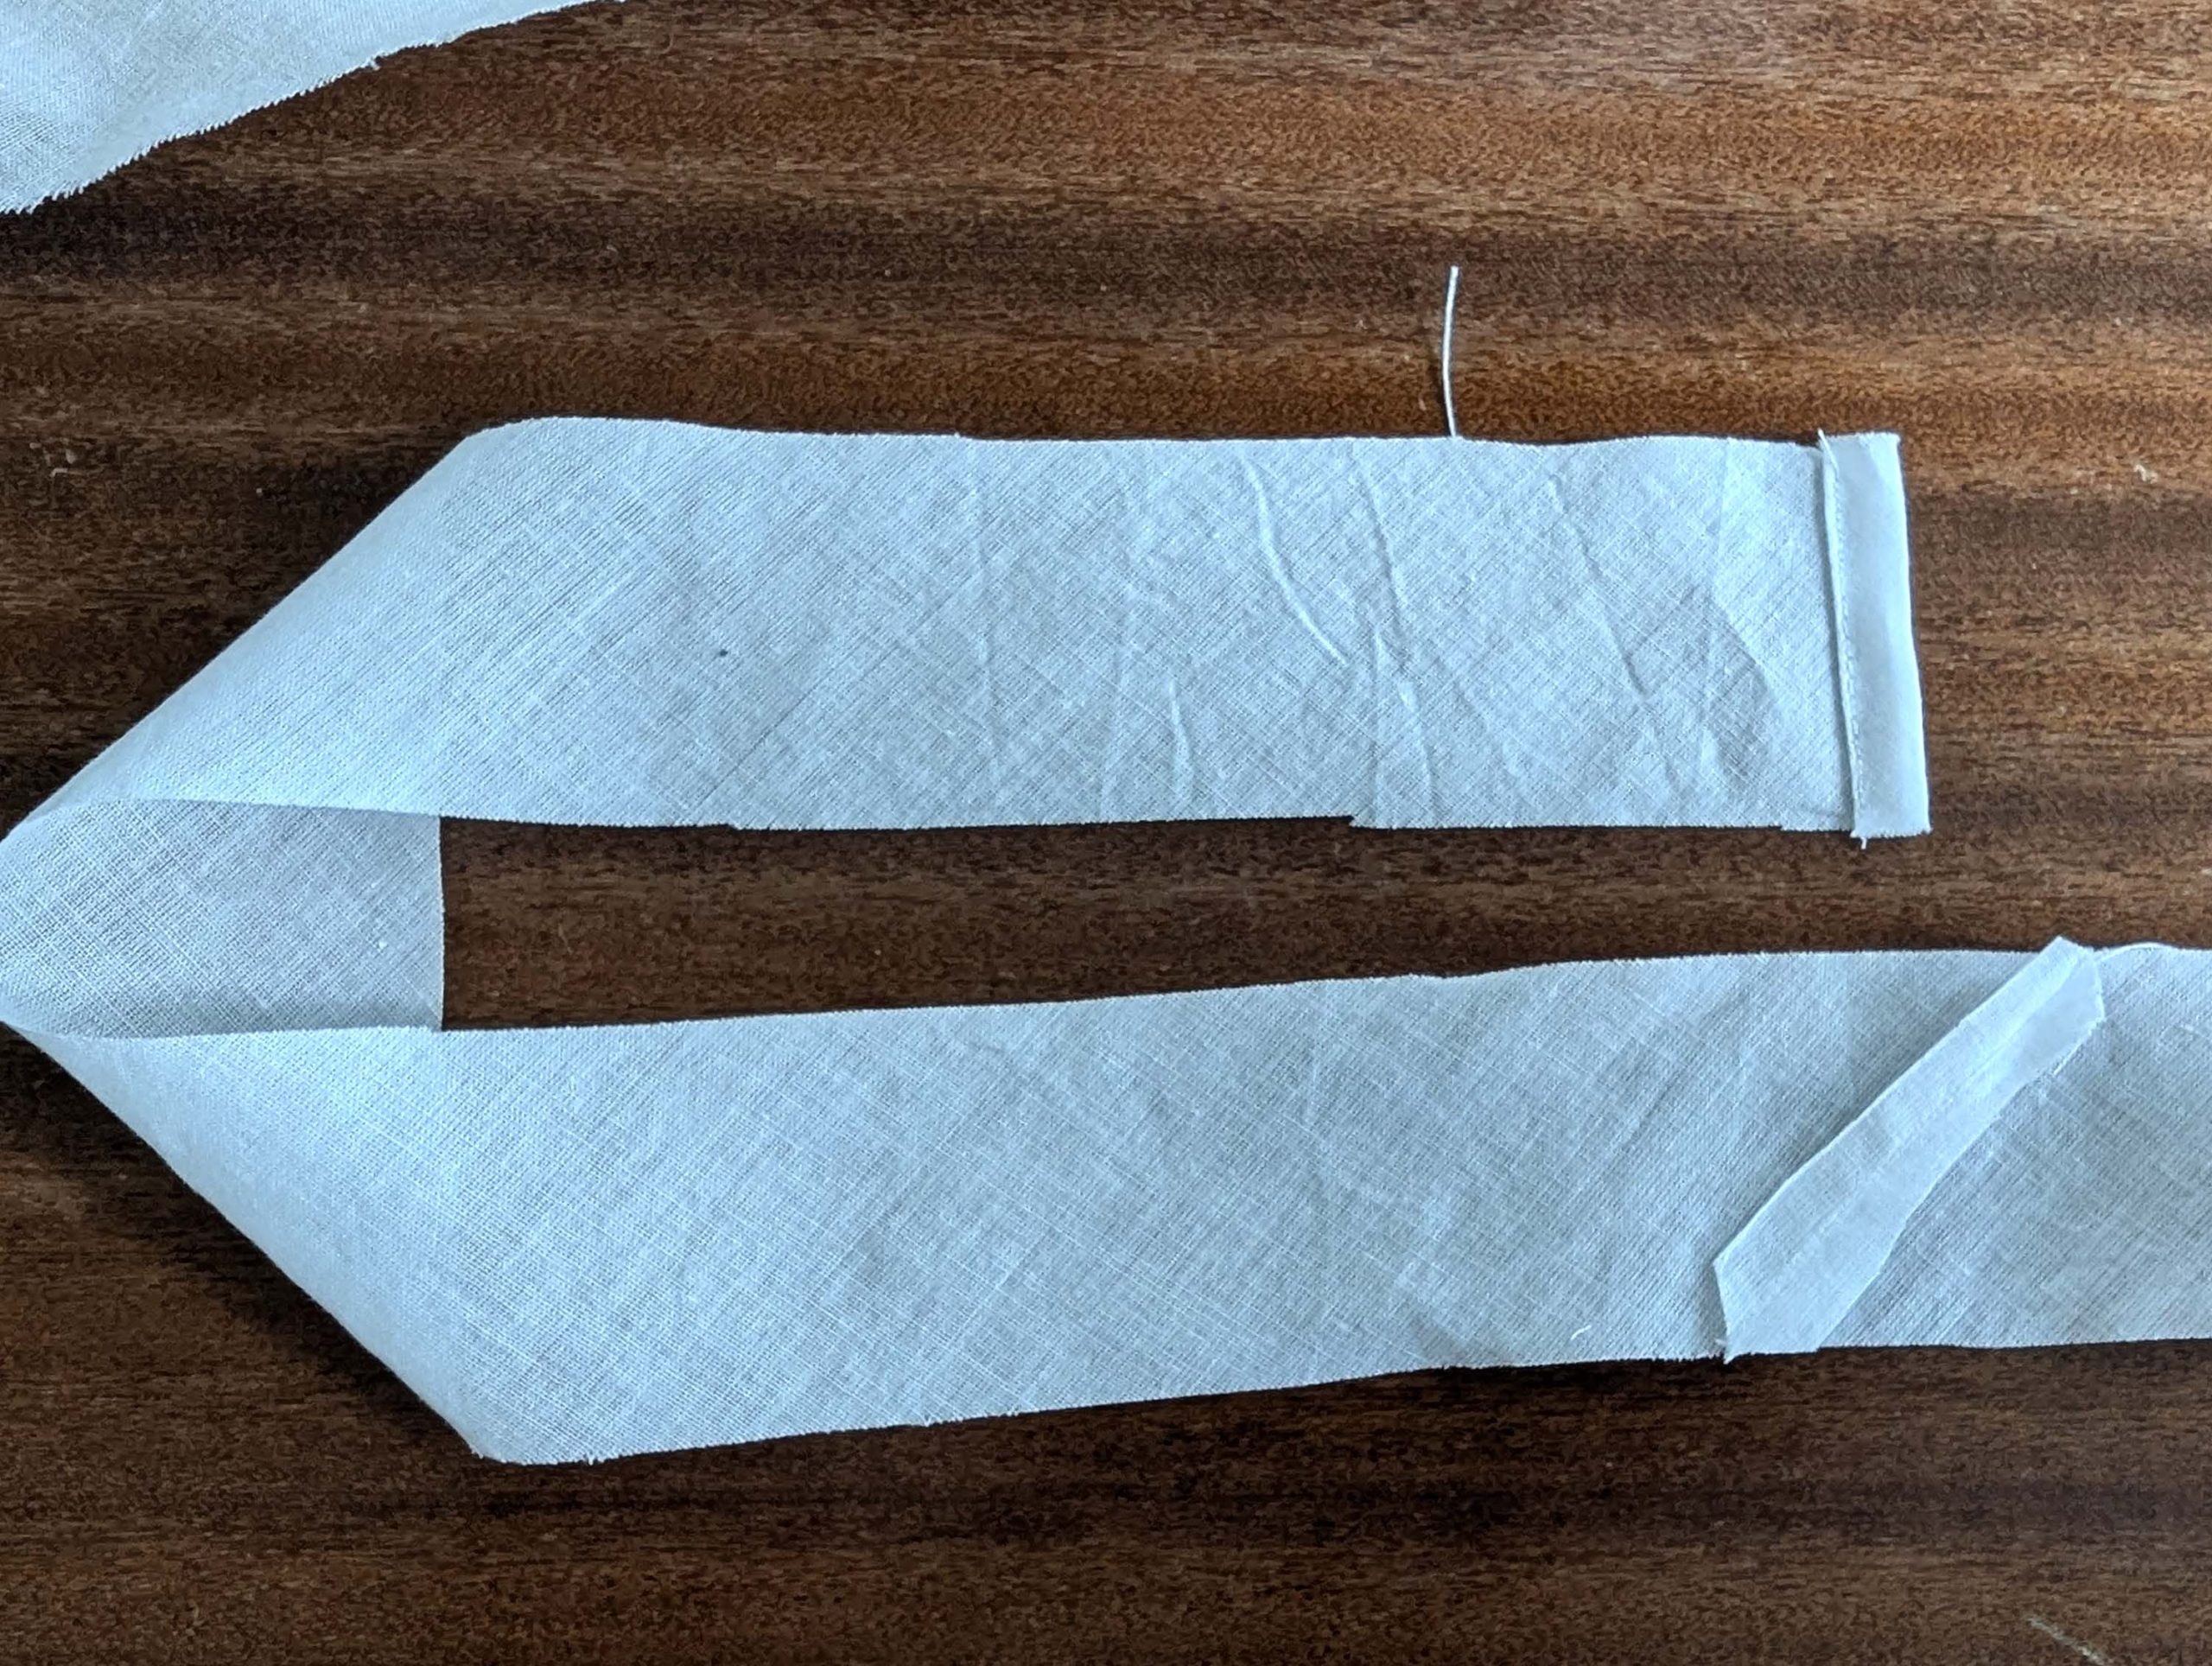
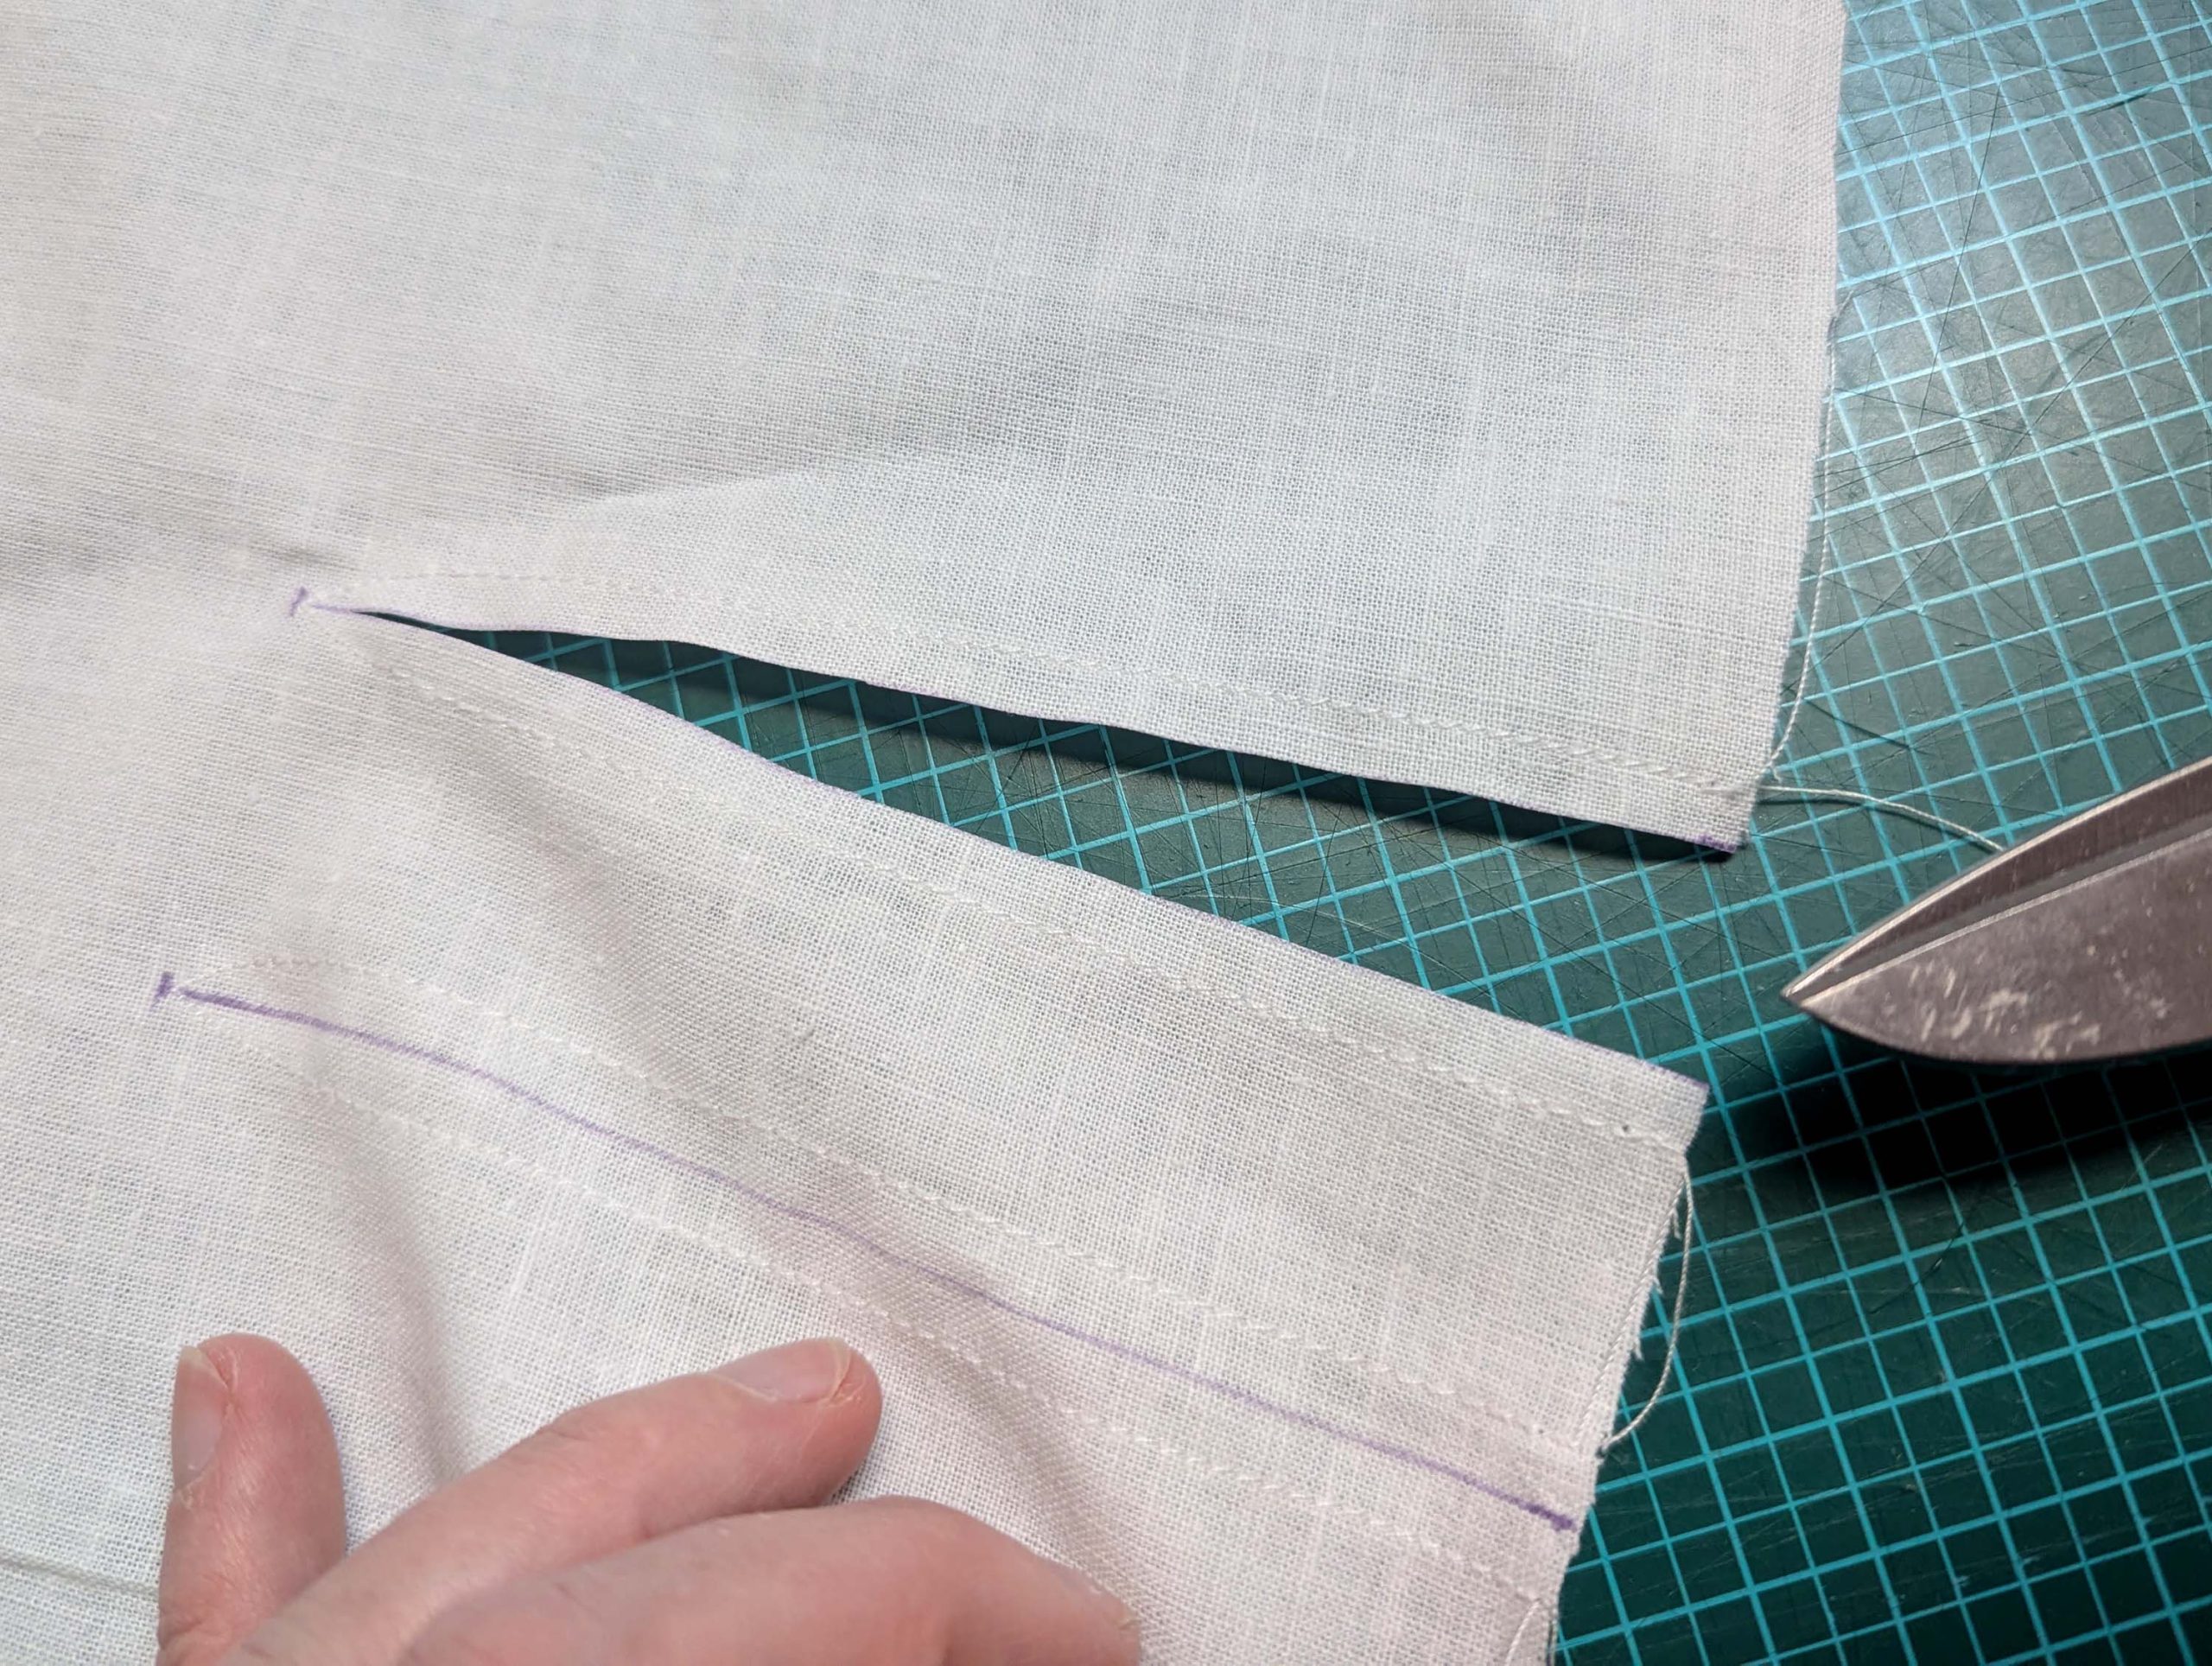
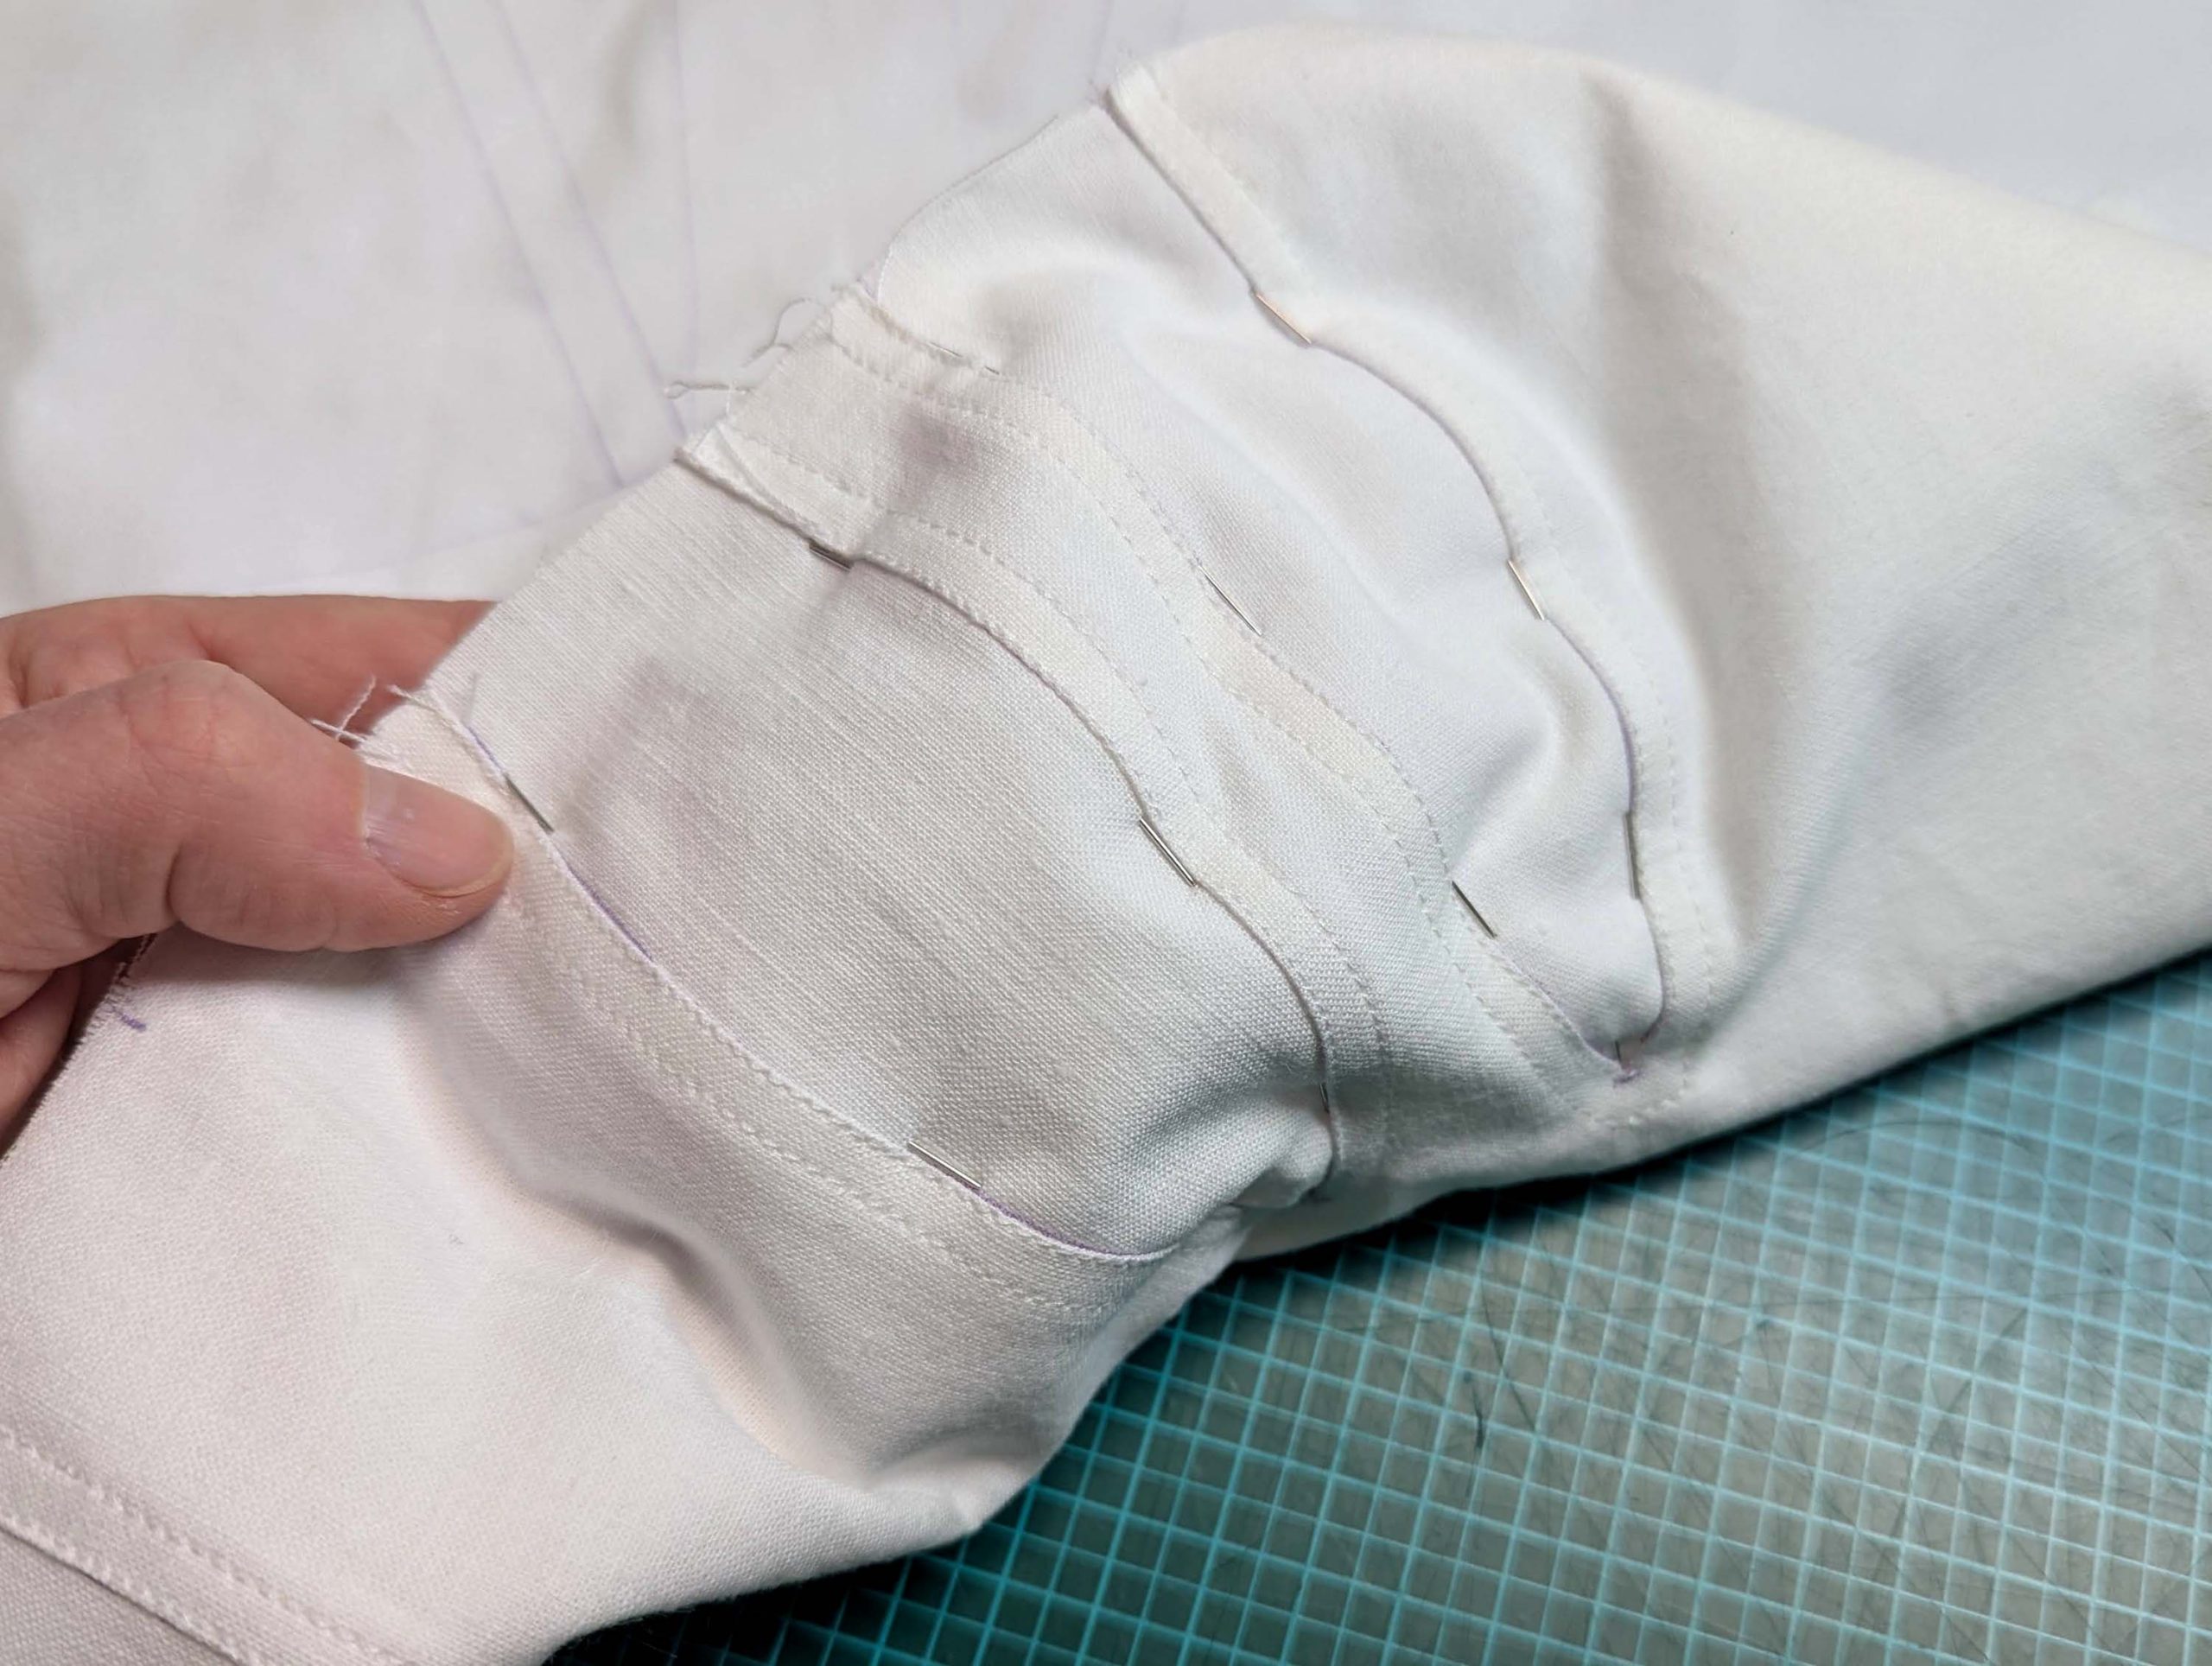
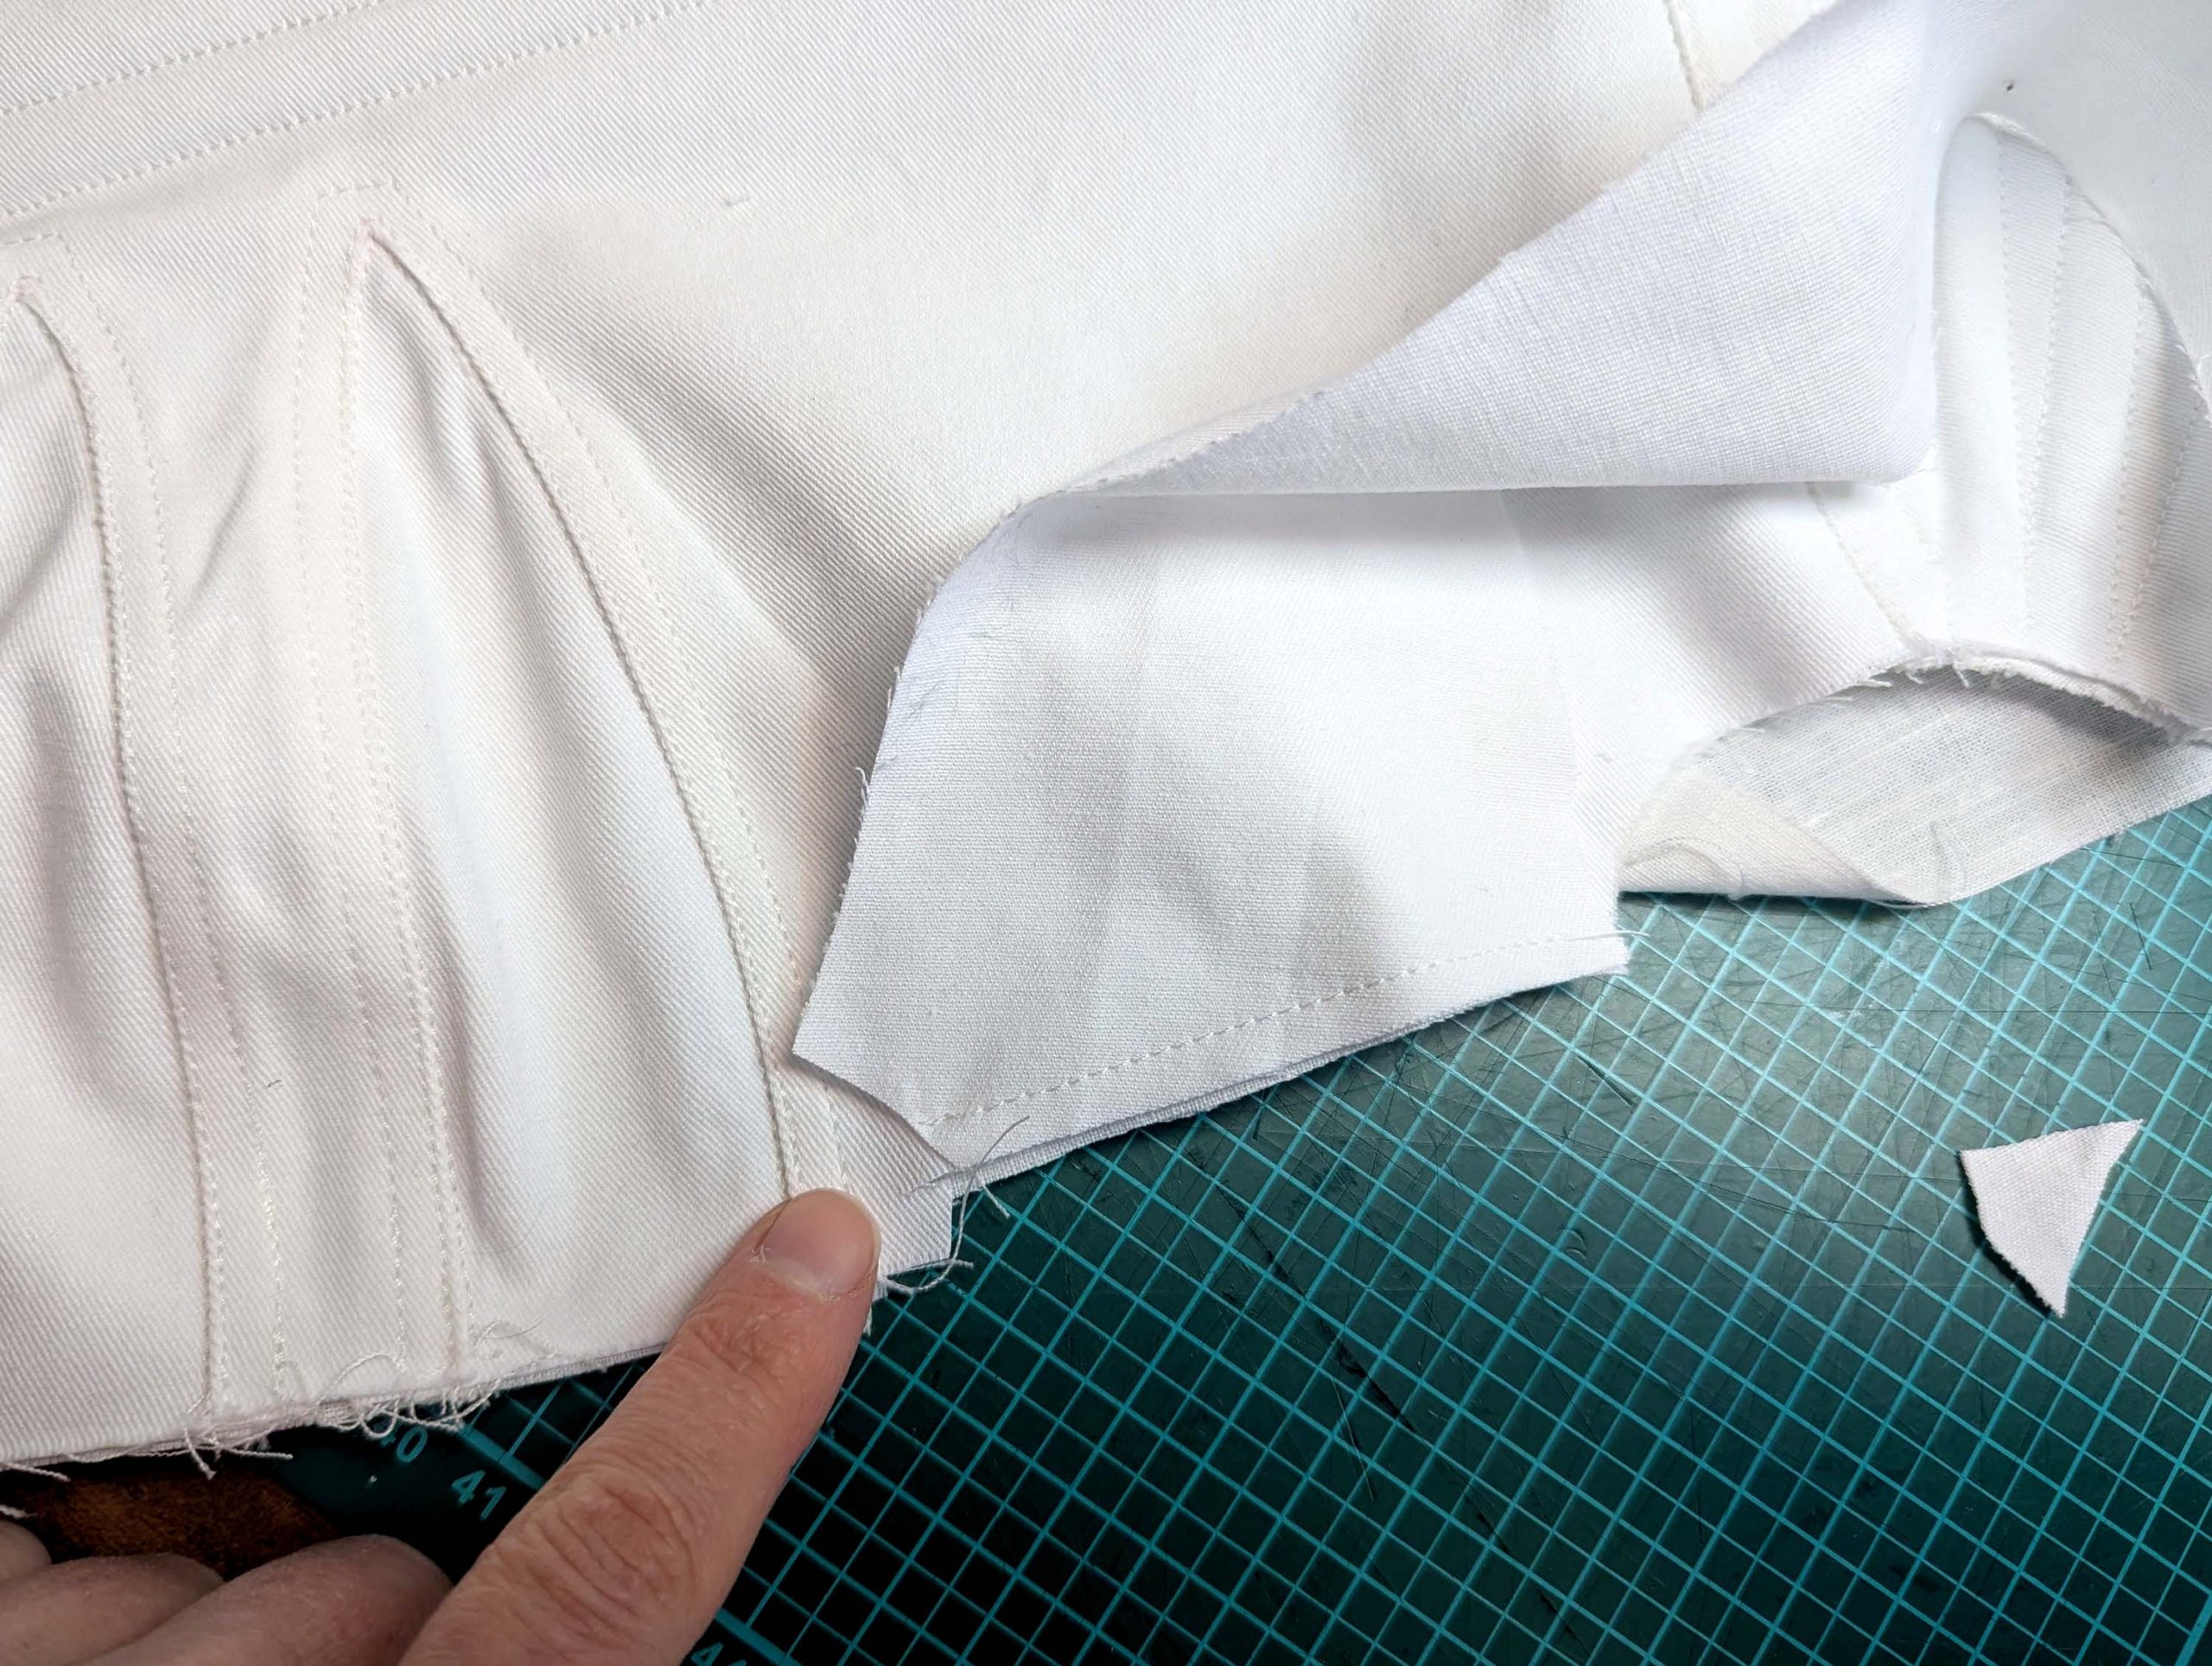
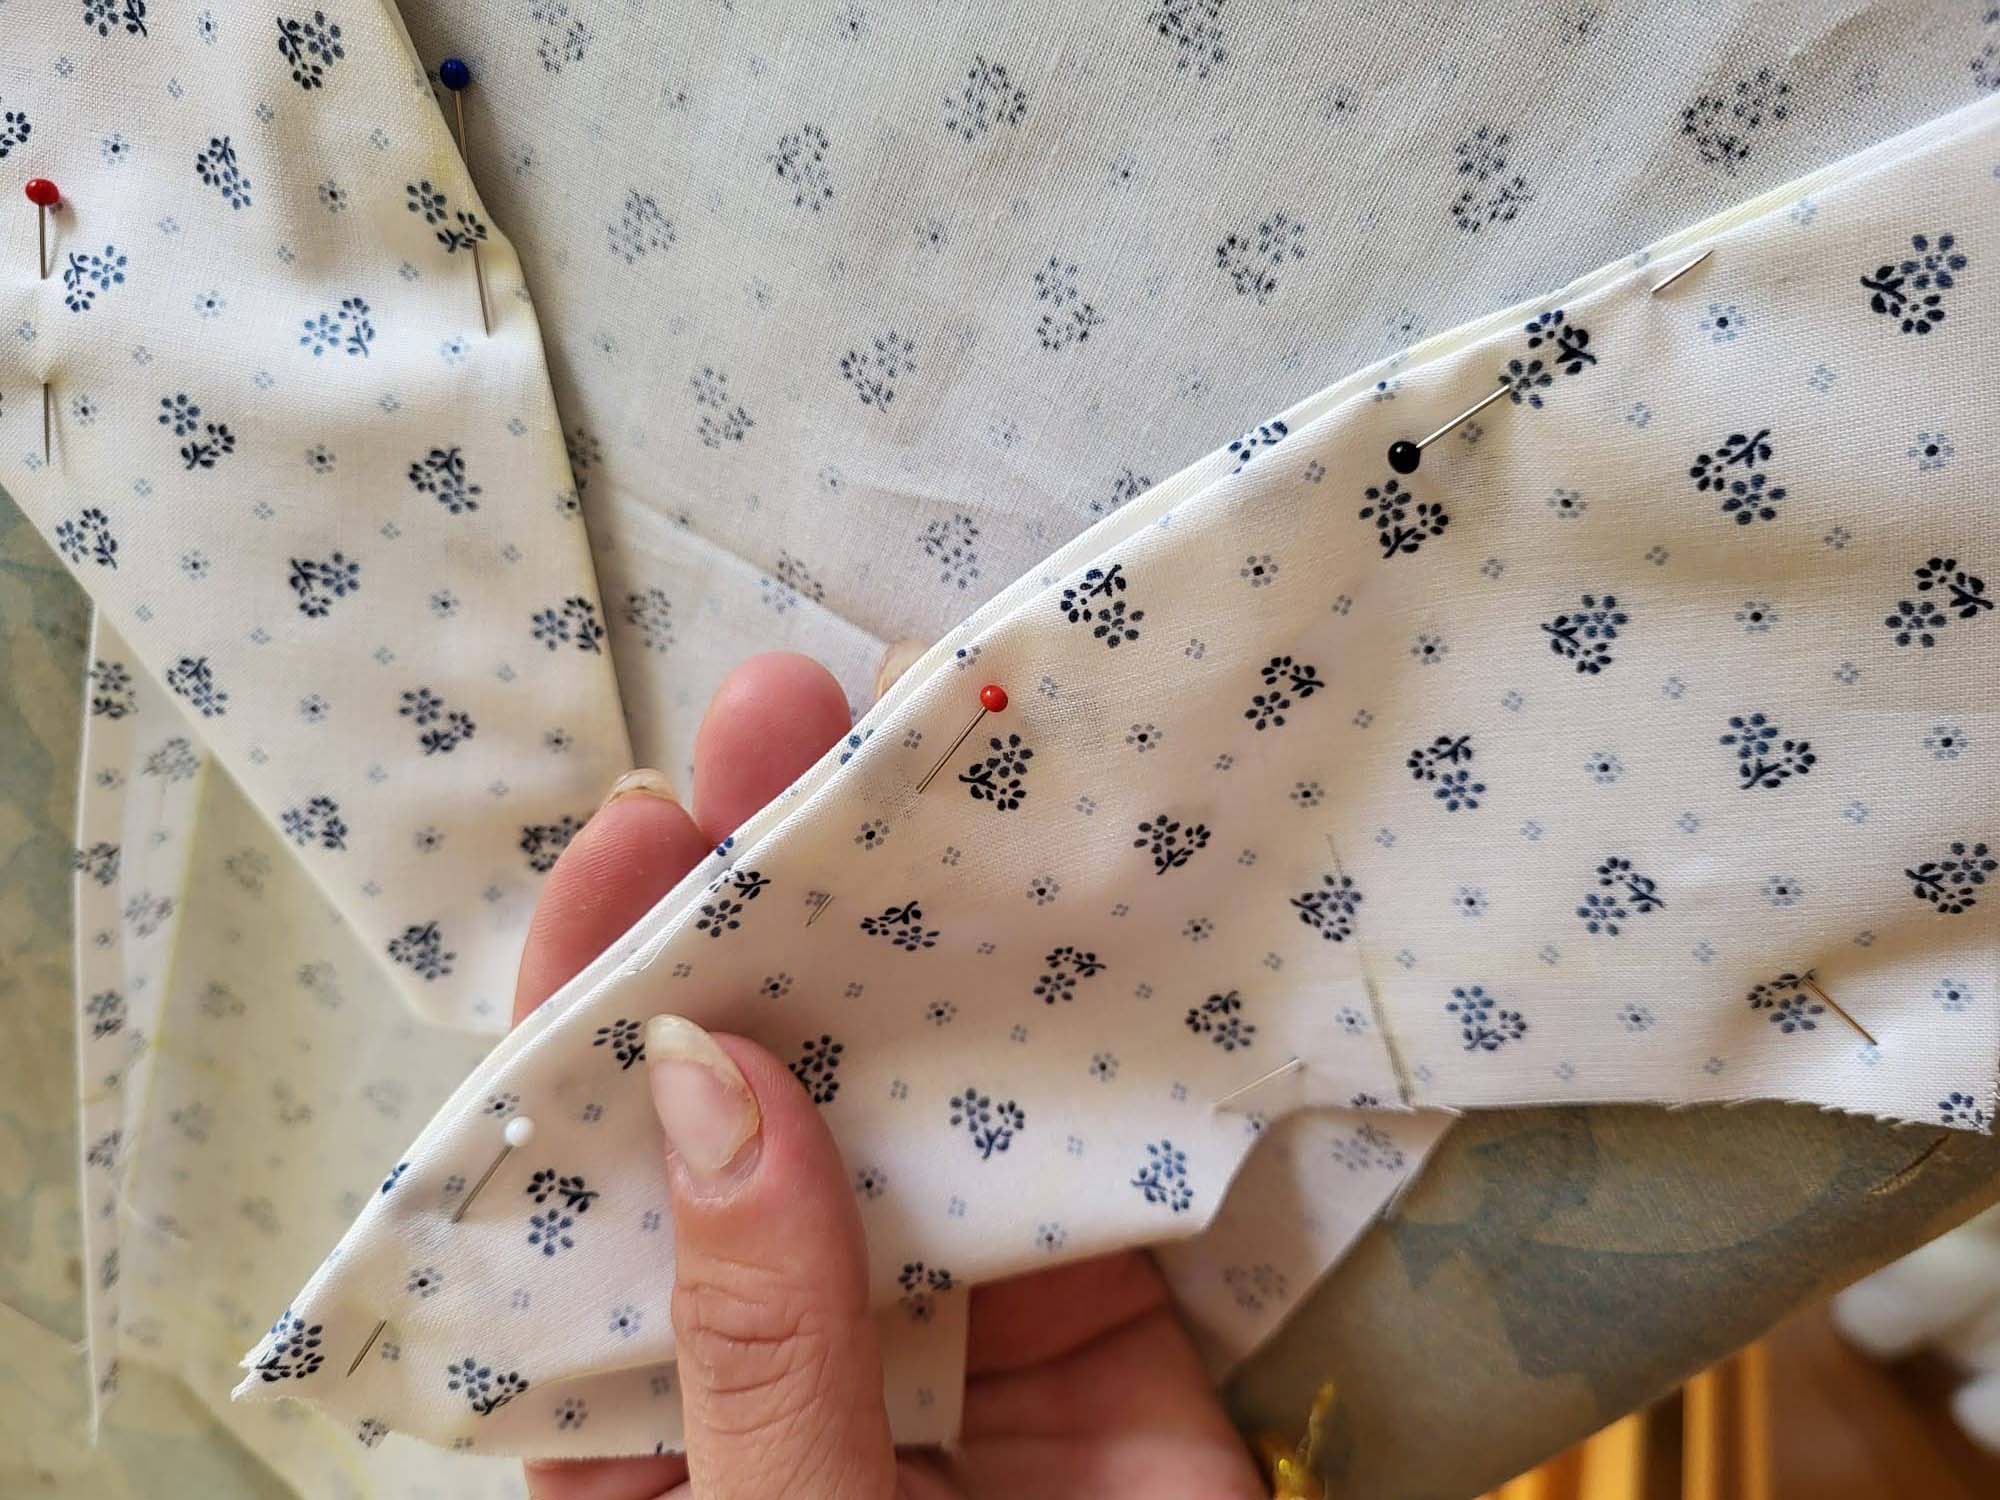
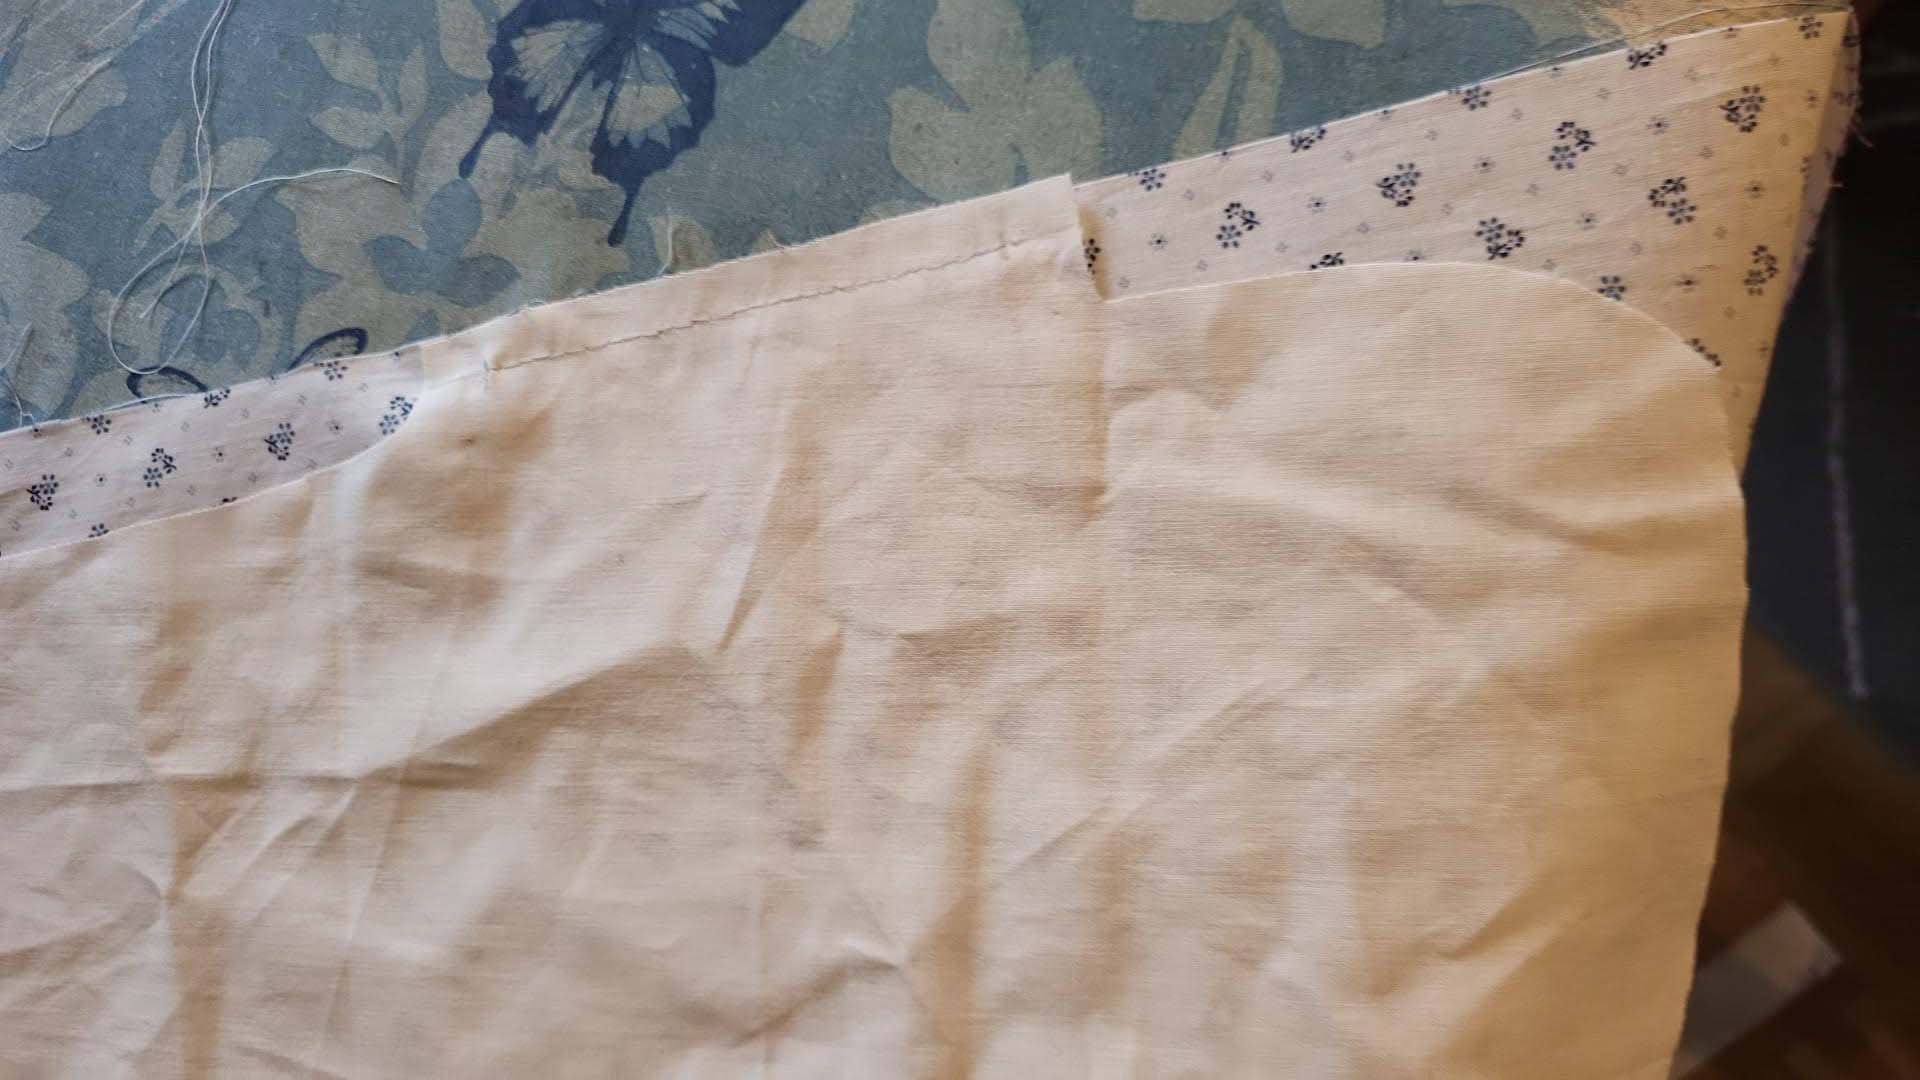
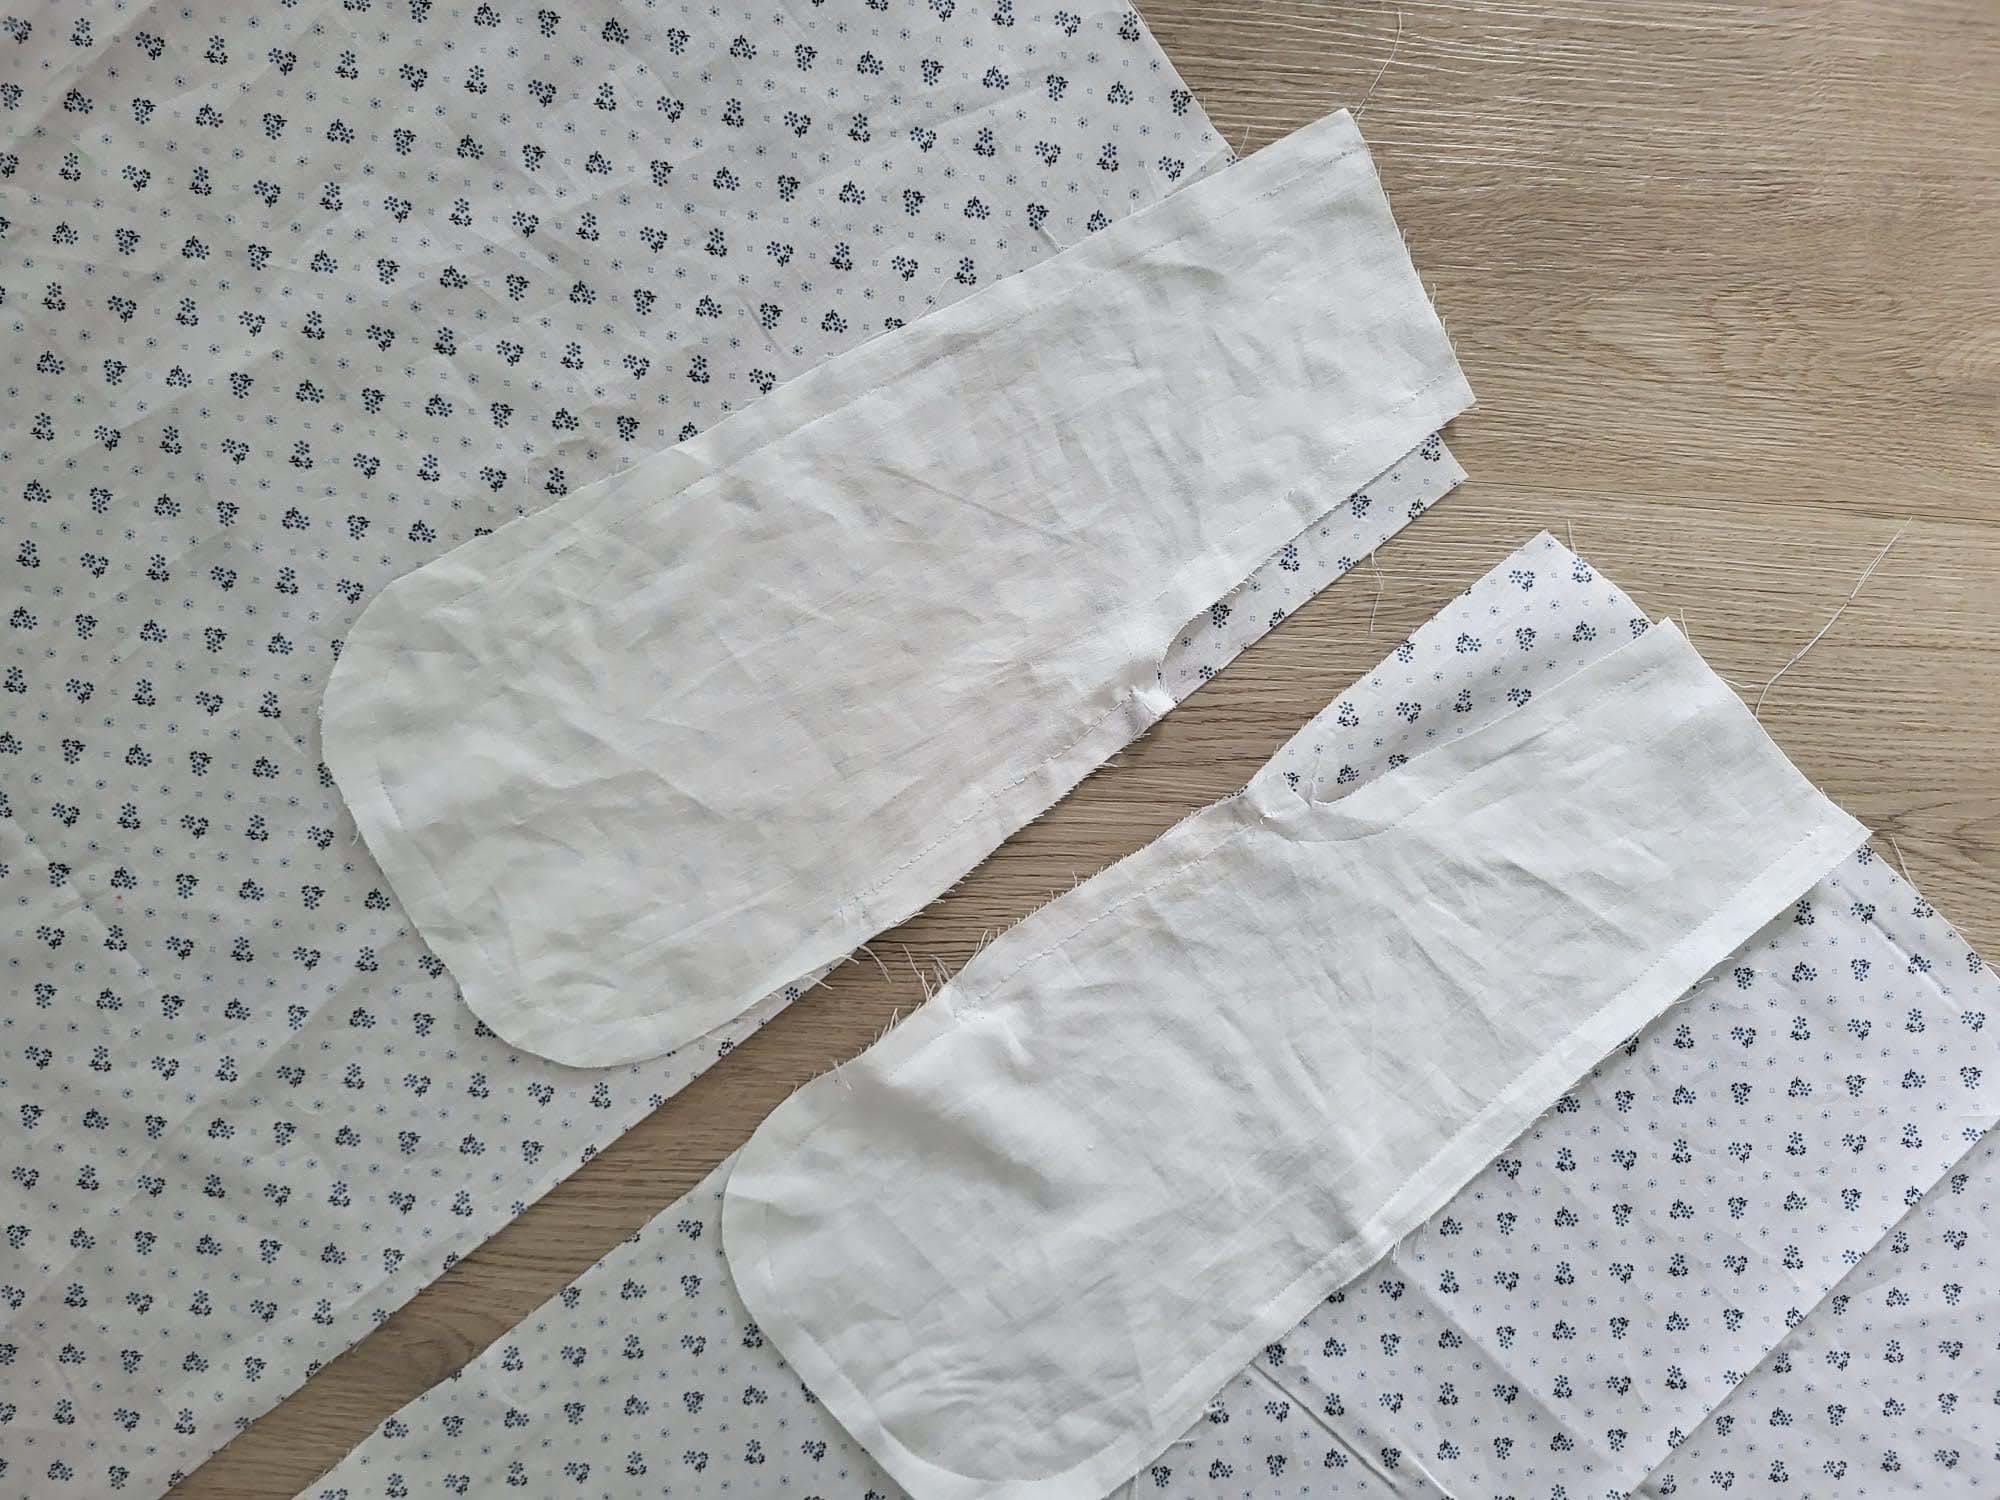
(3) Sew the sleeves to the bodice, right sides together, start and stop exactly at the marks. Sew the sleeve and side seams, right sides together, stopping exactly at the marks, leaving an opening for the gussets.
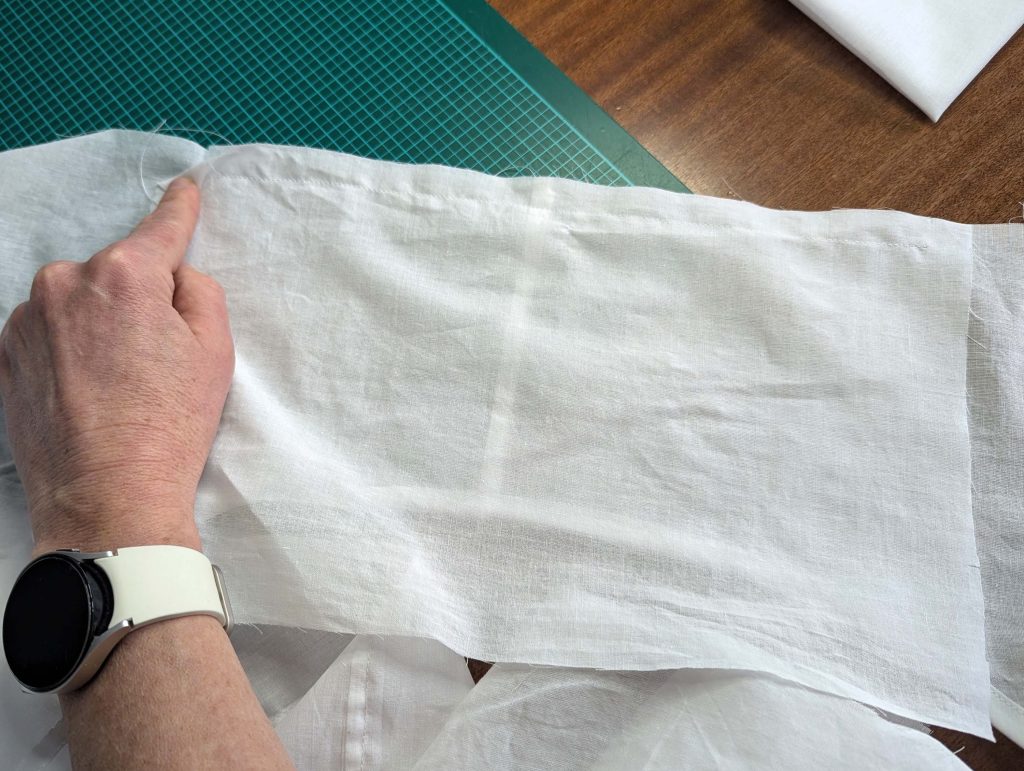
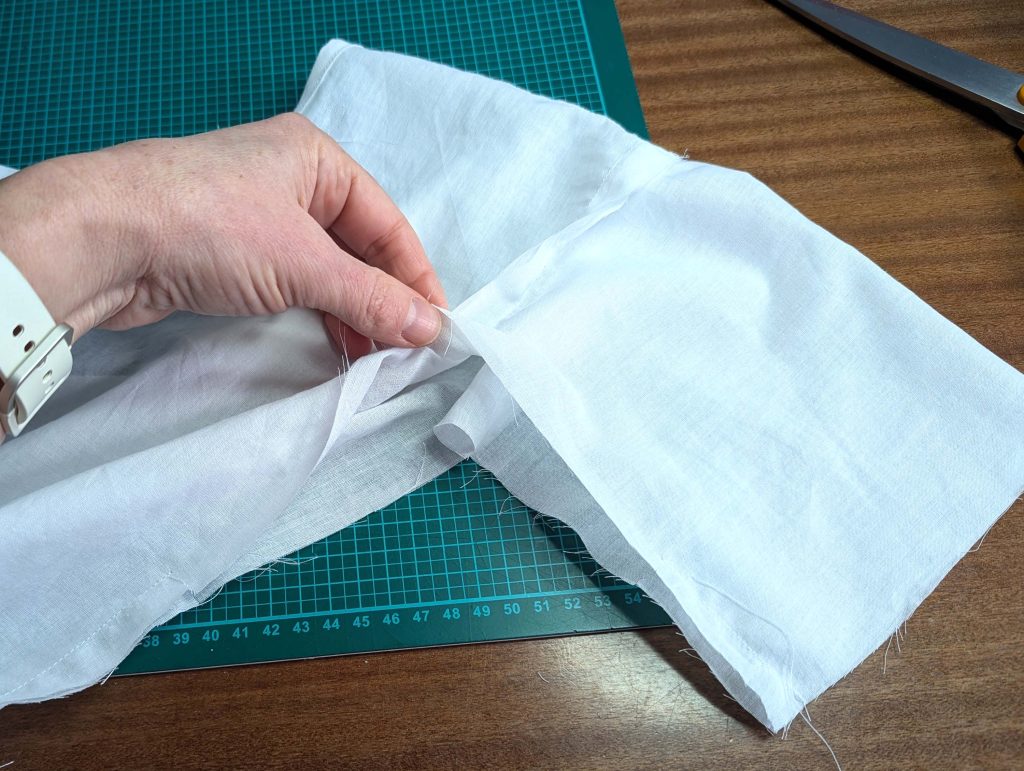
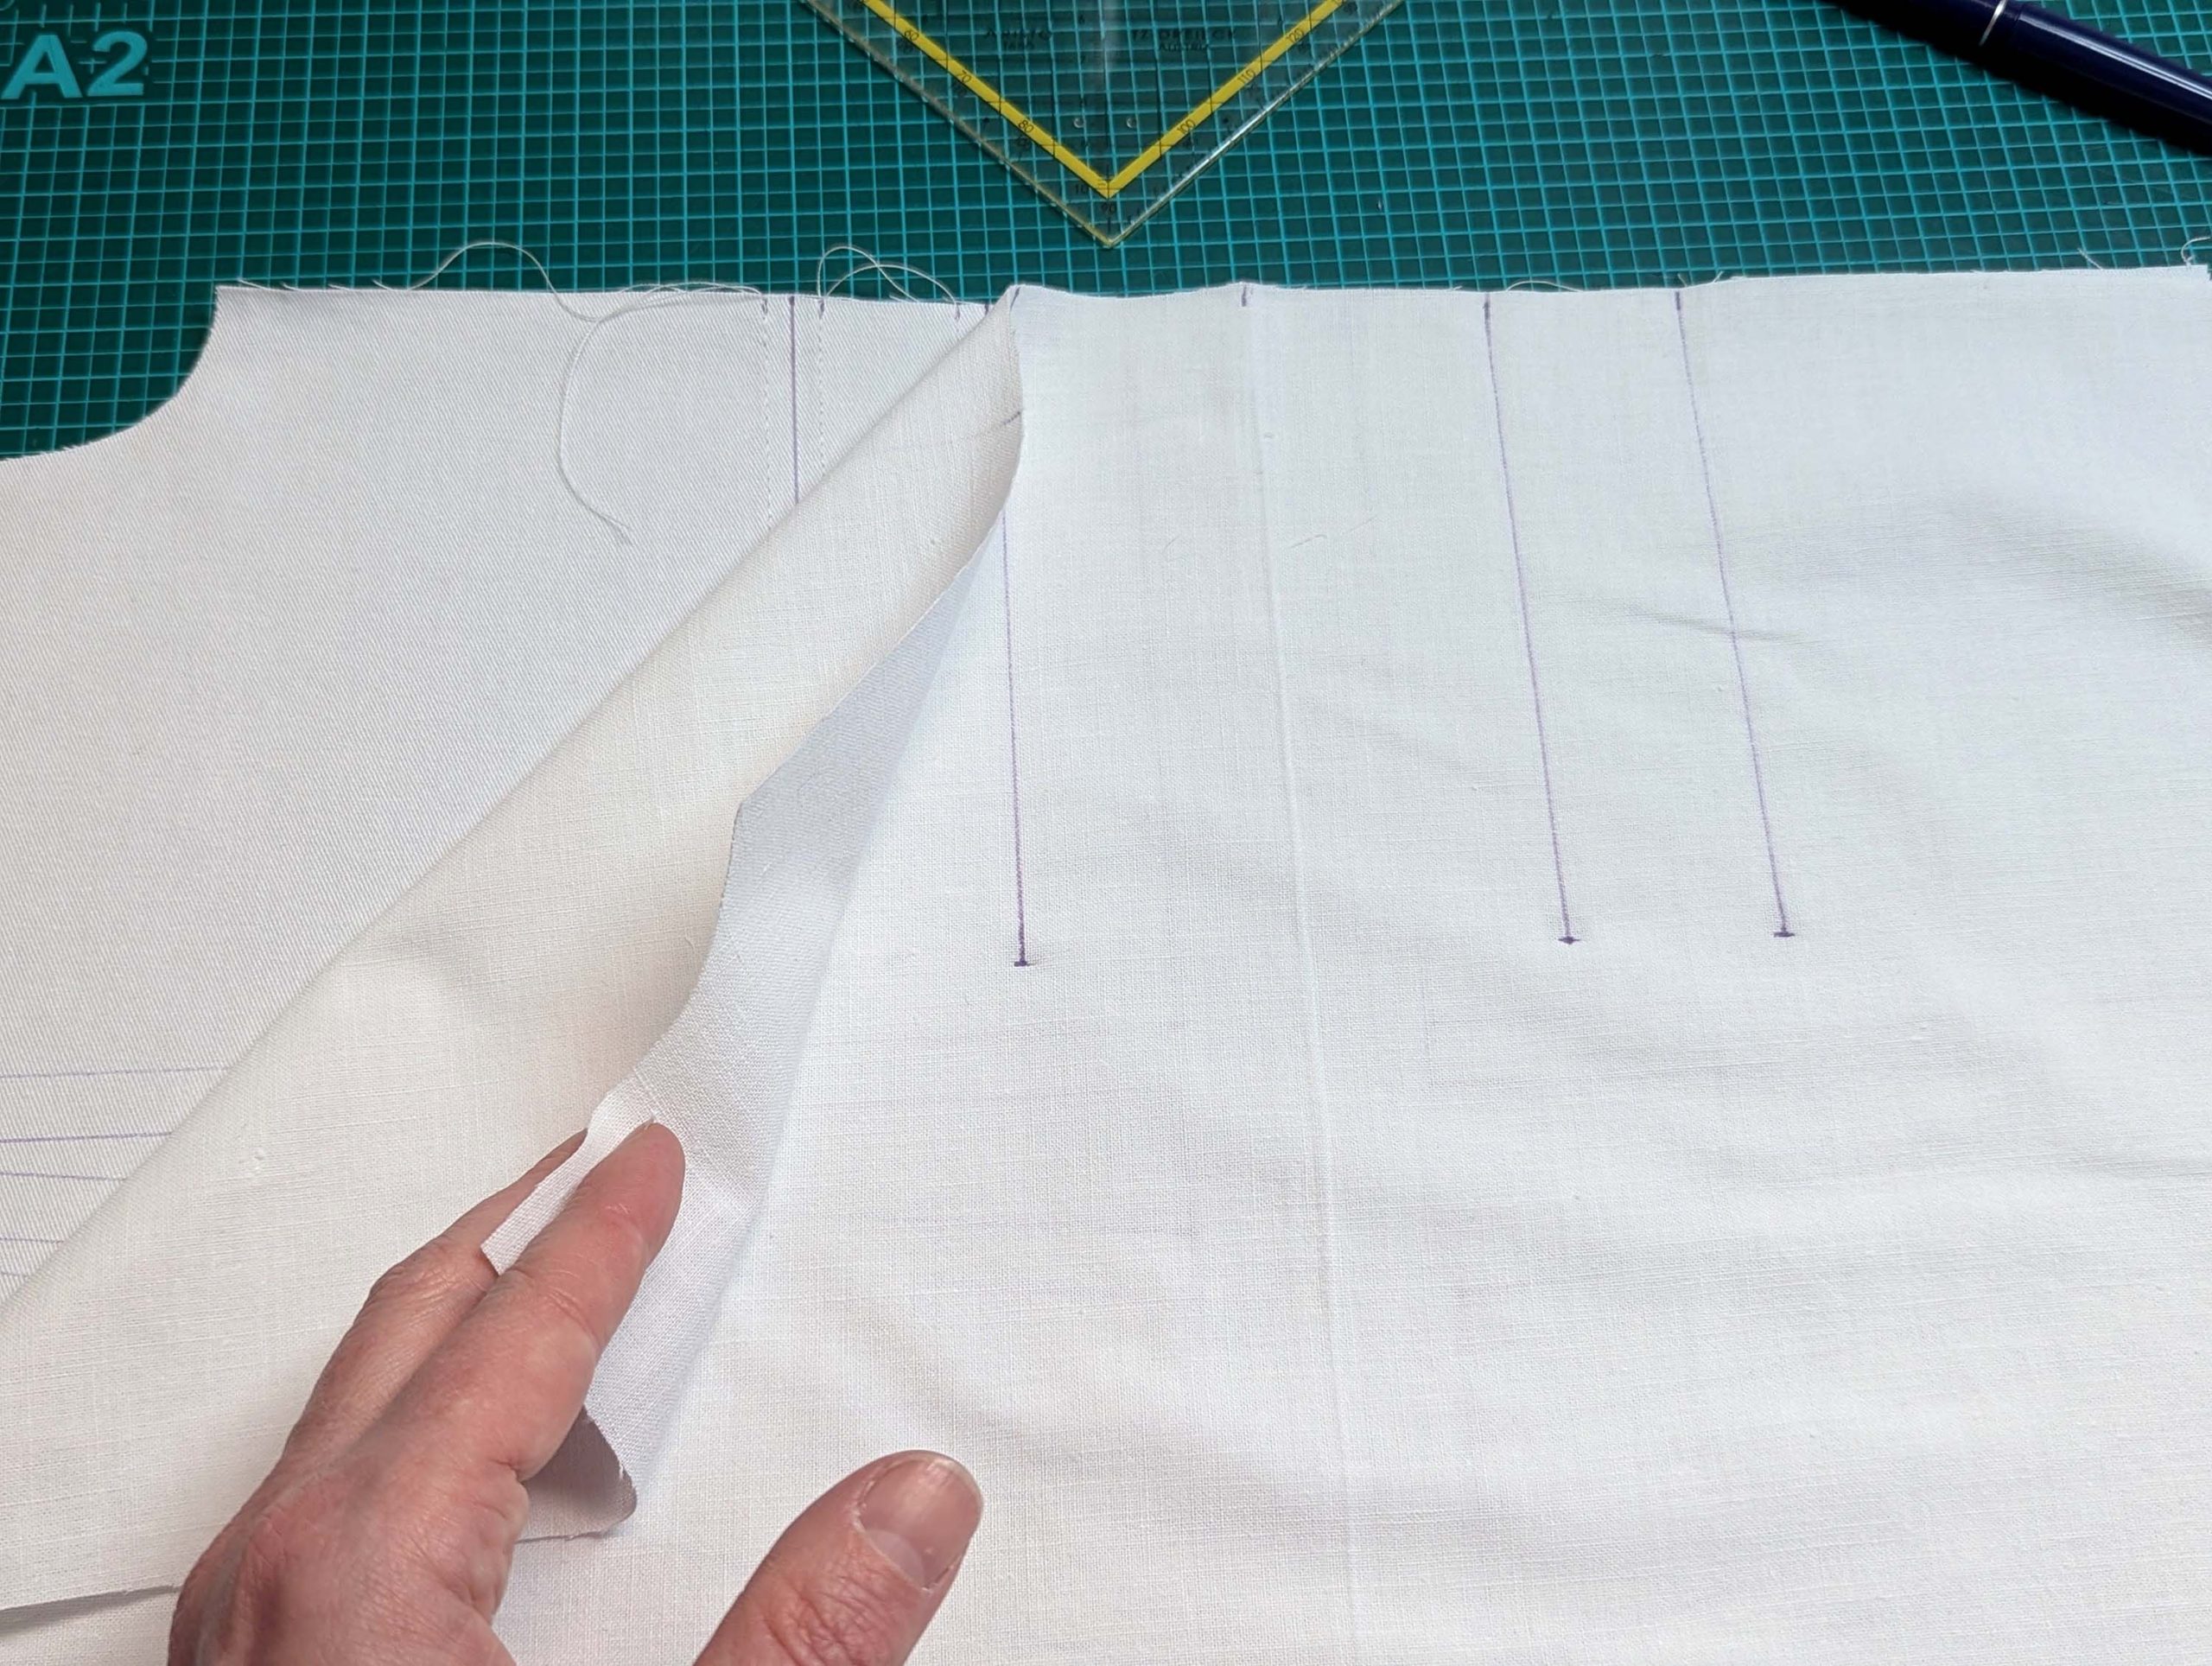
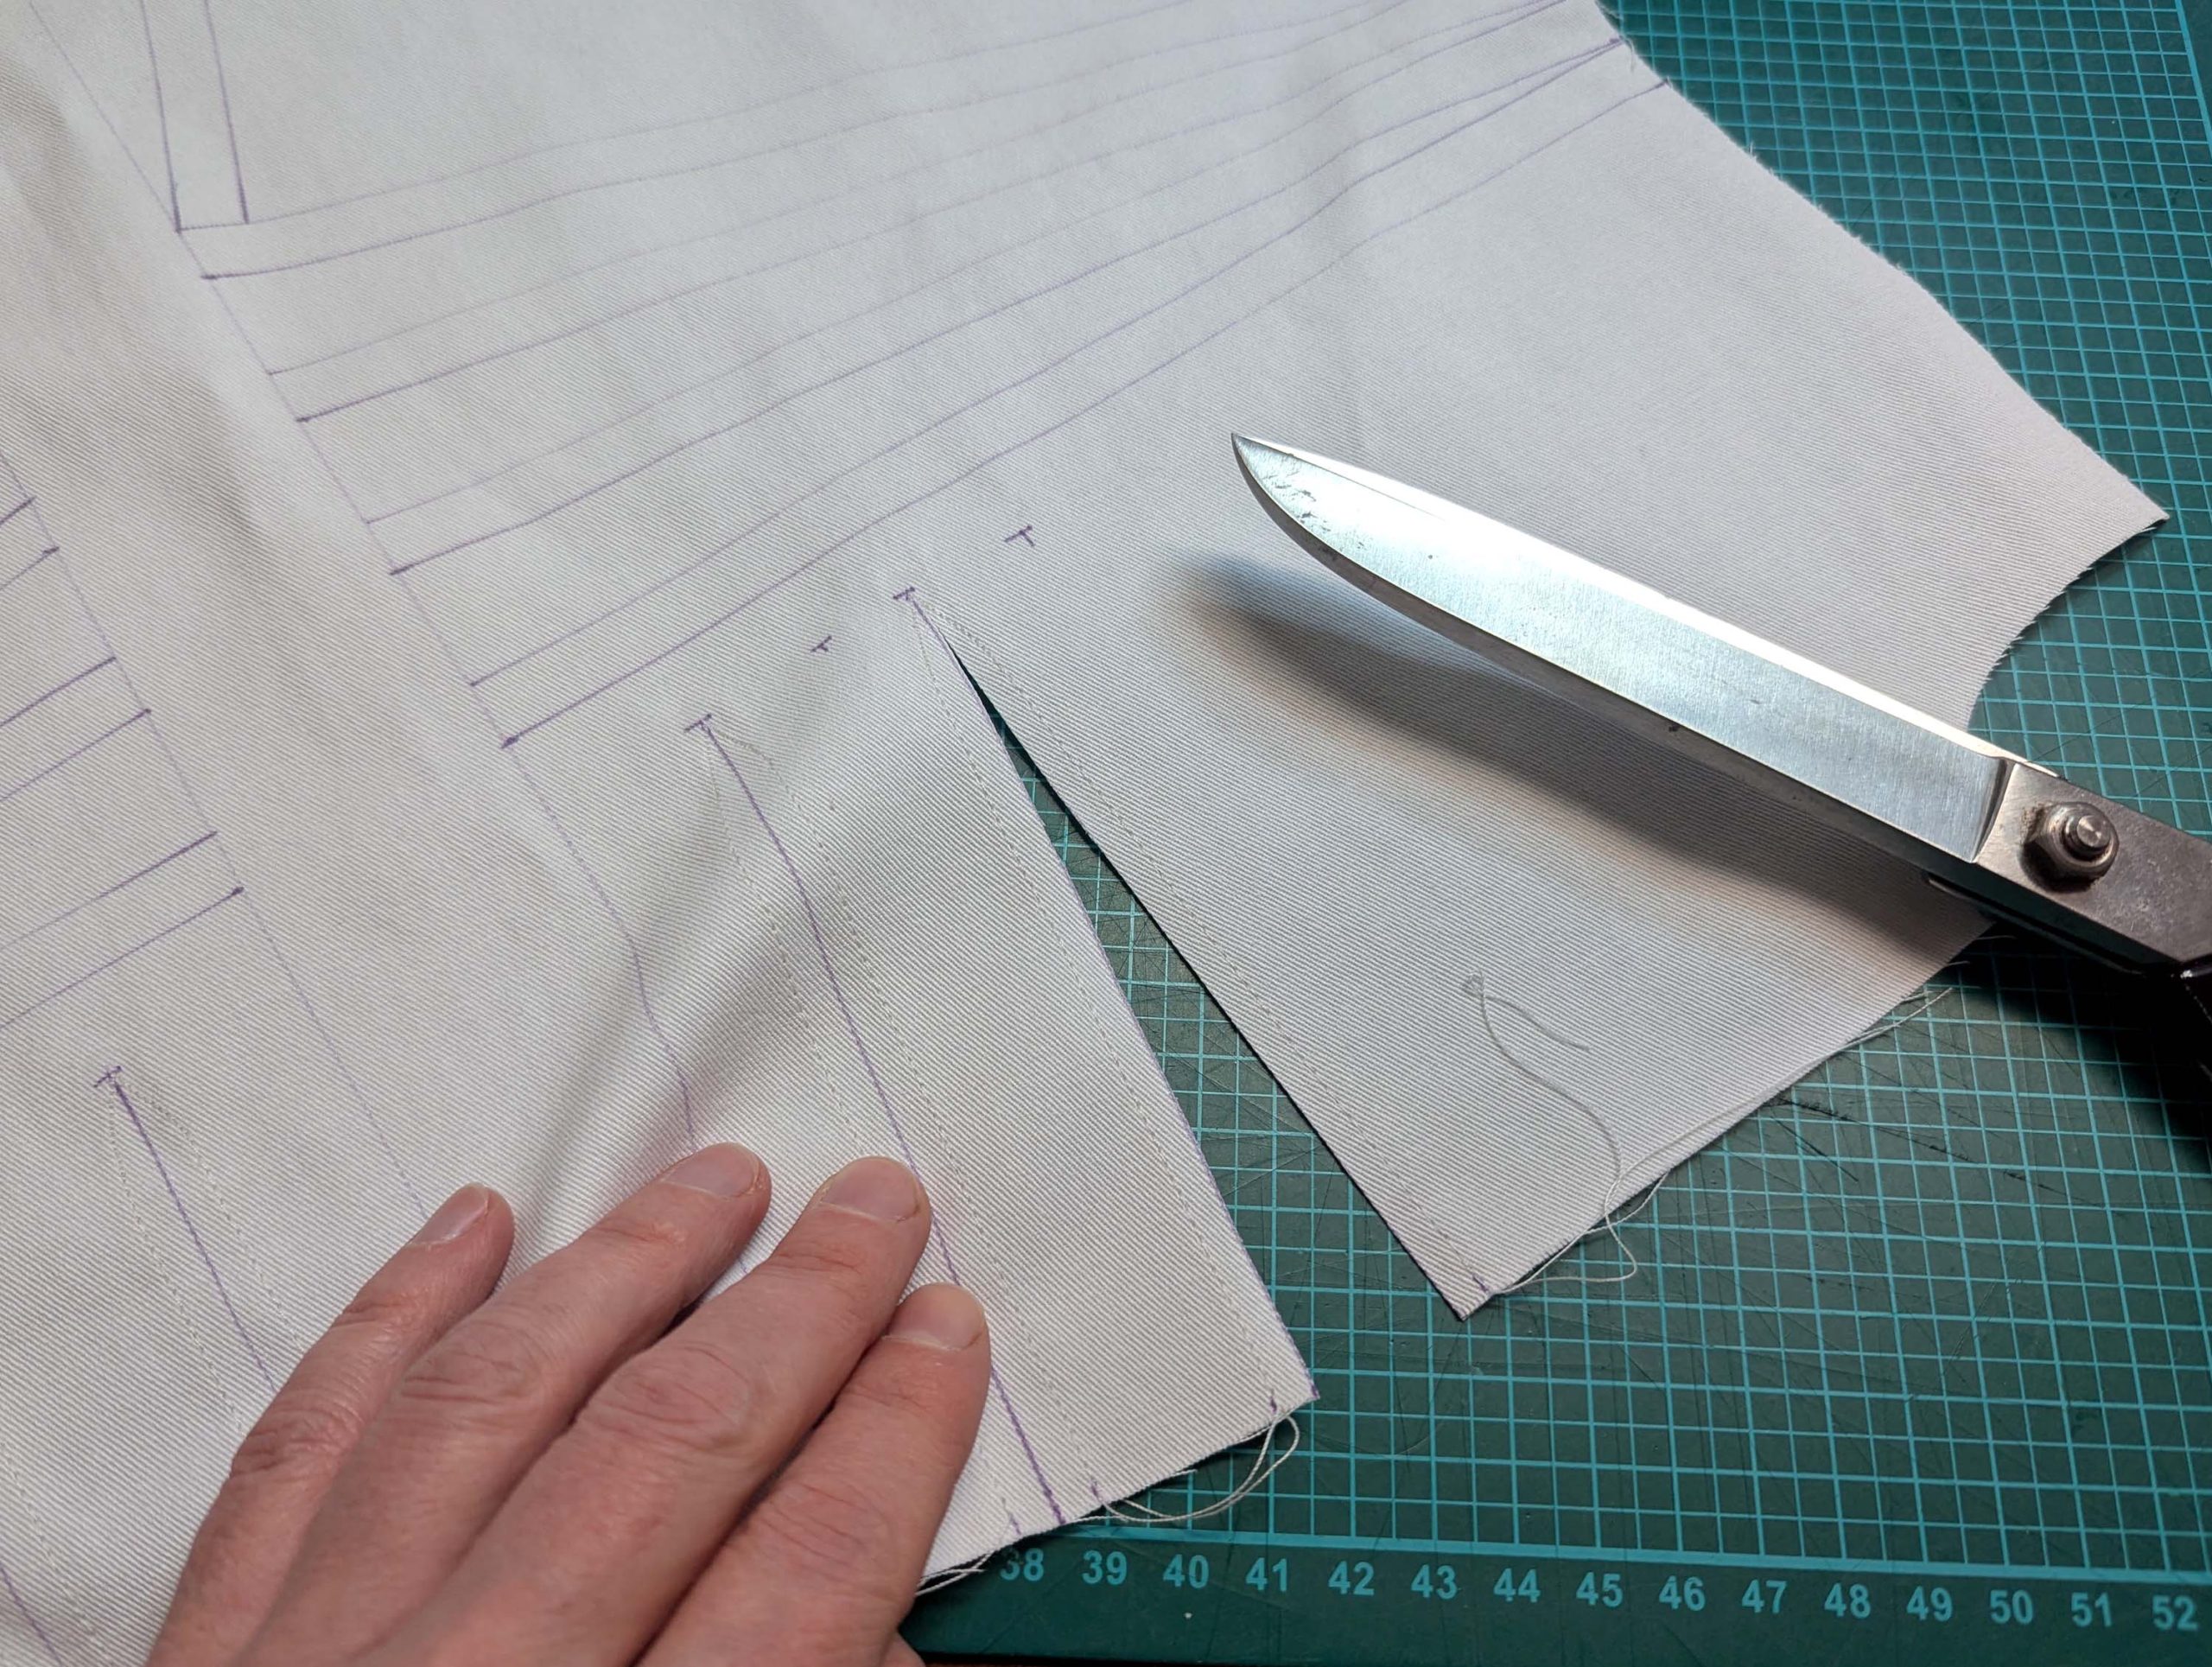
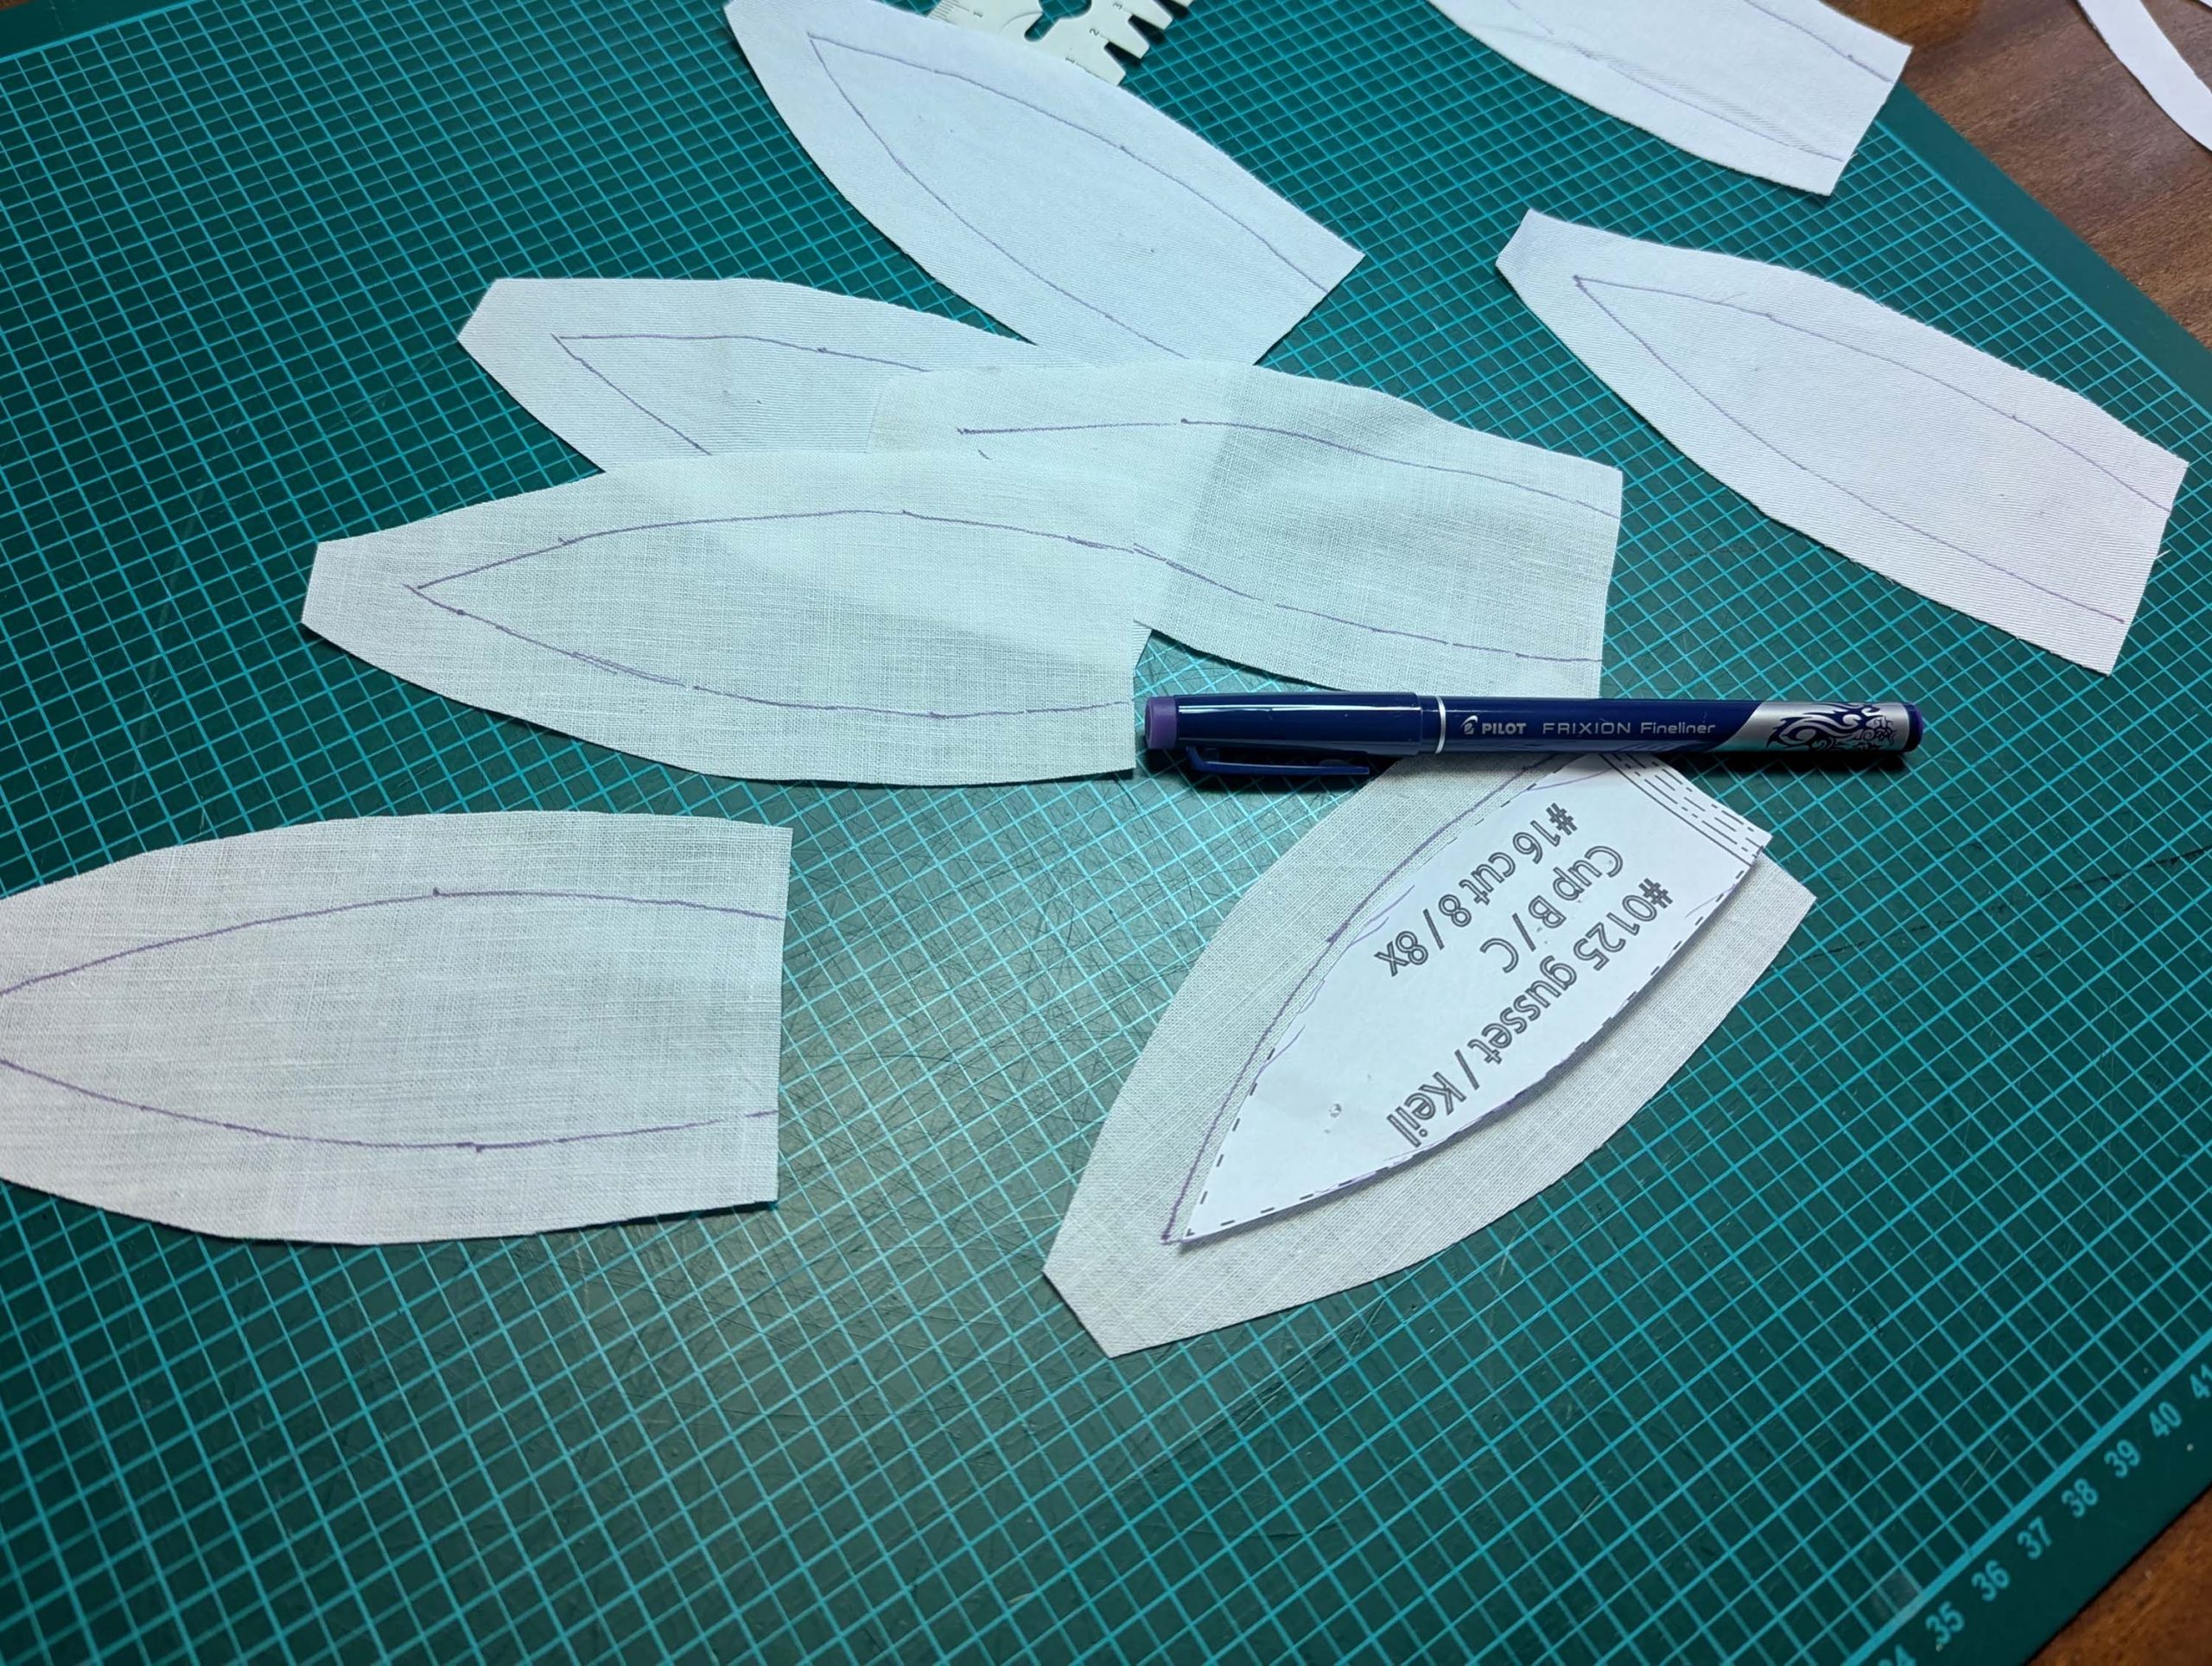
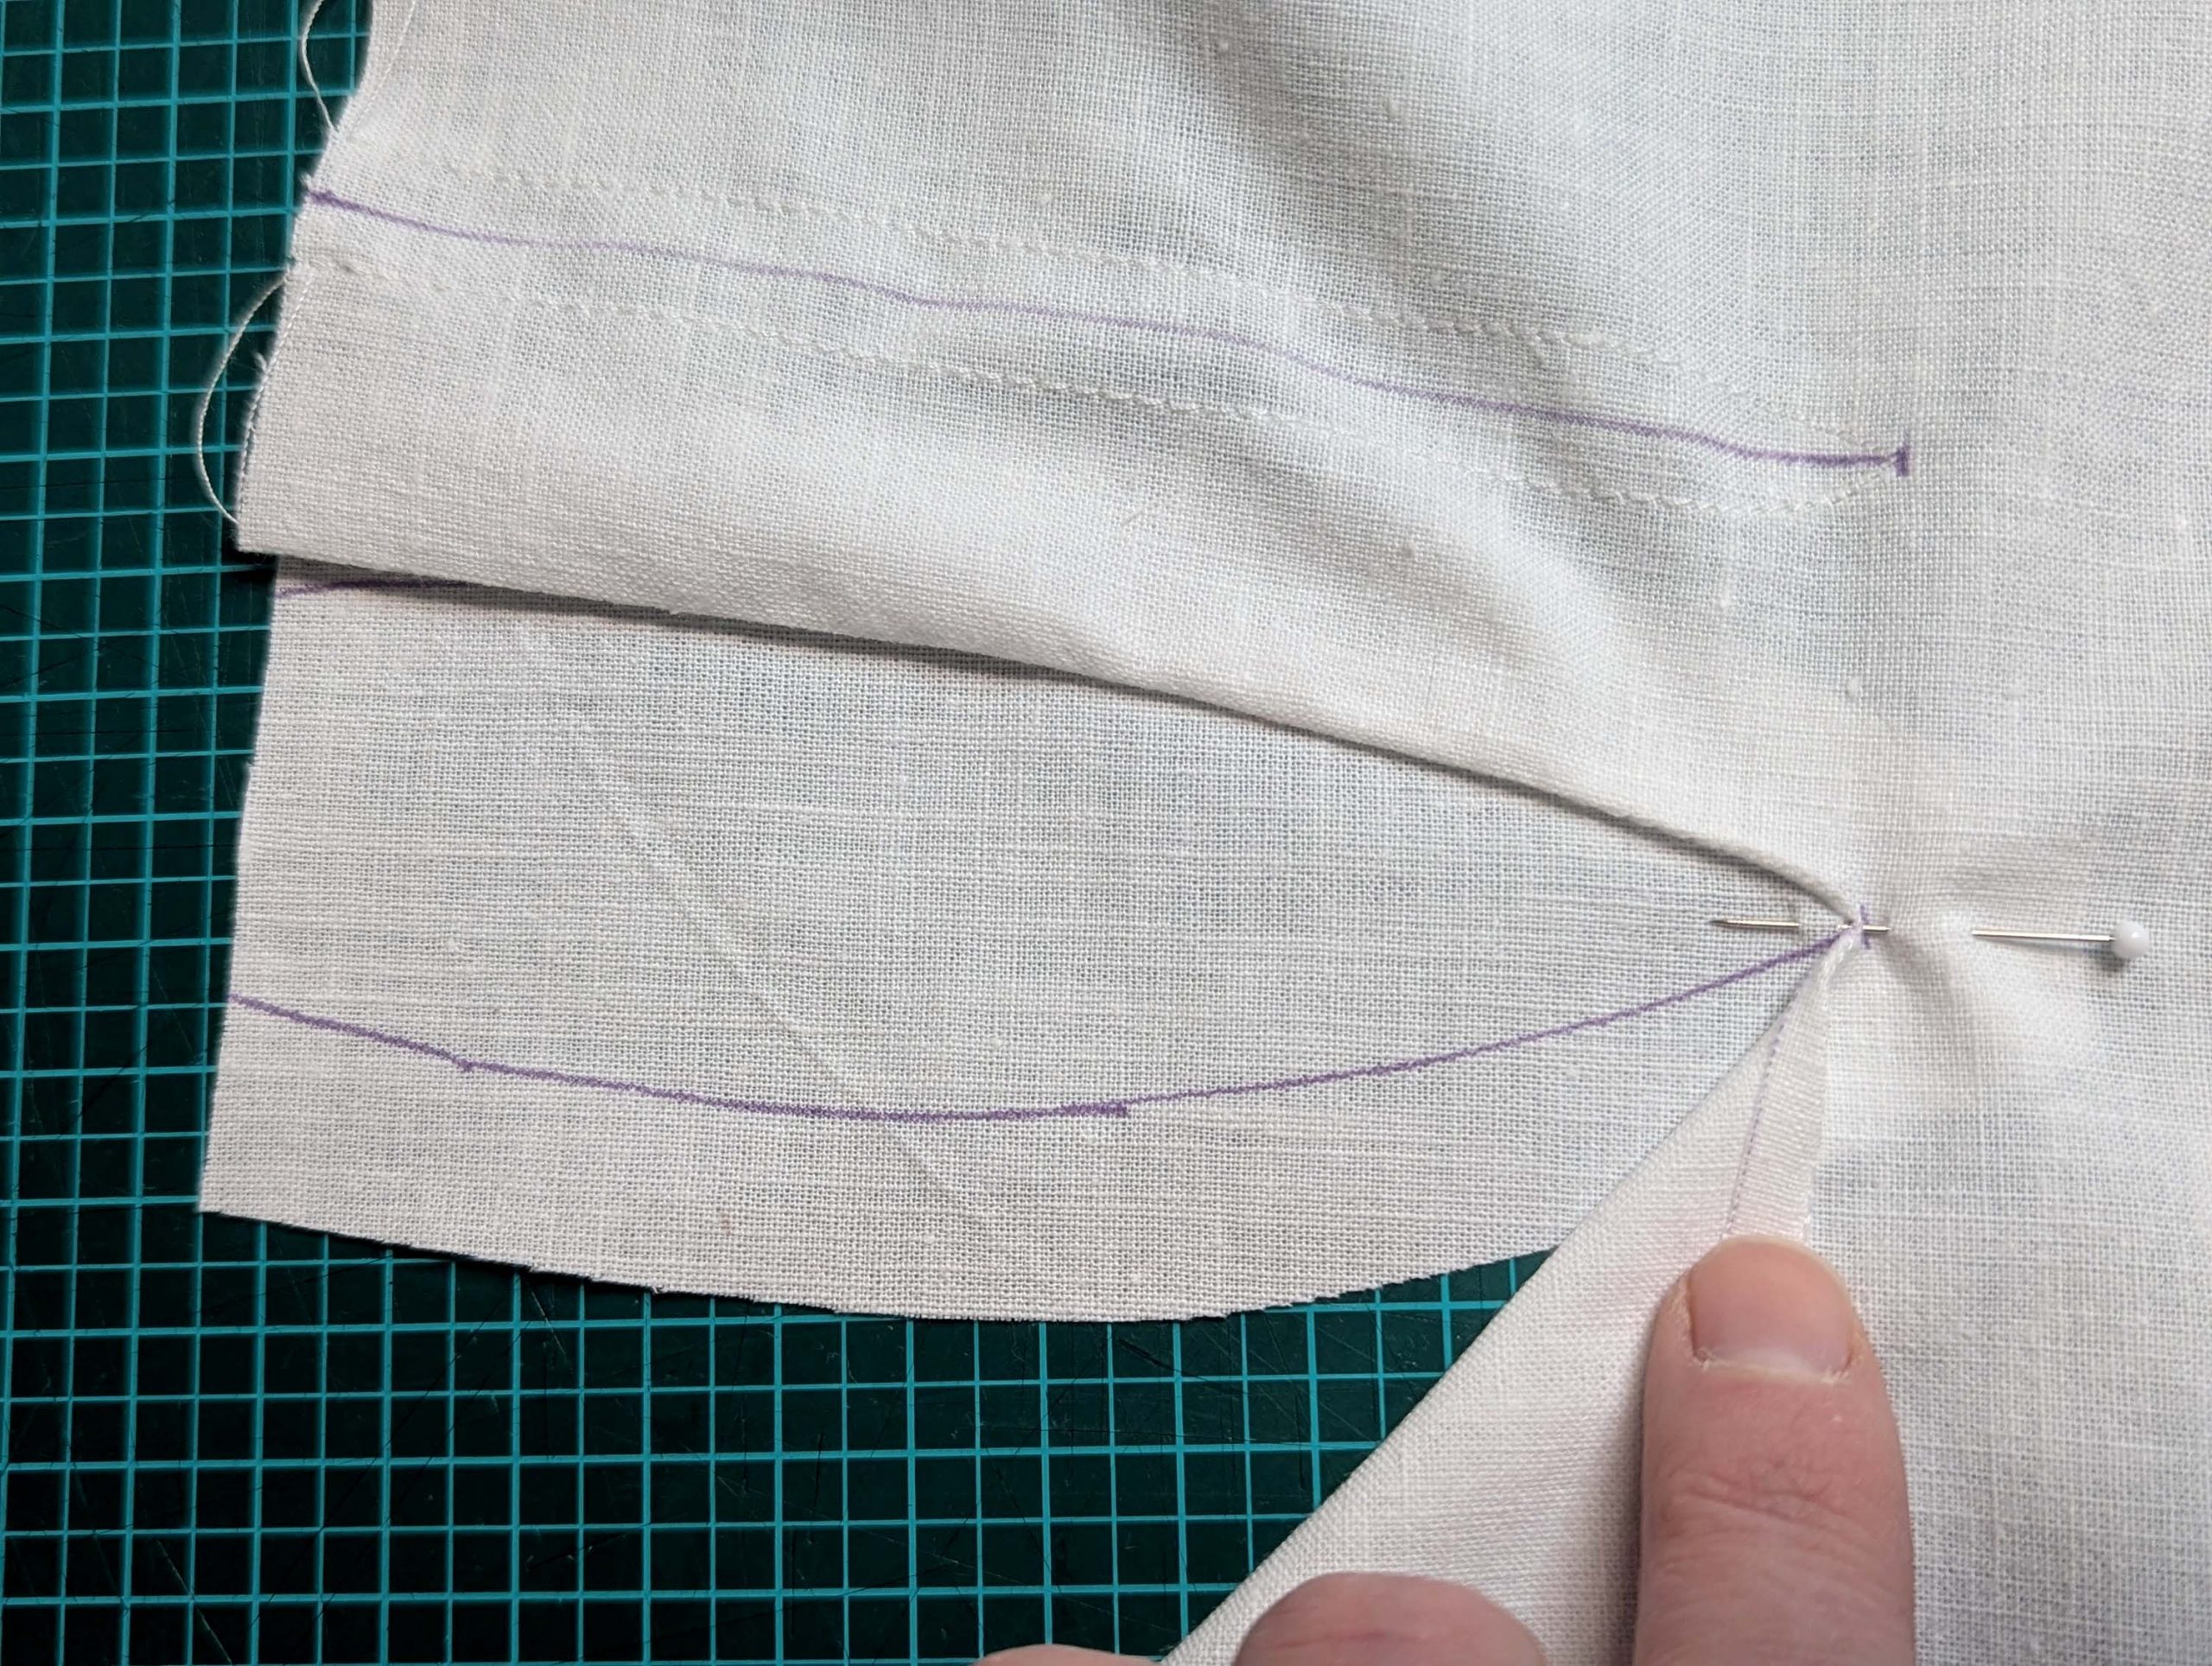
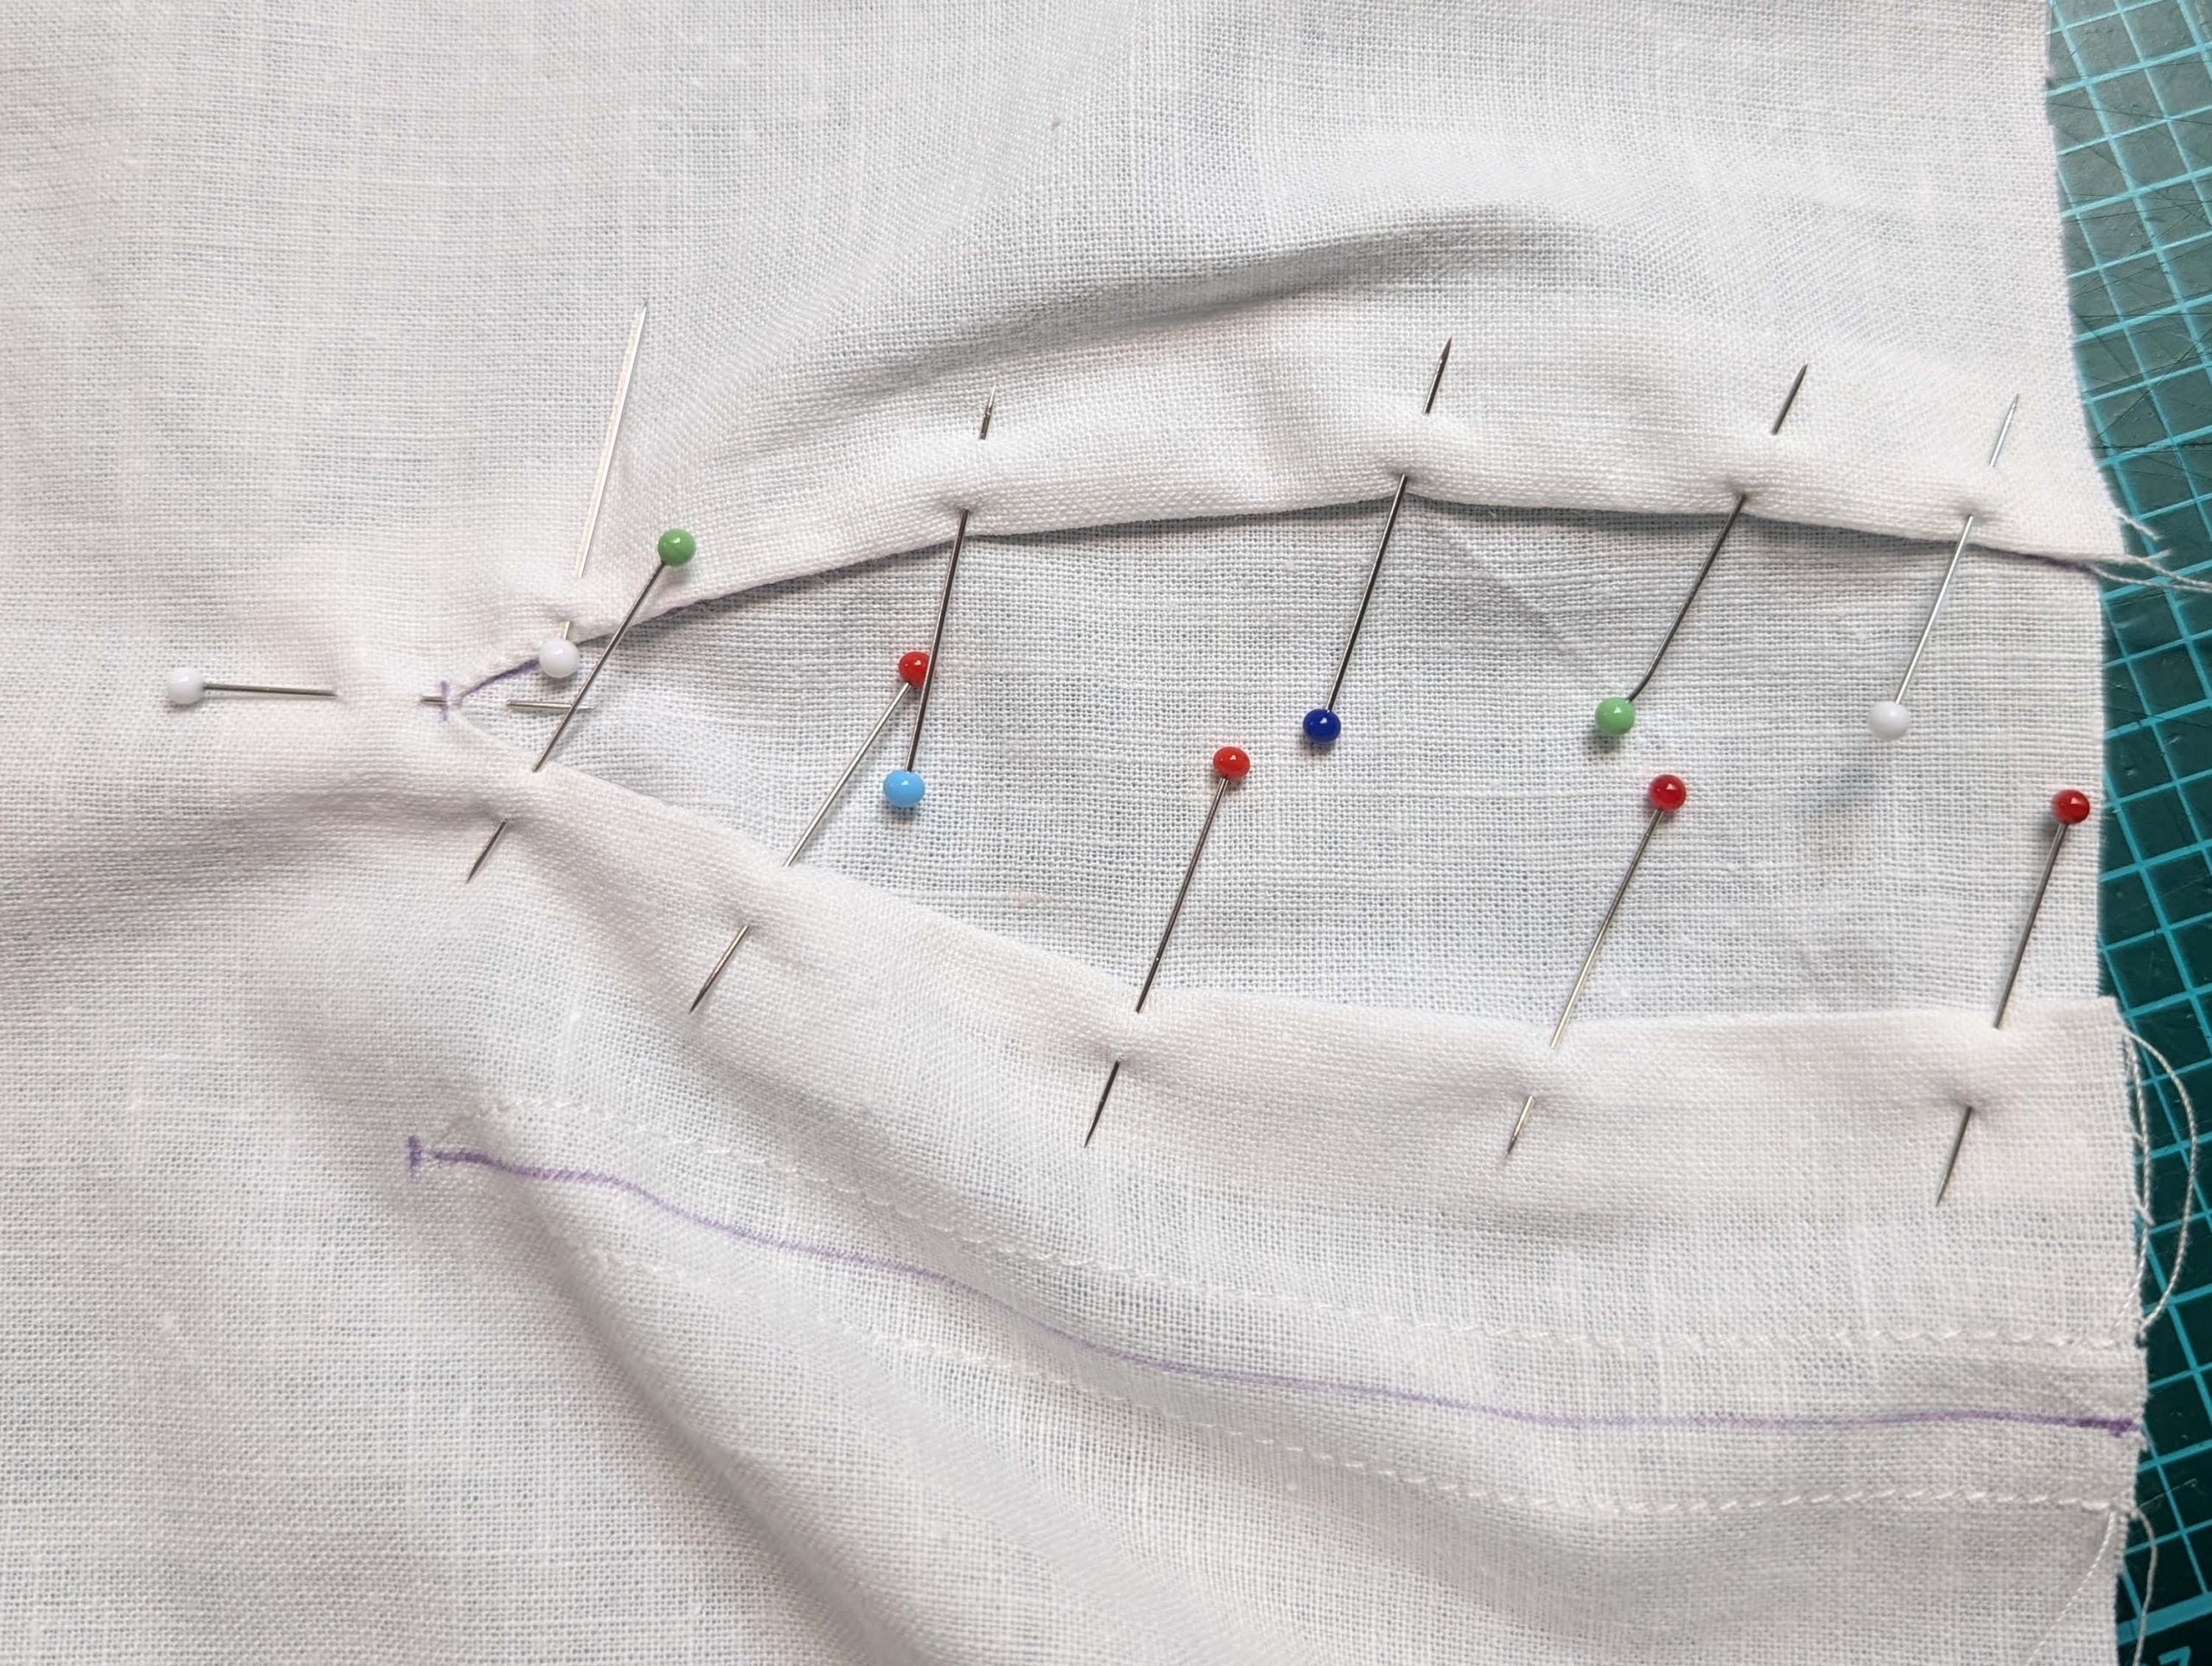
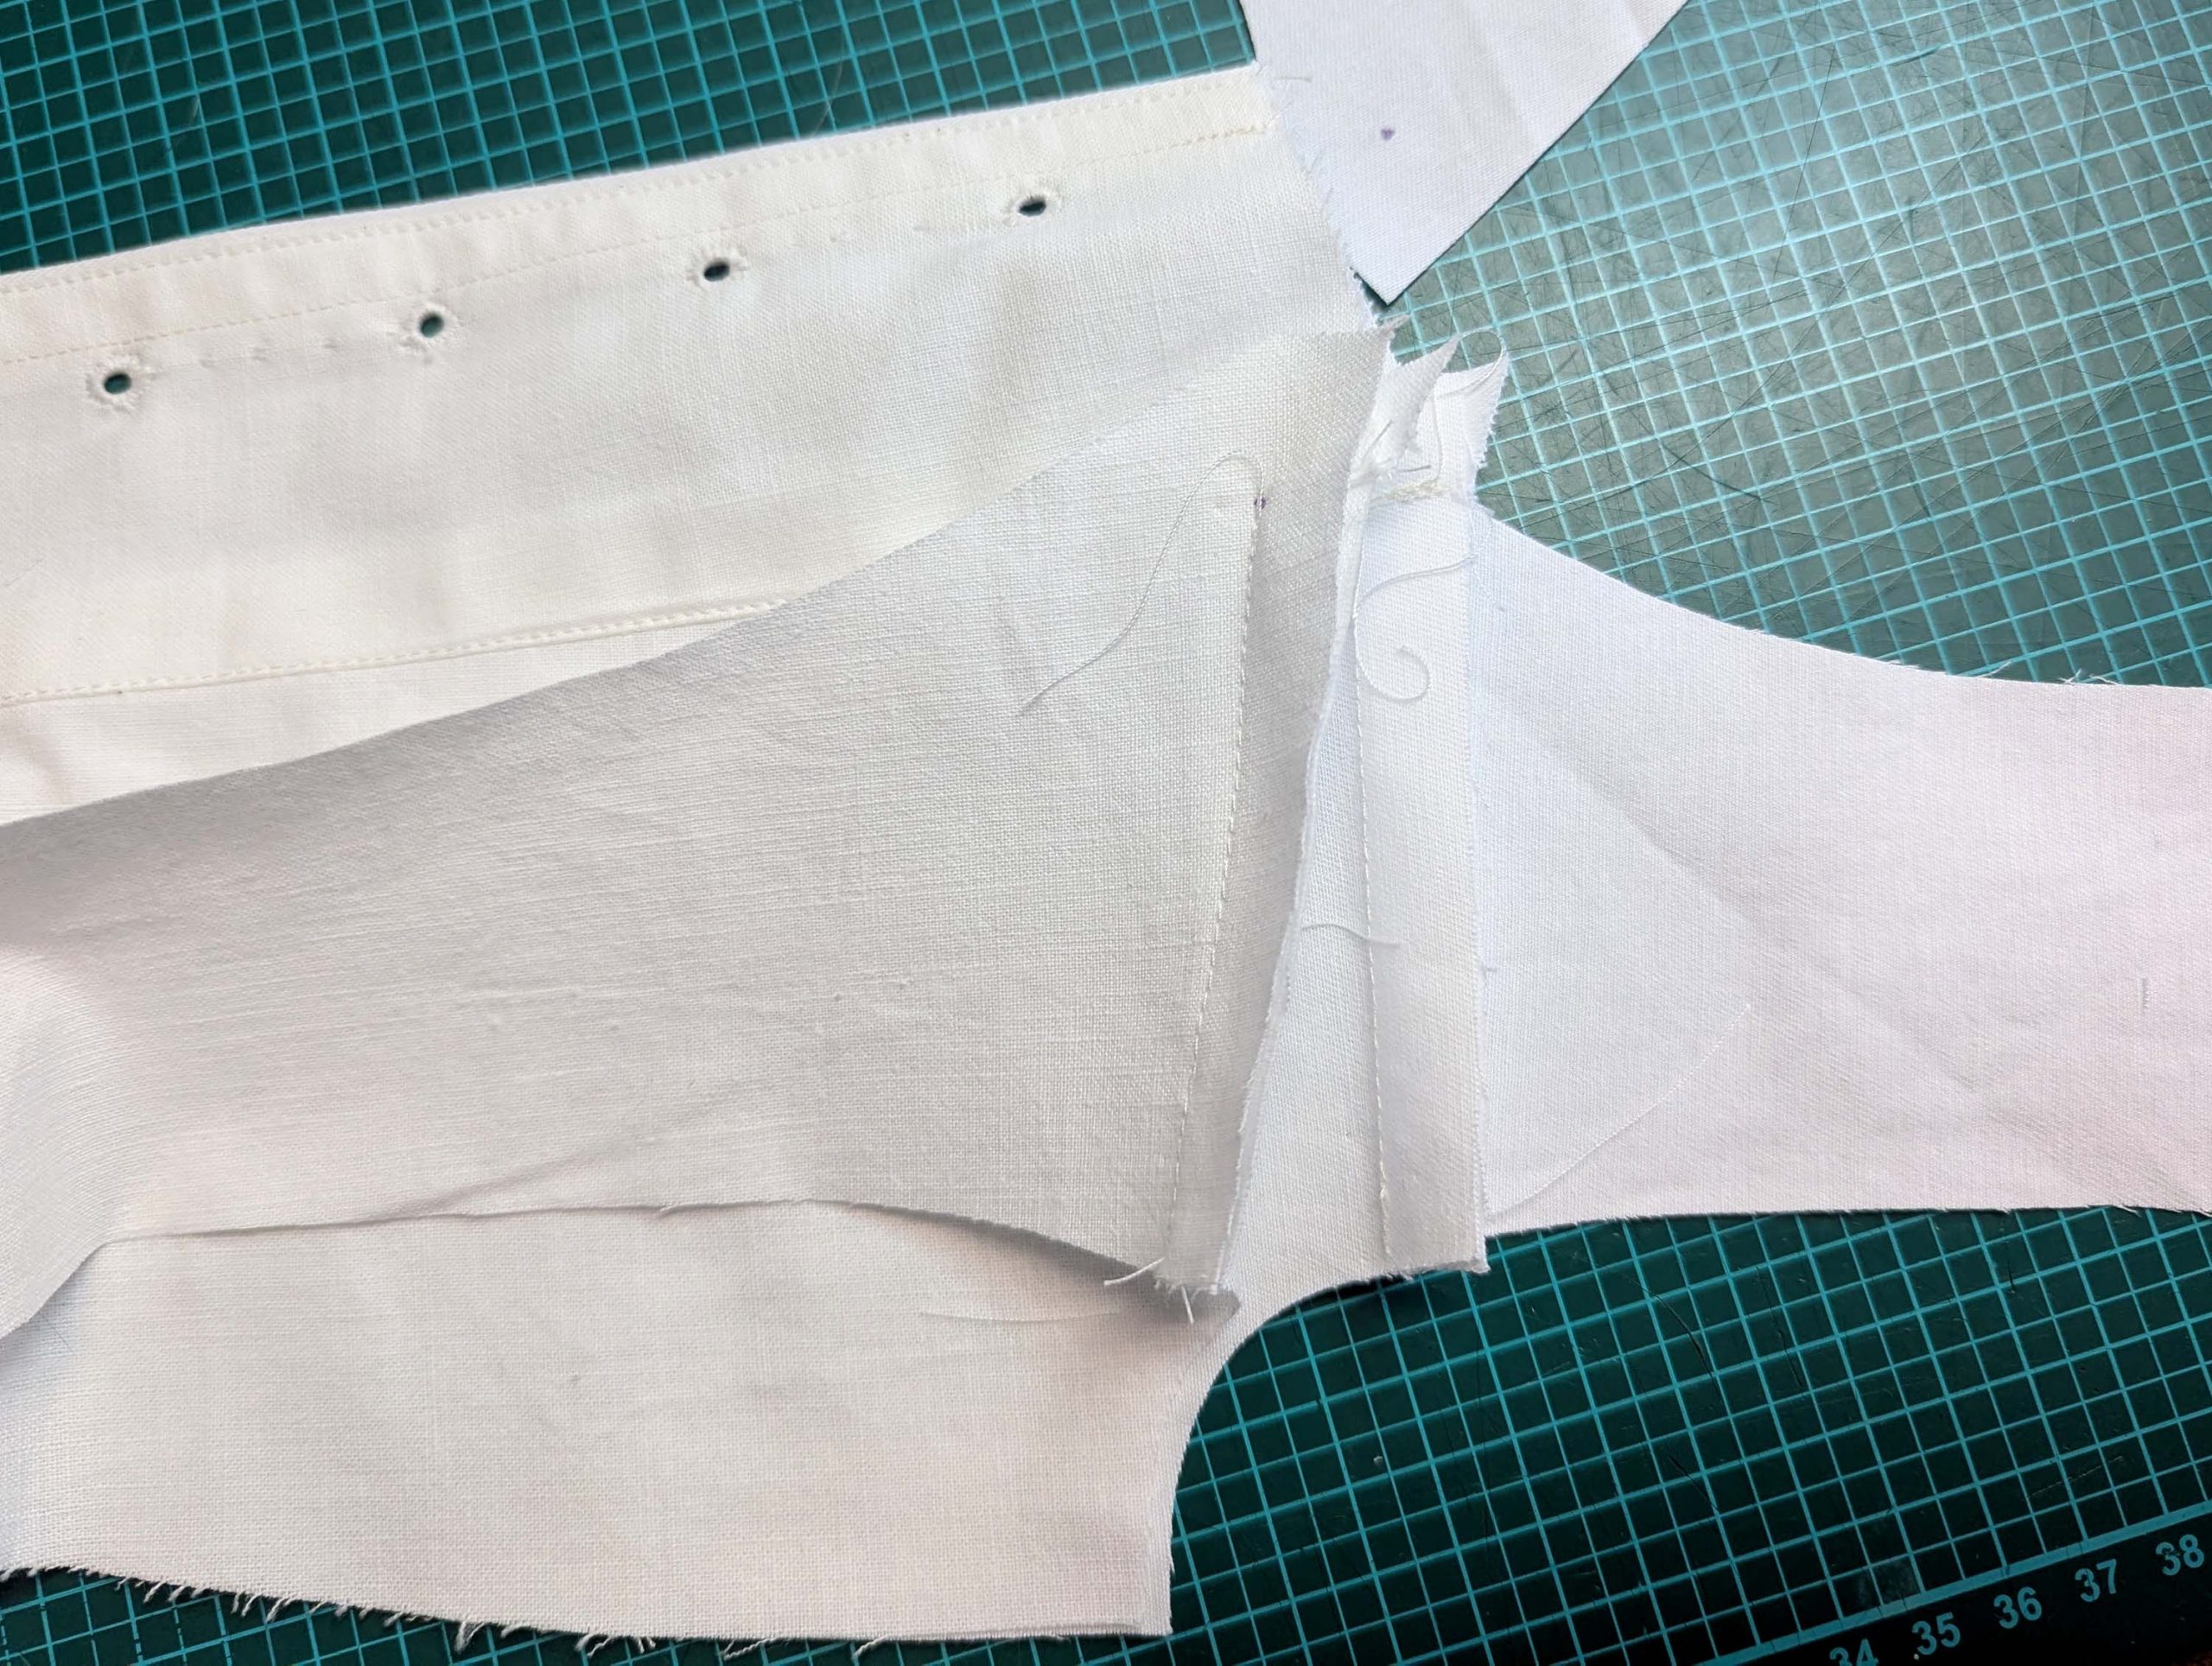
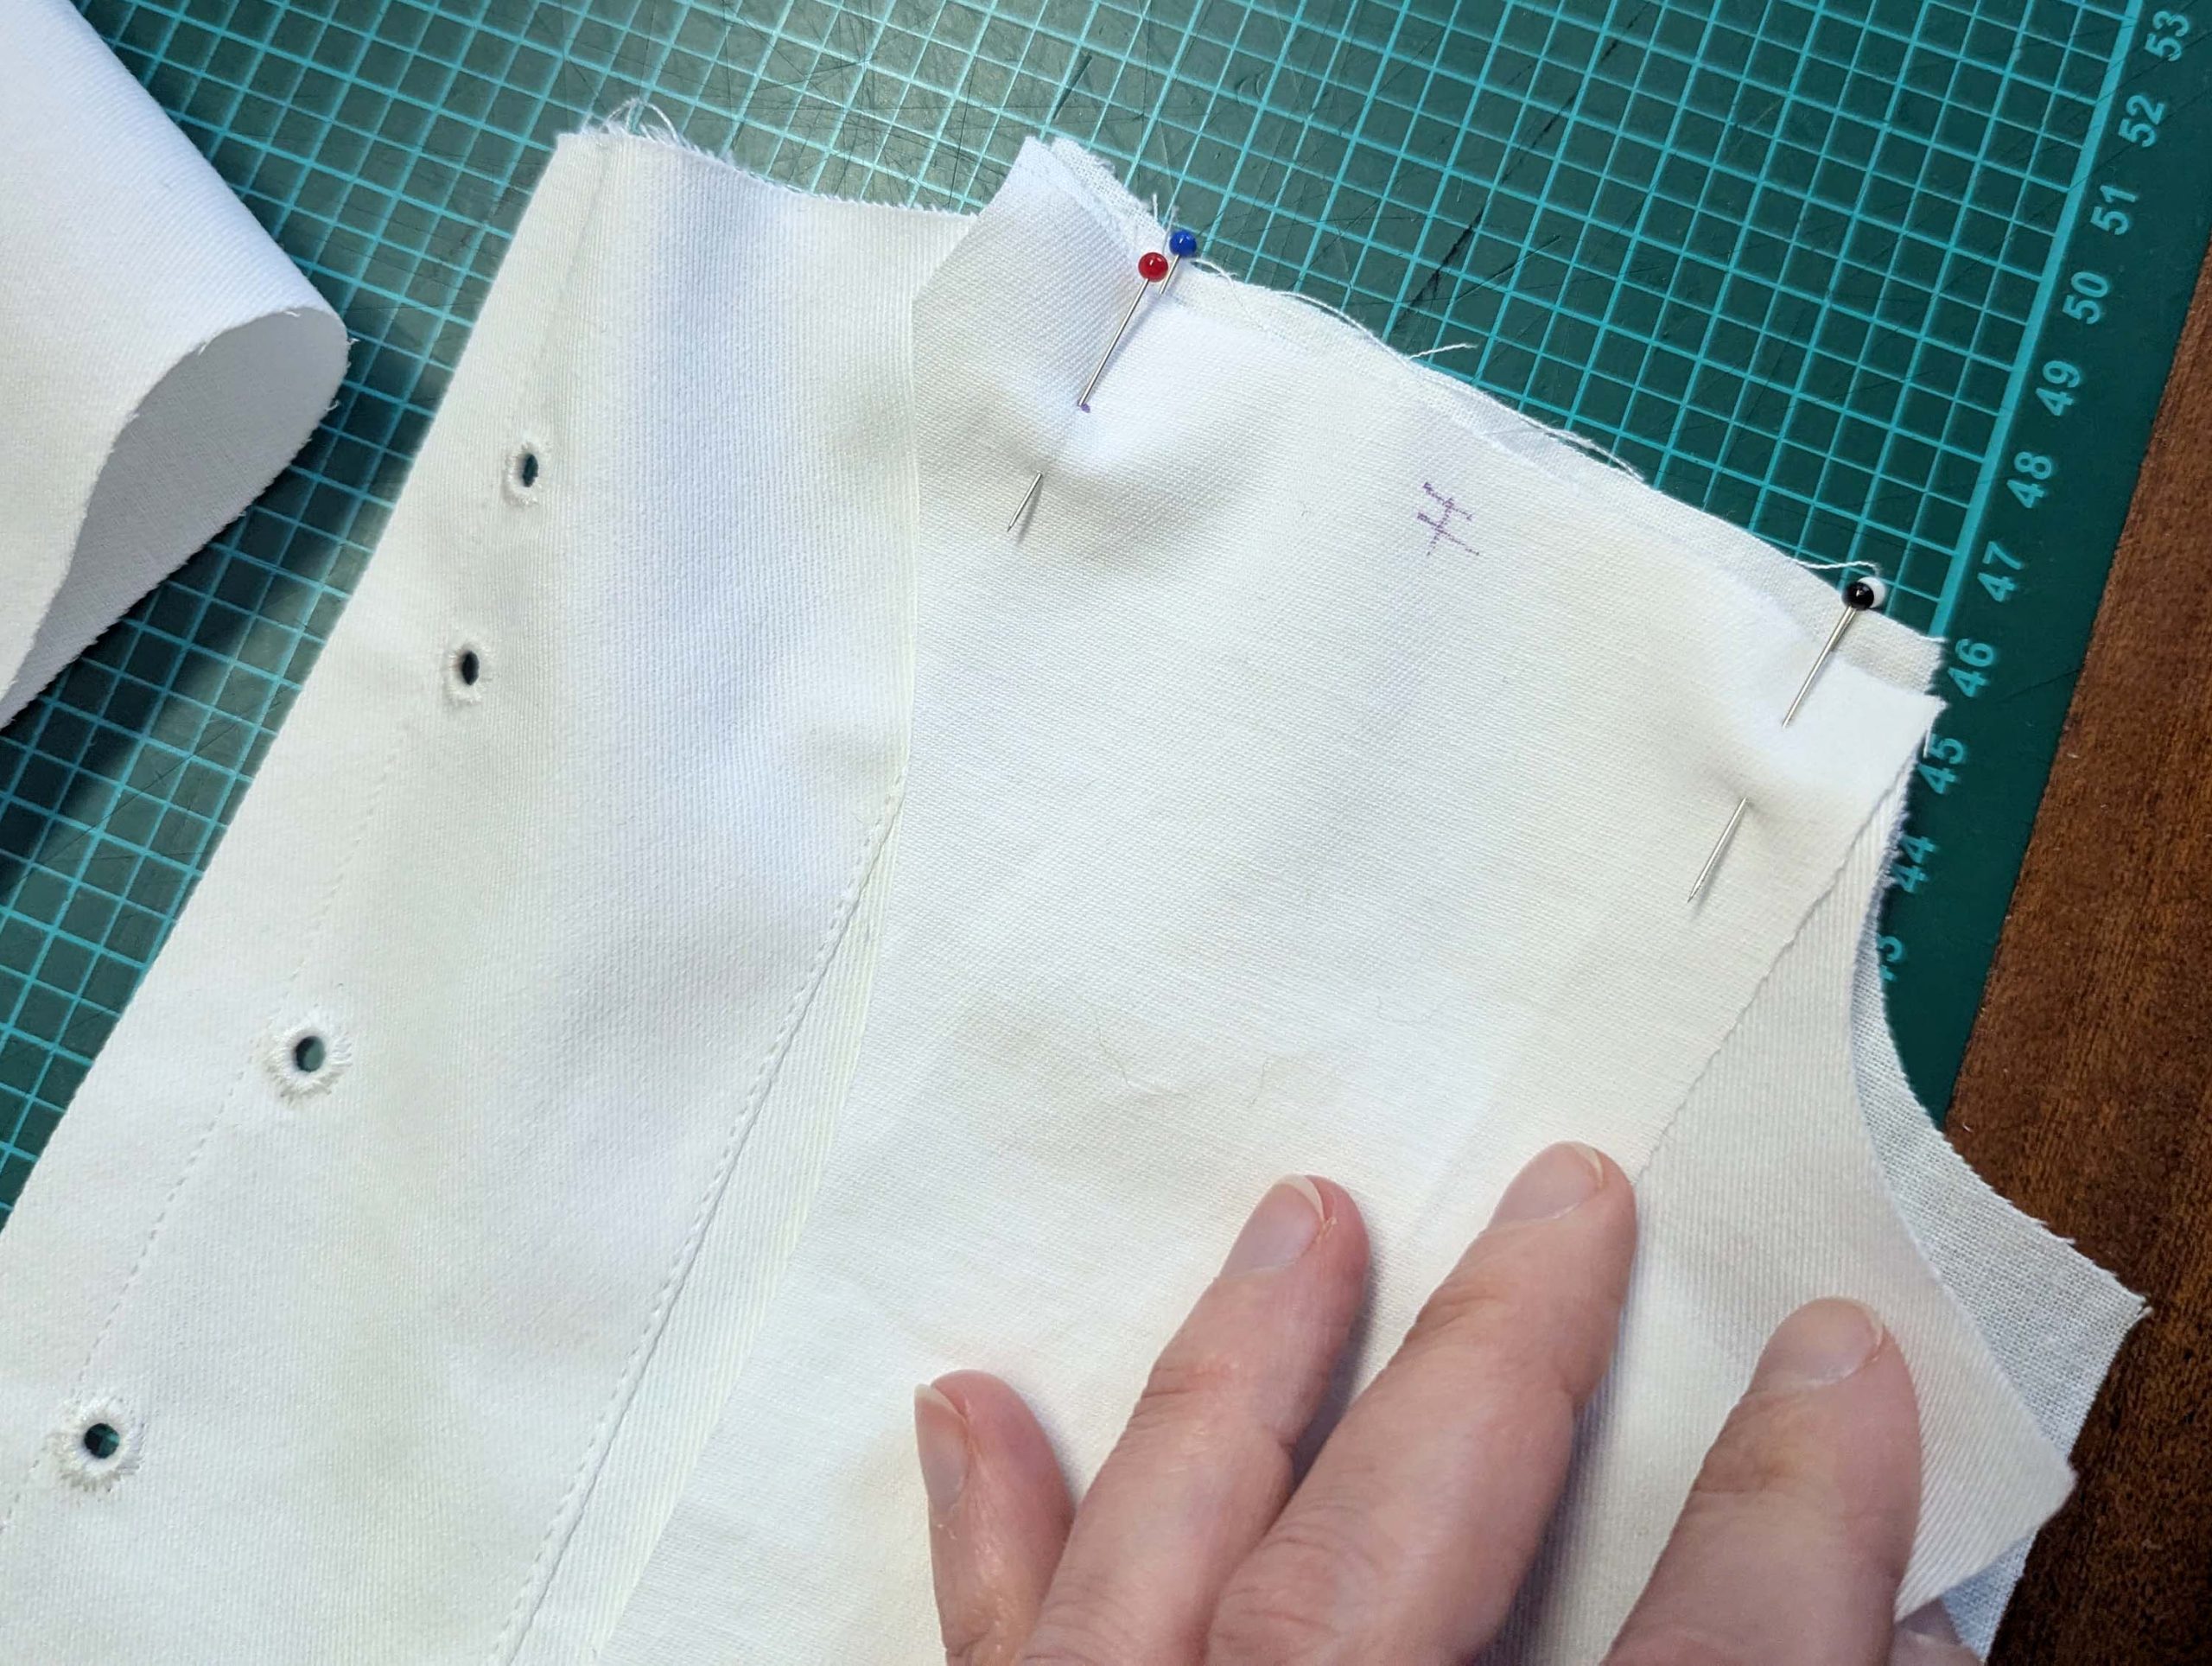
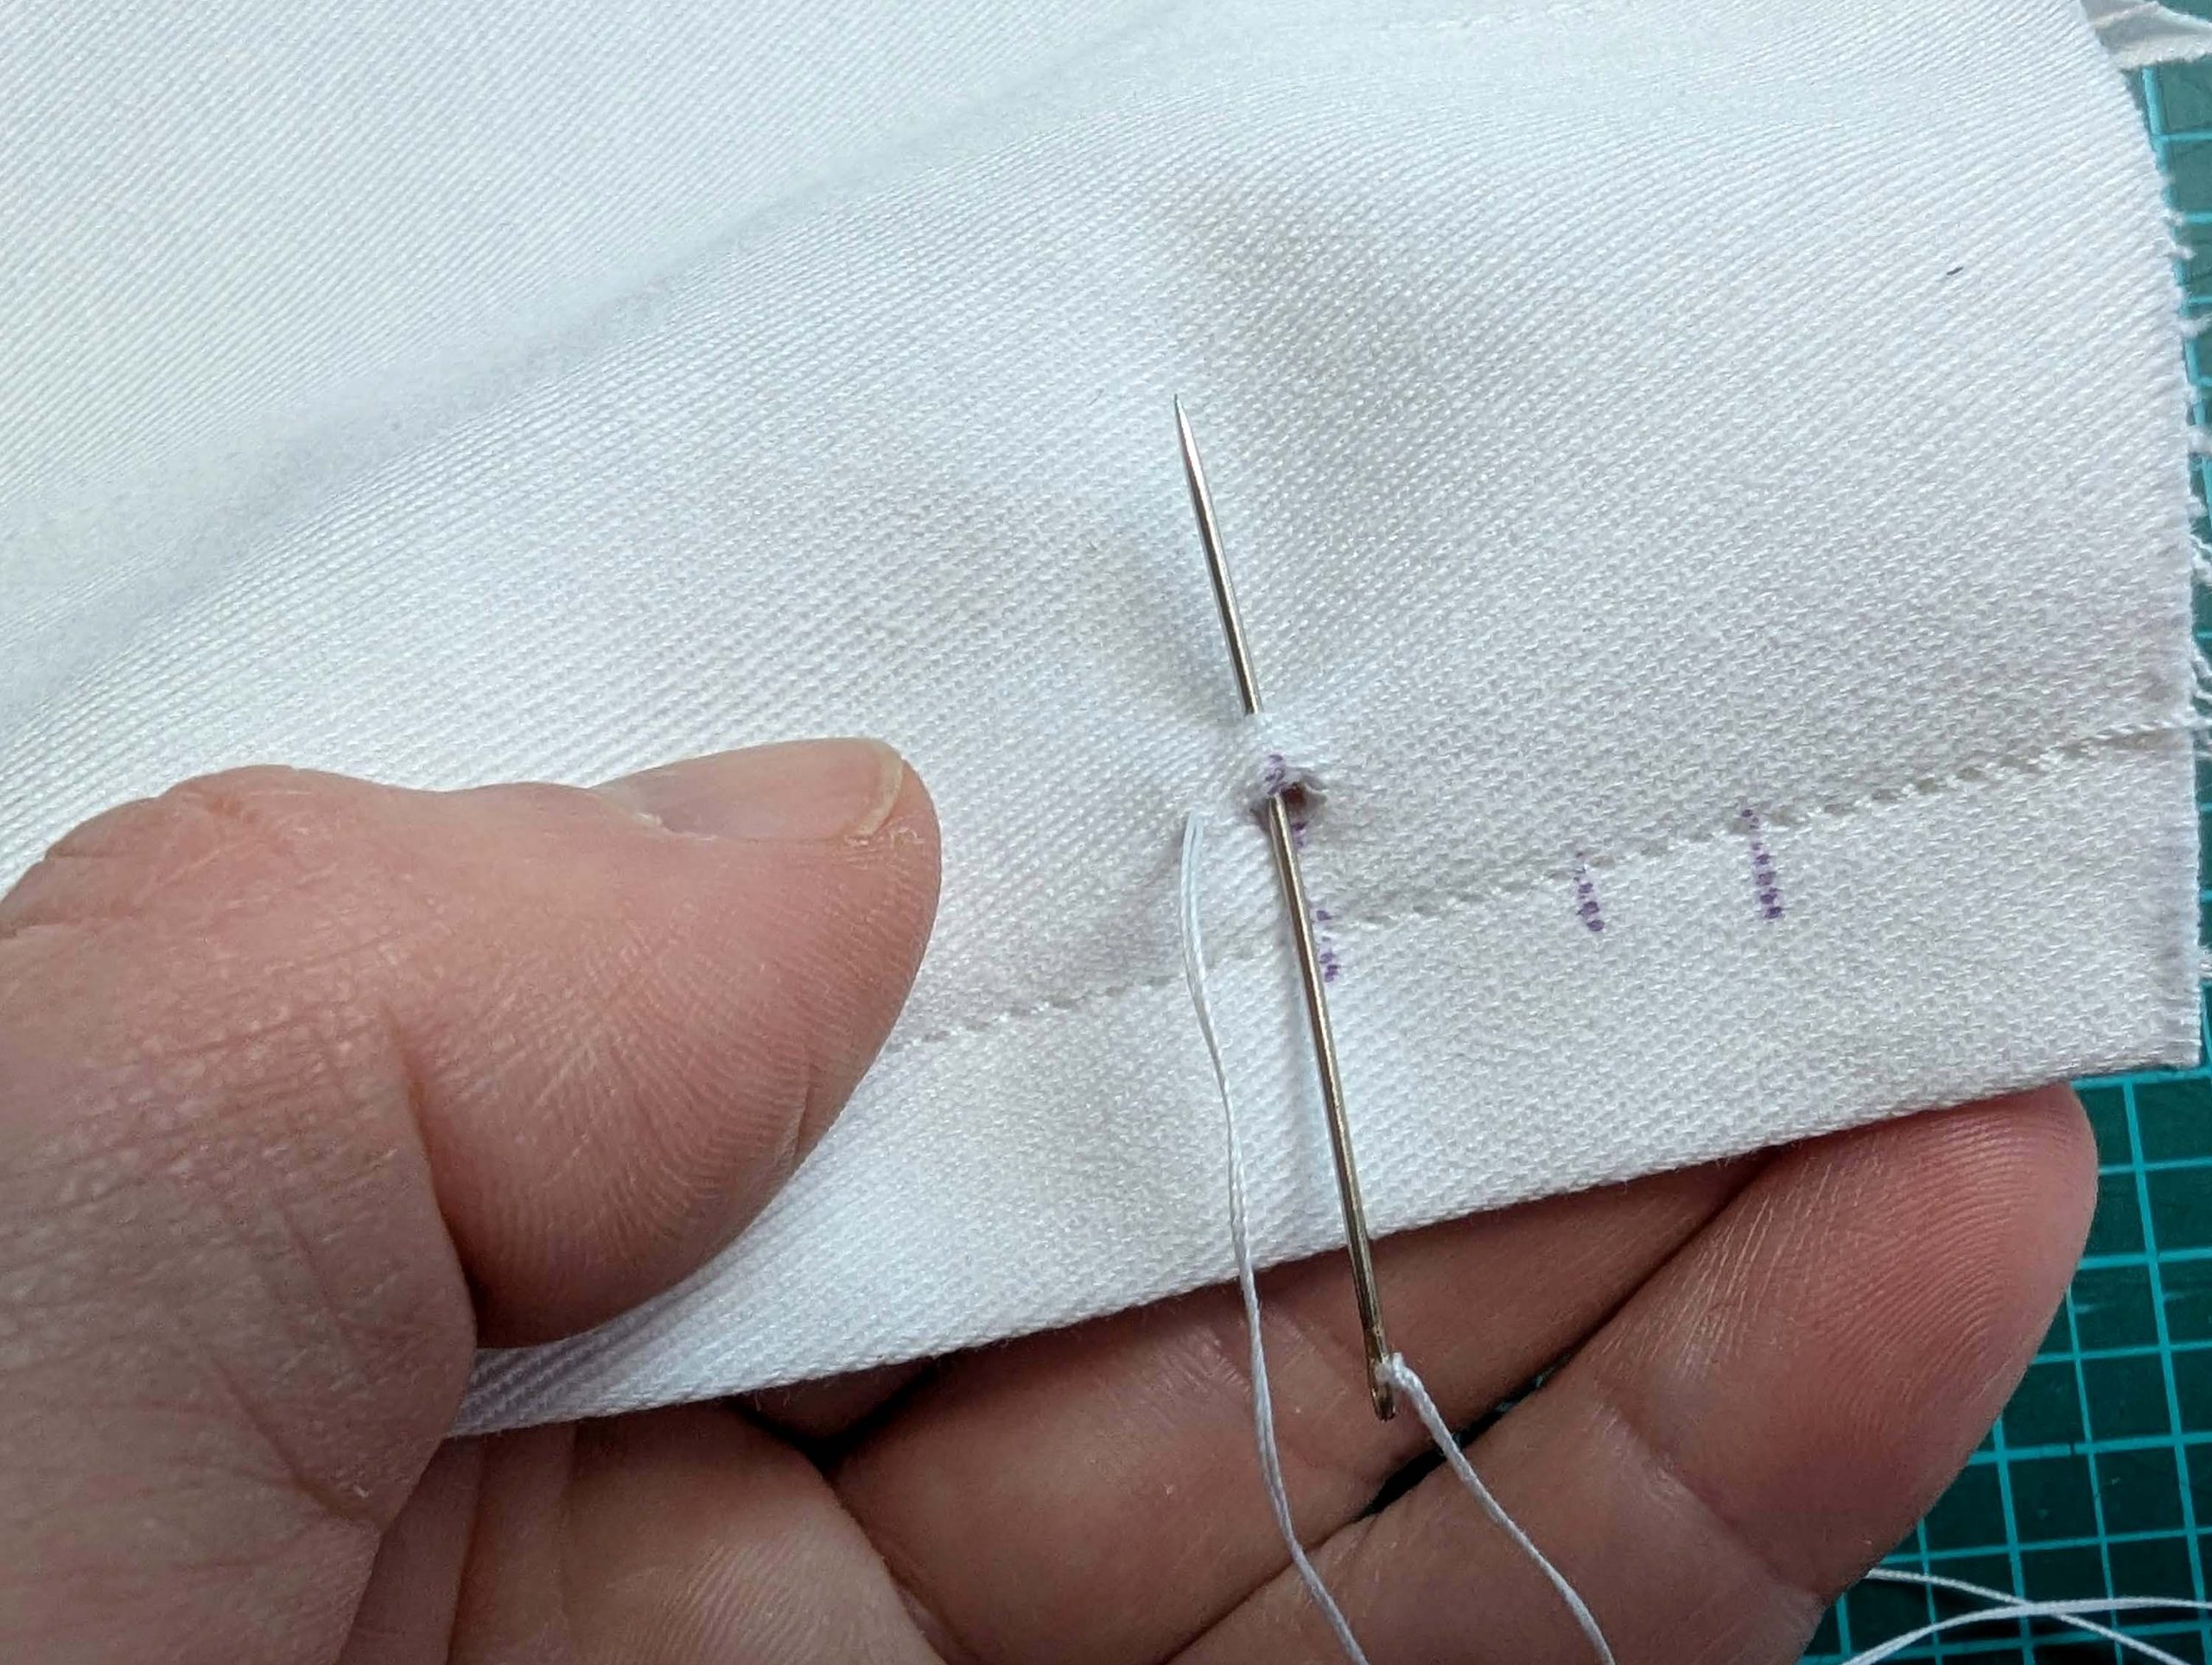
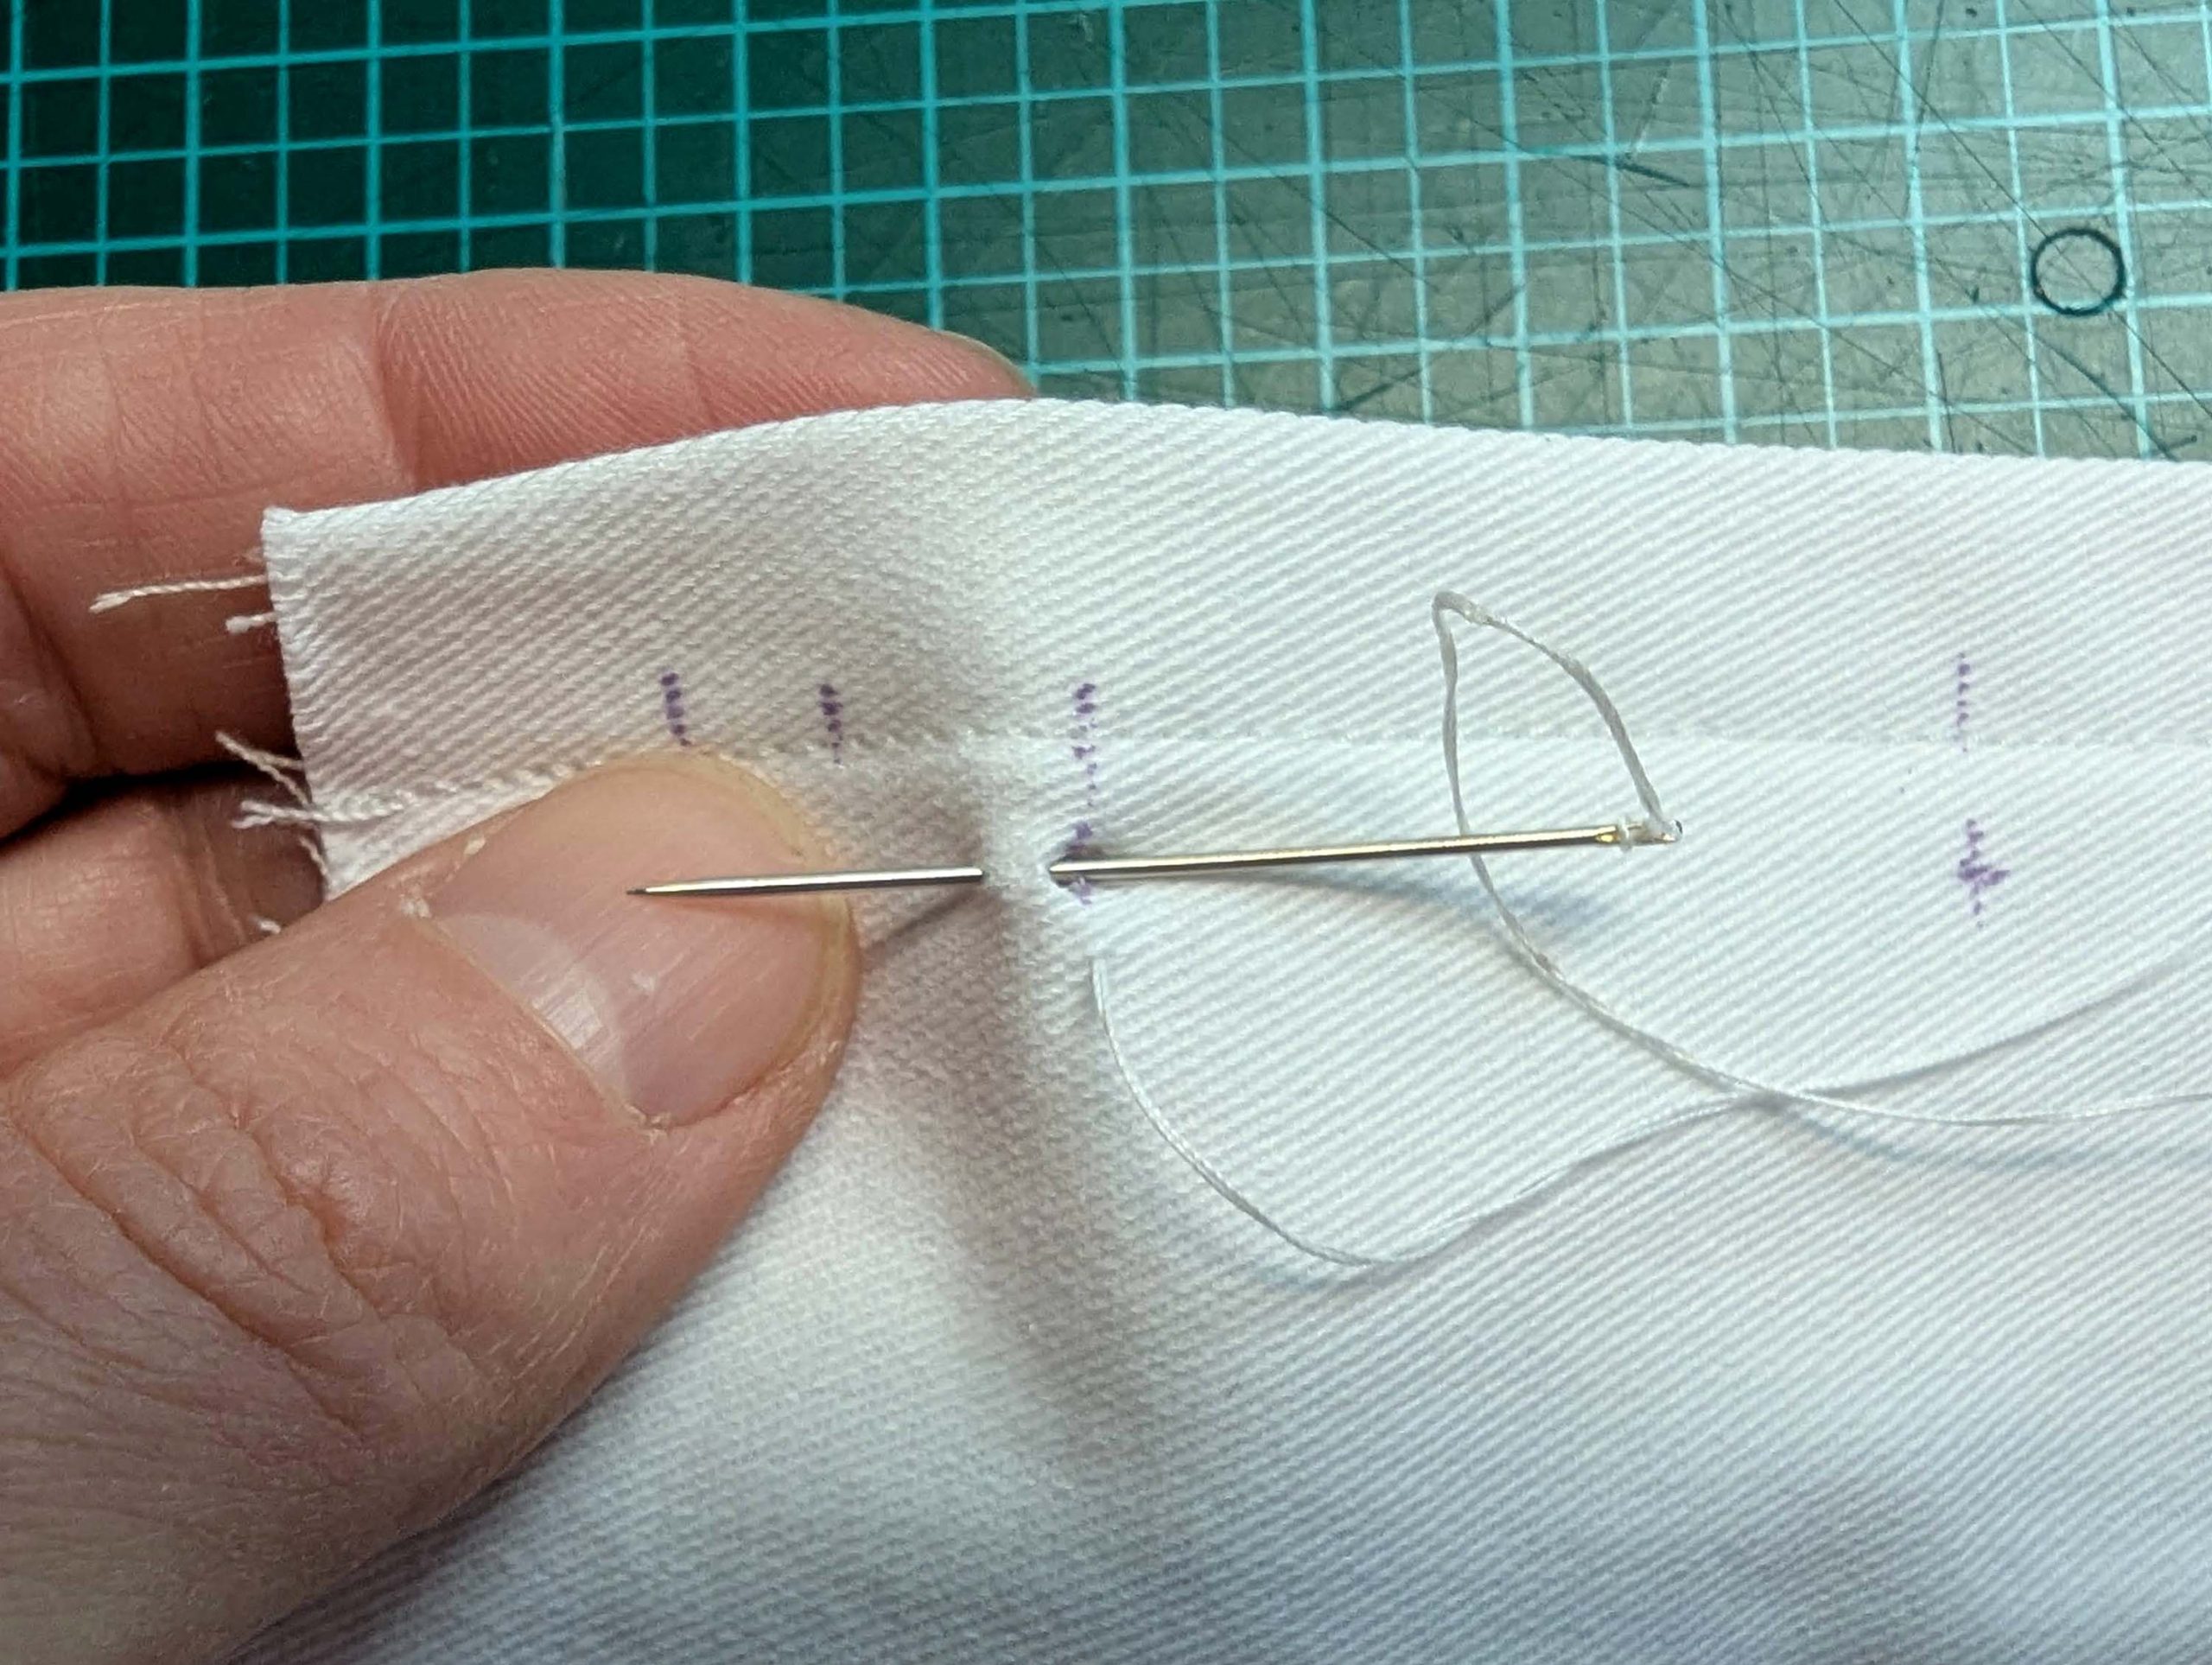
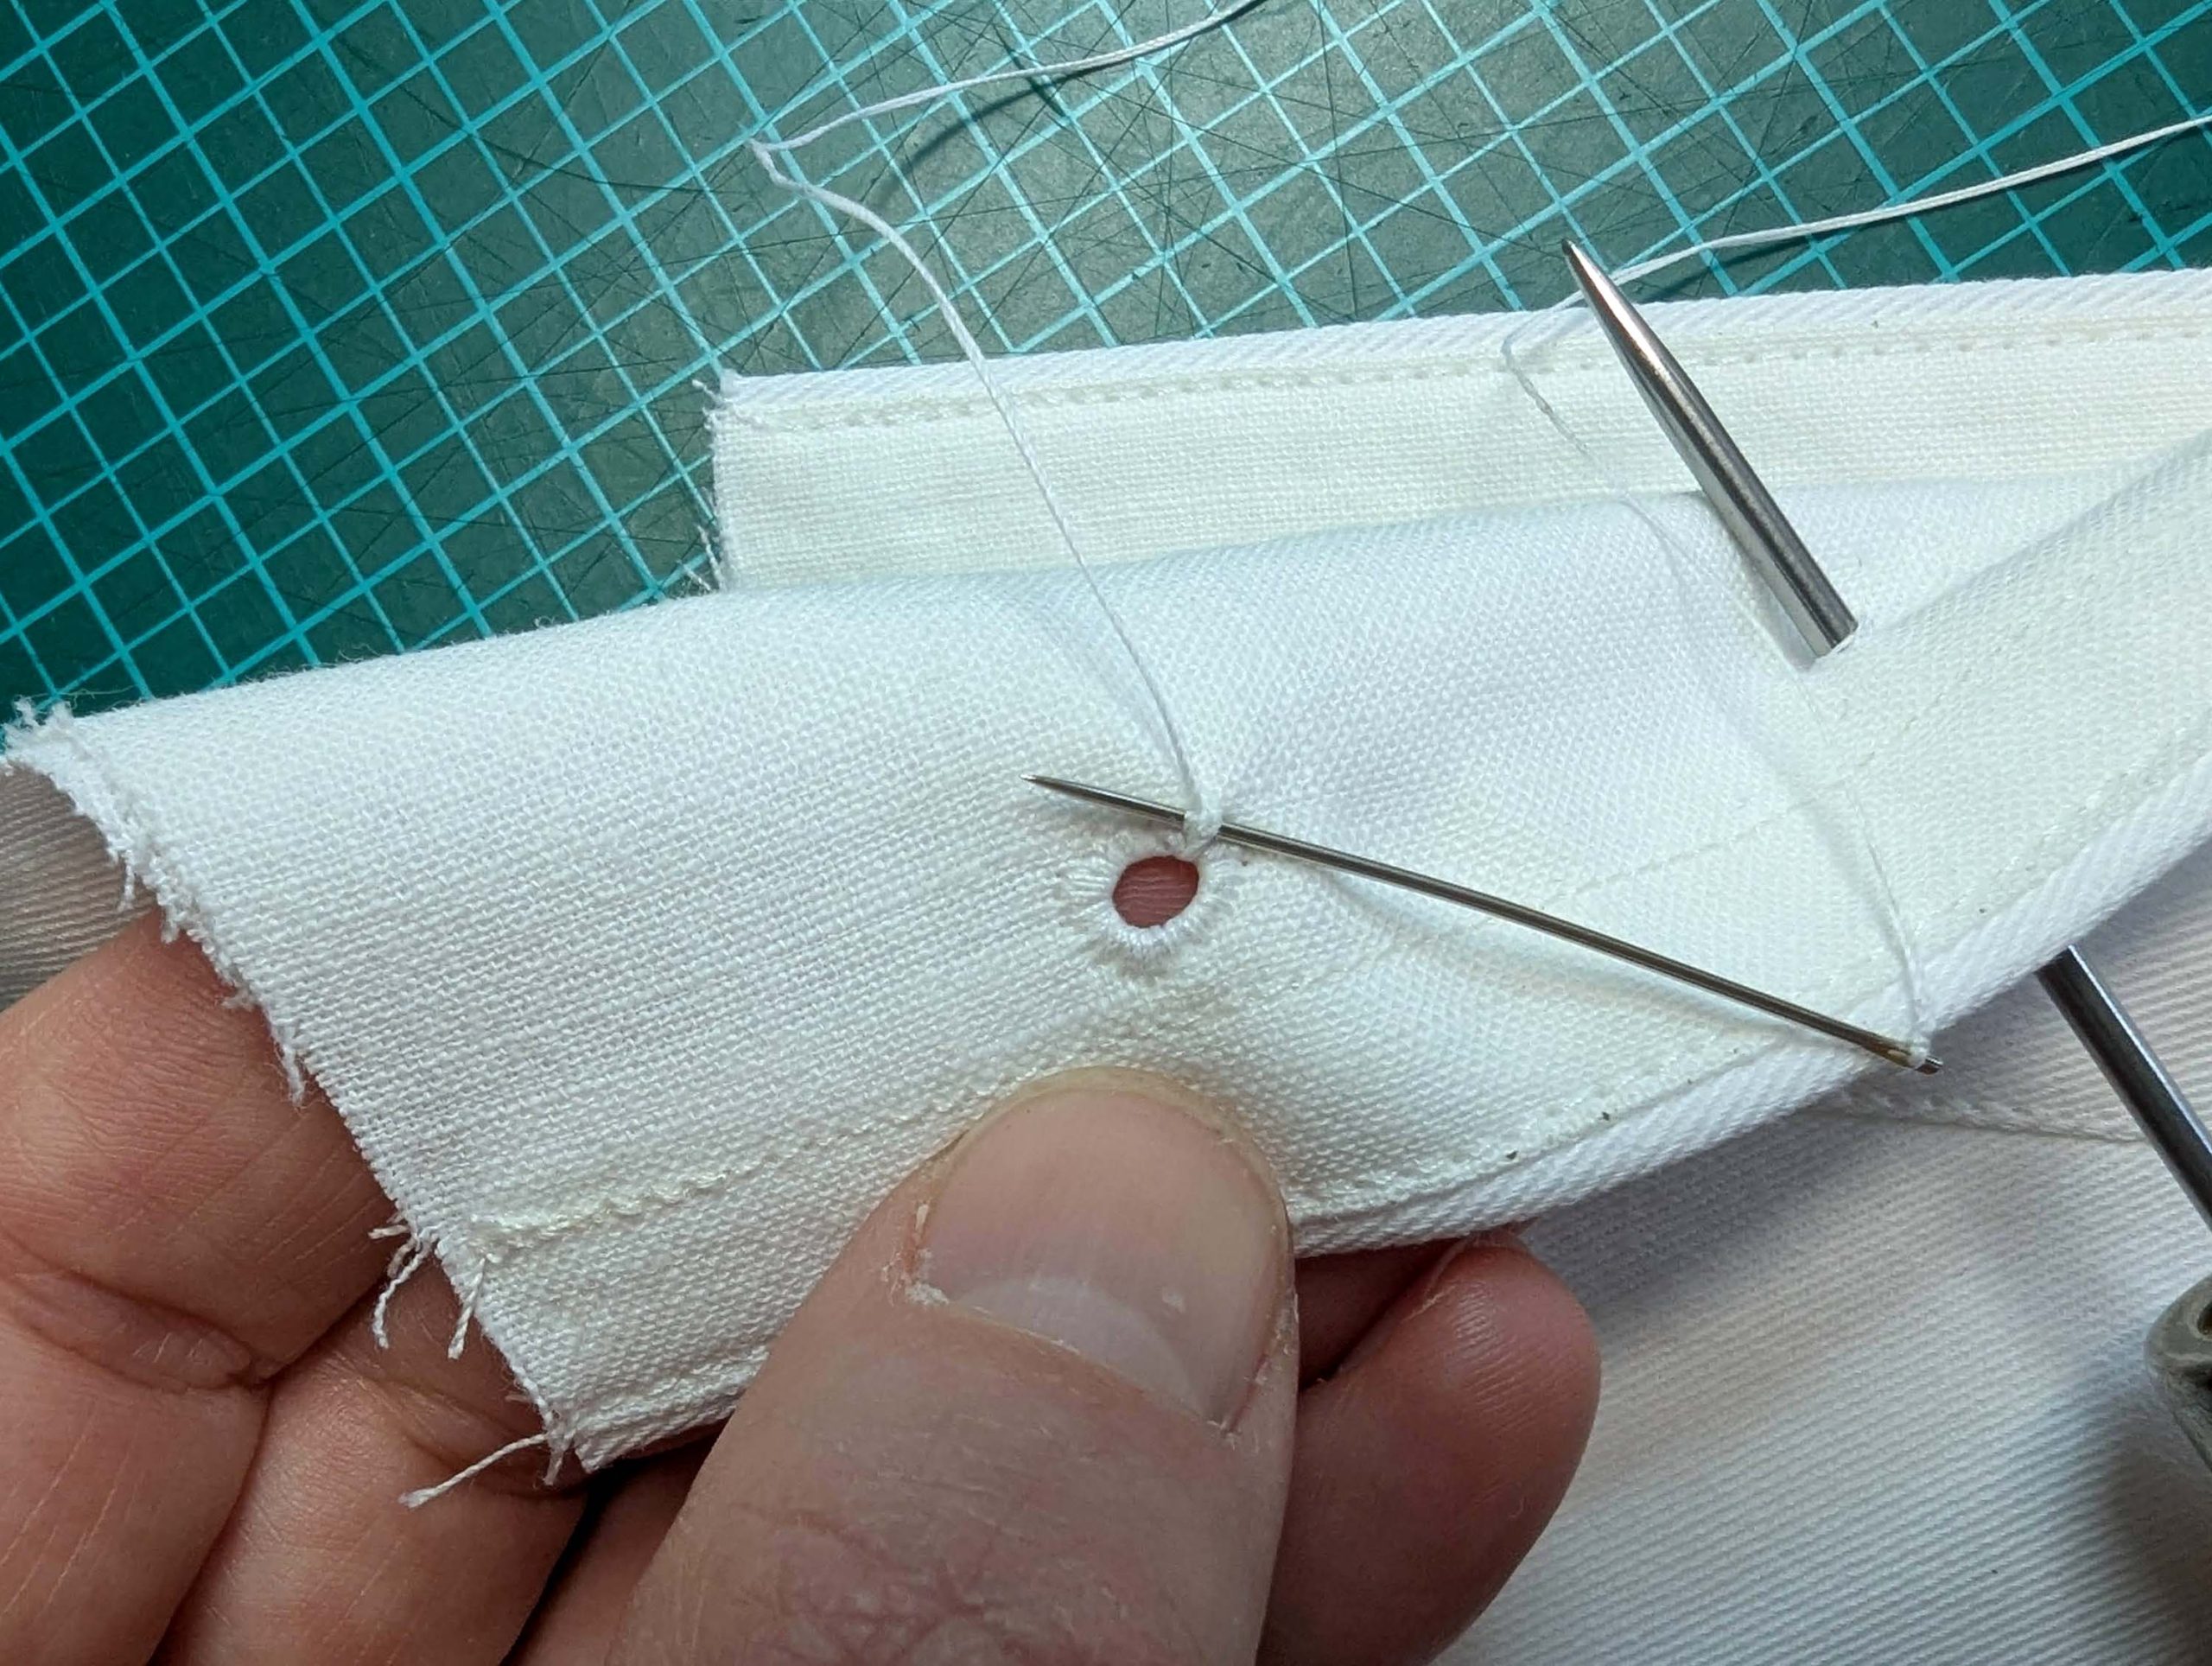
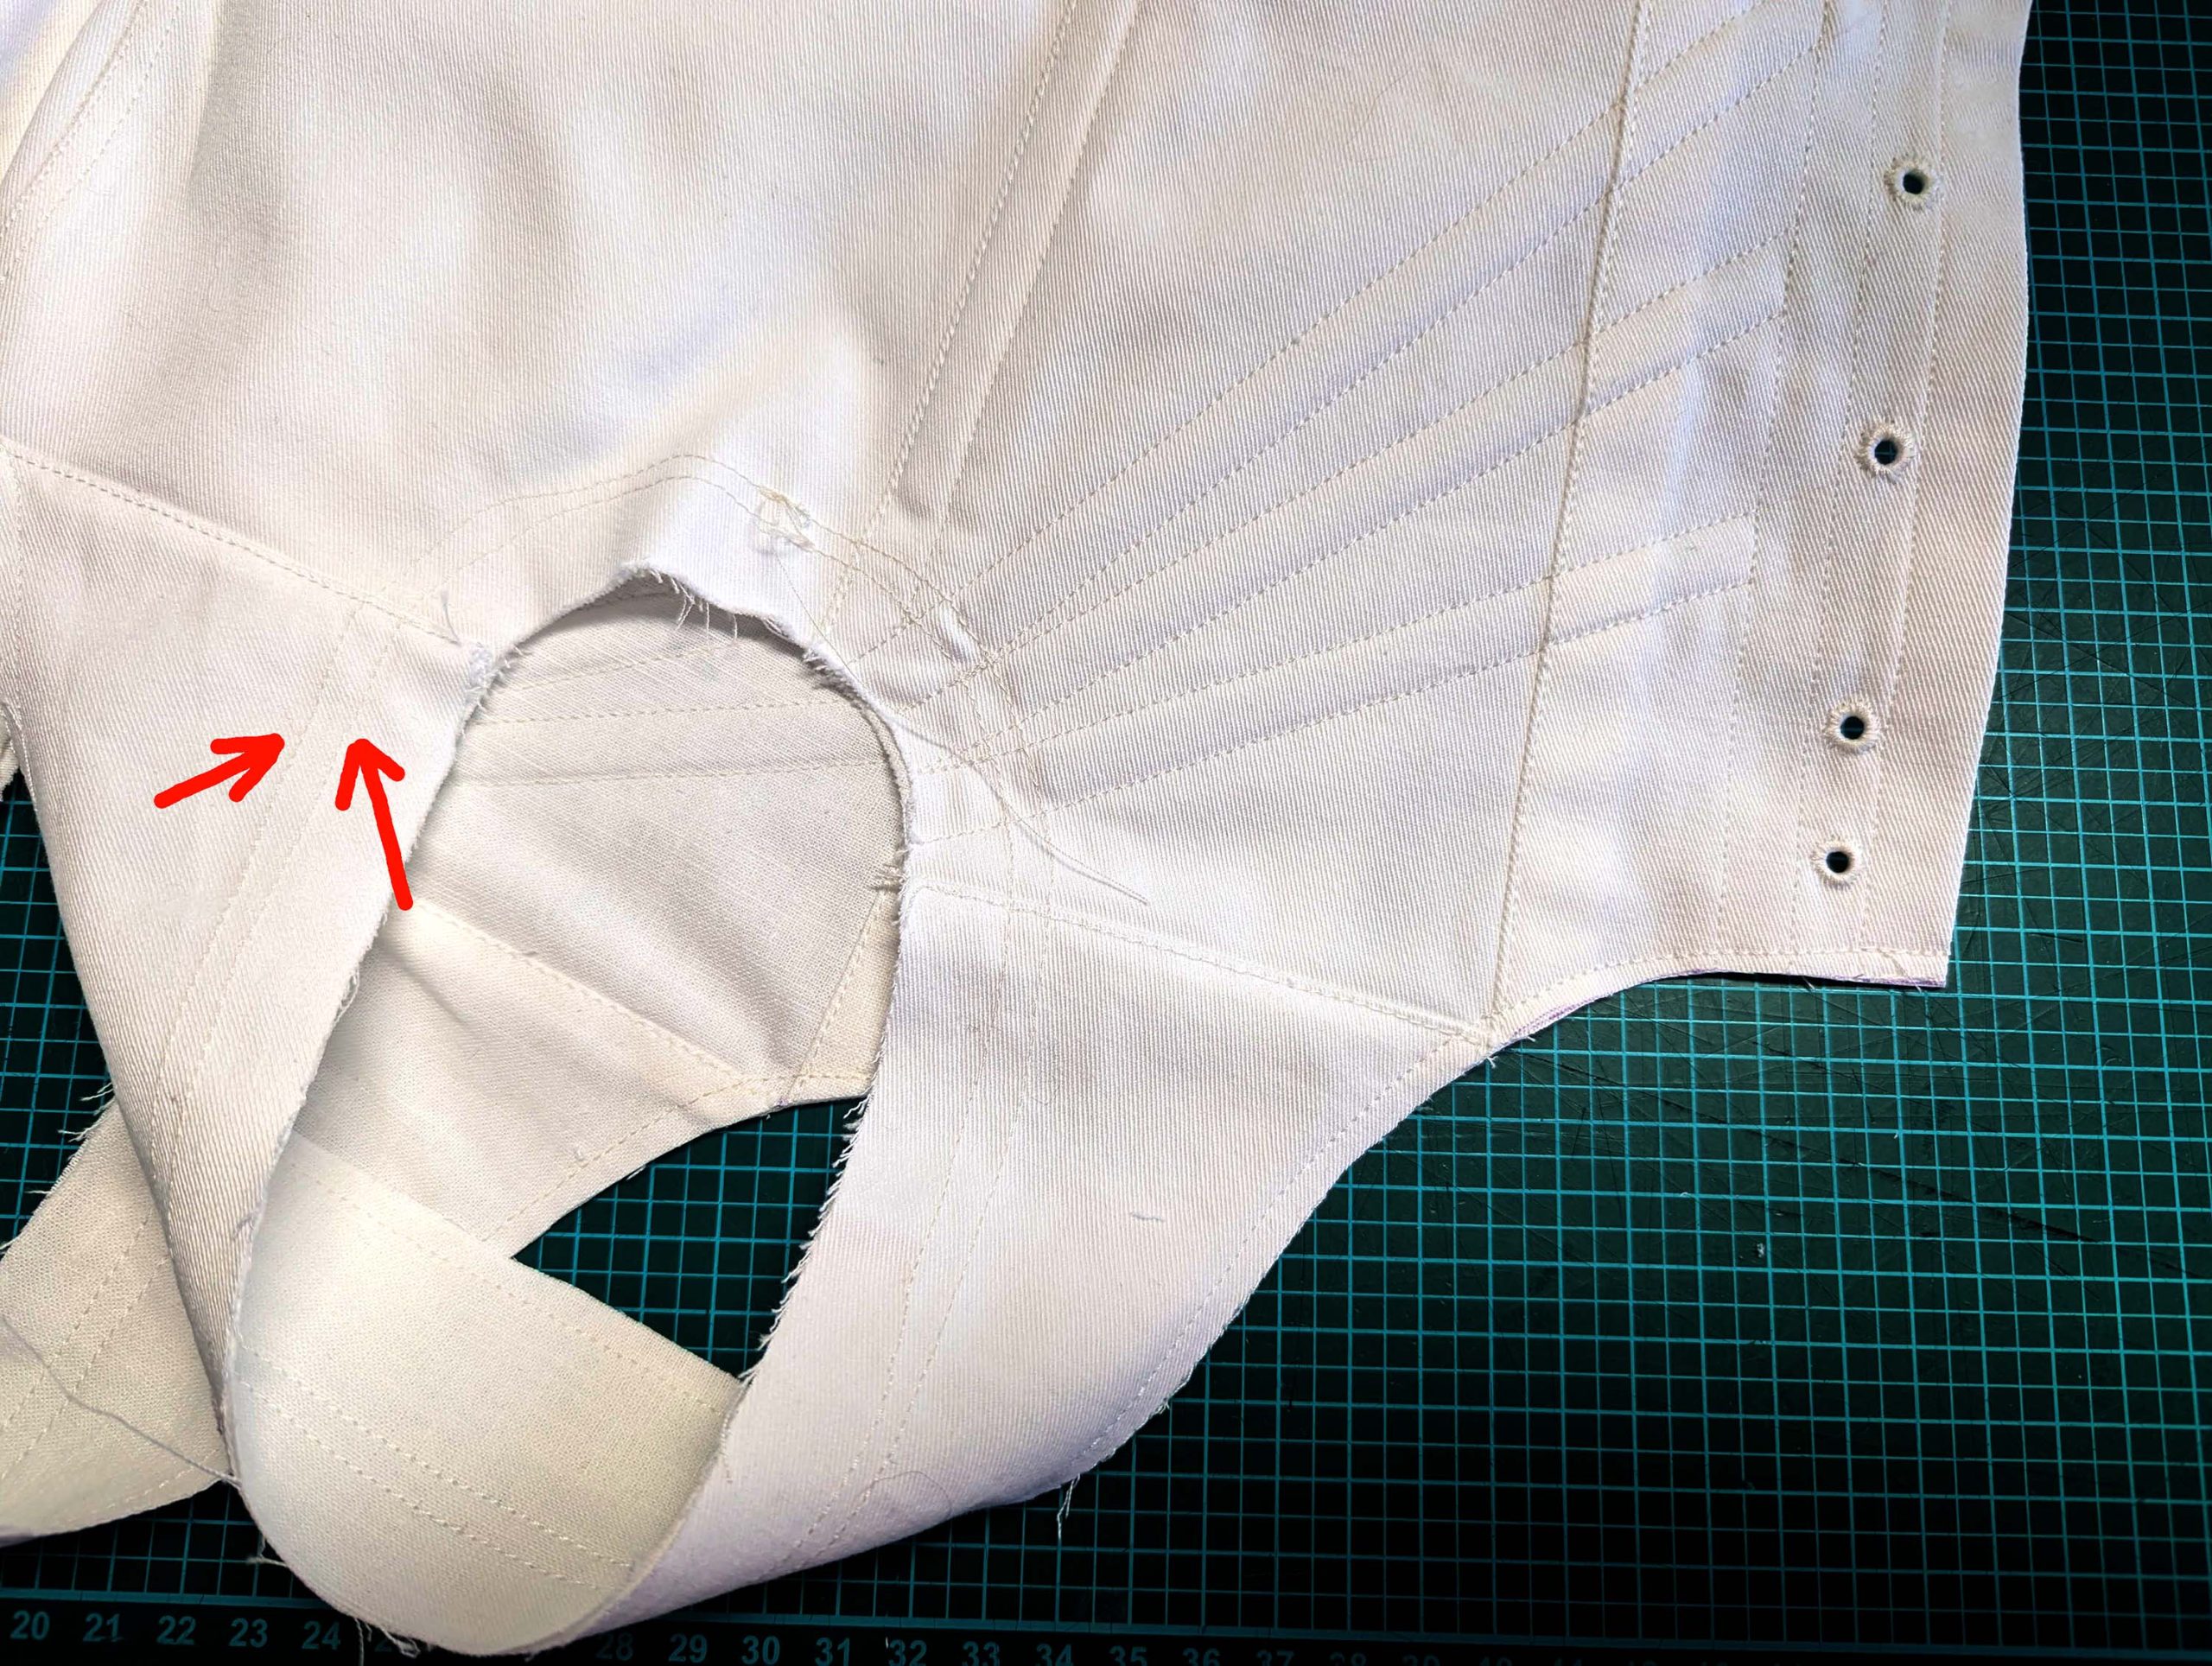
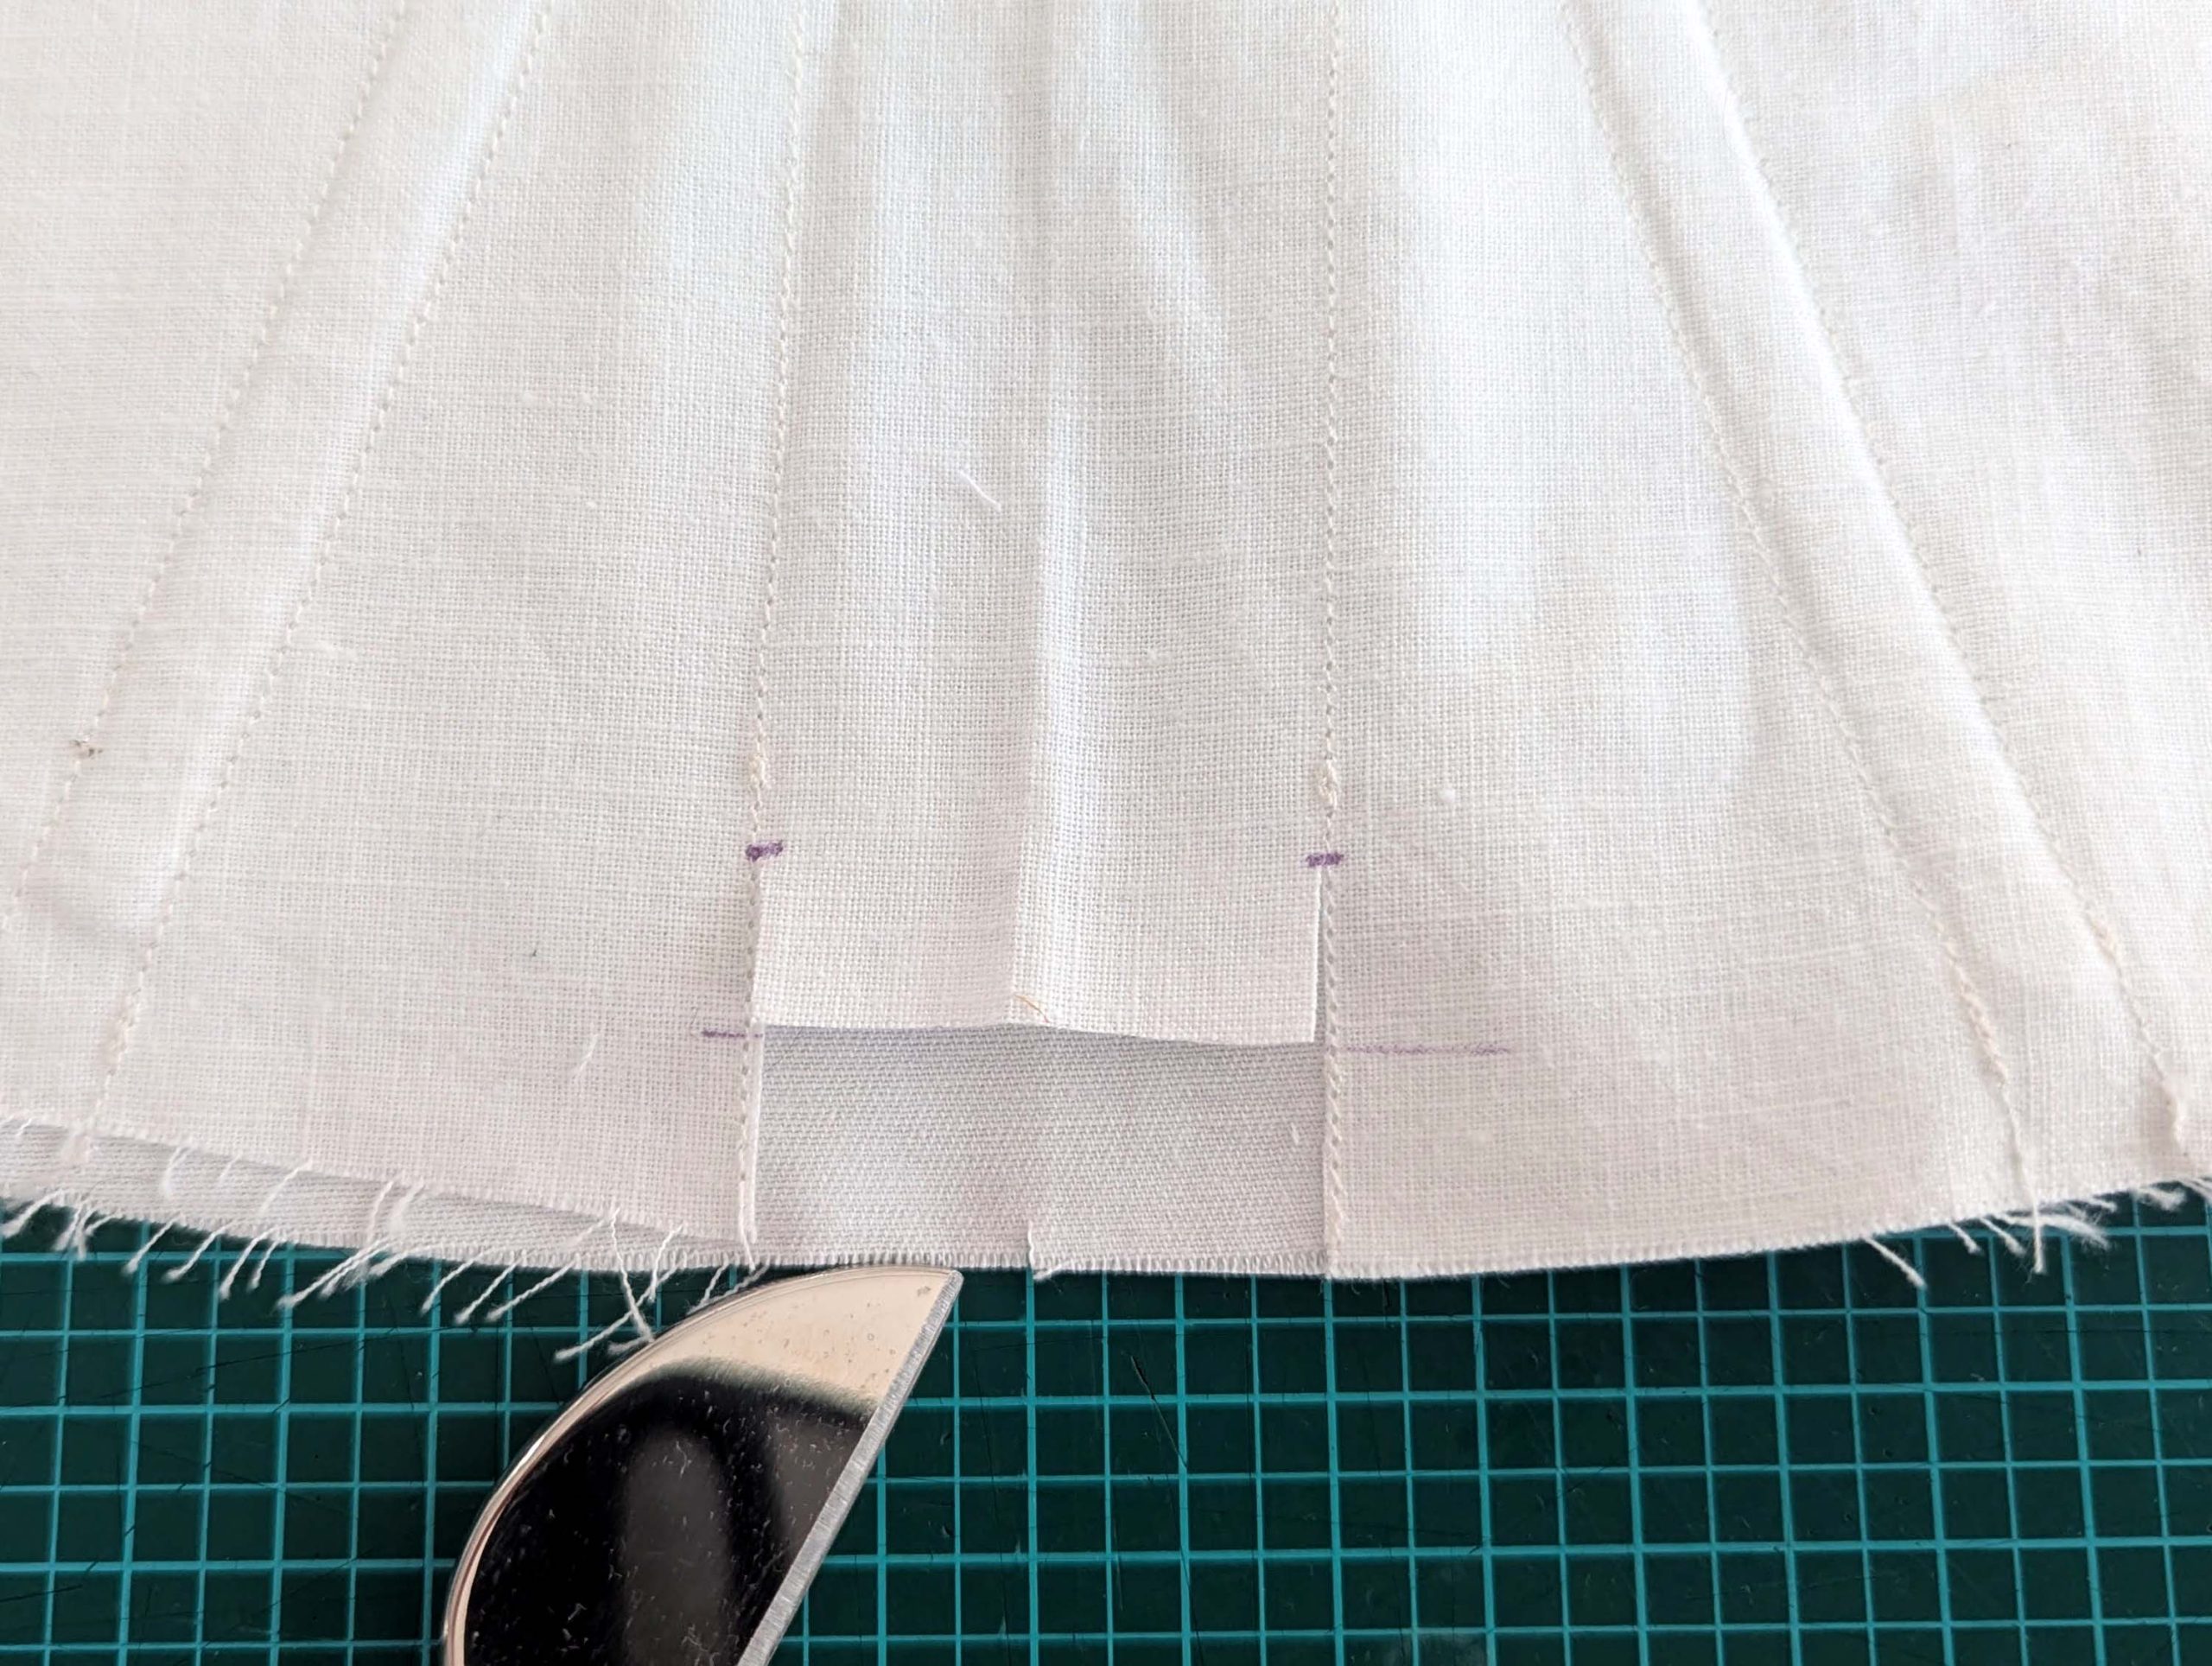
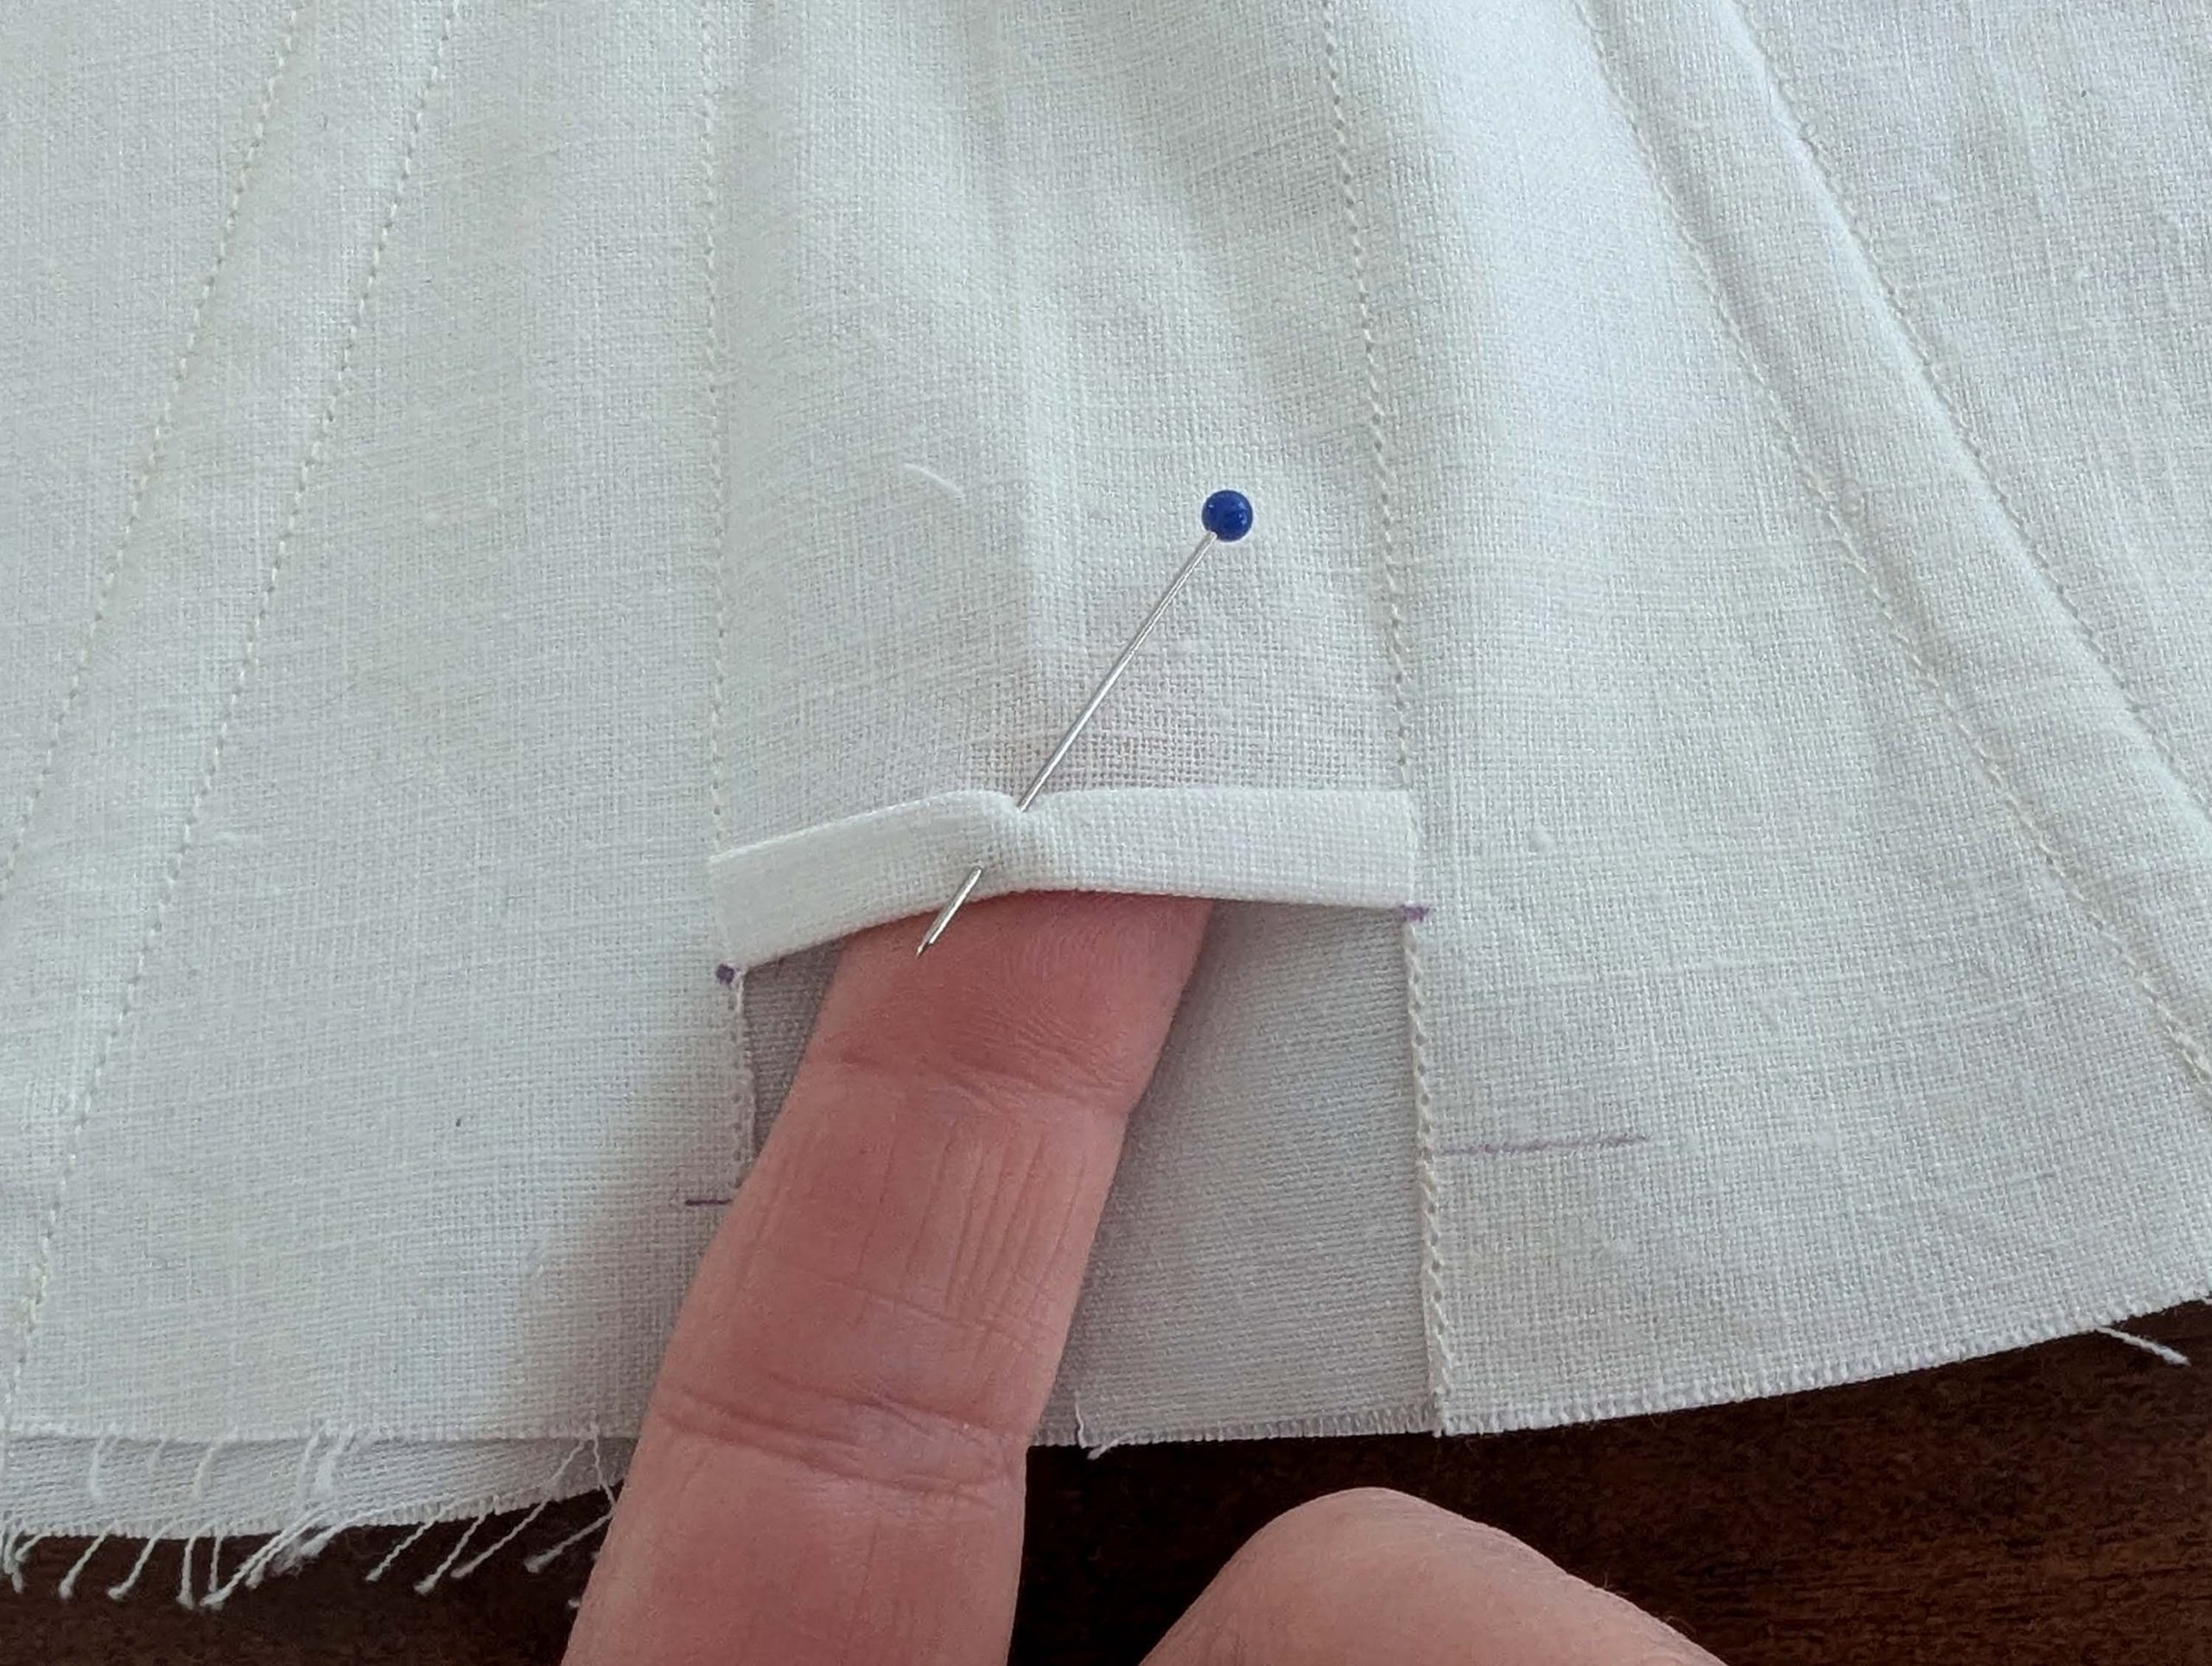
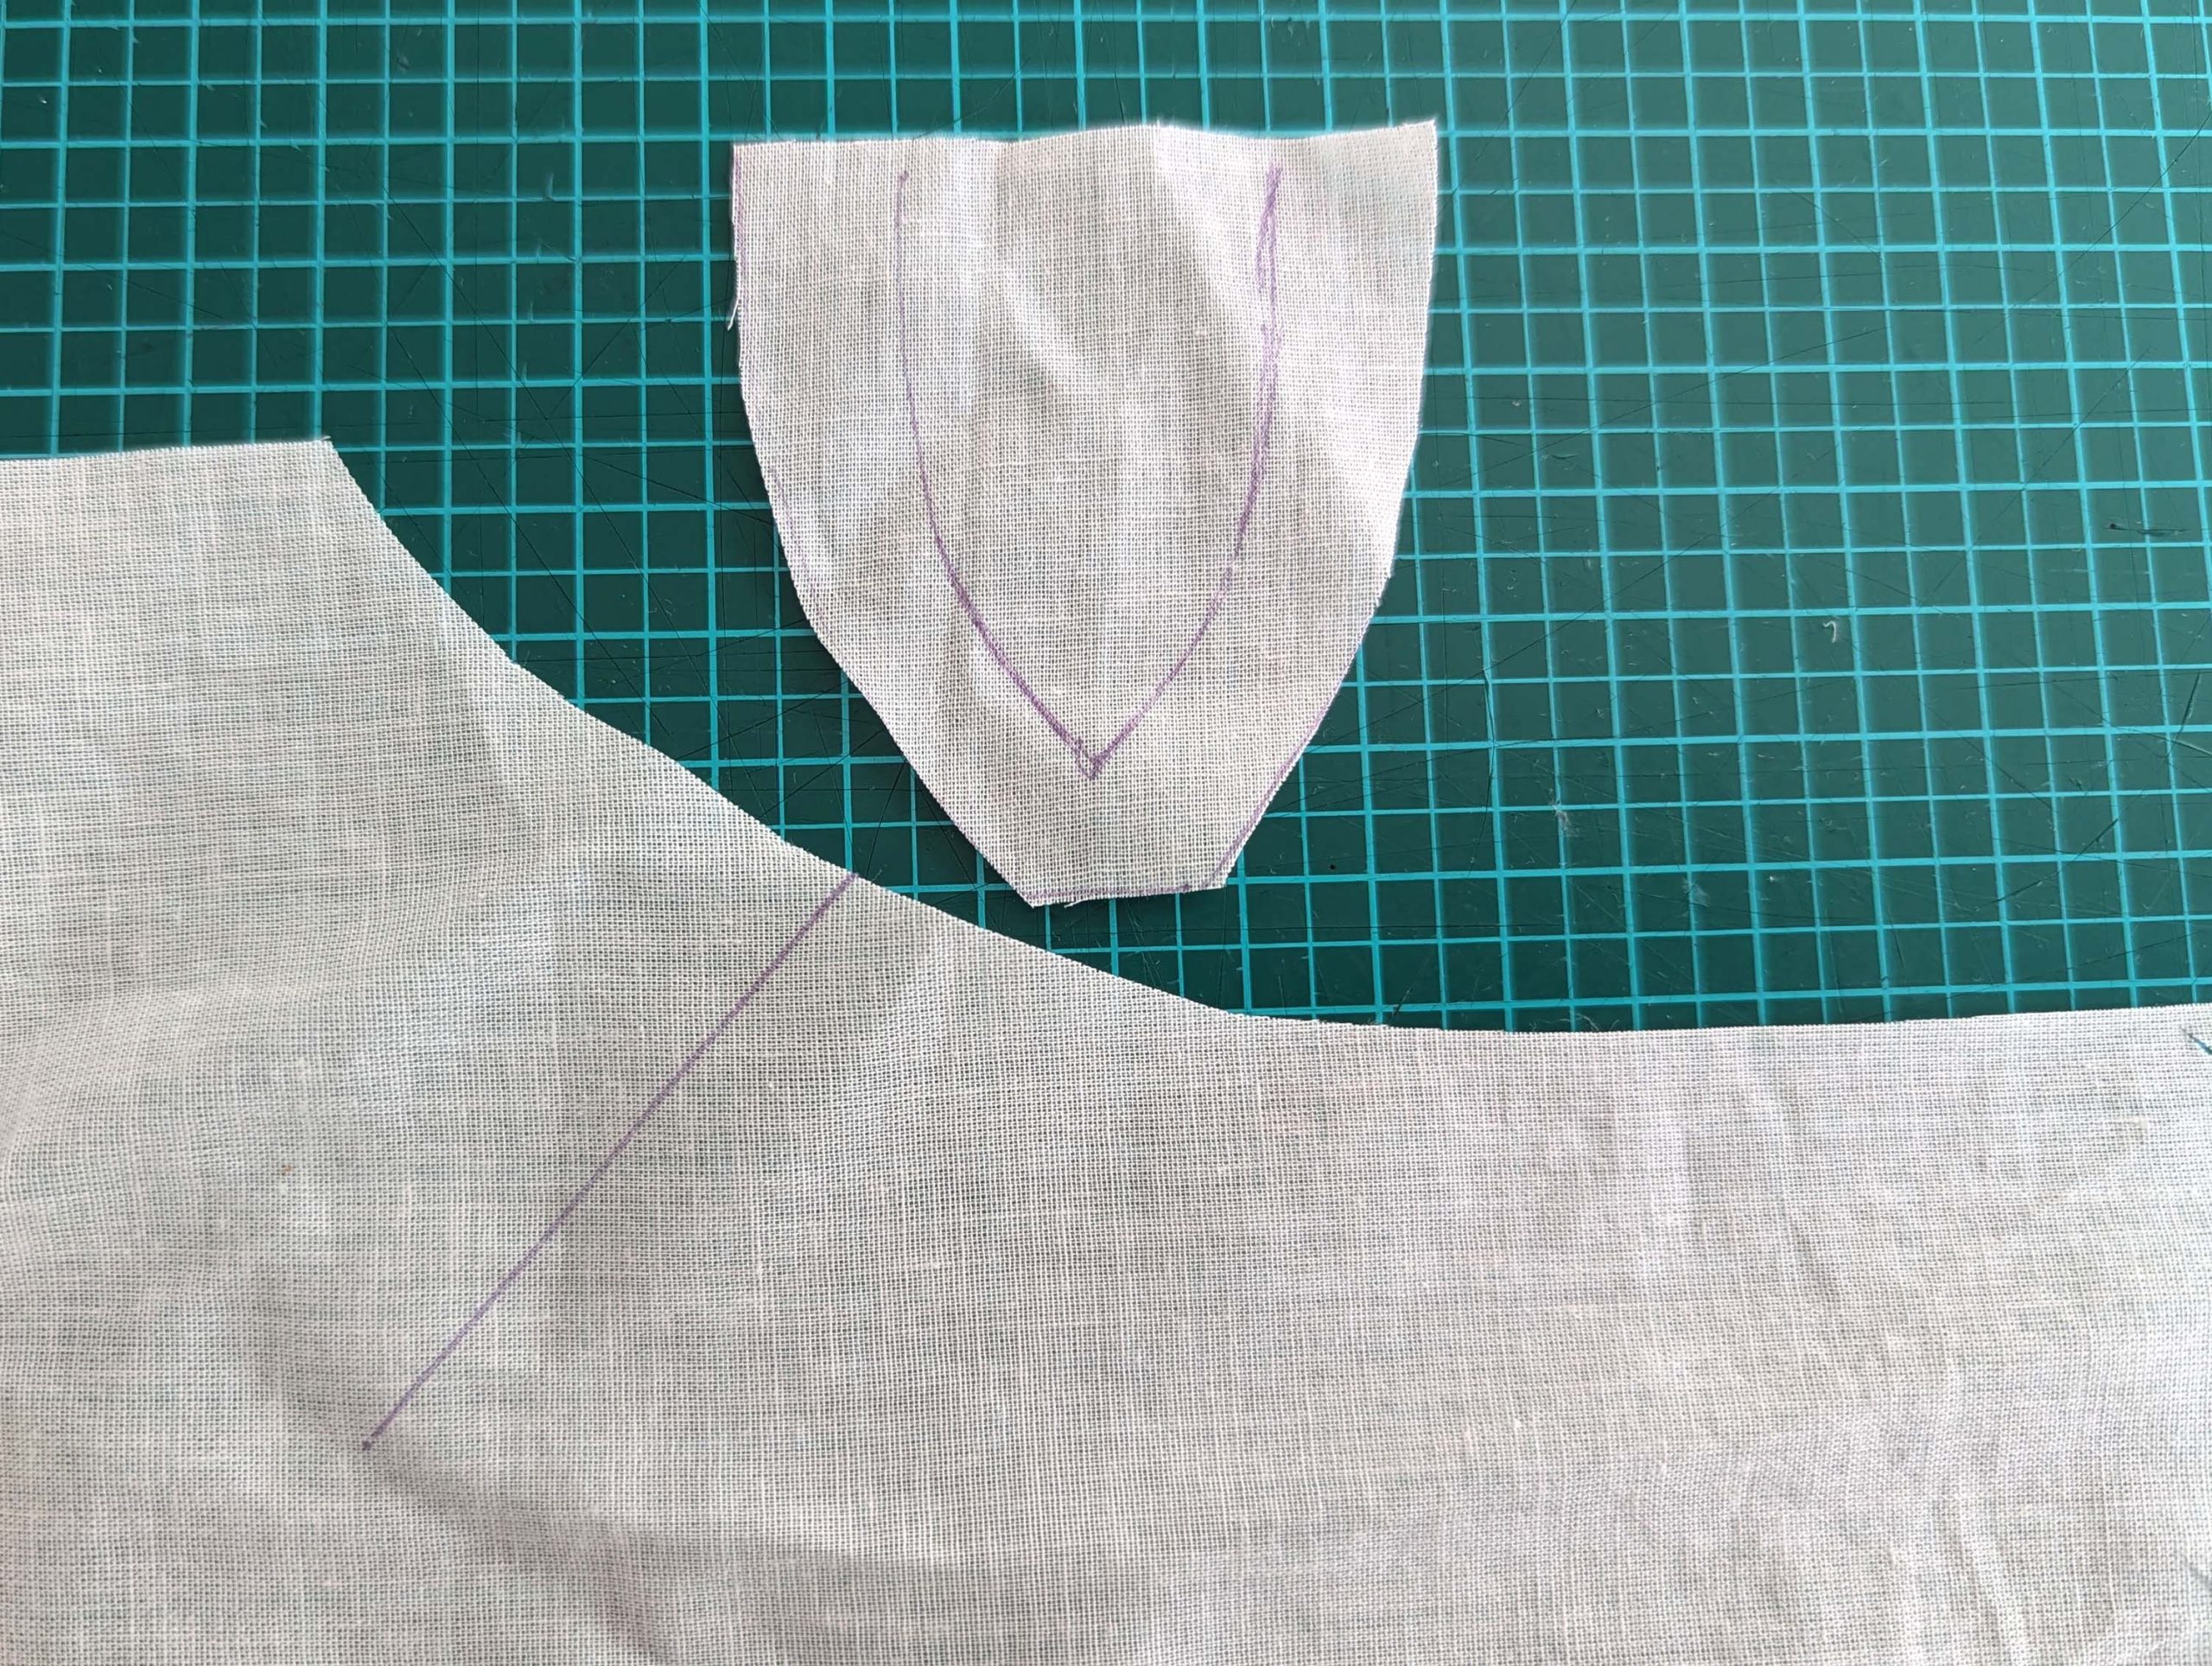
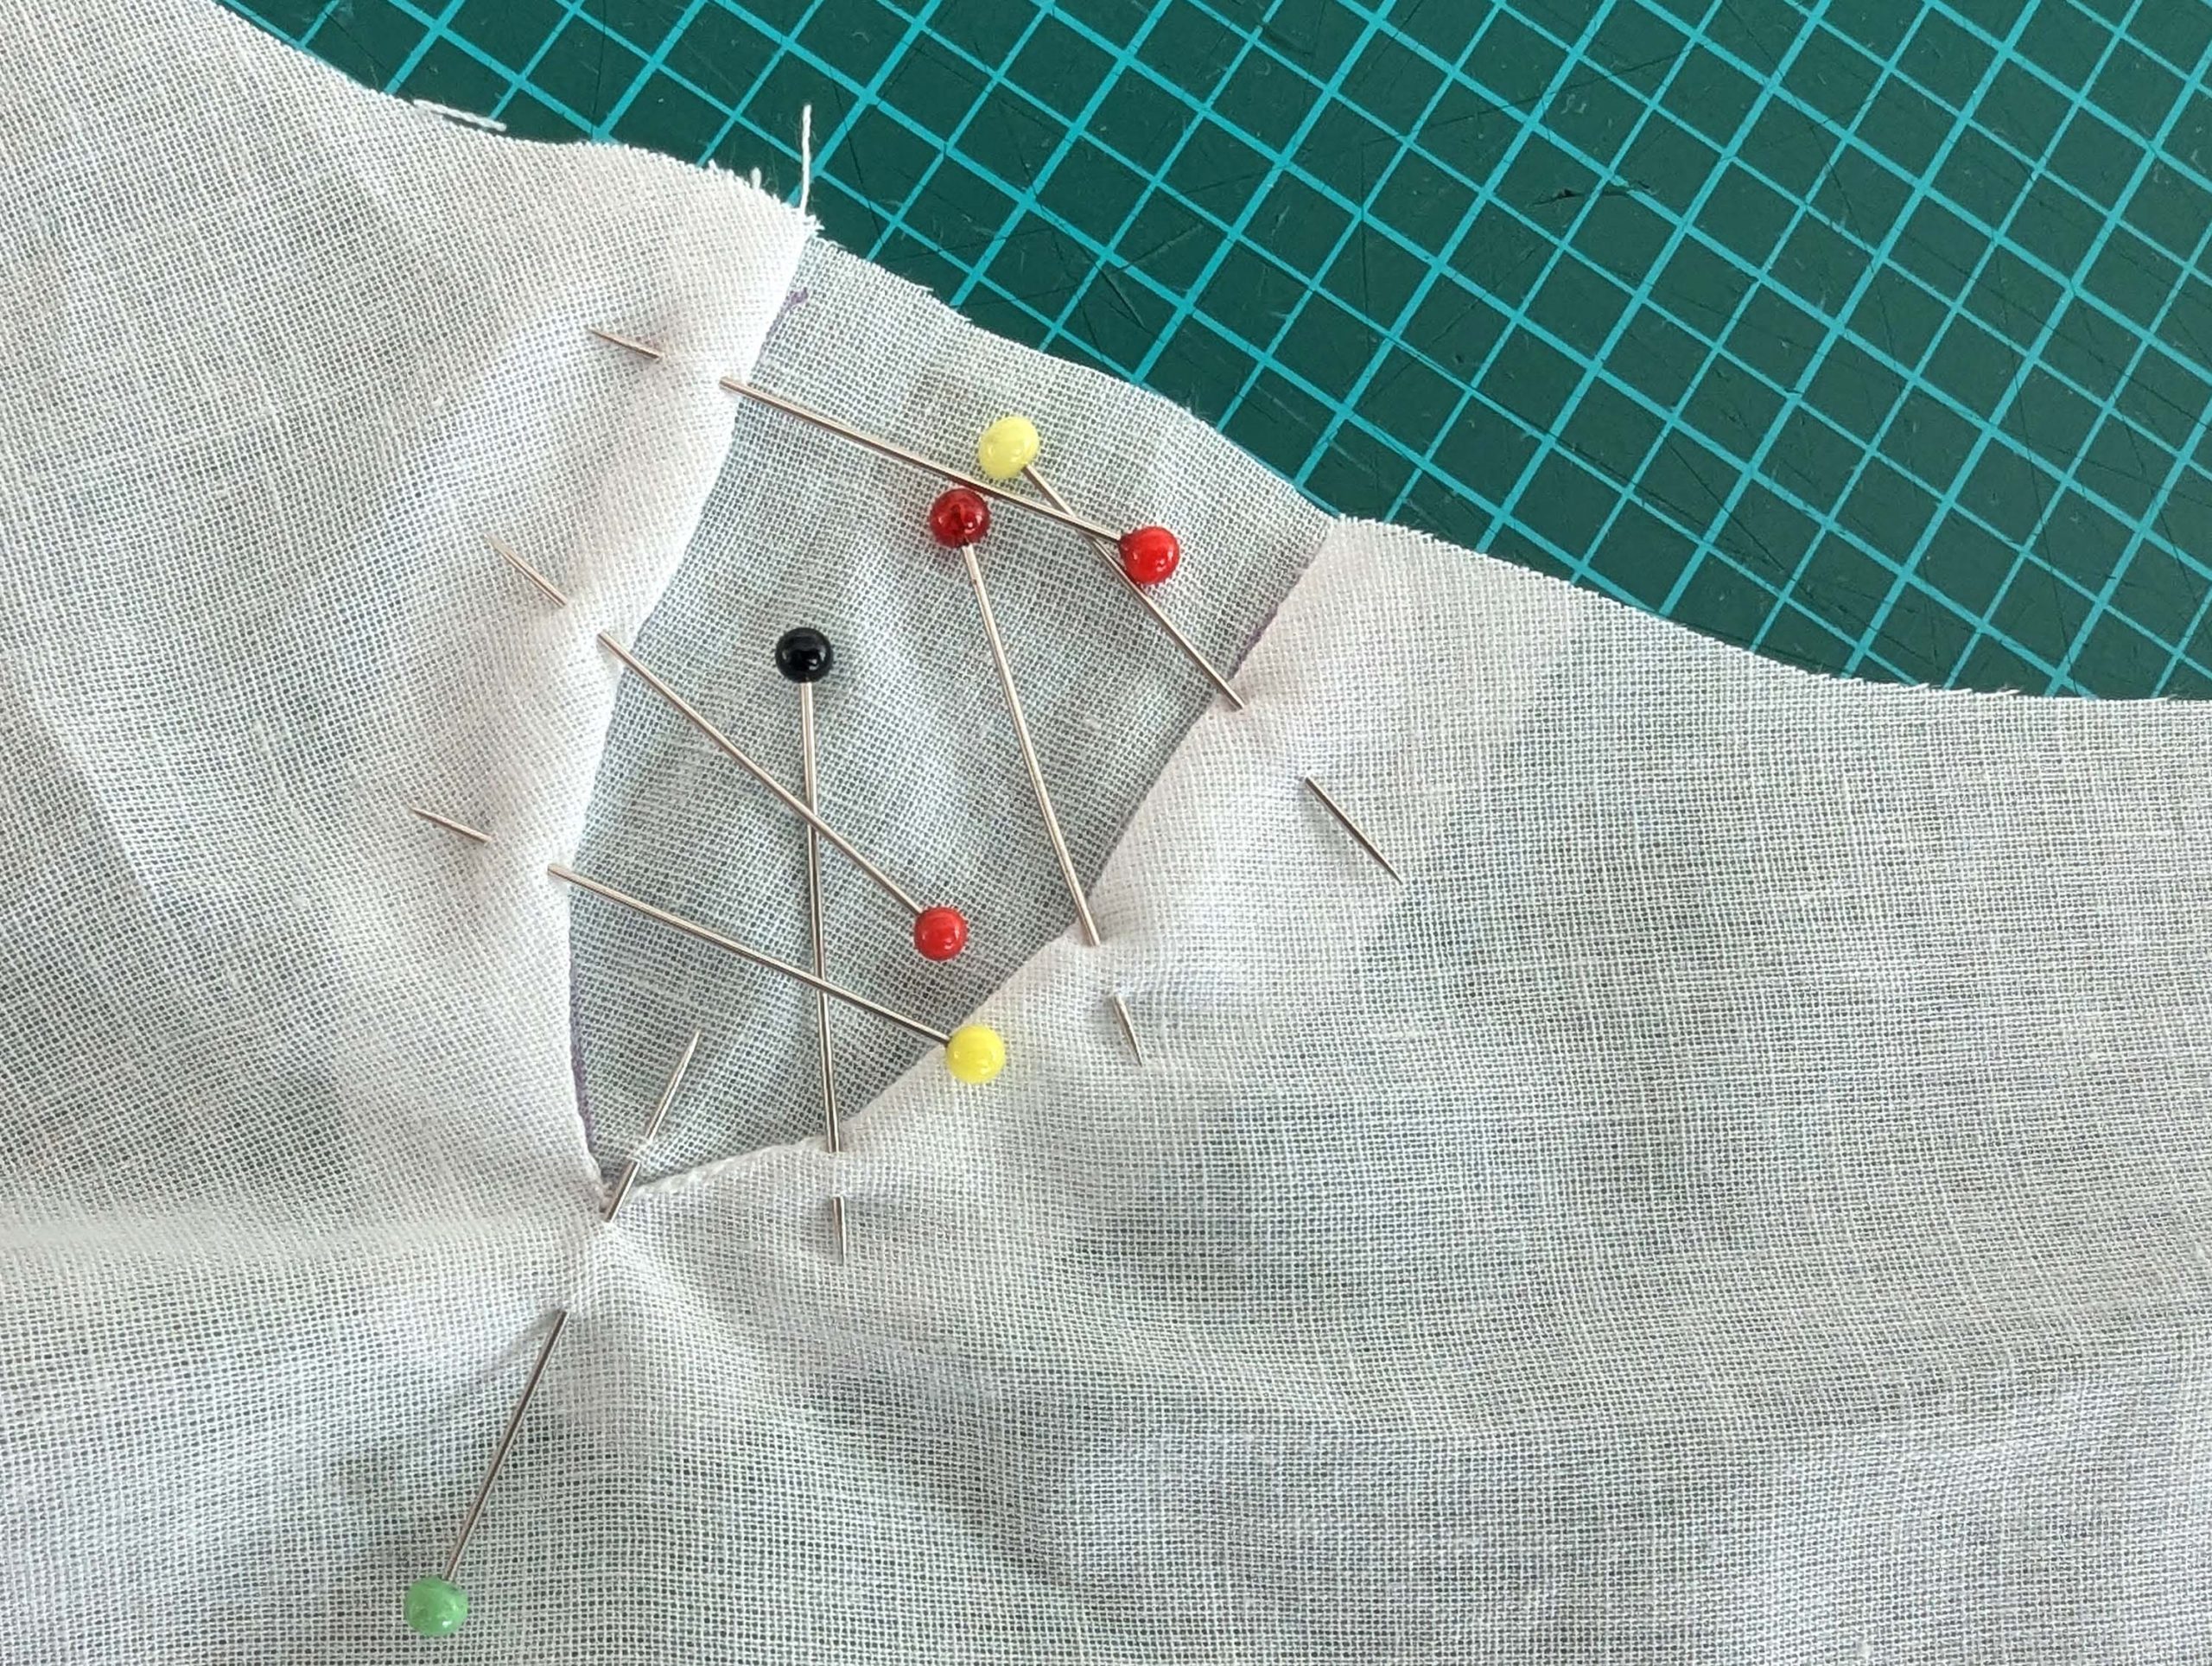
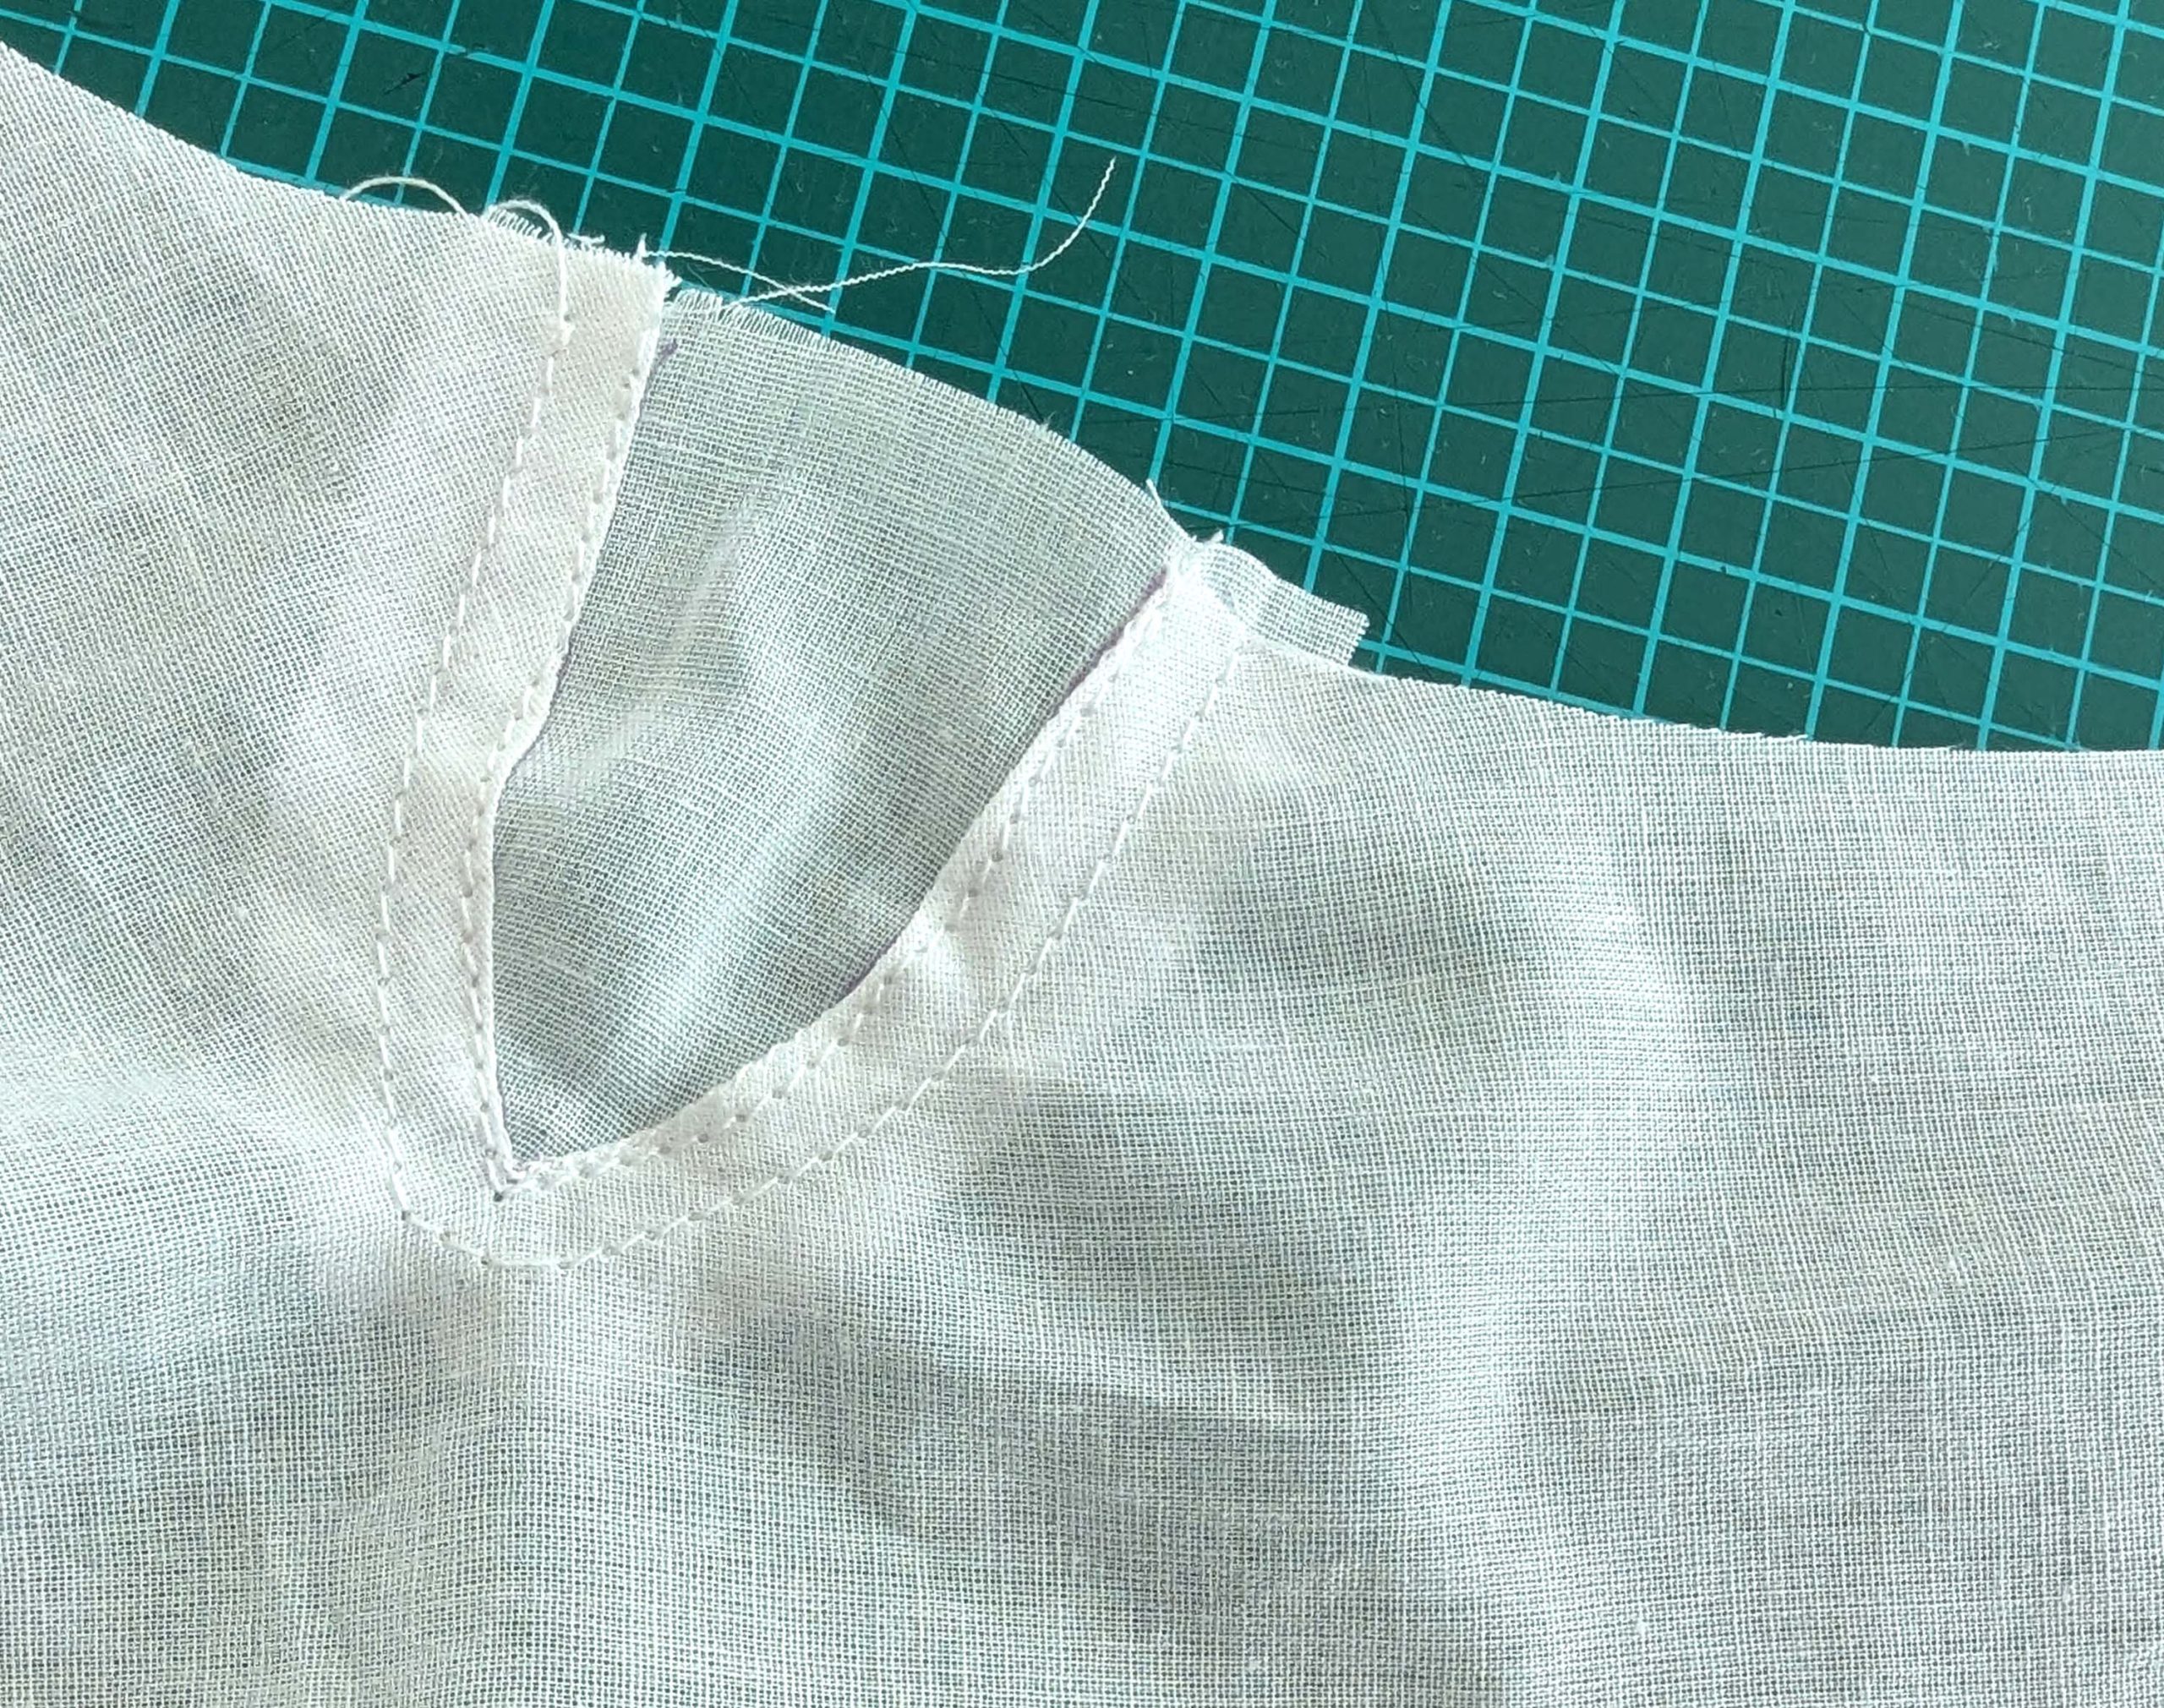
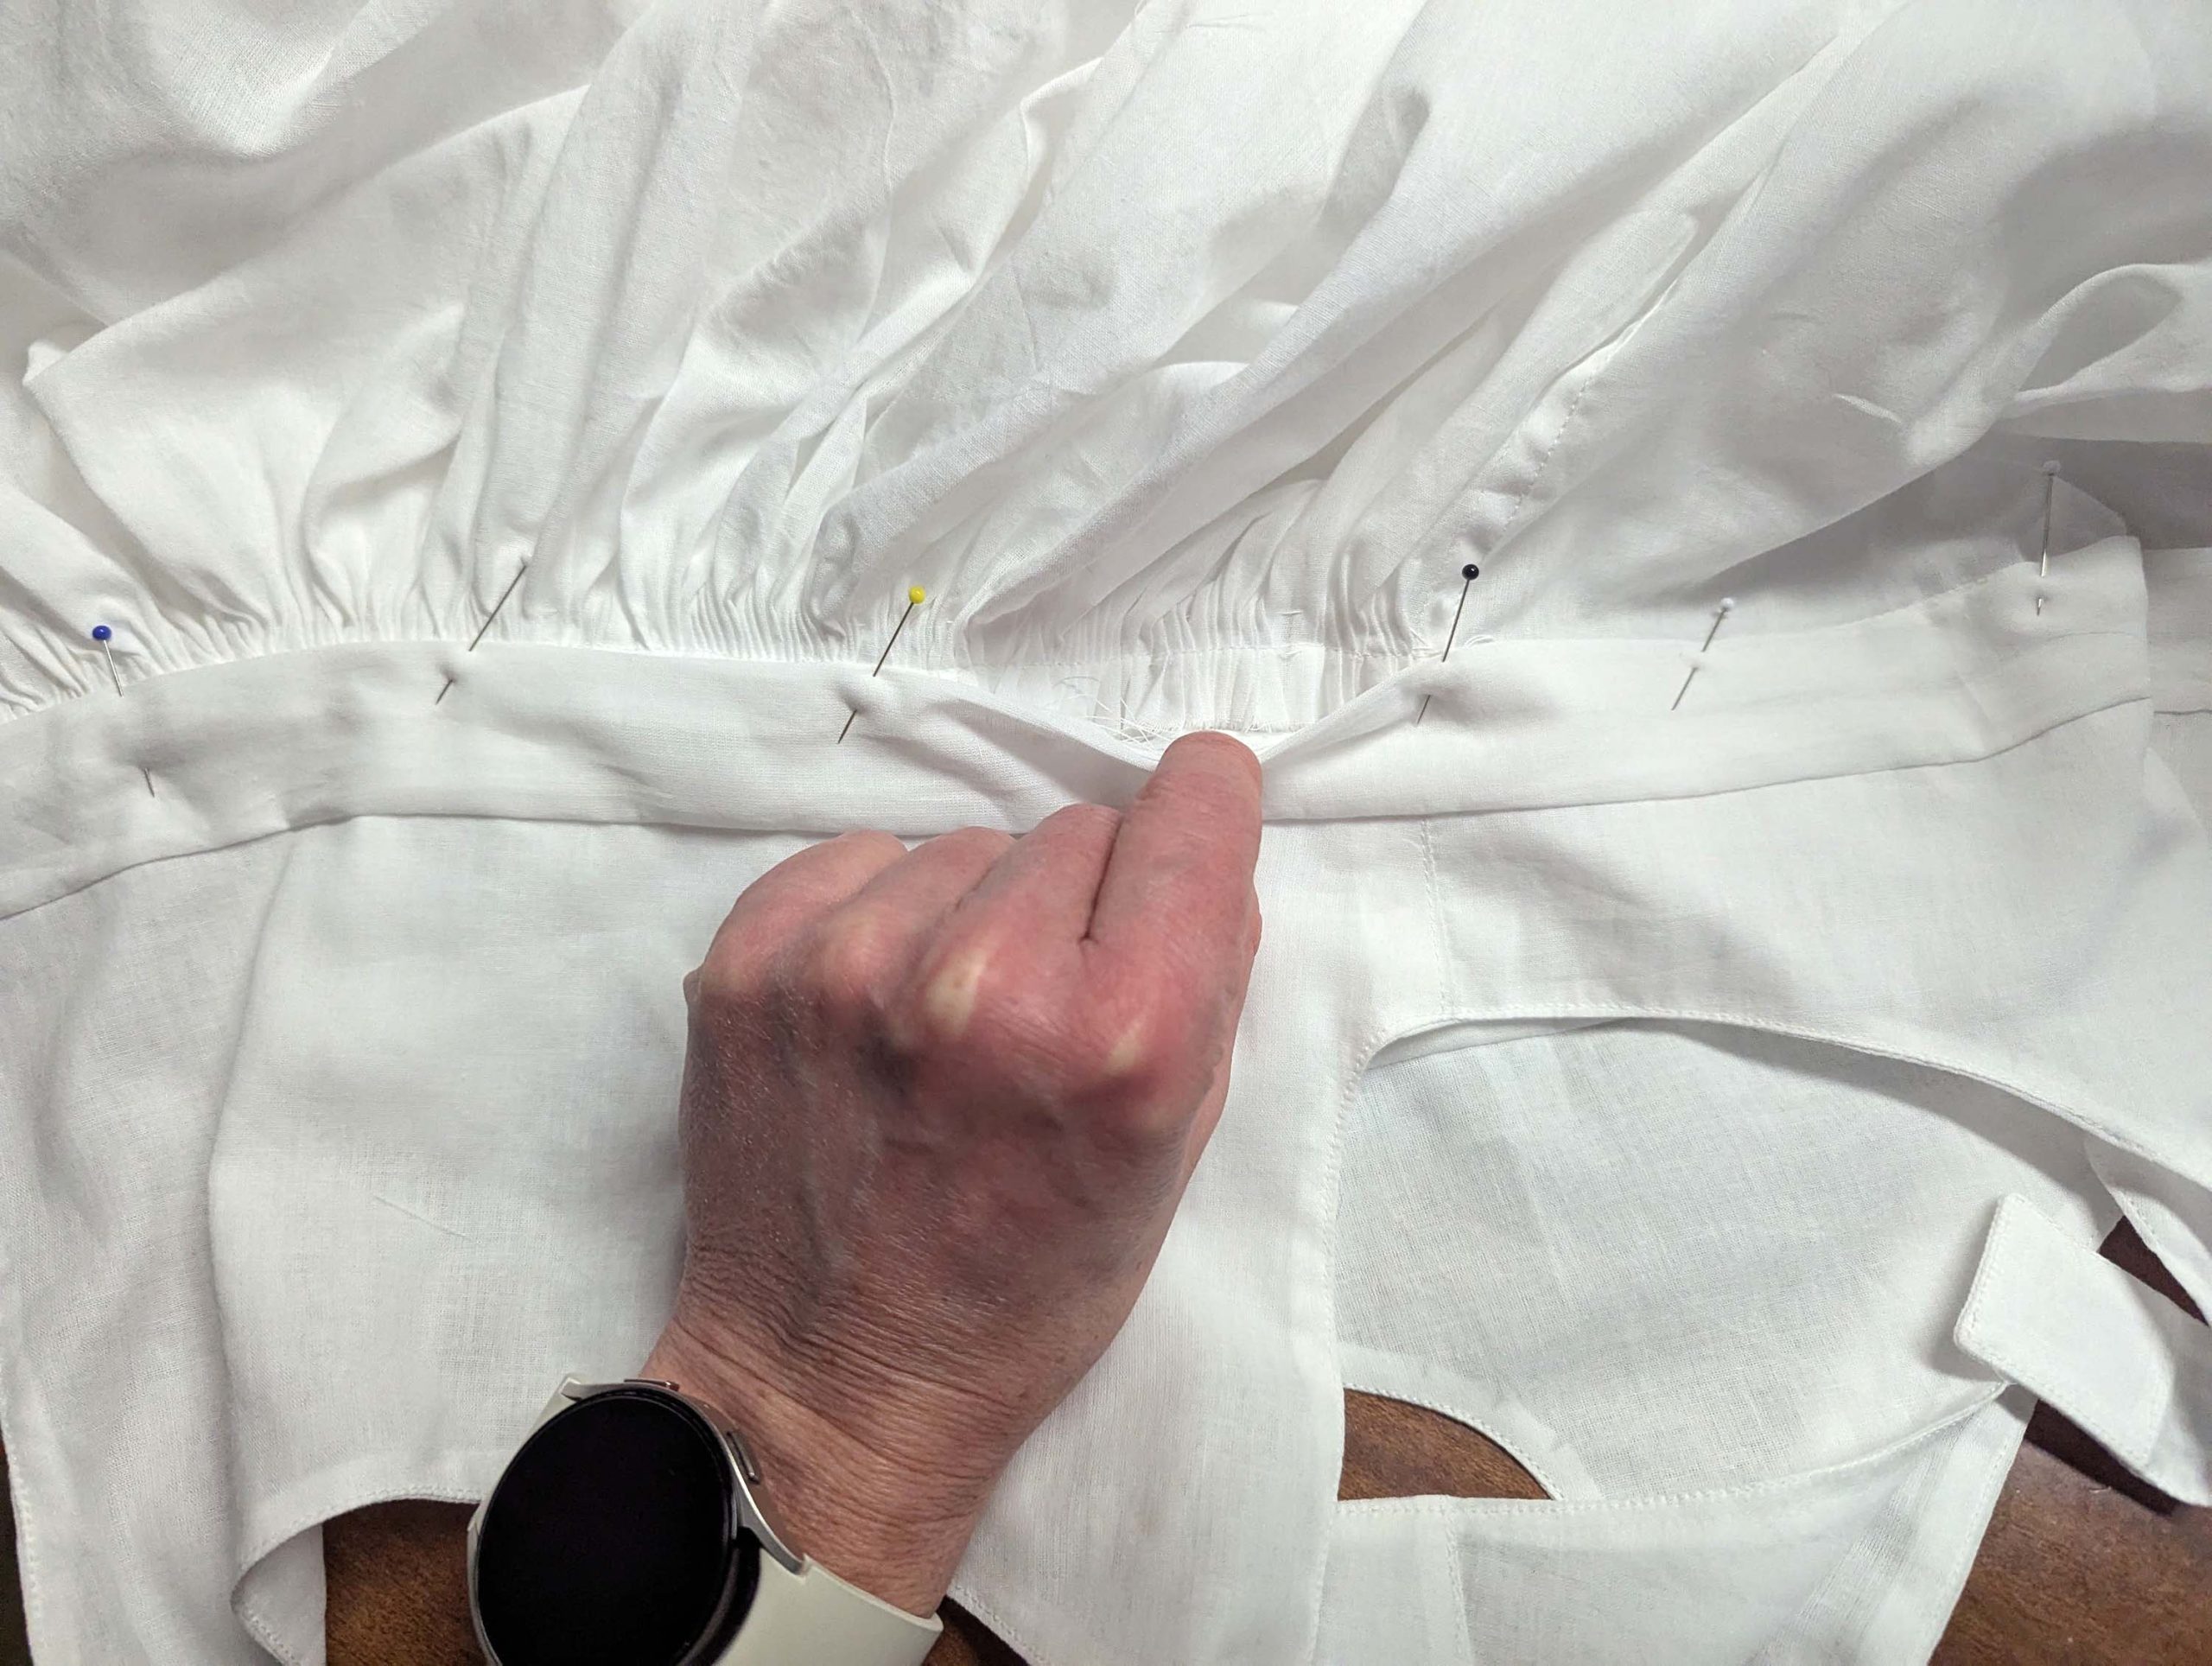
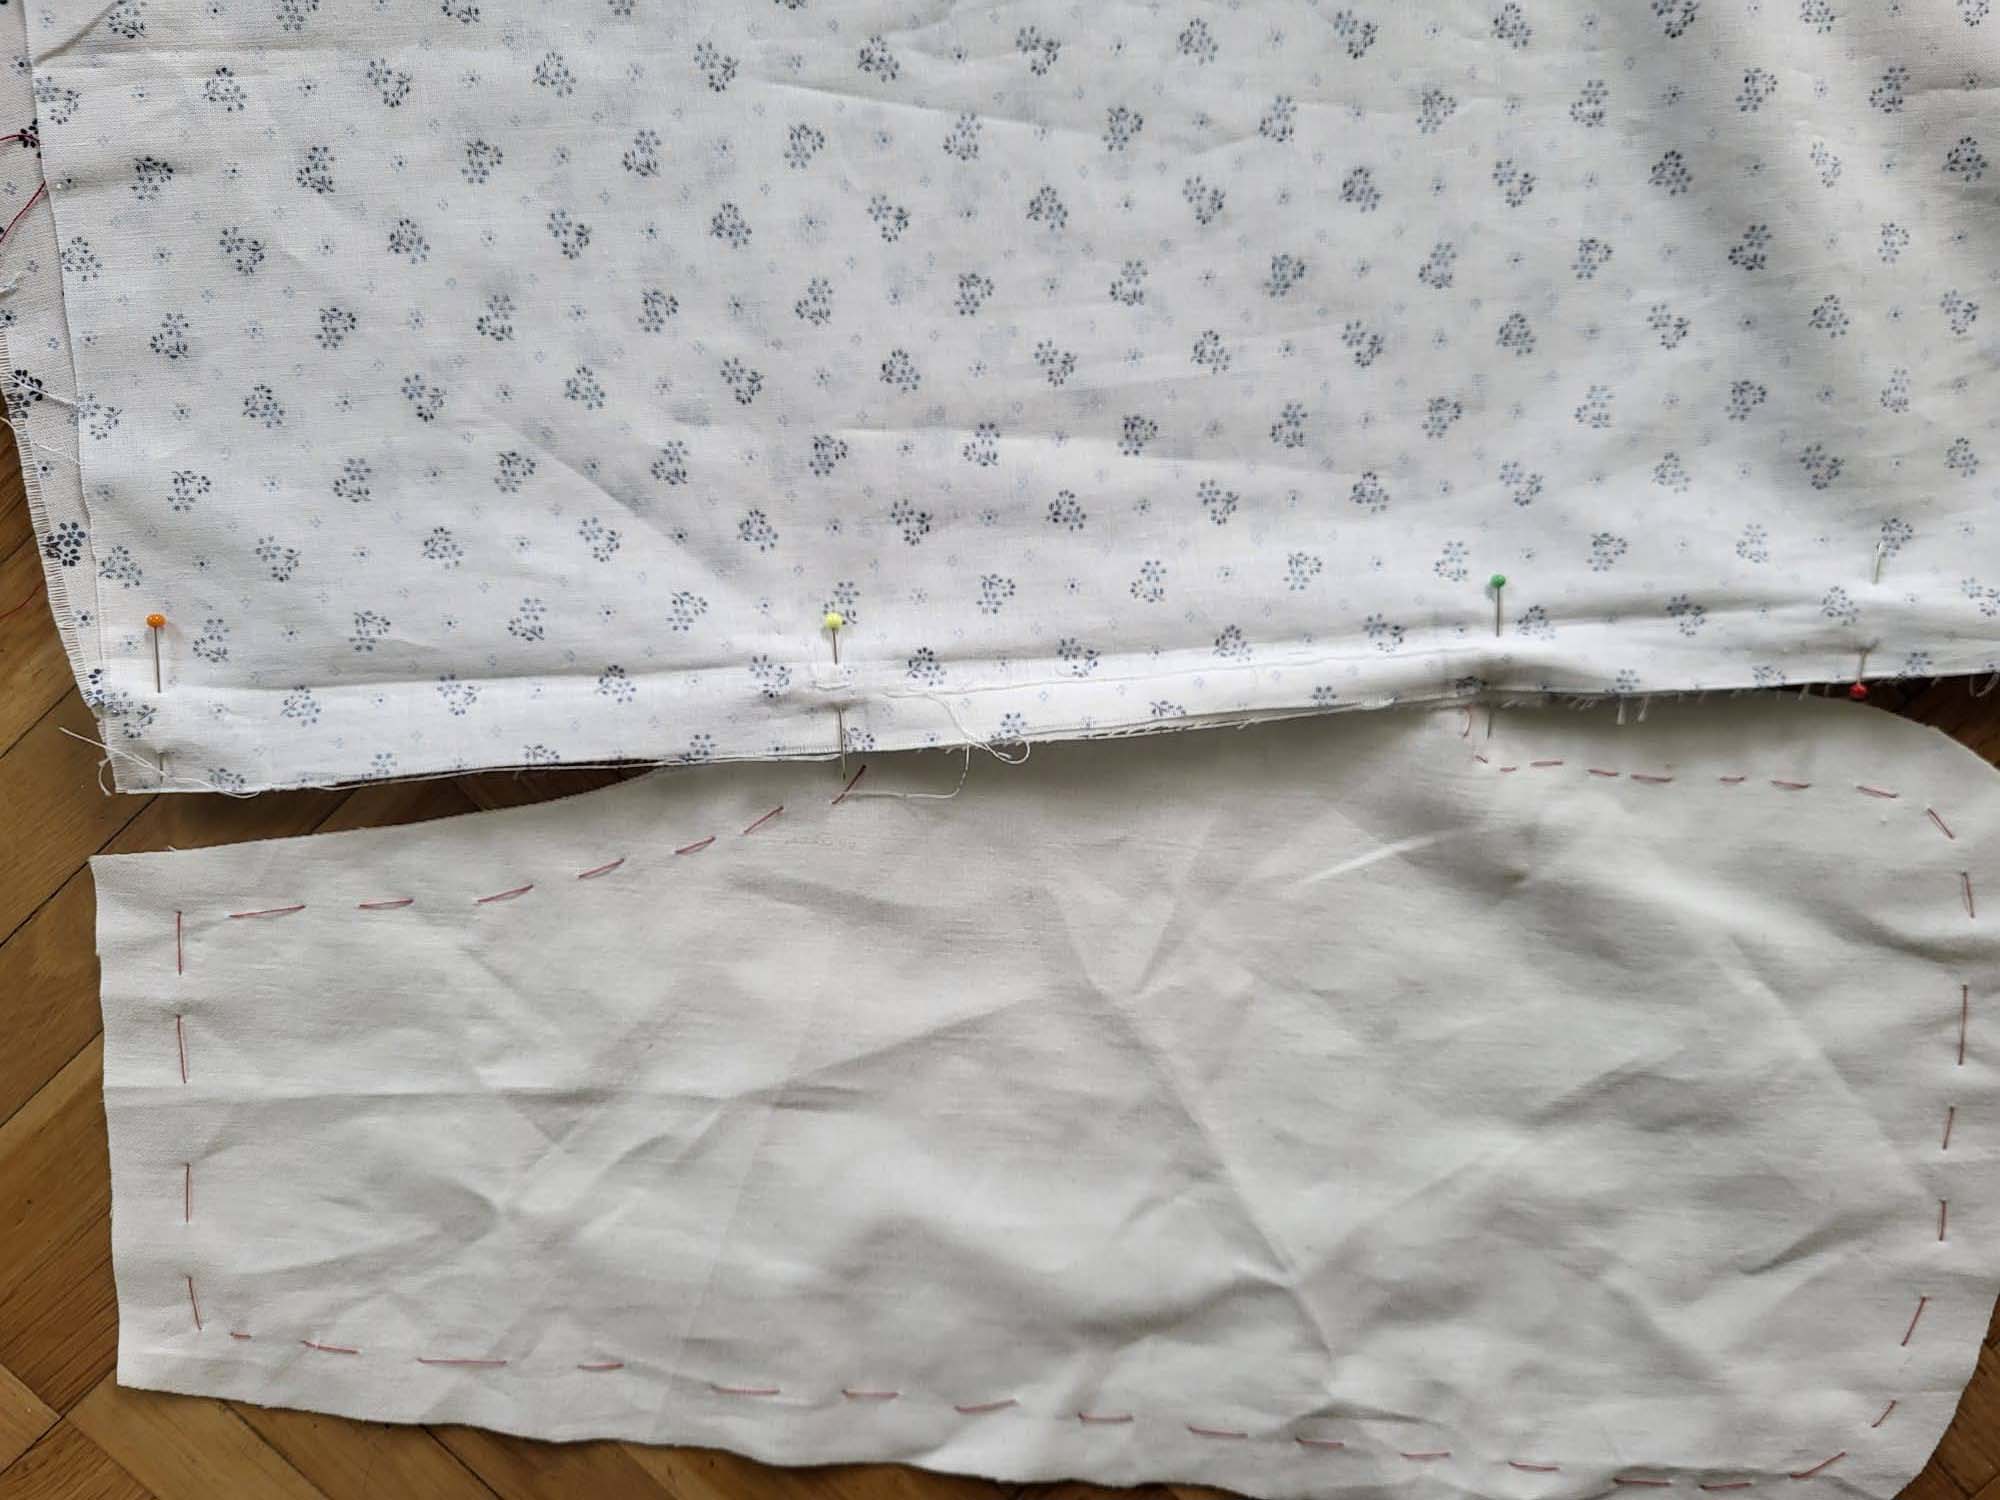
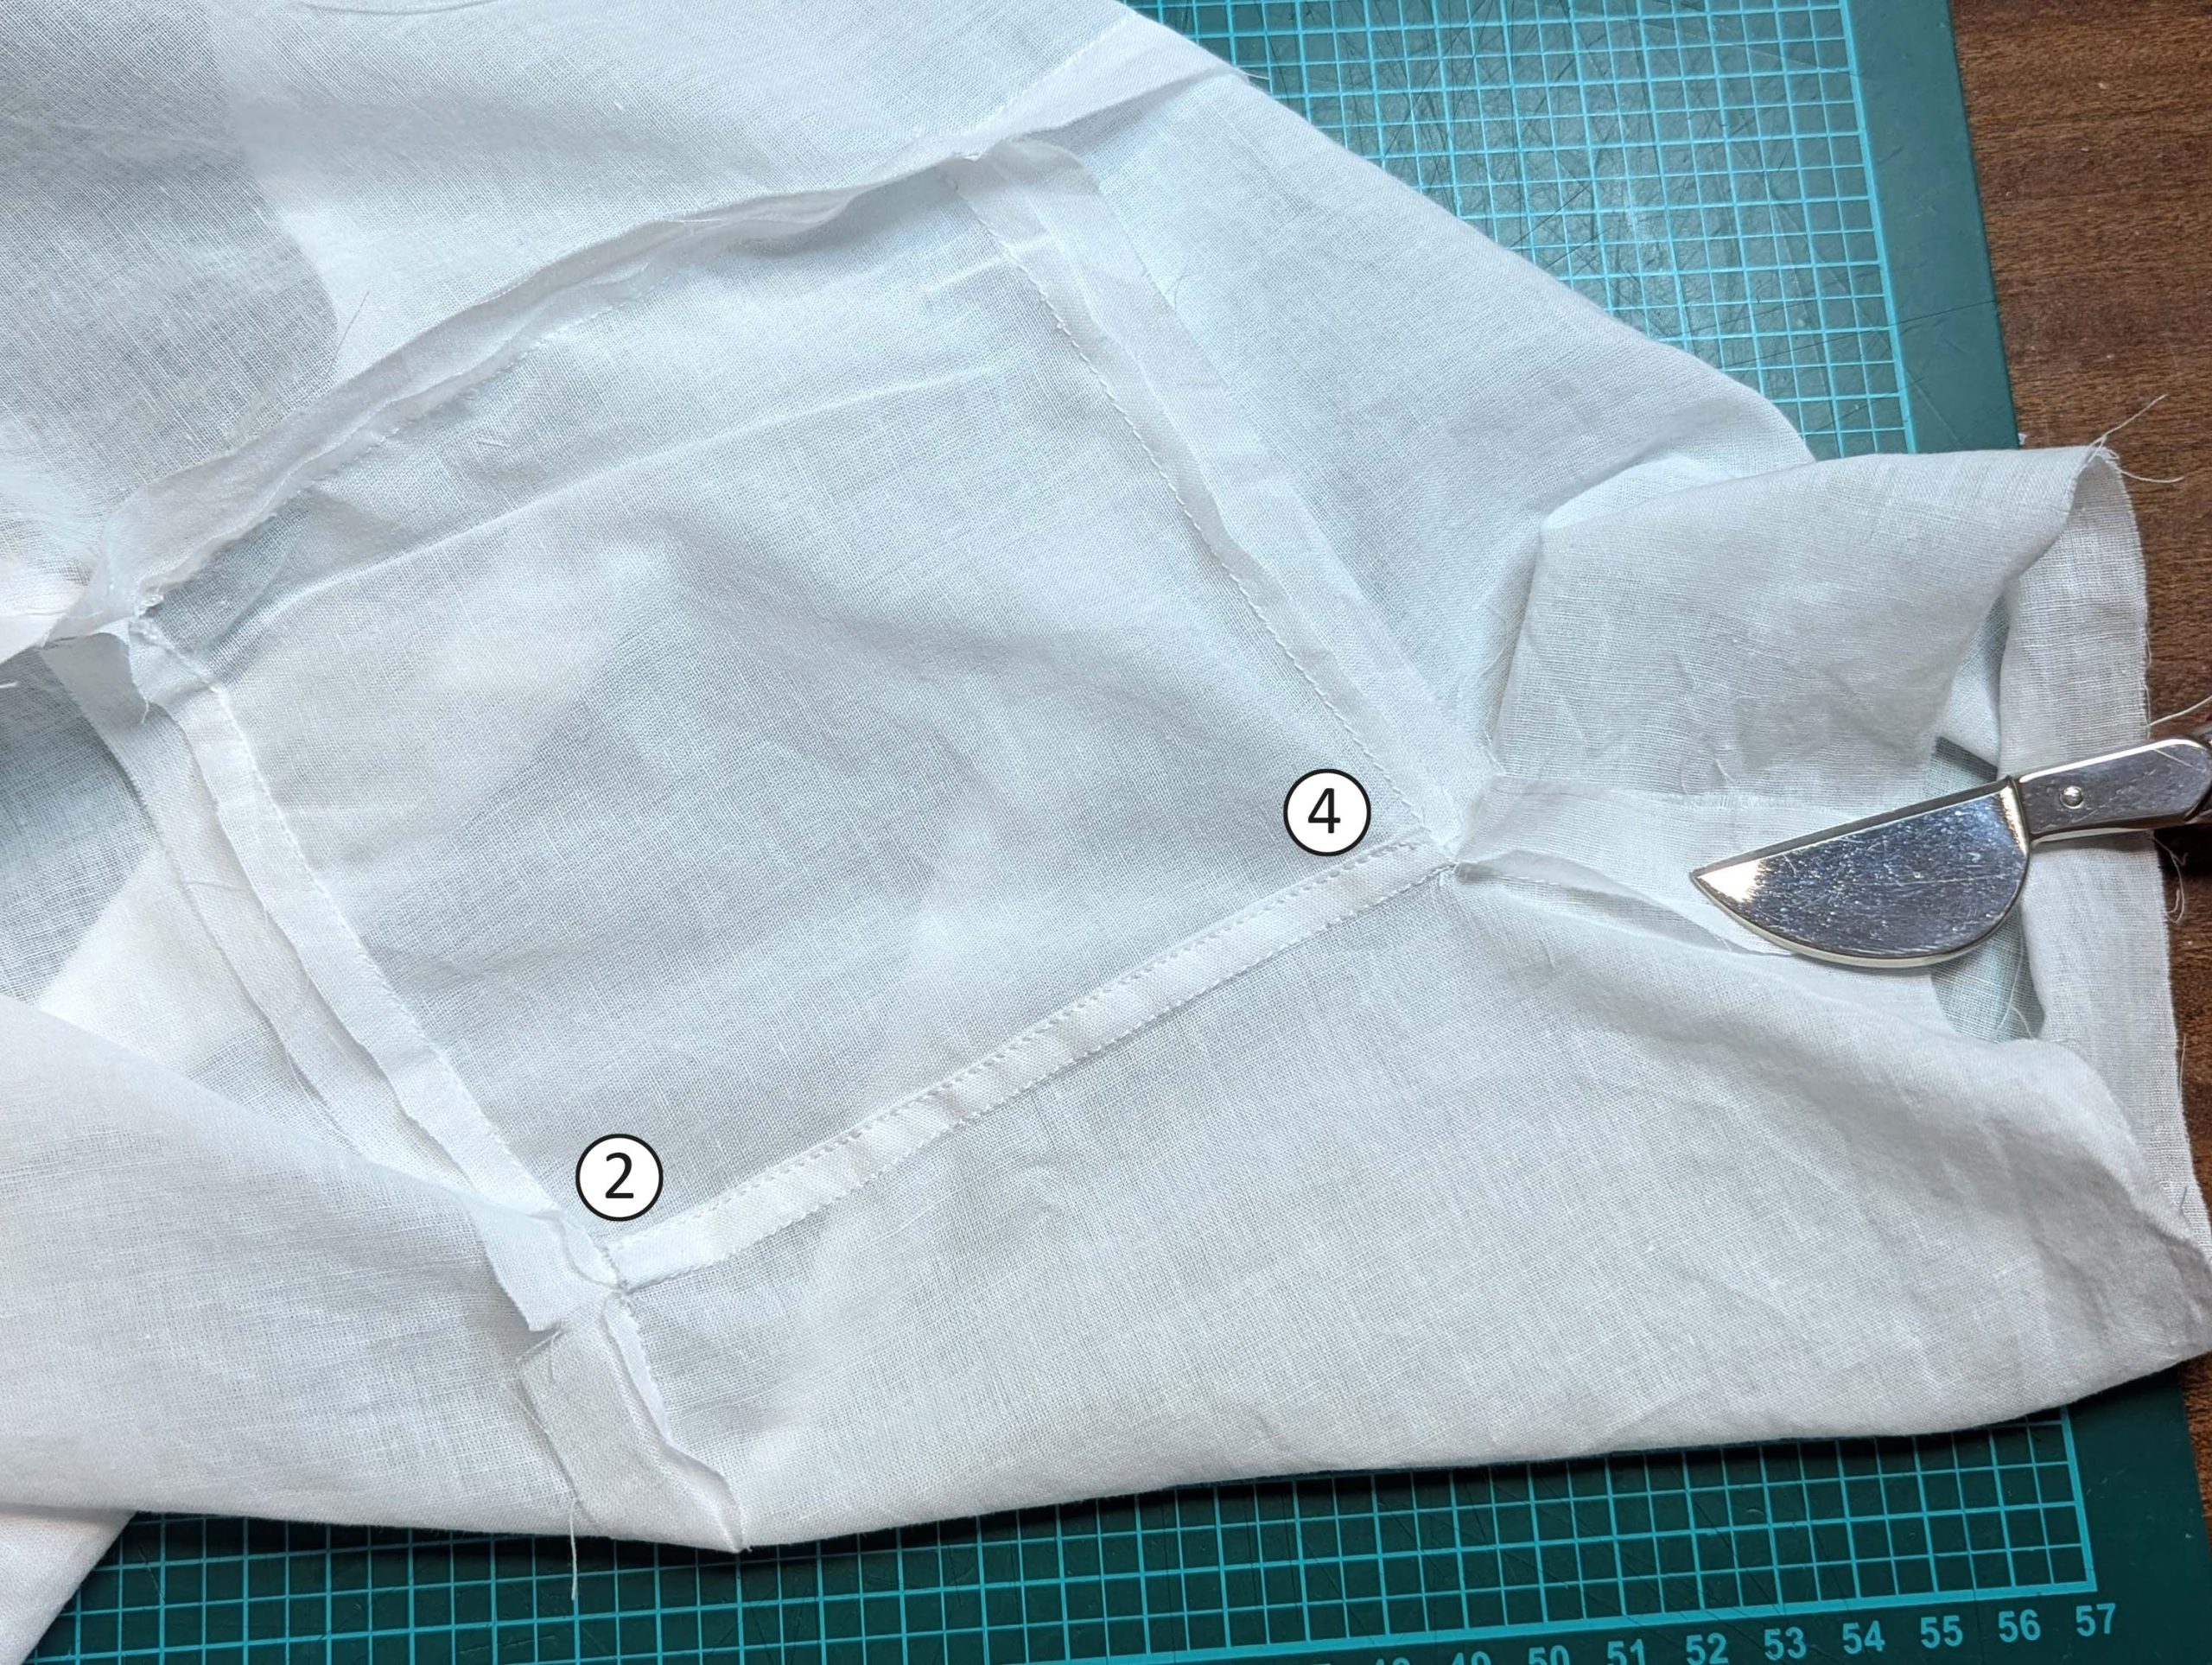
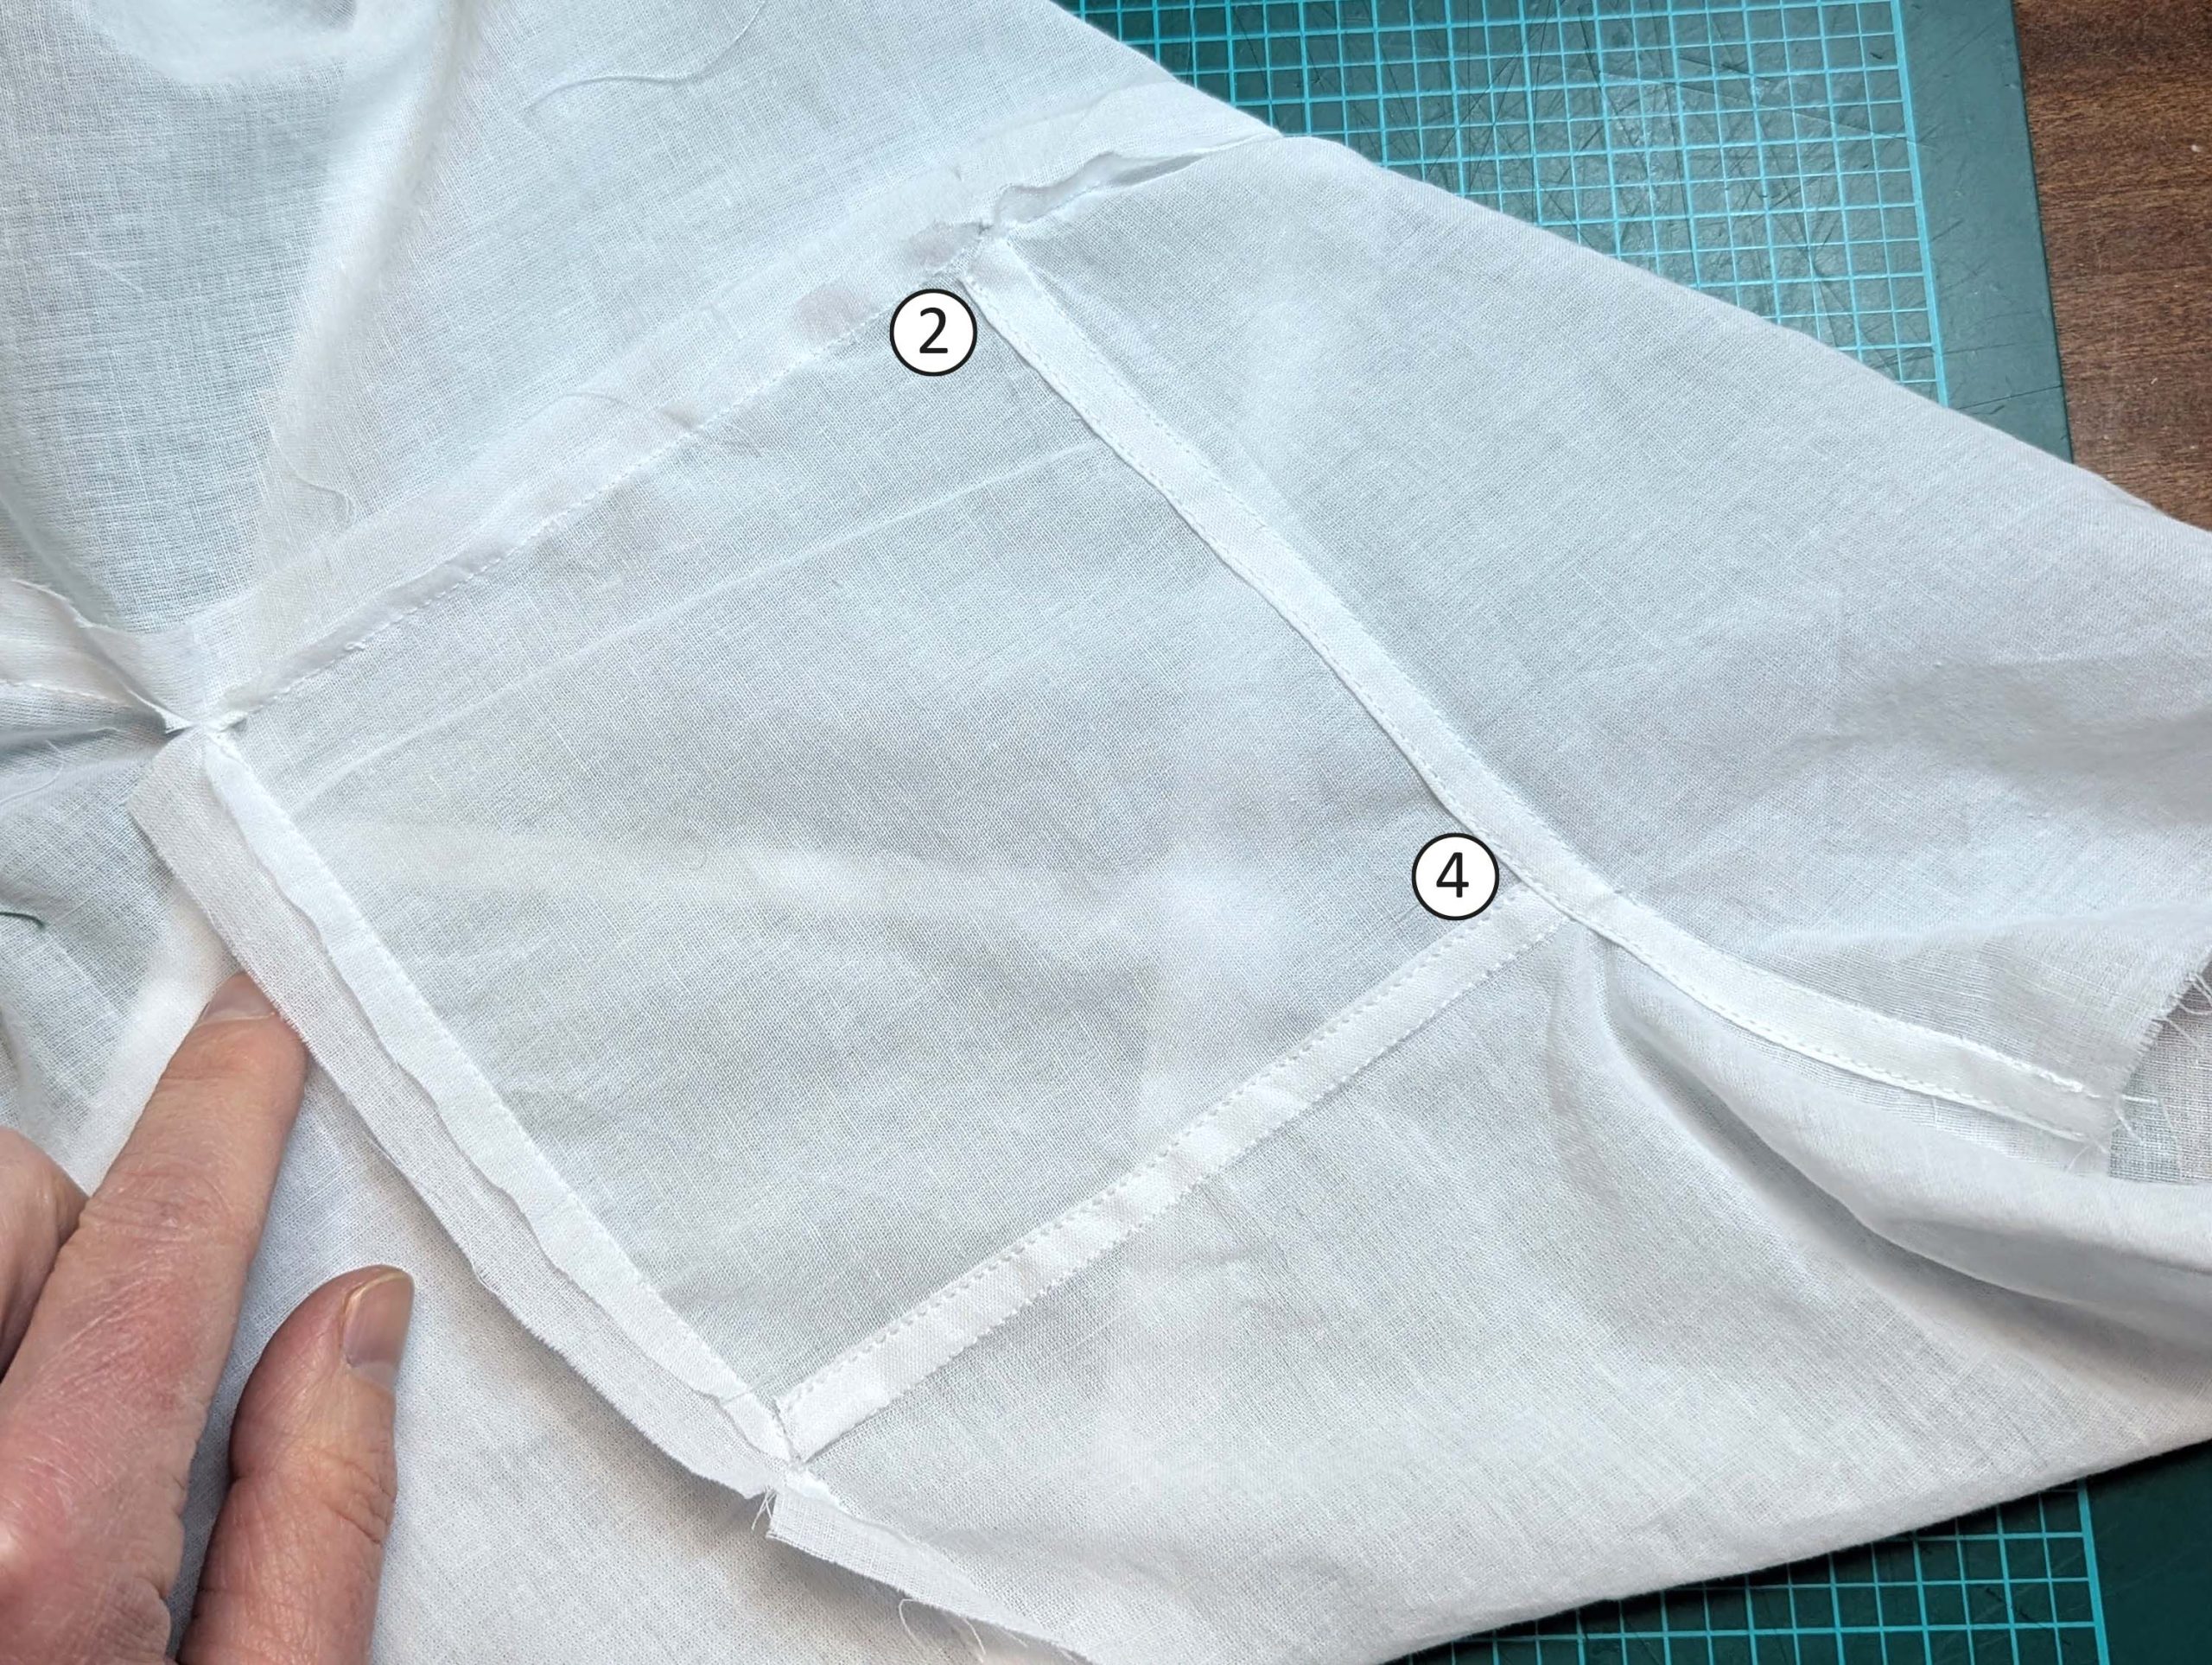
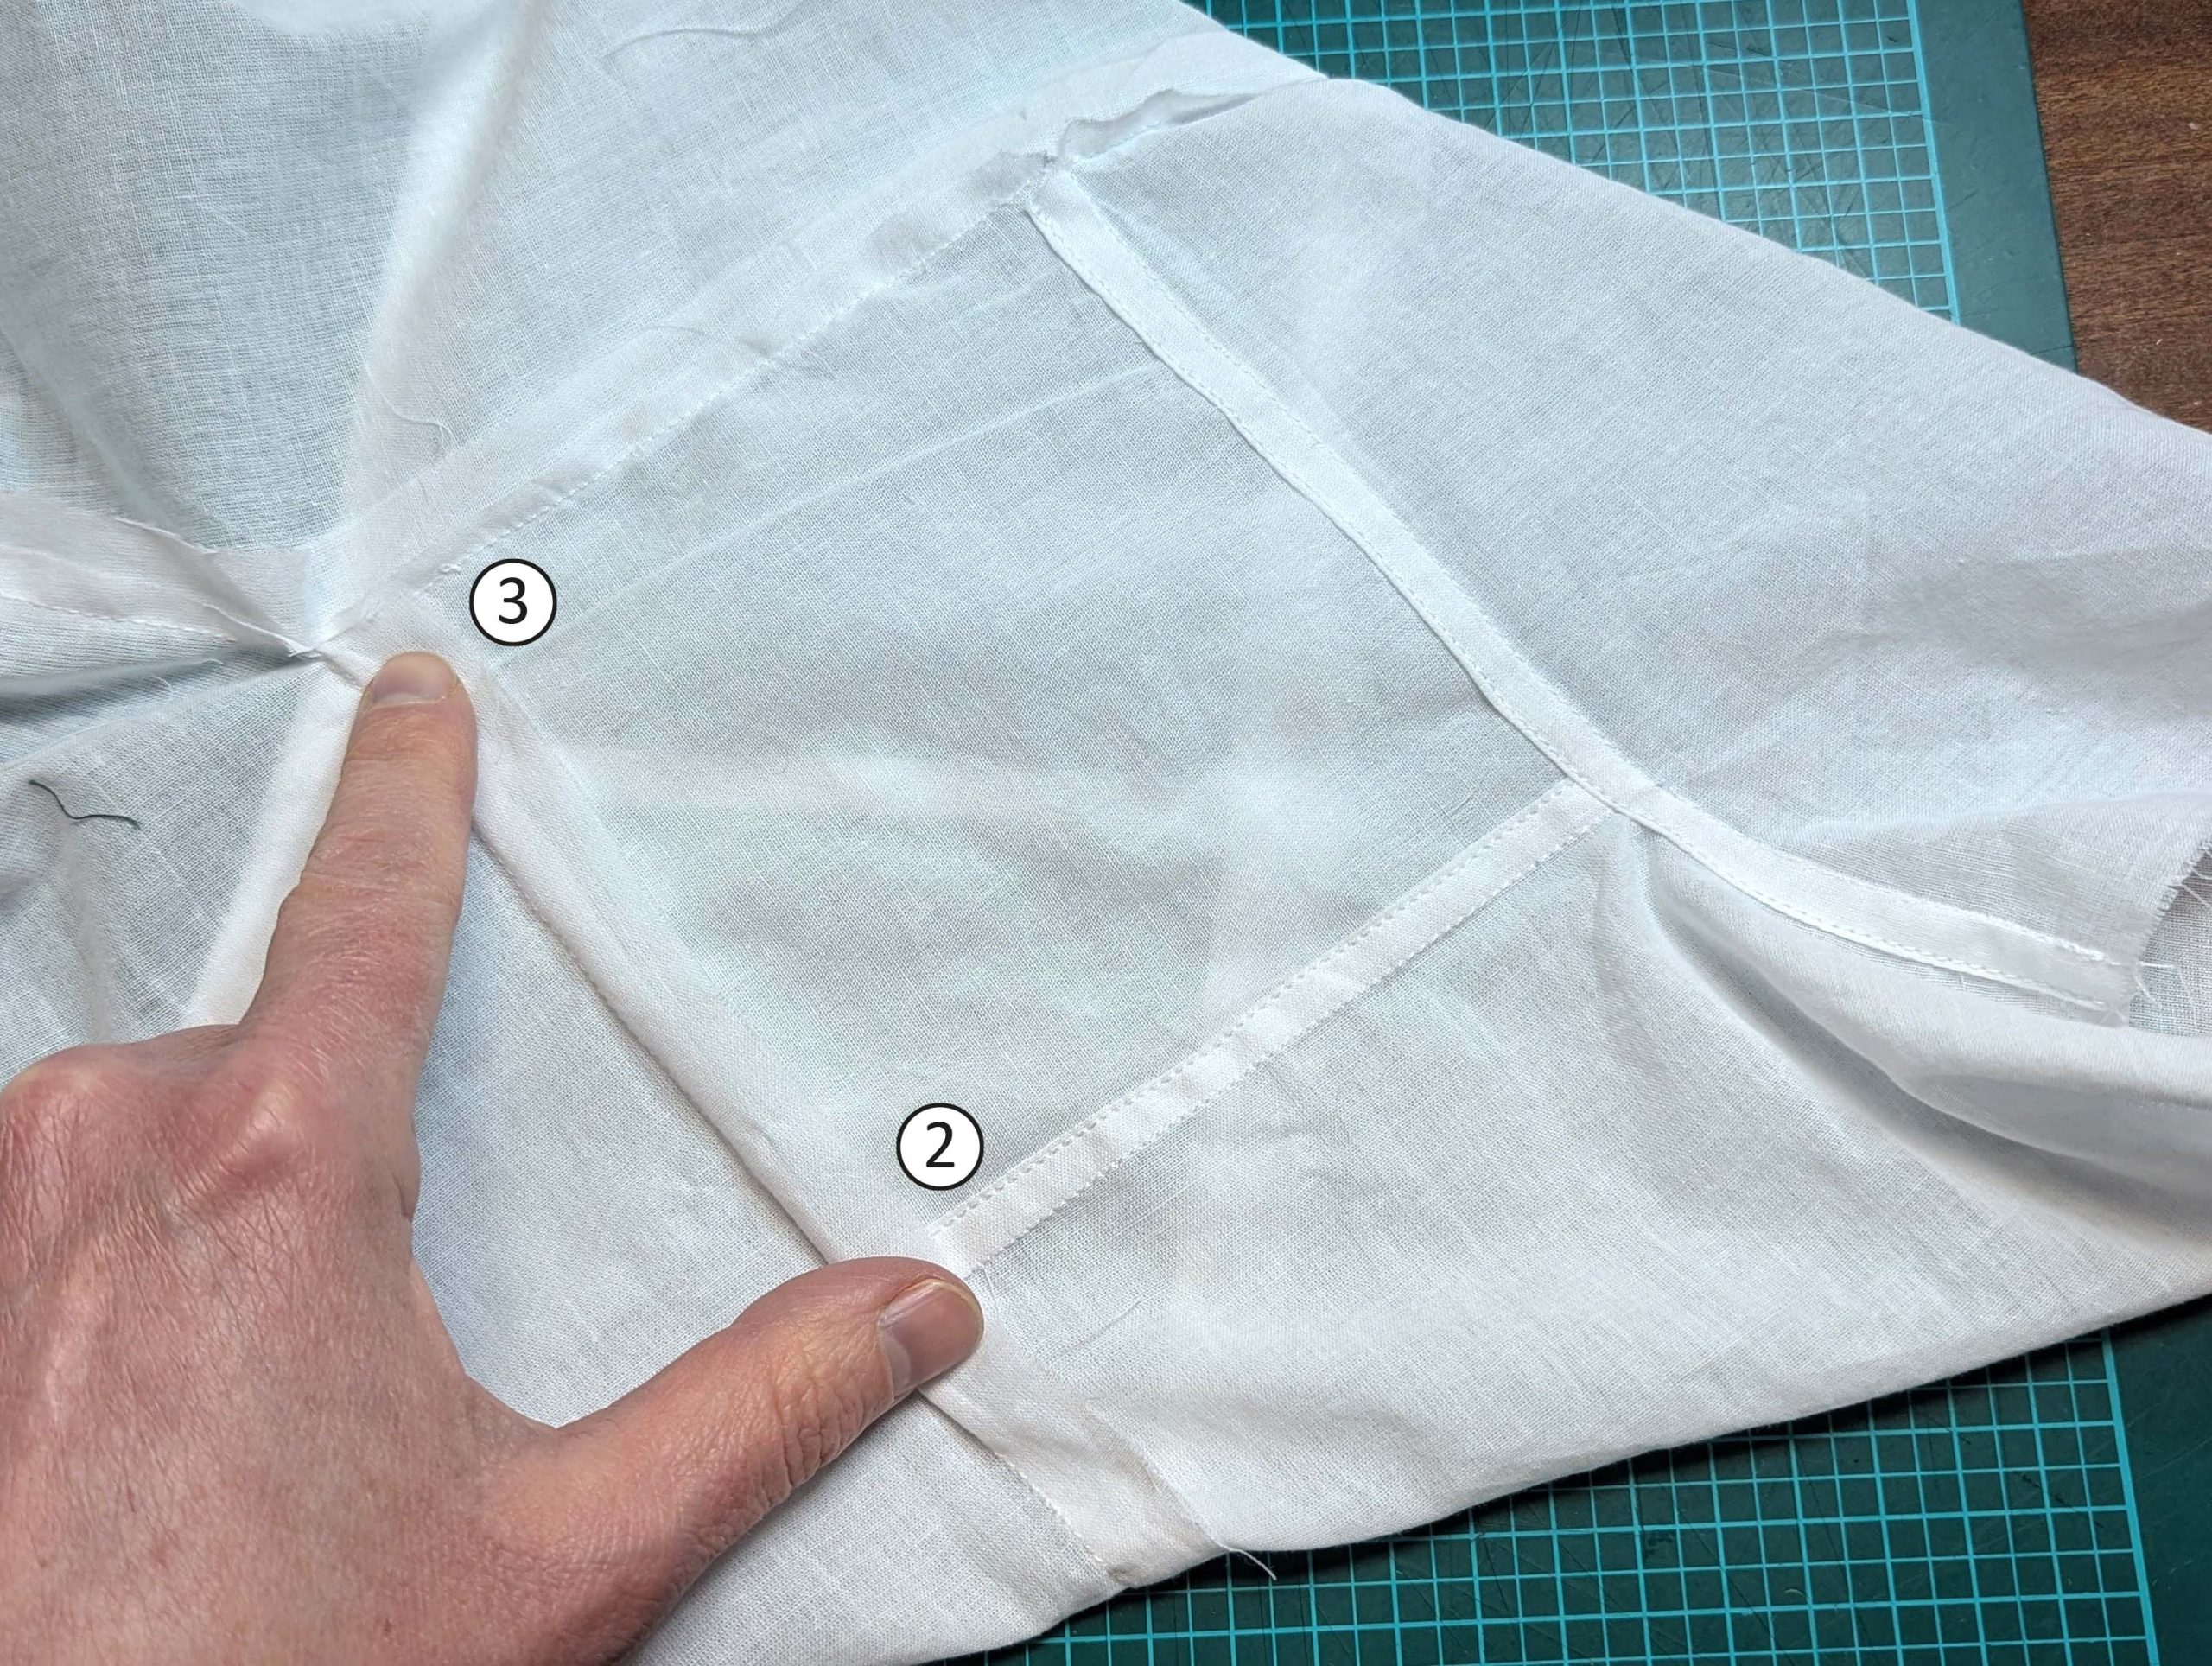
(4) Pin the gusset into the opening, right sides together, matching all marks. Sew, start, and stop exactly at the marks or pre-existing seams. Don’t catch any seam allowance while sewing. Now it´s getting a little bit complicated, making all the seams a flat felled seam.Trim back the seam allowances of the gusset all around to about ¼”, and trim back the corners at an angle of 45°.
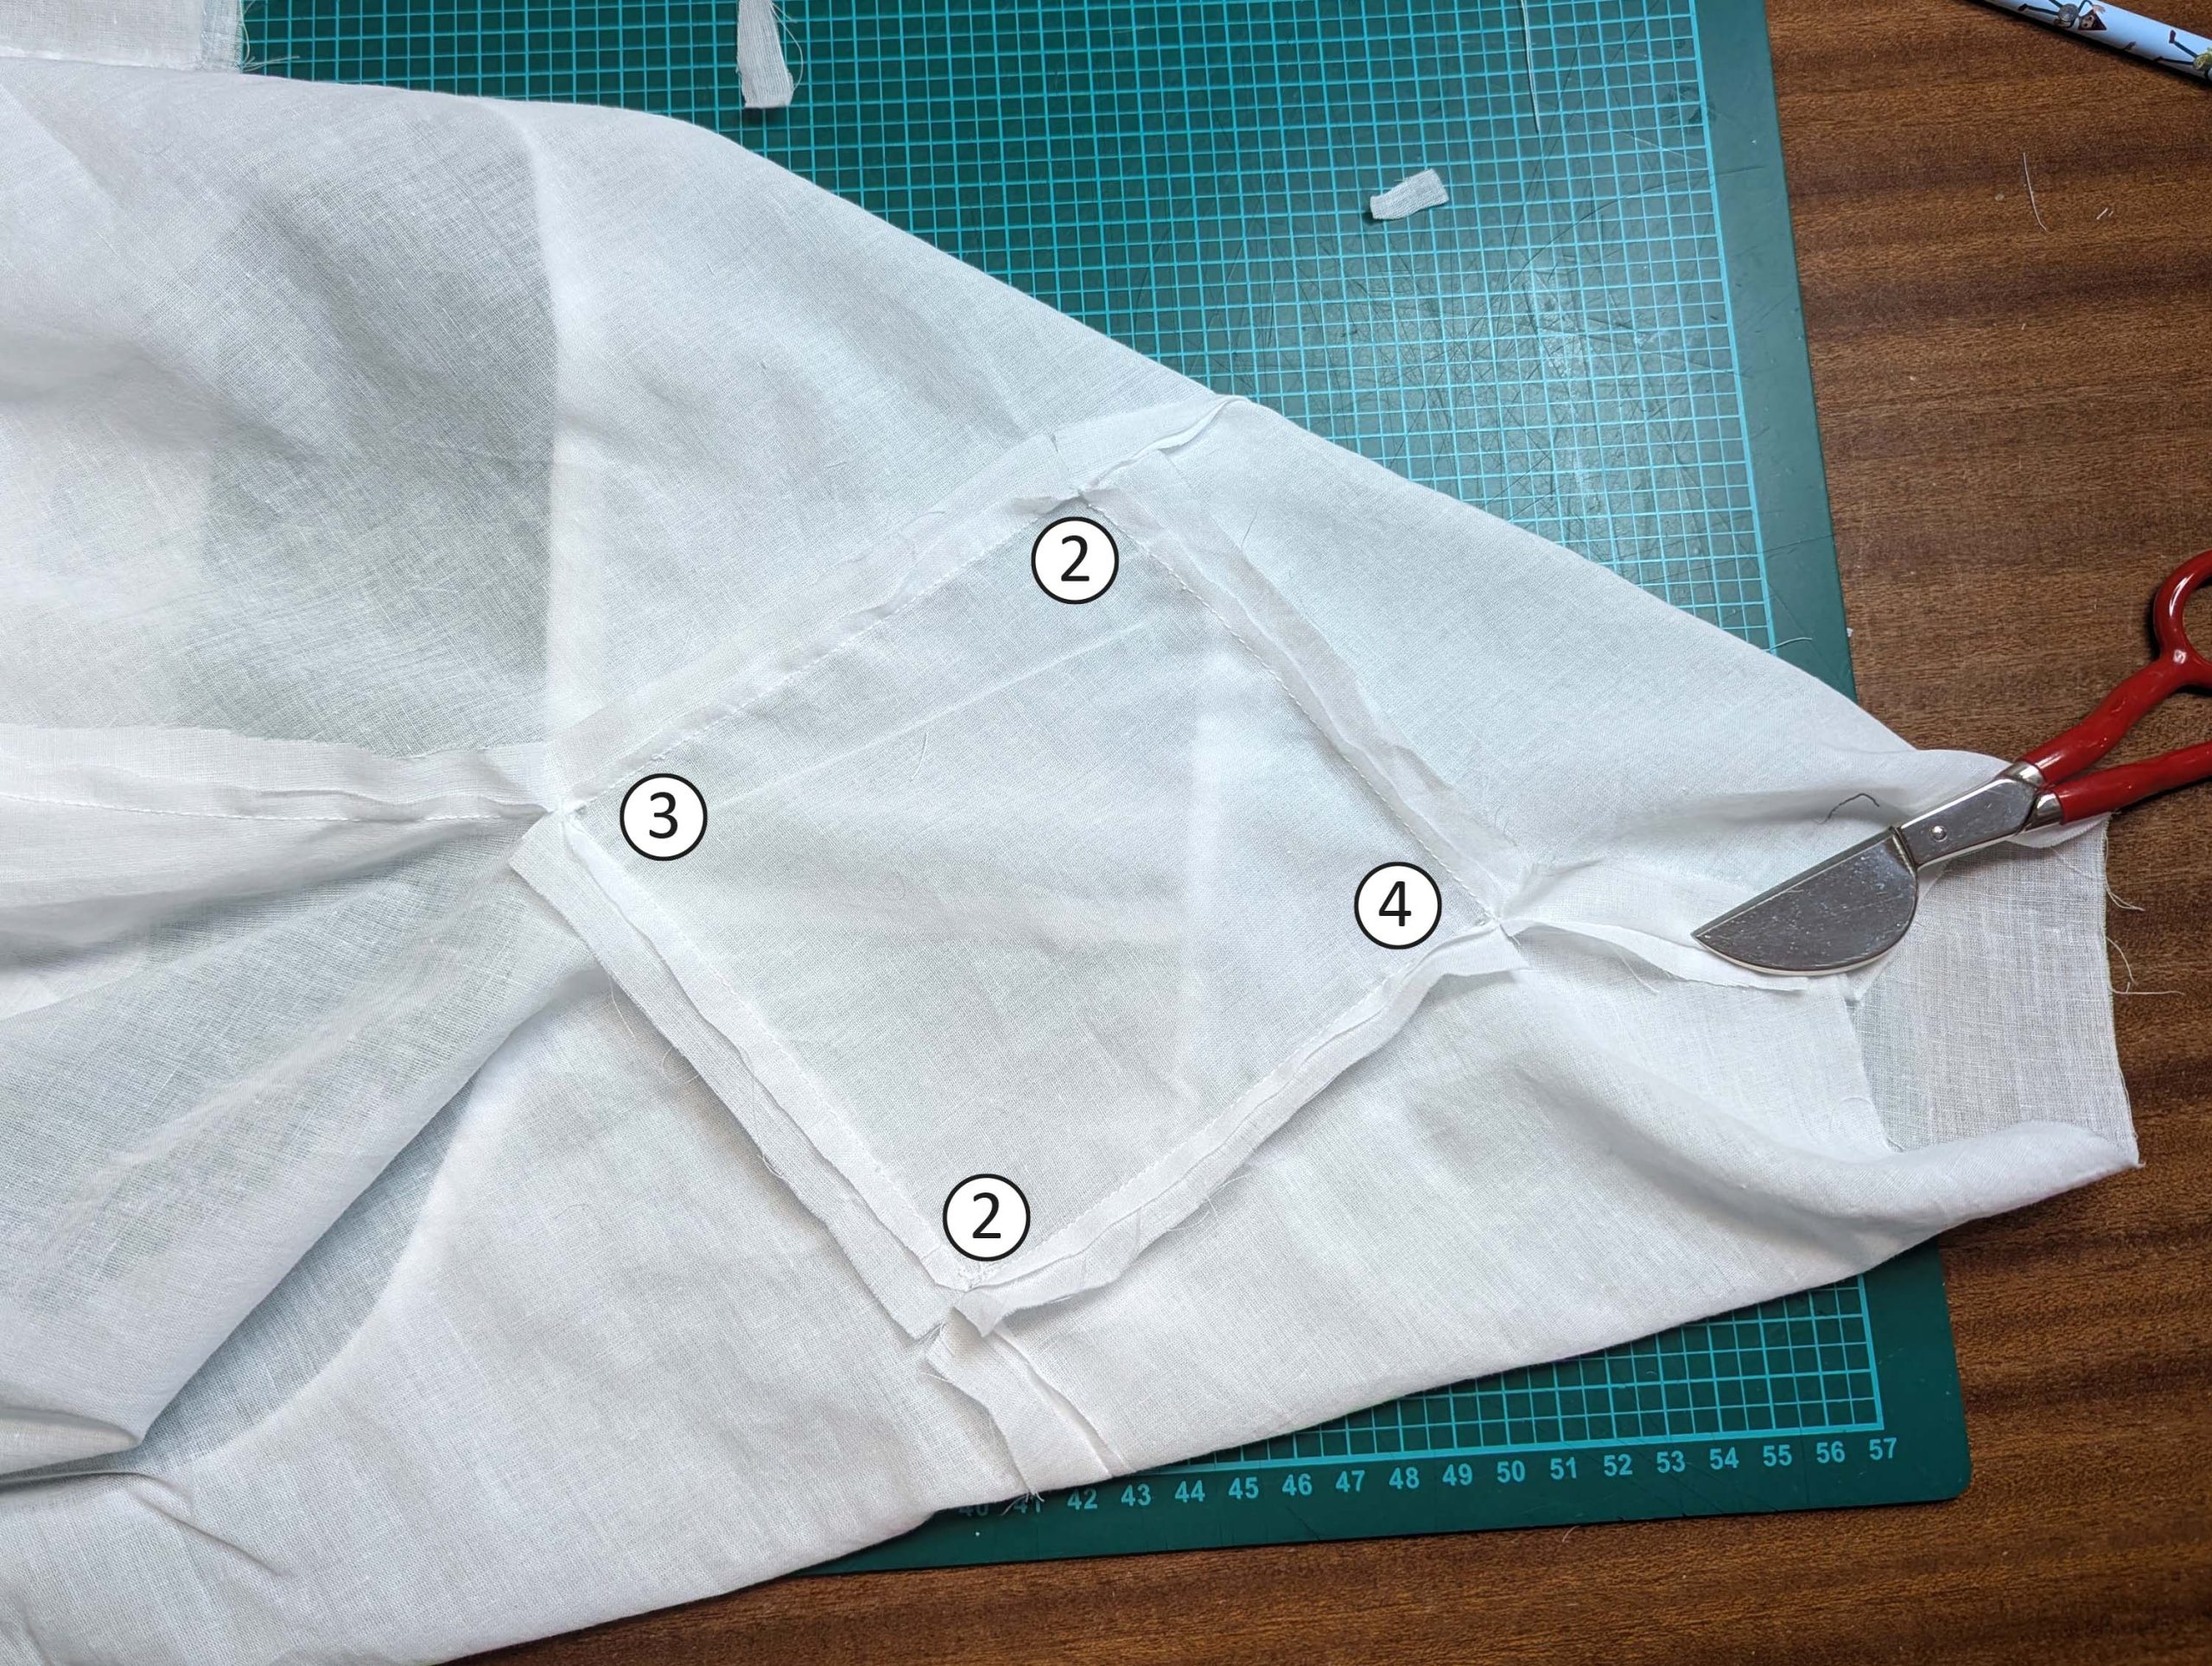
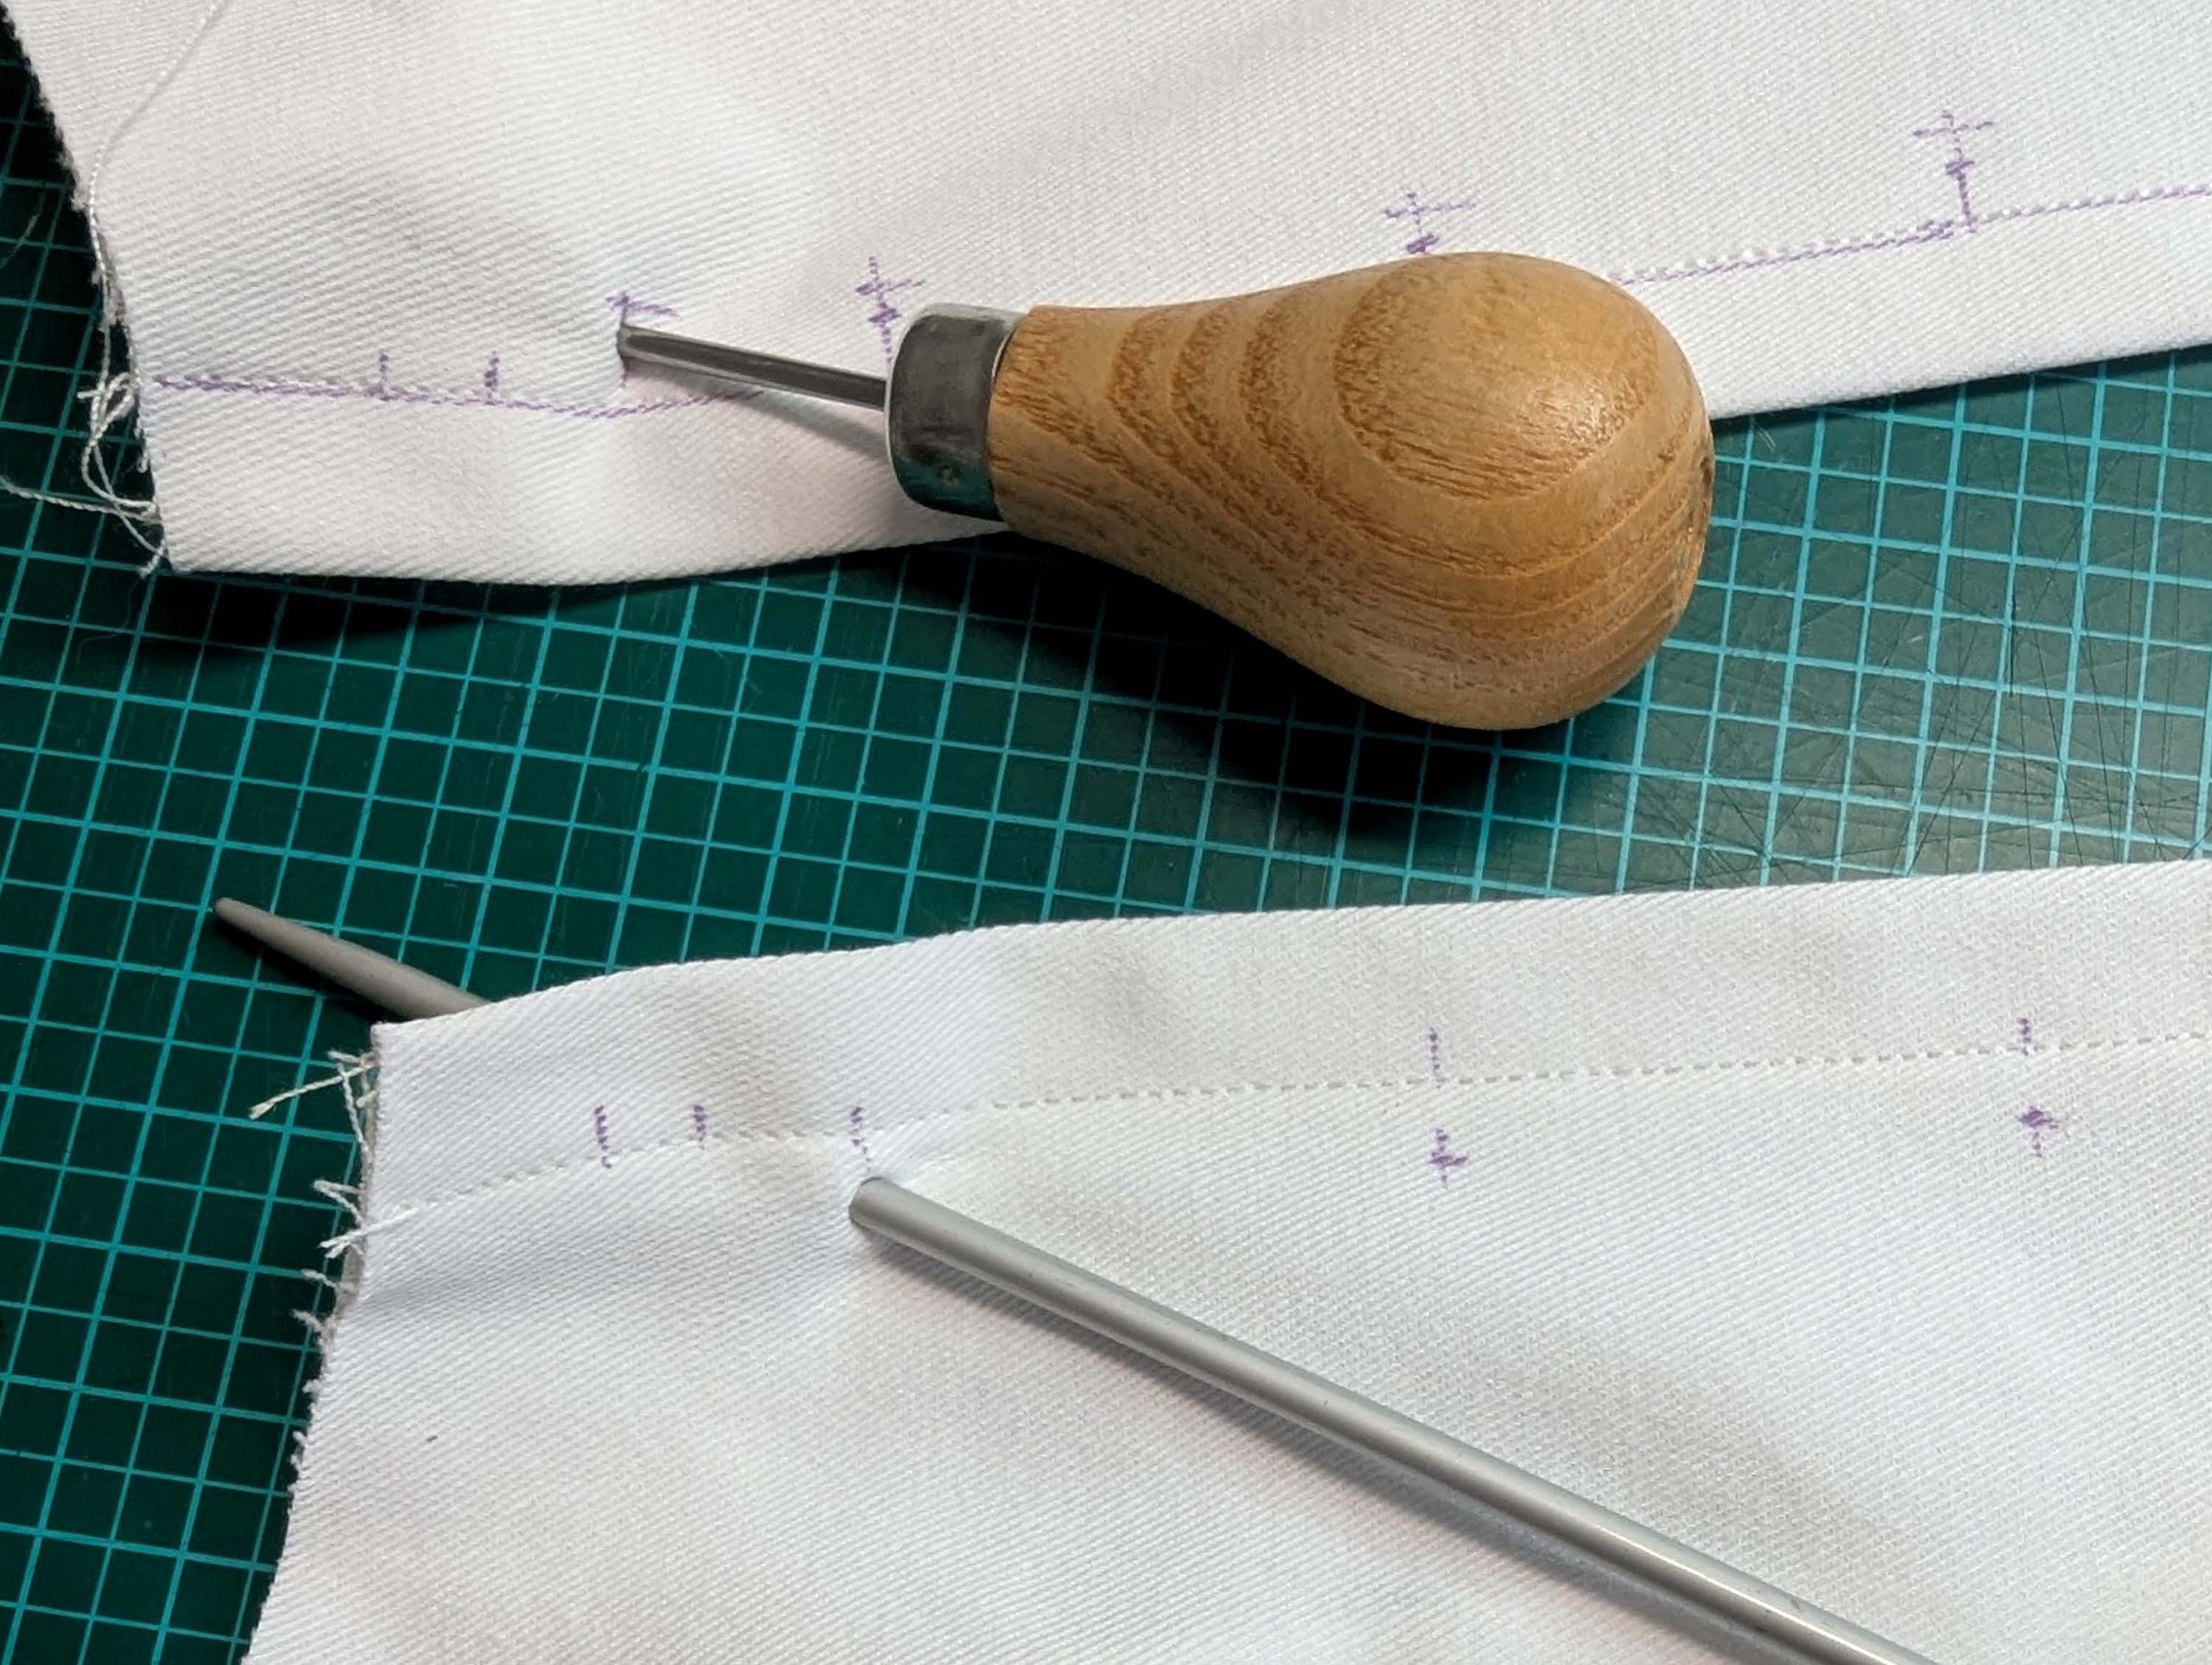
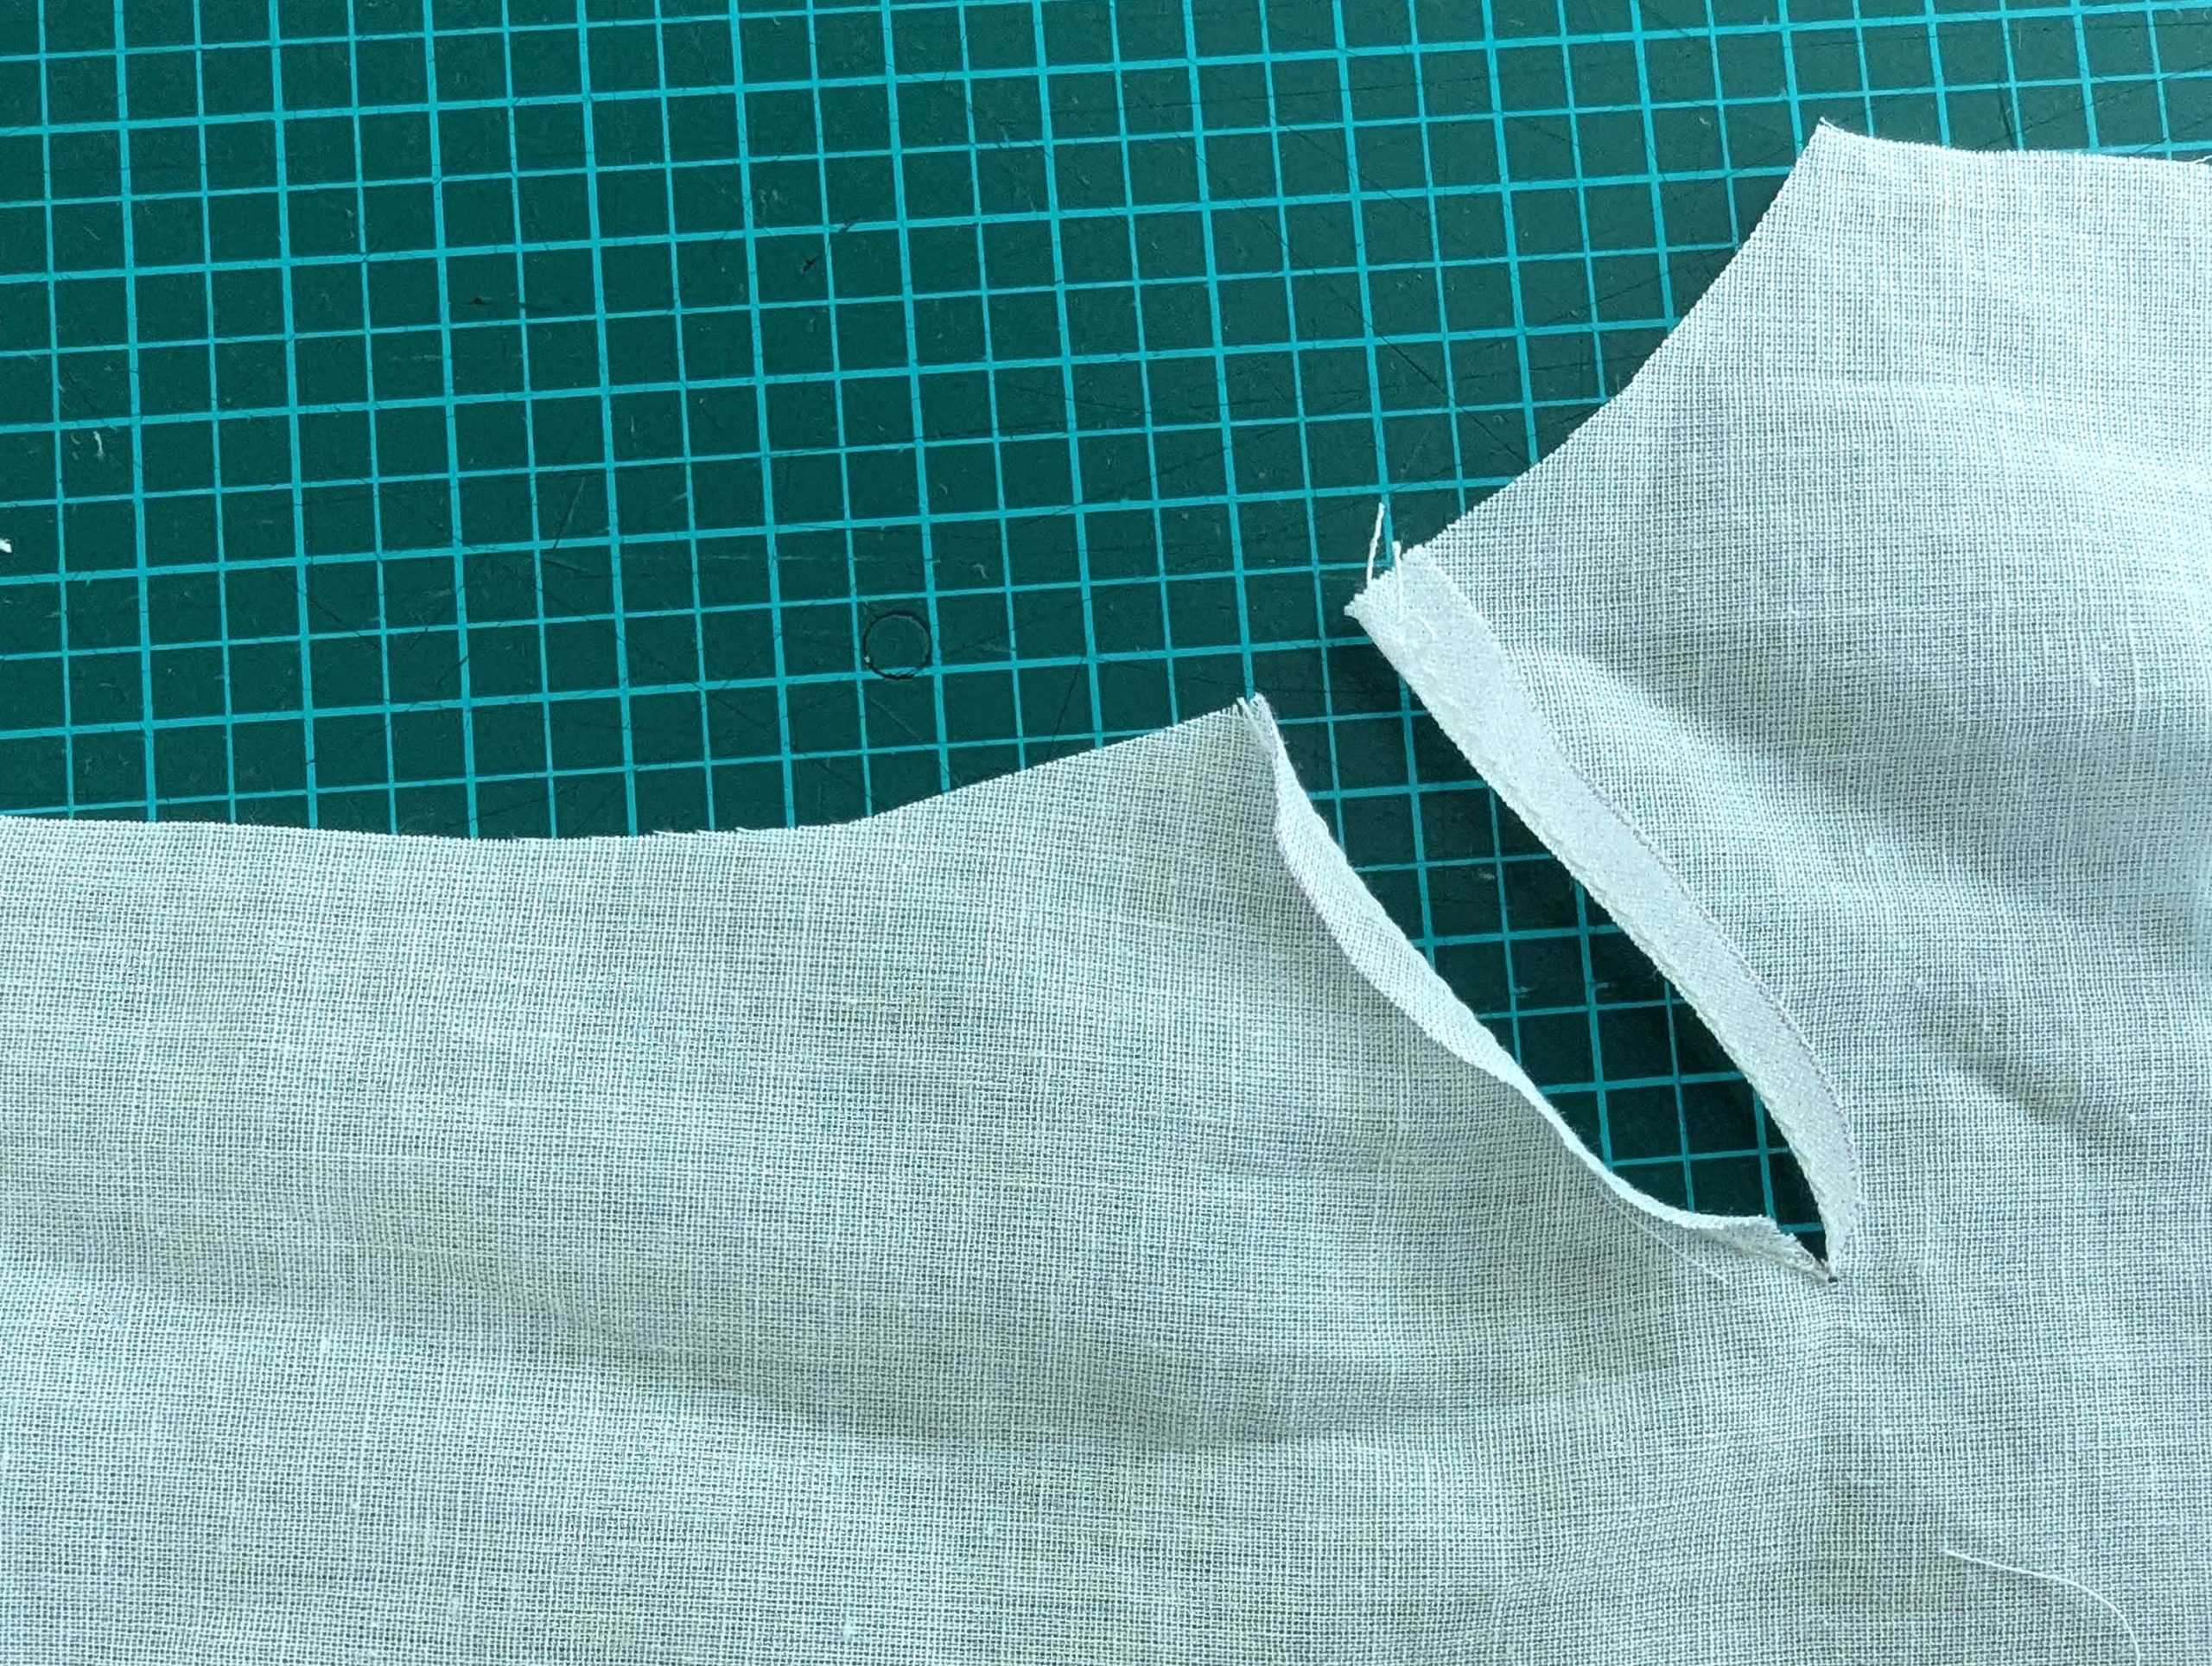
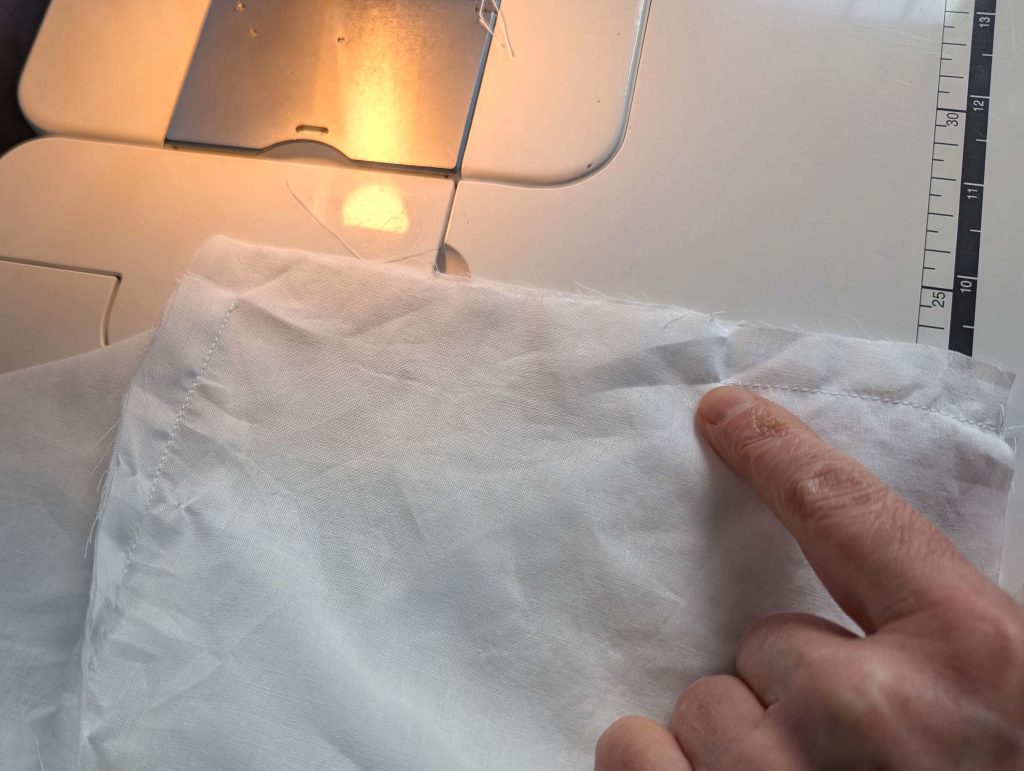
Notch and trim back the seam allowance of the sleeve and back as shown in the illustration in the sewing instruction and start between (2) and (4) at the back portion of the sleeve, folding the wider seam allowance over the trimmed back and press, edge, or fell stitch in place, creating a flat felled seam. Continue from (2) to (4) – front portion of the sleeve, followed by (3) to (2) on the back, until reaching (2) on the front, proceeding to (3), and then going all the way down until reaching the bottom edge.
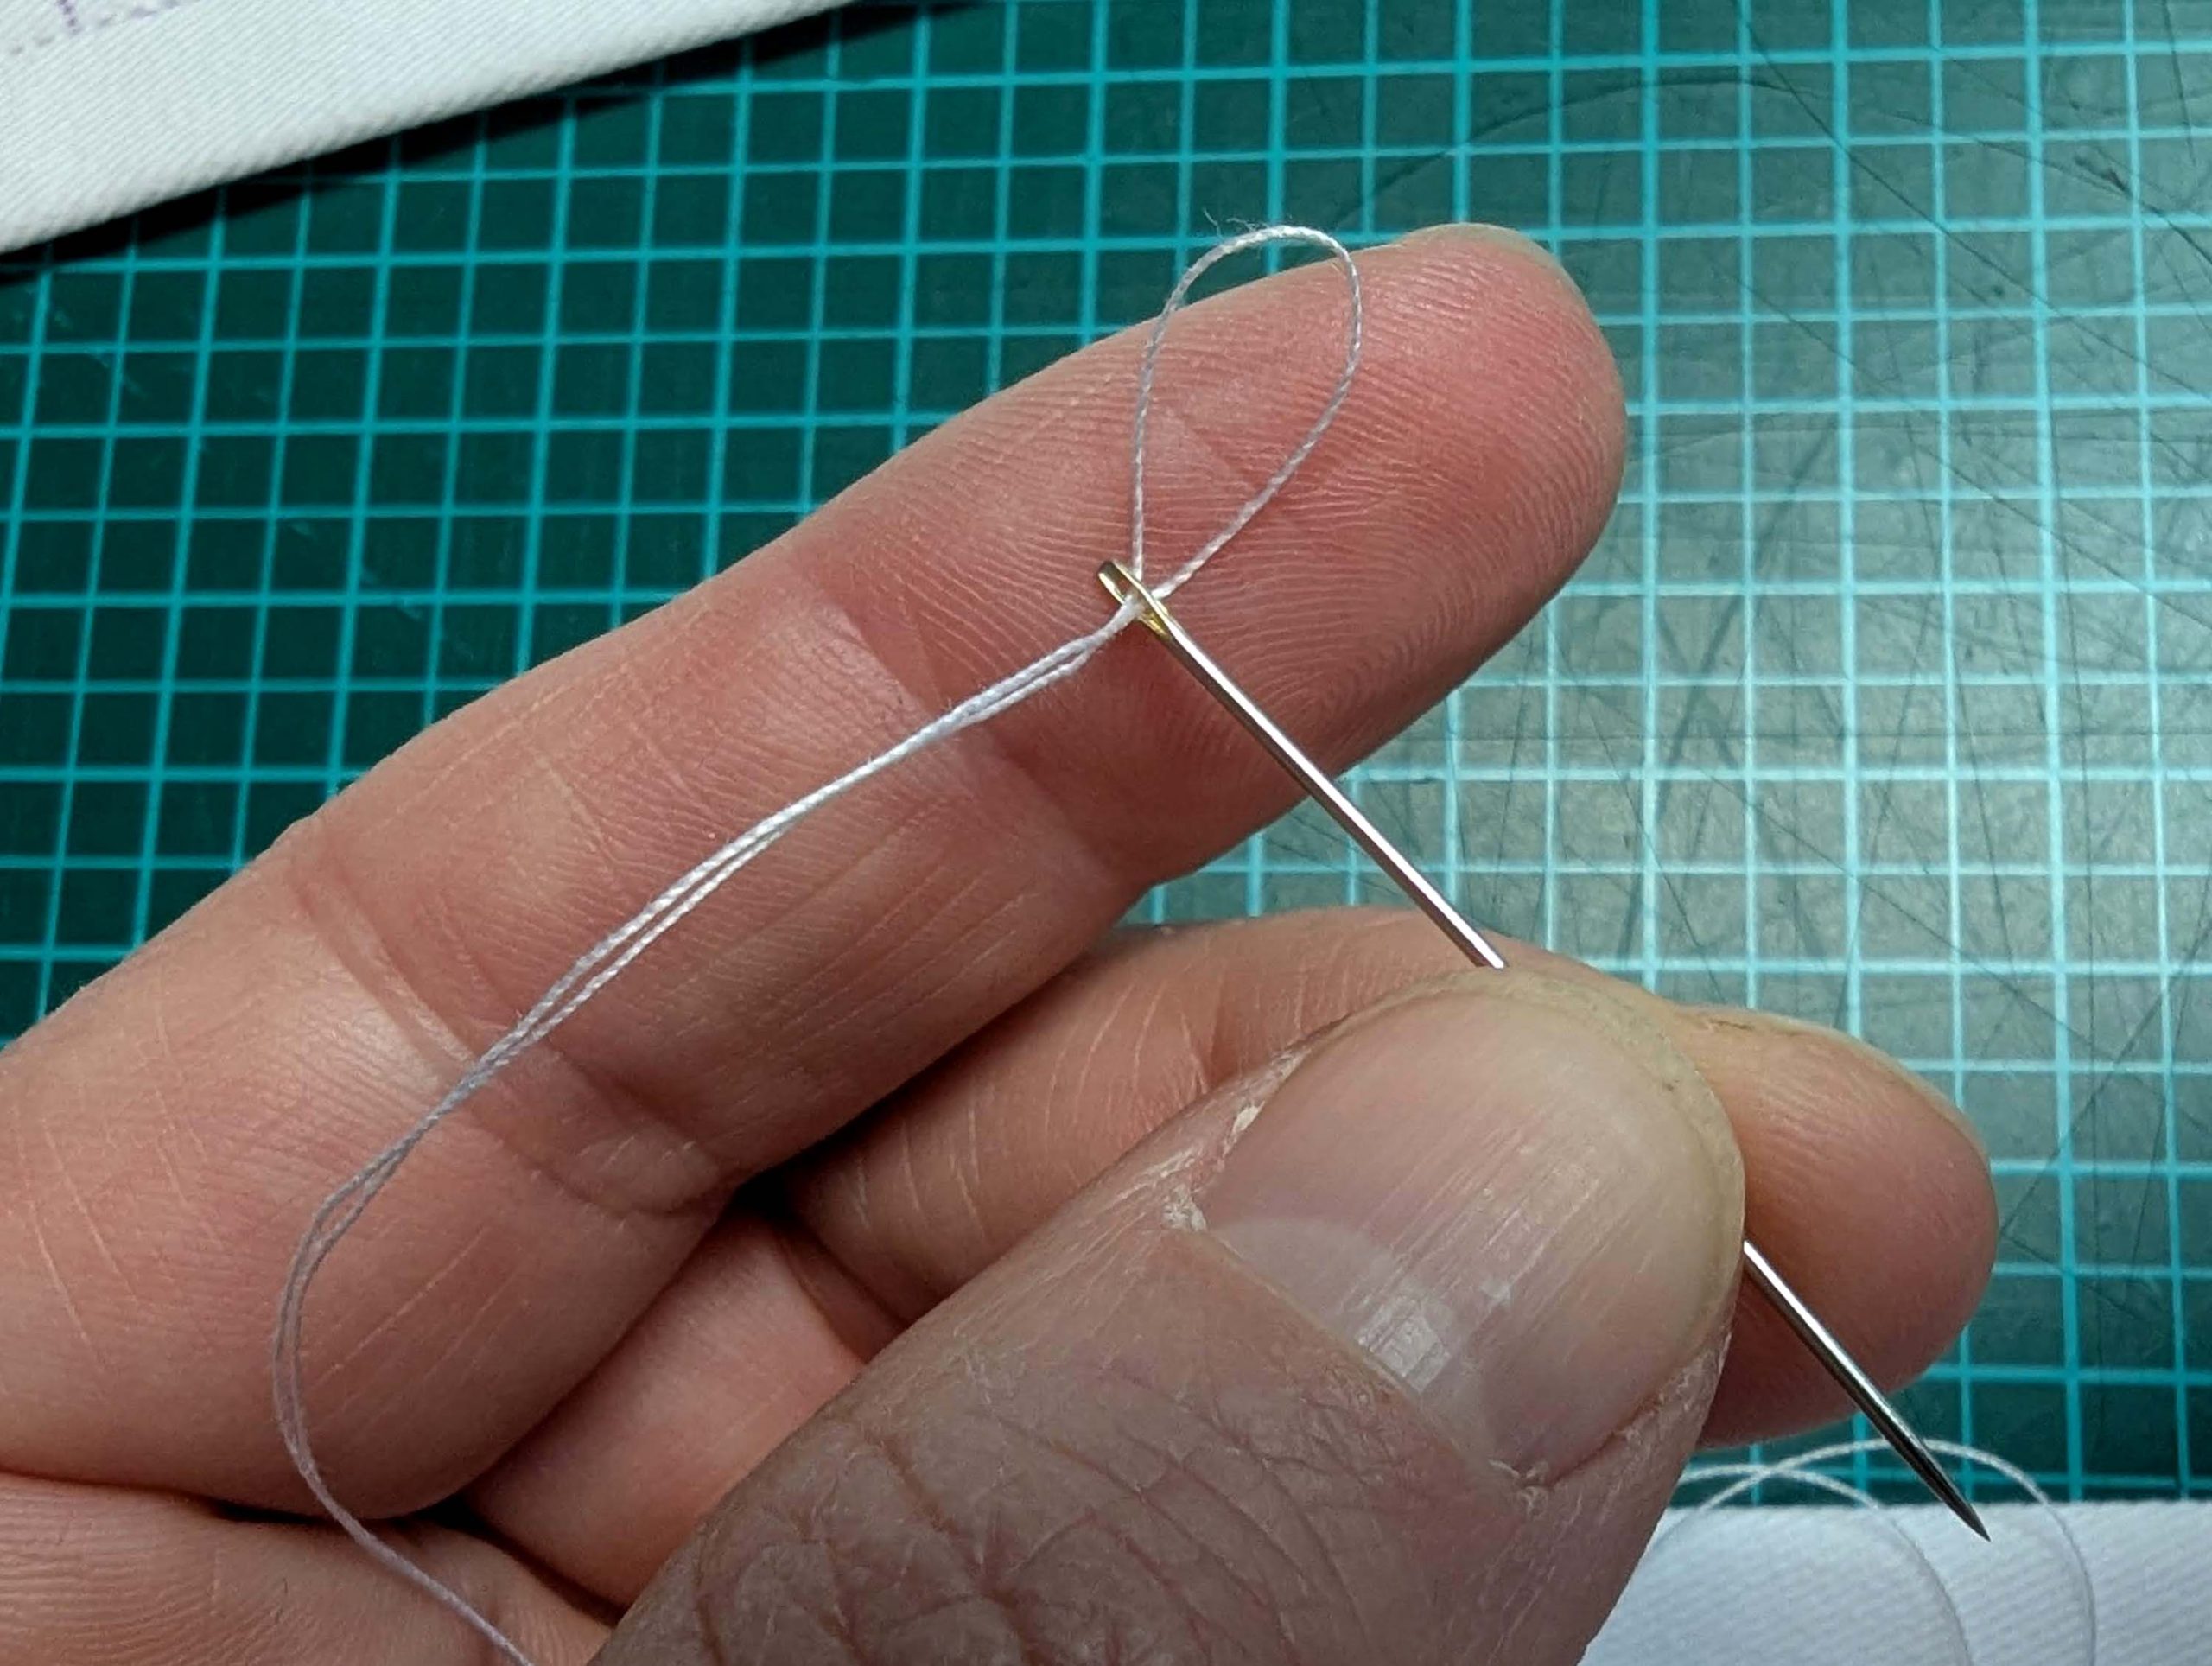
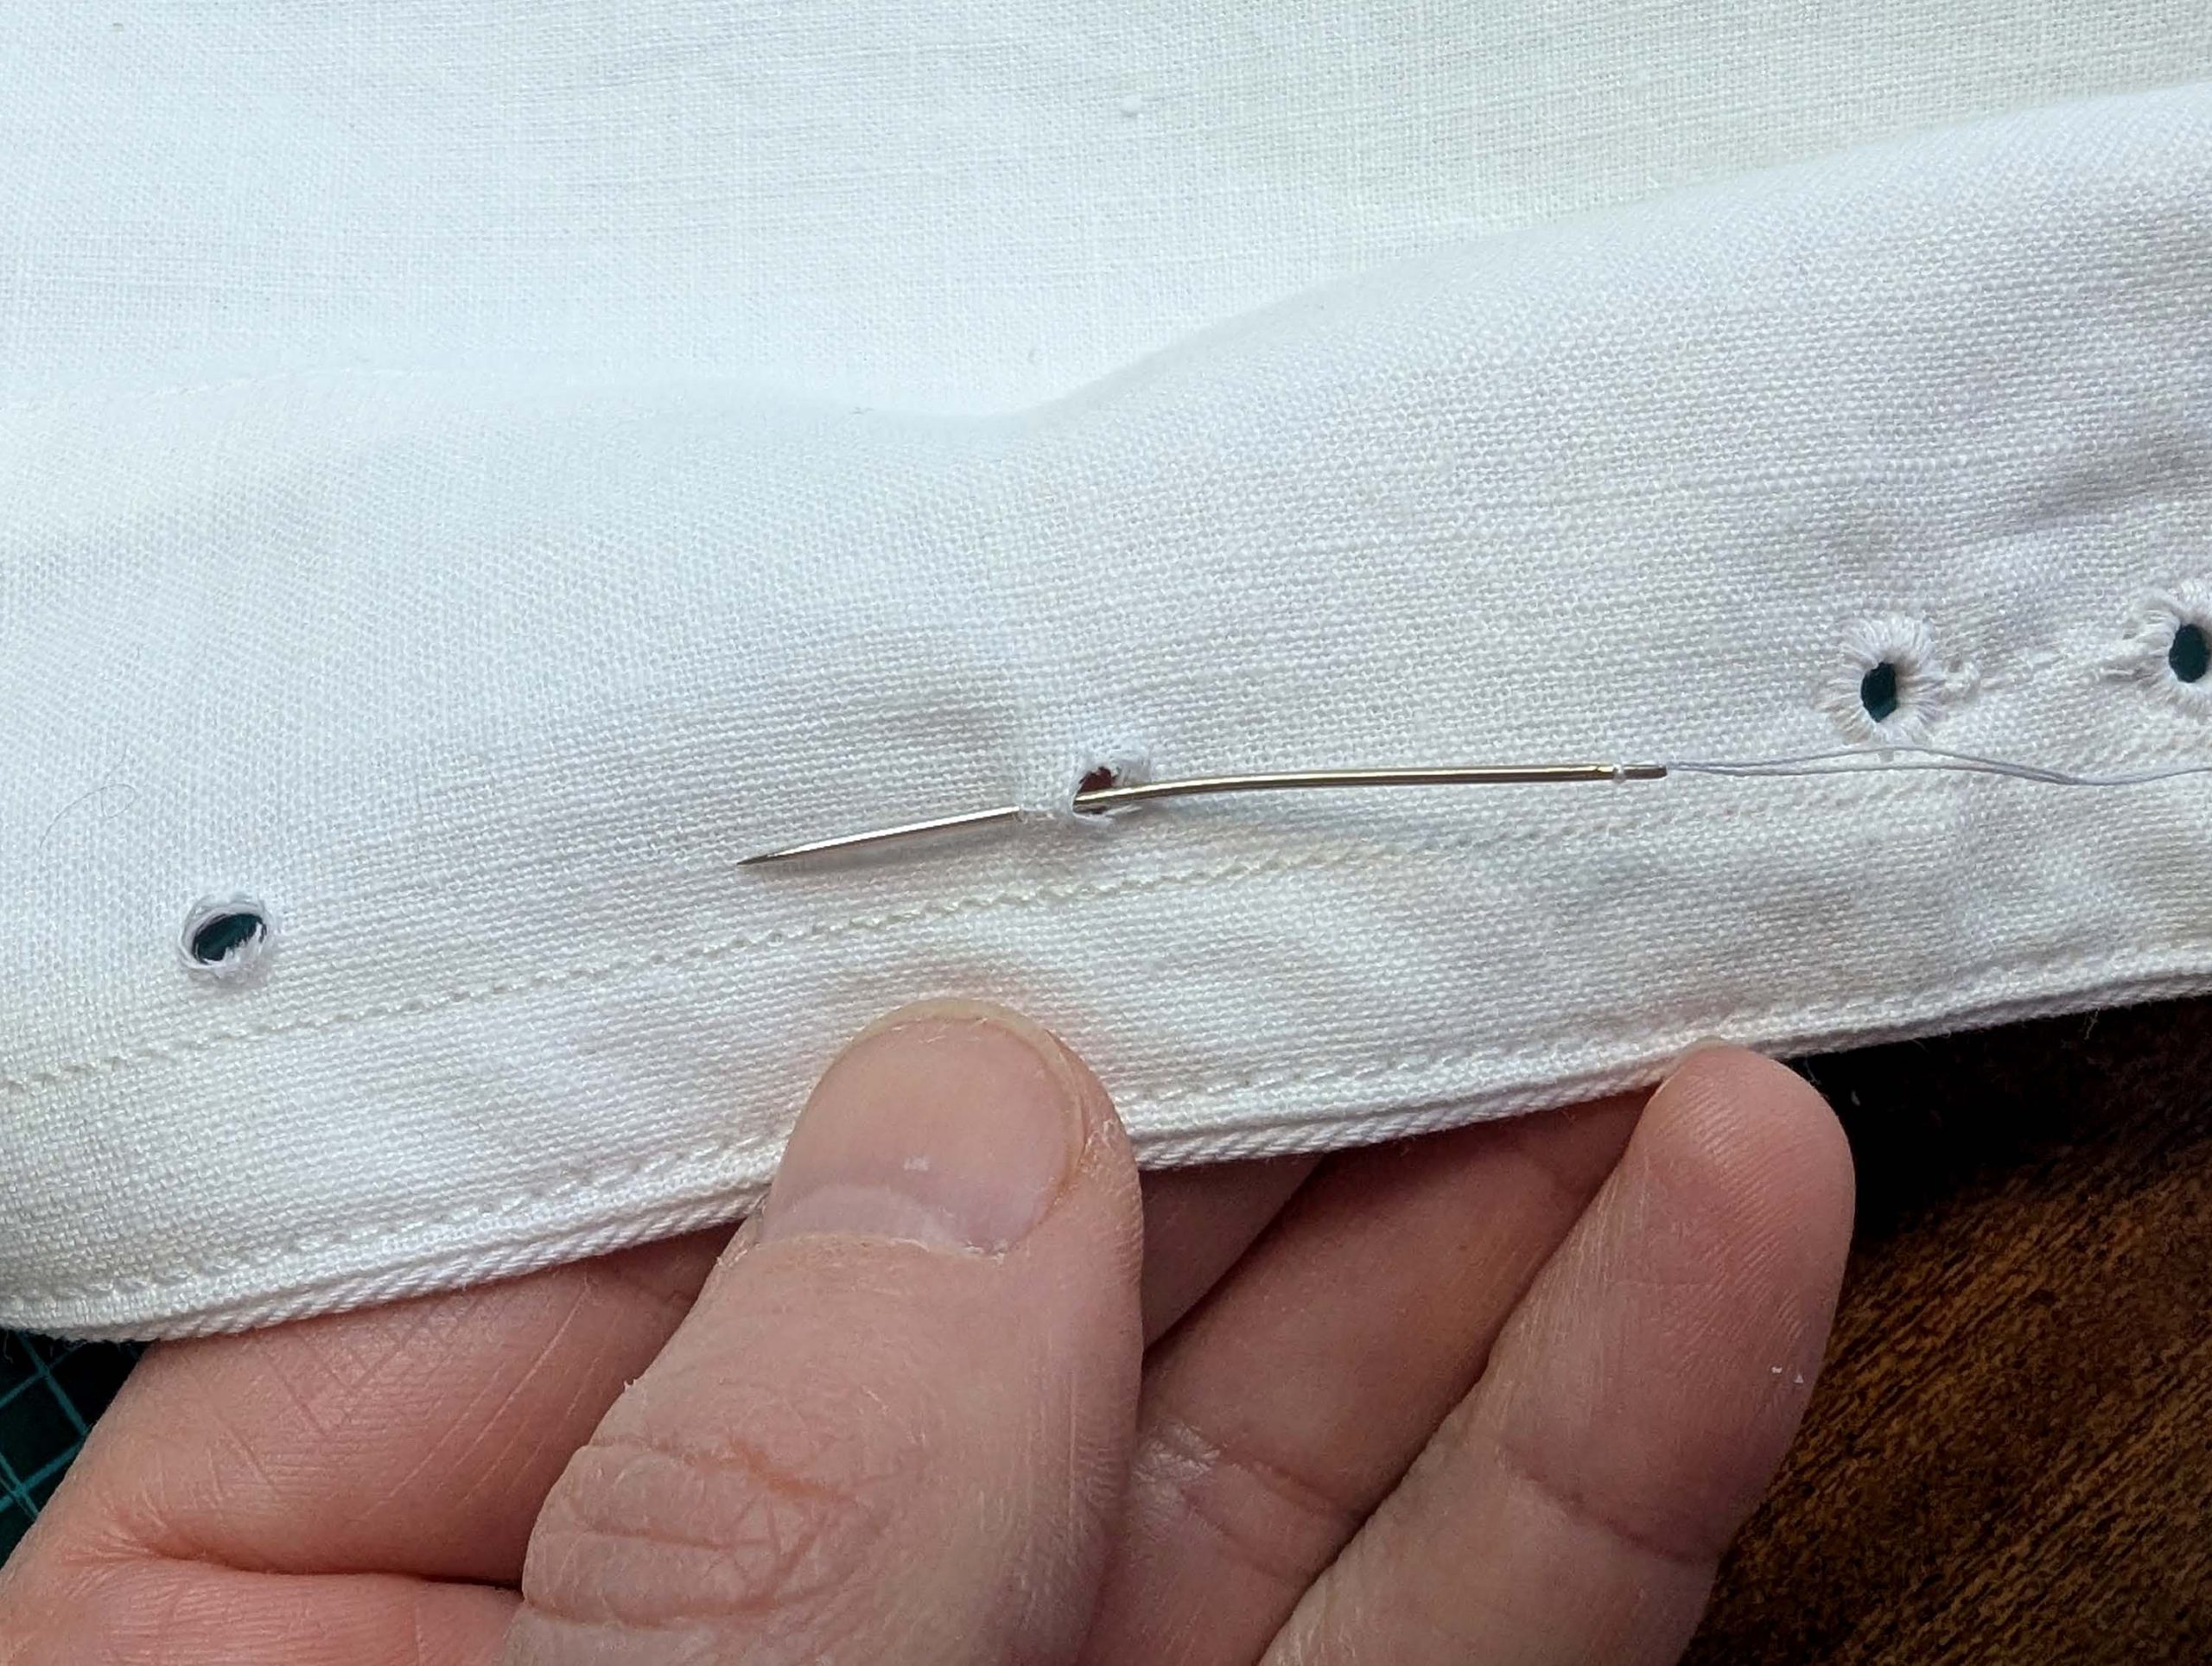
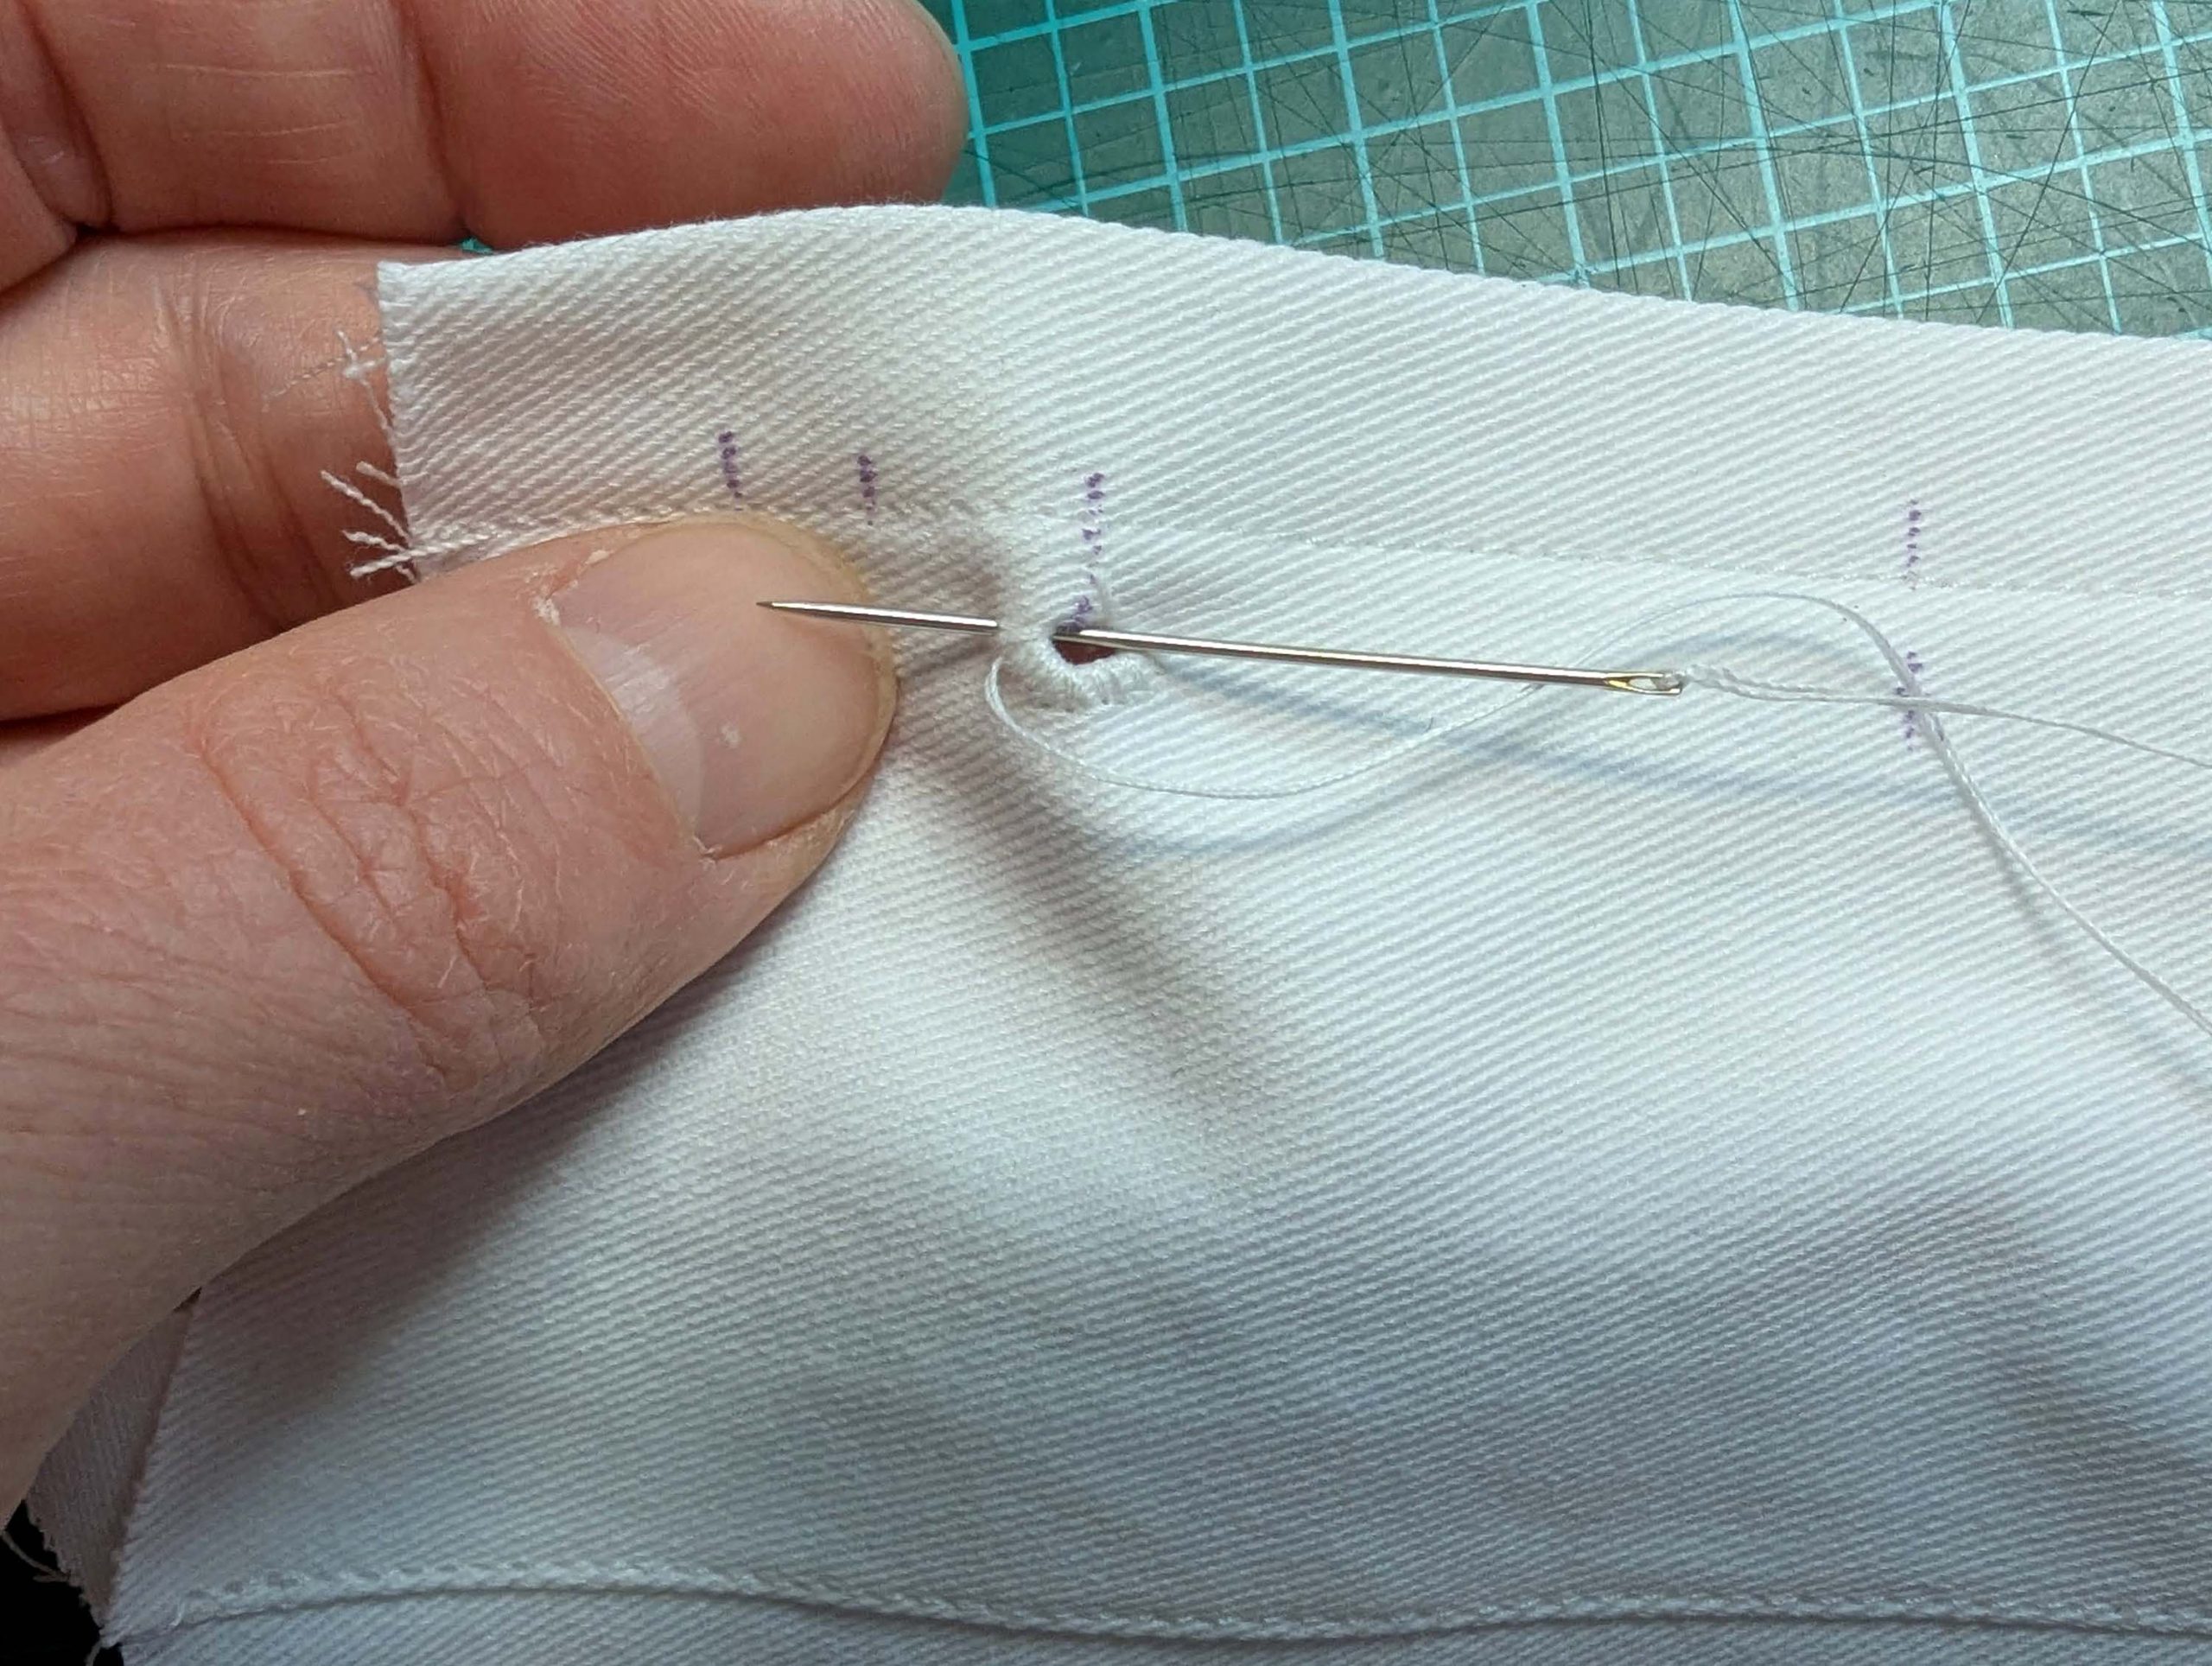
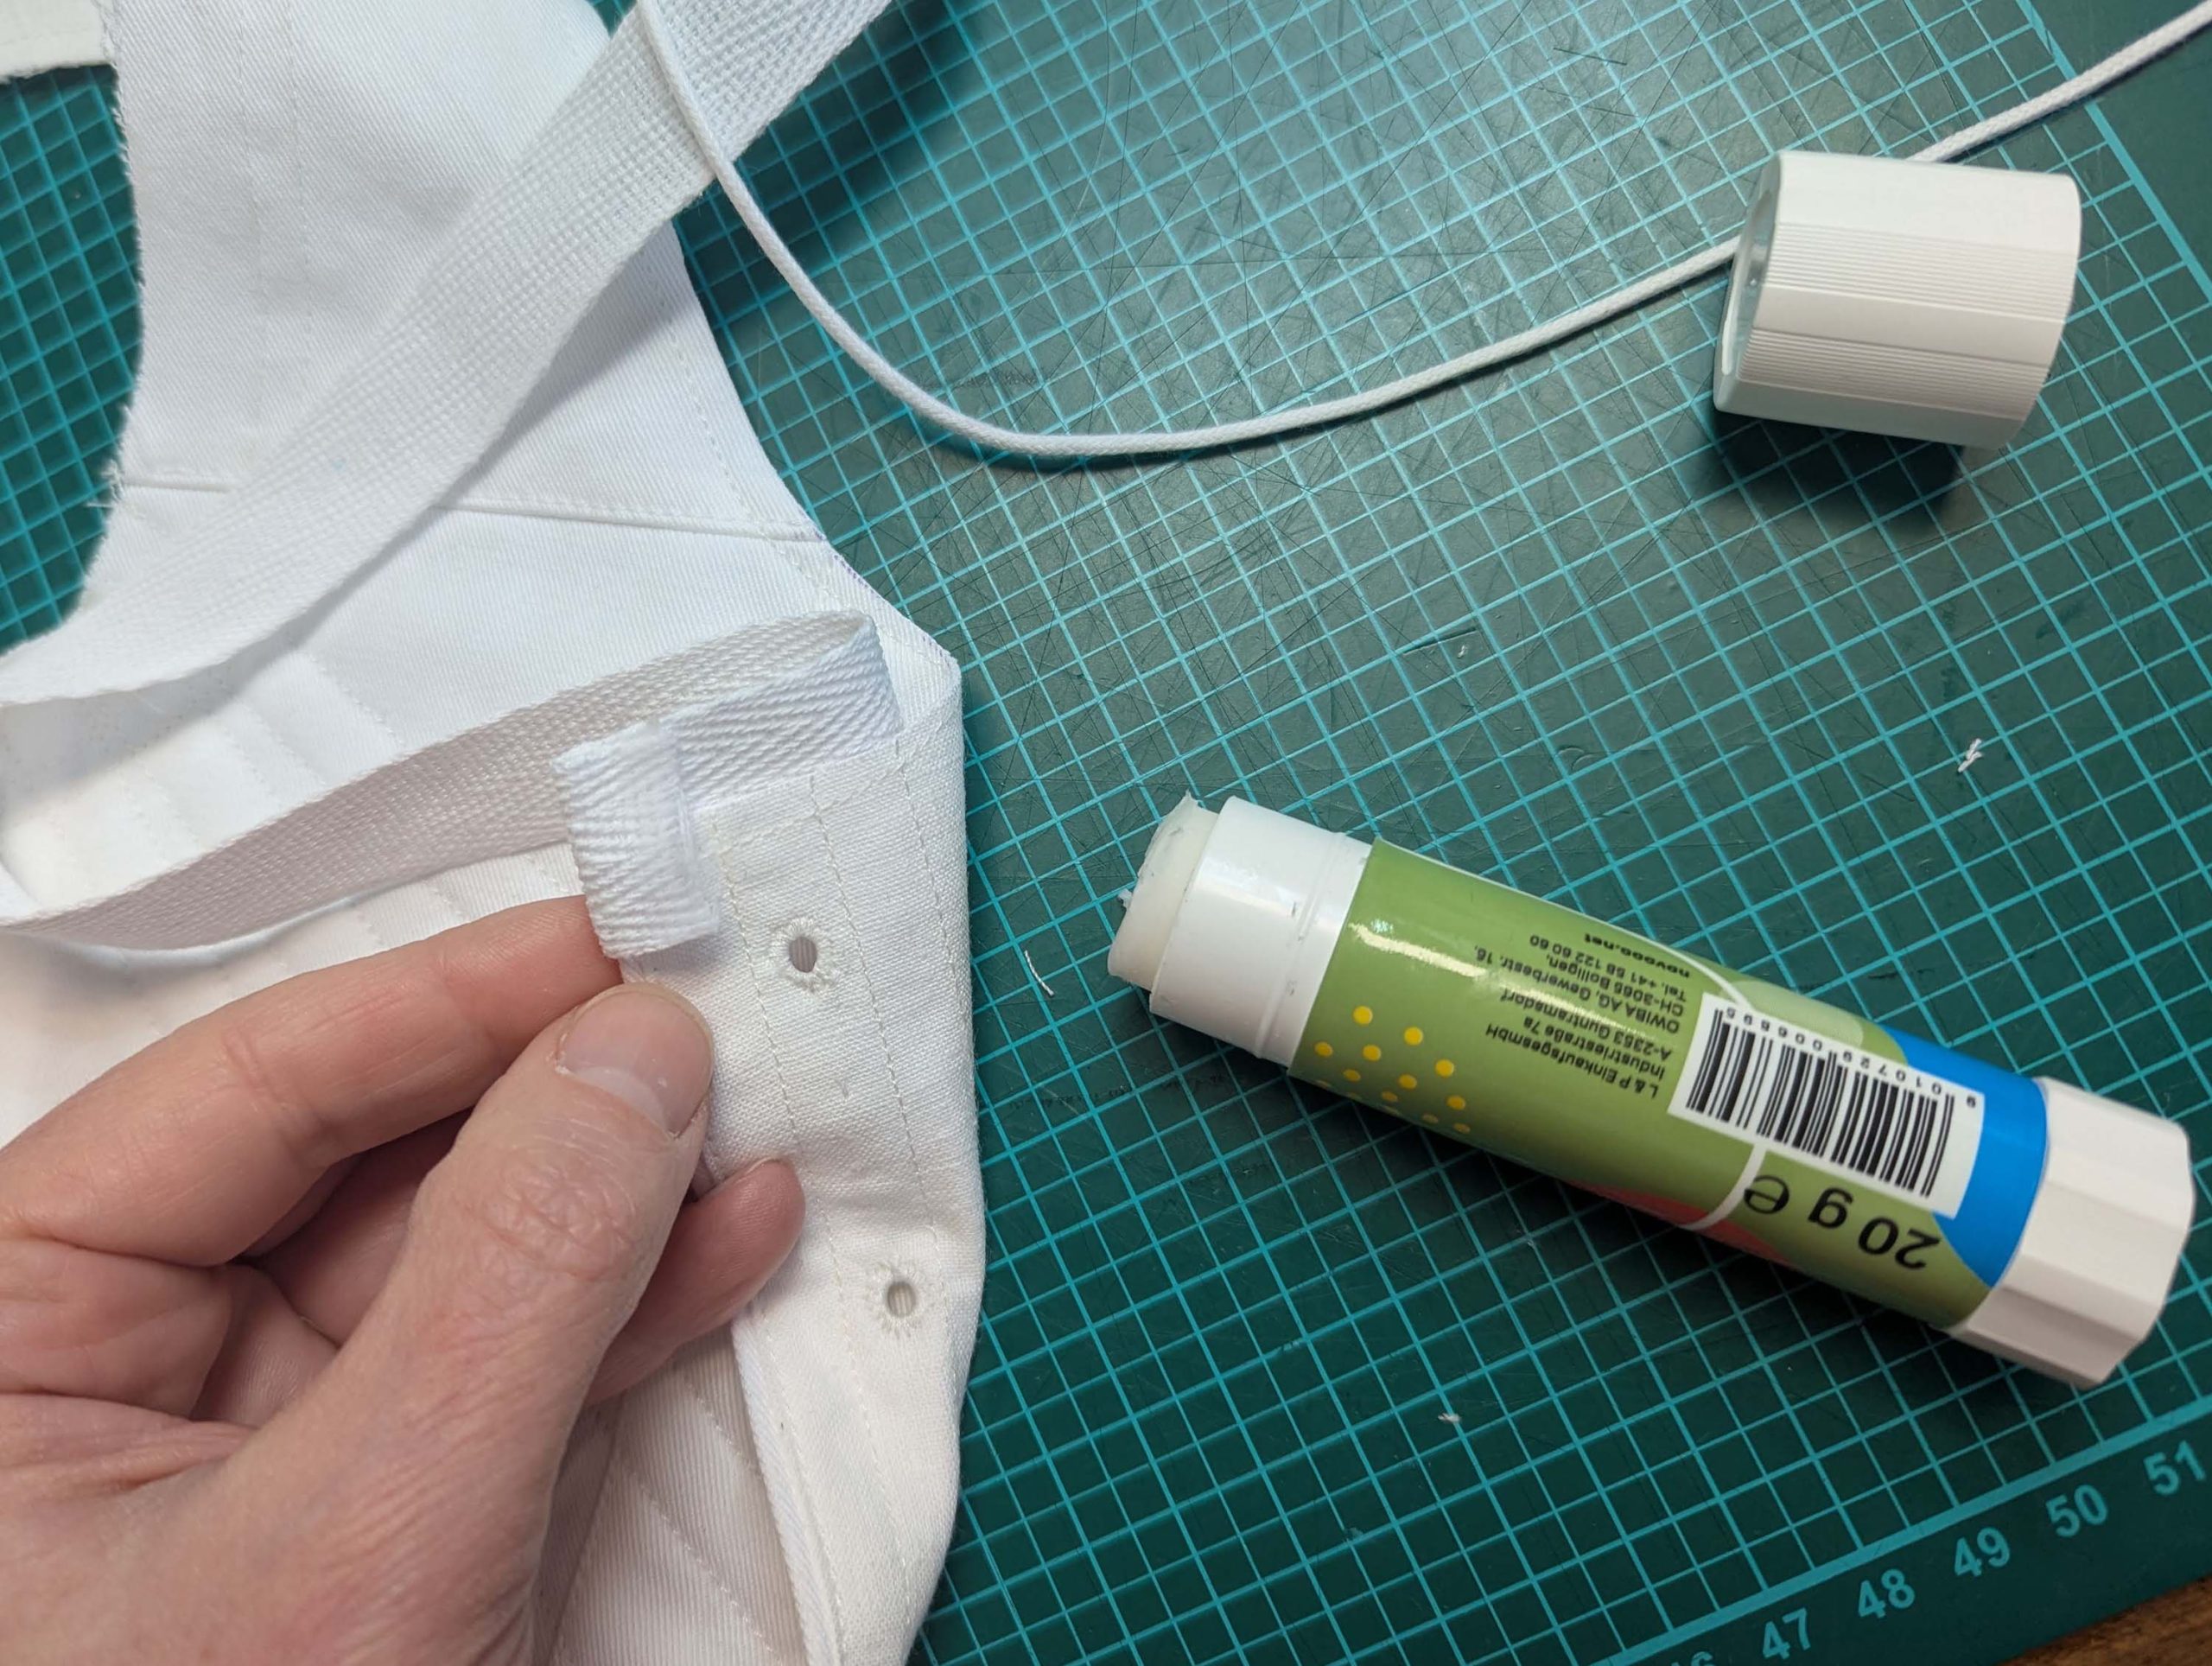
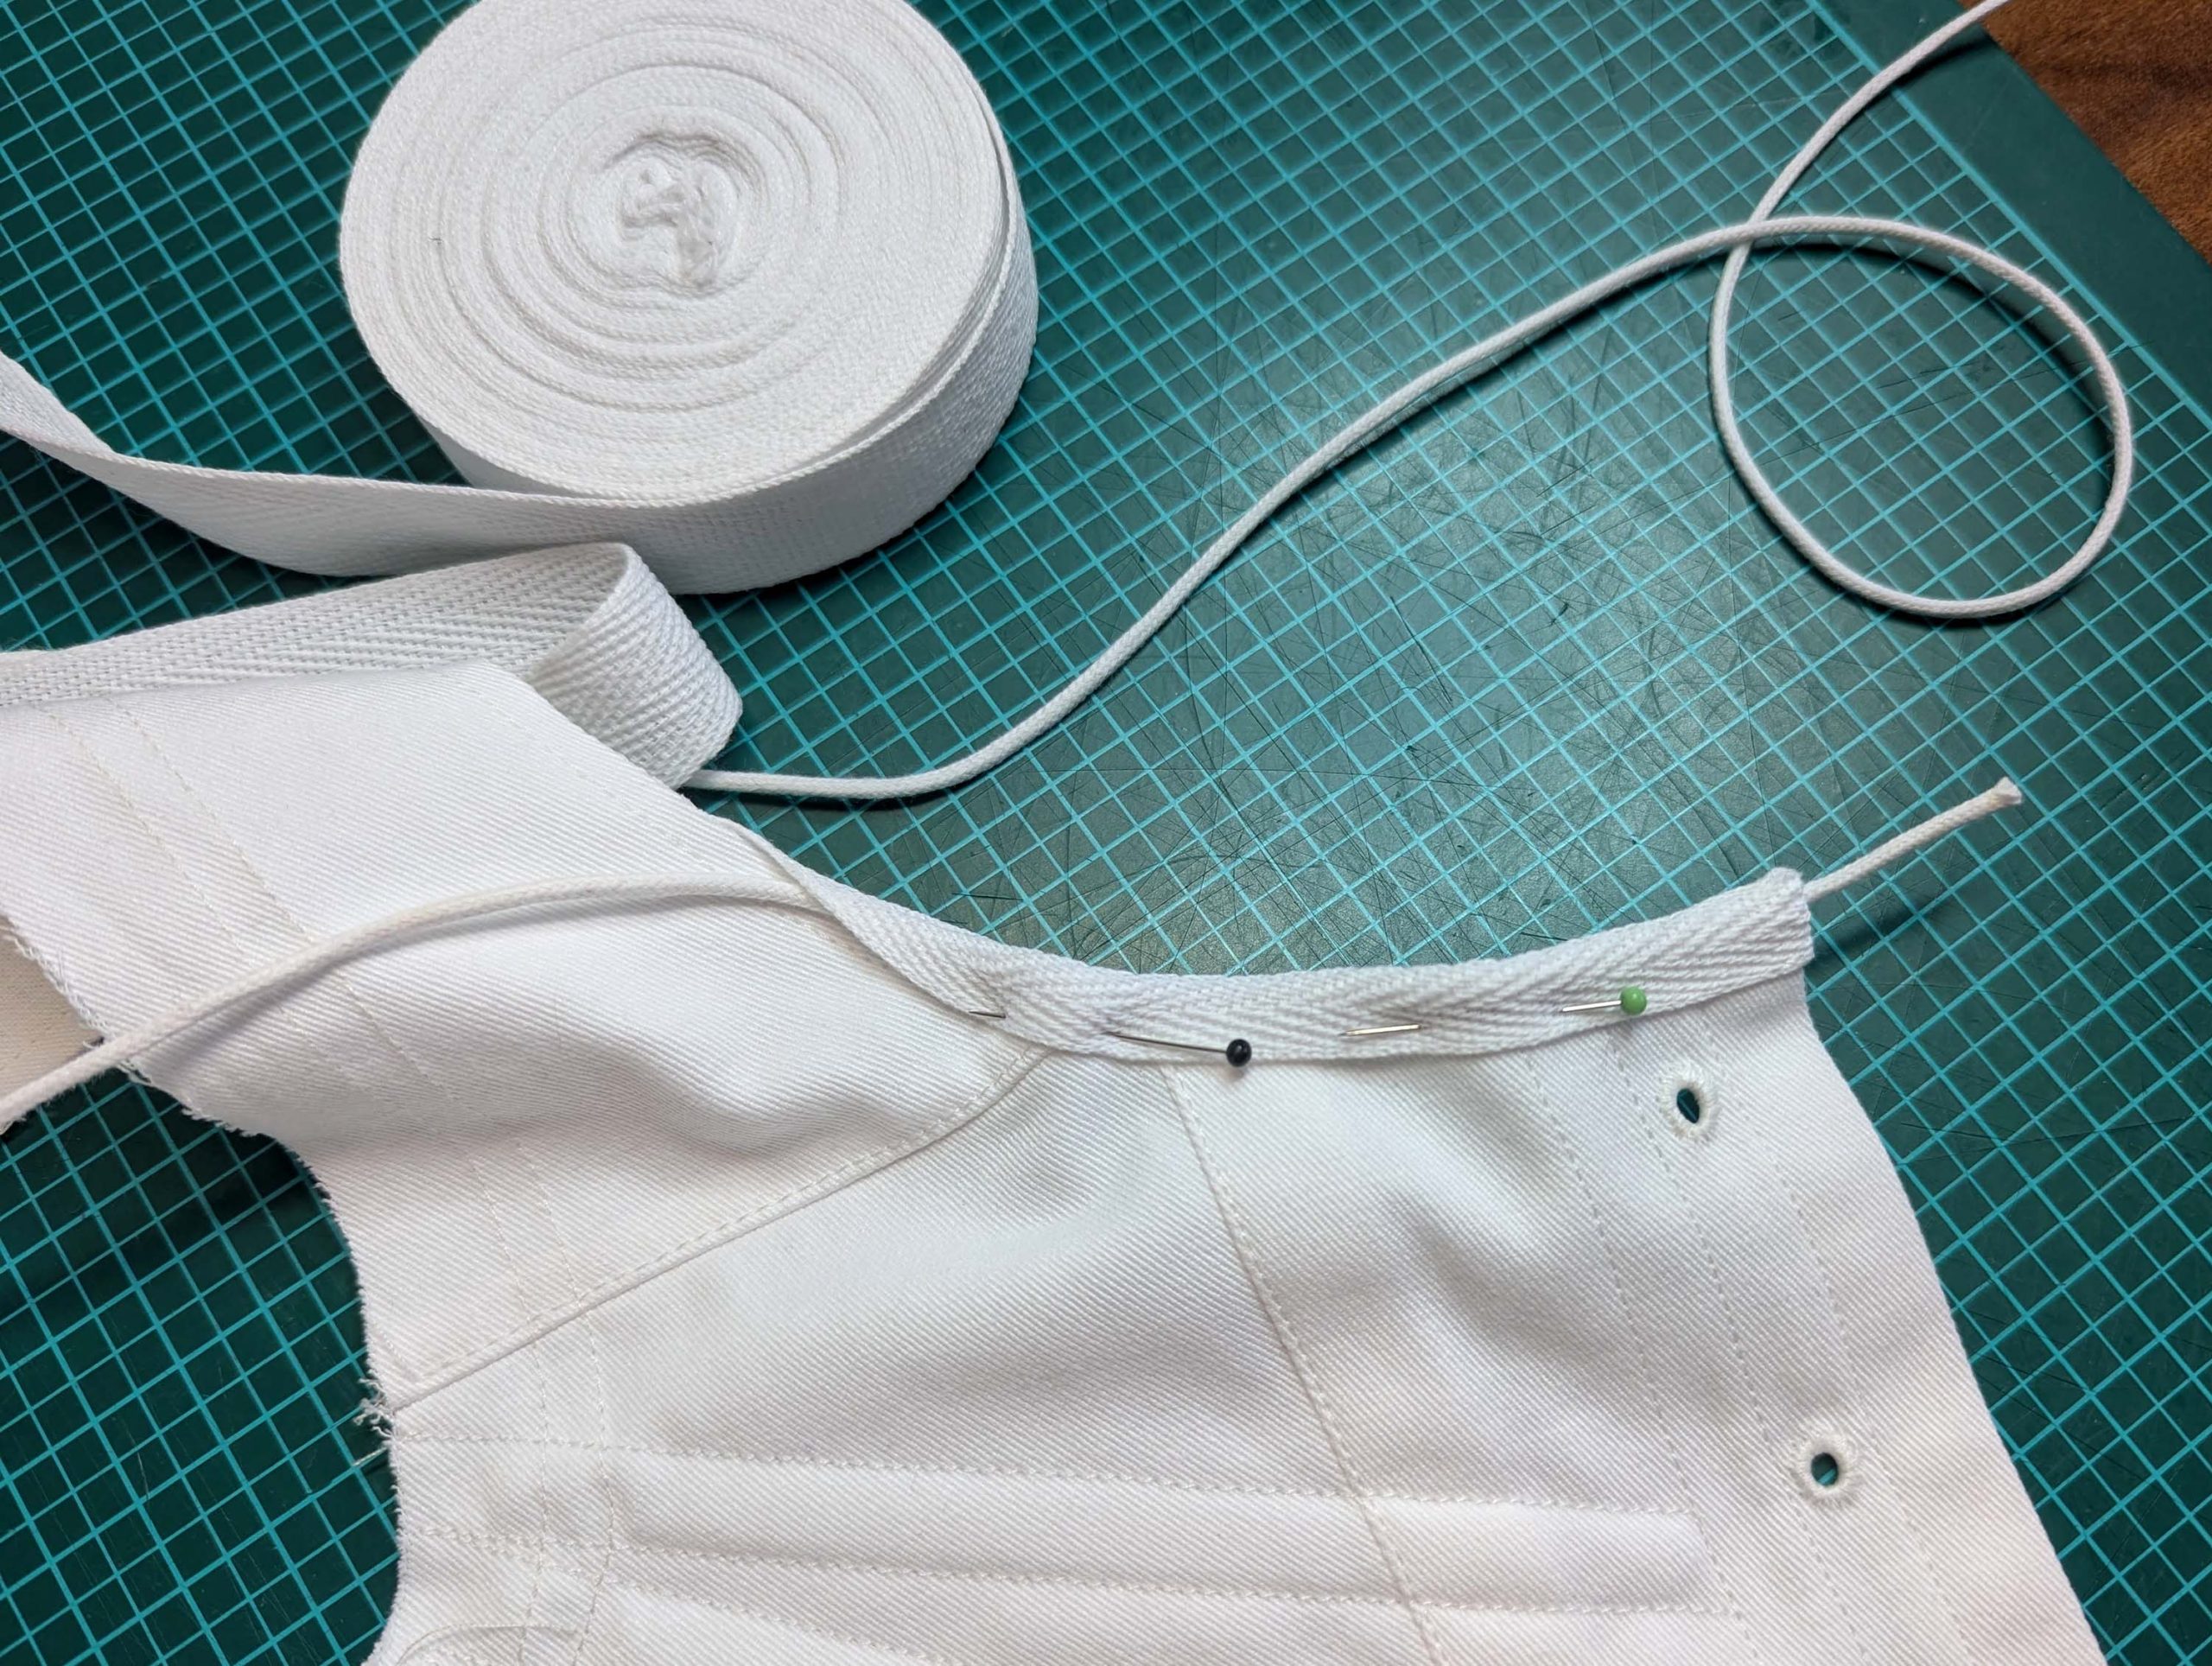
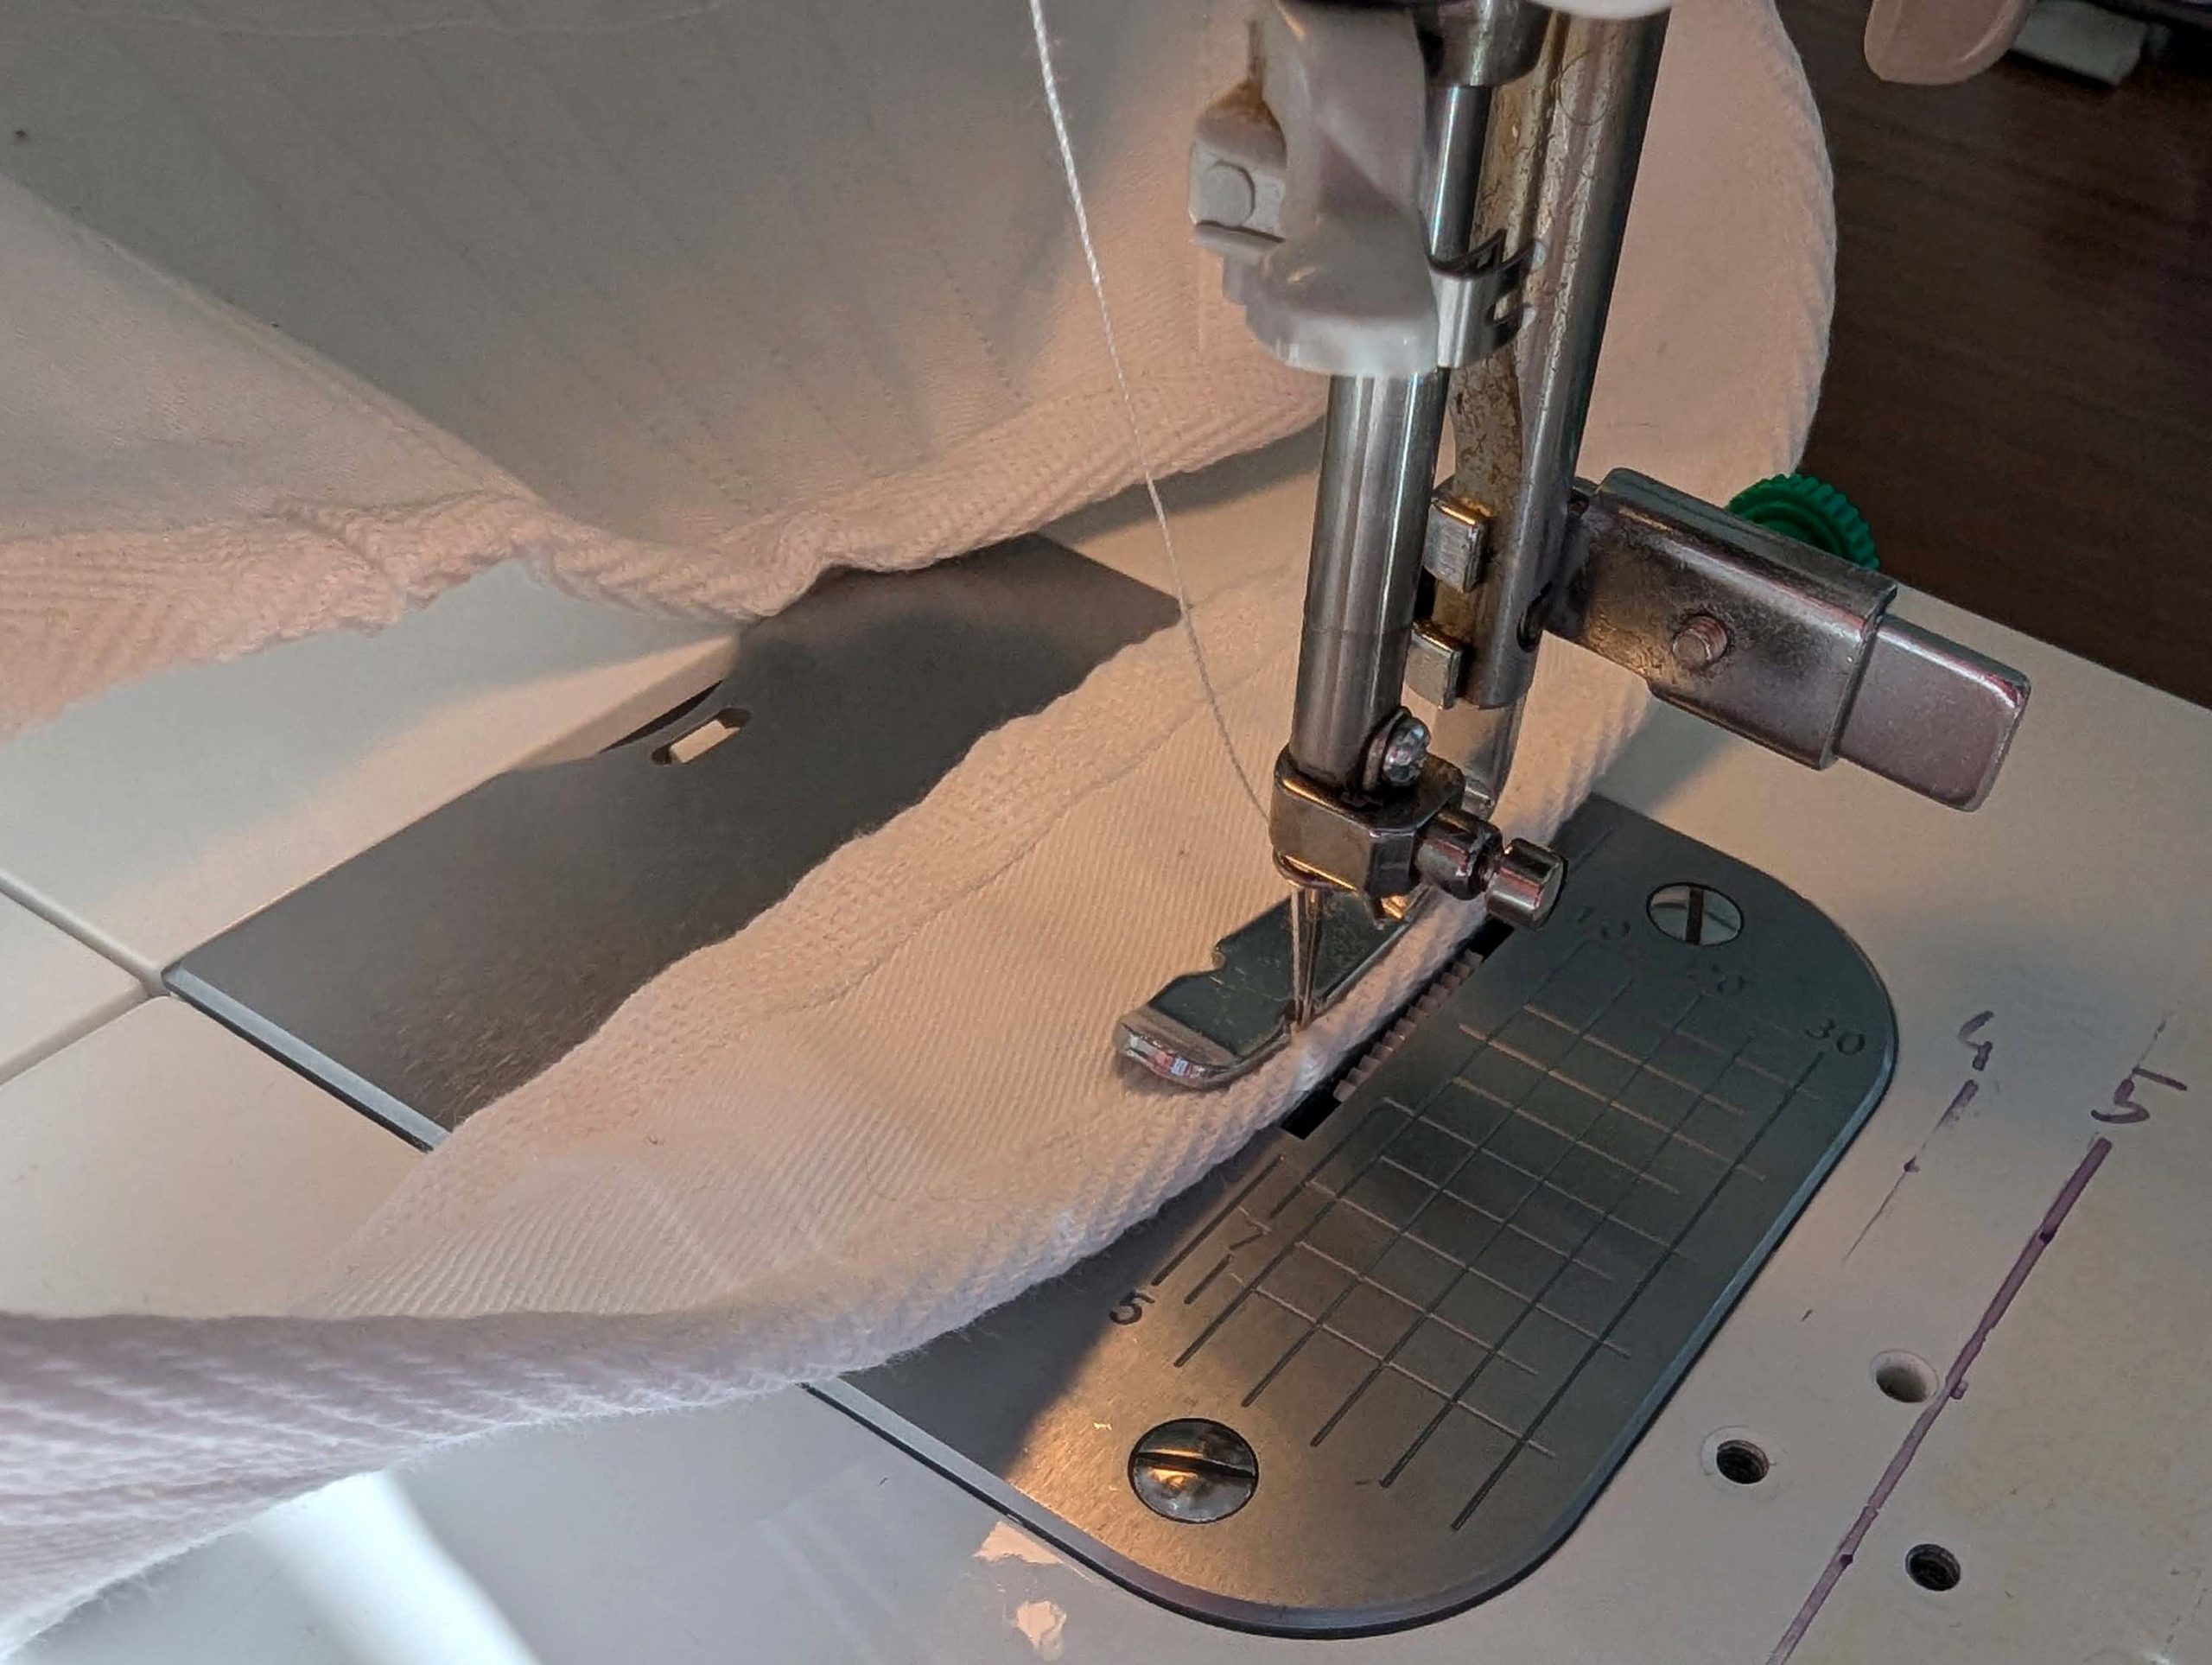
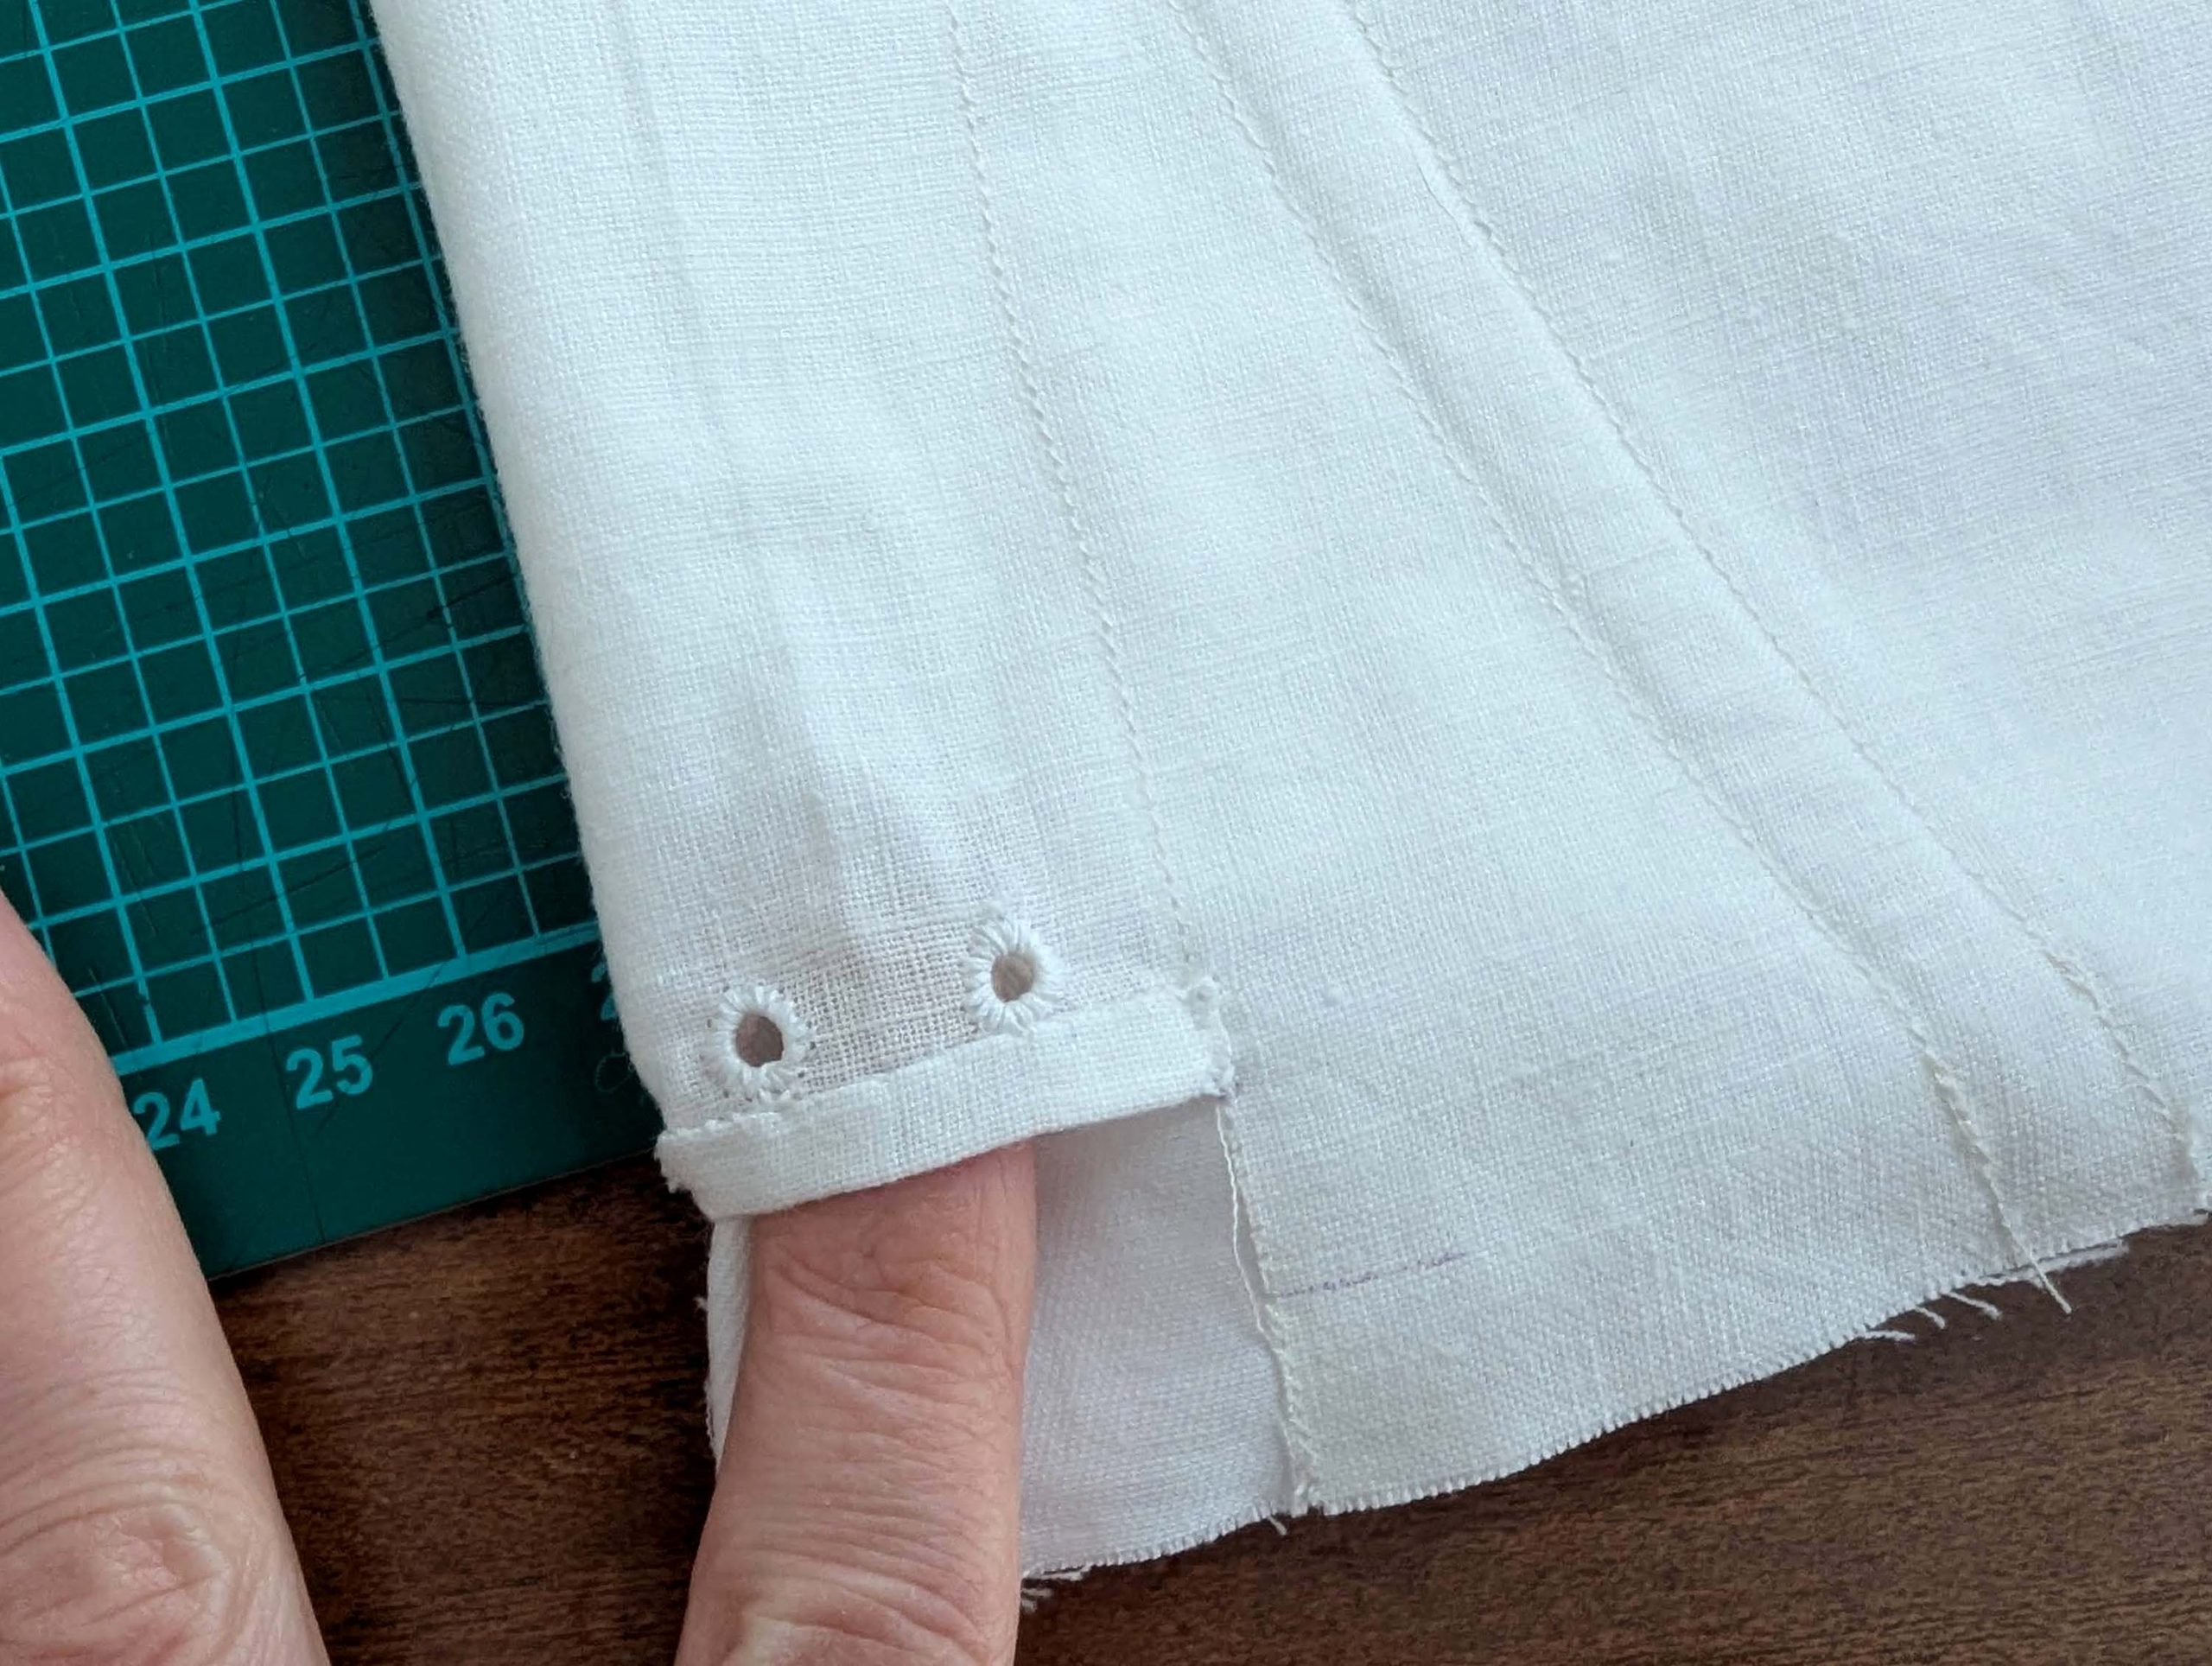
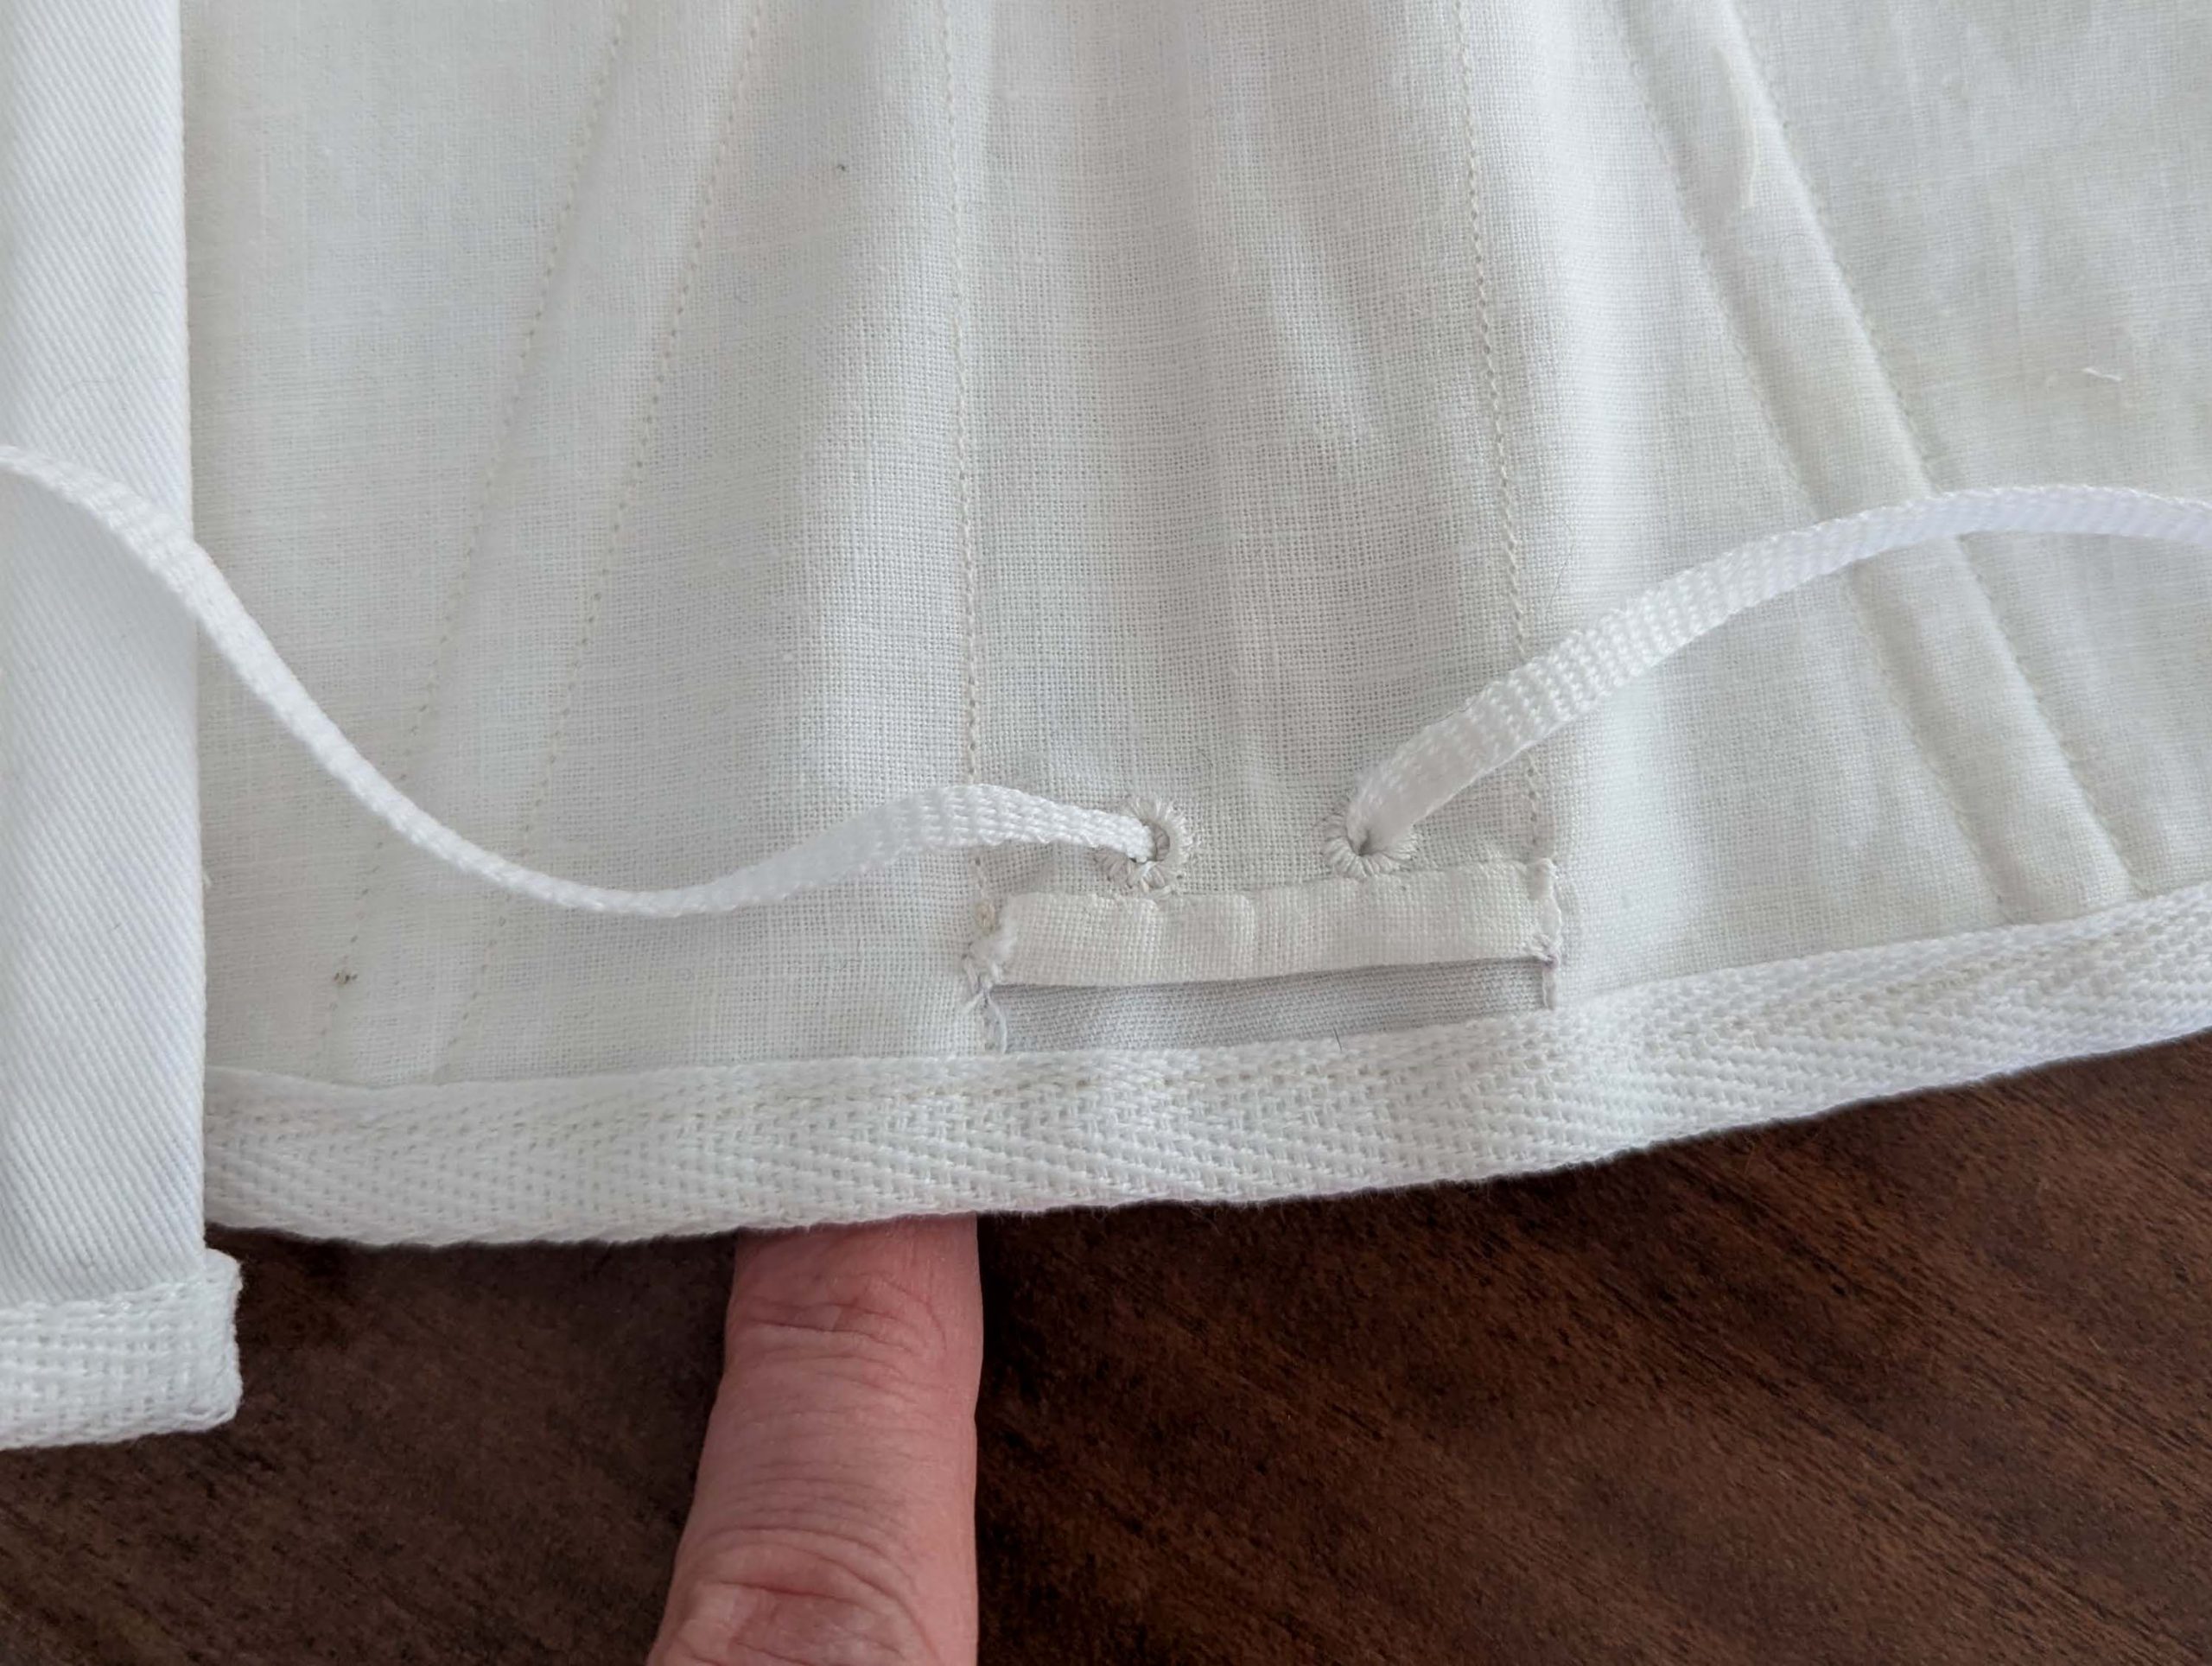
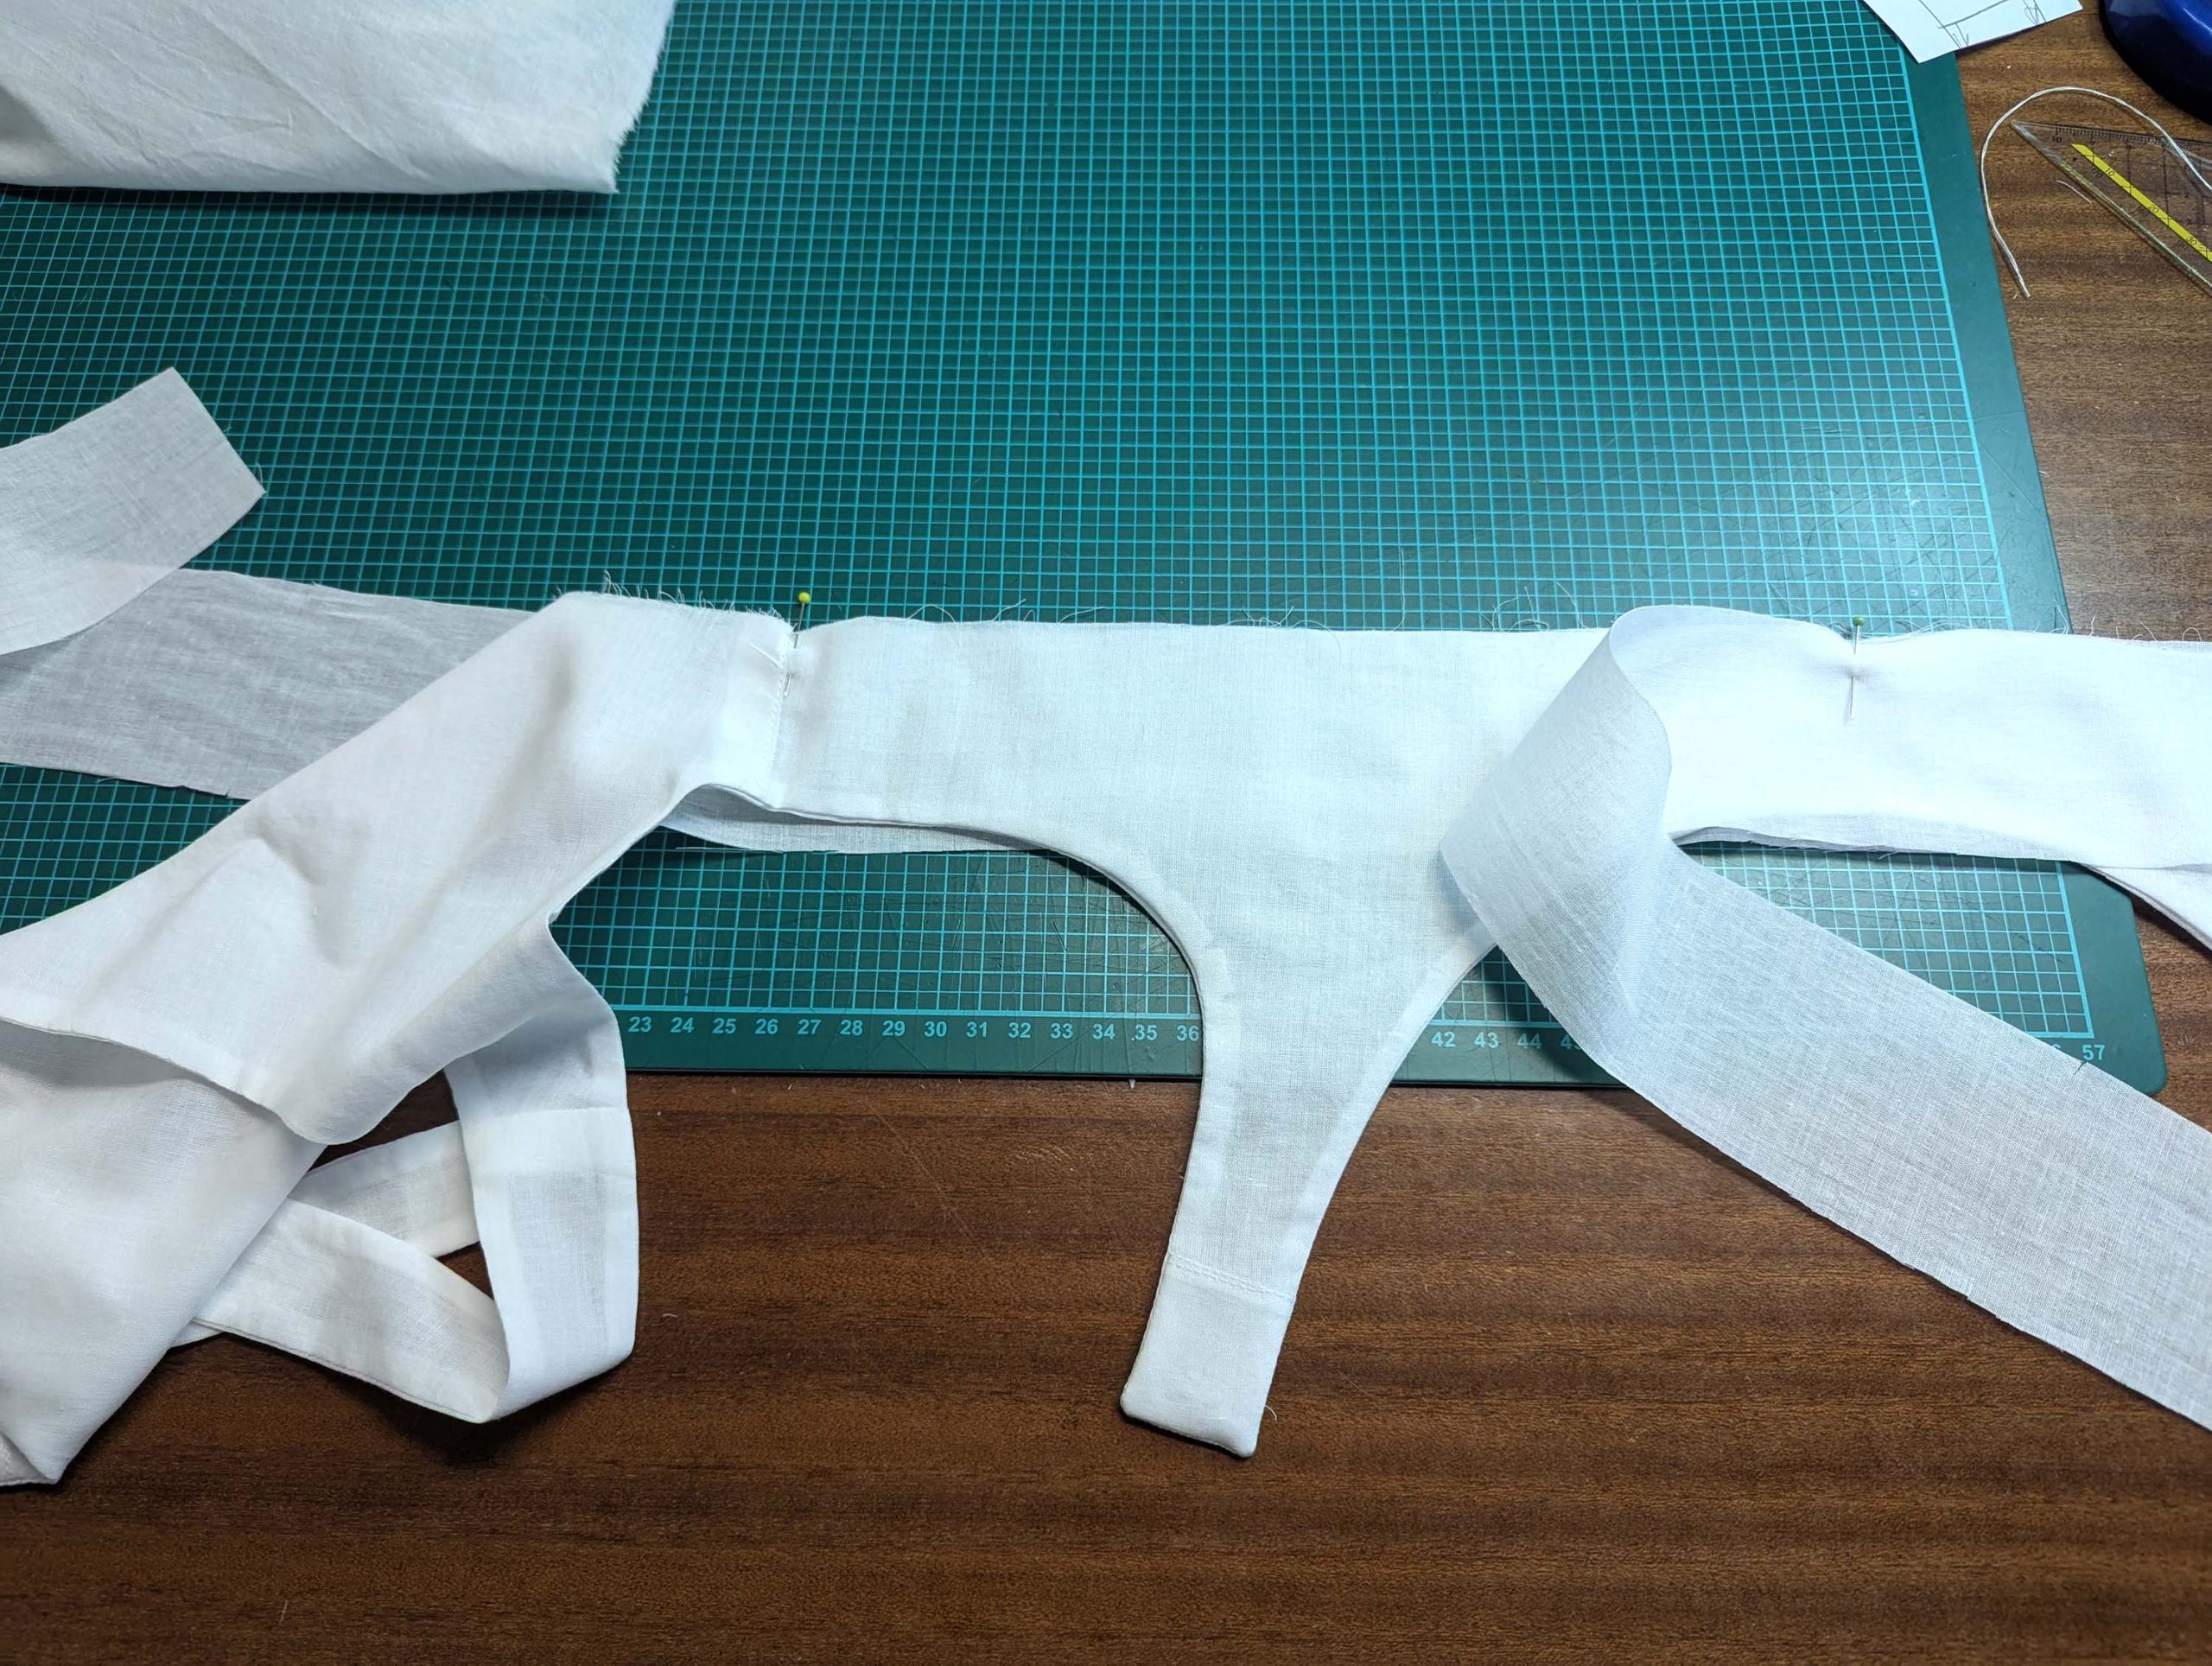
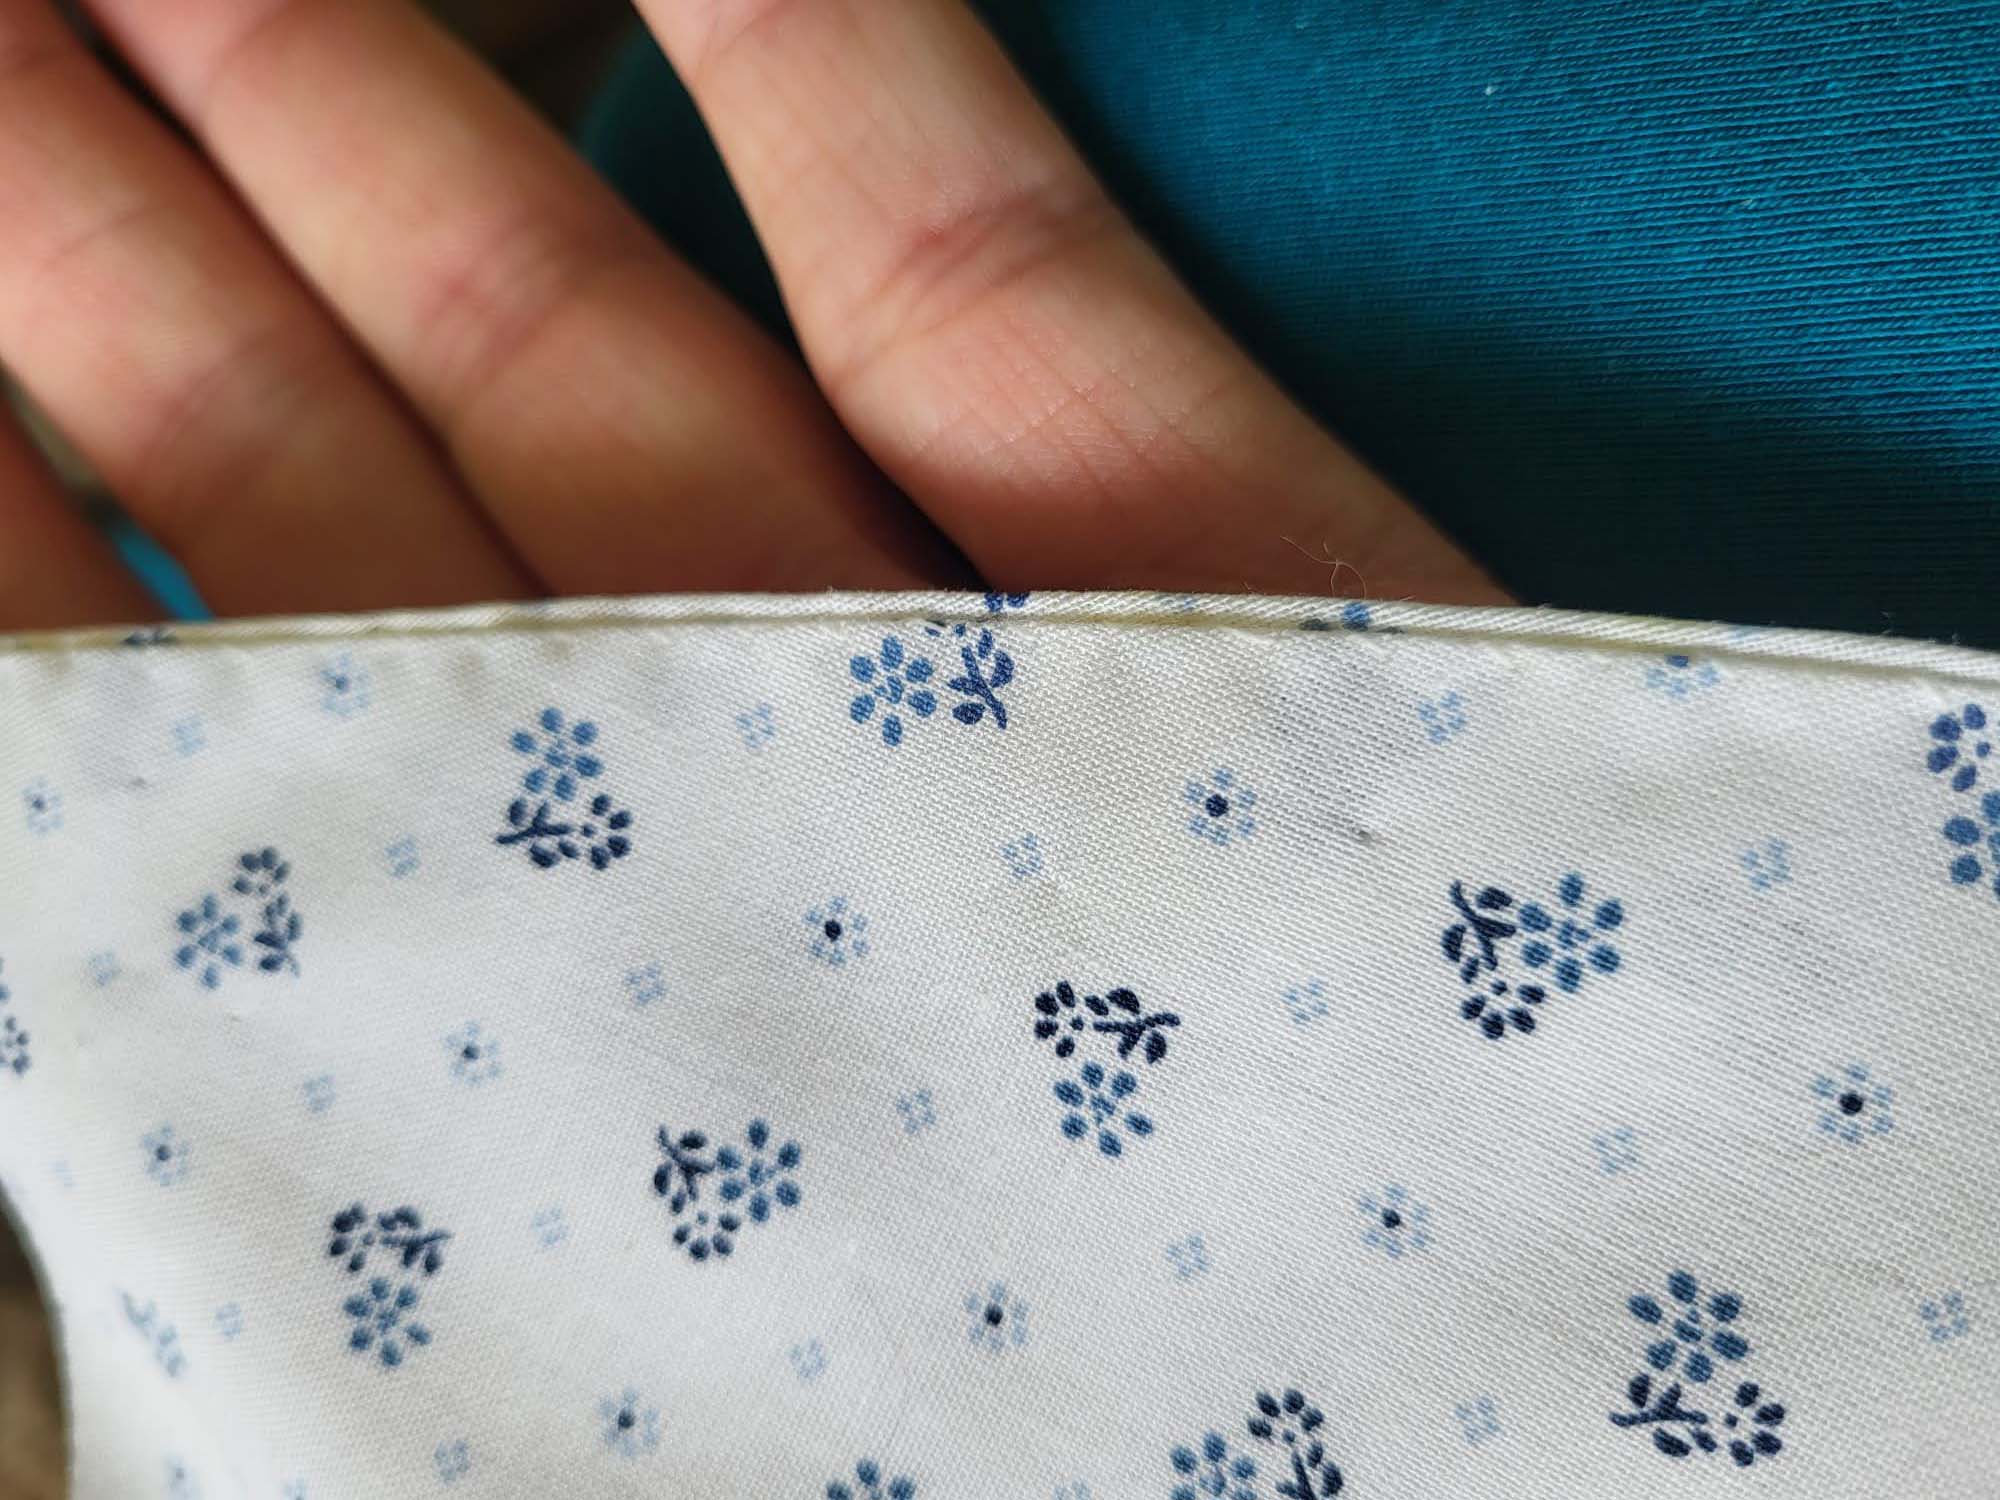
(5) Double turn in the sleeve hem and stitch in place, double turn in the hem and stitch in place in the same way. Thread the tunnel at the neckline with a narrow cotton tape.
That´s it, lets continue with the petticoat!