Archiv der Kategorie: Tutorials

Paletot 1976 - Anleitung Teil 1

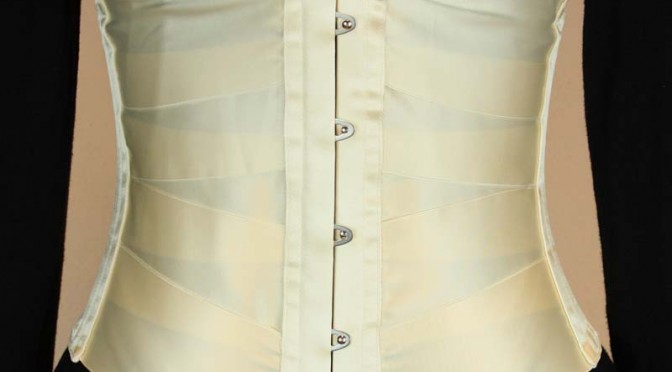
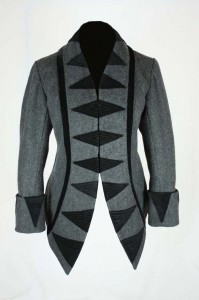
Im Frühling versprochen, endlich fertig, der Schnitt für eine viktorianische Jacke (Paletot), frei nach einem Vorbild aus der Zeitschrift “Der Bazar” von 1876. Ich möchte euch hier ein kleine Anleitung mit vielen Bildern einstellen.

IMG_2119 klein

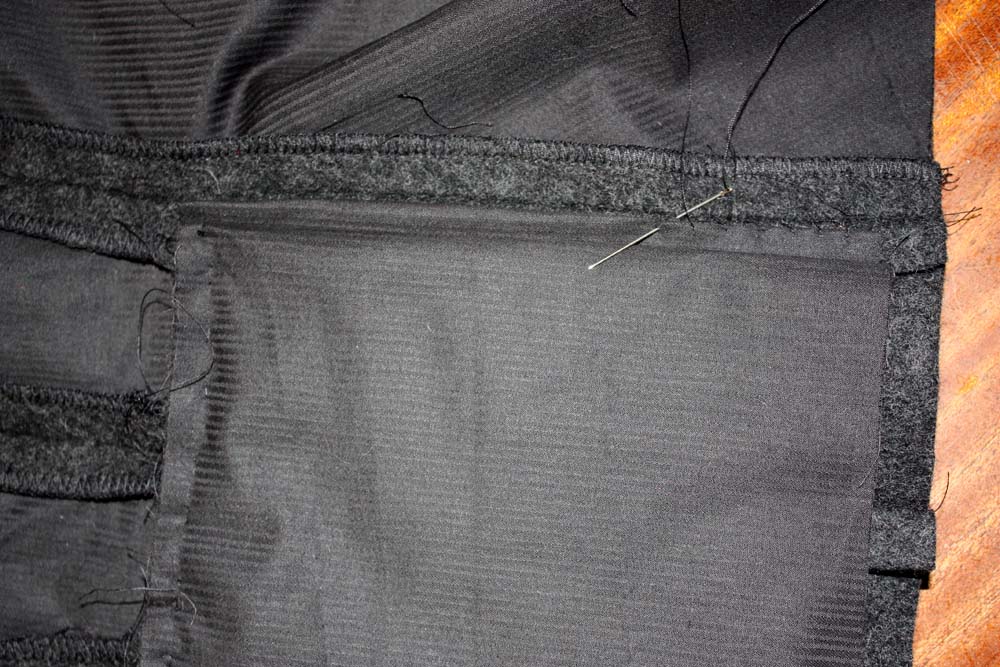
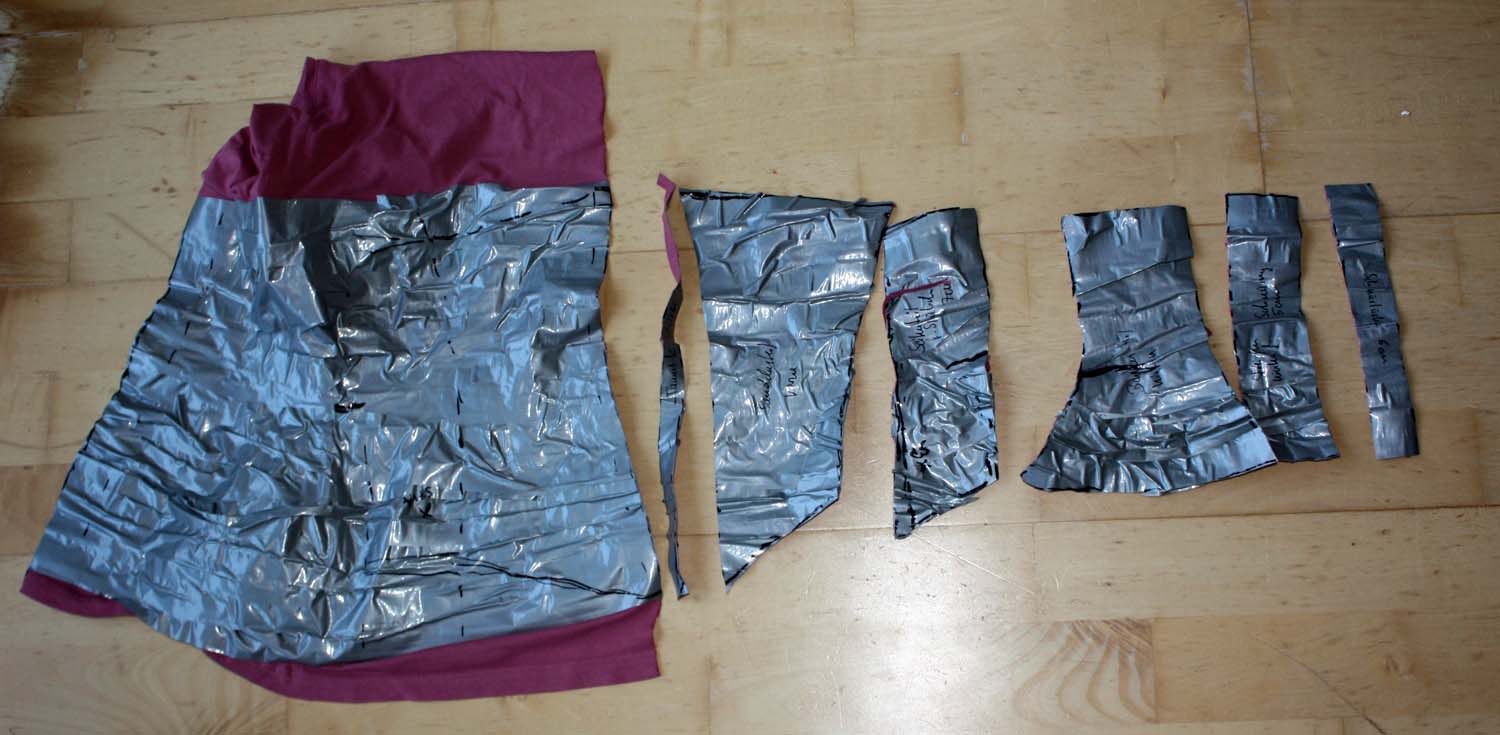
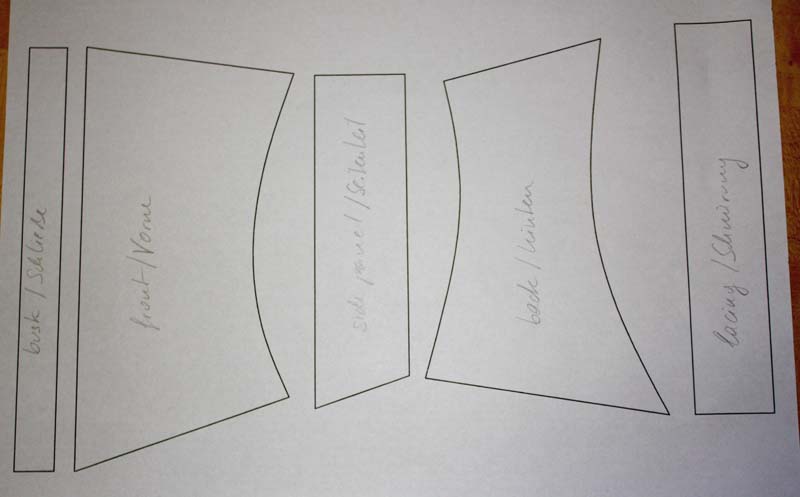
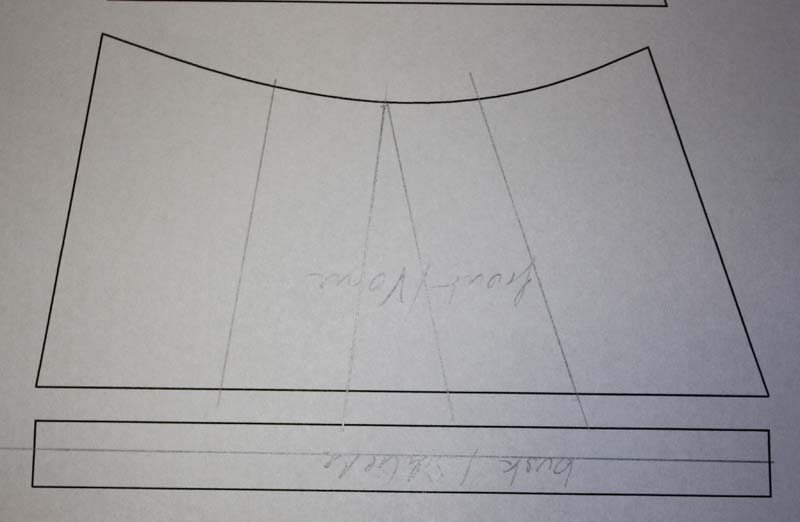
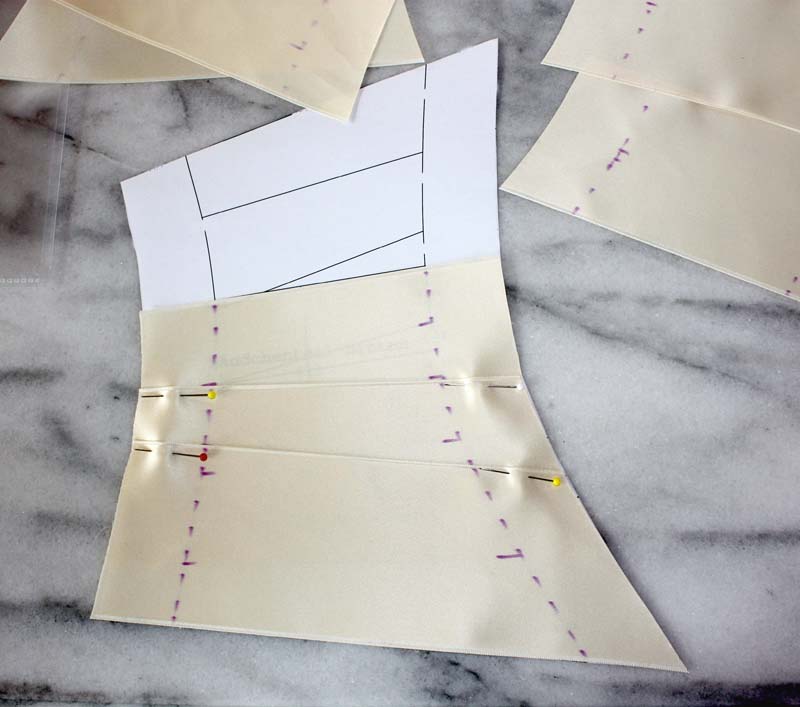
Teile zuschneiden, Futter für das Rückteil reicht nur bis zur Taille, Futter fürs Schößchen wird extra ein Streifen zugeschnitten (diesen Streifen erst einmal zur Seite legen). Futter und Oberstoff von Rückteil, seitl. Rückteil und seitl. Vorderteil werden als eine Lage verarbeitet, damit beim Nähen nichts verrutscht die Teile vorher gemeinsam versäubern. Vorderteil, Untertritt und äußere Manschette mit Einlage verstärken.

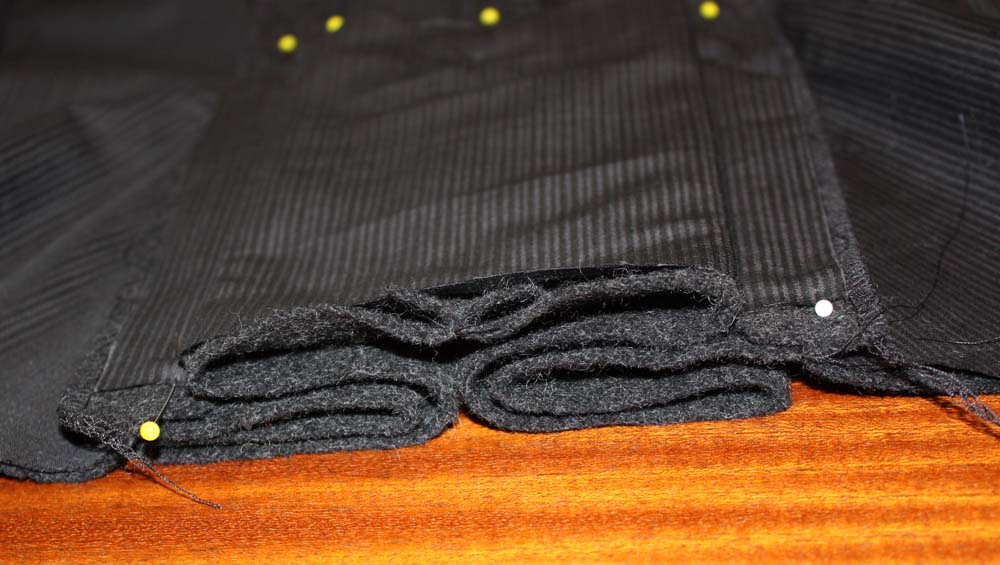
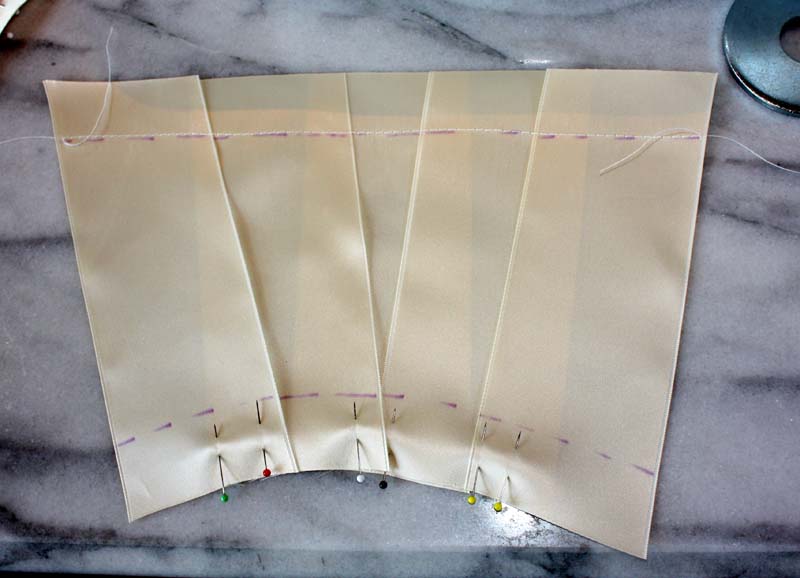
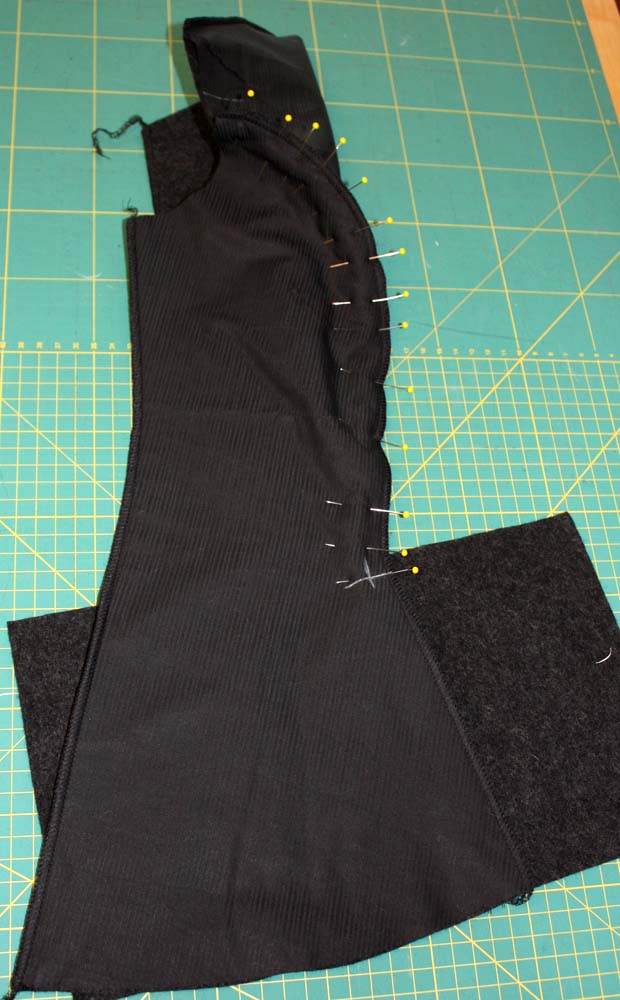
An den seitl. Rückteilen und den Rückenteilen in den Ecken Nahtzugaben genau markieren und zusammen nähen, an den Markierungen enden. Das Rückteil im Bereich des Schulterblattes etwas einhalten. NZ auseinander bügeln. Danach Schößchen an das seitl. Rückteil nähen. Darauf achten, dass die Naht oben in der Ecke innerhalb der Nahtzugabe liegt. Nahtzugaben auseinander bügeln, Schößchen falten und Kanten einbügeln. Seitl. Vorderteile an seitl. Rückenteile nähen, NZ auseinander bügeln (Achtung, Naht an der hinteren Mitte ist immer noch offen. Schulternähte schließen, Nahtzugaben auseinander bügeln.

. IMG_2073                         IMG_2074 IMG_2075


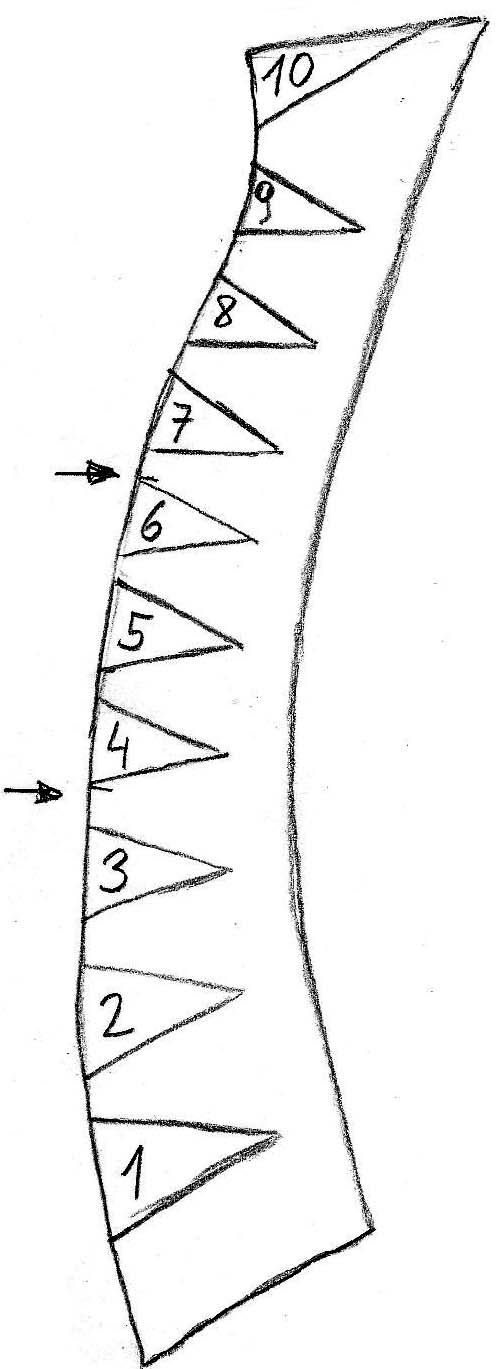
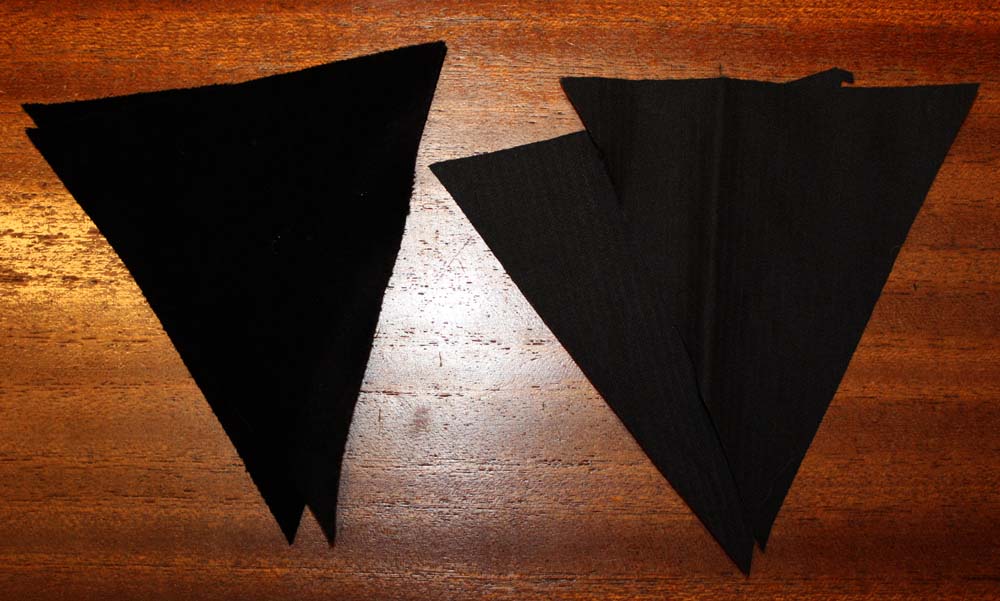
Verzierungen für den Kragen vorbereiten. Am Schnitt Dreiecke für die Samtapplikationen anzeichnen, 1cm Nahzugabe dazugeben und abpausen. Die einzelnen Dreiecke durchnummerieren. Pro Dreieck jeweils 2xSamt + 2xFutter zuschneiden. Jeweils 1 Teil Samt und 1 Futterteil rechts auf rechts aufeinander stecken, nähen, im Bereich der Spitze mit kurzer Stichlänge nähen. Die kurze Kante bleibt offen. Nahtzugabe an der Spitze knapp zurückschneiden, wenden und bügeln.

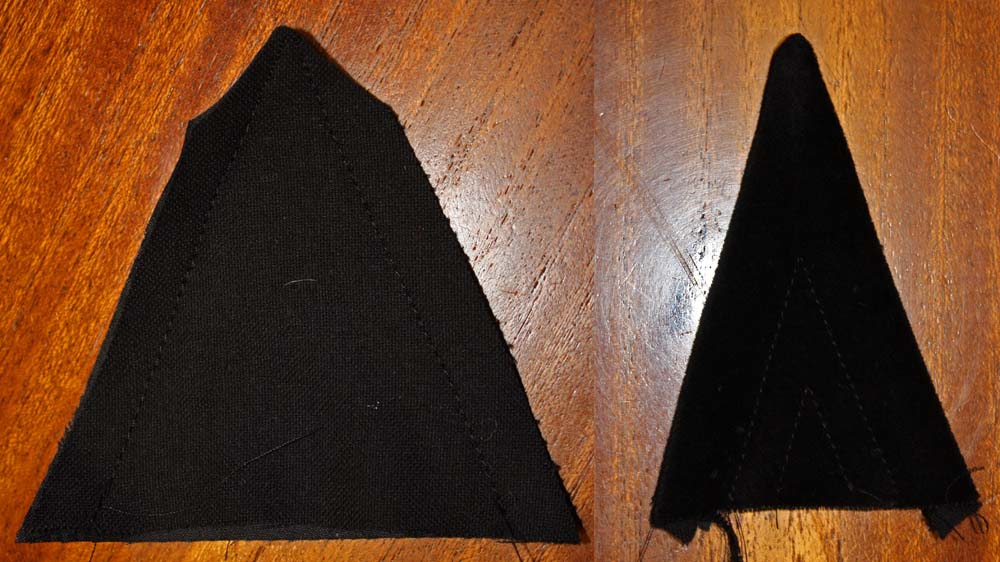
Von der Samtseite die Dreiecke im Abstand von 1,5cm zur Kante absteppen, danach mehrmals innen in Nähfußbreite absteppen damit das Muster entsteht.

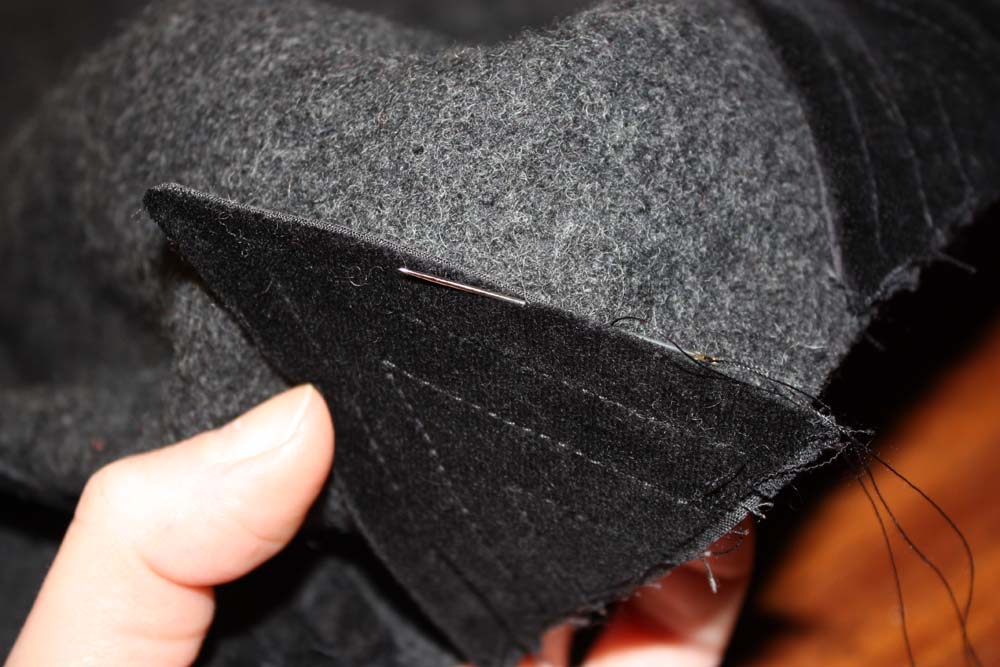
Die Dreiecke auf die entsprechende Position am Kragen stecken und in Nähfußbreite zur äußersten Naht aufsteppen. Zum Schluss entlang der Kante mit kleinen Handstichen annähen. Das Dreieck in der hinteren Mitte wird erst später aufgenäht.

Bild 13
IMG_2077
IMG_2078
IMG_2081

Kragenteile an die seitlichen Vorderteile nähen. Die Nahtzugaben werden in den Kragen gebügelt, die innere Nahtzugabe zurückgeschnitten.

Die Rückenteile nähen, achten, dass die Kragennähte genau aufeinander treffen. Unten genau in der Ecke enden. Nahtzugaben auseinander bügeln, das letzte Samtdreieck an der hinteren Mitte auf den Kragen aufnähen.

IMG_2082

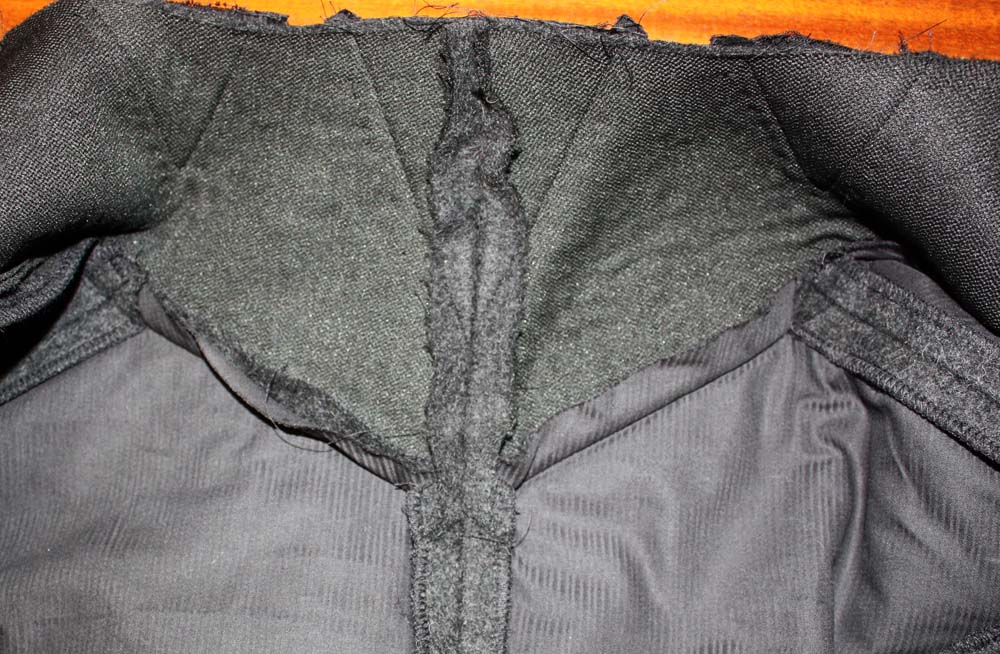
Samtband knapp neben der Naht auf das Kragenteil stecken und annähen.

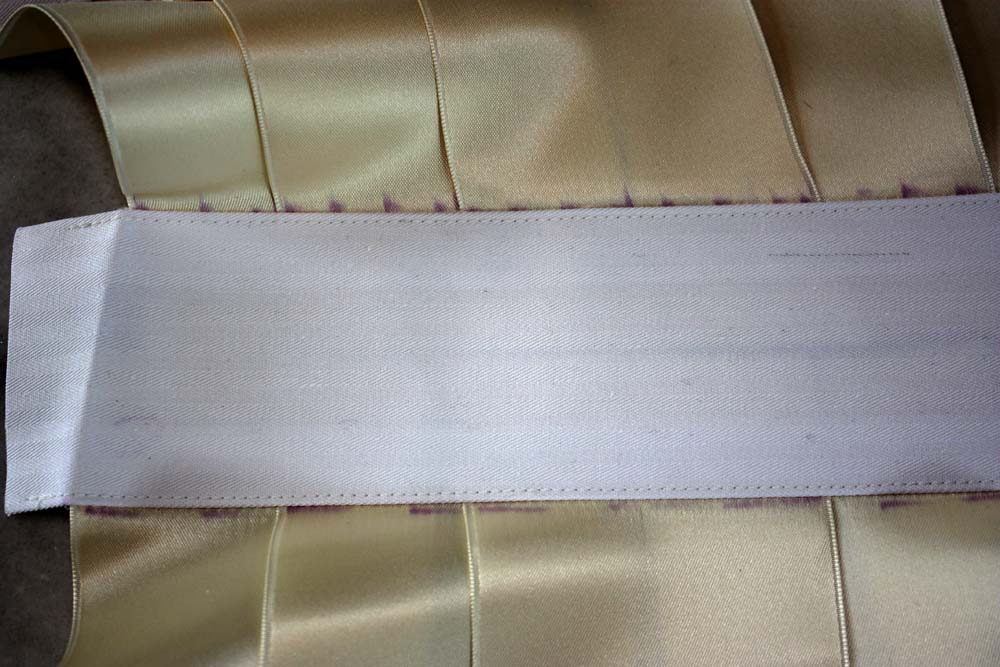
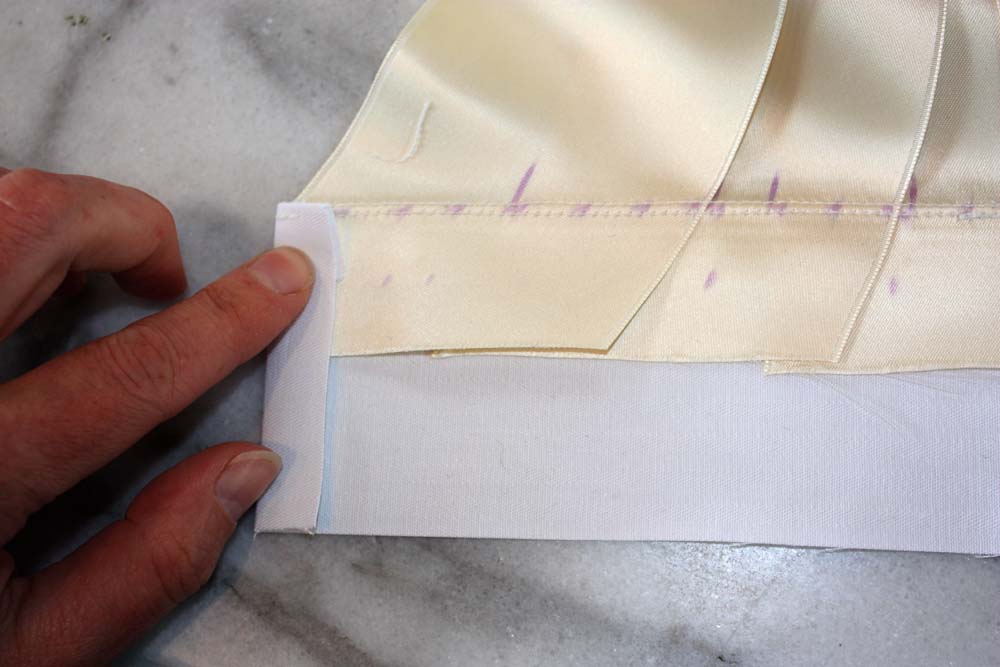
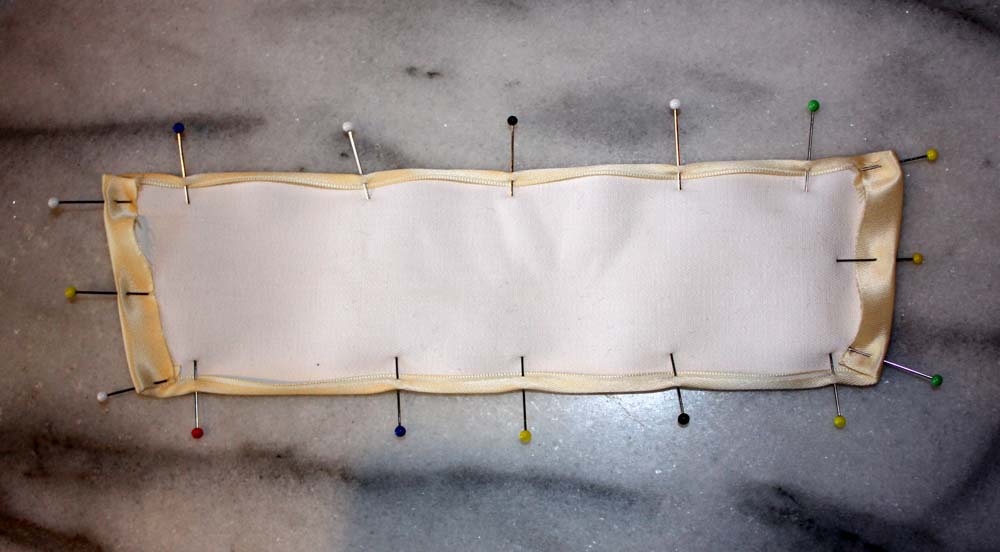
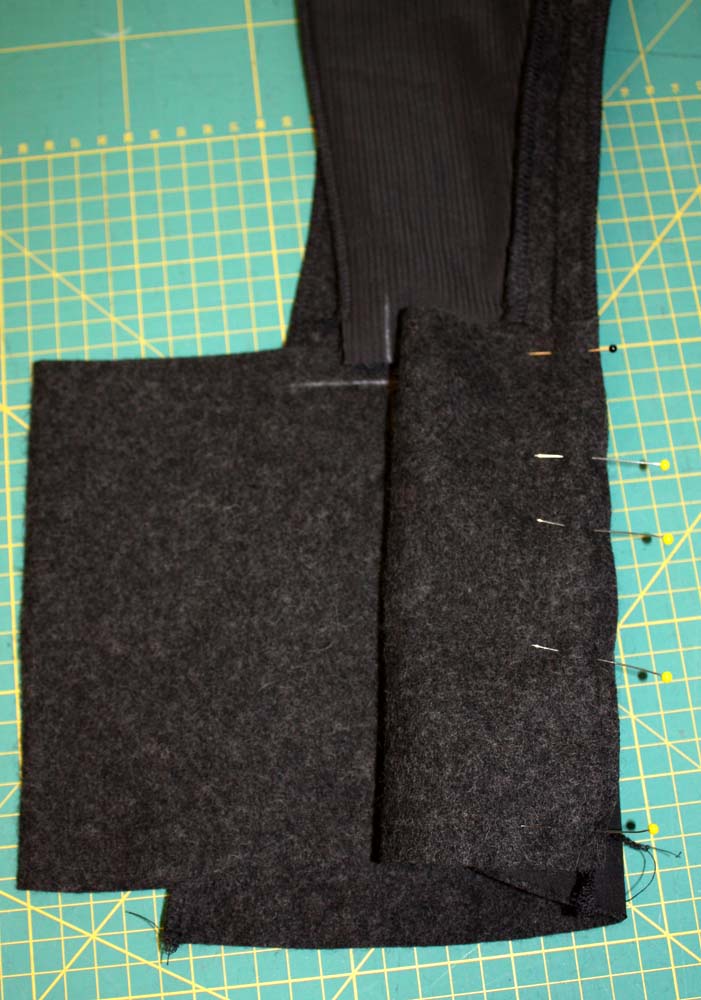
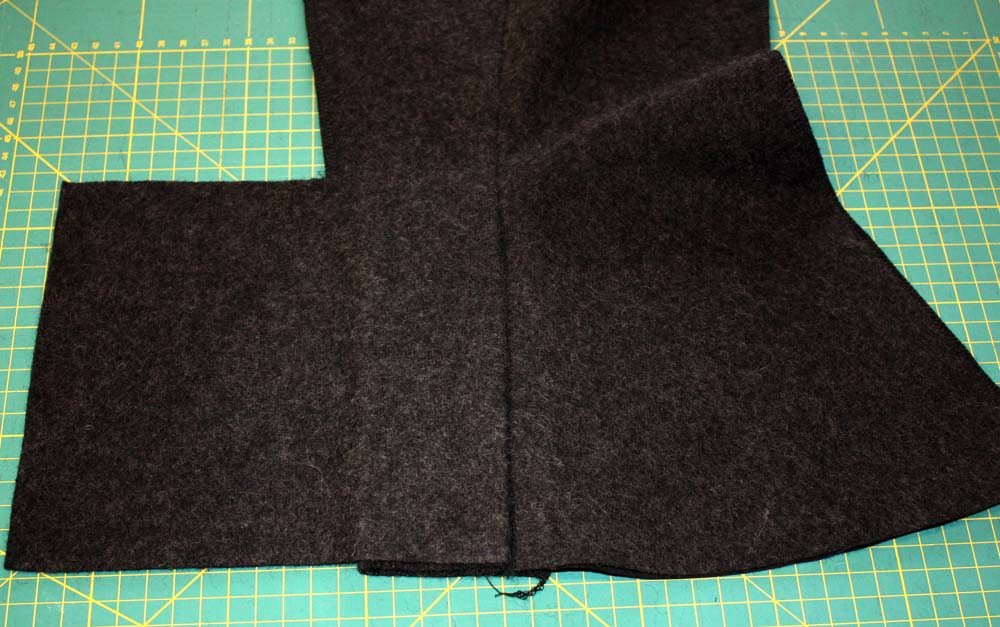
Schößchen an der hinteren Mitte schließen, Nahtzugabe auseinander bügeln, den Futterstreifen an die Oberkante heften und gemeinsam falten. Kanten einbügeln. Die seitlichen Nahtzugaben des Futterstreifens einschlagen und mit einem Staffierstich an der Nahtzugabe des Oberstoffes festnähen.

IMG_2085
IMG_2088
IMG_2087

Teil 2

Das Schnittmuster ist hier erhältlich.

How to sew a ribbon corset

Cycling with a corset, is impossible? With one of my half-bust corsets, I couldn´t imagine. But with an underbust corset? Let´s try it! Especially love that gorgeous ribbon corsets. You´ll find a lot of examples on the internet, also in Norah Waugh´s “Corset and Crinolines” there is a pattern for a ribbon waist cincher.

Konstruktion des Schnittmusters:

First I put on a good-fitting corset, above an old T-Shirt. Then my husband wrapped me up firmly with duct tape. Mark the center front and back precisely, also mark your desired gap at the back, the length and width of the busk, and the location of the iliac crest. On Originals the location of the side panels is not exactly at the sides, but a little bit more in the front.

http://www.metmuseum.org/collection/the-collection-online/search/157929

Now cut carefully along the center front and back. Place the halves on a plain area and adjust your markings as needed.

Markiere die einzelnen Schnittteile genau. Jetzt werden die einzelnen Teile so genau wie möglich auf ein Stück Papier übertragen.

This is how your pattern looks like now, it is essential to mark the parts exactly.

My ribbon has a width of 7 centimeters, therefore I mark the front and back parts the position of the ribbons accordingly. Also mark the width of your busk, the position of the lacing, and the tunnels for your boning at the side panel.

Now trace the single parts for the ribbons, number them exactly, and ad 3 centimeters allowance at the ribbon parts. For the other parts only add 1.5 centimeters.

Dann werden die Bänder zugeschnitten, das geht am besten mit dem Rollschneider, wichtig ist hier ganz genau zu arbeiten.

Mark the seam line, then pin the single parts together and baste. (The trick marker from Prym disappears by itself after a few days.)

Cut out lining for the busk, side part, and lacing of coutil fabric with seam allowance, sew to ribbon parts, fold seam allowance to coutil parts, and topstitch. It is important not to cut back seam allowance, later on by sewing the tunnels the ribbons will be stabilized.

Fold the upper and lower seam allowance of the side and lacing parts to the inside and press.

Now cut again parts from the coutil which will be faced with your Satin ribbon. Therefore cut side parts without seam allowance at all, lacing parts without seam allowance on the upper and lower edges, and also at the edge for the ribbon part. At the busk part leave seam allowance just at the edge for the ribbon part.

My satin ribbon has a width of 7cm therefore I can cover my side part in one piece. If your ribbon is narrower sew two parts together. Pin exactly to the side part of the corset and topstitch. Leave one edge open (red arrow). Sew tunnels. I made 5 tunnels but only 3 bones will be inserted.

At the back (lacing) sew parts of the coutil together with the sateen ribbon between. Open seam allowance, iron. Fold in the upper and lower seam allowance of facing. Fold the sateen ribbon around the edge of the coutil and sew like a side part. Sew tunnels, and leave open upper edge.

The busk part is a little bit more complicated to sew. At the right front edge mark Position for the loops. Sew the front edge, skip gaps at the right edge, and sew along the left front side without gaps.

At the upper and lower edges of the busk part mark the end of the busk, ad about 3/16″ (1/2cm) and sew with small stitches. Cut back seam allowance and turn inside out. Insert busk, at left side mark Position for the posts. Make holes with an awl and pop posts through the holes.

Fold the sateen ribbon around the coutil edge, sew like side part and lacing part. Sew busk in place, use your Zipper foot, and sew as close as possible.

At the back part mark the Position for the grommets and insert them. Insert boning and close upper edges. Insert lacing.

Sollte das Korsett im Bereich des Brustbeins etwas drücken einen kleinen Polster nähen und mit einigen Handstichen an der Oberkante der Schließe fixieren. Fertig!