
Searching the internet for ideas for a regency / empire coat I found this fashion plate and felt in love with it.
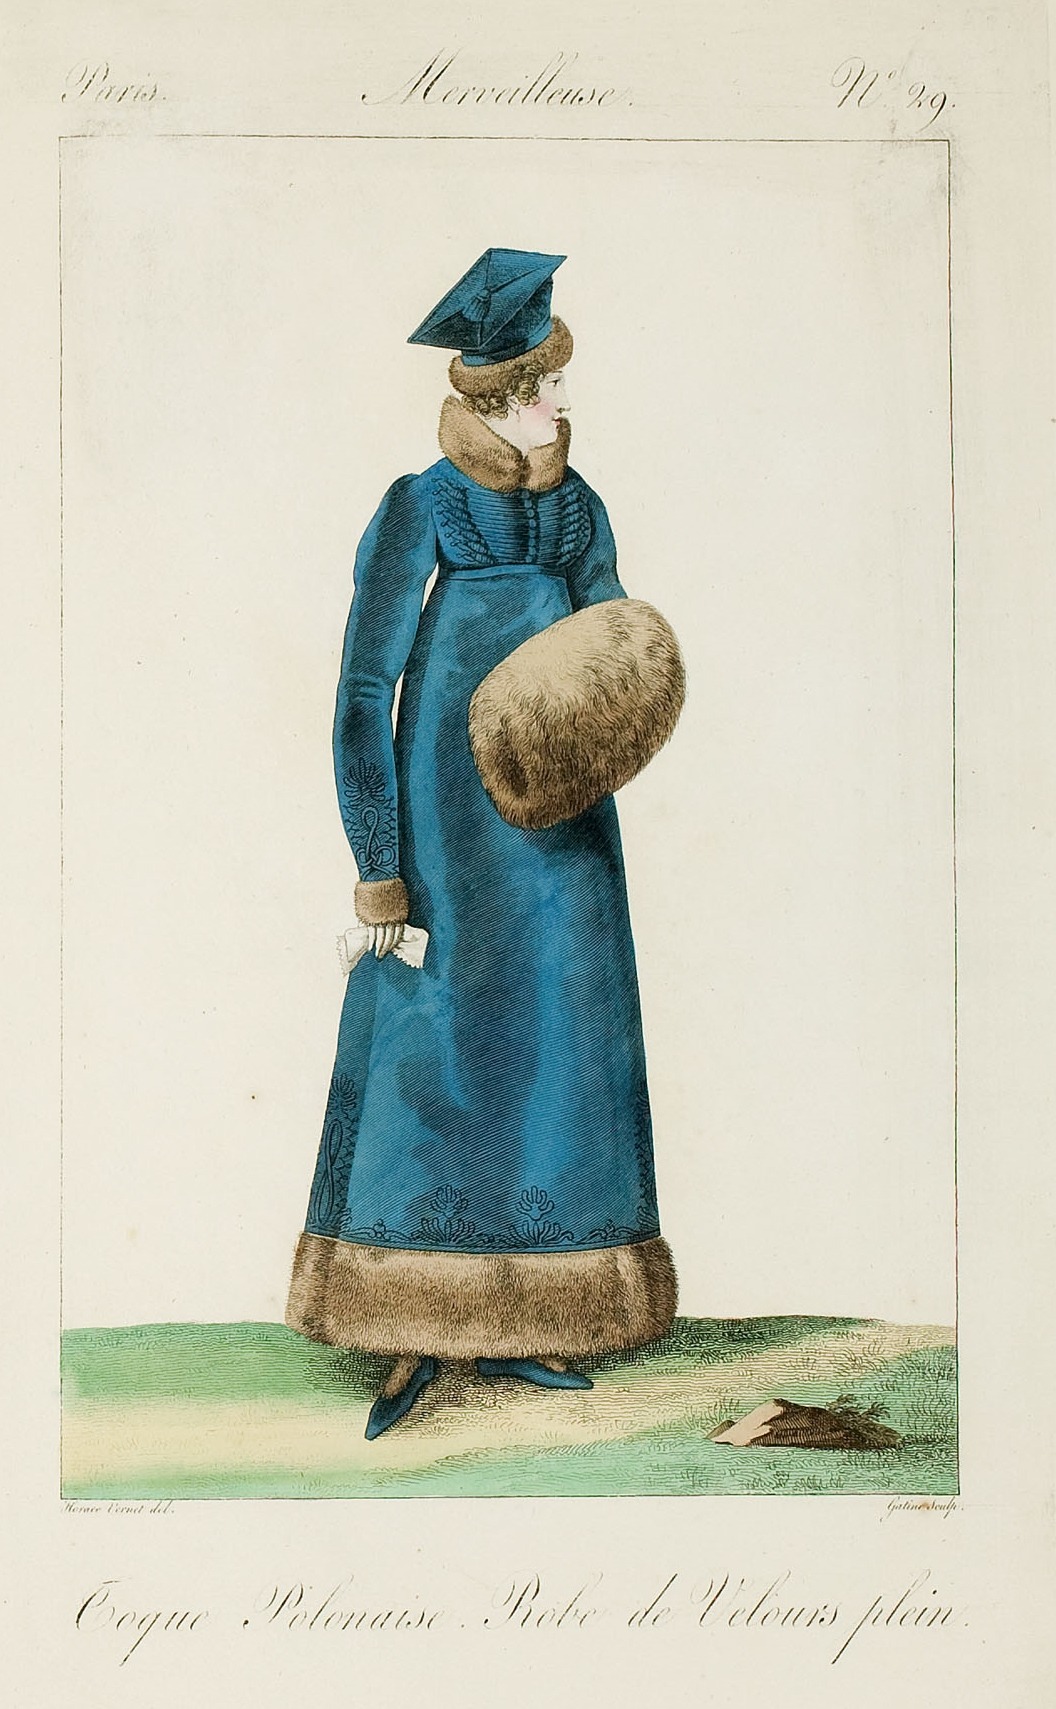
Incroyables et Merveilleuses, Georges Jacques Gatine, 1816
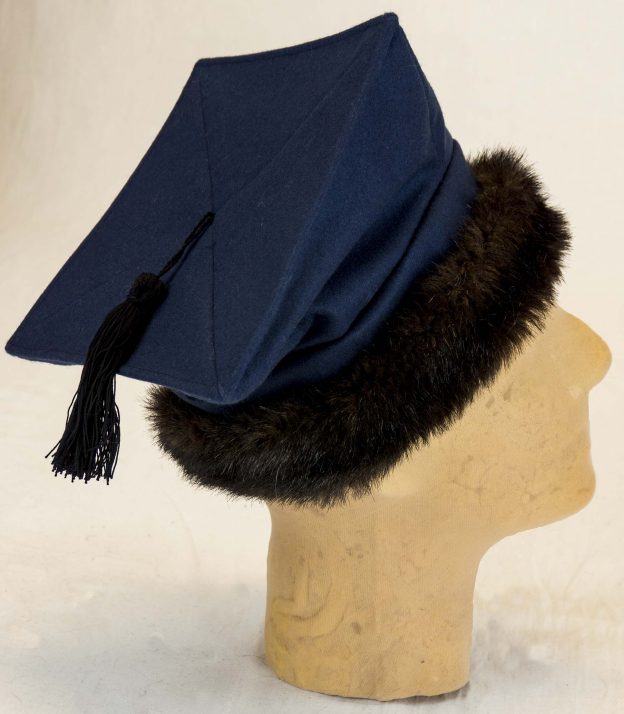
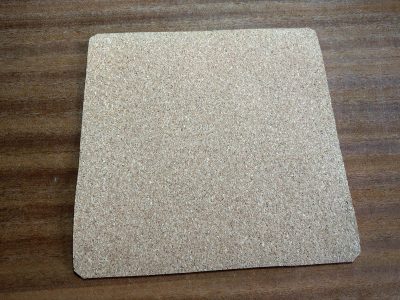
All that Details! The military braiding, the combination with fur, and of course that hat! It´s similar to a mortarboard, but not the same. So I started with a mockup to test my pattern. With little changes and a cork plate to give it that squared shape I think, I managed to create good reproduction of the artist’s vision.
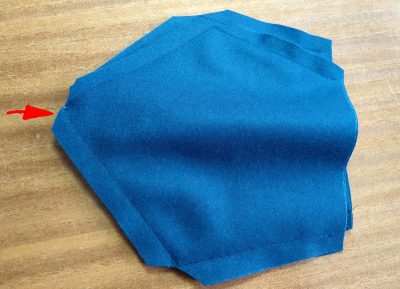
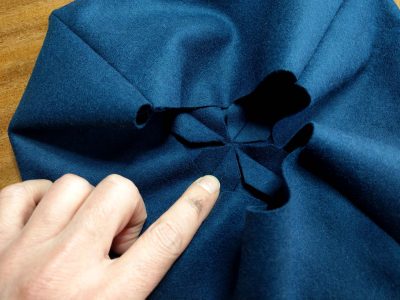
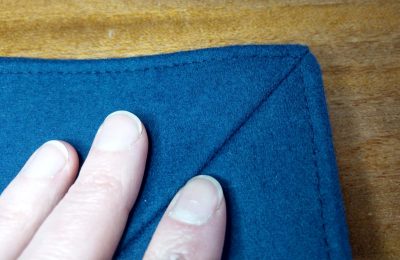
First, join the four top pieces and trim back the seam allowances as shown, quite narrow towards your stitching. Press open all seam allowances carefully. Turn inside out and check if your seam allowances lay flat at the center and the kink.
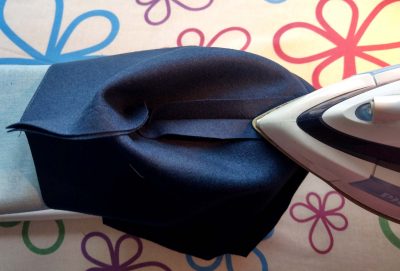
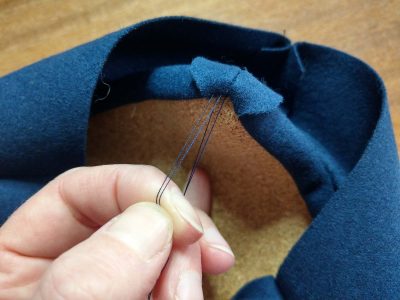
Prepare the square from cork and bevel the corners. Place the cork square inside the top and topstitch about ¼” (5mm) from the edge. As I did this with the sewing machine I wasn´t able to reach the corners neatly. So I left the threads quite long without locking the endings of my stitching. After that I threaded a needle with that threads and stitched all corners carefully by hand. To finish, I pulled the threads to the wrong side and knotted them together.
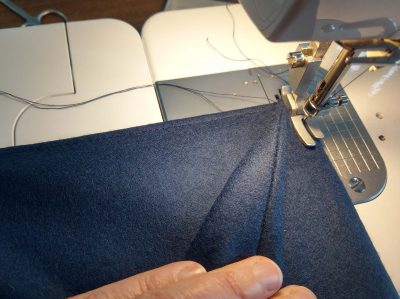
Prepare the top lining the same way and place inside the crown, wrong sides together, to cover the cork plate. Fix the lining with some stitches at the center and the four corners. Baste together lining and fashion fabric along the bottom edge.
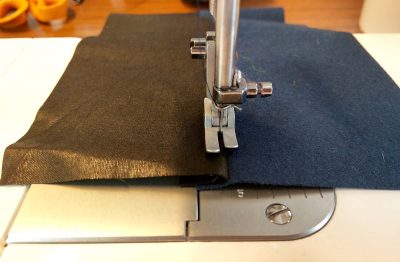
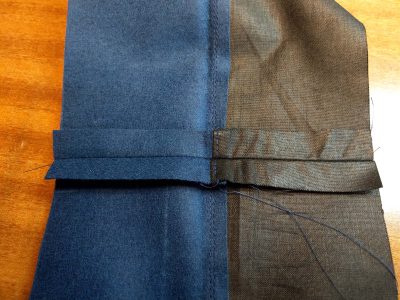
I prepared the crown as I do with waistbands: Line up fashion fabric and lining, right sides together and sew. Trim back the seam allowance and press towards the lining. From the right side topstitch at the lining, right beside the stitching line. This technique is called understitching.
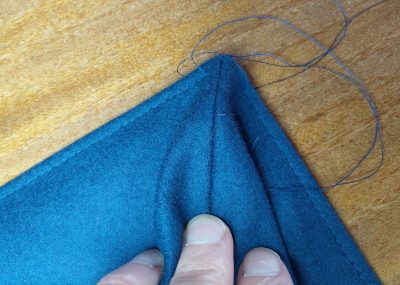
Close the crown to a ring, right sides together, and press open the seam allowance. Join top and crown, right sides together. Press the seam allowances towards the crown. Fold the crown lining inside, turn in the seam allowance and fell stitch along the seamline.
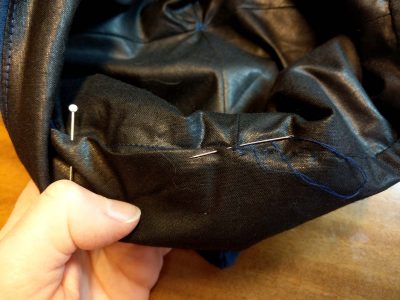
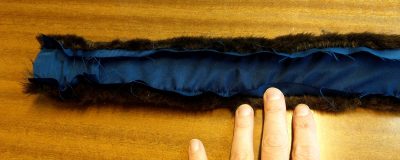
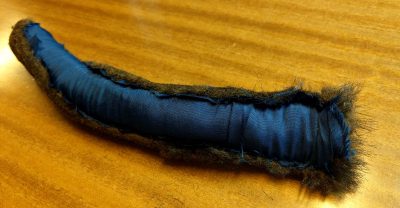
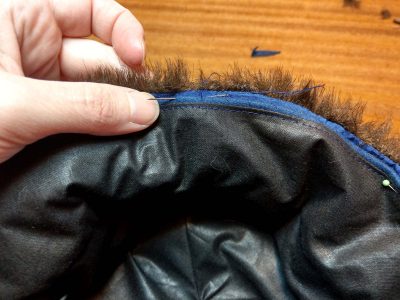
Prepare the fur trimming: Line up fur and lining, right sides together. While pinning/basting push the fur´s edge about ¼” (5mm) behind the lining´s edge. Sew along the long edges. Pull one of the edges through the tube, so you get the raw edges lined up with the right sides together. Sew together, leave an opening within the lining and turn to the right side. Close the opening with some stitches. This can be a little bit tricky. Alternatively you can prepare the trimming as you did before with the crown. Turn in the seam allowances at the raw edges of fur and lining, so that the fur´s edge protrudes the lining´s edge and fell stitch, wrong sides together.
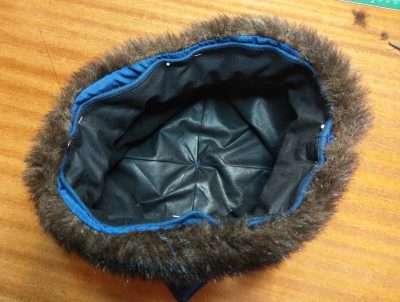
Pin and sew the trimming in place.
Attach a tassel to the center of the hat. You´ll find a tassel tutorial here: