
The Tails / Die Schößchen
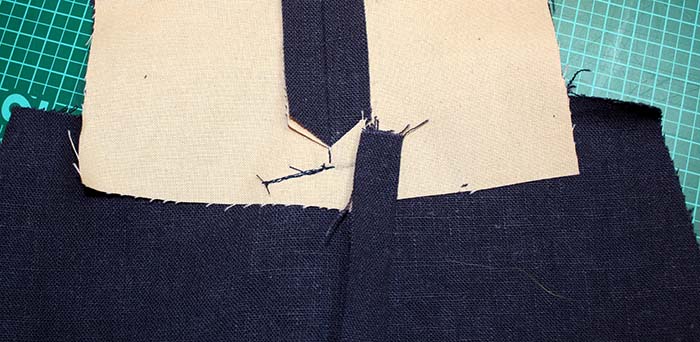
Let´s continue with this picture: this are the back parts already sewn together. You can see the seam allowance of the vent turned in and catch stitched to fix it. You will see small stitches on the right fabric side, but that doesn´t matter, it was usual on men´s clothing during the Regency and Romantic period.
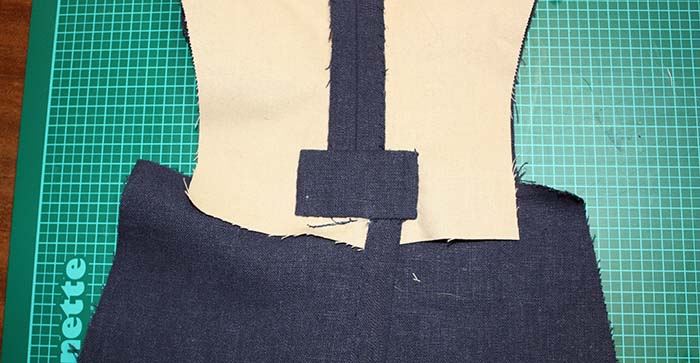
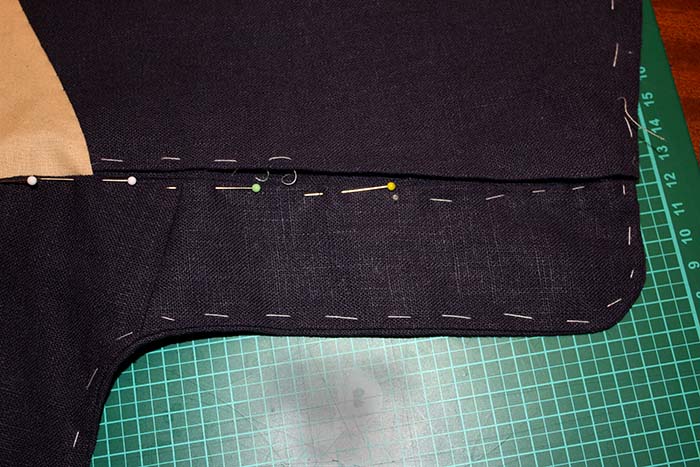
I sewed together fronts and back part, first along the side seam, stitching ends exactly at the waistline and pressed open the seam allowances. Then I sewed the folds and pressed them, the folds open towards the back, I notched the seam allowances were needed and fixed the folds with some stitches to the waistline. Now the back was lined with the cotton fabric; just a lining between the facing and the side seam is missing. I cut out a fitting piece from cotton fabric, turned in all seam allowances and slip stitched the Piece in place along the facing and side seam.
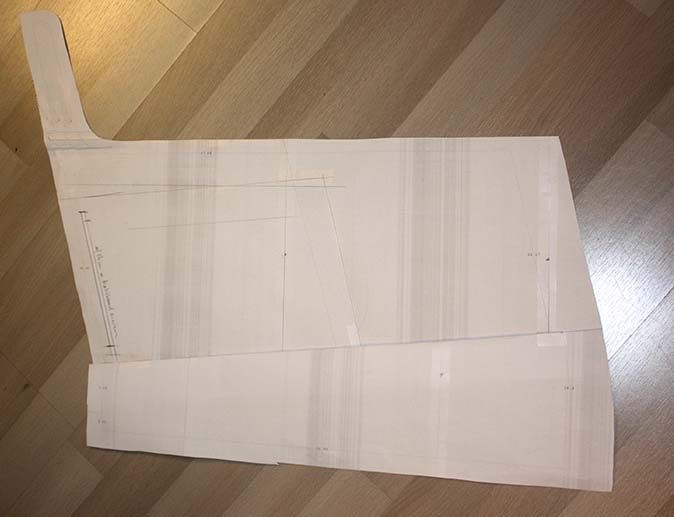
This is the paper pattern of the tail lining. Front and back part of the tail taped together and with the fold closed. Cut out from the same fabric as the tailcoat. During the regency and romantic period, the tails were lined with the same fabric as the coat. If you would use a felted wool fabric the seam allowances of the tails back and front edges are turned in; the lining would be cut without seam allowance, lined up with the tails and the raw edges of the lining would be slip stitched to the back and front edge. The hem would be left raw.
As I used linen I decided to cut my lining with seam allowance. I lined up the lining with the tails, right sides together, and stitched along the front and bottom edge (with the fold closed). I trimmed the seam allowances, turned the inside out and pressed. Then I basted along all edges to preserve the edges while sewing the rest. At the back edge I turned in the seam allowance of the lining and slip stitched to the back edges of the top layer. At the linings top edge (waistline) I turned in the seam allowance too, basted everything in place and joined the front facing and the tail lining with a ladder stitch.
Next time I´ll Show you the collar