Monthly Archives: May 2016

Making-of my 1830 Dress Part 3 The Skirt

The original skirt is made from georgette, I don´t know if there is a sateen layer underneath, but it looks like.
For the skirt panels I took three times my waist plus 2cm for the underlap at the back. If you are quite thin (thinner than me, my waist measurement with the corset is 78cm) you should take more to reach the desired diameter of the seam.
I sewed togehter the skirt panels first and made a slash at the center back, folded in the raw egdges and stitched them down. Why I didn´t used a seam at the center back? Because so I would have a visible seam at the front side.


IMG_3630


I made 7 folds each side, opening to the back, shift the edges to form a curved waistline

IMG_3622

IMG_3623


Sew the skirt to the bodice. The picture shows how it looks like at the center back.

IMG_3632


Trim the seam allowance at the waistline, fold it into the bodice and stitch down, catch only the lining.

IMG_3633


Fold in the fabric along the hemline. The skirt should end about 10cm from the floor at the ankle. You would wear ballerina shoes with that dress. I decided to sew my hem with small stitches from the right fabric side, because the original dress has a visible hem stitching line, not even tried to be covered with the trimmings and I was aware the sateen fabric doesn´t tolerate a hem stitch.

IMG_3637


For the belt I took one layer of sateen and one layer of cotton fabric, the edges neatend with bias binding. The belt is closed with hooks and sewn eyes. Finally a large bow is attatched.

IMG_3624

IMG_3626


That´s the finished dress. Excuse the picture but the dress doesn´t fit the dress form quite well and I just made a quick picture of the finished dress to show you.

IMG_3642

Go to Part 1 or Part 2


Making-of my 1830 Dress Part 2 The Sleeves

I think that sleeves are the most exiting sleeves I´ve ever seen.  Some years ago when I started to sew historical clothing I couldn´t imagine to wear dresses from the romantic era or the 1880´s. At that time, I even decided never to sew dresses from that eras. I don´t know what happened, but I changed my mind and made some 1880´s dresses and I loved them! Searching the internet for inspiration I found the dress from the LACMA and felled in love with it! Let´s start sewing the sleeves!


The sleeve pattern itself isn´t anything special. It´s just a pattern you would use to sew a puffed sleeve, it´s all about the folds! I´ll show you on a paper model. The length of the upper sleeve edge has to be the length of the underarm part where you don´t have folds, plus the upper part with the folds multiplied by 5. Length of upper edge = (2 x a) + (2 x b x 5). We have 15 folds, so depth of one fold is (2 x b) : 15


IMG_3636


First fold your sleeve lengthwise to the half, wrong sides together and press a little bit, not too strong because later on you don´t need that fold. You have calculated the depth of the folds before, now fold the double layer of fabric overlapping as shown and press.


IMG_3437

IMG_3441


Open the sleeve and lay it flat on a table. At all “hills” you mark 1,5cm from the half-line and fold diagonal “hills”-folds with the help of the iron. The 2nd picture shows how it looks like on fabric.


IMG_3627  IMG_3600


Close the fold´s again along the upper edge. Shift all corners to give the edge a straight finish, so the sleeve opens better when finished. Baste all folds in place. Do the same with the lower edge, it´s just the opposite direction to lay the folds.


IMG_3443


Sew a piped band to the lower edge of the sleeve

IMG_3605

IMG_3601


Insert the sleeve into the armhole. Add lace along the bottom edge.

Attatch thin tapes, about 15cm long, to the highest shoulder point and to the inside of the sleeve tape vis-a-vis the sleeve seam. Tie the tapes to loop up the sleeve as desired.


IMG_3604

IMG_3634

IMG_3640


Got to Part 1 or Part 3


Making-of my 1830 Dress Part 1 The Bodice

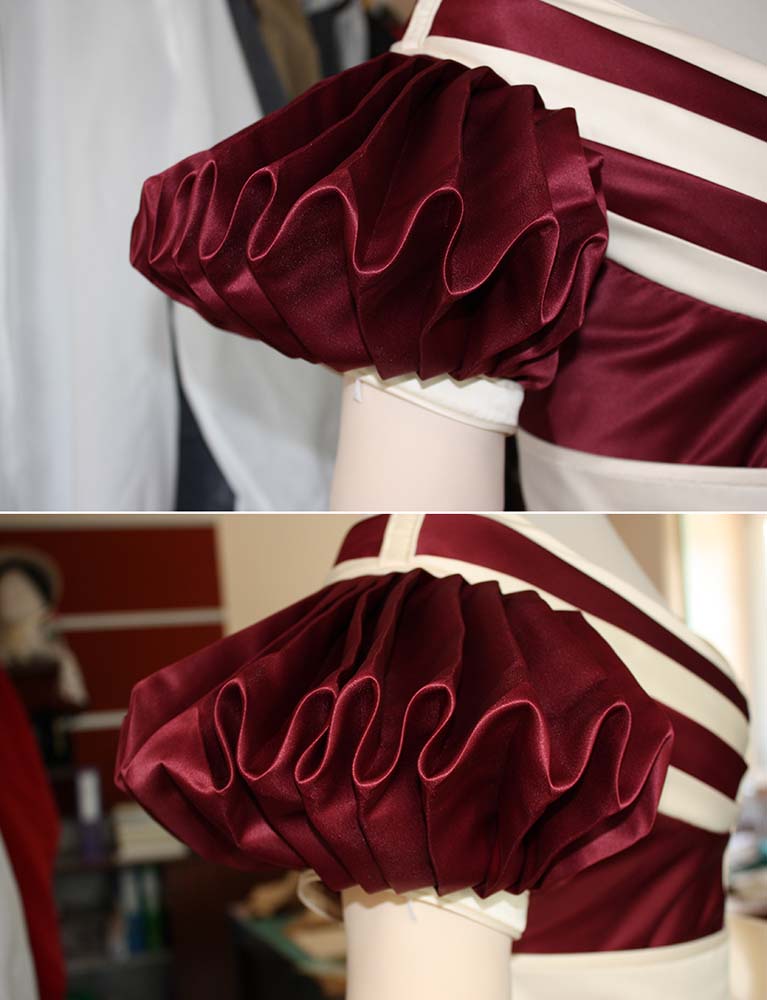
Do you know the 1830 dress from the LACMA? I´m talking about the pink evening dress with that amazing sleeves: 1830 Evening Dress
Fashion plates too show dresses with that kind of sleeves. But how to make them? The pictures from the LACMA really have a high resolution, but doesn´t show every detail to understand the sleeves.
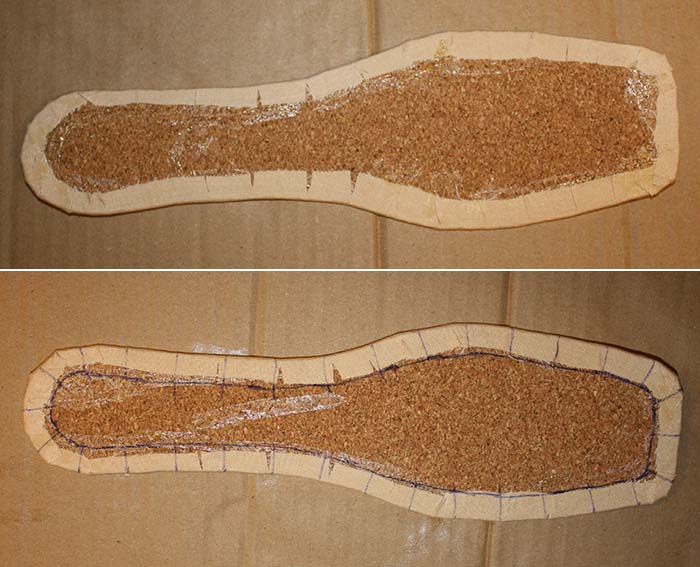
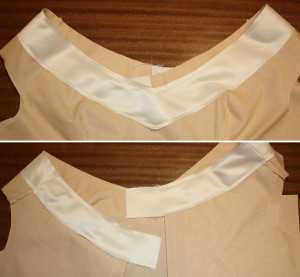
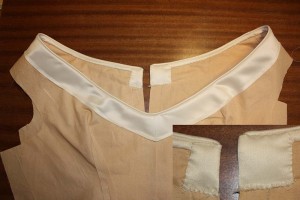
Finally I found this pictures: 1st 2nd
They gave me all Information I needed!


The fabrics used to make the original dress are silk sateen and silk organza. This are informations from the museum homepage. I think a silk georgette was used, because the fabric is less transparent than organza would be.


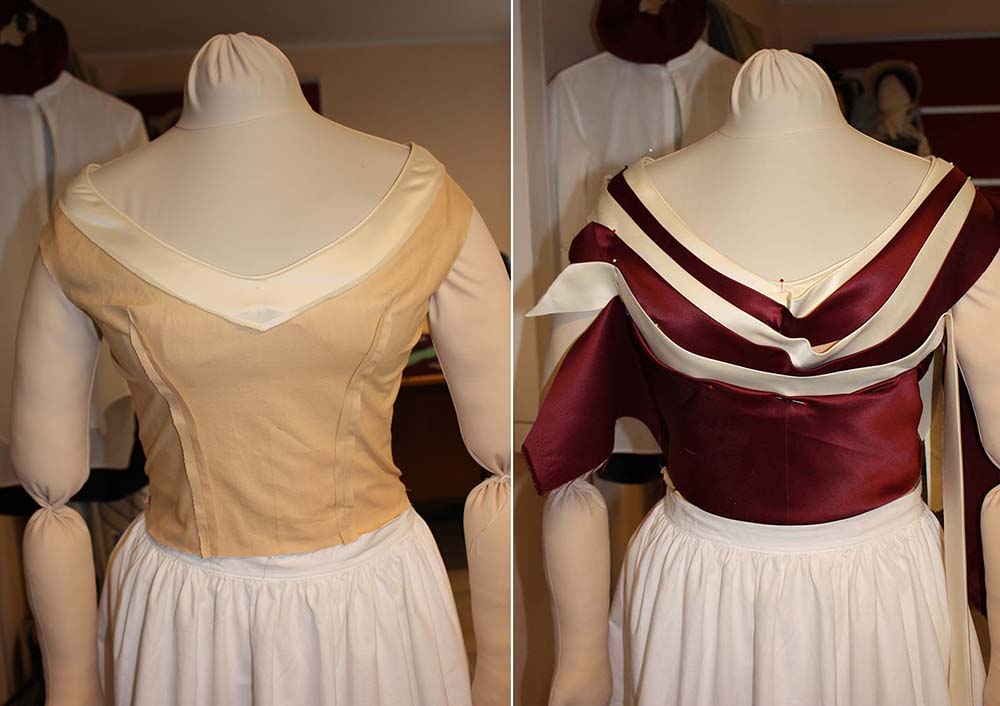
I think the sleeves are made from sateen covered with georgette, I´m not sure if the skirt is made the same way. For the bodice stripes of fabric, cut on the bias, are mounted. First I thought they where mounted on a cotton bodice, like later dresses would be, but it seems that the lower part of the bodice is just made from georgette. Neckline and armhole are piped.


I decided to use a basic bodice made from glazed Cotton to mount the stripes. The pattern I took from my 1845 dress. The dress fits quite well so I didn´t had to made any alterations.

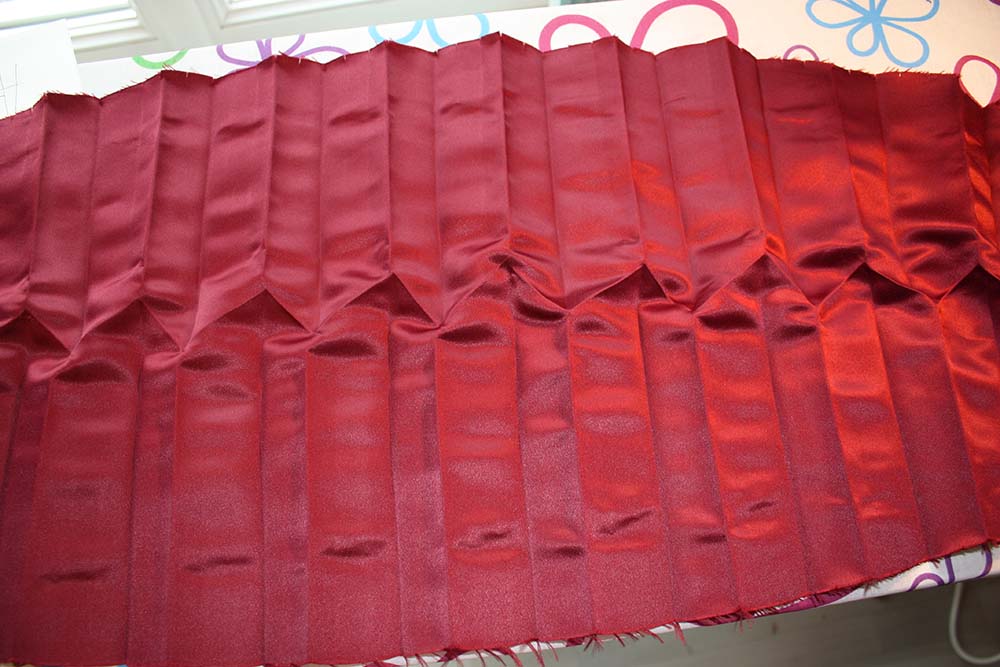
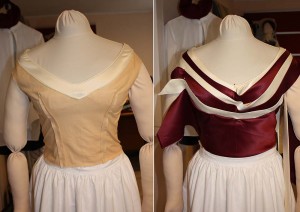
I decided to make the dress from sateen in ivory and burgundy. Why I didn´t used a georgette? Because I was a little bit under time pressure to finish the dress and there was no time left to find a matching georgette,


Let´s start sewing! Just close the darts and the shoulder seams. Cut the darts and press for less bulk. Turn in and topstitch facings at the center back, allow 2cm at the left side for a underlap.


IMG_3566


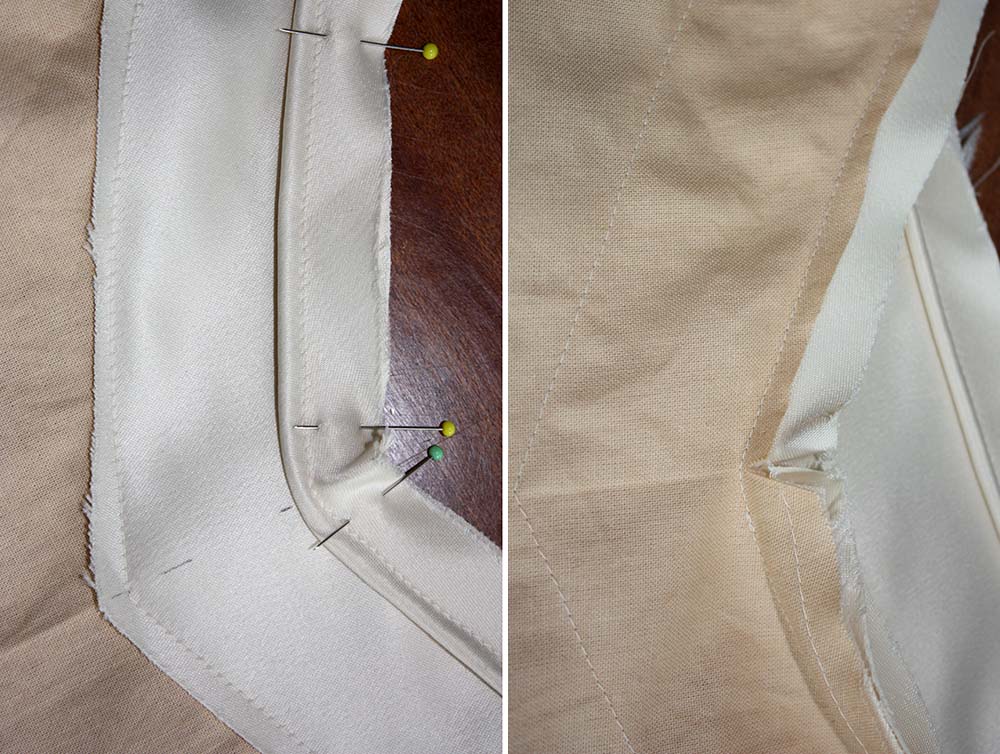
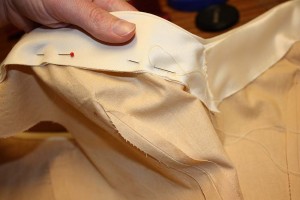
Wrong side up attach a 2″ wide facing around the neckline.


IMG_3570


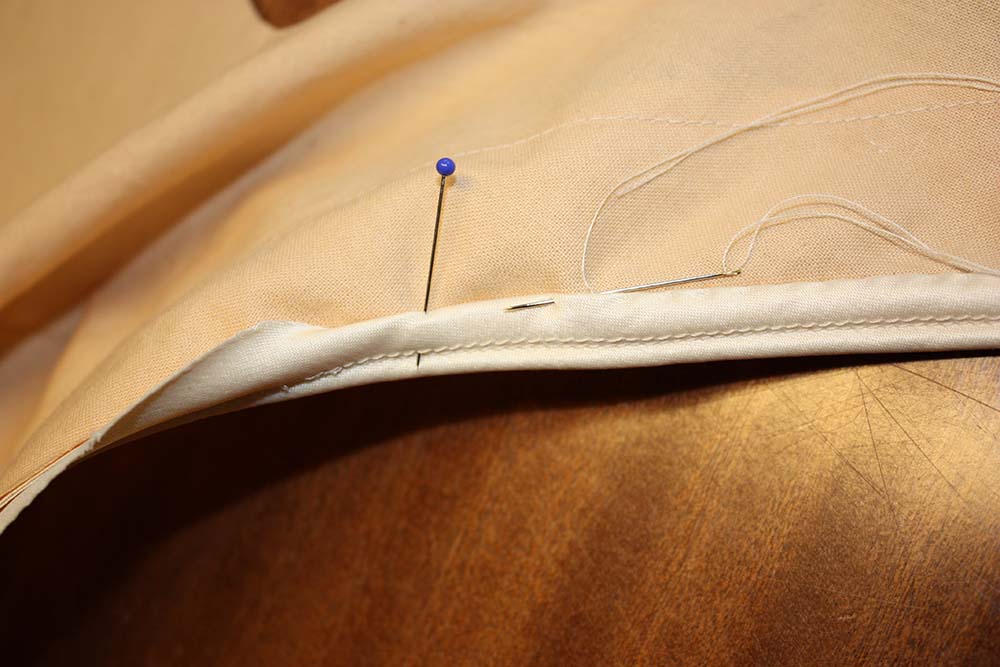
Sew your piping around the neckline. Trim the seam allowance of the bodice, the facing and the inner seam allowance of the piping. Nocht the seam allowances at the center front. Fold the upper seam allowance from the piping around and sew just to the cotton bodice. Fold over the facing at the back and stitch down.


IMG_3572

IMG_3577

IMG_3578


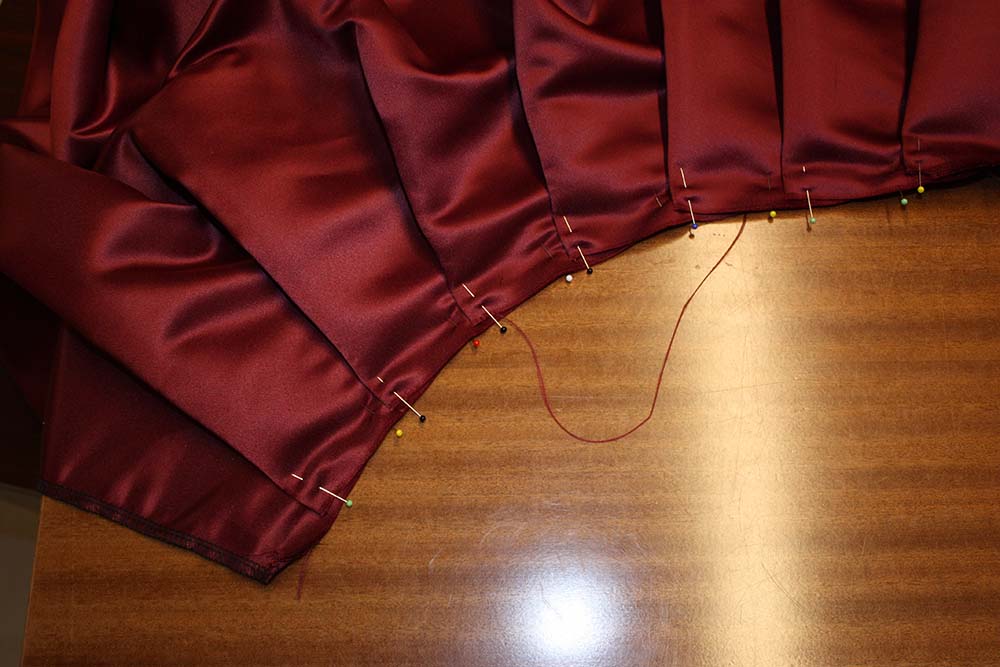
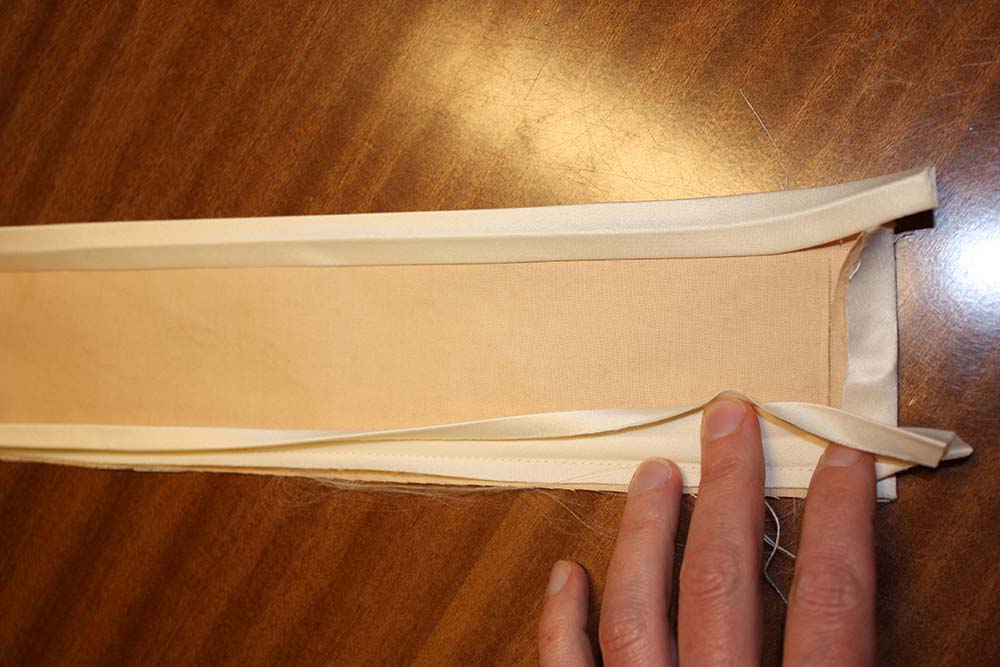
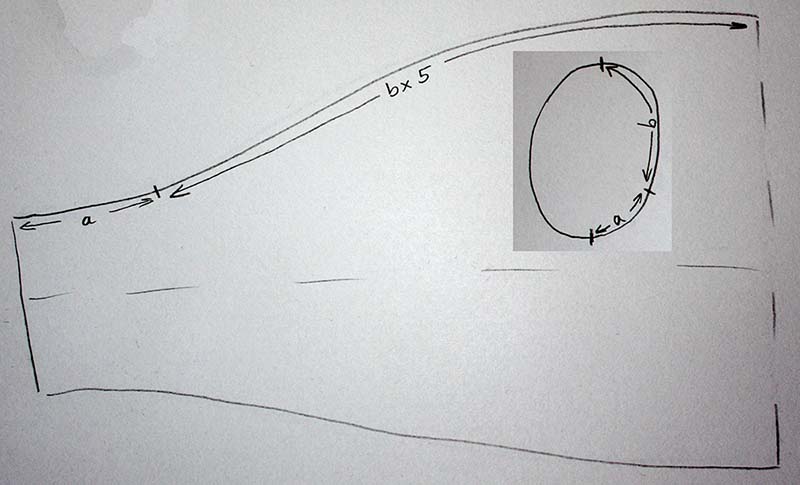
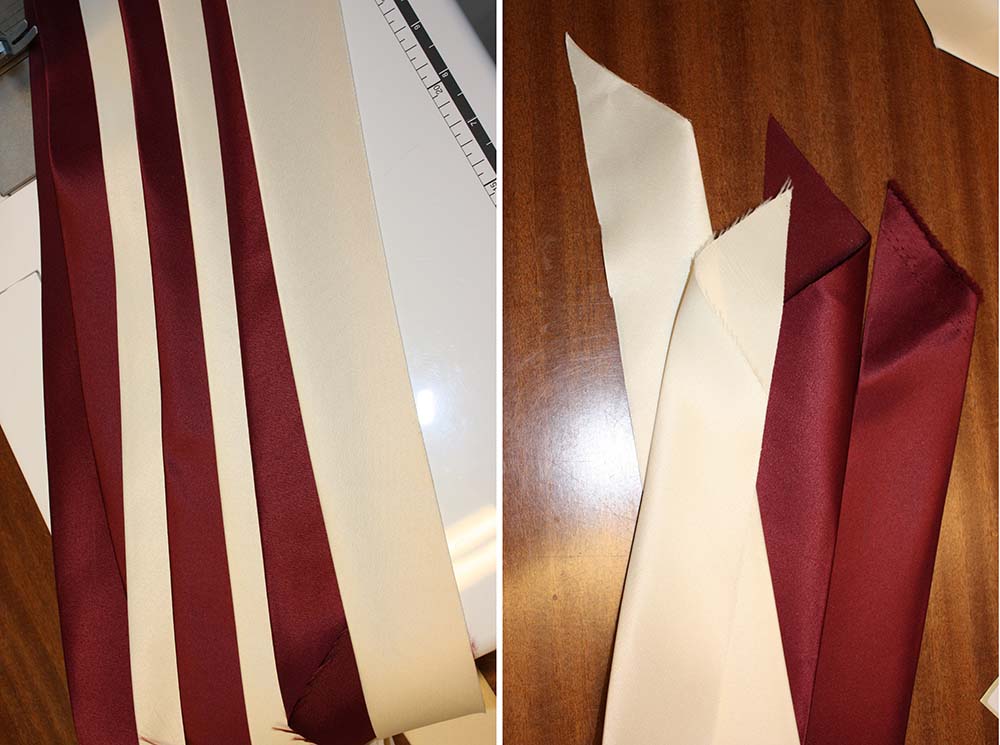
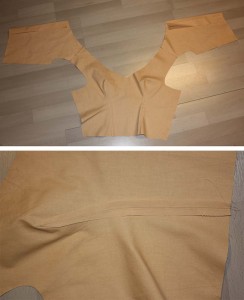
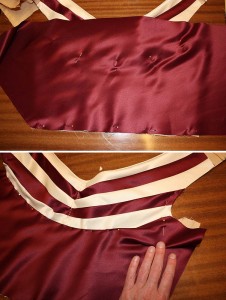
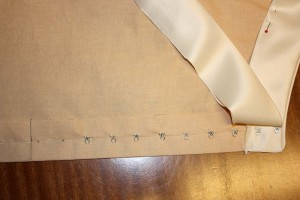
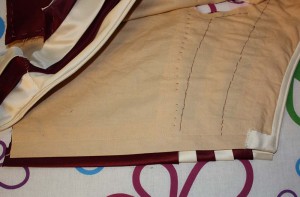
Prepared bias straps in ivoy and burgundy, folded lenghtwise, wrong sides togehter and pressed, width is now 5cm. The 2nd picture shows the straps pinned to the bodice to see how it looks like.  Decided to make the straps 3cm at the shoulderand 2cm wide at the center front.

IMG_3580

IMG_3582


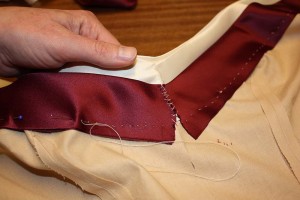
The first ivory strap is folded open and sewn to the bodice along the neckline. As you can see I shifted the shoulder point to the front, to the highest point of the shoulder. Then I sewed the strap along the bottom edge to the basic bodice.

IMG_3585

IMG_3586


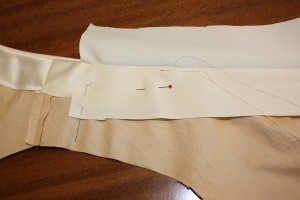
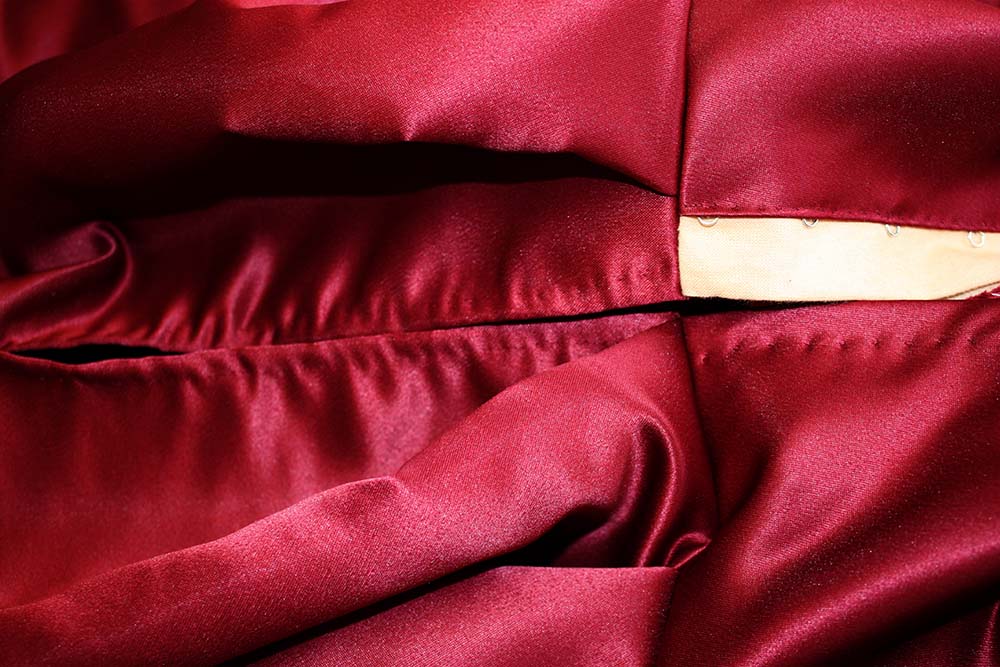
The 2nd strap in burgundy is sewn to the basic bodice just along the bottom edge. The top edge is left loose. Give the straps enough room for the breast. Don´t make thight stitches. At the center front fix straps with some stitches.

IMG_3587


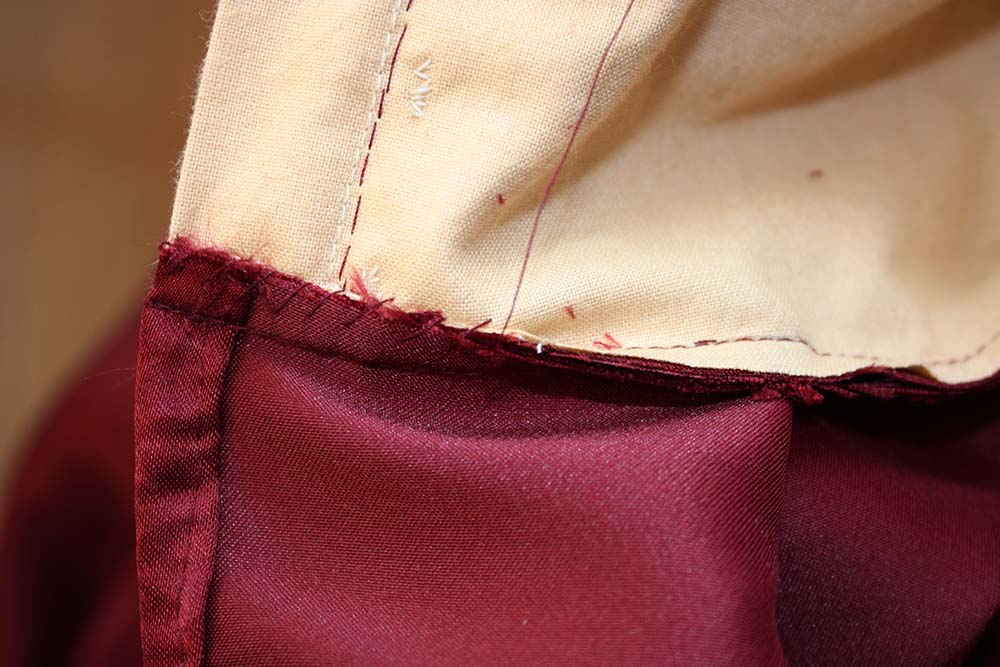
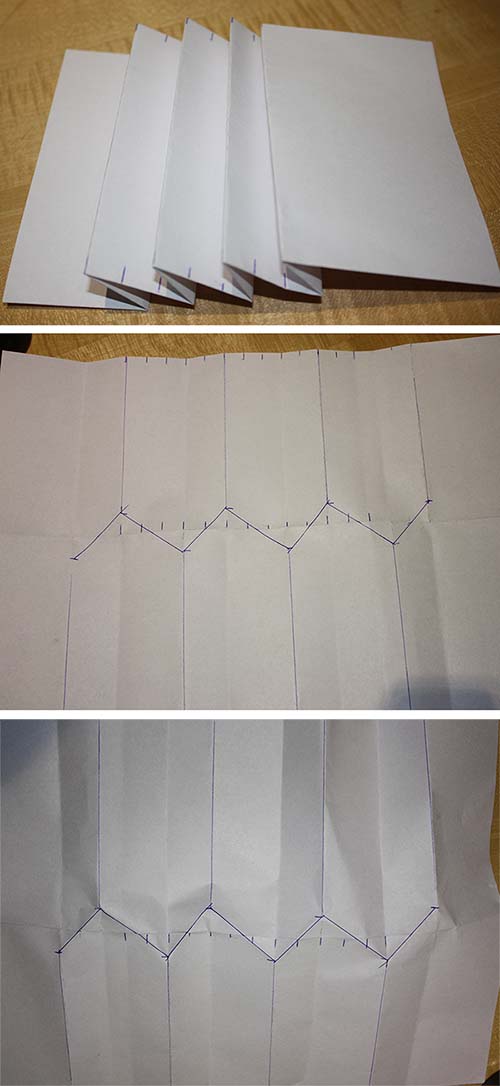
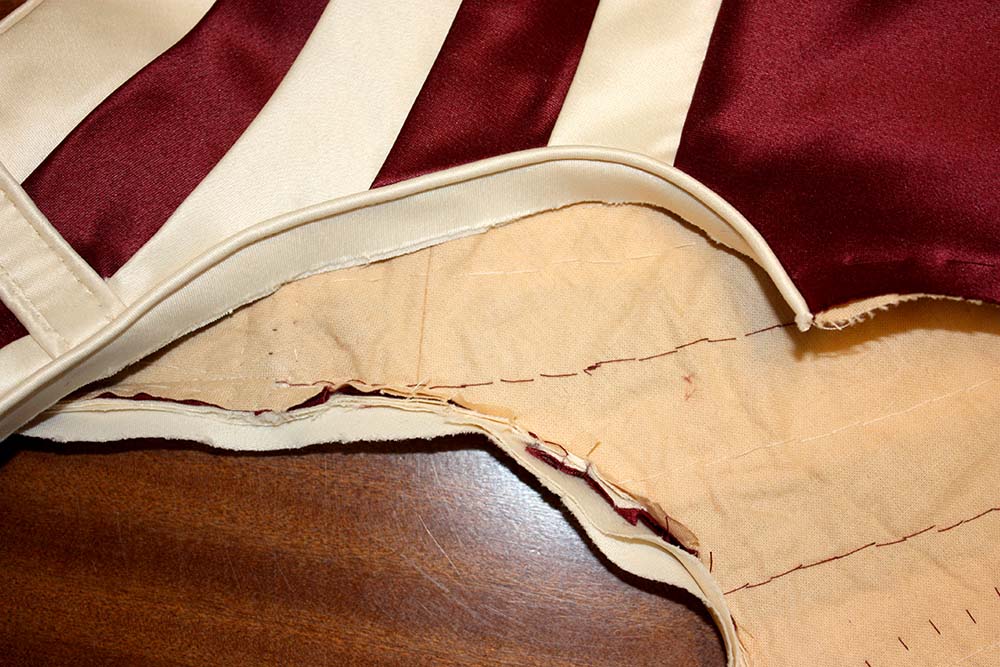
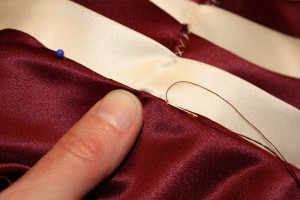
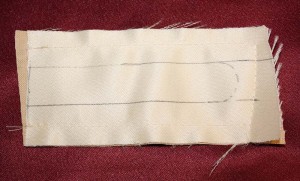
In the sam way sew the rest of the straps to the bodice. The lowermost piece is cut on the bias too, then pinned to the bodice. Draw the outline directly on the fabric incl. 1cm seam allowance at the top edge and cut out. Fold in the seam allowance at the top edge and sew to the 5th strap. Baste along the remaining edges to the basic bodice.

IMG_3588

IMG_3588IMG_3590


At the back sew straps to the bodice in the same way, overlap 1cm at the shoulders. At the left side mark center back (underlap is 2cm) and attatch eyelets first. At the right side form an overlap with the straps. Hooks can be attatched later. Sew along the right center back with small stitches through all layers.

IMG_3591

IMG_3593


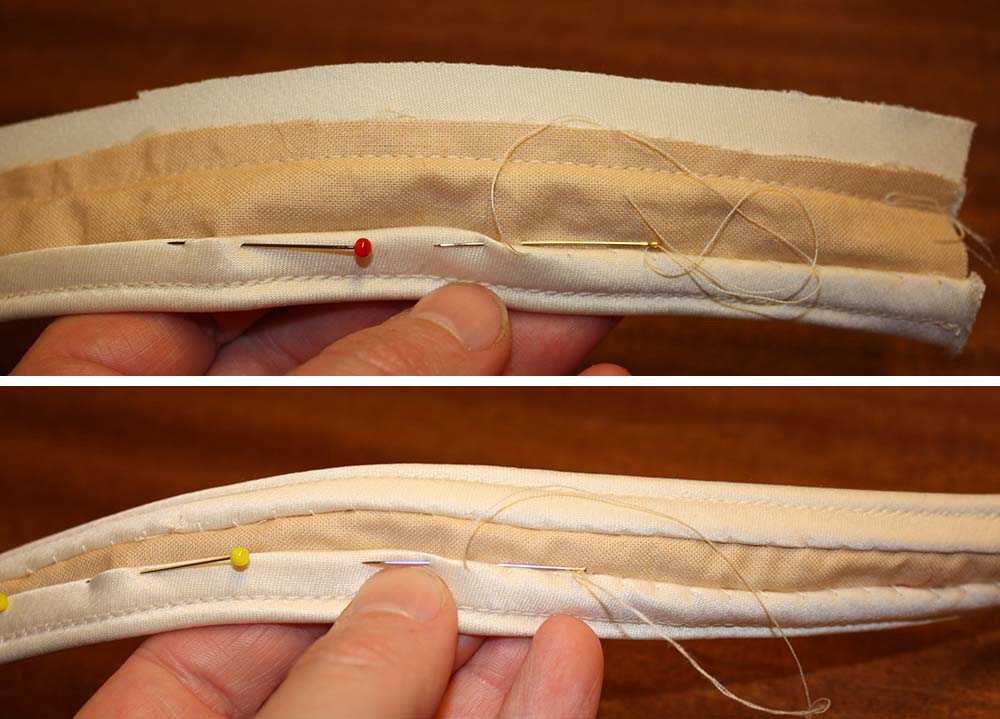
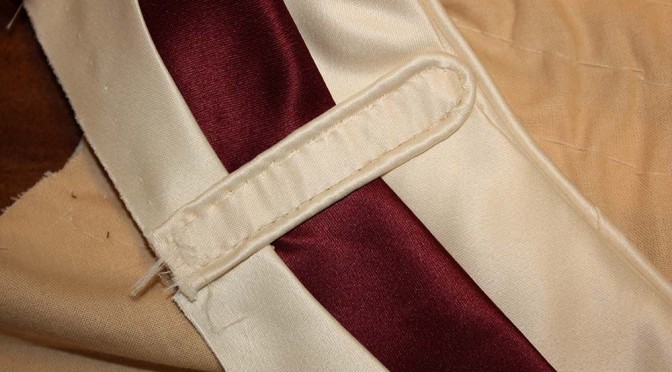
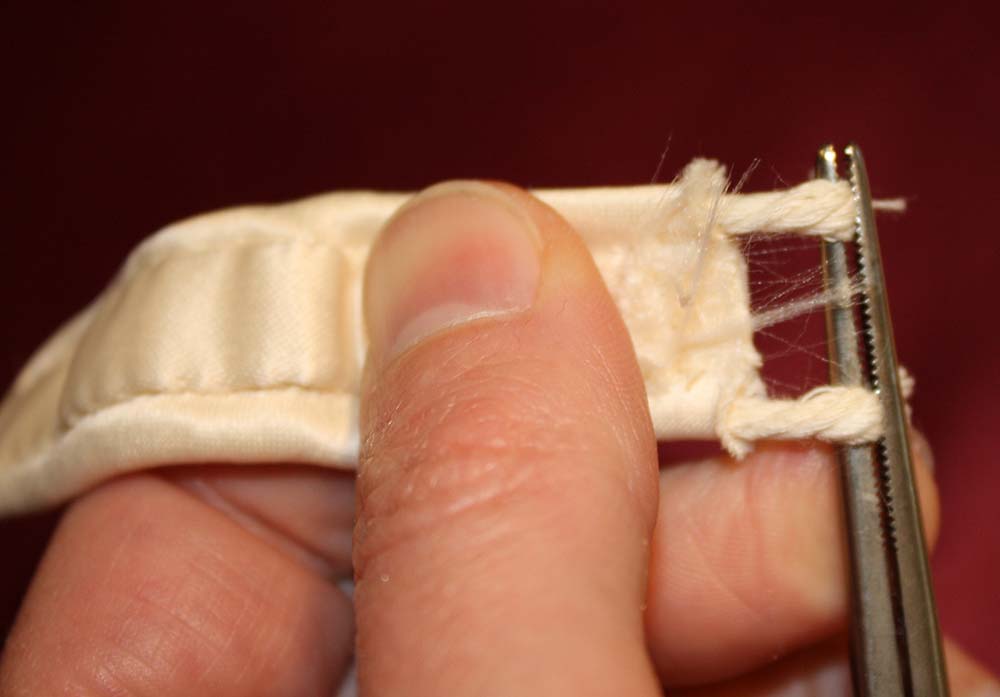
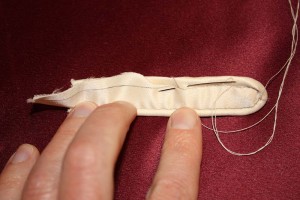
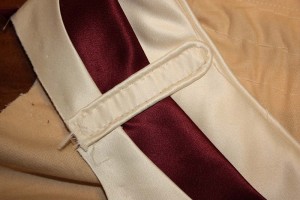
Sew piped epaulettes, 1cm wide. This is quite tricky and I have no idea to make it better then shown below. Before you sew the epaulettes to the shoulders pull out the piping and cut off the seam allowance to avoid bulk. Sew the epaulettes to the highest point of the shoulder covering the raw edges of the straps.


IMG_3594

IMG_3595

IMG_3596

IMG_3598


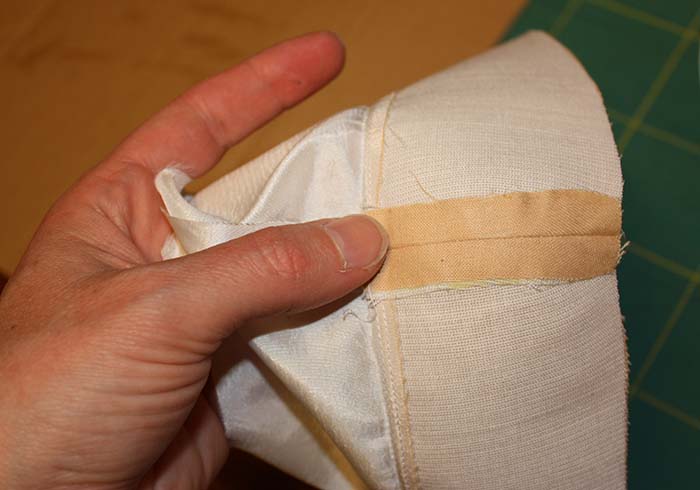
Before closing the side seams attatch a piping band to the armhole. Trim inner seam allowances, fold over the outmost and sew to the bodice like you did before with the neckline.


IMG_3599


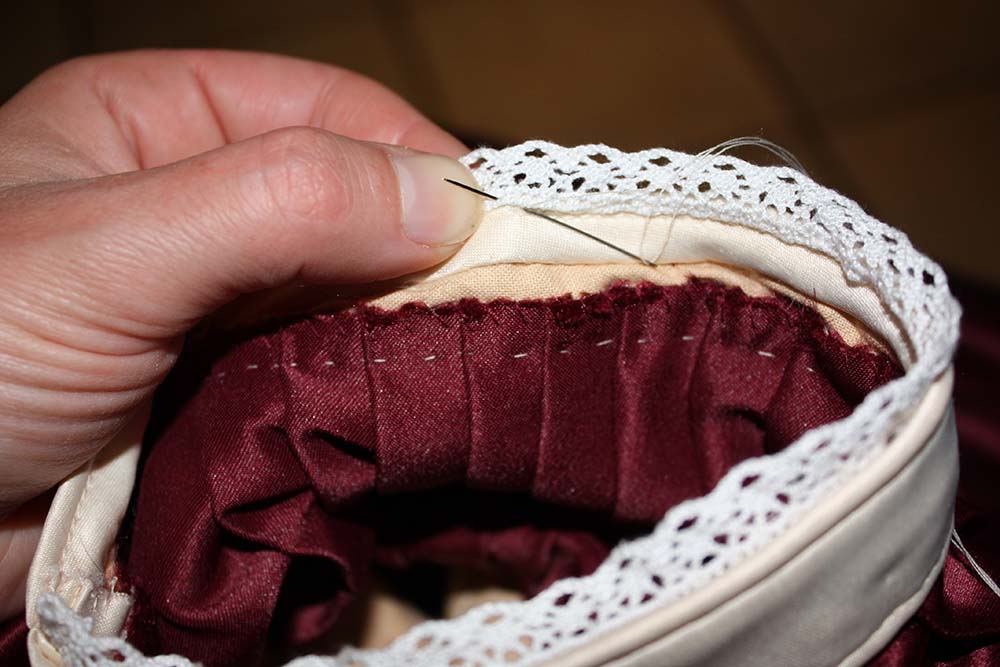
Next time I´ll show you the sleeves… Part 2


How to make Regency/Romantic Shoes without a last

Last year I decided to make my own shoes, fitting to my 1840 cotton dress. So I searched the internet for sites about shoemaking. But nearly everywhere you would need a last for making your own shoes. At least I found a site about how to make ballerina shoes without one. After some try and error now I have a period accurate pattern for my shoes with a squared toe cap and the same pattern for the right and left foot.


My first shoes had just a cork sole, because I was quite under time pressure to finish the shoes and cork was at home. Nevertheless, the shoes survived a one hour walk and a dancing evening. They were more comfortable than my wedding shoes I took with me in the case the self-made shoes get broken.


This time I´ll show you shoes with a leather sole.

First prepare the inner sole. I made mine from cork (better would be leather) covered with cotton. Let your adhesive (I used a special adhesive for leather) dry well before attaching the cotton. Turn around and notch the seam allowance. Stick the notched seam allowance to the underside of the inner sole. After drying transfer the marks from the pattern to the underside of the inner sole and mark the seam allowance.


IMG_3469

IMG_3470

IMG_3472


Prepare the upper shoe part. Cut two parts from upper fabric, linen and some stiff interlining. Transfer marks to the lining. Sew the pieces together along the inner edge, cut back seam allowance and fold the seam allowance towards the lining. From the right side topstitch along the inner edge on the lining, right beside the seam, catching the seam allowance. Close the heel seam and open the seam allowance with your fingernails. Glue the lining seam allowance to the interlining. Insert the heel support, glue or stitch with a zigzag to the interlining. Sew all layers together at the lower edge.

IMG_3468

IMG_3473

IMG_3475

IMG_3480

IMG_3479

IMG_3481


Sew again along the lower edge at the toe area and at the heel with a large gathering stitch. Now start to glue the upper shoe part to the inner sole. Start at the sides, respecting marks. At the toe and heel area gather the fabric a little bit. The edge of the fabric should stay within the line (seam allowance). Let the adhesive dry well before attaching the fabric. Hammer the edges to get permanent joint. Insert a piece of cork to the dimple on the underside of the inner sole. Bevel the edges with a knife, rasp the cork till the sole is flat again.

IMG_3484

IMG_3486

IMG_3487

IMG_3488

IMG_3489


Transfer the sole and heel pattern to the leather. If your leather is very stiff like mine the best is to cut it with a jigsaw (thankfully I own an electric one). Roughen the heel area and the upper part with sandpaper. Stick the heel to the sole (again let the glue dry 10 min and hammer). Smooth the edges with sandpaper and dye in the desired Color.

IMG_3462

IMG_3463

IMG_3465

IMG_3490

IMG_3491


Mark the outline of the leather sole at the undersides.

Apply glue to the leather sole and to the upper shoe part, take care there is enough glue at the edges. Join and hammer. Let the glue bond several hours.


IMG_3492

IMG_3493


Sew ribbons to the shoe, attach some decorations if desired.


IMG_3494

Download the pattern for size US 8 / EU 39 / UK 6                                

Pattern / Schnittmuster