
Additional to a strong fabric like coutil and facing fabric you need for sewing a corset some other materials and tools.
1. Tools
2. Spiral wire + End caps, plastic coated steel boning
3. Busk
4. Waistband, bias binding
5. Grommets (Eyelets with washers) and lacing
1. Tools
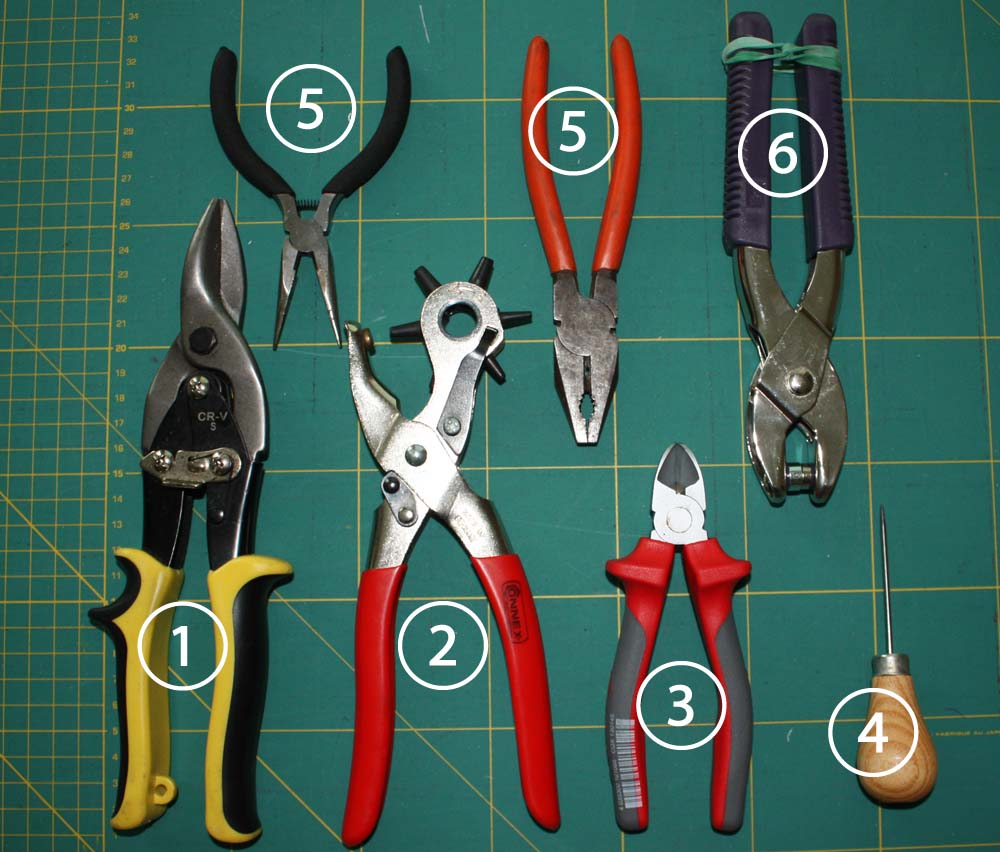

1) Metal shears for cutting metal boning, 2) Punch pliers, 3) Wire cutter for cutting spiral wire, 4) Awl, 5) Pliers for endcaps, 6)Tool for setting grommets 7)Grinder or rasp (optional)
2. Boning
Today as an alternative to whalebone mainly to kinds of boning are used. One side plastic coated metal boning, the other is spiral wire. I do not recommend synthetic whalebone or stuff like Rigilene for a classic corset.
You can buy boning in different length, but also continuous. With continuous boning you can cut your boning exactly the length needed. Boning should be about 1 ¼” (3cm) shorter than the boning channel, that you can sew on your bias binding without problems.
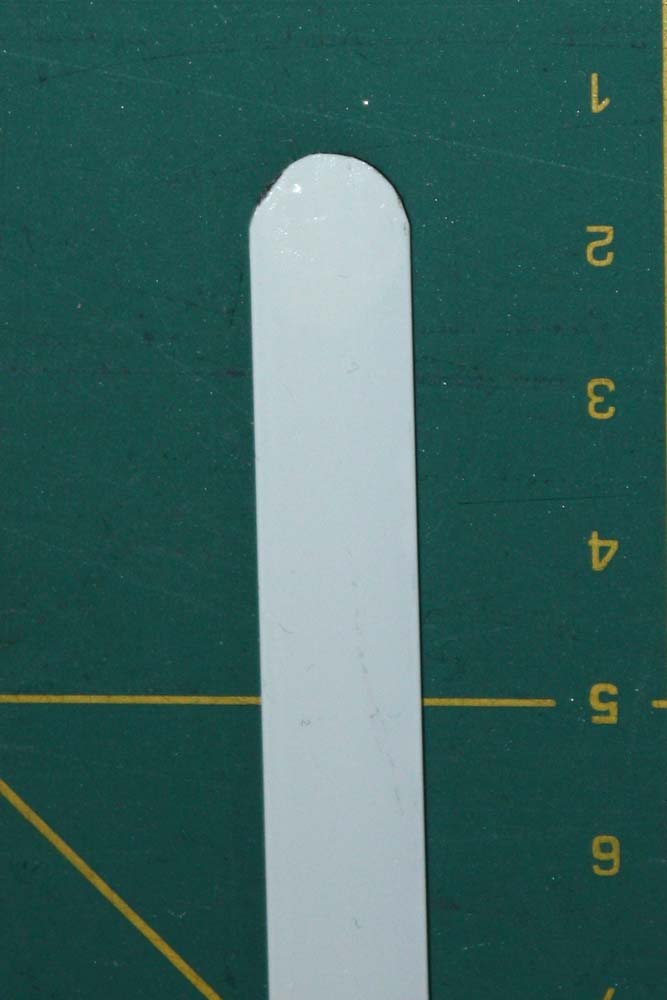
Metal boning is cut with metal shears, optionally you can bevel the corners with the metal shears or round ends with a sander or grinder.
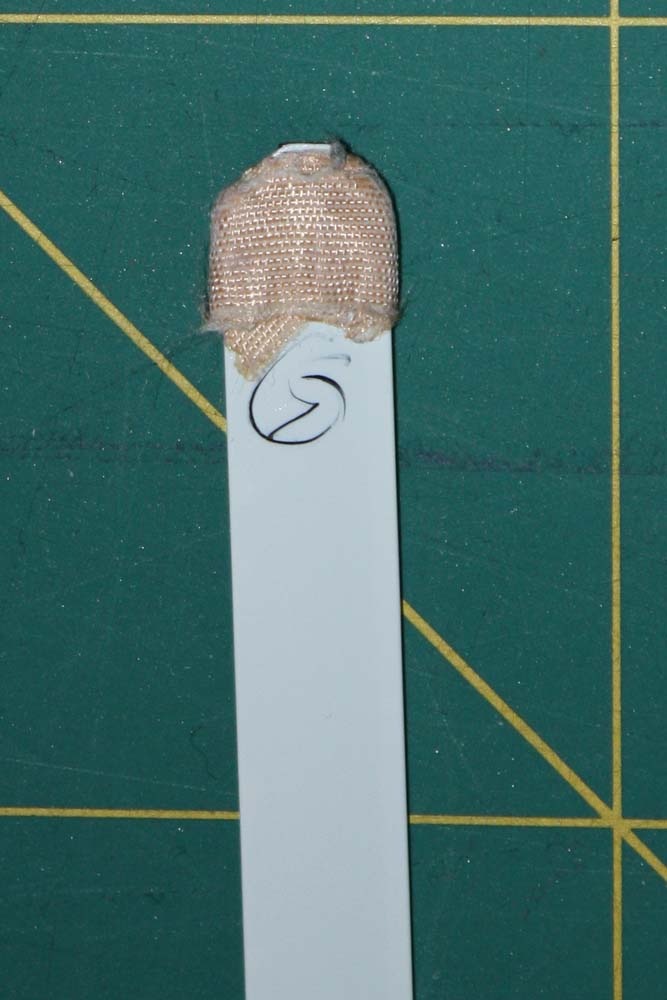
Ends must be coated otherwise they would destroy your fabric. You can buy end caps for metal bones but they slip of easily. On the internet you find a variety of tips coating the ends. I can´t recommend using adhesive tape, you can´t insert your boning easily and ends of boning can cut through the tape.
I tried coating with polymer clay, it is getting crumbly over the years and harden in the oven is a little bit tricky with longer boning. I tried coating with hot glue, but it isn´t a good option too.
My favorite is coating the ends with white acrylic lacquer. Dip ends into the lacquer about 5/8” (1,5cm) and let them dry. Turn over boning in the first few minutes some times that you won´t get beads. After drying repeat process. If you get beads that doesn´t matter, just sand them.

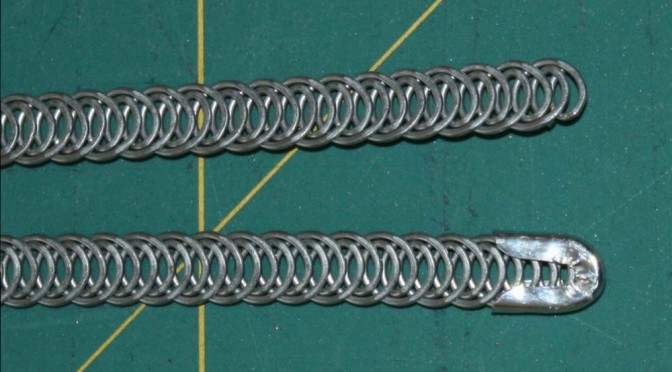
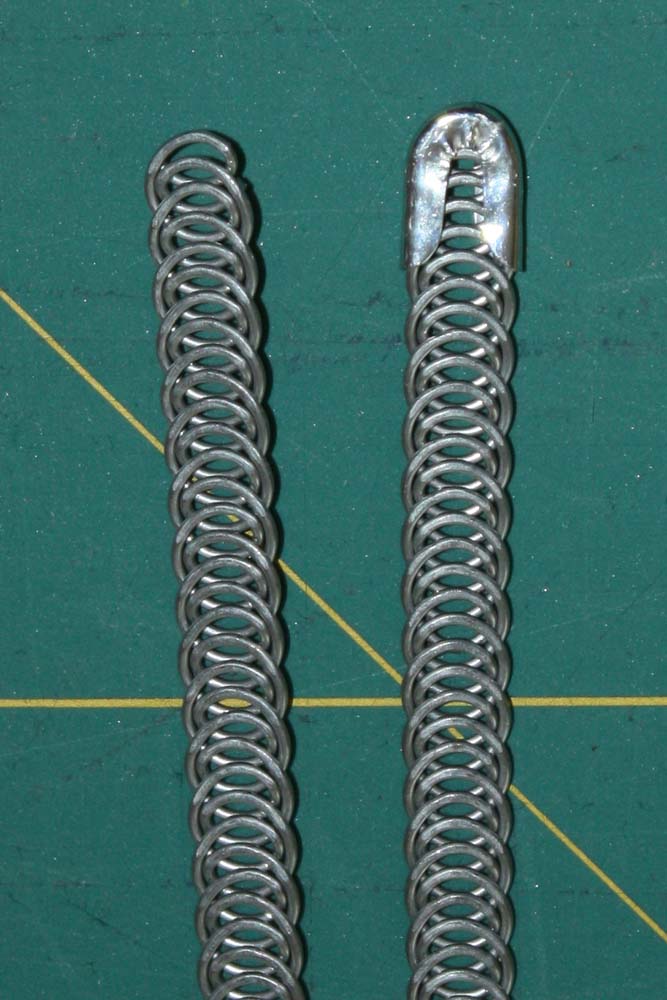
Spiral wire is cut with the wire cutter. The spiral contains of two wires twisted together, so you always have to cut two wires. For coating ends use end caps and press them to the ends with pliers.
3. Busk
You can buy busks in different lengths and widths. The narrower metal busks are more flexible and softer than the wider ones. About 1873 spoon busks appeared, narrow at the top and getting wider, like a “spoon” at the bottom. Modern spoon busks are only slightly curved, in the past they were curving into the waist achieving the desired hour glass silhouette. Spoon busks are more rigid than other busks.
The length of the busk is fixed when you do your mock-up. Always try to sit down.
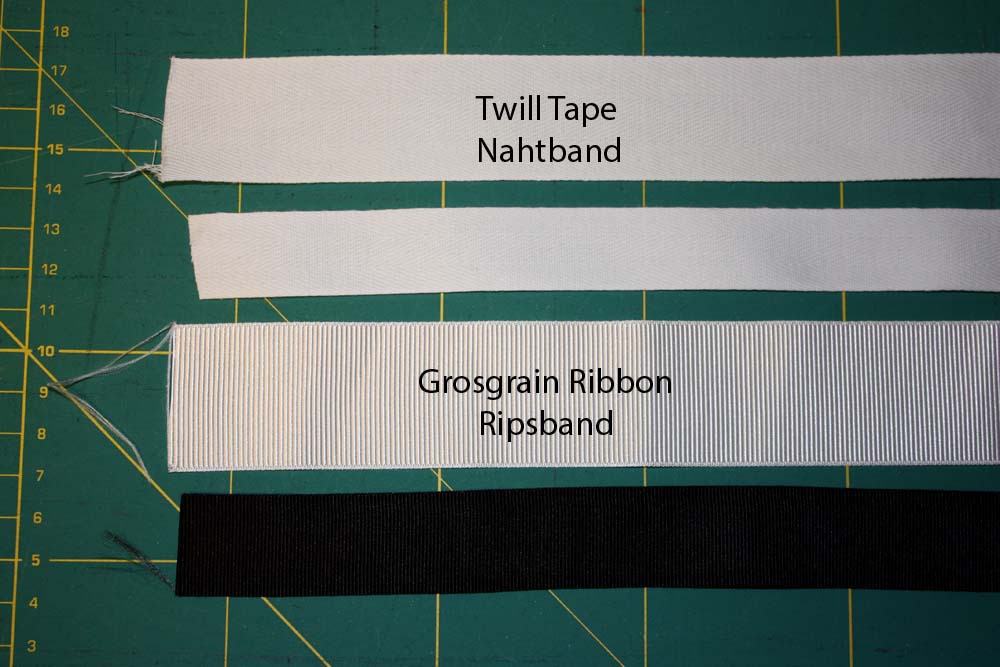
4. Waistband
At waistline there is most tension of the corset, therefore it is reinforced with a waistband. You can choose between a cotton twill tape or a grosgrain ribbon. The band shouldn´t be too wide 3/8” – 1 ¼” (1,5 – 3cm).
Before using cotton tape iron hot to shrink.
5. Grommets and Lacing
Grommets (eyelets and washers) are inserted along the back edge for lacing the corset. You always should use eyelets with washers. I prefer to use grommets with a hole of 4mm. The holes for the grommets I cut with punch pliers. At the area of the waist grommets will be set a little bit closer together than at the top and the bottom, because of the higher tension at that area.
Insert grommets with a setting tool.
Laces for corsets you can buy from cotton or polyester, ready cut or by the meter. The lace should be long enough to put on the corset comfortable.
You can fuse the ends of the lacing with a lighter if it is polyester, for cotton laces you can use heat shrink tubing.
Laces from polyester slide a little bit easier through the grommets, I prefer cotton lacings, because I lace up my corsets by myself.